1
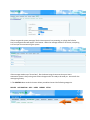
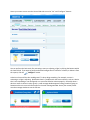
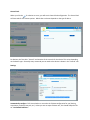
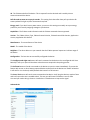
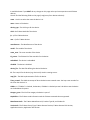
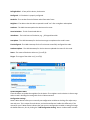
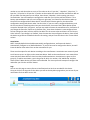
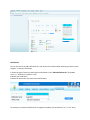
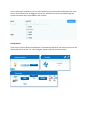
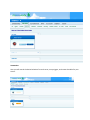
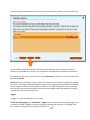
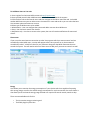
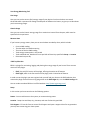
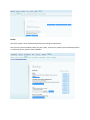
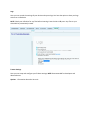
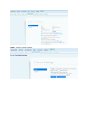
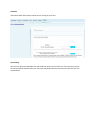
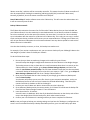
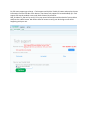
User Manual
More information on your Dashboard:
The dashboard has 2 purposes:
1. Controlling your Devices and Scenes
2. Advanced setup and configuration of the system
Dashboard Overview
NOTE: by default, Vera does not have any rooms or sections. You can optionally create rooms if you
have lots of devices and scenes, and you can create sections if you have lots of rooms.
NOTE: Whenever you have made configuration or setup changes, the "SAVE" button will appear on the
right side. You must click "SAVE" if you want to keep your changes. If you close the browser without
clicking "SAVE", any changes made since your last "SAVE" will be lost.
The dashboard has 4 parts:
1. Banner Area
2. Control Menu
3. Filter Menus
4. Main Section
1. The Banner at the top displays the current time according to the Vera system. If the time is not
correct, click on "Setup > Location" to adjust your time, time zone and location settings.
If there are general system messages, like the Vera system is busy resetting, or a plugin has failed to
load, a message window will appear in the banner. When the message window is not shown, everything
is ok and you can continue using the system.
If the message window says "Server Busy", like the above image, that means that your Home
Automation system is busy saving some recent changes and is not ready to be used yet. Just wait for the
message to go away.
2. The CONTROL Menu under the banner allows you add and control the following categories:
DEVICES AUTOMATION APPS USERS ENERGY SETUP
3. The FILTER menus let you restrict what you see on the screen. For example, they allow you to choose
between the various Devices, the different setup options for Automation, and different options for User
control.
4. The Main Section contains various panels for every room created. You can hide any of the panels by
clicking the
button. These panels contain Control Pads for Devices, Scenes, Climates, and other
setup items.
Hover your mouse cursor over the Control Pad title to see the "Pin" and "Configure" buttons:
You can perform the basic tasks, like activating a scene or adjusting a light, by clicking the buttons within
the Control Pod. If you want to perform advanced configuration of a Scene or a Device, or delete it from
the system, click the
"Configure" button.
A Device or Scene will be color coded green if it's busy doing something. For example, a scene is
activating or a light is adjusting. Red means there's a problem with the scene or device, such as a device
that is not responding or not configured, or a scene that failed to activate properly. Generally when a
device or scene is shown in red or green, a small message window appears telling you what's going on.
Sometimes there is too much information for the small message window. Hover your mouse pointer
over the message window to see the full text.
Control Pads
When you click the
for a device or scene, you will see its Control Pad configuration. The Control Pad
will have tabs for the various options. Which tabs are shown depends on the type of device.
For Devices, the first tab is "Control" and contains all the controls for the device. This varies depending
on the device type. Generally every command you can send to the device is shown in the "Control" tab.
Settings
Automatically configure -Tells Vera whether or not to do the Z-Wave configuration for you (Setting
associations, wake-up intervals, etc.). Unless you are an expert Z-Wave user, this should always be left
on "Use Default Behavior."
ID - The Z-Wave node ID of the device. This is separate from the device # and is used by Vera to
communicate with the device.
Poll this node at most once every X seconds - This setting limits how often Vera polls your device for
status updates like Light on/off or thermostat heat/cool.
Energy used - If you don't have a power meter, you can use this setting to manually set up an energy
profile for your house by assigning wattage to your devices.
Capabilities - The Z-Wave node information and the Z-Wave command classes supported.
Version - The Z-Wave Library Type, Z-Wave Protocol Version, Z-Wave Protocol Sub Version, Application
Version, Application Sub Version
Manufacturer - The manufacturer of the device.
Model - The model of the device.
Neighbors - The other devices on your network that the Z-Wave protocol reports are in direct range of
the device.
Configured at - The last time we successfully configured the device.
The Configure node right now button will send a command to the device to be reconfigured with Vera.
Basically it will try to report all the above values that were acquired in the pairing process.
The Poll now button will send a command to the device to report its status immediately. If you use the
feature with sensor or other battery powered devices make sure that the devices are 'awake' otherwise
it will wait for it to 'wake up' and by default that interval is of 30 minutes.
The Stress Test button will send a stress command to that device. It will ping the device a couple of time
and it will report the time it needed to do it. This way you will know if the device is too far from
Vera and you need to bring it closer or install other z-wave devices to improve the signal.
Advanced tab
It would be better if you DON'T do any changes on this page unless you have experience with Z-Wave
devices.
You will find the following fields on this page (it might vary from device to device):
room - Use this to select the room the device is in.
name - Name of the device.
device_type - The UPnP type for the device.
altid - the Z-Wave Node ID of the device
ip - n/a for Z-Wave devices
mac - n/a for Z-Wave devices
manufacturer - The Manufacturer of the device
model - The model of the device
room_num - The room number of the device
id_parent - The Z-Wave ID of the controller for the device
embedded - The device is embedded
disabled - The device is disabled
device_file - The XML file defining the device's behavior.
id - The Luup ID for the device (e.g. Device #4). Used in creating scenes.
Impl_file - The XML implementation file for the device.
Time_created - The UNIX timestamp of when the device was created. room: the Luup room number for
the room the device is in.
Hidden - 1 if "Hidden" is checked, 0 otherwise; If Hidden is checked you won’t be able to see the device
on the Dashboard anymore
Category_num - The ID of the category the device is part of.
Capabilities - The Z-Wave node information and the Z-Wave command classes supported.
ManufacturerInfo - The Z-Wave Manufacturer ID, Product Type ID, and Product ID
VersionInfo - The Z-Wave Library Type, Z-Wave Protocol Version, Z-Wave Protocol Sub Version,
Application Version, Application Sub Version
PollingEnabled - 1 if we poll this device, 0 otherwise
Configured - 1 if the device is properly configured.
NodeInfo - The raw data from the Z-Wave node information frame
Neighbors - The devices that this device reported it could "see" after a neighbor node update.
LastReset - The UNIX timestamp when the device was last reset
AssociationNum - The id of associated devices
InitialName - The initial name of the device, e.g. _GE Keypad Controller
LastUpdate - The UNIX timestamp for the last time we got an update on the node's status
FirstConfigured - The UNIX timestamp for the first time we successfully configured the node.
LastRouteUpdate - The UNIX timestamp for the last time we updated the routes for this node.
Status - The status of the device either on (1) or off (0)
Target - The target of the either on (1) or off (0)
Device Options (Z-Wave)
Update Neighbor Nodes
Press this button to update the neighbors for the device. The neighbors are the devices in direct range
and are used in building the routing table for the Z-Wave network.
Configuration settings
Some Z-Wave devices allow you to manually set configuration variables to do things like adjust ramp
rate and so on. This is unique for each device, and each manufacturer handles this differently. If the
manual for your Z-Wave device indicates that you can set a configuration variable or setting to change
the default behavior, do it by clicking the "Add Configuration Setting" button. Indicate which variable
number to set, and what value to set it to. The value can be a '1 byte hex', '1 byte dec', '2 byte hex', '2
byte dec', '4 byte hex' or '4 byte dec'. If you do not know what this means and the manufacturer did not
tell you which one they want you to choose, then choose '4 byte dec'. Put the setting you want in
'Desired Value'. Vera will attempt to configure the node after you click the red 'Save' button. If it's a
battery operated device and Vera can't configure it right away, it will wait for that device to wake up.
Once Vera has configured the Z-Wave device, Vera will ask the device again for the value of the
configuration setting and show it under 'Current Value'. If you set a value, configured the device, and
the current value is something other than your desired value, that means the Z-Wave device did not
accept the 'Desired Value' you gave it, and you may need to contact the manufacturer for clarification. If
you change the 'Data Size' option to say 'Monitor only', then when the device is next configured Vera
will not change the value, but Vera will ask the device for the current value and show it in the 'Current
Value' column. If you change it to 'Default', then the next time Vera configures the device, Vera will tell
the device to go back to the default value for this setting, and you'll see the value in the 'Current Value'
column.
Associations
NOTE: Leave By default Vera should automatically configure devices, and leave each device's
Automatically configure set to 'Default Behavior'. If you tell Vera not to configure the device, Vera will
leave the device alone and will not set the associations for you.
These are also unique for each device according to the manufacturer. Associations are commonly used
to tell sensors to turn on lights, and to associate devices. Refer to the manufacturer's user manual that
came with the Z-Wave device to learn how they handle associations. Associations are given an ID or
group ID. To add an association, type in the group ID, which is a number, click 'Add Group' and then
check off the Z-Wave devices you want to be associated. The Vera system will attempt to configure the
node after you click the red 'Save' button.
Logs
You can use this page to see any Events or Notifications that Vera has recorded for this device.
Once you click on the Logs tab on the device you will see the My Alerts page where you can see all your
notifications for that device new or old.
Notifications
You can use this tab to add notifications for your devices to be alerted when anything you want to track
happens. To set up a notification
1. Select the type of event you want to be notified about in the "Add notifications for:" dropdown
menu. i.e. "A Device is turned on or off."
2. Name your notification.
3. Select the exact event you want to be notified about.
For example, to receive notifications for an appliance module, you would select "on" or "off." Once
you've created your notification, you can select which users you want to be notified when this event
occurs. The notification will be logged on our servers, and the users will be informed through the
contact information they've provided for their account.
Pinned Devices
If you want to see your devices on Dashboard - Pinned Devices tab hover your mouse cursor over the
Control Pad title to see the "Pin" and "Configure" buttons and click on the pin button.
Devices
On this page you will find all of your devices listed. You can use the Filter Menu to show your devices in
groups according to each device type, such as Lights, Climate, Sensors, Locks, etc. Each device will
appear in the Main Area ordered according to the room they are assigned in. You can access the Control
Pad Configurations for each device from this page.
Automation
Here you will control the device behaviors for each scene, set up triggers, and create schedules for your
scenes.
Scenes
A scene can be a group of commands which run:
1. at the push of a button on a device (trigger)
2. at specific times (schedule)
3. manually, by pressing the Run button
A scene can also notify you of events, like sending you a text message when a door is unlocked.
Click on the wrench button of your device and you will see a notification tab.
To add and edit Scenes, go to "Automation". Here you will see Control Pads for each scene. Here you
will control the device behaviors for each scene, set up triggers, and create schedules for your scenes.
If you want to create a scene first you need to go to Automation > "New scene". You will have to give a
name to your scene.
Here is where you will do most of your work on the device tab of the new scene that you’ve just created.
First you have to set up what the scene should do and what commands to send, for this you will have to
chose the devices from DEVICES tab and click on the available buttons to specify what commands should
be sent
Here you will notice you have the immediate button which represents the delays. It is set by default on
immediate. By this button you can set up commands that your scene should run as soon as the scene is
fired up. Whenever you add another delay you will have to make sure to select that delay in order to
add commands.
To set up when the scene should run, you will have to take into consideration both the TRIGGERS and
the SCHEDULES tab.
Adding a Scene
Go to "Automation > New Scene". You will find a variety of options here to control the different aspects
of your scene. These are Devices, Triggers, Schedules, Luup, and Advanced
In addition to controlling these aspects of your scene, you can also set Delays and associate scenes with
your rooms.
Delays
A Delay is a timer that you can use to change the status of the device in the near future. For example
you want your lights to turn on as soon as the scene runs (immediate), and you want them to turn off
after 2 minutes. This is called a Delay.
To set a Delay, you have to click on the orange dropdown menu that says 'Immediate'. This will allow
you to manage delays and specify different commands for each delay.
On the drop down menu -> Manage delays button
On the new popup window please enter the value and select seconds, minutes or hours and click close.
After adding a Delay (e.g. 5 minutes), you have to select the newest created Delay and you will notice in
the list of devices below, there will be no button pressed. Whenever you switch from one delay to
another, from Immediate to 5 minutes, you will be able to select different commands to be executed.
For example you can set up a scene to turn on a light immediate the scene is ran and turn off that same
light after 5 minutes.
NOTE: Associating a scene with a room is optional. This feature can be useful for helping you to organize
your scenes. For example, hallway and bathroom lights can be triggered if bedroom lights are switched
on late at night, therefore you may want to associate this scene with the bedroom. Perhaps you'd like
the living room thermostat turned down if the temperature outside reaches high degrees. You would
associate this scene with your living room.
Triggers
A trigger is an event that tells Vera to run a scene.
To edit an existing trigger, go to Automation > Triggers. Here you will find a list of existing triggers. You
can enable or disable a trigger here, delete a trigger by clicking on the trash icon in the trigger's title
bar, or edit it's configuration by clicking on the wrench icon.
To add a new trigger, go to Automation > Scenes > Add A New Scene > Triggers. You will then be
allowed to add a trigger as part of the scene creation process. You will need to name your scene in the
upper left corner, and be given options that apply to your available devices. The most common options
are sunset, sunrise, a sensor is tripped, and an armed sensor is tripped.
In the example show below, the scene is called "Hot Day Scene". The trigger being created uses
a Weather Forecast app to detect a temperature rise above 75 degrees. This temperature rise can then
be used to adjust a thermostat device.
Schedules
To edit an existing schedule, go to Automation > Schedules. Here you will find a list of existing triggers.
You can enable or disable a schedule here, delete a schedule by clicking on the trash icon in the trigger's
title bar, or edit it's configuration by clicking on the wrench icon.
To add a new schedule, go to Automation > Scenes > Add A New Scene > Schedules. You will then be
allowed to add a schedule as part of the scene creation process. You will need to name your scene in the
upper left corner, and be given options to create schedules based on intervals, days of the week, days of
the month, or one-time events called "absolute".
Interval based: For example, do something every x minutes, or every other hour. The minimum interval
is 1 minute. There is no maximum. Specify the interval in hours or minutes.
Day of week based: For example, do something at 7:00 and 9:00 on Monday, Wednesday and Friday.
You can check off what day(s) of the week you want this occur, and tell Vera what time(s) of day. You
can specify multiple times, separated by commas. For example, check off Monday and Wednesday and
put in 7:00, 9:00, 21:00 to do this at those three times on Monday and Wednesday. You can specify the
time in either 12-hour or 24-hour format, so you could also put in: 7:00am, 9:00am, 9:00pm.
Day of month based: For example, do something at 8:00 on the 1st and 15th of each month. As
explained above in "Day of week based", you can enter multiple times, in 12- or 24-hour format.
Absolute: For example, do something on 5 Mar 2005 at 11:15. Use this timer to do something one time,
at a certain time.
After you specify the options for the schedule, you can tell Vera what to do at those times, in exactly the
same way you do when creating a scene. As explained in the scenes instructions, you can tell Vera to do
something with a device and then after a period of time, do something else, such as: turn on the garage
light and 30 seconds later turn it off again.
Triggers
On this page you have an overview where you can see the list with all the triggers that you added on
your scenes, their names and also the date for the last run.
You can enable or disable or even remove them from the scene.
Also you can press on the wrench key and edit the trigger (change the name, the device that is selected
on the trigger).
Schedules
On this page you have an overview where you can see the list with all the schedules that you added on
your scenes, their names and also the date for the last run.
You can enable or disable or even remove them from the scene.
Also you can press on the wrench key and edit the schedule (change the name, the date and time for
this schedule).
Apps
The MiOS Market is your one-stop shop for any and all plugins that developers create for the Vera
platform. Through the MiOS Market, you can add plugins for everything from controlling your house
through a smartphone to an IP camera.
To get started, visit "Apps > Install Apps". Use the numbers at the top and bottom of the list to go
through the pages and see everything that's available. When you see a plugin you'd like to install, all you
need to do is click the "Install" button under that device's description. To see a list of all apps that are
available and under development, click on "Apps Portal".
In this section you can download new apps and configure your existing app settings. If you are a
developer, you can create your own apps by visiting "Apps > Develop Apps".
Account
Here you will find options for changing contact information, setting up user alerts, and adding and
removing users from the system.
To Add More Users to Your unit
1. Users register for their own MiOS account at http://cp.mios.com/
2. Users provide you with their MiOS username and email associated with the account
3. Click the Users tab on the Control menu and then navigate to the Other users Filter tab. In the Add
another MiOS user area you can either enter the new user’s name and email or you can select the New
Vera account option and create an account.
4. Select type of MiOS account to be added:
• Administrator – User can configure the system and add or remove other MiOS users.
• Guest - User has basic control over devices.
• Notification only - User has no access to the system, but can still receive notifications of events and
alarms.
Please note:
If you are on the same Internet connection as other Vera systems which you cannot control and are
controlled by other MiOS users, a section will appear called "Vera systems on my home network
controlled by others", which lists them for your reference along with the MiOS usernames that can
control the system. You will need to ask one of those users to add you if you want to control it as well.
Energy
Vera allows you to monitor the energy consumption of your devices which are capable of reporting
their energy usage, as well as the overall energy consumption for each room and for the entire house. It
also allows you to see how the energy usage evolved over a period of several months, weeks or days.
There are two available tools for this:
•
•
The Vera native energy monitoring tool
The ERGY plugin by Echo Labs
Vera Energy Monitoring Tool
Live Usage
Here you can see the current (live) energy usage of your devices. On the scale there are several
thresholds which represent the average consumption of different size houses, to give you an idea about
your house energy usage.
Historic Usage
Here you can see the historic energy usage for a certain time interval from the past, which must be
specified in the input boxes.
Measure Data
If you have any energy meters, here you can see the data recorded by them, which includes:
•
•
•
•
•
•
Current kWh reading
The date when it started measuring
The time of the last kWh reading
Total energy consumption in this period
Total estimated cost, based on the cost per kWh of electricity specified in Setup >> Location
Estimated cost per day
ERGY by Echo Labs
ERGY is a plugin for monitoring, logging and plotting the energy usage of your house. There are two
versions of this plugin:
•
•
ERGY, the paid, full version of the plugin, offering the entire set of features
ERGY Light, which is the free version of the plugin, with a limited set of features
In order to use this plugin you must register both yourself and your Vera on the ERGY website, then
activate the plugin from the Vera UI by going either to the ERGY Light tab, or to the ERGY Settings tab.
You can read more about ERGY on its official website: http://www.ergyenergy.com/
Setup
In this section you have control over the following options:
Rooms - You can add rooms to the system, or rename existing rooms.
Location - Setup time and date, city, timezone, and cost of electricity per KWH.
Tech Support - Fill out this form to contact Tech Support and open a support ticket for any questions
you may have concerning your Vera system.
Net & Wi-Fi - Here you can configure and troubleshoot advanced network settings NOTE: Recommended for developers and advanced users.
Backup - Your Vera system is set to automatically backup your settings on a daily basis. Here you can
restore your system to previous backup profiles or restore the entire system to factory defaults.
Logs - Here you can control the settings of your device and system logs. You have the option to have
your logs written to a USB device. NOTE: Check your USB drive for any files before inserting it into the
Vera USB ports. Any files on your drive WILL be permanently erased.
Z-Wave Settings - Here you can setup and configure your Z-Wave settings. NOTE: Recommended for
developers and advanced users.
Insteon Settings - Here you can setup and configure your Insteon settings. NOTE: Recommended for
developers and advanced users.
Firmware - Displays the current firmware and allows you to update the firmware.
Unit Settings - Here you can name your individual unit and set a cap on the amount of notifications the
system is allowed to send out per day.
Rooms
You can add rooms to the system, rename existing rooms or remove rooms.
Location
Setup date format, timezone, temperature format, city and cost of electricity per KWH.
You will need these settings in order to properly install certain apps.
Net & Wi-Fi
Here you can configure and troubleshoot advanced network settings - NOTE: Recommended for
developers and advanced users.
Options available:
•
•
•
•
Troubleshoot network
Reset to default network settings
Reboot unit
Select how does the unit connect to the Internet
Backup
Your Vera system is set to automatically backup your settings on a daily basis.
Here you can create a complete backup for your system, restore your system to previous backup profiles
or restore the entire system to factory defaults.
Logs
Here you can control the settings of your device and system logs. You have the option to have your logs
written to a USB device.
NOTE: Check your USB drive for any files before inserting it into the Vera USB ports. Any files on your
drive WILL be permanently erased.
Z-wave Settings
Here you can setup and configure your Z-Wave settings. NOTE: Recommended for developers and
advanced users.
Options - information about the Vera unit
Repair - heal the z-wave network
Advanced - advanced settings
Insteon Settings
Here you can setup and configure your Insteon settings. NOTE: Recommended for developers and
advanced users.
Firmware
Information about the firmware version that is running on your Vera
Unit Settings
Here you can name your individual unit and enable the option to secure the unit. If you choose to secure
the unit you will be asked to enter your username and password every time you access the unit form the
same network
Z-Wave Advanced Options
Here you have various advanced Z-Wave options. Use these options only if you understand what they
mean. Most users will not need these options.
Reset Z-Wave network purges all data in Vera's Z-Wave chip, which also clears out the list of Z-Wave
devices paired to Vera. You will then need to reset any devices you previously paired, and pair them
again. If you also want to get rid of your scenes, network settings, users, network devices, etc., you can
do a full factory reset.
WARNING: This process is IRREVERSIBLE, you cannot restore your devices from a backup, you have to
pair each of them again. Before proceeding you have to manually unpair all the devices, otherwise you
will create duplicate nodes which will compromise your Z-Wave network.
If you already have another Z-Wave controller that you want to be the master, and you want Vera to be
the secondary controller, bring the master controller and Vera close to each other, tell the current
master controller to start sending network data or to add another Z-Wave controller, and then
click Copy Z-Wave network from a master controller. You will see the status of the transfer in blue at
the top of the page, and Vera will tell you if it was successful. The "Role" shown on the 'Options' tab will
then also change a minute or so later.
Controller shift tells Vera to transfer the role of primary controller to another Z-Wave controller. After
you click 'Controller Shift,' proceed to add the other Z-Wave controller the same way you normally
would. The difference between adding the controller by clicking 'Controller Shift' versus adding the
controller the normal way by clicking 'Add ZWave controller', is that if you choose 'Controller Shift', at
the end when the other Z-Wave controller gets added, that other ZWave controller will become the
'Master controller', and Vera will be a secondary controller. This means the other Z-Wave controller will
then be responsible for healing the networking and being the SIS/SUC (a technical Z-Wave term).
Normally, by default, Vera is the master controller and is SIS/SUC.
Reset Z-Wave chip will send a software reset to the Z-Wave chip. This will restart the code written on it.
It will not cause any loose of data.
Backup Z-Wave network:
The Z-Wave chip maintains the master list of all the other Z-Wave devices that you have included into
your Z-Wave network. Vera also maintains its own database with a list of devices, and Vera's database
has a lot more detail, such as the name of the device, the room that it's in and so on. Vera continually
syncs its database with the master list of devices in the Z-Wave chip. This is why you can carry it around
to pair and unpair devices, and Vera will show any new or removed devices. If change your Z-Wave unit,
then all your devices will disappear since the new one doesn't have any devices paired to it and so Vera
deletes the ones in its database.
Vera also has the ability to restore, or clone, this backup into another unit.
For example, if you receive a replacement unit, you can restore a backup of your old dongle's data to the
new dongle so you don't have to rebuild your network.
To do this follow these steps:
1. Be sure that you have not made any changes to Vera within the past 2 hours.
Vera will backup the dongle's configuration whenever the list of devices in the dongle changes.
The backup process is slow, so Vera does it in small increments when there is no activity on the
Z-Wave network. In Vera's toolbar, go to Setup->Z-Wave Settings->Options, and look at the
value for Last Z-Wave network backup. This will show the date & time that Vera last completed
a successful backup of the dongle. Be sure that this is not empty or "N/A". If it is, go to Setup->ZWave Settings->Advanced and click Go on "Backup Z-Wave network "
2. Once you've confirmed that Vera has a backup of your dongle, go to Advanced, Backup and
choose Create backup.
Your browser will prompt you to save a file. Save it to your computer somewhere, such as on
the Desktop. Be sure to wait until your browser has finished downloading. That backup file
contains both Vera's database as well as the dongle's.
3. Connect your new Z-Wave unit. Wait a minute to be sure that it boots up.
4. Go to Advanced, Backup and in the restore section, click 'choose file' and locate the backup file.
Check the box 'Restore Dongle Firmware'. Then click Restore.
5. Leave Vera alone for 15 minutes.
Vera will restore its database, which has all the detailed information on the device, and will also
restore the dongle's data from the backup file, which takes several minutes.
6. Confirm your new Z-Wave unit is working and that you have a complete list of devices.
NOTE In case you forgot to backup your existing settings and you have the "Backup my configuration on
server" service activated from Setup->Backup Auto-Backup section, your Vera will backup your data
once per day. So, login with your account, go to Setup->Backup and you will see there the backups.
Select the last one and restore it to your Vera unit.
Network Troubleshooting
By default Vera automatically configures its network, if you connect it to your router it will automatically
configure in switch mode.
If after plugging Vera into your network, you don't see your Vera on cp.mios.com, please follow these
steps to fix your networking:
•
•
•
•
•
•
•
•
•
•
Unplug Vera from the power cord
Unplug all the cables from Vera
Plug a cable from your computer into Vera's LAN port
Plug Vera into the power cord
Wait it to start and for your computer to get an IP address:
In windows you can type this in Start->Run to view it: cmd /K ipconfig
In linux and mac you have to start a terminal and type there ifconfig | grep -B1 "inet addr"
By default you should receive an IP from Vera that should be in the range 192.168.81.100 192.168.81.254
If you've changed the default LAN IP in Vera you'll receive an IP from that range
If you've disabled Vera's dhcp server you won't receive an IP and you'll have to setup one
manually on your pc
o In Windows 7
Open Control Panel
View by: Large icons -> Network and Sharing Center
View by: Category -> View network status and tasks
Click on Change adapter settings
Right click on LAN connection to Vera , then click on Properties
Highlight the Internet Protocol Version 4 (TCP/IPv4) item, and click on
Properties
In the IP address field enter 192.168.81.10
In the subnet mask field enter 255.255.255.0
In the Default gateway field enter 192.168.81.1
Click OK
Click OK Again
o In Windows XP
Open Windows Start menu.
Open Control Panel.
Classic view: Open Network Connections
Category view: Select Network and Internet Connections, and then Network
Connections.
Double-click on your the LAN connection to Vera.
Click Properties.
In the General tab, highlight the Internet Protocol (TCP/IP) item, and
click Properties.
In the IP address field enter 192.168.81.10
In the subnet mask field enter 255.255.255.0
In the Default gateway field enter 192.168.81.1
Click OK
Click OK again
o In Mac OS X
Open the Apple Menu(Top left corner of your screen)
Click System Preferences
Click Network
Click the Locations dropdown and select Edit Locations
Click the plus sign and call your new location "Vera system Troubleshooting"
Select "Ethernet" from the list on the left
Select "Manually" from the Configure IPv4 dropdown
Enter 192.168.81.10 in the IP address field
Enter 255.255.255.0 in the subnet mask field
Enter 192.168.81.1 in the Router field
Hit "Apply"
after you have an ip on your PC and you can ping Vera's ip successfully open an web browser
and type this in the address bar: 192.168.81.1
Vera's web interface should open and then go to Setup->Net&Wi-Fi
check the Internet settings: If Vera connects directly to your cable or DSL modem, select
"Directly to the internet. Vera is a gateway" If Vera is plugged into your router, select "Through
another gateway on my network. Vera is a switch" If you want Vera to connect wirelessly, you'll
need to enter your wireless network information(ssid, key) and make sure to disconnect Vera's
eth1 port from your network.
In order to activate the MiOS service you'll first need to make an account on cp.mios.com, and
add your Vera to your account while on the network with it from cp.mios.com
•
•
•
•
Wave Troubleshooting
How does Z-Wave work?
Z-Wave has a range for indoor use of approximately 80-100 feet from node to node so some devices
have longer range and others shorter. The range of a Z-Wave signal is strongly influenced by the
environment and depends on many factors, from the antenna and implementation of the device to the
materials the product is encased in, and the materials that the radio signal has to go through (concrete
walls or metal doors). So if a node is more than 80-100 feet from the gateway you put a repeater node
(like an plug-in on/off switch) in between and the signal will go from the gateway to the repeater node,
to the end device. The signal will hop up to 4 times until the 5th device and you can create scenes,
associations, etc. between any of those nodes (devices) in the network. Depending on how your house is
set-up, we recommend for indoor use that the distance should be about 40-50 feet.
Because door locks are a special breed of z-wave devices which require an exchange of security keys
when they communicate with the Vera unit we recommend that the distance should be about 20-30 feet
from the controller.
For outdoor z-wave devices that range can go up to 300 feet for line of sight.
Things to consider regarding Z-Wave range:
Each wall or obstacle (i.e.: refrigerator, big screen TV, etc.) between the remote or a Z-Wave device and
the destination device will reduce the maximum range by approximately 25-30%. Brick, tile or concrete
walls block more of the Z-Wave signal than walls made of wooden studs and plasterboard (drywall). Wall
mounted Z-Wave devices installed in metal junction boxes will suffer a significant loss of range
(approximately 20%) since the metal box blocks a large part of the Z-Wave signal.
If you are experiencing issues with your z-wave network's responsiveness or reliability, you should repair
the network to let the z-wave chip in Vera rebuild its mesh network. To repair your network:
1.
2.
3.
4.
Go to Setup -> Z-Wave Settings.
Click the "Repair" tab
Click "GO"
Don't do anything else with your system. It's best to do a repair overnight, because repairing
your network prevents Vera from polling your nodes, detecting events, reporting when your
door locks open, etc.
5. After the repair finishes, from Z-Wave Device>Repair, you can view a repair report that can
identify which nodes on your network have weaker connections to the mesh and can help you
identify locations where you might need to add a module to improve the network
Device stopped communicating
Please know that the possible reasons for your z-wave device(s) to lose communication with Vera is
caused by one of the following:
-a battery operated device has the batteries discharged so can you please check the batteries
and see if it works?
-is the distance between Vera and the device larger than 15 feet? If so do you have any other zwave device between Vera and the device to increase the Z-Wave range? If you do have you
added a new device in your Z-Wave network and forgot to do a heal to repair the network?
Please run a repair from Z-Wave Settings > Repair and see if it solves the issue.
-is that device a door lock? If so you will need to add in your z-wave network a security
compatible (encryption capable) device which can relay the encrypted signal that the door lock
needs to communicate with the Vera unit.
-are there any devices that use the 900 MHz frequency band like old cellular phones, baby
monitoring devices or weather stations ? If so they will interfere with the Z-Wave network and
thus cause your devices to stop communicating with Vera so we advise that you move those
devices outside of the z-wave network.
-it is recommended that Vera is in a central position of your Z-Wave network so it will do less
hops to get to the device you want to control. Is there any way you can re-organize your z-wave
network and move your Vera unit in a central position?
Tech Support
If, after reading this documentation, you find yourself with a problem that you're unable to resolve you
can submit a trouble ticket to our technical support team by going to Setup->Tech Support and filling in
your contact information and the details of your problem. After hitting submit, you'll see Vera collect
the logs from your box, compress them, and send them off to us. When the process is complete, you'll
see "Successfully submitted ticket: XXXX." Please reference the trouble ticket number in future
correspondence about the same issue. We'll look into the issue and get back to you as soon as we can.
For full access support go to Setup -> Tech support and click the 'Enable it' button and send us the text
information from the left side of this button ( now shows Tech support full access disabled). (Ex: Tech
support full control enabled, access code 10xxx-21xxxx (ssh reference:
SSH_22=10xxx TS_SRV=ts1.xyz.com)). Fill in your contact information and the details of your problem
and press the submit button. We need to have full access to verify your whole logs to see what's
happening with your unit.