Download P-CAST user manual - SignIPS media portal
Transcript
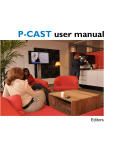
P-CAST user manual Chief-editors P-CAST P-CAST (Philips cast) is internal communication through digital signage within Philips. It helps us to touch all our employees in an innovative and sustainable way, engage them better, and build brand visibility and company pride. There are two different user-manuals available, one for chief-editors and one for editors. The roles will be explained in chapter one. This user manual is meant for chief-editors and it helps you finding your way through the system. It shows you how we use P-CAST within Philips. If you have questions after reading this manual, you can contact Rogier Guns ([email protected]). Page | 2 Index 1 Roles and playlists Page 4 2 Getting started with P-CAST Page 5 3 Types of content Page 6 4 How to upload a picture to a Photo-pool? Page 7 5 How to open a playlist? Page 9 6 P-CAST toolbar Page 10 7 How to publish a template item on P-CAST? Page 12 8 How to upload a media-item to the media-pool? Page 14 9 How to add a media-item to your playlist? Page 16 10 How to add an item with automatic feed to your playlist? Page 17 11 How to add a Twitter template? Page 20 12 How to edit or preview an item? Page 21 13 How to copy, paste and share content? Page 22 14 Some tips Page 23 Page | 3 1 Roles P-CAST can be controlled any place, anytime, anywhere. You only need an internet connection. Content can be updated by 3 groups of people: 1. Chief-editors A chief-editor should always be a communications officer. Chief-editors can prepare and publish content on P-CAST. They are responsible for the content on P-CAST. This user-manual is for chiefeditors. 2. Editors Editors can prepare content using the templates from the Corporate pool and save it in their own playlist in the ‘Draft pool’. When the template is finished, they can inform Rogier Guns, and let him know in what playlist the template should be displayed. They will take care of further steps. 3. Employees It is possible to give employees the opportunity to publish short messages on P-CAST. The employees will be visible with their name, so it will be a personal message. This can be done via a special group in Connect Us. The difference between (chief-)editors and employees is that the first two publish in name of Philips. The last group publishes on their own name. Playlists There are three different levels of playlists in P-CAST. As a chief-editor you can choose which playlist(s) you want to display on your P-CAST systems. Some playlists already exist and you can easily subscribe on them. An example is the global playlist. By subscribing to this playlist, you can be sure that your P-CAST TV’s, always has content to display. 1. Global playlist This playlist consists of global Philips content with e.g. PNN, commercial, world clocks. You can subscribe to this playlist, and it will automatically be updated to your P-CAST system. Chief-editors will always be informed via email when something is added to the global playlist. When a new PCAST system will be rolled out, it’s a good idea to subscribe to this playlist, so that the system already has items to display and won’t show a black screen. 2. Country/city/sector playlists This playlist consists of content that is country/city/sector based. E.g. news, project information, success-stories etc. Some of these playlists already exist, like a Philips IT playlist. You can inform via Rogier Guns if there is a playlist available that may be relevant for you. It’s also possible to make your own playlist, for your country/city or sector. 3. Local playlists Research shows that people like to see information on P-CAST that is close to them. That’s why a local playlist really adds value to your P-CAST system. In your local playlist, you can publish items about e.g. local events, local project information, building related information, did you know (Connect Us), local HR information etc. You can manage this playlist yourself. Page | 4 2 Getting started with P-CAST When you want to publish templates, video’s, pictures etc. you can use the P-CAST CMS (Content Management System). 1. Go to www.philips.signips.com and login with your username and password. It’s not possible to change the password. After typing it once, most likely you will get a popup with the question if you want to save the password to your computer. It’s smart to do this, because the password is hard to remember. 2. The screen below will show up. The left button is the ‘program’ button. This gives you access to the program part of P-CAST. In the menu that will show up after clicking this button, you can upload pictures, videos, add template items, open your playlist etc. The right button is the ‘advanced’ button. In the advanced menu you can see the location map (where are your players located), the machine status monitor, machine overview and machine categories (very technical, ask Rogier for help). You won’t use this button very often. Page | 5 3 Types of content With P-CAST you can make two types of content: you can publish a media-item or a template-item. A media item can be a video or Photoshop template (JPG-file). The last one is called a media-item, because the whole template/image should be in your playlist for 20 seconds. In that way it’s like a short video of 20 seconds. Before you can publish a media-item in your playlist, you have to add it to the media-pool. You learn this is next chapters. A template items is an easy way to make a P-CAST item that is in line with the Philips guidelines. A template is a background and you can add your own text and picture. The system contains different templates with themes like ‘news’, ‘sustainability’, ‘NPS’, ‘calamities’, ‘Connect us’ and more. There are also empty templates that you can use. The template items are always regarding guidelines, with the right font and colors and the Philips logo is included. Here is an example of a template item without a picture and with a picture. It’s your choice if you want to use a picture in your template. If you go to the program menu, you can have a look at the available media items via ‘view/edit media pool’. If you click on ‘view/edit template pool’ you get an overview of the available templates. And when you go to ‘view/edit photo pool’ you see the available photos (that you can add to template items). It’s possible to add your own media item or photo. This is explained in the next chapters. Page | 6 4 How to upload a picture to a photo-pool? If you want to make a template item for P-CAST, you have the choice to use the template as it is, or you can add your own picture. To make a template with a picture (like you see in the below picture), you have to upload the picture to the system first, before you can use it in your template item. If you want to use a standard template item without your own picture, go to the next chapter. 1. Go to www.philips.signips.com and login 2. Click the ‘program’ button 3. Click ‘upload new photo’ Page | 7 4. Click ‘Browse’, select the photo you want to add and the template pool to which you want to upload it. Enter a photo name of your choice. Then click ‘upload picture’. 5. Your picture is uploaded and you can use it in your template. 6. To view or edit the pictures in the photo pool, go to the menu and click on ‘View/edit photo pool’. Page | 8 5 How to open a playlist? 1. Go to www.philips.signips.com and login 2. Click the ‘program’ button 3. Click ‘View/edit existing program’ 4. Select your program pool and playlist, and then ‘Load’. ** The numbers behind your playlist tell you the amount of machines this playlist is on (in this case 70) and the amount of media items in this playlist (in this case 6). Page | 9 6 P-CAST toolbar The toolbar can be found on top of your screen, after opening your playlist. The tools help you to edit your playlist and the items in the playlist. 1. Move selected item up Click on the item you want to move up. It becomes darker grey. Then click this button and the item moves up. 2. Move selected item down Click on the item you want to move down. It becomes darker grey. Then click this button and the item moves down. 3. Delete selected item Click on the item you want to delete. It becomes darker grey. Then click on the delete button and the item will be deleted. 4. Delete all items By clicking this button, all the items in you playlist will be deleted. 5. Delete all but selected item Select the item you don’t want to delete by clicking them. They will be darker grey. Then click this button and all the items will be deleted except the selected item. 6. Add media item With this button, you can add a media item. A media-item can be a video or Photoshop template (JPG-file). The last one is called a media-item, because the whole template should be in your playlist for 20 seconds. And in that way it’s kind of a short video. Before you can publish a media-item in your playlist, you have to add it to the media-pool. (For explanation, see chapter 9) 7. Add template item A template item is an easy way to make a P-CAST item that is in line with the Philips guidelines. A template is a background and you can add your own text and picture. The system contains different templates with themes like ‘news’, ‘sustainability’, ‘NPS’, ‘calamities’, ‘Connect us’ and more. There are also empty templates that you can use. (For explanation, see chapter 12) 8. Add news item Use this button to add an item with automatic feed. This can be an RSS feed (RSS is a way to easily distribute a list of headlines, news, or content to P-CAST) or it can be a Connect Us feed or a Data portal feed. (for explanation, see chapter 10) 9. Add Twitter item 10. Copy item Select the item you want to copy in your playlist. It becomes darker grey. Then click this button, and the item is copied. (for explanation, see chapter 22) 11. Paste item Page | 10 To paste the copied item, click the paste button. After pasting it, you can change the location by clicking the arrows. (button 1 and 2) (for explanation, see chapter 22) 12. Edit item (also for previewing items) Select an item that you want to edit by clicking on it. It will become darker grey. Click the edit button to edit the selected item or preview it. You can edit the title, body-text, picture, template (background) and scheduling. Don’t forget to click ‘Save item’ after editing. And after saving your item, you have to save your playlist too! 13. Set item to normal priority When you click this button (after clicking medium/high priority), you go back to normal priority. 14. Set item to medium priority 15. Set item to high priority When you first select the P-CAST item you want to edit, and then click this button, the crown before the item becomes gold. This means that this will be the only item displayed. The other items in your playlist will be ignored. You can use this for example when Frans van Houten is visiting and you want to publish a ‘welcome’ message between 3.00 and 4.00 pm. 16. Edit link for this item When you click this button, you can make a link in your virtual player. This link will only be visible for the viewers of the virtual player (your team), not on the TV’s. 17. Save playlist This is the most important button. After everything you changed in you playlist, you have to save it! If you forget it, and close it without saving, your work will be gone. 18. Load playlist When you are in your playlist, and you want to open another playlist, you can click ‘load’. 19. Print playlist With this button, you can print your playlist. It gives you an overview of the thumbnails, info and duration of the items in your playlist. Page | 11 7 How to publish a template item on P-CAST? 1. Click ‘Add template item’ in the toolbar on top of your screen. 2. Select a template pool and pick the template you want to use. 3. Media duration should be 20 seconds 4. Go to ‘step 2’. You see some tabs. The ones you will use most are: -Text: when you want to use the template with only text -Photo and text: when you want to add your own picture to the template and your own text Text size is ‘Medium’. It is very important to check if the screens will display your templateitem properly. Use the ‘preview page’ button for this. Page | 12 • • • • 5. There is no spelling check on P-CAST. The more text you type, the smaller the text will get. And people have only 20 seconds time to read your message. Two reasons to keep it short. Title will be truncated when it’s too long (without a notification). So, always preview your item before you save it! You have the possibility to add a schedule to your template. If you do this, the template will automatically be removed from your playlist after the selected time. For scheduling go to step 3. The standard setting is ‘no schedule’. If you click the right tab ‘scheduled’ you can select your date/time. In the bottom of the screen click: ‘Add from now to date/time’ or ‘Add from date/time to date/time’. Fill in time and date and then click ‘Add to schedule’. You can add more then one schedule. 6. Click: ‘Save page’ 7. Your template is visible in the playlist. 8. Don’t forget to save your playlist before closing! Page | 13 8 How to upload a media-item to the media-pool? A media-item can be a video or Photoshop template (JPG-file) that you want to display for 20 seconds. Before you can publish a media-item in your playlist, you have to add it to a media-pool. - JPG files should have a resolution of 1360x768. Video should not be longer than one minute and can be either WMV or MPEG. Ideal resolution is 1360x768, but it can be converted by the system (which will result in black frames). 1. Click ‘upload new media’ 2. Click ‘Browse’ and select the media-item you want to add. 3. Select the media pool and media category to which you want to upload the media-item to. Page | 14 4. Resolution is standard 1360 x 768. Select ‘background color’ and ‘media duration’ (20 sec). And then click ‘upload media file’. 5. Your media-item is added to the queue. The files go through the media-converter. Especially with big files (like movies) it can take some time. When a file is processed in the media-converter, you can see it at the upper right corner. The green dot will be a grey rectangle. When you click on it, you can see the status of your media-item. 6. When the media-item is uploaded, you can find it in your media pool. Click on ‘View/edit media pool’ to see it. Page | 15 9 How to add a media-item to your playlist? 1. To add a media-item, open your playlist. 2. Click ‘Add media item’ in the toolbar on top of your screen. 3. Select the ‘media pool’ and ‘category’ of the media-item. * You can subscribe to the ‘P-CAST usergroup update emails’ (via Rogier Guns). You will receive emails when a useful media-item is uploaded to the media-pool. This email says in what media pool and category the media-item is. (you will also be informed when a media-item of templateitem is added to the Philips Global playlist, when you’re subscribed to this playlist) 4. For a preview, click ‘Preview media’, to save: ‘Save media item’ 5. You can choose to add a schedule (on top of your screen). This is explained in ‘How to publish a template item on P-CAST?’ Page | 16 10 How to add an item with automatic feed to your playlist? It is possible to make an item for P-CAST that automatically displays the information that is in a ‘feed’. These can be 1) RSS feed, 2) a Connect Us feed or 3) a data portal feed. Add a template with RSS-feed 1. Click on the ‘Add news item’ tool in the tool-bar on top of your screen. 2. In the following screen you can select the template of your choice. For a news-item, this can be the ‘News’ template’. 3. Then select the feed. You can take a look at the available feeds on the system by clicking the arrow on the right. If you want a feed that is not in the list, contact Rogier Guns. 4. It is not possible to preview RSS-templates! 5. You can add a schedule to your item, before you ‘save newsitem’. 6. Don’t forget to save your playlist. Add a template with Connect Us-feed It is possible to give employees the opportunity to publish short messages on P-CAST via Connect Us. This is a nice way to make P-CAST more interactive and involve employees in the system. The message will be published with their own name above it, so it’s a personal message. • • • • The Connect Us template is always linked to one group The Connect Us group needs to be a new group and needs to contain a description about that the first 120 characters will be directly published on P-CAST. The person who posted the message will be visible with his/her full name. The social media guidelines are valid on all postings. Page | 17 • • • • • When the system is abused, the communications officer can delete the message. The Connect Us name needs to be published in the title of the template. For example: You on TV @ HTC, ConnectUs VB, etc. You have to realize that you need to launch this new service to make it work. Tell employees how it works and ask them to use it. If you made the new Connect Us group, contact Rogier Guns to add the feed to the P-CAST system. On request, you can do other interacting things via Connect Us, like votings and polls etc. There are costs associated with these things. 1. Before you can add the template, you have to make your own group in Connect Us. When you did that, contact Rogier Guns, so he can help you with the feed in P-CAST. When this is done, go to step 2. 2. Click on the ‘Add news item’ tool in the tool-bar on top of your screen. 3. Select the Connect Us template in the template pool. 4. Select your Feed. 5. Add a schedule if you want. 6. It is not possible to review items with feed. 7. Save newsitem. 8. Save playlist. *The system will automatically display the first 120 characters of the last 6 messages posted on Connect Us. It’s an option to publish the same template twice or more. Add a template with Data portal feed Imagine you want to publish vacancies on P-CAST. The vacancies will be delivered by HR, but you don’t want to update these vacancies yourself and you don’t want your HR colleague to be in your P-CAST system. For these occasions we have a data portal. Your HR-colleague can log-on to the data-portal, and fill in the information of the vacancies. He/she is responsible for the content. You only have to publish a Page | 18 template with ‘data portal feed’ in your playlist and the system will automatically and randomly pick vacancies and display them on P-CAST. There are some concepts (with data portal) available, e.g. vacancies, Shout Out (compliments), Deal of the Day (NL only). These are free to use. For the development of new concepts, we’ll have to pay. This tutorial explains how to add a template with data portal feed to your playlist. For more information about the use of a data portal, contact Rogier Guns. 1. Click on the ‘Add news item’ tool in the tool-bar on top of your screen. 2. Select the Empty BG (feed template) 3. Choose if you want to use the ‘feed duration’ or the ‘template duration’. If it’s a short movie, select the first one, because then the template will be visible as long as the movie is. 4. Select the feed you want to use. 5. You can add a schedule before you click on ‘save mediaitem’. 6. It is not possible to review items with feed. 7. Don’t forget to save your playlist, after saving the template. Page | 19 11 How to add a Twitter template? You can show Twitter feeds on your P-CAST systems. 1. Click on ‘Add twitter item’ in the toolbar. 2. Select the Twitter template in the Philips-corporate pool. 3. Go to ‘Step 2 – Select content’. 4. Title: this is the title that will be displayed above the Twitter-tweets. 5. Select what you want to be displayed. In this example we use PhilipsNL. String= PhilipsNL and reactions from people to PhilipsNL User= Postings by PhilipsNL Hashtag= When you select this one, P-CAST will show all the tweets that contain the hashtag # of your choice. E.g. #Sonicare 6. ‘Feed preview’ will show you the available feeds at that moment. 7. Select 3 tweets per page for the best view. 8. If you click ‘preview page’, it will not show the template the same way as it’s published on PCAST. Your TV’s will show the content in the right way. 9. In ‘Step 3’ you can add a schedule if you want. 10. Click ‘save page’ when it’s finished. *You can copy and paste the Twitter template in your playlist, to show 6 or more Twitter feeds. Page | 20 12 How to edit or preview an item? If you made a template-item or added a media-item to your playlist and saved it, you can still edit it. It is also possible to preview your items. 1. First select the item that you want to edit or preview by clicking on it. When it is selected, it is darker grey colored. 2. Then click on the ‘pencil’ in your toolbar. 3. In the next screen, you can choose to ‘preview page’ if you want. 4. You can also go through step 1, 2 and 3 to edit/change the template (step 1), the text and/of photo (step 2) or the scheduling (step 3). 5. Don’t forget to save your changes by clicking ‘save page’. 6. After saving your page, don’t forget to save you whole playlist before closing! Page | 21 13 How to copy, paste and share content? 1. Select the item that you want to copy in your playlist. (it becomes dark grey) 2. Click ‘copy item’ in the toolbar on top of your screen. 3. Click ‘Paste item’ to paste the item in the same playlist. If you want to paste the item in another playlist: click ‘copy’, go to the other playlist, and click ‘paste’. The item will be visible in the other playlist. 4. The item will be pasted above the original file. Use the arrows down in your playlist. 5. Don’t forget to save your playlist when you’re finished. to move the item up or Do you have something that is interesting for all the P-CAST users? Share it! Use the copy-paste buttons to copy and paste your item to the ‘Philips Shared’ pool. All the chief-editors have access to this playlist, so they can copy and paste your item to their playlist. When you’ve added an interesting item to the shared pool, contact Rogier Guns. They will inform the P-CAST group about the new item via email. If we all share content, it will take less effort to have a great playlist! Page | 22 14 Some tips o If you make a mistake with your playlist, you can load the playlist history. This is very helpful to know as a fallback scenario. Go to: view/edit existing program select your playlist click ‘Load history’ and select the playlist you want to load. o o Use the ‘pencil button’ in your toolbar to preview items. Always preview your item before you save it! Sometimes the title is truncated, when it’s too long. The system will not notify you when this happens. That’s why it’s very important to review all the items before you save them. You can make screenshot (Print Screen) for review. Nice way to show people how their message will look like. It is possible to see your playlist on your laptop, the same way it looks like on your TV’s. This is for review purposes only. There is one virtual playlist per location available. Ask Rogier Guns. o o Page | 23


