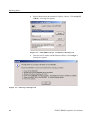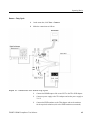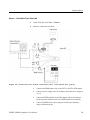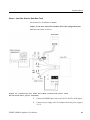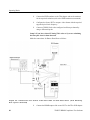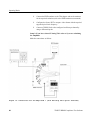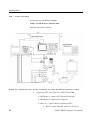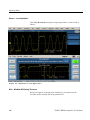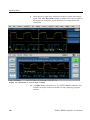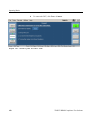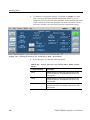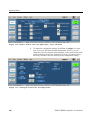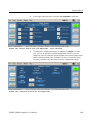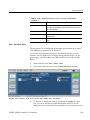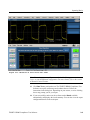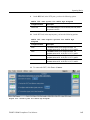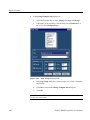
1
Online Help
TDSHT3
HDMI Compliance Test Software
077-0024-01
Adapted from TDSHT3 HDMI Compliance Test Software Online Help,
Version 3.0.1
www.tektronix.com
Copyright © Tektronix. All rights reserved. Licensed software products are owned by Tektronix or its
suppliers and are protected by national copyright laws and international treaty provisions.
Tektronix products are covered by U.S. and foreign patents, issued and pending. Information in this
publication supercedes that in all previously published material. Specifications and price change
privileges reserved.
TEKTRONIX and TEK are registered trademarks of Tektronix, Inc.
Contacting Tektronix
Tektronix, Inc.
14200 SW Karl Braun Drive
P.O. Box 500
Beaverton, OR 97077
USA
For product information, sales, service, and technical support:
In North America, call 1-800-833-9200.
Worldwide, visit www.tektronix.com to find contacts in your area
Warranty 9(b)
Tektronix warrants that the media on which this software product is furnished and the encoding of the programs
on the media will be free from defects in materials and workmanship for a period of three (3) months from the
date of shipment. If any such medium or encoding proves defective during the warranty period, Tektronix will
provide a replacement in exchange for the defective medium. Except as to the media on which this software
product is furnished, this software product is provided “as is” without warranty of any kind, either express or
implied. Tektronix does not warrant that the functions contained in this software product will meet Customer’s
requirements or that the operation of the programs will be uninterrupted or error-free.
In order to obtain service under this warranty, Customer must notify Tektronix of the defect before the expiration
of the warranty period. If Tektronix is unable to provide a replacement that is free from defects in materials and
workmanship within a reasonable time thereafter, Customer may terminate the license for this software product
and return this software product and any associated materials for credit or refund.
THIS WARRANTY IS GIVEN BY TEKTRONIX IN LIEU OF ANY OTHER WARRANTIES, EXPRESS
OR IMPLIED. TEKTRONIX AND ITS VENDORS DISCLAIM ANY IMPLIED WARRANTIES OF
MERCHANTABILITY OR FITNESS FOR A PARTICULAR PURPOSE. TEKTRONIX’
RESPONSIBILITY TO REPLACE DEFECTIVE MEDIA OR REFUND CUSTOMER’S PAYMENT IS
THE SOLE AND EXCLUSIVE REMEDY PROVIDED TO THE CUSTOMER FOR BREACH OF THIS
WARRANTY. TEKTRONIX AND ITS VENDORS WILL NOT BE LIABLE FOR ANY INDIRECT,
SPECIAL, INCIDENTAL, OR CONSEQUENTIAL DAMAGES IRRESPECTIVE OF WHETHER
TEKTRONIX OR THE VENDOR HAS ADVANCE NOTICE OF THE POSSIBILITY OF SUCH
DAMAGES.
Table of Contents
About the TDSHT3 HDMI Compliance Test Software ............................................................1
Introduction ..............................................................................................................................3
Conventions ................................................................................................................................................ 3
Feedback...................................................................................................................................................... 3
Updates through the Web Site................................................................................................................... 4
Getting Started..........................................................................................................................5
Compatibility ............................................................................................................................................... 5
Recommended Accessories ...................................................................................................................... 5
Requirements and Restrictions................................................................................................................. 6
Default Layouts and Templates................................................................................................................. 6
Default Settings........................................................................................................................................... 8
How to Use the Software.......................................................................................................................... 11
Error Codes ............................................................................................................................................... 18
Operating Basics ....................................................................................................................23
Software View............................................................................................................................................ 23
General Purpose Knob ............................................................................................................................. 34
Enable Remote Control of Test Equipment............................................................................................ 34
Configure New IP Address for GPIB-ENET ............................................................................................ 39
Remote Control Caution........................................................................................................................... 43
Remote GPIB Commands ........................................................................................................................ 46
Dialog Boxes ............................................................................................................................................. 48
How to…..................................................................................................................................53
Calculate Tbit............................................................................................................................................. 53
Deskew....................................................................................................................................................... 55
TDSHT3 HDMI Compliance Test Software
i
Table of Contents
Select Which Tests to Run....................................................................................................................... 57
Configure ................................................................................................................................................... 59
Connect...................................................................................................................................................... 63
View Waveform........................................................................................................................................ 110
Test........................................................................................................................................................... 124
Measurement Algorithms ....................................................................................................255
Software CRU Technology..................................................................................................................... 255
Test Methods ........................................................................................................................261
Source ...................................................................................................................................................... 261
Sink........................................................................................................................................................... 270
Cable ........................................................................................................................................................ 275
Report Generator..................................................................................................................277
About Report Generator......................................................................................................................... 277
How to Start Report Generator .............................................................................................................. 277
Shortcut Keys.......................................................................................................................................... 278
How to Operate Report Generator......................................................................................................... 279
Template Editor ....................................................................................................................................... 279
Report Layout Editor .............................................................................................................................. 317
Report Viewer .......................................................................................................................................... 334
How to…................................................................................................................................................... 344
Report Generator Error Codes .............................................................................................................. 352
ii
TDSHT3 HDMI Compliance Test Software
About the TDSHT3 HDMI Compliance Test
Software
Figure 1: TDSHT3 HDMI Compliance Test Software
The TDSHT3 HDMI Compliance Test Software is a High Definition Multimedia
Interface (HDMI) compliance test solution. This software helps the test,
validation, and design engineers perform both HDMI physical layer validation
and compliance testing. The TDSHT3 HDMI Compliance Test Software
provides credible test results in conformance with the HDMI standards and test
specifications.
The TDSHT3 HDMI Compliance Test Software offers automated tests for:
Source
Clock-Data Tests: Eye Diagram (Test ID 7-10), Duty Cycle
(Test ID 7-8), Rise Time (Test ID 7-4), Fall Time (Test ID 7-4), Clock
Jitter (Test ID 7-9), Over/Undershoot V-H (Test ID 7-5),
Over/Undershoot V-L (Test ID 7-5), Inter-Pair Skew (Test ID 7-6)
Data-Data Tests: Inter-Pair Skew (Test ID 7-6)
Single-Ended Tests: Intra-Pair Skew (Test ID 7-7), Low Amplitude +
(Test ID 7-2), Low Amplitude - (Test ID 7-2)
TDSHT3 HDMI Compliance Test Software
1
About the TDSHT3 HDMI Compliance Test Software
Sink
Differential Tests: Min/Max-Diff Swing Tolerance (Test ID 8-5), Jitter
Tolerance (Test ID 8-7)
Single-Ended Tests: Intra-Pair Skew (Test ID 8-6)
Cable
Differential Tests: Eye Diagram (Test ID 5-3)
The software offers automatic 'one-button' testing that ensures faster validation
with higher reliability.
The software supports only single-link HDMI device resolutions.
2
TDSHT3 HDMI Compliance Test Software
Introduction
Conventions
This document uses the following conventions:
When steps require a sequence of selections by using the software interface,
the '>' delimiter marks each transition between a menu and an option, for
example, File > Minimize.
Commands, button names, menu names, and dialog box names are indicated
with bold font and title case. For example, Click Open from the shortcut
menu.
Device under Test (DUT) refers to the HDMI Source, Sink, or Cable being
tested.
Two or more adjacent hyperlinks are separated by '|.'
The software uses the following convention:
Three dots '...' next to any command means that the command opens a dialog
box, which requires input.
Feedback
Tektronix values your feedback on our products. To help us serve you better,
please send us your suggestions, ideas, or comments on the TDSHT3 HDMI
Compliance Test Software.
Direct your feedback via e-mail to [email protected] or FAX at (503)
627-5695 and include the following information. Please be as specific as
possible.
General information
Instrument model number and hardware options, if any
Probes used
Your name, company, mailing address, phone number, FAX number, e-mail
id
TDSHT3 HDMI Compliance Test Software
3
Introduction
Please indicate if you would like to be contacted by Tektronix about your
suggestions or comments
Program specific information
Software version number
Description of the problem such that technical support can duplicate the
problem
The instrument setup file of the oscilloscope and the application are also
required to identify the problem
If possible, save the waveform on which you are performing the test as a
.wfm file
Note: To know the software version number, click Help > About in the software.
Once you have gathered this information, you can contact technical support by
e-mail. When you use e-mail, be sure to type in the subject line 'TDSHT3 HDMI
Compliance Test Software Problem,' and then attach the .wfm files. You can then
attach the file to your e-mail (depending on the capabilities of your e-mail
editor).
Updates through the Web Site
Periodic software upgrades may be available.
To check for upgrades:
4
1.
Go to the Tektronix Web site (www.tektronix.com).
2.
Click Software and Drivers to link to the Software and Firmware Finder
Web page.
3.
Enter the product name 'TDSHT3 HDMI Compliance Test Software' to find
available software upgrades.
TDSHT3 HDMI Compliance Test Software
Getting Started
Compatibility
For information on oscilloscope compatibility, refer to the Optional Applications
Software on Windows-Based Oscilloscopes Installation Manual, Tektronix part
number 071-1888-XX. The manual is also available as a PDF file.
Recommended Accessories
Supported Probes
P7350 - 5 GHz differential probe
P7350SMA – 5 GHz differential probe
P7330 - 4 GHz differential probe
P6330 - 4 GHz differential probe
P7380 - 8 GHz differential probe
P7240 - 4 GHz single-ended probe
Supported Test Fixtures
HDMI TPA-P-DI
HDMI TPA-P-SE
HDMI TPA-P-TDR
HDMI-TPA-R-DI
HDMI-TPA-R-SE
HDMI-TPA-R-TDR
TDSHT3 HDMI Compliance Test Software
5
Getting Started
Requirements and Restrictions
Do not change the oscilloscope settings when the test runs. If you change the
settings when the test runs, the software may give abnormal test results.
Prerequisites
TekVisa must be installed on the oscilloscope. If you do not have TekVisa,
you can download it from
http://www.tek.com/site/sw/search/1,1058,,00.html
If the signal is not connected and the noise level is less than 50 mV, then the
software detects and displays a message such as 'Improper Waveform.'
For better and reliable results
Before you run any test, calibrate the probes and oscilloscope for Signal
Path Compensation.*
If the signal is not connected and the noise level is less than 50 mV, then the
software detects and gives a message such as 'Invalid Signal.'
* To calibrate an oscilloscope, on the oscilloscope menu bar, click Utilities >
Instrument Calibration, and then click Calibrate.
Default Layouts and Templates
Templates under C:\TekApplications\TDSHT3\ReportGenerator\Templates
Source Clock-Data Tests
Source_Clock_Data_Eye.rgt
Source_Clock_Data_Jitter.rgt
Source_Clock_Data_Max_Duty_Cycle.rgt
Source_Clock_Data_Min_Duty_Cycle.rgt
Source_Clock_Data_Clock_Overshoot_VH+.rgt
Source_Clock_Data_Clock_Undershoot_VH-.rgt
Source_Clock_Data_Data_Overshoot_VH+.rgt
Source_Clock_Data_Data_Undershoot_VH-.rgt
Source_Clock_Data_Clock_Overshoot_VL-.rgt
6
TDSHT3 HDMI Compliance Test Software
Getting Started
Source_Clock_Data_Clock_Undershoot_VL+.rgt
Source_Clock_Data_Data_Overshoot_VL-.rgt
Source_Clock_Data_Data_Undershoot_VL+.rgt
Source_Clock_Data_Clock_Rise_Time.rgt
Source_Clock_Data_Data_Rise_Time.rgt
Source_Clock_Data_Clock_Fall_Time.rgt
Source_Clock_Data_Data_Fall_Time.rgt
Source_Clock_Data_Inter_Pair_Skew.rgt
Source Data-Data Tests
Source_Data_Data_Inter_Pair_Skew.rgt
Source Single-Ended Tests
Source_SingleEnded_Intra_Pair_Skew.rgt
Source_SingleEnded_Low_Amplitude+.rgt
Source_SingleEnded_Low_Amplitude-.rgt
Cable
Cable_EyeDiagram_Eye_TP1.rgt
Cable_EyeDiagram_Jitter_TP1.rgt
Cable_EyeDiagram_Eye_TP2.rgt
Cable_EyeDiagram_Jitter_TP2.rgt
Sink Tests
Sink_Min_Diff_Swing_Vol.rgt
Sink_Max_Diff_Swing_Vol.rgt
Sink_Intra_Pair_Skew.rgt
Sink_Jitter_Tol.rgt
TDSHT3 HDMI Compliance Test Software
7
Getting Started
Layouts under C:\TekApplications\TDSHT3\ReportGenerator\Layouts
Sink.rpl
Source.rpl
Cable.rpl
Source_Clock_Data_Over_Undershoot_VH.rpl
Source_Clock_Data_Over_Undershoot_VL.rpl
Default Settings
Table 1: Default Settings
Parameter
Selection
Default Setting
Flow Controls
Select
Device Type Tab
Source (Clock-Data Tests)
Source Test
Eye Diagram
Sink Test
Min/Max-Diff Swing Tolerance (Differential)
Cable Test
Eye Diagram
Clock Input
Ch1
Data Input
Ch2
Clock
PLL
Ref Level Units
Percentage
Clock
Ch1
Data
Ch2
Select
Source
Configuration
CRU
Others
Clock/Data
Selection
8
TDSHT3 HDMI Compliance Test Software
Getting Started
Table 1: Default Settings (Contd.)
Parameter
Selection
Default Setting
DTG file path
C:\TekApplications\TDSHT3\Patterns\TEST5
-3 EyeDiagram 1920X1081i 60Hz Gray
RGB.dtg
Sink
Configuration
Clock output from
DTG
A1
Data0 output from
DTG
B1
Data1 output from
DTG
B2
Data2 output from
DTG
C1
Signal
Sources
Signal Sources Tab
DTG
AWG Unavailable
Control Type
GPIB
Board Type
GPIB0
GPIB Address
(Primary)
1
GPIB Address
(Secondary)
0
View
Waveform
Clock/Data
Waveforms
Result
Summary
View Jitter Plot
Unavailable
View Eye Plot
Unavailable
View Jitter Plot
Unavailable
View Eye Plot
Unavailable
Result Statistics
Unavailable
Result Details
TDSHT3 HDMI Compliance Test Software
9
Getting Started
Table 1: Default Settings (Contd.)
Parameter
Selection
Default Setting
External
From Input Setup - Input - Ch1
Deskew
From Input Setup - Hysteresis - 10%
From Input Setup - Ref Level - 50%
To Input Setup - Input - Ch2
To Input Setup - Hysteresis - 10%
To Input Setup - Ref Level - 50%
Slope - Rise
Slope - # of Slopes - 1
Internal
From Input Setup - Input - Ch1
To Input Setup - Input - Ch2
Slope - Rise
Report
Generator
Generate Report Tab
Select Report C:\TekApplications\TDSHT3\ReportGenerato
r\Layouts\Source.rpl
Define Report Layout
Tab
Edit Report Layout C:\TekApplications\TDSHT3\ReportGenerato
r\Layouts\Source_Clock_Data_Eye_Diagram
.rpl
Define Test Template
Tab
C:\TekApplications\TDSHT3\ReportGenerato
r\Templates\Source_Clock_Data_Eye.rgt
Report
Configuration
pane
Pair (CK, D)
Data0
Resolution
1920*1080i
Refresh Rate
60Hz
Report File
C:\TekApplications\TDSHT3\ReportGenerato
r\Layouts
Enable Preview
Selected
Report
Configuration
10
TDSHT3 HDMI Compliance Test Software
Getting Started
Table 1: Default Settings (Contd.)
Parameter
Advanced
Selection
Default Setting
Device ID
TDSHT3 - 001
Device Details
HDMI Device
Pair (Single-Ended)
Data0
Pair (D, D)
Data0 - Data1
Use oscilloscope
settings for image
report
Selected
How to Use the Software
How to Start the Software
When you start the software, a warning message box may appear.
Figure 2: Warning Message box
This happens due to the following reasons:
1.
Oscilloscope bandwidth is less than 4 GHz. For higher resolution HDMI
signals, you need at least a 4 GHz oscilloscope. Your oscilloscope
bandwidth is less than 4 GHz. You cannot measure less than 1 ns Tbit
signals accurately.
2.
Serial Pattern Trigger option is not available. Source Intra-pair skew test
requires serial trigger (Option ST) but it is not found in the oscilloscope.
You cannot perform the Source intra-pair skew test.
3.
Maximum available record length for two channels is less than 16 M.
For HDMI compliance testing, you need at least 16 M record length in two
channels. This is available with Option 4 M or above, but it is not available
TDSHT3 HDMI Compliance Test Software
11
Getting Started
in the installed oscilloscope. The software runs the eye and jitter
measurements with the maximum available record length.
Depending on the type of oscilloscope that you have, you can start the software
in different ways.
1.
For supported B series oscilloscopes, select App > HDMI Compliance
Test Software.
Figure 3: Run Application (for B-series oscilloscopes)
2.
For TDS7000 series oscilloscopes, select File > Run Application> HDMI
Compliance Test Software.
Figure 4: Run Application (for 7000-series oscilloscopes)
12
TDSHT3 HDMI Compliance Test Software
Getting Started
3.
For DPO70000 series and DSA70000 oscilloscopes, select Analyze >
HDMI Compliance Test Software.
Figure 5: Run Application (for DPO70000/DSA70000-series
oscilloscopes)
4.
A splash screen indicates that the software loading is in progress.
Figure 6: Splash screen indicating software loading in progress
TDSHT3 HDMI Compliance Test Software
13
Getting Started
5.
The oscilloscope display resizes to fit in the upper part of the screen. The
lower part of the oscilloscope screen displays the TDSHT3 HDMI
Compliance Test Software.
Figure 7: Application Interface
6.
The software is automatically set to its default settings.
7.
If you gain access to the oscilloscope functions, then the oscilloscope
display appears full screen and the TDSHT3 HDMI Compliance Test
Software recedes to the background.
8.
To return to the TDSHT3 HDMI Compliance Test Software, click APP on
the top right of the oscilloscope display.
How to Minimize and Maximize the Software
The software appears even when you minimize the oscilloscope display.
To minimize the window, click File > Minimize. The TDSHT3 HDMI
Compliance Test Software window minimizes to the Windows taskbar. The
upper part of the screen has the oscilloscope display and the lower part of
the screen has the desktop.
To restore the minimized window to its previous size, click its taskbar
button.
To hide the window, click Hide on the top-right of the software window.
Note: If you click Hide, the TDSHT3 HDMI Compliance Test Software window
goes to the background and the oscilloscope fills the display.
14
TDSHT3 HDMI Compliance Test Software
Getting Started
How to Return to the Software
When you gain access to the oscilloscope functions, the oscilloscope fills the
display. You can gain access to the oscilloscope functions in the following ways:
Choose either the menu bar or the toolbar mode on the oscilloscope, and
then gain access to the menus.
Click App > Restore Application for B series, click Analyze > Restore
Application for DPO70000/DSA70000 series, or click APP on the top right
of the TDS7000 series oscilloscope display to return to the software.
How to Exit the Software
To quit the software:
On the menu bar, click File > Exit.
The Exit dialog box appears.
Figure 8: Exit dialog box
Click either Yes, No, or Cancel. Yes is selected by default. When the
software runs, it automatically changes some oscilloscope settings. When
you quit the software, you can choose whether to retain these settings or
restore the previous settings.
Note: Using other methods to quit the software may result in an abnormal
termination of the software.
TDSHT3 HDMI Compliance Test Software
15
Getting Started
Software Folders and File Names
The TDSHT3 HDMI Compliance Test Software uses file name extensions to
identify the file type. The following table lists the default folder names and their
purpose:
Table 2: Software Folders and File Names
Folder
Purpose
C:\TekApplications\TDSHT3
This is the software data folder.
C:\TekApplications\TDSHT3\Temp
This folder stores the software intermediate files.
C:\TekApplications\TDSHT3\Image
s
This folder stores all the images.
C:\TekApplications\TDSHT3\Data
This folder stores all the software data.
C:\TekApplications\TDSHT3\setup
This folder stores all the save and recall files.
C:\TekApplications\TDSHT3\Demo
Tools
This folder stores the demo waveforms.
C:\TekApplications\TDSHT3\Report
Generator
This folder stores the report generator files, layouts,
and templates.
Shortcut Keys
Table 3: Shortcut Keys
16
Menu
Shortcut Key
File
Alt+F
Tests
Alt+T
Results
Alt+R
Utilities
Alt+U
Help
Alt+H
File > Recall Compliance Default
Alt+F+D
File > Recall
Alt+F+R
File > Recall > First Recent
Alt+F+E+1
File > Recall > Second Recent
Alt+F+E+2
File > Recall > Third Recent
Alt+F+E+3
File > Recall > Fourth Recent
Alt+F+E+4
File > Save
Alt+F+S
TDSHT3 HDMI Compliance Test Software
Getting Started
File > Recall Recent
Alt+F+E
File > Preferences
Alt+F+P
File > Preferences > Position Eye Mask in Center
Alt+F+P+M
File > Preferences > Acquisition Alert Message
Alt+F+P+A
File > Preferences > Trigger (Rise/Fall Time or
Over/Undershoot) > Pulse Width
Alt+F+P+T+W
File > Preferences > Trigger (Rise/Fall Time or
Over/Undershoot) > Edge Trigger
Alt+F+P+T+E
File > Minimize
Alt+F+M
File > Exit
Alt+F+X
Tests > Select
Alt+T+S
Tests > Select > Source
Alt+T+S+S
Tests > Select > Sink
Alt+T+S+K
Tests > Select > Cable
Alt+T+S+C
Tests > Configure
Alt+T+C
Tests > Connect
Alt+T+N
Tests > View Waveform
Alt+T+V
Results > Summary
Alt+R+S
Results > Details
Alt+R+D
Utilities > Report Generator
Alt+U+R
Utilities > Deskew
Alt+U+D
Help > Help Topics
Alt+H+T
Help > About HDMI
Alt+H+A
TDSHT3 HDMI Compliance Test Software
17
Getting Started
Error Codes
The following table lists the error codes, their descriptions, and the possible
solutions:
Table 4: Error Codes
Error
Code
Error Message
Description
Possible Solution
101
Input is 'Not Conn.'
Both sources are selected as not
connected.
Select valid channels (Ch1-Ch2, Ref1Ref2) for at least clock/data source/data
source (differential tests) or for
input1/input2 (single-ended tests).
102
Conflict in the selection of inputs.
The sources that are selected for
the two inputs are the same. The
inputs clock source and data source
for differential tests, input 1 and
input 2 for single-ended tests.
Select different channel sources for input
1 and input 2 for single-ended tests and
different channel sources for clock
source and data source for differential
tests.
103
The combination of Ref and Live
input signals is not valid.
The software supports both Ref or
both Live combinations of channels.
Select both ref channels or both live
channels for clock and data sources.
104
Ref Wfm is not valid.
The software cannot switch on ref
waveforms. Ref waveforms could be
empty.
Recall the required ref waveform from the
appropriate file on the oscilloscope.
110
Unable to acquire waveform.
The oscilloscope is not able to
acquire the signal and trigger.
Ensure that the software configurations
are proper. Check the probes and test
fixture connections. If the test uses serial
trigger, ensure that the CTL pattern is
present on the waveform.
111
Not enough acquisitions to perform
the test.
The software expects to acquire a
minimum number of acquisitions
that are configured.
Ensure that the software configurations
are proper. Check the probes and test
fixture connections.
113
Error in importing the Wfm.
The software could not import the
waveform from acquisition. This
happens when there is no valid
waveform in the acquisition
memory.
Check the probes and test fixture
connections. Run the test again.
114
Improper Wfm.
Signal is not probed at the proper
test points.
Refer to the connections diagram and
probe the proper signal.
115
Ref Wfms have different Record
Lengths/Sample Rates.
The ref waveforms have different
sample rates and/or record lengths.
Use waveforms that are acquired
simultaneously for ref waveforms.
18
TDSHT3 HDMI Compliance Test Software
Getting Started
Table 4: Error Codes (Contd.)
Error
Code
Error Message
Description
Possible Solution
121
Ref Levels entered are outside
the range of the Wfm.
Unable to locate the edges on the
waveform at the transition because
the levels configured do not fall
within the transition of the waveform.
Enter the Ref Level voltage value where
the transition occurs on the waveform.
Enter 50 percent of the level of the peakto-peak transition level for mid ref levels,
80 percent of the peak-to-peak for high
ref levels, and 20 percent of the peak-topeak for low ref levels.
122
((Hysteresis Level/2) + Ref Level)
cannot be greater than 100
percent.
((Hysteresis Level/2) + Ref Level)
has to be within 100 percent for
edge finding.
Set both the ref and (Hysteresis Level/2)
to be less than 100 percent.
123
High Level is less than or equal to
Low Level.
The configured high-level value is
less than the low level value.
Configure the high level to be greater
than the low level.
131
Error in calculating Tbit.
Not a valid clock waveform.
Supply a valid clock waveform and run
the test again.
132
Clock input is required to
calculate Tbit.
The Tbit value has to be calculated
before you run a test that uses only
data source(s).
Select and run a test that uses clock
source for Tbit value. Click Connect,
select clock source, and then click Recalculate Tbit before you run the test.
152
Select any test to continue.
Configure, Connect, View
Waveform, and Run Test need at
least one test to be selected.
Select at least one test before you click
either Configure, Connect, View
Waveform, or Run Test.
161
Unable to recover clock.
Improper waveform or the software
components are missing.
Supply the proper waveform. Reinstall the
software.
171
Unable to find edges.
The waveform may be noisy or the
hysteresis level may be low.
Check the probes and test fixture
connections. Increase the hysteresis
band level.
172
Not enough edges.
Number of edges found on the
waveform is less than the minimum
number of edges that is required for
the test.
Decrease the horizontal scale to have
more complete cycles of the waveform.
Adjust the hysteresis level of the signal to
find the edge at the required level.
173
Unable to calculate skew.
Could not find the mid of the
waveform.
Check the probes and test fixture
connections.
174
CTL pattern not found.
The CTL pattern 0010101011 was
not found on the waveform.
Ensure that the appropriate pattern is
present on the source waveform. Change
the polarity of the waveform.
175
Option ST is not installed on the
oscilloscope.
Option ST is not available on the
oscilloscope.
Install Option ST.
177
Unable to find
overshoot/undershoot.
Signal is not probed at the proper
test points.
Follow the instructions in the setup
diagram and probe the proper signal.
178
Unable to calculate Vswing.
Signal is not probed at the proper
test points.
Follow the instructions in the setup
diagram and probe the proper signal.
181
Check the DTG connection.
DTG connection has failed. This
TDSHT3 HDMI Compliance Test Software
• Switch on the DTG and wait for the
19
Getting Started
Table 4: Error Codes (Contd.)
Error
Code
Error Message
Description
Possible Solution
could happen if:
• The DTG is not switched on.
• There is a mismatch in the
GPIB-ENET configuration,
software GPIB configuration,
or DTG remote control
configuration.
• The GPIB cable is not
connected properly.
DTG software to load.
• Check GPIB connections.
• Ensure that the primary and
secondary addresses of DTG in
the remote control match the
GPIB-ENET configuration of the
oscilloscope.
• Ensure that the GPIB-ENET
configuration on your
oscilloscope matches the signal
sources configuration in the
software.
182
File not found in the DTG.
The configured file is not found in
the DTG.
Ensure that the specified file in the
software is present in the DTG.
Specify a file name that is present in the
DTG.
183
Invalid logical channel.
The logical channel is invalid.
Provide a proper logical channel.
184
Conflict in selection of outputs
from the DTG.
The same physical channel (A1, A2,
B1, B2, C1, C2, D1, D2) is selected
for any two logical channels (Clock,
Data0, Data1, Data2).
Select different physical channels (A1,
A2, B1, B2, C1, C2, D1, D2) for a given
logical channel (Clock, Data0, Data1,
Data2).
191
Check the AWG connection.
AWG connection has failed. This
could happen if:
• the AWG is not switched on
• there is a mismatch in the
GPIB-ENET configuration,
application GPIB
configuration, and AWG
remote control configuration
• if the GPIB cable is not
connected properly.
Switch on the AWG and wait for the AWG
software to load. Check GPIB
connections. Ensure that the primary
address of AWG in the Utility > Network
> Address matches with the GPIB-ENET
configuration of the oscilloscope. Ensure
that the GPIB-ENET configuration on your
oscilloscope matches the signal sources
configuration in the software.
192
File not found in the AWG.
File is not present in the AWG.
Ensure that the required file is present in
the AWG.
193
Check the Signal Sources
connection.
Signal sources connection has
failed. It may be due to DTG or AWG
connection failure. DTG connection
has failed. This could happen if:
• The DTG is not switched on
There is a mismatch in the GPIBENET configuration, software GPIB
configuration, and DTG remote
control configuration
If the GPIB cable is not connected
properly
For DTG connection failure:
Switch on the DTG and wait for the DTG
software to load. Check the GPIB
connections. Ensure that the primary
address of DTG in the remote control
matches the GPIB-ENET configuration of
the oscilloscope. Ensure that the GPIBENET configuration on your oscilloscope
matches the signal sources configuration
in the software.
20
TDSHT3 HDMI Compliance Test Software
Getting Started
Table 4: Error Codes (Contd.)
Error
Code
Error Message
Description
Possible Solution
properly.
For AWG connection failure:
Switch on the AWG and wait for the AWG
software to load. Check the GPIB
connections. Ensure that the primary
address of AWG in the Utility > Network
> Address matches with the GPIB-ENET
configuration of the oscilloscope. Ensure
that the GPIB-ENET configuration on your
oscilloscope and signal sources
configuration in the software match.
AWG connection has failed. This
could happen if:
The AWG is not switched on
There is a mismatch in the GPIBENET configuration, software GPIB
configuration, and AWG remote
control configuration
If the GPIB cable is not connected
properly
Primary addresses of DTG and
AWG are same.
Select distinct primary addresses for DTG
and AWG.
194
Jitter value is unavailable.
Signal is not probed at the proper
test points.
Follow the instructions in the setup
diagram and probe the proper signal.
201
Edges on the Wfm are lesser than
the configured number of edges.
Deskew number of edges set by the
user to perform the deskew is not
available on the waveform.
Ensure that the edges in the waveform
and the display in the numeric input are
the same. Adjust the horizontal scale to
increase the number of transitions that is
required to adjust the deskew.
202
Calculated skew is greater than
the oscilloscope skew range.
The calculated skew value is greater
than the oscilloscope deskew range.
The deskew will be done to the maximum
deskew value that is applicable to the
oscilloscope.
203
Cycle has less than 20 sample
points.
Insufficient number of samples in a
complete cycle. The number of data
points in the identified cycle is less
than 20.
Increase the sampling rate.
211
Select the test point(s) to
continue.
No test points are selected.
Select any one or both of the test points
in cable configuration.
221
Mask cannot be moved beyond
this position.
Upper and lower masks have
exceeded their boundary values.
The mask co-ordinates are beyond
the plottable area.
Change the Mask Movement mode from
Coarse to Fine. After changing to Fine,
you will be able to move a bit further. If
you are already in Fine mode, and this
message appears, then you are in the
maximum/minimum possible position.
222
Unable to calculate mask
margins.
An error occurred while calculating
the mask margins.
The signal may be wrong (noise, invalid
pattern). Connection to the probe tip may
be loose. Recheck the connection and
run the test again.
TDSHT3 HDMI Compliance Test Software
21
Getting Started
22
TDSHT3 HDMI Compliance Test Software
Operating Basics
Software View
TDSHT3 HDMI Compliance Test Software Window
The software window includes a menu bar, selection pane, test selection pane,
execution pane, and status bar. The client pane changes between the
configuration pane, parameter selection pane, connection pane, and view
waveform pane depending on what you have selected in the selection pane. After
you run the test, the client pane automatically changes to the result pane.
Figure 9: Application Window
TDSHT3 HDMI Compliance Test Software
23
Operating Basics
TDSHT3 HDMI Compliance Test Software Interface Controls
The software uses a Microsoft Windows interface.
Note: The oscilloscope software shrinks to fit in the top part of the display when
the TDSHT3 HDMI Compliance Test Software runs.
The software interface uses the following controls:
Table 5: Application Interface Controls
24
Control
Description
Menu bar
The Menu bar provides access to the software menus. It is
located at the top of the software window.
Area/Tab
An Area/Tab control encloses visual frame with a set of related
options.
Option button
An Option button allows you to select either a command or a
task.
Drop-down list box
A Drop-down list box lists items from which you can select one
item.
Field
A Field is a box where you can enter text or values.
Check boxes
You can select or clear check boxes that you use to set
preferences.
Scroll bar
A Scroll bar is a vertical or horizontal bar at the side or bottom of
a display area that is used to move around that area.
Browse
Browse refers to the window where you can browse through a
list of folders and files.
Command button
A Command button refers to the usually rectangular button that
carries out a command and may initiate immediate action.
Numeric keypad
You can use a Numeric keypad to enter numeric values.
Text keypad
You can use a Text keypad to enter text.
MP/GP knob
A line between the knob icon and the field indicates which knob
you can turn on the oscilloscope to select a value.
F1
F1 help opens help on a topic associated with the currently
selected item in your software.
TDSHT3 HDMI Compliance Test Software
Operating Basics
Menus
The menu bar of TDSHT3 HDMI Compliance Test Software consists of the
following menus:
Figure 10: Menu bar
File menu
Figure 11: File menu
Table 6: File menu options
Menu Selection
Description
Recall Default
Click File > Recall Default to recall the default settings for both the
software and the oscilloscope.
Recall
Click File > Recall to recall the previously saved settings for the
software from an .ini file.
Save
Click File > Save to save the software settings to an .ini file.
Recall Recent
Click File > Recall Recent to select among the recently saved and
recalled setups.
Preferences
Click File > Preferences to select one of the following options. Click
an option again to clear the selection.
Position Eye Mask in Center
Acquisition Alert Message
Trigger (Rise/Fall Time or Over/Undershoot)
Minimize
Click File > Minimize to minimize the software window.
Exit
Click File > Exit to quit the software.
TDSHT3 HDMI Compliance Test Software
25
Operating Basics
Note: The File > Preferences > Trigger (Rise/Fall Time or Over/Undershoot)
menu appears only on supported B-series oscilloscopes.
Tests menu
Figure 12: Tests menu
Table 7: Tests menu options
Menu Selection
Description
Select
Click Tests > Select to display or modify the test selection for
Source, Cable, or Sink in the client pane.
Configure
Click Tests > Configure to display or modify the configuration
parameters for the selected test(s).
Connect
Click Tests > Connect to display the connection instructions for
the selected test(s).
View Waveform
Click Tests > View Waveform to display a sample waveform or
waveforms based on the settings for the selected test(s).
Results menu
Figure 13: Results menu
Table 8: Results menu options
26
Menu Selection
Description
Summary
Click Results > Summary to display the result summary of the
last test(s) that you conducted.
Details
Click Results > Details to display the detailed results of the last
test that was conducted.
TDSHT3 HDMI Compliance Test Software
Operating Basics
Utilities menu
Figure 14: Utilities menu
Table 9: Utilities menu options
Menu Selection
Description
Report Generator
Click Utilities > Report Generator to open the Report Generator
pane.
Deskew
Click Utilities > Deskew to open the deskew pane. The deskew
pane allows you to compensate the skew between the
oscilloscope channels.
Help menu
Figure 15: Help menu
Table 10: Help menu options
Menu Selection
Description
Help Topics
Click Help > Help Topics to display the help file for the TDSHT3
HDMI Compliance Test Software.
About TDSHT3
Click Help > About TDSHT3 to display a dialog box with
information about the current TDSHT3 HDMI Compliance Test
Software.
TDSHT3 HDMI Compliance Test Software
27
Operating Basics
Preferences
On the menu bar, click File > Preferences to select any of the options described
in the following table. Click an option again to clear the selection.
Figure 16: Preferences
Table 11: Preferences options
28
Option
Description
Position Eye Mask in
Center
Select this option to position the mask at the center of the eye
diagram. Clear this option to position the mask to the left of the
eye diagram.
Acquisition Alert
Message
Select this option to receive an alert message that allows the
software to use the custom oscilloscope setup. Clear this option
to stop receiving the alert message.
Trigger (Rise/Fall Time
or Over/Undershoot)
Select either Pulse Width or Edge Trigger for the Rise/Fall Time
or the Over/Undershoot test. The default value is Edge Trigger.
Select Pulse Width if the signal has very high
inter-symbol interference. This option is available only on
supported B-series oscilloscopes.
TDSHT3 HDMI Compliance Test Software
Operating Basics
Selection pane
The selection pane, which is located to the left of the software window, allows
you to navigate through the software.
Figure 17: Selection pane
The following table lists the buttons and their task descriptions:
Table 12: Selection options
Button Name
Description
Select
Click Tests > Select to display or modify the test selection for Source,
Cable, or Sink in the client pane.
Configure
Click Tests > Configure to display or modify the configuration parameters
for the selected test(s).
Connect
Click Tests > Connect to display the connection instructions for the
selected test(s).
View
Waveform
Click Tests > View Waveform to display a sample waveform or waveforms
based on the settings for the selected test(s).
TDSHT3 HDMI Compliance Test Software
29
Operating Basics
Result pane
The result pane, which is located at the center of the software window, appears as
shown in the following diagram:
Figure 18: Result pane
The result pane includes the result summary pane and the report configuration
pane.
Result Summary pane
The result summary pane displays the test results.
Figure 19: Result Summary pane
This icon indicates that the test has passed.
This icon indicates that the source eye diagram test has passed conditionally.
This icon indicates that the test has failed.
This icon indicates that the test could not be run due to an error.
30
TDSHT3 HDMI Compliance Test Software
Operating Basics
Table 13: Result Summary options
Option
Description
Status
The status icons display the status of the test as Pass,
Conditional Pass (for the source eye diagram test), Fail, or Error.
Test Name
The Test Name box displays the test id, test name, and signal
names - CK (Clock), D (Data).
View Jitter Plot
Click View Jitter Plot to display the jitter plot. This command is
available if you have successfully run the clock jitter test.
View Eye Plot
Click View Eye Plot to display the eye plot. This command is
available if you have successfully run the eye diagram test.
Result Details
Click Result Details to display the Result Details dialog box
that shows the details of the test results categorized as test
name, specification range, measured value, result, and remarks.
Report Configuration pane
You can set the report details to identify and generate the report automatically.
You can also set a default report file.
Figure 20: Report Configuration pane
TDSHT3 HDMI Compliance Test Software
31
Operating Basics
In the report configuration pane, you can configure the following parameters:
Table 14: Report Configuration options
Category
Description
Pair
The Pair (CK, D) list allows you to specify the unique pairs on
which the test is conducted.
Resolution
In the Resolution box, type the resolution at which you
conducted the test. Some examples are VGA, SVGA, XGA,
SXGA, and so on.
Refresh Rate
In the Refresh Rate box, type the refresh rate at which you
conducted the test. Some examples are 40 Hz, 43 Hz, 57 Hz, 60
Hz, and so on.
Report File
The Report File box allows you to specify the path and the file
where you want to save the generated report. However, for the
selected test, a default file name and path already exists.
Enable Preview
Select the Enable Preview check box to preview the report
automatically after generation.
Clear Report
Click Clear Report to clear all the previously generated reports.
Advanced
Click Advanced to open the Advanced Report Configuration
dialog box.
Execution pane
The execution pane, which is located to the right of the software window,
displays the Run Test and Result buttons. After you successfully run a test, the
Summary and Detail buttons are available.
Figure 21: Execution pane
32
TDSHT3 HDMI Compliance Test Software
Operating Basics
Click on each button to perform a particular task. The following table lists the
buttons and their task descriptions:
Table 15: Execution options
Button name
Description
Run Test
Click Run Test to run the selected test or tests.
Result
Click Result to display the result pane that shows the test
results.
Summary
Click Summary to generate a report summary as a .csv file.
Detail
Click Detail to generate a report. The Report Viewer utility
appears and displays the test results. The test results are
displayed only if you have selected Enable Preview in the report
configuration pane. Otherwise, the test results are stored in a file
and the folder path of the stored file is shown in a message box.
Note: The report details are real time. The results history is maintained as long
as you do not change the device type. If you change the device type, then the
history is cleared.
TDSHT3 HDMI Compliance Test Software
33
Operating Basics
Status bar
At the bottom of the software window is the status bar, which displays the
selected test and the important configuration parameters.
Figure 22: Status bar
General Purpose Knob
1.
Click in any number box to display the connection to one of the general
purpose knobs.
2.
Turn the corresponding knob on the oscilloscope front panel to adjust the
value for the selected parameter.
3.
For better resolution, press the Fine button.
Enable Remote Control of Test Equipment
There are two methods to connect to AWG/DTG. One is the GPIB-USB method
and the other, is the GPIB-ENET method.
The following section will guide you through the process of connecting the
AWG, the DTG, and the digital oscilloscope used for Sink and Cable tests:
You will need Tektronix AWG710/B, Tektronix DTG5274, Tektronix supported
oscilloscope, and National Instruments GPIB-USB-B with the included software,
NI-488.2 for Windows.
34
TDSHT3 HDMI Compliance Test Software
Operating Basics
1.
Ensure that NI-VISA is NOT installed.
2.
Install NI-488.2 for Windows (version 2.1 or later).
Figure 23: NI-488.2 for Windows
3.
Install the Measurement & Automation Explorer software.
4.
When prompted, enable the GPIB-USB interface.
Note: If you already have NI-488.2 installed on your oscilloscope, then ensure
that you have the appropriate version and installation parameters. Otherwise,
remove NI-488.2, and then reinstall the appropriate version.
5.
Restart the oscilloscope.
6.
Configure the DTG GPIB primary address to 1 and AWG GPIB primary
address to 2.
7.
Connect the USB-GPIB controller to the USB port on the oscilloscope (the
TDS7000B rear panel is shown here). The oscilloscope operating system
will detect the USB-GPIB controller and install the appropriate driver for it.
TDSHT3 HDMI Compliance Test Software
35
Operating Basics
8.
Using GPIB cables, connect (stack) both the DTG and AWG GPIB ports to
the GPIB port of the GPIB controller.
Figure 24: Connections for AWG/DTG (using GPIB-USB method)
36
TDSHT3 HDMI Compliance Test Software
Operating Basics
9.
Open the Measurement & Automation Explorer software that was installed
with the NI-488.2 software.
Figure 25: Measurement & Automation Explorer
10. In the configuration pane, look under Devices and Interfaces for the GPIB
device.
11. Right-click the GPIB device and click Scan for Instruments.
12. Note the GPIB Instrument Number and the Primary Address to configure
the instrument connection in the TDSHT3 HDMI Compliance Test
Software.
13. Right-click the instrument, and then click Communicate with Instrument.
14. In the NI-488.2 Communicator dialog box, click Query and check that
'*IDN?' displays a description of the correct equipment.
15. Start the TDSHT3 HDMI Compliance Test Software.
16. Click Select.
17. Click the Sink tab.
TDSHT3 HDMI Compliance Test Software
37
Operating Basics
18. Select one of the differential tests, such as Jitter Tolerance.
Figure 26: Jitter Tolerance (Sink test) Select pane
19. Click Connect.
20. Click Signal Sources. The Signal Sources Setup dialog box appears.
Figure 27: Signal Source Setup
21. In the Signal Sources Setup dialog box, click the DTG tab.
22. Configure the GPIB Board Type by using the GPIB Instrument Number that
you noted in step 12.
23. Configure the Primary Address by using the address that you noted in step
12.
24. Leave the Secondary Address set to 0.
38
TDSHT3 HDMI Compliance Test Software
Operating Basics
25. Click the AWG tab and repeat steps 22 through 24 for the AWG.
26. Click Test Conn and look for a message that the connection is successful.
27. This completes the GPIB hookup.
Configure New IP Address for GPIB-ENET
There are two methods to connect to AWG/DTG. One is the GPIB-USB method
and the other, the GPIB-ENET method.
GPIB-ENET and GPIB-ENET/100 for Windows 3.1/95/98/ME/NT/2000/XP
1.
Confirm that you have installed the latest NI-488.2 driver software for your
device.
2.
Connect your GPIB-ENET or GPIB-ENET/100 to an Ethernet network by
using a category 5 Ethernet cable to connect the RJ-45 port on your
hardware to an Ethernet hub. You could also connect the external hardware
directly to your oscilloscope by using an Ethernet crossover cable.
3.
Connect the power to your GPIB-ENET or GPIB-ENET/100 and turn it on.
When you power on your GPIB-ENET, the POWER LED comes on
immediately. The READY LED flashes while it completes its power-on
self-test. When the test completes successfully and the IP address is
assigned, the READY LED remains steady, indicating that the unit is ready
to operate. To assign your IP address, continue to step 4.
4.
Run the Measurement & Automation Explorer software from Programs >
National Instruments.
5.
Some devices are not Windows Plug and Play compatible. Hence, they do
not automatically appear in the Devices and Interfaces list. Other devices
may reside in another oscilloscope on your network. To add non Plug and
Play or remote DAQ devices, right-click Devices and Interfaces in the
configuration tree, and then click Create New. Follow the instructions in the
wizard. Select GPIB-ENET/100 or GPIB-ENET interface according to the
hardware.
How to Configure GPIB-ENET/100
1.
Configure an existing device.
To configure an existing National Instruments device, right-click the device
name in Devices and Interfaces in the configuration tree, and then click
Properties. You can also configure existing device properties by clicking
Properties in the toolbar.
TDSHT3 HDMI Compliance Test Software
39
Operating Basics
2.
To configure the network parameters of your GPIB-ENET/100, right-click
your GPIB interface in the configuration tree, and click Device
Configuration.
3.
Click Properties. Configure the IP address as shown in the following
image:
Figure 28: GPIB-ENET/100 Properties
4.
After entering the IP settings, click OK. A message box appears as follows:
Figure 29: GPIB-ENET/100 Properties message box
40
TDSHT3 HDMI Compliance Test Software
Operating Basics
5.
After you reset the CFG in the ENET card, click OK in the
GPIB-ENET/100 Properties message box. The software will configure and
another message box appears.
Figure 30: GPIB-ENET/100 Properties re-confirm message box
6.
Click OK. The ENET card is configured.
7.
Verify the configuration by pinging the IP address and through ICTA.
How to Configure GPIB-ENET (old card)
1.
Right click Devices and Interfaces. Click Assign IP Address. A message
box appears.
Figure 31: IP Assign Address message box
Note: The GPIB software installation is in the path C:\Program Files\National
Instruments\NI-488.2\GPIB-ENET on the oscilloscope.
TDSHT3 HDMI Compliance Test Software
41
Operating Basics
2.
Run the Measurement & Automation Explorer software. Click Assign IP
Address. A message box appears.
Figure 32: GPIB-ENET Assign IP Address message box
3.
Enter the new IP Address and the Ethernet Address. Click Assign. A
message box appears.
Figure 33: IPassign message box
42
TDSHT3 HDMI Compliance Test Software
Operating Basics
4.
Follow the instructions in the Ipassign message box. Click OK. Another
message box appears.
Figure 34: Ipassign re-confirm message box
5.
Follow the instructions in the new Ipassign message box. Click OK.
Remote Control Caution
If you run the Sink or Cable tests, the GPIB Bus Timing dialog box appears.
Figure 35: GPIB Bus Timing dialog box
Click OK to continue if you are sure that the Bus Timing parameter is already set
to 2 µsec. Otherwise, click Cancel and follow the procedure outlined later to
change the Bus Timing parameter manually.
Once you have changed the parameter, select the check box if you do not want
the dialog box to appear again in the current session. However, if you click File >
TDSHT3 HDMI Compliance Test Software
43
Operating Basics
Recall Default or you quit the software, then the dialog box appears again when
you run the test.
When you install the remote control for the test equipment, the Measurement &
Automation Explorer software will be installed on the oscilloscope. You can start
the software by clicking Start > Program Files > National Instruments >
Measurement & Automation.
To change the Bus Timing parameter, perform the following steps:
44
1.
Start the Measurement & Automation Explorer software.
2.
In the configuration pane, look under Devices and Interfaces for the GPIB
device.
3.
Right-click the GPIB device and click Properties. The GPIB
Configuration dialog box appears.
4.
In the GPIB Configuration dialog box, click the Advanced tab.
5.
In the Bus Timing list, select 2µsec.
TDSHT3 HDMI Compliance Test Software
Operating Basics
Figure 36: GPIB Configuration dialog box
6.
Quit the TDSHT3 HDMI Compliance Test Software and restart the
oscilloscope.
TDSHT3 HDMI Compliance Test Software
45
Operating Basics
Remote GPIB Commands
The Remote General Purpose Interface Bus (RGPIB) is essentially another way
of interfacing with the oscilloscope. It allows you to control much of the
functionality of the oscilloscope as defined by the software, from a Remote GPIB
controller.
You can use the following GPIB command to start the TDSHT3 HDMI
Compliance Test Software:
application:activate “HDMI Compliance Test Software”
How to Set and Query
1.
The command syntax for setting the value to the variable is:
VARIABLE:VALUE “<variable name>”,“<variable value>”
The arguments <variable
indicated.
2.
name>
and <variable
value>
are required in the order
The command syntax for querying the value of the variable is:
VARIABLE:VALUE? “<variable name>”
3.
The command syntax to run the selected test is:
variable:value "sequencerState", "Sequencing"
The TDSHT3 HDMI Compliance Test Software will be remotely controllable for
the following set of commands for (VARIABLE:VALUE):
Application
Table 16: Command Arguments and Queries (Application)
Variable
Name
Valid Values
Function (Set)
Query Form
Application
Exit
Set the value to quit running
software.
Query to return the name of the
currently running software.
Version
-
-
Query to return the version of the
currently running software, for example,
Version: 1.0.0.
46
TDSHT3 HDMI Compliance Test Software
Operating Basics
Sequencer
Table 17: Command Arguments and Queries (Sequencer)
Variable
Name
Valid Values
Function (Set)
Query Form
sequencerState
{Sequencing}: to set
{Ready, Sequencing}: returned
on query
Set the sequencer state.
Return the sequencer state.
Save/Recall
Table 18: Command Arguments and Queries (Save/Recall)
Variable
Name
Valid Values
Function (Set)
Query Form
Setup
{Default, Recall, Save}
Set the Save/Recall/Default
action.
Default value for this variable is an
empty string. Thus, the variable is set
to selected value momentarily and
after the task is completed, it returns to
its default value.
recallName
Any string 1-8 chars, comprised
of A-Z, 0-9
Set the setup recall file name.
Return the setup recall file name.
saveName
Any string 1-8 chars, comprised
of A-Z, 0-9
Set the setup save file name.
Return the setup save file name.
Report
Table 19: Command Arguments and Queries (Report)
Variable
Name
Valid Values
Function (Set)
Query Form
reportSummar
y
Save
Save the report summary to a
.csv file.
-
ReportDetail
Save
Save the report details to a .rpt
file.
-
TDSHT3 HDMI Compliance Test Software
47
Operating Basics
Dialog Boxes
Result Details
After the test is complete, on the result pane, click Result Details to display the
details of the result.
Figure 37: Result Details
Table 20: Result Details
48
Option
Description
Test Name
The Test Name box displays the test id, test name, and signal
names - CK (Clock), D (Data).
Spec Range
The Spec Range box describes the HDMI standards and test
specifications limit for the test.
Meas Value
The Meas Value box displays the measured value.
Result
The Result box displays the status of the test as Pass, Fail, or
Error.
Remarks/Comments
The Remarks/Comments box displays the results of Tbit,
Vswing, and Margin. If the test could not be run, then an error
code appears.
Close
Click Close to quit the Result Details dialog box.
View Jitter Plot
Click View Jitter Plot to display the jitter plot. This command is
available if you have successfully run the clock jitter test.
View Eye Plot
Click View Eye Plot to display the eye plot. This command is
available if you have successfully run the eye diagram test.
Result Statistics
Click Result Statistics to display statistics based on the tests.
TDSHT3 HDMI Compliance Test Software
Operating Basics
Note: The parameters in the Result Details dialog box may change depending on
the test that you run.
Virtual Keyboard
Virtual Keyboard – Numeric
1.
Click any number box to display the icon for the numeric keyboard.
Figure 38: Configure Source
2.
Click the icon to display the numeric keyboard.
Figure 39: Numeric keyboard
TDSHT3 HDMI Compliance Test Software
49
Operating Basics
3.
Click the number keys to enter the desired value.
4.
Select a unit measure.
5.
Click Enter to confirm your entry. Selections are not effective until you
click Enter.
Virtual Keyboard – Text
1.
Click any text box to display the icon for the text keyboard.
Figure 40: Configure Cable
2.
Click the icon to display the text keyboard.
Figure 41: Text Keyboard
50
TDSHT3 HDMI Compliance Test Software
Operating Basics
3.
Use the text keyboard to enter the required text (such as a file name).
4.
Click Enter to confirm your entry. Selections are not effective until you
click Enter.
Report Configuration Advanced
In the report configuration pane, click Advanced to open the Report
Configuration Advanced dialog box.
Figure 42: Advanced Report Configuration
In the Report Configuration Advanced dialog box, you can configure the
following parameters:
Table 21: Report Configuration Advanced options
Category
Description
Device ID
The Device ID box allows you to specify the DUT on which you
conducted the test by printing the device id on the generated
report.
Device Details
The Device Details box allows you to specify the DUT on which
you conducted the test by printing the device details on the
generated report.
Pair (Single-Ended)
The Pair (Single-Ended) list allows you to select the pair on
which you conducted the single-ended test.
Pair (D, D)
The Pair (D, D) list allows you to select the pair on which you
conducted the data-data test.
Use oscilloscope
settings for image report
Select the Use oscilloscope settings for image export check
box to use the current settings of the oscilloscope for image
export.
TDSHT3 HDMI Compliance Test Software
51
Operating Basics
Exit
To quit the software:
On the menu bar, click File > Exit.
The Exit dialog box appears.
Figure 43: Exit
Click either Yes, No, or Cancel. Yes is selected by default. While the
software is running, it automatically changes some oscilloscope settings.
When you quit the software, you can choose whether to retain these settings
or restore the previous settings.
Note: Using other methods to quit the software may result in an abnormal
termination of the software.
52
TDSHT3 HDMI Compliance Test Software
How to…
Calculate Tbit
Figure 44: Tbit pane
Tbit is the time that is required to transmit one bit of data. Tbit is one bit time at
the specified pixel clock frequency (= TPIXEL/10).
For all the tests that require clock, the software calculates Tbit. For all the other
tests, you have an option of either recalculating Tbit or use the previous Tbit
value for the test.
If you click Re-calculate, the software computes the specified number of
averages of TPIXEL and then calculates Tbit. If you use the existing Tbit value,
then the software uses the previously calculated Tbit value or you can also again
recalculate Tbit by using the Tbit pane.
To calculate Tbit for a measurement, use the Tbit pane. You can calculate Tbit
for Duty Cycle, Rise Time, Fall Time, Over/Undershoot V-H, Over/Undershoot
V-L, Inter-Pair Skew for Clock-Data Tests, Inter-Pair Skew for Data-Data Tests,
Intra-Pair Skew, Low Amplitude +, and Low Amplitude – measurement if the
clock is not connected.
TDSHT3 HDMI Compliance Test Software
53
Operating Basics
To calculate Tbit
1.
Set up the connections as shown in the following diagram:
Figure 45: Connections to calculate Tbit
Connect an TPA-P-DI adapter to a Source DUT HDMI output
connector.
Connect a power supply to a TPA board.
Configure the Source DUT to output a video format with the required
supported pixel clock frequency.
Connect a TMDS Clock to the configured oscilloscope channel by
using a differential probe.
54
TDSHT3 HDMI Compliance Test Software
Operating Basics
2.
In the tbit pane, you have the following options:
Table 22: Tbit pane configure options
Configure Parameter
Description
# of Avgs
In the # of Avgs box, enter the desired number of periods that
are considered to calculate Tbit. The default value is 100.
Re-calculate
Click Re-calculate to recalculate the Tbit value.
Existing Value
Click Existing Value to use the previously calculated Tbit
value.
Note: Tbit value is used for oscilloscope setup and limit calculations. If the
DUT’s display resolution and the refresh rate changes, you have to recalculate
Tbit.
Deskew
Deskew is recommended before you conduct any skew test. To ensure accurate
results, deskew the test setup before you conduct the tests from your device under
test.
1.
Figure 46:
On the menu bar, click Utilities > Deskew.
Utilities Deskew pane
TDSHT3 HDMI Compliance Test Software
55
Operating Basics
2.
In the source pane, you have the following options:
Table 23: Utilities Deskew Source options
Configure Parameter
Description
External
Click External if you will use an external deskew fixture (such
as the clock signal of DUT).
Internal
Click Internal to probe the compensation signal on an
oscilloscope.
3.
Select the input channels between which you want to perform the deskew
operation. Hysteresis and Ref Level are available only for an external
source.
4.
In the slope pane, you have the following options:
Table 24: Utilities Deskew Slope options
5.
56
Configure Parameter
Description
Rise
Click Rise to calculate the average of the number of slopes
and then set the skew for a rising pulse.
Fall
Click Fall to calculate the average of the number of slopes and
then set the skew for a falling pulse. You do not have to
calculate the average of the number of slopes for a falling
pulse for an internal source.
# of Slopes
In the # of Slopes box, enter the required number of slopes to
set the skew for either a rising pulse or a falling pulse. Ensure
that the required number of slopes is present in the acquisition.
Click Run Test to deskew the probes.
TDSHT3 HDMI Compliance Test Software
Operating Basics
Select Which Tests to Run
Source
Figure 47: Select Source with Eye diagram test selected
The following table shows how to select the source test parameters:
Table 25: Select Source options
Test type
How to select
Source
Click Tests > Select > Source to select the source tab.
Eye Diagram
In the Source tab, select the Eye Diagram check box.
Duty Cycle
In the Source tab, select the Duty Cycle check box.
Rise Time
In the Source tab, select the Rise Time check box.
Fall Time
In the Source tab, select the Fall Time check box.
Clock Jitter
In the Source tab, select the Clock Jitter check box.
Over/Undershoot V-H
In the Source tab, select the Over/Undershoot V-H check
box.
Over/Undershoot V-L
In the Source tab, select the Over/Undershoot V-L check
box.
Inter-Pair Skew
In the Source tab, select the Inter-Pair Skew check box in
either the clock-data tests pane or the data-data tests pane.
Intra-Pair Skew
In the Source tab, select the Intra-Pair Skew check box.
TDSHT3 HDMI Compliance Test Software
57
Operating Basics
Table 25: Select Source options (Contd.)
Test type
How to select
Low Amplitude +
In the Source tab, select the Low Amplitude + check box.
Low Amplitude –
In the Source tab, select the Low Amplitude - check box.
Select All
In the Source tab, click Select All to select multiple tests
either for Clock-Data Tests or Single-Ended Tests. When you
select more than one test, Select All changes to Clear All.
Sink
Figure 48: Select Sink with Min/Max-Diff Swing Tolerance test selected
The following table shows how to select the sink test parameters:
Table 26: Select Sink options
58
Test type
How to select
Sink
Click Tests > Select > Sink to select the sink tab.
Min/Max-Diff Swing
Tolerance
In the Sink tab, select the Min/Max-Diff Swing Tolerance
check box.
Jitter Tolerance
In the Sink tab, select the Jitter Tolerance check box.
Intra-Pair Skew
In the Sink tab, select the Intra-Pair Skew check box.
TDSHT3 HDMI Compliance Test Software
Operating Basics
Cable
Figure 49: Select Cable with Eye Diagram test selected
The following table shows how to select the cable test parameters:
Table 27: Select Cable options
Test Type
How to Select
Cable
Click Tests > Select > Cable to select the cable tab.
Eye Diagram
In the Cable tab, select the Eye Diagram check box.
Configure
Source
On the menu bar, click Tests > Configure to configure the parameters for the
selected test(s).
In the configure pane, you will see the factory default configuration for the test
you selected. For most tests, you can use the factory default configuration.
However, you can change the values by using the virtual keyboard or the general
purpose knob on the oscilloscope front panel. Using the File menu, you can also
restore the factory defaults or save and recall your own configuration settings.
For more information about configuration, click the Test help topic, and then go
to the specific test.
TDSHT3 HDMI Compliance Test Software
59
Operating Basics
The following table shows the parameters that you can configure for source
(clock-data tests):
Figure 50: Parameters for Source Clock-Data tests
The following table shows the parameters that you can configure for source
(data-data tests):
Figure 51: Parameters for Source Data-Data tests
60
TDSHT3 HDMI Compliance Test Software
Operating Basics
The following table shows the parameters that you can configure for source
(single-ended tests):
Figure 52: Parameters for Source Single-Ended tests
Sink
On the menu bar, click Tests > Configure to configure the parameters for the
selected test.
In the configure pane, you will see the factory default configuration for the test
you selected. For most tests, you can use the factory default configuration.
However, you can change the values by using the virtual keyboard or the general
purpose knob on the oscilloscope front panel. Using the File menu, you can also
restore the factory defaults or save and recall your own configuration settings.
For more information about configuration, click the Test help topic, and then go
to the specific test.
The following table shows the parameters that you can configure for sink
(differential tests):
Figure 53: Parameters for Sink Differential test
TDSHT3 HDMI Compliance Test Software
61
Operating Basics
The following table shows the parameters that you can configure for sink
(single-ended tests):
Figure 54: Parameters for Sink Single-Ended tests
Cable
On the menu bar, click Tests > Configure to configure the parameters for the
selected test.
In the configure pane, you will see the factory default configuration for the test
you selected. For most tests, you can use the factory default configuration.
However, you can change the values by using the virtual keyboard or the general
purpose knob on the oscilloscope front panel. Using the File menu, you can also
restore the factory defaults or save and recall your own configuration settings.
For more information about configuration, click the Test help topic, and then go
to the specific test.
The following table shows the parameters that you can configure for cable
(differential tests):
Figure 55: Parameters for Cable Differential tests
62
TDSHT3 HDMI Compliance Test Software
Operating Basics
Connect
Source – Eye Diagram
1.
On the menu bar, click Tests > Connect.
2.
Make the connections as follows:
Figure 56: Connections for Source Eye Diagram
TDSHT3 HDMI Compliance Test Software
63
Operating Basics
Connect the HDMI output of the source DUT to the TPA-P-TDR
adapter.
Connect a power supply to the TPA adapter and set the power supply to
3.30 V.
Connect the EDID emulator to the TPA adapter and set the emulator
for the required resolution (refer to the EDID emulator user manual).
Connect a TMDS Clock to the configured oscilloscope channel by
using a SMA differential probe.
Connect the TMDS_DATA pair on which you will conduct the test to
the configured oscilloscope channel by using a SMA differential probe.
Configure the Source DUT to output the required video format.
64
TDSHT3 HDMI Compliance Test Software
Operating Basics
Source – Duty Cycle
1.
On the menu bar, click Tests > Connect.
2.
Make the connections as follows:
Figure 57: Connections for Source Duty Cycle
Connect the HDMI output of the source DUT to the TPA-P-DI adapter.
Connect a power supply to the TPA adapter and set the power supply to
3.30 V.
Connect the EDID emulator to the TPA adapter and set the emulator
for the required resolution (refer to the EDID emulator user manual).
TDSHT3 HDMI Compliance Test Software
65
Operating Basics
Configure the Source DUT to output a video format with the required
supported pixel clock frequency.
Connect a TMDS Clock to the configured oscilloscope channel by
using a differential probe.
66
TDSHT3 HDMI Compliance Test Software
Operating Basics
Source – Rise Time
1.
On the menu bar, click Tests > Connect.
2.
Make the connections as follows:
Figure 58: Connections for Source Rise Time
Connect the HDMI output of the source DUT to the TPA-P-DI adapter.
Connect a power supply to the TPA adapter and set the power supply to
3.30 V.
Connect the EDID emulator to the TPA adapter and set the emulator
for the required resolution (refer to the EDID emulator user manual).
Configure the Source DUT to output a video format with the required
supported pixel clock frequency.
TDSHT3 HDMI Compliance Test Software
67
Operating Basics
Connect a differential probe to a TMDS_DATA/CLOCK.
If you have selected 'Re-calculate Tbit' in the configuration pane, then
connect the clock channel to the configured oscilloscope channel by
using a second differential probe.
68
TDSHT3 HDMI Compliance Test Software
Operating Basics
Source – Fall Time
1.
On the menu bar, click Tests > Connect.
2.
Make the connections as follows:
Figure 59: Connections for Source Fall Time
Connect the HDMI output of the source DUT to the TPA-P-DI adapter.
Connect a power supply to the TPA adapter and set the power supply to
3.30 V.
Connect the EDID emulator to the TPA adapter and set the emulator
for the required resolution (refer to the EDID emulator user manual).
Configure the Source DUT to output a video format with the highest
supported pixel clock frequency.
TDSHT3 HDMI Compliance Test Software
69
Operating Basics
Connect a differential probe to TMDS_DATA/CLOCK.
If you have selected 'Re-calculate Tbit' in the configuration pane, then
connect the clock channel to the configured oscilloscope channel by
using a second differential probe.
70
TDSHT3 HDMI Compliance Test Software
Operating Basics
Source – Clock Jitter
1.
On the menu bar, click Tests > Connect.
2.
Make the connections as follows:
Figure 60: Connections for Source Clock Jitter
Connect the HDMI output of the source DUT to the TPA-P-DI adapter.
Connect a power supply to the TPA adapter and set the power supply to
3.30 V.
Connect the EDID emulator to the TPA adapter and set the emulator
for the required resolution (refer to the EDID emulator user manual).
TDSHT3 HDMI Compliance Test Software
71
Operating Basics
Configure the Source DUT to output a video format with the required
supported pixel clock frequency.
Connect a TMDS Clock to the configured oscilloscope channel by
using a differential probe.
72
TDSHT3 HDMI Compliance Test Software
Operating Basics
Source – Over/Undershoot V-H (Voltage-High)
1.
On the menu bar, click Tests > Connect.
2.
Make the connections as follows:
Figure 61: Connections for Source Over/Undershoot V-H
Connect the HDMI output of the source DUT to the TPA-P-TDR
adapter.
Connect a power supply to the TPA adapter and set the power supply to
3.30 V.
TDSHT3 HDMI Compliance Test Software
73
Operating Basics
Connect the EDID emulator to the TPA adapter and set the emulator
for the required resolution (refer to the EDID emulator user manual).
Configure the Source DUT to output a video format with the required
supported pixel clock frequency.
Connect a SMA differential probe to TMDS_DATA/CLOCK.
If you have selected 'Re-calculate Tbit' in the configuration pane, then
connect the clock channel to the configured oscilloscope channel by
using a SMA differential probe.
74
TDSHT3 HDMI Compliance Test Software
Operating Basics
Source – Over/Undershoot V-L (Voltage-Low)
1.
On the menu bar, click Tests > Connect.
2.
Make the connections as follows:
Figure 62: Connections for Source Over/Undershoot V-L
Connect the HDMI output of the source DUT to the TPA-P-TDR
adapter.
Connect a power supply to the TPA adapter and set the power supply to
3.30 V.
TDSHT3 HDMI Compliance Test Software
75
Operating Basics
Connect the EDID emulator to the TPA adapter and set the emulator
for the required resolution (refer to the EDID emulator user manual).
Configure the Source DUT to output a video format with the required
supported pixel clock frequency.
Connect a SMA differential probe to TMDS_DATA/CLOCK.
If you have selected 'Re-calculate Tbit' in the configuration pane, then
connect the clock channel to the configured oscilloscope channel by
using a SMA differential probe.
76
TDSHT3 HDMI Compliance Test Software
Operating Basics
Source – Inter-Pair Skew for Clock-Data Tests
Note: The connection diagram shows both the probes connected to the data
signals, instead of one probe being connected to clock signal and the other probe
to the configured data signal on the fixture.
1.
On the menu bar, click Tests > Connect.
2.
Make the connections for Clock to Data Skew as follows:
Figure 63: Connections for Inter-Pair Skew (Clock-Data)
TDSHT3 HDMI Compliance Test Software
77
Operating Basics
Connect the HDMI output of the source DUT to the TPA-P-DI adapter.
Connect a power supply to the TPA adapter and set the power supply to
3.30 V.
Connect the EDID emulator to the TPA adapter and set the emulator
for the required resolution (refer to the EDID emulator user manual).
Connect a TMDS Clock to the configured oscilloscope channel by
using a differential probe.
Connect the TMDS_DATA pair on which you will conduct the test to
the configured oscilloscope channel by using a second differential
probe.
Configure the Source DUT to output the required video format.
78
TDSHT3 HDMI Compliance Test Software
Operating Basics
Source – Clock-Data Tests Select All
1.
On the menu bar, click Tests > Connect.
2.
Make the connections as follows:
Figure 64: Connections for Source Clock-Data tests (with Select All option)
Connect the HDMI output of the source DUT to the TPA-P-DI adapter.
Connect a power supply to the TPA adapter and set the power supply to
3.30 V.
Connect the EDID emulator to the TPA adapter and set the emulator
for the required resolution (refer to the EDID emulator user manual).
Connect a TMDS Clock to the configured oscilloscope channel by
using a differential probe.
TDSHT3 HDMI Compliance Test Software
79
Operating Basics
Connect the TMDS_DATA pair on which you will conduct the test to
the configured oscilloscope channel by using a second differential
probe.
Configure the Source DUT to output the required video format.
Note: For Single-Ended Tests Select All, use the Source Intra-Pair Skew connect
procedure.
80
TDSHT3 HDMI Compliance Test Software
Operating Basics
Source – Inter-Pair Skew for Data-Data Tests
On the menu bar, click Tests > Connect.
Setup 1: If you have selected 'Re-calculate Tbit' in the configuration pane
Make the connections as follows:
Figure 65: Connections for Inter-Pair Skew of Data-Data tests (with
Re-calculate Tbit option selected)
Connect the HDMI output of the source DUT to the TPA-P-DI adapter.
Connect a power supply to the TPA adapter and set the power supply to
3.30 V.
TDSHT3 HDMI Compliance Test Software
81
Operating Basics
Connect the EDID emulator to the TPA adapter and set the emulator
for the required resolution (refer to the EDID emulator user manual).
Configure the Source DUT to output a video format with the required
supported pixel clock frequency.
Connect a TMDS Clock to the configured oscilloscope channel by
using a differential probe.
Setup 2: If you have selected 'Existing Tbit' value or if you are calculating
the inter-pair skew for data-data tests
Make the connections for Data to Data Skew as follows:
Figure 66: Connections for Source Inter-Pair Skew of Data-Data tests (with Existing
Tbit option selected)
Connect the HDMI output of the source DUT to the TPA-P-DI adapter.
82
TDSHT3 HDMI Compliance Test Software
Operating Basics
Connect a power supply to the TPA adapter and set the power supply to
3.30 V.
Connect the EDID emulator to the TPA adapter and set the emulator
for the required resolution (refer to the EDID emulator user manual).
Connect a TMDS_DATA<X> Clock to the configured oscilloscope
channel by using a differential probe.
Connect the TMDS_DATA<Y> pair on which you will conduct the test
to the configured oscilloscope channel by using a second differential
probe.
Configure the Source DUT to output the required video format.
TDSHT3 HDMI Compliance Test Software
83
Operating Basics
Source – Intra-Pair Skew
On the menu bar, click Tests > Connect.
Setup 1: If you have selected 'Re-calculate Tbit' in the configuration pane
Make the connections as follows:
Figure 67: Connections for Source Intra-Pair Skew test (with Re-calculate Tbit
option selected)
Connect the HDMI output of the source DUT to the TPA-P-DI adapter.
Connect a power supply to the TPA adapter and set the power supply to
3.30 V.
84
TDSHT3 HDMI Compliance Test Software
Operating Basics
Connect the EDID emulator to the TPA adapter and set the emulator
for the required resolution (refer to the EDID emulator user manual).
Configure the Source DUT to output a video format with the required
supported pixel clock frequency.
Connect a TMDS Clock to the configured oscilloscope channel by
using a differential probe.
Setup 2: If you have selected 'Existing Tbit' value or if you are calculating
the intra-pair skew
Make the connections as follows:
Figure 68: Connections for Source Intra-Pair Skew test (with Existing Tbit option
selected)
TDSHT3 HDMI Compliance Test Software
85
Operating Basics
Connect the HDMI output of the source DUT to the TPA-P-SE adapter.
Connect a power supply to the TPA adapter and set the power supply to
3.30 V.
Connect the EDID emulator to the TPA adapter and set the emulator
for the required resolution (refer to the EDID emulator user manual).
Connect the first single-ended probe to
TMDS_DATA<X>+/TMDS_CLOCK+.
Connect the second single-ended probe to TMDS_DATA<X>–
/TMDS_CLOCK+.
Configure the Source DUT to output a video format with the required
supported pixel clock frequency.
86
TDSHT3 HDMI Compliance Test Software
Operating Basics
Source – Low Amplitude +
On the menu bar, click Tests > Connect.
Setup 1: If you have selected 'Re-calculate Tbit' in the configuration pane
Make the connections as follows:
Figure 69: Connections for Low Amplitude + (with Re-calculate Tbit option selected)
Connect the HDMI output of the source DUT to the TPA-P-DI adapter.
Connect a power supply to the TPA adapter and set the power supply to
3.30 V.
TDSHT3 HDMI Compliance Test Software
87
Operating Basics
Connect the EDID emulator to the TPA adapter and set the emulator
for the required resolution (refer to the EDID emulator user manual).
Configure the Source DUT to output a video format with the required
supported pixel clock frequency.
Connect a TMDS Clock to the configured oscilloscope channel by
using a differential probe.
Setup 2: If you have selected 'Existing Tbit' value or if you are calculating
low amplitude
Make the connections as follows:
Figure 70: Connections for Low Amplitude + (with Existing Tbit option selected)
88
TDSHT3 HDMI Compliance Test Software
Operating Basics
Connect the HDMI output of the source DUT to the TPA-P-SE adapter.
Connect a power supply to the TPA adapter and set the power supply to
3.30 V.
Connect the EDID emulator to the TPA adapter and set the emulator
for the required resolution (refer to the EDID emulator user manual).
Connect the first single-ended probe to TMDS_DATA<X>+/
TMDS_CLOCK+.
Configure the Source DUT to output a video format with the required
supported pixel clock frequency.
TDSHT3 HDMI Compliance Test Software
89
Operating Basics
Source – Low Amplitude On the menu bar, click Tests > Connect.
Setup 1: If you have selected 'Re-calculate Tbit' in the configuration pane
Make the connections as follows:
Figure 71: Connections for Low Amplitude - (with Re-calculate Tbit option selected)
90
TDSHT3 HDMI Compliance Test Software
Operating Basics
Connect the HDMI output of the source DUT to the TPA-P-DI adapter.
Connect a power supply to the TPA adapter and set the power supply to
3.30 V.
Connect the EDID emulator to the TPA adapter and set the emulator
for the required resolution (refer to the EDID emulator user manual).
Configure the Source DUT to output a video format with the required
supported pixel clock frequency.
Connect a TMDS Clock to the configured oscilloscope channel by
using a differential probe.
TDSHT3 HDMI Compliance Test Software
91
Operating Basics
Setup 2: If you have selected 'Existing Tbit' value or if you are calculating
low amplitude
Make the connections as follows:
Figure 72: Connections for Low Amplitude - (with Existing Tbit option selected)
Connect the HDMI output of the source DUT to the TPA-P-SE adapter.
Connect a power supply to the TPA adapter and set the power supply to
3.30 V.
Connect the EDID emulator to the TPA adapter and set the emulator
for the required resolution (refer to the EDID emulator user manual).
92
TDSHT3 HDMI Compliance Test Software
Operating Basics
Connect the first single-ended probe to TMDS_DATA<X>+/
TMDS_CLOCK+.
Configure the Source DUT to output a video format with the required
supported pixel clock frequency.
TDSHT3 HDMI Compliance Test Software
93
Operating Basics
Sink – Min/Max-Diff Swing Tolerance
On the menu bar, click Tests > Connect.
Setup 1: To find the minimum swing voltage of the Sink DUT
Make the connections as follows:
Figure 73: Connections for Min/Max-Diff Swing Tolerance (to find minimum swing
voltage of the Sink DUT)
Note: Using the Cable Emulator/Cable is not mandatory. You can connect a
TPA-P-TDR fixture directly to the DUT. If you find this inconvenient, then use
the Cable Emulator/Cable to connect the DUT conveniently.
94
TDSHT3 HDMI Compliance Test Software
Operating Basics
Connect the DTG to the TPA-R-TDR by using eight one meter or one
and a half meter SMA cables:
Module A, Channel 1+, 1-: Connect to CLOCK_P, and
CLOCK_N
Module A, Channel 2+, 2-: No Connection
Module B, Channel 1+, 1-: Connect to DATA0_P and DATA0_N
Module B, Channel 2+, 2-: Connect to DATA1_P and DATA1_N
Module C, Channel 1+, 1-: Connect to DATA2_P and DATA2_N
Module C, Channel 2+, 2-: No Connection
Connect the Cable Emulator from the TPA-R-TDR to the Sink DUT.
Connect and configure the DC Power Supply to drive +5 V between +5
V Power (P_5V) and DDC/CEC Ground (P_GND) on the
TPA-R-TDR.
TDSHT3 HDMI Compliance Test Software
95
Operating Basics
Setup 2: To measure the minimum differential swing voltage by using an
oscilloscope
Make the connections as follows:
Figure 74: Connections for Min/Max-Diff Swing Tolerance (to measure the minimum
differential swing voltage using an oscilloscope)
Note: Using the Cable Emulator/Cable is not mandatory. You can connect a
TPA-P-TDR fixture directly to the DUT. If you find this inconvenient, then use
the Cable Emulator/Cable to connect the DUT conveniently.
Remove the Sink DUT from the Cable Emulator.
Connect the TPA-R-DI test fixture at the end of the Cable Emulator.
96
TDSHT3 HDMI Compliance Test Software
Operating Basics
Connect a TMDS Clock/Data channel to the configured oscilloscope
channel by using a differential probe.
Setup 3: To find the maximum swing voltage of the Sink DUT
1. Remove the TPA-R-DI text fixture at the end of the Cable Emulator.
2. Connect the Sink DUT to the Cable Emulator.
Figure 75: Connections for Min/Max-Diff Swing Tolerance (to find the maximum swing
voltage of the Sink DUT)
TDSHT3 HDMI Compliance Test Software
97
Operating Basics
Sink – Jitter Tolerance
On the menu bar, click Tests > Connect.
Setup 1: To find the device tolerance limit
Make the connections as follows:
Figure 76: Connections for Jitter Tolerance (to find the device tolerance limit)
Connect the DTG, AWG, Bias-Tees, and the TPA-R-TDR.
AWG Marker 1+ output to DTG External Clock input
AWG Marker 2+ output to DTG Trigger In
AWG Ch. 1+ output to Bias-Tee signal input (RF)
Bias-Tee signal output (RF and DC) to CLOCK_P
98
TDSHT3 HDMI Compliance Test Software
Operating Basics
DTG DC_OUT (1) to Bias-Tee DC-level input (DC)
AWG Ch. 1- output to Bias-Tee signal input (RF)
Bias-Tee signal output (RF and DC) to CLOCK_N
DTG DC_OUT (2) to Bias-Tee DC-level input (DC)
DTG Module A, Channel 1+, 1-: No Connection
DTG Module A, Channel 2+, 2-: No Connection
DTG Module B, Channel 1+, 1-: Connect to DATA0_P and
DATA0_N
DTG Module B, Channel 2+, 2-: Connect to DATA1_P and
DATA1_N
DTG Module C, Channel 1+, 1-: Connect to DATA2_P and
DATA2_N
DTG Module C, Channel 2+, 2-: No Connection
Connect the TPA-R-TDR to the Sink DUT by using a Cable Emulator
specified for tested pixel clock rate.
Connect and configure the DC Power Supply to drive +5 V between +5
V Power (P_5V) and DDC/CEC Ground (P_GND) on the
TPA-R-TDR.
TDSHT3 HDMI Compliance Test Software
99
Operating Basics
Setup 2: To measure the parameters
Make the connections as follows:
Figure 77: Connections for Jitter Tolerance (to measure the parameters)
Remove the Sink DUT.
Connect the TPA-R-DI test adaptor to a Cable Emulator.
Connect a Clock to the configured oscilloscope channel by using a
differential probe.
Connect the DATA pair on which you will conduct the test to the
configured oscilloscope channel by using a second differential probe.
100
TDSHT3 HDMI Compliance Test Software
Operating Basics
Sink – Intra-Pair Skew
On the menu bar, click Tests > Connect.
Note: The procedure mentioned next is for the clock intra-pair skew test. For
other pairs, interchange the connection of DATA<X>_P with CLOCK_P and
DATA<X>_N with CLOCK_N. Make the appropriate changes in the
configuration of the DTG Outputs accordingly.
For example, to calculate the intra-pair skew of Data0:
Connect DATA0_P to Module A1+, DATA0_N to DTG Module A2+, CLOCK_P
to Module B1+, and CLOCK_N to module B1-.
TDSHT3 HDMI Compliance Test Software
101
Operating Basics
Setup 1: To measure Tbit
Make the connections as follows:
Figure 78: Connections for Sink Intra-Pair Skew (to measure Tbit)
Note: Using the Cable Emulator/Cable is not mandatory. You can connect a
TPA-P-TDR fixture directly to the DUT. If you find this inconvenient, then use
the Cable Emulator/Cable to connect the DUT conveniently.
102
TDSHT3 HDMI Compliance Test Software
Operating Basics
Connect the DTG to the TPA-R-TDR by using eight one meter
(preferable) or one and a half meter SMA cables:
Module A, Channel 1+: Connect to CLOCK_P
Module A, Channel 1-: No Connection
Module A, Channel 2+: Connect to CLOCK_N
Module A, Channel 2-: No Connection
Module B, Channel 1+, 1-: Connect to DATA0_P and DATA0_N
Module B, Channel 2+, 2-: Connect to DATA1_P and DATA1_N
Module C, Channel 1+, 1-: Connect to DATA1_P and DATA1_N
Module C, Channel 2+, 2-: No Connection
Connect the TPA-R-TDR to the Cable Emulator.
Connect the TPA-R-DI to the Cable Emulator.
Connect a Clock to the configured oscilloscope channel by using a
differential probe.
TDSHT3 HDMI Compliance Test Software
103
Operating Basics
Setup 2: To find intra-pair skew of the Sink DUT
Make the connections as follows:
Figure 79: Connections for Sink Intra-Pair Skew (to find intra-pair skew of the
Sink DUT)
Note: Using the Cable Emulator/Cable is not mandatory. You can connect a
TPA-P-TDR fixture directly to the DUT. If you find this inconvenient, then use
the Cable Emulator/Cable to connect the DUT conveniently.
104
TDSHT3 HDMI Compliance Test Software
Operating Basics
Remove the TPA-R-DI test fixture from the Cable Emulator.
Connect the Sink DUT to the Cable Emulator.
Connect and configure the DC Power Supply to drive +5 V between +5
V Power (P_5V) and DDC/CEC Ground (P_GND) on the
TPA-R-TDR.
Cable – Eye Diagram
On the menu bar, click Tests > Connect.
Setup diagram for TP1
Make the connections as follows:
TDSHT3 HDMI Compliance Test Software
105
Operating Basics
Figure 80: Connections for Cable Eye Diagram (Setup diagram for TP1)
106
TDSHT3 HDMI Compliance Test Software
Operating Basics
Connect the DTG to the 'input' TPA-P-TDR adapter by using eight one
meter (preferable) or one and a half meter SMA cables:
Module A, Channel 1+, 1-: Connect to CLOCK_P and CLOCK_N
Module A, Channel 2+, 2-: No Connection
Module B, Channel 1+, 1-: Connect to DATA0_P and DATA0_N
Module B, Channel 2+, 2-: Connect to DATA1_P and DATA1_N
Module C, Channel 1+, 1-: Connect to DATA2_P and DATA2_N
Module C, Channel 2+, 2-: No Connection
Connect the oscilloscope to the 'output' TPA-R-DI adapter by using two
differential probes, and supply 3.3 V power.
Connect a TMDS CLOCK to the configured oscilloscope channel by
using a differential probe.
Connect the TMDS_DATA pair on which you will conduct the test to
the configured oscilloscope channel by using a second differential
probe.
TDSHT3 HDMI Compliance Test Software
107
Operating Basics
Setup diagram for TP2
Make the connections as follows:
Figure 81: Connections for Cable Eye Diagram (Setup diagram for TP2)
Remove the TPA-P-DI test adaptor.
Connect the Cable DUT.
108
TDSHT3 HDMI Compliance Test Software
Operating Basics
Connect the TPA-R-DI test adaptor.
Connect a TMDS CLOCK to the configured oscilloscope channel by
using a differential probe.
Connect the TMDS_DATA pair on which you will conduct the test to
the configured oscilloscope channel by using a second differential
probe.
TDSHT3 HDMI Compliance Test Software
109
Operating Basics
View Waveform
Source – Eye Diagram
Click View Waveform to display the input signals Clock and Data as follows:
Figure 82: Waveform of Source Eye Diagram
110
TDSHT3 HDMI Compliance Test Software
Operating Basics
Source – Duty Cycle
Click View Waveform to display the Clock signal as follows:
Figure 83: Waveform of Duty Cycle
TDSHT3 HDMI Compliance Test Software
111
Operating Basics
Source – Rise Time
Click View Waveform to display the input signals Clock or Data as follows:
Figure 84: Waveform of Rise Time
112
TDSHT3 HDMI Compliance Test Software
Operating Basics
Source – Fall Time
Click View Waveform to display the input signals Clock or Data as follows:
Figure 85: Waveform of Fall Time
TDSHT3 HDMI Compliance Test Software
113
Operating Basics
Source – Clock Jitter
Click View Waveform to display the Clock signal as follows:
Figure 86: Waveform of Clock Jitter
114
TDSHT3 HDMI Compliance Test Software
Operating Basics
Source – Over/Undershoot V-H (Voltage-High)
Click View Waveform to display the input signals Clock or Data as follows:
Figure 87: Waveform of Over/Undershoot V-H
TDSHT3 HDMI Compliance Test Software
115
Operating Basics
Source – Over/Undershoot V-L (Voltage-Low)
Click View Waveform to display the input signals Clock or Data as follows:
Figure 88: Waveform of Over/Undershoot V-L
116
TDSHT3 HDMI Compliance Test Software
Operating Basics
Source – Inter-Pair Skew for Clock-Data Tests
Click View Waveform to display the input signals Clock and Data as follows:
Figure 89: Waveform of Inter-Pair Skew (Clock-Data)
TDSHT3 HDMI Compliance Test Software
117
Operating Basics
Source – Clock-Data Tests Select All
Click View Waveform to display the input signals Clock and Data as follows:
Figure 90: Waveform of Source Multiple Tests
118
TDSHT3 HDMI Compliance Test Software
Operating Basics
Source – Inter-Pair Skew for Data-Data Tests
Click View Waveform to display the input signals Data+ and Data, Clock as
follows:
Figure 91: Waveform of Inter-Pair Skew (Data-Data)
TDSHT3 HDMI Compliance Test Software
119
Operating Basics
Source – Intra-Pair Skew
Click View Waveform to display the input signals Data+ or Data-/Clock as
follows:
Figure 92: Waveform of Source Intra-Pair Skew
120
TDSHT3 HDMI Compliance Test Software
Operating Basics
Source – Low Amplitude +
Click View Waveform to display the input signals Data+ or Data-/Clock as
follows:
Figure 93: Waveform of Low Amplitude +
TDSHT3 HDMI Compliance Test Software
121
Operating Basics
Source – Low Amplitude Click View Waveform to display the input signals Data+ or Data-/Clock as
follows:
Figure 94: Waveform of Low Amplitude -
Sink – Min/Max-Diff Swing Tolerance
Because no signal is connected to the oscilloscope, you cannot view the
waveform for the min/max-diff swing tolerance test.
122
TDSHT3 HDMI Compliance Test Software
Operating Basics
Sink – Jitter Tolerance
Because no signal is connected to the oscilloscope, you cannot view the
waveform for the jitter tolerance test.
Sink – Intra-Pair Skew
If you have selected re-calculate Tbit, then click View Waveform to display the
Clock signal as follows:
Figure 95: Waveform of Sink Intra-Pair Skew
Cable – Eye Diagram
Because no signal is connected to the oscilloscope, you cannot view the
waveform for the eye diagram test.
TDSHT3 HDMI Compliance Test Software
123
Operating Basics
Test
Source – Eye Diagram
This test allows you to confirm that the differential signal on each TMDS
differential data pair has an 'eye opening' (region of valid data) which meets or
exceeds the limits on eye opening in the specification.
You will need one supported oscilloscope, two differential probes, one DC power
supply 3.3 V, one EDID emulator, and one TPA-P-DI fixture.
1.
On the menu bar, click Tests > Select > Source.
2.
In the clock-data tests pane, select the Eye Diagram check box.
Figure 96: Select Source with Eye Diagram test selected
124
TDSHT3 HDMI Compliance Test Software
Operating Basics
3.
To change the configuration settings, click Tests > Configure. For most
tests, you can use the factory default configuration. However, you can
change the values by using the virtual keyboard or the general purpose knob
on the oscilloscope front panel. Using the File menu, you can also restore
the factory defaults or save and recall your own configuration settings.
Figure 97: Configure Source for Eye Diagram
4.
In the input pane, you have the following options:
Table 28: Input options for Eye Diagram
5.
Configure Parameter
Description
Clock
Clock indicates the oscilloscope channel to which you will
connect the clock input. The available choices are Ch1, Ch2,
Ch3, Ch4, Ref1, Ref2, Ref3, and Ref4.
Data
Data indicates the oscilloscope channel to which you will
connect the data input. The available choices are Ch1, Ch2,
Ch3, Ch4, Ref1, Ref2, Ref3, and Ref4.
In the horiz/acq pane, you have the following option:
Table 29: Horiz/Acq options for Eye Diagram
Configure
Parameter
Description
Record Length
In the Rec Length box, enter the desired record length value for the
eye tests.
TDSHT3 HDMI Compliance Test Software
125
Operating Basics
6.
In the CRU pane, you have the following option:
Table 30: CRU options for Eye Diagram
7.
Configure Parameter
Description
CRU
The CRU list allows you to configure the CRU. The available
choices are PLL, Raw, and Ideal. The default value is first
order PLL and is used for compliance testing. Raw and Ideal
are used for analysis.
Define
The Define is available only when PLL is selected.
In the reference levels pane, you have the following options:
Table 31: Reference Levels options for Eye Diagram
126
Configure Parameter
Description
Units
The Units list allows you to set the reference level units to
either Per (%) or Abs.
Per (%) indicates that the reference levels are a percentage of
the Vswing value.
Abs indicates that the reference levels are absolute voltage
values.
Hysteresis
In the Hysteresis box, enter the desired hysteresis percent
value. The default value is 10 percent.
The hysteresis range is between 2 percent and 10 percent.
Mid
In the Mid box, enter the desired mid reference voltage value.
The default value is 50 percent.
TDSHT3 HDMI Compliance Test Software
Operating Basics
8.
To connect the DUT, click Tests > Connect.
Figure 98: Connect pane for Source Eye Diagram
TDSHT3 HDMI Compliance Test Software
127
Operating Basics
9.
Ensure that your signal in the oscilloscope display is similar to the sample
signal. Click View Waveform to display a sample of the expected signal. If
the displays are not similar, go back and check your configuration and
connections.
Figure 99: Waveform of Source Eye Diagram
10. Click Run Test to perform the test. The TDSHT3 HDMI Compliance Test
Software sets up the oscilloscope and the test runs, displaying a progress
indicator.
128
TDSHT3 HDMI Compliance Test Software
Operating Basics
11. If you have run the eye diagram test successfully, the software makes Result
available automatically and displays the eye diagram plot. A warning
message box may also appear. For more information on the eye diagram
plot, refer to the online help. For more information on the message box,
refer to the online help.
Figure 100: Source Eye Diagram plot
TDSHT3 HDMI Compliance Test Software
129
Operating Basics
12. Click Half Screen to view the eye diagram plot in half screen. You can also
view both the result summary of the test and the report configuration in the
result pane as shown in the following diagram. For more information on
result summary and report configuration, refer to the online help.
Figure 101: Waveform of Source Eye Diagram plot and Result
130
TDSHT3 HDMI Compliance Test Software
Operating Basics
13. In the result summary pane, click Result Details to display the details of the
result. For more information on the result details, refer to the online help.
Figure 102: Result Details for Source Eye Diagram
14. In the Result Details dialog box, click Result Statistics to display statistics
based on the tests. For more information on result statistics, refer to the
online help.
Figure 103: Result Statistics for Source Eye Diagram
Source – Duty Cycle
This test allows you to confirm that the duty cycle of the differential TMDS
clock does not exceed the limits allowed by the specification.
You will need one supported oscilloscope, one differential probe, one DC power
supply 3.3 V, one EDID emulator, and one TPA-P-DI fixture.
TDSHT3 HDMI Compliance Test Software
131
Operating Basics
1.
On the menu bar, click Tests > Select > Source.
2.
In the clock-data tests pane, select the Duty Cycle check box.
Figure 104: Select Source with Duty Cycle test selected
3.
To change the configuration settings, click Tests > Configure. For most
tests, you can use the factory default configuration. However, you can
change the values by using the virtual keyboard or the general purpose knob
on the oscilloscope front panel. Using the File menu, you can also restore
the factory defaults or save and recall your own configuration settings.
Figure 105: Configure Source for Duty Cycle
132
TDSHT3 HDMI Compliance Test Software
Operating Basics
4.
In the input pane, you have the following option:
Table 32: Input options for Duty Cycle
5.
Configure Parameter
Description
Clock
Clock indicates the oscilloscope channel to which you will
connect the clock input. The available choices are Ch1, Ch2,
Ch3, and Ch4.
In the horiz/acq pane, you have the following option:
Table 33: Horiz/Acq options for Duty Cycle
6.
Configure Parameter
Description
# of Acqs
In the # of Acqs box, enter the desired number of acquisitions
that are required for the test. The default value is 10 K.
In the tbit pane, you have the following options:
Table 34: Tbit options for Duty Cycle
Configure Parameter
Description
# of Avgs
In the # of Avgs box, enter the desired number of periods that
are considered to calculate Tbit. The default value is 100.
Re-calculate
Click Re-calculate to recalculate the Tbit value.
Existing Value
Click Existing Value to use the previously calculated Tbit
value.
TDSHT3 HDMI Compliance Test Software
133
Operating Basics
7.
To connect the DUT, click Tests > Connect.
Figure 106: Connect pane for Duty Cycle
134
TDSHT3 HDMI Compliance Test Software
Operating Basics
8.
Ensure that your signal in the oscilloscope display is similar to the sample
signal. Click View Waveform to display a sample of the expected signal. If
the displays are not similar, go back and check your configuration and
connections.
Figure 107: Waveform of Duty Cycle
9.
Click Run Test to perform the test. The TDSHT3 HDMI Compliance Test
Software sets up the oscilloscope and the test runs, displaying a progress
indicator.
TDSHT3 HDMI Compliance Test Software
135
Operating Basics
10. The software makes Result available automatically and displays the result
summary. You can also view the report configuration details in the result
pane.
Figure 108: Result for Duty Cycle
Table 35: Result options for Duty Cycle
Option
Description
Test Name
The Test Name box displays the test id, test name, and signal
name - CK (Clock).
Status
Status indicates the status of the test as Pass, Fail, or Error.
Result Details
Click Result Details to display the details of the result.
Report Configuration pane
You can set the report details to identify and generate the report automatically.
You can set a default report file.
136
TDSHT3 HDMI Compliance Test Software
Operating Basics
Figure 109: Report Configuration for Duty Cycle
In the report configuration pane, you can configure the following parameters:
Table 36: Report Configuration options for Duty
Cycle
Category
Description
Pair (CK, D)
The Pair (CK, D) list allows you to specify the unique pairs on
which the test is conducted.
Resolution
The Resolution box allows you to specify the resolution on
which the test is conducted.
Refresh Rate
The Refresh Rate box allows you to specify the refresh rate at
which the test is conducted.
Report File
The Report File box allows you to specify the path and the file
where the generated report will be saved. However, for the
selected speed, a default file name and path already exists.
Enable Preview
Select the Enable Preview check box to preview the report
automatically after generation.
Clear Report
Click Clear Report to clear all the results and records of the
earlier tests.
Advanced
Click Advanced to open the Report Configuration
Advanced dialog box.
11. In the result summary pane, click Result Details to display the details of the
result.
TDSHT3 HDMI Compliance Test Software
137
Operating Basics
Figure 110: Result Details for Duty Cycle
Table 37: Result Details options for Duty Cycle
Option
Description
Test Name
The Test Name box displays the test id, test name, and signal
name - CK (Clock).
Spec Range
The Spec Range box displays the HDMI standards and test
specifications limit for the test.
Meas Value
The Meas Value box displays the measured value.
Result
The Result box displays the status of the test as Pass, Fail, or
Error.
Remarks/Comments
The Remarks/Comments box displays the relevant details, for
example, Tbit, and Margin. If the test could not be run, then an
error code appears.
Close
Click Close to quit the Result Details dialog box.
Source – Rise Time
This test allows you to confirm that the rise times on the TMDS differential
signals fall within the limits of the specification.
You will need one supported oscilloscope, one differential probe, one DC power
supply 3.3 V, one EDID emulator, and one TPA-P-DI fixture.
138
1.
On the menu bar, click Tests > Select > Source.
2.
In the clock-data tests pane, select the Rise Time check box.
TDSHT3 HDMI Compliance Test Software
Operating Basics
Figure 111: Select Source with Rise Time test selected
3.
To change the configuration settings, click Tests > Configure. For most
tests, you can use the factory default configuration. However, you can
change the values by using the virtual keyboard or the general purpose knob
on the oscilloscope front panel. Using the File menu, you can also restore
the factory defaults or save and recall your own configuration settings.
Figure 112: Configure Source for Rise Time
TDSHT3 HDMI Compliance Test Software
139
Operating Basics
4.
In the input pane, you have the following options:
Table 38: Input options for Rise Time
5.
Configure Parameter
Description
Clock
Clock indicates the oscilloscope channel to which you will
connect the clock input. The available choices are Ch1, Ch2,
Ch3, Ch4, and Not Conn.
Data
Data indicates the oscilloscope channel to which you will
connect the data input. The available choices are Ch1, Ch2,
Ch3, Ch4, and Not Conn.
In the horiz/acq pane, you have the following option:
Table 39: Horiz/Acq options for Rise Time
6.
Configure Parameter
Description
# of Acqs
In the # of Acqs box, enter the desired number of acquisitions
that are required for the test. The default value is 10 K.
In the tbit pane, you have the following options:
Table 40: Tbit options for Rise Time
140
Configure Parameter
Description
# of Avgs
In the # of Avgs box, enter the desired number of periods that
are considered to calculate Tbit. The default value is 100.
Re-calculate
Click Re-calculate to recalculate the Tbit value.
Existing Value
Click Existing Value to use the previously calculated Tbit
value.
TDSHT3 HDMI Compliance Test Software
Operating Basics
7.
In the reference levels pane, you have the following options:
Table 41: Reference Levels options for Rise Time
8.
Configure Parameter
Description
Units
The Units list allows you to set the reference level units to
either Per (%) or Abs.
Per (%) indicates that the reference levels are a percentage of
the Vswing value.
Abs indicates that the reference levels are absolute voltage
values.
Hysteresis
In the Hysteresis box, enter the desired hysteresis percent
value. The default value is 10 percent.
High
In the High box, enter the desired high reference voltage
value. The default value is 80 percent.
Mid
In the Mid box, enter the desired mid reference voltage value.
The default value is 50 percent.
Low
In the Low box, enter the desired low reference voltage value.
The default value is 20 percent.
To connect the DUT, click Tests > Connect.
Figure 113: Connect pane for Rise Time
9.
Ensure that your signal in the oscilloscope display is similar to the sample
signal. Click View Waveform to display a sample of the expected signal. If
the displays are not similar, go back and check your configuration and
connections.
TDSHT3 HDMI Compliance Test Software
141
Operating Basics
Figure 114: Waveform of Rise Time
10. Click Run Test to perform the test. The TDSHT3 HDMI Compliance Test
Software sets up the oscilloscope and the test runs, displaying a progress
indicator.
142
TDSHT3 HDMI Compliance Test Software
Operating Basics
11. The software makes Result available automatically and displays the result
summary. You can also view the report configuration details in the result
pane.
Figure 115: Result for Rise Time
Table 42: Result options for Rise Time
Option
Description
Test Name
The Test Name box displays the test id, test name, and signal
name - CK (Clock), D (Data).
Status
Status indicates the status of the test as Pass, Fail, or Error.
Result Details
Click Result Details to display the details of the result.
TDSHT3 HDMI Compliance Test Software
143
Operating Basics
Report Configuration pane
You can set the report details to identify and generate the report automatically.
You can set a default report file.
Figure 116: Report Configuration for Rise Time
In the report configuration pane, you can configure the following parameters:
Table 43: Report Configuration options for Rise
Time
144
Category
Description
Pair (CK, D)
The Pair (CK, D) list allows you to specify the unique pairs on
which the test is conducted.
Resolution
The Resolution box allows you to specify the resolution on
which the test is conducted.
Refresh Rate
The Refresh Rate box allows you to specify the refresh rate at
which the test is conducted.
Report File
The Report File box allows you to specify the path and the file
where the generated report will be saved. However, for the
selected speed, a default file name and path already exists.
Enable Preview
Select the Enable Preview check box to preview the report
automatically after generation.
Clear Report
Click Clear Report to clear all the results and records of the
earlier tests.
Advanced
Click Advanced to open the Report Configuration
Advanced dialog box.
TDSHT3 HDMI Compliance Test Software
Operating Basics
12. In the result summary pane, click Result Details to display the details of the
result.
Figure 117: Result Details for Rise Time
Table 44: Result Details for Rise Time
Option
Description
Test Name
The Test Name box displays the test id, test name, and signal
name - CK (Clock), D (Data).
Spec Range
The Spec Range box displays the lower limit and upper limit of
the rise time test.
Meas Value
The Meas Value box displays the measured value.
Result
The Result box displays the status of the test as Pass, Fail, or
Error.
Remarks/Comments
The Remarks/Comments box displays the relevant details, for
example, Tbit, and Margin. If the test could not be run, then an
error code appears.
Close
Click Close to quit the Result Details dialog box.
Result Statistics
Click Result Statistics to display statistics based on the tests.
TDSHT3 HDMI Compliance Test Software
145
Operating Basics
13. In the Result Details dialog box, click Result Statistics to display statistics
based on the tests.
Figure 118: Result Statistics for Rise Time
The software calculates statistics for each selected test, and logs the statistics on a
cycle-by-cycle basis in a large waveform. The standard statistics are for the
Maximum, Minimum, Mean, Standard Deviation, and Population.
Table 45: Result Statistics for Rise Time test
146
Option
Description
Test
Name
The Test Name box displays the test id, test name, and signal names - CK (Clock), D
(Data).
Populatio
n
The software calculates this statistic by using the following equation:
Population (X) = N
Min
The software calculates this statistic by using the following equation:
Min (X) = Lowest value of X
Max
The software calculates this statistic by using the following equation:
Max (X) = Highest value of X
Mean
The software calculates this statistic by using the following equation:
Std Dev
The software calculates this statistic by using the following equation:
TDSHT3 HDMI Compliance Test Software
Operating Basics
Table 45: Result Statistics for Rise Time test (Contd.)
Option
Description
Pk-Pk
The software calculates this statistic by using the following equation:
Xppn = Max(X) - Min(X)
Close
Click Close to quit the Result Statistics dialog box.
Source – Fall Time
This test allows you to confirm that the fall times on the TMDS differential
signals fall within the limits of the specification.
You will need one supported oscilloscope, one differential probe, one DC power
supply 3.3 V, one EDID emulator, and one TPA-P-DI fixture.
1.
On the menu bar, click Tests > Select > Source.
2.
In the clock-data tests pane, select the Fall Time check box.
Figure 119: Select Source with Fall Time test selected
TDSHT3 HDMI Compliance Test Software
147
Operating Basics
3.
To change the configuration settings, click Tests > Configure. For most
tests, you can use the factory default configuration. However, you can
change the values by using the virtual keyboard or the general purpose knob
on the oscilloscope front panel. Using the File menu, you can also restore
the factory defaults or save and recall your own configuration settings.
Figure 120: Configure Source for Fall Time
4.
In the input pane, you have the following options:
Table 46: Input options for Fall Time
5.
Configure Parameter
Description
Clock
Clock indicates the oscilloscope channel to which you will
connect the clock input. The available choices are Ch1, Ch2,
Ch3, Ch4, and Not Conn.
Data
Data indicates the oscilloscope channel to which you will
connect the data input. The available choices are Ch1, Ch2,
Ch3, Ch4, and Not Conn.
In the horiz/acq pane, you have the following option:
Table 47: Horiz/Acq options for Fall Time
148
Configure Parameter
Description
# of Acqs
In the # of Acqs box, enter the desired number of acquisitions
that are required for the test. The default value is 10 K.
TDSHT3 HDMI Compliance Test Software
Operating Basics
6.
In the tbit pane, you have the following options:
Table 48: Tbit options for Fall Time
7.
Configure Parameter
Description
# of Avgs
In the # of Avgs box, enter the desired number of periods that
are considered to calculate Tbit. The default value is 100.
Re-calculate
Click Re-calculate to recalculate the Tbit value.
Existing Value
Click Existing Value to use the previously calculated Tbit
value.
In the reference levels pane, you have the following options:
Table 49: Reference Levels options for Fall Time
Configure Parameter
Description
Units
The Units list allows you to set the reference level units to
either Per (%) or Abs.
Per (%) indicates that the reference levels are a percentage of
the Vswing value.
Abs indicates that the reference levels are absolute voltage
values.
Hysteresis
In the Hysteresis box, enter the desired hysteresis percent
value. The default value is 10 percent.
High
In the High box, enter the desired high reference voltage
value. The default value is 80 percent.
Mid
In the Mid box, enter the desired mid reference voltage value.
The default value is 50 percent.
Low
In the Low box, enter the desired low reference voltage value.
The default value is 20 percent.
TDSHT3 HDMI Compliance Test Software
149
Operating Basics
8.
To connect the DUT, click Tests > Connect.
Figure 121: Connect pane for Fall Time
150
TDSHT3 HDMI Compliance Test Software
Operating Basics
9.
Ensure that your signal in the oscilloscope display is similar to the sample
signal. Click View Waveform to display a sample of the expected signal. If
the displays are not similar, go back and check your configuration and
connections.
Figure 122: Waveform of Fall Time
10. Click Run Test to perform the test. The TDSHT3 HDMI Compliance Test
Software sets up the oscilloscope and the test runs, displaying a progress
indicator.
TDSHT3 HDMI Compliance Test Software
151
Operating Basics
11. The software makes Result available automatically and displays the result
summary. You can also view the report configuration details in the result
pane.
Figure 123: Result for Fall Time
Table 50: Results for Fall Time test
152
Option
Description
Test Name
The Test Name box displays the test id, test name, and signal
name - CK (Clock), D (Data).
Status
Status indicates the status of the test as Pass, Fail, or Error.
Result Details
Click Result Details to display the details of the result.
TDSHT3 HDMI Compliance Test Software
Operating Basics
Report Configuration pane
You can set the report details to identify and generate the report automatically.
You can set a default report file.
Figure 124: Report Configuration for Fall Time
In the report configuration pane, you can configure the following parameters:
Table 51: Report Configuration options for Fall
Time
Category
Description
Pair (CK, D)
The Pair (CK, D) list allows you to specify the unique pairs on
which the test is conducted.
Resolution
The Resolution box allows you to specify the resolution on
which the test is conducted.
Refresh Rate
The Refresh Rate box allows you to specify the refresh rate at
which the test is conducted.
Report File
The Report File box allows you to specify the path and the file
where the generated report will be saved. However, for the
selected speed, a default file name and path already exists.
Enable Preview
Select the Enable Preview check box to preview the report
automatically after generation.
Clear Report
Click Clear Report to clear all the results and records of the
earlier tests.
Advanced
Click Advanced to open the Report Configuration
Advanced dialog box.
TDSHT3 HDMI Compliance Test Software
153
Operating Basics
12. In the result summary pane, click Result Details to display the details of the
result.
Figure 125: Result Details for Fall Time
Table 52: Result Details for Fall Time
154
Option
Description
Test Name
The Test Name box displays the test id, test name, and signal
name - CK (Clock), D (Data).
Spec Range
The Spec Range box displays the lower limit and upper limit of
the fall time test.
Meas Value
The Meas Value box displays the measured value.
Result
The Result box displays the status of the test as Pass, Fail, or
Error.
Remarks/Comments
The Remarks/Comments box displays the relevant details, for
example, Tbit, and Margin. If the test could not be run, then an
error code appears.
Close
Click Close to quit the Result Details dialog box.
Result Statistics
Click Result Statistics to display statistics based on the tests.
TDSHT3 HDMI Compliance Test Software
Operating Basics
13. In the Result Details dialog box, click Result Statistics to display statistics
based on the tests.
Figure 126: Result Statistics for Fall Time
The software calculates statistics for each selected test, and logs the statistics on a
cycle-by-cycle basis in a large waveform. The standard statistics are for the
Maximum, Minimum, Mean, Standard Deviation, and Population.
Table 53: Result Statistics for Fall Time
Option
Description
Test Name
The Test Name box displays the test id, test name, and signal names - CK
(Clock), D (Data).
Population
The software calculates this statistic by using the following equation:
Population (X) = N
Min
The software calculates this statistic by using the following equation:
Min (X) = Lowest value of X
Max
The software calculates this statistic by using the following equation:
Max (X) = Highest value of X
Mean
The software calculates this statistic by using the following equation:
Std Dev
The software calculates this statistic by using the following equation:
TDSHT3 HDMI Compliance Test Software
155
Operating Basics
Table 53: Result Statistics for Fall Time (Contd.)
Option
Description
Pk-Pk
The software calculates this statistic by using the following equation:
Xppn = Max(X) - Min(X)
Close
Click Close to quit the Result Statistics dialog box.
Source – Clock Jitter
This test allows you to confirm that the TMDS clock does not carry excessive
jitter.
You will need one supported oscilloscope, one differential probe, one DC power
supply 3.3 V, one EDID emulator, and one TPA-P-DI fixture.
1.
On the menu bar, click Tests > Select > Source.
2.
In the clock-data tests pane, select the Clock Jitter check box.
Figure 127: Select Source with Clock Jitter test selected
156
TDSHT3 HDMI Compliance Test Software
Operating Basics
3.
To change the configuration settings, click Tests > Configure. For most
tests, you can use the factory default configuration. However, you can
change the values by using the virtual keyboard or the general purpose knob
on the oscilloscope front panel. Using the File menu, you can also restore
the factory defaults or save and recall your own configuration settings.
Figure 128: Configure Source for Clock Jitter
4.
In the input pane, you have the following option:
Table 54: Input options for Clock Jitter
5.
Configure Parameter
Description
Clock
Clock indicates the oscilloscope channel to which you will
connect the clock input. The available choices are Ch1, Ch2,
Ch3, Ch4, Ref1, Ref2, Ref3, and Ref4.
In the horiz/acq pane, you have the following option:
Table 55: Horiz/ options for Clock Jitter
Configure Parameter
Description
Record Length
In the Rec Length box, enter the desired record length value
for the clock jitter tests.
TDSHT3 HDMI Compliance Test Software
157
Operating Basics
6.
In the CRU pane, you have the following option:
Table 56: CRU options for Clock Jitter
7.
Configure Parameter
Description
CRU
The CRU list allows you to configure the CRU. The available
choices are PLL, Raw, and Ideal. The default value is first
order PLL and is used for compliance testing. Raw and Ideal
are used for analysis.
Define
The Define is available only when PLL is selected.
In the reference levels pane, you have the following options:
Table 57: Reference Levels options for Clock Jitter
158
Configure Parameter
Description
Units
The Units list allows you to set the reference level units to
either Per (%) or Abs.
Per (%) indicates that the reference levels are a percentage of
the Vswing value.
Abs indicates that the reference levels are absolute voltage
values.
Hysteresis
In the Hysteresis box, enter the desired hysteresis percent
value. The default value is 10 percent.
The hysteresis range is between 2 percent and 10 percent.
Mid
In the Mid box, enter the desired mid reference voltage value.
The default value is 50 percent.
TDSHT3 HDMI Compliance Test Software
Operating Basics
8.
To connect the DUT, click Tests > Connect.
Figure 129: Connect pane for Clock Jitter
TDSHT3 HDMI Compliance Test Software
159
Operating Basics
9.
Ensure that your signal in the oscilloscope display is similar to the sample
signal. Click View Waveform to display a sample of the expected signal. If
the displays are not similar, go back and check your configuration and
connections.
Figure 130: Waveform of Clock Jitter
10. Click Run Test to perform the test. The TDSHT3 HDMI Compliance Test
Software sets up the oscilloscope and the test runs, displaying a progress
indicator.
160
TDSHT3 HDMI Compliance Test Software
Operating Basics
11. If you have run the clock jitter test successfully, the software makes Result
available automatically and displays the clock jitter plot. For more
information on the clock jitter plot, refer to the online help.
Figure 131: Clock Jitter plot
TDSHT3 HDMI Compliance Test Software
161
Operating Basics
12. Click Half Screen to view the clock jitter plot in half screen. You can also
view both the result summary of the test and the report configuration in the
result pane as shown in the following diagram. For more information on
result summary and report configuration, refer to the online help.
Figure 132: Source Clock Jitter plot and Result
162
TDSHT3 HDMI Compliance Test Software
Operating Basics
13. In the result summary pane, click Result Details to display the details of the
result. For more information on the result details, refer to the online help.
Figure 133: Result Details for Clock Jitter
14. In the Result Details dialog box, click Result Statistics to display statistics
based on the tests. For more information on result statistics, refer to the
online help.
Figure 134: Result Statistics for Clock Jitter
TDSHT3 HDMI Compliance Test Software
163
Operating Basics
Source – Over/Undershoot V-H (Voltage-High)
This test allows you to confirm that the differential TMDS signals do not have
overshoot or undershoot beyond that allowed by the specified limits.
You will need one supported oscilloscope, one differential probe, one DC power
supply 3.3 V, one EDID emulator, and one TPA-P-DI fixture.
1.
On the menu bar, click Tests > Select > Source.
2.
In the clock-data tests pane, select the Over/Undershoot V-H check box.
Figure 135: Select Source with Over/Undershoot V-H test selected
3.
164
To change the configuration settings, click Tests > Configure. For most
tests, you can use the factory default configuration. However, you can
change the values by using the virtual keyboard or the general purpose knob
on the oscilloscope front panel. Using the File menu, you can also restore
the factory defaults or save and recall your own configuration settings.
TDSHT3 HDMI Compliance Test Software
Operating Basics
Figure 136: Configure Source for Over/Undershoot V-H
4.
In the input pane, you have the following options:
Table 58: Input options for Over/Undershoot V-H
5.
Configure Parameter
Description
Clock
Clock indicates the oscilloscope channel to which you will
connect the clock input. The available choices are Ch1, Ch2,
Ch3, Ch4, and Not Conn.
Data
Data indicates the oscilloscope channel to which you will
connect the data input. The available choices are Ch1, Ch2,
Ch3, Ch4, and Not Conn.
In the Horiz/Acq pane, you have the following option:
Table 59: Horiz/Acq options for Over/Undershoot V-H
Configure Parameter
Description
# of Acqs
In the # of Acqs box, enter the desired number of acquisitions
that are required for the test. The default value is 10 K.
TDSHT3 HDMI Compliance Test Software
165
Operating Basics
6.
In the tbit pane, you have the following options:
Table 60: Tbit options for Over/Undershoot V-H
7.
Configure Parameter
Description
# of Avgs
In the # of Avgs box, enter the desired number of periods that
are considered to calculate Tbit. The default value is 100.
Re-calculate
Click Re-calculate to recalculate the Tbit value.
Existing Value
Click Existing Value to use the previously calculated Tbit
value.
To connect the DUT, click Tests > Connect.
Figure 137: Connect pane for Over/Undershoot V-H
8.
166
Ensure that your signal in the oscilloscope display is similar to the sample
signal. Click View Waveform to display a sample of the expected signal. If
the displays are not similar, go back and check your configuration and
connections.
TDSHT3 HDMI Compliance Test Software
Operating Basics
Figure 138: Waveform of Over/Undershoot V-H
9.
Click Run Test to perform the test. The TDSHT3 HDMI Compliance Test
Software sets up the oscilloscope and the test runs, displaying a progress
indicator.
TDSHT3 HDMI Compliance Test Software
167
Operating Basics
10. The software makes Result available automatically and displays the result
summary. You can also view the report configuration details in the result
pane.
Figure 139: Result for Over/Undershoot V-H
Table 61: Result for Over/Undershoot V-H
168
Option
Description
Test Name
The Test Name box displays the test id, test name, and signal
name - CK (Clock), D (Data).
Status
Status indicates the status of the test as Pass, Fail, or Error.
Result Details
Click Result Details to display the details of the result.
TDSHT3 HDMI Compliance Test Software
Operating Basics
Report Configuration pane
You can set the report details to identify and generate the report automatically.
You can set a default report file.
Figure 140: Report Configuration for Over/Undershoot V-H
In the report configuration pane, you can configure the following parameters:
Table 62: Report Configuration options for
Over/Undershoot V-H
Category
Description
Pair (CK, D)
The Pair (CK, D) list allows you to specify the unique pairs on
which the test is conducted.
Resolution
The Resolution box allows you to specify the resolution on
which the test is conducted.
Refresh Rate
The Refresh Rate box allows you to specify the refresh rate at
which the test is conducted.
Report File
The Report File box allows you to specify the path and the file
where the generated report will be saved. However, for the
selected speed, a default file name and path already exists.
Enable Preview
Select the Enable Preview check box to preview the report
automatically after generation.
Clear Report
Click Clear Report to clear all the results and records of the
earlier tests.
Advanced
Click Advanced to open the Report Configuration
Advanced dialog box.
TDSHT3 HDMI Compliance Test Software
169
Operating Basics
11. In the result summary pane, click Result Details to display the details of the
result.
Figure 141: Result Details for Over/Undershoot V-H
Table 63: Result Details for Over/Undershoot V-H
Option
Description
Test Name
The Test Name box displays the test id, test name, and signal
name - CK (Clock), D (Data).
Spec Range
The Spec Range box displays the HDMI standards and test
specifications limit for the test.
Meas Value
The Meas Value box displays the measured value.
Result
The Result box displays the status of the test as Pass, Fail, or
Error.
Remarks/Comments
The Remarks/Comments box displays the relevant details, for
example, Tbit, and Margin. If the test could not be run, then an
error code appears.
Close
Click Close to quit the Result Details dialog box.
Source – Over/Undershoot V-L (Voltage-Low)
This test allows you to confirm that the differential TMDS signals do not have
overshoot or undershoot beyond that allowed by the specified limits.
You will need one supported oscilloscope, one differential probe, one DC power
supply 3.3 V, one EDID emulator, and one TPA-P-DI fixture.
1.
170
On the menu bar, click Tests > Select > Source.
TDSHT3 HDMI Compliance Test Software
Operating Basics
2.
In the clock-data tests pane, select the Over/Undershoot V-L check box.
Figure 142: Select Source for Over/Undershoot V-L
3.
To change the configuration settings, click Tests > Configure. For most
tests, you can use the factory default configuration. However, you can
change the values by using the virtual keyboard or the general purpose knob
on the oscilloscope front panel. Using the File menu, you can also restore
the factory defaults or save and recall your own configuration settings.
Figure 143: Configure Source for Over/Undershoot V-L
TDSHT3 HDMI Compliance Test Software
171
Operating Basics
4.
In the Input pane, you have the following options:
Table 64: Input options for Over/Undershoot V-L
5.
Configure Parameter
Description
Clock
Clock indicates the oscilloscope channel to which you will
connect the clock input. The available choices are Ch1, Ch2,
Ch3, Ch4, and Not Conn.
Data
Data indicates the oscilloscope channel to which you will
connect the data input. The available choices are Ch1, Ch2,
Ch3, Ch4, and Not Conn.
In the Horiz/Acq pane, you have the following option:
Table 65: Horiz/Acq options for Over/Undershoot V-L
6.
Configure Parameter
Description
# of Acqs
In the # of Acqs box, enter the desired number of acquisitions
that are required for the test. The default value is 10 K.
In the Tbit pane, you have the following options:
Table 66: Tbit options for Over/Undershoot V-L
172
Configure Parameter
Description
# of Avgs
In the # of Avgs box, enter the desired number of periods that
are considered to calculate Tbit. The default value is 100.
Re-calculate
Click Re-calculate to recalculate the Tbit value.
Existing Value
Click Existing Value to use the previously calculated Tbit
value.
TDSHT3 HDMI Compliance Test Software
Operating Basics
7.
To connect the DUT, click Tests > Connect.
Figure 144: Connect pane for Over/Undershoot V-L
8.
Ensure that your signal in the oscilloscope display is similar to the sample
signal. Click View Waveform to display a sample of the expected signal. If
the displays are not similar, go back and check your configuration and
connections.
TDSHT3 HDMI Compliance Test Software
173
Operating Basics
Figure 145: Waveform of Over/Undershoot V-L
9.
174
Click Run Test to perform the test. The TDSHT3 HDMI Compliance Test
Software sets up the oscilloscope and the test runs, displaying a progress
indicator.
TDSHT3 HDMI Compliance Test Software
Operating Basics
10. The software makes Result available automatically and displays the result
summary. You can also view the report configuration details in the result
pane.
Figure 146: Result for Over/Undershoot V-L
Table 67: Result for Over/Undershoot V-L
Option
Description
Test Name
The Test Name box displays the test id, test name, and signal
name - CK (Clock), D (Data).
Status
Status indicates the status of the test as Pass, Fail, or Error.
Result Details
Click Result Details to display the details of the result.
TDSHT3 HDMI Compliance Test Software
175
Operating Basics
Report Configuration pane
You can set the report details to identify and generate the report automatically.
You can set a default report file.
Figure 147: Report Configuration for Over/Undershoot V-L
In the report configuration pane, you can configure the following parameters:
Table 68: Report Configuration options for
Over/Undershoot V-L
176
Category
Description
Pair (CK, D)
The Pair (CK, D) list allows you to specify the unique pairs on
which the test is conducted.
Resolution
The Resolution box allows you to specify the resolution on
which the test is conducted.
Refresh Rate
The Refresh Rate box allows you to specify the refresh rate at
which the test is conducted.
Report File
The Report File box allows you to specify the path and the file
where the generated report will be saved. However, for the
selected speed, a default file name and path already exists.
Enable Preview
Select the Enable Preview check box to preview the report
automatically after generation.
Clear Report
Click Clear Report to clear all the results and records of the
earlier tests.
Advanced
Click Advanced to open the Report Configuration
Advanced dialog box.
TDSHT3 HDMI Compliance Test Software
Operating Basics
11. In the result summary pane, click Result Details to display the details of the
result.
Figure 148: Result Details for Over/Undershoot V-L
Table 69: Result Details for Over/Undershoot V-L
Option
Description
Test Name
The Test Name box displays the test id, test name, and signal
name - CK (Clock), D (Data).
Spec Range
The Spec Range box displays the HDMI standards and test
specifications limit for the test.
Meas Value
The Meas Value box displays the measured value.
Result
The Result box displays the status of the test as Pass, Fail, or
Error.
Remarks/Comments
The Remarks/Comments box displays the relevant details, for
example, Tbit, and Margin. If the test could not be run, then an
error code appears.
Close
Click Close to quit the Result Details dialog box.
Source – Inter-Pair Skew for Clock-Data Tests
This test allows you to confirm that any skew between the differential pairs in the
TMDS portion of the HDMI link does not exceed the limits in the specification.
You will need one supported oscilloscope, two differential probes, one DC power
supply 3.3 V, one EDID emulator, and one TPA-P-DI fixture.
Note: Deskew is recommended before you conduct any skew test.
1.
On the menu bar, click Tests > Select > Source.
TDSHT3 HDMI Compliance Test Software
177
Operating Basics
2.
In the clock-data tests pane, select the Inter-Pair Skew check box.
Figure 149: Select Source with Inter-pair Skew (Clock-Data) test selected
3.
To change the configuration settings, click Tests > Configure. For most
tests, you can use the factory default configuration. However, you can
change the values by using the virtual keyboard or the general purpose knob
on the oscilloscope front panel. Using the File menu, you can also restore
the factory defaults or save and recall your own configuration settings.
Figure 150: Configure Source for Inter-pair Skew (Clock-Data)
178
TDSHT3 HDMI Compliance Test Software
Operating Basics
4.
In the Input pane, you have the following options:
Table 70: Input options for Inter-pair Skew (Clock-Data)
5.
Configure Parameter
Description
Clock
Clock indicates the oscilloscope channel to which you will
connect the clock input. The available choices are Ch1, Ch2,
Ch3, and Ch4.
Data
Data indicates the oscilloscope channel to which you will
connect the data input. The available choices are Ch1, Ch2,
Ch3, and Ch4.
In the Tbit pane, you have the following options:
Table 71: Tbit options for Inter-pair Skew (ClockData)
6.
Configure Parameter
Description
# of Avgs
In the # of Avgs box, enter the desired number of periods that
are considered to calculate Tbit. The default value is 100.
Re-calculate
Click Re-calculate to recalculate the Tbit value.
Existing Value
Click Existing Value to use the previously calculated Tbit
value.
In the reference levels pane, you have the following options:
Table 72: Reference Levels options for Inter-pair
Skew (Clock-Data)
7.
Configure Parameter
Description
Units
The Units list allows you to set the reference level units to
either Per (%) or Abs.
Per (%) indicates that the reference levels are a percentage of
the Vswing value.
Abs indicates that the reference levels are absolute voltage
values.
Hysteresis
In the Hysteresis box, enter the desired hysteresis percent
value. The default value is 10 percent.
Mid
In the Mid box, enter the desired mid reference voltage value.
The default value is 50 percent.
To connect the DUT, click Tests > Connect. Click Deskew to deskew the
test setup.
TDSHT3 HDMI Compliance Test Software
179
Operating Basics
Figure 151: Connect pane for Inter-pair Skew (Clock-Data)
8.
180
Ensure that your signal in the oscilloscope display is similar to the sample
signal. Click View Waveform to display a sample of the expected signal. If
the displays are not similar, go back and check your configuration and
connections.
TDSHT3 HDMI Compliance Test Software
Operating Basics
Figure 152: Waveform of Inter-pair Skew (Clock-Data)
9.
Click Run Test to perform the test. The TDSHT3 HDMI Compliance Test
Software sets up the oscilloscope and the test runs, displaying a progress
indicator.
TDSHT3 HDMI Compliance Test Software
181
Operating Basics
10. The software makes Result available automatically and displays the result
summary. You can also view the report configuration details in the result
pane.
Figure 153: Result for Inter-pair Skew (Clock-Data)
Table 73: Result for Inter-pair Skew (Clock-Data)
182
Option
Description
Test Name
The Test Name box displays the test id, test name, and signal
name - CK (Clock), D (Data).
Status
Status indicates the status of the test as Pass, Fail, or Error.
Result Details
Click Result Details to display the details of the result.
TDSHT3 HDMI Compliance Test Software
Operating Basics
Report Configuration pane
You can set the report details to identify and generate the report automatically.
You can set a default report file.
Figure 154: Report Configuration for Inter-pair Skew
(Clock-Data)
In the report configuration pane, you can configure the following parameters:
Table 74: Report Configuration options for Interpair Skew (Clock-Data)
Category
Description
Pair (CK, D)
The Pair (CK, D) list allows you to specify the unique pairs on
which the test is conducted.
Resolution
The Resolution box allows you to specify the resolution on
which the test is conducted.
Refresh Rate
The Refresh Rate box allows you to specify the refresh rate at
which the test is conducted.
Report File
The Report File box allows you to specify the path and the file
where the generated report will be saved. However, for the
selected speed, a default file name and path already exists.
Enable Preview
Select the Enable Preview check box to preview the report
automatically after generation.
Clear Report
Click Clear Report to clear all the results and records of the
earlier tests.
Advanced
Click Advanced to open the Report Configuration
Advanced dialog box.
TDSHT3 HDMI Compliance Test Software
183
Operating Basics
11. In the result summary pane, click Result Details to display the details of the
result.
Figure 155: Result Details for Inter-pair Skew (Clock-Data)
Table 75: Result Details for Inter-pair Skew
(Clock-Data)
Option
Description
Test Name
The Test Name box displays the test id, test name, and signal
name - CK (Clock), D (Data).
Spec Range
The Spec Range box displays the HDMI standards and test
specifications limit for the test.
Meas Value
The Meas Value box displays the measured value.
Result
The Result box displays the status of the test as Pass, Fail, or
Error.
Remarks/Comments
The Remarks/Comments box displays the relevant details, for
example, Tbit, and Margin. If the test could not be run, then an
error code appears.
Close
Click Close to quit the Result Details dialog box.
Source – Clock-Data Tests Select All
This option enables you to run the eye diagram, duty cycle, rise time, fall time,
clock jitter, over/undershoot v-h, over/undershoot v-l, and inter-pair skew test
simultaneously.
You will need one supported oscilloscope, two differential probes, one DC power
supply 3.3 V, one EDID emulator, and one TPA-P-DI fixture.
1.
184
On the menu bar, click Tests > Select > Source.
TDSHT3 HDMI Compliance Test Software
Operating Basics
2.
In the clock-data tests pane, click Select All.
Figure 156: Select Source with Multiple tests selected
3.
To change the configuration settings, click Tests > Configure. For most
tests, you can use the factory default configuration. However, you can
change the values by using the virtual keyboard or the general purpose knob
on the oscilloscope front panel. Using the File menu, you can also restore
the factory defaults or save and recall your own configuration settings.
Figure 157: Configure Source for Source Multiple Tests selected
TDSHT3 HDMI Compliance Test Software
185
Operating Basics
4.
In the input pane, you have the following options:
Table 76: Input options for Source Multiple Tests
5.
Configure Parameter
Description
Clock
Clock indicates the oscilloscope channel to which you will
connect the clock input. The available choices are Ch1, Ch2,
Ch3, and Ch4.
Data
Data indicates the oscilloscope channel to which you will
connect the data input. The available choices are Ch1, Ch2,
Ch3, and Ch4.
In the horiz/acq pane, you have the following options:
Table 77: Horiz/acq options for Source Multiple
Tests
6.
Configure Parameter
Description
# of Acqs
The # of Acqs box displays the number of acquisitions that
are required for the test. The default value is 10k.
Record Length
In the Rec Length box, enter the desired record length value
for all the selected tests.
In the CRU pane, you have the following option:
Table 78: CRU options for Source Multiple Tests
186
Configure Parameter
Description
CRU
The CRU list allows you to configure the CRU. The available
choices are PLL, Raw, and Ideal. The default value is first
order PLL and is used for compliance testing. Raw and Ideal
are used for analysis.
Define
The Define is available only when PLL is selected.
TDSHT3 HDMI Compliance Test Software
Operating Basics
7.
In the reference levels pane, you have the following options:
Table 79: Reference Levels options for Source
Multiple Tests
8.
Configure Parameter
Description
Units
The Units list allows you to set the reference level units to
either Per (%) or Abs.
Per (%) indicates that the reference levels are a percentage of
the Vswing value.
Abs indicates that the reference levels are absolute voltage
values.
Hysteresis
In the Hysteresis box, enter the desired hysteresis percent
value. The default value is 10 percent.
The hysteresis range is between 2 percent and 10 percent.
High
The High box displays the high reference voltage value. The
default value is 80 percent.
Mid
In the Mid box, enter the desired mid reference voltage value.
The default value is 50 percent.
Low
The Low box displays the low reference voltage value. The
default value is 20 percent.
To connect the DUT, click Tests > Connect.
Figure 158: Connect pane for Source Multiple Tests selected
TDSHT3 HDMI Compliance Test Software
187
Operating Basics
9.
Ensure that your signal in the oscilloscope display is similar to the sample
signal. Click View Waveform to display a sample of the expected signal. If
the displays are not similar, go back and check your configuration and
connections.
Figure 159: Waveform of Source Multiple Tests selected
10. Click Run Test to perform the test. The TDSHT3 HDMI Compliance Test
Software sets up the oscilloscope and the test runs, displaying a progress
indicator.
188
TDSHT3 HDMI Compliance Test Software
Operating Basics
11. If you have run the tests successfully, the software makes Result available
automatically and displays the eye diagram plot and the clock jitter plot. For
more information on the plots, refer to the online help. You can also view
both the result summary of the test and the report configuration in the result
pane as shown in the following diagram:
Figure 160: Result for Source Multiple Tests selected
Table 80: Result for Source Multiple Tests selected
Option
Description
Test Name
The Test Name box displays the test id, test name, and signal
names - CK (Clock), D (Data).
Status
Status indicates the status of the test as Pass, Fail, or Error.
View Jitter Plot
Click View Jitter Plot to view the jitter plot for the clock jitter
test.
View Eye Plot
Click View Eye Plot to view the eye plot for the eye diagram
test.
Result Details
Click Result Details to display the details of the result.
TDSHT3 HDMI Compliance Test Software
189
Operating Basics
Report Configuration pane
You can set the report details to identify and generate the report automatically.
You can set a default report file.
Figure 161: Report Configuration pane for Source Multiple
Tests
In the report configuration pane, you can configure the following parameters:
Table 81: Report Configuration options for Source
Multiple Tests
190
Category
Description
Pair (CK, D)
The Pair (CK, D) list allows you to specify the unique pairs on
which the test is conducted.
Resolution
The Resolution box allows you to specify the resolution on
which the test is conducted.
Refresh Rate
The Refresh Rate box allows you to specify the refresh rate at
which the test is conducted.
Report File
The Report File box allows you to specify the path and the file
where the generated report will be saved. However, for the
selected speed, a default file name and path already exists.
Enable Preview
Select the Enable Preview check box to preview the report
automatically after generation.
Clear Report
Click Clear Report to clear all the results and records of the
earlier tests.
Advanced
Click Advanced to open the Report Configuration
Advanced dialog box.
TDSHT3 HDMI Compliance Test Software
Operating Basics
12. In the result summary pane, click Result Details to display the details of the
result.
Figure 162: Result Details for Source Multiple Tests
Table 82: Result Details for Source Multiple Tests
Option
Description
Test Name
The Test Name box displays the test id, test name, and signal
name - CK (Clock), D (Data).
Spec Range
The Spec Range box displays the HDMI standards and test
specifications limit for the test.
Meas Value
The Meas Value box displays the measured value.
Result
The Result box displays the status of the test as Pass, Fail, or
Error.
Remarks/Comments
The Remarks/Comments box displays the relevant details, for
example, Tbit, and Margin. If the test could not be run, then an
error code appears.
Close
Click Close to quit the Result Details dialog box.
View Jitter Plot
Click View Jitter Plot to display the jitter plot for the clock jitter
test.
View Eye Plot
Click View Eye Plot to display the eye plot for the eye diagram
test.
Result Statistics
Click Result Statistics to display statistics based on the tests.
TDSHT3 HDMI Compliance Test Software
191
Operating Basics
13. In the Result Details dialog box, click Result Statistics to display statistics
based on the tests.
Figure 163: Result Details for Source Multiple Tests
The software calculates statistics for each selected test, and logs the statistics on a
cycle-by-cycle basis in a large waveform. The standard statistics are for the
Maximum, Minimum, Mean, Standard Deviation, and Population.
Table 83: Result Details for Source Multiple Tests
192
Option
Description
Test Name
The Test Name box displays the test id, test name, and signal names - CK (Clock), D
(Data).
Population
The software calculates this statistic by using the following equation:
Population (X) = N
Min
The software calculates this statistic by using the following equation:
Min (X) = Lowest value of X
Max
The software calculates this statistic by using the following equation:
Max (X) = Highest value of X
Mean
The software calculates this statistic by using the following equation:
Std Dev
The software calculates this statistic by using the following equation:
TDSHT3 HDMI Compliance Test Software
Operating Basics
Table 83: Result Details for Source Multiple Tests
(Contd.)
Option
Description
Pk-Pk
The software calculates this statistic by using the following equation:
Xppn = Max(X) - Min(X)
Close
Click Close to quit the Result Statistics dialog box.
Note: Perform similar steps as mentioned in this procedure to test Single-Ended
Select All.
Source – Inter-Pair Skew for Data-Data Tests
This test allows you to confirm that any skew between the differential pairs in the
TMDS portion of the HDMI link does not exceed the limits in the specification.
You will need one supported oscilloscope, two differential probes, one DC power
supply 3.3 V, one EDID emulator, and one TPA-P-DI fixture.
Note: Deskew is recommended before you conduct any skew test.
1.
On the menu bar, click Tests > Select > Source.
2.
In the data-data tests pane, select the Inter-Pair Skew check box.
Figure 164: Select Source with Inter-Pair Skew (Data-Data) test selected
TDSHT3 HDMI Compliance Test Software
193
Operating Basics
3.
To change the configuration settings, click Tests > Configure. For most
tests, you can use the factory default configuration. However, you can
change the values by using the virtual keyboard or the general purpose knob
on the oscilloscope front panel. Using the File menu, you can also restore
the factory defaults or save and recall your own configuration settings.
Figure 165: Configure Source for Inter-Pair Skew (Data-Data)
4.
In the Input pane, you have the following options:
Table 84: Input options for Inter-Pair Skew (DataData)
194
Configure Parameter
Description
Data A
Data A indicates the oscilloscope channel to which you will
connect the data input. The available choices are Ch1, Ch2,
Ch3, and Ch4.
Data B
Data B indicates the oscilloscope channel to which you will
connect the data input. The available choices are Ch1, Ch2,
Ch3, and Ch4.
Clock
Clock indicates the oscilloscope channel to which you will
connect the clock input. The available choices are Ch1, Ch2,
Ch3, and Ch4.
TDSHT3 HDMI Compliance Test Software
Operating Basics
5.
In the Tbit pane, you have the following options:
Table 85: Tbit options for Inter-Pair Skew (DataData)
6.
Configure Parameter
Description
# of Avgs
In the # of Avgs box, enter the desired number of periods that
are considered to calculate Tbit. The default value is 100.
Re-calculate
Click Re-calculate to recalculate the Tbit value.
Existing Value
Click Existing Value to use the previously calculated Tbit
value.
In the reference levels pane, you have the following options:
Table 86: Reference Levels options for Inter-Pair
Skew (Data-Data)
Configure Parameter
Description
Units
The Units list allows you to set the reference level units to
either Per (%) or Abs.
Per (%) indicates that the reference levels are a percentage of
the Vswing value.
Abs indicates that the reference levels are absolute voltage
values.
Hysteresis
In the Hysteresis box, enter the desired hysteresis percent
value. The default value is 10 percent.
Mid
In the Mid box, enter the desired mid reference voltage value.
The default value is 50 percent.
TDSHT3 HDMI Compliance Test Software
195
Operating Basics
7.
To connect the DUT, click Tests > Connect.
Figure 166: Connect pane for Inter-Pair Skew (Data-Data)
8.
196
Ensure that your signal in the oscilloscope display is similar to the sample
signal. Click View Waveform to display a sample of the expected signal. If
the displays are not similar, go back and check your configuration and
connections. The waveform shown here is for the re-calculate Tbit option.
Click Run Test to run the test. The Confirm dialog box appears. Click
Continue to continue to run the test. Go to step 10.
TDSHT3 HDMI Compliance Test Software
Operating Basics
Figure 167: Waveform of Inter-Pair Skew (Data-Data)
9.
If you have selected existing Tbit value, then click View Waveform to get a
different waveform on your display. Ensure that your signal in the
oscilloscope display is similar to the sample signal.
10. Click Run Test to run the test. The TDSHT3 HDMI Compliance Test
Software sets up the oscilloscope and the test runs, displaying a progress
indicator.
TDSHT3 HDMI Compliance Test Software
197
Operating Basics
11. The software makes Result available automatically and displays the result
summary. You can also view the report configuration details in the result
pane.
Figure 168: Result for Inter-Pair Skew (Data-Data)
Table 87: Result for Inter-Pair Skew (Data-Data Tests)
198
Option
Description
Test Name
The Test Name box displays the test id, test name, and signal
name - D (Data), D (Data).
Status
Status indicates the status of the test as Pass, Fail, or Error.
Result Details
Click Result Details to display the details of the result.
TDSHT3 HDMI Compliance Test Software
Operating Basics
Report Configuration pane
You can set the report details to identify and generate the report automatically.
You can set a default report file.
Figure 169: Report Configuration pane for Inter-Pair Skew
(Data-Data)
In the report configuration pane, you can configure the following parameters:
Table 88: Report Configuration options for InterPair Skew (Data-Data)
Category
Description
Pair (CK, D)
The Pair (CK, D) list allows you to specify the unique pairs on
which the test is conducted.
Resolution
The Resolution box allows you to specify the resolution on
which the test is conducted.
Refresh Rate
The Refresh Rate box allows you to specify the refresh rate at
which the test is conducted.
Report File
The Report File box allows you to specify the path and the file
where the generated report will be saved. However, for the
selected speed, a default file name and path already exists.
Enable Preview
Select the Enable Preview check box to preview the report
automatically after generation.
Clear Report
Click Clear Report to clear all the results and records of the
earlier tests.
Advanced
Click Advanced to open the Report Configuration
Advanced dialog box.
TDSHT3 HDMI Compliance Test Software
199
Operating Basics
12. In the result summary pane, click Result Details to display the details of the
result.
Figure 170: Result Details for Inter-Pair Skew (Data-Data)
Table 89: Result Details for Inter-Pair Skew (DataData)
200
Option
Description
Test Name
The Test Name box displays the test id, test name, and signal
name - D (Data), D (Data).
Spec Range
The Spec Range box displays the HDMI standards and test
specifications limit for the test.
Meas Value
The Meas Value box displays the measured value.
Result
The Result box displays the status of the test as Pass, Fail, or
Error.
Remarks/Comments
The Remarks/Comments box displays the relevant details, for
example, Tbit, and Margin. If the test could not be run, then an
error code appears.
Close
Click Close to quit the Result Details dialog box.
TDSHT3 HDMI Compliance Test Software
Operating Basics
Source – Intra-Pair Skew
This test allows you to confirm that any skew within any one differential pair in
the TMDS portion of the HDMI link does not exceed the limits in the
specification.
You will need one supported oscilloscope, two single-ended probes, one DC
power supply 3.3 V, one EDID emulator, and one TPA-P-SE fixture.
Note: Deskew is recommended before you conduct any skew test.
1.
On the menu bar, click Tests > Select > Source.
2.
In the single-ended tests pane, select the Intra-Pair Skew check box.
Figure 171: Select Source with Source Intra-Pair Skew test selected
3.
To change the configuration settings, click Tests > Configure. For most
tests, you can use the factory default configuration. However, you can
change the values by using the virtual keyboard or the general purpose knob
on the oscilloscope front panel. Using the File menu, you can also restore
the factory defaults or save and recall your own configuration settings.
TDSHT3 HDMI Compliance Test Software
201
Operating Basics
Figure 172: Configure Source for Intra-Pair Skew
4.
In the input pane, you have the following options:
Table 90: Input options for Source Intra-Pair Skew
5.
Configure Parameter
Description
Input
Input+ indicates the oscilloscope channel to which you will
connect the positive input. The available choices are Ch1,
Ch2, Ch3, and Ch4.
Input
Input- indicates the oscilloscope channel to which you will
connect the negative input. The available choices are Ch1,
Ch2, Ch3, and Ch4.
Clock
Clock indicates the oscilloscope channel to which you will
connect the clock input. The available choices are Ch1, Ch2,
Ch3, and Ch4.
In the horiz/acq pane, you have the following option:
Table 91: Horiz/Acq option for Source Intra-Pair
Skew
202
Configure Parameter
Description
# of Acqs
In the # of Acqs box, enter the desired number of acquisitions
that are required for the test. The default value is 10 K.
TDSHT3 HDMI Compliance Test Software
Operating Basics
6.
In the Tbit pane, you have the following options:
Table 92: Tbit options for Source Intra-Pair Skew
7.
Configure Parameter
Description
# of Avgs
In the # of Avgs box, enter the desired number of periods that
are considered to calculate Tbit. The default value is 100.
Re-calculate
Click Re-calculate to recalculate the Tbit value.
Existing Value
Click Existing Value to use the previously calculated Tbit
value.
To connect the DUT, click Tests > Connect.
Figure 173: Connect pane for Source Intra-Pair Skew
TDSHT3 HDMI Compliance Test Software
203
Operating Basics
8.
Ensure that your signal in the oscilloscope display is similar to the sample
signal. Click View Waveform to display a sample of the expected signal. If
the displays are not similar, go back and check your configuration and
connections. The waveform shown here is for the re-calculate Tbit option.
Click Run Test to run the test. The Confirm dialog box appears. Click
Continue to continue to run the test. Go to step 10.
Figure 174: Waveform of Source Intra-Pair Skew
9.
If you have selected existing Tbit value, then click View Waveform to get a
different waveform on your display. Ensure that your signal in the
oscilloscope display is similar to the sample signal.
10. Click Run Test to run the test. The TDSHT3 HDMI Compliance Test
Software sets up the oscilloscope and the test runs, displaying a progress
indicator.
204
TDSHT3 HDMI Compliance Test Software
Operating Basics
11. The software makes Result available automatically and displays the result
summary. You can also view the report configuration details in the result
pane.
Figure 175: Result for Source Intra-Pair Skew
Table 93: Result for Source Intra-Pair Skew
Option
Description
Test Name
The Test Name box displays the test id, test name, and signal
name - D0+ (Data), D0- (Data).
Status
Status indicates the status of the test as Pass, Fail, or Error.
Result Details
Click Result Details to display the details of the result.
TDSHT3 HDMI Compliance Test Software
205
Operating Basics
Report Configuration pane
You can set the report details to identify and generate the report automatically.
You can set a default report file.
Figure 176: Report Configuration for Source Intra-Pair Skew
In the report configuration pane, you can configure the following parameters:
Table 94: Report Configuration options for Source
Intra-Pair Skew
206
Category
Description
Pair (CK, D)
The Pair (CK, D) list allows you to specify the unique pairs on
which the test is conducted.
Resolution
The Resolution box allows you to specify the resolution on
which the test is conducted.
Refresh Rate
The Refresh Rate box allows you to specify the refresh rate at
which the test is conducted.
Report File
The Report File box allows you to specify the path and the file
where the generated report will be saved. However, for the
selected speed, a default file name and path already exists.
Enable Preview
Select the Enable Preview check box to preview the report
automatically after generation.
Clear Report
Click Clear Report to clear all the results and records of the
earlier tests.
Advanced
Click Advanced to open the Report Configuration
Advanced dialog box.
TDSHT3 HDMI Compliance Test Software
Operating Basics
12. In the result summary pane, click Result Details to display the details of the
result.
Figure 177: Result Details for Source Intra-Pair Skew
Table 95: Result Details for Source Intra-Pair Skew
Option
Description
Test Name
The Test Name box displays the test id, test name, and signal
name - D0+ (Data), D0- (Data).
Spec Range
The Spec Range box displays the HDMI standards and test
specifications limit for the test.
Meas Value
The Meas Value box displays the measured value.
Result
The Result box displays the status of the test as Pass, Fail, or
Error.
Remarks/Comments
The Remarks/Comments box displays the relevant details, for
example, Tbit, and Margin. If the test could not be run, then an
error code appears.
Close
Click Close to quit the Result Details dialog box.
Source – Low Amplitude +
This test allows you to confirm that DC voltage levels on the HDMI link are
within specified limits for each TMDS signal.
You will need one supported oscilloscope, one single-ended probe, one DC
power supply 3.3 V, one EDID emulator, and one TPA-P-SE fixture.
1.
On the menu bar, click Tests > Select > Source.
2.
In the single-ended tests pane, select the Low Amplitude + check box.
TDSHT3 HDMI Compliance Test Software
207
Operating Basics
Figure 178: Select Source with Low Amplitude + test selected
3.
To change the configuration settings, click Tests > Configure. For most
tests, you can use the factory default configuration. However, you can
change the values by using the virtual keyboard or the general purpose knob
on the oscilloscope front panel. Using the File menu, you can also restore
the factory defaults or save and recall your own configuration settings.
Figure 179: Configure Source for Low Amplitude +
208
TDSHT3 HDMI Compliance Test Software
Operating Basics
4.
In the input pane, you have the following options:
Table 96: Input options for Low Amplitude +
5.
Configure Parameter
Description
Input+
Input+ indicates the oscilloscope channel to which you will
connect the positive input. The available choices are Ch1,
Ch2, Ch3, and Ch4.
Clock
Clock indicates the oscilloscope channel to which you will
connect the clock input. The available choices are Ch1, Ch2,
Ch3, and Ch4.
In the horiz/acq pane, you have the following option:
Table 97: Horiz/Acq option for Low Amplitude +
6.
Configure Parameter
Description
# of Acqs
In the # of Acqs box, enter the desired number of acquisitions
that are required for the test. The default value is 10 K.
In the Tbit pane, you have the following options:
Table 98: Tbit options for Low Amplitude +
7.
Configure Parameter
Description
# of Avgs
In the # of Avgs box, enter the desired number of periods that
are considered to calculate Tbit. The default value is 100.
Re-calculate
Click Re-calculate to recalculate the Tbit value.
Existing Value
Click Existing Value to use the previously calculated Tbit
value.
In the voltage pane, you have the following option:
Table 99: Voltage option for Low Amplitude +
Configure Parameter
Description
AVcc
In the AVcc box, enter the desired voltage value. The default
value is 3.3 V.
TDSHT3 HDMI Compliance Test Software
209
Operating Basics
8.
To connect the DUT, click Tests > Connect.
Figure 180: Connect pane for Low Amplitude +
9.
210
Ensure that your signal in the oscilloscope display is similar to the sample
signal. Click View Waveform to display a sample of the expected signal. If
the displays are not similar, go back and check your configuration and
connections. The waveform shown here is for the re-calculate Tbit option.
Click Run Test to run the test. The Confirm dialog box appears. Click
Continue to continue to run the test. Go to step 11.
TDSHT3 HDMI Compliance Test Software
Operating Basics
Figure 181: Waveform of Source – Low Amplitude + test
10. If you have selected existing Tbit value, then click View Waveform to get a
different waveform on your display. Ensure that your signal in the
oscilloscope display is similar to the sample signal.
11. Click Run Test to run the test. The TDSHT3 HDMI Compliance Test
Software sets up the oscilloscope and the test runs, displaying a progress
indicator.
TDSHT3 HDMI Compliance Test Software
211
Operating Basics
12. The software makes Result available automatically and displays the result
summary. You can also view the report configuration details in the result
pane.
Figure 182: Result for Low Amplitude +
Table 100: Result for Low Amplitude +
212
Option
Description
Test Name
The Test Name box displays the test id, test name, and signal
name - D0+ (Data), CK (Clock).
Status
Status indicates the status of the test as Pass, Fail, or Error.
Result Details
Click Result Details to display the details of the result.
TDSHT3 HDMI Compliance Test Software
Operating Basics
Report Configuration pane
You can set the report details to identify and generate the report automatically.
You can set a default report file.
Figure 183: Report Configuration for Low Amplitude +
In the report configuration pane, you can configure the following parameters:
Table 101: Report Configuration options for Low
Amplitude +
Category
Description
Pair (CK, D)
The Pair (CK, D) list allows you to specify the unique pairs on
which the test is conducted.
Resolution
The Resolution box allows you to specify the resolution on
which the test is conducted.
Refresh Rate
The Refresh Rate box allows you to specify the refresh rate at
which the test is conducted.
Report File
The Report File box allows you to specify the path and the file
where the generated report will be saved. However, for the
selected speed, a default file name and path already exists.
Enable Preview
Select the Enable Preview check box to preview the report
automatically after generation.
Clear Report
Click Clear Report to clear all the results and records of the
earlier tests.
Advanced
Click Advanced to open the Report Configuration
Advanced dialog box.
TDSHT3 HDMI Compliance Test Software
213
Operating Basics
13. In the result summary pane, click Result Details to display the details of the
result.
Figure 184: Results Details for Low Amplitude +
Table 102: Result Details for Low Amplitude +
Option
Description
Test Name
The Test Name box displays the test id, test name, and signal
name - D0+ (Data), CK (Clock).
Spec Range
The Spec Range box displays the HDMI standards and test
specifications limit for the test.
Meas Value
The Meas Value box displays the measured value.
Result
The Result box displays the status of the test as Pass, Fail, or
Error.
Remarks/Comments
The Remarks/Comments box displays the relevant details, for
example, Tbit, and Margin. If the test could not be run, then an
error code appears.
Close
Click Close to quit the Result Details dialog box.
Source – Low Amplitude This test allows you to confirm that DC voltage levels on the HDMI link are
within specified limits for each TMDS signal.
You will need one supported oscilloscope, one single-ended probe, one DC
power supply 3.3 V, one EDID emulator, and one TPA-P-SE fixture.
1.
214
On the menu bar, click Tests > Select > Source.
TDSHT3 HDMI Compliance Test Software
Operating Basics
2.
In the single-ended tests pane, select the Low Amplitude - check box.
Figure 185: Select Source with Low Amplitude - test selected
3.
To change the configuration settings, click Tests > Configure. For most
tests, you can use the factory default configuration. However, you can
change the values by using the virtual keyboard or the general purpose knob
on the oscilloscope front panel. Using the File menu, you can also restore
the factory defaults or save and recall your own configuration settings.
Figure 186: Configure Source for Low Amplitude -
TDSHT3 HDMI Compliance Test Software
215
Operating Basics
4.
In the input pane, you have the following options:
Table 103: Input options for Low Amplitude -
5.
Configure Parameter
Description
Input–
Input- indicates the oscilloscope channel to which you will
connect the positive input. The available choices are Ch1,
Ch2, Ch3, and Ch4.
Clock
Clock indicates the oscilloscope channel to which you will
connect the clock input. The available choices are Ch1, Ch2,
Ch3, and Ch4.
In the horiz/acq pane, you have the following option:
Table 104: Horiz/acq option for Low Amplitude -
6.
Configure Parameter
Description
# of Acqs
In the # of Acqs box, enter the desired number of acquisitions
that are required for the test. The default value is 10 K.
In the Tbit pane, you have the following options:
Table 105: Tbit options for Low Amplitude -
7.
Configure Parameter
Description
# of Avgs
In the # of Avgs box, enter the desired number of periods that
are considered to calculate Tbit. The default value is 100.
Re-calculate
Click Re-calculate to recalculate the Tbit value.
Existing Value
Click Existing Value to use the previously calculated Tbit
value.
In the voltage pane, you have the following option:
Table 106: Voltage option for Low Amplitude -
216
Configure Parameter
Description
AVcc
In the AVcc box, enter the desired voltage value. The default
value is 3.3 V.
TDSHT3 HDMI Compliance Test Software
Operating Basics
8.
To connect the DUT, click Tests > Connect.
Figure 187: Connect pane for Low Amplitude -
9.
Ensure that your signal in the oscilloscope display is similar to the sample
signal. Click View Waveform to display a sample of the expected signal. If
the displays are not similar, go back and check your configuration and
connections. The waveform shown here is for the re-calculate Tbit option.
Click Run Test to run the test. The Confirm dialog box appears. Click
Continue to continue to run the test. Go to step 11.
TDSHT3 HDMI Compliance Test Software
217
Operating Basics
Figure 188: Waveform of Low Amplitude -
10. If you have selected existing Tbit value, then click View Waveform to get a
different waveform on your display. Ensure that your signal in the
oscilloscope display is similar to the sample signal.
11. Click Run Test to run the test. The TDSHT3 HDMI Compliance Test
Software sets up the oscilloscope and the test runs, displaying a progress
indicator.
218
TDSHT3 HDMI Compliance Test Software
Operating Basics
12. The software makes Result available automatically and displays the result
summary. You can also view the report configuration details in the result
pane.
Figure 189: Result for Low Amplitude -
Table 107: Result for Low Amplitude Option
Description
Test Name
The Test Name box displays the test id, test name, and signal
name - D0- (Data), CK (Clock).
Status
Status indicates the status of the test as Pass, Fail, or Error.
Result Details
Click Result Details to display the details of the result.
TDSHT3 HDMI Compliance Test Software
219
Operating Basics
Report Configuration pane
You can set the report details to identify and generate the report automatically.
You can set a default report file.
Figure 190: Report Configuration for Low Amplitude -
In the report configuration pane, you can configure the following parameters:
Table 108: Report Configuration options for Low
Amplitude -
220
Category
Description
Pair (CK, D)
The Pair (CK, D) list allows you to specify the unique pairs on
which the test is conducted.
Resolution
The Resolution box allows you to specify the resolution on
which the test is conducted.
Refresh Rate
The Refresh Rate box allows you to specify the refresh rate at
which the test is conducted.
Report File
The Report File box allows you to specify the path and the file
where the generated report will be saved. However, for the
selected speed, a default file name and path already exists.
Enable Preview
Select the Enable Preview check box to preview the report
automatically after generation.
Clear Report
Click Clear Report to clear all the results and records of the
earlier tests.
Advanced
Click Advanced to open the Report Configuration
Advanced dialog box.
TDSHT3 HDMI Compliance Test Software
Operating Basics
13. In the result summary pane, click Result Details to display the details of the
result.
Figure 191: Result Details for Low Amplitude -
Table 109: Result Details for Low Amplitude Option
Description
Test Name
The Test Name box displays the test id, test name, and signal
name - D0- (Data), CK (Clock).
Spec Range
The Spec Range box displays the HDMI standards and test
specifications limit for the test.
Meas Value
The Meas Value box displays the measured value.
Result
The Result box displays the status of the test as Pass, Fail, or
Error.
Remarks/Comments
The Remarks/Comments box displays the relevant details, for
example, Tbit, and Margin. If the test could not be run, then an
error code appears.
Close
Click Close to quit the Result Details dialog box.
Sink – Min/Max-Diff Swing Tolerance
This test allows you to confirm that the Sink correctly supports TMDS
differential voltages at minimum levels.
You will need one supported oscilloscope, one digital timing generator (DTG),
one differential probe, one DC power supply, eight SMA cables, one GPIB
controller, and one TPA-P-TDR fixture.
1.
On the menu bar, click Tests > Select > Sink.
TDSHT3 HDMI Compliance Test Software
221
Operating Basics
2.
In the differential tests pane, select the Min/Max-Diff Swing Tolerance
check box.
Figure 192: Select Sink with Min/Max-Diff Swing Tolerance test selected
3.
To change the configuration settings, click Tests > Configure. For most
tests, you can use the factory default configuration. However, you can
change the values by using the virtual keyboard or the general purpose knob
on the oscilloscope front panel. Using the File menu, you can also restore
the factory defaults or save and recall your own configuration settings.
Figure 193: Configure Sink for Min/Max-Diff Swing Tolerance
222
TDSHT3 HDMI Compliance Test Software
Operating Basics
4.
In the input pane, you have the following option:
Table 110: Input option for Min/Max-Diff Swing
Tolerance
5.
Configure Parameter
Description
Input
Input indicates the oscilloscope channel to which you will
connect the input. The available choices are Ch1, Ch2, Ch3,
and Ch4.
Vicm indicates common mode voltage. In the Vicm pane, you have the
following option:
Table 111: Vicm option for Min/Max-Diff Swing
Tolerance
6.
Configure Parameter
Description
Vicm
In the Vicm list, you can configure Vicm for either 3.0 V or
3.3 V. It is recommended that you conduct the test by using
both the Vicm values.
In the DTG pane, you have the following option:
Table 112: DTG option for Min/Max-Diff Swing
Tolerance
Configure Parameter
Description
Pattern Path
In the Pattern Path box, enter the absolute path of the pattern
file present in the DTG.
TDSHT3 HDMI Compliance Test Software
223
Operating Basics
7.
In the outputs pane, you have the following options:
Table 113: Outputs options for Min/Max-Diff Swing
Tolerance
8.
Configure Parameter
Description
Clock
The Clock list allows you to configure the output. The
available choices are A1, A2, B1, B2, C1, C2, D1, and D2.
Data0
The Data0 list allows you to configure the output. The
available choices are A1, A2, B1, B2, C1, C2, D1, and D2.
Data1
The Data1 list allows you to configure the output. The
available choices are A1, A2, B1, B2, C1, C2, D1, and D2.
Data2
The Data2 list allows you to configure the output. The
available choices are A1, A2, B1, B2, C1, C2, D1, and D2.
To connect the DUT, click Tests > Connect.
Figure 194: Connect pane for Min/Max-Diff Swing Tolerance
224
TDSHT3 HDMI Compliance Test Software
Operating Basics
9.
To configure and test the GPIB connection to the DTG, click Signal
Sources. The Signal Sources Setup dialog box appears.
Figure 195: Signal Sources Setup for Min/Max-Diff Swing
Tolerance
10. In the select pane, click GPIB. Configure the appropriate GPIB board
number.
11. To test both the connection and the DTG GPIB configuration, click Test
Conn.
12. Because no signal is connected to the oscilloscope, you cannot view the
waveform for the min/max-diff swing tolerance test.
Note: To run the test successfully, ensure that the Bus Timing parameter is set to
2 µsec on your GPIB board configuration. For more details, refer to the section
on Remote Control Caution.
13. Click Run Test to perform the test. The TDSHT3 HDMI Compliance Test
Software sets up the oscilloscope and conducts the test. Follow the
instructions in the dialog box. Depending on your answer, a series of dialog
boxes may prompt you for your input.
TDSHT3 HDMI Compliance Test Software
225
Operating Basics
14. If you successfully run the test, the software makes Result available
automatically and displays the result summary. You can also view the report
configuration details in the result pane.
Figure 196: Result for Min/Max-Diff Swing Tolerance
Table 114: Result for Min/Max-Diff Swing Tolerance
226
Option
Description
Test Name
The Test Name box displays the test id, test name, and signal
name - D (Data).
Status
Status indicates the status of the test as Pass, Fail, or Error.
Result Details
Click Result Details to display the details of the result.
TDSHT3 HDMI Compliance Test Software
Operating Basics
Report Configuration pane
You can set the report details to identify and generate the report automatically.
You can set a default report file.
Figure 197: Report Configuration for Min/Max-Diff Swing
Tolerance
In the report configuration pane, you can configure the following parameters:
Table 115: Report Configuration options for
Min/Max-Diff Swing Tolerance
Category
Description
Pair (CK, D)
The Pair (CK, D) list allows you to specify the unique pairs on
which the test is conducted.
Resolution
The Resolution box allows you to specify the resolution on
which the test is conducted.
Refresh Rate
The Refresh Rate box allows you to specify the refresh rate at
which the test is conducted.
Report File
The Report File box allows you to specify the path and the file
where the generated report will be saved. However, for the
selected speed, a default file name and path already exists.
Enable Preview
Select the Enable Preview check box to preview the report
automatically after generation.
Clear Report
Click Clear Report to clear all the results and records of the
earlier tests.
Advanced
Click Advanced to open the Report Configuration
Advanced dialog box.
TDSHT3 HDMI Compliance Test Software
227
Operating Basics
15. In the result summary pane, click Result Details to display the details of the
result.
Figure 198: Result Details for Min/Max-Diff Swing Tolerance
Table 116: Result Details for Min/Max-Diff Swing
Tolerance
Option
Description
Test Name
The Test Name box displays the test id, test name, and signal
name - D (Data).
Spec Range
The Spec Range box displays the HDMI standards and test
specifications limit for the test.
Meas Value
The Meas Value box displays the measured value.
Result
The Result box displays the status of the test as Pass, Fail, or
Error.
Remarks/Comments
The Remarks/Comments box displays the relevant details, for
example, Tbit, and Margin. If the test could not be run, then an
error code appears.
Close
Click Close to quit the Result Details dialog box.
Sink – Jitter Tolerance
This test allows you to confirm that the maximum allowed TMDS clock jitter is
supported by the Sink DUT.
You will need one supported oscilloscope, two differential probes, one digital
timing generator (DTG), one arbitrary waveform generator (AWG), one DC
power supply, 12 SMA cables, two bias-tees, one cable emulator, one GPIB
controller, one TPA-R-DI, and one TPA-R-TDR.
228
TDSHT3 HDMI Compliance Test Software
Operating Basics
1.
On the menu bar, click Tests > Select > Sink.
2.
In the differential tests pane, select the Jitter Tolerance check box.
Figure 199: Select Sink with Jitter Tolerance test selected
3.
To change the configuration settings, click Tests > Configure. For most
tests, you can use the factory default configuration. However, you can
change the values by using the virtual keyboard or the general purpose knob
on the oscilloscope front panel. Using the File menu, you can also restore
the factory defaults or save and recall your own configuration settings.
Figure 200: Configure Sink for Jitter Tolerance
TDSHT3 HDMI Compliance Test Software
229
Operating Basics
4.
In the input pane, you have the following options:
Table 117: Input options for Jitter Tolerance
5.
Configure Parameter
Description
Clock
Clock indicates the oscilloscope channel to which you will
connect the clock input. The available choices are Ch1, Ch2,
Ch3, and Ch4.
Data
Data indicates the oscilloscope channel to which you will
connect the data input. The available choices are Ch1, Ch2,
Ch3, and Ch4.
On the Setup tab, in the horiz/acq pane, you have the following option:
Table 118: Horiz/acq option for Jitter Tolerance
6.
Configure Parameter
Description
Record Length
In the Rec Length box, enter the desired record length value
for the jitter tolerance tests.
On the Setup tab, in the frequency pair pane, you have the following option:
Table 119: Frequency Pair option for Jitter
Tolerance
7.
Configure Parameter
Description
Frequency Pair
In the Frequency Pair list, click the desired value for the jitter
tolerance tests. The available choices are D, Ck: 500 KHZ, 10
MHZ and D, Ck: 1 MHZ, 7 MHZ.
On the Setup tab, in the CRU pane, you have the following option:
Table 120: CRU options for Jitter Tolerance
230
Configure Parameter
Description
CRU
The CRU list allows you to configure the CRU. The available
choices are PLL, Raw, and Ideal. The default value is first
order PLL and is used for compliance testing. Raw and Ideal
are used for analysis.
Define
The Define is available only when PLL is selected.
TDSHT3 HDMI Compliance Test Software
Operating Basics
8.
On the Setup tab, you also have the following options:
Table 121: Setup options for Jitter Tolerance
9.
Configure Parameter
Description
Ref Level Units
The Ref Level Units list allows you to set the reference level
units to either Per (%) or Abs.
Per (%) indicates that the reference levels are a percentage of
the Vswing value.
Abs indicates that the reference levels are absolute voltage
values.
Hysteresis
In the Hysteresis box, enter the desired hysteresis percent
value. The default value is 10 percent.
Mid Ref
In the Mid Ref box, enter the desired mid reference voltage
value. The default value is 50 percent.
On the DTG tab, in the DTG pane, you have the following option:
Table 122: DTG option for Jitter Tolerance
Configure Parameter
Description
Pattern Path
In the Pattern Path box, enter the absolute path of the pattern
file present in the DTG.
10. On the DTG tab, in the outputs pane, you have the following options:
Table 123: DTG Outputs options for Jitter Tolerance
Configure Parameter
Description
Clock
The Clock list allows you to configure the output. The
available choices are A1, A2, B1, B2, C1, C2, D1, and D2.
Data0
The Data0 list allows you to configure the output. The
available choices are A1, A2, B1, B2, C1, C2, D1, and D2.
Data1
The Data1 list allows you to configure the output. The
available choices are A1, A2, B1, B2, C1, C2, D1, and D2.
Data2
The Data2 list allows you to configure the output. The
available choices are A1, A2, B1, B2, C1, C2, D1, and D2.
TDSHT3 HDMI Compliance Test Software
231
Operating Basics
11. To connect the DUT, click Tests > Connect.
Figure 201: Connect pane for Jitter Tolerance
12. To configure and test the GPIB connection to the DTG, click Signal
Sources. The Signal Sources Setup dialog box appears.
Figure 202: Signal Sources Setup for Jitter Tolerance
13. In the select pane, click GPIB. Configure the appropriate GPIB board
number.
14. To test both the connection and the DTG GPIB configuration, click Test
Conn.
15. Because no signal is connected to the oscilloscope, you cannot view the
waveform for the jitter tolerance test.
232
TDSHT3 HDMI Compliance Test Software
Operating Basics
Note: To run the test successfully, ensure that the Bus Timing parameter is set to
2 µsec on your GPIB board configuration. For more details, refer to the section
on Remote Control Caution.
16. Click Run Test to perform the test. The TDSHT3 HDMI Compliance Test
Software sets up the oscilloscope and conducts the test. The Sink Jitter
Tolerance dialog box appears.
Figure 203: Sink Jitter Tolerance
17. Follow the instructions in the Sink Jitter Tolerance dialog box. Click OK.
The Connect Sink Device dialog box appears.
Figure 204: Connect Sink Device
TDSHT3 HDMI Compliance Test Software
233
Operating Basics
18. Follow the instructions in the Connect Sink Device dialog box. Click OK.
The test runs, displaying a progress indicator. The Confirm Sink Device
Support dialog box appears.
Figure 205: Confirm Sink Device Support
19. Follow the instructions in the dialog box. Depending on your answer, a
series of dialog boxes may prompt you for your input.
20. If you successfully run the test, the software calculates the jitter values and
displays the results. The software makes Result available automatically and
displays the result summary, the eye diagram plot, and the clock jitter plot.
For more information on the plots, refer the online help. You can also view
the report configuration details in the result pane.
Figure 206: Result for Jitter Tolerance
234
TDSHT3 HDMI Compliance Test Software
Operating Basics
Table 124: Result for Jitter Tolerance
Option
Description
Test Name
The Test Name box displays the test id, test name, and signal
name - CK (Clock), D (Data).
Status
Status indicates the status of the test as Pass, Fail, or Error.
Result Details
Click Result Details to display the details of the result.
Report Configuration pane
You can set the report details to identify and generate the report automatically.
You can set a default report file.
Figure 207: Report Configuration for Jitter Tolerance
In the report configuration pane, you can configure the following parameters:
Table 125: Report Configuration options for Jitter
Tolerance
Category
Description
Pair (CK, D)
The Pair (CK, D) list allows you to specify the unique pairs on
which the test is conducted.
Resolution
The Resolution box allows you to specify the resolution on
which the test is conducted.
Refresh Rate
The Refresh Rate box allows you to specify the refresh rate at
which the test is conducted.
Report File
The Report File box allows you to specify the path and the file
where the generated report will be saved. However, for the
selected speed, a default file name and path already exists.
TDSHT3 HDMI Compliance Test Software
235
Operating Basics
Table 125: Report Configuration options for Jitter
Tolerance (Contd.)
Category
Description
Enable Preview
Select the Enable Preview check box to preview the report
automatically after generation.
Clear Report
Click Clear Report to clear all the results and records of the
earlier tests.
Advanced
Click Advanced to open the Report Configuration
Advanced dialog box.
21. In the result summary pane, click Result Details to display the details of the
result.
Figure 208:
Result Details for Jitter Tolerance
Table 126: Result Details for Jitter Tolerance
236
Option
Description
Test Name
The Test Name box displays the test id, test name, and signal
name – CK (Clock), D (Data).
Spec Range
The Spec Range box displays the HDMI standards and test
specifications limit for the test.
Meas Value
The Meas Value box displays the measured value.
Result
The Result box displays the status of the test as Pass, Fail, or
Error.
TDSHT3 HDMI Compliance Test Software
Operating Basics
Table 126: Result Details for Jitter Tolerance
(Contd.)
Option
Description
Remarks/Comments
The Remarks/Comments box displays the relevant details, for
example, Tbit, and Margin. If the test could not be run, then an
error code appears.
Close
Click Close to quit the Result Details dialog box.
View Jitter Plot
Click View Jitter Plot to view the jitter plot for the jitter
tolerance test.
View Eye Plot
Click View Eye Plot to view the eye plot for the jitter tolerance
test.
Sink – Intra-Pair Skew
This test allows you to confirm that the maximum allowed timing skew within
each TMDS pair is supported by the Sink DUT.
You will need one supported oscilloscope, one differential probe, one cable
emulator, one TPA-P-DI fixture, one digital timing generator (DTG), one DC
power supply, eight SMA cables, one GPIB controller, and one TPA-P-TDR
fixture.
1.
On the menu bar, click Tests > Select > Sink.
2.
In the single-ended tests pane, select the Intra-Pair Skew check box.
Figure 209: Select Sink with Intra-Pair Skew test selected
3.
To change the configuration settings, click Tests > Configure. For most
tests, you can use the factory default configuration. However, you can
change the values by using the virtual keyboard or the general purpose knob
TDSHT3 HDMI Compliance Test Software
237
Operating Basics
on the oscilloscope front panel. Using the File menu, you can also restore
the factory defaults or save and recall your own configuration settings.
Figure 210: Configure for Sink Intra-Pair Skew
Note: The default configuration is to calculate the intra-pair skew of the clock
channel. If you want to calculate the intra-pair skew for other data channels,
then interchange the DTG physical channels of Data<X> with Clock. For
example, to calculate the intra-pair skew of Data0, assign A1 to Data0 and
assign B1 to Clock. Make the appropriate changes in the test connections.
4.
In the input pane, you have the following option:
Table 127: Input option for Sink Intra-Pair Skew
5.
Configure Parameter
Description
Clock
Clock indicates the oscilloscope channel to which you will
connect the clock input. The available choices are Ch1, Ch2,
Ch3, and Ch4.
In the Tbit pane, you have the following options:
Table 128: Tbit options for Sink Intra-Pair Skew
238
Configure Parameter
Description
# of Avgs
In the # of Avgs box, enter the desired number of periods that are
considered to calculate Tbit. The default value is 100.
Re-calculate
Click Re-calculate to recalculate the Tbit value.
Existing Value
Click Existing Value to use the previously calculated Tbit value.
TDSHT3 HDMI Compliance Test Software
Operating Basics
6.
In the DTG pane, you have the following option:
Table 129: DTG option for Sink Intra-Pair Skew
7.
Configure Parameter
Description
Pattern Path
In the Pattern Path box, enter the absolute path of the pattern
file present in the DTG.
In the outputs pane, you have the following options:
Table 130: Output options for Sink Intra-Pair Skew
8.
Configure Parameter
Description
Clock
The Clock list allows you to configure the output. The
available choices are A1, A2, B1, B2, C1, C2, D1, and D2.
Data0
The Data0 list allows you to configure the output. The
available choices are A1, A2, B1, B2, C1, C2, D1, and D2.
Data1
The Data1 list allows you to configure the output. The
available choices are A1, A2, B1, B2, C1, C2, D1, and D2.
Data2
The Data2 list allows you to configure the output. The
available choices are A1, A2, B1, B2, C1, C2, D1, and D2.
To connect the DUT, click Tests > Connect.
Figure 211: Connect pane for Sink Intra-Pair Skew
TDSHT3 HDMI Compliance Test Software
239
Operating Basics
9.
To configure and test the GPIB connection to the DTG, click Signal
Sources. The Signal Sources Setup dialog box appears.
Figure 212: Signal Sources Setup for Sink Intra-Pair Skew
10. In the select pane, click GPIB. Configure the appropriate GPIB board
number.
11. To test both the connection and the DTG GPIB configuration, click Test
Conn.
12. Ensure that your signal in the oscilloscope display is similar to the sample
signal. Click View Waveform to display a sample of the expected signal. If
the displays are not similar, go back and check your configuration and
connections. The sample signal appears if you have selected the re-calculate
Tbit option.
240
TDSHT3 HDMI Compliance Test Software
Operating Basics
Figure 213: Waveform of Sink Intra-Pair Skew
Note: To run the test successfully, ensure that the Bus Timing parameter is set to
2 µsec on your GPIB board configuration. For more details, refer to the section
on Remote Control Caution.
13. Click Run Test to perform the test. The TDSHT3 HDMI Compliance Test
Software sets up the oscilloscope and conducts the test. Follow the
instructions in the dialog box. Depending on your answer, a series of dialog
boxes may prompt you for your input.
14. If you successfully run the test, the software makes Result available
automatically and displays the result summary. You can also view the report
configuration details in the result pane.
TDSHT3 HDMI Compliance Test Software
241
Operating Basics
Figure 214: Result for Sink Intra-Pair Skew
Table 131: Result for Sink Intra-Pair Skew
Option
Description
Test Name
The Test Name box displays the test id, test name, and signal
name - CK (Clock).
Status
Status indicates the status of the test as Pass, Fail, or Error.
Result Details
Click Result Details to display the details of the result.
Report Configuration pane
You can set the report details to identify and generate the report automatically.
You can set a default report file.
Figure 215: Report Configuration for Sink Intra-pair Skew
242
TDSHT3 HDMI Compliance Test Software
Operating Basics
In the report configuration pane, you can configure the following parameters:
Table 132: Report Configuration options for Sink
Intra-Pair Skew
Category
Description
Pair (CK, D)
The Pair (CK, D) list allows you to specify the unique pairs on
which the test is conducted.
Resolution
The Resolution box allows you to specify the resolution on
which the test is conducted.
Refresh Rate
The Refresh Rate box allows you to specify the refresh rate at
which the test is conducted.
Report File
The Report File box allows you to specify the path and the file
where the generated report will be saved. However, for the
selected speed, a default file name and path already exists.
Enable Preview
Select the Enable Preview check box to preview the report
automatically after generation.
Clear Report
Click Clear Report to clear all the results and records of the
earlier tests.
Advanced
Click Advanced to open the Report Configuration
Advanced dialog box.
15. In the result summary pane, click Result Details to display the details of the
result.
Figure 216: Result Details for Sink Intra-pair Skew
TDSHT3 HDMI Compliance Test Software
243
Operating Basics
Table 133: Result Details for Sink Intra-Pair Skew
Option
Description
Test Name
The Test Name box displays the test id, test name, and signal
name - CK (Clock).
Spec Range
The Spec Range box displays the HDMI standards and test
specifications limit for the test.
Meas Value
The Meas Value box displays the measured value.
Result
The Result box displays the status of the test as Pass, Fail, or
Error.
Remarks/Comments
The Remarks/Comments box displays the relevant details, for
example, Tbit, and Margin. If the test could not be run, then an
error code appears.
Close
Click Close to quit the Result Details dialog box.
Cable – Eye Diagram
This test allows you to confirm that the Cable assembly outputs a compliant data
eye. You can check the input test signal at TP1, and verify the output of the
cable, for compliance, at TP2.
You will need one supported oscilloscope, two differential probes, one digital
timing generator (DTG), one GPIB controller, one DC power supply 3.3 V, eight
SMA cables, one TPA-R-DI fixture, and one TPA-R-TDR fixture.
1.
On the menu bar, click Tests > Select > Cable.
2.
In the differential tests pane, select the Eye Diagram check box.
Figure 217: Select Cable with Eye Diagram test selected
244
TDSHT3 HDMI Compliance Test Software
Operating Basics
3.
To change the configuration settings, click Tests > Configure. For most
tests, you can use the factory default configuration. However, you can
change the values by using the virtual keyboard or the general purpose knob
on the oscilloscope front panel. Using the File menu, you can also restore
the factory defaults or save and recall your own configuration settings.
Figure 218: Configure Cable for Eye Diagram
4.
In the input pane, you have the following options:
Table 134: Input options for Cable Eye Diagram
5.
Configure Parameter
Description
Clock
Clock indicates the oscilloscope channel to which you will
connect the clock input. The available choices are Ch1, Ch2,
Ch3, and Ch4.
Data
Data indicates the oscilloscope channel to which you will
connect the data input. The available choices are Ch1, Ch2,
Ch3, and Ch4.
On the Setup tab, in the horiz/acq pane, you have the following option:
Table 135: Horiz/Acq option for Cable Eye Diagram
Configure Parameter
Description
Record Length
In the Rec Length box, enter the desired record length value
for the eye tests.
TDSHT3 HDMI Compliance Test Software
245
Operating Basics
6.
On the Setup tab, in the test points pane, you have the following options:
Table 136: Test Points options for Cable Eye
Diagram
7.
Configure Parameter
Description
TP1
TP1 represents the first test point. Feed the worst possible
compliant signal at TP1. By default, the TP1 check box is
selected.
TP2
TP2 represents the second test point. The worst possible
compliant signal fed at TP1 is transmitted through the cable.
The same signal is tested at TP2 with the TP2 specification.
By default, the TP2 check box is selected.
On the Setup tab, in the CRU pane, you have the following option:
Table 137: CRU options for Cable Eye Diagram
8.
Configure Parameter
Description
CRU
The CRU list allows you to configure the CRU. The available
choices are PLL, Raw, and Ideal. The default value is first
order PLL and is used for compliance testing. Raw and Ideal
are used for analysis.
Define
The Define is available only when PLL is selected.
On the Setup tab, you also have the following options:
Table 138: Setup options
246
for Cable Eye Diagram
Configure Parameter
Description
Ref Level Units
The Ref Level Units list allows you to set the reference level
units to either Per (%) or Abs.
Per (%) indicates that the reference levels are a percentage of
the Vswing value.
Abs indicates that the reference levels are absolute voltage
values.
Hysteresis
In the Hysteresis box, enter the desired hysteresis percent
value. The default value is 10 percent.
Mid Ref
In the Mid Ref box, enter the desired mid reference voltage
value. The default value is 50 percent.
TDSHT3 HDMI Compliance Test Software
Operating Basics
9.
On the DTG tab, in the DTG pane, you have the following option:
Table 139: DTG option for Cable Eye Diagram
Configure Parameter
Description
Pattern Path
In the Pattern Path box, enter the absolute path of the pattern
file present in the DTG.
10. On the DTG tab, in the outputs pane, you have the following options:
Table 140: DTG Outputs options for Cable Eye
Diagram
Configure Parameter
Description
Clock
The Clock list allows you to configure the output. The
available choices are A1, A2, B1, B2, C1, C2, D1, and D2.
Data0
The Data0 list allows you to configure the output. The
available choices are A1, A2, B1, B2, C1, C2, D1, and D2.
Data1
The Data1 list allows you to configure the output. The
available choices are A1, A2, B1, B2, C1, C2, D1, and D2.
Data2
The Data2 list allows you to configure the output. The
available choices are A1, A2, B1, B2, C1, C2, D1, and D2.
11. To connect the DUT, click Tests > Connect.
Figure 219: Connect pane for Cable Eye Diagram
TDSHT3 HDMI Compliance Test Software
247
Operating Basics
12. To configure and test the GPIB connection to the DTG, click Signal
Sources. The Signal Sources Setup dialog box appears.
Figure 220: Signal Sources setup for Cable Eye Diagram
13. In the select pane, click GPIB. Configure the appropriate GPIB board
number.
14. To test both the connection and the DTG GPIB configuration, click Test
Conn.
15. Because no signal is connected to the oscilloscope, you cannot view the
waveform for the eye diagram test.
Note: To run the test successfully, ensure that the Bus Timing parameter is set to
2 µsec on your GPIB board configuration. For more details, refer to the section
on Remote Control Caution.
16. Click Run Test to perform the test. The TDSHT3 HDMI Compliance Test
Software sets up the oscilloscope and the test runs, displaying a progress
indicator.
17. The software creates a worst eye and asks you to verify the worst eye. If you
want to adjust the eye diagram, change the parameters in the DTG, and then
click either Yes or No. Follow the instructions in the dialog box. Depending
on your answer, a series of dialog boxes may prompt you for your input.
18. If you have run the test successfully, the software makes Result available
automatically and displays the eye diagram plot and the clock jitter plot for
both TP1 and TP2. For more information on the plots, refer the online help.
You can also view both the result summary of the test and the report
configuration in the result pane as shown in the following diagram:
248
TDSHT3 HDMI Compliance Test Software
Operating Basics
Figure 221: Result for Cable Eye Diagram
Table 141: Result for Cable Eye Diagram
Option
Description
Test Name
The Test Name box displays the test id, test name, and signal
name - CK (Clock), D (Data).
Status
Status indicates the status of the test as Pass, Fail, or Error.
TestPoint
You can check the input test signal at TP1, and verify the
output of the cable, for compliance, at TP2. From the
TestPoint list, select either TP1 or TP2 to view the respective
details.
View Jitter Plot
Click View Jitter Plot to view the jitter plot for the selected test
point for the eye diagram test.
View Eye Plot
Click View Eye Plot to view the eye plot for the selected test
point for the eye diagram test.
Result Details
Click Result Details to display the details of the result.
TDSHT3 HDMI Compliance Test Software
249
Operating Basics
Report Configuration pane
You can set the report details to identify and generate the report automatically.
You can set a default report file.
Figure 222: Report Configuration for Cable Eye Diagram
In the report configuration pane, you can configure the following parameters:
Table 142: Report Configuration options for Cable
Eye Diagram
250
Category
Description
Pair (CK, D)
The Pair (CK, D) list allows you to specify the unique pairs on
which the test is conducted.
Resolution
The Resolution box allows you to specify the resolution on
which the test is conducted.
Refresh Rate
The Refresh Rate box allows you to specify the refresh rate at
which the test is conducted.
Report File
The Report File box allows you to specify the path and the file
where the generated report will be saved. However, for the
selected speed, a default file name and path already exists.
Enable Preview
Select the Enable Preview check box to preview the report
automatically after generation.
Clear Report
Click Clear Report to clear all the results and records of the
earlier tests.
Advanced
Click Advanced to open the Report Configuration
Advanced dialog box.
TDSHT3 HDMI Compliance Test Software
Operating Basics
19. In the result summary pane, click Result Details to display the details of the
result.
Figure 223: Result Details for Cable Eye Diagram
Table 143: Result Details for Cable Eye Diagram
Option
Description
Test Name
The Test Name box displays the test id, test name, and signal
name - CK (Clock), D (Data).
Spec Range
The Spec Range box displays the HDMI standards and test
specifications limit for the test.
Meas Value
The Meas Value box displays the measured value.
Result
The Result box displays the status of the test as Pass, Fail, or
Error.
Remarks/Comments
The Remarks/Comments box displays the relevant details, for
example, Tbit, and Margin. If the test could not be run, then an
error code appears.
Close
Click Close to quit the Result Details dialog box.
TestPoint
You can check the input test signal at TP1, and verify the output
of the cable, for compliance, at TP2. From the TestPoint list,
select either TP1 or TP2 to view the respective details.
View Jitter Plot
Click View Jitter Plot to view the jitter plot for the selected test
point for the eye diagram test.
View Eye Plot
Click View Eye Plot to view the eye plot for the selected test
point for the eye diagram test.
Result Statistics
Click Result Statistics to display statistics based on the tests.
TDSHT3 HDMI Compliance Test Software
251
Operating Basics
20. In the Result Details dialog box, click Result Statistics to display statistics
based on the tests.
Figure 224: Result Statistics for Cable Eye Diagram
The software calculates statistics for each selected test, and logs the statistics on a
cycle-by-cycle basis in a large waveform. The standard statistics are for the
Maximum, Minimum, Mean, Standard Deviation, and Population.
Table 144: Result Statistics for Cable Eye Diagram
252
Option
Description
Test Name
The Test Name box displays the test id, test name, and signal names - CK (Clock),
D (Data).
Population
The software calculates this statistic by using the following equation:
Population (X) = N
Min
The software calculates this statistic by using the following equation:
Min (X) = Lowest value of X
Max
The software calculates this statistic by using the following equation:
Max (X) = Highest value of X
Mean
The software calculates this statistic by using the following equation:
TDSHT3 HDMI Compliance Test Software
Operating Basics
Table 144: Result Statistics for Cable Eye Diagram
(Contd.)
Option
Description
Std Dev
The software calculates this statistic by using the following equation:
Pk-Pk
The software calculates this statistic by using the following equation:
Xppn = Max(X) - Min(X)
Close
Click Close to quit the Result Statistics dialog box.
TDSHT3 HDMI Compliance Test Software
253
Operating Basics
254
TDSHT3 HDMI Compliance Test Software
Measurement Algorithms
Software CRU Technology
The HDMI specification mandates the Clock Recovery Unit (CRU) by using a
Phase Locked Loop (PLL) with first order transfer function characteristics, to test
both the jitter and the eye diagram. A PLL-based CRU implemented in hardware
makes correlation of test results difficult due to differences in vendor-specific
implementations. There are software PLL techniques that exist to extract clock
and timing data from a serial data stream. The following method shows a more
practical and affordable way to satisfy the requirement:
PLL Characteristics
Figure 225: PLL design for CRU implementation
TDSHT3 HDMI Compliance Test Software
255
Measurement Algorithms
The diagram shows a simplified block diagram of generic phase-locked loop
(PLL). A PLL consists of the Phase Detector (PD), Low-Pass Filter (LPF),
Voltage Controlled Oscillator (VCO), and Frequency Divider (FD).
The phase of the input signal is compared to the phase of FD output. The input of
the FD is the output of VCO, whose frequency is controlled by the LPF output.
The LPF output is a filtered form of the PD output. When the phase of FD output
is leading compared to the input phase, the PD output changes to decrease the
VCO frequency. Thus, the FD output will lag. Due to the effect of this feedback
mechanism, the frequency of VCO is locked to N-times of the input frequency.
The LPF restricts the quick variation of the incoming signal, so that high
frequency changes in the input phase are attenuated before they are transferred to
consecutive functional blocks. Therefore, the VCO output represents the average
phase of input signal even if the input signal does not have the constant phase
rotation (frequency). Using this approach, the PLL circuitry recovers the clock
information from the modulated input signal.
The transfer function from the input phase to the output phase is represented by
following equation:
where Kp and Kv are the sensitivity coefficients of PD and VCO respectively,
and N is the division factor of FD. H(s) is the transfer function of LPF in the
frequency domain.
Assuming that N, Kp, and Kv are constant, the function G(s) can be simplified as
follows:
Note that G(s) becomes the first order low-pass filter only when H(s) is constant,
namely when H(s) is non-dependent on the frequency. This means that H(s) is
not a low-pass filter in this case. On the contrary, it is well known that the PLL is
not stable without a low-pass filter in place of H(s). Therefore, the first order
transfer function that is required by CRU for HDMI may not be realized by the
PLL circuitry as shown in the earlier PLL Functional Block diagram.
256
TDSHT3 HDMI Compliance Test Software
Measurement Algorithms
Conventional Method
Figure 226: Conventional diagram of PLL design for CRU implementation
The diagram shows a simple PLL design for CRU, measuring both the clock
jitter and eye diagram within a digital oscilloscope. The input signal is first
converted to digital information with an A/D converter. The phase of the input
signal is extracted by finding the rising (or falling) edges of the digitized signal.
A digital simulation of an actual hardware PLL circuit may be realized because
the input and output signals exist as just digital information. In this case, the
voltage values at several points in the PLL circuit are expressed in the time
domain, and are repetitively calculated to derive their time variation. The time
interval of the calculation must be sufficiently small to retain the high precision
of the simulation. Hence, it requires significant digital processing capability to
simulate actual PLL within a reasonable amount of time.
In this method, the phase transfer function of the PLL is determined by the
characteristics of the simulated components. As long as the simulation observes
the laws of physics, the resultant transfer function does not differ from that of the
actual hardware PLL circuit. Given the time to process the data in the simulation,
using this method is not advisable. Hence, the first order transfer function to be
realized by this method may not be useful either.
TDSHT3 HDMI Compliance Test Software
257
Measurement Algorithms
Another method to simulate a PLL in software is to use its time domain transfer
function from the input phase error to output timing information. The impulse
response is used as the time domain transfer function. In this case, given the input
signal X(t), the integral operation shown next gives the output signal Y(t).
where G(t) is the time domain representation of G(s) mentioned in the previous
section. This is called a convolution integral. In this case, the input signal is
represented as discrete-time samples. The integration shown earlier should also
be performed in discrete fashion as follows:
There are two disadvantages in the time domain convolution method. One is that
it still requires a huge number of multiplications and additions to calculate the
values of all time points, as easily seen from the form of the equation above.
Another is that it is not always practical to express the time domain transfer
function as an explicit mathematical representation. In many cases, the human
interpretation of the transfer function is made in frequency domain. Some means
of conversion is required to derive the time domain response from the frequency
domain characteristics. This requirement will complicate the design of the user
interface.
It is important to mention that the first order transfer function characteristics can
be realized by this convolution method, even though it has the difficulties
described earlier. This method is inherently stable as far as an appropriate
impulse response is adopted, because it does not include a feedback loop.
258
TDSHT3 HDMI Compliance Test Software
Measurement Algorithms
Proposed Method
Figure 227: Proposed diagram of PLL design for CRU implementation
The PLL circuitry acts as a low-pass filter for incoming time information. In the
frequency domain, the filter function is realized by multiplying the frequency
response coefficients to the input spectrum. The convolution integral in the time
domain is equivalent to simple multiplication between frequency-domain
functions derived by the Fourier Transform. If the time information and the PLL
characteristics are transformed to frequency domain, the PLL processing
becomes much easier than in the time domain.
As seen in this equation, the calculation becomes one per sample point
multiplication (though between complex numbers). Hence, the demand for digital
processing performance is low.
After the filter function is performed, the time information of the output signal
may be derived with inverse transformation. Using an FFT algorithm, the
forward and inverse transformation can be executed in relatively short time
compared to simulation in time domain. Thus, the total time to calculate the
recovered clock can be significantly reduced.
TDSHT3 HDMI Compliance Test Software
259
Measurement Algorithms
Jitter Test
The jitter of the incoming clock signal is measured by statistically analyzing the
time difference between the incoming and recovered clocks. The timing
information of both signals is already retained in digital form, so the jitter
calculation is simple and straightforward. Usually, the peak-to-peak jitter value
and the standard deviation (RMS) jitter value are used for evaluating the signal
quality.
Appropriate sample points should be chosen to measure the jitter for specific
cases such as the clock-to-data jitter at the first bit. Such a requirement is
addressed by specifying a rectangular area with time range of [-T..+T] and
voltage range of [-V..+V].
To obtain an accurate test, a large number of samples are required. As the earlier
area restriction reduces the number of measured samples, the capability to
process more and more samples is desired. Using the proposed method, it
becomes realistic to gather a huge amount of statistical information for a more
precise test.
Eye Diagram
An eye diagram is the incoming data waveform repeatedly drawn with the
recovered clock used as the time reference. The recovered clock is represented as
time information. Hence, it may be used to derive the position where the input
data waveform should be drawn. The resulting diagram will precisely indicate the
true marginal area with which the reliability of data transmission is determined.
The vertical coordinate to draw the incoming waveform is determined by using
the data value itself. Determine the horizontal coordinate (x) by the following
equation:
where Tn is the time of incoming waveform, and Tref is the time of the reference
signal (the recovered clock signal).
260
TDSHT3 HDMI Compliance Test Software
Test Methods
Source
Eye Diagram
This sequence explains the actions that the software takes while it performs an
eye diagram test. For the procedure on how to make this test, see eye diagram
test procedure.
1.
Connect TPA-P-TDR to the Source DUT HDMI output connector.
2.
Connect the SMA differential probes to TMDS Clock and configure as
trigger.
3.
Connect the second differential probe to TMDS Data.
4.
Configure the Source DUT to output the first supported video format.
5.
Set up the oscilloscope as follows:
Memory length of at least 16 M points
Single-shot trigger at rising edge of TMDS Clock (50 percent)
Sampling rate of at least 10 GS/s
Adjust the vertical scale to accommodate the waveform in six vertical
divisions
6.
Capture the waveforms on the oscilloscope.
Note: Do not transfer the waveforms.
7.
Perform software clock recovery as follows:
Find VH and VL of both clock and data.
Find 50 percent reference level of the clock.
Pass the TIE values through the filter (FFT and IFFT) H(s) = 1/(1+sτ),
where τ = 40 nsec.
TDSHT3 HDMI Compliance Test Software
261
Test Methods
Reconstruct the clock, and then create a bit clock (x10 clock) by using
even up sampling.
8.
Draw the eye diagram.
x10 clock is used for slicing.
Draw the eye diagram with ½ UI+UI+½ UI method. This will ensure
that all UIs are overlapped.
9.
Create eye mask.
Calculate VSWING by using VH and VL of the data.
Construct the mask co-ordinate by using TBIT and VSWING.
10. Position the mask in such a way that one of its left side corners just touches
the waveform.
11. If any other part of the waveform either touches or crosses the data eye, then
it implies FAIL.
12. Calculate the data jitter by using the histogram technique. The histogram
co-ordinates are VC+/-5 mV.
13. If data jitter is more than (0.3*TBIT), then it implies FAIL.
14. Repeat the test for all the remaining TMDS_DATA pairs.
15. Repeat the test for all supported pixel clock rates. Only one video format is
required per pixel clock rate.
Duty Cycle
This sequence explains the actions that the software takes while it performs a
duty cycle test. For the procedure on how to make this test, see duty cycle test
procedure.
262
1.
Connect a TPA-P-DI adapter to the Source DUT HDMI output connector.
2.
Configure the Source DUT to output a video format with the required
supported pixel clock frequency.
3.
Connect a differential probe to the TMDS Clock.
4.
Display the waveform of one clock period.
TDSHT3 HDMI Compliance Test Software
Test Methods
5.
Set up the oscilloscope as follows:
Adjust the vertical scale to accommodate the waveform in six vertical
divisions (Refer vertical setting).
Trigger: Edge trigger.
Acquire at least 10,000 waveforms in FastAcq.
6.
Find the minimum and maximum duty cycle by using the following method:
Figure 228: TMDS AC Clock waveform
7.
Compare with the limit value.
If minimum duty cycle is more than 40 percent, then it implies PASS.
If maximum duty cycle is less than 60 percent, then it implies PASS.
Rise/Fall Time
This sequence explains the actions that the software takes while it performs a
rise/fall time test. For the procedure on how to make this test, see rise time test
procedure and fall time test procedure.
1.
Connect a TPA-P-DI adapter to the Source DUT HDMI output connector.
2.
Connect the Power Supply to the TPA board.
3.
Configure the Source DUT to output a video format with the required
supported pixel clock frequency.
4.
Connect a differential probe to TMDS_DATA0 and configure as trigger.
5.
Set the trigger position at the center of the screen.
TDSHT3 HDMI Compliance Test Software
263
Test Methods
6.
Set up the oscilloscope as follows:
Calculate TBIT by using differential clock.
Set the vertical scale to accommodate the waveform in at least six
divisions.
Set the horizontal scale to more than 2*TBIT.
If pulse width trigger is selected, Trigger with pulse width trigger with
(4*TBIT) pulse. or trigger with edge trigger.
7.
Accumulate at least 10,000 triggered waveforms by acquiring the waveform
in FastAcq mode of acquisition.
8.
Calculate VSWING of the signal (VSWING = VH-VL), and then find the 20
percent and 80 percent of the level.
9.
Measure the rise time and fall time.
Enable the oscilloscope rise time measurement. Set the reference level
to 20 percent and 80 percent.
Acquire at least 10 K waveforms (RUN and STOP).
Calculate the rise time.
Set the trigger to negative pulse.
Enable the oscilloscope rise time measurement.
Acquire at least 10 K waveforms (RUN and STOP).
Calculate the fall time.
10. Compare with the limit.
If TRISE is less than 75 ps or TRISE is more than (0.4*TBIT), then it
implies FAIL.
If TFALL is less than 75 ps or TFALL is more than (0.4*TBIT), then it
implies FAIL.
11. Repeat the test for all the remaining TMDS clock and data pairs.
264
TDSHT3 HDMI Compliance Test Software
Test Methods
Clock Jitter
This sequence explains the actions that the software takes while it performs a
clock jitter test. For the procedure on how to make this test, see clock jitter test
procedure.
1.
Connect TPA-P-DI to the Source DUT HDMI output connector.
2.
Connect the differential probe to the TMDS Clock and configure as trigger.
3.
Connect the second differential probe to TMDS_CLOCK.
4.
Configure the Source DUT to output the required supported video format.
5.
Set up the oscilloscope as follows:
Adjust the vertical scale to accommodate the waveform in six vertical
divisions.
Set the record length to 16 M.
Set the sample rate to 10 Gs/Sec.
Trigger with the rising edge of the clock (50 percent level).
6.
Capture the waveforms on the oscilloscope.
7.
Do not transfer the waveforms.
8.
Perform software clock recovery as follows:
Set the reference level to 50 percent of the clock and hysteresis to 10
percent of VSWING.
Calculate the Software CRU filter as follows.
H(s) = 1/(1+sτ), where τ = 40 nsec.
9.
Draw the TMDS waveform with positive edge trigger.
10. Measure the clock jitter as follows:
Calculate VSWING by using VH and VL of the clock.
Calculate the center voltage as follows:
VC = (VH+VL)/2
Draw the histogram at VC+/-20 mV.
Calculate Pk-Pk jitter and ‘Interpolated’ Pk-pk jitter.
TDSHT3 HDMI Compliance Test Software
265
Test Methods
11. If clock jitter exceeds (0.25*TBIT), then it implies FAIL.
Overshoot/Undershoot
This sequence explains the actions that the software takes while it performs an
overshoot/undershoot test. For the procedure on how to make this test, see
over/undershoot V-H test procedure and over/undershoot V-L test procedure.
1.
Connect an TPA-P-TDR adapter to the Source DUT HDMI output
connector.
2.
Control the Source DUT to output a video format with the required
supported pixel clock frequency.
3.
Connect a SMA differential probe to TMDS_DATA0 and TMDS_CLOCK.
4.
Set up the oscilloscope and acquire the waveform.
Calculate TBIT by using differential clock.
Set the vertical scale to accommodate the waveform in at least six
divisions.
Set the horizontal scale to (2*TBIT).
Trigger with pulse width trigger with (4*TBIT) pulse (rising edge).
Acquire the waveform with FastAcq.
Acquire at least 10 K waveforms (RUN and STOP).
266
TDSHT3 HDMI Compliance Test Software
Test Methods
5.
Measure the values VH, VL, VH+, VH-, VL+, and VL- by using the following
method:
Measure the peak voltage (VH+).
Measure the least voltage after the dip (VH-).
Trigger with pulse width trigger with (4*TBIT) pulse (falling edge).
Measure the minimum voltage (VL-).
Measure the least voltage after the dip (VL+).
Calculate VDIFFSWING (VH-VL).
Calculate overshoot and undershoot as follows:
Overshoot = max{abs(VH+) and abs(VL-)}
Undershoot = max{abs(VL+ ) and abs(VH-)}
If overshoot is more than 15 percent of VDIFFSWING, then it implies
FAIL.
If undershoot is more than 25 percent of VDIFFSWING, then it implies
FAIL.
Repeat for all the remaining TMDS clock and data (+ and -) signals.
Inter-Pair Skew
This sequence explains the actions that the software takes while it performs an
inter-pair skew test. For the procedure on how to make this test, see inter-pair
skew test procedure for clock-data tests and inter-pair skew test procedure for
data-data tests.
1.
Connect a TPA-P-DI adapter to the Source DUT HDMI output connector.
2.
Connect the first differential probe to TMDS_DATA0.
3.
Connect the second differential probe to TMDS_DATA1.
4.
Configure the Source DUT to output a video format with the required
supported pixel clock frequency.
TDSHT3 HDMI Compliance Test Software
267
Test Methods
5.
Set up the oscilloscope and acquire the waveform.
Trigger with CTL pattern by using serial trigger.
Adjust the vertical scale to accommodate the waveform in six vertical
divisions.
Calculate TBIT by using differential clock.
Set the horizontal scale to at least 20* TBIT (2*Tbit per division).
Set the horizontal trigger position to 80%.
Trigger with CTL pattern (1101010100) this requires Option ST.
Set the bit rate based on the TBIT value.
Acquire the waveform in real-time single shot.
6.
Calculate the skew as follows:
For data-data inter-pair skew:
Find the CTL pattern in Data<X>.
Find the CTL pattern in Data<Y>.
Find the skew between the two channels in each transition.
Calculate the average skew.
For data-clock inter-pair skew:
Find the CTL pattern in Data<X>.
Find the rising edge of the clock.
Find the skew between the two rising edges.
268
6.
If TSKEW is less than (0.2*TPIXEL), then it implies FAIL.
7.
Repeat the test for the remaining combinations of TMDS pairs.
TDSHT3 HDMI Compliance Test Software
Test Methods
Intra-Pair Skew
This sequence explains the actions that the software takes while it performs an
intra-pair skew test. For the procedure on how to make this test, see intra-pair
skew test procedure.
1.
Connect a TPA-P-SE adapter to the Source DUT HDMI output connector.
2.
Connect the first single-ended probe to TMDS_DATA0+.
3.
Connect the second single-ended probe to TMDS_DATA0-.
4.
Configure the Source DUT to output a video format with the highest
supported pixel clock frequency.
5.
Set up the oscilloscope as follows:
Calculate TBIT by using differential clock.
Adjust the vertical scale to accommodate the waveform in six vertical
divisions.
Set the horizontal scale to (2*TBIT).
Trigger with edge trigger of Data+ (Rising edge with 50 percent level).
6.
Display the waveform of TMDS_DATA0+ and DATA0-. Accumulate at
least 10,000 triggers by acquiring the waveform in FastAcq mode.
7.
Determine the most common TMDS_DATA0- 50 percent point by using the
histogram method.
8.
Measure skew from most common TMDS_DATA0+ point to 50 percent
point of first edge of TMDS_DATA0-.
8.
If skew is less than (0.15*TBIT), then it implies FAIL.
9.
Repeat the test for all the remaining TMDS differential pairs.
TDSHT3 HDMI Compliance Test Software
269
Test Methods
Sink
Min/Max-Diff Swing Tolerance
This sequence explains the actions that the software takes while it performs a
min/max-differential swing tolerance test. For the procedure on how to make this
test, see min/max-diff swing tolerance test procedure.
1.
Configure the DTG to output any sink-supported video format.
Load the pattern that contains repeating RGB gray ramp 0, 1, 2…254,
255, 0, 1, 2… during each video period.
Map all the logical channels to physical channels.
Run the DTG.
Enable all the output channels.
2.
Search for and record the minimum differential swing voltage that the Sink
DUT supports without error at VICM = 3.0 V.
Set VICM = 3.0 V.
Set VDIFF = 170 mV on all TMDS differential pairs. (Note that
'Amplitude and Offset' mode in the DTG 'Level' window should be
chosen. In this mode, 'Amplitude' should be set to 0.085 Vpp to
correspond to a 170 mV differential swing.)
Reduce VDIFF, in 20 mV steps (corresponding to 0.01 Vpp steps in the
'Amplitude' setting), on all pairs until the Sink DUT outputs errors or
VDIFF of 70 mV is reached.
Record VDIFF {minimum} at first voltage level where no error appears.
If VDIFF {minimum} is more than or equal to 150 mV, then it implies
FAIL.
3.
270
Repeat the test for VICM = 3.3 V.
TDSHT3 HDMI Compliance Test Software
Test Methods
4.
Verify the maximum differential voltage that the Sink DUT supports.
Set VDIFF = 1.2 V on all TMDS differential pairs. (Note that 'Amplitude
and Offset' mode in the DTG 'Level' window should be chosen. In this
mode, 'Amplitude' should be set to 0.6 Vpp to correspond to a 1.2 V
differential swing.)
Verify that the DUT continues to support the signal without errors.
If DUT fails to support the signal, then it implies FAIL.
Intra-Pair Skew
This sequence explains the actions that the software takes while it performs an
intra-pair skew test. For the procedure on how to make this test, see intra-pair
skew test procedure.
1.
Configure the DTG to output any sink-supported video format that uses the
maximum sink-supported pixel clock frequency. If multiple formats are
available, a native format is preferred.
2.
Calculate Tbit by using the differential clock.
3.
For each of the TMDS clock and data pairs that act as the tested pair:
Set the delay for all outputs to 0 ns. Disable 'Differential Timing Offset'
if it is previously enabled.
Move the TMDS '+' signal of the tested pair to DTG output module A,
1+.
Move the TMDS '-' signal of the tested pair to DTG output module A,
2+.
Change the DTG configuration to output the pattern for the tested
TMDS channel on module A, 1.
4.
In the DTG ‘Timing,’ set the tested channel (connected to 1A1) and enable
'Differential Timing Offset.'
5.
Set the delay value in the differential timing offset to approximately
(0.1*TBIT). This corresponds to the initial intra-pair skew value.
6.
Increase the skew (Differential Timing Offset) by steps of less than or equal
to (0.1*TBIT), until the Sink DUT outputs errors or until reaching either
(0.6*TBIT) or 1 nsec.
7.
If errors are seen on DUT, then:
TDSHT3 HDMI Compliance Test Software
271
Test Methods
Reduce the skew one step, so that the Sink DUT outputs no errors.
If intra-pair skew is less than (0.4*TBIT), then it implies FAIL.
Jitter Tolerance
This sequence explains the actions that the software takes while it performs a
jitter tolerance test. For the procedure on how to make this test, see jitter
tolerance test procedure.
1.
Operate the Sink DUT to support the HDMI input signal.
2.
Configure the DTG as follows:
Load the appropriate pattern in the DTG
No jitter on any output
3.
Configure the AWG as follows:
Under 'Vertical' menu, set the following:
Filter-through
Amplitude = 0.5 VPP
Offset = 0 V
Marker 1 = 0.00 V to 1.00 V
Marker 2 = 0.00 V to 2.00 V
No jitter on output initially, with ability to add two simultaneous jitter
components.
4.
Determine and use the worst-case TMDS_CLOCK to TMDS_DATA skew
condition for the Sink DUT.
Connect the signals to DUT by using cable emulator.
Use binary search algorithm to find out the worst skew.
Set the DTG delay on all channels to this worst-case skew.
5.
Measure jitter tolerance while verifying adequate support by sink.
For each of the two test cases:
D_JITTER = 500 kHz, C_JITTER = 10 MHz
D_JITTER = 1 MHz, C_JITTER = 7 MHz
272
TDSHT3 HDMI Compliance Test Software
Test Methods
6.
The initialization sequence is as follows:
Set C_JITTER and D_JITTER amplitudes to levels at which (0.3*TBIT)
of jitter is present on the TMDS_CLOCK pair as well as the output eye
diagram of the TNDS_DATA pairs at the sink is worst case.
Create the eye diagram similar to the source eye diagram test.
Check the violation with sink minimum eye mask.
The data jitter component used in AWG is called as Djw [TBIT].
7.
Check the C_JITTER worst condition.
Set the C_JITTER component to (0.3*TBIT) in the equation.
Create and load the waveform in the AWG.
Connect the clock to the oscilloscope. Measure the C_JITTER value by
using the source jitter measurement.
Readjust the equation. Create the C_JITTER component to (0.3*TBIT)
(+/-2 percent).
Connect the signal to the DUT.
Increase the D_JITTER component from (0.5*TBIT) in steps of
(0.05*TBIT) until the sink adequately supports the signal.
If the DUT fails, set the last supported jitter values in the AWG.
Connect the signals to the oscilloscope.
Measure D_JITTER by using the source eye diagram measurement.
Find the maximum supported D_JITTER amplitude.
If maximum supported jitter is less than (Djw*TBIT), then it implies
FAIL.
TDSHT3 HDMI Compliance Test Software
273
Test Methods
8.
Check for the D_JITTER worst condition.
Set the D_JITTER component to (Djw*TBIT) in the AWG equation file.
Load the waveform in the AWG.
Connect the clock to the oscilloscope. Measure the C_JITTER value by
using the source jitter measurement.
Readjust the equation. Create the D_JITTER component to (Djw*TBIT)
(+/-2 percent).
Connect the signal to the DUT.
Increase the C_JITTER component from (0.3*TBIT) in steps of
(0.1*TBIT) until the sink either fails to adequately support the signal or
until testing at (0.5*TBIT) value.
If the DUT fails, set the last supported jitter values in the AWG.
Connect the signals to the oscilloscope.
Measure C_JITTER by using the source eye diagram measurement
technique. This C_JITTER is the maximum supported C_JITTER
amplitude at worst case D_JITTER.
If maximum supported C_JITTER amplitude is less than (0.3*TBIT),
then it implies FAIL.
9.
274
If the maximum supported C_JITTER amplitude is greater than or equal to
(0.3*TBIT) and the D_JITTER amplitude is greater than or equal to Djw,
then it implies PASS.
TDSHT3 HDMI Compliance Test Software
Test Methods
Cable
Eye Diagram
This sequence explains the actions that the software takes while it performs an
eye diagram test. For the procedure on how to make this test, see eye diagram
test procedure.
1.
Configure the DTG to output a video format corresponding to the specified
bandwidth of the cable. If no bandwidth is specified, then configure the
DTG to output 1920 x 1080i @ 60 Hz (74.25 MHz pixel clock).
Load the appropriate pattern file.
Set the logical channel to physical channel mapping.
Run the pattern.
Enable all the DTG output.
2.
Configure the DTG to output worst-case eye as follows:
Adjust jitter on TMDS_CLOCK pair to output 0.4 ns at 500 KHz
(worst jitter permitted at (TP1 = 0.3*TBIT) at 75 MHz).
Adjust the output swing voltage to 500 mV for every TMDS singleended signal.
Using jitter/eye analyzer, measure the TMDS_CLOCK jitter and eye
diagram of all the three TMDS_DATA pairs.
Repeat and readjust as necessary to create the input worst-case eye
diagram.
3.
Connect the cable DUT between the TPA-R-TDR and TPA-R-DI adapters.
4.
Measure jitter at TPA-R-DI (procedure same as the source eye
measurement).
If data jitter is greater than 0.67 ns (= 0.5*TBIT at 75 MHz), then it
implies FAIL.
Calculate the measurement BOX vertical setting as follows:
VC = (VH+VL)/2 = ±5 mV
Test the eye diagram with sink minimum eye mask. If any of the points
violates, then it implies FAIL.
TDSHT3 HDMI Compliance Test Software
275
Test Methods
276
5.
Adjust the DTG swing voltage to (VH, VL) = (3.3 V, 2.9 V) without jitter
(clock jitter should remain at the worst case input condition).
6.
Measure the eye mask on all the TMDS_DATA channels at CTP2.
7.
If any measured eyes do not meet the sink minimum eye mask, then it
implies FAIL.
TDSHT3 HDMI Compliance Test Software
Report Generator
About Report Generator
Report Generator allows you to generate and print reports directly from the
oscilloscope. It enhances the TDSHT3 HDMI Compliance Test Software
capabilities by simplifying the process of creating and maintaining reports.
Report Generator automates the process of compiling the test results and
generating the reports. It allows you to set up the template layout by using either
the factory default templates or the custom templates. Report Generator allows
you to save files in custom file formats such as .rgt, .rpl, or .rpt. You can also
save the generated reports as an .rtf file. Report Generator is integrated with the
TDSHT3 HDMI Compliance Test Software. You can also convert rtf to pdf by
using third-party software.
How to Start Report Generator
Utilities > Report Generator
You can generate and print reports directly from the oscilloscope.
Figure 229: Generate Report pane
Perform the following steps to generate a report:
1.
Create a new or edit an existing test template.
TDSHT3 HDMI Compliance Test Software
277
Report Generator
2.
Define a new or edit an existing report layout.
3.
Generate, print, or view a report.
Note: The report image settings are similar to the existing export settings of the
oscilloscope. It is recommended that you use Graticule(s) only for Image view
setting in export setup.
Shortcut Keys
Table 145: Shortcut Keys
Action/Common Key
Shortcut Key
Open
Ctrl+O
Save
Ctrl+S
Template Editor
New
Ctrl+N
Find
Ctrl+F
Replace
Ctrl+H
Print
Ctrl+P
Cut
Ctrl+X
Copy
Ctrl+C
Paste
Ctrl+V
Delete
Del
Select All
Ctrl+A
Bring to Front
Ctrl+Plus
Send to Back
Ctrl+Minus
Edit Text
Alt+Enter
Report Layout
278
New
Ctrlr+N
GoTo
Ctrl+G
Refresh Template List
F5
TDSHT3 HDMI Compliance Test Software
Report Generator
Table 145: Shortcut
Keys (Contd.)
Action/Common Key
Shortcut Key
Report Viewer
Find
Ctrl+F
Select All
Ctrl+A
Del
Del
GoTo
Ctrl+G
Bring to Front
Ctrl+Plus
Send to Back
Ctrl+Minus
Edit Text
Alt+Enter
How to Operate Report Generator
Template Editor
About Template Editor
The report generator provides you with factory default templates. You can also
create your own templates. Use Template Editor to create and edit templates in
the .rgt format (report generator template). A template stores the fields and their
positions. You can save the templates and reuse them in any number of reports or
report layouts. You can cut, copy, and paste across templates. Once the report is
generated, the software fills in the fields of the template by using the acquired
data from the oscilloscope.
Template Editor has a palette list that displays the following groups of fields: the
TDSHT3 Fields, Oscilloscope Fields, and Native Fields. Template Editor allows
you to create custom groups; once created, these groups appear in the palette list.
The fields are listed according to the group selected. You can use these fields to
design and create a template.
You can place the fields in the template, and then move and size them
appropriately. Multiple fields can be selected and placed in the template. You can
select more than one field and make the following changes: cut, copy, paste,
align, delete, size, edit font, and change caption of the fields.
TDSHT3 HDMI Compliance Test Software
279
Report Generator
Once a template is defined and saved, either click Done to close the Template
Editor, or use the Layout icon to go directly to the Report Layout Editor.
Figure 230: Report Layout Editor
Default Settings
Table 146: Template Editor Default Settings
Parameter
Selection
Default Setting
Page Size
Change Template
Size
The default page size is 8.5 inches x 11 inches.
Palette List
None
The palette list displays TDSHT3 fields by default. If there are no TDSHT3 fields, then the
oscilloscope fields are displayed.
Static Text
Static Text
The static text parameter inserts My Static Text.
Fields
None
The default size of the field dragged into the template is 200 pixels x 300 pixels.
280
TDSHT3 HDMI Compliance Test Software
Report Generator
Application View – Template Editor Window
The Template Editor window includes a menu bar, toolbar, client area, palette
list, and status bar. When you click New Template in the software, the client
area in the Template Editor window is empty. When you click Edit Template in
the software, the client area displays the selected template.
Figure 231: Template Editor Window
TDSHT3 HDMI Compliance Test Software
281
Report Generator
Application View – Palette List
View > Palette Toolbar
The palette list is a floating toolbar that has a list of Native Fields, TDSHT3
Fields, and Oscilloscope Fields grouped logically. You can drag and drop fields
from the palette list into the template. The palette toolbar is displayed by default.
Click View > Palette Toolbar to either show or hide the toolbar.
Figure 232: Palette list
The palette list groups the fields into the following categories:
Native Fields: Native Fields are fields such as Static Text, Rectangle, Line,
Logo, Table, Date, and Time.
TDSHT3 Fields: TDSHT3 Fields are the fields that are related to the
software.
Oscilloscope Fields: Oscilloscope Fields are groups of fields that are related
to the data acquired from the oscilloscope.
Custom Groups: Custom Groups represent the custom groups created.
282
TDSHT3 HDMI Compliance Test Software
Report Generator
Application View – Palette List – Native Fields
You can enhance the report by using the following parameters from the Native
Fields: Static Text, Rectangle, Line, Logo, Table, Date, and Time.
You can drag any field from the Native Field and drop it in the active template.
Static Text
1. From the Native Fields, drag and drop the static text.
Figure 233: Edit Text dialog box
2. In the Edit Text dialog box,
Click the icon next to the Text box to open the Virtual Keyboard.
In the Virtual Keyboard, select the text, and then click Enter.
3. Click OK.
Rectangle
From the Native Fields, drag and drop the Rectangle into the active template.
The black squares that appear at the corners of the rectangle allow you to
increase the size.
Line
From the Native Fields, drag and drop the Line into the active template.
The black squares that appear at the corners of the line allow you to increase the
size.
TDSHT3 HDMI Compliance Test Software
283
Report Generator
Logo
1. From the Native Fields, drag and drop the Logo into the active template.
Figure 234: Edit Image dialog box
2. In the Edit Image dialog box,
Click the icon next to the Image box to open the Virtual Keyboard.
In the Virtual Keyboard, type the path and filename, and then click
Enter; or, click Browse to navigate to the location where the image is
available.
3. Click OK.
Table
1. From the Native Fields, drag and drop the Table into the active template.
Figure 235: Edit Table dialog box
284
TDSHT3 HDMI Compliance Test Software
Report Generator
2. In the Edit Table dialog box, you can select the number of rows and
columns.
Click the icon next to the Number of Rows box and the Number of
Columns box to edit the number.
In the Virtual Keyboard, type the number, and then click Enter.
3. Click OK.
Date and Time
From the Native Fields, drag and drop the Date and Time.
Application View – Palette List – TDSHT3 Fields
Table 147: TDSHT3 Application Fields
TDSHT3 Fields
Source
- Clock-Data
- Configuration Parameters
- Clock Input
- Data Input
- Ref Level Units
- Hysteresis
- High Ref Level
- Mid Ref Level
- Low Ref Level
- Number of Acquisitions
- Record Length
- Clock
- Tbit # of Avgs
TDSHT3 HDMI Compliance Test Software
285
Report Generator
Table 147: TDSHT3 Application Fields
(Contd.)
TDSHT3 Fields
- Eye Diagram Results
- Statistics
- Clock TIE
Population
- Clock TIE Min
- Clock TIE Max
- Clock TIE Mean
- Clock TIE Std Dev
- Clock TIE Pk-Pk
- Recovered Clock
TIE Population
- Recovered Clock
TIE Min
- Recovered Clock
TIE Max
- Recovered Clock
TIE Mean
- Recovered Clock
TIE Std Dev
- Recovered Clock
TIE Pk-Pk
- Test Name
- Spec Range
- Meas Value
- Result
- Remarks/Comments
- Eye Diagram Image
- Tbit
- Vswing
- Oscilloscope Image
- Mask Hits
- Clock Jitter Results
- Statistics
- Clock TIE
Population
- Clock TIE Min
- Clock TIE Max
- Clock TIE Mean
286
TDSHT3 HDMI Compliance Test Software
Report Generator
Table 147: TDSHT3 Application Fields
(Contd.)
TDSHT3 Fields
- Clock TIE Std Dev
- Clock TIE Pk-Pk
- Recovered Clock
TIE Population
- Recovered Clock
TIE Min
- Recovered Clock
TIE Max
- Recovered Clock
TIE Mean
- Recovered Clock
TIE Std Dev
- Recovered Clock
TIE Pk-Pk
- Test Name
- Spec Range
- Meas Value
- Result
- Remarks/Comments
- Clock Jitter Image
- Tbit
- Vswing
- Oscilloscope Image
- Overshoot/Undershoot
V-H Results
- Clock Overshoot V-H+
- Test Name
- Spec Range
- Meas Value
- Result
Remarks/Comments
- Tbit
- Vswing
- Oscilloscope
Image
- Clock Undershoot VH- Test Name
- Spec Range
TDSHT3 HDMI Compliance Test Software
287
Report Generator
Table 147: TDSHT3 Application Fields
(Contd.)
TDSHT3 Fields
- Meas Value
- Result
Remarks/Comments
- Tbit
- Vswing
- Oscilloscope
Image
- Data Overshoot V-H+
- Test Name
- Spec Range
- Meas Value
- Result
Remarks/Comments
- Tbit
- Vswing
- Oscilloscope
Image
- Data Undershoot V-H- Test Name
- Spec Range
- Meas Value
- Result
Remarks/Comments
- Tbit
- Vswing
- Oscilloscope
Image
- Overshoot/Undershoot
V-L Results
- Clock Overshoot V-L- Test Name
- Spec Range
- Meas Value
- Result
Remarks/Comments
- Tbit
- Vswing
288
TDSHT3 HDMI Compliance Test Software
Report Generator
Table 147: TDSHT3 Application Fields
(Contd.)
TDSHT3 Fields
- Oscilloscope
Image
- Clock Undershoot VL+
- Test Name
- Spec Range
- Meas Value
- Result
Remarks/Comments
- Tbit
- Vswing
- Oscilloscope
Image
- Data Overshoot V-L- Test Name
- Spec Range
- Meas Value
- Result
Remarks/Comments
- Tbit
- Vswing
- Oscilloscope
Image
- Data Undershoot V-L+
- Test Name
- Spec Range
- Meas Value
- Result
Remarks/Comments
- Tbit
- Vswing
- Oscilloscope
Image
- Duty Cycle Results
- Max Duty Cycle
- Test Name
- Spec Range
- Meas Value
TDSHT3 HDMI Compliance Test Software
289
Report Generator
Table 147: TDSHT3 Application Fields
(Contd.)
TDSHT3 Fields
- Result
Remarks/Comments
- Tbit
- Oscilloscope
Image
- Min Duty Cycle
- Test Name
- Spec Range
- Meas Value
- Result
Remarks/Comments
- Tbit
- Oscilloscope
Image
- Rise Time Results
- Clock Rise Time
- Statistics
- Clock Rise
Population
- Clock Rise Min
- Clock Rise Max
- Clock Rise
Mean
- Clock Rise Std
Dev
- Clock Rise PkPk
- Test Name
- Spec Range
- Meas Value
- Result
Remarks/Comments
- Tbit
- Vswing
- Oscilloscope
Image
- Data Rise Time
- Statistics
- Data Rise
Population
290
TDSHT3 HDMI Compliance Test Software
Report Generator
Table 147: TDSHT3 Application Fields
(Contd.)
TDSHT3 Fields
- Data Rise Min
- Data Rise Max
- Data Rise Mean
- Data Rise Std
Dev
- Data Rise PkPk
- Test Name
- Spec Range
- Meas Value
- Result
Remarks/Comments
- Tbit
- Vswing
- Oscilloscope
Image
- Fall Time Results
- Clock Fall Time
- Statistics
- Clock Fall
Population
- Clock Fall Min
- Clock Fall Max
- Clock Fall Mean
- Clock Fall Std
Dev
- Clock Fall PkPk
- Test Name
- Spec Range
- Meas Value
- Result
Remarks/Comments
- Tbit
- Vswing
- Oscilloscope
Image
- Data Fall Time
- Statistics
TDSHT3 HDMI Compliance Test Software
291
Report Generator
Table 147: TDSHT3 Application Fields
(Contd.)
TDSHT3 Fields
- Data Fall
Population
- Data Fall Min
- Data Fall Max
- Data Fall Mean
- Data Fall Std
Dev
- Data Fall Pk-Pk
- Test Name
- Spec Range
- Meas Value
- Result
Remarks/Comments
- Tbit
- Vswing
- Oscilloscope
Image
- Inter-Pair Skew (ClockData) Results
- Test Name
- Spec Range
- Meas Value
- Results
- Remarks/Comments
- Tbit
- Vswing
- Oscilloscope Image
- Data-Data
- Configuration
Parameters
- Data Input A
- Data Input B
- Inter-Pair Skew (DataData) Results
- Test Name
- Spec Range
- Meas Value
- Result
292
TDSHT3 HDMI Compliance Test Software
Report Generator
Table 147: TDSHT3 Application Fields
(Contd.)
TDSHT3 Fields
- Remarks/Comments
- Tbit
- Vswing
- Oscilloscope Image
- Single-Ended
- Configuration
Parameters
- Clock Input
- Input +
- Input - Number of
Acquisitions
- Avcc
- Tbit # of Avgs
- Intra-Pair Skew Results
- Test Name
- Spec Range
- Meas Value
- Result
- Remarks/Comments
- Tbit
- Oscilloscope Image
- Low Amplitude +
Results
- Test Name
- Spec Range
- Meas Value
- Result
- Remarks/Comments
- Oscilloscope Image
- Low Amplitude Results
- Test Name
- Spec Range
- Meas Value
- Result
TDSHT3 HDMI Compliance Test Software
293
Report Generator
Table 147: TDSHT3 Application Fields
(Contd.)
TDSHT3 Fields
- Remarks/Comments
- Oscilloscope Image
Sink
- Differential
- Configuration
Parameters
- Clock Input
- Data Input
- Ref Level Units
- Hysteresis
- High Ref Level
- Mid Ref Level
- Low Ref Level
- Record Length
- Clock
- Min/Max-Diff Swing
Tolerance
- Vicm
- Frequency Pair
- DUT Freq
- DTG Configuration
Parameters
- DTG Filepath
- Physical Clock
Channel
- Logical Clock Channel
- Physical Data
Channel 0
- Logical Data Channel
0
- Physical Data
Channel 1
- Logical Data Channel
1
- Physical Data
Channel 2
- Logical Data Channel
2
294
TDSHT3 HDMI Compliance Test Software
Report Generator
Table 147: TDSHT3 Application Fields
(Contd.)
TDSHT3 Fields
- Min/Max-Diff Swing
Tolerance Results
- Test Name
- Spec Range
- Meas Value
- Result
- Remarks/Comments
- Vswing
- Oscilloscope Image
- Jitter Tolerance Results
- Clock Jitter Results
- Test Name
- Spec Range
- Meas Value
- Result
Remarks/Comments
- Jitter Image
- Tbit
- Vswing
- Data Jitter Results
- Test Name
- Spec Range
- Meas Value
- Result
Remarks/Comments
- Eye Image
- Tbit
- Vswing
- Mask Hits
- Single-Ended
- Configuration
Parameters
- Clock Input
- DTG Configuration
Parameters
- DTG Filepath
- Physical Clock
TDSHT3 HDMI Compliance Test Software
295
Report Generator
Table 147: TDSHT3 Application Fields
(Contd.)
TDSHT3 Fields
Channel
- Logical Clock Channel
- Physical Data
Channel 0
- Logical Data Channel
0
- Physical Data
Channel 1
- Logical Data Channel
1
- Physical Data
Channel 2
- Logical Data Channel
2
- Intra-Pair Skew Results
- Test Name
- Spec Range
- Meas Value
- Result
- Remarks/Comments
- Tbit
- Vswing
- Oscilloscope Image
Cable
- Differential
- Configuration
Parameters
- Clock Input
- Data Input
- Ref Level Units
- Hysteresis
- High Ref Level
- Mid Ref Level
- Low Ref Level
- Record Length
- Test Points
- Clock
296
TDSHT3 HDMI Compliance Test Software
Report Generator
Table 147: TDSHT3 Application Fields
(Contd.)
TDSHT3 Fields
- DTG Configuration
Parameters
- DTG Filepath
- Physical Clock
Channel
- Logical Clock Channel
- Physical Data
Channel 0
- Logical Data Channel
0
- Physical Data
Channel 1
- Logical Data Channel
1
- Physical Data
Channel 2
- Logical Data Channel
2
- Eye Diagram Results
- Statistics
- T x Clock TIE
Population
- T x Clock TIE Min
- T x Clock TIE Max
- T x Clock TIE
Mean
- T x Clock TIE Std
Dev
- T x Clock TIE PkPk
- Recovered Clock
TIE Population
- Recovered Clock
TIE Min
- Recovered Clock
TIE Max
- Recovered Clock
TIE Mean
- Recovered Clock
TIE Std Dev
- Recovered Clock
TDSHT3 HDMI Compliance Test Software
297
Report Generator
Table 147: TDSHT3 Application Fields
(Contd.)
TDSHT3 Fields
TIE Pk-Pk
- Test Name
- Spec Range
- Meas Value
- Result
- Remarks/Comments
- TP1 Eye Diagram
Image
- TP1 Jitter Image
- TP2 Eye Diagram
Image
- TP2 Jitter Image
- Tbit
- Vswing
- Oscilloscope Image
- Mask Hits (TP1)
- Mask Hits (TP2)
Report
Configuration
- Pair (CK, D)
- Resolution
- Refresh Rate
- Device ID
- Device Details
- Pair (Single-Ended)
- Pair (D, D)
Application Version Number
298
TDSHT3 HDMI Compliance Test Software
Report Generator
Application View – Palette List – Oscilloscope Fields
The Oscilloscope Fields are grouped into 10 different groups:
Waveform Group: The Waveform Group has all the active live channels
and independent channels (only CH1 to CH4) waveforms in both jpeg and
bmp. These waveforms are generated to smooth out the stair-step effect seen
on the display.
Vertical Group: The Vertical Group has all vertical related fields, such as
the vertical scale, position, and offset.
Horizontal Group: The Horizontal Group has all horizontal related fields,
such as the horizontal divisions, scale, record length, position, and sample
rate.
Math Group: The Math Group has all the math related fields, such as the
math definition for a specified math channel, magnitude, spectral gate,
spectral phase, spectral window, and spectral frequencies of the math
channel.
Trigger Group: The Trigger Group has all trigger related fields, such as the
trigger type, mode, level, and various fields related to different trigger types.
Measurement Group: The Measurement Group has all the measurements,
such as the eight automated measurements and the immediate
measurements.
Acquisition Group: The Acquisition Group has all acquisition related
fields, such as the acquisition mode, acquisition state, repetitive mode, and
fast acquisition mode.
Cursor Group: The Cursor Group has all the cursor related fields, such as
the cursor mode, source, state and type of the cursor, H Bars, and V Bars.
Zoom Group: The Zoom Group has all zoom related fields, such as the
zoom horizontal position and horizontal scale.
Histogram Group: The Histogram Group has all histogram fields, such as
the co-ordinates of histogram box, mode, size, and source.
Screen Snapshot Group: The Screen Snapshot Group has two variations:
one in color and the other in black-and-white. For these screenshots, the
attributes are graticule, ink-saver, and jpeg.
TDSHT3 HDMI Compliance Test Software
299
Report Generator
Menus – File menu
Table 148: Template Editor | File menu
Menu Selection
Description
New
Click File > New to create a new template.
Open
Click File > Open to open a template file.
Close
Click File > Close to close the active template.
Save
Click File > Save to save changes to the file.
Save As
Click File > Save As to save the template to a different file by using
the Save As dialog box.
Print
Click File > Print to either print all or part of the contents of the
active template.
Print Preview
Click File > Print Preview to display a sample view of the active
template as it would be printed.
List of recent templates
Click File > List of recent templates to open a previously (recently)
opened template.
Exit
Click File > Exit to quit template editor.
Menus – Edit menu
The available edit menu selections depend on whether a template is active or not.
In other words, the client area is either empty or has an open template.
Table 149: Template Editor | Edit menu
300
Menu Selection
Description
Cut
Click Edit > Cut to cut the selected fields.
Copy
Click Edit > Copy to copy the selected fields.
Paste
Click Edit > Paste to paste the clipboard content.
Delete
Click Edit > Delete to delete the selected fields.
Select All
Click Edit > Select All to select all the fields.
Create Custom Group
Click Edit > Create Custom Group to create a custom group.
Edit Custom Group
Click Edit > Edit Custom Group to edit the custom group.
Change Template Size
Click Edit > Change Template Size to change the template size.
Find
Click Edit > Find to find the data that matches the search criteria.
Replace
Click Edit > Replace to replace the data that matches the search
criteria with the specified data.
TDSHT3 HDMI Compliance Test Software
Report Generator
Menus – View menu
A check mark appears next to the selected command.
Table 150: Template Editor | View menu
Menu Selection
Description
Toolbar
Click View > Toolbar to either display or hide the selected
toolbars such as Standard, Align Size, Layout, and Action.
Status Bar
Click View > Status Bar to either display or hide the status
bar.
Palette Bar
Click View > Palette Bar to either display or hide the palette
bar.
Grid Lines
Click View > Grid Lines to either display or hide the grid lines
in the client area.
Menus – Object menu
The available object menu selections depend on whether a parameter in the client
area is selected or not.
Table 151: Template Editor | Object menu
Menu Selection
Description
Bring to Front
Click Object > Being to Front to bring the selected fields to
the front.
Send to Back
Click Object > Send to Back to send the selected fields back.
Hide Text/Show Text
Click Object > Hide Text/Show Text to either hide or show
the caption of the selected parameter.
Position Caption on
Top/to the Left
Click Object > Position Caption on Top/to the Left to
position the caption of the selected parameter either on top or
to the left.
Edit Caption
Click Object > Edit Caption to edit the caption of the selected
parameter.
Change Font
Click Object > Change Font to change the font of the
selected parameter or the caption by using the Change Font
dialog box.
Align Fields
Click Object > Align Fields to aligns fields to the top, bottom,
left, or right.
Make Same Size
Click Object > Make Same Size to resize the selected objects
to the same size by either height, width, or both.
TDSHT3 HDMI Compliance Test Software
301
Report Generator
Menus – Windows menu
Table 152: Template Editor | Windows menu
Menu Selection
Description
New Window
Click Window > New Window to open a new window
duplicating the current active window.
Cascade
Click Window > Cascade to arrange the open templates in
the client area from the upper left side to lower right side so
that they overlap one another.
Tile
Click Window > Tile to arrange the open templates
horizontally and vertically in the application client area without
overlapping.
Arrange Icons
Click Window > Arrange Icons to arrange the icons of any
templates you have minimized to the bottom left of the window.
List of open templates
Click Window > List of open templates to jump to another
open template.
Menus – Help menu
Table 153: Template Editor | Help menu
302
Menu Selection
Description
Help Topics
Click Help > Help Topics to display online help.
About Template Editor
Click Help > About Template Editor to display version and
copyright information.
TDSHT3 HDMI Compliance Test Software
Report Generator
Toolbars
Click View > Toolbars to choose to either display or hide these toolbars.
Toolbars – Standard toolbar
View > Toolbar > Standard
Click View > Toolbar > Standard to either display or hide the standard toolbar.
TDSHT3 HDMI Compliance Test Software
303
Report Generator
Toolbars – Align or Size toolbar
View > Toolbar > Align/Size
Click View > Toolbar > Align/Size to either display or hide the Align/Size
toolbar.
Toolbars – Layout toolbar
View > Toolbar > Layout
Click View > Toolbar > Layout to either display or hide the layout toolbar.
304
TDSHT3 HDMI Compliance Test Software
Report Generator
Toolbars – Action toolbar
View > Toolbar > Action
Click View > Toolbar > Action to either display or hide the action toolbar.
Status bar
The status bar displays the status of the application and tool tips for selected
options.
How to Use Template Editor
To create a new template
1.
From the Palette List, drag and drop the fields that you want in the report.
Note: If you drag and drop a group from the palette list, then all the fields within
the group are placed in the active template.
2.
Organize the fields as you want them to appear in the report.
3.
After you have finished creating the template, click File > Save.
To edit an existing template
1.
Organize the fields as you want them to appear in the report.
Note: From the Palette List, drag and drop the fields that you want in the report.
2.
If you drag and drop a group from the palette list, then all the fields within
the group are placed in the active template.
3.
Organize the fields as you want them to appear in the report.
TDSHT3 HDMI Compliance Test Software
305
Report Generator
4.
After you have finished editing the template, click File > Save.
You can create a custom group, edit a custom group, and change the
template size.
You can also edit the caption, change a font, align the fields, and make
the selected fields of the same size.
Create Custom Groups
Edit > Create Custom Group
You can create custom groups by using any fields from the palette list.
1.
Click Edit > Create Custom Group.
Figure 236: Create Custom Group - Step 1 of 2 dialog box
2.
306
In the Create Custom Group - Step 1 of 2 dialog box, type the group
name. You can type the group name by using the Virtual Keyboard.
TDSHT3 HDMI Compliance Test Software
Report Generator
3.
Click Next. The Select Fields - Step 2 of 2 dialog box displays all the fields
of the palette list.
Figure 237: Select Fields - Step 2 of 2 dialog box
4.
Using Add >>, Add All, << Remove, or Remove All, you can click the
fields you want to include in the new group.
5.
Click Finish.
TDSHT3 HDMI Compliance Test Software
307
Report Generator
Edit Custom Groups
Edit > Edit Custom Group
You can edit custom groups.
1.
Click Edit > Edit Custom Group.
Figure 238: Edit Custom Group - Step 1 of 2 dialog box
2.
308
In the Edit Custom Group - Step 1 of 2 dialog box, click a group to edit.
TDSHT3 HDMI Compliance Test Software
Report Generator
3.
Click Next.
Figure 239: Select Fields - Step 2 of 2 dialog box
4.
In the Select Fields - Step 2 of 2 dialog box, click the fields you want to add
or remove from the group by using Add >>, Add All, << Remove, or
Remove All.
5.
Click Finish.
TDSHT3 HDMI Compliance Test Software
309
Report Generator
Delete Custom Groups
Edit > Edit Custom Group
You can delete custom groups.
1.
Click Edit > Edit Custom Group.
Figure 240: Edit Custom Group - Step 1 of 2 dialog box
310
2.
In the Edit Custom Group - Step 1 of 2 dialog box, click a group to delete.
3.
Click Delete. A message box appears asking for your confirmation.
4.
Click Yes to delete.
TDSHT3 HDMI Compliance Test Software
Report Generator
Change Template Size
Edit > Change Template Size
You can change the size and page setup for a template.
1.
Click Edit > Change Template Size. The Change Template Size dialog box
appears.
Figure 241: Change Template Size dialog box
TDSHT3 HDMI Compliance Test Software
311
Report Generator
2.
In the Change Template Size dialog box,
Select the Template Size as either 1/4 page, 1/2 page, or Full page.
If the printer is not available, select the Page Size as Default (8.5" x
11"); else, click Configure Page....
Figure 242: Page Setup dialog box
In the Page Setup dialog box, select the paper size, source, orientation,
and margins.
Click OK to return to the Change Template Size dialog box.
Click OK.
Note: Do not reduce the template size beyond the content filled in the template.
You may lose information.
312
TDSHT3 HDMI Compliance Test Software
Report Generator
Select All
Edit > Select All
To cut, copy, or delete the fields from the active template, you need to select the
fields. Click CTRL + selecting the fields to select the fields from the active
template.
Find
Edit > Find
You can search for text in the active template.
1.
Click Edit > Find.
Figure 243: Find dialog box
2.
In the Find dialog box, type the search string by using the Virtual Keyboard.
3.
Click Find Next until you find the required search string.
TDSHT3 HDMI Compliance Test Software
313
Report Generator
Replace
Edit > Replace
You can both search and replace the text in the active template.
1.
Click Edit > Replace.
Figure 244: Replace dialog box
2.
In the Replace dialog box, by using the Virtual Keyboard, type the search
string in the Find what box.
3.
In the Replace with box, by using the Virtual Keyboard, type the
replacement string.
4.
Click Find Next until you find the required search string.
5.
Click Replace to replace one instance of the string, or click Replace All to
replace all instances of the string.
6.
Click Cancel after you have replaced the strings.
Bring To Front
Object > Bring To Front
You can bring the selected fields to the front.
Send To Back
Object > Send To Back
You can send the selected fields back.
314
TDSHT3 HDMI Compliance Test Software
Report Generator
Show/Hide Text
Object > Show/Hide Text
You can either show or hide the captions for the selected fields.
Position Caption
Object > Position Caption to the Left, or on Top
You can position the caption of the selected fields either to the left or on the top.
Edit Caption
Object > Edit Caption
You can edit the caption of the selected parameter or object.
1.
Click Object > Edit Caption. The Edit Caption dialog box appears.
Figure 245: Edit Caption dialog box
2.
In the Edit Caption dialog box, click the icon next to the Caption box to
type the caption by using the Virutal Keyboard.
3.
Click OK.
Change Font
Object > Change Font
You can change font for the selected field in the template.
1.
Select the field or fields in the active template.
TDSHT3 HDMI Compliance Test Software
315
Report Generator
2.
Click Object > Change Font or right-click the field to display the options.
Figure 246: Font dialog box
3.
In the Font dialog box, choose the font size, color, style, and effects.
4.
Click OK.
Align Fields
Object > Align Fields
You can align the fields to either top, bottom, left, or right.
316
1.
Select the fields in the active template.
2.
Click Object > Align Fields > Top, Bottom, Left, or Right to align the
fields accordingly.
TDSHT3 HDMI Compliance Test Software
Report Generator
Make Same Size
Object > Make Same Size
You can set the selected fields to either the same height, width, or both.
1.
Select the fields in the active template.
2.
Click Object > Make Same Size > Height, Width, or Both to make the
selected fields of the same size.
Report Layout Editor
About Report Layout Editor
Report Layout Editor helps you to define the report layout to generate reports.
The report layout, once created, can be reused to generate multiple reports.
You can select the number of test templates per page and position the templates
in the report. The report can have multiple pages with different template sizes.
Each template is a sub-report with a unique test title. This unique test title helps
you select the required template when you generate a report. You can define
headers and footers for the report layout.
To display Report Layout Editor, click Define Report Layout > New Layout.
TDSHT3 HDMI Compliance Test Software
317
Report Generator
Figure 247: Report Layout window
The Report Layout Editor window has two panes.
List of Templates: This pane displays a list of templates, template sizes,
template folders, and buttons that allow you to clear or place a template in a
report layout tile and to create new templates.
Report Layout: This pane displays the selected report layout and the
header, footer definition.
318
TDSHT3 HDMI Compliance Test Software
Report Generator
Default Settings
Table 154: Report Layout Default Settings
Parameter
Selection
Default Setting
Report Layout
Layout
Four tests per page
Page Size
Page Setup
8.5 inches x 11 inches
Layout Editor
None
One page
Go to
Edit
Displays the current page number in the page
layout
Font
None
Arial > Regular 9
Default Margin
Size
None
Margin size on all sides of the paper is 0.8 inch
TDSHT3 HDMI Compliance Test Software
319
Report Generator
Application View – Report Layout Editor Window
The Report Layout Editor window includes a menu bar, toolbar, list of templates
pane, and a report layout pane.
Figure 248: Report Layout Editor window
320
TDSHT3 HDMI Compliance Test Software
Report Generator
Application View – List of Templates pane
The list of templates pane displays the path of the template, templates in the
folder, file names, and template sizes. You can select the template from this list
and place it in the report layout pane.
Figure 249: List of Templates pane
In the list of templates pane, you can:
Select a different path where you have saved the customized templates
either by using the Virtual Keyboard or clicking Directory that displays a
Browse for Folder dialog box.
Click New to create a new template. The Template Editor window appears,
where you can create a new template.
Drag and drop the template file to the report layout pane's tile, or select the
template file and then click Place on Tile >>.
Click << Clear Tile to clear the selected tile in the report layout pane.
TDSHT3 HDMI Compliance Test Software
321
Report Generator
Application View – Report Layout pane
Depending on the number of tests selected per page, the report layout pane
appears as follows:
Figure 250: Report Layout pane
In the report layout pane, you can do the following:
Specify a title for each test.
Define or modify the header and footer.
Navigate between pages of the report layout.
322
TDSHT3 HDMI Compliance Test Software
Report Generator
Menus – File menu
Table 155: File menu selection and Description
Menu Selection
Description
New
Click File > New to create a new report layout.
Open
Click File > Open to opens a report layout file.
Save
Click File > Save to save changes to the file.
Save As
Click File > Save As to save the report layout to a different file
by using the Save As dialog box.
Page Setup
Click File > Page Setup to print either all or part of the contents
of the active template.
Configure Page
Use the Page Setup dialog box to configure the paper size,
source, orientation, and margins.
Default (8.5
inches X 11
inches)
Use the Page Setup dialog box to configure the page setup to
default - 8.5 inches x 11 inches.
Layout Preview
Click File > Layout Preview to display a sample view of the
active report layout as it would be printed.
List of recent report
layouts
Click File > List of recent report layouts to open a previously
(recently) opened report layout.
Exit
Click File > Exit to quit report layout editor.
Menus – Edit menu
Table 156: Edit menu selection and Description
Menu Selection
Description
Go To
Click Edit > Go To to go to the page that was typed in the Go
To Page dialog box.
TDSHT3 HDMI Compliance Test Software
323
Report Generator
Menus – View menu
A check mark appears next to the selected command.
Table 157: View menu selection and Description
Menu Selection
Description
Toolbar
Click View > Toolbar to either display or hide the selected
toolbars such as Standard, Page, Layout, and Action.
Status Bar
Click View > Status Bar to either display or hide the status
bar.
Refresh Template List
Click View > Refresh Template List to update the template
list in the list of templates pane.
Menus – Layout menu
A check mark appears next to the selected command.
Table 158: Layout menu selection and Description
Menu Selection
Description
One Test Per Page
Click Layout > One Test Per Page to change the report
layout to fit one test per page.
Two Tests Per Page
Click Layout > Two Tests Per Page to change the report
layout to fit two tests per page.
Four Tests Per Page
Click Layout > Four Tests Per Page to change the report
layout to fit four tests per page.
Menus – Page menu
Table 159: Page menu selection and Description
Menu Selection
Description
Insert Blank
324
Before Current
Page
Click Page > Insert Blank > Before Current Page to insert a
blank page before the current page.
After Current
Page
Click Page > Insert Blank > After Current Page to insert a
blank page after the current page.
TDSHT3 HDMI Compliance Test Software
Report Generator
Table 159: Page menu selection and Description
(Contd.)
Menu Selection
Description
Insert Copy
Before Current
Page
Click Page > Insert Copy > Before Current Page to insert a
copy of the current page before the current page.
After Current
Page
Click Page > Insert Copy > After Current Page to insert a
copy of the current page after the current page.
Delete
Click Page > Delete to delete the current page.
Menus – Help menu
Table 160: Help menu selection and Description
Menu Selection
Description
Help Topics
Click Help > Help Topics to display online help.
About Report Layout
Editor
Click Help > About Report Layout Editor to display version
and copyright information.
Toolbars
Click View > Toolbars to choose to either display or hide these toolbars.
Toolbars – Standard toolbar
View > Toolbars > Standard
Click View > Toolbars > Standard to either display or hide the standard
toolbar.
TDSHT3 HDMI Compliance Test Software
325
Report Generator
Toolbars – Layout toolbar
View > Toolbars > Layout
Click View > Toolbars > Layout to either display or hide the layout toolbar.
Toolbars – Page toolbar
View > Toolbars > Page
Click View > Toolbars > Page to either display or hide the page toolbar.
326
TDSHT3 HDMI Compliance Test Software
Report Generator
Toolbars – Action toolbar
View > Toolbars > Action
Click View > Toolbars > Action to either display or hide the action toolbar.
How to Use Report Layout Editor
To define a report layout, perform the following steps:
1.
Set the report layout.
Click Layout > One Test Per Page/Two Tests Per Page/Three Tests
Per Page. The report layout pane displays tiles depending on the
selected number of tests per page.
2.
Add the templates.
The list of templates pane displays the templates in the default directory
- C:\TekApplications\TDSHT3\ReportGenerator\Templates.
From the list of templates pane, drag and drop the templates to the tiles
in the report layout pane. You can use Place on Tile and Clear Tile to
move the templates to the tiles and to clear the tiles.
If you want to define a new template, click New in the list of templates
pane.
To browse for a different folder other than the default templates, click
Directory to display the Browse for Folder dialog box. Navigate to
the folder where you have the templates stored and then click OK.
3.
Define Header and Footer.
TDSHT3 HDMI Compliance Test Software
327
Report Generator
4.
Save the report layout.
Click File > Save to display the Save dialog box. Type the report
layout name and then click Save.
The report layout is saved in the .rpl format.
To edit an existing report layout, perform the following steps:
1.
Change the report layout.
Click Layout > One Test Per Page/Two Tests Per Page/Three Tests
Per Page. The report layout pane displays tiles depending on the
selected number of tests per page.
An alert message appears.
Click Yes to continue or click No to stop.
2.
Add or remove the templates.
In the report layout pane, click the tile to which you want to either add
or remove the template.
To remove a template from the report layout, complete the following
steps:
In the list of templates pane, click Clear Tile.
An alert message appears.
Click Yes to continue or click No to stop.
To add a template to the report layout, complete the following steps:
The list of templates pane displays the templates in the default
directory C:\TekApplications\TDSHT3\ReportGenerator\Templates.
From the list of templates pane, drag and drop the templates to the
tiles in the report layout pane. Click Place on Tile to move the
template to the selected tile.
If you want to define a new template, click New in the list of
templates pane.
To browse for a different folder other than the default templates,
click Directory to display the Browse for Folder dialog box.
Navigate to the folder where you have the templates stored and
then click OK.
328
TDSHT3 HDMI Compliance Test Software
Report Generator
3.
Modify Header and Footer.
4.
Save the report layout.
Click File > Save to display the Save dialog box. Type the report
layout name and then click Save.
The report layout is saved in the .rpl format.
Note: Each report can have up to five pages.
How to Add a Template
Using the Report Layout Editor, you can add a template to an existing report.
Follow these steps to add a template to the report:
1.
Click Define Report Layout to open a new layout.
2.
Click File > Open and browse for generated reports. The report is displayed
in the report layout pane.
3.
From the standard toolbar, click Insert New Page before Current Page or
Insert New Page after Current Page.
4.
From the list of templates pane, select the template that you want to add to
the current page layout. Drag and drop the template file on to the report or
click Place on Tile to add the template.
5.
Add test titles for this layout.
6.
Click File > Save to save the modified report as an .rpl or .rpt file.
7.
Click Generate Report to generate a report for the unfilled template from
the .rpl or .rpt file.
TDSHT3 HDMI Compliance Test Software
329
Report Generator
Configure Page
File > Page Setup > Configure Page
You can configure the paper size, source, orientation, and margins.
Figure 251: Page Setup window
After you have configured the page setup, click OK.
330
TDSHT3 HDMI Compliance Test Software
Report Generator
Go To Page
Edit > Go To
Use the Go To Page dialog box to go to different pages in the report layout.
Figure 252: Go To Page dialog box
1.
In the Enter Page Number box, either enter the page number or click the
icon next the Enter Page Number box to display the Virtual Keyboard.
2.
Click Go To. The report layout pane displays the relevant page.
Change Report Layout
Layout > One Test Per Page/Two Tests Per Page/Four Tests Per Page
You can change the report layout to fit either one, two, or four tests per page.
TDSHT3 HDMI Compliance Test Software
331
Report Generator
Header/Footer Definition
To modify Header Definition, do the following:
1.
In the report layout pane, click Header - Click to Modify.
Figure 253: Header/Footer Definition dialog box
2.
In the Header/Footer Definition dialog box, select the header position Header Left, Header Center, or Header Right.
3.
Type the Header Definition in the text box.
Click the icon next to the text box to display the Virtual Keyboard. In
the Virtual Keyboard, type the text, and then click Enter.
To insert special text, click Insert Special Text to display a submenu.
Click Date, File Name, Author, Page X of Y, Page X, or Logo.
4.
Click Set Font to change the font style, size, effects, color, and script for
each field separately, and then click OK.
5.
In the Header/Footer Definition dialog box, click OK.
To modify Footer Definition, do the following:
1.
In the report layout pane, click Footer - Click to Modify.
Figure 254: Header/Footer Definition dialog box
332
TDSHT3 HDMI Compliance Test Software
Report Generator
2.
In the Header/Footer Definition dialog box, select the footer position Footer Left, Footer Center, or Footer Right.
3.
Type the Footer Definition in the text box.
Click the icon next to the text box to display the Virtual Keyboard. In
the Virtual Keyboard, type the text, and then click Enter.
To insert special text, click Insert Special Text to display a submenu.
Click Date, File Name, Author, Page X of Y, Page X, or Logo.
4.
Click Set Font to change the font style, size, effects, color, and script for
each field separately, and then click OK.
5.
In the Header/Footer Definition dialog box, click OK.
Insert Pages
To insert pages, do the following:
Click Page > Insert Blank > Before Current Page/After Current Page to
insert a new page before the current page or after the current page.
Click Page > Insert Copy > Before Current Page/After Current Page to
insert copy of the current page before the current page or after the current
page.
Note: When you insert a copy of a page before or after the current page, the
current page layout is the same as the new page.
TDSHT3 HDMI Compliance Test Software
333
Report Generator
Report Viewer
About Report Viewer
Report Viewer allows you to view the generated report.
On the Generate Report tab, either click Load Report or click Generate
Report to display Report Viewer and browse for the report that you want to view
or generate.
Figure 255: Application Report Viewer window
334
TDSHT3 HDMI Compliance Test Software
Report Generator
Application View – Report Viewer Window
The Report Viewer window includes a menu bar, toolbar, align/size bar, and
client area.
Figure 256: Report Viewer window
TDSHT3 HDMI Compliance Test Software
335
Report Generator
Menus – File menu
Table 161: File menu selection and Description
Menu Selection
Description
Open
Click File > Open to open a template file.
Save
Click File > Save to save changes to the file.
Save As
Click File > Save As to save the template to a different file by
using the Save As dialog box.
Print
Click File > Print to either print all or part of the contents of the
active template.
Print Preview
Click File > Print Preview to display a sample view of the
active template as it would be printed.
Print Setup
Click File > Print Setup to set up the printer.
Export to RTF
Click File > Export to RTF to export the report in rich text
format (.rtf).
List of recent templates
Click File > List of recent templates to open a previously
(recently) opened template.
Exit
Click File > Exit to quit Report Viewer.
Menus – Edit menu
The available edit menu selections depend on whether a field is selected or not.
Table 162: Edit menu selection and Description
336
Menu Selection
Description
Cut
Click Edit > Cut to cut the selected fields and place it on the
clipboard.
Copy
Click Edit > Copy to copy the selected fields to the clipboard.
Paste
Click Edit > Paste to paste the clipboard content.
Delete
Click Edit > Delete to delete the selected fields.
Select All
Click Edit > Select All to select all the fields.
Add Text Field
Click Edit > Add Text Field to add a text field to the report.
Find
Click Edit > Find to find the data that matches the search
criteria.
Replace
Click Edit > Replace to replace the data that matches the
search criteria with the specified data.
Go To
Click Edit > Go To to go to the page number specified in the
Go To Page dialog box.
TDSHT3 HDMI Compliance Test Software
Report Generator
Menus – View menu
A check mark appears next to the selected command.
Table 163: View menu selection and Description
Menu Selection
Description
Toolbar
Click View > Toolbar to either display or hide the standard
toolbar.
Align/Size Bar
Click View > Align/Size Bar to either display or hide the
align/size toolbar.
Status Bar
Click View > Status Bar to either display or hide the status
bar.
Separators
Click View > Separators to either display or hide the
separators.
Menus – Object menu
The available object menu selections depend on whether a field in the client area
is selected or not.
Table 164: Object menu selection and Description
Menu Selection
Description
Bring To Front
Click Object > Bring To Front to bring the selected field to
front.
Send To Back
Click Object > Send To Back to send the selected field back.
Hide Text/Show Text
Click Object > Hide Text/Show Text to either show or hide
the caption of the selected field.
Position Caption on
Top/to the Left
Click Object > Position Caption on Top/to the Left to
position the caption of the selected field either to the left or on
top.
Edit Text
Click Object > Edit Text to edit the text in the selected field.
Change Font
Click Object > Change Font to change the font of the
selected field or the caption by using the Change Font dialog
box.
Align Fields
Click Object > Align Fields to align fields to the top, bottom,
left, or right.
Make Same Size
Click Object > Make Same Size to resize the selected fields
to the same size by either height, width, or both.
TDSHT3 HDMI Compliance Test Software
337
Report Generator
Menus – Help menu
Table 165: Help menu selection and Description
Menu Selection
Description
Help Topics
Click Help > Help Topics to display online help.
About Report Viewer
Click Help > About Report Viewer to display version and
copyright information.
Toolbars
Click View > Toolbars to choose to either display or hide these toolbars.
Toolbars – Standard toolbar
View > Toolbar > Standard
Click View > Toolbar > Standard to either display or hide the standard toolbar.
338
TDSHT3 HDMI Compliance Test Software
Report Generator
Toolbars – Align or Size toolbar
View > Toolbar > Align/Size
Click View > Toolbar > Align/Size to either display or hide the Align/Size
toolbar.
Status bar
The status bar displays the status of the application and tool tips for selected
options.
Separators
View > Separators
Click View > Separators to either display or hide the template separators.
How to Use Report Viewer
With the report viewer, you can:
View a report
Edit text
Find text
Replace text
You can select some objects and bring them front or send them back. You can
show/hide text, position caption to the left, or on top. You can edit caption or
TDSHT3 HDMI Compliance Test Software
339
Report Generator
change font. You can align selected fields or make the selected fields of the same
size. You can export a report to an .rtf file.
Export to RTF
File > Export to RTF
You can export a report to a rich text format (.rtf) file.
Note: Report Generator exports the report to an .rtf file in a compressed format
to ensure that the file size is small. If you edit the .rtf file by using Microsoft
Word, then the file size may increase.
Find
Edit > Find
You can search for text in the report.
1.
Click Edit > Find. The Find dialog box appears.
Figure 257: Find dialog box
340
2.
In the Find dialog box, type the search string by using the Virtual Keyboard.
3.
Click Find Next until you find the required search string.
TDSHT3 HDMI Compliance Test Software
Report Generator
Replace
Edit > Replace
You can search and replace the text in the report.
1.
Select Edit > Replace.
Figure 258: Replace dialog box
2.
In the Replace dialog box, enter the search string by using the Virtual
Keyboard in the Find what box.
3.
In the Replace with box, by using the Virtual Keyboard, type the
replacement string.
4.
Click Find Next until you find the required search string.
5.
Click Replace to replace one instance of the string, or click Replace All to
replace all instances of the string.
6.
Click Cancel after you have replaced the strings.
Bring To Front
Object > Bring To Front
You can bring the selected fields to the front.
Send To Back
Object > Send To Back
You can send the selected fields back.
TDSHT3 HDMI Compliance Test Software
341
Report Generator
Show/Hide Text
Object > Show/Hide Text
You can either show or hide the captions for the selected fields.
Position Caption
Object > Position Caption to the Left, or on Top
You can position the caption of the selected fields either to the left or on the top.
Edit Caption
Object > Edit Caption
You can edit the caption of the selected parameter or object.
1.
Click Object > Edit Caption. The Edit Caption dialog box appears.
Figure 259: Edit Caption dialog box
2.
In the Edit Caption dialog box, click the icon next to the Caption box to
enter the caption by using the Virtual Keyboard.
3.
Click OK.
Change Font
Object > Change Font
You can change font for the selected field in the template.
1.
342
Select the field or fields in the active template.
TDSHT3 HDMI Compliance Test Software
Report Generator
2.
Click Object > Change Font or right-click the field to display the options.
Figure 260: Font dialog box
3.
In the Font dialog box, choose the font size, color, style, and effects.
4.
Click OK.
Align Fields
Object > Align Fields
You can align the fields to either top, bottom, left, or right.
1.
Select the fields in the active template.
2.
Click Object > Align Fields > Top, Bottom, Left, or Right to align the
fields accordingly.
Make Same Size
Object > Make Same Size
You can set the selected fields to either the same height, width, or both.
1.
Select the fields in the active template.
TDSHT3 HDMI Compliance Test Software
343
Report Generator
2.
Click Object > Make Same Size > Height, Width, or Both to make the
selected fields of the same size.
How to…
Create or Edit a Test Template
Utilities > Report Generator > Define Test Template
You can either create a new test template or edit an existing template.
Figure 261: Define Test Template pane
To create a new test template
344
1.
On the Define Test Template tab, click New Template.
2.
The Template Editor window appears with an empty client area.
3.
Create the template by using the palette list.
4.
After you create a new test template, click Done.
TDSHT3 HDMI Compliance Test Software
Report Generator
To edit an existing test template
1.
On the Define Test Template tab, click Browse. The Open dialog box
appears.
Figure 262: Open dialog box to edit an existing test template
2.
The Open dialog box displays the existing factory default templates and
customized templates in the path
C:\TekApplications\TDSHT3\ReportGenerator\Templates.
3.
Select the template that you want to use, and then click Open.
4.
On the Define Test Template tab, click Edit Template.
5.
The Template Editor window appears with the client area displaying the
selected template.
6.
Edit the template by using the palette list.
7.
After you edit an existing test template, click Done.
TDSHT3 HDMI Compliance Test Software
345
Report Generator
Define or Edit a Report Layout
Utilities > Report Generator > Define Report Layout
You can either create a new report layout or edit an existing report layout.
Figure 263: Define Report Layout pane
To create a new report layout
346
1.
On the Define Report Layout tab, click New Layout.
2.
The Report Layout Editor window appears with an empty report layout area.
3.
Create the report by defining the report layout and dragging and dropping
the templates to the report layout area.
4.
After you create a new report layout, click Done.
TDSHT3 HDMI Compliance Test Software
Report Generator
To edit an existing report layout
1.
On the Define Report Layout tab, click Browse. The Open dialog box
appears.
Figure 264: Open dialog box to edit an existing report layout
2.
The Open dialog box displays the existing factory default report layout and
customized report layouts in the path
C:\TekApplications\TDSHT3\ReportGenerator\Layouts.
3.
Select the report layout that you want to use, and then click Open.
4.
On the Define Report Layout tab, click Edit Layout.
5.
The Report Layout Editor window appears with the report layout area
displaying the customized report layout and the selected template files.
6.
Edit the report layout by using the list of templates and defining the report
layout.
7.
After you edit an existing report layout, click Done.
TDSHT3 HDMI Compliance Test Software
347
Report Generator
Generate, Print, or View a Report
Utilities > Report Generator > Generate Report
You can generate, print, or view a report.
Figure 265: Generate Report pane
348
TDSHT3 HDMI Compliance Test Software
Report Generator
To generate a report
1.
On the Generate Report tab, click Browse. The Open dialog box appears.
Figure 266: Open dialog box to generate a report
2.
The Open dialog box displays the existing reports in the path
C:\TekApplications\TDSHT3\ReportGenerator\Reports.
3.
Select the report that you want to generate, and then click Open.
TDSHT3 HDMI Compliance Test Software
349
Report Generator
4.
On the Generate Report tab, click Generate Report.
Figure 267: Assign Data to Report dialog box
350
5.
In the Assign Data to Report dialog box, select a test template in this report
to assign the current data from your test software.
6.
Click Assign. Report Viewer displays the report with the current data from
the software. You can choose to export the report to a .rtf format file.
TDSHT3 HDMI Compliance Test Software
Report Generator
To print a report
1.
On the Generate Report tab, click Browse. The Open dialog box appears.
Figure 268: Open dialog box to print a report
2.
The Open dialog box displays the existing reports in the path
C:\TekApplications\TDSHT3\ReportGenerator\Reports.
3.
Select the report that you want to print, and then click Open. Report Viewer
displays the selected report with the current data from the software.
If the page settings do not match the page settings for the report, a Page
Size Mismatch dialog box appears.
Click Yes to continue.
Click No to stop printing the report.
If the printer is available, the report is printed.
TDSHT3 HDMI Compliance Test Software
351
Report Generator
Report Generator Error Codes
Table 166: Report Generator Error Codes
Error
Code
Error Message
Description
Possible Solution
Report Generator Interface Error Codes
741
Some installation files are missing
or corrupted, try reinstalling the
application. The application will now
exit.
The application FDB file path that is
retrieved from the registry is either
corrupted or the file path is invalid.
Remove the application and try
reinstalling.
742
Some installation files are missing
or corrupted, try reinstalling the
application. The application will now
exit.
Application id that is retrieved from
the registry is invalid (< 0).
Remove the application and try
reinstalling.
743
Some installation files are missing
or corrupted, try reinstalling the
application. The application will now
exit.
The application version is invalid.
Remove the application and try
reinstalling.
744
Some installation files are missing
or corrupted, try reinstalling the
application. The application will now
exit.
The application is unable to spawn
Report Viewer.
Report Viewer executable file is
missing, or there might be a resource
crunch if there are many applications
currently running.
Try closing some of the other
applications. If this does not work,
then remove and reinstall the
application.
745
Internal initialization error. The
application will exit now.
The memory map file or
synchronization events for
communication with RGScope are
already open. The application was
previously not shut down completely.
Try closing RGScope.
The application was not closed
completely last time. A module
RGScope might be still running in the
background. Try closing it.
352
TDSHT3 HDMI Compliance Test Software
Report Generator
Table 166: Report Generator Error Codes (Contd.)
Error
Code
Error Message
Description
Possible Solution
746
Some installation files are missing
or corrupted, try reinstalling the
application. The application will exit
now.
The application is unable to spawn
the oscilloscope interface.
RGScope file is missing, or there
might be a resource crunch if there
are many applications currently
running.
Try closing some of the other
applications. If this does not work,
then remove and reinstall the
application.
747
Some installation files are missing
or corrupted, try reinstalling the
application. The application will exit
now.
The application FDB file read failed.
The file may be read only.
Remove and reinstall the application.
748
Some installation files are missing
or corrupted, try reinstalling the
application. The application will exit
now.
The Acc application FDB file read
failed. The file may be read only.
Remove and reinstall the application.
749
Some installation files are missing
or corrupted, try reinstalling the
application. The application will exit
now.
Not invoked by the desired
application. The application name
passed by the invoking application is
not found in the registry.
Remove and reinstall the application.
750
Some installation files are missing
or corrupted, try reinstalling the
application. The application will exit
now.
The application is unable to spawn
the Report Layout Editor.
The Report Layout Editor executable
file is missing, or there might be a
resource crunch if there are many
applications running currently.
Quit some of the other applications.
If this does not work, then remove
and reinstall the application.
751
Some installation files are missing
or corrupted, try reinstalling the
application. The application will exit
now.
The application is unable to spawn
the Template Editor.
The Template Editor executable file
is missing, or there might be a
resource crunch if there are many
applications running currently.
Quit some of the other applications.
If this does not work, then remove
and reinstall the application.
Not invoked by the desired
application. The application name
passed by invoking the application is
not found in the registry.
Remove and reinstall the application.
Report Layout Editor Error Codes
721
Some installation files are missing
or corrupted, try reinstalling the
application.
TDSHT3 HDMI Compliance Test Software
353
Report Generator
Table 166: Report Generator Error Codes (Contd.)
Error
Code
Error Message
Description
Possible Solution
722
The Selected file is not a valid
layout for this application.
The layout belongs to some other
application.
The layout file being opened belongs
to an older application, which may
have been removed. It is not
possible to open a file belonging to
another application.
723
Layout file is not valid for the
current version of the Application.
The layout was created for some
other version of the application.
The opened layout file belongs to a
different version of the same
application, which may have been
removed. It is not 'possible to open a
file belonging to another version.
Template Editor Error Codes
761
Error in Initialization of Application.
The dlls and application executables
are not properly installed.
Remove and reinstall the application.
762
Invalid Application Name.
The registry entries are not
appropriate.
Remove and reinstall the application.
763
The Selected file is not a valid
template for this application.
The template belongs to some other
application.
The opened template file belongs to
a different version of the same
application, which may have been
removed. It is not possible to open a
file belonging to another version.
764
Template file is not valid for the
current version of the Application.
The template was created for some
other version of the application.
The opened template file belongs to
a different version of the same
application, which may have been
removed. It is not possible to open a
file belonging to another version.
765
A Group with the specified name
already exists.
The user tried to create a custom
group with the same name as an
existing group.
Try to use a different name other
than the existing groups.
Oscilloscope Interface Error Codes
781
MFC initialization failed.
The MFC dlls are not properly
installed.
Reinstall the application.
782
Error in creating or setting system
resource.
The system resources that are
required for communication are
already open.
Quit all the application related
executables and try again.
783
RGScope already running.
RGScope.exe is already running on
the system.
Quit RGScope and restart the
application.
784
Memory exception occurred +
<context specific message>.
The application has performed an
illegal memory access.
Quit the application and restart.
785
An exception occurred.
An unknown exception has occurred
in the application.
Quit the application and restart.
786
File Exception occurred + <context
specific message>.
An exception occurred while
accessing a file.
Quit the application and restart.
354
TDSHT3 HDMI Compliance Test Software
Report Generator
Table 166: Report Generator Error Codes (Contd.)
Error
Code
Error Message
Description
Possible Solution
787
Error in acquiring window resources
+ <context specific message>.
The application was not able to
acquire windows resources such as
GDI objects.
Quit the application and restart.
788
Failed to connect to the
oscilloscope.
The application was not able to
connect to the oscilloscope. Ensure
that TekScope.exe is running.
If this does not solve the problem,
then reinstall the application.
789
Error querying registry.
Either the required registry key does
not exist or an error occurred while
getting its value.
Quit the application and restart. If
this does not solve the problem, then
reinstall the application.
790
Error in reading FDB file.
Either the FDB file does not exist or it
may be read-only.
Ensure that the FDB file is present
and not read-only. If this does not
solve the problem, then reinstall the
application.
791
Invalid frame received.
Oscilloscope interface received an
invalid message from RG interface.
Quit the application and restart.
792
Error in allocating memory.
There was an error in getting
memory from the system.
Quit one or more applications
running on the system, and then
restart RGApp.
793
<context specific message>.
There was an error in creating the
jpeg file.
Ensure that the 'temp' folder exists
and there is sufficient free space on
the hard disk drive.
Message Boxes and Dialogs in the User Interface
701
Error initializing Report Generator.
The system resources cannot be
allocated. Try closing some of the
other applications.
If this does not work, then remove
and reinstall the application.
702
No valid file name was provided.
This happens when no filename is
selected in the application for
generating a report.
Select a valid file.
703
<Path of the file selected>
The template file name is invalid.
The reading of the template file fails.
This will happen if the application
fails to read the .rgt file.
Select another valid template file.
704
<filename> is not a valid Report
Layout.
An invalid report layout was
provided.
This happens if the application fails
to read the layout file.
Select another valid layout file.
705
<filename> is not a valid Report
Layout file for the application.
The layout is not valid for the
application. This means that the file
was read properly but the application
name and version for the .rpl file do
not match that of the application.
Select another valid layout file for the
application.
TDSHT3 HDMI Compliance Test Software
355
Report Generator
Table 166: Report Generator Error Codes (Contd.)
Error
Code
Error Message
Description
Possible Solution
706
Invalid report file specified.
A file other than the Report
Generator file(s) is selected with the
extension (.rpt, .rgt, .rpl) used by
Report Generator files.
Select another valid file.
707
Invalid file format.
Other file types such as text are
selected.
Select another valid file.
708
<filename> is not a valid report file
for <AppName>.
The application name and version for
the report file do not match that of
the application.
Select another valid report file for
that application.
709
Unable to read the report file.
An exception occurs for a rpt file.
This happens if the application
cannot read the report .rpt file.
Select another valid report file for
that application.
356
TDSHT3 HDMI Compliance Test Software