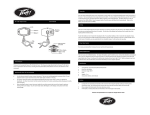
1
NION nE Quick Set-Up Guide Version 1.7.2.0 March 27, 2015 Copyright notice The information contained in this manual is subject to change without notice. Peavey Electronics is not liable for improper installation or configuration. The information contained herein is intended only as an aid to qualified personnel in the design, installation and maintenance of engineered audio systems. The installing contractor or end user is ultimately responsible for the successful implementation of these systems. All creative content in this manual, including the layout, art design, content, photography, drawings, specifications and all other intellectual property is Copyright © 2015 Peavey Electronics Corporation. All Rights Reserved. Features & specifications subject to change without notice. All other registered trademarks or trademarks are the property of their respective owners. The ratc-server component is based in part on the work of the libwebsockets project: http://libwebsockets.org. Prepared by Peavey Digital Research, 6 Elm Place, Eynsham, Oxford, OX29 4BD, UK. Email:[email protected] (mailto:[email protected]). Scope This guide describes how to quickly set up a NION nE. For detailed information, including information on the warranty, refer to the NION Hardware Manual. Also visit the MediaMatrix Training Center (http://mmschool.peavey.com/). Thank you Thank you for purchasing this MediaMatrix product. It is designed to provide years of trouble-free operation and high quality performance. We are confident that you will find this product and other MediaMatrix products to be of the highest quality. ii Version 1.7.2.0 March 27, 2015 1 - Important safety instructions Warning: When using electrical products, basic cautions should always be followed, including the following: 1. 2. 3. 4. 5. 6. 7. 8. 9. 10. 11. 12. 13. 14. 15. 16. 17. 18. March 27, 2015 Read these instructions. Keep these instructions. Heed all warnings. Follow all instructions. Do not use this apparatus near water. Clean only with a dry cloth. Do not block any of the ventilation openings. Install in accordance with manufacturer’s instructions. Do not install near any heat sources such as radiators, heat registers, stoves or other apparatus (including amplifiers) that produce heat. Do not defeat the safety purpose of the polarized or grounding-type plug. A polarized plug has two blades with one wider than the other. A grounding type plug has two blades and a third grounding plug. The wide blade or third prong is provided for your safety. If the provided plug does not fit into your outlet, consult an electrician for replacement of the obsolete outlet. Protect the power cord from being walked on or pinched, particularly at plugs, convenience receptacles, and the point they exit from the apparatus. Only use attachments/accessories provided by the manufacturer. Use only with a cart, stand, tripod, bracket, or table specified by the manufacturer, or sold with the apparatus. When a cart is used, use caution when moving the cart/apparatus combination to avoid injury from tip-over. Unplug this apparatus during lightning storms or when unused for long periods of time. Refer all servicing to qualified service personnel. Servicing is required when the apparatus has been damaged in any way, such as power-supply cord or plug is damaged, liquid has been spilled or objects have fallen into the apparatus, the apparatus has been exposed to rain or moisture, does not operate normally, or has been dropped. Never break off the ground pin. Write for our free booklet Shock Hazard and Grounding. Connect only to a power supply of the type marked on the unit adjacent to the power supply cord. If this product is to be mounted in an equipment rack, rear support should be provided. Control panel devices, including the xControl range, D series and nTouch 60, are designed for mounting in NEMA metal enclosures. Grounding to the front plate is required. Note for UK only: If the colors of the wires in the mains lead of this unit do not correspond with the terminals in your plug‚ proceed as follows: Version 1.7.2.0 1 a) The wire that is colored green and yellow must be connected to the terminal that is marked by the letter E‚ the earth symbol‚ b) colored green or colored green and yellow. c) The wire that is colored blue must be connected to the terminal that is marked with the letter N or the color black. d) The wire that is colored brown must be connected to the terminal that is marked with the letter L or the color red. 19. This electrical apparatus should not be exposed to dripping or splashing and care should be taken not to place objects containing liquids, such as vases, upon the apparatus. 20. The on/off switch in this unit does not break both sides of the primary mains. Hazardous energy can be present inside the chassis when the on/off switch is in the off position. The mains plug or appliance coupler is used as the disconnect device, the disconnect device shall remain readily operable. 21. Exposure to extremely high noise levels may cause a permanent hearing loss. Individuals vary considerably in susceptibility to noise-induced hearing loss, but nearly everyone will lose some hearing if exposed to sufficiently intense noise for a sufficient time. The U.S. Government’s Occupational Safety and Health Administration (OSHA) has specified the following permissible noise level exposures: Duration Per Day in Hours Sound Level dBA, Slow Response 8 90 6 92 4 95 3 97 2 100 1½ 102 1 105 ½ 110 ¼ or less 115 According to OSHA, any exposure in excess of the above permissible limits could result in some hearing loss. Ear plugs or protectors to the ear canals or over the ears must be worn when operating this amplification system in order to prevent a permanent hearing loss, if exposure is in excess of the limits as set forth above. To ensure against potentially dangerous exposure to high sound pressure levels, it is recommended that all persons exposed to equipment capable of producing high sound pressure levels such as this amplification system be protected by hearing protectors while this unit is in operation. SAVE THESE INSTRUCTIONS! 2 Version 1.7.2.0 March 27, 2015 2 - Installation and configuration What's in the box? NION series products are packaged in a single container. This container includes the following items: NION nE Network Input/Output Node IEC removable power supply cable User manual/literature package If any of these items are missing, please contact your Authorized Peavey MediaMatrix contractor/dealer. Applying power to the NION nE 1. Place a NION nE on a flat surface or in a rack. 2. Plug an Ethernet cable into the LAN port at the rear of the unit, then connect the other end of the cable to a local Ethernet switch. 3. Insert the power cable provided into the back of the NION nE. Once power has been successfully applied to the unit, the Power LED on the front right hand side of the unit will illuminate and the unit will automatically boot up. Notes: The NION nE does not have a Power on/off button or switch. Switching the mains supply to the unit off or removing the IEC power cable from the rear of the unit is the only way to remove power from the unit permanently. A power down action from the NION nE web interface will shut down the unit for approximately 10 seconds. It will then automatically boot up. In the event of a sudden loss of power, the NION nE will automatically boot up approximately 20 seconds after power is returned. Communications information The NION nE is supplied with a fixed static IP address. A white sticker displaying the IP address is situated on the rear panel next to the 25 pin DB connector for GPIO. The NioNode web interface is used to edit and change the default IP scheme. Note: If the static IP address is changed, the white sticker should be removed and the new IP address written in the same white space. March 27, 2015 Version 1.7.2.0 3 Configuring your PC for connecting to a NION nE 1. Open the Windows network settings. For Windows 7: a) On the Start menu, click Computer. b) Right-click Network, and then click Properties. c) Click Change Adapter Settings and then select the network you wish to edit. a) For Windows XP: a) On the Start menu, click My Network Places. b) Click View Network Connections. 1. Configure the PC with an IP address in the same subnet as is printed on the while sticker on the back of the NION nE. For example, if the sticker shows 10.7.5.75, then your computer's IP address will be 10.7.5.x where x is any value below 75, such as 10.7.5.66. 2. Set the subnet mask to 255.255.255.0. Specifying the IP address via the web browser 1. Open a web browser and enter the NION nE IP address into the web address bar. 2. Click the Network tab. If a different static IP address is required then: a) Make sure that static is selected in the IP Configuration Method list. b) Fill in IP address and netmask value appropriate to your network. The Gateway and DNS entries can also be entered if required. 4 Version 1.7.2.0 March 27, 2015 Note: To change settings on the web interface a user name and password is needed. The default username is superuser; it has no password. If DHCP is required for set-up purposes, select DHCP in the IP Configuration Method list. Note: Care should be taken when choosing DHCP rather than static. DHCP mode is provided on the NION machine as a convenience when using NioNodes in informal settings, such as when you are experimenting. Static IP addresses should always be used when NioNodes are deployed in production systems. DHCP-obtained IP addresses depend on a lease to be maintained by the DHCP server in order to keep an assigned IP address. If the IP address is allowed to expire there is a chance that the IP address assigned to one or mode NioNodes could be lost, changes or reassigned, resulting in the lost of control audio from a NION project. 3. Once the network configuration page has been completed, reboot the NION: a) Click the Special tab. March 27, 2015 Version 1.7.2.0 5 b) In the action list , click reboot and then click do it. 4. Once the NION nE has rebooted, enter the new IP address into the web browser. What to do next NIONs are designed to be used in conjunction with an NWare project. Refer to the section Adding a NioNode to your design in the NWare User Guide for more information. 6 Version 1.7.2.0 March 27, 2015 3 - Troubleshooting Introduction Problem Solution 1. Connect to the NION nE via the serial port (on Cannot connect to NION nE because IP page 7). address unknown 2. Specify a new IP address and reboot the unit (on page 8). Need to manually erase role (because NION is constantly rebooting, for example). 1. Connect to the NION nE via the serial port (on page 7) or via telnet (on page 7). 2. Manually erase the role and reboot the NION (on page 8). Connecting to the NION nE via the serial port 1. Connect a serial cable between the PC serial port and the NION nE RS-232 serial port. 2. Start a Terminal Emulator Program with the following settings: Baud rate 57600. 8 bit Data. No parity. 1 Stop bit. No Flow control. 3. Power cycle the NION nE. 4. As soon as the NION nE starts to boot up (and the fans can be heard), continuously press the Esc key. A command prompt like this => will be displayed in the console window. 5. Press Enter. Connecting to the NION nE via Telnet 1. Open a Command prompt window. 2. Type telnet <IP address> and press Enter to connect to the NION. 3. At the logon prompt, type root and press Enter. March 27, 2015 Version 1.7.2.0 7 Specifying a new IP address To specify a static IP address 1. 2. 3. 4. Type setenv dhcp no and press Enter. Type setenv ipaddr <IP address> and press Enter. Type setenv netmask <subnet mask> and press Enter. If you want the settings to be saved and used each time the NION boots, type saveenv and press Enter. If you omit this step, the settings will only be used for the current session. 5. Type boot and press Enter. To specify an IP address automatically using DHCP 1. Type setenv dhcp yes and press Enter. 2. If you want the settings to be saved and used each time the NION boots, type saveenv and press Enter. If you omit this step, the settings will only be used for the current session. 3. Type boot and press Enter. Some examples Scenario Command to use The NION is configured with a static IP address, but you want to assign a new address that is temporary. setenv ipaddr 10.1.10.100 You want to use DHCP for this session and each time the NION boots. setenv dhcp yes setenv netmask 255.255.0.0 boot saveenv boot You want to use a static IP address for this session and each time the NION boots. setenv dhcp no setenv ipaddr 10.1.10.100 setenv netmask 255.255.0.0 saveenv boot Erasing the role via a terminal connection 1. At the logon prompt, type root and press Enter. 2. Type rm /opt/pion/projects/* and press Enter. 3. Type reboot and press Enter. 8 Version 1.7.2.0 March 27, 2015 MediaMatrix® A Division of Peavey Electronics Corp. 5022 Hartley Peavey Drive, Meridian Mississippi, 39305, USA Phone: 866.662.8750 http://www.peaveycommercialaudio.com/products.cfm/mm/ Features & Specifications subject to change without notice Copyright © 2015, All Rights Reserved 80307501