1
IVA ver 0.6 user manual
1
I
Contents
1. IVA Introduction.......................................................................................................................... 6
1.1. Changing user settings...................................................................................................... 10
Data you can change:........................................................................................................ 11
1.2. IVA courses........................................................................................................................ 12
If you are a student:........................................................................................................... 12
If you are a teacher or the owner of the course:................................................................ 13
1.2.2. Applying for a course...................................................................................................13
1.2.3. Selecting/changing a course....................................................................................... 13
1.3. Calendar. Managing events............................................................................................... 14
2. Webtop ................................................................................................................................... 17
2.1. Structure of the Webtop: Statistics, Portfolio. ................................................................... 17
2.2. Using Webtop and Portfolio, tools..................................................................................... 18
2.2.1. Adding objects to Webtop and Portfolio...................................................................... 18
How to add a folder:........................................................................................................... 18
How to add a document:.................................................................................................... 19
How to add a weblink:........................................................................................................ 19
How to add memo:............................................................................................................. 19
How to add a wiki:.............................................................................................................. 20
How to unzip:..................................................................................................................... 20
2.2.2. Sorting objects in Webtop and Portfolio folder ........................................................... 20
2.2.3. Manipulating the objects: copy, cut, rename, delete, sort, adding to calendar, zip.....21
Copying the object:............................................................................................................ 21
Sorting the objects:............................................................................................................ 22
2.2.4. Publishing/hiding an object using object's settings..................................................... 23
2.2.5. Who has viewed the objects........................................................................................23
2.2.6. Course participation activity; quiz results; total grade................................................. 24
2.3. Taking quizzes................................................................................................................... 25
2.4. Checking the quiz results................................................................................................... 26
1
I
Last updated 1/11/2005
IVA ver 0.6 user manual
2
I
2.5. WIKI................................................................................................................................... 26
What is Wiki and Wikipage?.............................................................................................. 26
2.5.2. Writing to a Wikipage.................................................................................................. 27
2.5.3. Formatting the Wikipage............................................................................................. 28
Paragraph.......................................................................................................................... 28
Horizontal separation line...................................................................................................28
List......................................................................................................................................28
Formatting the text ............................................................................................................ 29
Creating a new Wiki subpage............................................................................................ 29
2.6. How to see, what's on other participants Webtop?............................................................31
2.7. IVA Mailbox........................................................................................................................ 31
3. Bookshelf ................................................................................................................................. 33
3.1. Students Bookshelf............................................................................................................ 34
Sending a groupmail:......................................................................................................... 35
Sending e-mail using IVA internal mail ............................................................................. 35
3.2. Teachers Bookshelf .......................................................................................................... 36
3.2.1. Teacher: setting up the course materials.................................................................... 36
3.2.2. Teacher: who and when has viewed the materials..................................................... 38
3.2.3. Teacher: changing the course info.............................................................................. 38
3.2.4. Teacher: monitoring course participation activity; results of quizzes; final grade and
comments to students .......................................................................................................... 40
How to see statistics.......................................................................................................... 40
Entering final grade and comments .................................................................................. 41
4. Workshops .............................................................................................................................43
4.1. What is section Workshops............................................................................................... 43
4.2. Knowledge Building ...........................................................................................................43
4.2.1. What is Knowledge Building?...................................................................................... 43
4.2.2. Taking part in Knowledge Building discussions ......................................................... 43
Starting a new thread to created context........................................................................... 43
Taking part in discussions..................................................................................................44
Discussion settings............................................................................................................ 44
2
I
Last updated 1/11/2005
IVA ver 0.6 user manual
3
I
Using Knoledge Building.................................................................................................... 45
4.2.3. Teacher: starting with Knowledge Building ............................................................... 45
4.2.4. Teacher: changing the context of Knowledge Building............................................... 47
4.3. Jamming............................................................................................................................48
4.3.1. What is Jamming?....................................................................................................... 48
4.3.2. Opening the jamming session..................................................................................... 48
4.3.3. Working with jamming session ................................................................................... 49
Descendence tree of the media files................................................................................. 49
How to add your version of the object .............................................................................. 50
Viewing annotations........................................................................................................... 51
How to add your annotation............................................................................................... 51
4.3.4. Teacher: adding a new jamming session .................................................................. 51
Teacher: censoring annotations and added mediafiles ................................................... 54
Teacher: censoring an annotatioon................................................................................... 54
Teacher: canceling the censoring of annotation................................................................ 54
Teacher: censoring a mediafile..........................................................................................54
Teacher: deleting a mediafile.............................................................................................55
4.4. Soubgroup Portfolio .......................................................................................................... 55
4.5. Creating a soubgroup.........................................................................................................55
What is a soubgroup?........................................................................................................ 55
Adding a soubgroup........................................................................................................... 56
Defining soubgroup members............................................................................................56
Deleting Soubgroup........................................................................................................... 57
4.5.2. Working in soubgroups................................................................................................57
4.5.3. Who belongs to other soubgroups?............................................................................ 58
5. Administration......................................................................................................................... 59
5.1. Users administration ......................................................................................................... 59
How to add a teacher......................................................................................................... 60
How to add a student ........................................................................................................ 60
How to remove a teacher .................................................................................................. 60
How to remove a student .................................................................................................. 60
3
I
Last updated 1/11/2005
IVA ver 0.6 user manual
4
I
5.2. Administrating quizzes....................................................................................................... 61
5.2.1. Creating a new empty quiz ......................................................................................... 61
5.2.2. Renaming the quiz.......................................................................................................62
5.2.3. Adding quiz questions................................................................................................. 62
How to add a question....................................................................................................... 62
5.2.4. Questions according to their type................................................................................ 63
Matching ............................................................................................................................64
How does it look for students:............................................................................................64
Multiple choise................................................................................................................... 64
How does it look for students:............................................................................................65
Numerical........................................................................................................................... 66
Mark all correct...................................................................................................................67
How goes the evaluation:...................................................................................................68
Example............................................................................................................................. 68
How it looks for students:................................................................................................... 69
How it looks for students:................................................................................................... 70
Paragraph.......................................................................................................................... 71
How it looks for students:................................................................................................... 71
Short answer ..................................................................................................................... 72
How it looks for student:.....................................................................................................72
Entering the metadata........................................................................................................73
Saving test questions to pool............................................................................................. 74
Searching for the question from pool and adding question to quiz................................... 75
5.2.5. Quiz settings................................................................................................................ 75
Publishing the quiz............................................................................................................. 75
Time limits and defining number of repeats.......................................................................76
Access for all participants.................................................................................................. 76
Access for subgroups........................................................................................................ 77
Access restrictions for persons.......................................................................................... 78
5.3. Assignments ......................................................................................................................78
5.4. Management of assignments............................................................................................. 79
4
I
Last updated 1/11/2005
IVA ver 0.6 user manual
5
I
6. Index......................................................................................................................................... 82
5
I
Last updated 1/11/2005
IVA ver 0.6 user manual
6
I
1. IVA Introduction
IVA learning management system (LMS) is a pedagogical concept, based on modern social
constructivist learning theory. Learning is not just gathering ready-made knowledge but
constructing personal knowledge, building your own „world of meanings“ in active and
meaningful action. Authentic and profound context, life-like tasks, councelling and feedback
from teacher/expert, communication and collaboration with co-learners plays important role in
this. According to this, IVA is tiled into three sections:
-
bookshelf for instructions and (con)texts prepared by a teacher,
-
webtop with different tools for independent working and presenting homeworks,
-
workshops for group work and communication.
IVA has user friendly and intuitive and easy to pick up user interface, which is designed using
several metaphors familiar from computer world and school world. IVA is open source software,
it means, that anyone can download it to his and change the source if its needed.
You can enter to IVA over login page.
6
I
Last updated 1/11/2005
IVA ver 0.6 user manual
7
I
After logging in to IVA every user enters to the section called Lobby. This is an area where
user can see open courses and can register to the course, select course, change user
settings and can observe course events in Calendar view.
After selecting a course user can see different IVA sections dependig on his/her status (student,
teacher)
There are three IVA sections visible for students:
-
Webtop is section, where studend acts independently. There are different tools for
individual work and presenting homeworks. Student can see its activity of
participation, reults of tests and manage events by dint of Calendar.
-
Bookshelf is section where a teacher sets up (con)texts and instructions. There is
also courses information page.
-
Workshops is section for collaboration and communication. In this section are also
all quizzes.
For teacher there is additionally visible IVA's fourth section: Administration. Additionally to
previously presented learners areas, teacher has course administration area, where teacher
can do different administrative actions – change participants lists, add subgroups, tests,
present and evaluate homeworks, administrate course events, change course information.
7
I
Last updated 1/11/2005
IVA ver 0.6 user manual
8
I
To be sure, in which IVA section you are in precise moment, each section is marked with
different color: WebTop – blue, BookShelf – gray, WorkShops – red, Management – Yellow:
8
I
Last updated 1/11/2005
IVA ver 0.6 user manual
9
I
Structure of IVA:
IVA
Lobby
Mailbox
Select a course
Open courses
Calendar
Statistics
Settings
Webtop
Webtop
Mailbox
Mailbox
Statistics
Course info
Portfolio
Welcome page
Workshops
Administration
Mailbox
Mailbox
Knowledge building
Participants
Jamming
Assignments
Subgroup portfolios
Quizzes
Calendar
Course info
9
I
Last updated 1/11/2005
IVA ver 0.6 user manual
10
I
Starting in IVA. Lobby
1. To start working in IVA you need IVA user name and password. It is important to remember
that user name and password are case sensitive! As you go to the IVA homepage, you see
IVA 's design view. To login you should click on Login link and enter your user name and
password.
2. As you enter to the IVA, first you'll get top IVA Lobby. Here you can apply for new courses,
choose a course, you can see course events in calendar view and change your user
settings.
3. Entering to IVA for the first time, we suggest you to change your user settings. Add your
first name and last name, e-mail address, change language if you need. It would be good if
you could add also your photograph and phone number.
4. In IVA you can act as a teacher or as a student. With the same user name and password
once you can be as a student another time as a teacher. You obtain your role as student or
as teacher, as you will be added to the course.
5. For all questions about using IVA there is a user manual under the link Help in pages
Header.
1.1.
Changing user settings
The first thing you need to do in IV A – change your user settings (language, add first name and
last name, e-mail address). All your data is visible to all course participants
NB! If you haven't added your first and last name, you can't be added to course participants
list.
NB! If you haven't added your e-mail address, you will not get any internal e-mails sent from
10
I
Last updated 1/11/2005
IVA ver 0.6 user manual
11
I
IVA.
•
For changing user settings, click Settings in Lobby.
Data you can change:
Nickname: You can not change that
Password: set your password
Confirm: insert your password once more
NB! As you change your password and save it you have to enter again to the login page, where you should
insert your new password.
First name: NB! Be sure you entered this field, without it you can't be added to course participants list.
Last name: NB! Be sure you entered this field, without it you can't be added to course participants list.
Language: You can choose between estonian, english, german and finnish
Follow browsers language preference: chooses language settings according to browser language
settings
Upload your image: your photo is visible in Workshops, your Portfolio, in discussion forums. To upload
your photo click 'Browse' button. Then find image you want to upload and click 'Open'.
NB! format of uploaded image.Choose .gif, .jpg or .bmp. Size of the image should be 60x80 pixels.
There is a special software you can use to change the size of your photo. For example Irfran View is a
free image processing software (you can download it from www.irfanview.com)
... or give a link to an image (URL): if you have your photo somewere in the internet, you can give the
address of the webpage
E-mail: your e-mail address. NB! You should definitely enter your e-mail address – otherwise you won't get
any e-mails sent by internal e-mail.
Homepage: if you have your own homepage, enter the address here.
Organization: organization (departement) where you learn or work
Address line 1: Home or work address
Address line 2: Home or work address
City:
Country:
Phone:
Mobile:
Quote:
Background:
Personal interests:
11
I
Last updated 1/11/2005
IVA ver 0.6 user manual
12
I
Professional interests:
Send by e-mail: as you enter your e-mail address in user settings, you have possibility to send to your email address all messages listed below:
•
internal mail messages
•
grades
•
Bookshelf change notification
•
Knowledge Building change notification
•
Jamming change notification
Display events on front page: in Lobby view you see all recent events of active courses (added new
events or learning materials etc).
•
To save all changes click ‘Submit’ and to reset changes click ‘Cancel’.
1.2.
IVA courses
If you are a student:
You can enter a course only if are added to course participants list. Only teacher of this
precise course can add you to course participants list. In Lobby you can see all courses, you've
been added to. You can change courses by clicking Select a course on left menu of Lobby.
Courses that you've entered recently or where is added some new events or material are
displayed right after entering IVA
•
If you've been added to some course, you can enter the course by clicking Select a course
on left menu of Lobby.
•
You can apply to a new courses if teacher has opened the course for applying. You can
apply in Open courses in left menu of Lobby.
NB! after applying you will be in courses waiting list, until teacher confirms your participation.
NB! Remember, you appear as user in IVA environment only after you have activated your
user account!
IVA user account activates only after you have entered IVA for first time. Before that you can't
be added to any of the courses.
12
I
Last updated 1/11/2005
IVA ver 0.6 user manual
13
I
If you are a teacher or the owner of the course:
To open a course you need to turn to IVA helpdesk and they will open new IVA course where
you will be signed as a teacher.
•
You can add students to your course by search engine or by opening a course for
everybody.
•
To open a course you first need to open and activate your IVA user account (you
activate it as you enter IVA for first time). With the same user account you can access
all your courses.
1.2.2. Applying for a course
You can apply only for open courses. To see open courses list:
1. Enter to IVA Lobby section
2. Click Open Courses on the left menu of the website
3. If there are open courses for applying, mark the courses you need or find interesting and
click Register. If there are no open courses you will see remark 'no courses to apply'.
NB! After registering you will be on course waiting list (remark 'application is pending') – you can
access course only after lectruer has confirmed your application and added you to course
participants list (you will receive a message ito your IVA mailbox).
NB! teacher can not add you to course participants list if you have not filled your first and last
name in Lobby Settings section.
1.2.3. Selecting/changing a course
Selecting/changing a courseYou can select/change a course right after logging in to IVA in
Lobby section. In the left menu of Lobby you can see link Select a course.
To change a course, click on that link, select a course from the list and click on the courses
name. If you have'nt applied for any courses yet, click on Open courses in the left menu, select
13
I
Last updated 1/11/2005
IVA ver 0.6 user manual
14
I
a course you want to apply and click on Register.
You can change a course in Lobby, where you can go from any section in IVA. You just click on
tag 'Lobby' under coloured bar.
NB! In the list Select a course you can see only these courses, where you have been added as
a student or teacher. In the list Open courses you can see courses open for applying.
After entering to the course, you will be in courses BookShelf section. There you can see
teachers explanational text about the course, course information and learning materials for the
course.
1.3.
Calendar. Managing events
IVA Calendar is in the left menu of the Lobby and contains material and references to
additional material and events. There are three kinds of events in Calendar:
•
Personal events (only you can add and delete these events)
•
Soubgroup events (all soubgroup members can add and delete these events)
•
Course events (only teacher can add or delete these events)
Events may have different Status - complete or incomplete or unspecified. Colour of the status
marks its satus as following:
•
Incomplete event, there is still time for final deadline – blue
•
Incomplete event, deadline has passed – red
•
Complete event – green
•
Status is undefined – black
Only person, who has added the event can define or change the events status.
14
I
Last updated 1/11/2005
IVA ver 0.6 user manual
15
I
Location of the Calendar:
1. As you enter IVA, you will be in Lobby.
2. Click on link 'Calendar' in the left menu.
Then you can see all events: events name, deadline, name of the course.Kalendri asukoht:
How to open an event. Click on event's name (the last column, name is given as hyperlink). If
event is connected with an attachment, you can open it by clickin on attachment's name. If there
is a weblink added to event, you can open it just by clicking on it.
How to add an event. You can add personal events to Calendar. Personal events are visible
only for you. To add events:
1. Click on button 'Change' which is under calendar in the left menu.
2. Click on button 'Add event' (in the middle of pages upper side). Enter necessary
information and determine starting time and ending time.
Changing events. You can change only these events you have added to Calendar. For
changing events:
1. Open Calendar.
2. Click on events name, you want to change and click the button 'Change'.
3. Make all changes you need, and click the button 'Save'.
Deleting events. You have rights to delete only these courses you have added. To delete an
event:
1. click on button 'Change' under Calendar.
2. Mark checkbox before event you want to delete.
15
I
Last updated 1/11/2005
IVA ver 0.6 user manual
16
I
3. Click on button 'Delete'.
Hiding an event. If you don't want to delete an event, but hide it:
1. Open 'Calendar'
2. Mark checkbox before these events you want to hide
3. Click on button Hide
4. To see hidden events, click on button 'Hidden_events'.
16
I
Last updated 1/11/2005
IVA ver 0.6 user manual
17
I
2. Webtop
2.1.
Structure of the Webtop: Statistics,
Portfolio.
To go to Webtop, just click on section Webtop in coloured heading of the page.
Webtop (blue) is section for students individual work.
Possibilities of WebTop:
•
Statistics – all information about the course (grades, activity)
•
Webtop – different tools for presenting your works to costudents and teacher.
•
Portfolio – describing and presenting your homeworks
•
Section Webtop contains subdivisions like Statistics, Portfolio: (folder for
assignments)
•
In Statistics you see time related course events
•
Webtop is place to present your works to other students and teacher. In WebTop you
can keep your files, notes etc. All objects in WebTop are by default visible to everyone in
course
•
With Object settings you can change these default rights of objects: who can see or comment
these objects. To do that just click on objects icon.
•
Folder Portfolio appears to the WebTop, as teacher has set individual works. Objects
(homeworks), set up in Portfolio are by default visible only to teacher and owner of the
object. You can show objects in Portfolio if you want. To do that, use object's settings,
which open as you click on padlock icon. There are also quizzes for filling in individually
in Portfolio. You have to observe the time limit for filling the quizzes.
17
I
Last updated 1/11/2005
IVA ver 0.6 user manual
18
I
2.2.
Using Webtop and Portfolio, tools
WebTop is by default place where you kan keep your different objects and where your
costudents and teacher have access to. You can change objects status by clicking on padlock
icon next objects name.
Portfolio is a folder, that appears automatically, as teacher has set any individual homeworks.
This is a place for presenting homeworks, that only you and teacher can access. You can
change object default settings in Portfolio folder.
Objects you can add to Portfolio:
•
folder – folders let you organise objects as you need – by content, by object type etc.
•
file – object you add may be in any format.
•
link – reference to materials in internet
•
memo – simple tool for writing your own texts (notes and other simple text withour
requirement for special design)
•
wiki – tool that enables to create Wikipages, write nonlinear hypertexts
2.2.1. Adding objects to Webtop and Portfolio
1. Click on section Webtop or Portfolio (if you want to add a homework).
NB! Present your homeworks always only in Portfolio!
2. Click on button which describes what you want to do (add folder; add file; add link, add
memo, add Wiki)
How to add a folder:
1. Click on button Add folder
.
2. On the opened page Add folder enter to a field Folder name the name of the folder you
want to create
3. Click button Submit to save folder or click button Cancel to cancel creating folder
NB! Folders on the same level must have different names. For example, you can't create
two folders named Notes in the same level.
NB! As long as you haven't added any objects to your folder (folder is empty) the folder's
18
I
Last updated 1/11/2005
IVA ver 0.6 user manual
19
I
name will be in bold script.
How to add a document:
1. Click on button Add file
2. On the opened page Adding document, click button Browse and find the file (in your
computer) you want to upload.
3. To the field Title of the document: write how you want to name your document. If you
don't fill this field, uploaded document remains it's original name (as it was in your
computer)
4. Click button Submit to save the document or click button Cancel to cancel adding a
document
NB! Documents on the same level must have different names. For example, you can't
create two documents named Notes in the same level (folder).
How to add a weblink:
1. Click on button Add link
2. In the opened page Adding a link write to the field Title how you would like other course
participants to see the link. If you don't write the title others will see the web-address
from URL field
3.
To the field URL: Write or paste reference's web-address
4. Click button Submit to save weblink or click button Cancel to cancel adding a weblink
NB! By adding a link be sure you wrote http:// in front of the webaddress, otherwise it is
considered as wrong address. If you paste web address, be sure, there won't be double
http:// in front of the web-address.
How to add memo:
1. Click on button Add memo
.
2. On the opened page Adding a memo write to the field Memo name how you want to
name this memo.
3. To the field Content write the content of your memo.
19
I
Last updated 1/11/2005
IVA ver 0.6 user manual
20
I
4. Click button Submit to save memo or click button Cancel to cancel creating memo
NB! Memos on the same level must have different names. For example, you can't create
two memos named Remember in the same level (folder).
How to add a wiki:
1. Click on button Add wiki
2. On the opened page Adding ZWiki write to the field Title of the Wiki how you want to
name this wiki.
3. Click button Submit to save Wiki or click button Cancel to cancel adding a Wiki.
How to unzip:
Using unzip function you can upload more files at a time, you can also upload HTML files
containing images. Images in HTML file must be in the same level (the same folder) as the
HTML file.
1. Click on button unzip
2. On the opened page Uploading and unzip a zip-file click Browse and find the file (in your
computer) you want to upload for unzipping
3. Click button Submit to upload a zip-file or click button Cancel to cancel uploading and
unzipping a zip-file.
2.2.2. Sorting objects in Webtop and Portfolio
folder
In order to organize objects in WebTop and Portfolio you can sort objects by clicking on arrows
after objects or by by using specal buttons which mark different characteristics of these objects:
•
name
•
size
•
time (of creation)
To sort objects click on requested characteristics above the objects line
Example. To sort objects by name, click on button Name.Manipulating the added objects: copy,
20
I
Last updated 1/11/2005
IVA ver 0.6 user manual
21
I
cut, delete, rename, sort, adding to calendar, zipping.
2.2.3. Manipulating the objects: copy, cut, rename, delete, sort,
adding to calendar, zip
Copying the object:
1. Check the check-box before object, you want to copy (there may be several objects).
2. Button Copy makes a copy of marked objects in cache.
3. Choose/enter the folder you want to paste the objects
4. Button Paste envinces copied objects into the folder you entered
NB! Definitely use command Paste after command Copy. Otherwise the procedure will
not be done.
Cutting the object:
You can use cut command in case you want to move object to another folder.
1. Check the check-box before object, you want to cut (there may be several objects)
2. Button Cut removes marked object(s) from a object tree and makes a copy of marked
objects in cache
3. Choose/enter the folder you want to paste the objects
4. Button Paste envinces copied objects into the folder you entered
NB! Definitely use command Paste after command Copy. Otherwise chosen objects will
not appear in folder you wanted and chosen objects will be just deleted.
Deleting the object:
1. Check the check-box before object, you want to delete (there may be several objects)
2. Button Delete erases marked object(s).
Renaming the object:
1. Check the check-box before object, you want to rename (there may be several objects).
21
I
Last updated 1/11/2005
IVA ver 0.6 user manual
22
I
2. Button Rename opens new window Renaming where you see the objects current name
and you can give a new name to object(s).
3. Button Submit saves the new name; button Cancel resets your action, and object will
not renamed.
Sorting the objects:
To sort objects click on arrows at the end of objects data line. To move object up, check the
chec-box before object and click on arrow up.
Adding a object's reference to calendar:
1. Check the check-box before object, you want to add to calendar with reference (there
may be several objects).
2. Clicking on button Calendar opens calendar view in a new window.
3. Fill requested fields. Remember, weblink remarks a reference to internet address and
begins with http://
4. Click on button Save to save your actions.
Zipping the objects (archiving):
Arciving funtion is ment for zipping files in WebTop into one zip-file. Using zip-function you can
lift all files you want at once from WebTop or Portfolio to your computer:
1.
Check the check-box before object, you want to add to zip-file (there may be several
objects).
2. Click on button Zip
3. In opened dialog-box click Save to Disk to save archive to your computer.
22
I
Last updated 1/11/2005
IVA ver 0.6 user manual
23
I
In order to open archived file, you have to have unzip-program. By unzipping first open file
index.html and then you can choose, which subfile you want to open.
2.2.4. Publishing/hiding an object using object's
settings
Owner of the object may allow other participants to add comments and rate this object. To tune
object's settings click on padlock icon next to objects owner name.
You can define object status: Unset, Draft, Revising, Final. This enables to comment objects in
different phases of preparation.
The owner of the object can define wether comments and ratings are visible or not
The owner of the object can define who can access and comment his/her objects.
The owner of the object can set a time limit for commenting.
§
Using Object settings function you can give other course participants access to
objects and allow them to comment and rate this object. You can also define object
status as Unset and leave uploaded objects unshared.
When could disclosing the object be necessary? You need to disclose objects if you wish to
keep your object concealed from others in the beginning, because it's not ready and you wish to
share it good and ready. As the object is finished you dan disclose it using objects settings
defining who has access to that object.
NB! As default setting, everything in WebTop is visible to every course participant
Objects in your Portfolio are visible only to objects owner (you) and teacher.
With Objects settings you can change objects status and define who can access the object.
You can access other participants disclosed objects in their Webtop by clicking on participants
name in Workshop section.
NB! Don't forget to give a teacher access to your objects in Portfolio at the very latest
before the submittion deadline.
23
I
Last updated 1/11/2005
IVA ver 0.6 user manual
24
I
2.2.5. Who has viewed the objects
In IVA you can check who and when have viewed objects in your Portfolio. To check, who has
viewed your object:
1. Open section Webtop
2. Open section WebTopThere is a objects name and objects owners name (person who
uploaded the object) by every object. Click on objects owner name.
3. In next page you see who and when has viewed this object. This information is presented
as a table:
Name
Date
Juku
Today
Kati
02.04.2005
Kalle
Yesterday
2.2.6. Course participation activity; quiz results; total
grade
For every IVA course there is a statistics that paticipant can see:
•
course partitipation activity,
•
results of your quizzes,
•
total grade of the course and teacher's comments,
•
assignments and their deadlines
To see that information:
1. Open section Webtop
2. Click on link Statistics in the left menu
3. In next page you see Information about all your courses
Object's information contains following data:
•
Wieved. How many times you have viewed the course page (reloading the page)
•
Read. Read messages in KnowledgeBuilding of the WorkShops section of this course
24
I
Last updated 1/11/2005
IVA ver 0.6 user manual
25
I
•
Posted. Posted messages in KnowledgeBuilding of the WorkShop section of this course.
•
Media files. Added media files to MediaBuilding of the Workshops section of this course.
•
Last access. When did you last accessed the course.
•
Total grade. What is your total grade for this course (teacher will insert this).
•
Comment. teachers comments about your results, grades or works.
•
List of homeworks in Portfolio with deadlines and grades. List of assignments given
by teacher. This section is appearant only if the teacher has set up assignments with
inner IVA assignement delivering tool to Portfolio.
2.3.
Taking quizzes
You can solve quizzes from the moment as teacher has opened the quiz.
Solving a quiz
1. Select section Webtop
2. Click on Portfolio in left menu
3. Click on test you want to solve. You see note 'I am ready, start solving' and by clicking
on that note you start solving
4. Answer the questions
5. To end solving, click on button Save answers (and you see note Answers saved).
NB! There may be following limits set for quiz:
•
Time limit – time while quiz is visible and opened for solving.
•
Access limit – quiz ist visible and opened for solving only for defined persons.
•
Group access limit– quiz is visible and opend for solving only for defined subgroups.
Types of quiz questions
There are following types of quizes in IVA:
•
Matching
25
I
Last updated 1/11/2005
IVA ver 0.6 user manual
26
I
•
Paragraph
•
Yes/No
•
Numerical
•
Multiple choise
•
Short answer
•
Percent
•
Mark all correct
2.4.
Checking the quiz results
You can see quiz results by clicking Logpage in left menu of WebTop.
2.5.
WIKI
What is Wiki and Wikipage?
Using Wiki you can create a simple webpage with connected keywords for using in IVA. It
means, that you can design the text on that page with simple tools (Bold, Italic, Underline) and
create links, that refere to materials uploaded in IVA (more about it in 2.8.1.). Wiki is not created
by IVA creators - this is a tool, which is brought in from outside IVA. We describe only simpliest
ploys for using Wiki. You can read more about using Wiki from http://zwiki.org.
Wiki has been used in www for different purposes – for example on address www.wikipedia.org
there is an encyclopedia created and supplemented by users. In Wikipedia structure every
keyword is on separate page.
A student could use Wiki in creating their essays or term papers, which would give to their work
new possibilites and values.
For a teacher is Wiki the primary tool in IVA in creating course's welcome page (in
Bookshelf) and very useful tool in creating a curriculum or learning directions.
Wikipage usage possibilites
Here are some ideas and descriptions, how to use Wiki-tool for your course:
26
I
Last updated 1/11/2005
IVA ver 0.6 user manual
27
I
•
You can use Wiki for creating a list of subjects/topics. By clicking on a keyword in Wiki
frontpage, there will open a subpage, where you can find more information about this
keyword.
For example: create to IVA welcome page a list of subjects, where by clicking opens a
subpage containing:
§
Webtop
§
Bookshelf
§
Workshops
You can write to every subpage according to its content – information about Webtop to
Webtop subpage.
•
You can use Wiki for groupwork – for example you describe on welcome page different
groupworks and for every groupwork you create a new subpage.
•
You can use Wiki for creating a course encyclopedia.
2.5.2. Writing to a Wikipage
1.
In sections Webtop, Porfolio and Subgroup portfolios in section Workshops, there is
link Add Wiki.
2.
Click link Add wiki
3.
There will open a field, where you enter the name of a Wikipage formatted as wiki-word:
for example MyPlan or just Plan.
4.
You can see the title of created Wikipage under tools in this section you started creating
the wikipage.
5.
Clicking on Wikipage's title there will open a Wikipage composing view.
27
I
Last updated 1/11/2005
IVA ver 0.6 user manual
28
I
6.
You can add text, create new (titles) subtopics to created Wikipage. You can change
every word you enter as a wiki-word (first letter and any of the following letters is in
uppercase for example FirstWiki), to weblink. With wikiword as weblinks you can move to
any subpage wich is connected to a keywords in created wikpage (for example to
remind, what one or another keyword means or what information is there about the
keyword)
NB! You can change a word to wiki-word differently look 2.5.3 Formatting the wikipage links
that are created like that, lead you outside from created wikipage to different webpages in
IVA or outside IVA.
On the right side of Wikis special header menu, there are tools for creating Wiki, adding or
changing text:
Full – enables you to look the perviously entered comments and wiki-words
(topics/subtopics). There you can change titles of topic (for example MyPlan). To do that
enter a new Wikiword into the field before reparent, rename, delete! buttons and click on
reparent .
Simple - You can see all topics, links and comments but you can not change the title of the
topic.
Minimal Edit opens the content of added wikipage in content box with information about
author and time of entering. In this content box you can enter additional text or change
previously entered text.
28
I
Last updated 1/11/2005
IVA ver 0.6 user manual
29
I
2.5.3. Formatting the Wikipage
Paragraph
•
Entering text is like working with usual text redactor – as you reach the end of line, text
will automatically move to new line, so you shouldn't use enter tab for moving cursor to
new line.
•
Pressing „enter“ two times, ends the pragraph.
•
Pressing „enter“ three or more times will not create larger paragraph distinctions as
pressing „enter“ two times.
Horizontal separation line
•
Four or more hyphens in a row (----)creates a horizontal separation line .
List
•
To create a list (choose for text type WikiWikiWeb markup, look in Formatting the text):
1. leave 8 spaces before the first element of the list;
2. add a marking of the list – asterisk, dot, number etc.;
3. go to the new line by pressing „Enter“;
4. leave 8 spaces before each element of the list and add a marking of the list
•
Before second level list you should leave 8+8 spaces
•
To end the list you should press „enter“ twice.
Formatting the text
In formatting the text it depends on text type, which ploys you can use. If you choose Structured
Text (Struktureeritud tekst):
•
Bold text: write the text between double asterisks: **text**
•
Italic: Write the text between single asterisks: *text*
29
I
Last updated 1/11/2005
IVA ver 0.6 user manual
30
I
•
Underline: Write the text between single underlines: _text_
•
Entered webaddress works as weblink if you start it with http://
•
if you want to change a keyword to a weblink, just write it as one word and without
umlaut: „Article“:http://
•
If you want to use the type Monospace, you should leave 1 or 2 spaces before
paragraph. You can end the paragraph by pressing „enter“ once (otherwise the text you
entered will not appear).
Attention! Links created as described before, open in the same window. Don't close the
window, or you close all IVA environment and you have to log in again. You can move back to
Wikipage using browsers Back button.
Creating a new Wiki subpage
You can create Wiki subpages using words in special format, so called wiki-words.
A wiki-word should have:
Two letters in word – the first and any of the following letters - should be in uppercase (for
example MyName). But don't write the whole word in uppercase!
A wiki-word may contain one or more words. If link you want to create contains more than one
word, write the words in title with uppercase first letters between square brackets: for example
[My Old Friend].
Wiki-word may not contain:
•
Numbers
•
Symbols
•
Only uppercase letters
To create a new wiki-subpage:
1. You have to decide if you want to add a comment to the end of previously entered text
(enter the topic and text to content-box below and click add comment) or you want to
change previously entered text (click edit in the header right menu ).
2. Write the keyword as wiki-word (see requierments fo wiki-word described previously)
30
I
Last updated 1/11/2005
IVA ver 0.6 user manual
31
I
3. Click Add comment or Save
4. After the added wiki-word there will be a purple question mark, which works as a
weblink, in the text. For example: MyStory?
5. If you want to change referred word to a linked subpage, click on question mark after
the word.
•
There will open a new Wiki subpage, which title is the same as the linked wiki-word
with question mark. Enter the necessary text.
•
Click on Create
6. If you don't want to change the referred word into linked subpage, don't click on
question mark after the wiki-word.
Attention! If you don't click on question mark there will be no new page created.
Attention! If you have created a wikipage with keyword, the keyword will appear as a weblink to
created page in whole text.
To go to Wikipage welcome page click on Home in webpage upper menu. If you want to see
all subpages created with keywords, you will find them on welcome page of Wiki.
NB! You can create and follow up your own wikipage. To Wikipages of other course participants
you can only add comments.
More information about creating and designing Wikipages you can find on webpage
http://zwiki.org
2.6.
How to see, what's on other participants
Webtop?
In IVA you can see the content of other users Webtop and Portfolio, if the content is opened for
seeing and commenting.
All objects in IVA Webtop are by default open for all course participants to see. The owner of
objects can change it by changing the objects settings.
To see objects in other course participants Webtop:
1. Choose section Workshops
31
I
Last updated 1/11/2005
IVA ver 0.6 user manual
32
I
2. In Workshops section you will find list of all course participants. Click on participants
name, whos objects in Weobtop you want to see.
3. There will open a participans Webtop in new window. Click on object you want to see. To
be sure, wich user's Webtop you see, look at the IVA bread crumb strip.
2.7.
IVA Mailbox
Mailbox is visible in every IVA section on the left under the coloured strip in header of the
page. Mailbbox is for sending mails inside IVA . You can sedn a inner mail to every IVA user if
you know his/her username.
Options in the Mailbox: Mailbox, New Mail, Outbox
Mailbox
Shows all incoming e-mail.
As you open an e-mail you can answer to the mail by clicking Reply.
New Mail
To send an e-mail you have to enter into the field To: persons IVA username or choose it from
the course participants list above and click Add name.
Outbox
Here you can check if recipient has read your e-mail. Click on e-mail title in the Outbox. The
recipients name in header of the sent mail is in bold letters as long as the recipient hasn't read
your letter.
32
I
Last updated 1/11/2005
IVA ver 0.6 user manual
33
I
33
I
Last updated 1/11/2005
IVA ver 0.6 user manual
34
I
3. Bookshelf
As you enter to a IVA course you first appear to be in Bookshelf and Courses welcome page.
Here is all important information about the course set up by teacher: course program, learning
instructions etc. as wiki-pages.
A student can add comments to teachers wiki-page, but sudent can't change or delete it.
There is a link New things, where you can see a list of all learning materials you haven't read
yet.
You can read more about Wiki in subdivision 2.8.
There are learning materials prepared by a teacher in Bookshelf: learning materials and
instructions.
NB! Only teacher can add materials to the Bookshelf. Student can read, listen, watch the
materials set up in Bookshelf. Therefore we concentrate in two aspects of Bookself section –
learners level and teachers level.
If you want to go to Bookshelf section, click on Bookshelf in header of the course webpage.
You can find in the left menu of the Bookshelf:
•
Course info
•
Courses welome page
•
Course materials set up by the teacher
34
I
Last updated 1/11/2005
IVA ver 0.6 user manual
35
I
3.1.
Students Bookshelf
There are a course info, courses welcome page and course materials set up by the
teacher visible for the student in courses Bookshelf.
•
If teacher has organized materials into folders, then student can at first see those folders
in Bookshelf. Foldrs are visible in the centre of welcome page and also in left menu. You
can open the folder by clicking on folder title. Folder can contain objects (files, wikipages,
memos etc.) and also subfolders, which open by clicking on their title.
•
If teacher hasn't created folders to organize learning materials, student will see all files
directly in welcome page. In that case there will be reference only to course info in the
left menu of Bookshelf.
Courses welcome page is created with Wiki and student can add comments there. To add a
comment, you should write your comment to the text box in the foot of the page and then click
Add comment.
NB! All materials set up in Bookshelf should open immidiately no matter which type of document
it is. If your computer has problems with opening the document, then you should first save the
document into teh computer and then open it. Depending on file format, you have to have
appropriate program in your computer to open these files. For example to open audio and video
files you should have Windows Mediaplayer, to open files in pdf-format Acrobat Reader.
Course info
Course info contains the following data about the course:
•
Course title
•
Organisation
•
Description
•
Methods
•
Starting date (DD.MM.YYYY)
•
Ending date (DD.MM.YYYY)
You can send a groupmail to the whole group in course info. It means, if you have to send to all
group members a mail with the same content (a reminder, important message etc.). Using this
link in foot of the course info you can post an e-mail, where in recipients line will be all course
participants. So you can avoid time-consuming e-mailing to every course participant separately.
Attention! Only these participants will get your group mail, who have defined their e-mail
address in settings (see in Lobby).
35
I
Last updated 1/11/2005
IVA ver 0.6 user manual
36
I
How to see course info
1. Choose section Bookshelf
2. Click on link course info in left menu of the page
3.
Sending a groupmail:
1. Choose section Bookshelf
2. Click on course info in the left menu of the page.
3. Click on link Send an e-mail message to whole group in foot of the page.
4. The mailing program in your computer (Eudora, Thunderbird, NescapeMail) will open
(not web-based e-mailing page). There will be every course participants (who have
defined their e-mail address in IVA user settings section) e-mail addresses on recipients
line Then just write your message and send as regular e-mail.
Sending e-mail using IVA internal mail
1. Choose section Bookshelf
2. Click on course info in the left menu of the page
3. Click on link Send a message to whole group by IVA internal mail in foot of the page
4. There will open a page Sending a new e-mail
•
Pick receiver– from a list of all course participants, click Add name
•
To – if you send the groupmail form Bookshelf, all course participants are automatically
added into recipients line (To:)
36
I
Last updated 1/11/2005
IVA ver 0.6 user manual
37
I
•
Subject – title of the mail
•
Text – content of e-mail
•
Send – delivers your e-mail
3.2.
Teachers Bookshelf
Course info holds important information about course. To let students see information about
the course in course welcome page, the teacher has to fill out the courses welcome page
first. Note that teachers cannot add participants to a course if the course info form is not filled
in. Use Wiki in filling the courses welcome page. More about wiki in subdivision 3.5.
A teacher can present and organise materials in Bookshelf as he/she wants with tools in
Bookshelf (add folder, add file, add Wiki etc.). It is recommended to put learning instructions
and learning materials to the Bookshelf.
Teacher can check in Bookshelf, who and when has viewed the lerning materials.
3.2.1. Teacher: setting up the course materials
Only teacher add and remove materials to Bookshelf. The tools for set up are similar to
tools in Webtop. Teacher can:
•
create folders to organize materials,
•
upload files,
•
set weblinks,
•
use simple intraIVA text editor (memo),
•
create Wiki
There are no rules for teacher how to construct a course. So at first the Bookshelf is
completely empty. Teacher can consturct the course just like he/she considers to be right.
37
I
Last updated 1/11/2005
IVA ver 0.6 user manual
38
I
Example 1
Teacher wants to construct the course in chronological order. Teacher creates folders for each
lecture and adds learning materials, instructions, files, links to each folder. There will be a list of
created folders in the left menu of course info page. Student can access materials by clicking on
folders title.
Example 2
Teacher wants to present course materials according to their type. Teacher creates different
folders for reading material, weblinks, learning instructions etc. and adds the materials into the
folders
Example 3
Teacher sets material unstructured or semistructured. There will be learning materials and
instructions right in course info page and assignments, additional material and links are
gathered into the folders. Notice, that in the left menu appear only folders and no aother
filetypes.
38
I
Last updated 1/11/2005
IVA ver 0.6 user manual
39
I
3.2.2. Teacher: who and when has viewed the
materials
Teacher can see, who has viewed the learning materials in Bookshelf and also, when was it
viewed.
1. Open section Bookshelf
2. After every object in Bookshelf there is its owner name. Click on this name.
3. In new window you see, who and when has viewed this object. This information is
presented as a table:
Nimi
Kuupäev
John
Today
Kate
Yesterday
Karl
06.04.2003
3.2.3. Teacher: changing the course info
1. Select section Bookshelf.
2. In new window click on upmost link Course info
3. Click on link
Change course info.
4. Button Save saves all changes and button Cancel – resets changes.
1.
You can change following information:
•
Course title
•
Organization
•
Description
•
Methods
•
Starting time (DD.MM.YYYY)
•
Ending time (DD.MM.YYYY)
•
Quote - Moto that desribes the course. It will appear in Statistics as student enters the
course
39
I
Last updated 1/11/2005
IVA ver 0.6 user manual
40
I
•
Logo – Logo or image that characterizes the course. It appears in Lobby before the title
of the course and on welcome page in Bookshelf section
•
Status – it is visible in IVA statistics. Status should be set according to courses stage at
the moment:
§
Preparation – if course is still in preparation phase.
§
Open – course appears in section Open courses in the left menu of the Lobby.
Students can there apply for a course.
§
Closed – time for applying has passed. Course doesn't appear in open courses
section anymore
§
Finished – the course is over
§
Automatic - If teacher doesn't want show the course in section Open courses in
Lobby. Teacher has to add students him/herself.
Attention! In time you change course info, you'll be automatically in IVA Administration
section. As you save or cancel changes in course info, you move automatically back to
Bookshelf section.
40
I
Last updated 1/11/2005
IVA ver 0.6 user manual
41
I
3.2.4. Teacher: monitoring course participation
activity; results of quizzes; final grade and
comments to students
There are tools for a teacher in IVA to:
• monitire course participation activity in course statistics
• see test results and add comments if necessary
• give a final grade and comments to it.
All these actions are possible to do for one student or for whole group.
How to see statistics
1. Select section Bookshelf
2. Select Course info in left menu
3. Choose wether you want to see overall statistics about a course (click on link course
satistics) or you want to see statistics of one specific user (click on link info after users
name).
Statistics contains:
•
Viewed: How many times has the page been opened (reloaded)
•
Read: How many messages has been read in Knowledge building section
•
Posted: How many messages has been posted Knowledge building section
41
I
Last updated 1/11/2005
IVA ver 0.6 user manual
42
I
•
Media files: How many messages has been aaded in Jamming section
•
Test results: Test results are presented in three ways – gained points/maximum points
and percent of right answers. Test results are given as links to the test. By clicking on
results you open the test with questions, student answers, right answers and comments
•
Last access: When was the course last accesed
•
Final grade: How was the course passed through, teachers evaluation
•
Comment: Teachers comment about participation, assignments and grades
Attention! As you look, enter or change this information, you will be automatically sent to
Administration section.
Attention! If user hasn't entered a course yet:
•
as you click on info after users name, you see a note 'User has no events'
•
in course statistics you see information only about these users, who has entered course
at least once.
Entering final grade and comments
1. Select section Booksehlf
2. Select ourse info form left menu
3. Select link Course statistics from foot of the page
4. Enter final grades and, if necessary, comments
42
I
Last updated 1/11/2005
IVA ver 0.6 user manual
43
I
5. To see test rsults, click on link Test results after the user name. Test results are
presented in three ways: gained points/maximum points, percent of right answers. If
students has solved test several times, the results are presented sequentially and are
separated with colon.
6. If you want to change the automatically calculated results or you want to add a comment,
click on test result (given as a link)
43
I
Last updated 1/11/2005
IVA ver 0.6 user manual
44
I
4. Workshops
4.1.
What is section Workshops
Workshops is a section for group activity and interaction. There are following subsections:
•
KnowledgeBuilding
•
Jamming
•
Soubgroups
On Workshops first page there is a list of course participants. As you click on participants
name, you can see items on his/her webtop or Portfolio, if he/she (owner of the portfolio) has
allowed it.
4.2.
Knowledge Building
4.2.1. What is Knowledge Building?
Knowledge Building is a tool for group discussions. To manage discussions there are many
different conceptions for holding on topic and clear structure of discussion. In IVA there are two
basic conceptions – Investigative Learning and Six Hats Thinking. If necessary, it is possible to
use the common discussion forum.
4.2.2. Taking part in Knowledge Building
discussions
A student can participate in KnowledgeBuilding discussions after the teacher has created
discussion contexts and defined in which format will the discussions take place. Discussions can
be as common discussion forums or choose one of the basic concepts.
44
I
Last updated 1/11/2005
IVA ver 0.6 user manual
45
I
Starting a new thread to created context
1. Select section Workshops
2. Select KnowledgeBuilding from the left menu
3. Choose which concept you want to participate and click on it title
4. Click on link
Start new thread
•
If teacher seleced Six Hat Thinking concept, student will automatically be in a role of
Blue hat and new thread has automatic start: „Jälgides kõrvalt meie arutelu protsessi,
...(Observing our discussion,...)“
•
If you have chosen Uuriv õppimine (investigative learning), the new thread begins
with “Tahaksin saada teada, miks/kuidas... (I'd like to know why/how...) Tahaksin uurida,
miks/kuidas...(I'd like to exploe why/how...)”. There are guiding questions: “ Kas tahad
esitada ühiseks aruteluks probleemi, mis sulle endale huvi pakub? (Do you want to ask
a question what's interesting to yourself?) Kas tahad selgitada oma uurimiseesmärke?
(Do you want to explain your research objective?)”
•
If teacher has selected Forum, the new thread will be a new message
Taking part in discussions
1. Select section Workshops.
2. Select Knowledge Building ifrom left menu.
3. Choose which context or discussion in context you want to take part in and click on it's
title
4. If there has been created no threads to context, you have to create a thread first
5. If there is already thread created to context, you just add your message to thread.
Discussion settings
User can change settings of discussions first page:
•
If there is more than one contexts, the up and down arrows appear before the context
title
. You can move the context upwards or downwards by clicking on that arrow.
•
Next to context is link hide context / Show context . clicking on these links you can
hide or show the context..
If context is hidden, only title of the context, the number of added notes and messages will be
45
I
Last updated 1/11/2005
IVA ver 0.6 user manual
46
I
displayed.
If the context is not hidden, there will be displayed the title of the context, number of new
notes, number of messages, short descriptions of context, link to full description, started
threads, time when threads were added, who added the thread and number of messages to this
thread.
Attention! There might be more than one thread within one context.
Using Knoledge Building
At first teacher creates context related to current topic. With context teacher selects also the
format of the discussion – usual forum or knowledge based discussion.
Based on context, there will be created one or more threads, which opens discussions. To take
part in discussion, student has to select a knowledge type.
•
•
If teacher has selected Six Hats Thinking for format of discussion, thread participant
chooses his/her „Hat“ and participates in discussion from certain position. There are six
hats: blue (distanced from problem, observes the process of discussion), white
(concentrates on missing information), red (based on emotions and intuition), green
(new suggestions based on constuctivity and creativity), yellow (optimistic, find always
a bright side in the matter), black (cautiousness, points out risks). Specific explanation
about meaning of hats opens as you click on
next to knowledge type when you are
answering to a thread.
If teaches has selected Uuriv mõtlemine (investigative thinking) for format of
discussion, at first you have to pose your problem. Then you specify the problem, is it
an answer to previously entered message, new message, question or suggestion to
context or previous opinion.
4.2.3. Teacher: starting with Knowledge Building
• Teacher opens the Knowledge Building work by creating a discussion context. If teacher
hasn't created any contexts, student doesn't see a Knowledge Building option in left menu of
Workshops.
• As important as creating the discussion context, is selecting of knowledge type for
discussion. It depends on posed problems and teacher's peferences. The closer explanation
about knowledge types is in subdivision 5.2.2 Using Knowledge Building.
46
I
Last updated 1/11/2005
IVA ver 0.6 user manual
47
I
1. Select section Workshops
2. Select Knowledge Building from the left menu
3. Click on link
Create new context
4. In new page Creating a new context for discussion fill out following fields:
•
Title of the context – context will be presented by that to students (for example: Elearning as alternative to classroom learning).
•
Short description – introductive short text (for example: E-learning has become
very important form of learning. Still there is some mistrust to e-learning).
•
Long description – elaborsated description (for example: there are lots of
possibilites to bring e-learning to bear: well developed e-learning environments, lots
of people have their own compuers and internet access, there are opened computer
classes in libraries and public schools. Although universities and some organisations
prvide e-learning courses, most teachers and also learners tend to prefer the usual
classroom learning model.)
•
Knowledge type set – slect knowledge type: Uuriv õppimine (investigative learning),
Six Hats Thinking or Forum
What is the difference between short and long description? As student enters to Knowledge
Building section, at first she/he sees the title and short description of context. At the end of short
description there is a link full description, which opens the long description of discussion context
5. Press the button Continue to save your context, press the button Cancel to reset the
context.
47
I
Last updated 1/11/2005
IVA ver 0.6 user manual
48
I
4.2.4. Teacher: changing the context of
Knowledge Building
Teacher can change the context of Knowledge Building, if necessary:
1. Select section Workshops.
2. Select Knowledge Building from left menu
3. Click on link
edit context up and right part of the page
4. Make all changes you need
5. Press the button Continue to save your context, press the button Cancel to reset the
context, press the button Delete to delete the context.
6.
4.3.
Jamming
4.3.1. What is Jamming?
Jamming is the place for collaborative digital jamming sessions. Jamming enables with audio,
video files to:
•
upload
•
make new versions of presented files and show the relation to the primal file
(descendence tree)
•
comment uploaded files
48
I
Last updated 1/11/2005
IVA ver 0.6 user manual
49
I
4.3.2. Opening the jamming session
1. Select section Workshops
2. Select Jamming in left menu
3. You see all existing jamming sessions. Click on projects title or icon you want to open.
4.3.3. Working with jamming session
1. Open jamming session. You'll see:
•
content of mediaproject
•
title of mediaproject
•
uploaded icons
•
links to comments
2. Read the content of Mediaproject.
To see mediafile click on icon of the file (to move back use the back button of your browser)
Descendence tree of the media files
All files that are added to the mediaproject are related to eachother. From the first object there
will be branching new objects. To visualize this branching, there are connection lines between
49
I
Last updated 1/11/2005
IVA ver 0.6 user manual
50
I
related objects, so called descendence tree. This is the easiest way to give a structured
overview.
How to add your version of the object
1. Open media project
2. Mark the object, to which you want to add your version (branched direclty from first
object or from one of yoiur coursemates objects)
3. Click Continue with your version.
4. Fill the field Title of jam session (Attention! Only 10 first letters will be displayed in
descendence tree).
5. Upload the file using Browse button.
6. Press the button Submit to save your session or Cancel to reset your session
50
I
Last updated 1/11/2005
IVA ver 0.6 user manual
51
I
To read comments, click on link annotations.
Viewing annotations
In annotation view you can see all annotations concerning this object. By every comment there
is the time, when annotation was added and who added this
How to add your annotation
1. Open annotation view
2. Click on link
add annotation
3. Write your comment into the textfield
4. Press the button Submit to save your annotation or Cancel to reset your annotation
51
I
Last updated 1/11/2005
IVA ver 0.6 user manual
52
I
4.3.4. Teacher: adding a new jamming session
For students to start work in Jamming, teacher has to add jamming session:
1. Select section Workshops
2. Select Jamming from the left menu
3. Click on link
Add new jam session
4. Fill out fields in Adding new jamming session page
5. Click Submit to save the jam session, click Cancel to reset your actions.
Fields in Adding new jamming session page:
•
Title of jam session
•
Type of jam session – You can select for jam session type:
•
- Mutate on previous – in case you want to add your version to previously entered objects
•
- Explore possibilities – if you start new jamming session
•
- Diverge & Converge -
•
•
Description of jam session – content of the jamming session, goals, tasks and
other necessary information
•
Name of the starting artefact – the name of the artefact that will be displayed.
Attention! In front page of jamming session (descendence tree) will be displayed only first 10 letters of
artefact name
•
Upload the starting artefact – the file that is starting the jam session (for example, if
jamming session is for designing a new logo, the starting artefact could be a current
logo). Click Browse to fint file you want to upload.
•
Annotation for the starting artefact – teachers comments (wether there is
something to special to pay attention, anything well done, something to change etc.)
52
I
Last updated 1/11/2005
IVA ver 0.6 user manual
53
I
The added jamming session will be displayed like this:
Pildi juurde selgituseks:
•
The icon of the artefact depends on type of uploaded mediafile
•
note Cats is the name of the jamming session
•
Explore possibilities is the type of the jamming session
•
0 new artefacts shows how many new artefacts has been added since the last visit
•
5 artefacts shows how many files has been added to this jamming session
53
I
Last updated 1/11/2005
IVA ver 0.6 user manual
54
I
Teacher: censoring annotations and added mediafiles
Censoring annotations means, that teacher can if necessary change annotations invisible.
So teacher doesn't change the content of annotation, but makes the whole annotation
invisible.
There will be a note about censoring in annotations view. It says that annotation is censored
and when it was censored. You will also see, who added the annotation.
It is possible also to restore the annotation
It is possible to censor also mediafiles, not only annotations.
Teacher: censoring an annotatioon
1. Open the annotation view
2. check annotations you want to censor
3. Click Remove annotations
Teacher: canceling the censoring of annotation
1. Open the annotations view
2. Check the censored annotations you want to restore
3. Click Restore annotations
Teacher: censoring a mediafile
1. Open the annotations view
2. Check the mediafiles you want to censor
3. Click Remove artefact
54
I
Last updated 1/11/2005
IVA ver 0.6 user manual
55
I
Teacher: deleting a mediafile
It is not possible to do delete separate files or annotations inside jamming session, it is
possible to censor them. It is possible to delete only the whole jamming session.
1. Select section Workshops
2. Select Jamming from the left menu
3. Check the jamming session you want to delete.
4. Click Delete .
5. There will be a warning - „Are you sure you want to delete the following jam sessions:
jamming session title“ To delete the jaming session click OK, to restore the jamming
session click Cancel
4.4.
Soubgroup Portfolio
1. Select section Workshops
2. Select Soubgroup portfolios from the left menu
3. If teacher asked to create soubgroups, click Soubgroup management
4. Click Add soubgroup
4.5.
Creating a soubgroup
What is a soubgroup?
Soubgtroup is collaboration area, and by its nature soubgroups Webtop. Group members can
take the same actions as in their personal Portfolio in Webtop. Everything in Soubgroub
Portfolio is visible only to soubgroup members. You can create several soubgroups. One person
can be a member of many soubgroups.
Soubgroup members can present their works in soubgroups portfolio.
55
I
Last updated 1/11/2005
IVA ver 0.6 user manual
56
I
Adding a soubgroup
1. Select section Workshops
2. Click on Soubgroup portfolios in the left menu of the page
3. Click on Soubgroup management in the centre of the page
4. Click
Add soubgroup
5. In the field Name of the subgroup write the name of new group
6. Click Save
Attention! Soubgroups have to have different names.
Attention! Soubgroup name can't contain symbols or letters with umlaut.
Defining soubgroup members
Mark the soubgroup you want to add/remove members to. Click Membership
You see two lists Course participants and Soubgroup members
•
Course participants - all participants of this course.
•
Soubgroups members – course participants you have added to this soubgroup
Adding members to a soubgroup
1. check/mark people in Course participants list, you want to add to soubgroup
members
2. click Move
56
I
Last updated 1/11/2005
IVA ver 0.6 user manual
57
I
Removing members from soubgroup
1. check/mark people in Soubgroup members list you want to remove from soubgroup
2. Click Move
Deleting Soubgroup
1. Select Soubgroups portfolios
2. Select soubgroup management
3. Check/mark the soubgroup you want to delete.
4. Click Delete
1. NB! You can delete only this soubgroup you have created, if there hasn't been added any
objects (files).
4.5.2. Working in soubgroups
1. Select section Workshops.
2. Select Soubrogup portfolios from the left menu. If you have been added to soubgroup
you'll see the title of this soubgroup. Click on title of soubgroup you want to open.
3. There is similar working area in Soubgroups portfolios section, as you have in your
personal pertfolio in Webtop section. You can add files, folders, memos, links, create
Wikipages. In footer you see all soubgroup members.
NB! you can add files, folders, links, etc only to these soubgroup portfolios, which member
you are
4. You can add annotations to objects in soubgroups portfolios. Just click on number (0 , 1,
2, etc) after the objects name.
57
I
Last updated 1/11/2005
IVA ver 0.6 user manual
58
I
5. Teacher can give student an assignment to create soubgroups themselves. At first you
need to agree on who belongs to which soubgroup. See subchapter Addin a soubgroup
Attention! You can delete, copy or rename only these soubgroups, you have added!
4.5.3. Who belongs to other soubgroups?
You can see, who belongs to other soubgroups of this course:
1. Select Workshops
2. Click Soubgroup portfolios in the left menu. You see a list of all soubgroups of this
course
3. Click on name of the soubgroup which members you want to see.
* or click Soubgroup management and List soubgroups to see members of all
soubgroups of this course
58
I
Last updated 1/11/2005
IVA ver 0.6 user manual
59
I
5. Administration
Administration section is visible and opens only to teachers. In administration section
teacher can manage the course actions.
•
Participants – adding/removing course participants
•
Assignments - creating new assignments or evaluating homeworks submitted by students
•
Quizzes - creating, managing and editing quizzes, defining quiz settings and viewing quiz
results
•
Calendar - adding, modifying or deleting course events. Students will see the events in their
calendar
•
Course info - holds important information about course. Note that teachers cannot add
participants to a course if the course info form is not filled in.
5.1.
Users administration
Course participant can be in teachers or in students role. Participant can have only one role in
the one course, but different roles in different courses (for example you have been added to
three courses. In one course you act as a teacher, and in other two as a student). The creator
of the course is always in teachers role and can add more teachers to the course if necessary.
Attention! To adda a new participant to the course, the IVA user has to be:
1. registered IVA user
2. entered to IVA environment at least once (this activates her/his IVA user account)
Changing the list of course participants
1. Select secton Administration
2. Select Participants from the left menu
I
3. There will open a formula “Adding new users to course courses title”.
Last updated 1/11/2005
59
IVA ver 0.6 user manual
60
I
•
Last name – enter the last name of the IVA user to appropriate field and click
Search
•
First name - enter the first name of the IVA user to appropriate field and click
Search
•
Affiliation – select the affiliation of the person you want to find from the ... and click
Search
•
Displaying all IVA users – leave all the fields empty and click Search
NB! If you want to see all IVA users, whos name begins with specific letter, enter this letter to
the last or first name field and click Search. All users, whos last or first name begins with that
letter will be displayed.
There will be displayed all IVA users in left menu. In right menu, there will be two
sections: Teachers and Students. There you can see, who has been added to your
course and which role she/he has.
How to add a teacher
Search for the IVA users as described before. Select IVA users, who you to add to your
course teachers, marking the selectbox before users name and click Add by Teacher
selection.
How to add a student
Search for the IVA users as described before. Select IVA users, who you to add to your
course students list, marking the selection box before users name and click Add by Student
selection.
How to remove a teacher
Select persons, you want to remove rom the course teachers list, by marking the selection
box before the teachers name and click Remove.
How to remove a student
Select persons, you want to remove rom the course students list, by marking the selection
box before the students name and click Remove.
Attention! This page is disabled until all course information is submitted and course status is
open(not preparing, not finished)
60
I
Last updated 1/11/2005
IVA ver 0.6 user manual
61
I
5.2.
Administrating quizzes
Teacher can administrate quizzes only in Administration section. Here you can:
•
create new quizzes; add, change, delete questions
•
save questions to the pool and search for questions from the pool
•
enter the metadata to the quizzes or to quiz questions
•
show and hide quizzes
•
set the restrictions to quiz accessibility
Created and published quizzes are visible in Portfolio in Webtop
Creating a quiz consists four steps:
1. Creating a new, empty quiz
2. Renaming the quiz
3. Entering the questions or selecting from the questions found in pool
4. Publishing the quiz and defining how many times can student solve the test
5.2.1. Creating a new empty quiz
1. Select section Administration
2. Select Quizzes from the left menu
3. Click on
Add quiz
Attention! Quizzes have by default names quiz1, quiz2, quiz3, and so will they displayed also in
Portfolio in Webtop, if you don't rename the quizzes.
61
I
Last updated 1/11/2005
IVA ver 0.6 user manual
62
I
5.2.2. Renaming the quiz
1. Mark the radio button before the quiz you want to rename
2. Click on Settings below
3. Enter the name you want to give to the quiz and click OK
5.2.3. Adding quiz questions
Types of questions
•
•
•
•
•
•
•
•
Matching
Paragraph
Yes/No
Numerical
Multiple choice
Shot answer
Percent
Mark all correct
62
I
Last updated 1/11/2005
IVA ver 0.6 user manual
63
I
How to add a question
1. Select Quizzes in Administration section. Click on the nme of the quiz you want to add a
question to.
2. There will open an Editing quiz page, where you can see aready added questions too.
3. Select the type of question from ...menu
4. Click Add. You can search for the questions in Pool or create new questions by yourself.
5.2.4. Questions according to their type
In this chapter are presented the types of test questions as teacher sees them in Administration
section.
NB! You can design the text of the question using all tools of text redactor: choose the style,
font, size, colour, background add weblinks use upperand under cases (m²) etc.
63
I
Last updated 1/11/2005
IVA ver 0.6 user manual
64
I
Matching
Student has to match variants in left column with variants in right column
64
I
Last updated 1/11/2005
IVA ver 0.6 user manual
65
I
How does it look for students:
Multiple choise
In multiple choise question, student has to mark only one right answer.
Teacher enters question in the main field and enters the possible answers in column
Responses and marks with radion button the right answer. Behind every possible answer there
is a field Feedback where teacher can enter additional comments if necessary. Students see
the comments only if teacher has allowed it in quiz settings.
Attention! After clicking Save, there will always be a new empty line for another possible
answer.
65
I
Last updated 1/11/2005
IVA ver 0.6 user manual
66
I
How does it look for students:
Numerical
By this type of question there is a right answer and allowed range of mistake. The allowed range
of mistake is entered as a range of numbers – teacherd defines the lower limit and upper limit of
the answer. Student can not see this defined range of mistake.
Teacher can choose wether the evaluation for this question is range or gradual.
•
Range – if the answer is between lower and upper limit, the answer is considered right and
gets maximum points.
I
66
Last updated 1/11/2005
IVA ver 0.6 user manual
67
I
Note, if the range is between 7 and 13, the right answer can be 8 – 12,9. If you want 7 or 13
considered to be the right answers too, the upper limit has to be 14 and the lower limit 6.
•
Gradual – the result depends on how far from the right anser is the student answer inside
of the defined range.
Example: If the right answer is 10, upper limit is 13 and lower limit is 7 and maximum result is
10 points then answers 7,8,9,10,11,12,13 will give following result:
7 and 13 = 0 points
8 and 12 = 3,3 points
9 and 11 = 6,7 points
10 = 10 points
Mark all correct
By this type of question, there can be several right answers.
67
I
Last updated 1/11/2005
IVA ver 0.6 user manual
68
I
Note! If you want to enter more possible answers as there is free fields, after filling these fields
click Save open the question and there will be additional fields for answers. You can open
question in page 'Editing quiz' by clicking change on the question line.
How does it look for students:
68
I
Last updated 1/11/2005
IVA ver 0.6 user manual
69
I
How goes the evaluation:
By creating the question, teacher has to define the maximum points for right answers. This
defined result will be devided into so many equal parts as there are possible answers.
Example: If the maximum result is 3 points and there are 3 possible answers, then value of
every answer is 1 point no matter if the answer is defind to be correct or incorrect.
The result will be calculated as following:
•
Every correctly answered variant gives defined amount of points (maximum points
divided by the number of possible answers)
•
Marking the correct answers and leaving incorrect answerd unmarked is considered as
right answer.
•
If student marks incorrect variants the answer is considered as wrong and student gets
no points for this answer. Also if student doesn't mark the correct answer she/he doesn't
get points for this variant. So there will be no reduction for wrong answer.
Example
Question: Mark the areas of individual work in IVA
Maximum result: 4
Variants: 4
Points for one variant: 1
Variants
Portfolio
Knowledge building
Welcome page
Statistics
Student
+
+
-
Teacher
+
+
Points for answer
1
1
0
0
Result: 2 points
Yes/No question
By this type of question it has to be possible to answer yes or no. If the answer is 'yes', teacher
marks the check-box under the question field. If the correct answer is 'no', teacher leaves the
check-box unmarked.
69
I
Last updated 1/11/2005
IVA ver 0.6 user manual
70
I
How it looks for students:
Percent
This type of question is ood for assignments in sciences.
You can define the type of answer:
70
I
Last updated 1/11/2005
IVA ver 0.6 user manual
71
I
•
•
•
•
strength of solution
amount of solvent
amount of soluble
solvent/soluble
How it looks for students:
71
I
Last updated 1/11/2005
IVA ver 0.6 user manual
72
I
Paragraph
By this type of question student has to write the answer with few sentences. The evaluation is
not automatic.
How it looks for students:
72
I
Last updated 1/11/2005
IVA ver 0.6 user manual
73
I
Short answer
By this type of question student has to write the answer, but the evaluation is automatic. This
means, that teacher has to define all correct answers. The answer can be numerical or written in
words. If student enters one of these predefined variants the anwer is considered as correct.
If teacher needs more fields for possile answers, she/he just has to click 'save' and reopen the
question in 'Editing quiz' page.
Note! The answers may be in different formsor contain different words. Teacher has to write all
possible answers.
How it looks for student:
73
I
Last updated 1/11/2005
IVA ver 0.6 user manual
74
I
Metadata of test questions
Entering the metadata
After creating a question, it will be displayed with right answer(s), question type and maximum
result. It is possible to change question if necessary by clicking link change after question in
column Change.
By clicking on the other link change in column Metadata there will open a page for metadata.
Teacher hs to fill this page if she/he wants to save question to the pool. Metadata contain
information about origin and status of the questionto users who search for this question from
the pool.
• Questions saved to the pool can search only author of the question or all teachers, if question
settings in metadata allow it.
• Metadata gives information about test (title), status (draft, final, revised, unavailable), rights
(private, shared, public), language (test questions might be in different languages), copyright
and other restrictions. You can enter keywords about the question, to ease searches from the
pool for this question.
74
I
Last updated 1/11/2005
IVA ver 0.6 user manual
75
I
Saving test questions to pool
• Saving questions to pool is possibleonly if teacher has added keyword(s) to metadata
information
• Keyword(s) should be related to question content, title or topic. You can enter keywords in
Metadata page or in editing question page as you create the question.
• To the field 'title' you can enter the title of the question or quiz but it might be also unfilled
• Click Save
75
I
Last updated 1/11/2005
IVA ver 0.6 user manual
76
I
• After saving you see 'Editing quiz' page with all information about questions. To save
question to pool mark the question and click Save to pool.
•
•
You can save every question to pool only once
Searching for the question from pool and adding question to quiz
•
To find a question in the pool click Search questions from pool
•
Use keywords for search and click Search
•
If there is appropriate question(s), it will be displayed in search page. Select which of the
found questions you want to add and select a quiz you want to add this question to.
•
Click Copy
76
I
Last updated 1/11/2005
IVA ver 0.6 user manual
77
I
5.2.5. Quiz settings
Publishing the quiz
The created quiz is unvisible to students until teacher has published it in Administration section.
Published quizzes appear in folder Portfolio in Webtop.
1. Select Quizzes in Administration section.
2. Mark the quiz you want to publish.
3. Click Settings under the list of quizzes
Time limits and defining number of repeats
Select a quiz and click Settings under he quizzes list. In page Changing quiz settings you can
describe the test define test type (selftest, quiz, survey), set time limit and the number of
repeats, if the questions are randomized if the answers are visible to student after answering
and permissions to define who can access the quiz. To save your preference click Save.
As you have selected the range of persons (not published, open for all, open for subgroups,
open for persons) who have access to the quiz you can set a timelimit for solving – starting time
and ending time.
77
I
Last updated 1/11/2005
IVA ver 0.6 user manual
78
I
Access for all participants
•
Mark radio button 'Open for all' and click OK
•
Click link restrictions. In opened page you can define the starting time and ending time by
date but also by exact time (hour, minute).
•
If you wnt to define the number of allowed repeats enter the allowed number to the field
Repeated.
•
To save your selections click Save.
Access for subgroups
1. Mark radio button Open for subgroups
2. click OK
3. click on link restrictions after 'Open for subgroups'
4. You will see the list of all existing subgroups. Mark the subgroups you want to set time
limit to.
5. Click Add
78
I
Last updated 1/11/2005
IVA ver 0.6 user manual
79
I
6. all subgroups will presented again, and after previously selected subgroups there is a
keyword timelimit. To set timelimit click on the groups title (presented as weblink) and
you see the time setting page.
7. In opened page you can define the starting time and ending time by date but also by
exact time (hour, minute). If you wnt to define the number of allowed repeats enter the
allowed number to the field Repeated. To save your selections click Save.
Access restrictions for persons
1. Mark radio button Open for persons
2. Click OK
3. Click on link restrictions after 'Open for persons'
4. You will see the list of course participantss. Mark the persons you want to set time limit to
and click Add
5. In opened page you can define the starting time and ending time by date but also by
exact time (hour, minute). If you wnt to define the number of allowed repeats enter the
allowed number to the field Repeated. To save your selections click Save.
5.3.
Assignments
In Assignemnts of Adminitration section teacher can set assignemnt for students. Teacher can
79
I
Last updated 1/11/2005
IVA ver 0.6 user manual
80
I
•
add new, change and delete present assignments,
•
evaluate and comment assignents presented by students,
•
set an evaluation scale,
•
administrate the points given for the assignments.
Assignment may be:
•
Quiz – all quizzes will be visible in Portfolio in Webtop
•
Product – student's individual assignment (student uploads it personal portfolio on Webtop).
•
Groupwork – assignments for subgroups (will be uploaded in subgroups portfolio in
Workshops section).
•
Presentation – presentation of project rendition etc. which doesn't have to be in IVA. For
example, presentation might take part in classroom, but it will appear as an event in
Calendar.
•
Peer review – review of other students assignments. It is possible only if the owner (student
who uploaded the assignment) has allowed it in object settings.
There will be automatically a new course event added to Calendar. If the event is presentation,
product or groupwork there will be an icon
5.4.
in Statistics.
Management of assignments
1. If you want to set assignments start with defining grading scale. The scale can have 10
levels as maximum. By default there is grading scale as following:
Grade
Lower limit %
Points
A
90
0.0
B
80
0.0
C
70
0.0
D
60
0.0
E
50
0.0
F
80
I
Last updated 1/11/2005
IVA ver 0.6 user manual
81
I
2. Add an assignment – for example Product.
a) Select Assignments from Administration section
b) Click Add assignment
c) Select Product from the assignments type selection and click Add
d) on page Editing an assignment enter title of assignment, description, timelimit,
guidelines and total points.
Note! There is a check-box Lock folder after deadline. Mark the check-box if you
want to permit uploading assignments after deadline to the folder.
e) Click Save.
With this action:
1. There will be a new event in students statistics about new assignment. If you want to
change this event, select Calendar events in Administration section. Click on the title
of event you want to change and then button Change. Do necessary changes and click
Save.
81
I
Last updated 1/11/2005
IVA ver 0.6 user manual
82
I
2. To students Portfolio in Webtop section will created subfolder named as the new
assignment. Students have to upload the assignment to this subfolder in their Portfolio.
Note! If there is time limit for assignment, it is possible to change the content of the
folder only until this defined deadline.
Teacher can see and grade assignments:
1. Select Assigments in Administration section
2. Click Grade assignments
3. You will see general grading table where you can see all assignments, links to students
homeworks and points for homeworks.
4. Select whos assignments you want to see. Click on link Look in assignments column.
5. Grade the assignment. If you want, you can enter the gained points and comment to the
folder Grade. Grades you enter will appear automatically in general grading table. You
can enter grades also directly to the general grading table aswell.
6. It is possible to save all assignments to a zip file by clicking on link Archive
assignments under general grading table.
7. Teacher can save the general grading table as .csv file. It is possible to open this file in
table format (.xls etc.)
Note! There will be a new event about new assignment in students Calendar in Webtop. If you
want to change the event, you can do it in Calendar events in Administration section.
82
I
Last updated 1/11/2005
IVA ver 0.6 user manual
83
I
6. Index
Help
Reference to IVA user manual
Peer review
Type of assignment, which expects students to comment other
dents assignments
Publish
Sends assignments to Portfolio
Lobby
Place user enters after logging in, here you can select a course,
change user settings.
Presentation
Type of assignment, presenting materials from outside of IVA
(presentation, project etc.)
File
Tool for uploading documents created outside IVA
Administration
IVA section, which is visible only for participants in teacher role,
for administrating different materials related to course
Rating
Owner of the object can give other students righs to evaluate
this object.
Info
Located in Webtop section in Statistics. Gives information about
course participant's assignments, results, and participation.
Calendar
Located in left menu of Lobby. Dates turn to links if on this day
there is a course event.
User settings
Located in Lobby under link Settings. You can change
information about you and your user settings (language,
preferences etc)
Cancel
Interrups your actions
Folder
Tool that enables to structure uploaded files and other objects
Comment
Owner of the object can give other students rights to comment
this object in Object's settings (padlock icon next to object's
name)
Kontext
Topic of discussion in Knowledge building in Workshop section
Course welcome page
Welcome page is in Bookshelf section. After selecting a course,
course participant will first see welcome page with information
about course. Teacher has to create the welcome page using
wiki
83
I
Last updated 1/11/2005
IVA ver 0.6 user manual
84
I
Course info
Data about course in Bookshelf section: course participants list
with contactinformation (e-mail address), and grades in
teacher's view
Pool
Storage of quiz questions
IVA bread crumb strip.
Line of keywords, shows your location in IVA
Product
Type of assignment (for teacher visible in Administration section
in Assignments)which defines for assignment an individual work,
like essay
Jamming
Jamming is the place in Workshop secton for collaborative
digital jamming sessions enables to upload different mediafiles
and evaluate or comment them
Memo
Tool for creating texts directly in IVA environmrent
Metadata
Data about quiz questions. Necessary if question will be stored
in pool
Owner of the object
IVA user who has uploaded or created an object in IVA: files,
folders, memos, weblinks, wikis etc
Object's settings
Tool for giving other students rights to access, evaluate or
comment your objects (assignments)
Object's status
Defines object's status
Zip/Unzip
Tool for packing and unpacking files
Portfolio
Folder in Webtop section for publishing assignments. Objects in
Portfolio are visible to all course participants. Portfolio appears
automatically, as teacher has set any assignments.
Mailbox
Tool for sending e-mails to course participants.
Statistics
Located in left menu ofWebtop section. Gives you information
of course events, assignments, grades and participation activity
Assignment
in
Statistics section
Icon in Statistics which marks event of groupwork or product
Bookshelf
IVA section, where teacher publishes course materials..
Students can't change here anything.
Subgroups portfolios
Located in Workshops section. For presenting subgroup
assignments.
Groupwork
Type of assignment, whcih defines groupwork for homework.
Teacher finds it in Assignment in Administration section.
Save
Saves your actions in IVA
Subgroups
Little groups of course participants, in case teacher wants to
give different assignments to different groups of people.
Submit
Saves your action in IVA
84
I
Last updated 1/11/2005
IVA ver 0.6 user manual
85
I
Event
Colors marking status of
the event:
Blue
Green
Red
Black
Knowledge building
Workshops
Reply
Webtop
Information that appears in Calendar and in Statistics section,
marks assignments with deadline
•
Incomplete event, there is still time for final deadline
•
Complete event
•
Incomplete event, deadline has passed
•
Status is undefined
Tool in workshop section for group discussions
IVA section for groupworks: discussion forums, presenting
mediafiles, subgroups assignments
For answering to mail or previous comments
IVA section for individual work, in Webtop you see your grades
and statistics with course events
Weblink
Tool for adding a weblink
Wiki
Wiki-word
Tool for creating a non-linear hypertext
WikiStart
Log out
New things
A word that works as weblink to a subpage (formatted like
WikiWord)
Gives access to previously (earlier IVA versions) created
wikipages.
Link on upper menu that logs you out from IVA
Located in Bookshelf section on the right side. Gives you
overview about all new things in IVA that you haven't
seen/opened yet.
85
I
Last updated 1/11/2005


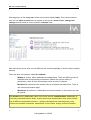
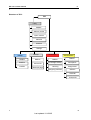
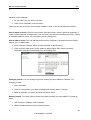
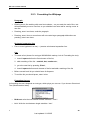
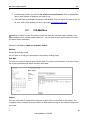
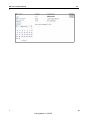
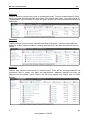
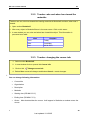
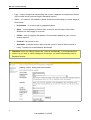
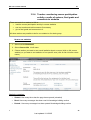


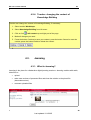
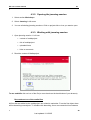
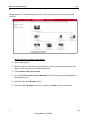
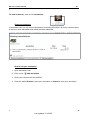

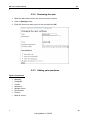
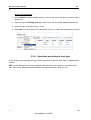

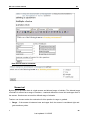
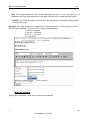
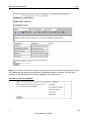
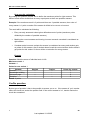
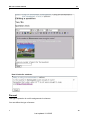
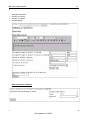
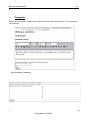
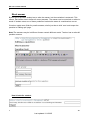
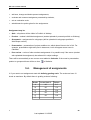
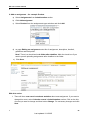
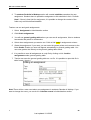


![User Manual here [ 3427KB]](http://vs1.manualzilla.com/store/data/005961880_1-89f360bcc6dca28ab650306b93dc2a96-150x150.png)