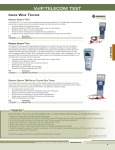
1
PROFESSIONAL NETWORK TESTING & PROTOCOL ANALYSIS
WireXpert
WX4500
User’s Manual
Psiber Data
www.psiberdata.com
WireXpert WX4500
User’s Manual
CONTENTS
Notes................................................................................................................. 4
Safety Notices...................................................................................................................... 5
Declaration of Conformity.................................................................................................... 7
Getting Started........................................................................................... 8
What’s inside the box.......................................................................................................... 8
WireXpert at a Glance......................................................................................................... 9
WireXpert Kit....................................................................................................................... 11
Dual Control System (DCS)............................................................................................... 12
WireXpert Adapters........................................................................................................... 13
Link and Channel Adapters.............................................................................................. 13
Adapter Configuration Warnings..................................................................................... 14
Fiber Adapters..................................................................................................................... 14
Cabling Certification and Tests....................................................................................... 14
Copper Cable Certification Testing................................................................................. 15
Permanent Link Configuration Tests............................................................................... 15
Channel Configuration Tests............................................................................................ 15
WireXpert User Interface.................................................................................................. 16
Touch Screen Layout.......................................................................................................... 16
The One Touch Concept..................................................................................................... 16
Setup.................................................................................................................................. 17
Autotest.............................................................................................................................. 18
Data.................................................................................................................................... 18
Tools................................................................................................................................... 19
WireXpert Software........................................................................................................... 20
Adapter Detection.............................................................................................................. 20
Digital Fault Finding........................................................................................................... 20
System Requirements........................................................................................................ 20
Memory ............................................................................................................................... 21
Memory Requirements....................................................................................................... 21
Saved Test Capacities........................................................................................................ 21
Battery information............................................................................................................ 21
Using External Power......................................................................................................... 22
Battery Safety...................................................................................................................... 22
Power Supply...................................................................................................................... 23
Connectivity......................................................................................................................... 23
Dimensions.......................................................................................................................... 23
Environmental Conditions................................................................................................. 23
2
Using WireXpert........................................................................................ 24
How do I check the software (firmware) version information of my WireXpert?............. 24
How do I know if I have the correct adapter for testing?.................................................. 24
How do I upgrade the firmware?....................................................................................... 24
How to setup date/time in my WireXpert?........................................................................ 25
How do I select the limit?.................................................................................................. 26
How do I select the cable type for certification?............................................................... 26
How do I set reference between local and remote units?................................................ 27
How do I run certification test (AutoTest)?........................................................................ 28
How do I save test data?................................................................................................... 29
How can I setup my WireXpert to save results automatically?........................................ 29
How do I add a new site in WireXpert?............................................................................. 30
Where do I change default labelling scheme for saving test results?.............................. 31
What are the labelling options available for saving test results in WireXpert?............... 31
How do I export test results into ReportXpert?................................................................. 31
Now I have my results in USB thumbdrive, how do I export to PC?.................................. 32
How do I export result into an Excel sheet or pdf reports?............................................... 34
Where can I change the Auto Power-off time setting?..................................................... 34
How do I check if my WireXpert is running in Demonstration (demo) mode?.................. 35
How do I format the internal flash?................................................................................... 35
How do I replace an old battery?....................................................................................... 36
Testing Copper Cables........................................................................... 37
Connecting to Cabling for Certification.......................................................................... 37
Entering the Site Information........................................................................................... 37
Choose the Labelling Format............................................................................................ 37
Simple Labels..................................................................................................................... 38
TIA 606-A Class 1 Labels................................................................................................... 38
TIA 606A-Class2................................................................................................................. 39
Adapter Configuration....................................................................................................... 40
Adapter Insertion Counts................................................................................................... 40
Set the Test Limit................................................................................................................ 40
Set the Cable Type............................................................................................................. 40
Set Connector Information................................................................................................ 40
Performing AutoTests........................................................................................................ 40
Technical Support................................................................................... 42
Warranty..................................................................................................... 43
3
Notices
No part of this manual may be reproduced in any form or by any means
(including electronic storage and retrieval or translation into a foreign
language) without prior agreement and written consent from Psiber Data
as governed byinternational copyright laws.
Manual Part Number
3000 – 0012
WX User Guide
Edition
First Edition, November 10, 2011
Psiber Data GmbH
Warranty
The material contained in this document is provided “as is,” and is subject
to being changed, without notice, in future editions. Further, to the maximum extent permitted by applicable law, disclaims all warranties,
either express or implied, with regard to this manual and any information
contained herein, including but not limited to the implied warranties of
merchantability and fitness for a particular purpose. Psiber Data shall
not be liable for errors or for incidental or consequential damages in
connection with the furnishing, use, or performance of this document or of
any information contained herein. Should Psiber Data and the user have
a separate written agreement with warranty terms covering the material
in this document that conflict with these terms, the warranty terms in the
separate agreement shall control.
Technology Licenses
The hardware and/or software described in this document are furnished
under a license and may be used or copied only in accordance with the
terms of such license.
4
Safety Notices
CAUTION
notice denotes a hazard. It calls attention to an operating
procedure, practice, or the like that, if not correctly performed or
adhered to, could result in damage to the product or loss of
important data. Do not proceed beyond a CAUTION notice until
the indicated conditions are fully understood and met.
WARNING
notice denotes a hazard. It calls attention to an operating
procedure, practice, if not correctly performed or adhered to,
could result in personal injury or death. Do not proceed beyond
a WARNING notice until the indicated conditions are fully
understood and met.
General Safety Information
WARNING
▪▪ Do not use the device if it is damaged. Before you use the
device, inspect the casing. Look for cracks or missing plastic.
Do not operate the device around explosive gas, vapor, or dust.
▪▪ Always use the device with the cables provided.
▪▪ Observe all markings on the device before establishing any
connection.
▪▪ Turn off the device and application system power before
connecting to the I/O terminals.
▪▪ When servicing the device, use only the specified replacement
parts.
▪▪ Do not operate the device with the cover removed or loosened.
▪▪ Use only the power adapter provided by the manufacturer to
avoid any unexpected hazards.
CAUTION
▪▪ If the device is used in a manner not specified by the
manufacturer, the device protection may be impaired.
▪▪ Always use dry cloth to clean the device. Do not use ethyl
alcohol or any other volatile liquid to clean the device.
▪▪ Do not permit any blockage of the ventilation holes of the
device.
5
Environmental Conditions
This instrument is designed for indoor use and in an area with low
condensation. The table below shows the general environmental
requirements for this instrument.
Environmental
conditions
Operating Temperature
Requirements
0 °C to 50 °C
Operating humidity
20% to 85% RH non-condensing
Storage temperature
–20 °C to 70 °C
Storage humidity
5% to 90% RH non-condensing
Note
The WX4500 WireXpert complies with the following Safety and
Regulatory requirements.
DIN EN 55024, Edition:2003-10 (IEC/CISPR 24:1997, modified
+ A1:2001 + A2:2002); EN 55024:1998 + A1:2001 + A2:2003
DIN EN 55022; VDE 0878-22:2008-05 (IEC/CISPR 22:2005,
modified+ A1:2005); EN 55022:2006 + A1:2007
RoHS Directive : 2009/95/EC 27 January 2003
REACH Directive : Article 33 of European Reach Regulation
No 1907/2006
Psiber Data guarantees that no substance of very high concern
(SVHC), as mentioned in the latest Reach article in force by above
date, are used in the product of this declaration.
LVD Directive : Product is in accordance with EU Low Voltage
Directive 2006/95/EC
ETL Verified Certificate of Conformance Number :
100657061CRT-001d
Regulatory Markings
The CE mark is a registered trademark of the European Community. This CE mark shows that the product complies with all
the relevant European Legal Directives.
6
Declaration of Conformity
Manufacturer‘s Name:
Manufacturer’s Address: Psiber Data Pte. Ltd.
#03-005, iHub,
9 Jurong Town Hall Road,
Singapore 609431
Declares under sole responsibility that the product as originally delivered
Model Number: WireXpert, WX4500-FA
Description: Class FA Copper Certification Kit
Equipment: Cable Certifier
complies with the essential requirements of the following applicable European
Directives and carries the CE marking accordingly:
DIN EN 55024, Edition:2003-10 (IEC/CISPR 24:1997, modified + A1:2001 +
A2:2002); EN 55024:1998 + A1:2001 + A2:2003
DIN EN 55022; VDE 0878-22:2008-05 (IEC/CISPR 22:2005, modified +
A1:2005); EN 55022:2006 + A1:2007
RoHS Directive : 2009/95/EC 27 January 2003
REACH Directive : Article 33 of European Reach Regulation No 1907/2006
Psiber Data guarantees that no substance of very high concern (SVHC), as mentioned in the latest
Reach article in force by above date, are used in the product of this declaration.
LVD Directive : Product is in accordance with EU Low Voltage Directive
2006/95/EC
ETL Verified Certificate of Conformance Number : 100657061CRT-001d
Date:
September 8, 2012
Quality Management Signature
Arvind C Patel
Psiber Data Pte. Ltd.
www.psiberdata.com
7
Getting Started
What’s inside the box


Softcase(WX_AX_SCASE)
Calibration Certificate
Power Adapters(WX_AC_PWRAD x 2)
CAT 6A Channel adapters (WX_AD_6ACH2)
WireXpert System
Permanent link test kit
(WX_AD_6ALKIT2)
8
WireXpert at a Glance
Item
Power On-Off Button
Touch Sensitive LCD
screen
USB device connector
Functionality
Used to turn on or turn off the device. Turn off
is almost instantaneous and Press and hold
for 5 sec to turn on the unit. This button also
indicates the status of charging and remaining
charge in the batteries of the device. Refer to
battery charging section for more information.
Like most modern devices, all the functions of
the WireXpert are operated using the intuitive
touch screen menus. A detailed description
of various functionalities is described in later
sections.
Not relevant in software release v1.0
9
Audio Jack
While carrying certification tests using
WireXpert and RemoteXpert the audio jack
provides a way to coordinate the testing
with the talk-set feature. Two headsets are
included as a part of the kit. The voice communication feature between the local and the
remote units is automatically activated when
you plug in the headsets.
USB Host Connector
To export saved test results and firmware
upgrades. WireXpert allows an easy way to
export the test results into a USB thumb drive
instead of having to carry the device around
to connect to a PC.
RJ-45 Connector
Not relevant in software release v1.0
Power Supply Jack
To recharge the unit. Use the power adapter
shipped with your WireXpert.
One-touch access
buttons
A quick and easy way to access most
important functions of the WireXpert. Perform
Autotest with just one click without having to
browse back and forth in the user menus
Brightness Control
Adjust the brightness of the LCD display to
suit the ambient light
Navigation scroll
buttons
Scroll up/down when there are long lists
Context sensitive help
Help menu relevant to the functionality on the
current screen shown on the LCD display
Probe interface connector
Connect different probes CAT6A Channel,
or CAT6A Link etc. depending on the type of
certification you are performing
Battery Compartment
door
To replace the battery. Open the compartment by unscrewing the fastener to change
the battery
10
WireXpert Kit
The WireXpert product line will have the following orderable parts.
Product Number
Name
WX4500-FA
WireXpert ClassFA
WireXpert LAN cable certifier master unit
coppert kit (class FA
and a remote unit, with two CAT 6A chanadapters not included) nel adapters, two CAT 6A link adapters
and Class FA cable certification software
license
WX_AD_MM2
WX4500 Multimode
adapter pair
Multimode Fiber adapter set for certification testing at 850 nm and 1300 nm
wavelengths with dual wavelength source
(850nm VCSEL and 1300nm LED light
source)
WX_AD_SM2
WX4500 Singlemode
adapter pair
Singlemode Fiber adapter set for certification testing at 1310 nm and 1550 nm
wavelengths
WX_AD_6ACH1
WX4500 CAT6A
channel adapter
WX_AD_6ACH2
WX4500 CAT6A
channel adapter pair
WX_
AD_6ALKIT2
WX4500 CAT6A
permanent link
testing kit
kit for CAT6A (and below) permanent
link testing comprising a pair of CAT6A
permanent link interface adapters WX_
AD_6ALINT, and a pair of CAT6A permanent link test cords WX_AC_6ALCORD
WX_
AD_6ALINT1
WX4500 CAT6A
permanent link
interface adapter
When mated to CAT6A permanent link
test cord WX_AC_6ALCORD, CAT 6A
permanent link interface adapter supports
CAT6A (and below) permanent link
certification testing
WX_
AC_6ALCORD1
WX4500 CAT6A
permanent link test
cord
When mated to CAT6A permanent link
interface adapter WX_AD_6ALINT, CAT 6A
permanent link test cord supports CAT6A
(and below) permanent link certification
testing
WX_AD_TERACH1
WX4500 CLASS
FA TERA channel
adapter
Class FA channel adapter with TERA
interface, suitable for Class F/Class FA
channel testing
WX_AD_TERACH2
WX4500 CLASS
FA TERA channel
adapter pair
A pair of Class FA channel adapters with
TERA interface, suitable for Class F/Class
FA channel testing
WX_AD_TERAL1 WX4500 CLASS FA
TERA permanent link
adapter
Description
Class FA permanent link adapter with
TERA interface, suitable for Class F/Class
FA permanent link testing
11
WX_AD_TERAL2 WX4500 CLASS FA
TERA permanent link
adapter pair
A pair of Class FA permanent link adapters
with TERA interface, suitable for Class F/
Class FA permanent link testing
WX_AD_GGARJCH1
WX4500 CLASS FA
GG45/ARJ45 channel
adapter
Class FA channel adapter with TERA
interface, suitable for Class F/Class FA
channel testing
WX_AD_GGARJCH2
WX4500 CLASS FA
GG45/ARJ45 channel
adapter pair
A pair of Class FA channel adapters with
GG45/ARJ45 interface, suitable for Class
F/Class FA channel testing
WX_AD_GGARJL1
WX4500 CLASS FA
GG45/ARJ45 permanent link adapter
Class FA permanent link adapter with
GG45/ARJ45 interface, suitable for Class
F/Class FA permanent link testing
WX_AD_GGARJL2
WX4500 CLASS FA
GG45/ARJ45 permanent link adapter pair
A pair of Class FA permanent link adapters
with TERA interface, suitable for Class F/
Class FA permanent link testing
WX_AC_BAT
battery pack for
WX4500
WX_AX_SCASE
WX_AC_HCASE
Hard carry case for
WX4500
WX_AC_TALKSET1
Talkset for WX4500
WX_AC_PWRAD Power adapter for
WX4500
AC/DC power adapter (battery charger)
for WX4500
Dual Control System (DCS)
WireXpert consists of two devices for dual ended certification testing that
look identical. In order to distinguish them a label may be placed at the
bottom of the unit. The two devices also come with different colour of the
strap. Both the devices have a LCD and touch screen. The identical look
and feel of the two devices of WireXpert gives you significant advantage
while performing certification tests. It allows you to start and save test
results from either ends and also provide much deeper insight into the test
for the user at the remote end.
WireXpert Adapters
All WireXpert test adapters plug into the adapter slot at the top of the
local and remote units. WireXpert automatically detects any adapters
connected to it and configures its interface to the matching parameters
and limits.
12
Link and Channel Adapters
Each WireXpert test kit includes adapters for testing copper cabling in
both Link and Channel configurations.
Link adapters connect to the customer’s wall plate and telecommunications panel jacks. WireXpert software compensates for the adapter’s
transmission characteristics so they do not affect test results.
WireXpert uses a revolutionary scheme of testing link configurations
that provide highly accurate and repeatable measurements. Since Link
configuration measurements are highly influenced by the performance of
the RJ-45 jack and the link cord, the wear and tear of the cord contributes
adversely to the accuracy of measurements. In traditional certification
equipment it becomes imperative to replace the link adapters often to
remain complaint to certification standards. This is often an expensive
proposition to change the entire link adapter set and increases the cost of
owning a tester by having to buy the expensive Permanent link adapters
every year or so.
To overcome this problem the Permanent Link Adapters in WireXpert
come with a high precision Permanent Link interface adapter and a
Permanent link cord shown in the figure below. By employing this scheme
you will only have to replace a rather inexpensive Link Cord to overcome
the degradation issues of the test heads.
Channel adapters connect to the customer’s patch cords at the wall plate
and telecommunications panel. WireXpert software compensates for the
adapter’s transmission characteristics so they do not affect test results.
13
Adapter Configuration Warnings
WireXpert displays a warning when it detects a potential conflict between
the detected adapter and any of the test settings. Using an inappropriate
adapter will significantly affect measurement accuracy. This is especially
important for category 6A and 7 installations.
CAUTION
Never connect WireXpert test adapters or test cables to a voltage
source such as a telephone jack. Excessive voltages can damage
WireXpert adapters and the WireXpert analyser, and void your
warranty.
Fiber Adapters
WireXpert provides complete certification testing for multi mode and single
mode fibres using fibre adapters.

Fibre adapters are sold in pairs and in these configurations:
▪▪WX_AD_SM2 – Singlemode 1310nm and 1550 nm
▪▪WX_AD_MM2– Multimode 850 nm and 1300 nm
Multimode fibre probes have a VCSEL source at 850nm and an LED
signal source at 1300nm. The singlemode fiber probes consist of dual
wavelength DFB laser sources.
14
Cabling Certification and Tests
Certification testing with WireXpert is highly intuitive and simple. An
autotest function coordinates a series of measurements between the local
and remote devices and analyses the results to determine if the cabling
run passes or fails the selected standards.
Copper Cable Certification Testing
Standards for structured twisted pair cabling require that both ends of each
cable run be tested to find the worst case performance condition. All certification testing requires a two-part test set consisting of a main unit and a remote
unit, each of which has similar test capabilities. One unit tests the cabling run
from the telecommunications closet end and the other tests from the outlet
end.
There are two primary considerations when testing:
▪▪Whether the user patch cords are included in the cabling run during
the test. If so, channel test configuration is required. If not, link test
configuration is required.
▪▪Which standard should be used (Category or Class).
Permanent Link Configuration Tests
The link configuration is used in facilities still under construction and
does not include user patch cords. Because the link configuration does
not include the two additional connections which the patch cords would
produce, performance standards are more stringent. The local and remote
units attach to the link under test with special link test adapters.
Channel Configuration Tests
The channel configuration includes the user patch cords at both ends of
the cable run. The pass/fail limits applied when testing are less stringent
than for link configuration to allow for the performance degradation inherent in the two additional modular-8 connections. The local and remote
units attach to the channel under test with special channel adapters.
15
WireXpert User Interface
Touch Screen Layout
All the touch interface screens of WireXpert can be segmented into three.
The information segment which is at the top provides Device Information,
Device Name etc. The Functionality Segment is below the information tab,
it allows the user to execute various functions in the device. The Navigation tabs in the functionality segment logically partition the user screens.

The one touch access segment below the display provides quick shortcuts
to jump to major functionalities like AutoTest, Viewing/Editing database etc
with just one click.
The One Touch Concept
The fundamental philosophy behind the WireXpert User Interface is
simplicity in its ease of use. Most of the users of WireXpert would use it
under four very specific scenarios.
1. To do a certification test or the AutoTest
2. To Setup the AutoTest for various limits and cables that is to be
certified.
3. To manage Data that is saved in the device, to view saved results,
modify or delete the records etc.
4. Other functionalities or Tools for advanced or expert users for
troubleshooting the installations.
16
Based on these most common usage scenarios, the user interface of
WireXpert is divided into four sections.
a) AutoTest
b) Setup
c) Data
d) Tools
Each of these sections or “touch lens buttons” can be accessed very
quickly with just a touch. Most of the user actions in WireXpert would
require you no more than two clicks to perform.
Setup
This is the section you will most likely land up in after powering on the
device. It has 3 navigation tabs below each allowing you to configure
different settings. The Test settings tab lets you setup the AutoTest configuration including the limits, cable type, labels for saving results etc. The
System settings tab allows you to set the system settings like Date/Time,
Auto sleep, Auto saving of results in the memory etc. The last navigation
tab Information in the setup section gives the information like calibration
status, adapter (probe) status and type of adapter etc.

Test Settings
System Settings
17
Setup Information
Autotest
The one touch autotest button allows you to start the test with just one
click if both the local and remote units are connected properly. You can
view summary results screen once the autotest is completed. The result of
the test is indicated at the top left of the screen. Further detailed plots and
results can be viewed and saved in this section.


Main Screen
Detailed results
Plots
Daten
The Data section allows you to manage sites, test database and test
results. You can add/delete new sites and records or rename them.

18
You can organize stored results, sort them alphabetically, time wise and
edit them without having to use the PC based software, ReportXpert.
Tools
The tools section lets you perform advanced troubleshooting using WireXpert
and perform certain calibrations between local and remote measurements
required for accurate attenuation measurement.
19
WireXpert Software
Adapter Detection
WireXpert software automatically detects which adapters are connected
to the local and remote units and configures the testing program to match
these adapters. Conflicts between the installed s and testing selections
generate an error message.
Digital Fault Finding
WireXpert software automatically pinpoints cable fault locations and
causes, speeding problem resolution and increasing operator productivity.
System Requirements
Depending on the adapters you are using, the WireXpert kit contains
everything needed to certify copper cabling to Category 6 or to Category
6A/7.
To certify optical fibre cabling, purchase a set of adapters (included in the
Fibre Professional Certification Kit).
For a list of available adapters, please visit www.psiberdata.com.
To print reports, archive test results and download WireXpert software
upgrades and profiles, the PC based data management software, ReportXpert and a Windows PC is required. The PC must run Windows 2000
or higher and ReportXpert software.
To transfer files, profiles and software updates using a USB Flash drive,
the PC must be equipped with a USB port.
Memory
1GB internal flash memory.
2GB USB Flash Drive included allows for flexible
test record storage.
20
Memory Requirements
The amount of memory that each test result takes up depends on the options that you set before starting the test. Generally, if you save plots with
each test, test result files are larger than if you omit plots.
WireXpert allocates approximately 1 GB of internal Flash memory for test
result storage. The exact amount of memory available depends on the
size of the WireXpert software.
The following table lists approximate record storage capacities for the
internal Flash memory when configured for 1GB and for a 1 GB removable USB Flash drive.
All sizes of USB Flash drive will work as extra storage media.
Saved Test Capacities
Autotest configuration
Category 6/6A/7 with full plot
data (1 GHz)
Capacity (No. of records)
Internal Flash 1GB
USB-Stick 2 GB
USB Flash Drive
2 GB
8000
Battery information
WireXpert local and remote units are powered by Lithium Ion rechargeable batteries. These batteries contain circuitry that reports their state of
charge to WireXpert. The units can also be powered by external AC/DC
power adapters. Connecting the adapters also charges the batteries.
A fully charged battery can run WireXpert for five to eight hours before
requiring recharging. Reducing the screen brightness and enabling the
sleep function allows WireXpert to run longer on a charge.
21
WARNING
Do not calibrate or operate WireXpert while the battery is hot
immediately after charging.
If the environment is causing the temperature rise, pleas move the
unit to a suitable environment. Contact your nearest Technical Support
centre if in doubt.
Using External Power
To power the units with AC power or to charge their batteries:
▪▪Use the AC to DC ()
CAUTION
Use only the external supplied with the WireXpert kit. Using other
power s may damage the tester and will void its warranty.
▪▪Connect the end of the cable to the charging jack on
the side of the unit.
▪▪Plug the body of the into an appropriate AC source.
Battery Safety
To avoid the risk of fire, burns or damage to your battery pack, do not
allow metal objects to touch the battery contacts.
The battery pack is suitable for use only with compatible WireXpert
devices.
Do not disassemble he battery pack. There are no user serviceable parts
inside. Do not dispose of the battery pack in fire or water.
Handle a damaged or leaking battery with extreme care. If you come into
contact with the electrolyte, wash the exposed area with soap and water.
If the electrolyte contacts the eye, flush the eye with water for 15 minutes
and seek medical attention.
Do not expose the battery pack o high storage temperatures (above
55°C).
22
When discarding a battery pack, contact your local waste disposal
provider regarding local restrictions on the disposal or recycling of Lithium
Ion batteries.
To obtain a replacement battery (part number N2641A-135), contact your
local dealer.
Do not charge the battery pack if the ambient temperature is above 40°C.
Power Supply
▪▪Removable/rechargeable Li-Ion batteries provide more than 8 hours
of continuous operation.
▪▪AC power: 100~240V AC plugs directly into the battery. Can be
recharged separate from the instrument.
Connectivity
▪▪ interface connector
▪▪Auxiliary 10/100Mbit/s Ethernet port, RJ-45
▪▪Universal Serial Bus (USB1.1) port
▪▪Talkset inerface: 3.5mm stereo jack
Dimensions
▪▪Size: 220mm x 110mm x 53mm
▪▪Weight: approx. 1.0 kg (approx 2.2 lbs.)
Environmental Conditions
▪▪Operating temperature: 0°C to +40°C
▪▪Storage Temperature: -10°C to +55°C
▪▪Relative humidity: 10% to 80%
23
Using WireXpert
How do I check the software (firmware)
version information of my WireXpert?
Goto Setup->information tab to check the software version and hardware
version numbers. It also gives you the next yearly calibration due date in
the same screen.
How do I know if I have the correct adapter for testing?
The type of adapter that is installed in WireXpert can be found from Test
Settings tab in setup menu.
How do I upgrade the firmware?
To upgrade the WireXpert software, use a USB flash drive and prepare
it for upgrade of the latest firmware using ReportXpert. Plug in the USB
flash drive in the USB host connector of WireXpert. WireXpert will come
up with a screen as shown below. Select the start software update option and it will prompt a caution message. Choose Yes to upgrade the
software.
24
How to setup date/time in my WireXpert?
From the setup touch lens button, go to System tab and select time and date.
It opens up the screens shown below. Choose the edit button to set or change
date and time.
25
How do I select the limit?
From the Setup touch lens button, select the Test Settings tab; choose
Limit menu at the top and it will open up a screen with different limits to
choose from. Run through the hierarchy and choose the appropriate limit
for the certification job that you are performing.
How do I select the cable type for certification?
To select the type of cable under certification, go to Test Settings tab
under Setup touch lens button. It will open up a screen to select the cable
manufacturer followed by the name of the cable. Choose the appropriate
cable under certification.
26
How do I set reference between local and remote units?
It is recommended that whenever the local
and remote unit pair is being used for the
first time you perform a set reference measurement. If there is a mismatch between
the software versions or the reference calibration between local and remote units has
expired the WireXpert would require you to
perform a Set Reference measurement as
shown in the figure below.
To perform a set reference measurement,
go to the tools menu and select the set
reference measurement icon. Connect the
WireXpert local and remote unit for reference calibration. This is done by connecting a Permanent link adapter at the local
end and a Channel adapter at the remote
end and connecting them together. Press
“OK” to start the Set Reference procedure,
once the Set Reference is complete the
screen shows a Pass or Fail message. The
flow of the screens is shown below.
27
How do I run certification test (AutoTest)?
Once you have setup the WireXpert for the desired certification process,
WireXpert allows you to perform AutoTest with just one touch of AutoTest
touch lens button. Once the test is completed it will show the summary
results page with Pass or Fail message.
28
How do I save test data?
Once the autotest is completed, the test results can be saved manually
by pressing the SAVE button at the bottom right corner. Depending on
the type of labelling chosen the labels are either chosen automatically or
you will be required to key in the record name based on your own naming
scheme.
A keypad will open up letting you enter the name of the record to be saved
and press SAVE.
How can I setup my WireXpert
to save results automatically?
Auto saving of results removes the hassle of manually having to save after
every test. You should setup the labelling scheme before enabling the Autosaving option. Go to the Setup touch lens menu and select the Auto Save
results option at the bottom.
29
How do I add a new
site in WireXpert?
To add a new site for a certification job, go to
Setup one touch menu and click on New, a
keypad will allow you to enter the site name.
Also enter the details about the site like
address, contact number and other notes for
better referencing.
30
Where do I change default labelling
scheme for saving test results?
From the SETUP touch lens menu, select the label source. It will open up
another screen with different types of labelling scheme to choose from.
More information about the labelling schemes can be found in the next
chapter..
What are the labelling options available for saving test
results in WireXpert?
WireXpert supports simple Auto-Increment labels by incrementing the last
character or number of the label for the next test. This allows you to save
test results with unique labels without having to type labels after every test.
Alternatively, if you are following the labelling standards specified in the TIA
606 standard, WireXpert supports Class 1, Class 2 and Class 3 labels.
How do I export test results into ReportXpert?
ReportXpert is the PC based so lets you store, manage and generate
reports of the tests done on WireXpert. To export test results from WireXpert to the PC software you will need a USB flash drive. Plug a USB
flash drive into WireXpert and WireXpert will detect the USB drive insertion and come up with a screen with a list of options. Moving results will
not keep a copy of test results in the WireXpert. Copying results would
31
keep a copy of results in the WireXpert as well as copying the results to
the USB flash drive.
Now I have my results in USB thumbdrive,
how do I export to PC?
Once you have the results in the thumbdrive, run the ReportXpert application from your PC desktop. Plug in the thumdrive into the PC where the
PC software ReportXpert is installed. Start the ReportXpert application by
clicking on START ReportXpert.
Once the application is running, import test records from the USB flashdrive, from the File menu. The application will automatically guide you
through the process of importing test results.
32
You can view the desired plots by clicking on the respective labels of the
test results.
33
How do I export result into an Excel sheet or pdf reports?
From the list you can either click on the excel icon or the pdf icon to
generate the excel and pdf reports.
Where can I change the Auto Power-off time setting?
In the SETUP touch lens button, you can configure the Auto Power Off setting to the desired minute intervals.
34
How do I check if my WireXpert is running in Demonstration (demo) mode?
If WireXpert is in demonstration mode, all the tests on WireXpert are
simulated tests and are not real. To switch between Demo Mode or Real
Testing mode go to SETUP touch lens and SYSTEM tab and choose the
DEMO mode.
How do I format the internal flash?
You can restore all settings and internal flash memory to the factory settings from the SETUP touch lens button and System Settings.
35
CAUTION
Confirming this option will erase all current settings on the device and
erase all data including all stored results. There is no way to recover
the data once erased.
How do I replace an old battery?
The batteries are located on the bottom side of the units. To remove the
batteries:
1. Turn the unit off and disconnect the external power supplies.
2. Unscrew the flip battery compartment door and open it.
3. Pull the battery out and insert a new battery and close the
compartment door and fasten it in place with the screw.
36
Testing Copper Cables
Connecting to Cabling for Certification
This chapter briefly describes a possible check list of things and how you
might want to go about performing certification using WireXpert.
Entering the Site Information
Before starting a new certification job at a site, you might want to configure your WireXpert with the Site information by creating a new site. The
site information is useful in organizing the tests that are done under the
site name you create. The same site hierarchy is then displayed when
exporting the results into the PC software(ReportXpert).
Choose the Labelling Format
WireXpert supports multiple types of labelling for your saved results enabling you to smartly organize and document your job. You can configure
the device to choose different labelling schemes. There are also Simple
labels when you are performing a very small job and don’t want to use
standard labelling practices as specified in TIA 606A standards or use the
hierarchical labelling structures.
37
Simple Labels
Simple labels provide auto incrementing feature that generate unique
labels the last character is incremented after every test.
TIA 606-A Class 1 Labels
This type of labelling scheme follows the TIA 606-A Class 1 standard labelling
scheme. It is mostly used to support hierarchical labelling naming the floors,
Telecom rooms and patch panels etc.
38
TIA 606A-Class2
This type of labelling scheme follows the TIA
606-A Class 2 standard labelling scheme. It is
mostly used to support Backbone to Telecom
Room type installations.
Adapter Configuration
WireXpert tester uses different adapters to connect to cabling runs. The tester
automatically detects which adapters are installed in the local and remote units
and selects matching test parameters.
To connect the tester to a cable run:
1. Select the correct adapter for the type of cabling to be certified, either
Permanent link configuration, or Channel configuration testing or Fiber
testing.
2. Insert matching adapters in the bays at the top of the units.
3. Connect the adapters to the ends of the cable run being tested.
Adapter Insertion Counts
Every WireXpert adapter contains a memory chip that keeps track of how
many tests have been performed with the respective adapter. This data is
helpful in determining when the adapter is reaching the end of its useful life.
WireXpert will show a warning whenever the adapter insertion counts has
expired the specified life time insertion counts.
39
CAUTION
Never connect any WireXpert to a voltage source such as a telephone
jack. Excessive voltage will damage the units and the adapter and void
the warranty..
Set the Test Limit
Select LIMIT on the menu and choose from the options displayed.
Set the Cable Type
Select CABLE TYPE on the menu and choose from the options displayed.
Set Connector Information
Select CONNECTOR TYPE. The menu automatically takes you through the
screens to select the Connector Manufacturer and Connector Type.
Performing AutoTests
Once the setup is done AutoTest can be started by pressing the AutoTest
touch lens button.
40
Once the test is complete a summary results window will display the result
of the test whether it is a Pass or Fail. Detailed results can be viewed
by pressing the DETAILS tab at the bottom which will display all the
parameters that are measured during the test with the worst case margin
displayed on the right most column. The actual plots can be viewed by
clicking the respective test parameter that is measured. A cursor is always
placed at the worst case margin displaying the frequency and the worst
performing frequency and pair. The test results can be saved if autosaving of results is not enabled.
41
Technical Support
Please contact Psiber at the following locations,
Psiber Worldwide Offices
America
Psiber Data Systems Inc.
7075-K Mission Gorge Road
San Diego, CA 92120
Telephone: +1-619-287-9970
Fax: +1-619-287-9978
E-mail: [email protected]
www.psiber.com
France
Psiber Data France
Paris
Telephone: +33-(660)-970910 E-mail: [email protected] www.psiberdata.com
Italy
Psiber Italy Via Gaslini
20052 Monza (MI)
Telephone: +39-039-2844287 Fax +39-039-2844286 E-mail: [email protected] www.psiber.it
Asien & Pacific
Psiber Data Pte. Ltd.
3 Science Park Drive
#03-09, The Franklin
Singapore Science Park 1
Singapore 118223
Telephone: +65-6569-6019 ext. 105
Fax: +65-6899-1016
E-mail: [email protected]
www.psiberdata.com
United Kingdom
Psiber Data Ltd. Unit 14
New House Business Centre
Old Crawley Road
Faygate,West Sussex, RH12 4RU
Telephone: +44-(0)1293-852306 Fax: +44-(0)1293-852298
E-mail: [email protected]
www.psiber-data.co.uk
Europe
Germany
Psiber Data GmbH Felix-Wankel-Str. 4 82152 Krailling
Telephone: +49-(0)89-89136060 Fax: +49-(0)89-89136066
E-mail: [email protected]
www.psiberdata.com
42
Warranty
Psiber Data warrants that the product shall be free from defects in parts or workmanship for a
period of 12 months from the date of purchase if used in accordance with Psiber Data operating
specifications.
THIS IS THE ONLY WARRANTY MADE BY Psiber Data AND IS EXPRESSLY MADE IN LIEU
OF ALL OTHER WARRANTIES EXPRESSED OR IMPLIED, INCLUDING BUT NOT LIMITED TO
ANY IMPLIED WARRANTIES OF MERCHANTABILITY OR FITNESS FOR ANY PARTICULAR
PURPOSE.
Should any parts or workmanship prove defective, Psiber Data will repair or replace at Psiber Data’
option, at no cost to the Buyer except for shipping costs from the Buyer’s location to Psiber Data.
This is Buyer’s SOLE AND EXCLUSIVE REMEDY under this Agreement. This warranty does not
apply to products which have been subject to neglect, accident or improper use, or to units which
have been altered or repaired by other than an authorized repair facility.
For US-Customers:
Return of Equipment – To return a product to Psiber Data Systems Inc., first obtain a Return
Authorization number from our Customer Service by calling +1 619-287-9970. The RA# must be
clearly marked on the shipping label, or the package will not be accepted by Psiber Data Systems
Inc. See sample label below.
To: Psiber Data Sytems Inc.
7075-K Mission Gorge Road
San Diego, CA 92120
RA# XXXXXXXX
For European-Customers:
Return of Equipment – To return a product to Psiber Data GmbH, first obtain a Return Authorization
number from our Customer Service by calling +49-89-89136060. The RA# must be clearly marked
on the shipping label.
To: Psiber Data GmbH
Felix-Wankel-Str. 4
82152 Krailling
Germany
RA# XXXXXXXX
For ASIA/PACIFIC-Customer:
Return of Equipment - To return a product to Psiber Data Pte. Ltd., first obtain a Return Authorization number from Our Customer Service by calling +65-6569-6019 or e-mail:
[email protected]. The RA# must be clearly marked on The shipping label.
To: Psiber Data Pte. Ltd.
3 Science Park Drive
#03-09 The Franklin
Singapore Science Park 1,
Singapore 118223
RA# XXXXXXXX
Copyright 2012 Psiber Data. All rights reserved. WireXpert, psiber and the Psiber logo are
trademarks of Psiber Data.
43
WireXpert WX4500
Users Manual
Psiber US:
Psiber Data Sytems Inc.
7075-K Mission Gorge Road
San Diego, CA 92120
Phone: +1 (619) 287 99970
e-mail: [email protected]
www.psiber.com
Psiber Europe:
Psiber Data GmbH
Felix-Wankel-Str. 4
82152 Krailling
Germany
Phone: +49 (89) 8913 6060
e-mail: [email protected]
www.psiberdata.com
Psiber Data Pte. Ltd.:
3 Science Park Drive
#03-09 The Franklin
Singapore Science Park 1,
Singapore 118223
Phone: +65-6569-6019
e-mail: [email protected]
www.psiberdata.com
www.psiberdata.com