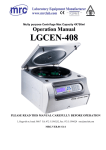
1
Acoustic Telemetry
Modems
User’s Manual
January 2001
P/N 003452
Benthos, Inc.
49 Edgerton Drive
North Falmouth, MA 02556
U.S.A.
Tel: (508) 563-1000
Fax: (508) 563-6444
www.benthos.com
ii
BENTHOS
Notices
Proprietary Information
The information, descriptions, photos and illustrations in this manual are the
property of Benthos, Inc. Materials may not be reproduced or disseminated
without the prior written consent of Benthos.
Warranty
LIMITED WARRANTY. Benthos warrants that the products sold hereunder
shall be free from defects in materials and workmanship under normal use
and service when correctly installed, used and maintained for a period of
12 months from date of shipment from Benthos. Purchaser’s receipt of any
product delivered hereunder shall be an unqualified acceptance of and a
waiver by Purchaser of the right of Purchaser to make a claim with respect to
such product unless Purchaser gives Benthos notice of any claim within
12 months after the receipt of such product. This warranty is limited to repair
or replacement of the said product at Benthos’ option, F.O.B the Benthos
plant in North Falmouth, Massachusetts, providing the product was not
abused or operated other than in accordance with the Benthos instruction
manuals. Since all Benthos oceanographic instruments are pressure tested
to rated depth prior to shipment, Benthos does not assume responsibility for
any damage due to leakage or implosion. Benthos reserves the right to
modify its warranty at any time, in its sole discretion. THIS LIMITED
WARRANTY IS NOT TRANSFERABLE.
LIMITATION OF LIABILITY. BENTHOS MAKES NO OTHER WARRANTY
REGARDING ITS PRODUCTS OR THE PRODUCTS OF OTHERS EITHER
EXPRESS OR IMPLIED; AND, ANY IMPLIED WARRANTY OF
MERCHANTABILITY OR FITNESS FOR A PARTICULAR PURPOSE
WHICH EXCEEDS THE FORGOING WARRANTIES IS HEREBY
DISCLAIMED BY BENTHOS AND EXCLUDED FROM ANY AGREEMENT
MADE BY ACCEPTANCE OF ANY ORDER.
BENTHOS DOES NOT ACCEPT LIABILITY BEYOND THE REMEDIES SET
FORTH HEREIN INCLUDING ANY LIABILITY FOR PRODUCTS NOT
BEING AVAILABLE FOR USE OR FOR LOST OR CORRUPTED DATA,
LOSS OF BUSINESS, LOSS OF PROFITS, LOSS OF USE OF THE
PRODUCT OR ANY ASSOCIATED EQUIPMENT, COST OF CAPITAL,
COST OF SUBSTITUTE OR REPLACEMENT PRODUCT, FACILITIES OR
User’s Manual
January 2001
Acoustic Telemetry Modems
iii
SERVICES, DOWN-TIME, CHARGES FOR PURCHASER’S TIME AND
EFFORT, THE CLAIMS OF THIRD PARTIES, INJURY TO PROPERTY, OR
ANY OTHER DIRECT, INDIRECT, SPECIAL, RELIANCE, INCIDENTAL OR
CONSEQUENTIAL DAMAGES, REGARDLESS OF THE NATURE OF THE
CLAIM AND WHETHER OR NOT FORESEEABLE AND WHETHER OR
NOT BASED ON BREACH OF WARRANTY, CONTRACT OR TORT
(INCLUDING NEGLIGENCE) OR STRICT LIABILITY, EVEN IF BENTHOS
HAS BEEN ADVISED OF THE POSSIBILITY OF SUCH DAMAGES, OR
FOR ANY CLAIM BY ANY THIRD PARTY EXCEPT AS EXPRESSLY
PROVIDED HEREIN. THIS LIMITATION OF LIABILITY APPLIES BOTH TO
PRODUCTS AND SERVICES AND SUPPORT PROVIDED PURCHASER
UNDER THIS AGREEMENT. NO ORAL OR WRITTEN INFORMATION OR
ADVICE GIVEN BY BENTHOS, ITS AGENTS OR EMPLOYEES SHALL
CREATE A WARRANTY OR IN ANY WAY INCREASE THE SCOPE OF THE
LIMITED WARRANTY PROVIDED ABOVE. ANY AND ALL LIABILITY OF
BENTHOS IS EXPRESSLY LIMITED TO THE PRICE PURCHASER HAS
PAID FOR THE PRODUCTS. PURCHASER’S SOLE REMEDY AGAINST
BENTHOS IN ANY DISPUTE UNDER THIS AGREEMENT SHALL BE TO
SEEK RECOVERY OF THE AMOUNTS PURCHASER PAID, PURSUANT
TO THE LIMITED WARRANTY PROVIDED ABOVE, UPON THE PAYMENT
OF WHICH BENTHOS, ITS AGENTS AND EMPLOYEES, AND
AFFILIATES, WILL BE RELEASED FROM AND DISCHARGED OF ALL
FURTHER OBLIGATIONS AND LIABILITY TO PURCHASER.
THE LIMITED WARRANTY OF BENTHOS GIVES PURCHASER SPECIFIC
LEGAL RIGHTS, AND PURCHASER MAY ALSO HAVE OTHER RIGHTS
THAT VARY FROM STATE TO STATE. SOME STATES DO NOT ALLOW
LIMITATIONS ON HOW LONG AN IMPLIED WARRANTY LASTS OR THE
EXCLUSION OR LIMITATION OF INCIDENTAL OR CONSEQUENTIAL
DAMAGES, SO THE ABOVE LIMITATIONS OR EXCLUSIONS MAY NOT
APPLY TO PURCHASER.
Liability
Benthos assumes no liability for damages, losses or costs incurred
consequentially through operation or malfunction of Benthos products.
Notices
iv
BENTHOS
Title
Title shall pass to the Buyer on delivery to the carrier at North Falmouth,
Massachusetts, U.S.A. Risk of damage or loss following such delivery shall
be the Buyer's, and Benthos shall in no way be responsible for safe arrival of
the shipment. Title shall so pass to the Buyer regardless of any provision for
payment of freight or insurance by Benthos, and regardless of the form of the
shipping documents. If shipment is consigned to Benthos, it shall be for the
purpose of securing the Buyer's obligations under contract.
Changes
Benthos reserves the right to make changes in design or specifications at any
time without incurring any obligation to modify previously installed units. This
manual is provided for informational and reference purpose only and is
subject to change without notice.
User’s Manual
January 2001
Acoustic Telemetry Modems
v
Preface
Congratulations on your purchase of a Benthos Series Acoustic Telemetry
Modem! The ATM-870 and ATM-880 Series Acoustic Telemetry Modems,
which employ the latest in digital signal processing technologies, are the most
advanced underwater communications systems available. They offer a low
cost yet reliable and effective alternative to many underwater
communications requirements.
This manual provides information on setting up, testing, and operating the
ATM-870 and ATM-880 Series Acoustic Telemetry Modems. It is divided into
the following eight sections:
Section 1 - Overview reviews the different modem configurations
available and describes the two advanced modulation schemes used by
the modems.
Section 2 - Specifications lists the specifications for the modems, the
modem transducers, and the battery packs.
Section 3 - Deployment Considerations reviews some important
installation factors to ensure the best possible performance from the
modems.
Section 4 - Setup and Test provides instructions for unpacking, setting
up, and testing the modems, and includes some simple procedures to
verify that commands and data are correctly transmitted and received.
Section 5 - Telesonar PC provides installation and operating
instructions for Telesonar PC, a graphical users interface (GUI) that
provides a user friendly means of configuring and operating the modems
in a Windows environment.
Section 6 - Modem Commands and Operating Parameters reviews
the three modem operating modes and provides detailed descriptions of
the modem commands and the modem operating parameters.
Section 7 - Maintenance and Troubleshooting provides instructions
for cleaning and inspecting the modems, changing the battery packs, and
troubleshooting operational problems that might occur during setup and
deployment of the modems.
Section 8 - Drawings includes outline drawings of the modems to assist
in their installation and setup.
Preface
vi
BENTHOS
Notes and Warnings
Where applicable, special notes and warnings are presented as follows:
NOTE A referral to another part of this manual or to another reference; a
recommendation to check that certain criteria are met before proceeding
further in a step or sequence; or general information applicable to the setup
and operation of the ATM-870 and ATM-880 Series Acoustic Telemetry
Modems.
WARNING A reminder that dangerous or damaging consequences could
result if certain recommended procedures are not followed.
Customer Service
We welcome your comments and suggestions for improving our products and
documentation as well as developing better ways of serving you with acoustic
technology. Therefore, please contact Customer Service should you have
any comments or suggestions about this manual or the ATM-870 and
ATM-880 Series Acoustic Telemetry Modems, or if you require service or
support.
Please contact us at:
BENTHOS, INC.
Attention: Customer Service
49 Edgerton Drive
North Falmouth, MA 02556
U.S.A.
Telephone: (508) 563-1000
Fax: (508) 563-6444
E-mail: [email protected]
www.benthos.com
User’s Manual
January 2001
Acoustic Telemetry Modems
vii
Contents
Notices . . . . . . . . . . . . . . . . . . . . . . . . . . . . . . . . . . . . . . . . . . . . . . . . . . . ii
Proprietary Information . . . . . . . . . . . . . . . . . . . . . . . . . . . . . . . . . . . . . ii
Warranty . . . . . . . . . . . . . . . . . . . . . . . . . . . . . . . . . . . . . . . . . . . . . . . . . ii
Liability . . . . . . . . . . . . . . . . . . . . . . . . . . . . . . . . . . . . . . . . . . . . . . . . . iii
Title . . . . . . . . . . . . . . . . . . . . . . . . . . . . . . . . . . . . . . . . . . . . . . . . . . . . iv
Changes . . . . . . . . . . . . . . . . . . . . . . . . . . . . . . . . . . . . . . . . . . . . . . . . iv
Preface . . . . . . . . . . . . . . . . . . . . . . . . . . . . . . . . . . . . . . . . . . . . . . . . . . . v
Notes and Warnings . . . . . . . . . . . . . . . . . . . . . . . . . . . . . . . . . . . . . . vi
Customer Service . . . . . . . . . . . . . . . . . . . . . . . . . . . . . . . . . . . . . . . . vi
Contents . . . . . . . . . . . . . . . . . . . . . . . . . . . . . . . . . . . . . . . . . . . . . . . . . vii
List of Figures . . . . . . . . . . . . . . . . . . . . . . . . . . . . . . . . . . . . . . . . . . . . xv
List of Tables . . . . . . . . . . . . . . . . . . . . . . . . . . . . . . . . . . . . . . . . . . . xvii
1 Overview
..........................
1-1
ATM-870 Series vs. ATM-880 Series Acoustic
Telemetry Modems . . . . . . . . . . . . . . . . . . . . . . . . . . . . . . . . . . . . . . 1-2
Modem and Transducer Configurations . . . . . . . . . . . . . . . . . . . 1-3
Surface Modems . . . . . . . . . . . . . . . . . . . . . . . . . . . . . . . . . . . . . . . . 1-4
ATM-871/881 Deck Box . . . . . . . . . . . . . . . . . . . . . . . . . . . . . . . . . 1-4
ATM-871R/881R Rack Mount Deck Box . . . . . . . . . . . . . . . . . . . . 1-4
Model ATM-870/880 Module . . . . . . . . . . . . . . . . . . . . . . . . . . . . . 1-4
Subsea Modems . . . . . . . . . . . . . . . . . . . . . . . . . . . . . . . . . . . . . . . . . 1-5
ATM-875/885 and ATM-875R/885R Acoustic
Telemetry Modems . . . . . . . . . . . . . . . . . . . . . . . . . . . . . . . . . . . 1-6
ATM-877/887 and ATM-877R/887R Acoustic
Telemetry Modems . . . . . . . . . . . . . . . . . . . . . . . . . . . . . . . . . . . 1-7
Modem Board Sets . . . . . . . . . . . . . . . . . . . . . . . . . . . . . . . . . . . . . . 1-8
ATM-875PCB/885PCB Modem Board Sets . . . . . . . . . . . . . . . . . 1-8
ATM-875RPCB/885RPCB Modem Board Sets . . . . . . . . . . . . . . . 1-8
Remote Transducers . . . . . . . . . . . . . . . . . . . . . . . . . . . . . . . . . . . . . 1-9
AT-408 Omnidirectional Transducer . . . . . . . . . . . . . . . . . . . . . . 1-9
AT-409 Line Array Transducer . . . . . . . . . . . . . . . . . . . . . . . . . . 1-10
AT-421 Directional Transducer . . . . . . . . . . . . . . . . . . . . . . . . . . 1-11
Acoustic Baffles . . . . . . . . . . . . . . . . . . . . . . . . . . . . . . . . . . . . . . 1-11
Typical Applications . . . . . . . . . . . . . . . . . . . . . . . . . . . . . . . . . . . . 1-12
Remote Data Acquisition . . . . . . . . . . . . . . . . . . . . . . . . . . . . . . . . 1-12
AUV Command and Control . . . . . . . . . . . . . . . . . . . . . . . . . . . . . . 1-14
Undersea Communications Network . . . . . . . . . . . . . . . . . . . . . . . 1-15
Contents
viii
BENTHOS
Modem Performance Factors . . . . . . . . . . . . . . . . . . . . . . . . . . . .
Barriers to Underwater Communications . . . . . . . . . . . . . . . .
Sound Speed in Seawater . . . . . . . . . . . . . . . . . . . . . . . . . . . . . . . .
Signal Fading . . . . . . . . . . . . . . . . . . . . . . . . . . . . . . . . . . . . . . . . . .
Multipath Interference and Reflections . . . . . . . . . . . . . . . . . . . . .
High Performance Modulation Schemes . . . . . . . . . . . . . . . . .
Advantages of High Speed 1-of-4 MFSK . . . . . . . . . . . . . . . . . . . .
Advantages of High Reliability Hadamard MFSK . . . . . . . . . . . . .
Tracking and Doppler Correction . . . . . . . . . . . . . . . . . . . . . . . . . .
Methods for Increased Reliability . . . . . . . . . . . . . . . . . . . . . . . .
Data Redundancy . . . . . . . . . . . . . . . . . . . . . . . . . . . . . . . . . . . . . . .
Convolutional Coding . . . . . . . . . . . . . . . . . . . . . . . . . . . . . . . . . . .
Multipath Guard Period . . . . . . . . . . . . . . . . . . . . . . . . . . . . . . . . . .
2 Specifications
......................
1-16
1-16
1-16
1-17
1-17
1-17
1-18
1-18
1-19
1-19
1-19
1-20
1-20
2-1
General . . . . . . . . . . . . . . . . . . . . . . . . . . . . . . . . . . . . . . . . . . . . . . . . . .
ATM-871 and ATM-881 Deck Boxes . . . . . . . . . . . . . . . . . . . . . . .
Physical Characteristics . . . . . . . . . . . . . . . . . . . . . . . . . . . . . . . . . .
Power Requirements . . . . . . . . . . . . . . . . . . . . . . . . . . . . . . . . . . . . .
Input/Output . . . . . . . . . . . . . . . . . . . . . . . . . . . . . . . . . . . . . . . . . . . .
Transducers . . . . . . . . . . . . . . . . . . . . . . . . . . . . . . . . . . . . . . . . . . . .
ATM-871R and ATM-881R Rack Mount Deck Boxes . . . . . . . .
Physical Characteristics . . . . . . . . . . . . . . . . . . . . . . . . . . . . . . . . . .
Power Requirements . . . . . . . . . . . . . . . . . . . . . . . . . . . . . . . . . . . . .
Input/Output . . . . . . . . . . . . . . . . . . . . . . . . . . . . . . . . . . . . . . . . . . . .
Transducers . . . . . . . . . . . . . . . . . . . . . . . . . . . . . . . . . . . . . . . . . . . .
ATM-875 and ATM-885 Subsea Modems . . . . . . . . . . . . . . . . . . .
Physical Characteristics . . . . . . . . . . . . . . . . . . . . . . . . . . . . . . . . . .
Power Requirements . . . . . . . . . . . . . . . . . . . . . . . . . . . . . . . . . . . . .
Input/Output . . . . . . . . . . . . . . . . . . . . . . . . . . . . . . . . . . . . . . . . . . . .
Transducers . . . . . . . . . . . . . . . . . . . . . . . . . . . . . . . . . . . . . . . . . . . .
ATM-875R and ATM-885R Subsea Modems . . . . . . . . . . . . . . . .
Physical Characteristics . . . . . . . . . . . . . . . . . . . . . . . . . . . . . . . . . .
Power Requirements . . . . . . . . . . . . . . . . . . . . . . . . . . . . . . . . . . . . .
Input/Output . . . . . . . . . . . . . . . . . . . . . . . . . . . . . . . . . . . . . . . . . . . .
Transducers . . . . . . . . . . . . . . . . . . . . . . . . . . . . . . . . . . . . . . . . . . . .
ATM-877 and ATM-887 Subsea Modems . . . . . . . . . . . . . . . . . . .
Physical Characteristics . . . . . . . . . . . . . . . . . . . . . . . . . . . . . . . . . .
Power Requirements . . . . . . . . . . . . . . . . . . . . . . . . . . . . . . . . . . . . .
Input/Output . . . . . . . . . . . . . . . . . . . . . . . . . . . . . . . . . . . . . . . . . . . .
Transducers . . . . . . . . . . . . . . . . . . . . . . . . . . . . . . . . . . . . . . . . . . . .
User’s Manual
2-1
2-2
2-2
2-2
2-2
2-3
2-3
2-3
2-3
2-4
2-4
2-4
2-4
2-5
2-5
2-6
2-6
2-6
2-6
2-7
2-7
2-8
2-8
2-8
2-9
2-9
January 2001
Acoustic Telemetry Modems
ix
ATM-877R and ATM-887R Subsea Modems . . . . . . . . . . . . . . . 2-9
Physical Characteristics . . . . . . . . . . . . . . . . . . . . . . . . . . . . . . . . . . 2-9
Power Requirements . . . . . . . . . . . . . . . . . . . . . . . . . . . . . . . . . . . . 2-10
Input/Output . . . . . . . . . . . . . . . . . . . . . . . . . . . . . . . . . . . . . . . . . . . 2-10
Transducers . . . . . . . . . . . . . . . . . . . . . . . . . . . . . . . . . . . . . . . . . . . 2-10
ATM-875PCB and ATM-885PCB Modem Board Sets . . . . . . . 2-11
Physical Characteristics . . . . . . . . . . . . . . . . . . . . . . . . . . . . . . . . . 2-11
Power Requirements . . . . . . . . . . . . . . . . . . . . . . . . . . . . . . . . . . . . 2-11
Input/Output . . . . . . . . . . . . . . . . . . . . . . . . . . . . . . . . . . . . . . . . . . . 2-11
Transducers . . . . . . . . . . . . . . . . . . . . . . . . . . . . . . . . . . . . . . . . . . . 2-12
ATM-875RPCB and ATM-885RPCB Modem Board Sets . . . . 2-12
Physical Characteristics . . . . . . . . . . . . . . . . . . . . . . . . . . . . . . . . . 2-12
Power Requirements . . . . . . . . . . . . . . . . . . . . . . . . . . . . . . . . . . . . 2-12
Input/Output . . . . . . . . . . . . . . . . . . . . . . . . . . . . . . . . . . . . . . . . . . . 2-13
Transducers . . . . . . . . . . . . . . . . . . . . . . . . . . . . . . . . . . . . . . . . . . . 2-13
AT-408 Omnidirectional Transducer . . . . . . . . . . . . . . . . . . . . . 2-13
AT-409 Line Array Transducer . . . . . . . . . . . . . . . . . . . . . . . . . . 2-14
AT-421 Directional Transducer . . . . . . . . . . . . . . . . . . . . . . . . . . 2-15
Modem Battery Packs . . . . . . . . . . . . . . . . . . . . . . . . . . . . . . . . . . 2-16
Transmitter/Preamp Alkaline Pack for
ATM-875/885/875R/885R . . . . . . . . . . . . . . . . . . . . . . . . . . . . . . . . 2-16
Transmitter/Preamp Alkaline Pack for
ATM-877/887/877R/887R . . . . . . . . . . . . . . . . . . . . . . . . . . . . . . . . 2-16
DSP/Receiver Alkaline Pack . . . . . . . . . . . . . . . . . . . . . . . . . . . . . . 2-16
Transmitter/Preamp Lithium Pack . . . . . . . . . . . . . . . . . . . . . . . . . 2-16
DSP/Receiver Lithium Pack . . . . . . . . . . . . . . . . . . . . . . . . . . . . . . 2-16
3 Deployment Considerations
...........
Remote Transducer Selection . . . . . . . . . . . . . . . . . . . . . . . . . . . .
Battery Pack Selection . . . . . . . . . . . . . . . . . . . . . . . . . . . . . . . . . .
Battery Pack Currents . . . . . . . . . . . . . . . . . . . . . . . . . . . . . . . . . . . .
Processing Overhead . . . . . . . . . . . . . . . . . . . . . . . . . . . . . . . . . . . .
Modem Battery Pack Capacity Calculations . . . . . . . . . . . . . . . . . .
Transmitter/Preamp Battery Pack Capacity Calculations . . . . .
DSP/Receiver Battery Pack Capacity Calculations . . . . . . . . . .
An Example Deployment Calculation . . . . . . . . . . . . . . . . . . . . .
Modem Operating Depth . . . . . . . . . . . . . . . . . . . . . . . . . . . . . . . . .
Modem Communications Range . . . . . . . . . . . . . . . . . . . . . . . . . .
3-1
3-1
3-2
3-2
3-3
3-3
3-4
3-5
3-6
3-9
3-9
Contents
x
BENTHOS
Multipath and Noise . . . . . . . . . . . . . . . . . . . . . . . . . . . . . . . . . . . . . . 3-9
Transducer Orientation . . . . . . . . . . . . . . . . . . . . . . . . . . . . . . . . . . 3-10
Use of an Acoustic Baffle . . . . . . . . . . . . . . . . . . . . . . . . . . . . . . . . 3-10
Height Above the Bottom and Distance Below the Surface . . . . . 3-10
Other Acoustic Equipment . . . . . . . . . . . . . . . . . . . . . . . . . . . . . . . 3-10
Typical Deployment Configurations . . . . . . . . . . . . . . . . . . . . . . 3-11
Dunking Transducer Deployment . . . . . . . . . . . . . . . . . . . . . . . . . . 3-11
Subsea Modem Deployment . . . . . . . . . . . . . . . . . . . . . . . . . . . . . . 3-12
4 Setup and Test
.....................
4-1
Unpacking and Inspection . . . . . . . . . . . . . . . . . . . . . . . . . . . . . . . . 4-1
Typical Setup Configurations . . . . . . . . . . . . . . . . . . . . . . . . . . . . . 4-2
Modem Connections . . . . . . . . . . . . . . . . . . . . . . . . . . . . . . . . . . . . . 4-3
ATM-871/881 Deck Box Front Panel Connectors . . . . . . . . . . . . . . . 4-4
ATM-871R/881R Rack Mount Deck Box Front
and Rear Panel Connectors . . . . . . . . . . . . . . . . . . . . . . . . . . . . . . 4-5
Subsea Modem Connectors . . . . . . . . . . . . . . . . . . . . . . . . . . . . . . . 4-7
Modem Operator Functions . . . . . . . . . . . . . . . . . . . . . . . . . . . . . . 4-7
ATM-871/881 Deck Box Operator Functions . . . . . . . . . . . . . . . . . . 4-7
ATM-871R/881R Rack Mount Deck Box Operator Functions . . . . . 4-8
Subsea Modem Operator Functions . . . . . . . . . . . . . . . . . . . . . . . . . 4-9
Setting Up and Checking the Modems . . . . . . . . . . . . . . . . . . . 4-10
Setting up the ATM-871/881 and ATM-871R/881R Modems . . . . . 4-10
Setting up the Local Host Processor . . . . . . . . . . . . . . . . . . . . . . . 4-12
Checking the Local Modem and Host Processor . . . . . . . . . . . . . 4-13
Verifying the Local Modem’s Operating Parameters . . . . . . . . 4-13
Changing the Local Modem’s Operating Parameters . . . . . . . . 4-15
Setting up the ATM-875/885 and ATM-875R/885R Modems . . . . . 4-16
Setting up the ATM-877/887 and ATM-877R/887R Modems . . . . . 4-18
Setting up the ATM-875PCB/885PCB and
ATM-875RPCB/885RPCB Board Sets . . . . . . . . . . . . . . . . . . . . . 4-20
Setting up the ATM-870/880 Module . . . . . . . . . . . . . . . . . . . . . . . . 4-23
Setting up the Remote Host Processor . . . . . . . . . . . . . . . . . . . . . 4-25
Checking the Acoustic Link . . . . . . . . . . . . . . . . . . . . . . . . . . . . . . . 4-25
5 Telesonar PC
.......................
5-1
Installing and Starting Telesonar PC . . . . . . . . . . . . . . . . . . . . . .
Installing Telesonar PC . . . . . . . . . . . . . . . . . . . . . . . . . . . . . . . . . . .
Starting Telesonar PC . . . . . . . . . . . . . . . . . . . . . . . . . . . . . . . . . . . .
Checking the Telesonar PC Version Number . . . . . . . . . . . . . . . . .
Exiting Telesonar PC . . . . . . . . . . . . . . . . . . . . . . . . . . . . . . . . . . . . .
Uninstalling Telesonar PC . . . . . . . . . . . . . . . . . . . . . . . . . . . . . . . . .
User’s Manual
5-1
5-1
5-4
5-6
5-6
5-6
January 2001
Acoustic Telemetry Modems
xi
The Main Window . . . . . . . . . . . . . . . . . . . . . . . . . . . . . . . . . . . . . . . . 5-7
Menu Bar . . . . . . . . . . . . . . . . . . . . . . . . . . . . . . . . . . . . . . . . . . . . . . . 5-8
Tool Bar . . . . . . . . . . . . . . . . . . . . . . . . . . . . . . . . . . . . . . . . . . . . . . . 5-9
Status Bar . . . . . . . . . . . . . . . . . . . . . . . . . . . . . . . . . . . . . . . . . . . . . . 5-9
Status Displays . . . . . . . . . . . . . . . . . . . . . . . . . . . . . . . . . . . . . . . . 5-10
Data Display . . . . . . . . . . . . . . . . . . . . . . . . . . . . . . . . . . . . . . . . . . . 5-12
Battery Pack Capacity Calculations . . . . . . . . . . . . . . . . . . . . . 5-13
Option 1: Transmitting Relatively Large
Data Files—Relatively Short Deployment . . . . . . . . . . . . . . . . . 5-14
Option 2: Transmitting Relatively Small
Data Files—Relatively Long Deployment . . . . . . . . . . . . . . . . . . 5-15
Configuring the Modems . . . . . . . . . . . . . . . . . . . . . . . . . . . . . . . . 5-17
Selecting and Configuring the Serial
Communications Port—Remote or Local Modem . . . . . . . . . . . 5-17
Selecting the Range Options . . . . . . . . . . . . . . . . . . . . . . . . . . . . . 5-18
Configuring the Local Modem . . . . . . . . . . . . . . . . . . . . . . . . . . . . 5-19
Advanced Local Modem Configuration Settings . . . . . . . . . . . 5-21
Saving the Local Modem Setup Configuration to a File . . . . . 5-22
Loading the Local Modem Setup Configuration from a File . . 5-23
Configuring the Remote Modem . . . . . . . . . . . . . . . . . . . . . . . . . . 5-25
Advanced Remote Modem Configuration Settings . . . . . . . . . 5-28
Saving the Remote Modem Setup
Configuration to a File . . . . . . . . . . . . . . . . . . . . . . . . . . . . . . . 5-29
Loading the Remote Modem Setup
Configuration from a File . . . . . . . . . . . . . . . . . . . . . . . . . . . . . 5-31
Resetting the Local Modem Factory Defaults . . . . . . . . . . . . . . . . 5-32
Resetting the Remote Modem Factory Defaults . . . . . . . . . . . . . . 5-33
Operating the Modems after Deployment . . . . . . . . . . . . . . . . 5-34
Selecting the Address of the Remote Modem . . . . . . . . . . . . . . . . 5-34
Checking the Acoustic Link between the Local and
the Remote Modem . . . . . . . . . . . . . . . . . . . . . . . . . . . . . . . . . . . . 5-35
Checking the Range between the Local and
Remote Modem’s Transducers . . . . . . . . . . . . . . . . . . . . . . . . . . 5-35
Changing the Transmit Power Level of the Remote Modem . . . . 5-36
Changing the Acoustic Baud Rate . . . . . . . . . . . . . . . . . . . . . . . . . 5-37
Going Online with the Remote Modem . . . . . . . . . . . . . . . . . . . . . 5-38
Going Online with the Remote Modem Automatically
on Power Up . . . . . . . . . . . . . . . . . . . . . . . . . . . . . . . . . . . . . . . . . 5-38
Going Offline with the Remote Modem . . . . . . . . . . . . . . . . . . . . . 5-38
Enabling and Disabling the Data Logger
of the Remote Modem . . . . . . . . . . . . . . . . . . . . . . . . . . . . . . . . . 5-38
Checking the Data Logger Memory of the Remote Modem . . . . . 5-39
Contents
xii
BENTHOS
Downloading the Contents of the Remote Modem’s
Data Logger Memory . . . . . . . . . . . . . . . . . . . . . . . . . . . . . . . . . . .
Clearing the Contents of the Remote Modem’s
Data Logger Memory . . . . . . . . . . . . . . . . . . . . . . . . . . . . . . . . . . .
Capturing Received Data from the Remote Modem . . . . . . . . . . .
Uploading Data to the Remote Modem . . . . . . . . . . . . . . . . . . . . . .
Modem Diagnostics . . . . . . . . . . . . . . . . . . . . . . . . . . . . . . . . . . . . .
Checking the Battery Voltages . . . . . . . . . . . . . . . . . . . . . . . . . . . .
Viewing the Background Noise Levels—Continuously . . . . . . . .
Viewing the Background Noise Levels—Periodically . . . . . . . . . .
Performing the Ping Test . . . . . . . . . . . . . . . . . . . . . . . . . . . . . . . . .
Activating Terminal Mode . . . . . . . . . . . . . . . . . . . . . . . . . . . . . . . .
Checking the Acoustic Modem Firmware Version Number . . . . .
6 Modem Commands and
Operating Parameters . . . . . . . . . . . . . . . .
5-40
5-42
5-43
5-44
5-46
5-46
5-46
5-47
5-48
5-49
5-49
6-1
Operating Modes . . . . . . . . . . . . . . . . . . . . . . . . . . . . . . . . . . . . . . . . . 6-1
Command Mode . . . . . . . . . . . . . . . . . . . . . . . . . . . . . . . . . . . . . . . . . 6-2
Lowpower State . . . . . . . . . . . . . . . . . . . . . . . . . . . . . . . . . . . . . . . 6-3
Acoustic Command Execution . . . . . . . . . . . . . . . . . . . . . . . . . . . 6-4
Online Mode . . . . . . . . . . . . . . . . . . . . . . . . . . . . . . . . . . . . . . . . . . . . 6-4
Device Enable . . . . . . . . . . . . . . . . . . . . . . . . . . . . . . . . . . . . . . . . . 6-5
Transmit Data Buffer . . . . . . . . . . . . . . . . . . . . . . . . . . . . . . . . . . . 6-6
Data Format . . . . . . . . . . . . . . . . . . . . . . . . . . . . . . . . . . . . . . . . . . . 6-7
Error Checking . . . . . . . . . . . . . . . . . . . . . . . . . . . . . . . . . . . . . . . . 6-7
Datalogger Mode . . . . . . . . . . . . . . . . . . . . . . . . . . . . . . . . . . . . . . . . . 6-7
Modem Commands . . . . . . . . . . . . . . . . . . . . . . . . . . . . . . . . . . . . . . . 6-9
Online Interrupt . . . . . . . . . . . . . . . . . . .+++ . . . . . . . . . . . . . . . . 6-13
Attention . . . . . . . . . . . . . . . . . . . . . . . . .AT . . . . . . . . . . . . . . . . . 6-15
Dial . . . . . . . . . . . . . . . . . . . . . . . . . . . . .ATDn . . . . . . . . . . . . . . . 6-17
Factory Reset. . . . . . . . . . . . . . . . . . . . .AT&F . . . . . . . . . . . . . . . 6-19
Hang Up . . . . . . . . . . . . . . . . . . . . . . . . .ATH . . . . . . . . . . . . . . . . 6-21
Online . . . . . . . . . . . . . . . . . . . . . . . . . . .ATO . . . . . . . . . . . . . . . . 6-23
Acoustic Link Test. . . . . . . . . . . . . . . . .ATXn . . . . . . . . . . . . . . . 6-25
Remote Power . . . . . . . . . . . . . . . . . . . .AT$Pn,m . . . . . . . . . . . . 6-27
Read Register . . . . . . . . . . . . . . . . . . . .ATSn? . . . . . . . . . . . . . . 6-29
Read Remote Registers . . . . . . . . . . . .AT$Sn . . . . . . . . . . . . . . 6-31
Set Register . . . . . . . . . . . . . . . . . . . . . .ATSn=n . . . . . . . . . . . . . 6-33
Write . . . . . . . . . . . . . . . . . . . . . . . . . . . .AT&W . . . . . . . . . . . . . . 6-35
Lowpower State . . . . . . . . . . . . . . . . . . .ATL . . . . . . . . . . . . . . . . 6-37
Range . . . . . . . . . . . . . . . . . . . . . . . . . . .ATRn . . . . . . . . . . . . . . . 6-39
User’s Manual
January 2001
Acoustic Telemetry Modems
xiii
Remote Doppler Correction. . . . . . . . . AT$Dn,m . . . . . . . . . . . 6-41
Local Battery Voltage . . . . . . . . . . . . . . ATV . . . . . . . . . . . . . . . 6-43
Remote Battery Voltage . . . . . . . . . . . . AT$Vn . . . . . . . . . . . . . 6-45
Break . . . . . . . . . . . . . . . . . . . . . . . . . . . AT$Kn . . . . . . . . . . . . . 6-47
Remote Data Logger Enable . . . . . . . . AT$BEn . . . . . . . . . . . . 6-49
Remote Data Logger Disable. . . . . . . . AT$BDn . . . . . . . . . . . . 6-51
Read Remote Data Logger. . . . . . . . . . AT$BTn . . . . . . . . . . . . 6-53
Clear Remote Data Logger. . . . . . . . . . AT$BCn . . . . . . . . . . . . 6-55
Remote Bytes Stored . . . . . . . . . . . . . . AT$BNn . . . . . . . . . . . . 6-57
Clear Local Data Logger . . . . . . . . . . . ATBC . . . . . . . . . . . . . . 6-59
Local Bytes Stored . . . . . . . . . . . . . . . . ATBN . . . . . . . . . . . . . . 6-61
Output Local Data Logger . . . . . . . . . . ATBT . . . . . . . . . . . . . . 6-63
Output Local Page . . . . . . . . . . . . . . . . ATBPn . . . . . . . . . . . . . 6-65
Modem Operating Parameters . . . . . . . . . . . . . . . . . . . . . . . . . . 6-67
Software Version Number . . . . . . . . . . S0 . . . . . . . . . . . . . . . . . 6-69
Doppler Correction . . . . . . . . . . . . . . . . S1 . . . . . . . . . . . . . . . . . 6-71
Received Data Statistics . . . . . . . . . . . S2 . . . . . . . . . . . . . . . . . 6-73
Serial Baud Rate . . . . . . . . . . . . . . . . . . S3 . . . . . . . . . . . . . . . . . 6-75
Acoustic Baud Rate . . . . . . . . . . . . . . . S4 . . . . . . . . . . . . . . . . . 6-77
Reserved . . . . . . . . . . . . . . . . . . . . . . . . S5 . . . . . . . . . . . . . . . . . 6-79
Transmit Power Level. . . . . . . . . . . . . . S6 . . . . . . . . . . . . . . . . . 6-81
Acoustic Response Time-out . . . . . . . S7 . . . . . . . . . . . . . . . . . 6-83
Forwarding Delay . . . . . . . . . . . . . . . . . S8 . . . . . . . . . . . . . . . . . 6-85
Reserved . . . . . . . . . . . . . . . . . . . . . . . . S9 . . . . . . . . . . . . . . . . . 6-87
Idle Time . . . . . . . . . . . . . . . . . . . . . . . . S10 . . . . . . . . . . . . . . . . 6-89
RS-232 Driver/Flow Control . . . . . . . . . S11 . . . . . . . . . . . . . . . . 6-91
ATX Test Message Length . . . . . . . . . . S12 . . . . . . . . . . . . . . . . 6-93
Verbose Level . . . . . . . . . . . . . . . . . . . . S13 . . . . . . . . . . . . . . . . 6-95
Response Address . . . . . . . . . . . . . . . . S14 . . . . . . . . . . . . . . . . 6-97
Operating Mode . . . . . . . . . . . . . . . . . . S15 . . . . . . . . . . . . . . . . 6-99
Reserved . . . . . . . . . . . . . . . . . . . . . . . . S16 . . . . . . . . . . . . . . . 6-101
Reserved . . . . . . . . . . . . . . . . . . . . . . . . S17 . . . . . . . . . . . . . . . 6-103
Modem Address . . . . . . . . . . . . . . . . . . S18 . . . . . . . . . . . . . . . 6-105
Reserved . . . . . . . . . . . . . . . . . . . . . . . . S19 . . . . . . . . . . . . . . . 6-107
Reserved . . . . . . . . . . . . . . . . . . . . . . . . S20 . . . . . . . . . . . . . . . 6-109
Contents
xiv
BENTHOS
7 Maintenance and Troubleshooting
......
7-1
General Cleaning and Inspection . . . . . . . . . . . . . . . . . . . . . . . . .
Changing the Battery Packs . . . . . . . . . . . . . . . . . . . . . . . . . . . . . .
Checking the Alkaline Battery Packs . . . . . . . . . . . . . . . . . . . . . . . .
Changing the ATM-875/885 or ATM-875R/885R Battery Packs . . .
Changing the ATM-877/887 or ATM-877R/887R
Transmitter/Preamp Battery Pack . . . . . . . . . . . . . . . . . . . . . . . . .
Changing the ATM-877/887 or ATM-877R/887R
DSP/Receiver Battery Pack . . . . . . . . . . . . . . . . . . . . . . . . . . . . . .
Troubleshooting . . . . . . . . . . . . . . . . . . . . . . . . . . . . . . . . . . . . . . . . .
8 Drawings
..........................
7-6
7-8
7-9
8-1
Surface Modems . . . . . . . . . . . . . . . . . . . . . . . . . . . . . . . . . . . . . . . . .
Subsea Modems . . . . . . . . . . . . . . . . . . . . . . . . . . . . . . . . . . . . . . . . .
Modem Board Sets . . . . . . . . . . . . . . . . . . . . . . . . . . . . . . . . . . . . . . .
Remote Transducers . . . . . . . . . . . . . . . . . . . . . . . . . . . . . . . . . . . . .
User’s Manual
7-1
7-2
7-3
7-4
8-1
8-1
8-1
8-1
January 2001
Acoustic Telemetry Modems
xv
List of Figures
Figure 1-1
ATM-871/881 Deck Box . . . . . . . . . . . . . . . . . . . . . . . . . . . . 1-5
Figure 1-2
ATM-875/885 and ATM-875R/885R
Acoustic Telemetry Modems . . . . . . . . . . . . . . . . . . . . . . 1-6
Figure 1-3
ATM-877/887 and ATM-877R/887R
Acoustic Telemetry Modems . . . . . . . . . . . . . . . . . . . . . . 1-7
Figure 1-4
ATM-875PCB/ATM-885PCB and
ATM-875RPCB/885RPCB Modem Board Sets . . . . . . . . 1-8
Figure 1-5
AT-408 Omnidirectional Transducer
and Beam Pattern . . . . . . . . . . . . . . . . . . . . . . . . . . . . . . . 1-9
Figure 1-6
AT-409 Line Array Transducer and Beam Pattern . . . . . 1-10
Figure 1-7
AT-421 Directional Transducer and Beam Pattern . . . . . 1-11
Figure 1-8
Data Acquisition and RF Link to Remote Station . . . . . . 1-12
Figure 1-9
Periodic Acquisition of Stored Data . . . . . . . . . . . . . . . . 1-13
Figure 1-10
Command and Control of an AUV . . . . . . . . . . . . . . . . . . 1-14
Figure 1-11
Network of Undersea Nodes . . . . . . . . . . . . . . . . . . . . . . 1-15
Figure 3-1
Deployed ATM-875R/885R and
AT-409 with Flotation . . . . . . . . . . . . . . . . . . . . . . . . . . . 3-13
Figure 4-1
Setup with ATM-871/881 Deck Box
as the Local Modem . . . . . . . . . . . . . . . . . . . . . . . . . . . . . 4-2
Figure 4-2
Setup with ATM-875/885 as Local
and Remote Modems . . . . . . . . . . . . . . . . . . . . . . . . . . . . 4-3
Figure 4-3
ATM-871/881 Deck Box Front Panel . . . . . . . . . . . . . . . . . 4-4
Figure 4-4
ATM-871R/881R Rack Mount Deck Box Front Panel . . . . 4-5
Figure 4-5
ATM-871R/881R Rack Mount Deck Box Rear Panel . . . . . 4-6
Figure 4-6
Subsea Modem On/Off Switches . . . . . . . . . . . . . . . . . . . . 4-9
Figure 4-7
ATM-871/881 and ATM-871R/881R SERIAL
I/O Connector . . . . . . . . . . . . . . . . . . . . . . . . . . . . . . . . . . 4-10
Figure 4-8
ATM-875/885 and ATM-875R/885R
POWER/SERIAL Connector . . . . . . . . . . . . . . . . . . . . . . 4-16
List of Figures
xvi
BENTHOS
Figure 4-9
ATM-877/887 and ATM-877R/887R POWER
and SERIAL Connectors . . . . . . . . . . . . . . . . . . . . . . . . . 4-18
Figure 4-10
ATM-870/880 POWER/SERIAL Connector . . . . . . . . . . . . 4-23
Figure 5-1
The Main Window . . . . . . . . . . . . . . . . . . . . . . . . . . . . . . . . . 5-7
Figure 5-2
The Open Acoustic Comm Menu . . . . . . . . . . . . . . . . . . . . 5-8
Figure 5-3
The Tool Bar . . . . . . . . . . . . . . . . . . . . . . . . . . . . . . . . . . . . . 5-9
Figure 5-4
The Display Setup Dialog Box . . . . . . . . . . . . . . . . . . . . . 5-12
Figure 5-5
The Battery Calculation Dialog Box . . . . . . . . . . . . . . . . . 5-14
Figure 5-6
The Battery Calculation Option 1 Dialog Box . . . . . . . . . 5-14
Figure 5-7
The Battery Calculation Option 2 Dialog Box . . . . . . . . . 5-16
Figure 5-8
The PC Communications Dialog Box . . . . . . . . . . . . . . . . 5-17
Figure 5-9
The Range Options Dialog Box . . . . . . . . . . . . . . . . . . . . . 5-19
Figure 5-10
The Local Modem Configuration Dialog Box . . . . . . . . . . 5-20
Figure 5-11
The Advanced Settings Dialog Box . . . . . . . . . . . . . . . . . 5-21
Figure 5-12
The Save As Dialog Box for Configuration Files . . . . . . . 5-23
Figure 5-13
The Open Dialog Box for Configuration Files . . . . . . . . . 5-24
Figure 5-14
The Remote Modem Configuration Dialog Box . . . . . . . . 5-26
Figure 5-15
The Acoustic Baud Rate Dialog Box . . . . . . . . . . . . . . . . 5-37
Figure 5-16
The Save As Dialog Box for Data Files . . . . . . . . . . . . . . 5-40
Figure 5-17
The Open Dialog Box for Any Files . . . . . . . . . . . . . . . . . 5-45
Figure 5-18
The Noise Level Display . . . . . . . . . . . . . . . . . . . . . . . . . . 5-47
Figure 5-19
The Noise History Display . . . . . . . . . . . . . . . . . . . . . . . . . 5-47
Figure 5-20
The Ping Test Dialog Box . . . . . . . . . . . . . . . . . . . . . . . . . 5-48
Figure 6-1
Conditions for Recognizing an Online
Interrupt Command . . . . . . . . . . . . . . . . . . . . . . . . . . . . . 6-14
Figure 6-2
Read Register Command and Resulting Display . . . . . . 6-30
Figure 6-3
Read Remote Register Command and
Resulting Display . . . . . . . . . . . . . . . . . . . . . . . . . . . . . . . 6-32
User’s Manual
January 2001
Acoustic Telemetry Modems
xvii
List of Tables
Table 4-1
ATM-871/881 and ATM-871R/881R SERIAL I/O
Connector Pinouts . . . . . . . . . . . . . . . . . . . . . . . . . . . . . 4-10
Table 4-2
ATM-871/881 and ATM-871R/881R SERIAL I/O
Connector to DB-9 Pin-to-Pin Connections . . . . . . . . . 4-12
Table 4-3
ATM-875/ATM-875R POWER/SERIAL
Connector Pinouts . . . . . . . . . . . . . . . . . . . . . . . . . . . . . 4-16
Table 4-4
ATM-875/885 and ATM-875R/885R POWER/SERIAL
Connector to DB-9 Pin-to-Pin Connections . . . . . . . . . 4-17
Table 4-5
ATM-877/887 and ATM-877R/887R SERIAL
Connector Pinouts . . . . . . . . . . . . . . . . . . . . . . . . . . . . . 4-18
Table 4-6
ATM-877/887 and ATM-877R/887R POWER
Connector Pinouts . . . . . . . . . . . . . . . . . . . . . . . . . . . . . 4-19
Table 4-7
ATM-877/887 and ATM-877R/887R SERIAL
Connector to DB-9 Pin-to-Pin Connections . . . . . . . . . 4-19
Table 4-8
ATM-875PCB/885PCB and ATM-875RPCB/885RPCB
DSP Board Serial Connector J2 Pinouts . . . . . . . . . . . . 4-20
Table 4-9
ATM-875PCB/885PCB Transmitter Board and
ATM-875RPCB/885RPCB Interface Board
Power Connector J4 Pinouts . . . . . . . . . . . . . . . . . . . . . 4-21
Table 4-10
ATM-875PCB/885PCB and ATM-875RPCB/885RPCB
DSP Board Serial Connector J2 to DB-9
Pin-to-Pin Connections . . . . . . . . . . . . . . . . . . . . . . . . . . 4-21
Table 4-11
ATM-875PCB/885PCB Transmitter Board
Transducer Connector J2 Pinouts . . . . . . . . . . . . . . . . . 4-22
Table 4-12
ATM-875RPCB/885RPCB Bulkhead
Connector Wiring . . . . . . . . . . . . . . . . . . . . . . . . . . . . . . 4-22
Table 4-13
ATM-870/880 POWER/SERIAL Connector Pinouts . . . . 4-23
Table 4-14
ATM-870/880 POWER/SERIAL Connector to DB-9
Pin-to-Pin Connections . . . . . . . . . . . . . . . . . . . . . . . . . . 4-24
Table 6-1
ATM-870 Series and ATM-880 Series Acoustic
Telemetry Modem Command Set . . . . . . . . . . . . . . . . . . 6-10
List of Tables
xviii
BENTHOS
Table 6-2
ATM-870 Series and ATM-880 Series Acoustic
Telemetry Modem S Registers . . . . . . . . . . . . . . . . . . . . 6-68
Table 7-1
Alkaline Transmitter/Preamp Battery Pack
Capacity vs. Voltage . . . . . . . . . . . . . . . . . . . . . . . . . . . . . 7-3
Table 7-2
Alkaline DSP/Receiver Battery Pack
Capacity vs. Voltage . . . . . . . . . . . . . . . . . . . . . . . . . . . . . 7-3
User’s Manual
January 2001
Acoustic Telemetry Modems
1
1-1
Overview
The Benthos acoustic telemetry modems include the Benthos ATM-870
Series and ATM-880 Series Acoustic Telemetry Modems, along with remote
transducers, board sets, software, and other products in the Benthos
"Telesonar" product line. The Benthos ATM-870 Series and ATM-880 Series
Acoustic Telemetry Modems provide wireless digital communications
between deployed underwater instrument packages and surface or subsea
platforms, or even shore-based stations, reliably exchanging data at baud
rates as high as 2400 bits/second. The ATM-880 Series, which provide
enhanced performance and additional features over that of the ATM-870
Series, are the latest addition to the Telesonar product line.
NOTE “Telesonar” is derived from the words telemetry and sonar, where
telemetry is data transmission, and the word sonar, a general term for the
applications of underwater sound, was derived many years ago from the
acronym for sound navigation and ranging. Benthos manufactures and
markets the ATM-870 Series and ATM-880 Series Acoustic Telemetry
Modems worldwide under the Telesonar product line name. The Telesonar
product line also includes Telesonar PC, a Windows based software
program that provides a user friendly means of setting up and operating the
modems.
Applications for both the ATM-870 Series and ATM-880 Series Acoustic
Telemetry Modems include remote monitoring of oceanographic sensors,
control of autonomous underwater vehicles (AUVs), control of wellhead and
pipeline valves, and two-way communications between nodes in an undersea
network. The ATM-870 Series and ATM-880 Series Acoustic Telemetry
Modems are the most advanced, the most multipath and noise tolerant, and
the most cost efficient ever available. In addition, they have been designed to
meet both the high data rate requirements of commercial users, and the
higher reliability, lower data rate requirements of the military. Hence the
modems employ two independent multiple frequency shift keying (MFSK)
modulation schemes: 1-of-4 MFSK for high speed communications generally
required by commercial users, and Hadamard MFSK, which is slower but
more reliable in a high multipath environment.
This section provides an overview of the ATM-870 Series and ATM-880
Series Acoustic Telemetry Modems, reviews a few of their many applications,
and describes the 1-of-4 MFSK and Hadamard MFSK modulation schemes.
1 Overview
1-2
BENTHOS
ATM-870 Series vs. ATM-880 Series Acoustic
Telemetry Modems
Both the ATM-870 Series and ATM-880 Series Acoustic Telemetry Modems
provide the same reliable high speed data communications. The ATM-880
Series, however, employs a new digital signal processor (DSP) chip that
greatly increases the available processing power over that of the ATM-870
Series. The additional processing power improves some of the existing
features and adds additional capability. The ATM-880 Series also provides
for planned future upgrades, including a 10,240-baud uplink. The ATM-880
Series are also fully backward compatible with the ATM-870 Series,
eliminating any requirement to replace older modems, unless the new
features are desired.
The additional and enhanced features currently provided by the new
ATM-880 Series Acoustic Telemetry Modems include the following:
Lower power consumption. The DSP and receiver consumes 50% less
power when the modem is active, the state in which the modem is waiting
to receive data or is transmitting data over the acoustic link.
Online break. A local modem that is connected to a PC will detect a break
if it is sent over the serial interface from the PC. If the local modem is online
with a remote modem, it will command the remote modem to send the
equivalent break on its serial interface. If the remote modem is connected
to an RD Instruments acoustic doppler current meter (ADCP), the break
will wake up and reset the current meter. Therefore, the current meter
essentially performs in the same manner as it would if it received the break
directly from the PC.
Doppler correction at any baud rate. Doppler correction can be enabled
and will function at any of the available acoustic baud rates.
The additional features to be provided by the new ATM-880 Series Acoustic
Telemetry Modems in the near future, and available as upgrades for the
ATM-880 Series modems, include the following:
High speed data link. The additional processing power of the new DSP
will enable acoustic baud rates up to 10,240 bits/second.
Adaptive baud rates. The baud rate that results in the optimum data
communications between two modems over the acoustic link will be
selected automatically before the actual data transmission commences.
User’s Manual
January 2001
Acoustic Telemetry Modems
1-3
The baud rate will be selected by the transmitting modem based on the
signal-to-noise ratio (SNR), the multipath conditions, the doppler shift, the
bit error rate, and other factors measured by the receiving modem. The
modems will use a communications handshaking similar to the
request-to-send (RTS) and clear-to-send (CTS) technique.
Data hopping and networking. The new DSP provides the additional
processing power that will enable the modems to function as repeaters,
providing underwater communications over essentially unlimited
distances, or over an underwater communications web.
Modem and Transducer Configurations
The ATM-870 Series and ATM-880 Series Acoustic Telemetry Modems are
organized into three main configuration groups: one group comprises the
surface modems; another, the subsea modems; and a third, the remote
transducers, which are used by both the surface and subsea modems. The
surface modems consist of three modem configurations: two deck boxes and
a modem module. The subsea modems include modems with either built-in
omnidirectional transducers or provisions for the use of any of the remote
transducers. The remote transducers include three different types, each with
unique beam patterns and available frequencies, and each with a built-in
preamplifier and transmitter. In addition to the three main groups, two printed
circuit board configurations are available for use in OEM applications. One
configuration comprises a complete modem board set and a transducer. The
other configuration comprises a modem board set without the transmitter for
use with one of the remote transducers.
NOTE Refer to Section 2, “Specifications,” for detailed specifications on
the modems, the remote transducers, and the board sets.
1 Overview
Modem and Transducer Configurations
1-4
BENTHOS
Surface Modems
The surface modems consist of three configurations: ATM-871 and ATM-881
Deck Boxes, which connect to a surface host processor; ATM-871R and
ATM-881R Rack Mount Deck Boxes, which are similar to the ATM-871 and
ATM-881 Deck Boxes but are rack mountable; and ATM-870 and ATM-880
Modules which are designed for installation in surface buoys. Any of the
modems can be used with any of the remote transducers.
ATM-871/881 Deck Box
An ATM-871/881 Deck Box is shown in Figure 1-1. The deck box, which is
watertight with the cover closed, is used to communicate with any of the
subsea modems—or another deck box—using one of the remote transducers
as a dunking transducer. It is powered with 100–120 VAC, 50–60 Hz;
200–240 VAC, 50–60 Hz; or external 21–48 VDC, and includes AC and DC
power cables and a 25-meter transducer cable. Optional 50-meter and
100-meter transducer cables are available. In addition, the deck box can be
connected to a host processor through its RS-232/422 serial port. The deck
box also includes a keyboard for entering commands and data, a display, and
a speaker and volume control for audio verification of transmitted data.
ATM-871R/881R Rack Mount Deck Box
The ATM-871R/881R Rack Mount Deck Box is used to communicate with
any of the subsea modems—or another deck box—using one of the remote
transducers as a dunking transducer. However, the deck box is designed to
be mounted in a standard 19-inch equipment rack. It is powered with
100–120 VAC, 50–60 Hz or 200–240 VAC, 50–60 Hz, and includes a
25-meter transducer cable. Optional 50-meter and 100-meter transducer
cables are available. In addition, the deck box can be connected to a host
processor through its RS-232/422 serial port. The deck box also includes a
speaker and volume control for audio verification of transmitted data, and
provisions for the use or an external amplifier.
Model ATM-870/880 Module
The ATM-870/880 Module is designed to be installed in a surface buoy. It
includes a connector for one of the remote transducers, an RS-232 serial port
connector for connecting to a host processor in the buoy, and an external DC
power connector. When installed in a surface buoy and controlled by the host
processor, the modem can communicate with other deployed modems.
User’s Manual
January 2001
Acoustic Telemetry Modems
1-5
Figure 1-1 ATM-871/881 Deck Box
Information received from those modems is output to the host processor and
can be transmitted over an RF link to a remote location. Similarly, the
deployed modems can receive information from the remote station.
Subsea Modems
The subsea modems consist of four configurations: ATM-875 and ATM-885
Acoustic Telemetry Modems, which include built-in omnidirectional or
directional transducers; ATM-875R and ATM-885R Acoustic Telemetry
Modems, which connect to remote transducers; ATM-877 and ATM-887
Acoustic Telemetry Modems, which are full ocean depth modems; and
ATM-877R and ATM-887R Acoustic Telemetry Modems, which are full
ocean depth modems that connect to remote transducers. All the modems
include internal alkaline battery packs or optional lithium battery packs.
1 Overview
Modem and Transducer Configurations
1-6
BENTHOS
ATM-875/885 and ATM-875R/885R Acoustic
Telemetry Modems
The ATM-875/885 and ATM-875R/885R Acoustic Telemetry Modems are
shown in Figure 1-2. The ATM-875/885 is completely self-contained in a hard
coat anodized aluminum housing and includes alkaline transmitter/preamp
and DSP/receiver battery packs, and a built-in omnidirectional or directional
transducer. The ATM-875R/885R is similar to the ATM-875/885 but does not
include a transducer or a transmitter. Instead, a 2-meter cable pigtail is
provided which connects from the transducer connector on the top end cap
of the modem to any of the remote transducers. Both the ATM-875/885 and
the ATM-875R/885R also include a power/serial connector that is installed on
the bottom end cap. The connector is used to input external power for
powering the modem instead of using its internal battery packs, and to
connect to either an RS-232 or an RS-422 serial interface.
BUILT-IN OMNIDIRECTIONAL OR
DIRECTIONAL
TRANSDUCER
REMOTE
TRANSDUCER
2-METER
CABLE PIGTAIL
(STANDARD)
ATM-875/885
ATM-875R/885R
Figure 1-2 ATM-875/885 and ATM-875R/885R Acoustic Telemetry
Modems
User’s Manual
January 2001
Acoustic Telemetry Modems
1-7
ATM-877/887 and ATM-877R/887R Acoustic
Telemetry Modems
The ATM-877/887 and ATM-877R/887R Acoustic Telemetry Modems are
shown in Figure 1-3. The ATM-877/887 is completely self-contained and
includes alkaline transmitter/preamp and DSP/receiver battery packs, and a
built-in directional transducer that is specifically designed for full ocean depth
applications. The ATM-877/887 modem functions the same as all the other
modems. However, the housing, which is constructed of thick-walled hard
coat anodized and painted aluminum, is designed for deployment to full
ocean depth. The ATM-877R/887R is similar to the ATM-877/887 but does
not include a transducer or a transmitter. Instead, a 2-meter cable pigtail is
provided which connects from the transducer connector on the top end cap
of the modem to an AT-421 remote transducer. Both the ATM-877/887 and
the ATM-877R/88R also include power and serial connectors that are
installed on the bottom end cap. The connectors are used to input external
power for powering the modem instead of using its internal battery packs, and
to connect to an RS-232 serial interface.
AT-421 REMOTE
TRANSDUCER (MF)
BUILT-IN
DIRECTIONAL
TRANSDUCER
ATM-877/887
ATM-877R/887R
2-METER
CABLE PIGTAIL
(STANDARD)
Figure 1-3 ATM-877/887 and ATM-877R/887R Acoustic Telemetry
Modems
1 Overview
Modem and Transducer Configurations
1-8
BENTHOS
Modem Board Sets
There are two modem board set configurations: the ATM-875PCB and
ATM-885PCB Modem Board Sets, which include an omnidirectional
transducer, and the ATM-875RPCB and ATM-885RPCB Modem Board
Sets, which do not include a transmitter or a transducer.
ATM-875PCB/885PCB Modem Board Sets
The ATM-875PCB/885PCB Modem Board Set is shown in Figure 1-4. The
ATM-875PCB/885PCB includes both a printed circuit board set mounted to a
chassis and an omnidirectional transducer. It is externally powered and is
designed for original equipment manufacture (OEM) applications, where the
modem is integrated into a housing or chassis of another manufacturer’s.
ATM-875PCB/885PCB
OMNIDIRECTIONAL
TRANSDUCER
ATM-875RPCB/885RPCB
Figure 1-4 ATM-875PCB/ATM-885PCB and ATM-875RPCB/885RPCB
Modem Board Sets
ATM-875RPCB/885RPCB Modem Board Sets
The ATM-875RPCB/885RPCB Modem Board Set is shown in Figure 1-4.
The ATM-875RPCB/885RPCB is also externally powered and is for OEM
applications. However, the transmitter is not included, as the board set is
specifically configured to connect directly to one of the remote transducers.
User’s Manual
January 2001
Acoustic Telemetry Modems
1-9
Remote Transducers
The remote transducers consist of three types: an AT-408 Omnidirectional
Transducer, an AT-409 Line Array Transducer, and an AT-421
Directional Transducer. Each remote transducer includes a built-in
preamplifier and transmitter.
AT-408 Omnidirectional Transducer
The AT-408 Omnidirectional Transducer is available in three frequency
bands: 9–14 kHz (LF), 16–21 kHz (MF) and 25–30 kHz (HF). The AT-408
Omnidirectional Transducer provides omnidirectional transmit and receive
beam patterns. It is best used in both deep and shallow water applications
where the direction of the receiving transducer is not known or is not fixed.
However, because of its omnidirectional beam pattern, the directivity index is
relatively small, and the multipath is more severe than a directional
transducer with the same input power level, as the energy is more widely
distributed. The AT-408 Omnidirectional Transducer and its typical vertical
beam pattern is shown in Figure 1-5.
(typical)
Figure 1-5 AT-408 Omnidirectional Transducer and Beam Pattern
1 Overview
Modem and Transducer Configurations
1-10
BENTHOS
AT-409 Line Array Transducer
The AT-409 Line Array Transducer is available in two frequency bands:
9–14 kHz (LF) and 16–21 kHz (MF). The AT-409 Line Array Transducer
provides omnidirectional transmit and receive beam patterns in the horizontal
plane, and directional transmit and receive beam patterns in the vertical
plane. It is best used in applications where it can be installed at approximately
the same depth as the receiving transducer, and where the bearing of the
receiving transducer is unknown or is not fixed. Because of its narrow vertical
beam, the AT-409 provides a larger directivity index than an omnidirectional
transducer with the same input power level, as energy that would otherwise
be directed vertically is instead applied horizontally. In addition, because less
energy is directed vertically, multipath due to sea surface and sea floor
reflections is minimized. However, because the AT-409 is omnidirectional in
the horizontal plane, its source level is still less than a directional transducer
with the same input power level, as the energy is more widely distributed. The
AT-409 Line Array Transducer and its typical vertical beam pattern is shown
in Figure 1-6.
(typical)
(depicted as LF
line array transducer)
Figure 1-6 AT-409 Line Array Transducer and Beam Pattern
User’s Manual
January 2001
Acoustic Telemetry Modems
1-11
AT-421 Directional Transducer
The AT-421 Directional Transducer is available in two frequency bands:
9–14 kHz (LF) and 16–21 kHz (MF). Whenever possible, the AT-421
Directional Transducer should be used, as it provides conical transmit and
receive beam patterns. And because the energy is focused into a narrow
beam, it provides a higher directivity index than an omnidirectional or a line
array transducer with the same input power level. The AT-421 Transducer is
most effective when used in the vertical channel, or when the transducer can
be pointed toward the receiving transducer in the horizontal channel. In the
latter case, multipath due to sea surface and sea floor reflections is minimized
as most of the energy is directed horizontally. The AT-421 Directional
Transducer and its typical vertical beam pattern is shown in Figure 1-7.
(depicted as LF
directional
transducer)
(typical)
Figure 1-7 AT-421 Directional Transducer and Beam Pattern
Acoustic Baffles
An acoustic baffle, when installed on a remote transducer, effectively reduces
the effects of noise or multipath signals that arrive from the back of the
transducer. Acoustic baffles are available for all the remote transducers.
Refer to "Customer Service" on page vi for information on how to contact
Benthos for detailed specifications.
1 Overview
Modem and Transducer Configurations
1-12
BENTHOS
Typical Applications
The ATM-870 Series and ATM-880 Series Acoustic Telemetry Modems are
used in numerous applications. Typical uses include remote acquisition of
real time or stored data from subsea instrument packages, command and
control of an AUV, and two-way communications between nodes in an
undersea network.
Remote Data Acquisition
A common application for the ATM-870 Series and ATM-880 Series Acoustic
Telemetry Modems is the acquisition of real time or stored data from
deployed instruments. In this application a subsea modem is deployed with
an instrument package, such as a current meter, a Conductivity/
Temperature/Depth (CTD) instrument or a tide gauge. The modem receives
data from the instrument by way of its RS-232/422 serial interface and either
immediately transmits the data to a receiving modem or stores the data for
RF LINK TO
REMOTE STATION
ATM-870/880 MODULE
(inside buoy)
SURFACE
BUOY
AT-408 OMNIDIRECTIONAL
TRANSDUCER
INSTRUMENT
PACKAGE
ATM-875/885
MODEM
Figure 1-8 Data Acquisition and RF Link to Remote Station
User’s Manual
January 2001
Acoustic Telemetry Modems
1-13
transmission at another time. One example of this application is shown in
Figure 1-8, where several ATM-875/885 Acoustic Telemetry Modems, each
of which include a built-in omnidirectional transducer, are each deployed with
an instrument package. All the modems communicate with an ATM-870/880
Module installed in a surface buoy. The module connects to an onboard host
processor and an AT-408 Omnidirectional Transducer, which is configured
as a dunking transducer. Data that are received from the instrument
packages are transmitted to a remote station receiver by way of an RF link
such as a cellular phone or a satellite connection. Use of modems in this
application eliminates the need to install expensive electrical cable between
a deployed instrument and a surface buoy. This is especially advantageous
when multiple instrumentation packages, which are deployed within the same
general area, must communicate by way of the same RF channel.
The ATM-871/881 Deck Box can be used to retrieve data that have been
collected by deployed instruments over a period of time and stored by the
modems. An example of this is shown in Figure 1-9, where several deployed
instrumentation packages are shown, each connected to an ATM-877/887
Acoustic Telemetry Modem, which has a built-in directional transducer and
can be deployed in water depths up to 6000 meters. The data that are
ATM-871/881 DECK
BOX ABOARD SHIP
AT-421 DIRECTIONAL
TRANSDUCER
CURRENT METER
WELLHEAD DATA
LOGGER
PITCH AND ROLL
SENSORS
ATM-877/887
MODEMS
Figure 1-9 Periodic Acquisition of Stored Data
1 Overview
Typical Applications
1-14
BENTHOS
collected by the instruments are stored by the modems over long periods of
time and then periodically retrieved. In this application, because directional
transducers are used and the transmission medium is the vertical channel,
reliable, higher speed communications can be obtained with minimum
multipath from sea surface and sea floor reflections.
AUV Command and Control
AUVs can only be controlled by an acoustic link. The ATM-870 Series and
ATM-880 Series Acoustic Telemetry Modems provide this capability by
allowing commands to be transmitted to an AUV. Furthermore, since the
modems provide two-way communications capability, AUV position and
status information, as well as other data can be received from the AUV. An
example of this application is shown in Figure 1-10. In this example the
modems provide the communications link between an under ice AUV and a
ATM-871/881 DECK BOX
INSIDE SURFACE STATION
AT-408 OMNIDIRECTIONAL
TRANSDUCER
AUV WITH AT-408 OMNIDIRECTIONAL
TRANSDUCER AND ATM-870/880 MODULE
Figure 1-10 Command and Control of an AUV
surface station. The AT-408 Omnidirectional Transducers used in this
example provide a reliable acoustic link between the AUV and the surface
station regardless of what depth or from what direction the AUV is located.
An ATM-871/881 Deck Box connected to a host processor is used in the
surface station, and an ATM-870/880 Module and host processor is used
aboard the AUV.
User’s Manual
January 2001
Acoustic Telemetry Modems
1-15
Undersea Communications Network
The ATM-870 Series and ATM-880 Series Acoustic Telemetry Modems
provide two-way communications between nodes in an undersea network.
The deployed instruments to which the modems are connected can
communicate with each other as well as with shore based stations. In the
example shown in Figure 1-11, AT-409 Line Array Transducers are used as
AT-409 LINE ARRAY
TRANSDUCERS
ATM-875R/885R ACOUSTIC
TELEMETRY MODEMS
Figure 1-11 Network of Undersea Nodes
remote transducers with ATM-875R/885R Acoustic Telemetry Modems. The
beam pattern of the AT-409 Line Array Transducer makes it a good choice
for the application, as it transmits and receives equally well in all directions
horizontally, yet provides good immunity from sea surface and sea floor
multipath reflections.
1 Overview
Typical Applications
1-16
BENTHOS
Modem Performance Factors
The primary function of modems is to both transmit and receive signals that
represent digital data—binary ones and zeros—over what usually is a hard
wired link such as a telephone line or a microwave link. In fact, the word
modem is derived from the terms modulation and demodulation, which refer
to the coding and transmission, and the receiving and decoding of digital
data, respectively. Two key factors measure a modem’s performance: speed
and reliability. Speed is measured by determining the number of bits
transmitted per second, which is referred to as the baud rate. Reliability is
measured by determining the bit error rate, which is the ratio of the number
of bits received in error to the total number of bits transmitted. Except when
noise interference is high, modems that transmit and receive data over phone
lines or microwave links typically function nearly error free, and at baud rates
of 128,000 bits/second or more. In addition, repeater systems allow virtually
unlimited transmission ranges. Those same performance factors are also
used to measure the capabilities of the ATM-870 Series and ATM-880 Series
Acoustic Telemetry Modems. However, with the transmission medium being
water and the transmitted signals being sound, a number of physical barriers
exist that constrain those performance factors, physical barriers that are not
present in either wire or microwave links.
Barriers to Underwater Communications
The major factors that constrain the performance of any communications
system that uses water as a communications medium are the relatively slow
speed of sound in water, the signal fading characteristics due to sound
absorption and destructive interference, the multipath interference due to sea
surface and sea floor reflections, and reflections from nearby objects.
Sound Speed in Seawater
The speed of sound in seawater, on average, is about 1500 meters/second.
This is compared to electromagnetic signals that are carried on a wire or
transmitted as radio signals and travel at nearly the speed of light. However,
the relatively slow speed of sound in seawater has no direct effect on the
baud rate of the modems; it affects only the time period between the
transmission of a signal and its reception. In most applications this delay is
not of much concern, as the alternative is to use a hard wired connection,
which is sometimes prohibitively expensive or not feasible.
User’s Manual
January 2001
Acoustic Telemetry Modems
1-17
Signal Fading
Signal fading is primarily caused by spreading loss and the absorption of
sound in water, but it is also caused by destructive interference due to
multipath, a situation where signals of like frequency nearly cancel each
other. This frequency dependent fading occurs when a multipath induced
reflection of the transmitted signal arrives at the receiving transducer at the
same time as a transmitted signal of the same frequency. The result is a
reduction in the amplitude of both signals. Signal fading due to spreading loss
is a result of the dispersion of energy as it radiates outwardly from the
transmitting transducer. And signal fading due to the absorption of sound in
water increases with increasing frequency. To a lesser extent, environmental
factors such as temperature, pressure, and salinity also affect absorption,
and absorption also occurs at the sea floor.
Multipath Interference and Reflections
The factor that most restricts both the baud rate and the reliability of an
acoustic modem is multipath. Multipath, which is particularly severe when
attempting to communicate over the horizontal channel in shallow water, is
the result of sea surface and sea floor reflections, reflections from objects that
are near the receiving modem, and refractions from thermal gradients and
water turbulence. Using directional remote transducers reduces the effects of
multipath when the transducers are aimed at each other, yet reflections from
objects such as piers or boats that are near the receiving transducer cause
overlapping of the received signals, resulting in decreased reliability. In
addition, multipath is usually not stationary; hence even techniques used to
track and reduce the effects of multipath do not significantly improve modem
performance in increasingly dynamic multipath situations. As a result,
multipath forces continual trade-offs in the speed, the reliability, and the cost
of acoustic modems.
High Performance Modulation Schemes
To reduce the effects of the physical barriers to underwater communications
and provide high modem performance at a low cost, the ATM-870 Series and
ATM-880 Series Acoustic Telemetry Modems employ two advanced MFSK
modulation schemes. One is 1-of-4 MFSK, and the other is Hadamard MFSK.
Although both modulation schemes use MFSK modulation, 1-of-4 MFSK, at
1 Overview
High Performance Modulation Schemes
1-18
BENTHOS
2400 bits/second, provides the highest baud rate. Hadamard MFSK provides
higher reliability, even at lower source levels, with a maximum baud rate of
1200 bits/second.
MFSK is a spread spectrum modulation technique that uses digital
processing algorithms to transmit many tones simultaneously. In the acoustic
modem application, each frame of data is transmitted using a broadband
signal of 5120-Hz bandwidth and 25-milliseconds pulsewidth. The 5120 Hz is
divided into 128 discrete frequency bins of 40-Hz bandwidth each. Of the
128 bins, 120 are reserved for data, and 8 are reserved for tracking and
Doppler compensation. Both the 1-of-4 MFSK and the Hadamard MFSK
modulation techniques use the same set of 128 frequency bins in a data
frame; however, each uses a different method to map the data into the bins.
Advantages of High Speed 1-of-4 MFSK
The primary advantage of 1-of-4 MFSK modulation over the Hadamard
MFSK modulation is its bandwidth efficiency; it is fast and is relatively simple
to encode. Therefore, when transmitting in the vertical channel, where
multipath interference is generally minimal, 1-of-4 MFSK provides good
reliability, even at the highest speed. However, should frequency dependent
fading be present, such as when transmitting in the horizontal channel, error
rates may be unacceptably high. In this case, either selecting Hadamard
MFSK modulation, as explained below, or one or more of the available
methods for improving reliability, as explained in "Methods for Increased
Reliability" on page 1-19, will reduce the number of errors.
Advantages of High Reliability Hadamard MFSK
The Hadamard MFSK modulation technique provides two major benefits over
1-of-4 MFSK: the ability to minimize the effects of frequency dependent
fading, which improves reliability, and the ability to operate at a lower signal
to noise ratio (SNR). Frequency dependent fading is minimized through the
use of processing algorithms that determine the maximum likelihood of a
combination of tones in all the frequency bins, allowing some tones to fade
without significantly affecting reliability. This process also leads to a lower
SNR requirement than 1-of-4 MFSK, allowing the transmitting modem to
operate in a reduced power mode.
User’s Manual
January 2001
Acoustic Telemetry Modems
1-19
Tracking and Doppler Correction
The remaining 8 frequency bins in a data frame are divided into 2 groups of
4 contiguous bins called tracking groups, which are used for timing and
Doppler correction. The lower tracking group comprises the first 4 bins in the
available 120 bins; the upper, the last 4 bins. Of the 4 bins in each tracking
group, only one has an active tone during a transmission cycle. In the lower
tracking group, the tone is present in the first bin; in the upper tracking group,
the fourth bin. The other three bins in each tracking group are not used, for
they provide the required frequency separation from the 1-of-4 data group or
the Hadamard group.
Methods for Increased Reliability
Three methods are provided by the ATM-870 Series and ATM-880 Series
Acoustic Telemetry Modems to further increase communications reliability
over that which is provided by the Hadamard MFSK modulation technique,
and all are user selectable and can be applied when using either 1-of-4 MFSK
or Hadamard MFSK modulation. One is data redundancy, another is
convolutional coding, and the third is multipath guard period. Data
redundancy essentially repeats the transmission of a series of data bits one
or more times. Convolutional coding uses error correcting algorithms that are
determined from the data that are to be transmitted. And multipath guard
period provides a short delay between data frames to allow for the dispersion
of the multipath signals.
Data Redundancy
Data redundancy, which is also referred to as frequency diversity, is a method
whereby the same data bits are transmitted two or more times in the same
data frame.
For 1-of-4 MFSK modulation, since the baud rate is fixed at 2400 bits/second,
a data redundancy of two reduces the effective baud rate—or the
throughput—to half this rate, or 1200 bits/second. Similarly, a data
redundancy of three repeats twice, in the same data frame, the transmission
of the same data bits. Therefore the throughput is reduced to one third for an
effective baud rate of 800 bits/second. Similarly, for Hadamard MFSK
modulation, since the baud rate is fixed at 1200 bits/second, a data
redundancy of two reduces the effective baud rate to 600 bits/second; a data
redundancy of three reduces the effective baud rate to 400 bits/second.
1 Overview
Methods for Increased Reliability
1-20
BENTHOS
Although data redundancy is available for both modulation schemes, when
comparing the reliability of using 1-of-4 MFSK with a data redundancy of two
for an effective baud rate of 1200 bits/second to that of Hadamard MFSK
without data redundancy for the equivalent baud rate, Hadamard MFSK is
much more reliable, especially at high SNRs. Only at very low SNRs is the
reliability of both modulation schemes approximately the same.
Convolutional Coding
Convolutional coding is an error correction technique of which two variations
are provided by the modems: 1/2 rate convolutional coding and 1/3 rate
convolutional coding. In 1/2 rate convolutional coding, every eight data bits
are followed by eight additional bits, which are encoded from the data bits
using a convolutional encoding algorithm. This convolutional code, when
decoded by the receiving modem using a Viterbi decoding algorithm, is used
to correct at least one error bit—if there are any—in the eight bits of data.
Again, the throughput is reduced by half since for every 16 bits transmitted,
only eight are data bits. The 1/3 rate convolutional coding method adds a
16-bit convolutional code to every eight bits of data; hence reducing the
throughput to one third of what it is without convolutional coding.
Multipath Guard Period
To further increase reliability, especially in high multipath situations where
signal overlap can occur, a selectable delay can be inserted between data
frames. The delay is selected based on the length of time the multipath is
present in the communications channel. Again, the baud rate is affected. For
example, a multipath guard period of 25 milliseconds adds 25 milliseconds to
the duration of each data frame, which is also 25 milliseconds; hence the
baud rate is reduced to half of what it is without the multipath guard period.
For a multipath guard period of 50 milliseconds, the baud rate is reduced to
one third.
User’s Manual
January 2001
Acoustic Telemetry Modems
2
2-1
Specifications
This section provides the specifications for the Benthos ATM-870 Series and
ATM-880 Series Acoustic Telemetry Modems, including the remote
transducers and the modem battery packs.
General
Frequency bands:
9–14 kHz (LF), 16–21 kHz (MF) and
25–30 kHz (HF)
Data modulation:
1-of-4 MFSK and Hadamard MFSK
Baud rate:
100–2400 bits/s with 1-of-4 MFSK
100–1200 bits/s with Hadamard MFSK
Addressable modems:
239
Processing features:
Data redundancy
1/2 rate convolutional coding
1/3 rate convolutional coding
Multipath guard period
Data frame period:
25 ms
Data bits per frame:
60 with 1-of-4 MFSK—no data redundancy
and no convolutional coding
30 with Hadamard MFSK—no data
redundancy and no convolutional coding
Operating temperature:
-5°C to 50°C
Storage temperature:
-45°C to 85°C
Serial interface:
RS-232/422 at 9600; 4800; or 2400 baud
Flow control:
RS-232—hardware RTS/CTS handshaking
or software XON/XOFF
RS-422—software XON/XOFF
handshaking
2 Specifications
General
2-2
BENTHOS
ATM-871 and ATM-881 Deck Boxes
The ATM-871 and ATM-881 Deck Boxes connect to any of the remote
transducers and is used to communicate with the subsea modems or another
deck box. In addition, a host processor can be connected to the deck box
through an RS-232/422 serial interface.
Physical Characteristics
Case construction:
Watertight with cover closed
Dimensions:
10 in. high by 14 in. wide by 6.5 in. deep
Weight:
11 lb
Transducer cable:
25 m length standard, 50 m and 100 m
optional, 1200 lb breaking strength
Power Requirements
AC input power:
100–120 VAC, 50–60 Hz, 3.6 A typ,
200–240 VAC, 50–60 Hz, 2.0 A typ,
auto sensing
External DC input power:
21–48 V
DC input current (when
not transmitting):
160 mA typ, 250 mA max @ 21 V
DC input current (when
transmitting)
1 A typ @ 21 V
Input/Output
User’s Manual
Operator controls:
Keypad
Speaker volume control
Power on/off switch
Displays and indicators:
LCD display
Power on/off indicator
Speaker
January 2001
Acoustic Telemetry Modems
2-3
Power:
AC power input
DC power input
Signal:
RS-232/422 serial interface (data)
Transducers (AT-408, AT-409, or AT-421)
Transducers
Available types:
AT-408 omnidirectional (LF, MF and HF)
AT-409 line array (LF and MF)
AT-421 directional (LF and MF)
ATM-871R and ATM-881R Rack Mount Deck
Boxes
The ATM-871R and ATM-881R Rack Mount Deck Boxes are rack mountable
acoustic telemetry modems that connect to any of the remote transducers.
Similar to the ATM-871 and ATM-881 Deck Boxes, they are used to
communicate with the subsea modems or another deck box. To send
commands and to send and receive data, the ATM-871R/881R must be
connected to a host processor through its RS-232/422 serial interface. In
addition, the ATM-871R/881R can be connected to an optional external
power amplifier.
Physical Characteristics
Case construction:
Aluminum
Dimensions:
3.5 in. high by 19 in. wide by 13.0 in. deep
Weight:
10 lb
Transducer cable:
25 m length standard, 50 m and 100 m
optional, 1200 lb breaking strength
Power Requirements
AC input power:
2 Specifications
100–120 VAC, 50–60 Hz, 3.6 A typ,
200–240 VAC, 50–60 Hz, 2.0 A typ,
auto sensing
ATM-871R and ATM-881R Rack Mount Deck Boxes
2-4
BENTHOS
Input/Output
Operator controls:
Speaker volume control
Power on/off switch
Amplifier select switch
Displays and indicators:
Power on/off indicator
Speaker
Power:
AC power input
Signal:
RS-232/422 serial interface (data)
Transducers (AT-408, AT-409, or AT-421)
Receiver out
Transmit out
Headphones
External amplifier in
Auxiliary
Transducers
Available types:
AT-408 omnidirectional (LF, MF and HF)
AT-409 line array (LF and MF)
AT-421 directional (LF and MF)
ATM-875 and ATM-885 Subsea Modems
The ATM-875 and ATM-885 Acoustic Telemetry Modems are completely self
contained subsea modems with a built-in omnidirectional or directional
transducer and internal transmitter/preamp and DSP/receiver alkaline battery
packs (optional lithium battery packs are available). The modems can
operate either on their internal battery packs or on external DC power.
Physical Characteristics
User’s Manual
Housing construction:
Hard coat anodized aluminum
Dimensions:
3.5 in. max dia by 33.5 in. long
Mounting:
Stainless steel sidebar
Weight in air:
24 lb
January 2001
Acoustic Telemetry Modems
2-5
Weight in water:
11 lb
Operating depth:
2000 m
Power Requirements
Transmitter/preamp
battery pack:
21 V alkaline or 23 V lithium
DSP/receiver battery pack:
6.0 V alkaline or 7.8 V lithium
External DC input power:
4–9 V (DSP/receiver)
14.8–48.0 V (transmitter/preamp)
DSP/receiver current,
lowpower state:
DSP/receiver current,
active:
0.7 mA typ, 0.8 mA max (ATM-870 Series)
1.1 mA typ, 1.2 mA max (ATM-880 Series)
170 mA typ, 200 mA max (ATM-870 Series)
85 mA typ, 100 mA max (ATM-880 Series)
Transmitter/preamp
current, standby:
100 µA typ, 160 µA max
Transmitter/preamp
current, active:
1 A typ @ 21 V
Input/Output
2 Specifications
Operator controls:
Plunger type on/off switch
Power:
External DC power input
Signal:
RS-232/422 serial interface (data)
Device enable:
Active low, open collector output. Maximum
sink current is 80 mA. Maximum applied
voltage is 40 VDC.
ATM-875 and ATM-885 Subsea Modems
2-6
BENTHOS
Transducers
Type:
Built-in LF, MF or HF omnidirectional, or MF
directional
Source level @ 21 V (typ.):
178 dB re 1 µPa @ 1 m for LF, MF and HF
omnidirectional
190 dB re 1 µPa @ 1 m for MF directional
Source level @ 14.8 V (typ.):
-3 dB down from source level at 21 V
ATM-875R and ATM-885R Subsea Modems
The ATM-875R and ATM-885R Acoustic Telemetry Modems are subsea
modems that include internal transmitter/preamp and DSP/receiver alkaline
battery packs (optional lithium battery packs are available) and connect to
any of the remote transducers with a supplied 2-meter cable. The modems
can operate either on their internal battery packs or on external DC power.
Physical Characteristics
Housing construction:
Hard coat anodized aluminum
Dimensions:
3.50 in. max dia by 29.75 in. long
Mounting:
Stainless steel sidebar
Weight in air:
24 lb
Weight in water:
11 lb
Operating depth:
2000 m
Power Requirements
User’s Manual
Transmitter/preamp
battery pack:
21 V alkaline or 23 V lithium
DSP/receiver battery pack:
6.0 V alkaline or 7.8 V lithium
January 2001
Acoustic Telemetry Modems
External DC input power:
DSP/receiver current,
lowpower state:
DSP/receiver current,
active:
2-7
4–9 V (DSP/receiver)
14.8–48.0 V (transmitter/preamp)
0.7 mA typ, 0.8 mA max (ATM-870 Series)
1.1 mA typ, 1.2 mA max (ATM-880 Series)
170 mA typ, 200 mA max (ATM-870 Series)
85 mA typ, 100 mA max (ATM-880 Series)
Transmitter/preamp
current, standby:
450 µA typ, 600 µA max
Transmitter/preamp
current, active:
1 A typ @ 21 V
Input/Output
Operator controls:
Plunger type on/off switch
Power:
External DC power input
Signal:
RS-232/422 serial interface (data)
Transducers (AT-408, AT-409, or AT-421)
Device enable:
Active low, open collector output. Maximum
sink current is 80 mA. Maximum applied
voltage is 40 VDC.
Transducers
Available types:
2 Specifications
AT-408 omnidirectional (LF, MF and HF)
AT-409 line array (LF and MF)
AT-421 directional (LF and MF)
ATM-875R and ATM-885R Subsea Modems
2-8
BENTHOS
ATM-877 and ATM-887 Subsea Modems
The ATM-877 and ATM-887 Acoustic Telemetry Modems are completely self
contained 6000-meter depth rated subsea modems with a built-in medium
frequency (MF) directional transducer and internal transmitter/preamp and
DSP/receiver alkaline battery packs (optional lithium battery packs are
available). The modems can operate either on their internal battery packs or
on external DC power.
Physical Characteristics
Housing construction:
Hard coat anodized and painted aluminum
Dimensions:
5.0 in. max dia by 33.5 in. long
Mounting:
Stainless steel sidebar
Weight in air:
36 lb
Weight in water:
17 lb
Operating depth:
6000 m
Power Requirements
Transmitter/preamp
battery pack:
21 V alkaline or 23 V lithium
DSP/receiver battery pack:
6.0 V alkaline or 7.8 V lithium
External DC input power:
4–9 V (DSP/receiver)
14.8–48.0 V (transmitter/preamp)
DSP/receiver current,
lowpower state:
DSP/receiver current,
active:
User’s Manual
0.7 mA typ, 0.8 mA max (ATM-870 Series)
1.1 mA typ, 1.2 mA max (ATM-880 Series)
170 mA typ, 200 mA max (ATM-870 Series)
85 mA typ, 100 mA max (ATM-880 Series)
Transmitter/preamp
current, standby:
100 µA typ, 160 µA max
Transmitter/preamp
current, active:
1 A typ @ 21 V
January 2001
Acoustic Telemetry Modems
2-9
Input/Output
Operator controls:
Plunger type on/off switch
Power:
External DC power input
Signal:
RS-232 serial interface (data)
Device enable:
Active low, open collector output. Maximum
sink current is 80 mA. Maximum applied
voltage is 40 VDC.
Transducers
Type:
Built-in MF directional
Source level @ 21 V (typ.):
190 dB re 1 µPa @ 1 m
Source level @ 14.8 V (typ.):
187 dB re 1 µPa @ 1 m
ATM-877R and ATM-887R Subsea Modems
The ATM-877R and ATM-887R Acoustic Telemetry Modems are 6000-meter
depth rated subsea modems that include internal transmitter/preamp and
DSP/receiver alkaline battery packs (optional lithium battery packs are
available) and connect to an AT-421 directional transducer with a supplied
2-meter cable. The modems can operate either on their internal battery packs
or on external DC power.
Physical Characteristics
2 Specifications
Housing construction:
Hard coat anodized and painted aluminum
Dimensions:
5.00 in. max dia by 28.25 in. long
Mounting:
Stainless steel sidebar
Weight in air:
36 lb
Weight in water:
17 lb
Operating depth:
6000 m
ATM-877R and ATM-887R Subsea Modems
2-10
BENTHOS
Power Requirements
Transmitter/preamp
battery pack:
21 V alkaline or 23 V lithium
DSP/receiver battery pack:
6.0 V alkaline or 7.8 V lithium
External DC input power:
4–9 V (DSP/receiver)
14.8–48.0 V (transmitter/preamp)
DSP/receiver current,
lowpower state:
DSP/receiver current,
active:
0.7 mA typ, 0.8 mA max (ATM-870 Series)
1.1 mA typ, 1.2 mA max (ATM-880 Series)
170 mA typ, 200 mA max (ATM-870 Series)
85 mA typ, 100 mA max (ATM-880 Series)
Transmitter/preamp
current, standby:
450 µA typ, 600 µA max
Transmitter/preamp
current, active:
1 A typ @ 21 V
Input/Output
Operator controls:
Plunger type on/off switch
Power:
DC power input
Signal:
RS-232 serial interface (data)
Transducer (AT-421)
Device enable:
Active low, open collector output. Maximum
sink current is 80 mA. Maximum applied
voltage is 40 VDC.
Transducers
Available types:
User’s Manual
AT-421 directional (LF and MF)
January 2001
Acoustic Telemetry Modems
2-11
ATM-875PCB and ATM-885PCB Modem Board
Sets
The ATM-875PCB and ATM-885PCB Modem Board Sets include both a
printed circuit board set mounted to a chassis and an omnidirectional
transducer. They are externally powered and are designed for OEM
applications.
Physical Characteristics
Chassis Dimensions:
2.81 in. wide by 1.5 in. high by 8.75 in. long
Mounting:
Chassis mounting holes
Power Requirements
External DC input power:
DSP/Receiver current,
lowpower state:
DSP/Receiver current,
active:
4–9 V (DSP/receiver)
14.8–48.0 V (transmitter/preamp)
0.7 mA typ, 0.8 mA max (ATM-870 Series)
1.1 mA typ, 1.2 mA max (ATM-880 Series)
170 mA typ, 200 mA max (ATM-870 Series)
85 mA typ, 100 mA max (ATM-880 Series)
Transmitter/preamp
current, standby:
100 µA typ, 160 µA max
Transmitter/preamp
current, active:
1 A typ @ 21 V
Input/Output
2 Specifications
Power:
External DC power input
Signal:
RS-232/422 serial interface (data)
Transducers (LF, MF or HF)
Device enable:
Active low, open collector output. Maximum
sink current is 80 mA. Maximum applied
voltage is 40 VDC.
ATM-875PCB and ATM-885PCB Modem Board Sets
2-12
BENTHOS
Transducers
Type:
LF, MF or HF omnidirectional, or MF
directional
Source level @ 21 V (typ.):
178 dB re 1 µPa @ 1 m for LF, MF and HF
omnidirectional
190 dB re 1 µPa @ 1 m for MF directional
Source level @ 14.8 V (typ.):
-3 dB down from source level at 21 V
ATM-875RPCB and ATM-885RPCB Modem
Board Sets
The ATM-875RPCB and ATM-885RPCB Modem Board Sets include a
printed circuit board set mounted to a chassis and are specifically configured
to connect directly to any of the remote transducers. They are externally
powered and are designed for OEM applications.
Physical Characteristics
Chassis Dimensions:
2.81 in. wide by 1.5 in. high by 8.75 in. long
Mounting:
Chassis mounting holes
Power Requirements
External DC input power:
DSP/receiver current,
lowpower state:
DSP/receiver current,
active:
User’s Manual
4–9 V (DSP/receiver)
14.8–48.0 V (transmitter/preamp)
0.7 mA typ, 0.8 mA max (ATM-870 Series)
1.1 mA typ, 1.2 mA max (ATM-880 Series)
170 mA typ, 200 mA max (ATM-870 Series)
85 mA typ, 100 mA max (ATM-880 Series)
Transmitter/preamp
current, standby:
450 µA typ, 600 µA max
Transmitter/preamp
current, active:
1 A typ @ 21 V
January 2001
Acoustic Telemetry Modems
2-13
Input/Output
Power:
External DC power input
Signal:
RS-232/422 serial interface (data)
Transducers (AT-408, AT-409, or AT-421)
Device enable:
Active low, open collector output. Maximum
sink current is 80 mA. Maximum applied
voltage is 40 VDC.
Transducers
Available types:
AT-408 omnidirectional (LF, MF and HF)
AT-409 line array (LF and MF)
AT-421 directional (LF and MF)
AT-408 Omnidirectional Transducer
The AT-408 is an omnidirectional transducer with a built-in preamp that can
be used as a dunking transducer with the ATM-871/881 Deck Box or the
ATM-871R/881R Rack Mount Deck Box, or as a remote transducer with the
ATM-875R/885R Acoustic Telemetry Modem or the ATM-875RPCB/
885RPCB Modem Board Set.
2 Specifications
Frequency bands:
9–14 kHz (LF), 16–21 kHz (MF) or
25–30 kHz (HF)
Source level @ 21 V (typ.):
178 dB re 1 µPa @ 1 m
Source level @ 14.8 V (typ.):
175 dB re 1 µPa @ 1 m
Preamp gain:
35 dB
Radiation pattern:
Omnidirectional
Housing construction:
Anodized aluminum
Dimensions:
4.0 in. dia by 14.5 in. long
Weight in air:
8.5 lb
Weight in water:
2.5 lb
Operating depth:
2000 m (6000 m optional)
AT-408 Omnidirectional Transducer
2-14
BENTHOS
AT-409 Line Array Transducer
The AT-409 is a line array transducer with an omnidirectional beam pattern
in the horizontal plane and a directional beam pattern in the vertical plane. It
can be used as a dunking transducer with the ATM-871/881 Deck Box or the
ATM-871R/881R Rack Mount Deck Box, or as a remote transducer with the
ATM-875R/885R Acoustic Telemetry Modem or the ATM-875RPCB/
885RPCB Modem Board Set.
User’s Manual
Frequency bands:
9–14 kHz (LF) or 16–21 kHz (MF)
Source level @ 21 V (typ.):
185 dB re 1 µPa @ 1 m (LF)
183 dB re 1 µPa @ 1 m (MF)
Source level @ 14.8 V (typ.):
-3 dB down from source level at 21 V
Preamp gain:
35 dB
Radiation pattern:
Horizontal plane—omnidirectional
Vertical plane—directional
Housing construction:
Anodized aluminum
Dimensions:
4.5 in. dia by 18.5 in. long (LF)
4.0 in. dia by 18.5 in. long (MF)
Weight in air:
10.5 lb (LF)
8.5 lf (MF)
Weight in water:
5.0 lb (LF)
2.5 lb (MF)
Operating depth:
1000 m (LF)
2000 m (MF), 6000 m optional
January 2001
Acoustic Telemetry Modems
2-15
AT-421 Directional Transducer
The AT-421 is a directional transducer with a conical beam pattern. It can be
used as a dunking transducer with the ATM-871/881 Deck Box or the
ATM-871R/881 Rack Mount Deck box, or as a remote transducer with the
ATM-875R/885R and ATM-877R/887R Acoustic Telemetry Modems or the
ATM-875RPCB/885RPCB Modem Board Set.
2 Specifications
Frequency bands:
9–14 kHz (LF) or 16–21 kHz (MF)
Source level @ 21 V (typ.):
190 dB re 1 µPa @ 1m
Source level @ 14.8 V (typ.):
187 dB re 1 µPa @ 1m
Preamp gain:
35 dB
Radiation pattern:
40° conical (LF)
60° conical (MF)
Housing construction:
Anodized aluminum
Dimensions:
8.0 in. dia by 10 in. long (LF)
4.5 in. dia by 13.0 in. long (MF)
Weight in air:
26 lb (LF)
12 lb (MF)
Weight in water:
8 lb (LF)
5.5 lb (MF)
Operating depth:
6000 m (LF)
500 m (MF), 6000 m optional
AT-421 Directional Transducer
2-16
BENTHOS
Modem Battery Packs
The acoustic telemetry modems require two battery packs: a
transmitter/preamp battery pack and a DSP/receiver battery pack. The
alkaline packs are standard with each modem; the lithium packs are optional.
Transmitter/Preamp Alkaline Pack for
ATM-875/885/875R/885R
Capacity:
18 A·h @ 21°C
Open circuit voltage:
21 V
Transmitter/Preamp Alkaline Pack for
ATM-877/887/877R/887R
Capacity:
28 A·h @ 21°C
Open circuit voltage:
21 V
DSP/Receiver Alkaline Pack
Capacity:
6 A·h @ 21°C
Open circuit voltage:
6.0 V
Transmitter/Preamp Lithium Pack
Capacity:
36 A·h @ 21°C
Open circuit voltage:
23 V
DSP/Receiver Lithium Pack
User’s Manual
Capacity:
14 A·h @ 21°C
Open circuit voltage:
7.8 V
January 2001
Acoustic Telemetry Modems
3
3-1
Deployment
Considerations
A number of factors must be considered before deploying an ATM-870 Series
or ATM-880 Series Acoustic Telemetry Modem. These include the choice of
a remote transducer, the choice of a transmitter/preamp and a DSP/receiver
battery pack, the required operating depth, the required communications
range, the multipath and noise conditions, and the physical protection of the
modems. This section reviews these factors and also presents some typical
installation configurations for the modems.
Remote Transducer Selection
When an ATM-875R/885R, an ATM-877R/887R, or an ATM-875RPCB/
885RPCB Acoustic Telemetry Modem, each of which use a remote
transducer, is to be installed, the type of remote transducer to use should be
carefully selected to best suit the application. Refer to "Remote Transducers"
on page 1-9 for general information on the available remote transducers, and
to Section 2, "Specifications," for detailed specifications. Also refer to
Section 7, "Maintenance and Troubleshooting," for dimensioned outline
drawings.
The AT-408 Omnidirectional Transducer and its beam pattern are shown in
Figure 1-5 on page 1-9. Its beam pattern shows that it transmits and receives
signals equally well in a wide hemispherical pattern. This transducer should
be selected when the horizontal direction or the depth of the receiving modem
is not known or is not always the same. However, more power is required
compared to a directional transducer to produce an equivalent source level,
and the effects of multipath are usually greater.
The AT-409 Line Array Transducer and its beam pattern are shown in
Figure 1-6 on page 1-10. Its beam pattern shows that it transmits and
receives signals equally well from all directions around the transducer, but not
as well directly above or below the transducer. This transducer is a good
choice when the receiving modem is always at the same depth as the
transmitting modem, but the horizontal direction of the receiving modem is
not known or is not always the same. Less power is required compared to an
omnidirectional transducer to produce an equivalent source level, and the
effects of multipath are usually less.
3 Deployment Considerations
Remote Transducer Selection
3-2
BENTHOS
The AT-421 Directional Transducer and its beam pattern are shown in
Figure 1-7 on page 1-11. Whenever possible, this transducer should be
selected. Its transmit and receive beam patterns are that of a narrow cone;
hence it is a good choice when the depth and direction of the receiving
modem is known and is stable, and the transducer can be pointed at the
receiving modem. This transducer requires the least amount of power to
produce the equivalent source level of an omnidirectional transducer, and it
provides the best protection against the effects of multipath.
Battery Pack Selection
For the subsea modems that use battery packs, the capacity of the battery
packs determines both the amount of data a modem can transmit and the
modem’s useful deployment life. In many cases, the amount of data a modem
will transmit while it’s deployed depends primarily on the selection of the
transmitter/preamp battery pack, which powers the modem’s amplifier and
preamplifier. A second battery pack, the DSP/receiver battery pack will
provide power to the DSP and the receiver for over a year when the modem
is in the lowpower state. However, the actual useful deployment life of a
modem depends on both battery packs.
Battery Pack Currents
In the lowpower state, where the modem is switched on but is inactive, a very
small amount of current is drawn from the DSP/receiver battery pack,
typically from 0.7 mA to a maximum of 0.8 mA. Therefore, the DSP/receiver
battery pack can provide power in the lowpower state for over a year.
Similarly, a very small amount of current is drawn from the
transmitter/preamp battery pack. This is the transmitter/preamp standby
current, and is typically from 100 µA to a maximum of 150 µA. However, when
the DSP and the receiver are active, hence not in the lowpower state, a
relatively large amount of current is drawn while the modem either receives
or transmits data, typically from 170 mA to a maximum of 200 mA for an
ATM-870 Series and 85 mA to a maximum of 100 mA for an ATM-880 Series
Acoustic Telemetry Modem. And when the modem is transmitting, a large
amount of current is drawn from the transmitter/preamp battery pack,
typically 1 A. Therefore, unless a modem is to be deployed for well over a
year with few transmissions, it is the amount of data to be transmitted that
determines its useful deployment life.
User’s Manual
January 2001
Acoustic Telemetry Modems
3-3
Processing Overhead
When transmitting a packet of data, whether it is a partial packet or the entire
4-kbyte data packet of the transmit data buffer, an additional 7 bytes are
transmitted and the transmitter/preamp remains active an additional
200 milliseconds over that required to transmit the actual data. Refer to
"Transmit Data Buffer" on page 6-6 for information on the 4-kbyte transmit
data buffer. The additional bytes should be taken into account when
transmitting a small amount of data many times.
Modem Battery Pack Capacity Calculations
There are two available types of battery packs for powering the subsea
modems: alkaline and lithium. The alkaline battery packs are standard; the
lithium, optional. And each modem includes two battery packs: a
transmitter/preamp and a DSP/receiver battery pack. The alkaline
transmitter/preamp battery pack is 21 volts; the lithium, 23 volts. The alkaline
DSP/receiver battery pack is 6 volts; the lithium, 7.8 volts. The choice of
which type of battery packs to use for a deployment depends on both the
deployment’s duration and the amount of data that will be transmitted. In
general, for short term deployments it is less expensive to use alkaline battery
packs—unless large amounts of data will be transmitted. For long term
deployments, where other than to change battery packs a modem would not
be recovered, it is usually more economical to use the more expensive lithium
battery packs. This is because the cost of recovering the modem to replace
an alkaline battery pack is likely to exceed the cost of using a lithium battery
pack to begin with. However, if only a small amount of data will be
transmitted, alkaline battery packs might still be the better choice, as the
standard alkaline DSP/receiver battery pack will power the modem in the
lowpower state for at least one year.
Although lithium batteries have a shelf life of ten years, the capacity of stored
alkaline batteries decreases by approximately 5% per year at 21°C. And
when supplying power to a load in a 0°C environment, the capacity of an
alkaline battery pack decreases by 25%.
NOTE Because the shelf life of an alkaline battery pack is much shorter
than a lithium battery pack, do not use an alkaline battery pack that is
greater than two years old. In addition, any alkaline battery pack that
measures less than 90% of its rated capacity should be replaced, unless a
very short deployment is planned.
3 Deployment Considerations
Battery Pack Selection
3-4
BENTHOS
NOTE The DSP/receiver battery pack calculations for the ATM-870 Series
and ATM-880 Series Acoustic Telemetry modems differ only in the
DSP/receiver lowpower state and active currents. In the examples that
follow, an ATM-870 Series Acoustic Telemetry modem is used.
NOTE The Acoustic Modem Software provides a convenient method for
calculating the required battery pack capacities. Refer to "Battery Pack
Capacity Calculations" on page 5-13 for more information.
Transmitter/Preamp Battery Pack Capacity Calculations
To select the required transmitter/preamp battery pack for the amount of data
to be transmitted during a single deployment, first determine the baud rate
that is to be used. Then, referring to Section 2, "Specifications," determine
the transmitter/preamp active current. For a short deployment the
transmitter/preamp standby current can be neglected. With this information,
the required amp-hour capacity can be calculated by using the following
equation:
Amp-hours = D x A/(R x 450)
Where
D = the amount of data to be transmitted in bytes
A = the transmitter/preamp active current in amperes
R = the baud rate in bits/second
The constant 450 is derived from the conversions 8 bits/byte and
3,600 seconds/hour.
For example, an ATM-875R Acoustic Telemetry Modem will be used during
a short deployment to transmit 3 Mbytes of data at 1200 bits/sec. Since the
transmitter/preamp active current is 1 A, the capacity requirement of the
transmitter/preamp battery pack is:
Amp-hours = (3 Mbytes)[(1 A/(1200 bits/sec x 450)]
= 5.6 A·h
Referring to "Modem Battery Packs" on page 2-16, it can be seen that an
alkaline transmitter/preamp battery pack, which has a capacity of
18 amp-hours, is more than sufficient.
User’s Manual
January 2001
Acoustic Telemetry Modems
3-5
DSP/Receiver Battery Pack Capacity Calculations
To select the required DSP/receiver battery pack for the amount of data to be
transmitted during a single deployment, first determine the baud rate that is
to be used and the required length of deployment. Then, referring to
Section 2, "Specifications," determine the DSP/receiver lowpower state and
active currents. With this information, the required amp-hour capacity can be
calculated by using the following equation:
Amp-hours = (TA x IA) + (TD - TA) x IL
Where
TA = the DSP/receiver active time in hours
IA = the DSP/receiver active current in amperes
TD = the total deployment time in hours
IL = the DSP/receiver lowpower state current in amperes
For example, an ATM-875R Acoustic Telemetry Modem will be used to
transmit 3 Mbytes of data at 1200 bits/sec. The modem will be deployed for
30 days. To calculate the required capacity of the DSP/receiver battery pack,
the DSP/receiver active time must first be determined:
TA = (3 Mbytes)/[(1200 bits/sec)(1 byte/8bits)]
= (20,000 seconds)(1 hour/3600 seconds)
= 5.56 hours
At 30 days the total deployment time in hours is
TD = (30 days)(24 hours/day)
= 720 hours
The DSP/receiver active current is 170–200 mA and the DSP/receiver
lowpower state current is 0.7–0.8 mA. Using 175 mA for the active current
and 0.7 mA for the lowpower state current, the capacity requirement of the
DSP/receiver battery pack is
Amp-hours = (5.56 hours)(0.170 A) + (720 hours - 5.56 hours)(.0007 A)
= 1.45 A·h
Referring to "Modem Battery Packs" on page 2-16 it can be seen that an
alkaline DSP/receiver battery pack, which has a capacity of 6 amp-hours, is
more than sufficient.
3 Deployment Considerations
Battery Pack Selection
3-6
BENTHOS
An Example Deployment Calculation
This example shows how to calculate the number of deployment days for an
ATM-875R Acoustic Telemetry modem when it is required to
transmit 500 bytes of data every 30 minutes and the standard alkaline
transmit/preamp and DSP/receiver battery packs are used. The processing
overhead and the transmitter/preamp standby current are also taken into
account along with the following additional deployment conditions:
Baud rate:
600 bits/sec
Temperature:
0°C
Transmit/preamp
battery pack capacity: 18 A·h
DSP/receiver
battery pack capacity: 6 A·h
Transmitter/preamp
current, active:
1A
Transmitter/preamp
current, standby:
150 µA
DSP/Receiver
current, active:
170 mA
DSP/receiver current,
lowpower state:
0.7 mA
The capacity of an alkaline battery is reduced by approximately 25% when
subject to a 0°C environment. Hence the transmitter/preamp battery pack
capacity is reduced by 25% from 18 amp-hours to 13.5 amp-hours; the
DSP/receiver battery pack, from 6 amp-hours to 4.5 amp-hours.
The calculation of the number of deployment days at the required
transmission rate of 500 bytes every 30 minutes for the transmitter/preamp
battery pack is performed as follows:
From the equation
Amp-hours = D x A/(R x 450)
D becomes
D = [amp-hours x (R x 450)]/A
User’s Manual
January 2001
Acoustic Telemetry Modems
3-7
D = (13.5 A·h)(600 bits/sec x 450)/1 A
= 3,645,000 bytes
To account for the processing overhead when transmitting a packet of data,
where in this case a single packet is 500 bytes, an additional 7 bytes of data
per packet must be added along with 200 milliseconds of transmitter/preamp
active time. However, to simplify the calculations, the 200 milliseconds can
be converted into equivalent bytes using the 600 bits/second baud rate and
the 8 bits/byte conversion:
Equivalent bytes = (0.2 sec x 600 bits/sec)/(8 bits/byte)
= 15 bytes
Now, the total bytes to be transmitted per packet is
500 + 7 + 15 = 522 bytes/packet
Hence the total number of packets that can be transmitted is
Total number of packets = (3,645,000 bytes)/(522 bytes/packet)
= 6,983 packets
And since 1 packet of data transmitted every 30 minutes is equivalent to
48 packets transmitted per day, the total number of deployment days is
Total deployment days = (6,983 packets)/(48 packets/day)
= 145.5 days
However, for long deployments the transmitter/preamp standby current must
be considered. Therefore, the transmitter/preamp battery pack capacity
required for the preamp is
Preamp amp-hours required = (deployment time in hours)(150 µA)
= (145.5 days)(24 hours/day)(150 µA)
= 0.52 A·h
Hence the original 13.5 amp-hour calculation must now be reduced by
0.52 amp-hours to 12.98 amp-hours and the total number of days
recalculated.
D = (12.98 A·h)(600 bits/sec x 450)/(1 A)
= 3,504,600 bytes
3 Deployment Considerations
Battery Pack Selection
3-8
BENTHOS
and the total number of packets is now
Total number of packets = (3,504,600 bytes)/(522 bytes/packet)
= 6,713 packets
And again, since 1 packet of data transmitted every 30 minutes is equivalent
to 48 packets transmitted per day, the total number of deployment days is
now
Total deployment days = (6,713 packets)/(48 packets/day)
= 140 days
The calculation of the DSP/receiver battery pack capacity required is
performed from the equation
Amp-hours = (TA x IA) + (TD - TA) x IL
To calculate the DSP/receiver active time per packet at a baud rate of
600 bits/second for a packet size of 522 bytes:
TA per packet = (522 bytes/packet)/[(600 bits/sec)(1 byte/8 bits)]
= 7 sec/packet
Hence to transmit 6,713 packets of data, the DSP/receiver active time
required is
TA = (7 sec/packet)(1 hour/3600 sec) x (6,713 packets)
= 3 hours
And since the DSP/receiver active current is 170 mA, the DSP/receiver
battery pack capacity required is
Amp-hours required = (13 hours) x (0.17 A) + [(140 days) x
(24 hours/day) - 13 hours] x 0.0007 A
= 2.21 A·h + 2.34 A·h
= 4.56 A·h
In this case the DSP/receiver battery pack capacity required is slightly greater
than the 4.5 amp-hour capacity available, this being the capacity after
reducing the 6.0 amp-hour capacity at 21°C for operation in a 0°C
environment. Therefore, reducing the deployment time from 140 days to 120
days will ensure that all the data will be transmitted for the deployment period.
User’s Manual
January 2001
Acoustic Telemetry Modems
3-9
Modem Operating Depth
The rated operating depth of the subsea modems and remote transducers is
typically 2000 meters. However, the ATM-877/887 and ATM-877R/887R
Acoustic Telemetry Modems, and the AT-421 Directional Transducer (LF)
are rated to 6000 meters. For custom applications a higher depth rating can
be provided. Refer to "Customer Service" on page vi for information on how
to contact Benthos should a higher rating be required.
WARNING Do not subject a subsea modem or remote transducer to a depth
that exceeds its rating as damage or destruction of the modem could occur.
Modem Communications Range
The communications range between two ATM-870 Series or two ATM-880
Series Acoustic Telemetry Modems depends on many factors: the
transmitting modem’s source level, the depth of the modems, the transducer
orientations, the operating frequency band, the beam pattern of the
transducers, the multipath and ambient noise conditions, and other factors.
In general, horizontal ranges of two to three kilometers are typical with
omnidirectional transducers and can be extended with the use of directional
transducers. When the installation and environmental conditions are known,
the approximate expected range can be estimated. Refer to "Customer
Service" on page vi for information on how to contact Benthos for help in
calculating the expected range.
Multipath and Noise
Because of the advanced modulation schemes used by the ATM-870 Series
and ATM-880 Series Acoustic Telemetry Modems, reliable operation can be
obtained even in relatively severe multipath and noise conditions, but usually
at the expense of a reduced baud rate. Refer to "High Performance
Modulation Schemes" on page 1-17 for an explanation of the modulation
schemes. However, paying particular attention to the remote transducer
orientation, its height above the bottom, or its depth below the surface, can
reduce the effects of multipath and ambient noise. In addition, in some
instances the use of acoustic baffles can further improve performance. And
accounting for the operating frequencies of other acoustic equipment in the
area is also important to obtain optimum performance from the modems.
3 Deployment Considerations
Modem Operating Depth
3-10
BENTHOS
Transducer Orientation
If possible, when using the AT-421 Directional Transducer, orient the
transducer such that it is pointing toward the receiving modem. If an AT-409
Line Array Transducer, which has a relatively narrow vertical beam pattern
and an omnidirectional horizontal beam pattern, is used, position the
transducer at approximately the same depth as the receiving modem. When
using an AT-408 Omnidirectional Transducer, which has an omnidirectional
beam pattern, the potential for multipath is the greatest, yet it is not required
to point the transducer at the receiving modem or position it at the same
depth.
Use of an Acoustic Baffle
For installations with relatively high multipath and ambient noise conditions,
such as surface and bottom multipath reflections, ship noise, sea state noise,
and other nearby acoustical noise sources, an acoustic baffle can be installed
on the transducer. The acoustic baffle minimizes the effects of multipath
signals and noise sources that arrive from behind the remote transducer.
Acoustic baffles are available for all the remote transducers. Refer to
"Customer Service" on page vi for information on how to contact Benthos for
detailed specifications.
Height Above the Bottom and Distance Below
the Surface
Adjusting the height of the remote transducer above the bottom for fixed
bottom installations can reduce the effects of multipath. Generally, raising a
transducer that is close to the bottom such that it is two or three meters above
the bottom will usually reduce multipath from bottom reflections. Similarly, for
a remote transducer that is near the surface, lowering the transducer will
generally reduce the effects multipath from surface reflections, and reduce
the effects of both ship noise and surface noise.
Other Acoustic Equipment
If there is other active acoustic equipment in the vicinity of a modem which
transmit at frequencies within or near the operating frequency of the modems,
modem performance will likely be reduced. The installation and use of other
equipment near a modem should be carefully considered prior to and after
installing and deploying a modem.
User’s Manual
January 2001
Acoustic Telemetry Modems
3-11
Typical Deployment Configurations
The deployment configurations of the ATM-870 Series and ATM-880 Series
Acoustic Telemetry Modems should take into account the selected battery
pack types, the required modem operating depth and communications range,
and the multipath and noise factors. As there are many possible deployment
configurations that will take these factors into account, especially for the
subsea modems, typical deployment configurations are presented only. In
addition, refer to Section 4, "Setup and Test," for information on the cables
and connectors used to connect the modems. The modems should be set up
and tested prior to deployment.
Each subsea modem is encased within an anodized aluminum housing. Each
remote transducer is encapsulated in a protective urethane mold and
mounted to an anodized aluminum housing, which contains a built-in
preamplifier and transmitter. These configurations provide a high degree of
protection from physical damage. However, for all installation configurations,
any installed cables that provide external power to the modem or connect to
a remote transducer should be properly secured to prevent crimping or
accidental disconnection.
Dunking Transducer Deployment
Any of the remote transducers, namely, the AT-408 Omnidirectional
Transducer, the AT-409 Line Array Transducer, or the AT-421 Directional
Transducer, can be used as a dunking transducer with the ATM-871 and
ATM-881 Deck Boxes or the ATM-871R and ATM-881R Rack Mount Deck
Boxes. When a remote transducer is used as a dunking transducer, the
25-meter cable that is included with the deck box is used both to connect to
the transducer and to lower it into the water. This cable must be strain
relieved at the transducer end. Therefore, a Kellums grip is installed on the
cable for this purpose. To strain relieve the cable, tie a nylon line from the loop
in the Kellums grip to one of the holes in the connector guard for an AT-408
Omnidirectional Transducer or to the mounting loop on the connector end of
an AT-409 Line Array Transducer. When securing the line, ensure that there
is sufficient slack in the section of cable between the Kellums grip and the
transducer connection to relieve any strain. In addition, when using a remote
transducer as a dunking transducer, it may be required to add weight to the
transducer to ensure it remains vertical in the water column. For an AT-409
Line Array Transducer, the weight can be tied to the bail on the end opposite
the connector end.
3 Deployment Considerations
Typical Deployment Configurations
3-12
BENTHOS
Subsea Modem Deployment
Any of the subsea modems, namely, the ATM-875/885, the ATM-875R/885R,
the ATM-877/887, or the ATM-877R/887R Acoustic Telemetry Modems are
typically moored on the sea floor, attached to a subsea structure, or installed
on an AUV. In any case the modem’s built-in transducer or its remote
transducer should be mounted such that it is oriented correctly. Refer to
"Transducer Orientation" on page 3-10 for more specific requirements, and
to Section 7, "Maintenance and Troubleshooting," for detailed dimensional
information on the subsea modems. When a subsea modem is moored, it
should be securely anchored using a clump weight. And if it is moored or
attached to a subsea structure, it should be pulled up vertically using flotation.
An example is shown in Figure 3-1 where an ATM-875 Acoustic Telemetry
Modem and an AT-409 Line Array Transducer are shown deployed with
flotation. The side bar is used both to attach the flotation and to anchor the
modem to a clump weight or to a structure.
NOTE When attaching flotation to a remote transducer that is attached to a
modem, strain relive the transducer cable by ensuring that the line is
shorter than the cable as shown in Figure 3-1.
User’s Manual
January 2001
Acoustic Telemetry Modems
3-13
FLOAT
AT-409 LINE ARRAY
TRANSDUCER
TRANSDUCER CABLE
SIDE BAR
ATM-875R/885R ACOUSTIC
TELEMETRY MODEM
Figure 3-1 Deployed ATM-875R/885R and AT-409 with Flotation
3 Deployment Considerations
Typical Deployment Configurations
3-14
User’s Manual
BENTHOS
January 2001
Acoustic Telemetry Modems
4
4-1
Setup and Test
This section provides instructions on how to unpack, set up and test the
ATM-870 Series and ATM-880 Series Acoustic Telemetry Modems. In
addition, some simple startup procedures are provided that will help to quickly
verify that the system is operational and that commands and data are reliably
transmitted and received. Specifically, the following topics are covered:
• Unpacking and inspection
• Some typical modem configurations
• Modem connector and pinout descriptions
• Setting up and checking the modems
• Verifying operation of the modems
NOTE Once the modems are set up and are operational, refer to Section 5,
"Telesonar PC," for instructions on how to easily configure and operate the
modems using Telesonar PC, and to Section 6, "Modem Commands and
Operating Parameters," for detailed information on the modem commands
and operating parameters.
Unpacking and Inspection
The ATM-870 Series and ATM-880 Series Acoustic Telemetry Modems, their
associated components, and this manual are carefully packed in sealed
boxes. Every effort is made to pack the modems to protect them during
shipment. However, carefully inspect the boxes for any signs of external
damage and immediately report any damage to Benthos and to the freight
carrier.
After inspecting the boxes, locate and remove the packing list, which is on the
outside of one of the boxes. While referring to the packing list, carefully
remove the contents of each of the boxes, checking the items against the
packing list to verify that all the items on the list are included. Inspect the
items for any physical damage that might have occurred during shipment.
Immediately report any damage to Benthos and to the freight carrier.
4 Setup and Test
Unpacking and Inspection
4-2
BENTHOS
Typical Setup Configurations
There are a number of different possible setup configurations for the
ATM-870 Series and ATM-880 Series Acoustic Telemetry Modems.
However, in most cases the modems connect to a host processor through an
RS-232 or an RS-422 serial interface; the ATM-877/887 and
ATM-877R/887R provide an RS-232 interface only. The host processor can
be a PC, an embedded processor, an instrument, or any other device that can
act as a data terminal. In addition, in a typical setup there is always a local
modem, which connects to a local host processor, and at least one remote
modem, which connects to a remote host processor. The local modem, which
can be either a surface modem or a subsea modem, is the modem from
which all commands are sent to the remote modem or modems and is usually
connected to a host processor. However, the ATM-871/881 Deck Box, which
has a built-in keypad and a data terminal, is the only modem where operator
commands can be entered directly without a host processor. Yet it, too, can
be connected to a processor.
ATM-871/881
LOCAL
MODEM
RS-232 LINK
PC
ATM-875/885
ACOUSTIC
LINK
REMOTE
MODEM
RS-232 LINK
INSTRUMENT
LOCAL
HOST
REMOTE
HOST
Figure 4-1 Setup with ATM-871/881 Deck Box as the Local Modem
User’s Manual
January 2001
Acoustic Telemetry Modems
4-3
A typical configuration is shown in Figure 4-1, where the local modem is the
ATM-871/881 Deck Box, which is connected to a local host processor, a PC,
through its RS-232 serial port. The remote modem is an ATM-875/885, which
is connected to an instrument through its RS-232 serial port.
In another typical configuration, the local modem is one of the subsea
modems, which is connected to a host processor. An example of this is
shown in Figure 4-2, where an ATM-875/885 is the local modem. In this setup
the local modem communicates with three remote modems, which are also
ATM-875/885 modems, and where each is connected to an instrument.
INSTRUMENT #1
ATM-875/885
REMOTE
MODEM #1
RS-232
ACOUSTIC
LINK
ATM-875/885
LOCAL
MODEM
REMOTE
HOST #1
INSTRUMENT #2
ATM-875/885
REMOTE
MODEM #2
RS-232
REMOTE
HOST #2
INSTRUMENT #3
PC
ATM-875/885
LOCAL
HOST
REMOTE
MODEM #3
RS-232
REMOTE
HOST #3
Figure 4-2 Setup with ATM-875/885 as Local and Remote Modems
Modem Connections
Although cables are supplied, special installations might require customer
supplied cables and connectors. For this purpose complete connector and
pinout descriptions are provided.
4 Setup and Test
Modem Connections
4-4
BENTHOS
ATM-871/881 Deck Box Front Panel Connectors
The ATM-871/881 Deck Box front panel connectors and their description and
use are listed below and are shown in Figure 4-3.
Connector
Description and Use
AC POWER:
CEE-type AC input connector that
connects to the AC power source.
DC POWER:
(2) banana jacks/binding posts, red (+)
and black (-), that connect to the DC
power source
SERIAL I/O:
DB-25S, RS-232/422 female serial port
connector that connects to the host
processor.
TRANSDUCER:
10-pin MS3102A18-1S female connector
that connects to the remote transducer.
DISPLAY
KEYPAD
SPEAKER
VOLUME
CONTROL
POWER
ON LED
AC ON/OFF
SWITCH
AC POWER
CONNECTOR
FUSE
DC POWER CONNECTORS
RED (21–48 VDC),
TRANSDUCER
BLACK (COMMON)
CONNECTOR
REMOTE/
TERMINAL
SWITCH
SERIAL I/O
CONNECTOR
Figure 4-3 ATM-871/881 Deck Box Front Panel
User’s Manual
January 2001
Acoustic Telemetry Modems
4-5
ATM-871R/881R Rack Mount Deck Box Front
and Rear Panel Connectors
The ATM-871/881 Rack Mount Deck Box front panel connectors and their
description and use are listed below and are shown in Figure 4-4.
Connector
Description and Use
PHONES:
1/4" phone jack that connects to a pair of
headphones. The speaker is disabled
when the headphones are connected.
SERIAL I/O:
DB-25S, RS-232/422 female serial port
connector that connects to the local host
processor. For convenience a similar
connector is available on the back panel
which serves the same purpose; either
connector, but not both, can be used.
PHONES
CONNECTOR
AC ON/OFF SWITCH
SERIAL I/O
CONNECTOR
SPEAKER
VOLUME CONTROL
Figure 4-4 ATM-871R/881R Rack Mount Deck Box Front Panel
The ATM-871R/881R Rack Mount Deck Box rear panel connectors and their
description and use are listed below and are shown in Figure 4-5.
4 Setup and Test
Connector
Description and Use
TRANSDUCER:
10-pin MS3102A18-1S female connector
that connects to the remote transducer.
Modem Connections
4-6
BENTHOS
SERIAL I/O:
DB-25S, RS-232/422 female serial port
connector that connects to the local host
processor. For convenience a similar
connector is available on the front panel
which serves the same purpose; either
connector, but not both, can be used.
RCVR OUT:
BNC connector that outputs the raw
acoustic receive signals.
XMIT OUT:
BNC connector that connects to the input
of an optional external amplifier.
EXT AMP IN:
BNC connector that connects to the
output of an optional external amplifier.
NOTE When an external amplifier is used, specially designed transducers
are required. Refer to "Customer Service" on page vi for information on
how to contact Benthos for details.
AUX:
BNC connector that is available for
custom applications.
AC POWER:
CEE-type AC input connector that
connects to the AC power source.
TRANSDUCER
CONNECTOR
SERIAL I/O
CONNECTOR
AUX
CONNECTOR
RCVR OUT
CONNECTOR
AC POWER
CONNECTOR
INT/EXT AMP
SELECT SWITCH
XMIT OUT
CONNECTOR
FUSE
EXT AMP IN
CONNECTOR
Figure 4-5 ATM-871R/881R Rack Mount Deck Box Rear Panel
User’s Manual
January 2001
Acoustic Telemetry Modems
4-7
Subsea Modem Connectors
The ATM-875/885 and ATM-875R/885R Acoustic Telemetry Modems
include a POWER/SERIAL connector on the bottom end cap for the external
power and RS-232/422 connections. The ATM-875R/885R also includes a
TRANSDUCER connector on the top end cap for connecting to a remote
transducer. The ATM-877/887 and ATM-877R/887R Acoustic Telemetry
Modems include separate POWER and SERIAL connectors, and the
ATM-877R/887R also includes a TRANSDUCER connector. A 2-meter cable
is supplied with the ATM-875R/885R and ATM-877R/887R for connecting to
a remote transducer.
Modem Operator Functions
Typically, most of the modem functions are controlled directly through the
keyboard of a PC if a PC is used as the host processor. However, a number
of operator functions are provided on the front panels of the ATM-871/881
Deck Box and the ATM-871R/881R Rack Mount Deck box. The subsea
modems have only one operator function, an on/off switch that powers up and
powers down the modem.
ATM-871/881 Deck Box Operator Functions
The ATM-871/881 Deck Box operator functions and their descriptions and
use are listed below and are shown in Figure 4-3 on page 4-4.
4 Setup and Test
Function
Description and Use
AC ON/OFF switch:
An AC circuit breaker/rocker switch that
turns the deck box AC power on or off.
POWER ON LED:
A red indicator that is illuminated when
power is applied.
SPEAKER:
Provides an audio verification of
transmitted and received data.
VOLUME control:
A single turn potentiometer that controls
the volume level of the speaker.
DISPLAY:
Displays commands and acoustic data,
providing the same indication as the
monitor of a PC if a PC is used as the
host processor.
Modem Operator Functions
4-8
BENTHOS
KEYPAD:
Allows operator input of commands and
data when the REMOTE/TERMINAL
switch is switched to TERMINAL.
REMOTE/TERMINAL switch: A toggle switch that allows operator input
of commands and data from the
keyboard of a connected PC when
switched to REMOTE, or from the
keypad when switched to TERMINAL.
FUSE:
A 4-amp slo-blow fuse that protects both
the internal and, if used, the external DC
power supply.
ATM-871R/881R Rack Mount Deck Box Operator
Functions
The ATM-871R/881R Rack Mount Deck Box operator functions and their
descriptions and use are listed below and are shown in Figure 4-4 on page
4-5 and Figure 4-5 on page 4-6.
Function
Description and Use
AC ON/OFF switch:
An AC circuit breaker/rocker switch that
turns the deck box AC power on or off.
SPEAKER:
Provides an audio verification of
transmitted and received data.
VOLUME control:
A single turn potentiometer that controls
the volume level of the speaker.
FUSE:
A 4-amp slo-blow fuse that protects both
the internal and, if used, the external DC
power supply.
INT/EXT AMP
SELECT switch:
User’s Manual
A toggle switch that selects the internal or
optional external power amplifier. In the
INT position, the internal amplifier is
selected; in the EXT position, the
external amplifier is selected.
January 2001
Acoustic Telemetry Modems
4-9
NOTE Always leave the INT/EXT AMP SELECT switch in the INT position
unless an optional external amplifier is connected to the XMIT OUT and EXT
AMP IN connectors.
Subsea Modem Operator Functions
The only operator function on the subsea modems is the on/off switch, which
is located on the side of the end cap as shown in Figure 4-6 for the
ATM-875/885 and ATM-875R/885R Acoustic Telemetry Modems. A similar
configuration is provided for the ATM-877/887 and ATM-877R/887R Acoustic
Telemetry Modems. To turn on the subsea modem, push the switch all the
way in. To turn off the modem, pull the switch all the way out. This
configuration causes the modem to turn on automatically when deployed due
to ambient pressure.
ATM-875/885
ATM-875R/885R
ON/OFF
SWITCH
ON/OFF
SWITCH
Figure 4-6 Subsea Modem On/Off Switches
4 Setup and Test
Modem Operator Functions
4-10
BENTHOS
Setting Up and Checking the Modems
When the modem connectors have been identified, the associated cables
can be connected and some preliminary checks performed. The first step is
to connect the local and remote modems to their remote transducers and host
processors, and then perform a few preliminary checks, including
establishing an in-air acoustic link between the modems.
Setting up the ATM-871/881 and ATM-871R/881R
Modems
The ATM-871/881 Deck Box or the
ATM-871R/881R Rack Mount Deck Box is
typically set up as the local modem. This is the
PIN 1
PIN 14
configuration shown in Figure 4-1 on page 4-2,
where the ATM-871/881 Deck Box is the local
modem and a PC is the local host processor.
However, as shown in Figure 4-2 on page 4-3, an
ATM-875/885 Acoustic Telemetry Modem or any
of the subsea modems can also be configured as
PIN 25
PIN 13
a local modem. When connecting an
ATM-871/881 Deck Box or an ATM-871R/881R
Rack Mount Deck Box to a PC, refer to
Figure 4-7 for the SERIAL I/O connector pin
Figure 4-7 ATM-871/881
orientation and to Table 4-1 for the pinout
and ATM-871R/881R
information.
SERIAL I/O Connector
Table 4-1 ATM-871/881 and ATM-871R/881R SERIAL I/O
Connector Pinouts
User’s Manual
PIN
LABEL
2
RXD
3
FUNCTION
SIGNAL
DIRECTION
RS-232 Receive
Host to Modem
TXD/RX(-)
RS-232 Transmit/RS-422 Receive(-)
Modem to Host/
Host to Modem
5
RTS/RX(+)
Request to Send/RS-422 Receive(+)
Modem to Host/
Host to Modem
7
GND
Common Ground
11
TX(-)
RS-422 Transmit(-)
Modem to Host
25
TX(+)
RS-422 Transmit(+)
Modem to Host
January 2001
Acoustic Telemetry Modems
4-11
NOTE If the ATM-871/881 Deck Box is used as the local modem, it is not
necessary to connect the deck box to a PC for checking the modem’s
operation, as commands can be entered from the keypad on the deck box.
Perform the steps listed below to connect a remote transducer and a PC to
an ATM-871/881 Deck Box or an ATM-871R/881R Rack Mount Deck Box.
Refer to "ATM-871/881 Deck Box Front Panel Connectors" on page 4-4 or to
"ATM-871R/881R Rack Mount Deck Box Front and Rear Panel Connectors"
on page 4-5 for information on the deck box connectors and their locations.
1. Connect the supplied 25-meter transducer cable from the
TRANSDUCER connector on the deck box to the bulkhead connector
on the remote transducer that is to be used as the dunking transducer.
2. If AC power is to be used, connect the supplied AC power cable to the
AC POWER connector on the deck box.
For the ATM-871/881 Deck box only, if DC power is to be used, connect
the supplied DC power cable to the banana jack/binding posts,
connecting 21–48 VDC to red and common to black.
NOTE There is no DC power switch on the ATM-871/881 Deck Box. The DC
power supply must be switched on or off separately.
3. For the ATM-871/881 Deck Box only, switch the REMOTE/TERMINAL
switch on the deck box to REMOTE.
NOTE To use the keypad on the ATM-871/881 Deck Box instead of a PC to
enter commands, switch the REMOTE/TERMINAL switch on the deck box to
TERMINAL.
4. Connect an RS-232 serial cable from the SERIAL I/O connector on
the deck box to an available serial COM port on the PC. Refer to Table
4-1 on page 4-10 for the connector pinout information. A straight wire,
pin for pin connection to the PC’s serial COM port is what is required.
Refer to Table 4-2 for the pin-to-pin connections for PC’s that have 9-pin
DB-9 serial port connectors. For those computers—usually laptops—a
DB-25P (male) to DB-9S (female) cable is required.
4 Setup and Test
Setting Up and Checking the Modems
4-12
BENTHOS
Table 4-2 ATM-871/881 and ATM-871R/881R SERIAL I/O Connector to
DB-9 Pin-to-Pin Connections
ATM-871/881, ATM-871R/881R
SERIAL I/O CONNECTOR
PIN
LABEL
FUNCTION
2
RXD
Receive
3
TXD
5
7
SIGNAL
DIRECTION
HOST PC DB-9
CONNECTOR
PIN
LABEL
FUNCTION
Host to Modem
3
TXD
Transmit
Transmit
Modem to Host
2
RXD
Receive
RTS
Request to
Send
Modem to Host
8
CTS
Clear to Send
GND
Ground
—
5
GND
Ground
Setting up the Local Host Processor
If a PC is to be used as the local host processor, it must be set up to run a
terminal program, such as ProComm, Windows Terminal, or Windows
Hyperterminal, and the serial port used to connect to the local modem must
be selected and correctly configured using the terminal program. Or, instead,
for a user friendly means of configuring and operating the modems,
Telesonar PC can be used. For instructions on how to install and start
Telesonar PC, refer to "Installing and Starting Telesonar PC" on page 5-1.
NOTE If Telesonar PC is installed and will be used to operate the modem, it
is not necessary to set up the PC as instructed below. Instead, refer to
"Selecting and Configuring the Serial Communications Port—Remote or
Local Modem" on page 5-17 to select the COM port, the baud rate, the serial
interface, and the handshaking being used by the modem.
After connecting the local modem to the PC as described in "Setting up the
ATM-871/881 and ATM-871R/881R Modems" on page 4-10, perform the
steps listed below to prepare the PC.
1. Install the terminal program communications software on the PC.
2. Start the terminal program, select the serial port that is connected to the
local modem, and configure the port as follows:.
User’s Manual
Baud Rate:
9600 bits/sec
Parity:
None
Data Bits:
8
Stop Bits:
1
January 2001
Acoustic Telemetry Modems
4-13
Checking the Local Modem and Host Processor
Once the local modem and the local host processor are set up, some simple
preliminary checks can be made to verify that the modem is operating
properly and that all of the connections are correct. Perform the steps listed
below to turn on the ATM-871/881 Deck Box or the ATM-871R/881R Rack
Mount Deck Box and perform the checks.
1. Connect the AC power cable to an available 100–120 VAC, 50–60 Hz or
200–240 VAC, 50–60 Hz power source, or the DC power cable to a
21–48 VDC power source.
2. Switch the AC ON/OFF switch on the front panel of the deck box to ON,
or switch on the DC power supply.
3. Rub the remote transducer head to check the connection between the
transducer and the modem. When rubbing the transducer, sounds
should be heard coming from the speaker on the front panel of the deck
box. If the sounds cannot be heard, increase the speaker volume by
adjusting the VOLUME control.
4. Switch the AC ON/OFF switch on the front panel of the deck box to
OFF, or switch off the DC power supply.
Verifying the Local Modem’s Operating Parameters
When the local modem is powered up, it will initialize a number of modem
operating parameters, such as the serial and acoustic baud rates, the modem
address, and other parameters. These operating parameters are stored in
S Registers, and they can be changed locally through the host processor by
using modem commands. If the ATM-871/881 Deck Box is being used as the
local modem, they can also be changed from the keypad on the front panel.
A changed S Register setting can also be made the default setting, which is
its setting when the modem is powered up. Detailed information on how to
enter modem commands and change S Registers is presented in Section 6,
"Modem Commands and Operating Parameters."
NOTE The modem commands can be entered directly from the keyboard
using the Terminal Mode feature of Telesonar PC. For instructions on how
to use Terminal Mode, refer to "Activating Terminal Mode" on page 5-49.
4 Setup and Test
Setting Up and Checking the Modems
4-14
BENTHOS
Perform the steps listed below to verify that the local host processor is
communicating correctly with the local modem and the S Registers are
initialized.
1. Turn on the PC and run the terminal program, or Telesonar PC in
Terminal Mode.
2. If the ATM-871/881 Deck Box or the ATM-871R/881R Rack Mount Deck
Box is being used as the local modem, switch the AC ON/OFF switch on
the front panel to ON, or switch on the DC power supply. If a subsea
modem is being used as the local modem, switch on the modem by
pushing in the switch on the side of the end cap.
The banner message followed by the command prompt (>) is displayed
on the ATM-871/881 Deck Box display if the deck box is being used as
the local modem and the REMOTE/TERMINAL switch is switched to
TERMINAL—or on the monitor of the PC if a PC is being used as the host
processor with a terminal program and the REMOTE/TERMINAL switch
is switched to REMOTE. The message includes the frequency band
(LF, MF, HF, or Nonstandard), the firmware version, and the command
prompt as shown in the following example:
Benthos ATM-87X
MF Frequency Band
Acoustic Modem Version 2.4
>
3. At the command prompt type ATS?, and then press Enter. The
S Register settings of the local modem are displayed as in the following
example:
Local Sregisters
S00=01 S01=05 S02=00 S03=02S04=05S05=03S06=00
S07=0ES08=05 S09=00 S10=1ES11=03S12=03S13=00
S14=03 S15=05 S16=00 S17=02S18=1FS19=03S20=00
>
NOTE Refer to Section 6, "Modem Commands and Operating Parameters,"
for detailed information on the S Register settings and their meanings.
User’s Manual
January 2001
Acoustic Telemetry Modems
4-15
Changing the Local Modem’s Operating Parameters
The S Register settings of the local modem can be changed whenever the
modem is in Command mode, the mode in which the command prompt (>) is
displayed. If the modem is not in Command mode, type +++ in rapid
succession. The command prompt will be displayed. The Set Register
Command (ATSn=n) is used to change an S Register setting, where the first
n in the command is the S Register number and the n following the equal
character (=) is the desired setting. The Write command (AT&W) saves the
S Register settings as the new startup configuration, where the changed
settings become the new default settings, which are the settings when the
modem is powered up.
For example, perform the steps listed below to change S Register 4 from 05
to 01, and to make it the default setting for the startup configuration.
1. At the command prompt (>) type ATS4=01, and then press Enter. The
command is executed, the modem responds with the message "OK,"
and the command prompt is again displayed:
ATS4=01
>1200 bits/second Hadamard
OK
>
This changes the acoustic baud rate of the modem from 600 bits/second
Hadamard with 25 milliseconds multipath guard period to
1200 bits/second Hadamard with no multipath guard period.
2. Type AT&W, and then press Enter. The command is executed and the
command prompt is once again displayed:
AT&W
Sregisters Stored
>
The setting of S Register 4 is now the default setting. Therefore,
whenever the modem is powered up, the S4 setting will be 01.
WARNING If the baud rate of the modem’s serial interface is changed, be
sure to set the baud rate of its host processor to the same baud rate,
otherwise it will not be possible for the host processor to establish
communications with the modem.
4 Setup and Test
Setting Up and Checking the Modems
4-16
BENTHOS
Setting up the ATM-875/885 and ATM-875R/885R
Modems
The ATM-875/885 and ATM-875R/885R
Acoustic Telemetry Modems are typically set
up as remote modems.
8
1
2
Power and Serial Interface Connections.
6
3
The power and serial interface connections
are made with a single POWER/SERIAL
4
5
connector located on the bottom end cap of
the modem. Either an RS-232 or an RS-422
serial interface connection can be made.
Figure 4-8 ATM-875/885
When connecting an ATM-875/885 or an
and ATM-875R/885R
ATM-875R/885R to a PC or to an instrument,
POWER/SERIAL
refer to Figure 4-8 for the POWER/SERIAL
Connector
connector pin orientation, and to Table 4-3 for
the pinout information. The POWER/SERIAL connector is a 9-pin Impulse
MBH-9-MP bulkhead connector that requires an Impulse MIL-9-FS mating
connector pigtail.
7
9
Table 4-3 ATM-875/ATM-875R POWER/SERIAL Connector Pinouts
User’s Manual
FUNCTION
SIGNAL
DIRECTION
PIN
LABEL
1
Xmit/Preamp
Power
2
DSP/Rcvr
Power
3
GND
Common Ground
4
TX(+)
RS-422 Transmit(+)
Modem to Host
5
DE
Device Enable (See NOTE below.)
Modem to Host
6
RTS/RX(+)
Request to Send/RS-422 Receive(+)
Modem to Host/
Host to Modem
7
TX(-)
RS-422 Transmit(-)
Modem to Host
8
RXD
RS-232 Receive
Host to Modem
9
TXD/RX(-)
RS-232 Transmit/RS-422 Receive(-)
Modem to Host/
Host to Modem
Transmitter/Preamp Power
(21–48 VDC)
To Modem
DSP/Receiver Power (4–9 VDC)
To Modem
January 2001
Acoustic Telemetry Modems
4-17
NOTE The Device Enable output is a logic low when the modem is in Online
Mode. Refer to "Device Enable" on page 6-5 for more information. Refer
also to Section 2, "Specifications," for the electrical specifications.
To connect the modem to a power supply, and to an instrument using the
RS-232 or RS-422 interface, refer to the pinout information provided in Table
4-3 on page 4-16 for the POWER/SERIAL connector, and the connector
information provided with the instrument. A mating connector pigtail is
provided for this purpose. When the modem is switched on, the internal
batteries power the modem only if external power is not applied.
To connect an ATM-875/885 or ATM-875R/885R to a power supply and to a
PC, perform the steps listed below.
1. Connect the connector pigtail to the POWER/SERIAL connector.
2. Refer to Table 4-4 and connect the conductors listed to an available
serial COM port on the PC. The table shows the connections for a DB-9
serial port connector typically used on laptop computers.
3. Refer to Table 4-3 and connect the DC power and ground conductors to
the DC power source if one is used.
Table 4-4 ATM-875/885 and ATM-875R/885R POWER/SERIAL
Connector to DB-9 Pin-to-Pin Connections
ATM-875/885, ATM-875R/885R
POWER/SERIAL
CONNECTOR
PIN
LABEL
3
GND
6
HOST PC DB-9
CONNECTOR
SIGNAL
DIRECTION
FUNCTION
PIN
LABEL
FUNCTION
Common Ground
5
GND
Ground
RTS
Request to
Send
Modem to Host
8
CTS
Clear to Send
8
RXD
Receive
Host to Modem
3
TXD
Transmit
9
TXD
Transmit
Modem to Host
2
RXD
Receive
Transducer Connections. A transducer cable is supplied with an
ATM-875R/885R Acoustic Telemetry Modem. Connect the transducer cable
to the TRANSDUCER connector on the modem and to the bulkhead
connector on the remote transducer.
4 Setup and Test
Setting Up and Checking the Modems
4-18
BENTHOS
Setting up the ATM-877/887 and ATM-877R/887R
Modems
The ATM-877/887 and ATM-877R/887R
Acoustic Telemetry Modems are typically set
up as remote modems.
Power and Serial Interface Connections.
The power and serial interface connections
are made with separate POWER and SERIAL
connectors located on the bottom end cap of
the modem. Only an RS-232 serial interface
connection is available. When connecting an
ATM-877/887 or an ATM-877R/887R to a PC
or to an instrument, refer to Figure 4-9 for the
POWER and SERIAL connector pin
orientations, and to Table 4-5 and Table 4-6
for the connector pinout information. The
POWER connector is a 3-pin Impulse
XSK-3-BCL bulkhead connector that requires
an Impulse RMK-3-FS mating connector
pigtail, and the SERIAL connector is a 6-pin
XSK-6-BCL bulkhead connector that requires
an RMK-6-FS mating connector pigtail.
1
2
3
POWER CONNECTOR
2
1
3
6
5
4
SERIAL CONNECTOR
Figure 4-9 ATM-877/887
and ATM-877R/887R
POWER and SERIAL
Connectors
Table 4-5 ATM-877/887 and ATM-877R/887R SERIAL
Connector Pinouts
FUNCTION
SIGNAL
DIRECTION
PIN
LABEL
1
GND
Common Ground
2
TXD
Transmit
Modem to Host
3
RTS
Request to Send
Modem to Host
4
RXD
Receive
Host to Modem
5
CTS
No Connection
6
DE
Device Enable (See NOTE below.)
—
Modem to Host
NOTE The Device Enable output is a logic low when the modem is in Online
Mode. Refer to "Device Enable" on page 6-5 for more information. Refer
also to Section 2, "Specifications," for the electrical specifications.
User’s Manual
January 2001
Acoustic Telemetry Modems
4-19
Table 4-6 ATM-877/887 and ATM-877R/887R POWER
Connector Pinouts
PIN
FUNCTION
1
Transmitter/Preamp Power (21–48 VDC)
2
Ground
3
DSP/Receiver Power (4–9 VDC)
To connect the modem to a power supply, and to an instrument using the
RS-232 interface, refer to the pinout information provided in Table 4-5 on
page 4-18 and Table 4-6 for the SERIAL and POWER connectors, and the
connector information provided with the instrument. Mating connector pigtails
are provided for this purpose. When the modem is switched on, the internal
batteries power the modem only if external power is not applied.
To connect an ATM-877/887 or ATM-877R/887R to a power supply and to a
PC, perform the steps listed below.
1. Connect the connector pigtails to the SERIAL and POWER connectors.
2. Refer to Table 4-7 and connect the conductors listed to an available
serial COM port on the PC. The table shows the connections for a DB-9
serial port connector typically used on laptop computers.
3. Refer to Table 4-6 and connect the DC power and ground conductors to
the DC power source if one is used.
Table 4-7 ATM-877/887 and ATM-877R/887R SERIAL Connector
to DB-9 Pin-to-Pin Connections
ATM-877/887, ATM-877R/887R
SERIAL CONNECTOR
PIN
LABEL
1
GND
2
SIGNAL
DIRECTION
FUNCTION
HOST PC DB-9
CONNECTOR
PIN
LABEL
FUNCTION
Common Ground
5
GND
Ground
TXD
Transmit
Modem to Host
2
RXD
Receive
3
RTS
Request to
Send
Modem to Host
8
CTS
Clear to Send
4
RXD
Receive
Host to Modem
3
TXD
Transmit
Transducer Connections. A transducer cable is supplied with an
ATM-877R/887R Acoustic Telemetry Modem. Connect the transducer cable
to the TRANSDUCER connector on the modem and to the bulkhead
connector on the remote transducer.
4 Setup and Test
Setting Up and Checking the Modems
4-20
BENTHOS
Setting up the ATM-875PCB/885PCB and
ATM-875RPCB/885RPCB Board Sets
The ATM-875PCB/885PCB and ATM-875RPCB/885RPCB Board Sets are
set up as either local or remote modems in OEM applications.
Power and Serial Interface Connections. The power and serial interface
connections, RS-232 or RS-422, are made with separate connectors on the
boards of the ATM-875PCB/885PCB and ATM-875RPCB/885RPCB Board
Sets. When connecting an ATM-875PCB/885PCB to a PC or to an
instrument, power is connected to J4 of the Transmitter Board. For an
ATM-875RPCB/885RPCB, power is connected to J4 of the Interface Board.
For both modems, the serial interface connection is made to J2 of the DSP
Board. The location of the J4 and J2 connectors is shown in Drawing
B875-08659 for an ATM-875PCB/885PCB and in Drawing B875-08693 for
an ATM-875RPCB/885RPCB. The drawings are included in Section 8,
"Drawings." Refer to Table 4-8 and Table 4-9 for the pinout information.
Table 4-8 ATM-875PCB/885PCB and ATM-875RPCB/885RPCB DSP
Board Serial Connector J2 Pinouts
PIN
LABEL
1
SIGNAL
DIRECTION
No Connection
2
TXD/RX(-)
3
RXD
4
5
FUNCTION
RS-232 Transmit/RS-422 Receive(-)
Modem to Host/
Host to Modem
RS-232 Receive
Host to Modem
No Connection
RTS/RX(+)
6
Request to Send/RS-422 Receive(+)
Modem to Host/
Host to Modem
Keyed Pin
7
GND
Common Ground
8
TX(+)
RS-422 Transmit(+)
Modem to Host
9
DE
Device Enable (See NOTE below.)
Modem to Host
10
TX(-)
RS-422 Transmit(-)
Modem to Host
NOTE The Device Enable output is a logic low when the modem is in Online
Mode. Refer to "Device Enable" on page 6-5 for more information. Refer
also to Section 2, "Specifications," for the electrical specifications.
User’s Manual
January 2001
Acoustic Telemetry Modems
4-21
Table 4-9 ATM-875PCB/885PCB Transmitter Board and
ATM-875RPCB/885RPCB Interface Board Power Connector J4 Pinouts
PIN
FUNCTION
1
DSP/Receiver Power (4–9 VDC)
2
Ground
3
Transmitter/Preamp Power (21–48 VDC)
4
No Connection
5
No Connection
To connect the modem to a power supply, and to an instrument using the
RS-232 or RS-422 interface, refer to the pinout information provided in Table
4-8 on page 4-20 for the DSP Board Serial connector J2 and Table 4-9 for the
Transmitter or Interface Board Power connector J4, and the connector
information provided with the instrument.
To connect an ATM-875PCB/885PCB or ATM-875RPCB/885RPCB to a
power supply and to a PC, perform the steps listed below.
1. Refer to Table 4-10 and connect the conductors listed to an available
serial COM port on the PC. The table shows the connections for a DB-9
serial port connector typically used on laptop computers.
2. Refer to Table 4-9 and connect the DC power and ground conductors to
the DC power source.
Table 4-10 ATM-875PCB/885PCB and ATM-875RPCB/885RPCB DSP
Board Serial Connector J2 to DB-9 Pin-to-Pin Connections
ATM-875PCB/885PCB,
ATM-875RPCB/885RPCB
DSP BOARD SERIAL
CONNECTOR J2
4 Setup and Test
PIN
LABEL
2
TXD
Transmit
3
RXD
5
7
HOST PC DB-9
CONNECTOR
SIGNAL
DIRECTION
FUNCTION
PIN
LABEL
FUNCTION
Modem to Host
2
RXD
Receive
Receive
Host to Modem
3
TXD
Transmit
RTS
Request to
Send
Modem to Host
8
CTS
Clear to Send
GND
Common Ground
5
GND
Ground
Setting Up and Checking the Modems
4-22
BENTHOS
ATM-875PCB/885PCB Transducer Connections. The ATM-875PCB/
885PCB includes an omnidirectional transducer and connector. Connect the
transducer to J2 of the Transmitter Board. Table 4-11 shows the pinout
information for J2 should a cable of a different length be required.
Table 4-11 ATM-875PCB/885PCB Transmitter Board Transducer
Connector J2 Pinouts
PIN
FUNCTION
1
Transducer (+)
2
No Connection
3
Transducer (-)
ATM-875RPCB/885RPCB Transducer Connections. The ATM-875RPCB/
885RPCB connects to any of the remote transducers—an AT-408
Omnidirectional Transducer, an AT-409 Line Array Transducer, or an AT-421
Directional Transducer. A bulkhead connector wiring assembly is supplied for
connecting to the ATM-875RPCB/885RPCB. The bulkhead connector is a
Subcon MCBH8F, which connects to the transducer cable supplied with any
of the remote transducers. Refer to Table 4-12 and connect the bulkhead
connector wiring assembly to J7 on the Interface Board and to J7 on the DSP
Board. Connect the remote transducer cable to the bulkhead connector
wiring assembly and to the bulkhead connector on the remote transducer.
Table 4-12 ATM-875RPCB/885RPCB Bulkhead Connector Wiring
User’s Manual
INTERFACE
BOARD J7
DSP
BOARD J7
PIN
PIN
1
—
Transmit Power (+)
8
2
—
Transmit Power (-)
7
3
—
Transmit On/Off
6
4
—
Transmit Signal
5
5
—
Power Control
4
6
—
Analog Ground
3
—
1
Receiver input (RG 174 shield)
2
—
2
Receiver Input (RG 174
conductor)
1
FUNCTION
BULKHEAD
CONNECTOR
WIRING
ASSEMBLY
January 2001
Acoustic Telemetry Modems
4-23
Setting up the ATM-870/880 Module
The ATM-870/880 Module is set up as either a
local or a remote modem.
8
1
Power and Serial Interface Connections.
2
9
7
The power and serial interface connections
6
3
are made with a single POWER/SERIAL
connector located on the side of the modem.
4
5
Either an RS-232 or an RS-422 serial interface
connection can be made. When connecting an
ATM-870/880 to a PC or to an instrument,
Figure 4-10 ATM-870/880
refer to Figure 4-10 for the POWER/SERIAL
POWER/SERIAL
connector pin orientation, and to Table 4-13
Connector
for the pinout information. The POWER/
SERIAL connector is a 9-pin Impulse MBH-9-MP bulkhead connector that
requires an Impulse MIL-9-FS mating connector pigtail.
Table 4-13 ATM-870/880 POWER/SERIAL Connector Pinouts
SIGNAL
DIRECTION
PIN
LABEL
FUNCTION
1
Xmit/Preamp
Power
2
DSP/Rcvr
Power
3
GND
Common Ground
4
TX(+)
RS-422 Transmit(+)
Modem to Host
5
DE
Device Enable (See NOTE below.)
Modem to Host
6
RTS/RX(+)
Request to Send/RS-422 Receive(+)
Modem to Host/
Host to Modem
7
TX(-)
RS-422 Transmit(-)
Modem to Host
8
RXD
RS-232 Receive
Host to Modem
9
TXD/RX(-)
RS-232 Transmit/RS-422 Receive(-)
Modem to Host/
Host to Modem
Transmitter/Preamp Power
(21–48 VDC)
To Modem
DSP/Receiver Power (4–9 VDC)
To Modem
NOTE The Device Enable output is a logic low when the modem is in Online
Mode. Refer to "Device Enable" on page 6-5 for more information. Refer
also to Section 2, "Specifications," for the electrical specifications.
4 Setup and Test
Setting Up and Checking the Modems
4-24
BENTHOS
To connect the modem to a power supply, and to an instrument using the
RS-232 or RS-422 interface, refer to the pinout information provided in Table
4-13 on page 4-23 for the POWER/SERIAL connector, and the connector
information provided with the instrument. A mating connector pigtail is
provided for this purpose.
To connect an ATM-870/880 to a power supply and to a PC, perform the
steps listed below.
1. Connect the connector pigtail to the POWER/SERIAL connector.
2. Refer to Table 4-14 and connect the conductors listed to an available
serial COM port on the PC. The table shows the connections for a DB-9
serial port connector typically used on laptop computers.
3. Refer to Table 4-13 and connect the DC power and ground conductors
to the DC power source if one is used.
Table 4-14 ATM-870/880 POWER/SERIAL Connector to DB-9
Pin-to-Pin Connections
ATM-870/880
POWER/SERIAL
CONNECTOR
PIN
LABEL
3
GND
6
HOST PC DB-9
CONNECTOR
SIGNAL
DIRECTION
FUNCTION
PIN
LABEL
FUNCTION
Common Ground
5
GND
Ground
RTS
Request to
Send
Modem to Host
8
CTS
Clear to Send
8
RXD
Receive
Host to Modem
3
TXD
Transmit
9
TXD
Transmit
Modem to Host
2
RXD
Receive
Transducer Connections. A transducer cable is supplied with an
ATM-870/880 Module. Connect the transducer cable to the TRANSDUCER
connector on the modem and to the bulkhead connector on the remote
transducer.
User’s Manual
January 2001
Acoustic Telemetry Modems
4-25
Setting up the Remote Host Processor
If a PC is to be used as the remote host processor, it must be set up to run a
terminal program, such as ProComm, Windows Terminal, or Windows
Hyperterminal. Or for a convenient user friendly means of configuring and
operating the modems, Telesonar PC can be installed. For instructions on
how to install and start Telesonar PC, refer to "Installing and Starting
Telesonar PC" on page 5-1. In addition, the serial port used to connect to the
local modem must be correctly configured. Setting up the PC is the same as
that of the PC for the local modem. Refer to "Setting up the Local Host
Processor" on page 4-12 for instructions.
If an instrument is to be used as the remote host processor, refer to the
documentation for the instrument for the setup information.
Checking the Acoustic Link
With the ATM-871/881 Deck Box or the ATM-871R/881R Rack Mount Deck
Box and its PC set up as the local modem and its host processor, and the
ATM-875/885 Acoustic Telemetry Modem or other subsea modem set up as
the remote modem, the acoustic link between the two modems can be
checked in air.
NOTE If a PC has not been connected to the ATM-871/881 Deck Box, the
keypad on the deck box can be used to enter the commands below.
However, with or without a PC connected, the REMOTE/TERMINAL switch
must be switched to TERMINAL to use the keypad.
NOTE The modem commands can be entered directly from the keyboard
using the Terminal Mode feature of Telesonar PC. For instructions on how
to use Terminal Mode, refer to Figure on page 5-49.
Perform the steps listed below to test the acoustic link between the local and
remote modems.
1. Place the deck box’s remote transducer within a few feet of the remote
modem’s transducer. Be sure no obstacles are between them.
2. Turn on the remote modem by pushing in the switch on the side of the
end cap.
4 Setup and Test
Setting Up and Checking the Modems
4-26
BENTHOS
NOTE If the modem is being turned on for the first time, the acoustic
address is 0. In addition, both the local and remote modems can have the
same address.
3. Turn on the PC and run the terminal program, or Telesonar PC in
Terminal Mode.
4. Switch the AC ON/OFF switch on the front panel of the deck box to ON,
or switch on the DC power supply.
The banner message followed by the command prompt (>) is displayed
on the ATM-871/881 Deck Box display if the deck box is being used as
the local modem and the REMOTE/TERMINAL switch is switched to
TERMINAL—or on the monitor of the PC if a PC is being used as the host
processor with a terminal program and the REMOTE/TERMINAL switch
is switched to REMOTE. The message includes the frequency band
(LF, MF, HF, or Nonstandard) the firmware version, and the command
prompt as shown in the following example:
Benthos ATM-87X
MF Frequency Band
Acoustic Modem Version 2.4
>
5. Type AT, and then press Enter.
The message "OK" and the command prompt are displayed.
NOTE When checking the acoustic link in air, should the link appear not to
be working, vary the separation of the transducers, as performance may
depend on the type of material, such as a hard table top or rug, in the
vicinity of the transducers. In addition, it may be required to change the
transmit power level, usually to a lower level. The transmit power level is
set by using the Remote Power command (AT$pn,m). For instructions on
how to use the Remote Power command, refer to "Remote Power AT$Pn,m"
on page 6-27.
6. Enter the Acoustic Link Test command (ATXn), where n is the remote
modem’s acoustic address, and then press Enter.
User’s Manual
January 2001
Acoustic Telemetry Modems
4-27
The remote modem transmits a 512-byte predetermined message which
is displayed. In addition, the local modem determines and displays the
following information about the received message:
ERR:
Number of bit errors in the message.
SNR:
Signal to noise ratio in dB of the received
signal.
AGC:
Automatic gain control setting resulting
from the received signal.
SPD:
Relative speed between the modems.
Refer to "Acoustic Link Test ATXn" on page 6-25 for more information on
how to use the Acoustic Link Test command.
7. Type AT$Sn, where n is the remote modem’s acoustic address, and
then press Enter.
The remote modem transmits its S Register settings, and the settings are
displayed.
NOTE Refer to Section 6, "Modem Commands and Operating Parameters,"
for detailed information on the S Register settings and their meanings.
4 Setup and Test
Setting Up and Checking the Modems
4-28
User’s Manual
BENTHOS
January 2001
Acoustic Telemetry Modems
5
5-1
Telesonar PC
Telesonar PC is a graphical users interface (GUI) software program that
provides a user friendly means of setting up and operating the ATM-870
Series and ATM-880 Series Acoustic Telemetry Modems without having to
enter specific commands or change S Register settings.
Once the local and remote modems are connected to host processors,
Telesonar PC can be used to operate the modems immediately. This section
provides instructions on how to install and start Telesonar PC; describes the
features of the Main window; provides instructions on how to calculate battery
capacity requirements, configure the modems, and operate the modems
once they are deployed; and reviews the various diagnostic tools available for
evaluating modem performance.
Installing and Starting Telesonar PC
Telesonar PC is installed using the Telesonar PC Setup program, which is
started by choosing Run in the Start menu. After installation, Telesonar PC
can be started. Instructions on how to install, start, check the version number,
exit from, and uninstall Telesonar PC are provided below.
Installing Telesonar PC
To install Telesonar PC:
1. Exit all programs and turn off any virus protection or screen saver
software.
2. Insert the Telesonar PC for Windows CD into the CD-ROM drive.
3. Select Start ➤ Run.
The Run dialog box opens:
5 Telesonar PC
Installing and Starting Telesonar PC
5-2
BENTHOS
4. Enter d:setup in the Open text box, where "d" is the drive letter of the
CD-ROM drive, and then click OK.
After the Setup Wizard is prepared, the Welcome dialog box opens:
5. Click Next.
The User Information dialog box opens:
6. Enter the required information, and then click Next.
The Choose Directory dialog box opens:
User’s Manual
January 2001
Acoustic Telemetry Modems
5-3
7. Click Next to accept the specified destination directory as the directory
in which Telesonar PC will be installed. Or instead, click Browse and
follow the instructions to select a different directory, and then click Next.
The Select Program Folder dialog box opens:
8. Click Next to accept Telesonar PC 1.6 as the name of the program
folder in which the program icons will be added. Or instead, select an
existing program folder from the list or type a new folder name, and then
click Next.
The Start Copying Files dialog box opens:
5 Telesonar PC
Installing and Starting Telesonar PC
5-4
BENTHOS
9. Click Next in the Start Copying Files dialog box.
The Telesonar PC program files are copied to the specified destination
directory, and then the Setup Finished dialog box opens:
10. Click Finish in the Setup Finished dialog box to exit from the setup
program.
Telesonar PC is installed and ready to be started.
Starting Telesonar PC
To start Telesonar PC:
1. Select Start ➤ Programs ➤ Telesonar PC 1.6.
The Modem applications menu opens:
User’s Manual
January 2001
Acoustic Telemetry Modems
5-5
2. Choose Modem.
Telesonar PC starts and the Main window opens:
In addition, the Check Modem Connection dialog box opens if no modem
is connected.
NOTE If a modem has been connected as described in "Setting Up and
Checking the Modems" on page 4-10 and the Check Modem Connection
dialog box appears, the serial communications port may not be configured
correctly. Click Commport in the Check Modem Connection dialog
box and refer to "Selecting and Configuring the Serial Communications
Port—Remote or Local Modem" on page 5-17 to configure the port.
Telesonar PC can also be started by clicking the Telesonar PC icon (
the Windows desktop.
5 Telesonar PC
) on
Installing and Starting Telesonar PC
5-6
BENTHOS
Checking the Telesonar PC Version Number
To check the Telesonar PC version number, choose Help ➤ About. The
About Telesonar PC window opens with the version number displayed.
Exiting Telesonar PC
To exit Telesonar PC:
1. Select File from the main menu bar in the Main window.
The File menu opens.
2. Choose Exit.
Uninstalling Telesonar PC
To uninstall Telesonar PC:
1. Exit from Telesonar PC.
2. Select Start ➤ Settings ➤ Control Panel to open the Control Panel.
3. Choose Add/Remove Programs in the Control Panel.
The Add/Remove Programs Properties dialog box opens:
4. Select Telesonar PC 1.6, and then Click Add/Remove.
5. Click Yes when asked to confirm the removal of the program and all of
its components.
Telesonar PC is uninstalled.
User’s Manual
January 2001
Acoustic Telemetry Modems
5-7
The Main Window
The Main window, which is shown in Figure 5-1 as it appears with a modem
connected to the PC, provides access to all of the modem commands and
status displays for the local and remote modems. The Main window opens
when Telesonar PC is started. All ten of the available status displays are
shown in the Main window in Figure 5-1; however, any one or more of the
displays can be hidden at any time, and they can be dragged anywhere on
the screen. Refer to "Status Displays" on page 5-10 for instructions on how
to show and hide the status displays. The Tool bar and the Status bar can
also be hidden. The Main window also contains standard Windows features,
such as the Title bar, the Menu bar, and the Maximize, Minimize, and Close
buttons.
Title bar
Cancel button
Menu bar
Maximize button
Tool bar
Status displays (10)
Status bar
Outgoing Data display
Minimize button
Incoming Data display
Figure 5-1 The Main Window
5 Telesonar PC
The Main Window
5-8
BENTHOS
Menu Bar
The Menu bar provides access to all of the modem commands through
pull-down menus. To open a menu from the Menu bar, place the mouse
pointer on the menu name to select it, and then click the left mouse button.
The menu opens as shown in Figure 5-2, which shows the open Acoustic
Comm menu. To choose an item from an open menu, place the mouse
pointer on the item to select it and then click the left mouse button. Although
most of the items in a menu are commands or options, some may be the
names of submenus, in which case a triangle ( ) follows the item. Selecting
the item opens the submenu.
Figure 5-2 The Open Acoustic Comm Menu
Some menu items, when chosen, open a window or a dialog box, which may
include many of the standard Windows features: check boxes, option
buttons, scroll bars, command buttons, and text boxes. Some menu items are
options that can be switched on or off. When switched on, a check mark
( ) precedes the item. To turn off an option that is switched on, place the
mouse pointer on the item and then click the left mouse button. Do the same
to turn on an option that is off. Some menu items may be dimmed, such as
the Hangup command in the Acoustic Comm menu shown in Figure 5-2. This
signifies the item cannot be chosen at the current time. When the item is
available, it is displayed normally.
NOTE To close a menu without choosing a menu item, click anywhere
outside the menu.
User’s Manual
January 2001
Acoustic Telemetry Modems
5-9
Tool Bar
The Tool bar, which is located just below the menu bar, is a convenient way
of choosing some commonly used modem commands. These commands are
represented by buttons, as shown in Figure 5-3. To choose a command using
a button on the Tool bar, place the mouse pointer over the button and click
the left mouse button.
To provide more display area on the Main window, the Tool bar can be
hidden. To hide the Tool bar, select View from the menu bar, and then choose
Show Toolbar. Repeat the procedure to show a hidden Tool bar.
Tests the acoustic
link with the
addressed remote
modem
Causes all remote
modems to go into
the lowpower state
Opens the Display
Setup dialog box
Goes online
with the addressed
remote modem
Obtains the range
to the addressed
remote modem
Figure 5-3 The Tool Bar
Status Bar
The Status bar is located at the bottom of the Main window as shown in
Figure 5-1 on page 5-7. The Status bar provides information about the local
modem, including whether the modem is online with another modem,
whether Capture is on or off, and what the selected frequency is for the local
modem. The Status bar also shows the file in which data are saved when
Capture is on.
To provide more display area on the Main window, the Status bar can be
hidden. To hide the Status bar, select View from the menu bar, and then
choose Show Status Bar. Repeat the procedure to show a hidden Status bar.
5 Telesonar PC
The Main Window
5-10
BENTHOS
Status Displays
There are a total of ten status displays, each of which provide current status
information about the local or remote modems. Some of the status displays,
such as the Remote ID, Power Level and Doppler Correction status displays
can also be used to send commands to a remote modem. All ten status
displays are shown in the Main window in Figure 5-1 on page 5-7, and are
described in more detail below. Any or all of the displays can be hidden. To
hide or show a display, select View from the menu bar, and then choose the
display. A check mark ( ) next to the display name indicates it is shown.
Remote ID. Displays and selects the
address of the remote modem to which
commands and data can be sent. Any
address from 000 to 239 can be selected by
clicking the down arrow in the Remote ID
drop-down list box. In addition, the status of
the remote modem can be obtained by
clicking Get Remote Status.
Acoustic Baud Rate. Displays and selects
the acoustic baud rate at which the local
modem will communicate with the
addressed remote modem. The acoustic
baud rate is selected with the down arrow.
Data Quality. Displays the relative quality
of the data received over the acoustic link,
from low to high.
Signal and Noise Level. Displays the
relative levels of the received signal and
noise, from low to high.
Remote Datalogger. Indicates whether the
addressed remote modem is in Datalogger
mode, and displays the relative amount of
data stored in its data logger memory, from
empty to full.
User’s Manual
January 2001
Acoustic Telemetry Modems
5-11
Power Level. Displays and selects the
transmit power level of the local and
addressed remote modems. To display the
power level of the remote modem, click Get
Remote Status in the Remote ID status
display. The power levels of the modems
are selected with the down arrows in the
Local and Remote drop-down list boxes.
Doppler Correction. Indicates whether
doppler correction is enabled for the local
and addressed remote modems. To check
the remote modem, click Get Remote
Status in the Remote ID status display. In
addition, doppler correction can be enabled
or disabled by checking or clearing the
Local and Remote check boxes.
Local and Remote Battery Voltages.
Displays the voltages of the local and
addressed remote modem DSP/receiver
and transmitter/preamp battery packs. To
display the battery voltages of the remote
modem, click Get Remote Status in the
Remote ID status display
Range. Displays the range between the
local and addressed modem’s transducers.
To select the units of range and the sound
velocity used in the calculation of range,
select Configuration from the menu bar, and
then choose Range Option. To display
range, click the Get Range button on the
Tool bar.
Speed. Displays the relative speed in knots
between the local and remote modems.
Opening indicates the modems are moving
father apart, and closing indicates the
modems are moving closer together.
5 Telesonar PC
The Main Window
5-12
BENTHOS
Data Display
The data display comprises an Incoming Data display and an Outgoing Data
display, as shown in Figure 5-1 on page 5-7. The Incoming Data display
displays data and responses that are input from the local modem over the
serial interface or received from a remote modem over the acoustic link. The
Outgoing Data display displays data or commands that are output to the local
modem over the serial interface or transmitted to a remote modem over the
acoustic link. The Incoming and Outgoing Data displays can be combined.
To set up the data display:
1. Do one of the following:
• Select File ➤ Display Setup.
• Click the Display button on the Tool bar.
The Display Setup dialog box shown in Figure 5-4 opens.
Figure 5-4 The Display Setup Dialog Box
2. In the Screen Option area of the Display Setup dialog box, do one of the
following:
• Select the Single Screen option to display both data and commands
sent to a remote modem in a single display.
• Select the Split Screen option to show both the Outgoing Data display
and the Incoming Data display.
User’s Manual
January 2001
Acoustic Telemetry Modems
5-13
3. Check or clear the Display Status Information check box.
Checking the Display Status Information check box displays all outgoing
data and commands and incoming data and responses and is typically
used for diagnostic purposes only.
4. Check or clear the Append Line Feed check box.
Checking the Append Line Feed check box causes the local modem to
append a line feed character after a carriage return character is received
from a remote modem over the acoustic link, and to output a line feed
character after transmitting a carriage return character to a remote
modem over the acoustic link.
5. Check or clear the Check Remote Modem Status at Startup check box.
Checking the Check Remote Modem Status at Startup check box opens
the Remote Modem Status dialog box when starting Telesonar PC.
6. Click Clear Display to clear all displayed data and commands.
Clicking Clear Display clears the displays immediately.
7. Click OK to save the new display settings and close the Display Setup
dialog box.
Battery Pack Capacity Calculations
Telesonar PC provides a convenient tool for calculating the required
transmitter/preamp and DSP/receiver battery pack capacities based on the
length of deployment and the amount of data to be transmitted. Two options
are provided: Option 1 calculates the required battery pack capacities for a
relatively short deployment and where a relatively large amount of data are
to be transmitted; and Option 2, for a relatively long deployment and where a
relatively small amount of data are to be transmitted periodically. Both options
take into account the battery chemistry, either alkaline or lithium, and the
expected ambient temperature.
NOTE The battery pack capacity calculations currently apply to the
ATM-870 Series Acoustic Telemetry Modems only.
5 Telesonar PC
Battery Pack Capacity Calculations
5-14
BENTHOS
Option 1: Transmitting Relatively Large Data
Files—Relatively Short Deployment
Transmitting large data files over a short period quickly uses a relatively large
portion of the transmitter/preamp battery pack capacity and a relatively small
portion of the DSP/receiver battery pack capacity.
To calculate the battery pack capacities required to transmit relatively large
data files over a relatively short period:
1. Choose Predeployment ➤ Battery Capacity.
The Battery Calculation dialog box shown in Figure 5-5 opens.
Figure 5-5 The Battery Calculation Dialog Box
2. Click Option 1.
The Battery Calculation Option 1 dialog box shown in Figure 5-6 opens.
Figure 5-6 The Battery Calculation Option 1 Dialog Box
User’s Manual
January 2001
Acoustic Telemetry Modems
5-15
3. Select the acoustic baud rate from the Bit rate drop-down list box.
4. Enter the expected length of deployment in days in the Length of
deployment text box.
5. Enter the total expected number of bytes that will be transmitted in the
Number of bytes to be uploaded text box.
6. Select the Alkaline or the Lithium Battery chemistry option.
7. Select the expected ambient temperature in degrees Celsius using the
Temperature slider.
8. Click Calculate to calculate and display the required battery capacities
and close the Battery Calculation Option 1 dialog box.
The Battery Calculation Output window opens with the battery capacity
requirements for the transmitter/preamp and DSP/receiver battery packs
displayed:
Option 2: Transmitting Relatively Small Data
Files—Relatively Long Deployment
Transmitting small data files periodically over a long period uses a relatively
large portion of the DSP/receiver battery pack capacity and a relatively small
portion of the transmitter/preamp battery pack capacity.
To calculate the battery pack capacities required to transmit relatively small
data files over a relatively long period:
1. Choose Predeployment ➤ Battery Capacity.
The Battery Calculations dialog box shown in Figure 5-5 on page 5-14
opens.
2. Click Option 2.
The Battery Calculation Option 2 dialog box shown in Figure 5-7 opens.
3. Select the acoustic baud rate from the Bit rate drop-down list box.
4. Enter the expected length of deployment in days in the Length of
deployment text box.
5 Telesonar PC
Battery Pack Capacity Calculations
5-16
BENTHOS
Figure 5-7 The Battery Calculation Option 2 Dialog Box
5. Enter the expected number of bytes that will be transmitted for each
message in the Number of bytes per message text box.
6. Select the time interval in minutes between transmissions in the Interval
that the message is sent text box.
7. Select the Alkaline or the Lithium Battery chemistry option.
8. Select the expected ambient temperature in degrees Celsius using the
Temperature slider.
9. Click Calculate to calculate and display the required battery capacities
and close the Battery Calculation Option 2 dialog box.
The Battery Calculation Output window opens with the battery capacity
requirements for the transmitter/preamp and DSP/receiver battery packs
displayed:
User’s Manual
January 2001
Acoustic Telemetry Modems
5-17
Configuring the Modems
To configure an ATM-870 Series or ATM-880 Series Acoustic Telemetry
Modem, the modem must first be connected to an available COM port on a
PC. Refer to "Setting Up and Checking the Modems" on page 4-10 for
instructions on how to connect the modem to a PC.
Selecting and Configuring the Serial
Communications Port—Remote or Local Modem
The default COM port for Telesonar PC is COM1. The default settings are
RS-232 serial interface, 9600 bits/sec baud rate and no handshaking. Any
changes to these settings take effect after the modem is powered down and
then powered up.
To select and configure the serial communications port:
1. Connect the remote or local modem to the PC.
2. Choose Configuration ➤ PC Communication.
The PC Communications dialog box shown in Figure 5-8 opens.
Figure 5-8 The PC Communications Dialog Box
5 Telesonar PC
Configuring the Modems
5-18
BENTHOS
3. In the Baud Rate area of the PC Communications dialog box, select the
baud rate—9600, 3800 or 2400 bits/sec.
4. In the Handshaking area select the required handshaking—Hardware
(RTS/CTS), Software (Xon/Xoff) or None.
WARNING If the serial interface is changed from RS-232 to RS-422, an
RS-422 serial interface connection to the modem is required to switch back
to RS-232. The opposite applies after changing from RS-422 to RS-232.
5. In the Driver area select the serial interface—RS-232 or RS-422.
6. In the Commport area select the COM port—Comm1, Comm2, Comm3,
or Comm4.
7. Check the 7 bit even-parity for online mode and remote buffer download
check box to enable even parity, or clear to disable.
8. Click OK to save the new selections and close the PC Communications
dialog box.
9. Power down and then power up the modem.
The changed settings take effect.
Selecting the Range Options
Telesonar PC calculates and displays the range from the local modem’s
transducer to the addressed remote modem’s transducer in units of
kilometers, meters, statute miles, or nautical miles. The range calculation is
based on the default value of the speed of sound in water of 1500 meters per
second. Both the units for range and the speed of sound in water can be
changed.
To change the units for range or the speed of sound in water, or both:
1. Choose Configuration ➤ Range Option.
The Range Options dialog box shown in Figure 5-9 opens.
User’s Manual
January 2001
Acoustic Telemetry Modems
5-19
Figure 5-9 The Range Options Dialog Box
2. Select the units for range in the Units drop-down list box.
3. Select the speed of sound in water in meters/sec to use in the range
calculations in the Sound Speed text box.
4. Click OK to save the new settings and close the Range Options dialog
box.
Configuring the Local Modem
To configure a local modem:
1. Connect the local modem to the PC.
2. Choose Configuration ➤ Local Modem.
The Local Modem Configuration dialog box shown in Figure 5-10 opens.
This dialog box is used to change the local modem’s operating
parameters, which are controlled by its S Register settings. For detailed
information on the S Registers, refer to Table 6-2 on page 6-68, which
lists all of the available S-Registers and the page references to where
detailed descriptions and available settings are provided.
NOTE When a setting in the Local Modem Configuration dialog box is
changed, a red dot appears next to the displayed setting or the displayed
setting turns red. The dot or displayed setting turns blue if the setting is
changed back to its original setting. The dot disappears or the displayed
setting turns back to black after clicking Apply or Save.
3. In the Local Modem Configuration dialog box, check the Doppler
Correction (S1) check box to enable doppler correction, or clear to
disable.
5 Telesonar PC
Configuring the Modems
5-20
BENTHOS
Figure 5-10 The Local Modem Configuration Dialog Box
4. Select the acoustic baud rate from the Acoustic Baud Rate (S4)
drop-down list box.
5. From the Test Packet Size (S12) drop-down list box, select the test
packet size that the modem will command a remote modem to send
when the Acoustic Link Test command (ATXn) is sent to that modem.
For information on the commands, refer to Table 6-1 on page 6-10, which
lists all of the available commands and the page references to where
detailed descriptions are provided.
6. In the Response Address (S14) drop-down list box, select the address
of the remote modem that the local modem will go online with when the
local modem is powered up or is awakened from its lowpower state.
This setting applies only when Operating Mode (S15) is set to Online.
7. Select the operating mode from the Operating Mode (S15) drop-down
list box.
Selecting Online for an operating mode places the modem into Online
mode after clicking Apply or Save in the Local Modem Configuration
dialog box and causes the modem to go online with the remote modem
whose address is the setting of Response Address (S14).
Selecting Command for an operating mode places the modem into
Command mode after clicking Apply or Save in the Local Modem
Configuration dialog box.
User’s Manual
January 2001
Acoustic Telemetry Modems
5-21
8. Select the modem address from the Modem ID (S18) drop-down list
box.
9. Select the transmit power level of the modem using the Transmit Power
Level (S6) scroll bar.
10. Select the Acoustic Response Time-out of the modem using the
Acoustic Resp. Timeout (S7) scroll bar.
11. Select the forwarding delay of the modem using the Forwarding Delay
(S8) scroll bar.
12. Click Apply to output the new settings to the modem, and then click Exit
to close the Local Modem Configuration dialog box. To close the dialog
box without changing the settings, click Exit only.
Clicking Apply also causes any red or blue dots to disappear and any
settings displayed in red or blue to turn black.
Advanced Local Modem Configuration Settings
The advanced local modem configuration settings determine the local
modem’s frequency and bandwidth. Typically, these settings are made at the
factory and do not require changing.
To change the local modem’s frequency and bandwidth:
1. Choose Configuration ➤ Local Modem.
The Local Modem Configuration dialog box shown in Figure 5-10 on
page 5-20 opens.
2. Click Advanced.
The Advanced Settings dialog box shown in Figure 5-11 opens.
Figure 5-11 The Advanced Settings Dialog Box
5 Telesonar PC
Configuring the Modems
5-22
BENTHOS
3. In the Bandwidth area of the Advanced Settings dialog box, select the
Full or Half option.
4. In the Frequency Band area, select the frequency band.
5. Click OK to save the new settings and close the Advanced Settings
dialog box.
The Cycle Power to Modem window opens:
6. Power down and then power up the modem.
The changed frequency and bandwidth settings take effect.
7. Click OK, and then click Exit in the Local Modem Configuration dialog
box.
Saving the Local Modem Setup Configuration to a File
Once the local modem has been configured, the setup configuration can be
saved to a file. Therefore, if the settings are later changed, they can easily be
recalled by loading the saved setup configuration from the file. Refer to
"Loading the Local Modem Setup Configuration from a File" on page 5-23 for
instructions on how to load a saved local modem setup configuration.
To save a local modem setup configuration to a file:
1. Choose Configuration ➤ Local Modem.
The Local Modem Configuration dialog box shown in Figure 5-10 on
page 5-20 opens.
2. If required, change the local modem configuration settings as described
in "Configuring the Local Modem" on page 5-19.
3. Click Save.
The Save As dialog box for configuration files shown in Figure 5-12
opens.
User’s Manual
January 2001
Acoustic Telemetry Modems
5-23
Figure 5-12 The Save As Dialog Box for Configuration Files
4. Click the arrow in the Save in drop-down list box and select the folder in
which to save the setup configuration file.
5. In the File name text box enter the name of the file in which to save the
setup configuration. The extension .cfg is added automatically.
6. Click Save to save the setup configuration to the specified file and close
the Save As dialog box.
7. In the Local Modem Configuration dialog box, click Exit to close the
dialog box.
Loading the Local Modem Setup Configuration from a File
Once a local modem setup configuration has been saved, it can be
loaded. Refer to "Saving the Local Modem Setup Configuration to a File" on
page 5-22 for instructions on how to save a local modem setup configuration.
To load a local modem setup configuration from a file:
1. Choose Configuration ➤ Local Modem.
The Local Modem Configuration dialog box shown in Figure 5-10 on
page 5-20 opens.
2. Click Open File.
The Open dialog box for configuration files shown in Figure 5-13 opens.
5 Telesonar PC
Configuring the Modems
5-24
BENTHOS
If the saved configuration file is not listed, it may be in a different folder
than the one shown. If this is the case, click the arrow in the Look in
drop-down list box and select the folder in which the file is located.
Figure 5-13 The Open Dialog Box for Configuration Files
3. Click the file name of the file to be opened, and then click Open.
The selected setup configuration is loaded and the Open dialog box
closes.
Settings in the Local Modem Configuration dialog box that have changed
are shown with a red dot next to the displayed setting, or the setting is
displayed in red.
4. Click Apply to output the new settings to the modem, and then click Exit
to close the Local Modem Configuration dialog box. To close the dialog
box without changing the settings, click Exit only.
Clicking Apply also causes any red dots to disappear and any settings
displayed in red to turn black.
User’s Manual
January 2001
Acoustic Telemetry Modems
5-25
Configuring the Remote Modem
To configure a remote modem:
1. Connect the remote modem to the PC.
2. Choose Predeployment ➤ Remote Setup.
The Remote Setup window opens:
3. Click OK to confirm that the remote modem is connected to the PC.
The Remote Modem Configuration dialog box shown in Figure 5-14
opens. This dialog box is used to change the remote modem’s operating
parameters, which are controlled by its S Register settings. For detailed
information on the S Registers, refer to Table 6-2 on page 6-68, which
lists all of the available S-Registers and the page references to where
detailed descriptions and available settings are provided.
NOTE When a setting in the Remote Modem Configuration dialog box is
changed, a red dot appears next to the displayed setting or the displayed
setting turns red. The dot or displayed setting turns blue if the setting is
changed back to its original setting. The dot disappears or the displayed
setting turns back to black after clicking Apply or Save.
4. In the Remote Modem Configuration dialog box, check the Doppler
Correction (S1) check box to enable doppler correction, or clear to
disable.
5. Check the Display received data statistics (S2) check box to enable the
received data statistics, or clear to disable.
When enabled, the modem will output the received data statistics every
time it receives a data packet.
5 Telesonar PC
Configuring the Modems
5-26
BENTHOS
Figure 5-14 The Remote Modem Configuration Dialog Box
6. Select the serial baud rate of the modem’s RS-232/422 serial interface
from the Serial Baud Rate (S3) drop-down list box.
7. Check the Echo check box only if a PC is being used as the host
processor and its terminal program does not have echo capability, and it
is desired to display all the characters entered from the keyboard. Clear
the check box otherwise.
8. Select the RS-232 option if the serial interface is RS-232, or the RS-422
option if the serial interface is RS-422.
9. Select the acoustic baud rate from the Acoustic Baud Rate (S4)
drop-down list box.
10. Select the RS-232 Driver/Flow Control from the RS-232 Driver Control
(S11) drop-down list box.
11. From the Test Packet Size (S12) drop-down list box, select the test
packet size that the modem will command another modem to send
when the Acoustic Link Test command (ATXn) is sent to that modem.
For information on the commands, refer to Table 6-1 on page 6-10, which
lists all of the available commands and the page references to where
detailed descriptions are provided.
User’s Manual
January 2001
Acoustic Telemetry Modems
5-27
12. Select the level of messaging the modem will provide from the Verbose
Level (S13) drop-down list box.
A selection is also provided that turns the messaging off.
13. In the Response Address (S14) drop-down list box, select the address
of the modem that the remote modem will go online with when the
remote modem is powered up or is awakened from its lowpower state.
This setting applies only when Operating Mode (S15) is set to Online.
14. Select the operating mode from the Operating Mode (S15) drop-down
list box.
Selecting Online for an operating mode places the modem into Online
mode after clicking Apply or Save in the Remote Modem Configuration
dialog box and causes the modem to go online with the modem whose
address is the setting of Response Address (S14).
Selecting Command for an operating mode places the modem into
Command mode after clicking Apply or Save in the Remote Modem
Configuration dialog box.
15. Select the modem address from the Modem ID (S18) drop-down list
box.
16. Select the transmit power level of the modem using the Transmit Power
Level (S6) scroll bar.
17. Select the Acoustic Response Time-out of the modem using the
Acoustic Resp. Timeout (S7) scroll bar.
18. Select the forwarding delay of the modem using the Forwarding Delay
(S8) scroll bar.
19. Select the idle time of the modem using the Idle Time (S10) scroll bar.
20. Click Apply to output the new settings to the modem, and then click Exit
to close the Remote Modem Configuration dialog box. To close the
dialog box without changing the settings, click Exit only.
Clicking Apply also causes any red or blue dots to disappear and any
settings displayed in red or blue to turn black.
The Finishing Remote Setup window opens:
5 Telesonar PC
Configuring the Modems
5-28
BENTHOS
21. Disconnect the remote modem, and then click OK.
Advanced Remote Modem Configuration Settings
The advanced remote modem configuration settings determine the remote
modem’s frequency and bandwidth. Typically, these settings are made at the
factory and do not require changing.
To change the remote modem’s frequency and bandwidth:
1. Connect the remote modem, and then Choose Predeployment ➤
Remote Setup.
The Remote Setup window opens:
2. Click OK to confirm that the remote modem is connected to the PC.
The Remote Modem Configuration dialog box shown in Figure 5-14 on
page 5-26 opens.
3. Click Advanced.
The Advanced Settings dialog box shown in Figure 5-11 on page 5-21
opens.
4. In the Bandwidth area of the Advanced Settings dialog box, select the
Full or Half option.
5. In the Frequency Band area, select the frequency band.
User’s Manual
January 2001
Acoustic Telemetry Modems
5-29
6. Click OK to save the new settings and close the Advanced Settings
dialog box.
The Cycle Power to Modem window opens:
7. Power down and then power up the modem.
The changed frequency and bandwidth settings take effect.
8. Click OK, and then click Exit in the Remote Modem Configuration dialog
box.
The Finishing Remote Setup window opens:
9. Disconnect the remote modem, and then click OK.
Saving the Remote Modem Setup Configuration to a File
Once a remote modem has been configured, the setup configuration can be
saved to a file. Therefore, if the settings are later changed, they can easily be
recalled by loading the saved setup configuration from the file. Refer to
"Loading the Remote Modem Setup Configuration from a File" on page 5-31
for instructions on how to load a saved remote modem setup configuration.
To save a remote modem setup configuration to a file:
1. Connect the remote modem, and then choose Predeployment ➤
Remote Setup.
The Remote Setup window opens:
5 Telesonar PC
Configuring the Modems
5-30
BENTHOS
2. Click OK to confirm that the remote modem is connected to the PC.
The Remote Modem Configuration dialog box shown in Figure 5-14 on
page 5-26 opens.
3. If required, change the remote modem configuration settings as
described in "Configuring the Remote Modem" on page 5-25.
4. Click Save.
The Save to File window opens:
5. Click Yes.
The Save As dialog box for configuration files shown in Figure 5-12 on
page 5-23 opens.
6. Click the arrow in the Save in drop-down list box and select the folder in
which to save the setup configuration file.
7. In the File name text box enter the name of the file in which to save the
setup configuration. The extension .cfg is added automatically.
8. Click Save to save the setup configuration to the specified file and close
the Save As dialog box.
9. In the Remote Modem Configuration dialog box, click Exit to close the
dialog box.
The Finishing Remote Setup window opens:
User’s Manual
January 2001
Acoustic Telemetry Modems
5-31
10. Disconnect the remote modem, and then click OK.
Loading the Remote Modem Setup Configuration from a File
Once a remote modem setup configuration has been saved, it can be loaded.
Refer to "Saving the Remote Modem Setup Configuration to a File" on page
5-29 for instructions on how to save a remote modem setup configuration.
To load a remote modem setup configuration from a file:
1. Connect the remote modem, and then choose Predeployment ➤
Remote Setup.
The Remote Setup window opens:
2. Click OK to confirm that the remote modem is connected to the PC.
The Remote Modem Configuration dialog box shown in Figure 5-14 on
page 5-26 opens.
3. Click Open File.
The Open dialog box for configuration files shown in Figure 5-13 on page
5-24 opens.
If the saved configuration file is not listed, it may be in a different folder
than the one shown. If this is the case, click the arrow in the Look in
drop-down list box and select the folder in which the file is located.
4. Click the file name of the file to be opened, and then click Open.
The selected setup configuration is loaded and the Open dialog box
closes.
5 Telesonar PC
Configuring the Modems
5-32
BENTHOS
Settings in the Remote Modem Configuration dialog box that have
changed are shown with a red dot next to the displayed setting, or the
setting is displayed in red.
5. Click Apply to output the new settings to the modem, and then click Exit
to close the Remote Modem Configuration dialog box. To close the
dialog box without changing the settings, click Exit only.
Clicking Apply also causes any red dots to disappear and any settings
displayed in red to turn black.
The Finishing Remote Setup window opens:
6. Disconnect the remote modem, and then click OK.
Resetting the Local Modem Factory Defaults
To reset a local modem’s factory defaults:
1. Connect the local modem, and then choose Configuration ➤ Local
Modem.
The Local Modem Configuration dialog box shown in Figure 5-10 on
page 5-20 opens.
2. Click Reset.
3. The Warning window opens:
4. Click Yes.
5. Click Exit in the Local Modem Configuration dialog box.
User’s Manual
January 2001
Acoustic Telemetry Modems
5-33
Resetting the Remote Modem Factory Defaults
To reset a remote modem’s factory defaults:
1. Connect the remote modem, and then choose Predeployment ➤
Remote Setup.
The Remote Setup window opens:
2. Click OK to confirm that the remote modem is connected to the PC.
The Remote Modem Configuration dialog box shown in Figure 5-14 on
page 5-26 opens.
3. Click Reset.
4. The Warning window opens:
5. Click Yes.
6. Click Exit in the Remote Modem Configuration dialog box.
The Finishing Remote Setup window opens:
7. Disconnect the remote modem, and then click OK.
5 Telesonar PC
Configuring the Modems
5-34
BENTHOS
Operating the Modems after Deployment
Telesonar PC provides a simple user interface for operating the ATM-870
Series and ATM-880 Series Acoustic Modems after they have been
deployed. The operator functions include selecting a remote modem’s
address; checking the acoustic link and measuring the range between a local
and a remote modem; changing a remote modem’s transmit power level and
acoustic baud rate; going on and off line with a remote modem; enabling and
disabling a remote modem’s data logger; and checking, downloading, and
clearing the contents of a remote modem’s data logger memory. In addition,
any received data can be saved to a file, and data from a file can be uploaded
to a remote modem.
Selecting the Address of the Remote Modem
To operate a remote modem over the acoustic link, the address of the remote
modem must first be selected. Once selected, it remains selected until
changed.
To select the address of the remote modem:
1. Choose Acoustic Comm ➤ Remote ID.
The Modem ID dialog box opens:
2. Select the address of the remote modem from the drop-down list box in
the Modem ID dialog box.
3. Click OK.
The new remote modem address takes effect, and the Modem ID dialog
box closes.
NOTE The address of the remote modem can also be selected from the
drop-down list box in the Remote ID status display in the Main window. If
the Remote ID status display is not visible, choose View ➤ Show Remote
ID.
User’s Manual
January 2001
Acoustic Telemetry Modems
5-35
Checking the Acoustic Link between the Local
and the Remote Modem
To check the acoustic link between the local and the remote modem:
1. Choose Acoustic Comm ➤ Test or click the Test Link button on the Tool
bar.
The local modem commands the remote modem to transmit a test
message and the test message is evaluated with the results displayed in
the Test Results window:
2. Click OK to close the Test Results window.
NOTE When checking the acoustic link in air, be sure to vary the
separation of the transducers and transmit power levels as necessary.
Checking the Range between the Local and
Remote Modem’s Transducers
To check the range between the local and remote modem’s transducers:
1. Choose Acoustic Comm ➤ Get Range or click the Range button on the
Tool bar.
The local modem acquires the range to the remote modem and the
Range Information window opens with the range information displayed:
5 Telesonar PC
Operating the Modems after Deployment
5-36
BENTHOS
The range is also displayed in the Range status display in the Main
window.
NOTE To make the Range status display visible in the Main window,
choose View ➤ Show Range.
2. Click OK to close the Range Information window.
Changing the Transmit Power Level of the
Remote Modem
To change the transmit power of the remote modem:
1. Choose Acoustic Comm ➤ Adjust Remote Power.
The Remote Power dialog box opens:
2. In the Remote Power dialog box select the transmit power level of the
remote modem using the Remote Power scroll bar.
Changing the power setting causes the displayed setting to turn red.
Changing the setting back to its original setting causes the displayed
setting to turn blue.
3. Click OK.
The local modem transmits the command to change the transmit power
level of the remote modem and the Remote Power dialog box closes.
The transmit power level is also displayed in the Power Level status
display in the Main window.
NOTE To make the Power Level status display visible in the Main window,
choose View ➤ Show Power Level.
User’s Manual
January 2001
Acoustic Telemetry Modems
5-37
Changing the Acoustic Baud Rate
To change the acoustic baud rate of both the local and the remote modem:
1. Choose Acoustic Comm ➤ Acoustic Baud Rate.
The Acoustic Baud Rate dialog box shown in Figure 5-15 opens.
Figure 5-15 The Acoustic Baud Rate Dialog Box
2. Taking into consideration the noise, the range and the multipath
environment, select the acoustic baud rate at which to communicate
with the remote modem.
3. Click OK.
The new acoustic baud rate takes effect, and the Acoustic Baud Rate
dialog box closes.
NOTE The acoustic baud rate can also be selected from the drop-down list
box in the Acoustic Baud Rate status display in the Main window. If the
status display is not visible, choose View ➤ Show Baud Rate.
5 Telesonar PC
Operating the Modems after Deployment
5-38
BENTHOS
Going Online with the Remote Modem
To go online with the remote modem, choose Acoustic Comm ➤ Connect or
click the Connect button on the Tool bar.
The local modem goes into Online mode and goes online with the remote
modem. In addition, the indicator on the Status bar in the Main window
turns green and ONLINE is displayed.
Going Online with the Remote Modem
Automatically on Power Up
To go online with the remote modem automatically on power up, the address
of the remote modem must first be selected from the Response Address
(S14) drop-down list box in the Local Modem Configuration dialog box. In
addition, Online must be selected from the Operating Mode (S15) drop-down
list box. To make these selections, refer to the instructions provided in
"Configuring the Local Modem" on page 5-19.
Going Offline with the Remote Modem
To go offline with the remote modem that the local modem is online with,
choose Acoustic Comm ➤ Hangup or click the Hangup button on the Tool
bar.
The local modem goes into Command mode and goes offline with the
remote modem. In addition, the indicator on the Status bar in the Main
window turns red and COMMAND is displayed.
Enabling and Disabling the Data Logger of the
Remote Modem
The data logger of the remote modem can be enabled or disabled. When the
data logger is enabled, the modem is in Datalogger mode, and input from its
host processor over the serial interface is treated as data and stored in the
modem’s data logger memory.
To enable the data logger of the remote modem, Choose Datalogger ➤
Enable Remote Datalogger.
The data logger of the remote modem is enabled, and the Remote
Datalogger status display in the Main window indicates ON and displays
the relative amount of data stored in its data logger memory.
User’s Manual
January 2001
Acoustic Telemetry Modems
5-39
NOTE To make the Remote Datalogger status display visible in the Main
window, choose View ➤ Show Datalogger Status.
To disable the data logger of the remote modem, choose Datalogger ➤
Disable Remote Datalogger.
The data logger of the remote modem is disabled and the Remote
Datalogger status display indicates OFF.
Checking the Data Logger Memory of the
Remote Modem
To check the data logger memory of the remote modem:
1. Choose Datalogger ➤ Check Remote Buffer.
The local modem commands the remote modem to transmit the number
of bytes stored in its data logger memory, and the Remote Datalogger
window opens with the number of bytes displayed:
The relative amount of data stored in the remote modem’s data logger
memory is also displayed in the Remote Datalogger status display in the
Main window.
NOTE To make the Remote Datalogger status display visible in the Main
window, choose View ➤ Show Datalogger Status.
2. Click OK to close the Remote Datalogger window.
5 Telesonar PC
Operating the Modems after Deployment
5-40
BENTHOS
Downloading the Contents of the Remote
Modem’s Data Logger Memory
The contents of the remote modem’s data logger memory can be
downloaded to a file in 512-byte or 4096-byte packets, where every
8 contiguous packets is defined as a block.
To download the contents of the remote modem’s data logger memory:
1. Choose Datalogger ➤ Download Packet Size.
2. The Download Packet Size dialog box opens:
3. Select the packet size, either 512 or 4096, and then click OK.
4. Choose Datalogger ➤ Download Remote Buffer.
The Save As dialog box for data files shown in Figure 5-16 opens.
Figure 5-16 The Save As Dialog Box for Data Files
User’s Manual
January 2001
Acoustic Telemetry Modems
5-41
5. Click the arrow in the Save in drop-down list box and select the folder in
which to save the data file.
6. In the File name text box enter the name of the file in which to save the
data. The extension .dat is added automatically.
7. Click Save to save the data to the specified file and close the Save As
dialog box.
The local modem commands the remote modem to transmit the contents
of its data logger memory, and the Downloading window opens:
The data are downloaded and stored in the specified file. When the
download is complete, the Downloading window closes.
As the data packets are received, the local modem analyses each block
of eight packets for errors. If any errors are detected, the local modem
requests a retransmission of the packet or packets containing errors
before proceeding with the transmission of the next block. This process
is repeated until all the blocks are received. The number of packets
retransmitted, if any, are displayed in the Downloading dialog box.
The downloading of data can be suspended by clicking Suspend. Clicking
Suspend closes the Downloading dialog box after the current block is
downloaded. To resume downloading data, choose Datalogger ➤ Resume
Download. The Downloading window opens again and the downloading
process resumes.
5 Telesonar PC
Operating the Modems after Deployment
5-42
BENTHOS
NOTE The suspended download can be resumed at any time, even after
sending additional commands to or going online with the addressed remote
modem, or any other remote modem. The download can even be resumed
after exiting from and restarting Telesonar PC.
Clearing the Contents of the Remote Modem’s
Data Logger Memory
To clear the contents of the remote modem’s data logger memory:
1. Choose Datalogger ➤ Clear Remote Buffer.
A Warning window opens warning that the command will erase the
contents of the data logger memory of the remote modem:
2. Click Yes.
The Warning window closes, and the local modem commands the
remote modem to erase the contents of its data logger memory.
NOTE To verify that the data logger memory of the remote modem is
cleared, check the data logger memory by choosing Datalogger ➤ Check
Remote Buffer as described in "Checking the Data Logger Memory of the
Remote Modem" on page 5-39.
User’s Manual
January 2001
Acoustic Telemetry Modems
5-43
Capturing Received Data from the Remote
Modem
When receiving data from the remote modem, the data can be
captured, or saved, to a file in real time. The saved data can also include the
received data statistics, which are the checksum (CRC), the signal-to-noise
ratio (SNR), the automatic gain control (AGC), and the speed (SPD).
To capture the received data:
1. Choose File Transfer ➤ Capture Options.
The Capture Options dialog box opens:
2. Select the All I/O option to include the data statistics with the captured
data, or select the Incoming Data option to include the data only.
3. Check or clear the Time Stamp check box. If checked, enter a key
character in the Time Stamp Key Character text box.
Checking the Time Stamp check box saves the date and time with the
captured data. The date and time are saved following each appearance
in the data of the character entered in the Time Stamp Key Character text
box.
4. Click OK to close the Capture Options dialog box.
5. Choose File Transfer ➤ Capture.
The Save As dialog box for data files shown in Figure 5-16 on page 5-40
opens.
6. Click the arrow in the Save in drop-down list box and select the folder in
which to save the data file.
5 Telesonar PC
Operating the Modems after Deployment
5-44
BENTHOS
7. In the File name text box enter the name of the file in which to save the
data. The extension .dat is added automatically.
8. Click Save to save the data to the specified file and close the Save As
dialog box.
"Capture ON" and the file in which data are saved are displayed in the
Status bar, and the received data are saved to the file.
9. To stop the capture of received data, Choose File Transfer ➤ Capture.
"Capture OFF" is displayed in the Status bar and the received data are
no longer saved.
NOTE Capture can be turned on or off at any time—before or while data are
being received—by choosing Capture from the File Transfer menu.
Uploading Data to the Remote Modem
Data can be uploaded from a file to the remote modem. The local modem,
however, must be online with the remote modem for the data to be uploaded.
To upload data from a file to a remote modem:
1. Choose Acoustic Comm ➤ Connect or click the Connect button on the
Tool bar.
The local modem goes into Online mode and goes online with the remote
modem. In addition, the indicator on the Status bar in the Main window
turns green and ONLINE is displayed.
2. Choose File Transfer ➤ Upload.
The Open dialog box for any files shown in Figure 5-17 opens.
If the data file is not listed, it may be in a different folder than the one
shown. If this is the case, click the arrow in the Look in drop-down list box
and select the folder in which the file is located.
3. Click the file name of the file to be opened, and then click Open.
User’s Manual
January 2001
Acoustic Telemetry Modems
5-45
Figure 5-17 The Open Dialog Box for Any Files
The Uploading window opens:
After the uploading is complete the Uploading window closes.
4. Choose Acoustic Comm ➤ Hangup or click the Hangup button on the
Tool bar.
The local modem goes into Command mode and goes offline with the
remote modem. In addition, the indicator on the Status bar in the Main
window turns red and COMMAND is displayed.
5 Telesonar PC
Operating the Modems after Deployment
5-46
BENTHOS
Modem Diagnostics
Telesonar PC provides several diagnostic functions which help to evaluate
modem performance. These diagnostic functions allow viewing the local and
remote modem battery voltages, viewing the background noise continuously
and periodically, commanding the modem to ping continuously to verify that
its transmitter is functioning, and placing the modem in Terminal mode to
allow direct entry of commands. In addition, the modem’s firmware version
number can be checked.
Checking the Battery Voltages
To view the local modem’s battery voltages, choose Diagnostic ➤ Local
Battery Voltages. The voltages of the local modem’s transmitter/preamp and
DSP/receiver battery packs are displayed in the Local Battery Voltages
status display.
To view the remote modem battery voltages, choose Diagnostic ➤ Remote
Battery Voltages. The voltages of the remote modem’s transmitter/preamp
and DSP/receiver battery packs are displayed in the Remote Battery
Voltages status display.
Viewing the Background Noise Levels—
Continuously
The relative minimum and maximum background noise levels can be viewed
in real time in continuous one-half second intervals. The local modem,
however, must not be online with a remote modem.
To view the background noise levels continuously:
1. Choose Diagnostic ➤ Noise Test ➤ Continuously.
The Noise Level display shown in Figure 5-18 opens.
The noise profile begins scrolling from the right to the left of the display.
The profile indicated in red is the maximum noise level measured during
every one-half second interval; the blue is the minimum. Generally, an
acceptable level of background noise is present when the maximum
amplitude of the noise profile is below the bottom third of the display.
2. Click OK to close, and clear the Noise Level display.
User’s Manual
January 2001
Acoustic Telemetry Modems
5-47
Figure 5-18 The Noise Level Display
Viewing the Background Noise Levels—
Periodically
The background noise levels can be viewed periodically at selectable
intervals.
To view the background noise levels periodically:
1. Choose Diagnostic ➤ Noise Test ➤ Background.
The Noise History display shown in Figure 5-19 opens.
Figure 5-19 The Noise History Display
2. Select the interval during which the noise measurements are made
using the Update Rate scroll bar. The update rate is displayed in
minutes and ranges from 0.25–9.75, and off, where off is selected by
sliding the scroll bar all the way to the right.
5 Telesonar PC
Modem Diagnostics
5-48
BENTHOS
The noise level is displayed at the end of each interval. Generally, an
acceptable level of background noise is present when the noise level is
below the bottom third of the display.
3. To clear the Noise History display, click Clear; to close, and clear the
display, click the Cancel button.
Performing the Ping Test
The ping test verifies that the local modem’s transmitter is functioning.
To perform the ping test:
1. Choose Diagnostic ➤ Ping Test.
The Ping Test dialog box shown in Figure 5-20 opens. In addition, the
indicator on the Status bar in the Main window turns blue and PINGTEST
is displayed.
Figure 5-20 The Ping Test Dialog Box
2. Select the frequency using the Frequency slider.
3. Click Start Ping.
The local modem is commanded to ping at a 0.800-ms rate (pings once
every 1.25 seconds) at the selected frequency, and with a pulse width of
3.125 ms.
4. To stop the ping test, click Stop Ping.
5. Click Exit to close the Ping Test dialog box.
The indicator on the Status bar in the Main window turns red and
COMMAND is displayed.
User’s Manual
January 2001
Acoustic Telemetry Modems
5-49
Activating Terminal Mode
Terminal mode allows direct entry of commands to the local or remote
modem by entering the commands from the keyboard. The commands are
displayed in the Outgoing Data display, and the received data, if any, are
displayed in the Incoming Data display. For instructions on how to enter
commands from the keyboard, refer to "Modem Commands" on page 6-9,
and for a list of all the available commands and the page references to where
detailed descriptions are provided, refer to Table 6-1 on page 6-10.
To activate Terminal mode, choose Diagnostic ➤ Terminal. The Terminal
Mode window opens:
Commands can now be entered from the keyboard and are displayed in the
Outgoing Data display.
To exit Terminal mode, again choose Diagnostic ➤ Terminal, or click Exit
Terminal Mode in the Terminal Mode window. Terminal mode terminates and
the Terminal Mode window closes.
Checking the Acoustic Modem Firmware
Version Number
To check the acoustic modem’s firmware version number, choose
Diagnostic ➤ Version. The Modem Version window opens:
To close the Modem Version window, click OK.
NOTE The acoustic modem firmware version number is not the Telesonar
PC version number. To check the Telesonar PC version number, choose
Help ➤ About.
5 Telesonar PC
Modem Diagnostics
5-50
User’s Manual
BENTHOS
January 2001
Acoustic Telemetry Modems
6
6-1
Modem Commands and
Operating Parameters
This section provides an overall description of the ATM-870 Series and
ATM-880 Series Acoustic Telemetry Modem operating modes, along with
detailed descriptions of each of the modem commands and operating
parameters. In addition, instructions on how to enter commands and change
operating parameters are provided. The modem commands, which are input
from the host processor over the serial interface, control the operation of the
modems. The operating parameters, which are determined from settings that
are stored in 21 nonvolatile memory locations called S Registers, S0–S20,
directly affect how many of the commands are applied and how the modem
functions in each of its operating modes. An understanding of the modem
operating modes, commands and the S Register settings is important to
efficiently operate the modems and to realize their full capabilities.
Refer to Table 6-1 on page 6-10 for a list of modem commands, and to
Table 6-2 on page 6-68 for a list of S Registers. The tables include page
references to the detailed descriptions of the commands and S Registers.
Operating Modes
The ATM-870 Series and ATM-880 Series Acoustic Telemetry Modems
operate in three distinct operating modes: Command mode, Online mode,
and Datalogger mode. Essentially, the operating modes determine how a
modem handles input from its host processor over the serial interface. In
Command mode the input is treated as commands which instruct the modem
to perform various functions, including sending commands to remote
modems. In Online mode the input is treated as data which are freely
exchanged between the local and remote host processors. In Datalogger
mode the input is also treated as data, but in this case the data are stored in
the flash memory of the modem’s data logger. At any time these data can be
transmitted acoustically or downloaded by the host processor over the serial
interface. When a modem is powered up, it immediately goes into one of the
three operating modes as determined by the setting of S Register 15: 00 for
Command mode, 01 for Online mode, or 02 for Datalogger mode. However,
after powering up, it is possible to change the operating mode, regardless of
the setting of S Register 15.
6 Modem Commands and Operating Parameters
Operating Modes
6-2
BENTHOS
Command Mode
When a modem is in Command mode, input from its host processor over the
serial interface is treated as commands. A modem will go into Command
mode when it is powered up only if S Register 15 is set to 00, which is the
factory default setting. When powered up, the resulting ATM-871 or ATM-881
Deck Box display, or the display on the monitor of a PC if a PC is used as the
host processor, will show the banner message. The message includes the
frequency band (LF, MF, HF, or Nonstandard), the firmware version, and the
command prompt (>) as shown in the following example for an ATM-880
Series Acoustic Telemetry Modem:
Benthos ATM-88X
MF Frequency Band
Acoustic Modem Version 2.4
>
In Command mode any of the commands can be entered. There are two
basic types of commands: commands that are executed by the local
modem—the modem where the commands are entered over the serial
interface—and commands that are sent by the local modem over the acoustic
link to be executed by a remote modem. The commands perform a number
of different functions: configuring the local modem’s S Register settings,
establishing an acoustic link with one or more remote modems, reading a
remote modem’s S Register settings, terminating the acoustic link, and many
others. When a command is entered, the modem will indicate the execution
of the command with a message and then display the command prompt (>).
A modem can be placed into Command mode in any of the following ways:
Using the Online Interrupt command (+++). Entering the Online
Interrupt command will place the modem into Command mode.
Cycling power—S Register 15 set to 00. If S Register 15 is set to 00,
powering down the modem and then powering up the modem will place the
modem into Command mode.
Allowing the idle time to expire—S Register 15 set to 00. If S Register
15 is set to 00, allowing the idle time to expire will place the modem into
Command mode and into the lowpower state. Refer to "Lowpower State"
below for information on the lowpower state and the idle time.
Receiving a Remote Data Logger Disable command (AT$BDn) when
it is in Datalogger mode. If the modem receives a Remote Data Logger
Disable command from another modem and it is in Datalogger mode, the
modem will go into Command mode, and S Register 15 will be set to 00.
User’s Manual
January 2001
Acoustic Telemetry Modems
6-3
Lowpower State
In any of the operating modes, when there is no input to the modem either
from its host processor over the serial interface or from a remote modem over
the acoustic link, the modem will go into the lowpower state after a preset
time. The lowpower state conserves battery power as only the modem’s
receiver is active. The preset time is the idle time and is determined by the
setting of S Register 10. When the modem goes into the lowpower state, the
message "Lowpower" is displayed on the ATM-871 or ATM-881 Deck Box
display, or on the monitor of the host PC if a PC is used as the host processor.
However, to display this message and many other messages, S Register 13
must be set to either 01 or 02, where 01 is the factory default setting. The idle
time is reset to zero when the modem receives input either from its host
processor or from a remote modem.
WARNING Although the idle time can be set to prevent the modem from
going into the lowpower state for an indefinite time, if the modem is being
powered by batteries, this setting will rapidly deplete the capacity of the
DSP/Receiver battery pack. Hence if batteries are being used to power the
modem, it is important that the idle time be set as short as possible.
When a modem is in the lowpower state, its receiver is still active. Therefore,
it can be awakened by input either from its host processor over the serial
interface or from a remote modem over the acoustic link. If the modem is
awakened by the host processor, it immediately goes into the operating mode
determined by the setting of S Register 15. If the modem receives a signal
over the acoustic link from a remote modem, it immediately checks the signal
to see if it is being addressed—either with its unique address or with a global
address that is the same for all the modems. If the modem does not recognize
its address or the global address, it remains in the lowpower state. If it
recognizes the signal as containing a valid address, it will go out of the
lowpower state and into the operating mode determined by the setting of
S Register 15.
NOTE When a modem is not being powered by batteries—typically for the
ATM-871 and ATM-881 Deck Boxes and the ATM-871R and ATM-881R Rack
Mounted Deck Boxes only—the idle time should be set to prevent the
modem from going into the lowpower state for an indefinite time. This
improves operating efficiency as the modem never has to be awakened.
6 Modem Commands and Operating Parameters
Operating Modes
6-4
BENTHOS
Acoustic Command Execution
When a modem receives a command over the acoustic link, it will respond in
one of the following ways:
Go into one of the three operating modes. If the command is the
Remote Data Logger Disable command (AT$BDn) and the modem is in
Datalogger mode, the modem will go into Command mode; if it is the Dial
command (ATDn), then Online mode; or if it is the Remote Data Logger
Enable command (AT$BEn), then Datalogger mode.
Go into the lowpower state. If the command is the Hang Up command
(ATH), the modem will go into the lowpower state without transmitting an
acknowledgment.
Transmit an acknowledgment. If the command is one that does not
require that the modem transmit back specific information, the modem will
execute the command and transmit an acknowledgment. For example, if a
modem receives the Remote Power command (AT$Pn,m), it executes the
command by setting the transmit power level to level m, and then it
transmits an acknowledgment at the new transmit power level.
Transmit information. If the command is one that requires that the
modem transmit back specific information, the modem will transmit the
requested information. For example, if a modem receives the Remote
Register command (AT$Sn), it executes the command by transmitting its
S Register settings.
Online Mode
When a modem is in Online mode and is online with a remote modem, input
from its host processor over the serial interface is treated as data which are
freely exchanged between the local and remote host processors.
A modem will go into Online mode when it is powered up only if S Register
15 is set to 01. In this case any input to the modem over the serial interface
is transmitted to the remote modem whose address is the setting of
S Register 14. However, as S Register 15 typically is set to 00 for Command
mode, the Dial command (ATDn) must first be used to place both the local
modem and the remote modem at address n into Online mode. The remote
modem must also confirm receipt of the Dial command by sending an
acknowledgment. Therefore, setting S Register 15 to 01 allows the modem
to go online automatically with any remote modem whose address is the
setting of S Register 14 after being powered up.
User’s Manual
January 2001
Acoustic Telemetry Modems
6-5
A modem can be placed into Online mode in any of the following ways:
Using the Dial command (ATDn). From Command mode only, entering
the Dial command will cause the modem to go into Online mode and to go
online with the remote modem at address n.
Using the Online command (ATO). From Command mode only, entering
the Online command will cause the modem to go into Online mode and to
go online with the modem it was online with prior to going into Command
mode.
Setting S Register 15 to 01. From Command mode only, setting
S Register 15 to 01 will place the modem into Online mode and cause it to
go online with the remote modem whose address is the setting of
S Register 14.
Using the Lowpower State command (ATL)—S Register 15 set to 01.
From Command mode only and if S Register 15 is set to 01, entering the
Lowpower State command will cause the modem to go into Online mode.
The modem will also go into the lowpower state. When awakened, the
modem will be online with the remote modem whose address is the setting
of S Register 14.
Allowing the idle time to expire—S Register 15 set to 01. If S Register
15 is set to 01, allowing the idle time to expire will place the modem into
Online mode. The modem will also go into the lowpower state. When
awakened, the modem will be online with the remote modem whose
address is the setting of S Register 14.
Cycling power—S Register 15 set to 01. If S Register 15 is set to 01,
powering down the modem and then powering up the modem will place the
modem into Online mode and the modem will be online with the remote
modem whose address is the setting of S Register 14.
Receiving a Dial command (ATDn) from a remote modem. If the
modem receives a Dial command from a remote modem, the modem will
go into Online mode and go online with the remote modem.
Device Enable
Device Enable is an active low output provided by all the modems except the
ATM-871 and ATM-881 Deck Boxes and the ATM-871R and ATM-881R
Rack Mount Deck Boxes. Refer to Section 2, "Specifications," for the
electrical specifications and to "Setting Up and Checking the Modems" on
page 4-10 for connection information. Device Enable is used to activate a
host processor when the modem is in Online mode.
6 Modem Commands and Operating Parameters
Operating Modes
6-6
BENTHOS
Transmit Data Buffer
Each modem includes an internal 4-kbyte transmit data buffer, which allows
data that are input to the modem over the serial interface to be organized into
packets of 4 kbytes. After the transmit data buffer has filled, the modem
immediately transmits the data. If data are input to the modem, but the
transmit data buffer does not fill, the modem will wait a preset time—called
the forwarding delay—after the last data are input, and then transmit
the partial packet. The forwarding delay is determined by the setting of
S Register 8 and ranges from 50 milliseconds to 5 seconds.
WARNING If the Online Interrupt command (+++) is entered to place the
modem into Command mode while data remains in the 4-kbyte transmit
data buffer, the data will be lost.
The 4-kbyte transmit data buffer also allows a faster host-to-modem baud
rate than the acoustic baud rate. For example, the host-to-modem baud rate
can be 9600 bits/second while the acoustic baud rate is 600 bits/second.
However, when the host-to-modem baud rate is faster than the acoustic baud
rate, no more than 4 kbytes of data can be input to the modem without loss
of data unless handshaking, which conforms to the RS-232 specification, is
used.
WARNING If handshaking is not used and data are input to the modem
when the 4-kbyte transmit data buffer is full, or when a modem is
transmitting a packet of data, whether it is a full or partial packet, the data
will be ignored, hence lost.
Although the use of handshaking, which uses the RS-232 signal RTS, is
optional, it is highly recommended when more than 4 kbytes of data are to be
transmitted. Handshaking will ensure there is no loss of data, as during the
time the modem is transmitting, or when the 4-kbyte transmit data buffer is
full, handshaking will not allow the host processor to output data to the
modem.
Refer to "Setting Up and Checking the Modems" on page 4-10 for
information on how to set up the modems. The recommended setup uses the
RS-232 handshaking signal RTS when connecting the modems.
User’s Manual
January 2001
Acoustic Telemetry Modems
6-7
Data Format
Data, including parity, that are input to the modem over the serial interface
when the modem is in Online mode can be in any format that fits into 8-bit
bytes. For example, the data can be 7 bits with parity, 8 bits with no parity, or
8-bit binary words. However, it cannot be 8 bits with parity.
Error Checking
With each 4-kbyte data packet transmitted, a checksum is calculated and
also transmitted. The modem that receives the packet also calculates a
checksum and compares it to the transmitted checksum. If enabled with the
setting of S Register 2, the received data statistics comprising the checksum
pass or fail results (CRC), the signal-to-noise ratio (SNR), the automatic gain
control setting (AGC), and the relative speed between the local and remote
modems (SPD) are displayed.
Datalogger Mode
When a modem is in Datalogger mode, input from its host processor over the
serial interface is treated as data which are stored in the flash memory of the
modem’s data logger. Up to 896 kbytes of data can be stored for an ATM-870
Series Acoustic Telemetry Modem and 832 kbytes for an ATM-880 Series. A
modem will go into Datalogger mode when it is powered up only if S Register
15 is set to 02. Data stored in the data logger memory are not lost when the
modem is powered down. The contents of the data logger memory of a
remote modem can be read or cleared at any time over the acoustic link. The
number of bytes of data stored can also be read. The same is true for a local
modem over the serial interface.
A modem can be placed into Datalogger mode in any of the following ways:
Setting S Register 15 to 02. From Command mode only, setting
S Register 15 to 02 will place the modem into Datalogger mode.
Using the Lowpower State command (ATL)—S Register 15 set to 02.
From Command mode only, if S Register 15 is set to 02, entering the
Lowpower State command will place the modem into Datalogger mode
and into the lowpower state.
Receiving a Remote Data Logger Enable command (AT$BEn). If the
modem receives a Remote Data Logger Enable command from another
modem, the modem will go into Datalogger mode, and S Register 15 will
be set to 02.
6 Modem Commands and Operating Parameters
Operating Modes
6-8
BENTHOS
Cycling power—S Register 15 is set to 02. If S Register 15 is set to 02,
powering down the modem and then powering up the modem will place the
modem into Datalogger mode.
Allowing the idle time to expire—S Register 15 is set to 02. If
S Register 15 is set to 02, allowing the idle time to expire will place the
modem into Datalogger mode and into the lowpower state.
When the modem is in Datalogger mode, data that are input to the modem
over the serial interface are stored in an 8-kbyte temporary data buffer. After
the temporary data buffer has filled, the data are immediately transferred to
the data logger memory. If the temporary data buffer has not filled, the
modem will wait a preset time—called the forwarding delay—after the last
data are input, and then transfer the data. This is the same forwarding delay
that is used for the transmit data buffer and is determined by the setting of
S Register 8. The delay settings range from 50 milliseconds to 5 seconds.
WARNING If the Online Interrupt command (+++) is entered to place the
modem into Command mode while data remains in the 8-kbyte temporary
data buffer, the data will be lost.
When more than 8 kbytes of data are to be stored, the use of handshaking,
which conforms to the RS-232 specification, should be used to ensure there
is no loss of data.
WARNING If handshaking is not used and data are input to the modem
when the 8-kbyte temporary data buffer is full, or while the modem is
transferring data from the temporary data buffer to the data logger memory,
transmitting the contents of the data logger memory over the acoustic link,
or clearing the data logger memory, the data will be ignored, hence lost.
Handshaking will ensure there is no loss of data, as when the 8-kbyte
temporary data buffer is full, or when data is being transferred to or
transmitted from the data logger memory, or the data logger memory is being
cleared, handshaking will not allow the host processor to output data to the
modem.
Refer to "Setting Up and Checking the Modems" on page 4-10 for
information on how to set up the modems. The recommended setup uses the
RS-232 handshaking signal RTS when connecting the modems.
User’s Manual
January 2001
Acoustic Telemetry Modems
6-9
Modem Commands
The modem commands are listed in Table 6-1. Also listed in the table are the
page references to where detailed descriptions of the commands are
provided. Any reference to a local modem in the table or in the detailed
descriptions refers to the modem to which commands are input from the host
processor over the serial interface. Any reference to a remote modem refers
to the modem to which acoustic commands are sent and from which data and
acknowledgments are received over the acoustic link.
Commands can only be entered when a modem is in Command mode. The
commands are input to the modem from its host processor over the serial
interface at the host-to-modem baud rate. The data format for the commands
is ASCII with 8 bits, no parity and 1 stop bit. If the ATM-871 or ATM-881 Deck
Box is used to enter commands, the commands can be entered from the
keypad when the REMOTE/TERMINAL switch is switched to TERMINAL. If
a PC is used as the host processor for the ATM-871 or ATM-881 Deck Box
or the ATM-871R or ATM-881 Rack Mount Deck Box, the commands can be
entered from the keyboard. However, when the ATM-871 or ATM-881 Deck
Box is used, the REMOTE/TERMINAL switch must be switched to REMOTE.
In all cases the commands are entered at the command prompt (>), and
every command must be followed by pressing Enter for the command to be
executed.
NOTE If required, refer to Section 4, "Setup and Test," for information on
how to set up the modems and verify their operation.
To place the modem into Command mode, do one of the following:
• Enter +++ rapidly.
• If S Register 15 is set to 00, power down and then power up the
modem.
• If S Register 15 is set to 00, wait for the idle time to expire.
The modem will go into Command mode and display the command
prompt (>).
To enter a command from the keyboard, type the command in accordance
with the commands listed in Table 6-1 and in the detailed descriptions that
follow.
6 Modem Commands and Operating Parameters
Modem Commands
6-10
BENTHOS
Table 6-1 ATM-870 Series and ATM-880 Series Acoustic Telemetry
Modem Command Set
Command
Syntax
User’s Manual
Command
Name
Result
Page
+++
Online Interrupt
Causes the local modem to go into
Command mode.
6-13
AT [Enter]
Attention
Resets the local modem idle time timer and
verifies communications between the host
processor and the modem.
6-15
ATDn [Enter]
Dial
Causes the local modem to go into Online
mode and to go online with the remote
modem at address n.
6-17
AT&F [Enter]
Factory Reset
Resets the local modem’s S Register
settings to their factory default settings.
6-19
ATH [Enter]
Hang Up
Causes all the remote modems to go into
the lowpower state.
6-21
ATO [Enter]
Online
Causes the local modem to go into Online
mode from Command mode and to go
online with the remote modem it was online
with prior to going into Command mode.
6-23
ATXn [Enter]
Acoustic Link
Test
Tests the acoustic link with the modem at
address n.
6-25
AT$Pn,m
[Enter]
Remote Power
Sets the transmit power level of the remote
modem at address n to level m.
6-27
ATSn? [Enter]
Read Register
Displays the setting of the local modem’s
S Register n.
6-29
AT$Sn [Enter]
Read Remote
Registers
Displays the S Register settings of the
remote modem at address n.
6-31
ATSn=n [Enter] Set Register
Sets the local modem’s S Register number
n to the value entered following "=."
6-33
AT&W [Enter]
Write
Saves the local modem’s S Register
settings as the new startup configuration.
6-35
ATL [Enter]
Lowpower
State
Forces the idle time of the local modem to
expire, which in turn causes the modem to
go into the lowpower state
6-37
ATRn [Enter]
Range
Displays the range from the local modem to
the remote modem at address n.
6-39
January 2001
Acoustic Telemetry Modems
6-11
Table 6-1 ATM-870 Series and ATM-880 Series Acoustic Telemetry
Modem Command Set (Continued)
Command
Syntax
Command
Name
Result
Page
AT$Dn,m
[Enter]
Remote
Doppler
Correction
Disables or enables doppler correction of
the remote modem at address n.
6-41
ATV [Enter]
Local Battery
Voltage
Displays the DSP/receiver and
transmitter/preamp battery voltages of the
local modem.
6-43
AT$Vn [Enter]
Displays the DSP/receiver and
Remote
transmitter/preamp battery voltages of the
Battery Voltage
remote modem at address n.
6-45
AT$Kn [Enter]
Break
Establishes an acoustic connection with the
remote modem at address n, which is
interfaced with an RDI current meter.
6-47
AT$BEn [Enter]
Remote Data
Causes the remote modem at address n to
Logger Enable go into Datalogger mode.
6-49
AT$BDn [Enter]
Causes the remote modem at address n to
Remote Data
go into Command mode if it is in Datalogger
Logger Disable
mode.
6-51
AT$BTn [Enter}
Read Remote
Data Logger
Displays the contents of the data logger
6-53
memory of the remote modem at address n.
AT$BCn [Enter]
Clear Remote
Data Logger
Clears the contents of the data logger
6-55
memory of the remote modem at address n.
AT$BNn [Enter]
Remote Bytes
Stored
Displays the number of bytes of data stored
in the data logger memory of the remote
modem at address n.
6-57
ATBC [Enter]
Clear Local
Data Logger
Clears the contents of the data logger
memory of the local modem.
6-59
ATBN [Enter]
Local Bytes
Stored
Displays the number of bytes of data stored
in the data logger memory of the local
modem.
6-61
ATBT [Enter]
Output Local
Data Logger
Outputs the contents of the data logger
memory of the local modem over the serial
interface.
6-63
ATBPn [Enter]
Output Local
Page
Outputs the contents of page n of the data
logger memory of the local modem over the
serial interface.
6-65
6 Modem Commands and Operating Parameters
Modem Commands
6-12
User’s Manual
BENTHOS
January 2001
Acoustic Telemetry Modems
Online Interrupt
6-13
+++
Syntax
+++
Defined
The Online Interrupt command causes the local modem to go into Command
mode. When a local modem is in Online mode and is online with a remote
modem, every character that is input to the local modem from its host
processor over the serial interface is transmitted to the remote modem.
Similarly, every character that is input to the remote modem from its host
processor over the serial interface is transmitted to the local modem.
However, if the characters +++ are typed in rapid succession when the local
modem is not transmitting or receiving data, either over the serial interface or
over the acoustic link, the modem will switch to Command mode, and the
remote modem will remain in Online mode. Similarly, when the local modem
is in Datalogger mode, every character that is input to the modem from its
host processor over the serial interface is stored in the modem’s data logger
memory. And if the characters +++ are typed in rapid succession when the
modem is not transmitting or receiving data, either over the serial interface or
over the acoustic link, the local modem will switch to Command mode.
WARNING If +++ is entered after data have been input to the modem
over the serial interface, but before the forwarding delay has elapsed, the
data will be lost. The setting of S Register 8 determines the forwarding
delay.
How to Use
To use the Online Interrupt command, type +++ rapidly.
The local modem will indicate that it has gone into Command mode by
displaying the command prompt (>).
6 Modem Commands and Operating Parameters
Modem Commands
6-14
BENTHOS
Special Considerations
The Online Interrupt command uses three plus characters—typed in rapid
succession—because of the low probability that a string of three plus signs
would be part of any data stream. To further ensure that these characters are
not part of a data stream, the local modem requires three additional
conditions for recognizing an interrupt:
1. There are no characters entered before the first plus sign is entered for
a period that is longer than one second.
2. There are no other characters entered between entering any two plus
signs.
3. The time interval between entering any two plus signs is less than one
second.
The three conditions are shown graphically in Figure 6-1.
No Characters
> One Second
+
No Characters
< One Second
+
No Characters
< One Second
+
Figure 6-1 Conditions for Recognizing an Online Interrupt Command
User’s Manual
January 2001
Acoustic Telemetry Modems
6-15
Attention
AT
Syntax
AT [Enter]
Defined
The Attention command resets the local modem’s idle time timer and verifies
that the communications link between the host processor and the modem is
functioning properly.
NOTE For the local modem to execute entered commands, the modem
must be in Command mode—with the command prompt (>) displayed. If the
modem is not in Command mode, refer to page 6-9 for instructions on how
to place the modem in Command mode.
How to Use
To use the Attention command, type AT, and then press Enter.
The local modem will indicate that it has verified communications with its
host processor by responding with the message "OK" and displaying the
command prompt (>).
Special Considerations
To display the message "OK" and many other messages, S Register 13 must
be set to either 01 or 02, where 01 is the factory default setting.
6 Modem Commands and Operating Parameters
Modem Commands
6-16
User’s Manual
BENTHOS
January 2001
Acoustic Telemetry Modems
Dial
6-17
ATDn
Syntax
ATDn [Enter]
Definition
The Dial command establishes an acoustic connection between the local
modem and the remote modem at address n. It causes the local modem to
go into Online mode and to go online with the remote modem. The acoustic
baud rate is determined by the setting of S Register 4 of the local modem.
NOTE For the local modem to execute entered commands, the modem
must be in Command mode—with the command prompt (>) displayed. If the
modem is not in Command mode, refer to page 6-9 for instructions on how
to place the modem in Command mode.
How to Use
To use the Dial command, type ATD followed by the hexadecimal address of
the remote modem, and then press Enter.
The local modem will establish an acoustic link with the addressed remote
modem. This is done by sending an acoustic command to the remote
modem. When the remote modem receives the acoustic command, it will
send an acknowledgment to the local modem, and then go into Online
mode.
Upon receiving the acknowledgment from the remote modem, the local
modem will respond with the message "CONNECT" followed by the acoustic
baud rate, the modulation scheme and whether any one or more of the three
methods for increased reliability are used as determined by the setting of
S Register 4, and then go into Online mode and go online with the remote
modem. It will remain in Online mode until it receives an Online Interrupt
command (+++) from its host processor or its idle time expires. The idle time
will expire if there is no input either from its host processor over the serial
interface or from a remote modem over the acoustic link for the idle time
period, which is determined by the setting of S Register 10.
6 Modem Commands and Operating Parameters
Modem Commands
6-18
BENTHOS
The remote modem will remain online with the local modem until it receives
an Online Interrupt command (+++) from its host processor, a Hang Up
command (ATH) from another modem, or its idle time expires.
When the local and remote modems are online, the local modem will
acoustically transmit all the data received from its host processor to the
remote modem, which will in turn output the data to its host processor.
Similarly, the remote modem will acoustically transmit all the data received
from its host processor to the local modem, which will in turn output the data
to its host processor.
Special Considerations
When using the Dial command, take note of the following:
• To display the message "CONNECT" followed by the acoustic baud
rate and many other messages, S Register 13 must be set to either 01
or 02, where 01 is the factory default setting.
• The local modem must receive an acknowledgment from the remote
modem within the acoustic response time-out, which is determined by
the setting of S Register 7. If an acknowledgment is not received,
"Response Not Received" will be displayed.
• If it is desired to enter additional commands after going online with a
remote modem and then go back online with the modem, first type +++
in rapid succession to cause the modem to go into Command mode.
Then enter the desired commands. To go back online with the same
remote modem, type ATO, and then press Enter. The Online command
(ATO) causes the local modem to go into Online mode from Command
mode and to go online with the remote modem it was online with prior
to going into Command mode.
User’s Manual
January 2001
Acoustic Telemetry Modems
Factory Reset
6-19
AT&F
Syntax
AT&F [Enter]
Definition
The Factory Reset command resets the local modem’s S Register settings to
their factory default settings.
NOTE For the local modem to execute entered commands, the modem
must be in Command mode—with the command prompt (>) displayed. If the
modem is not in Command mode, refer to page 6-9 for instructions on how
to place the modem in Command mode.
How to Use
To use the Factory Reset command, type AT&F, and then press Enter.
The local modem will reset its S Registers to their factory default settings,
and respond with the message "Factory Reset."
Special Considerations
When using the Factory Reset command, take note of the following:
• Using the Write command (AT&W) after using the Factory Reset
command will save the S Register factory default settings as the
startup configuration, which is the S Register settings when the modem
is powered up.
• When the modem is powered up, the S Registers will be set to their
startup configuration. This configuration is not necessarily the factory
default settings, as the S Register settings may have been changed
with the Set Register command (ATSn=n), and then saved as the new
startup configuration with the Write command (AT&W).
6 Modem Commands and Operating Parameters
Modem Commands
6-20
User’s Manual
BENTHOS
January 2001
Acoustic Telemetry Modems
6-21
Hang Up
ATH
Syntax
ATH [Enter]
Definition
The Hang Up command causes all the remote modems to go into the
lowpower state. It is not possible to send a Hang Up command to a specific
modem.
NOTE For the local modem to execute entered commands, the modem
must be in Command mode—with the command prompt (>) displayed. If the
modem is not in Command mode, refer to page 6-9 for instructions on how
to place the modem in Command mode.
How to Use
To use the Hang Up command, type ATH, and then press Enter.
The local modem will send the Hang Up command to address FF, which
each modem will recognize as one of its addresses. When the local
modem has completed the transmission, it will respond with the
message "Off Line."
Special Considerations
When using the Hang Up command, take note of the following:
• To display the message "Off Line" and many other messages,
S Register 13 must be set to either 01 or 02, where 01 is the factory
default setting.
• When a remote modem receives the Hang Up command, it will not
send an acknowledgment to the local modem. Instead, it will cease
transmissions and go into the lowpower state.
6 Modem Commands and Operating Parameters
Modem Commands
6-22
User’s Manual
BENTHOS
January 2001
Acoustic Telemetry Modems
6-23
Online
ATO
Syntax
ATO [Enter]
Definition
The Online command causes the local modem to go into Online mode from
Command mode and to go online with the remote modem it was online with
prior to going into Command mode.
NOTE For the local modem to execute entered commands, the modem
must be in Command mode—with the command prompt (>) displayed. If the
modem is not in Command mode, refer to page 6-9 for instructions on how
to place the modem in Command mode.
How to Use
To use the Online command, type ATO, and then press Enter.
The local modem will acknowledge the command with the message
"CONNECT" followed by the acoustic baud rate if the connection with the
remote modem has not been broken, and the local modem will again be
online with the remote modem.
Special Considerations
When using the Online command, take note of the following:
• To display the message "CONNECT" followed by the acoustic baud
rate and many other messages, S Register 13 must be set to either 01
or 02, where 01 is the factory default setting.
• If the local modem responds with the message "Off Line," the acoustic
connection has been broken and the local modem has switched to the
lowpower state. In this case, establish the connection again by using
the Dial command (ATDn).
6 Modem Commands and Operating Parameters
Modem Commands
6-24
User’s Manual
BENTHOS
January 2001
Acoustic Telemetry Modems
Acoustic Link Test
6-25
ATXn
Syntax
ATXn [Enter]
Definition
The Acoustic Link Test command tests the acoustic link between the local
modem and the remote modem at address n by causing the remote modem
to transmit a 32-byte, a 512-byte, or a 4-kbyte preset test message, which
can be displayed by the local modem. Which test message is transmitted and
whether the message is displayed is determined by the setting of S Register
12. In addition, the local modem measures and displays the following:
ERR:
Errors—the number of bits received that
did not match the test message.
SNR:
Signal to Noise Ratio—in dB, where the
higher the value the better the acoustic
environment.
AGC:
Automatic Gain Control—a hexadecimal
number where the lower the number the
less gain, which means a relatively
strong input signal was received.
Similarly, the higher the number the more
gain, which means a relatively weak input
signal was received. The lowest gain
indication is 00, and the highest is 5F.
SPD:
Speed—the relative speed in knots
between the local and remote modems,
where a negative number indicates the
modems are moving farther apart and a
positive number indicates the modems
are moving closer together.
6 Modem Commands and Operating Parameters
Modem Commands
6-26
BENTHOS
NOTE For the local modem to execute entered commands, the modem
must be in Command mode—with the command prompt (>) displayed. If the
modem is not in Command mode, refer to page 6-9 for instructions on how
to place the modem in Command mode.
How to Use
To use the Acoustic Link Test command, type ATX followed by the
hexadecimal address of the remote modem, and then press Enter.
The remote modem will transmit the preset test message and the local
modem will display the number of errors (ERR), the signal to noise ratio
(SNR), the automatic gain control setting (AGC), and the relative speed
(SPD). In addition, depending on the Setting of S Register 12, the local
modem will also display the message, which comprises the alphanumeric
characters in the ASCII set. For the 32-byte message only a partial set of
alphanumeric characters are transmitted. For the 512-byte and 4-kbyte
messages, multiple cycles of the alphanumeric set are transmitted.
Special Considerations
When using the Acoustic Link Test command, take note of the following:
• The local modem must receive an acknowledgment from the remote
modem within the acoustic response time-out, which is determined by
the setting of S Register 7. If an acknowledgment is not received,
"Response Not Received" will be displayed.
• To optimize the performance and efficiency of the modems, consider
reducing the transmit power level with the Remote Power command
(AT$Pn,m) and use the Acoustic Link Test command to verify a low
error rate—8 or less. Also consider increasing the modem’s acoustic
baud rate by changing the setting of S Register 4 with the Set Register
command (ATSn=n). Again, use the Acoustic Link Test command to
verify a low error rate. Similarly, if a high error rate is observed,
consider increasing the transmit power level or decreasing the acoustic
baud rate, or both.
User’s Manual
January 2001
Acoustic Telemetry Modems
Remote Power
6-27
AT$Pn,m
Syntax
AT$Pn,m [Enter]
Definition
The Remote Power command sets the transmit power level of the remote
modem at address n to level m. The range of settings for m is from 01 to 08
for a range of 0 dB to -21 dB of attenuation in -3 dB steps, where 0 dB is the
maximum transmit power level and -21 dB is the minimum transmit power
level as follows:
01: -21 dB (minimum power level)
02: -18 dB
03: -15 dB
04: -12 dB
05: -09 dB
06: -06 dB
07: -03 dB
08: 00 dB (maximum power level)
NOTE For the local modem to execute entered commands, the modem
must be in Command mode—with the command prompt (>) displayed. If the
modem is not in Command mode, refer to page 6-9 for instructions on how
to place the modem in Command mode.
How to Use
To use the Remote Power command, type AT$P followed by the hexadecimal
address of the remote modem, a comma character (,), and the value of m as
determined by the required transmit power level.
NOTE The hexadecimal address n must include the leading zero for
addresses 00–09.
6 Modem Commands and Operating Parameters
Modem Commands
6-28
BENTHOS
The local modem will respond with the message "OK," and the remote
modem will set its transmit power level.
Special Considerations
When using the Remote Power command, take note of the following:
• To display the message "OK" and many other messages, S Register
13 must be set to either 01 or 02, where 01 is the factory default
setting.
• The local modem must receive an acknowledgment from the remote
modem within the acoustic response time-out, which is determined by
the setting of S Register 7. If an acknowledgment is not received,
"Response Not Received" will be displayed.
User’s Manual
January 2001
Acoustic Telemetry Modems
Read Register
6-29
ATSn?
Syntax
ATSn? [Enter] or ATS? [Enter]
Definition
The Read Register command causes the local modem to display the setting
of its S Register n, or if the S Register number is not specified, the settings of
all its S Registers. The S Register numbers are in decimal, and the S Register
settings are in hexadecimal.
NOTE For the local modem to execute entered commands, the modem
must be in Command mode—with the command prompt (>) displayed. If the
modem is not in Command mode, refer to page 6-9 for instructions on how
to place the modem in Command mode.
How to Use
To use the Read Register command, type ATS and the number of the
S Register that is to be read, followed by a question mark (?). Or type ATS?
to read all the S Registers, and then press Enter.
The local modem will display the S Register setting or settings. An
example that uses the Read Register command is shown in Figure 6-2,
where S Register 18 was first displayed by entering ATS18, and then all
the S Registers were displayed by entering ATS?
Special Considerations
The S Register settings can be interpreted from Table 6-2 on page 6-68,
which includes page references to where detailed descriptions are provided.
6 Modem Commands and Operating Parameters
Modem Commands
6-30
BENTHOS
>ATS18?
1F
>ATS?
Local Sregisters
S00=01 S01=05 S02=00 S03=02 S04=05 S05=03 S06=00
S07=0E S08=05 S09=00 S10=1E S11=03 S12=03 S13=00
S14=03 S15=05 S16=00 S17=02 S18=1F S19=03 S20=00
>
Figure 6-2 Read Register Command and Resulting Display
User’s Manual
January 2001
Acoustic Telemetry Modems
Read Remote Registers
6-31
AT$Sn
Syntax
AT$Sn [Enter]
Definition
The Read Remote Registers command causes the local modem to display
the S Register settings of the remote modem at address n. The S Register
numbers are in decimal, and the S Register settings are in hexadecimal.
NOTE For the local modem to execute entered commands, the modem
must be in Command mode—with the command prompt (>) displayed. If the
modem is not in Command mode, refer to page 6-9 for instructions on how
to place the modem in Command mode.
How to Use
To use the Read Remote Registers command, type AT$S followed by the
hexadecimal address of the remote modem, and then press Enter.
The local modem will display the S Register settings of the remote
modem. An example that uses the Read Remote Registers command is
shown in Figure 6-3, where the S Register settings of the modem with
address 1 were displayed by entering AT$S1.
Special Considerations
When using the Read Remote Registers command, take note of the
following:
• The local modem must receive an acknowledgment from the remote
modem within the acoustic response time-out, which is determined by
the setting of S Register 7. If an acknowledgment is not received,
"Response Not Received" will be displayed.
• The S Register settings can be interpreted from Table 6-2 on page
6-68, which includes page references to where detailed descriptions
are provided.
6 Modem Commands and Operating Parameters
Modem Commands
6-32
BENTHOS
>AT$S1
Remote Registers
S00=01 S01=05 S02=00 S03=02 S04=05 S05=03 S06=00
S07=0E S08=05 S09=00 S10=1E S11=03 S12=03 S13=00
S14=03 S15=05 S16=00 S17=02 S18=1F S19=03 S20=00
>
Figure 6-3 Read Remote Register Command and Resulting Display
User’s Manual
January 2001
Acoustic Telemetry Modems
Set Register
6-33
ATSn=n
Syntax
ATSn=n [Enter]
Definition
The Set Register command sets the local modem’s S Register number n to
the value entered following "=."
NOTE For the local modem to execute entered commands, the modem
must be in Command mode—with the command prompt (>) displayed. If the
modem is not in Command mode, refer to page 6-9 for instructions on how
to place the modem in Command mode.
How to Use
To use the Set Register command, type ATS and the S Register number to
be changed, followed by the equal character (=) and the hexadecimal setting
desired, and then press Enter.
The local modem will change the S register setting and respond with the
message "OK."
Special Considerations
When using the Set Register command, take note of the following:
• To display the message "OK" and many other messages, S Register
13 must be set to either 01 or 02, where 01 is the factory default
setting.
• If at any time it is desired to return the S Register settings to the values
they were when the local modem was first powered up—and the Write
command (AT&W) was not used to save the S Register settings as part
of the startup configuration—power down the modem, and then power
up the modem again.
• Using the Write command (AT&W) after using the Set Register
command will save the S Register setting as part of the startup
6 Modem Commands and Operating Parameters
Modem Commands
6-34
BENTHOS
configuration, which is the S Register settings when the modem is
powered up.
User’s Manual
January 2001
Acoustic Telemetry Modems
Write
6-35
AT&W
Syntax
AT&W [Enter]
Definition
The Write command saves the S Register settings of the local modem as the
new startup configuration.
NOTE For the local modem to execute entered commands, the modem
must be in Command mode—with the command prompt (>) displayed. If the
modem is not in Command mode, refer to page 6-9 for instructions on how
to place the modem in Command mode.
How to Use
To use the Write command, type AT&W, and then press Enter.
The local modem will save its current S Register settings as the startup
configuration. The modem will respond with the message "Sregisters
Stored."
WARNING If power is lost while the Write command is being executed, all
the S Register settings will revert to the factory default settings upon power
up.
Special Considerations
When using the Write command, take note of the following:
• To display the message "Sregisters Stored" and many other
messages, S Register 13 must be set to either 01 or 02, where 01 is
the factory default setting.
• When the modem is powered up, the S Registers will be set to their
new startup configuration. The S Register settings can again be
changed with the Set Register command (ATSn=n), and then saved as
the new startup configuration with the Write command.
6 Modem Commands and Operating Parameters
Modem Commands
6-36
User’s Manual
BENTHOS
January 2001
Acoustic Telemetry Modems
Lowpower State
6-37
ATL
Syntax
ATL [Enter]
Definition
The Lowpower State command forces the idle time of the local modem to
expire, which in turn causes the modem to go into the lowpower state.
NOTE For the local modem to execute entered commands, the modem
must be in Command mode—with the command prompt (>) displayed. If the
modem is not in Command mode, refer to page 6-9 for instructions on how
to place the modem in Command mode.
How to Use
To use the Lowpower State command, type ATL, and then press Enter.
The local modem will immediately go into lowpower state and respond
with the message "Lowpower."
Special Considerations
When using the Lowpower State command, take note of the following:
• To display the message "Lowpower" and many other messages,
S Register 13 must be set to either 01 or 02, where 01 is the factory
default setting.
• The modem can be awakened by input either from its host processor
over the serial interface or from a remote modem over the acoustic link.
When awakened, the modem will go into the operating mode
determined by the setting of S Register 15.
WARNING The RS-232 driver will shut down whenever the modem is in the
lowpower state. Therefore, handshaking must be turned off at the host
processor when sending the first byte of data to the modem over the serial
interface. After the first byte is sent, handshaking can be turned on again.
6 Modem Commands and Operating Parameters
Modem Commands
6-38
User’s Manual
BENTHOS
January 2001
Acoustic Telemetry Modems
Range
6-39
ATRn
Syntax
ATRn [Enter]
Definition
The Range command causes the local modem to display the range from the
local modem to the remote modem at address n. The displayed range is from
0 to 999.9 meters in increments of tenths of meters, and 1000 to 9999 meters
in increments of one meter.
NOTE For the local modem to execute entered commands, the modem
must be in Command mode—with the command prompt (>) displayed. If the
modem is not in Command mode, refer to page 6-9 for instructions on how
to place the modem in Command mode.
How to Use
To use the Range command, type ATR followed by the hexadecimal address
of the remote modem, and then press Enter.
The modem will respond by displaying the range in meters to the remote
modem.
Special Considerations
The displayed range is the one-way range to the remote modem and is
determined acoustically based on a sound speed in seawater of
1500 meters/second.
6 Modem Commands and Operating Parameters
Modem Commands
6-40
User’s Manual
BENTHOS
January 2001
Acoustic Telemetry Modems
6-41
Remote Doppler Correction AT$Dn,m
Syntax
AT$Dn,m [Enter]
Definition
The Remote Doppler Correction command disables or enables doppler
correction of the remote modem at address n. The settings for m are 00 and
01 as follows:
00: Disable
01: Enable
NOTE For the local modem to execute entered commands, the modem
must be in Command mode—with the command prompt (>) displayed. If the
modem is not in Command mode, refer to page 6-9 for instructions on how
to place the modem in Command mode.
How to Use
To use the Remote Doppler Correction command, type AT$D followed by the
hexadecimal address of the remote modem, a comma character (,), and the
value of m as determined by the required setting.
The local modem will respond with the message "OK," and the remote
modem will enable or disable its doppler correction.
Special Considerations
When using the Remote Doppler Correction command, take note of the
following:
• To display the message "OK" and many other messages, S Register
13 must be set to either 01 or 02, where 01 is the factory default
setting.
• The local modem must receive an acknowledgment from the remote
modem within the acoustic response time-out, which is determined by
the setting of S Register 7. If an acknowledgment is not received,
"Response Not Received" will be displayed.
6 Modem Commands and Operating Parameters
Modem Commands
6-42
User’s Manual
BENTHOS
January 2001
Acoustic Telemetry Modems
6-43
Local Battery Voltage
ATV
Syntax
ATV [Enter]
Definition
The Local Battery Voltage command causes the local modem to display the
DSP/receiver and transmitter/preamp battery pack voltages.
NOTE For the local modem to execute entered commands, the modem
must be in Command mode—with the command prompt (>) displayed. If the
modem is not in Command mode, refer to page 6-9 for instructions on how
to place the modem in Command mode.
How to Use
To use the Local Battery Voltage command, type ATV, and then press Enter.
The local modem will display the DSP/receiver and transmitter/preamp
battery pack voltages of the local modem.
Special Considerations
When using the Local Battery Voltage command, take note of the following:
• The accuracy of the DSP/receiver battery pack measurement is ±0.2 V;
the transmitter/preamp battery pack measurement, ±1.0 V.
• While the voltages are being measured, the DSP/receiver battery pack
is under load and the transmitter/preamp battery pack is open circuited.
NOTE For alkaline battery packs only, refer to Table 7-1 and Table 7-2 on
page 7-3 for the estimated battery pack capacity remaining verses the
measured voltage for both the transmitter/preamp and DSP/receiver battery
packs.
6 Modem Commands and Operating Parameters
Modem Commands
6-44
User’s Manual
BENTHOS
January 2001
Acoustic Telemetry Modems
Remote Battery Voltage
6-45
AT$Vn
Syntax
AT$Vn [Enter]
Definition
The Remote Battery Voltage command causes the local modem to display
the DSP/receiver and transmitter/preamp battery pack voltages of the remote
modem at address n.
NOTE For the local modem to execute entered commands, the modem
must be in Command mode—with the command prompt (>) displayed. If the
modem is not in Command mode, refer to page 6-9 for instructions on how
to place the modem in Command mode.
How to Use
To use the Remote Battery Voltage command, type AT$V followed by the
hexadecimal address of the remote modem, and then press Enter.
The local modem will display the DSP/receiver and transmitter/preamp
battery pack voltages of the remote modem.
Special Considerations
When using the Remote Battery Voltage command, take note of the
following:
• The local modem must receive an acknowledgment from the remote
modem within the acoustic response time-out, which is determined by
the setting of S Register 7. If an acknowledgment is not received,
"Response Not Received" will be displayed.
• The accuracy of the DSP/receiver battery pack measurement is ±0.2 V;
the transmitter/preamp battery pack measurement, ±1.0 V.
• While the voltages are being measured, the DSP/receiver battery pack
is under load and the transmitter/preamp battery pack is open circuited.
6 Modem Commands and Operating Parameters
Modem Commands
6-46
User’s Manual
BENTHOS
January 2001
Acoustic Telemetry Modems
Break
6-47
AT$Kn
Syntax
AT$Kn [Enter]
Definition
The Break command establishes an acoustic connection with the remote
modem at address n, which is interfaced with an RD Instruments acoustic
doppler current meter (ADCP). It causes the local modem to go into Online
mode and to go online with the remote modem. The acoustic baud rate is
determined by the setting of S Register 4 of the local modem. In addition, the
remote modem outputs a break to the RDI current meter by holding the TXD
output of the modem high for 350 milliseconds. The break wakes up and
resets the current meter.
NOTE For the local modem to execute entered commands, the modem
must be in Command mode—with the command prompt (>) displayed. If the
modem is not in Command mode, refer to page 6-9 for instructions on how
to place the modem in Command mode.
How to Use
To use the Break command, type AT$K followed by the hexadecimal address
of the remote modem, and then press Enter.
The local modem will establish an acoustic link with the addressed remote
modem and cause the TXD output to go high for 350 milliseconds.
Special Considerations
The Break command is similar to the Dial (ATDn) command. Refer to "Dial
ATDn" on page 6-17 for information on the Dial command.
NOTE For the ATM-800 Series Acoustic Telemetry modems, while the local
modem is online with the remote modem, and if the PC can generate the
equivalent break, the local modem will command the remote modem to
send the break to the RDI instrument.
6 Modem Commands and Operating Parameters
Modem Commands
6-48
User’s Manual
BENTHOS
January 2001
Acoustic Telemetry Modems
6-49
Remote Data Logger Enable AT$BEn
Syntax
AT$BEn [Enter]
Definition
The Remote Data Logger Enable command causes the remote modem at
address n to go into Datalogger mode.
NOTE For the local modem to execute entered commands, the modem
must be in Command mode—with the command prompt (>) displayed. If the
modem is not in Command mode, refer to page 6-9 for instructions on how
to place the modem in Command mode.
How to Use
To use the Remote Data Logger Enable command, type AT$BE followed by
the hexadecimal address of the remote modem, and then press Enter.
The local modem will respond with the message "OK," and the remote
modem will go into Datalogger mode.
Special Considerations
When using the Remote Data Logger Enable command, take note of the
following:
• To display the message "OK" and many other messages, S Register
13 must be set to either 01 or 02, where 01 is the factory default
setting.
• The local modem must receive an acknowledgment from the remote
modem within the acoustic response time-out, which is determined by
the setting of S Register 7. If an acknowledgment is not received,
"Response Not Received" will be displayed.
• The Remote Data Logger Enable command sets S Register 15 of the
remote modem to 02.
6 Modem Commands and Operating Parameters
Modem Commands
6-50
User’s Manual
BENTHOS
January 2001
Acoustic Telemetry Modems
6-51
Remote Data Logger Disable AT$BDn
Syntax
AT$BDn [Enter]
Definition
The Remote Data Logger Disable command causes the remote modem at
address n to go into Command mode if it is in Datalogger mode.
NOTE For the local modem to execute entered commands, the modem
must be in Command mode—with the command prompt (>) displayed. If the
modem is not in Command mode, refer to page 6-9 for instructions on how
to place the modem in Command mode.
How to Use
To use the Remote Data Logger Disable command, type AT$BD followed by
the hexadecimal address of the remote modem, and then press Enter.
The local modem will respond with the message "OK," and the remote
modem will go into Command mode if it is in Datalogger mode.
Special Considerations
When using the Remote Data Logger Disable command, take note of the
following:
• To display the message "OK" and many other messages, S Register
13 must be set to either 01 or 02, where 01 is the factory default
setting.
• The local modem must receive an acknowledgment from the remote
modem within the acoustic response time-out, which is determined by
the setting of S Register 7. If an acknowledgment is not received,
"Response Not Received" will be displayed.
• The Remote Data Logger Disable command sets S Register 15 of the
remote modem to 00.
• The Remote Data Logger Disable command has no effect on the
remote modem if the remote modem is not in Datalogger mode.
6 Modem Commands and Operating Parameters
Modem Commands
6-52
User’s Manual
BENTHOS
January 2001
Acoustic Telemetry Modems
Read Remote Data Logger
6-53
AT$BTn
Syntax
AT$BTn [Enter]
Definition
The Read Remote Data Logger command causes the local modem to display
the contents of the data logger memory of the remote modem at address n.
NOTE For the local modem to execute entered commands, the modem
must be in Command mode—with the command prompt (>) displayed. If the
modem is not in Command mode, refer to page 6-9 for instructions on how
to place the modem in Command mode.
How to Use
To use the Read Remote Data Logger command, type AT$BT followed by the
hexadecimal address of the remote modem, and then press Enter.
The local modem will display the contents of the remote modem’s data
logger memory.
Special Considerations
When using the Read Remote Data Logger command, take note of the
following:
• The local modem must receive an acknowledgment from the remote
modem within the acoustic response time-out, which is determined by
the setting of S Register 7. If an acknowledgment is not received,
"Response Not Received" will be displayed.
• The contents of the remote modem’s data logger memory are
transmitted at the baud rate set by S Register 4 of the local modem. If
the 896-kbyte data logger memory is full, downloading its contents at a
baud rate of 1200 bits/second will take 2.2 hours.
• While the contents of the remote modem’s data logger memory is
being transmitted, the remote modem will not accept any input on the
serial interface or over the acoustic link.
6 Modem Commands and Operating Parameters
Modem Commands
6-54
User’s Manual
BENTHOS
January 2001
Acoustic Telemetry Modems
Clear Remote Data Logger
6-55
AT$BCn
Syntax
AT$BCn [Enter]
Definition
The Clear Remote Data Logger command causes the local modem to clear
the contents of the data logger memory of the remote modem at address n.
NOTE For the local modem to execute entered commands, the modem
must be in Command mode—with the command prompt (>) displayed. If the
modem is not in Command mode, refer to page 6-9 for instructions on how
to place the modem in Command mode.
How to Use
To use the Clear Remote Data Logger command, type AT$BC followed by
the hexadecimal address of the remote modem, and then press Enter.
The local modem will clear the contents of the remote modem’s data
logger memory.
Special Considerations
When using the Clear Remote Data Logger command, take note of the
following:
• The local modem must receive an acknowledgment from the remote
modem within the acoustic response time-out, which is determined by
the setting of S Register 7. If an acknowledgment is not received,
"Response Not Received" will be displayed.
• The time required to clear a remote modem’s data logger memory is
approximately 20 seconds plus the one-way sound travel time for the
acoustic command to reach the remote modem. Since sound travels at
about 1500 meters/second in seawater, it will take approximately
22 seconds to clear the data logger memory of a remote modem that is
3000 meters away from the local modem.
6 Modem Commands and Operating Parameters
Modem Commands
6-56
BENTHOS
• While the contents of the remote modem’s data logger memory is
being cleared, the remote modem will not accept any input on the serial
interface or over the acoustic link.
User’s Manual
January 2001
Acoustic Telemetry Modems
Remote Bytes Stored
6-57
AT$BNn
Syntax
AT$BNn [Enter]
Definition
The Remote Bytes Stored command causes the local modem to display the
number of bytes of data stored in the data logger memory of the remote
modem at address n.
NOTE For the local modem to execute entered commands, the modem
must be in Command mode—with the command prompt (>) displayed. If the
modem is not in Command mode, refer to page 6-9 for instructions on how
to place the modem in Command mode.
How to Use
To use the Remote Bytes Stored command, type AT$BN followed by the
hexadecimal address of the remote modem, and then press Enter.
The local modem will display the number of bytes of data stored in the
remote modem’s data logger memory.
Special Considerations
When using the Remote Bytes Stored command, take note of the following:
• The local modem must receive an acknowledgment from the remote
modem within the acoustic response time-out, which is determined by
the setting of S Register 7. If an acknowledgment is not received,
"Response Not Received" will be displayed.
• While the number of bytes of data stored in the data logger memory is
being transmitted, the remote modem will not accept any input on the
serial interface or over the acoustic link.
6 Modem Commands and Operating Parameters
Modem Commands
6-58
User’s Manual
BENTHOS
January 2001
Acoustic Telemetry Modems
Clear Local Data Logger
6-59
ATBC
Syntax
ATBC [Enter]
Definition
The Clear Local Data Logger command causes the local modem to clear the
contents of its data logger memory.
NOTE For the local modem to execute entered commands, the modem
must be in Command mode—with the command prompt (>) displayed. If the
modem is not in Command mode, refer to page 6-9 for instructions on how
to place the modem in Command mode.
How to Use
To use the Clear Local Data Logger command, type ATBC, and then press
Enter.
The local modem will clear the contents of its data logger memory. While
clearing the memory, the message "20 Seconds to clear..." is displayed
followed by "Buffer Cleared" when the memory is cleared.
Special Considerations
When using the Clear Local Data Logger command, take note of the
following:
• To display the message "20 Seconds to clear..." and many other
messages, S Register 13 must be set to either 01 or 02, where 01 is
the factory default setting.
• The time required to clear the local modem’s data logger memory is
approximately 20 seconds.
• While the contents of the local modem’s data logger memory is being
cleared, the local modem will not accept any input on the serial
interface or over the acoustic link.
6 Modem Commands and Operating Parameters
Modem Commands
6-60
User’s Manual
BENTHOS
January 2001
Acoustic Telemetry Modems
Local Bytes Stored
6-61
ATBN
Syntax
ATBN [Enter]
Definition
The Local Bytes Stored command causes the local modem to display the
number of bytes of data stored in its data logger memory.
NOTE For the local modem to execute entered commands, the modem
must be in Command mode—with the command prompt (>) displayed. If the
modem is not in Command mode, refer to page 6-9 for instructions on how
to place the modem in Command mode.
How to Use
To use the Local Bytes Stored command, type ATBN, and then press Enter.
The local modem will display the number of bytes of data stored in its data
logger memory.
6 Modem Commands and Operating Parameters
Modem Commands
6-62
User’s Manual
BENTHOS
January 2001
Acoustic Telemetry Modems
Output Local Data Logger
6-63
ATBT
Syntax
ATBT [Enter]
Definition
The Output Local Data Logger command causes the local modem to output
the contents of its data logger memory over the serial interface to its host
processor.
NOTE For the local modem to execute entered commands, the modem
must be in Command mode—with the command prompt (>) displayed. If the
modem is not in Command mode, refer to page 6-9 for instructions on how
to place the modem in Command mode.
How to Use
To use the Output Local Data Logger command, type ATBT.
The modem will output the contents of its data logger memory over the
serial interface to its host processor.
Special Considerations
When using the Output Local Data Logger command, take note of the
following:
• The contents of the data logger memory does not change when it is
output over the serial interface.
• While the contents of the local modem’s data logger memory is being
output, the local modem will not accept any input on the serial interface
or over the acoustic link.
6 Modem Commands and Operating Parameters
Modem Commands
6-64
User’s Manual
BENTHOS
January 2001
Acoustic Telemetry Modems
Output Local Page
6-65
ATBPn
Syntax
ATBPn [Enter]
Definition
The Output Local Page command causes the local modem to output the
contents of page n of the data logger memory over the serial interface to its
host processor. The range of page numbers is from 2 to 15 and each page
contains a maximum of 64 kbytes of data.
NOTE For the local modem to execute entered commands, the modem
must be in Command mode—with the command prompt (>) displayed. If the
modem is not in Command mode, refer to page 6-9 for instructions on how
to place the modem in Command mode.
How to Use
To use the Output Local Page command, type ATBP followed by the selected
data logger page number of the local modem’s data logger memory.
The local modem will output the contents of the selected data logger page
over the serial interface to its host processor.
Special Considerations
When using the Output Local Page command, take note of the following:
• The contents of the data logger page does not change when it is output
over the serial interface.
• While the contents of the local modem’s data logger page is being
output, the local modem will not accept any input on the serial interface
or over the acoustic link.
6 Modem Commands and Operating Parameters
Modem Commands
6-66
User’s Manual
BENTHOS
January 2001
Acoustic Telemetry Modems
6-67
Modem Operating Parameters
The ATM-870 Series and ATM-880 Series Acoustic Telemetry Modem
operating parameters are controlled by S Register settings, which are stored
in nonvolatile memory. The modem operating parameters and their
corresponding S Register settings are listed in Table 6-2. Also listed in the
table are the page references to where detailed descriptions of the
S Registers and their available settings are provided. The operating
parameters include the serial interface and acoustic link baud rates, the
modem address, the idle time, the transmit power level, the forwarding delay,
and a number of other parameters that affect the operation of the modem.
The S Register settings of the local modem can only be changed when the
modem is in Command mode. And when the modem is powered up, the
S Register settings are automatically set to their default settings, which is
their startup configuration. Any changes made to the S Register settings
during operation can be saved as the new startup configuration with the Write
command (AT&W), and the changed settings become the new default
settings. In addition, the S Registers can be set to their original factory default
startup configuration at any time with the Factory Reset command (AT&F).
NOTE With the exception of the Remote Power command (AT$Pn,m), which
changes the setting of S Register 6, the S Register settings of a remote
modem cannot be changed by an acoustic command.
To change an S Register setting, the modem must first be placed into
Command mode.
To place the modem into Command mode, do one of the following:
• Enter +++ rapidly.
• If S Register 15 is set to 00, power down and then power up the
modem.
• If S Register 15 is set to 00, wait for the idle time to expire.
The modem will go into Command mode and display the command
prompt (>).
To change the S Register setting, type ATS and the S Register number to be
changed, followed by the equal character (=) and the hexadecimal setting
desired, and then press Enter.
6 Modem Commands and Operating Parameters
Modem Operating Parameters
6-68
BENTHOS
Table 6-2 ATM-870 Series and ATM-880 Series Acoustic Telemetry
Modem S Registers
S Register
Name
Factory Default
Setting
Page
<Version>
6-69
S0
Software Version Number
S1
Doppler Correction
00
6-71
S2
Received Data Statistics
00
6-73
S3
Serial Baud Rate
02
6-75
S4
Acoustic Baud Rate
05
6-77
S5
Reserved
***
6-79
S6
Transmit Power Level
08
6-81
S7
Acoustic Response Time-out
0E
6-83
S8
Forwarding Delay
3C
6-85
S9
Reserved
***
6-87
S10
Idle Time
24
6-89
S11
RS-232 Driver/Flow Control
00
6-91
S12
ATX Test Message Length
00
6-93
S13
Verbose Level
01
6-95
S14
Response Address
00
6-97
S15
Operating Mode
00
6-99
S16
Reserved
***
6-101
S17
Reserved
***
6-103
S18
Modem Address
00
6-105
S19
Reserved
***
6-107
S20
Reserved
***
6-109
NOTE The factory settings for all reserved S Registers (***) should not be
altered.
User’s Manual
January 2001
Acoustic Telemetry Modems
6-69
Software Version Number
S0
Default Setting
<Version>
The software version number.
Definition
The setting of S Register 0 is the software version number. For example, a
setting of 15 is Version 1.5, and a setting of 20 is Version 2.0.
Available Settings
The setting of S Register 0 is factory set and cannot be changed.
6 Modem Commands and Operating Parameters
Modem Operating Parameters
6-70
User’s Manual
BENTHOS
January 2001
Acoustic Telemetry Modems
6-71
Doppler Correction
S1
Default Setting
00
Doppler correction is disabled.
Definition
The setting of S Register 1 determines whether Doppler correction is disabled
or enabled.
Available Settings
There are two available settings for S Register 1 as listed below.
00: Disables Doppler correction.
01: Enables Doppler correction.
Special Considerations
When Changing S Register 1, take note of the following:
• Doppler correction is effective to five knots of relative speed between
two modems communicating over the acoustic link.
• Doppler correction should be disabled if the two modems are fixed
such that there is no relative speed. Otherwise it is possible to obtain a
false Doppler correction in a low signal-to-noise environment.
• Doppler correction cannot be used with acoustic baud rates equal to or
greater than 800 bits/second for an ATM-870 Series Acoustic
Telemetry Modem; there is no baud rate limit for an ATM-880 Series.
• Doppler correction can be enabled or disabled remotely with the
Remote Doppler Correction command (AT$Dn,m).
6 Modem Commands and Operating Parameters
Modem Operating Parameters
6-72
User’s Manual
BENTHOS
January 2001
Acoustic Telemetry Modems
6-73
Received Data Statistics
S2
Default Setting
00
The display of received data statistics is disabled.
Definition
The setting of S Register 2 determines whether the received data statistics
are displayed after receiving a data packet. The received data statistics
comprise the following:
CRC:
Checksum—pass or fail, where a pass
condition signifies no errors were
detected, and a fail condition signifies
one or more bit errors were detected.
SNR:
Signal to Noise Ratio—in dB, where the
higher the value the better the acoustic
environment.
AGC:
Automatic Gain Control—a hexadecimal
number where the lower the number the
less gain, which means a relatively
strong input signal was received.
Similarly, the higher the number the more
gain, which means a relatively weak input
signal was received. The lowest gain
indication is 00, and the highest is 5F.
SPD:
Speed—the relative speed in knots
between the local and remote modems,
where a negative number indicates the
modems are moving farther apart and a
positive number indicates the modems
are moving closer together.
Available Settings
There are two available settings for S Register 2 as listed below.
00: Disables the display of received data statistics.
01: Enables the display of received data statistics.
6 Modem Commands and Operating Parameters
Modem Operating Parameters
6-74
User’s Manual
BENTHOS
January 2001
Acoustic Telemetry Modems
6-75
Serial Baud Rate
S3
Default Setting
02
The baud rate of the modem’s RS-232/422 serial
interface is 9600 baud with no echo.
Definition
The setting of S Register 3 determines the baud rate of the modem’s
RS-232/422 serial interface.
Available Settings
The available settings for S Register 3 are listed below and include settings
with and without echo. Select from the settings with echo only if a PC is being
used as the host processor and its terminal program does not have echo
capability, and it is desired to display all the characters entered from the
keyboard. If the terminal program has echo capability, select from the settings
without echo and turn the program’s echo feature on if it is desired to display
the characters entered.
00: 2400 baud RS-232 (no echo)
80: 2400 baud RS-232 (w/echo)
01: 4800 baud RS-232 (no echo)
81: 4800 baud RS-232 (w/echo)
02: 9600 baud RS-232 (no echo)
82: 9600 baud RS-232 (w/echo)
08: 2400 baud RS-422 (no echo)
88: 2400 baud RS-422 (w/echo)
09: 4800 baud RS-422 (no echo)
89: 4800 baud RS-422 (w/echo)
0A: 9600 baud RS-422 (no echo)
8A: 9600 baud RS-422 (w/echo)
WARNING If the baud rate of the modem’s serial interface is changed, be
sure to set the baud rate of its host processor to the same baud rate,
otherwise it will not be possible for the host processor to establish
communications with the modem.
6 Modem Commands and Operating Parameters
Modem Operating Parameters
6-76
BENTHOS
Special Considerations
When Changing S Register 3, take note of the following:
• When connecting an instrument to the modem, and with S Register 3
set to the default 02 for 9600 baud with no echo, the instrument’s serial
port should be configured as follows:
Baud rate:
9600 baud
Parity:
none
Data bits:
8
Stop bits:
1
• To have a changed S Register 3 setting take effect, enter the
Lowpower State command (ATL) to place the modem into the
lowpower state, and then enter the Attention command (AT) to bring
the modem out of the lowpower state. Or instead, use the Write
command (AT&W) to save the S Register setting as part of the startup
configuration, then power down and then power up the modem.
• After changing from RS-232 to RS-422, an RS-422 connection is
required to switch back to RS-232. The opposite is true after changing
from RS-422 to RS-232.
NOTE The ATM-871 or ATM-881 Deck Box display will remain blank for all
settings that use RS-422.
User’s Manual
January 2001
Acoustic Telemetry Modems
6-77
Acoustic Baud Rate
S4
Default Setting
05
The acoustic baud rate of the modem is
600 bits/second Hadamard with 25 milliseconds
multipath guard period.
Definition
The setting of S Register 4 determines the acoustic baud rate, the modulation
scheme—Hadamard MFSK or 1-of-4 MFSK—and whether any one or more
of the three methods for increased reliability are used, which are data
redundancy, convolutional coding and multipath guard period.
Available Settings
The range of settings for S Register 4 is from 00 to 03, 05 to 08, and 0A to
0D. Which setting to use depends on the application as described below.
For low noise, close range applications with no multipath, or when
communicating in the vertical channel, select from the following:
00: 2400 bits/sec 1-of-4
01: 1200 bits/sec Hadamard
02: 800 bits/sec 1-of-4 with rate 1/3 convolutional coding
03: 600 bits/sec 1-of-4 repeated twice with rate 1/2 convolutional coding
For low noise, moderate multipath conditions, select from the following:
05: 600 bits/sec Hadamard with 25 ms multipath guard period
06: 400 bits/sec 1-of-4 with rate 1/3 convolutional coding and 25 ms
multipath guard period
07: 300 bits/sec Hadamard with rate 1/2 convolutional coding and 25 ms
multipath guard period
08: 300 bits/sec 1-of-4 repeated twice with rate 1/2 convolutional coding
and 25 ms multipath guard period
6 Modem Commands and Operating Parameters
Modem Operating Parameters
6-78
BENTHOS
For high noise or high multipath conditions or both, select from the following:
0A: 200 bits/sec Hadamard with rate 1/2 convolutional coding and 50 ms
multipath guard period
0B: 150 bits/sec Hadamard repeated twice with rate 1/2 convolutional
coding and 25 ms multipath guard period
0C: 120 bits/sec 1-of-4 repeated five times with rate 1/2 convolutional
coding and 25 ms multipath guard period
0D: 100 bits/sec Hadamard repeated six times with 25 ms multipath guard
period
Special Considerations
When Changing S Register 4, take note of the following:
• If the local modem initiates communications with a remote
modem by using the Dial command (ATDn), the local modem’s
S Register 4 setting determines the acoustic baud rate for both
modems—regardless of the S Register 4 setting of the remote modem.
If the remote modem initiates communications with the local modem, it
is the remote modem’s S Register 4 setting that determines the
acoustic baud rate.
• S Register 4 of both modems must have the same setting when the
local modem does not use the Dial command (ATDn) to go online with
a remote modem. For example, setting S Register 15 to 01 will cause
the local modem to go into Online mode and to go online with the
remote modem whose address is the setting of S Register 14.
User’s Manual
January 2001
Acoustic Telemetry Modems
6-79
Reserved
S5
6 Modem Commands and Operating Parameters
Modem Operating Parameters
6-80
User’s Manual
BENTHOS
January 2001
Acoustic Telemetry Modems
6-81
Transmit Power Level
S6
Default Setting
08
The transmit power level of the modem is set to
0 dB, which is the highest power level.
Definition
The setting of S Register 6 determines the transmit power level of a modem.
Available Settings
The range of settings for S Register 6 is from 01 to 08 for a range of 0 dB to
-21 dB of attenuation in -3 dB steps, where 0 dB is the maximum transmit
power level and -21 dB is the minimum transmit power level as follows:
01: -21 dB (minimum transmit power)
02: -18 dB
03: -15 dB
04: -12 dB
05: -09 dB
06: -06 dB
07: -03 dB
08: 00 dB (maximum transmit power)
Special Considerations
The transmit power of a modem can be changed remotely with the Remote
Power command (AT$Pn,m).
6 Modem Commands and Operating Parameters
Modem Operating Parameters
6-82
User’s Manual
BENTHOS
January 2001
Acoustic Telemetry Modems
6-83
Acoustic Response Time-out
S7
Default Setting
0E
The local modem will wait seven seconds after
sending an acoustic command to a remote modem
for the remote modem to acknowledge receipt of
the command.
Definition
The setting of S Register 7 determines the acoustic response time-out, which
is the time during which a local modem will wait for an acknowledgment to an
acoustic command sent to a remote modem. If no acknowledgment is
received, the local modem will output the results message “Response Not
Received.”
Available Settings
The range of settings for S Register 7 is from 05 to 8C, where each increment
represents 0.5 seconds for a time range of 2.5 to 70.0 seconds.
Special Considerations
The acoustic response time-out should be increased as the range between a
local and a remote modem increases. As sound travels at about 1500
meters/second in seawater, the total travel time of the sound for a two-way
distance of 6000 meters is about 4 seconds. In addition, the time it takes for
a modem to respond to a command must be considered and is dependent on
the baud rate and the command sent. This time, however, will always be less
than 1 second. Therefore, the default setting of 0E for 7 seconds is sufficient
for modem ranges equal to or less than 3000 meters, which is equivalent to
a two-way distance of 6000 meters.
6 Modem Commands and Operating Parameters
Modem Operating Parameters
6-84
User’s Manual
BENTHOS
January 2001
Acoustic Telemetry Modems
6-85
Forwarding Delay
S8
Default Setting
3C
The modem will transmit the data in its
4-kbyte transmit data buffer, or transfer the data in
its 8-kbyte temporary data buffer to the data logger
memory when the corresponding buffer is full or
three seconds after the last data are input,
whichever occurs first.
Definition
The setting of S Register 8 determines the forwarding delay of a modem.
When a local modem is in Online mode and is online with a remote modem,
the local modem accumulates data in its 4-kbyte transmit data buffer. These
data are input from its host processor over the serial interface. Immediately
after the transmit data buffer has filled, the 4-kbyte data packet is transmitted.
However, if the transmit data buffer does not completely fill, the data are
transmitted anyway a preset time after the last data are input. This time is the
forwarding delay. Similarly, when a modem is in Datalogger mode, the data
in the 8-kbyte temporary data buffer are transferred to the data logger
memory immediately after the buffer has filled, or after the forwarding delay.
Available Settings
The range of settings for S Register 8 is from 01 to 64, where each increment
represents 0.05 seconds for a time range of 0.05 to 5.0 seconds.
Special Considerations
When Changing S Register 8, take note of the following:
• Transmission efficiency is improved if the 4 kbyte transmit data buffer
is allowed to fill before transmitting the data.
• Handshaking should be used to ensure there is no loss of data when
the 4-kbyte transmit buffer or the 8-kbyte temporary data buffer is full,
or the modem is transmitting data from the transmit data buffer or the
data logger memory, transferring data from the temporary data buffer
to the data logger memory, or clearing the data logger memory.
6 Modem Commands and Operating Parameters
Modem Operating Parameters
6-86
User’s Manual
BENTHOS
January 2001
Acoustic Telemetry Modems
6-87
Reserved
S9
6 Modem Commands and Operating Parameters
Modem Operating Parameters
6-88
User’s Manual
BENTHOS
January 2001
Acoustic Telemetry Modems
6-89
Idle Time
S10
Default Setting
24
If the local modem does not receive input from its
host processor over the serial interface or from a
remote modem over the acoustic link in 180
seconds, it will go into the lowpower state.
Definition
The setting of S Register 10 determines the idle time, which is the time after
which a modem will go into the lowpower state if there is no input either from
its host processor over the serial interface or from a remote modem over the
acoustic link.
WARNING The RS-232 driver will shut down whenever the modem is in the
lowpower state. Therefore, handshaking must be turned off at the host
processor when sending the first byte of data to the modem over the serial
interface. After the first byte is sent, handshaking can be turned on again.
Available Settings
The range of settings for S Register 10 is from 01 to 3C, where each
increment represents 5 seconds for a time range of 5 to 300 seconds. In
addition, 00 sets the idle time to 2 seconds and FF prevents the modem from
going into the lowpower state indefinitely.
Special Considerations
When Changing S Register 10, take note of the following:
• If a remote modem will be accessed once a day to retrieve a small
amount of data, the idle time should be set relatively short. If there will
be more frequent and more interactive sessions, the idle time should
be set relatively long to avoid the need to redial frequently.
• If a modem is not being powered by batteries, as is typically the case
for an ATM-871 or ATM-881 Deck Box or an ATM-871R or ATM-881R
Rack Mounted Deck Box, the idle time should be set long, or indefinite,
to improve operating efficiency.
6 Modem Commands and Operating Parameters
Modem Operating Parameters
6-90
User’s Manual
BENTHOS
January 2001
Acoustic Telemetry Modems
6-91
RS-232 Driver/Flow Control
S11
Default Setting
00
The RS-232 serial interface driver will shut down
after 30 seconds of no activity.
Definition
The setting of S Register 11 determines whether the RS-232 driver is allowed
to shut down after 30 seconds of no activity or is forced to remain active.
Allowing the driver to shut down conserves battery power. The setting also
determines whether hardware RTS/CTS handshaking or software
XON/XOFF handshaking is used for flow control.
WARNING The RS-232 driver will shut down whenever the modem is in the
lowpower state. Therefore, handshaking must be turned off at the host
processor when sending the first byte of data to the modem over the serial
interface. After the first byte is sent, handshaking can be turned on again.
Available Settings
There are three available settings for S Register 11 as listed below.
00: Selects hardware RTS/CTS handshaking and allows the RS-232
driver to shut down after 30 seconds of no activity.
01: Selects hardware RTS/CTS handshaking and forces the RS-232
driver to remain on at all times by pulsing the driver once every 25
seconds. (For factory use only, do not use.)
02: Selects hardware RTS/CTS handshaking and forces the RS-232
driver to remain on at all times by maintaining power to the driver
directly.
03: Selects software XON/XOFF handshaking and allows the RS-232
driver to shut down after 30 seconds of no activity.
6 Modem Commands and Operating Parameters
Modem Operating Parameters
6-92
User’s Manual
BENTHOS
January 2001
Acoustic Telemetry Modems
6-93
ATX Test Message Length
S12
Default Setting
00
When the Acoustic Link Test command (ATXn) is
used, the remote modem will be commanded to
transmit a 512-byte preset test message, and
when the message is received by the local
modem, it will not be displayed.
Definition
The setting of S Register 12 determines which of three preset test messages
a remote modem will be commanded to transmit when the Acoustic Link Test
command (ATXn) is used. The setting also determines whether the preset
message is displayed.
Available Settings
There are six available settings for S Register 12 as listed below.
00: 512-byte message (no display) 80: 512 byte message (with display)
01: 32-byte message (no display)
81: 32-byte message (with display)
02: Reserved
82: Reserved
03: 4-kbyte message (no display)
83: 4 k-byte message (with display)
6 Modem Commands and Operating Parameters
Modem Operating Parameters
6-94
User’s Manual
BENTHOS
January 2001
Acoustic Telemetry Modems
6-95
Verbose Level
S13
Default Setting
01
The verbose level of the modem is set to the level
which provides standard results messages only.
Definition
The setting of S Register 13 determines whether no messages, standard
results messages, or all messages, including diagnostic messages are
displayed.
Available Settings
The range of settings for S Register 13 is from 00 to 02 as listed below.
00: No messages are displayed.
01: Only standard results messages are displayed.
02: All messages are displayed. (For factory use only, do not use.)
Special Considerations
When Changing S Register 13, take note of the following:
• When the built-in keypad and display of an ATM-871 or ATM-881 Deck
Box is used to enter commands and display messages, or a PC is used
as the host processor, S Register 13 should be set to 01. The display
on the deck box or the monitor of the PC provides sufficient messaging
to determine the status of the modem.
• When an instrument is used as the host processor, S Register 13
should be set to 00. This will avoid errors that might occur should the
instrument be unable to recognize the messages.
6 Modem Commands and Operating Parameters
Modem Operating Parameters
6-96
User’s Manual
BENTHOS
January 2001
Acoustic Telemetry Modems
6-97
Response Address
S14
Default Setting
00
The address of the remote modem that the local
modem will go online with when the local modem
has gone into Online mode without using the Dial
command (ATDn) is 00.
Definition
The setting of S Register 14 is the hexadecimal address of the modem that
the local modem will go online with when the local modem goes into Online
mode without using the Dial command (ATDn). This will occur when
S Register 15 is set to 01 or, if already set to 01, when using the Lowpower
State command (ATL), allowing the idle time to expire or cycling power.
Available Settings
The range of settings for S Register 14 is from 00 to EF.
6 Modem Commands and Operating Parameters
Modem Operating Parameters
6-98
User’s Manual
BENTHOS
January 2001
Acoustic Telemetry Modems
Operating Mode
6-99
S15
Default Setting
00
When the modem is powered up or when
awakened from the lowpower state, the modem
will go into Command mode.
Definition
The setting of S Register 15 determines the operating mode that a modem
will go into when it is powered up or when the modem is awakened from the
lowpower state.
Available Settings
The range of settings for S Register 15 is from 00 to 02 as listed below.
00: Command mode
01: Online mode
02: Datalogger mode
6 Modem Commands and Operating Parameters
Modem Operating Parameters
6-100
User’s Manual
BENTHOS
January 2001
Acoustic Telemetry Modems
6-101
Reserved
S16
6 Modem Commands and Operating Parameters
Modem Operating Parameters
6-102
User’s Manual
BENTHOS
January 2001
Acoustic Telemetry Modems
6-103
Reserved
S17
6 Modem Commands and Operating Parameters
Modem Operating Parameters
6-104
User’s Manual
BENTHOS
January 2001
Acoustic Telemetry Modems
6-105
Modem Address
S18
Default Setting
00
The modem address is 00.
Definition
The setting of S Register 18 determines the address of a modem.
Available Settings
The range of settings for S Register 18 is from 00 to EF. This provides a total
of 239 addresses.
Special Considerations
When Changing S Register 18, take note of the following:
• S Register 18 cannot be changed by acoustic command, so it is
important that the correct address be set prior to deployment.
• The same address can be used for more than one modem.
• The address FF is a global address to which all modems respond and
should not be used.
6 Modem Commands and Operating Parameters
Modem Operating Parameters
6-106
User’s Manual
BENTHOS
January 2001
Acoustic Telemetry Modems
6-107
Reserved
S19
6 Modem Commands and Operating Parameters
Modem Operating Parameters
6-108
User’s Manual
BENTHOS
January 2001
Acoustic Telemetry Modems
6-109
Reserved
S20
6 Modem Commands and Operating Parameters
Modem Operating Parameters
6-110
User’s Manual
BENTHOS
January 2001
Acoustic Telemetry Modems
7
7-1
Maintenance and
Troubleshooting
This section encompasses the recommended care and maintenance
procedures for the subsea modem components of the ATM-870 Series and
ATM-880 Series Acoustic Telemetry Modems. Adherence to these
procedures will help to ensure many years of continuous, reliable
performance from the modems. In addition, a troubleshooting guide is
provided which will assist in isolating and correcting operational problems
that might occur during setup or deployment.
The care and maintenance of the modems involve two areas: general
cleaning and inspection, and changing the battery packs. The tools required
to perform these tasks include the following:
9/64 Allen wrench
5/32 Allen wrench
Phillips head screwdriver
Flat head screwdriver
Wire cutters
Silicone O-ring lubricant
Alcohol wipes
Paper towels
General Cleaning and Inspection
After retrieving a subsea modem, clean and inspect the modem as follows:
1. Turn the modem off by pulling the on/off switch all the way out. Refer to
Figure 4-6 on page 4-9 for the location of the modem on/off switch.
2. Using a cloth or paper towel dry the modem thoroughly.
3. Unplug the cable from the POWER/SERIAL connector on the modem,
inspect and clean the cable, and then clean the connector with an
alcohol wipe.
7 Maintenance and Troubleshooting
General Cleaning and Inspection
7-2
BENTHOS
4. Lubricate the POWER/SERIAL connector pins with a light coat of
silicone lubricant and install the dummy connector supplied with the
modem.
NOTE Be especially careful not to get any lubricant on the face of the
transducer as this will severely degrade its performance.
For the ATM-875R/885R and ATM-877R/887R Acoustic Telemetry Modems,
perform all the steps listed below. For the ATM-875/885 and ATM-877/887
modems, go to Step 8.
5. Unplug the remote transducer cable from both the remote transducer
connector on the modem and the connector on the remote transducer,
inspect and clean the cable, and then clean the connectors with an
alcohol wipe.
6. Lubricate the connector pins on the remote transducer with a light coat
of silicone lubricant.
7. Wash down the modem with clean, fresh water and remove any debris
that may have become attached to the housing.
8. Clean the transducer with a mild, non-abrasive detergent, being careful
to remove any buildup. After cleaning, spray the transducer again with
fresh water.
NOTE Do not use an ammonia-based cleaner such as a glass cleaner to
clean the transducer.
9. Carefully inspect the transducer for any signs of damage.
Changing the Battery Packs
The subsea modems each have internal battery packs which will occasionally
require changing. Refer to "Modem Battery Pack Capacity Calculations" on
page 3-3 for information about the available battery pack types and how to
calculate the battery life for the amount of data expected to be transmitted.
To change the battery packs, the modems require disassembly, and the
procedures for disassembling the ATM-875/885 and ATM-875R/885R
Acoustic Telemetry Modems are different than those for the ATM-877/887
and ATM-877R/887R Acoustic Telemetry Modems.
User’s Manual
January 2001
Acoustic Telemetry Modems
7-3
Checking the Alkaline Battery Packs
The capacity of alkaline batteries can be estimated by measuring the battery
voltages—either open circuited or under load. A more meaningful
measurement, however, is obtained when the batteries are under load. To
check an alkaline transmitter/preamp battery pack after removing it from a
modem, connect a 150-ohm, 5-watt resistor across the battery pack
terminals, measure the voltage across the load resistor with a digital
multimeter and refer to Table 7-1 to determine the battery pack capacity. Use
a 30-ohm, 2-watt resistor for an alkaline DSP/receiver battery pack and refer
to Table 7-2.
Table 7-1 Alkaline Transmitter/Preamp
Battery Pack Capacity vs. Voltage
Voltage Under 150-Ohm Load
(volts)
Capacity Remaining (%)
20
100
18
95
17
75
16
50
15
25
14
10
13
1
Table 7-2 Alkaline DSP/Receiver Battery
Pack Capacity vs. Voltage
Voltage Under 30-Ohm Load
(volts)
Capacity Remaining (%)
6.0
100
5.2
90
4.9
75
4.8
50
4.4
25
4.0
10
3.2
1
7 Maintenance and Troubleshooting
Changing the Battery Packs
7-4
BENTHOS
Changing the ATM-875/885 or ATM-875R/885R
Battery Packs
For either the ATM-875/885 or the ATM-875R/885R Acoustic
Telemetry Modem, both end caps require removal when changing the
transmitter/preamp and DSP/receiver battery packs. First, the
POWER/SERIAL connector end cap must be removed, and then the
transducer end cap for an ATM-875/885 Acoustic Telemetry Modem, or the
remote transducer connector end cap for an ATM-875R/885R Acoustic
Telemetry Modem.
To change the transmitter/preamp and DSP/receiver battery packs:
1. Turn the modem off by pulling the on/off switch all the way out. Refer to
Figure 4-6 on page 4-9 for the location of the modem on/off switch.
2. For an ATM-875/885 Acoustic Telemetry Modem only, use a 5/32 Allen
wrench to remove the four socket head screws and four washers that
attach the transducer guard to the housing clamp and remove the
guard.
3. With the modem on its side and resting on a flat surface, use a 9/64
Allen wrench to remove the three socket head screws that attach the
POWER/SERIAL connector end cap to the housing.
4. Carefully pull the end cap straight out from the housing. If required,
rotate the end cap slightly while pulling.
5. Disconnect the in-line connector that connects the battery pack to the
connector on the POWER/SERIAL connector end cap.
6. Using a 9/64 Allen wrench remove the three socket head screws that
attach the transducer end cap for an ATM-875/885 Acoustic Telemetry
Modem, or the remote transducer connector end cap for an
ATM-875R/885R Acoustic Telemetry Modem.
7. Carefully pull the end cap straight out from the housing. If required,
rotate the end cap slightly while pulling. When clear of the housing,
continue to pull the end cap out while pushing on the battery pack from
the other end of the housing. Pull the end cap out far enough to access
the 5-pin power connector on the top of the circuit board.
8. Disconnect the 5-pin power connector.
9. Cut the wire tie with wire cutters and remove the 10-pin serial cable
connector by first pressing down on the locking sleeve tab to unlock it,
then slide the locking sleeve along the wire harness out of the way, grab
the cable connector, and gently pull to disconnect it.
User’s Manual
January 2001
Acoustic Telemetry Modems
7-5
10. Place the end cap assembly on a clean, flat surface.
11. Using a Phillips head screwdriver, remove the two screws and washers
that secure the receiver battery pack to the chassis and disconnect and
remove the pack.
12. Install and connect a new DSP/receiver battery pack, orienting the pack
such that the point where the wires exit from the pack is away from the
chassis. Wrap the wires around the side of the chassis and secure the
pack with the two screws and washers.
13. Remove the transmitter/preamp battery pack by first pushing it out from
the POWER/SERIAL connector end cap end and then removing it from
the opposite end.
14. Inspect the O-rings on both end caps. They should be free of any
scratches, nicks or dirt. Inspect the O-ring surfaces on the housing.
They should also be free of any scratches, nicks or dirt.
If necessary, wipe the O-rings clean with an alcohol wipe and apply a
light coat of silicone lubricant. Replace any O-ring that appears cracked
or nicked.
When replacing an O-ring, first clean the O-ring surface on the housing
with a clean, lint-free cloth or paper towel, and then apply a thin coat of
silicone lubricant to the new O-ring before installing it onto the end cap.
15. Insert the new transmitter/preamp battery pack into the housing from the
transducer end cap end for an ATM-875/885 Acoustic Telemetry
Modem, or the remote transducer connector end cap end for an
ATM-875R/885R Acoustic Telemetry Modem, and slide the battery pack
into the housing about half way.
16. Connect the 10-pin serial connector to the circuit board and secure it
with the locking sleeve.
17. Connect the 5-pin serial connector to the circuit board.
18. Use a wire tie to secure the wire harness to the wire tie block. Slide the
chassis and the battery pack together into the housing, and then press
the end cap into the housing, being careful not to pinch the wires.
19. Line up the three holes in the end cap with the three holes in the
housing, and secure the end cap to the housing with the three hex head
screws.
7 Maintenance and Troubleshooting
Changing the Battery Packs
7-6
BENTHOS
20. Connect the in-line connector that connects the battery pack to the
connector on the POWER/SERIAL connector end cap, and then press
the end cap into the housing, being careful not to pinch the wires.
21. Line up the three holes in the end cap with the three holes in the
housing, and secure the end cap to the housing with the three hex head
screws.
22. For an ATM-875/885 Acoustic Telemetry Modem only, install and
secure the transducer guard using the four hex head screws.
Changing the ATM-877/887 or ATM-877R/887R
Transmitter/Preamp Battery Pack
For either the ATM-877/887 or the ATM-877R/887R Acoustic
Telemetry Modem, both end caps require removal when changing the
transmitter/preamp battery pack. First, the transducer end cap for an
ATM-877/887 Acoustic Telemetry Modem or the top end cap for an
ATM-877R/887R Acoustic Telemetry Modem must be removed, and then the
POWER/SERIAL connector end cap.
To change the transmitter/preamp battery pack:
1. Turn the modem off by pulling the on/off switch all the way out. Refer to
Figure 4-6 on page 4-9 for the location of the modem on/off switch.
2. Using a flat head screwdriver loosen the stainless steel band clamp on
the transducer end cap for an ATM-877/887 Acoustic Telemetry Modem
or the remote transducer connector end cap for an ATM-877R/887R
Acoustic Telemetry Modem. Slide the band clamp down along the
housing out of the way.
3. With the modem on its side and resting on a flat surface carefully pull
the end cap straight out from the housing, far enough to access the
connectors on the circuit board. If required, rotate the end cap slightly
while pulling.
4. Disconnect the 5-pin power and 10-pin serial cable connectors that
connect to the circuit board and set the end cap assembly aside.
5. Using a flat head screwdriver loosen the stainless steel band clamp on
the POWER/SERIAL connector end cap. Slide the clamp down along
the housing and out of the way.
6. Carefully pull the end cap straight out, completely removing it and the
battery tray with the installed battery packs from the housing. If required,
rotate the end cap slightly while pulling.
User’s Manual
January 2001
Acoustic Telemetry Modems
7-7
7. Remove the tape that holds the battery packs in the battery tray.
8. One at a time remove the two battery packs from the battery tray, and
then remove the tape that secures the in-line connectors and disconnect
the packs.
9. Connect the in-line connectors of the new battery packs and secure the
connectors with tape.
10. Install the battery packs into the battery tray one at a time, label side
out, tucking the battery wires out of the way, one between the battery
pack and the battery tray bulkhead, and the other between the two
packs.
11. Tape the battery packs in place using packing or electrical tape.
NOTE To replace the DSP/receiver battery pack along with the
transmitter/preamp battery pack, refer to Steps 5 and 6 in "Changing the
ATM-877/887 or ATM-877R/887R DSP/Receiver Battery Pack" on page 7-8
before proceeding.
12. Inspect the O-rings on both end caps. They should be free of any
scratches, nicks or dirt. Inspect the O-ring surfaces on the housing.
They should also be free of any scratches, nicks or dirt.
If necessary, wipe the O-rings clean with an alcohol wipe and apply a
light coat of silicone lubricant. Replace any O-ring that appears cracked
or nicked.
When replacing an O-ring, first clean the O-ring surface on the housing
with a clean, lint-free cloth or paper towel, and then apply a thin coat of
silicone lubricant to the new O-ring before installing it onto the end cap.
13. Feed the wire harness through the housing and slide the battery pack
into the housing until the gland seal O-ring on the end cap is against the
housing. Be careful not to scrape the O-ring surface on the inside wall of
the housing.
14. When the gland seal O-ring is against the housing, apply equal pressure
against the end cap and press it into the housing until the face seal
O-ring is firmly seated against the housing. If required, rotate the end
cap slightly when pressing it into the housing.
15. Slide the stainless steel band clamp back into position between the end
cap and the housing and tighten the clamp.
7 Maintenance and Troubleshooting
Changing the Battery Packs
7-8
BENTHOS
16. Connect the 5-pin power and 10-pin serial cable connectors to the
circuit board.
17. Slide the chassis into the housing until the gland seal O-ring on the end
cap is against the housing, being careful not to scrape the O-ring
surface on the inside wall of the housing
18. When the gland seal O-ring is against the housing, apply equal pressure
against the end cap and press it into the housing until the face seal
O-ring is firmly seated against the housing. If required, rotate the end
cap slightly when pressing it into the housing.
19. Slide the stainless steel band clamp back into position between the end
cap and the housing and tighten the clamp.
Changing the ATM-877/887 or ATM-877R/887R
DSP/Receiver Battery Pack
Only the transducer end cap for an ATM-877/887 Acoustic Telemetry Modem
or the remote transducer connector end cap for an ATM-877R/887R Acoustic
Telemetry Modem requires removal when changing the DSP/receiver battery
pack.
To change the DSP/receiver battery pack:
1. Turn the modem off by pulling the on/off switch all the way out. Refer to
Figure 4-6 on page 4-9 for the location of the modem on/off switch.
2. Using a flat head screwdriver loosen the stainless steel band clamp on
the transducer end cap for an ATM-877/887 Acoustic Telemetry Modem
or the remote transducer connector end cap for an ATM-877R/887R
Acoustic Telemetry Modem. Slide the band clamp down along the
housing out of the way.
3. With the modem on its side and resting on a flat surface carefully pull
the end cap straight out from the housing, far enough to access the
connectors on the circuit board. If required, rotate the end cap slightly
while pulling.
4. Disconnect the 5-pin power and 10-pin serial cable connectors that
connect to the circuit board and place the end cap assembly on a clean,
flat surface.
5. Using a Phillips head screwdriver remove the two screws and washers
that secure the DSP/receiver battery pack to the chassis and disconnect
and remove the pack.
User’s Manual
January 2001
Acoustic Telemetry Modems
7-9
6. Install and connect a new battery pack, orienting the pack such that the
point where the battery wires exit from the pack is away from the
chassis. Wrap the battery wires around the side of the chassis and
secure the pack with the two screws and washers.
7. Inspect the O-rings on both end caps. They should be free of any
scratches, nicks or dirt. Inspect the O-ring surfaces on the housing.
They should also be free of any scratches, nicks or dirt.
8. If necessary, wipe the O-rings clean with an alcohol wipe and apply a
light coat of silicone lubricant. Replace any O-ring that appears cracked
or nicked.
9. When replacing an O-ring, first clean the O-ring surface on the housing
with a clean, lint-free cloth or paper towel, and then apply a thin coat of
silicone lubricant to the new O-ring before installing it onto the end cap.
10. Connect the 5-pin power and 10-pin serial cable connectors to the
circuit board.
11. Slide the chassis into the housing until the gland seal O-ring on the end
cap is against the housing, being careful not to scrape the O-ring
surface on the inside wall of the housing.
12. When the gland seal O-ring is against the housing, apply equal pressure
against the end cap and press it into the housing until the face seal
O-ring is firmly seated against the housing. If required, rotate the end
cap slightly when pressing it into the housing.
13. Slide the stainless steel band clamp back into position between the end
cap and the housing and tighten the clamp.
Troubleshooting
If during system setup or deployment, an ATM-870 Series or ATM-880 Series
Acoustic Telemetry Modem does not appear to be functioning properly, use
the troubleshooting guide in this section for assistance. The troubleshooting
guide will help to quickly isolate most operational problems. However, should
further help be required, contact Benthos directly. Refer to "Customer
Service" on page vi for information about how to contact Benthos.
The troubleshooting guide includes a list of symptoms along with a list of
recommended checks designed to lead to the most likely cause of the
problem.
7 Maintenance and Troubleshooting
Troubleshooting
7-10
BENTHOS
When turning on the ATM-871/881 Deck Box, the POWER ON LED does
not illuminate.
A. If AC power is being used to power the deck box, verify that the AC
power cable is connected to the deck box and is plugged into a
100–120 VAC, 50–60 Hz or 200–240 VAC, 50–60 Hz power source.
B. If DC power is being used to power the deck box, verify that the DC
power cable is connected to the deck box, and is plugged into a
21–48 VDC power source.
C. Verify that the AC or DC voltage of the power source is correct.
D. Check the fuse.
If the fuse is blown, replace it with a 4 amp slo-blow type.
E. If AC power is being used to power the deck box, check the ON/OFF
circuit breaker/rocker switch to see if the circuit breaker has tripped.
The POWER ON LED illuminates when turning on the ATM-871/881
Deck Box, but there is no banner message displayed.
A. Verify that the AC or DC voltage of the power source is correct.
B. Turn the deck box off and then on again.
The ATM-871/881 Deck Box displays the banner message, but there is
no response on the display when entering commands from the keypad.
A. Verify that the REMOTE/TERMINAL switch is switched to
TERMINAL.
B. Verify that the AC or DC voltage of the power source is correct.
C. Turn the deck box off and then on again.
The ATM-871/881 Deck Box displays the banner message, but there is
no banner message displayed on the monitor of a connected host PC.
A. Verify that the RS-232 serial cable is configured correctly and is
connected to the correct serial port on the host PC. Refer to "Setting
up the ATM-871/881 and ATM-871R/881R Modems" on page 4-10.
B. Verify that the terminal program communications software is running.
C. Verify that the host PC serial port is configured correctly, with the
correct baud rate, parity, number of data bits, and number of stop bits.
Refer to "Setting up the Local Host Processor" on page 4-12.
User’s Manual
January 2001
Acoustic Telemetry Modems
7-11
NOTE The ATM-870 Series and ATM-880 Series Acoustic Telemetry
Modems are shipped with the serial baud rate of the RS-232/422 serial
interface between the modem and its host set to 9600 baud (no echo) as
determined by the setting of S Register 3.
D. Switch the REMOTE/TERMINAL switch to TERMINAL and use the
keypad on the deck box to enter the ATSn? command, where n is 3,
to verify that the baud rate selection as determined by the
setting of S Register 3 is the same as that configured for the host PC.
Refer to "Serial Baud Rate S3" on page 6-75 for information about
S Register 3.
E. Switch the REMOTE/TERMINAL switch back to REMOTE after
verifying the setting of S Register 3.
The ATM-871/881 Deck Box displays the banner message, and the
monitor of the host PC connected to the deck box displays the banner
message, but there is no displayed response to commands entered
from the keyboard of the host PC.
A. Verify that the REMOTE/TERMINAL switch is switched to REMOTE.
B. Verify that the terminal program communications software is running
and, if the program has an echo feature, that it is turned on.
If the terminal program communications software does not have an
echo feature, switch the REMOTE/TERMINAL switch to TERMINAL
and use the keypad on the deck box to enter the ATSn? command,
where n is 3, to verify that the baud rate selection as determined by the
setting of S Register 3 is one with echo on. Refer to "Serial Baud Rate
S3" on page 6-75 for information about S Register 3.
Switch the REMOTE/TERMINAL switch back to REMOTE after
verifying the setting of S Register 3.
7 Maintenance and Troubleshooting
Troubleshooting
7-12
BENTHOS
There is no banner message displayed on the monitor of the host PC
connected to a subsea modem when the modem is switched on.
A. Verify that the RS-232 serial cable is configured correctly and is
connected to the correct serial port on the host PC. Refer to "Setting
up the ATM-871/881 and ATM-871R/881R Modems" on page 4-10.
B. Verify that the terminal program communications software is running.
C. Verify that the host PC serial port is configured correctly, with the
correct baud rate, parity, number of data bits, and number of stop bits.
Refer to "Setting up the Local Host Processor" on page 4-12.
D. Verify that the DSP/receiver battery pack has not been depleted.
The monitor of the host PC connected to a subsea modem displays the
banner message when the modem is switched on, but there is no
displayed response to commands entered from the keyboard of the
host PC.
Verify that the terminal program communications software is running
and, if the program has an echo feature, that it is turned on.
If the terminal program communications software does not have an
echo feature, enter the ATSn? command, where n is 3, to verify that
the baud rate selection as determined by the setting of S Register 3 is
one with echo on. Refer to "Serial Baud Rate S3" on page 6-75 for
information about S Register 3.
There is serial communications with the local modem but no
transmissions can be heard from the local modem after entering a
command that requires the modem to transmit an acoustic command,
such as ATDn, ATXn, and others.
A. If the ATM-871/881 Deck Box is the local modem, increase the
volume setting using the VOLUME control.
B. If the local modem is an ATM-871/881 Deck Box, or an
ATM-875R/885R or ATM-877R/887R Acoustic Telemetry Modem,
check the transducer connections.
User’s Manual
January 2001
Acoustic Telemetry Modems
7-13
C. Verify that the verbose level as determined from S Register 13 is set
to 01 or 02. Refer to "Verbose Level S13" on page 6-95 for
information about S Register 13.
With the verbose level set to 01 or higher, errors—if any—will be
displayed which will help in isolating the problem.
D. Verify that the command is being sent correctly. Refer to Table 6-1 on
page 6-10 for a list of the available commands and their syntax.
E. If the modem is a subsea modem, verify that the transmitter/preamp
battery pack has not been depleted.
After entering a command that requires the modem to transmit an
acoustic command, such as ATDn, ATXn, and others, transmissions
can be heard from the local modem, but there are no responses heard
from the remote modem.
A. Verify that the correct address for the remote modem is being entered
when entering the command.
B. Verify that the correct modem transducers have been selected and
that they are oriented correctly. Refer to "Remote Transducer
Selection" on page 3-1 for information about making the optimum
selection.
C. Verify that the remote modem is switched on.
For a subsea modem deployed in deep water, water pressure will push
the on/off switch in, turning on the modem. If deployed in shallow
water, it may be necessary to retrieve the modem to verify that it is
turned on.
D. If the remote modem is a subsea modem, verify that the
transmitter/preamp or the DSP/receiver battery pack has not been
depleted.
7 Maintenance and Troubleshooting
Troubleshooting
7-14
User’s Manual
BENTHOS
January 2001
Acoustic Telemetry Modems
8
8-1
Drawings
This section includes the outline drawings for the ATM-870 Series and
ATM-880 Series Acoustic Telemetry Modems, including the surface and
subsea modems, the modem board sets, and the remote transducers. Refer
to these drawings when setting up and installing the modems.
NOTE Although the descriptions of the surface and subsea modems and
the modem board sets in the list below call out only the ATM-870 Series
Acoustic Telemetry Modems, those drawings also apply to the ATM-880
Series.
Surface Modems
B871-08594
Outline, ATM-871 Deck Box
Subsea Modems
A875-08446
Outline, ATM-875 Modem (LF)
A875-08676
Outline, ATM-875R Modem
B845-08339
Outline, ATM-877 Modem
B877-08723A
Outline, ATM-877R Modem
Modem Board Sets
B875-08659
Outline, ATM-875PCB, OEM Board Set
B875-08693
Outline, ATM-875RPCB, OEM Board Set
Remote Transducers
8 Drawings
A875-08689
Outline, ATM-408 Transducer (LF)
A875-08690
Outline, ATM-409 Transducer (LF)
B421-08716
Outline, ATM-421 Transducer (LF)
A875-09248
Outline, ATM-421 Transducer (MF)
Surface Modems
8-2
User’s Manual
BENTHOS
January 2001
Acoustic Telemetry Modems
8 Drawings
8-3
8-4
User’s Manual
BENTHOS
January 2001
Acoustic Telemetry Modems
8 Drawings
8-5
8-6
User’s Manual
BENTHOS
January 2001
Acoustic Telemetry Modems
8 Drawings
8-7
8-8
User’s Manual
BENTHOS
January 2001
Acoustic Telemetry Modems
8 Drawings
8-9
8-10
User’s Manual
BENTHOS
January 2001
Acoustic Telemetry Modems
8 Drawings
8-11
8-12
User’s Manual
BENTHOS
January 2001