1
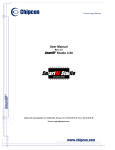
Application Note AN026
Wireless audio using CC1010
By O.A. Eek, R. Johnsen, K. H. Torvmark
Keywords
•
•
•
•
•
Wireless audio
CC1010
Full duplex operation
Time-Division Duplex (TDD)
Differential Pulse Code Modulation
(DPCM)
• DES encryption/decryption
• Wireless Headset
• Intercom
Introduction
The CC1010 is an excellent choice for a
RF transceiver for use in an embedded
system capable of performing full duplex
audio transmission. This application note
describes a solution for such a system,
and covers the principles used as well as
providing a detailed description of the
hardware and software used in a practical
implementation.
Full duplex functionality is achieved by the
use of time-division-duplex (TDD), where
each radio unit alternately transmits and
receives a packet of audio samples. In a
speech system where the available
bandwidth is shared, speech compression
is important to reduce the amount of data
transmitted.
SWRA066
This application note describes a
software-based codec which implements
packet compression and decompression
based on differential pulse code
modulation (DPCM) technology The
DPCM codec is very fast and is well suited
for the 8051 microcontroller that is
integrated into CC1010.
The CC1010DK development kit is used
as the hardware platform together with a
custom-made filter design, which also
performs
amplification
needed
for
interfacing to a microphone and headset
loudspeakers.
Page 1 of 23
Application Note AN026
Summary
A summary of the application parameters is given in Table 1.
Table 1: Application Parameters
System clock frequency:
Fundamental characteristics
14.7456 MHz
RF data rate:
One-way latency:
76.8 kb/s (9.6kB/s)
93 ms
Sampling frequency:
Resolution:
PCM-code:
Bandwidth of input signal:
8 kHz
8-bit
Linear, unsigned (0-255)
0-3 kHz (speech signal)
Compression of speech data:
Compression ratio:
Performed by DPCM
2:1
Functionality
By Time-division duplex (TDD)
Point-to-point, master/slave-configuration
DES encryption/decryption, 56-bit key.
Full duplex operation:
Addressing:
Encryption:
System overview
A block diagram of the system is given in Figure 1. The transmission chain shows the data
flow of how the speech signal is processed from start to end of the system.
Transm itter chain
Microphone
amplifier
Antialiasfilter
ADC
DPCMencoder
TransmitFIFO
DES
Encryption
RFmodulator
Antenna
Microphone
Antenna
Receiver chain
RFdemodulator
ReceiveFIFO
DES
decryption
DPCMdecoder
Loudspeaker
DAC
(PW M)
Reconstr.filter
Headset
buffer
Figure 1: System overview and signal flow
A received radio signal is received by the antenna and demodulated by the first stage in the
reception chain. The received signal is processed through the stages shown in Figure 1.
Finally, the loudspeaker reproduces the original speech signal. The receiver chain performs
the inverse operations of the transmitter chain. Since the application presented in this
application note supports full duplex operation, a radio unit contains both a transmitter and
receiver chain making it capable of both transmission and reception.
SWRA066
Page 2 of 23
Application Note AN026
The shaded blocks in Figure 1 represent functions performed inside the CC1010, while the
white blocks represent operations performed in external hardware.
Microphone and speaker circuits
The low-voltage output of a condenser microphone must initially be amplified to match the
dynamic range of the ADC. An op-amp configured as a simple inverting amplifier, as the one
shown in Figure 2, is well suited for this task. The resistor R1 and the internal impedance of
the microphone form a voltage divider biasing the microphone. The operating voltage of the
divider is 1.9 V using a supply voltage of 3.3 V. Due to the use of a single voltage supply, the
resistors R3 and R4 are necessary to set the common-mode voltage at half the supply
voltage. The feedback resistor, R5, and the input resistor, R2, determine the voltage gain
R5
. The minus sign indicates that
factor of the amplifier according to the expression AV = −
R2
the output is phase-reversed compared to the input. When using the configuration shown in
Figure 2 and the component values given in Table 4, the microphone voltage will be amplified
50 times matching the signal with the dynamic range of the ADC for normal speech levels.
The capacitor C1 blocks the DC level, used for biasing the microphone, from the inverting
input of the op-amp U1.
When selecting an op-amp for use as a microphone amplifier, it is important to select one
with a gain-bandwidth product (GBW) higher than the gain times the maximum frequency to
be used. In this case, it means that the GBW must be higher than 150 kHz. Also, the op-amp
should be low-noise and preferably have a rail-to-rail output stage. Because of the high gain,
it is very important to decouple the microphone amplifier voltage supply from the rest of the
circuit.
R1
Microphone
R5
R3
C1
R2
+
U1
PWM
Anti-aliasing
filter
(LP-filter)
R4
Reconstruction
filter
ADC
R9
R7
C2
R6
+
U2
C3
R10
R8
Headset
Microphone amplifier
Headset buffer
Figure 2: Microphone and headset circuit diagram
The purpose of the headset amplifier or buffer is to produce the current gain needed to drive
the headset loudspeakers. The input signal to the headset amplifier is the output signal of the
reconstruction filter. This signal swings between ground and the supply voltage. This means
that no voltage gain is needed. As shown in the figure, the headset buffer has many things in
common with the microphone amplifier already presented. The same inverting amplifier
configuration is used, but the ratio between the feedback resistor, R9, and the input resistor,
R6, is set to one, giving unity voltage gain (with phase inversion). The resistors R7 and R8
serve the same function as R3 and R4 in the microphone amplifier circuit, setting the
common mode voltage. The capacitor C2 blocks the DC-component from the reconstruction
filter stage, while C3 prevents the constant DC-level of the op-amp output from being applied
to the headphones. The two loudspeakers in the headset are connected in parallel, giving an
impedance of 16 Ω. To avoid saturation of the op-amp, the resistance R10 is connected in
series with the headphones. According to Ohm’s law (V = RI), the maximal theoretical output
current is 80 mA (with a maximal output voltage of 3.3 V p-p). The op-amp used is selected to
support this maximum current.
Since the headset buffer may draw a significant current from the power supply, proper
decoupling should be used to ensure a stable supply voltage level.
SWRA066
Page 3 of 23
Application Note AN026
Digitising speech
A speech signal is an analog signal, continuous both in time and in amplitude. This signal
must be digitised prior to digital processing and transmission. During digitising, the
continuous analog signal is sampled and quantized into a finite number of discrete amplitude
levels at regular time intervals. There are two essential parameters in this process; the
sampling frequency determines at which rate the signal is sampled, while the resolution
determines how many different amplitude levels that can be represented. According to
Nyquist’s sampling theorem, the sampling frequency must be greater than two times the
highest frequency component in the source signal in order for it to be possible to reconstruct
the original signal without error. If this criterion is not met, aliasing will result in folding of
frequencies so that high frequencies appear as lower frequencies. Also, the limited number of
amplitude levels in a digital representation introduces quantization error or noise inversely
proportional to the resolution.
In this application CC1010’s integrated 10-bit analog-to-digital converter (ADC) digitises the
analog speech signal provided by the microphone circuit. Even though the ADC can sample
with 10-bit resoultion, only the 8 most significant bits (MSB) are used while the 2 least
significant bits (LSB) are discarded. The microphone signal is sampled once every 125 µs,
resulting in a sampling frequency of 8 kHz. At this frequency, the signal to be digitised must
be limited to a bandwidth smaller than 4 kHz in order to avoid aliasing. The chosen sampling
frequency of 8 kHz combined with 8 bit resolution produces an uncoded digital voice stream
of 64 kbps.
Using a PWM-timer for digital-to-analog conversion
There is no dedicated on-chip digital-to-analog converter (DAC) on the CC1010. Instead, the
received and decoded digital sound samples can be played back using pulse width
modulation (PWM). The PWM technique involves modulating the pulse width of a squarewave signal proportional to the amplitude of the digital signal. The PWM carrier frequency
and the amplitude of the pulses are fixed. The number of different pulse widths that can be
represented within one PWM-period determines the resolution of the PWM signal. When the
PWM signal is filtered with an analog low-pass filter with the appropriate cut-off frequency,
the result is an analog version of the digital signal.
Max
Original
signal
Min
Time
Figure 3: Pulse width modulation (PWM) [2]
A frequency analysis of a typical PWM-signal would reveal that there is a strong peak at the
PWM carrier frequency, fPWM. The harmonics of the PWM carrier exist at f = k ⋅ f PWM , where
k is a positive integer. When using PWM for digital-to-analog conversion, low-pass filtering
should be performed to eliminate the carrier and its harmonics. According to the Nyquist
SWRA066
Page 4 of 23
Application Note AN026
theorem, the carrier frequency has to be at least twice the signal frequency. However, a much
higher frequency is desirable in order to ease the requirements on the reconstruction filter.
CC1010 has two timers (Timer 2 and 3) that can be configured for either timer or PWM use.
In PWM mode, the timer works as an 8-bit counter as illustrated in Figure 4. The current
counter value is continuously compared to the current speech sample, and produces a PWM
output of either a logical one, when the counter value is lower than the speech sample value,
or a logical zero, when the counter value exceeds the sample value. The PWM period is the
time needed for the counter to count from 0 to 255. The shortest possible period is given by
the main oscillator frequency divided by 255, obtained when the clock divider is set to zero.
This gives a minimum PWM-period of 17.3 µs when the system is running at 14.7456 MHz. A
lower PWM carrier frequency can be chosen by setting the clock-divider to a desired value
between 2 and 255, at the cost of making it more difficult to eliminate the carrier by filtering.
System
clock
Clock divider
(0-255)
8 bit counter
(Timer 3)
A
8 bit
speech sample
B
A<B?
PWM
output
Figure 4: Timer 3 configured for pulse width modulation
In the practical implementation described in this application note, Timer 3 is used to perform
PWM. In order to move the PWM-carrier and its harmonics as far away from the pass-band of
the reconstruction filter as possible, the PWM period is set to its minimum value resulting in a
carrier frequency of 57.8 kHz.
Anti-aliasing and reconstruction filters
A speech signal carries most of its information in the frequency range between 300 and 3000
Hz. Band-limiting should be performed by using an anti-aliasing filter with a cut-off frequency
at 3000 Hz. This filter is required to provide sufficient attenuation at frequencies above the
Nyquist frequency (4 kHz). To completely avoid the risk of aliasing, the reconstruction filter
should attenuate frequencies below 4 kHz to a level not detectable by the ADC. Thus, for the
8-bit linear integrated ADC, the minimum stop-band attenuation of the filter would preferably
be:
Amin = 20 log( 1,5 ⋅ 2 N ) = 20 log( 1,5 ⋅ 2 8 )≈ 50dB
[3]
To achieve this level of attenuation, a high-order filter would be required. Cost and practicality
issues demand that this requirement be relaxed, and a 5th order filter (switched-capacitor
Butterworth) was used in the practical implementation. Even though the attenuation of this
filter is less than 50 dB (approximately 13 dB attenuation) at the Nyquist frequency, aliasing
does not represent a real problem in practice since a speech signal contains little energy
above this frequency.
The reconstruction filter, which was also implemented as a 5th order filter, smoothens the
output signal and removes the PWM-carrier and its harmonics. Because of the high PWMfrequency, which shifts the unwanted frequency components up in the frequency spectrum, a
5th order filter provides sufficient attenuation.
Switched-capacitor filters
In order to keep the filter circuit design as simple as possible, the anti-aliasing and
reconstruction filters can be realized using switched-capacitor filters. Switched-capacitor
SWRA066
Page 5 of 23
Application Note AN026
filters are clocked, sampled-data systems where the input is sampled at a high rate and
processed on a discrete-time, rather than on a continuous-time basis. This represents a
fundamental difference between switched-capacitor filters and conventional active and
passive filters, which are continuous-time systems. The operation of switched-capacitor filters
is based on the ability of on-chip capacitors and MOS switches to simulate resistors. The
values of these on-chip capacitors can be closely matched to other capacitors in the IC,
resulting in integrated filters whose cut-off frequencies are proportional to the frequency of an
applied clock.
Figure 5 shows an appropriate configuration of the MAX7414 low-pass, 5th order, Butterworth
from Maxim [4]. Capacitor C2 and C3 are included for decoupling purposes, while C1 sets the
internal oscillator frequency, which determines the filter’s cut-off frequency according to the
relation:
fc =
3 ⋅10 5
[4]
C1( pF )
The primary disadvantage of switched-capacitor filters is that they produce more noise at
their outputs, both random noise and clock feed-through, than standard active filter circuits. In
addition, when using such filters for anti-aliasing or reconstruction filtering, beat frequencies
will alias into the pass-band if the filter clocks are not synchronized with the ADC (or DAC).
Depending on the required filter characteristics, a switched capacitor filter may be more or
less expensive to implement than a continuous-time filter. In our tests, op-amp-based active
filters proved to give better subjective audio quality than switched capacitor filters.
C2
Input
VDD ______
SHDN
IN
OUT
Output
MAX7414
COM
CLK
OS
GND
C1
C3
Figure 5: Switched-capacitor filter used for anti-aliasing- and reconstruction-filtering [4]
Active filters
To avoid the noise problems related to switched-capacitor filters, another alternative is to use
analog active filters for anti-aliasing- and reconstruction filtering. Active filters use amplifying
elements, usually op-amps, with resistors and capacitors in their feedback loops to
synthesize the desired filter characteristics. A single op-amp can form a 1st or a 2nd order filter
section. To obtain higher filter orders, several filter sections can be cascaded.
Figure 6 gives an example on how a 6th order active low-pass filter with unity gain can be
constructed by cascading three 2nd order sections based on a Sallen-Key topology. The
capacitor- and resistor values determine the filter response and characteristics.
SWRA066
Page 6 of 23
Application Note AN026
C4
C2
R2
R1
C1
+
C5
+
+
-
R5
R3
-
C3
R4
R6
C6
-
Figure 6: Sallen-Key 6th order unity-gain low-pass filter
In the practical implementation, a 6th order Tschebyscheff filter with a cutoff-frequency of 3
kHz and 1 dB of pass-band ripple was used. The component values were calculated from
equations given in [7].
Differential Pulse Code Modulation (DPCM)
To allow the system to operate in full duplex mode, the data rate of the sampled speech has
to be reduced. By using the simple technique of Differential Pulse Code Modulation (DPCM),
the sound samples are represented by four bit differences instead of the original eight bit
PCM samples, efficiently halving the amount of data to be transferred. The DPCM technique
is useful because the differences between successive speech samples are likely to be small,
meaning that the original samples contain redundant information that can be removed without
loosing valuable information. In the practical example, the DPCM-codec is implemented in
software, allowing compression and decompression to be performed by the CC1010’s
integrated 8051 micro-controller.
A block diagram of the implemented DPCM-encoder used in the application is shown in
Figure 7. The encoder calculates the difference between a predicted sample and the original
sound sample. A predicted sample is used instead of the previous original sample in order to
avoid accumulation of errors. The predicted sample is in this case simply the previous
decoded sample. At the cost of an increased computational load, a more sophisticated
predictor could be constructed by letting the predicted sample be based on more than one of
the previous samples.
Original
8-bit PCM
sample (n)
+
+
4-bit quantized
difference code
16-bit
difference
Quantizer
-
8-bit predicted
sample (n - 1)
+
Register
-64, -32, -16, -8, -4, -2, -1,
0,1, 2, 4, 8, 16, 32, 64
+
+
Dequantizer
8-bit decoded
difference
Figure 7: DPCM-encoder block diagram
The next encoding step is to quantize the newly calculated 16-bits signed difference
according to the code set shown in Table 2. In order to increase the dynamic range of the
limited number of coded differences, a non-linear code set is used at the cost of accuracy for
larger differences. When quantizing, the difference is truncated to the nearest value in the
table. 15 different quantizing values are utilized by the encoder when quantizing the
calculated differences. This is done in order to make the encoder operate faster to meet the
strict timing requirements of the circuit. The quantizer performs a binary search, and by using
15 values instead of 16, one level in the binary search tree can be omitted. The last stage of
the encoding is to generate the next predicted sample. Adding the dequantized difference
SWRA066
Page 7 of 23
Application Note AN026
code to the previous predicted sample does this. The register acts like a delay element
delaying the predicted sample by one sample period. Through the use of DPCM-compression
the 64 kbps voice stream generated by the ADC is compressed to 32 kbps.
Table 2: DPCM code set for quantized differences
Code value
Coded
difference
0
0
1
2
3
4
-64 -32 -16 -8
5
-4
6
-2
7
-1
8
0
9
1
10
2
11
4
12
8
13
16
14
32
15
64
The DPCM-decoder shown in Figure 8 is the same as the lower part of the encoder in Figure
7. The four bit received difference code is dequantized according to the same code set used
by the encoder (Table 2), and the result is added to the last predicted sample to produce the
new decoded sample value.
Because of the simplicity of the decoder, the process of decoding is highly efficient and fast,
resulting in the decoder occupying just a minute portion of the overall available execution
time.
-64, -32, -16, -8, -4, -2, -1,
0,1, 2, 4, 8, 16, 32, 64
4-bit quantized
difference code
8-bit
difference
Dequantizer
+
+
8-bit predicted
sample (n)
+
8-bit predicted
sample (n - 1)
Register
Figure 8: DPCM-decoder block diagram
Time-Division Duplex
Conventional telephone systems operate in full duplex mode. This means that both parties
can speak at the same time. Many radio systems (like a walkie-talkie system) operate in halfduplex mode in which only one person can talk over the channel at any given time. By using
Time-Division Duplex (TDD), full duplex operation can be achieved with half-duplex cost and
simplicity. Using TDD, the signal is transmitted one way at a time, but the direction of
transmission is switched very fast with low latency (time delay) as illustrated in Figure 9.
Master
Slave
Tx
Rx
Tx
Rx
Tx
Tx
Rx
Tx
Rx
Tx
Figure 9: Time-division duplex (TDD)
SWRA066
Page 8 of 23
Application Note AN026
Software FIFO-buffers
Using TDD makes it necessary to buffer the sampled digital voice stream both before
transmission and after reception to ensure a continuous stream of speech data in both
directions. FIFO-buffers, which are accessed by the use of pointers and indirect addressing,
are implemented in software. In each radio unit these buffers occupy 1 kB of CC1010’s
external RAM. The term “external RAM” is used due to convention with the original Intel 8051;
in the CC1010 this RAM actually is on-chip [1].
In order to ease the timing related to buffer access, the buffers are implemented in pairs
(2*256 bytes) according to the agreed packet format, represented by a transmit-buffer-pair
and a receive-buffer-pair. This buffer configuration ensures that a single buffer is not written
to and read from at the same time, efficiently removing the risk of accidentally overwriting
byte-values not yet read. Figure 10 shows how a buffer-pair is accessed (written to or read
from).
Buffer
number
0
255
0
Buffer 1
255
Buffer 1
Buffer 2
0
Buffer 2
255
0
255
Time
Figure 10: Buffer-pair access
DES encryption/decryption
DES (Data Encryption Standard) is an encryption standard developed by the US government
and IBM. DES encryption/decryption is supported by hardware in CC1010. Blocks of data
ranging from 1 to 256 bytes can be encrypted/decrypted in one operation by the DES module.
Encryption is the process of encoding an information bit stream to secure the data content.
The DES algorithm is a common and well-established encryption method. An encryption key
of 56 bits is used to encrypt the message. The receiver must use the exact same key to
decrypt the message. Otherwise the data will be garbled.
In this application, a block of 256 bytes of DPCM-encoded speech data is encrypted prior to
transmission. During reception, received and buffered packets are decrypted before
disassembling (DPCM-decoding and desampling). Encryption/decryption is done in-place,
which means that each byte of data read from buffer (external RAM) for encryption/decryption
will be written back to the same location after encryption/decryption. The timing of DES
encryption/decryption is summarized in Figure 11.
SWRA066
Page 9 of 23
Application Note AN026
Transmission
Assemble
packet
A
Encrypt
packet
B
C
B
A
D
= Transmitbuffer 0
C
= Transmitbuffer 1
Transmit
packet
A
Receive
packet
A
B
C
Reception
Decrypt
packet
C
B
B
A
= Receivebuffer 0
C
= Receivebuffer 1
Disassemble
packet
A
B
C
Figure 11: Timing of DES encryption/decryption
It is very important to implement encryption correctly; otherwise the security of the system
may be easily compromised. The security of a system using a well-established cipher such as
DES is not guaranteed unless the implementation is done in a secure fashion. Important
note: Chipcon cannot guarantee that the application described in this application note is
secure. The user should make his/her own evaluation of all security issues.
A good reference of cryptographic techniques can be found in [6].
System initialization
Before the two radio units can communicate, initial preparations have to be performed on
both sides. One of the radio units operates as the master; the other operates as a slave.
The ADC is set to operate in single mode using the supply voltage as a reference. The ADCchannel corresponding to the port connected to the output of the microphone circuit is
selected and the ADC-clock divider is set to its minimum value ensuring that the conversions
will be executed as fast as possible. The ADC is then powered up from sleep mode.
Timer 3 is set up as a pulse width modulator. The PWM-period is set to the minimum and the
timer is started.
Timer 1 is set up as an interrupt-timer, generating interrupts according to the specified
sampling frequency. During program execution, all actions related to sampling and D/A
conversion is initiated by the corresponding interrupt service routine, which is called every
time the timer interrupt occurs.
Before any data is sent or received, a calibration of the RF-receiver is performed in order to
compensate for supply voltage, temperature and process variations. The calibration result is
stored internally in the chip, and is valid as long as power is applied, and the temperature and
supply voltage do not change drastically.
The initialization steps described above are performed before the RF-transceivers are
activated and are therefore referred to as local initialization (local init.) in Figure 12.
The averaging filter [1] is adjusted during the initiation phase. While the master has its filter
free running, the slave transmits a preamble of 144 bits of alternating ones and zeros. This
DC balanced bit-pattern ensures that the averaging filter will be tuned to produce a threshold
level approximately halfway between a logical one and a logical zero. In order to retain the
correct comparison level even when unbalanced data is received at some later point, the filter
SWRA066
Page 10 of 23
Application Note AN026
is locked after the adjustment is completed. A synchronization byte is transmitted to indicate
the end of the preamble sequence. After the master filter is adjusted, the slave filter is
updated in the same way. When master and slave are to update their averaging filters, they
behave a bit differently as shown in Figure 12. The master has the ability to timeout if a
synchronization byte is not detected within a specified period. In this way, the system will not
be stuck in the wait for sync state. Another nice effect of the timeout feature is that the units
can be powered up in arbitrary order.
Master
Slave
RESET
RESET
Local
init.
Local
init.
T ransmit
preamble
Wait for
sync
Preambles
transmitted
T imeout
Wait for
sync
Sync
received
T ransmit
preamble
Preambles
transmitted
Sync
received
Normal
operation
Normal
operation
Figure 12: System initialization state diagram
SWRA066
Page 11 of 23
Application Note AN026
Transmitting and receiving data
The CC1010 supports four different data modes for transmission and reception [1]. The
Synchronous NRZ (No Return to Zero) mode is used in this application, in order to obtain the
maximum supported bit rate of 76.8 kbps and still be able to utilize CC1010’s hardware for
synchronization and preamble detection.
Transmission
In the NRZ mode, data buffering occurs through the buffer referred to as RFBUF in Figure 13.
During data transmission, the CC1010’s modem shifts out bits of an 8-bit shift register to the
modulator one at a time, at a rate according to the chosen bit rate of 76.8 kbps. When the
shift register is empty, it will load a new byte from the RFBUF-register and continue shifting
out bits. The contents of the RFBUF register remain intact after a shift register load and an
interrupt is generated signalling that the next data byte can be loaded into RFBUF [1].
If a new byte is not written to RFBUF within eight bit periods, the next time the shift register is
empty it will load the same byte from RFBUF again. This sets the limit for the interval at which
successive data bytes must be available, in order to avoid an error in the stream of data. With
an RF bit rate of 76.8 kbps a single RF-byte-interval corresponds to 384 instruction cycles
(system clock=14.7456 MHz) or approximately 104 µs.
RF
Transmitter
Modulator
8-bit shift register
RF
Receiver
Demodulator
RFBUF
8051 core
Figure 13: RF-data buffering
It is especially important to consider the buffering performed inside the CC1010 at the end of
a transmission. When the last byte of a data packet is loaded into the shift register, it is still
not transmitted. In order to ensure that all data bits are sent before the system is switched
from transmit to receive mode, two extra bytes, containing eight consecutive zeros, are
concatenated at the end of the actual data content. This will result in approximately seven of
the extra bits being transmitted along with the real data [1].
Reception
When receiving data, the buffering in the CC1010 modem works oppositely of how it works
during transmit. Bit by bit from the demodulator is shifted into the eight-bit shift register. When
the shift register is filled up, the contents are loaded into RFBUF (Figure 13) and an interrupt
request is generated. The byte must be read within one byte period. If not, it will be
overwritten by the next byte received and data is lost. No special considerations have to be
taken at the start and end of receptions.
SWRA066
Page 12 of 23
Application Note AN026
Packet format
A quite simple packet format is used by the application. As Figure 14 illustrates, the first 18
shaded bytes constitute a preamble. The preamble consists of 18 bytes of alternating ones
and zeros. This preamble is followed by a synchronization byte defined as the bit pattern
01011010. In addition to being an essential element of the synchronization scheme, the
synchronization byte also functions as a start of frame delimiter that tells the receiving unit
that a block of 256 data bytes comes next.
The bulk of the packet is the 255 bytes of DPCM encoded sound samples. Every byte in this
part contains two four-bit DPCM-codes representing two quantized differences. In this way
the 255 bytes actually represent 510 sound samples.
The first byte of data following immediately after the synchronization byte, labelled Initial
predicted sample in Figure 14, serves a special function. This byte holds a single calculated
predicted sample instead of two difference codes. When the receiver reads this byte, no
DPCM-decoding is necessary, since the sample is already in a decoded form. The receiver
can decode this byte directly, but most importantly it can be saved in the DPCM-decoder’s
register and used as a start value for the following decoding. As long as the initial received
predicted sample has not been corrupted during transmission this ensures that the DPCMdecoder always will be correctly initialized before a new packet is decoded. Without this
functionality occasional loss of packets could lead to accumulation of errors.
18
Preamble
1 byte 1 byte
Initial
Sync byte predicted
sample
255
DPCM-encoded sound samples
Figure 14: Packet format
Timing and state transitions during packet exchange
The two radio units are organised in a master-slave-configuration. After the initialization is
completed, master and slave go into normal operation. Due to the duplex operation, correct
interaction between these units is crucial.
The master starts sampling its input signal immediately after initialization. As soon as a
sample is available, it is encoded, and assembled in one of the master’s two transmit buffers.
When this buffer is completely filled up with encoded samples, a flag (bufferfullflag) is
set to indicate that a packet transmission can be initiated. During transmission, the first
transmit buffer is read from while new encoded samples are saved to the other buffer.
After the master has successfully transmitted a packet, the RF-mode is switched from
transmission to reception. In this mode, the master is prepared to receive and disassemble a
packet from the slave. However, if a packet is not received within a limited timeout period
(sync byte not detected), the master will fill its buffers with null samples and return to
transmission mode. The ability to timeout is implemented in order to avoid that the system
should come to a complete stop if a packet is lost. On the other hand, when the master
successfully receives a packet transmitted by the slave, the decoding of this packet starts
immediately after reception is completed.
SWRA066
Page 13 of 23
Application Note AN026
The incoming packets transmitted by the master dictate the timing of the slave. After
initialization, the slave goes into reception mode, and waits for a packet. If a packet is not
received within a limited timeout period (sync byte not detected), the slave will also fill its
receive buffers with null samples. However, the slave does not return to transmission mode
after a timeout. Instead it will remain in receive mode and continue to wait for incoming
packets. After a packet is successfully received the slave responds by transmitting a packet
back to the master. Unfortunately, the loss of a packet by the slave also causes the master to
lose one packet since the slave only transmits after successful packet receptions.
The reason why the receive buffers have to be reset (filled with null-samples) after timeouts,
is in order to avoid that the buffered packets are disassembled and decoded repeatedly
during packet loss, resulting in an annoying audible sound loop.
To summarize the packet exchange the master is controlling the overall timing by
continuously sending packets regardless of whether the slave actually is sending anything in
return. While the slave does not receive packets, neither will packets be transmitted by it.
Main states and state transitions of the master and the slave during packet exchange are
shown in Figure 15.
a.) Master
b.) Slave
Init.
Init.
Timeout
Transmit
packet
Rec.buffer
reset
Wait for
sync
Reset
rec.buffer.
Packet
transmitted
Packet
received
Wait for
sync
Sync
received
Reset
rec.buffer.
Rec.buffer
reset
Wait for
sync
Timeout
Packet
transmitted
Receive
packet
Packet
received
Sync
received
Receive
packet
Sync
received
Transmit
packet
Figure 15: State transitions during packet exchange
Source files
The bulk of the source code is separated in six different source files, each of which holds one
or more closely related functions. An overview of these source files, their functions and
interaction, is given in the following sections. Figure 16 shows how the most important
functions interact and exchange data.
SWRA066
Page 14 of 23
Application Note AN026
RF-transmit
RF-receive
Packetsend
Packetreceive
DES
(Encrypt)
DES
(Decrypt)
Packetassembler
DPCMencoder
Main
Packetdisassembler
ADC- DACin
out
DPCMdecoder
Figure 16: Function interaction and data flow
Main
As the names imply, the MasterMain.c and SlaveMain.c source files hold the
main(…) functions of the master- and slave-unit. These functions are called at program
start-up. This is where initiation and configuration of peripherals and the RF-transceiver is
done.
During normal operation the most important task of the main(…) function is to digitize the
input speech signal, apply the pulse width modulation on received data as the first step of
digital-to-analog conversion and control overall timing. The functions PacketSend(…) and
PacketReceive(…) are alternately called from within an infinite loop as part of the timedivision duplex (TDD) scheme. Sampling of the input signal, adjustment of the PWM-dutycycle,
and
calls
to
both
the
PacketAssembler(…)
and
the
PacketDisassembler(…)
functions are initiated by the timer interrupt
(Timer0_ISR(…)), which occurs at fixed intervals according to the sampling period. The
master- and slave-unit use two slightly different versions of the main(…) function. These
differences are mainly related to timing-issues.
DPCM-codec
The DpcmCodec.c source file contains the functions DpcmEncoder(…) and
DpcmDecoder(…), which realize the compression scheme needed in order to achieve full
duplex
operation.
The
DpcmEncoder(…)
function
is
used
by
the
PacketAssembler(…)function during the process of assembling packets of coded
samples for transmission, while the DpcmDecoder(…) function is used by the
PacketDisassembler(…) function when decoding is performed on received samples.
Packet-assembler
The PacketAssembler.c source file contains the function PacketAssembler(…).
Its task is to interact with the DpcmEncoder(…) and main(…), and put together packets
of encoded speech samples in the transmit buffer. This buffer, which is available to the
functions PacketAssembler(…), PacketSend(…), and SingleDES(…), is defined
SWRA066
Page 15 of 23
Application Note AN026
in the header of the PacketAssembler.c source file. The additional function
InitializeAssembler(…) is defined in the slave unit for timing reasons.
Packet-disassembler
The PacketDisassembler.c source file contains the PacketDisassembler(…),
InitializeDisassembler(…), and ResetReceiveBuffers(…) functions. The
PacketDisassembler(…) function uses the DpcmDecoder(…) function to convert
received and buffered packets to a stream of decoded speech samples. The receive buffer,
also available for the DES(…) and PacketReceive(…) functions, is defined in the header
of this source file. The function InitializeDisassembler(…) is included for timing
reasons and is unlike the InitializeAssembler(…) function implemented both in the
master and the slave. Whenever the function ResetReceiveBuffers(..) is called the
receive buffers are filled with null-samples.
DES
The DES.c source file is a modified version of halDES.c, which can be found in CC1010’s
HAL (Hardware Abstraction Library). The only function in this source file is the DES(…)
function that performs DES encryption/decryption on a block of data. While the HAL-version
of DES(…) always waits until encryption/decryption is completed before the function returns,
the modified version can either wait until completion, or return immediately after
encryption/decryption is initialized.
Packet-transceiver
This PacketTransceiver.c source file contains all the functions related to RF
transmission and reception. When called from main(…), the PacketSend(…) function
transmits a preamble consisting of alternating ones and zeros, a synchronization byte, and
256 encoded bytes of speech data read from one of the transmit buffers. When the function
PacketReceive(…) is called, the system goes into the synchronization and preamble
detection mode. After a synchronization byte is successfully received, 256 bytes of encoded
speech data is received and written to the receive buffer defined by the
PacketDisassembler(…) function. Master and slave use two slightly different versions
of the PacketReceive(…) function. These differences are related to the state transitions
explained later in the text. The AverageFilterUpdate(…) is used in both the master
and the slave to lock the averaging filter. This function is similar to PacketReceive(…),
except that the averaging filter is free-running during preamble and synchronization detection.
After a valid synchronization byte is received, locking the filter ends the filter update. No
speech data is received by the AverageFilterUpdate(…) function.
Other source files
In addition to the files already covered, functions and macros from Chipcon’s Hardware
Abstraction Library (hal.h), Hardware Register Definition File (Reg1010.h), and
Evaluation Board Hardware Definition File (cc1010eb.h) are used to access the resources
of the CC1010 and its development board. The ConfigureTimer01(…) function used for
timer configuration is actually a simplified version of the halConfigTimer01(…) function
from the HAL library, and is included in a separate source file available to both the master
and the slave.
SWRA066
Page 16 of 23
Application Note AN026
Source code efficiency
The percentage that various functions consume of the total time available is more interesting
than the absolute time needed for a single execution of a function. Table 3 shows the worstcase time consumption for possible active functions during RF transmission and reception
expressed in terms of instruction cycles. The total time available is 384 cycles.
Table 3: Worst-case time consumption during a single RF-byte-interval
DpcmEncoder(…)
DpcmDecoder(…)
PacketAssembler(…)
PacketDisassembler(…)
Cycles
consumed
108
25
57
42
InitializeAssembler(…) /
InitializeDisassembler(…)
9/9
SendPacket(…) /
ReceivePacket(…)
64 / 64
Timer0_ISR(…)
63
Combined worst-case time
consumption during a single interval
(384 cycles)
368
Function
Percentage
Remarks
of total time
28%
7%
15%
11%
Only one of the
2%/2%
functions is called
during a single interval
Only one of the
17%/17%
functions is called
during a single interval
Interrupt Service
16%
Routine
368 cycles is equivalent
to 100 µs @ 14.7456
96%
MHz (of 104 µs
available)
The DPCM encoder is the most processor-intensive task, followed by the Send/Receive
functions and the interrupt service routine. Since the program uses 96% of the available time,
there is not much possibility of inserting additional code unless the code is further optimized.
Using the CC1010DK Development Kit
The application described in this note has been developed and tested using the CC1010DK
Development Kit [5] connected to a prototype circuit board containing the required external
circuitry (microphone amplifier, anti-aliasing filter, reconstruction filter and headset buffer) as
shown in Figure 17.
SWRA066
Page 17 of 23
Application Note AN026
Figure 17: A complete prototype unit
Jumper settings
The jumpers are used to configure the CC1010EB (the motherboard included in the
CC1010DK). The factory default settings described in the user manual [5] can be used with
one exception. Since the application uses the AD0 input to the ADC, the jumper that connects
the RT1 potentiometer to the AD0 pin on the CC1010 should not be present.
PWM-output
If the switched-capacitor filter used for reconstruction filtering is connected directly to the
digital Timer 3 PWM-output pin (P3.5) a lot of noise is introduced. To avoid this noise the
switched-capacitor filter should be connected to the buffered and filtered Timer 3 PWM-output
pin (labeled PWM3) instead. This pin is available at the analog connector on the CC1010EB.
An active filter can be directly connected to the digital Timer PWM-output pin (P3.5) without
risking extra noise to be introduced.
LEDs
The CC1010EB has four LEDs connected to the CC1010 chip. The software uses three of
these LEDs to indicate certain events.
The red LED (connected to P1.2) is lit after the unit is successfully initiated. If the red LED is
not lit after the unit is turned on, the other unit is probably not yet activated or it may be out of
range.
The blue LED (connected to P2.5) is used to indicate when a packet transmission is initiated.
During normal operation the LED will toggle after a packet is received and before a packet is
transmitted.
The yellow LED (connected to P1.3) is only used by the Master, and is toggled whenever a
reception timeout occurs. During normal operation this LED indicates that a packet
transmitted by the slave has been lost.
SWRA066
Page 18 of 23
Application Note AN026
Buttons
Pressing buttons 2 and 3 enables and disables the DES crypto functionality respectively.
Connections made to the external circuit board
In addition to the connection made to the Timer 3 PWM output already described, the output
of the external analog anti-aliasing filter must be connected to the ADC through the analog
connector labeled AD0 on the evaluation board (CC1010EB). A connection between ground
on both circuit boards should also be made in order to establish a common ground level.
Performance
The DPCM codec described in this application note is used because of its simplicity and
superior speed. However, because of its fixed code set [Table 2], the codec represents a
compromise between sound quality and dynamic range. At high frequencies the codec may
not keep up with the input signal resulting in attenuation and introduction of noise. These side
effects could be limited if a more sophisticated codec was implemented. However, the 8051
microcontroller operates near its limits, so substantial additional workload is not easily
introduced.
Because of its large gain the microphone amplifier circuit is sensitive to noise. Through
proper shielding and decoupling problems related to audible noise should be minimized or
even completely eliminated. Proper PCB layout must be done to ensure good performance.
The overall system performance is good; the sound quality is close to telephone quality.
Source code download
The full source code for the application described in this application note can be downloaded
from Chipcon’s web site at www.chipcon.com
Bill of Materials
Table 4: Microphone amplifier components
Component
R1
R2
R3
R4
R5
C1
U1
Value
Description
Microphone biasing
1 kΩ
resistor
Input resistor
2 kΩ
47 kΩ Offset resistor
47 kΩ Offset resistor
100 kΩ Feedback resistor
AC coupling
1 µF
TS921 Opamp
Table 5: Headphone buffer components
Component
SWRA066
Value
Description
Page 19 of 23
Application Note AN026
R6
R7
R8
Input resistor
Offset resistor
Offset resistor
Feedback
10 kΩ
resistor
2,2 µF AC coupling
47 µF AC coupling
TS921 Opamp
10 kΩ
47 kΩ
47 kΩ
R9
C3
C4
U2
Table 6: Switch-cap filter components
Component
C1
C2
C3
Value
100 pF
0.1 µF
0.1 µF
Filter IC
MAX7414
Description
Sets the cut-off frequency to 3000 Hz
Decoupling capacitor
Decoupling capacitor
5th-order, Butterworth, low-pass, switchedcapacitor
Table 7: Active filter components
Component
R1
R2
R3
R4
R5
R6
C1
C2
C3
C4
C5
C6
Opamps
Value
43.2 kΩ
15.8 kΩ
80.9 kΩ
120 kΩ
20.5 kΩ
330 kΩ
3.3 nF
10 nF
330 pF
10 nF
4.7 nF
15 pF
Description
ST TS464 Quad Rail-to-Rail Op Amp
Table 8: Other components
Component
Value
Linear regulator
MAX 882
Headset
2*32 Ω
Microphone
1,3 kΩ
Standard jack
sockets
Veroboard
Description
3,3 V, low-dropout, linear
regulator
PC multimedia stereo headset
Condenser microphone
(attached to headset)
2*3,5 mm
Laboratory circuit board
SWRA066
Page 20 of 23
Application Note AN026
References
Cited references
[1]
[2]
[3]
[4]
[5]
[6]
[7]
Chipcon AS, SmartRF CC1010 Datasheet, Rev.1.2, 2002
Atmel, Application note AVR335: Digital Sound Recorder with AVR and
DataFlash. Rev. 1456B, 2002.
Ifeachor, E.C. & Jervis, B.W., Digital Signal Processing – A practical
Approach. 2nd ed. Harlow, England: Prentice Hall, 2002
Maxim, 19-4766: 5th-order, Low-pass, Switched-capacitor Filters, datasheet.
Rev 1. 9/98. Available from: http://www.maxim-ic.com [Accessed 30.07.03]
Chipcon AS, User Manual, SmartRF CC1010DK Development Kit. Rev. 2.1,
2003
Schneier, Bruce, Applied Cryptography. 2nd ed. New York: John Wiley &
Sons.
Kugelstadt, Thomas, Active Filter Design Techniques. Excerpted from Op
Amps For Everyone. Dallas, Texas : Texas Instruments Incorporated.
General references
[8]
[9]
Kientzle, T., A programmer’s guide to sound. Reading, Massachusetts:
Addison-Wesley Developers Press, 1997
Anderson, Ross, Security Systems – A Guide To Building Dependable
Distributed Systems. New York: John Wiley & Sons.
Document History
Revision
1.0
Date
Description/Changes
Initial release.
SWRA066
Page 21 of 23
Application Note AN026
Address Information
Web site:
E-mail:
Technical Support Email:
Technical Support Hotline:
http://www.chipcon.com
[email protected]
[email protected]
+47 22 95 85 45
Headquarters:
Chipcon AS
Gaustadalléen 21
NO-0349 Oslo
NORWAY
Tel: +47 22 95 85 44
Fax: +47 22 95 85 46
E-mail: [email protected]
US Offices:
Chipcon Inc., Western US Sales Office
19925 Stevens Creek Blvd.
Cupertino, CA 95014-2358
USA
Tel: +1 408 973 7845
Fax: +1 408 973 7257
Email: [email protected]
Chipcon Inc., Eastern US Sales Office
35 Pinehurst Avenue
Nashua, New Hampshire, 03062
USA
Tel: +1 603 888 1326
Fax: +1 603 888 4239
Email: [email protected]
Sales Office Germany:
Chipcon AS
Riedberghof 3
D-74379 Ingersheim
GERMANY
Tel: +49 7142 9156815
Fax: +49 7142 9156818
Email: [email protected]
Sales Office Asia :
Chipcon Asia Pacific
37F, Asem Tower
159-1 Samsung-dong, Kangnam-ku
Seoul 135-798 Korea
Tel: +82 2 6001 3888
Fax: +82 2 6001 3711
Email: [email protected]
Chipcon AS is a ISO 9001:2000 certified company
’
SWRA066
Page 22 of 23
Application Note AN026
Disclaimer
Chipcon AS believes the information contained herein is correct and accurate at the time of this printing. However,
Chipcon AS reserves the right to make changes to this product without notice. Chipcon AS does not assume any
responsibility for the use of the described product.; neither does it convey any license under its patent rights, or the
rights of others. The latest updates are available at the Chipcon website or by contacting Chipcon directly.
As far as possible, major changes of product specifications and functionality, will be stated in product specific Errata
Notes published at the Chipcon website. Customers are encouraged to sign up for the Developer’s Newsletter in
order to receive the most recent updates on products and support tools.
When a product is discontinued this will be done according to Chipcon’s procedure for obsolete products as
described in Chipcon’s Quality Manual. This includes informing about last-time-buy options. The Quality Manual can
be downloaded from Chipcon’s website.
Trademarks
SmartRF® is a registered trademark of Chipcon AS. SmartRF® is Chipcon's RF technology platform with RF library
cells, modules and design expertise. Based on SmartRF® technology Chipcon develops standard component RF
circuits as well as full custom ASICs based on customer requirements and this technology.
All other trademarks, registered trademarks and product names are the sole property of their respective owners.
© 2003, Chipcon AS. All rights reserved.
SWRA066
Page 23 of 23