1
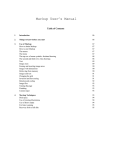
Andromeda
StippleArt Filter™
copyright © 2013
Andromeda Software, Inc.
Licensing and Copyright Agreement
Copyright © 2013 by Andromeda Software Inc. All rights reserved. Except as
permitted under copyright law, no part of the program or this user manual
may be reproduced or distributed in any form or by any means without the
prior written permission of Andromeda Software Inc. The program, and this
Manual, are licensed only for individual use on a single computer.
Limitations on Warranty and Liability
Neither Andromeda Software Inc, or its distributors and dealers, make any
warranties or representations, either expressed or implied, as to the software
and documentation, including without limitation, the condition of software and
implied warranties of its merchantability or fitness for a particular purpose.
Andromeda Software Inc. shall not be liable for any lost profits or for any
direct, indirect, incidental, consequential or other damages suffered by
licensee or others resulting from the use of the program or arising out of any
breach or warranty.
Trademarks
Series 1 Photography Filters, Series 2 Three-D Filter, Series Three-D Luxe
Filter, Series 3 Screens Filter, Series 4 Techtures Filter, Andromeda
Shadow Filter, Andromeda Velociraptor Filter, Andromeda Varifocus Filter,
Andromeda Cutline Filter, Andromeda Measurement Filter, Andromeda
Lens Doc Filter, Andromeda Perspective Filter, Andromeda EtchTone
Filter, Andromeda PhotoTiler Plug-in, Andromeda Series and Suite Filters
are trademarks of Andromeda Software Inc. Adobe Photoshop is a
trademark of Adobe Systems Inc. All other products are trademarks of their
respective companies.
Andromeda StippleArt Filter
Developed by: Dave Dyer, Donn Gladstone, Steve Myers,
Lou Ann Barbeau
UI Design: Dave Dyer
Technical Completion: Lou Ann Barbeau
Quality Assurance: Lou Ann Barbeau, Jane Narramore
Documentation: Dave Dyer, Lou Ann Barbeau
Sales Support: Jane Narramore
Marketing: Jane Narramore
© 2013 Andromeda Software
Inc. Thousand Oaks,CA USA.
Tel No. (805) 379-4109
web: www.andromeda.com
Table of Contents
1.0 INTRODUCTION .....................................................................2
2.0 QUICK START TUTORIAL......................................................3
2.1 General Help...............................................................3
2.2 Key Concepts.............................................................4
2.3 Traditional Stipple Dots..............................................5
2.4 Adding Color ........................................................... .8
Andromeda StippleArt Filter
Page 1
1.0 INTRODUCTION
The StippleArt Filter is an Adobe Photoshop compatible plug-in which
converts a grayscale or color image into formal screened dots or artistic dot
patterns and introduces an option to blend the original image color back
into the dot pattern or image background. The result is a StippleArt
image which can either be a screened black and white bitmap image or a
continuous tone grayscale or color image depending on the options
chosen in the UI.
The Filter provides the options in the UI to choose and manipulate a dot
pattern and use it to interpret your image or blend with your image as a
special effect. Several "dot only", "dot/image" and "inverted dot
variations" are possible within the plugin UI and should be explored.
Image dot patterns can also be output onto layers in Adobe
Photoshop for further blending and manipulatiion within the Phtotshop
blending options. StippleArt is Photoshop "Smart Object" compatible.
The primary variations include:
A. Traditional black dot screen conversions - Stipple Art can output
a pure black and white stipple version of your image. The
standard black dot patterns can resemble the hand done stipple
images of the past or can supply an organized dot pattern grid.
Use of larger dot pattern produces output image files which can be
used for engraving or silkscreening processes.
B. Colorized dot patterns - Rather than a formal black stipple
interpretation, choose options to bring the image color through the
dot pattern for colorized stipple results.
C. Artistic pointillist like effects - Choose a dot shape from our
dot library and choose the dot size Then blend color from your
image into the dots and blend the background color into the
stipple image background to mimic layered pointillist art effects.
D. Abstract and geometric image designs. Use your image
with one of the more unique dot pattern configurations and the
stippleart movement and coutour sliders and blending sliders to
create your own image abstracts. Invert the dot pattern for
dramatic tiled or mosaic translations.
Andromeda StippleArt Filter
Page 2
2.0 QUICK START TUTORIAL
The purpose of this Quick Start Tutorial is to guide the User through
a brief but effective “hands on” lesson to provide exposure to the
primary features of the two StippleArt Filter controls.
2.1 Help
Installation Help: These instructions are in the README file
accom-panying the product files.
Helper Text: As you pass the cursor over any UI item (buttons,
windows, controls etc.), mouse-over text pops up with a brief
description of the item’s function.
Technical Support: Technical Support is available online
at www.andromeda.com under the Support tab and via email at
[email protected].
Web Site: www.andromeda.com is a source of additional information
related to the StippleArt Filter product. Andromeda product demos
are available free for downloading as well as fully functional products for online purchase. The demo product can be made fully
functional by purchasing a product through our online store and
supplying a registration number within the demo startup screen.
Andromeda StippleArt Filter
Page 3
2.2 Key Concepts
The StippleArt Filter uses the continuous tone image to generate
the specified dot pattern for a grayscale or color image. There are
also blending and contouring options available for rendering color
and detail into your image. Understanding the following key
concepts will help you make choices to get the best results from
your images:
Screened Output - In any of our screening products we describe
the output resolution as a lpi "(lines per inch)" or dpi "(dots per
inch)" value. It is the same with the StippleArt Plugin. The
intended output can be a screened image and the option for dot
size is relative to the dpi output. The result is that the higher the
dpi of your input image, the better the output quality with more
input data, the plugin has more pixel area to draw better dots.
Dot Size - The dot size slider indicates approximately 2x the size
of the pixel grid that contains it. So a dot size of 4 on the slider
renders an 8 pixels x by 8 pixels dot. If your image is 300dpi
and you select your dot size as 4 on the slider, your output
dpi is aprox. 300/4x2 or 37.5 dpi. The dot size range is 2 - 30.
The percent value next to the dot size is the percent of the
maximum dot size. This is what is saved in presets, so if you run
the same preset on an image twice as large, the dot size will
double too. The intent is that the visual effect of the preset is the
same or similar, independent of the image size.
Image quality - whether you are using the StippleArt Plugin as a
screening tool, or for it's artistic effects the higher dpi images
yield the best the output quality. At higher resolution the plugin
has a more refined pixel area to draw better dots.
Review and proof your work - After you have output your image
back to your host application, view the results at 100% to see the
quality of the rendering, and proof your work or a section of your image
to review the dot screen size and overall image result.
Andromeda StippleArt Filter
Page 4
2.3 Traditional Stipple Application
OBJECTIVE: The objective of this tutorial is to demonstrate how to
use the StippleArt Filter to output a black and white line screen
image. In this session we will convert a continuous tone image into a
stipple image using basic functions in the UI. Use the tutorial
wagon.jpg image we have provided or use your own image.
The wagon image is 150 dpi and 7.5 x 5 inches. Here are the steps:
1.
Open the wagon image and StippleArt Plugin and look
through the presets display across the bottom. Select one of the
presets that indicates that it may be grayscale and we will edit the
slider and dot settings from there.
2.
In the center of the right side set the Zoom value to 100%
formost accurate viewing. For larger images you can use 50%
but review your final output at 100% for accuracy.
Andromeda StippleArt Filter
Page 5
3. Mouse over the dot pattern library on the right side of the
preview image. The dot name will appear as you mouse over
each dot. Find the dot labeled "hills" and select it as shown. This
is the standard round Default dot for this product.
4. Now go to the adjustment sliders on the left side and we'll
proceed from the top down.
Brightness and Contrast sliders should be set based on
your image contrast and the effect you want. You may need
to come back and make adjustments after the other slider
values are determined.
Set brightness at 71%.
Set Contrast at 50%.
The next 3 sliders determine the dot size and configuration.
Dot size - For a more refined stipple effect stay in the smaller
size range. I'm choosing 3 for our purposes.
Dot Image Scale - allows you to refine the dot size within its
size range. If you see you dark areas filling in completely you
may want to reduce the dot scale, or you could change your
brightness to lighten the image overall.
Set Dot image Scale to 78%.
Softness slider - should be set at 0 if you want pure black
and white output. Increasing the softness slider adds
grayscale to your dot image to help smooth the edges. Zoom
in to 400% and move the softness slider to see the effect.
Then set it back to 100% to continue working.
Set softness to 0 for a pure black and white screen.
The next group of sliders move the dots around each in a
different way. These should be used lightly for best results.
Randomness slider - When set to 0 the dots appear very
organized in a gridlike pattern. As you move the slider, the dots
become randomized more or less based on the tone in your
image. Keep this setting low. I used 2%.
Andromeda StippleArt Filter
Page 6
Movement slider - Moves the dots to help define edges
or strong lines in your image. Dots will migrate toward
strong edges as shown in the wagon image above.
tip: use the contrast slider to maximize your result.
Set the Movement slider at 90%.
Contour slider - This slider elongates the dots more or less
relative to their location along perceived edges in your image.
This is good for optomizing and contouring image details, but
should also be used very lightly unless you want a more
abstract image outcome.
Set Contour at 1%.
Click OK to output your result so far. Your current settings
will be rememebered on exit.
View image below at 200% for accuracy.
To continue...
undo the StippleArt output in Photoshop (Ctr Z), reopen the
StippleArt UI with your original image and lets look at the last 2
sliders to add some some color options.
Andromeda StippleArt Filter
Page 7
2.4 Adding Color
The StippleArt plugin saves your settings on exit so we can
re-open it and add some color. With your image reopened in
the StippleArt Filter, move the Blend Background and Blend
Dot sliders to introduce some color.
Blend Background slider alone will blend your image
back in to the background. The dots will remain black.
Set Background at 11%
Blend Dot slider will blend the color back into the dots. As
the slider value is increased the dot becomes more
colorized.
Set Blend Dot at 85%
Before your render your result see if there are any other
adjustments you want to make. When working between black
and white and color, the same settings may not be the best for
both. I also increased the Dot image scale to 95% to get a fuller
color dot.
Andromeda StippleArt Filter
Page 8