1
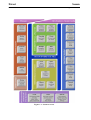
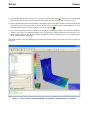
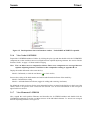
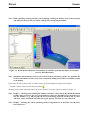
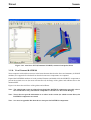
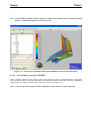
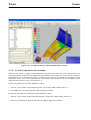
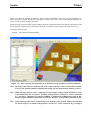
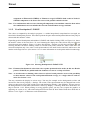
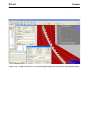
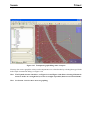
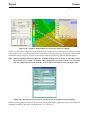
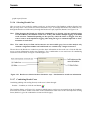
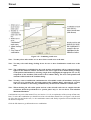
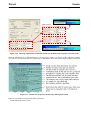
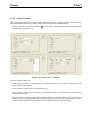
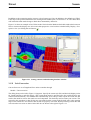
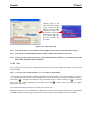
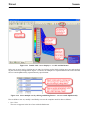
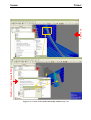
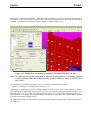
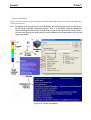
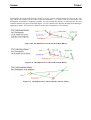
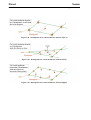
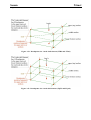
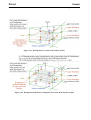
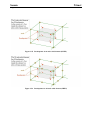
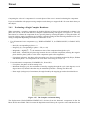
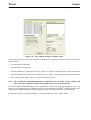
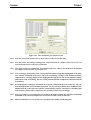
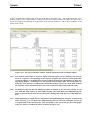
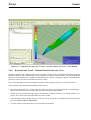
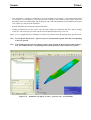
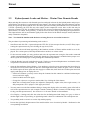
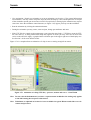
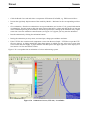
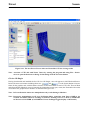
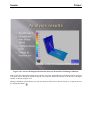
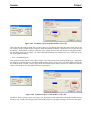
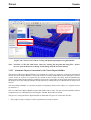
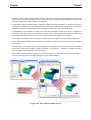
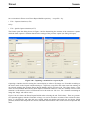
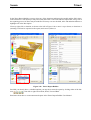
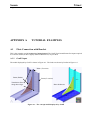
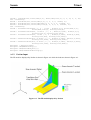
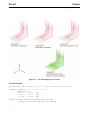
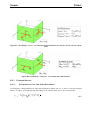
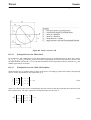
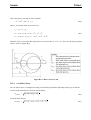
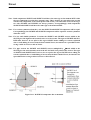
Sesam
Program version 3.0
Xtract
1-FEB-2011
3-35
• Set > Name (or right-click the new set)
In the Name and description of set dialog enter the desired information and click OK.
• Give the set content (fill it with elements) by Set > Union (or right-click the set) and select an alternative:
— Existing set – set stored on the results file or previously defined in Xtract
— Element type – elements of a given element type
— Material type – elements having a given material type
— Elements – single element number or range of element numbers
— Beam cross section – beam elements having a given cross section
— Model – all elements of a given superelement
— Shell thickness – plate/shell elements with thickness within a specified range
— Coordinate ranges – elements within specified coordinate ranges
— Result values – elements containing result values within a specified range
— Top/Bottom/Right/Left – use the left mouse button to drag a line across the model and all elements
completely above/below/to the right of/to the left of the line are put into the set
— Rubberband – use the left mouse button to drag a rubberband (rectangle) over the model, all elements
completely inside the rubberband are put into the set
— Polygon – use the left mouse button to make a polygon, close it by either clicking the first point or
hitting the space key (the Delete key removes the last point while right-click and Esc aborts the operation), all elements completely inside the polygon are put into the set
The upper part of Figure 3.35 illustrates how the rubberband option is used to create a set containing elements in the vicinity of the upper part of the bracket.
• Modify the content of the set by:
— Set > Subtract by
— Set > Intersect with
The lower part of Figure 3.35 is the result of the following action: Set > Subtract by > Element type. In
the Select list item dialog appearing you may select item BTSS (23) (the name of the 3 node beam element) to subtract beam elements leaving only 8 node shell elements (SCQS (28)) in the set.
• You may also add and remove single elements:
— Set > Pick to add – the complement is shown allowing you to click elements to add to the set, when
done leave the picking mode by giving Set > Pick to add once more and see the set by clicking
— Set > Pick to remove – click elements to remove from the set, when done leave the picking mode by
giving Set > Pick to remove once more
• You may modify the way the graphical means for modifying a set (options Top, Bottom, Right, Left,
Rubberband and Polygon) works by:
— Set > Select outside/opposite – this allows you to select elements outside an area defined by Rubberband and Polygon (it is less relevant for Top, Bottom, Right, Left as it merely exchanges the functionalities of Top and Bottom and likewise for Right and Left)