1
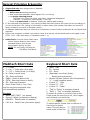
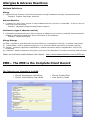
Meditech Public Health (CMPH) Quick Reference Cards Feb 2015 Logon/ Access: Launching Meditech Double click the My Apps Icon on your desktop Double click on the Meditech Folder Double click on the Meditech 5.67 Icon. MEDITECH LOGON Screen will appear. Enter your User Name and Password In the HCIS field, press F9 to select Test or Live. Meditech Desk Top will appear with the menu relevant to your program. Before proceeding ensure Caps Lock is on. General Principles & Security: Single click only when using mouse in Meditech. Charting: > Never remove existing comments. > Most recent documentation should appear first / on the top > Use proper charting format DD MMM YYYY, Text, first initial. Last name, professional designation. Example: 14 FEB 2014, Child Fainted, J. Doe, RN. > There is no spell check in Meditech. Check your spelling before saving. IT will audit staff using Meditech. Your viewing of data must be limited to the clients you are providing service for at that time. The viewing of information on other clients (this includes information on yourself & family members) can result in disciplinary action. All Meditech passwords require a minimum of 8 characters (number & letter combination & one Capital letter required). Ensure your computer is locked if you need to leave as all activity can be traced back to the logged in user (CTRL + ALT + DEL then enter) or (Windows symbol + L). Audit Check: From the Public Health menu choose Custom Reports, then choose Standard Reports, then choose Immunization Activity by User. NOTE: Fill in all fields, but keep the “Site Office” field blank. Meditech Short Cuts T = Today T + (#) = Today plus (# of days) T — (#) = Today minus (# of days) N = Now (current time) SP - Same as Patient SNOK - Same as Next of Kin SPTN - Same as Person to Notify SG - Same as Guarantor Enter Postal Code in “city” field and the city/province/postal code will automatically populate Formats Name LAST,FIRST (no spaces) Phone 10 digits (no spaces or dashes) DDMMYY - Date Format (no slashes) L#L #L# - Postal Code (one center space) Keyboard Short Cuts (ESC) - Exit F9 - Lookup F12 - Save (Spacebar) once then (Enter) Recalls previous patient Window Symbol (bottom left of keyboard) + “L” - Locks computer screen Control “C” - Copy Control “X” - Cut Control “V” - Paste “Tab” or “Enter” to navigate forward “Shift” + “Tab” to navigate backward To select all clients on your list click on the Check mark the top of your list, click it again and Uncheck your entire list. To select specific clients click on the box in front of your client’s name. This will place a check mark in that box. Mother-Baby Link Acute Care Facilities that use Meditech Following a discharge from acute care for mom and baby (separately or together) a PreDischarge Referral is completed and an inquiry will appear in CSI. Mother-Baby links created in acute care are visible in the EMR. This routine creates a Public Health visit link in the EMR. Open Status—Pre-discharge referral will arrive in open status Accept for service: Intake+Pro button to register client into PH (then register mother if client was baby). Direct to another site for service: Highlight Inquiry, Edit Inquiry button, Contact tab and edit site Intake Status—Client registered to Public Health. No longer able to edit. Closed Status—Edit Inquiry button used to close inquiry without proceeding to intake status (i.e. received in error). Manual Mother-Baby Link To Create Mother-Baby Link in Public Health Register the mother to PH Register the baby to PH Newborn Menu Newborn ULI in Newborn Field Mother ULI in New Mother Field then tab CAUTION: “Yes” to copy demographics from new mother to baby will include changing the baby’s last name to the mother’s. Always choose “No”. Please see the Public Health Meditech User Manual - http://insite.albertahealthservices.ca/3034.asp Person Mode Change List: Gives you the ability to change the List you wish to view. There are 3 types of lists found under Change List. Lookup List, Custom List and Request—Search List Searching for a Client - Use Lookup List Recommend searching with ULI (# plus 9 digit ULI number with no spaces). If client not found with ULI, search client by name (LAST,FIRST) To avoid duplication do not register client until you have thoroughly searched EMR. Client Lists Custom Lists: Clients on these lists are viewable by you only. These clients will stay on your Custom List until you physically take them off. Look-Up List: Useful for finding client you need just for that moment. These clients are a one time view only. Clients on this list will only stay on your list while in the current Meditech session. Once you return to the menu this list will clear. Request—Search List: These lists identifies the service or program that a client is registered to and is viewable by all staff within your HCIS. Edit List: Gives you the ability to change the clients you have on your Custom List and allows you to change the status of a registration on a Request—Search list. CM Coordinator Desktop In the CM Coordinator Desktop PHNs and Admins are trained on the use of all the Side Buttons. Resource Sch and Schedule Appt enables you to choose from the pop up whether to go directly into the client’s appointment or to go to the appointment book. Associations button enables you to link a mom and a baby or an entire family together, usually this shows the children in the home linked with mother’s/primary caregiver’s record. Note: If the client’s record is the child’s/baby’s so the relationship to the client Is usually “Parent” or “Foster Parent” under the F9 lookup, and the reverse relationship is usually “Child” or “Foster Child”. Letters button provides a way to generate form letters to individual clients. The letters are attached to the client’s electronic record. Editing letters: Content within CDC letters was approved provincially Editing is required for the words in bold font Exit from viewing the letter by toolbar top left file icon, scroll down to exit Address for letterhead is address of office where client is registered New Request button, enables you to place clients on one or more search lists. These lists may be viewed by all staff within the HCIS depending on their search criteria. A client may be registered to more than one service (list) and program (site/office) at one time. Immunization Clinical Details Legend This will assist you in reviewing your clients record Comments & Exceptions General Information The Exemption at the top of the Comments and Exceptions screen pertains to the client and all vaccines (Example: client refusing all vaccines). The Component section at the bottom of the Comments and Exceptions screen pertains to each single antigen. Columns in Component Section: Exemption Date — Does not change the Schedule Projection table, as client is still eligible. Always use Current Date Reason: All reasons will begin with CX—client refusal Stopped Date — Removes Eligible Component from Schedule Projection table. Always use Current Date. Reason: All reasons will begin with CS— history of disease, positive serology, completed series, immunocompromised, Hep B carrier, series stopped, previous adverse reaction, or allergy. Override Date — Changes the Eligible Date in Schedule Projection table. Always use Projected/ Future Date Reason: All reason will begin with CO— Nurse override (such as Hep A, accelerated HABV or Hep B, Adult Td with no previous vaccine recorded) Note: You can only have one date, in one column at a time on any given component. If you are entering an exception for a multiple component vaccine, enter the exception for each component, i.e. MMR = an exemption date on MEA, MU and RUB components Please see the Public Health Meditech User Manual - http://insite.albertahealthservices.ca/3034.asp PCS—Editing/Correcting Documentation ** PCS documents may be edited within 7 days Editing after 7 days you will need to contact the IT Service Desk. Step #1: Highlight the intervention to edit. Step#2: Click the ‘History’ column for that intervention (the column that calculates the amount of time since documentation occurred). Once you click the ‘History’ column you will go to a different screen. Step #3: Highlight & click on the documentation to edit. The documentation that was completed will be displayed. Step #4 Make the desired changes Step #5: Click ‘Return’. You will be returned to the prior screen Step #6: Click ‘Return’ again Step #7: Click ‘Save’ to save your work PCS—Removing an Intervention To Remove a DUPLICATED intervention that has not been documented on or saved. Unsaved documentation is ‘pink’ in color. Step #1: Highlight the duplicate Step #2: Click ‘Delete Intervention’ If the duplicate has been documented on or saved, it cannot be deleted without first cancelling the documentation (if within 7 days). To Remove Entire Intervention (i.e. saved by mistake): *This is the same process that is used to change the status of an intervention from ACTIVE to COMPLETE (i.e. when the intervention is no longer needed, such as Infant Feeding Data for the preschool clinic) Step #1: Highlight the intervention. Note the history column is empty so you can proceed Step #2: Click the ‘status’ column for that intervention. You will get a pop-up box Step #3: Change the status to ‘Complete’. PCS—Cancelling Documentation Steps to Remove Documentation from Intervention: Editing allowed within 7 days. Step #1: Highlight the intervention that requires documentation cancellation Step#2: Click the ‘History’ column for that intervention (the column that calculates the amount of time since documentation occurred) You will go to a different screen. Step #3: Highlight & click on the documentation to cancel Step#4: Click ‘undo’ Step #5: Pop up box will automatically appear. Enter the reason for cancelling and click ‘OK’ Step #6: Click ‘Return’. You will be returned to the prior screen Step#7: Click ‘Save’ to save your work NOTE: We can no longer cancel the intervention only your documentation within an intervention. We would simply choose Complete, if we needed an intervention removed from the client’s working documents. Allergies & Adverse Reactions Meditech Definitions: Allergy Hypersensitivity reaction of the immune system to foreign substances normally considered harmless. Example: Peanuts, Bee Stings, Morphine Adverse Reaction A reaction to a drug, food, vaccine or other substance which is noxious or unintended. It may or may not involve the immune system. Example: Nausea/vomiting following Demerol injection Intolerance (type of adverse reaction) Unpleasant symptoms that occur after consuming a substance, due to lack of particular enzyme/chemical needed for absorption/metabolism and/or elimination of the substance. Example: lactose intolerance Allergy Ratings (M) Mild: transient or mild discomfort less than 48 hours; no limitations in activity, no medical intervention (I) Intermediate: mild to moderate symptoms, no or minimal medical intervention or therapy required (S) Severe: marked or significant incapacitation, medical intervention and/or hospitalization, may be lifethreatening (U) Unknown: unable to determine the severity (the use of this descriptor for severity should be used minimally Please see the Public Health Meditech User Manual - http://insite.albertahealthservices.ca/3034.asp EMR— The EMR is the Complete Client Record The Following are Viewable in the EMR ▪ Client’s Demographic information ▪ Client’s Immunization/ Lab results ▪ Client’s Growth Chart ▪ Care Activity / Notes Downtime Procedure Unplanned Downtime If downtime occurs unexpectedly while actively working in the system, the work in progress will not be saved. Report unexpected downtime to Service Desk for your area. The procedure for planned or unplanned downtime is the same: Reference PHN Shared Drive or the Rural Public Health User Manual Appendices on InSite for Downtime Procedures, Clinic Downtime Work Sheet and PCS Assessments. Daily schedules and the Immunization Profile Report from Client Immunization Screen may be printed as a reference for planned downtime Document date and time of assessments and client information on the Clinic Downtime Worksheet and PCS Assessments. Immunization may be provided if adequate information is available and the PHN is comfortable that client may be safely immunized. Once the system is accessible enter information from the Downtime Worksheets, backdating to the date and time the assessment occurred. When entering information for someone else, ensure you record their ID number as the care provider. Once entered, leave the paper documentation for their review and verification before shredding. RESOURCES Meditech User Manual found on Insite Public Health Meditech User Manual - http://insite.albertahealthservices.ca/3034.asp


![4403002491_712_716 menu_EN_A [s]](http://vs1.manualzilla.com/store/data/005650300_1-96030b29e24dd373b0bced3bef593dda-150x150.png)