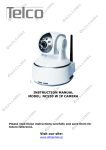
Download 720 Indoor IP IR PT Dome with wifi
Transcript
720 Indoor IP IR PT Dome with wifi prefatory note Thanks for choosing the network cameras of our company. ⅠRequirements for products application environment To ensure the safety of operation, achieve satisfied performance and prolong the working life, please consider the following factors when choose the installation environment. 1. Please check and make sure the power supply is matched with required standard, avoid of the damage as the power supply is not matched (Input voltage is DC 12V) 2. Don’t install the products in wet or rainy places. 3. Don’t install the products in strenuous vibration environment. 4. Don’t expose the products in direct sunlight, keep from the heat or high temperature environment. 5. Keep the ventilation is good, prevent the air-vent from be blocked.( Kindly 1/ 109 IP Camera User Manual advise that the back panel should be kept from the objects or the wall about 15cm) 6. Don’t put any volatile corrosive chemicals in the installation environment. 7. Make sure the grounding is correct. 8. Make sure the connection with the other devices are correct when installation. 【Warm tip】There may be some differences from the real products, please subject to our available products. If any question when installation, please contact the provider. 2/ 109 IP Camera User Manual Notice items 1. Don’t touch the power supply and device with wet hands. 2. Don’t splash water on the device, which could cause the short circuit even burnt to fire. 3. Don’t pileup anything on the device. 4.When the power supply cable is plugged in the socket, there is still electricity in the machine even though it’s off. It’d better to be disconnected with power. 3/ 109 IP Camera User Manual ※ Special tip ※ To help you to use the products effectively, the followings are factory default settings: ★ Network camera(IP is marked on the body of the camera) IP address: 192.168.1.229 Subnet mask:255.255.255.0 Username: admin Password: admin 4/ 109 IP Camera User Manual List 1 Overview....................................................................................................................................7 1.1 Software Overview .............................................................................................................7 1.2 Main functions.....................................................................................................................7 2 Software installation ..................................................................................................................9 2.1 How to achieve it.................................................................................................................9 2.2 Installation.......................................................................................................................... 9 2.3 Uninstallation.....................................................................................................................11 3 Software Operation...................................................................................................................13 3.1 User login...........................................................................................................................13 3.2 Add devices........................................................................................................................16 3.3 Preview...............................................................................................................................19 3.4 Record configuration..........................................................................................................20 3.5 Replay........................ ........................................................................................................22 5/ 109 IP Camera User Manual 4 IE Management Settings.....................................................................................................24 4.1 Visit IP camera via IE..................................................................................................24 4.2 Main interface and functions........................................................................................29 4.2.1 Main interface.......................................................................................................29 4.2.2 Functions settings.................................................................................................33 Appendix A FAQ....................................................................................................................73 Appendix B Specifications......................................................................................................79 Appendix C Packing list........................................................................................................105 6/ 109 IP Camera User Manual 1 Overview 1.1 Software Overview The central management software could make the video monitoring, storage, data forward, management and control to all the network surveillance devices including DVS and IP cameras. It can manage up to 540 channels video at the same time, any channel of them could be set or updated by remote. The screen layout supports 1/4/9/16/25/36 channels live view in one single window. Also the user could operate the 2-way talk, e-map, log search, alarm control, remote search etc functions. 1.2 Main functions ◆ Manage up to 540 channels at the same time(15 Groups) ◆ Central monitoring, storage, data forward, management and control ◆ e-map 7/ 109 IP Camera User Manual ◆ Live view and loop monitoring ◆ Two way talk and broadcast ◆ Multi-way record (Pre-record, manual record, alarm record and schedule record) ◆ Support the research by channel, date and incident type. ◆ PTZ control ◆ Call the preset points by alarm linkage. ◆ Support multi-way alarm type( video lost, motion detection, probe linkage) ◆ Log management ◆ Snapshot ◆ DDNS ◆ PPPOE 8/ 109 IP Camera User Manual 2 Software installation 2.1 How to achieve it 1 CD is coming with and packed in the package, read the CD by PC driver and install “Client(v3.0.15) setup.exe” in the appointed path of PC. Run it when the installation is compelted. 2.2 Installation Double click the setup file “Client (v3.0.15) setup.exe”, you could see the following window. 9/ 109 IP Camera User Manual 10/ 109 IP Camera User Manual According to the wizards, Click 【Next】along the way till【Finish】 button,click【Finish】 to complete the installation. The default path is “C:\Program Files\ Client (v3.0.15)” 2.3 Uninstallation There’re two ways you could uninstall the software ◆ ”In the “Start” menu, choose “Program” →“Client (v3.0.15)”→“Uninstall Client (v3.0.15)” ◆ “Client (v3.0.15)”。Open “Control Panel” window and delete the software in the list. Please refer to the following window. 11/ 109 IP Camera User Manual ◆Click 【Next】along the way till【Finish】 button,click【Finish】 12/ 109 IP Camera User Manual 3 Software Operation 3.1 User login The system will pop up the tip you to apply a username and password to start it at the first running. Like the following window. Notice: The username and password can’t be with special character “ ' \\/ : * ? \< > |”, the password should not be less than 6 digits. If the software has been registered with username, you could see the following directly 13/ 109 IP Camera User Manual when run it. Choose the username and input the password to log in the software. Tick “Save password”, “Auto Login”, so you could skip this step in the following logins. The operation menu is located at the top of the main interface, 14/ 109 the left area is device list IP Camera User Manual and PTZ control panel, the bottom area is alarm information tips and quick play bar. 15/ 109 IP Camera User Manual 3.2 Add devices “Local setting”----“ Device management”----“ Area”, Click right mouse button at the blank area, choose “ Add area” and input the information matched, save it. And then click right mouse button in “Area”, choose “ Add device” to see the following window. Click “ Online equipment” to search the devices in the local network. Choose any 16/ 109 IP Camera User Manual devices displayed and the parameters of it will be input automatically in the upper equipment information area. Click “Save” to complete it. The added device will be displayed is the left list. 17/ 109 IP Camera User Manual 18/ 109 IP Camera User Manual 3.3 Preview Choose “Preview” menu and drag the device to any window you want to make the preview. 19/ 109 IP Camera User Manual 3.4 Record configuration “Local setting”----“Record configuration”. Choose the disk you need to make the video footage saved, the packing size for video clip. Choose the channels which need to make storage and draw the mouse to cross the time bar to set up the starting time and end time. After the settings, you could click to operate the recording. 20/ 109 IP Camera User Manual 21/ 109 IP Camera User Manual 3.5 Replay In the “Replay” menu, choose a window to make the playback and the device, set the searc h date and type, click “search” to get the video clip. As well as the time bar at bottom will show the detailed time segment. 22/ 109 IP Camera User Manual 23/ 109 IP Camera User Manual 4 IE Management Settings 4.1 Visit IP camera via IE You need to install ActiveX Control when you visit IP Camera for the first time. You can install ActiveX Control in two ways: (1) Auto-Installation You need to lower the security level of the IE temporarily in order to install ActiveX Control into your PC as follows: Choose Internet Option: 【tools】→【Internet Option】. Click the label of 【Security】 and your current security setting is displayed. Set the security level low and click 【apply】. Enter your IP Camera address in the IE address line (for example: hhdemo1.vicp.net). If you see a dialogue as follows【Do you want to install ActiveX Control】,Please click 【Yes】 and install ActiveX Control. Once finished installing your ActiveX Control, retrieve your security setup for default 24/ 109 IP Camera User Manual value. (2)Download the Active-X from login page: 25/ 109 IP Camera User Manual Input the IP address of the IP cam in IE browser, click 【Enter】to display the login page. Click the 【Click to install Active-X】, will pop up the following dialog box. Click 【Run】to install it. 26/ 109 IP Camera User Manual 27/ 109 IP Camera User Manual Log in and Preview: Input User Name (Default: admin), Password (Default: admin). Click 【login】 to visit the main interface as follows. 28/ 109 IP Camera User Manual 4.2 Main interface and functions 4.2.1 Main interface 29/ 109 IP Camera User Manual Information in Preview page Icon Functions Log off the active user Video adjustment Real time snapshot On/Off Two way talk On/Off Monitoring On/Off Manual recording On/Off 3D positioning On/Off Full screen 30/ 109 IP Camera User Manual Video Parameter settings Icon Functions Brightness Chroma Saturation Contrast Sharpness Blue Red Gamma 31/ 109 IP Camera User Manual PTZ control Click 【PTZ Control】and display this interface, click again to hide it. There’re 8 direction buttons to control the Pan/Tilt, drag the bar to adjust the running speed. Click to activate the auto-scanning, click again to stop it. Click the right side function buttons to operate Focus, Iris and Zoom. Choose one Preset point and click to call it. Click preset points and Click to set to delete them. 32/ 109 IP Camera User Manual 4.2.2 Functions settings Click to see the interface of functions settings. Local settings: 【Protocol type】 【Stream type】 TCP,UTP optional. Main stream, Sub stream. 【Display mode】 Full screen, 4:3 ratio,16:9 ratio, adjustable to resolution. 【Package file size】 128M、256M、512M optional. 【Transmission performance】Shortest delay mode, Good real-time, Normal real-time and fluency, Good fluency. 【Save record file as】 Could be set by manual. 【Save captured picture as】 Could be set by manual. 33/ 109 IP Camera User Manual 34/ 109 IP Camera User Manual System information: Under this, the users could set the 【IP Camera Name】, and check out the information about 【Channel】, 【Alarm in】, 【Alarm out】, 【Device type】, 【Product SN】, 【Device info】, 【Software version】, 【Hardware version】and 【Sensor version】. 35/ 109 IP Camera User Manual Network Parameters 3G parameters: Click here to activate 3G communication. EVDO, WCDMA modules are supported If uses EVDO, the IP address bar will show the WAN IP address, for example, 116.204.xxx.xxx, this device could be visited directly with it in IE browser; If uses WCDMA, the IP address bar will show the LAN IP address, for example, 192.168.xxx.xxx, the device should be working together with NVR. 36/ 109 IP Camera User Manual Basic parameters: The user could set the 【IP address】, 【Subnet mask】, 【Gateway】and 【DNS adress】 etc. 37/ 109 IP Camera User Manual NTP parameters: Click to activate network time protocol function,the default NTP server address is time.buptnet.edu.cn, the user could choose the local server to sync the time. 38/ 109 IP Camera User Manual UPnP parameters: Click to activate Universal Plug-n-Play function, Appoint and Auto mode are optional. Under Appoint mode, input the IP address to make the mapppig of network. 39/ 109 IP Camera User Manual FTP parameters: Input the information of 【FTP URL】, 【Port】, 【User name】, 【Password】, 【FTP Path】 and save the settings. 40/ 109 IP Camera User Manual E-mail parameters: When alarm triggered, the message will sent by e-mail to the appointed address. Input the information of 【SMTP server】, 【SMTP port】, 【SMTP username】, 【SMTP password】and the address of sent and received, save the settings. 41/ 109 IP Camera User Manual PPPoE: Click to activate PPPoE function. Input the information of 【PPPoE address】, 【Name】and 【Pwd】and save the settings, the device will restart and obtain a WAN IP address. 42/ 109 IP Camera User Manual Wi-Fi parameters: Click to activate the Wi-Fi function. Input the information of【SSID】, 【Password】of Wi-Fi router, and then input the self-defined 【IP address】, 【Subnet mask】, 【Gateway】, save the settings. Tip: The IP address here should be in the same network segment with Wi-Fi router. If use DHCP serve, please choose 【Auto IP address(DHCP)】. 43/ 109 IP Camera User Manual User Management: If the active user is “admin”, it could add new users with different operation authority. 44/ 109 IP Camera User Manual Channel Setting: Input the self-defined name in 【OSD name】, choose the 【Title】,【Date】,【Time】,【Week】, 【Bit rate】to display the related information on screen. 45/ 109 IP Camera User Manual Video parameters: Parameter Codec Main Stream Sub Stream H.264&MJPEJ H.264&MJPEJ 800X600,1280X720,1280X 960,1600X1200 176X144,352X288,704X288 I Frame Interval 50 50 Frame rate 25 25 CBR&VBR CBR&VBR 2148 512 Best,Better,Good,Standard,S Best,Better,Good,Standard,Sub ub-standard,General -standard,General Resolution Rate control Bit rate Image quality Style AUTO 46/ 109 IP Camera User Manual 47/ 109 IP Camera User Manual Video Cover Settings: Click to activate the privacy mask function. Drag your mouse in the video area and loose it to finish the drawing, save the settings to obtain the privacy mask. are supported. 48/ 109 Multi area mask IP Camera User Manual Audio parameters: Click to activate the audio function. Choose the proper parameters from 【Input type】, 【Audio codec】and 【Bit rate】 【Audio codec】ADPCMA,G711A,G711U,G726,AMR,AAC optional. 【Bit rate】8k,11.025k,16k,22.05k,24k,32k,44.1k,48k optional. 49/ 109 IP Camera User Manual Video lost alarm: Click 【Video loss detect】and 【Send e-mail】to activate the video loss alarm function, the message will sent by e-mail to the appointed e-mail address. Input the alarm clear time in 【Alarm output duration】, the alarm will be cleared automatically in the appointed time. Choose the channels in 【Linkage alarm output】to decide the alarm output channel. 50/ 109 IP Camera User Manual Motion Detect Alarm: Schedule set Choose 【Everyday】to make the alarm in the whole week, or choose the appointed days to make the alarm. Tip:Time Segment 1 and Time Segment 2 can not be set crossed. 51/ 109 IP Camera User Manual Linkage record: Choose the channel which needs to be linkaged, input the recording time and set the file save mode. 52/ 109 IP Camera User Manual Linkage snap: Choose the channel which needs to be linkaged, input the snapshot numbers and interval, set the file save mode. 53/ 109 IP Camera User Manual Linkage preset No: Choose Channel and preset number which needs to be linkaged. 54/ 109 IP Camera User Manual Linkage alarm output: Choose Channel which needs to be linkaged and input the alarm output duration time, click and save it. The message will be sent by e-mail to the appointed e-mail address. 55/ 109 IP Camera User Manual Motion detect parameters: Click to activate the motion detection function. Drag your mouse in the video area and loose it to finish the drawing, save the settings to obtain the motion detection for the appointed area. Multi area mask are supported. The sensitivity degree is adjustable from 1-99. 56/ 109 IP Camera User Manual Sensor Alarm: Choose 【Everyday】to make the alarm in the whole week, or choose the appointed days to make the alarm. Tip:Time Segment 1 and Time Segment 2 can not be set crossed. 57/ 109 IP Camera User Manual Linkage record: Choose the channel which needs to be linkaged, input the recording time and set the file save mode. 58/ 109 IP Camera User Manual Linkage Snap: Choose the channel which needs to be linkaged, input the snapshot numbers and interval, set the file save mode. 59/ 109 IP Camera User Manual Linkage preset No: Choose Channel and preset number which needs to be linkaged. 60/ 109 IP Camera User Manual Linkage alarm output: Choose Channel which needs to be linkaged and input the alarm output duration time, click and save it. The message will be sent by e-mail to the appointed e-mail address. 61/ 109 IP Camera User Manual Alarm type setting: Click to activate senor alarm function, choose the senor type NO or NC and save the settings. 62/ 109 IP Camera User Manual PTZ parameters: COM setting 【COM】COM1 (Default) 【Baud rate】300,600,1200,2400,4800,9600,19200,38400,57600,115200,230400 optional. 【Data bits】5,6,7,8 optional. 【Stop bits】1,2optional. 【Check type】Odd, Even, Null optional. 【Flow control】Hardware, Software, Null optional. 63/ 109 IP Camera User Manual 64/ 109 IP Camera User Manual PTZ control setting: Input the protocol address and choose the protocol in 【Embedded protocol】, save the settings. Tip: The settings should be same with decoder settings of P/T. 65/ 109 IP Camera User Manual Cruise setting: If the user has set more than 2 preset points, it could set 1 group of cruise scanning including the preset points. Choose the cruise No., Preset points No.,Cruise steps and input the standing time at each point. Click to save the settings. Click scanning. 66/ 109 to call the cruise IP Camera User Manual PTZ setting: 【Config 1】Default setting 【Config 2】 Auto Zoom recovery time:0-255sec optional Auto Iris recovery time:0-255sec optional Auto shutter speed:On/Off optional Shutter time:1/30, 1/15, 1/8, 1/4sec optional Image frozen:On/Off optional Digital zoom:On/Off optional Zoom speed:On/Off optional Wide Dynamic:On/Off/Manual optional, manual wide dynamic range is 1-128 BLC:On/Off optional,the setting range is 1-255 Auto white balance:On/off optional Red gain:The setting range is 1-255 67/ 109 IP Camera User Manual Green gain:The setting range is 1-255 Day/Night: Automatic, Black and white, Color optional Auto exposure:Automatic; Shutter priority: 1/4, 1/8, 1/15, 1/30, 1/50, 1/60, 1/100 , 1/120 , 1/180, 1/250, 1/500, 1/1000, 1/2000, 1/4000, 1/10000 optional; Aperture priority:F1.6, F2.2 , F3.2 , F4.4, F6.4, F8.8, F12, F17, F24, F34 optional; Brightness priority:0[db]、6[db]、12[db]、18[db]、24[db]、30[db] optional Joystick auto-focus recovery: All automatic, Auto focus, Auto aperture, All manual. 68/ 109 IP Camera User Manual 69/ 109 IP Camera User Manual Registration Management: This function should work with NVR. 70/ 109 IP Camera User Manual Devices maintenance: Click to sync the time with PC. Click 【Browse】to find the updated firmware, and then click 【Update】to start the operation. Click 【Reboot Device】to finish it. 71/ 109 IP Camera User Manual Log: Choose 【Operation】or 【Alarm】in type of operation, set the date and Start/End time to search the related logs. 72/ 109 IP Camera User Manual Appendix A FAQ Factory default parameters IP Address: 192.168.1.229 Administrator Name:admin Password: admin Subnet Mask: Gateway: Web Port: 255.255.255.0 192.168.1.1 80 DHCP: OFF DDNS: OFF Forget Password Answer:【RESET】on the IP Camera back, press it to retrieve all parameter to default (Factory Setting). Note:please don't press 【RESET】if you are not professional. What shall I do if IP Camera can’t restart after it is upgraded abnormally or power 73/ 109 IP Camera User Manual interrupted? Answer: Firstly, press the RESET on the IP Camera back panel, plug in the IP Camera and unloose the RESET. After 12 seconds, the system will run backup programs. (The backup programs include upgrading and parameter settings. The functions of video & audio are not available). After re-upgrade the system programs, IP Camera will restart normally. No ActiveX in IE Browser Reason:uninstall ActiveX. Answer:You need to install ActiveX Control when you visit IP Camera for the first time. You can install ActiveX Control in two ways: (1) Auto-Installation You need to lower the security level of the IE temporarily in order to install ActiveX Control into your PC as follows: Choose Internet Option: 【tools】→【Internet Option】. Click the label of 【Security】 and your current security setting is displayed. 74/ 109 IP Camera User Manual Set the security level low and click 【apply】. Enter your IP Camera address in the IE address line (for example: hhdemo1.vicp.net). If you see a dialogue as follows【Do you want to install ActiveX Control】,Please click 【Yes】 and install ActiveX Control. Once finished installing your ActiveX Control, retrieve your security setup for default value. Why fail to logon to IP Camera after upgrade through IE Browser? (2) Download Installation Download ActiveX Control compressed package from the IP Camera address. Then close the IE browser. Answer: Delete the caching of Browser. Operation: find the tool of browser---Internet options---Internet temporary file---click “delete file” button,choose the option” delete all offline contents”. Confirm and restart to logon IP Camera. Can’t visit IP Camera via IE browser? Reason 1: Internet offline. Answer: If it is an error of network connection, do the following steps: Connect PC to 75/ 109 IP Camera User Manual network to test whether they work normally or not. Reason 2: IP Address was taken by other device. Answer: Cut off the connection of IP Camera and network, connect IP Camera and PC, then set IP address again according to recommendatory operation. Reason 3:IP address lies in different subnet? Answer: Check the IP and subnet mask, test the settings of gateway. Reason 4: The physical address of network conflict with IP Camera? Answer: please modify the physical address of IP Camera. Reason 5:The web port is modified by others? Answer: please contact administrators of networks to obtain relevant port information. Reason 6: When the causes can not found。 Answer: please restore IP Camera to default state, and connect IP Camera. (System default IP address: 192.168.1.229, mask address: 255.255.255.0). Speaker without sound Reason 1: Without connecting Audio input. Answer: Checking the Audio connection. 76/ 109 IP Camera User Manual Reason 2: Without choosing the option of Audio in IP Camera. Answer: Checking the Audio parameter of IP Camera, choosing the option of Audio. The effect of the audio is not good. Reason: When there are much noises for the Audio and the distortion is very serious, please check the input signal level, if it is not lineate input, the signal level is not matching with the signal level of IP Camera. And it results in the saturation distortion. Answer: please adopt the properly lineate input accord with the IP Camera. Why the data can’t access to switch? Reason: 1. If it is the second class switch, the address is wrong. 2. If it is the third class switch, please bind the port and physical address. 3. Didn’t consider the server when config the firewall. Please check the internet connection with ping command. It must be the internet problem if the ping command can’t connect. Please add new binding between IP address of IP Camera and Mac address in the switch if IP address bind Mac address. Refer to the Port of IP Camera to config the switch if it didn’t consider the server when the switch configed firewall. 77/ 109 IP Camera User Manual How to transmit the Audio and Video service in the internet for IP Camera? Please confirm the method of internet connection: If the internet is the static IP address, set the IP address ,subnet mask and gateway for server same as the static address provided by ISP; If the internet is ADSL or Broad Band, It needs to be authorized. It can be authorized by some intelligent device, for example: PC or small Router. If it is interior of the LAN, there is a public IP address. But it can’t be found in exterior of the internet, in this case, the connecting server need to be set. Answer 1: Using in the office or building. Meanwhile user want to visit the IP Camera in other city, in this situation, it can do a transmission to the device connected with Internet. It can be finished by Port mapping. The popular port mapping software like Port map, tunnel, user can set it, selecting all IP addresses, then fill in the final IP address with the interior address of IP Camera in LAN. Answer 2: It is a good way to select the Router as the transmitting device if there is no PC. Now most of Router have the port map function, designate the DMZ address as the address of IP Camera. 78/ 109 IP Camera User Manual Appendix B Specifications ⅠBox camera dimension: box camera dimension(1) 79/ 109 IP Camera User Manual Box camera dimension(2) 80/ 109 IP Camera User Manual Box camera specification: type 1080P 960P 720P 1/3” Progressive scan CMOS Image sensor Mini. illumination 0.01Lux(F1.2,A GC ON) 0.1Lux(F1.2,AGC ON) 1Lux(F1.2,AGC ON) WDR —— 120dB —— AGC AUTO ON/OFF ≥52dB S/N White balance AUTO ON/OFF Electronic shutter 1/50~1/100,000s ON/OFF Synchronous internal —— Day/night switch auto/color/B/W/external control —— 81/ 109 IP Camera User Manual Video compression resolution H.264,MJPEG 25 fps (1920×1080) 25fps (1280 ×960), 25fps (1280 × 720) 15fps (1600 ×1200), 25 fps (1280×720), 25 fps (800×600) Video compression bit rate 32Kbps-8Mbps Audio compression ADPCM、G711A、G711V、G726、AMR、AAC Audio sampling rate 8K、16Koptional Video adjustment Network Protocol brightness、chroma、saturation、contrast、acutance adjusted via CMS software or IE web TCP/IP、HTTP、DHCP、DDNS、PPPOE、FTP、SMTP、NTP、 additive RTP/RTSP Security User’s name and password, MAC and IP binding Users authiorization PTZ control、two way audio、manual recording、alarm control、 parameter setting、network preview、process playback、journal review Users capacity Support 10 users,2ch video preview simultaneously 82/ 109 IP Camera User Manual OSD Display time,week,date,bit-rate,title Privacy mask 4 areas max, black area displaying Dual-stream Different resolution and frame between main stream and substream Audio Support audio out and in Video loss alarm Alarm motion output, send e-mail Motion detection 20 areas,sensitivity:0-9 degree selectable Motion detection linkage Alarm motion output, PC incident, recording, snap, FTP upload ,send email , e-map Probe alarm ON/OFF Probe alarm linkage Alarm motion output, PC incident、 recording、snap、FTP upload ,send email , e-map PTZ protocol PELCO-D、PELCO-P Storage Support SD card, MAX 32G,timing recording, alarm recording, alarm snapshot 83/ 109 Universal function IP Camera User Manual Support PC time synchronization、remote upgrading、remote restart、remote reset and log book review Alarm input 1channel Alarm output 1channel Audio input 1channel Audio output 1channel COM Port 1 RJ45 10M/100M ethernet 485 port 1 Power port 1 Reset port 1 Expanded function WIFI、3G Power supply DC12V;AC24V;POE 84/ 109 IP Camera User Manual Power consumption <8W Working temp -10℃~+55℃ Working humidity 90%RH System requirement Operate system:Microsoft Windows XP Windows 7 Ultimate Edition / Professional;Windows 2003 Professional Edition/Enterprise Edition IE: Microsoft Internet Explorer 6.0、8.0 Box camera weight Net weight:0.5KG、gross weight:0.7KG。 dimension package:20CM(L)x11CM((W)x10CM(H). 40pcs/box 85/ 109 IP Camera User Manual ⅡDome camera dimension: Vandal proof dome camera dimension 86/ 109 IP Camera User Manual IR dome dimension 87/ 109 IP Camera User Manual Dome and IR dome specification: type 1080P 960P 720P 1/3” Progressive scan CMOS Image sensor Mini. illumination 0.01Lux(F1.2,AGC ON) 0.1Lux(F1.2,AGC ON) 1Lux(F1.2,AGC ON) WDR —— 120dB —— AGC AUTO ON/OFF ≥52dB S/N White balance AUTO ON/OFF Electronic shutter 1/50~1/100,000s ON/OFF Synchronous internal —— Day/night switch auto/color/B/W/external control —— 88/ 109 IP Camera User Manual Lens 4-9mm IR distance 10-20m(IR dome) Video compression H.264,MJPEG resolution 25 fps (1920×1080) 25fps (1280 × 960), 25fps (1280 × 720) 15fps (1600 × 1200), 25 fps (1280×720), 25 fps (800×600) Video compression bit rate 32Kbps-8Mbps Audio compression ADPCM、G711A、G711V、G726、AMR、AAC Audio sampling rate 8K、16Koptional Video adjustment Network Protocol Security brightness、chroma、saturation、contrast、acutance adjusted via CMS software or IE web TCP/IP、HTTP、DHCP、DDNS、PPPOE、FTP、SMTP、NTP、 additive RTP/RTSP User’s name and password, MAC and IP binding 89/ 109 Users authiorization IP Camera User Manual PTZ control、two way audio、manual recording、alarm control、 parameter setting、network preview、process playback、journal review Users capacity Support 10 users,2ch video preview simultaneously OSD Display time,week,date,bit-rate,title Privacy mask 4 areas max, black area displaying Dual-stream Different resolution and frame between main stream and substream Audio Support audio out and in Video loss alarm Alarm motion output, send e-mail Motion detection 20 areas,sensitivity:0-9 degree selectable Motion detection linkage Alarm motion output, PC incident, recording, snap, FTP upload ,send email , e-map Probe alarm ON/OFF 90/ 109 Probe alarm linkage PTZ protocol Storage Universal function IP Camera User Manual Alarm motion output, PC incident 、 recording 、 snap 、 FTP upload ,send email , e-map PELCO-D、PELCO-P Support SD card, MAX 32G,timing recording, alarm recording, alarm snapshot Support PC time synchronization 、 remote upgrading 、 remote restart、remote reset and log book review Alarm input 1channel Alarm output 1channel Audio input 1channel Audio output 1channel COM Port 1 RJ45 10M/100M ethernet 485 port 1 Power port 1 91/ 109 IP Camera User Manual Reset port 1 Expanded function WIFI、3G Power supply DC12V;AC24V;POE Power consumption <8W Working temp -10℃~+55℃ Working humidity 90%RH System requirement Operate system:Microsoft Windows XP Windows 7 Ultimate Edition / Professional ; Windows 2003 Professional Edition/Enterprise Edition IE: Microsoft Internet Explorer 6.0、8.0 Dome camer a weight dimension Net weight:1.3KG、gross weight:1.7KG. Package dimension:16CM(L)x16CM(W)x16CM(H) 16pcs/box 92/ 109 IP Camera User Manual Ⅲ IR Bullet camera dimension: IR bullet dimension (1) 93/ 109 IP Camera User Manual IR bullet dimension (2) 94/ 109 IP Camera User Manual IR bullet specification: type 1080P 960P 720P 1/3” Progressive scan CMOS Image sensor Mini. illumination 0.01Lux(F1.2,A GC ON) 0.1Lux(F1.2,AGC ON) 1Lux(F1.2,AGC ON) WDR —— 120dB —— AGC AUTO ON/OFF ≥52dB S/N White balance AUTO ON/OFF Electronic shutter 1/50~1/100,000s ON/OFF Synchronous internal —— 95/ 109 IP Camera User Manual Day/night switch auto/color/B/W/external control Video compression resolution Lens —— H.264,MJPEG 15fps (1600 × 1200), 25 fps (1280×720), 25 fps (800×600) 4mm、6mm、8mm、12mm、16mm、4-9mm、5-15mm(dimension(2) cant install 4-9mm、5-15mm lens) 25 fps (1920×1080) 25fps (1280 × 960), 25fps (1280 × 720) IR Distance Match with lens Video compression bit rate 32Kbps-8Mbps Audio compression ADPCM、G711A、G711V、G726、AMR、AAC Audio sampling rate 8K、16Koptional brightness、chroma、saturation、contrast、acutance adjusted via CMS software or IE web TCP/IP、HTTP、DHCP、DDNS、PPPOE、FTP、SMTP、NTP、 additive RTP/RTSP Video adjustment Network Protocol Security User’s name and password, MAC and IP binding 96/ 109 Users authiorization IP Camera User Manual PTZ control、two way audio、manual recording、alarm control、 parameter setting、network preview、process playback、journal review Users capacity Support 10 users,2ch video preview simultaneously OSD Display time,week,date,bit-rate,title Privacy mask 4 areas max, black area displaying Dual-stream Different resolution and frame between main stream and substream Audio Support audio out and in Video loss alarm Alarm motion output, send e-mail Motion detection 20 areas,sensitivity:0-9 degree selectable Motion detection linkage Alarm motion output, PC incident, recording, snap, FTP upload ,send email , e-map Probe alarm ON/OFF 97/ 109 Probe alarm linkage PTZ protocol Storage Universal function IP Camera User Manual Alarm motion output, PC incident、 recording、snap、FTP upload ,send email , e-map PELCO-D、PELCO-P Support SD card, MAX 32G,timing recording, alarm recording, alarm snapshot Support PC time synchronization、remote upgrading、remote restart、remote reset and log book review Alarm input 1channel Alarm output 1channel Audio input 1channel Audio output 1channel COM Port 1 RJ45 10M/100M ethernet 485 port 1 Power port 1 98/ 109 IP Camera User Manual Reset port 1 Expanded function WIFI、3G Power supply DC12V;AC24V;POE Power consumption <12W Working temp -10℃~+55℃ Working humidity 90%RH System requirement Operate system:Microsoft Windows XP Windows 7 Ultimate Edition / Professional;Windows 2003 Professional Edition/Enterprise Edition IE: Microsoft Internet Explorer 6.0、8.0 Dimen sion(1) Dimen sion(2) weight Net weight:1.7KG、gross weight:2KG. dimension Package dimension:32.5CM(L)x18CM(W)x17CM(H). 8pcs/box weight Net weight:1KG、gross weight:1.3KG. dimension Package dimension:30CM(L)x16.5CM(W)x14CM(H). 99/ 109 8pcs/box IP Camera User Manual Ⅳ Specification: 100/ 109 IP Camera User Manual Parameters: Image P/T Sensor 1/4" CMOS sensor Resolution 1.0 MP Min.Illumination 0 Lux when IR is on Lens f=3.6mm, F=2.0, IR lens IR_CUT ICR True D/N Pan 350° Tilt 100° Preset 32 IR control Auto/manual LED 10pcs 850nm IR illuminators, IR range 5m Main stream:1280×720,30fps; Resolution Bit rate Sub stream:640×480,30fps Cell phone stream:320×240,30fps 101/ 109 IP Camera User Manual Video H.264/JPEG compression Network Max Frame rate 30 f/s Main stream 90kbps ~ 2.048Mbps Sub stream 90kbps ~ 512kbps Picture rotation Mirror/Flip OSD Support Audio G.711/G.726 compression Protocols TCP/IP、HTTP、RTSP、SMTP、FTP、DHCP、DDNS、 UPNP、NTP Wi-Fi Advanced 802.11b/g/n Cell phone Support monitor 102/ 109 IP Camera User Manual Talkback Support SD card storage Support SD card Support download Interface Motion detection 4 areas settings Alarm Email/FTP/SD card storage/Send message to the notifications server User 3 levels authorization Time/Date Support Upgrade Network update RJ-45 10Base-T/100base-TX SD card slot Available Alarm input 1 CH 103/ 109 IP Camera User Manual General PC client Alarm output 1 CH Audio input Build-in microphone, 1 audio input jack Audio output 1 audio output jack Weight 358g Size 102mm*107mm*148mm Power supply DC 5V Consumption <6W Temperature -20℃~ 50℃ Humidity 10% ~ 80% OS Microsoft Windows XP/Vista/Window 7 Browser Internet Explorer6.0 above, Safari、Firefox. Client software Free 104/ 109 IP Camera User Manual Appendix C Packing list The whole kit includes: 1 pc of network camera 1 pc of CD(Software) 1 pc of user manual 1 pc of certificate of quality 105/ 109 IP Camera User Manual Warranty Card 1. 1 Year warranty from the day of shipment. 2. Please attach this card when you ship back the goods for replacement or repairing. 3. We also repair the over-due products, but we’ll charge the cost fees according to the practical damage. 4. We don’t accept and repair the returned products without the warranty card. Exception; ★ Breakdown or damage caused by dismantling or modifying the device by the customer. ★ Breakdown or damage caused by wrong power supply or natural disaster. ★ By any other artificial reasons. 1、 Please fill the card and ship it together with the products. 2、 The freight should be paid when ship back. QA Stamp 106/ 109 IP Camera User Manual Information of vendor: (Filled by vendor) (Filled by user) Information of user: Name: Name : Address: Address: P.O: P.O: Tel: Tel: Checked by the user: Date: Signature: Stamp: 107/ 109 IP Camera User Manual Products repairing record: Date Malfunction and handling 108/ 109 IP Camera User Manual rior notice will be given for any changes of products design and specifications 109/ 109


![- [ [ [ ANSEL ] ] ]](http://vs1.manualzilla.com/store/data/005876018_1-a636cab6934c7a831e92a71c6eb2f063-150x150.png)
