1
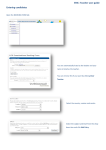
My Sage Pay
User Manual
Page 1 of 49
Contents
About this guide .............................................................................................. 4
Getting started ................................................................................................. 5
Online help ............................................................................................................... 5
Accessing My Sage Pay ........................................................................................... 5
The Administrator account........................................................................................ 5
Creating user accounts ............................................................................................ 6
Forgotten user account details ................................................................................. 8
Administering user accounts .................................................................................... 9
The Transactions area ................................................................................... 10
What is the Transactions area for? ......................................................................... 10
Transactions........................................................................................................... 11
Quick reporting ....................................................................................................... 11
Advanced reporting ................................................................................................ 11
Transaction Total Summaries ................................................................................. 12
Changing the displayed columns ............................................................................ 13
Export..................................................................................................................... 14
Detailed transaction information ............................................................................. 15
Transaction Summary ............................................................................................ 16
Additional Details ................................................................................................... 17
Authorisation Details .............................................................................................. 18
Fraud Results ......................................................................................................... 19
Related Transactions ............................................................................................. 20
Summary................................................................................................................ 21
Settlement .............................................................................................................. 22
Bulk Actions ........................................................................................................... 23
Gift Aid ................................................................................................................... 24
Invalid..................................................................................................................... 25
The Virtual Terminal ...................................................................................... 27
What is the Virtual Terminal for? ............................................................................ 27
Vendors in Merchant Category 6012 – Financial Institutions .................................. 28
Processing a transaction through the Virtual Terminal ............................................ 29
Card Machine Transactions Tab................................................................... 31
What is this tab for?................................................................................................ 31
Quick Reporting ..................................................................................................... 31
Changing the displayed columns ............................................................................ 32
Export..................................................................................................................... 33
Page 2 of 49
Settings........................................................................................................... 34
What is the Settings area for? ................................................................................ 34
My Account Settings............................................................................................... 35
Display & General Settings..................................................................................... 36
Restricted domains................................................................................................. 36
Language settings (Protocol 3.0 feature) ................................................................ 37
Account Settings .................................................................................................... 37
Your Payment Page Logo ...................................................................................... 38
AVS/CV2 ................................................................................................................ 39
Add a New AVS/CV2 Rule ..................................................................................... 39
3D Secure .............................................................................................................. 40
Restrictions ............................................................................................................ 42
Blocked IP Addresses ............................................................................................ 42
Add a Blocked Country........................................................................................... 43
Blocked Card Ranges ............................................................................................ 43
Blocked Issuing Countries ...................................................................................... 43
Valid IP Addresses ................................................................................................. 44
Account Change Log .............................................................................................. 45
Users...................................................................................................................... 46
Pay methods .......................................................................................................... 47
Surcharges (Protocol 3.0 feature)........................................................................... 48
Search ............................................................................................................. 49
What can I search for? ........................................................................................... 49
Updated: 22/07/2013
Page 3 of 49
About this guide
This is a full user guide to My Sage Pay.
If you have any questions about this guide, please email [email protected].
Page 4 of 49
Getting started
Online help
There is more information available on our online help centre which can be found at
www.sagepay.com/help should you need further assistance on using My Sage Pay.
Accessing My Sage Pay
You will only be able to log in to My Sage Pay once your Sage Pay account has been set up and you have
been sent your log in details. If your account has been set up but you are yet to receive your log in details
for My Sage Pay, please email [email protected].
To access your My Sage Pay account, you will need to type the following URL into your browser window:
Test Servers
https://test.sagepay.com/mysagepay
Live Servers
https://live.sagepay.com/mysagepay
We recommend that you have the latest version of the web browser which you will be accessing the My
Sage Pay admin area from
The Administrator account
When your Sage Pay test account is set up, you will receive an email which outlines how to access your
password retrieval link to obtain your Vendor Name and Admin Password. These details will give you
access to your Administrator account within the My Sage Pay system. Your Administrator account details
always remain the same and you should ensure that you keep this information in a safe place.
Important Note: The Administrator account only allows you to create and administer other user accounts.
You will not be able to view any transactions when you are logged in using the Administrator account. You
must therefore create your own user account before you are able to access the full My Sage Pay system.
Updated: 22/07/2013
Page 5 of 49
Creating user accounts
To log in to My Sage Pay with your Administrator account you will need to enter the following information
on the My Sage Pay login screen:
Vendor Name – Enter your Vendor Name in this field
User Name – Enter your Vendor Name in this field as well
Password – Enter your Admin password in this field
When you have successfully logged in as the Administrator, you will see the following screen:
Updated: 22/07/2013
Page 6 of 49
To create a new user, click on the ‘Users’ section circled in red:
Click on the
button.
The next screen will ask for a user name and password for the new account. You will also be able to
choose what account privileges and My Sage Pay access rights the new user will have. You will also have
the option to set the default landing page the user will be presented with when they log in.
When you have entered the required information, click the
Updated: 22/07/2013
button to create the new user.
Page 7 of 49
The new user account will now be listed on the main user screen. If you ever need to unlock a user
account, change the Account Privilege, My Sage Pay access, or delete a user account, you can do so
through this area of My Sage Pay as long as you have “Administration” privileges.
When you have created the new user account, you should then log out and log back in with the new user
account details.
Important Note: When you login with the new user account, you will need to use your Vendor Name in the
Vendor Name field. The user name you created should be entered in the User Name field. You will also
need to enter the password you created for this account.
Forgotten user account details
Should you ever forget your username or password, you can now retrieve this information automatically.
N.B: You will need to ensure that you have added and verified an email address against your username
before you can start using this feature. If you have not done so, you will need to contact the account
administrator to either reset your password or remind you of your username.
To do this, simply click on one of the links on the sign in page, and
then follow the instructions to either reset your password or have
your username sent to you.
Updated: 22/07/2013
Page 8 of 49
Administering user accounts
Accounts with access to the ‘User Administration’ area are able to unlock user accounts, delete user
accounts, create user accounts or change their settings.
When you log in using the administrator account and select the users section as discussed previously, you
will see the list of current user’s set up on the vendor account. You will also be able to see which user
accounts are logged in or locked out at that point in time.
If you ever need to lock, unlock or delete a user’s account, select the + symbol next to the user and you will
be displayed with the below view. The actions are highlighted in red below.
Important Note: If you lock out the Administrator account, you will need to email [email protected]
for this account to be unlocked. This request must come from a the Primary/billing contact on the account
Updated: 22/07/2013
Page 9 of 49
The Transactions area
What is the Transactions area for?
The Transactions area is used to find the details of a transaction, settlement or invalid request. To access
the transactions area, select the “Transactions” tab highlighted below in red.
You will see that you are presented with 4 different sections down the left hand side
•
•
•
•
•
Transactions
Summary
Settlement
Bulk Actions (Only if you process Deferred/Release and Authenticate/Authorise)
Invalid
Updated: 22/07/2013
Page 10 of 49
Transactions
This report will show all of your transactions and provide additional information on all payments.
Quick reporting
Located at the top of the transaction page is the quick reporting tool that will allow you to instantly see your
transactions by the hour, day, week, month or year at the click of a button. It will also filter your
transactions so you can simply see all your successful or failed transactions.
If you accept different currencies, you can quickly separate them using the currency tabs just above the
transaction list.
Advanced reporting
If you need to refine the transaction list further using specific filters, you can also do this by selecting the
“advanced” button highlighted above.
You will then be presented with options to “Refine your report” as displayed above. Simply choose the
dates from the calendar to display transactions within that time period. You can also click on the month
and year field to display a dropdown menu if you want to change the month/year.
Updated: 22/07/2013
Page 11 of 49
You will have the ability to refine your transactions with the following:
•
•
•
•
•
•
•
Payment type
Transaction Type
Account type
Vendor Tx Code
Amount (Inc. Surcharge)
VSP auth code
Last 4 digits of the card
By clicking on the transaction, you will be able to view further details of the transaction. You will be
prompted with a new screen that is discussed further in this document under the heading Transaction
Detail.
If you select the plus symbol next to the transaction you can view some additional information with regards
to addresses as displayed below.
Transaction Total Summaries
On each report you create, you will immediately be able to see a totals summary for all the transactions
split by each payment type and also separated by success and failed transactions.
N.B: The totals will only be displayed for each individual currency and not on the “All” tab.
Simply click or hover on the link located at the bottom on the transaction screen
Updated: 22/07/2013
Page 12 of 49
Changing the displayed columns
You are able to select which columns you want to display in the
Transaction Report by selecting the
symbol or click on the link
show/hide columns at the bottom. You will then be prompted with this
window.
•
•
•
•
•
•
•
•
•
•
•
•
•
•
•
•
•
•
•
•
•
•
•
•
•
•
•
•
•
•
•
•
Transaction ID – Sage Pay’s unique transaction reference (VPSTxID)
Card Holder – Card holder name entered on payment pages
Type – Payment types such as payment, deferred, refund, void etc
Vendor Tx Code – Your unique transaction identifier
Amount – The amount of the transaction
Received – Date of the transaction
CV2 – Card security code result
Add – Address verification result
PC – Post Code verification result
3D – 3D Secure authentication result
T3M Action – This is the result of the addition fraud checks by the 3rd Man
Refund – Displays if the transaction has been refunded
Repeat – Displays if the transaction has been repeated
Success – If the transaction was successful
System – Displays how the transaction was processed (Form, Server or Direct)
Account Type – Displays if the transaction was Ecommerce, Moto or Continuous Authority
Payment Type – The type of card that was used
Last 4 digits
VPS Authcode – Sage Pay’s authorisation reference
Bank Authcode – The bank’s authorisation code
Batch ID – The settlement batch ID
Abort – Indicates whether a deferred transaction has been aborted and not sent for settlement
Release – Indicates whether a deferred transaction has been sent for settlement
Username – Displays the user who has performed the payment if processed within the My Sage Pay
area
T3M Score – The 3rd man fraud result score
T3M ID –The 3rd man transaction reference
Billing Name
Billing Address
Delivery Name
Delivery Address
Card Name
Card Address
Updated: 22/07/2013
Page 13 of 49
Export
You can use this option to print your transaction list, view in Excel or export to a CSV format. This is
particularly useful if you need to use or access transaction information outside the My Sage Pay admin
area.
Select the relevant button in the bottom left hand corner of the screen.
Selecting the
Selecting the
CSV format.
Updated: 22/07/2013
button will open up a print preview and the option to print out your transactions
button will open a window to open the transactions in Excel or save it as a
Page 14 of 49
Detailed transaction information
When you click on the transaction row within the transaction report, you will see further information about
the transaction, from the authorisation details to fraud results. This display shows you everything we know
about the selected transaction.
This information will help you address any customer queries you receive, make decisions about delivery,
and allow you to release, authorise, abort, cancel, void, refund or repeat transactions against this card (if
you have permissions to do so).
This display has 5 different sections to it that you can navigate to using the tabs on the left - highlighted in
red below.
•
•
•
•
•
Summary
Additional Details
Authorisation Details
Fraud Results
Related Transaction Details
Updated: 22/07/2013
Page 15 of 49
Transaction Summary
The transaction summary provides an overview of the transaction, when the transaction took place, a
description of the transaction, along with the contact details for the customer.
•
•
•
•
•
•
•
•
•
•
Customer name – The customer’s name for the transaction
Customer email – The customer’s email address provided
Completed - This is the date/time the transaction completed
Amount (Inc. Surcharge) – The full amount of the transaction including the surcharges
Surcharge – The additional charge added to the transaction
Description – This will show a description of the transaction
Sage Pay unique ID – This is the unique identifier for Sage pay
Billing Address – The billing address entered and sent to Sage Pay
Deliver Address - The delivery address entered and sent to Sage Pay
Cardholder Address – The address entered/captured on the payment page*
*Only available for transactions using the Form & Server integrated method
Updated: 22/07/2013
Page 16 of 49
Additional Details
The additional details section provides further information on the transaction, start and completions times,
the System used, whether the transaction has been refunded or repeated, and the URLs to which
customers were sent. You will also be able to see the shopping basket if this has been passed onto Sage
Pay.
•
•
•
•
•
•
•
•
•
•
•
•
•
Released - This field shows if the transaction has been released *
Aborted - This field shows if the transaction has been aborted *
Refunded - This field shows if the transaction has been refunded
Repeated - This field shows if the transaction has been repeated
Callback URL - This is the URL in which the shopper has been redirected to**
User - This is the Sage Pay username that has processed the action
Started - This is the date/time the transaction started
Completed - This is the date/time the transaction completed
Gift Aid - This indicates that GiftAid was applied to the transaction
System Used - This is the Sage Pay method used to process the transaction
Client IP - The IP Address of the computer used to place this transaction
Client Location - This shows the geographical location of that IP Address if available
Shopping Basket – Details of the shopping basket and the goods ordered if provided
*Only displayed on deferred transactions
**Only available for transactions using the Server integration method
Updated: 22/07/2013
Page 17 of 49
Authorisation Details
The Authorisation Details section shows the card and cardholder details and the authorisation details
obtained during the transaction. You will also be able to see the merchant account details for the
transaction.
•
•
•
•
•
•
•
•
•
•
•
Acquirer - The merchant acquirer used for this transaction.
Merchant Number - The merchant number used in the transaction
Bank authcode - The bank authorisation code for this transaction
VPS authcode - The Sage Pay authorisation code for this transaction
Attempt - How many attempts the customer made to complete payment
Account Type - Displays if this was a ecommerce, MOTO or continuous authority transaction
Settlement Info - Information regarding settlement, date/time, amount and batch ID
Cardholder name - The cardholder name entered at the time of the transaction.
Card Address - The cardholder’s address entered on the payment pages at the time of the
transaction*.
Last 4 Digits - The last 4 digits of the Debit/Credit card used in the transaction
Additional card details – The type of card and issuing bank
*Only applies to transactions using the Server integration method
Updated: 22/07/2013
Page 18 of 49
Fraud Results
The fraud results section shows the fraud screening details regarding the 3D Secure authentication, AVS,
CV2 and the Third Man.
•
•
•
•
•
•
•
•
•
•
•
•
3D Secure applied - This field shows if the 3D Secure checks were applied and if any 3D Secure rules
were applied.
3D Secure Results Status - This field shows the result of the 3D-Authentication.
Attempt – This will show the number of time the verification was attempted
ECI Result – ECI (Electronic Commerce Indicator) flags are passed to indicate the 3D Secure status
from the card issuing bank. We convert these ECI flags to coloured flags on the Reports pages to help
clearly identify the status.
CAVV UCAF result - Card Authenticate Validation Value (CAVV) for VISA transactions, or Universal
Cardholder Authentication Field (UCAF) for MasterCard / Maestro transactions. This is the value
passed back in the PARes. If a CAVV or UCAF value is provided, the transaction has been 3DSecured, and a liability shift may occur should the transaction later be found to be fraudulent.
XID – The 3D Secure transaction identifier
AVS CV2 Applied – This field shows if the AVS/CV2 checks were applied and if any
AVS/CV2 rules were applied.
Address Numeric’s – This field shows the AVS/CV2 response for the Billing Address.
Post Code Value – This field shows the AVS/CV2 response for the Billing Post Code.
CV2 Value – This field shows the AVS/CV2 response for the CV2 number (also known
as the
security code).
The 3rd Man Results - This field shows the results of The 3rd Man fraud screening checks
Total fraud score - This field shows the score results from The 3rd Man
For more information about the AVS/CV2, 3D Secure and the 3rd Man responses please download the
Sage Pay Fraud Prevention Advice guide from the Sage Pay online help centre:
www.sagepay.com/help/userguides
Updated: 22/07/2013
Page 19 of 49
Related Transactions
The related transaction section shows all transactions associated with the payment currently selected. This
can include Refunds, Repeats, Authorises and Releases.
If you select and expand the related transaction, it will display the detailed transaction view.
•
•
•
•
•
•
•
Vendor Tx Code – Unique transaction reference
User – The user that has processed the action
Amount (Inc. Surcharge) – Amount of the transaction including any surcharges
System Used – How this transaction was processed (Form, Server, Direct)
VPS authcode - The Sage Pay VPS authorisation code for this transaction
Bank authcode - The bank authorisation code for this transaction
Started - This is the date/time the transaction started
Updated: 22/07/2013
Page 20 of 49
Summary
This report provides a summary of all of your transactions and shows you the total amount of funds coming
in and going out. You can expand and collapse the report by using the + and – symbols on the left hand
side.
You should use this option if you would like to view a breakdown of all your transactions should you need to
obtain a full report. Here you can access information by account type, payment type, card type and user.
Updated: 22/07/2013
Page 21 of 49
Settlement
This report displays the settlement details of all of the transactions that you have processed through your
Sage Pay account.
You should use this option if you would like to show a summary of transactions which have been sent for
settlement. This will show the total number and value of transactions in each batch.
SAMPLE
From this list, you will be able to access further information about each transaction that has been sent for
settlement. Simply click on the transaction to open up the Transaction details.
Updated: 22/07/2013
Page 22 of 49
Bulk Actions
This report displays your deferred transactions that are awaiting release. If you do not have the deferred
payment type on your account, you will not see any information in this section.
If you have any transactions that have not been released you will be presented with a list of transactions
that you can bulk release or bulk abort.
In order to bulk release or abort your transactions tick the checkbox next to each transaction.
Select the
Select the
Updated: 22/07/2013
button to release the selected payments.
button to abort the selected transactions.
Page 23 of 49
Gift Aid
This report displays any transactions where the customer has agreed to allow Gift Aid relief to be claimed.
N.B: If you do not have the Gift Aid functionality enabled on your account, you will not see this option.
Updated: 22/07/2013
Page 24 of 49
Invalid
This report will display all invalid transactions that have been rejected by Sage Pay for the account that you
are currently logged in to.
Simply use the calendar or quick reporting buttons to set the date range.
Click on the transaction to display a detailed view of the invalid request as displayed below.
Updated: 22/07/2013
Page 25 of 49
Updated: 22/07/2013
Page 26 of 49
The Virtual Terminal
What is the Virtual Terminal for?
The Virtual Terminal is used to process any Mail Order or Telephone Order transactions and is our online
equivalent of a PDQ machine in a shop. To access the Terminal area, click the Terminal tab highlighted in
red below.
You can use this terminal as back up if your web site is out of action, and for those customers who prefer to
pay by phone. You can only use our Terminal screens if you have a Mail Order/Telephone Order (MOTO)
merchant number associated with your account. If you only have an E-Commerce merchant number on
your account, the Virtual Terminal will not be available to you.
Please contact your acquiring bank to request a MOTO merchant number. Some banks may allow you to
use the same merchant account; others may require you to set up a new one. Once you have an account,
send the details to [email protected], along with your Vendor name, and they will set up the account
for you.
Updated: 22/07/2013
Page 27 of 49
Vendors in Merchant Category 6012 – Financial Institutions
Important Note: Vendors classified by their Merchant Acquirer in Merchant Category 6012 – Financial
Institutions will notice additional, optional, fields when processing Terminal transactions.
The Merchant Category Code (MCC) 6012 Financial Institution is used for variety of payments initiated by
financial institutions. MCC 6012 is the most fraudulent MCC in the UK market. As advised by UK numbers,
the majority of fraud perpetrated on the MCC 6012 is on compromised VISA debit card details that are used
to pay of transfer balances to other cards. Members are therefore unable to confirm whether a payment is
genuine, despite matching of full CVV2 with AVS.
To address this situation, additional data for MCC 6012 is to be captured and submitted, unchanged, to the
card issuer for Visa transactions to assist in authorisation decisions. The additional information required is:
•
•
•
•
Recipient Date of Birth
Recipient Account Number
Recipient Post Code
Recipient Last Name
Updated: 22/07/2013
Page 28 of 49
Processing a transaction through the Virtual Terminal
The Virtual Terminal screen is split into two sections with the first section having additional tabs:
Section 1 includes:
•
•
•
Billing Address
Delivery Address
Advanced
You will need to enter information in the fields above. The fields marked with * are mandatory fields and
must contain data.
•
•
•
•
•
•
•
•
•
•
•
First Name – Customers first name
Last Name - Customers last name
Phone Number – Telephone number
Email Address – Email address
Address Line 1 – 1st line of the customers address
Address Line 2 - 2nd line of the customers address
Town/City – Town/City of customers address
Post/Zip Code – Customers Post/Zip code
Country – Drop Down list of country
State Code – Only applicable when United States is selected as billing country
Make Delivery Address Same as Billing Address – Checking this field will auto populate the billing
address details into the delivery address details
Updated: 22/07/2013
Page 29 of 49
The “Advance” section contains all the setting to change how you process a transaction through the Virtual
Terminal.
• Unique Tx Code – This is the vendor tx code
that is auto generated, you can amend this
reference if you wish. If you are amending this, you
will need to enter a unique reference that has not
been used before.
• Transaction Type – If you have other
transaction types apart from the default
PAYMENT, you can select them here.
• Reference – You can enter your own payment
reference here for your records
• Gift Aid – Select this box if you wish to claim
gift aid on the payment
• Apply AVS/CV2 Checks? – This check box
allows you to choose how you wish to apply your
AVS/CV2 rules
Section 2 includes:
•
The Card Details
The fields marked with * are mandatory fields
and must contain data.
• Amount – The amount of transaction
• Currency – Select the currency of the
transaction
• Card Number – The card number printed
on the front of the card with no spaces
• Payment Type – The type of card (e.g.
Visa, MasterCard) which is automatically
populated based on the card number entered
• Expiry Date - Expiry date of the card
being used
• CV2 - The security code, usually the last three digits, printed on the signature strip on the reverse of the
card (For Amex cards the security code is 4 digits found on the front of the card).
• Name on Card – Name printed on the card
• Cardtype Surcharge – This field will only become active if you have set up the surcharge feature on
your account. This will allow you to add the default surcharge to the payment or specify a specific amount.
For more information on how to set this up, please see page 41.
• Description – Free text field to enter additional details
Important Note: The Virtual Terminal does not send an email to your customer on completion of the
transaction. To do this, you will need to send your own invoice/receipt on completion of the transaction.
Updated: 22/07/2013
Page 30 of 49
Card Machine Transactions Tab
What is this tab for?
The Card Machine Transactions tab presents transactions placed through your Sage Pay Card Machine.
If you do not currently have any Sage Pay Card Machine transactions to be displayed the following
message will be shown;
“You don’t currently have any card machine transactions to display here. If you would like to find out more
information about Sage Pay’s card machine terminals, please call 0845 111 4466 or email
[email protected].”
Sage Pay is able to offer Card Machines to vendors based in the UK and Republic of Ireland.
Quick Reporting
Located at the top of the transaction page is the quick reporting tool that will allow you to instantly see your
transactions by the hour, day, week, month or year at the click of a button. It will also filter your
transactions so you can simply see all your successful or failed transactions.
Updated: 22/07/2013
Page 31 of 49
Changing the displayed columns
You are able to select which columns you want to display in the Transaction Report by clicking the link
show/hide columns at the bottom. You will then be prompted with this window;
•
•
•
•
•
•
•
•
•
•
•
•
•
•
•
•
•
•
•
•
•
•
•
•
•
•
•
•
•
Account Type – Displays Card Holder Present to indicate transaction was placed on a Sage Pay Card
Machine, can also display
Amount –The amount of the transaction, is the totals of Sale, Cashback and Gratuity
Auth Message – Authorisation response for the transaction
Bank Authcode – The bank’s authorisation code
Card Number – Displays the first six and last four digits of the card used in the transaction
Cashback – The amount of cashback provided with the transaction
Client – Terminal Identifier
Currency - The currency of the transaction
DCC Amount – The amount of the transaction where Dynamic Currency Conversion has been applied
DCC Currency – The currency used in the Dynamic Currency Conversion
Exchange Rate – The exchange rate used in the Dynamic Currency Conversion
Gratuity – Displays the amount of gratuity applied to the transaction
Merchant – Identifies the site for the Card Terminal used in the transaction
Merchant Number – Displays the Merchant Number that was used to process the transaction
Method – Displays whether the card used in the transaction was Dipped, Keyed, Swiped or Contactless
Payment Type – The type of card that was used
PIN Bypassed? – Displays whether PIN entry was bypassed in the transaction
Received – Date of the transaction
Sale – The amount of the transaction minus any gratuity
Success – If the transaction was successful
Terminal ID – The Terminal ID from the Card Machine used to process the transaction
Time Batched – When the transaction was batched for settlement
Tx Fallback – The Floor Limit for the transaction
Tx Reference – Sequence Number issued by the Card Machine as an identifier for the transaction
Type – Payment types such as Sale, Refund, Sale with Cash, Cancelled Sale, Cancelled Sale with
Cash, Cancelled Refund
User Reference 1 – Customisable field to contain additional information
User Reference 2 – Customisable field to contain additional information
User Reference 3 – Customisable field to contain additional information
User Reference 4 – Customisable field to contain additional information
Updated: 22/07/2013
Page 32 of 49
Export
You can use this option to view your transactions in Excel or export to a CSV format. This is particularly
useful if you need to use or access transaction information outside the My Sage Pay admin area, and also
allows you to filter transactions by currency or other values contained within this file.
Select the
button in the bottom left hand corner of the screen.
Then use the following option to view the transaction information in an Excel format.
Updated: 22/07/2013
Page 33 of 49
Settings
What is the Settings area for?
The Settings section is used to manage your Sage Pay account or administer your user accounts. To
access the Settings area select the Settings tab highlighted below in red.
You will see that you are presented with 7 different sections down the left hand side
•
•
•
•
•
•
•
•
•
•
My Account
Settings
AVS/CV2
3D Secure
Restrictions
Valid IP’s
Change Log
Users
Pay Methods
Surcharges
Important Note: Not all user accounts will have access to this screen. Only users that have been given
administrative access will have this tab.
PLEASE EXERCISE CAUTION when modifying these settings because they will immediately affect your
Sage Pay account, possibly modifying the user experience or affecting your authorisation rates.
Updated: 22/07/2013
Page 34 of 49
My Account Settings
The My Account section allows you to manage your user details, contact preferences and passwords.
N.B: To set up automatic password retrievals, you need to ensure that you have added and verified your
email address within this section.
To edit any details, simply click on the
button. Here you can also opt-in to any updates and
communications from Sage Pay as well as determine the landing page when you log in.
To change your password, simply click on the
button within the ’My password’ section. A pop up
window will appear that will request your new password and will also indicate how strong the password is.
You can also see when the last time you accessed My Sage Pay at the bottom of this screen
Updated: 22/07/2013
Page 35 of 49
Display & General Settings
This section is split into 4 sections:
•
•
•
•
Restricted Domains
Language settings
Account Settings
Your Payment Pages Logo
Restricted domains
You can restrict the email domain of the email address which users wish to add and verify against their
account. For example, by limiting it only to your company email address. To do this, simply add the email
domain in the blow box.
Updated: 22/07/2013
Page 36 of 49
Language settings (Protocol 3.0 feature)
If you have integrated our hosted payment page (Form & Server integration) using the latest protocol
(version 3), then you will be able to select the language which the payment page will be displayed in from
within My Sage Pay. To do this, select the
button and select the language from the drop down
menu.
Account Settings
If you select the
button in the Account Settings section you will be prompted with the below display.
You can use this section to change the display and confirmation email (Form only) settings on your
account.
•
•
•
•
•
•
Company Display Name – This is the name displayed on the payment pages and in the confirmation
emails (Form only).
Your Full Home Page URL – This is the main URL for your website. This can be displayed in your
confirmation emails (Form only) and some Sage Pay error pages.
Your support e-mail address – This is your main support email address, used in your confirmation
emails (Form only) and some Sage Pay error pages. We will also use this as the ‘reply to’ address for
your confirmation emails.
Send HTML e-mails – By default, Sage Pay Form integration will send HTML emails for all order
confirmations. You can switch off HTML emails by un-checking this box, so Sage Pay will then send text
emails only.
Default Currency in Terminal –By default, the Terminal will select GBP as the transaction currency. If
you have multi-currency set up on your Sage Pay account you can use this option to choose which
currency is selected by default.
Payment Page Templates - You can use this section to change the payment pages which are
displayed to your customers during the payment process. The payment pages are the pages where
your customers enter their credit card details. You will only be able to change these if you are using
Server or Form to process your transactions.
Important Note: If you change these settings you will change the look of your payment pages, and may
stop them from working altogether if you have not created your own customised pages correctly. For
information about customising the payment pages, please visit the online help centre on the website:
www.sagepay.com/help
Updated: 22/07/2013
Page 37 of 49
Your Payment Page Logo
This section will display your company logo that you have sent into Sage Pay. This is the logo customers
will see on the Sage Pay payment pages if you are using the Form or Server redirect integration method.
If you have not sent in a logo to Sage Pay it provides you with the details on how to do this.
Updated: 22/07/2013
Page 38 of 49
AVS/CV2
You can use these options to change the AVS/CV2 Fraud settings on your account.
AVS CV2 Checking is ON – Click the
button to switch off AVS/CV2 and any associated rules on
your account. If you turn off AVS/CV2 checks your transactions will not receive an AVS/CV2 response from
the bank, the AVS/CV2 rules will not be applied and you will not need to enter CV2 information on any
payment screens (however, it will be down to the bank’s discretion whether they will authorise a transaction
without a CV2 value).
Select the
button to be prompted with the below display.
Add a New AVS/CV2 Rule
You can add AVS/CV2 rules to your account by entering your rule criteria and then clicking the add rule
button. You can set up multiple rules on your account. For more information about AVS/CV2 rules, please
refer to the AVS/CV2 and 3D Secure Rule Base Guide, which can be downloaded from the Sage Pay
website:
http://www.sagepay.com/help/downloads
Important Note: Adding AVS/CV2 rules to your account will mean that transactions which do not pass your
AVS/CV2 rules will be automatically declined. An online reversal will be sent to the bank to cancel the
transaction.
Updated: 22/07/2013
Page 39 of 49
3D Secure
You can use these options to change the 3D Secure Fraud Checking options on your account.
You will first need to request that 3D Secure is activated on your account by sending an email to
[email protected]
Please note that 3D Secure checking will only work if your account with Sage Pay has been enabled for 3D
Secure.
3D Secure Checking is On - Click the
on your account.
button to switch off 3D Secure and any associated rules
When you have activated 3D Secure on your account, all ecommerce transactions will be checked to
ensure they are 3D Secure compliant and if so will be passed to the issuing bank for authentication. Noncompliant cards will simply have an authorisation request processed.
Select the ‘Add Rule’ button to be prompted with the below display.
Updated: 22/07/2013
Page 40 of 49
Add a 3D Secure Rule - You can add 3D Secure rules to your account by entering your rule criteria and
then clicking the
button. For information about how to set up a 3D Secure rule base, please refer
to the AVS/CV2 and 3D Secure Rule Base Guide, which can be downloaded from the Sage Pay website:
http://www.sagepay.com/help/downloads
Important Note: Adding 3D Secure rules to your account will mean that transactions which do not pass
your 3D Secure rules will not be passed for authorisation. You will only receive a liability shift for 3D Secure
transactions if the result returns a green flag. Only vendors using Protocol 2.22 or above will be able to use
3D Secure on their account.
Updated: 22/07/2013
Page 41 of 49
Restrictions
You can use these options to add restrictions to your account. You can see from the screenshot below that
this is split up into 4 sections
•
•
•
•
Blocked IP Addresses
Add a Blocked Country
Blocked Card Ranges
Blocked Issuing Countries
Blocked IP Addresses
Select the
button to be prompted with the below display.
You can use this section to add a specific IP address that you want to block from being able to process a
transaction through your Sage Pay account.
Updated: 22/07/2013
Page 42 of 49
Add a Blocked Country
Select the
button to be prompted with the below display.
You can use this section to add a country that you want to block from being able to process a transaction
through your Sage Pay account. Every customer with an IP address located in this country will be blocked
from ordering.
Blocked Card Ranges
Select the
button to be prompted with the below display.
You can use this section to add a specific card range that you want to block from ordering through your
Sage Pay account.
Blocked Issuing Countries
Select the
button to be prompted with the below display.
You can use this section to add a blocked issuing country that you want to block from ordering through your
Sage Pay account. Every customer with a card issued in this country will be blocked from ordering.
Updated: 22/07/2013
Page 43 of 49
Valid IP Addresses
You can use this section to add or remove IP Addresses on your account. This should be the external IP
Address of your server.
Select the
button to be prompted with the below display.
You need to enter the IP address and the subnet mask of your server and select
address to the list of valid IP address.
to add the IP
To remove an IP address select symbol highlighted in red in the above screenshot.
Important Note: You only need to add IP Addresses to your account if you are integrating with Direct or
Server. If you change your web server you will need to change the IP Address on your account. It is not
necessary to add IP Addresses to your account if you are integrating with Form or using the Terminal.
Updated: 22/07/2013
Page 44 of 49
Account Change Log
This section displays changes made through the setting options. This will allow you to track changes you
and other administrative users have made to your account.
Updated: 22/07/2013
Page 45 of 49
Users
This section displays a list of all the users that have been set up on the Sage Pay account. For further
information on this section please go to Administering User Accounts on Page 7 of this document.
Updated: 22/07/2013
Page 46 of 49
Pay methods
This section provides information on how your Sage Pay account is set up to accept payments. You will
also be able to set up and manage the PayPal payment option.
You will be able to see the following information about the payment methods on your account:
• The card types your account is set up to accept .
• Local European payment method your account has been set up for (only if you have applied for the
Local European Payments service from Sage Pay).
• Any other payment methods such as PayPal.
In addition to the above, you will also see which currencies your account has been set up for.
Use PayPal Express Checkout with Sage Pay
If you select
button in the Use PayPal Express Checkout with Sage Pay section
you will be prompted with the below display.
If you would like your customers to have the option of using their PayPal account to pay for goods on your
site, you will need to apply for and configure your PayPal business account to accept payments via Sage
Pay, and enter the PayPal Primary log in email address to connect your account.
For further information on setting up PayPal with Sage Pay, please view the below link.
http://www.sagepay.com/help/faq/how_do_i_set_up_paypal_on_my_sage_pay_account
Updated: 22/07/2013
Page 47 of 49
Surcharges (Protocol 3.0 feature)
Surcharges are only available to use if you have integrated your e-commerce payments using the latest
protocol (Version 3.0) or processing payments through the Virtual Terminal.
Within this section, you will be able to manage any surcharges you wish to add to your transactions.
Please note that surcharges should only be used to cover your costs, and not as a revenue generator.
Sage Pay cannot be held responsible for any surcharges that are applied to your account.
Adding a default Surcharge
You can add a default surcharge to a particular payment type so an additional amount is automatically
added each time a payment is accepted using that Payment type. To do this, click the
button for the
below screen to pop up.
Select the payment type you wish to apply the surcharge to. If you can accept different currencies through
that payment type, you can then specify the currency which you would like the surcharge to apply to.
Select whether you wish to apply a fixed value or a percentage and enter the value. You don’t need to add
the special characters such as £ or %.
Once you have finished, click the
surcharges to other payment types.
Updated: 22/07/2013
button to save. Continue the process if you wish to add
Page 48 of 49
Search
What can I search for?
Search can be used if you want to locate a particular transaction. In the search box highlighted in red
below, you can enter any part of the customer’s name or address to return transactions matching any of the
criteria you have entered.
You must enter data into the search field and select the
You can refine your search by selecting the
to return the results.
button.
You will then be displayed with Refine your report options as displayed below. Simply set criteria from the
calendar to display transaction within a time period, you can select the month and year field to display a
dropdown menu if you want to change the month/year.
You also have the ability to search for:
•
•
•
•
•
•
•
Payment Type
Transaction Type
Account Type
Vendor Tx Code
Amount (inc.Surcharge)
VPS Auth code
Last 4 digits
Important Note: You must enter data into the search box in order to return transactions in the list
Updated: 22/07/2013
Page 49 of 49