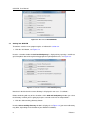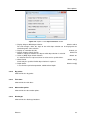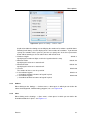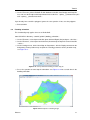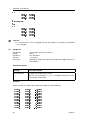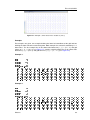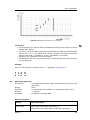
1
3D/2D modelling suite for integral water solutions
Delft3D
QUICKIN
User Manual
QUICKIN
Generation and manipulation of grid-related parameters such as bathymetry, initial conditions and roughness
User Manual
Hydro-Morphodynamics & Water Quality
Version: 4.00.34158
28 May 2014
QUICKIN, User Manual
Published and printed by:
Deltares
Boussinesqweg 1
2629 HV Delft
P.O. Box 177
2600 MH Delft
The Netherlands
For sales contact:
telephone: +31 88 335 81 88
fax:
+31 88 335 81 11
e-mail:
[email protected]
www:
http://www.deltaressystems.nl
telephone:
fax:
e-mail:
www:
+31 88 335 82 73
+31 88 335 85 82
[email protected]
http://www.deltares.nl
For support contact:
telephone: +31 88 335 81 00
fax:
+31 88 335 81 11
e-mail:
[email protected]
www:
http://www.deltaressystems.nl
Copyright © 2014 Deltares
All rights reserved. No part of this document may be reproduced in any form by print, photo
print, photo copy, microfilm or any other means, without written permission from the publisher:
Deltares.
Contents
Contents
1 Guide to this manual
1.1 Introduction . . . . . . . . . . . . . . . .
1.2 Name and specifications of the program .
1.3 Manual version and revisions . . . . . . .
1.4 Typographical conventions . . . . . . . .
1.5 Changes with respect to previous versions
.
.
.
.
.
1
1
1
2
2
3
2 Introduction to QUICKIN
2.1 Introduction . . . . . . . . . . . . . . . . . . . . . . . . . . . . . . . . . . .
2.2 Program considerations . . . . . . . . . . . . . . . . . . . . . . . . . . . . .
5
5
5
3 Getting started
3.1 Overview of Delft3D . . . . . .
3.2 Starting Delft3D . . . . . . . .
3.3 Getting into QUICKIN . . . . .
3.4 Exploring some menu options
3.5 Exiting QUICKIN . . . . . . .
.
.
.
.
.
.
.
.
.
.
.
.
.
.
.
.
.
.
.
.
.
.
.
.
.
.
.
.
.
.
.
.
.
.
.
.
.
.
.
.
.
.
.
.
.
.
.
.
.
.
.
.
.
.
.
.
.
.
.
.
.
.
.
.
.
.
.
.
.
.
.
.
.
.
.
.
.
.
.
.
.
.
.
.
.
.
.
.
.
.
.
.
.
.
.
7
7
7
8
10
13
4 General operation
4.1 General program operation instruction . . . . . . . . . . . . . . . . . . . . .
4.2 Key stroke functions . . . . . . . . . . . . . . . . . . . . . . . . . . . . . . .
15
15
15
5 Menu options
5.1 File menu . . . . . . . . . . . . . . . . . . . . .
5.1.1 New project . . . . . . . . . . . . . . . .
5.1.2 Open project . . . . . . . . . . . . . . .
5.1.3 Save project . . . . . . . . . . . . . . .
5.1.4 Save project as . . . . . . . . . . . . . .
5.1.5 Attribute files . . . . . . . . . . . . . . .
5.1.6 Import . . . . . . . . . . . . . . . . . . .
5.1.7 Export . . . . . . . . . . . . . . . . . .
5.1.8 Delft3D-FLOW attributes . . . . . . . . .
5.1.9 Open Colour map . . . . . . . . . . . .
5.1.10 Open Settings . . . . . . . . . . . . . .
5.1.11 Save Settings . . . . . . . . . . . . . . .
5.1.12 Exit . . . . . . . . . . . . . . . . . . . .
5.2 Edit menu . . . . . . . . . . . . . . . . . . . . .
5.2.1 Land boundary . . . . . . . . . . . . . .
5.2.2 Polygon . . . . . . . . . . . . . . . . . .
5.2.3 Depth . . . . . . . . . . . . . . . . . . .
5.2.4 Depth linear . . . . . . . . . . . . . . .
5.2.5 Depth isoline . . . . . . . . . . . . . . .
5.2.6 Depth line sweep . . . . . . . . . . . . .
5.2.7 Samples . . . . . . . . . . . . . . . . .
5.2.8 Check dike heights . . . . . . . . . . . .
5.2.9 Edit Second Depth Animate Incremental
5.2.10 Dry points . . . . . . . . . . . . . . . .
5.2.11 Thin dam points . . . . . . . . . . . . .
5.2.12 Observation points . . . . . . . . . . . .
5.2.13 Dredge and dump areas . . . . . . . . .
19
19
19
20
20
20
20
22
23
25
27
27
27
27
28
28
30
32
32
32
32
33
33
33
33
34
34
34
Deltares
.
.
.
.
.
.
.
.
.
.
.
.
.
.
.
.
.
.
.
.
.
.
.
.
.
.
.
.
.
.
.
.
.
.
.
.
.
.
.
.
.
.
.
.
.
.
.
.
.
.
.
.
.
.
.
.
.
.
.
.
.
.
.
.
.
.
.
.
.
.
.
.
.
.
.
.
.
.
.
.
.
.
.
.
.
.
.
.
.
.
.
.
.
.
.
.
.
.
.
.
.
.
.
.
.
.
.
.
.
.
.
.
.
.
.
.
.
.
.
.
.
.
.
.
.
.
.
.
.
.
.
.
.
.
.
.
.
.
.
.
.
.
.
.
.
.
.
.
.
.
.
.
.
.
.
.
.
.
.
.
.
.
.
.
.
.
.
.
.
.
.
.
.
.
.
.
.
.
.
.
.
.
.
.
.
.
.
.
.
.
.
.
.
.
.
.
.
.
.
.
.
.
.
.
.
.
.
.
.
.
.
.
.
.
.
.
.
.
.
.
.
.
.
.
.
.
.
.
.
.
.
.
.
.
.
.
.
.
.
.
.
.
.
.
.
.
.
.
.
.
.
.
.
.
.
.
.
.
.
.
.
.
.
.
.
.
.
.
.
.
.
.
.
.
.
.
.
.
.
.
.
.
.
.
.
.
.
.
.
.
.
.
.
.
.
.
.
.
.
.
.
.
.
.
.
.
.
.
.
.
.
.
.
.
.
.
.
.
.
.
.
.
.
.
.
.
.
.
.
.
.
.
.
.
.
.
.
.
.
.
.
.
.
.
.
.
.
.
.
.
.
.
.
.
.
.
.
.
.
.
.
.
.
.
.
.
.
.
.
.
.
.
.
.
.
.
.
.
.
.
.
.
.
.
.
.
.
.
.
.
.
.
.
.
.
.
.
.
.
.
.
.
.
.
.
.
.
.
.
.
.
.
.
.
.
.
.
.
.
.
.
.
.
.
.
.
.
.
.
.
.
.
.
.
.
.
.
.
.
.
.
.
.
.
.
.
.
.
.
.
.
.
.
.
.
.
.
.
.
.
.
.
.
.
.
.
.
.
.
.
.
.
.
.
.
.
.
.
.
.
.
.
.
.
.
.
.
.
.
.
.
.
.
.
.
.
.
.
.
.
.
.
.
.
.
.
.
.
.
.
.
.
.
.
.
.
.
.
.
.
.
.
.
.
.
iii
QUICKIN, User Manual
5.3
5.4
5.5
5.6
iv
Operations menu . . . . . . . . . . . . . . . . .
5.3.1 New Domain . . . . . . . . . . . . . . .
5.3.2 Select domain . . . . . . . . . . . . . .
5.3.3 Delete domain . . . . . . . . . . . . . .
5.3.4 Change centre of projection . . . . . . .
5.3.5 Delete . . . . . . . . . . . . . . . . . .
5.3.6 Create Rectangular Grid . . . . . . . . .
5.3.7 Data in cell centre . . . . . . . . . . . .
5.3.8 Grid cell averaging . . . . . . . . . . . .
5.3.9 Triangular interpolation . . . . . . . . . .
5.3.10 Internal diffusion . . . . . . . . . . . . .
5.3.11 Smoothing . . . . . . . . . . . . . . . .
5.3.12 Courant numbers . . . . . . . . . . . . .
5.3.13 Actual and maximum data dimensions .
5.3.14 Check interpolation . . . . . . . . . . . .
5.3.15 Volumes and areas . . . . . . . . . . . .
5.3.16 Combine depth and uniform value . . . .
5.3.17 Combine depth and second depth . . . .
5.3.18 Combine samples and uniform value . .
5.3.19 Copy depth to samples . . . . . . . . . .
5.3.20 Change samples to difference with depth
5.3.21 Copy polyline to samples . . . . . . . . .
5.3.22 Copy polyline to samples channel . . . .
5.3.23 Swap depth and second depth . . . . . .
5.3.24 Undo depth . . . . . . . . . . . . . . . .
5.3.25 Undo samples . . . . . . . . . . . . . .
View menu . . . . . . . . . . . . . . . . . . . .
5.4.1 Spherical co-ordinates . . . . . . . . . .
5.4.2 Boundary . . . . . . . . . . . . . . . . .
5.4.3 Legend . . . . . . . . . . . . . . . . . .
5.4.4 3D View . . . . . . . . . . . . . . . . .
5.4.5 Land boundary . . . . . . . . . . . . . .
5.4.6 Polygons . . . . . . . . . . . . . . . . .
5.4.7 Grid . . . . . . . . . . . . . . . . . . . .
5.4.8 Depth . . . . . . . . . . . . . . . . . . .
5.4.9 Second depth . . . . . . . . . . . . . .
5.4.10 Samples . . . . . . . . . . . . . . . . .
5.4.11 Samples as triangles . . . . . . . . . . .
5.4.12 Dry points . . . . . . . . . . . . . . . .
5.4.13 Thin dams . . . . . . . . . . . . . . . .
5.4.14 Observation points . . . . . . . . . . . .
5.4.15 Discharges . . . . . . . . . . . . . . . .
5.4.16 Dredge and dump areas . . . . . . . . .
Co-ordinate System menu . . . . . . . . . . . .
Settings menu . . . . . . . . . . . . . . . . . . .
5.6.1 General . . . . . . . . . . . . . . . . . .
5.6.2 Polyline to samples . . . . . . . . . . . .
5.6.3 Change colour map . . . . . . . . . . .
5.6.4 Legend . . . . . . . . . . . . . . . . . .
5.6.5 Colours . . . . . . . . . . . . . . . . . .
.
.
.
.
.
.
.
.
.
.
.
.
.
.
.
.
.
.
.
.
.
.
.
.
.
.
.
.
.
.
.
.
.
.
.
.
.
.
.
.
.
.
.
.
.
.
.
.
.
.
.
.
.
.
.
.
.
.
.
.
.
.
.
.
.
.
.
.
.
.
.
.
.
.
.
.
.
.
.
.
.
.
.
.
.
.
.
.
.
.
.
.
.
.
.
.
.
.
.
.
.
.
.
.
.
.
.
.
.
.
.
.
.
.
.
.
.
.
.
.
.
.
.
.
.
.
.
.
.
.
.
.
.
.
.
.
.
.
.
.
.
.
.
.
.
.
.
.
.
.
.
.
.
.
.
.
.
.
.
.
.
.
.
.
.
.
.
.
.
.
.
.
.
.
.
.
.
.
.
.
.
.
.
.
.
.
.
.
.
.
.
.
.
.
.
.
.
.
.
.
.
.
.
.
.
.
.
.
.
.
.
.
.
.
.
.
.
.
.
.
.
.
.
.
.
.
.
.
.
.
.
.
.
.
.
.
.
.
.
.
.
.
.
.
.
.
.
.
.
.
.
.
.
.
.
.
.
.
.
.
.
.
.
.
.
.
.
.
.
.
.
.
.
.
.
.
.
.
.
.
.
.
.
.
.
.
.
.
.
.
.
.
.
.
.
.
.
.
.
.
.
.
.
.
.
.
.
.
.
.
.
.
.
.
.
.
.
.
.
.
.
.
.
.
.
.
.
.
.
.
.
.
.
.
.
.
.
.
.
.
.
.
.
.
.
.
.
.
.
.
.
.
.
.
.
.
.
.
.
.
.
.
.
.
.
.
.
.
.
.
.
.
.
.
.
.
.
.
.
.
.
.
.
.
.
.
.
.
.
.
.
.
.
.
.
.
.
.
.
.
.
.
.
.
.
.
.
.
.
.
.
.
.
.
.
.
.
.
.
.
.
.
.
.
.
.
.
.
.
.
.
.
.
.
.
.
.
.
.
.
.
.
.
.
.
.
.
.
.
.
.
.
.
.
.
.
.
.
.
.
.
.
.
.
.
.
.
.
.
.
.
.
.
.
.
.
.
.
.
.
.
.
.
.
.
.
.
.
.
.
.
.
.
.
.
.
.
.
.
.
.
.
.
.
.
.
.
.
.
.
.
.
.
.
.
.
.
.
.
.
.
.
.
.
.
.
.
.
.
.
.
.
.
.
.
.
.
.
.
.
.
.
.
.
.
.
.
.
.
.
.
.
.
.
.
.
.
.
.
.
.
.
.
.
.
.
.
.
.
.
.
.
.
.
.
.
.
.
.
.
.
.
.
.
.
.
.
.
.
.
.
.
.
.
.
.
.
.
.
.
.
.
.
.
.
.
.
.
.
.
.
.
.
.
.
.
.
.
.
.
.
.
.
.
.
.
.
.
.
.
.
.
.
.
.
.
.
.
.
.
.
.
.
.
.
.
.
.
.
.
.
.
.
.
.
.
.
.
.
.
.
.
.
.
.
.
.
.
.
.
.
.
.
.
.
.
.
.
.
.
.
.
.
.
.
.
.
.
.
.
.
.
.
.
.
.
.
.
.
.
.
.
.
.
.
.
.
.
.
.
.
.
.
.
.
.
.
.
.
.
.
.
.
.
.
.
.
.
.
.
.
.
.
.
.
.
.
.
.
.
.
.
.
.
.
.
.
.
.
.
37
38
38
38
38
38
39
40
40
41
41
41
41
42
42
42
43
44
45
46
47
47
47
48
48
48
48
49
50
50
50
50
51
51
51
52
52
52
53
53
53
53
54
54
54
54
56
56
56
57
Deltares
Contents
5.7
5.6.6 Sizes . . . . . . . . . .
5.6.7 Averaging options . . .
5.6.8 TEKAL block indicators
5.6.9 Order caches . . . . . .
Help menu . . . . . . . . . . . .
5.7.1 User manual . . . . . .
5.7.2 About . . . . . . . . . .
.
.
.
.
.
.
.
.
.
.
.
.
.
.
.
.
.
.
.
.
.
.
.
.
.
.
.
.
6 Tutorial
6.1 Interpolation . . . . . . . . . . . . . . .
6.1.1 Open grid and land boundary .
6.1.2 Open samples . . . . . . . . .
6.1.3 Zoom in and out . . . . . . . .
6.1.4 High and low sample density . .
6.1.5 Points outside area of influence
6.2 Save depth . . . . . . . . . . . . . . .
6.3 Dredge and dump areas . . . . . . . .
6.4 Flooding animation . . . . . . . . . . .
6.5 QUICKIN in the ArcMap environment .
.
.
.
.
.
.
.
.
.
.
.
.
.
.
.
.
.
.
.
.
.
.
.
.
.
.
.
.
.
.
.
.
.
.
.
.
.
.
.
.
.
.
.
.
.
.
.
.
.
.
.
.
.
.
.
.
.
.
.
.
.
.
.
.
.
.
.
.
.
.
.
.
.
.
.
.
.
.
.
.
.
.
.
.
.
.
.
.
.
.
.
.
.
.
.
.
.
.
.
.
.
.
.
.
.
.
.
.
.
.
.
.
.
.
.
.
.
.
.
.
.
.
.
.
.
.
.
.
.
.
.
.
.
.
.
.
.
.
.
.
.
.
.
.
.
.
.
.
.
.
.
.
.
.
.
.
.
.
.
.
.
.
.
.
.
.
.
.
.
.
.
.
.
.
.
.
.
.
.
.
.
.
.
.
.
.
.
.
.
.
.
.
.
.
.
.
.
.
.
.
.
.
.
.
.
.
.
.
.
.
.
.
.
.
.
.
.
.
.
.
.
.
.
.
.
.
.
.
.
.
.
.
.
.
.
.
.
.
.
.
.
.
.
.
.
.
.
.
.
.
.
.
.
.
.
.
.
.
.
.
.
.
.
.
.
.
.
.
.
.
.
.
.
.
.
.
.
.
.
.
.
.
.
.
.
.
.
.
.
.
.
.
.
.
.
.
.
.
.
.
.
.
.
.
.
.
.
.
.
.
.
.
.
.
.
.
.
.
.
.
.
.
.
.
.
.
.
.
.
.
57
58
58
58
59
59
59
.
.
.
.
.
.
.
.
.
.
63
63
63
63
64
64
66
68
68
71
72
References
A Files of QUICKIN
A.1 Delft3D project file . . . . . .
A.2 Land boundary file . . . . . .
A.3 Sample file . . . . . . . . . .
A.4 Polygon file . . . . . . . . . .
A.5 Orthogonal curvilinear grid file
A.6 Bathymetry file . . . . . . . .
A.7 Grid and depth file . . . . . .
A.8 Open boundary file . . . . . .
A.9 Dry points file . . . . . . . . .
A.10 Thin dams file . . . . . . . . .
A.11 Observation points file . . . .
A.12 Annotation file . . . . . . . . .
A.13 DD Boundary file . . . . . . .
A.14 Colour scheme file . . . . . .
A.15 Settings file . . . . . . . . . .
Deltares
75
.
.
.
.
.
.
.
.
.
.
.
.
.
.
.
.
.
.
.
.
.
.
.
.
.
.
.
.
.
.
.
.
.
.
.
.
.
.
.
.
.
.
.
.
.
.
.
.
.
.
.
.
.
.
.
.
.
.
.
.
.
.
.
.
.
.
.
.
.
.
.
.
.
.
.
.
.
.
.
.
.
.
.
.
.
.
.
.
.
.
.
.
.
.
.
.
.
.
.
.
.
.
.
.
.
.
.
.
.
.
.
.
.
.
.
.
.
.
.
.
.
.
.
.
.
.
.
.
.
.
.
.
.
.
.
.
.
.
.
.
.
.
.
.
.
.
.
.
.
.
.
.
.
.
.
.
.
.
.
.
.
.
.
.
.
.
.
.
.
.
.
.
.
.
.
.
.
.
.
.
.
.
.
.
.
.
.
.
.
.
.
.
.
.
.
.
.
.
.
.
.
.
.
.
.
.
.
.
.
.
.
.
.
.
.
.
.
.
.
.
.
.
.
.
.
.
.
.
.
.
.
.
.
.
.
.
.
.
.
.
.
.
.
.
.
.
.
.
.
.
.
.
.
.
.
.
.
.
.
.
.
.
.
.
.
.
.
.
.
.
.
.
.
.
.
.
.
.
.
.
.
.
.
.
.
.
.
.
.
.
.
.
.
.
.
.
.
.
.
.
.
.
.
.
.
.
.
.
.
.
.
.
.
.
.
.
.
.
.
.
.
.
.
.
.
.
.
.
.
.
.
.
.
.
.
.
.
.
.
.
.
.
.
.
.
.
.
.
.
.
.
.
.
.
.
.
.
.
.
.
.
.
.
.
.
.
.
.
.
.
.
.
.
.
.
77
77
79
80
81
82
83
84
86
87
88
89
90
91
91
92
v
QUICKIN, User Manual
vi
Deltares
List of Figures
List of Figures
3.1
3.2
3.3
3.4
3.5
3.6
3.7
3.8
3.9
3.10
3.11
3.12
3.13
3.14
Title window of Delft3D . . . . . . . . . . . . . . . . . . . . . . . . . . . . .
7
Main window Delft3D-MENU . . . . . . . . . . . . . . . . . . . . . . . . . .
8
Selection window for Grid and Bathymetry . . . . . . . . . . . . . . . . . .
8
Select working directory window . . . . . . . . . . . . . . . . . . . . . . .
9
Select working directory window to set the working directory to <quickin/maracaibo> 9
A part of the current working directory is shown in the title bar due to its length
9
Main window of the QUICKIN . . . . . . . . . . . . . . . . . . . . . . . . .
10
Operational information displayed in the statusbar . . . . . . . . . . . . . . .
10
Menu item File → Attribute Files → Open Land Boundary . . . . . . . . . .
10
File open window Open Land Boundary . . . . . . . . . . . . . . . . . . .
11
Land boundary, grid and samples for the Maracaibo model . . . . . . . . . .
11
Polygon to enclose the area for triangular interpolation . . . . . . . . . . . .
12
Depth contours in the lake region after triangulation and averaging . . . . . .
13
Window Save Depth to save depth files . . . . . . . . . . . . . . . . . . . .
14
4.1
Location of anchor + and distance between anchor and cursor at the right . .
15
5.1
5.2
5.3
5.4
5.5
5.6
5.7
5.8
5.9
5.10
5.11
5.12
5.13
5.14
5.15
5.16
5.17
5.18
5.19
5.20
5.21
5.22
5.23
5.24
5.25
5.26
5.27
5.28
5.29
5.30
5.31
5.32
QUICKIN menu options . . . . . . . . . . . . . . . . . . . . . . . . . . .
Options on the File menu . . . . . . . . . . . . . . . . . . . . . . . . . .
Options on the File→ Attribute Files menu . . . . . . . . . . . . . . . . .
File → Import options . . . . . . . . . . . . . . . . . . . . . . . . . . . .
File → Export sub-menu options . . . . . . . . . . . . . . . . . . . . . .
Open and save Delft3D-FLOW attribute files . . . . . . . . . . . . . . . .
Options on the Edit menu . . . . . . . . . . . . . . . . . . . . . . . . . .
Options on the Edit → Land Boundary menu . . . . . . . . . . . . . . .
Options on the Edit → Area of Interest menu . . . . . . . . . . . . . . .
Options on the Edit → Dredge and Dump Areas sub-menu . . . . . . . .
Options on the Dredge and Dump Properties window for a dredge area
Options on the Dredge and Dump Properties window for a dump area .
Options on the Operations menu . . . . . . . . . . . . . . . . . . . . . .
Options on the Operations → Delete menu . . . . . . . . . . . . . . . .
Create Rectangular Grid. . . form . . . . . . . . . . . . . . . . . . . . .
Options on the Combine Depth and Uniform Value sub-menu . . . . . . .
Options on the Combine Depth and Second Depth sub-menu . . . . . .
Options on the Combine Samples and Uniform Value sub-menu . . . . .
Copy Polyline to Samples parameters . . . . . . . . . . . . . . . . . . .
Parameters form for Polyline to Samples Channel . . . . . . . . . . . . .
Options on the View menu . . . . . . . . . . . . . . . . . . . . . . . . .
Options on the View → Spherical Co-ordinates sub-menu . . . . . . . .
Options on the Slope Parameters window . . . . . . . . . . . . . . . . .
Options on Co-ordinate System menu . . . . . . . . . . . . . . . . . . .
Options on Settings menu . . . . . . . . . . . . . . . . . . . . . . . . .
Options on Settings window . . . . . . . . . . . . . . . . . . . . . . . .
Options on Parameters Polyline to Sample window . . . . . . . . . . .
Opions on Colour Map for Parameter window . . . . . . . . . . . . . .
Opions on Settings → Colours menu . . . . . . . . . . . . . . . . . . . .
Opions on Settings → Colours menu . . . . . . . . . . . . . . . . . . . .
Opions on Settings → Sizes menu . . . . . . . . . . . . . . . . . . . . .
Options on Averaging Options menu . . . . . . . . . . . . . . . . . . . .
19
19
20
22
24
25
28
29
30
35
36
36
37
39
40
43
44
46
47
48
49
49
53
54
54
55
56
56
57
60
61
61
Deltares
.
.
.
.
.
.
.
.
.
.
.
.
.
.
.
.
.
.
.
.
.
.
.
.
.
.
.
.
.
.
.
.
.
.
.
.
.
.
.
.
.
.
.
.
.
.
.
.
.
.
.
.
.
.
.
.
.
.
.
.
.
.
.
.
vii
QUICKIN, User Manual
viii
5.33 Options on TEKAL Block Indicator window . . . . . . . . . . . . . . . . . .
5.34 Options on Order Caches window . . . . . . . . . . . . . . . . . . . . . . .
5.35 Opions on Help menu . . . . . . . . . . . . . . . . . . . . . . . . . . . . . .
61
62
62
6.1
6.2
6.3
6.4
6.5
6.6
6.7
6.8
6.9
6.10
6.11
6.12
6.13
6.14
6.15
6.16
Land boundary and grid for Lake Maracaibo . . . . . . . . . . . . . . . . . .
Samples covering the Lake Maracaibo model area . . . . . . . . . . . . . .
Default relative search cell for grid cell averaging . . . . . . . . . . . . . . .
Grid cell averaging result within a pre-defined polygon . . . . . . . . . . . .
Interpolation results after applying grid cell averaging and triangulation . . . .
Display of Points Yet to be Found . . . . . . . . . . . . . . . . . . . . . . . .
Continuous shade display, all grid points inside the polygon have a depth value
Save Depth window to save the depth files . . . . . . . . . . . . . . . . . .
Location of dredge and dump areas . . . . . . . . . . . . . . . . . . . . . .
Edit Dredge and Dump, with polygon names . . . . . . . . . . . . . . . . . .
Dredge and Dump areas with their links . . . . . . . . . . . . . . . . . . . .
Change the dredge and dump area properties . . . . . . . . . . . . . . . . .
Jooin parameter Flooding to colour map jet . . . . . . . . . . . . . . . . . .
Example of a flooding image . . . . . . . . . . . . . . . . . . . . . . . . . .
ARC-GIS data frame properties form . . . . . . . . . . . . . . . . . . . . . .
Options on the Operations menu . . . . . . . . . . . . . . . . . . . . . . . .
63
64
65
65
66
67
67
68
69
69
70
70
71
71
72
74
A.1
A.2
A.3
A.4
Example 1, lower left corner is located at (100, 0) .
Example 2, lower left corner is located at (75, −25)
Dry points in model area . . . . . . . . . . . . . .
Example of thin dams in a model area . . . . . . .
85
86
88
89
.
.
.
.
.
.
.
.
.
.
.
.
.
.
.
.
.
.
.
.
.
.
.
.
.
.
.
.
.
.
.
.
.
.
.
.
.
.
.
.
.
.
.
.
.
.
.
.
.
.
.
.
.
.
.
.
Deltares
1 Guide to this manual
1.1
Introduction
This User Manual concerns the data interpolation module, QUICKIN, of the Delft3D software
suite. To make this manual more accessible we will briefly describe the contents of each
chapter and appendix.
If this is your first time to start working with QUICKIN module we suggest you to read and
practice the getting started of Chapter 3 and the tutorial of Chapter 6. These chapters explain
the user interface options and guide you through the definition of your first data interpolation
to a curvilinear grid.
Chapter 2: Introduction to QUICKIN, provides specifications of QUICKIN and the areas of
applications.
Chapter 3: Getting started, explains the use of the overall menu program, which gives
access to all Delft3D modules and to the pre- and post-processing tools. Last but not least
you will get a first introduction into the QUICKIN Graphical User Interface, used to define data
on of grids vertices or grid cells which can be used in a hydrodynamic, wave or water quality
simulation.
Chapter 4: General operation, provides practical information on the general operation of the
QUICKIN module.
Chapter 5: Menu options, provides a description of all menu and toolbar options.
Chapter 6: Tutorial, emphasis at giving you some first hands-on experience in using the
QUICKIN module to define the input of a simple problem.
References, provides a list of publications and related material on the QUICKIN module.
Appendix A: Files of QUICKIN, gives a description of the files that can be used in QUICKIN
as input or output. Generally, these files are generated by QUICKIN or other modules of
the Delft3D suite and you need not to be concerned about their internal details. However, in
certain cases it can be useful to know these details, for instance to generate them by means
of other utility programs.
1.2
Name and specifications of the program
Title
QUICKIN
Description
QUICKIN is a program for the generation, interpolation or manipulation
of space varying quantities such as bathymetries, initial conditions or
parameter fields on Cartesian or spherical (curvilinear) grids e.g. created with RGFGRID (RGFGRID (2013)). Bathymetries can be generated for both the hydrodynamic simulation programs Delft3D-FLOW
(Delft3D-FLOW (2013)) and Delft1D2D (Delft1D2D (2002)), QUICKIN
can display animations of flooding files generated with Delft1D2D.
Special facilities
various interpolation methods
Deltares
1
QUICKIN, User Manual
user selectable ’area of influence’ by polygon
various viewing options
various depth manipulation options
various sample manipulation options
functionality: dredge and dump areas
new functionality: multiple grids and depths
1.3
Manual version and revisions
A manual applies to a certain release of the related numerical program. This manual applies
to QUICKIN, version 4.17.00.
1.4
Typographical conventions
Throughout this manual, the following conventions help you to distinguish between different
elements of text to help you learn about QUICKIN.
Example
Description
Waves
Boundaries
Title of a window or sub-window.
Sub-windows are displayed in the Module window and
cannot be moved.
Windows can be moved independently from the Module window, such as the Visualisation Area window.
Save
Item from a menu, title of a push button or the name of
a user interface input field.
Upon selecting this item (click or in some cases double
click with the left mouse button on it) a related action
will be executed; in most cases it will result in displaying
some other (sub-)window.
In case of an input field you are supposed to enter input
data of the required format and in the required domain.
<\tutorial\wave\swan-curvi>
<siu.mdw>
Directory names, filenames, and path names are expressed between angle brackets, <>. For the Linux
and UNIX environment a forward slash (/) is used instead of the backward slash (\) for PCs.
“27 08 1999”
Data to be typed by you into the input fields are displayed between double quotes.
Selections of menu items, option boxes etc. are described as such: for instance ‘select Save and go to
the next window’.
delft3d-menu
Commands to be typed by you are given in the font
Courier New, 10 points.
User actions are indicated with this arrow.
2
Deltares
Guide to this manual
1.5
Example
Description
[m/s] [-]
Units are given between square brackets when used
next to the formulae. Leaving them out might result in
misinterpretation.
Changes with respect to previous versions
Version
Description
4.00.00
Complete new version of QUICKIN
Deltares
3
QUICKIN, User Manual
4
Deltares
2 Introduction to QUICKIN
2.1
Introduction
The main purpose of the QUICKIN program is to create, manipulate and visualise model
bathymetries for the Delft3D modules FLOW and WAVE (2 and 3 dimensional flow and transport and 2D short wave propagation) and for the programs Delft1D2D (flood and overland
flow); Delft1D2D (2002), SWAN; SWAN (2000). Initial condition fields or parameter fields can
also be specified.
Bathymetries for Delft3D-WAVE and SWAN can be defined on a Cartesian or spherical (curvilinear) grid, a bathymetry for Delft1D2D is defined on a rectangular grid.
The grids can be created using the RGFGRID program.
2.2
Program considerations
One of the problems of depth interpolation is that the samples (raw data) may originate from
various sources, each of different date, quality and resolution. If these samples are all copied
into one large file, the ’high’ quality data would be contaminated with ’low’ quality data, leading
to non optimal interpolation results.
In order to cope with this problem of ’data contamination’, the program allows for subsequent
opening and interpolation of files. Thus, starting with the best data available, the optimal
bathymetry is obtained, because points that have already been interpolated with ’good’ quality
data, are not overwritten in subsequent steps by interpolation with ’low’ quality data.
Since the Delft3D-FLOW and SWAN programs use equations that in fact are averaged over
the grid dimensions, the best results are obtained if the model bathymetry approximates the
real bathymetry in an averaged sense rather than in a local sense. Therefore, if the sample
resolution is higher than the grid resolution, we advise to assign depth values by means of an
averaging method. Instead, if there are less sample points than grid points, the depth at grid
points has to be interpolated (e. g. with a triangulation interpolation method).
Since the preferred interpolation method may vary over the model area, the QUICKIN program
allows you to interactively select the active interpolation area, by means of a polygon, and the
desired interpolation method. Also, the classic problem of triangular interpolation over areas
that should not be covered by the data, but that may be inside the triangles spanned by the
triangle network, can effectively be avoided by means of a polygon. Typically, this kind of
situation occurs when a tidal flat is surrounded by channels which have been measured by
boat, whereas the flat itself has not been surveyed.
Furthermore, a bathymetry can be created or modified without samples data, by changing
grid depth values interactively of by specifying sample data using a polygon. Typically, this is
of interest when future planned channels have to be built into an existing model bathymetry.
A powerful so-called ’depth diffusion’ mechanism is provided, that propagates user-supplied
depth information at selected grid points or lines into the model, keeping a smooth transition
between the original and the constructed bathymetry. Furthermore, if desired, the bathymetry
can be smoothed by the depth smoothing option.
Deltares
5
QUICKIN, User Manual
3D viewing is implemented to provide a clear view of bathymetries.
6
Deltares
3 Getting started
3.1
Overview of Delft3D
The Delft3D program suite is composed of a set of modules (components) each of which
covers a certain range of aspects of a research or engineering problem. Each module can be
executed independently or in combination with one or more other modules.
Delft3D is provided with a menu shell through which you can access the various modules. In
this chapter we will guide you through some of the input screens to get the look-and-feel of
the program. In the Tutorial, Chapter 6, you will learn to define a simple scenario.
3.2
Starting Delft3D
To start Delft3D:
On an MS Windows platform: select Delft3D in the Programs menu.
On Linux machines: type delft3d-menu on the command line.
Next the title window of Delft3D is displayed, Figure 3.1.
Figure 3.1: Title window of Delft3D
After a short while the main window of the Delft3D-MENU appears, Figure 3.2.
Several menu options are shown. For now, only concentrate on exiting Delft3D-MENU, hence:
Click on the Exit push button.
The window will be closed and you are back in the Windows Desktop screen for PCs or on
the command line for Linux workstations.
Remark:
In this and the following chapters several windows are shown to illustrate the presentation of Delft3D-MENU and QUICKIN. These windows are grabbed from the PC-platform.
For Linux workstation the content of the windows is the same, but the colours may be
different.
Deltares
7
QUICKIN, User Manual
Figure 3.2: Main window Delft3D-MENU
3.3
Getting into QUICKIN
To continue start the menu program again, as indicated in section 3.2.
Click the Grid button, see Figure 3.2
Next the selection window for Grid and bathymetry is displayed for preparing a curvilinear
grid, interpolate data on that grid and aggregate the hydrodynamic cells, see Figure 3.3.
Figure 3.3: Selection window for Grid and Bathymetry
Note that in the title bar the current directory is displayed, in our case <D:/delft3d>.
Before continuing with any of the selections of this Grid and bathymetry window, you select
the directory in which you are going to prepare scenarios and execute computations:
Click the Select working directory button.
Next the Select working directory window is displayed, see Figure 3.4 (your current directory
may differ, depending on the location of your Delft3D installation).
8
Deltares
Getting started
Figure 3.4: Select working directory window
Browse to and open the <tutorial> sub-directory of your Delft3D Home-directory.
Open the <quickin> directory.
Enter the <maracaibo> sub-directory and close the Select working directory window
by clicking button OK, see Figure 3.5.
Figure 3.5: Select working directory window to set the working directory to
<quickin/maracaibo>
Next the Grid and bathymetry window is re-displayed, but now the changed current working
directory is displayed in the title bar, see Figure 3.6.
Figure 3.6: A part of the current working directory is shown in the title bar due to its length
Remark:
In case you want to start a new project for which no directory exists yet, you can select
in the Select working directory window to create a new folder.
Click on QUICKIN in the Grid and bathymetry window, see Figure 3.3.
Deltares
9
QUICKIN, User Manual
QUICKIN is loaded and the primary input screen is opened, Figure 3.7.
Figure 3.7: Main window of the QUICKIN
In the lower-left corner of the status bar QUICKIN gives additional operational information,
see Figure 3.8, such as:
User selections.
Operational instructions (for instance Toggle anchor mode).
x and y co-ordinates of the current cursor position.
Co-ordinate system: Cartesian or Spherical.
Distance (in metre) to a user-defined anchor point (only displayed when the anchor is
activated).
Figure 3.8: Operational information displayed in the statusbar
3.4
Exploring some menu options
To open a land boundary:
Upon selecting File → Attribute Files → Open Land Boundary, you can open a collection
of land boundaries, see Figure 3.9. Land boundaries (or land-water marking) are in files
with default mask <∗.ldb>.
Figure 3.9: Menu item File → Attribute Files → Open Land Boundary
Next the Open Land Boundary window is displayed, see Figure 3.10.
In the current directory one land boundary file is present.
10
Deltares
Getting started
Figure 3.10: File open window Open Land Boundary
Select <mar_01.ldb> and click Open to open the land boundary file.
Similar open the grid <mar_02.grd> (on the File →Import →Grid (RGFGRID)) and the samples in <mar_02.xyz> (on the File →Attribute Files →Open Samples). After opening these
data files the screen looks like as in Figure 3.11.
Figure 3.11: Land boundary, grid and samples for the Maracaibo model
Since the resolution of samples in the lake is low compared to the grid points, we will use a
triangular interpolation to interpolate towards the grid points. First define a polygon
On the Edit menu click Polygon menuarrow New.
Click with the left mouse to obtain a polygon similar as in Figure 3.12.
To activate the interpolation operation:
Deltares
11
QUICKIN, User Manual
Figure 3.12: Polygon to enclose the area for triangular interpolation
On the Operations menu, click Triangular Interpolation.
Since the samples often do not cover the shore region on land, the grid points at the landwater interface cannot get a depth value from the triangular interpolation.
On the Operations menu, click Grid Cell Averaging, to obtain Figure 3.13.
We will now finish generating the depth for the Maracaibo model. Refer to Chapter 6, Tutorial,
to finalise the depth.
To save the unfinished depth:
On the File menu, point to Export and click Depth
The Save As window opens, see Figure 3.14.
You will be back in the main window of QUICKIN.
12
Deltares
Getting started
Figure 3.13: Depth contours in the lake region after triangulation and averaging
3.5
Exiting QUICKIN
To exit the QUICKIN
Click Exit on the File menu.
You will be back in the Grid and bathymetry window, see Figure 3.3
Click Return to return to the main window of Delft3D-MENU, see Figure 3.2
Click Exit.
The window is closed and the control is returned to the desk top or the command line.
In this Getting Started session you have learned to access the QUICKIN and to open and
inspect a bathymetry samples file.
We encourage new users next to run the tutorial described in Chapter 6.
Deltares
13
QUICKIN, User Manual
Figure 3.14: Window Save Depth to save depth files
14
Deltares
4 General operation
4.1
General program operation instruction
The main menu bar is positioned at the top of the screen.
Help
Upon selecting Help → User Manual, the QUICKIN User Manual in PDF-format will be opened.
Use the bookmarks in the contents to locate the subject you are interested in.
Print screen
Press Ctrl-P or click
current screen.
on the toolbar to obtain the print window for a hardcopy of the
File menu
The file-menu is the standard Open and Save As window. The file mask depends on the type
of data that you want to open or save. You can change the directory by navigating through the
folders.
It is possible to specify whether to Stay on the Start-up Directory or not, in the Settings
General form.
General cursor and keyboard functions
The left mouse activates or confirms desired actions. The Esc key cancels the last edit action.
The right mouse may also confirm actions, or may put the program back into its original mode.
In many situations, the Ins and Enter keys on the right-hand bottom of a keyboard function
in the same way as the left and right mouse, respectively.
4.2
Key stroke functions
A = Anchor, or on toolbar
When clicking
on the toolbar and next pressing the A key on the keyboard, a so-called
anchor will appear, which acts as zero-distance point. The distance (in metre) of the present
cursor position to this point is displayed in the status bar at the right of the co-ordinate system
indicator, see Figure 4.1. Moving the cursor around and pressing A again will relocate the
anchor. Clicking
again will de-activate the anchor.
Figure 4.1: Location of anchor + and distance between anchor and cursor at the right
C = Change
Deltares
15
QUICKIN, User Manual
In Edit → Samples, pressing C allows you to change the value of individual samples.
D = Delete
In the Edit → Polygon, Depth, Samples options, pressing D allows you to delete individual
points (polygon, depth or sample).
E = Erase polygon
In Edit → Polygon, keeping E pressed allows you to delete the indicated polygon.
I = Insert
In Edit → Polygon, pressing I when the cursor is not on a polygon point allows you to start a
new polygon. When the cursor is on a polygon point, pressing I allows you to insert polygon
points between two points of the indicated polygon.
In Edit → Samples, pressing I allows you to create samples.
Ctrl-P = Print screen
Pressing Ctrl-P will open the print window. The current screen will be printed to your printer
or to a file.
R = Replace
In Edit → Polygon or Edit → Observation Area, pressing R allows you to replace (move)
individual points.
Mouse wheel
Use the mouse wheel to zoom in and zoom out. Other ways are:
Click
on the toolbar to zoom in.
Click
on the toolbar to zoom out.
To define a zoom box, click
on the toolbar and drag a box.
Ctrl + = Zoom in
Keep the Ctrl-key pressed and use the + key to zoom in more.
Ctrl - = Zoom out
Keep the Ctrl-key pressed and use the - key to zoom in more.
Ctrl move cursor = move focus of screen
Keep the Ctrl-key pressed and move the cursor around. The current screen will move accordingly.
Ctrl arrow keys = move focus of screen left, right, up or down
Keep the Ctrl-key pressed and use the arrow keys to move the focus of the screen accordingly.
Esc = Undo
In various edit modes the latest action will be undone pressing Esc.
Tab = depth cursor
16
Deltares
General operation
In menu Edit → Depth and menu item Depth Linear, pressing the Tab key while the cursor
is on a grid point, will display the depth value in the lower status bar. In normal view (not in
3D View), you can press the Tab key to go into ’depth cursor mode’. This allows you to ’walk’
over the depth points using the arrow keys. When in ‘depth cursor mode’ you can increase or
decrease the depth values by using the + and - keys, respectively.
Deltares
17
QUICKIN, User Manual
18
Deltares
5 Menu options
The menu bar contains the following items, see Figure 5.1, each item is discussed in a separate sections
Figure 5.1: QUICKIN menu options
5.1
File menu
When opening a land boundary or polygon before opening the grid file be sure you choose
the same co-ordinate system as the grid file you want to load, see section 5.5.
When opening files, QUICKIN will not check the co-ordinate system in the file against the
current co-ordinate system in QUICKIN, except when opening a grid.
On the File menu, see Figure 5.2, options are available to import land boundaries, samples,
depth files and grid files. The results at each stage of the bathymetry definition process can
be saved. The option to quit QUICKIN is located here also.
Figure 5.2: Options on the File menu
The start-up directory to open and save files can be configured in the General Parameters
form on the menu Settings → General. As default the file menu starts at the last directory
selected.
For the formats of the files you are referred to Appendix A.
5.1.1
New project
Upon selecting File → New Project, all objects (land boundaries, polygons, grids, depths,
samples etc.) will be deleted; i.e. you start from scratch.
Deltares
19
QUICKIN, User Manual
5.1.2
Open project
Upon selecting File → Open Project, the Open Project window appears in which you can
browse to an existing project (<∗.d3d> file).
Remark:
A project saved by RGFGRID or D-Waq DIDO can be read by QUICKIN.
5.1.3
Save project
Upon selecting File → Save Project, the current project (filenames for grid and depth) will be
saved under the same name. If the project name is not known yet, the Save Project window
appears.
Remark:
When you started with an existing project, or when you saved the project before, saving
the project will not save changes you have made to the depth(s). Either use Save
Project As or save individual depths.
5.1.4
Save project as
Upon selecting File → Save Project As, the current project can be saved under a different
name.
5.1.5
Attribute files
On the File → Attribute Files sub-menu, see Figure 5.3, options are available to open and
save objects that are indirectly related to the grids.
Figure 5.3: Options on the File→ Attribute Files menu
20
Deltares
Menu options
Open land boundary
Upon selecting File → Attribute Files → Open Land Boundary, you can open a collection
of land boundaries. Land boundaries (or land-water marking) are in files with default mask
<∗.ldb>.
Remark:
If you open another land boundary file, it will be visualised together with the existing
land boundary.
Save land boundary
Save the land-boundary, e.g. after it has been edited. Land boundary files have as default
mask <∗.ldb>.
Open polygon
Upon selecting File → Attribute Files → Polygons, you can open a collection of polygons from
a file with mask (<∗.pol>). Polygons are per definition closed. If the polygon is not closed in
the file it will still be shown as closed.
Remark:
If you open another polygons file, they will be visualised together with existing polygons.
Save polygon
When saving polygons, each polygon will be saved as a closed polyline. A polygon file has
as default mask <∗.pol>.
Open samples
The samples in a file with mask <∗.xyz>, may be a set of disordered x, y , z values given in
a sequential list of free-formatted x, y , z values.
Remark:
If you open another samples file, the samples will be visualised together with existing
samples.
Open TEKAL samples
In this file both the depth values and the grid information are contained. In order to use this
option you must have saved the bathymetry in TEKAL format (on the File menu, point to
Export and click Grid and Depth (TEKAL).
Deltares
21
QUICKIN, User Manual
Save samples
The program offers the facility to insert additional samples, delete or replace samples. The
modified data set of samples can then be saved as a sequential list of free-formatted x, y , z
values.
Open text file
Texts can be displayed in the graphics area if their position (x, y), the text and colour are
defined. See an example in section A.12.
5.1.6
Import
On the Import sub-menu, see Figure 5.4, options are available to import objects that are
directly related to the grids.
Figure 5.4: File → Import options
Grid (RGFGRID)
Upon selecting File → Import → Grid (RGFGRID), you can open a collection of grids. The
grid file has a default mask <∗.grd>.
Remarks:
The co-ordinate system in QUICKIN is set accordingly to the system specified in the
grid file.
If the co-ordinate system is spherical then the co-ordinates are shown in stereographic
projection.
If no co-ordinate system is specified, Cartesian is presumed.
22
Deltares
Menu options
Depth
Interpolated depth values in a file with mask <∗.dep> can be opened in the Delft3D-FLOW
depth-file format.
Grid and Depth (Arc)
This option is relevant to users of Delft1D2D. Upon selecting File → Import → Grid and
Depth (ARC), you can open a single grid. This GIS file contains both a rectangular grid
and bathymetry definition in one file. The file has mask <∗.a∗>. If the extension chosen
is <amu>, QUICKIN assumes that a Delft1D2D map-file of u-velocity components has to be
opened and the v -velocity components in file <∗.amv> are automatically opened as well. The
resulting velocity vector field will be displayed and can be shown on a map of the Delft1D2D
bathymetry. A description of this file format is given in section A.7.
Grid and Depth (ROMS)
Upon selecting File → Import → Grid and Depth (ROMS), you can open a grid in the NetCDF
format as used for the Regional Ocean Modelling Sytem (ROMS).
Second depth
A second file of interpolated depth values can be opened in a file with mask <∗.dep>. This
second depth field can be subtracted from or added to the present depth values (e. g. adding
a non-uniform mean sea level correction to the present depth values), see menu Operations
→ Combine Depth and Second Depth.
Second Grid and Depth (Arc)
After you have opened a bathymetry in a file with mask <∗.adp>, you can open water levels
in a file with mask <∗.amz>, to be displayed together with the bathymetry.
Grid (incremental)
After you have opened a ARC-grid (Grid and Depth (ARC)) file with mask <∗.aht>, you can
open a incremental result file <∗.inc> from Delft1D2D. This file can be used for animation in
QUICKIN.
5.1.7
Export
On the File → Export sub-menu, see Figure 5.5, options are available to export objects that
are directly related to the grids.
Deltares
23
QUICKIN, User Manual
Figure 5.5: File → Export sub-menu options
Depth
Interpolated depth values can be saved in the Delft3D-FLOW depth-file format. The default
mask is <∗.dep>. If you need to specify a different extension (initial or rougness data) enter
the required filename and extension, and add as last character a dot (ex. <waterlevel.ini.>
the file on disk will be named <waterlevel.ini>). Another possibility is to rename the filename
after it is saved.
Grid and depth (Arc)
Save the bathymetry and rectangular grid definition.
Grid and depth (ROMS)
Save the grid and depth values in a NetCDF file which can be used with ROMS (Regional
Ocean Model.System).
Grid and depth (TEKAL)
This file can be used in the Deltares | Delft Hydraulics standard plotting packages as Delft3DQUICKPLOT and GPP, QUICKPLOT (2013) and GPP (2013).
24
Deltares
Menu options
Active grid (RGFGRID)
After you have interpolated depth values on the grid, some parts of the grid may not be
covered with data, e.g. if these parts fall on land. In that case this option gives an easy
way to ’cut’ away those parts of the grid that are not interpolated. A new grid is written to a
file with mask <∗.grd>, that only contains active grid cells, plus a so-called ’computational
grid enclosure’ file with mask <∗.enc>, see the Delft3D-FLOW User Manual Delft3D-FLOW
(2013), that indicates the border of the computational domain in Delft3D-FLOW computations.
5.1.8
Delft3D-FLOW attributes
Dry points, thin dams and observation points for the hydrodynamic module Delft3D-FLOW
can be defined in two ways: either using the Visualisation Area window of the FLOW Graphical User Interface, or, using QUICKIN. The (sediment) dredge and dump areas and their
characteristics can only be defined in QUICKIN, see Figure 5.6.
Figure 5.6: Open and save Delft3D-FLOW attribute files
Open dry points
Open a file with Delft3D-FLOW dry points. This file has mask <∗.dry>. See section 5.2.10
for details how to define these points.
When opening a file with dry points and dry points are already defined, then the latter will be
removed.
Deltares
25
QUICKIN, User Manual
Save dry points
Save the dry points to a file with mask <∗.dry>. A description of this file format is given in
section A.9.
Open thin dams
Open a file with Delft3D-FLOW thin dams. This file has mask <∗.thd>. See section 5.2.11
for details how to define these points.
When opening a file with thin dams and thin dams are already present, then the latter will be
removed.
Save thin dams
Save the thin dams to a file with mask <∗.thd>. A description of this file format is given in
section A.10.
Open observation points
Open a file with Delft3D-FLOW observation points. This file has mask <∗.obs>. See section 5.2.12 for details how to define these points.
When opening a file with observation points and observation points are already defined, then
the latter will be removed.
Save observation points
Save the observation points to a file with mask <∗.obs>. A description of this file format is
given in section A.11.
Open discharges
Open a file with Delft3D-FLOW discharges. This file has mask <∗.src>. It is not possible to
define discharge location, type and time-series, in that case you have to use FLOW-GUI.
When opening a file with discharges and discharges are already present, then the latter will
be removed.
Open dredge and dump areas
Open the file that contains the dredge and dump areas (defined in a separate polygon file),
the depths to be dredged and the links between dredge and dump areas. The file has mask
<∗.dad>.
26
Deltares
Menu options
Save dredge and dump areas
Save the dredge and dump areas (defined in a separate polygon file), the depths to be
dredged and the links between dredge and dump areas. The file has mask <∗.dad>. When
asked to save the polygon file, click Yes when not yet saved.
5.1.9
Open Colour map
You can choose from a number of pre-defined colour schemes (in file with masks <∗.clr> or
<∗.clrmap>). These colour schemes have the same format as used for Delft3D-QUICKPLOT,
see section A.14 for the file format.
Restriction:
Only the colour space RGB is supported
Remark:
If the file <quickin.clrmap> exists on the start-up directory then this file will be read, if
the file does not exist on the start-up directory it will try to read the file on the installation
directory <$D3D_HOME/$ARCH/plugins/default>.
5.1.10
Open Settings
If you have saved your QUICKIN settings in a previous session, you can open these settings
again, see section A.15 for the file format.
Remark:
If the file <quickin.clrmap> exists on the start-up directory then this file will be read, if
the file does not exist on the start-up directory it will try to read the file on the installation
directory <$D3D_HOME/$ARCH/plugins/default>.
5.1.11
Save Settings
If you have made changes in one of the forms on the Settings menu, you can save these
settings to be used later on again.
5.1.12
Exit
Exit from the QUICKIN program
Deltares
27
QUICKIN, User Manual
5.2
Edit menu
Several edit modes are presented on the Edit menu, see Figure 5.7. An edit mode is an
operation mode which needs at least a mouse click, i.e. a set of operation instructions which
is valid for a certain data set, and which may go with some specific display method. The
following objects may be modified:
Land boundary
Polygon
Depth
Samples
Delft3D-FLOW attributes (dry points, thin dams, observation points or dredge and dump
areas)
Figure 5.7: Options on the Edit menu
Esc = Undo
In most edit modes, Esc will undo the latest action.
5.2.1
Land boundary
The land boundary is used to visualise the land-water interface. To edit (define or modify) a
land boundary, possible edit actions see Figure 5.8.
Edit
Upon selecting Edit → Land Boundary → Edit, you can start editting a polyline that defines
an Land Boundary. When there is no polyline the edit mode is set to New, otherwise you have
to select first a polyline (from the menu Edit → Land Boundary → Select or press the key
s). After you have selected the polyline you can use key-strokes, icons in the toolbar or menu
items to switch the edit mode.
28
Deltares
Menu options
Figure 5.8: Options on the Edit → Land Boundary menu
New
Upon selecting Edit → Land Boundary → New, you can start to define a new polyline, click
on
, or use the key-stroke n to start a new polyline.
Delete
Upon selecting Edit → Land Boundary → Delete, click on
delete (erase) the selected polyline.
, or use the key-stroke e, to
Select
Upon selecting Edit → Land Boundary → Select, or use the key-stroke s, you can select a
polyline by clicking on one of its edges or vertices. After that the polyline will be highlighted
Insert point
Upon selecting Edit → Land Boundary → Insert Point, click on
, or use the key-stroke i,
you can insert a point into the selected polyline. The point will be inserted at the nearest linear
piece of the polyline.
Move point
Upon selecting Edit → Land Boundary → Move Point, click on
you can move (replace) a point on the selected polyline.
, or use the key-stroke r,
Delete point
Upon selecting Edit → Land Boundary → Delete Point, click on
you can delete a point on the selected polyline by indicating it.
Deltares
, or use the key-stroke d,
29
QUICKIN, User Manual
5.2.2
Polygon
The Area of Interest polygon is used to limit the area of influence of operations and or edit
actions. All grid points and samples that are inside the polygon are active in the subsequent
interpolation or manipulation steps. The polygon is self closing. see Figure 5.9.
Figure 5.9: Options on the Edit → Area of Interest menu
Edit
Upon selecting Edit → Area of Interest → Edit, you can start editting a polygon that defines
an Area of Interest. When there is no polygon the edit mode is set to New, otherwise you
have to select first a polygon (from the menu Edit → Area of Interset → Select or press the
key s). After you have selected the polygon you can use key-strokes, icons in the toolbar or
menu items to switch the edit mode.
New
Upon selecting Edit → Area of Interest → New, you can start to define a new polygon, click
on
, or use the key-stroke n to start a new polygon.
Delete
Upon selecting Edit → Area of Interest → Delete, click on
delete (erase) the selected polygon.
, or use the key-stroke e, to
Select
Upon selecting Edit → Area of Interest → Select, or use the key-stroke s, you can select a
polygon by clicking on one of its edges or vertices. AFter that the polygon will be highlighted
30
Deltares
Menu options
Insert point
Upon selecting Edit → Area of Interest → Insert Point, click on
, or use the key-stroke i,
you can insert a point into the selected polygon. The point will be inserted at the nearest
linear piece of the polygon.
Move point
Upon selecting Edit → Area of Interest → Move Point, click on
you can move (replace) a point on the selected polygon.
, or use the key-stroke r,
Delete point
Upon selecting Edit → Area of Interest → Delete Point, click on
you can delete a point on the selected polygon by indicating it.
, or use the key-stroke d,
To define dredge and dump areas go to the Edit menu, point to Dredge and Dump Areas and
click New Area.
The polygon will remain valid after each operation, but it can be deleted, via menu Edit →
Polygon → Delete. The polygon can be used as a so-called ’fault line’ in the interpolation
process.
Upon selecting Edit → Polygon, you can start to define a new polygon, or click on
a new polygon.
to start
Valid action keys are
In Edit → Polygon mode the following keys can be used:
I = Insert
Pressing I allows you to insert individual polygon points. The message at the left of the
statusbar now reads ’Insert a point’, click the left mouse to insert individual points.
R = Replace
Pressing R allows you to replace (move) individual polygon points. The message at the left of
the statusbar now reads ’Get a point’. If you have got it by clicking the left mouse, the message
will read ’Put a point’, and you can do so by clicking the left mouse at the new desired position.
D = Delete
Pressing D allows you to delete individual polygon points.
X = Break open polygon
Keep X pressed and move with the cursor over a polygon point to split the polygon. Effectively,
the pointed co-ordinates are replaced by default ‘missing’ values.
E = Erase polygon
Entire polygon sections are deleted. Press key E and then click with the left mouse button on
a point of the polygon which need to be deleted. Finish the operation by pressing the right
mouse button.
Deltares
31
QUICKIN, User Manual
5.2.3
Depth
By clicking on a grid point, a window opens in which the depth value is displayed. You can
change the value manually. The depth value −999.000 indicates the grid point has no depth
value (missing value).
To delete individual depth points, first press D and click on the grid point. Press C or I to go
back in the edit mode.
Tab = depth cursor
In menu Edit → Depth and menu item Depth Linear pressing the Tab key while the cursor is
on a grid point, will display the depth value in the lower status bar. In normal view (not in 3D
View), you can press the Tab key to go into ’depth cursor mode’. This allows you to ’walk’
over the depth points using the arrow keys. When in ‘depth cursor mode’ you can increase or
decrease the depth values by using the + and - keys, respectively.
Press the D key to delete the current depth value. Press Esc to undo the latest changes.
Press Tab again to go into normal cursor mode. The depth value and the (M, N) indices of
the current depth point are given in the status bar at the bottom of the screen.
5.2.4
Depth linear
Manually interpolate a line of grid depth values, by clicking two points in the grid that have
valid depth values. The points in between the two grid points will be linearly interpolated in
between the values of the end points. This edit option, in combination with Operations →
Internal Diffusion, provides a very powerful way to build new bathymetries or modify existing
ones.
See this combination like the construction of a ship. First, a ships framework is built, (lines of
grid depth values) then, its plates are welded to the frame (Internal Diffusion).
Reject a result by pressing Esc. If the desired end points do not yet have valid depth values,
first assign depth values by putting the cursor on top of these points and pressing Tab. The +
or - keys will increase or decrease the depth value.
5.2.5
Depth isoline
The operation described above can also be performed in iso-line mode. The value of the
iso-line is taken as the value of the FIRST point that has been indicated.
5.2.6
Depth line sweep
Indicate two points on the same grid line. The grid points on the indicated grid line will be
copied onto the grid lines parallel to the indicated line. Use the polygon to limit the effective
area.
32
Deltares
Menu options
5.2.7
Samples
Samples can be inserted (with a specified depth value), replaced or deleted in the same way
as the points of a polygon. The value of the marked sample is displayed in the status bar at
the bottom of the screen together with the x and y co-ordinates and the distance from the
anchor. The value of the marked sample can then be modified by pressing the + (higher) or
- (lower) key (or press D for delete or press Esc for restore). In edit mode after pressing the
C-key), sample values can be modified. In edit Insert after pressing the I-key), new sample
values can be inserted.
5.2.8
Check dike heights
It allows you to quickly check whether the dykes in a Delft1D2D schematisation start overtopping at the proper water level. (Typically useful in a polder area divided in different compartments). First open a Delft1D2D bathymetry <∗.adp>. Next choose this option and click some
depth point from which you want to ‘release’ water at the level (positive up) that you specify
by typing a value. Next, water is ‘released’ from that point and the surrounding bathymetry is
‘filled’ until the water is stopped either by dykes or high grounds. Increase the ‘release level’
until dykes start flooding. The wetted area is displayed by means of the ‘second depths’, see
View → Second Depth.
5.2.9
Edit Second Depth Animate Incremental
The option allows for animation of the flooding process computed by Delft1D2D. First, open a
Delft1D2D bathymetry <∗.adp> and then choose this option. Open the relevant incremental
file <∗.inc> and press the space bar to start the animation. The animation can be stopped
(and restarted) by pressing the space bar again, and be propagated over 1 hour intervals by
pressing the +-key. The wetted area is displayed by means of the ‘second depths’, see View
→ Second Depth.
5.2.10
Dry points
Dry points are grid cells centred around a water level point that are permanently dry during
a computation, irrespective of the local water depth and without changing the water depth
as seen from the wet points. In QUICKIN dry points are specified as single points. In the
Delft3D-FLOW GUI they can also be defined as a line of points.
Click inside a grid cell to define it as dry point. Click on an existing dry point to delete this
point.
Remark:
Dry points for the hydrodynamic module Delft3D-FLOW can be defined in two ways:
either using the Visualisation Area window of the Delft3D-FLOW Graphical User Interface, or using QUICKIN.
Deltares
33
QUICKIN, User Manual
5.2.11
Thin dam points
Thin dams are infinitely thin objects defined at the velocity points which prohibit flow exchange
between the two adjacent computational cells without reducing the total wet surface and the
volume of the model. The purpose of a thin dam is to represent small obstacles (e. g. breakwaters, dams) in the model which have sub-grid dimensions, but large enough to influence
the local flow pattern. Thin dams are specified at the edges of a grid cell. In QUICKIN thin
dams are specified as single grid edges. In the Delft3D-FLOW GUI they can also be defined
as a line of vortices.
Click at a grid vortex to define it as thin dam. Click on an existing thin dam to delete this point.
Remark:
Thin dams for the hydrodynamic module Delft3D-FLOW can be defined in two ways:
either using the Visualisation Area window of the Delft3D-FLOW Graphical User Interface, or using QUICKIN.
5.2.12
Observation points
Observation points are used to monitor the time-dependent behaviour of one or all computed
quantities as a function of time at a specific location, i.e. water elevations, velocities, fluxes,
salinity, temperature and concentration of the constituents. Observation points represent an
Eulerian viewpoint at the results. Observation points are located at cell centres, i.e. at water
level points.
Click inside a grid cell to define it as observation point; specify a name (maximum of 20
characters) for the point. Click on an existing observation point to delete this point.
Remark:
Observation points for the hydrodynamic module Delft3D-FLOW can be defined in two
ways: either using the Visualisation Area window of the Delft3D-FLOW Graphical User
Interface, or using QUICKIN.
5.2.13
Dredge and dump areas
The Edit → Dredge and Dump Areas menu item contains several items to define and edit the
dredge and dump areas, see Figure 5.10, each item is discussed in a separate sections.
First you have to define the locations of dredge and dump areas by editing polygons. For each
area a polygon is required. Next you give each area a meaningful name. Click the name field
and specify the polygon name, reflecting for instance if it will be a dredge or a dump site, and
specify a drege depth (if applicable).
The next step is to link (connect) each dredge area to a dump area. Individual links can be
deleted
34
Deltares
Menu options
Figure 5.10: Options on the Edit → Dredge and Dump Areas sub-menu
New area
First you have to define the locations of dredge and dump areas by editting polygons. Select
Edit → Dredge and Dump Areas → New Area and start defining a new area. Pressing the
right-mouse button will stop defining the current polygon and the next left-mouse click will start
a new area (polygon).
Edit properties
By pressing Edit → Dredge and Dump Areas → Edit Properties you can edit the properties of
a dredge/dump area (i.e. name of area and the dredge depth, -999.000 means no dredging),
see Figure 5.11.
If the area is a dredge area you have also to specify the amount of dredge material (percentages) which will be dumped in the linked dump areas, see Figure 5.12.
Deltares
35
QUICKIN, User Manual
Figure 5.11: Options on the Dredge and Dump Properties window for a dredge area
Figure 5.12: Options on the Dredge and Dump Properties window for a dump area
Delete area
Up on selecting Edit → Dredge and Dump Areas → Delete Area you can delete a polygon
which defines a dredge or dump area. Click with the left mouse button inside a polygon, then
that polygon will be deleted and all the links from or to that area.
Insert point
Upon selecting Edit → Dredge and Dump Areas → Insert Point, you can insert a point into
the polygon. The point will be inserted at the closest linear piece of the polygon.
Move point
Upon selecting Edit → Dredge and Dump Areas → Move Point, you can move a point on the
polygon.
Delete point
Upon selecting Edit → Dredge and Dump Areas → Delete Point, you can delete a point on
the polygon by indicating it.
36
Deltares
Menu options
New link
Upon selecting Edit → Dredge and Dump Areas → New Link, you can define a link (connection) between a dredge and a dump area. First click in a dredge area, subsequently in the
dump area.
Delete link
Upon selecting Edit → Dredge and Dump Areas → Delete Link, you can delete a link (connection) between a dredge and a dump area. After selecting the menu-item select with the
left mouse button the link which need to be deleted.
5.3
Operations menu
On the Operations menu, see Figure 5.13, you may choose to calculate depth values at grid
points from sample values using various interpolation options (grid cell averaging, triangular
interpolation, internal diffusion). The area and volume of (part of) a grid can be calculated.
Figure 5.13: Options on the Operations menu
Deltares
37
QUICKIN, User Manual
5.3.1
New Domain
On the Operations → New Domain menu, create a new domain. This means that every grid
create action will add a new domain to your model. If you want to adjust your grid by the option
Operations → Create Rectangular Grid. . . , deactivate this menu item first.
5.3.2
Select domain
If your project consists of multiple grids (so-called domain decomposition application) you can
switch between the domains (grids) by clicking Edit → Select Domain, or click
toolbar. Next, click on the grid you want to become the active grid.
5.3.3
on the
Delete domain
To delete a domain or grid, select Edit → Delete Domain. Next, click on an active or inactive
grid. When deleting a domain, also objects (except dredge and dump areas) defined on the
grid will be deleted.
5.3.4
Change centre of projection
For spherical co-ordinates QUICKIN can use two different projections, plane projection and
stereographic projection. For stereographic projection a special function is implemented to
centring the computer screen to the centre of projection and the sphere. This function can
be invoked by clicking the menu item Operations → Change Centre of Projection, see Figure 5.13. When using this command the centre of the projection is set to the centre of the
screen. This action requires recalculation of the projection and a new screen refresh. The
centre of the projection does not change when using zoom in, zoom out or pan, so there is no
performance drawback and a smooth screen-refresh is obtained.
5.3.5
Delete
Using this option you can (see Figure 5.14) delete the Land Boundary, Polygons, Depth,
Second Depth and Samples. It is possible to indicate an area of influence, by defining a
polygon. If a polygon is defined, the operation applies to points inside the polygon. When
choosing Delete → Polygons all polygons will be deleted.
Land boundaries
If a polygon is defined, the land boundary points inside the polygon are removed. If no polygon
exists you are asked if all land boundary points have to be removed. If you have defined two
or more polygons, than only the points inside the first defined polygon will be removed.
Polygons
If polygons are present, they all will be removed.
38
Deltares
Menu options
Figure 5.14: Options on the Operations → Delete menu
Depth
If a polygon is defined, the depths inside the polygon are removed. If no polygon exists you
are asked if all depth points have to be removed. If you have defined two or more polygons,
than only the depths inside the first defined polygon will be removed.
Second depth
If a polygon is defined, the second depths inside the polygon are removed. If no polygon
exists you are asked if all second depth points have to be removed. If you have defined two or
more polygons, than only the second depths inside the first defined polygon will be removed.
Samples
If a polygon is defined, the samples inside the polygon are removed. If no polygon exists you
are asked if all samples have to be removed. If you have defined two or more polygons, than
only the samples inside the first defined polygon will be removed.
5.3.6
Create Rectangular Grid
Specify the grid spacing, grid origin, rotation of the grid (counter clockwise) and the number
of grid cells in both directions to quickly create a rectangular grid with rectangular cells. The
parameters involved and their default values are, see Figure 5.15.
Number of Grid Cells in M-Direction
Number of Grid Cells in N-Direction
Delta X [m]
default: 50
default: 50
default: 100.0
Grid cell size M-direction [m]
Delta Y [m]
default: 100.0
Grid cell size N-direction [m]
Origin X [m]
Origin Y [m]
Rotation left [degrees]
Deltares
default: 0.0
default: 100.0
default: 0.0
39
QUICKIN, User Manual
Figure 5.15: Create Rectangular Grid. . . form
5.3.7
Data in cell centre
QUICKIN can be applied to specify any spatially varying parameter, which may also be some
initial condition or some spatially varying input parameter. Because some of these parameters
may be defined at cell centres (rather than cell corners, as with Delft3D-FLOW depth values),
the position of the points to interpolate (or average) to, can be changed to the cell centres.
The water level is an example of a parameter defined at cell centres.
5.3.8
Grid cell averaging
This method is the preferred method if there are (many) more samples than grid points. The
standard option is simple averaging. Also, the maximum or minimum value of the samples
in the grid point vicinity can be chosen (maybe to guarantee a wetted gully), or the value of
the closest sample within the vicinity. (See menu Settings → Averaging Options). The default
vicinity is defined as the area covered by an 8 point polygon surrounding the current grid point,
with its four corners as the cell centres of the four grid cells around the grid point. In between
these corner points, another four points are added that lie halfway between the grid point and
its neighbouring grid points. The default area can be increased or decreased in size by a
linear scaling factor that can be specified in the Settings → General form.
Defaults:
Relative Search Cell Size for Averaging: 1.0
Minimum Number of Averaging Points: 4
Averaging Options: Average value of near points
40
Deltares
Menu options
5.3.9
Triangular interpolation
The triangulation method is best suited for data sets that have a resolution that is about
equal to or smaller than the grid resolution. The samples are first organised into a so-called
Delaunay network, next grid values are interpolated. The amount of operations needed in
the network creation process depends quadratically on the number of samples. So, consider
working in portions rather than with the complete data sets. In that case, take special care
at the border zones of adjacent interpolation areas. Maybe delete the border zones using a
polygon and re-interpolate these zones using a slightly larger polygon.
Default:
Default the ‘interpolation process’ is not shown, see the menu View → Interpolation
5.3.10
Internal diffusion
Grid points that have no depth value yet, i.e. ’blank’ points with the indicator value of -999, are
modified in their value by the so-called ’Internal diffusion’ mechanism. Basically, this mechanism is a smoothing process which is called repeatedly, but that does not change values of
already existing depth values. Therefore, a smooth transition with the existing bathymetry is
inherent. This gives an easy method to fill ’gaps’ in a bathymetry, or to build new bathymetries in combination with the Edit → Depth Linear mode, as explained above. The Number of
Internal Diffusion Steps can be specified in General form of menu Settings.
Default:
Number of Internal Diffusion Steps
5.3.11
default: 200
Smoothing
In some bathymetries large depth gradients may occur, that may result in non-smooth numerical results in the hydrodynamic or wave programs. Isolate these regions and treat them with
this volume conserving smoothing method.
The Number of Smoothing Steps and the Smoothing Factor can be specified in the Settings
→ General form.
The defaults are:
Number of Smoothing Steps
Smoothing Factor
5.3.12
default: 10
default: 0.5
Courant numbers
The latter option copies the Courant numbers defined as
p
Courant = 2∆T c 1/∆x2 + 1/∆y 2
see Delft3D-FLOW (2013), to the second depth array and sets display parameters such that
the second depth is displayed as continuous shading. ∆t is thepcomputational time-step in
seconds (see Settings → General), and c the local wave celerity, g(h + ζ0 ) (see menu item
Settings → General).
Deltares
41
QUICKIN, User Manual
The default values are:
Time-step for Courant Number
Reference Level ζ0
default: 60.0 [s]
default: 0.0 [m]
Remark:
Note that you have to specify the time-step in seconds, but in FLOW you specify minutes.
5.3.13
Actual and maximum data dimensions
The actual and maximum dimensions of various data objects are presented in ‘history’.
5.3.14
Check interpolation
If both samples and depth values are opened in the program, it is possible to check the quality
of the interpolation by reverse interpolation of the samples in the created bathymetry. The
reverse interpolation is performed for all grid cells within the polygon that have depth values
at all four grid cell-corners. The reverse-interpolation is realised by bilinear interpolation of the
samples in the grid cells. The difference between these values and the original sample values
gives an indication for the quality of the interpolation. (Or an indication of the variance of your
sample data in relation to the resolution of the grid. Therefore, if you see large differences, do
not conclude too hastily that the interpolation itself is poor!) The mean difference, the mean
absolute difference and the maximum difference are presented via menu option Operations
→ Actual and maximum data dimensions, together with the number of samples that have
been evaluated.
5.3.15
Volumes and areas
Volumes and areas are calculated for computational grid cells within the polygon. The area of
the computational cells is always smaller then the area of the polygon. If no polygon is given,
all grid cells are used. The volumes and areas are computed for those cells with four valid
depth values (data at cell vertices) or with one valid depth value (data at cell centre). Also the
depth should be positive (ζref + dζ > 0) for a contribution to the volumes and areas. Where dζ
is the depth value at the cell centre, for data defined at the cell vertices it is defined as mean
value of the four surrounding depth values.
Areas are given in the squared unit of the grid (mostly given in metres); volumes are given in
squared unit of the grid multiplied by the unit of the depth. (For a Delft3D-FLOW bathymetry,
both must be in metres). Volumes are given below a user definable reference level. The origin
of that reference level is equal to the reference level of the depth data. The reference level is
defined positive in upward direction. (Whereas depth values are defined positive in downward
direction.)
Default:
Reference Level ζref
42
default: 0.0 [m]
Deltares
Menu options
5.3.16
Combine depth and uniform value
Using this option you can (see Figure 5.16) assign a value to not yet specified depths. For
existing depths you can do some basic operations: add a constant value (for instance when
you want to change the reference level), multiply with a constant value (for instance with -1
when your depths are positive upwards), or take the minimum or maximum of the depths and
a specified value. Optionally, you can use a polygon to restrict the area of operation.
To use this options you first have to specify the uniform value (default: -999.0) in a pop-up
window.
Figure 5.16: Options on the Combine Depth and Uniform Value sub-menu
Fill Missing Depths with Uniform Value
This option operates on grid points with non-existing depth values; they will be assigned the
Uniform Value. The other options operate on grid points with existing (yet defined) depth
values.
Change Depth to Max of Depth and Uniform Value
If the Uniform Value is larger than the depth, the depth value is replaced by the Uniform Value.
Change Depth to Min of Depth and Uniform Value
If the Uniform Value is smaller than the depth, the depth value is replaced by the Uniform
Value.
Deltares
43
QUICKIN, User Manual
Add Uniform Value to Depth
The Uniform Value is added to the depth value.
Multiply Depth with Uniform Value
The depth value is multiplied by the Uniform Value (for instance with -1 when your depths are
positive upwards).
5.3.17
Combine depth and second depth
Using this option you can (see Figure 5.17) manipulate the depth using the second depth.
The depth can be replaced by the second depth, the maximum or minimum can be taken,
the second depth can be added or subtracted, the depth can be multiplied or divided by the
second depth. If a polygon is defined, the operation applies to grid points inside the polygon.
Figure 5.17: Options on the Combine Depth and Second Depth sub-menu
Copy Second Depth to Depth
If the second depth value is specified, the depth value will be replaced by the second depth
value.
Fill Missing Depth with Second Depth
This option operates on grid points with non-existing depth values; they will be assigned the
Second Depth Value.
44
Deltares
Menu options
Change Depth to Max of Depth and Second Depth
If the Second Depth Value is larger than the depth, the depth value is replaced by the Second
Depth Value.
Change Depth to Min of Depth and Second Depth
If the Second Depth Value is smaller than the depth, the depth value is replaced by the Second
Depth Value.
Add Second Depth to Depth
The Second Depth Value is added to the depth value.
Subtract Second Depth from Depth
The Second Depth Value is subtracted from the depth value.
Multiply Depth with Second Depth
The depth value is multiplied by the Second Depth Value.
Divide Depth by Second Depth
The depth value is divided by the Second Depth Value.
5.3.18
Combine samples and uniform value
Using this option you can (see Figure 5.18) manipulate samples compared to a Uniform Value.
Optionally, you can use a polygon to restrict the area of operation.
To use these options you first have to specify the uniform sample value.
Change Samples to Uniform Value
Samples will get the Uniform Value.
Change Samples to Max of Sample and Uniform Value
Samples with a value smaller than the Uniform Value will get the Uniform Value.
Change Samples to Min of Sample and Uniform Value
Samples with a value larger than the Uniform Value will get the Uniform Value.
Deltares
45
QUICKIN, User Manual
Figure 5.18: Options on the Combine Samples and Uniform Value sub-menu
Add Uniform Value to Samples
The Uniform Value will be added to the sample value.
Multiply Samples with Uniform Value
Samples will be multiplied by the Uniform Value.
Delete Samples Larger than Uniform Value
Samples larger than the Uniform Value will be deleted.
Delete Samples Smaller than Uniform Value
Samples smaller than the Uniform Value will be deleted.
5.3.19
Copy depth to samples
If you want to interpolate a detailed model based upon an existing overall model, first open
the grid and the depths of the overall model. Then, copy the overall depth information to the
samples and open the detailed model grid. Then, interpolate these samples to the detailed
model. If a polygon is defined, the depth points inside the polygon are copied to samples.
46
Deltares
Menu options
5.3.20
Change samples to difference with depth
The depth value at sample point locations is interpolated based upon the depth values at the
grid points. Next the original sample value is subtracted from this re-interpolated value.
5.3.21
Copy polyline to samples
A polyline can be changed to sample points by specifying the value at the begin and end of
the polyline, see Figure 5.19. By linear interpolation the samples in-between are determined.
If ’NO’ linear interpolation is specified (0) the value at the begin of the polyline is used for all
samples on the polyline (iso-line). The number of samples per line segment can be specified
in the Settings → Polyline to Samples window, see Figure 5.19. Also, spline shape is possible
for smooth isolines.
Figure 5.19: Copy Polyline to Samples parameters
The default values are:
Value at Begin of Polyline
default: 1.0 [m]
If no linear interpolation is used, all points will have the value at the begin.
Value at End of Polyline
default: 0.0 [m]
Linear Interpolation Yes or No
default: 0 (No)
Remark:
If you define more than one polygon, only the first polygon will be used.
5.3.22
Copy polyline to samples channel
A polyline can be changed to sample points of a channel where the polyline is the centre
line of the channel. The depth and width at the bottom have to be specified at the beginning
and end of the channel as well as the channel slope and the number of samples across the
channel width, see Figure 5.20. If the channel is placed in an existing bottom (presented
by samples) it is possible to remove channel samples above the original bottom and remove
existing samples above the channel (dredged channel). To this end a triangle network is
created by the program. The position where a line of the channel slope crosses a triangle, a
sample is created with a depth which is determined by linear interpolation of the depth of the
triangle edges. The number of samples and the shape of the channel line can be specified in
the Settings menu, Polyline to Samples window, see Figure 5.20
The default values are:
Channel Width at Begin of Polyline
Deltares
default: 100.0 [m]
47
QUICKIN, User Manual
Figure 5.20: Parameters form for Polyline to Samples Channel
Channel Depth at Begin of Polyline
Channel Width at End of Polyline
Channel Depth at End of Polyline
Number of Points across Channel Width
Channel Side Slope
Minimal Channel Depth
Delete or Add Samples
default: 10.0 [m]
default: 100.0 [m]
default: 10.0 [m]
default: 5
default: 5
default: 10.0 [m]
default: 0
Remark:
If you define more than one polygon, only the first polygon will be used.
5.3.23
Swap depth and second depth
This will interchange the depth and second depth points. If a polygon is defined, only the
depth points inside the polygon are interchanged.
5.3.24
Undo depth
Reset the depth values to values prior to the last action. When applying the edit modes,
pressing Esc has the same effect.
5.3.25
Undo samples
Reset the sample values to values prior to the last action. When applying the edit modes,
pressing Esc has the same effect.
5.4
View menu
On the View menu, you may choose to display several data sets, see Figure 5.21
48
Deltares
Menu options
Figure 5.21: Options on the View menu
5.4.1
Spherical co-ordinates
Here you can select how to project the spherical co-ordinates onto the screen, see Figure 5.22.
Figure 5.22: Options on the View → Spherical Co-ordinates sub-menu
Remarks:
Only applicable for a spherical co-ordinate system.
Default: A spherical grid is shown in stereographic projected co-ordinates.
Plane co-ordinates
Upon selecting View → Spherical Co-ordinates → Plane Co-ordinates, you can choose to the
display the co-ordinates as they are.
Deltares
49
QUICKIN, User Manual
Stereographic projected co-ordinates
Upon selecting View → Spherical Co-ordinates → Stereo Projected Co-ordinates, the coordinates are displayed using a stereographic projection onto the screen.
5.4.2
Boundary
Show or hide the computational boudary.
5.4.3
Legend
Show or hide the colour band on the left side of the screen.
5.4.4
3D View
Does not have the required performance, it very slow
In the Delft3D-3DView window a fully 3-dimensional view of the data is shown.
c:
h:
i:
r:
s:
x:
z:
Switch rendering mode
Toggle help
Inverse depth
Reste view
Toggle samples
Increase depth
Decrease depth
left mouse: Rotate in xy -plane
CTRL+left mouse: move origin xy -plane
middle-mouse: zoom
right mouse: rotate z -axis
5.4.5
Land boundary
Upon selecting View → Land Boundary, you can show the land boundary.
The following view options are available:
No Land Boundary
Do not show the land boundaries.
Lines
Show the land boundaries as lines.
Lines with Dots
Show the land boundaries as lines with dots at the land boundary points.
Filled
Show the land boundaries as lines filled with a colour.
50
Deltares
Menu options
5.4.6
Polygons
The following view options are available:
No Polygons
Do not show the polygons.
Lines
Show the polygons as lines.
Lines with Dots
Show the polygons as lines with dots at the polygon points.
Filled
Show the polygons as lines filled with a colour.
5.4.7
Grid
The following view options are available:
No grid
Do not show the grid.
Lines
Show the grid with lines.
Node numbers
Show the node numbers.
Cell numbers
Show the grid cell numbers.
5.4.8
Depth
The following view options are available:
No depth
Do not show the depth.
Continuous shades
Show the depth as continuous shades interpolated from the values at the depth points.
Patches
Show the depth as average of the depth points.
Coloured Dots
Show the depth as coloured dots.
Coloured Numbers
Show depth with numbers coloured according value.
Mono coloured Numbers
Show depth with numbers in a single colour.
Points yet to be found
Show the depth points with an undefined value.
Deltares
51
QUICKIN, User Manual
5.4.9
Second depth
The following view options are available:
No second depth
Do not show the second depth.
Continuous shades
5.4.10
Show the second depth as continuous shades interpolated from the values at the depth
points.
Patches
Show the second depth as average of the values at the depth points.
Coloured Dots
Show the second depth as coloured dots.
Coloured Numbers
Show second depth with numbers coloured according value.
Mono coloured Numbers
Show second depth with numbers in a single colour.
Points yet to be found
Show the second depth points with an undefined value.
Samples
The following view options are available:
No Samples
Do not show the samples.
Coloured Dots
Show the samples as coloured dots.
Coloured Numbers
Show samples with numbers coloured according value.
Mono coloured Numbers
Show samples with numbers in a single colour.
5.4.11
Samples as triangles
The samples can be displayed as colour filled isolines using a triangle network. This is a slow
visualisation method, zoom in to reduce the number of samples that must be triangulated. It
is possible to display the slopes (α) of the individual triangles, or the local mild slope criterion.
The slope is defined as the inner product of the triangle normal vector and the upward unit
vector. The mild slope criterion is defined as α/kH , H being the total water depth, (d + ζ0 )
and k being the wave number, which depends on the specified Wave Period. You can either
display these values as numbers, or as green/red triangles indicating whether the slope or
mild slope criterion is satisfied.
The following display options are available:
52
No Sample Triangles
Edges
Continuous Shading
Edges and Continuous Shading
Triangle Slopes
This option triggers the following sub-menu, see Figure 5.23
Deltares
Menu options
Figure 5.23: Options on the Slope Parameters window
Display Slope or Mild Slope Criterion
5.4.12
default: neither
For each triangle, either the slope or the mild slope criterion can be displayed or be
checked against some criterion.
Display as a Number Yes/No
default: yes
Display Criterion Check Yes/No
default: no
Shows in red/green whether the slope or mild slope criterion is satisfied
Value of (Mild) Slope Check Criterion
default: 0.1
If a criterion check is requested, then its value can be specified here.
Wave Period
default: 6.0 [s]
Needs only be specified if mild slope criterion is required
Depth Offset
default: 0.0 [m]
Is used in wave period computation, added to local depth.
Dry points
Show or hide the dry points.
5.4.13
Thin dams
Show or hide the thin dams.
5.4.14
Observation points
Show or hide the observation points.
5.4.15
Discharges
Show or hide the discharge locations.
Deltares
53
QUICKIN, User Manual
5.4.16
Dredge and dump areas
Show or hide the dredge and dump areas.
5.5
Co-ordinate System menu
If you want to import some files and you known on forehand what the co-ordinate system is
you have to select it here. Sometimes this will be the case if you first load a land boundary
and/or polygons before you import the grid.
Figure 5.24: Options on Co-ordinate System menu
There are two option for the co-orduinate system
1 Cartesian co-ordinates.
2 Spherical co-ordinates
Only WGS84 is supported.
5.6
Settings menu
The following options can be accessed through the Settings menu, see Figure 5.25
Figure 5.25: Options on Settings menu
5.6.1
General
The following parameters influence the behaviour of the operations above. They are set via
the following parameter list, see Figure 5.26
Go Back to Start-up Directory Yes or No
default: 0 (No)
When navigating through the directories in the file menu, you can specify whether to always go back to the start up directory, or keep the latest directory so that you have to
navigate only once.
Number of Internal Diffusion Steps
default: 200
54
Deltares
Menu options
Figure 5.26: Options on Settings window
Number of Smoothing Steps
default: 10
Smoothing Factor
default: 0.05
A value of 0.0 gives no smoothing; a value of 1.0 makes a point the average of its neighbouring depth points.
Time-step for Courant Number
default: 60.0 [s]
The time step is in seconds. The Courant number is computed following the definition in
the Delft3D-FLOW User Manual, valid for the ADI method in a staggered grid. The local
water depth is the depth value + the Reference Level ζ0
Reference Level Zref ζ0
default: 0.0 [m]
The reference level is defined as positive upward.
Relative Search Cell Size for Averaging
default: 1.1
Giving a cell search area of 1 grid cell, a value of two gives a factor 2 larger cells in both
directions.
Minimum Number of Averaging Points
default: 4
Time Interval Incremental Images
default: 0.05
Parameter to Plot in Edit-incremental
default: 1
1 = water height, 2 = flow velocity, 3 = water level, 4 = U-component, 5 = V-component
Delete Polygon after Operations
default: 0 (No)
Deltares
55
QUICKIN, User Manual
Figure 5.27: Options on Parameters Polyline to Sample window
5.6.2
Polyline to samples
In the parameter form, see Figure 5.27, you can specify the number of samples per polyline
segment, the distance between the samples, and the shape of the polyline.
Number of Samples per Segment
Fixed Distance between Samples
default: 9
default: 0.0 [m]
A non-zero distance specifies the distance between the samples. If zero distance is specified, the distance depends on the segment size and the number of points per segment.
Spline Shape Yes or No
default: 0 (No)
The shape of the Polyline to Samples and Polyline to Samples Channel operations can
be a straight line (0) or a spline shape (1).
5.6.3
Change colour map
When clicking on the Settings → Change Colour Map menu, a form opens in which you
can select the relation between a parameter (i.e. Depth) and the loaded colour maps; see
Figure 5.28
Figure 5.28: Opions on Colour Map for Parameter window
5.6.4
Legend
When clicking on the Settings → Legend menu, a form opens in which you can define how
the iso-colour figures should be displayed; see Figure 5.29
Autoscale Legend
default: On
Specify whether the program should determine the isocolour values automatically, or to
do it yourself. If you leave it to the program, it will determine the minimum and maximum
56
Deltares
Menu options
Figure 5.29: Opions on Settings → Colours menu
5.6.5
depth value within the viewing area and display the number of iso-colours specified above.
Zooming in will always result in display of the same number of iso-colours. If you want to
specify the isocolour values yourself, you have to specify one of the three parameters
below. When zooming in, the iso-colour values will remain fixed.
Number of digits
default: 3
Specifying the number of digits used in the legend and on the map.
Minimum Value
default: On
Specifying this value turns autoscale off.
Maximum Value
default: On
Specifying this value turns autoscale off.
Classes
default: 20
The number of classes can be specified
X Co-ordinate Legend
default: 16
x Co-ordinate of lower left corner of legend in pixels
Y Co-ordinate Legend
default: 20
y Co-ordinate of lower left corner of legend in pixels
Colours
When clicking on the Settings → Colours menu, a form opens in which you can define the
colours for background, land boundary, polygons, etc.; see Figure 5.30
5.6.6
Sizes
When clicking on the Settings → Sizes menu, a form opens in which you can define the
linewidth and dotsize in pixels. See Figure 5.31
Deltares
57
QUICKIN, User Manual
5.6.7
Averaging options
For all averaging methods, see Figure 5.32, the surrounding area depends on the shape of the
surrounding grid cells and the parameter Relative Search Cell Size for Averaging (in Settings
→ General). The default value of 1.0 gives an area of 1.0 grid cell, a value of two gives a
factor 2.0 larger cells in both directions. The shape of the area around a given grid point is
defined by an eight point polygon that has the surrounding cell centres as corners and the
points halfway in between the grid point and the surrounding grid points in between these
corners.
Average Value of Near Points
Value of Closest Point
Maximum Value of Near Points
Minimum Value of Near Points
Shepard
The Shepard method is a weighted averaging method, with weights depending on the
reciprocal of the squared distance between the grid point and the surrounding samples:
s=
N
X
si
d2
i=1 i
N
X
1
2
d
i=1 i
(5.1)
with:
s
N
di
si
5.6.8
Averaged value
number of samples within the polygon
distance between grid point and sample point i
value of sample point i
TEKAL block indicators
The next parameters (see Figure 5.33) can be specified to indicate which block of x, y and z
values must be read from a TEKAL type file.
Block Indicator, (4 Characters)
Multiplication Factor for z Values
5.6.9
default: dept
default: 1.0
Order caches
The parameters set in the Order caches window, see Figure 5.34, influence the drawing order
of the several items. The drawing order of the caches is: 5, 4, 3, 2, 1, 0. Cache 5 is drawn first
and cache 0 is drawn last. So the items which will drawn in cache 0 are drawn on top. If there
is no need the draw a cache it will not be done, this improves the drawing performance by
avoiding unnecessary drawing. So if an item is changed in cache 3 only caches 3, 2, 1 and 0
are drawn.
Rest
text
58
default: 0
default: 0
Deltares
Menu options
5.7
Polygons
Dredge and Dump
Dry Points, Thin Dams, Observation Points
Computational boundary
Second Depth
Active Grid
Active Depth
Samples
Land Boundary
Inactive Grids and Depths
Triangle Samples
default:
default:
default:
default:
default:
default:
default:
default:
default:
default:
default:
1
1
1
1
1
2
2
2
1
4
5
Help menu
On the Help menu, you may choose to read the user manual or the version number of
QUICKIN; see Figure 5.35
5.7.1
User manual
When clicking on the Help → User Manual the user manual of QUICKIN will be displayed (file
<QUICKIN _User_manual.pdf>).
5.7.2
About
When clicking on the Help → About a window will display the current version number of
QUICKIN.
Deltares
59
QUICKIN, User Manual
Figure 5.30: Opions on Settings → Colours menu
60
Deltares
Menu options
Figure 5.31: Opions on Settings → Sizes menu
Figure 5.32: Options on Averaging Options menu
Figure 5.33: Options on TEKAL Block Indicator window
Deltares
61
QUICKIN, User Manual
Figure 5.34: Options on Order Caches window
Figure 5.35: Opions on Help menu
62
Deltares
6 Tutorial
6.1
6.1.1
Interpolation
Open grid and land boundary
For details, see Sections 3.2 and 3.3
Start Delft3D and click Select working directory to enter the <tutorial\quickin\maracaibo>
directory.
Start QUICKIN.
For Lake Maracaibo we will exercise generating a bathymetry from samples for Delft3DFLOW.
On the File menu, select Attribute Files and click Open Land Boundary. . . .
Select and open the file <mar_01.ldb> that contains an outline of the land boundary.
On the File menu, select Import and click Grid (RGFGRID). . . ; open <mar_02.grd>
The land boundary and grid look like in Figure 6.1.
Figure 6.1: Land boundary and grid for Lake Maracaibo
In Delft3D-FLOW, the water level is defined in the centre of a grid cell that is surrounded by
four grid points. In the next steps, the model bathymetry at the grid points will be created by
interpolating the available depth samples.
6.1.2
Open samples
On the File menu, select Attribute Files and click Open Samples. . . .
Open the scattered samples file <mar_02.xyz>.
Note: that the sample density is high in the centre part and low in the lower part. In low
Deltares
63
QUICKIN, User Manual
sample density areas, triangulation is more suited, in high density areas, averaging is more
suited, see Figure 6.2.
Figure 6.2: Samples covering the Lake Maracaibo model area
6.1.3
Zoom in and out
To zoom in or out several facilities are available:
On the toolbar click
to zoom in or
to zoom out.
Press the + or - key while keeping the CTRL-key pressed.
Use the mouse scroll wheel.
To zoom in on a specific area
Click
on the toolbar and drag a box around the area.
To zoom out to full extent, click
on the toolbar.
To pane the grid: keep the CTRL-key pressed and move around with the cursor. Hereafter you
will interpolate the sample data onto the grid.
6.1.4
High and low sample density
Areas with a high sample density need an other interpolation method then areas with a low
sample density. In general grid cell averaging is used in areas with a high sample density,
and triangulation is used in areas with a low sample density. High sample density is obtained
where there are a few or more sample points in the direct neighbourhood of a grid point, low
density is obtained when there is in average less then 1 sample point in the direct neighbourhood.
64
Deltares
Tutorial
High sample density
The dense part is best interpolated by an averaging procedure, so that all samples within
the direct surroundings of a grid point (see Figure 6.3) are taken into account to get the best
volume for the grid cell.
Figure 6.3: Default relative search cell for grid cell averaging
The default relative search area is defined by the centres of the surrounding grid cells, and
the mids of the grid cell faces, see Figure 6.3. The minimum number of samples for grid cell
averaging is default 4. If there are less samples in the search area, no depth value is calculated. Moreover, if there are not enough samples available, the depth should be interpolated
by triangulation. The relative search area and minimum number of averaging points can be
changed in Settings → General.
Create a polygon by clicking
on the toolbar and next by clicking the left mouse around
the interpolation area, see Figure 6.4.
Click the right-mouse button to close the polygon and leave the polygon edit mode.
On the Operations menu, click Grid Cell Averaging to perform the averaging within the
previously defined polygon.
Figure 6.4: Grid cell averaging result within a pre-defined polygon
Low sample density
The sparse part is best interpolated by a triangulation method (Operations → Triangular Interpolation). For the moment hide the samples: View → Samples → No Samples. After a
grid cell averaging method and a triangulation most of the depth points did get a value, see
Figure 6.5.
Deltares
65
QUICKIN, User Manual
Figure 6.5: Interpolation results after applying grid cell averaging and triangulation
Remarks:
Only grid points inside the polygon are taken into account for the operation.
Only samples inside the polygon are taken into account for the operation.
If a grid point has already a depth value assigned, the operation will not overrule this
value.
If you do not use a polygon to define a limited area, all grid points and samples will be
part of the operation.
6.1.5
Points outside area of influence
The result of the previous section is shown in Figure 6.5. Note that grid points that are outside
the polygon are excluded from the operation.
As long as not every grid point has a depth value, you are not finished with generating a depth
file.
Points that were not interpolated yet
First remove the polygon.
On the Operations menu, select Delete and click Polygons, or click on the toolbar.
On the View menu, select Depth and click Yet to be Found to see which grid points still
have to be assigned a depth value.
Edit a new polygon as shown in Figure 6.6.
On the Operations menu, select Internal Diffusion to fill in these missing points within the
polygon area. After selecting View → Depth → Continuous Shade from the menubar you
obtain Figure 6.7.
66
Deltares
Tutorial
Figure 6.6: Display of Points Yet to be Found
Figure 6.7: Continuous shade display, all grid points inside the polygon have a depth
value
Deltares
67
QUICKIN, User Manual
6.2
Save depth
To save the depth values at the grid points
On the File menu, select Export and click Depth.
The file window Save Depth opens, see Figure 6.8.
Figure 6.8: Save Depth window to save the depth files
Enter <mar_01> and click Save to save the depth file.
6.3
Dredge and dump areas
Start QUICKIN in the <tutorial\quickin\dredge_and_dump> directory.
On the File menu, select Attribute Files and click Open Land Boundary. . . .
Select and open file <manukau.ldb> that contains an outline of the land boundary.
You can fill the land boundary polygon by selecting the menu option Settings → Colours and
set the appropriate colours for Land Boundary, Land Boundary Filled and select menu item
View → Land Boundary → Filled.
Now we will define some dredge and dump areas with polygons.
On the Edit menu, click Dredge and Dump Areas and New Area
Define the polygons like in Figure 6.9, finish a polygon by clicking the right mouse button.
68
Deltares
Tutorial
Figure 6.9: Location of dredge and dump areas
Renaming the default polygon names can be done by editing the properties of an area. Select
Edit → Dredge and Dump Areas → Edit Properties, click in an area and change the polygon
names as listed below.
Rename the polygon in the north-east of the harbour “dredge 1”
Rename the polygon in the east of the harbour “dredge 2”
Rename the polygon in the entrance of the harbour “dredge 3”
Rename the northerly polygon at sea “dump 1”
Rename the southerly polygon at sea “dump 2”
You will see that the the polygons are filled in and the names are shown at the mass-centre
of the polygon, see Figure 6.10.
Figure 6.10: Edit Dredge and Dump, with polygon names
Deltares
69
QUICKIN, User Manual
When finished point to Files → Delft3D-FLOW Attribute files → Save Dredge and Dump
Areas to save dredge and dump areas to the files <∗.pol> and <∗.dad>.
To define the links that connect dredge to dump areas, first press Edit → Dredge and Dump
Areas → New Link. Next, click inside a dredge polygon, followed by a click inside a dump
polygon.
Connect ‘dredge 1’ to ‘dump 1’.
Connect ‘dredge 2’ to ‘dump 1’.
Connect ‘dredge 3’ to ‘dump 2’.
The result is shown in Figure 6.11.
Figure 6.11: Dredge and Dump areas with their links
If you want to delete a link, first select Edit → Dredge and Dump Areas → Delete Link, and
next click the dredge depth field of the link to be deleted.
To edit the dredging properties, select the Edit → Dredge and Dump Areas → Edit Properties.
Now you can edit the properties of the dredge and dump area by clicking them and typing the
requested fields, see Figure 6.12.
Figure 6.12: Change the dredge and dump area properties
Set the dredge depth in the areas ‘dredge 1’ and ‘dredge 2’ to “10.0 m”, and in ‘dredge 3’
to “20.0 m”, see Figure 6.12.
70
Deltares
Tutorial
On the File menu, point to Delft3D-FLOW Attributes and click Save Dredge and Dump Areas, and save the dredge and dump characteristics to the files <option_1_characteristics.pol>
and <option_1_characteristics.dad>.
If you already have saved the polygons, ignore the save question. If not, save the polygons.
Exit QUICKIN.
6.4
Flooding animation
This functionality only applies for users of Delft1D2D.
Start QUICKIN in directory <tutorial\quickin\flooding_animation>.
On the File menu, select Import and click Open Grid and Depth (Arc) and open <atiel.aht>.
On the File menu, select Import and click Grid (Incremental) and open the incremental file
<tlt.inc>.
On the Settings menu, click Colour Map for Parameters. Join the Depth parameter to the
bathymetry (inverse) colour map and join the Flooding parameter to the jet colour map ,
see Figure 6.13.
Figure 6.13: Jooin parameter Flooding to colour map jet
Press the spacebar to start/stop the animation. See Figure 6.14 for a certain time in the
flooding animation.
Figure 6.14: Example of a flooding image
Deltares
71
QUICKIN, User Manual
Exit QUICKIN.
6.5
QUICKIN in the ArcMap environment
In this case you should be familiar with using co-ordinate systems in ArcMap.
ArcMap layers (e.g. shape files, SDE layers) most times have also information about the coordinate system (spatial reference). If not available, ArcMap marks this as unknown. On the
other hand, if it is known to you, spatial reference can be added to these layers by the program
ArcCatalog.
If the layers in ArcMap have a projected co-ordinate system or probably an unknown coordinate system, then you can use Cartesian in QUICKIN. It is your responsibility the coordinates have the unit metres. You can see the used (projected) co-ordinate system of the
layers and of the data frame via the properties of the data frame. For QUICKIN the coordinate system of the data frame is leading. As you know, ArcMap has possibilities to set the
co-ordinate system of the data frame, while layers have different co-ordinate systems.
If you want to use spherical co-ordinates in QUICKIN while using ArcMap, the co-ordinate
system of the data frame must be WGS84 (in ArcMap it has the name CGS_WGS_1984).
This will be the case when all layers have this co-ordinate system.
If you are familiar with ArcMap you can have one or more layers with different co-ordinate
systems and select (import) the WGS84 system for the data frame. Figure 6.15 shows the
properties window of de data frame, <custom> give the co-ordinate system of the data frame.
Figure 6.15: ARC-GIS data frame properties form
You start loading layers or an <∗.mxd> file in ArcMap. The co-ordinate system of the data
frame must be as described above. You will see that ArcMap displays the values of longitude
and latitude as plane co-ordinates in degrees.
72
Deltares
Tutorial
Then you can start using the commands and functions of QUICKIN. The program has a menu
item to change into projected co-ordinates. When using this command, the layers in ArcMap
are displayed as projected and also the grid, polygons, samples of the program.
When using the menu item View → Spherical Co-ordinates → Plane Co-ordinates, both the
layers in ArcMap and the objects of QUICKIN are displayed as plane co-ordinates.
Centring the screen in stereographic mode
In the standalone version of QUICKIN, the visualisation using the stereographic projection
method always uses the centre of the screen as the point where the screen touches the
sphere. This is more difficult to realise when working within the GIS environment because
screen handling now is governed by the GIS system. Therefore a special function has been
implemented to perform this task of centring the computer screen. This function can be invoked by clicking the menu item Operations → Change Centre of Projection, see Figure 6.16.
When using this command the centre of the projection is set to the centre of the screen. This
action needs recalculation of the projection and a new screen refresh. By using this command
you are aware of changing the screen. When using zoom in, zoom out, pan, the centre of the
projection does not change. So there is more performance and a smooth screen-refresh in
this case.
Deltares
73
QUICKIN, User Manual
Figure 6.16: Options on the Operations menu
74
Deltares
References
Delft1D2D, 2002. Delft1D2D User Manual. Deltares, 0.00 ed. 1, 5
Delft3D-FLOW, 2013. Delft3D-FLOW User Manual. Deltares, 3.14 ed. 1, 25, 41
GPP, 2013. Delft3D-GPP User Manual. Deltares, 2.14 ed. 24
QUICKPLOT, 2013. Delft3D-QUICKPLOT User Manual. Deltares, 2.14 ed. 24
RGFGRID, 2013. Delft3D-RGFGRID User Manual. Deltares, 4.00 ed. 1
SWAN, 2000. SWAN Cycle III version 40.11 User Manual (not the short version). Delft
University of Technology, Delft, The Netherlands, 0.00 ed. 5
Deltares
75
QUICKIN, User Manual
76
Deltares
A Files of QUICKIN
In the following sections we describe the attribute files used in QUICKIN.
For each file which can handled by QUICKIN we give the following information:
File contents.
Filetype (free formatted, fix formatted or unformatted).
Filename and extension.
Generated by (i. e. how to generate the file).
Restrictions on the file contents.
Example(s).
Remarks:
The access mode of all attribute files is sequential.
In the examples the file content is printed in font Courier and comment (not included in
the file) between curly brackets font, unless explicitly stated differently.
A.1
Delft3D project file
File contents
Filetype
File format
Filename
Generated
Domain input for a model.
ASCII
Free formatted.
<name.d3d>
RGFGRID, QUICKIN, D-Waq DIDO, or manually offline
Record description:
A header block containing general information and then for each domain a detailed description.
Deltares
77
QUICKIN , User Manual
Keyword
Description
FileInformation
FileCreatedBy
Version string of the program who generated this file the first time
FileCreationDate
Creation date and time
FileVersion
Version number of <∗.d3d> file
Geometry
LandBoundaryName
Name of the file with the land boundaries
LandBoundaryFormat
Format of the land boundary file, possible values are: TEKAL,
NETCDF or SHAPEFILE. The NetCDF file is according the ’World
Vector Shoreline’ format
DDBound
FileDDBound
Name of the file with the domain decomposition boundaries
For each grid
Keyword
Description
Grid
Type
Format of the grid file, possible values are: RGF, RGF_NETCDF,
DFLOW_FM, TELEMAC
FileName
Name of grid file with the geographical co-ordinates
FlowDepth
Name of the file containing the depth values at the cell corners of
the grid
Aggregation
Name of the aggregation file
Restriction:
The maximum record length in the file is 132.
Example:
The model friesian_tidal_inlet contains three different subdomains (f01, f02, f03) and the
project file has the name <friesian_tidal_inlet.d3d.>
[FileInformation]
FileGeneratedBy = Deltares, Delft3D-DIDO Version 4.04.00.11836M, Jun 21 2010, 12:09:34
FileCreationDate = 2010-06-21, 13:35:22
FileVersion
= 0.03
[DDBound]
FileDDBound = f34-123.ddb
78
Deltares
Files of QUICKIN
[Grid]
Type
FileName
Aggregation
Monitoring Areas
[Grid]
Type
FileName
Aggregation
Monitoring Areas
[Grid]
Type
FileName
Aggregation
Monitoring Areas
A.2
=
=
=
=
RGF
f01.grd
f34_dd-f01.dwq
f34_dd-f01.dmo
=
=
=
=
RGF
f02.grd
f34_dd-f02.dwq
f34_dd-f02.dmo
=
=
=
=
RGF
f03.grd
f34_dd-f03.dwq
f34_dd-f03.dmo
Land boundary file
File contents
Filetype
File format
Filename
Generated
The co-ordinates of one or more polylines. Each polyline (piecewise
linear) is written in a single block of data.
ASCII
Free formatted
<name.ldb>
RGFGRID, QUICKIN, etc
Record description:
Record
Record description
Preceding description records, starting with an asterisk (∗), and will
be ignored.
1
A non blank character string, starting in column one
2
Two integers representing the numbers of rows and number of
columns for this block of data
Two reals representing the x, y or λ, φ-co-ordinate
Example:
*
* Polyline L007
*
L007
6 2
132400.0
132345.0
132165.0
131940.0
131820.0
131585.0
*
* Polyline L008
*
L008
Deltares
549045.0
549030.0
549285.0
549550.0
549670.0
549520.0
79
QUICKIN, User Manual
4
2
131595.0
131750.0
131595.0
131415.0
*
* Polyline L009
*
L009
6 2
131595.0
148975.0
150000.0
152105.0
153150.0
154565.0
549685.0
549865.0
550025.0
550175.0
549655.0
564595.0
564935.0
565500.0
566375.0
567735.0
Remark:
In case this file is read as a polygon file then the polylines are closed by QUICKIN to
get a polygon.
A.3
Sample file
File contents
Filetype
File format
Filename
Generated
The location and value of samples.
ASCII
Free formatted
<name.xyz>
Manually or Offline with QUICKIN and data from digitised charts or
GIS-database.
Record description:
Filetype
Record description
Free formatted
Location and sample value per row
Two reals representing the x, y or λ, φ-coordinate and one real representing the sample value
Example:
Sample file with 12 sample values with their location (free formatted file).
213813.2
214686.0
214891.7
210330.8
211798.0
212460.0
212436.9
185535.4
186353.0
187959.2
190193.0
208578.7
80
603732.1
607226.1
610751.2
601424.1
604444.8
607475.7
610362.5
606607.9
603789.4
601197.6
599101.5
602513.7
-4.053000
-4.522000
-5.000000
-2.169000
-2.499000
-2.760000
-2.865000
1.360000
1.122000
0.9050000
0.7050000
-0.7990000
Deltares
Files of QUICKIN
A.4
Polygon file
File contents
Filetype
File format
Filename
Generated
The co-ordinates of one or more polygons. Each polygon is written
in a single block of data
ASCII
Free formatted
<name.pol>
RGFGRID, QUICKIN, D-Waq DIDO, etc
Record description:
The file may contain one or more polygons. For every polygon the file should contain a line
indicating the name of the polygon, followed by a line indicating the number of points making
up the polygon and the number of coordinates, i.e. 2, finally followed by the coordinate data.
Record
Record description
Preceding description records, starting with an asterisk (∗), and will
be ignored.
1
A non blank character string, starting in column one
2
Two integers representing the numbers of rows and number of
columns for this block of data
Two reals representing the x, y or λ, φ-coordinate
Restriction:
The first record and the last record in the block should be the same
Example:
*
* Deltares, Delft3D-DIDO Version 3.39.01.4423:4459, Sep 25 2008, 20:10:54
* 2008-09-25, 22:11:08
*
Observation Area 001
5
2
1.8768018E+05 6.1708738E+05
1.8996981E+05 6.1001035E+05
1.9746314E+05 6.1266423E+05
1.9480925E+05 6.1838830E+05
1.8768018E+05 6.1708738E+05
Observation Area 002
5
2
2.0011703E+05 6.1818015E+05
1.9819166E+05 6.1063479E+05
2.0568498E+05 6.0870942E+05
2.0797461E+05 6.1599460E+05
2.0011703E+05 6.1818015E+05
Observation Area 003
5
2
1.9340425E+05 6.1396516E+05
2.0183425E+05 6.1365294E+05
1.9944054E+05 6.0558720E+05
1.9522555E+05 6.0595146E+05
Deltares
81
QUICKIN , User Manual
1.9340425E+05
A.5
6.1396516E+05
Orthogonal curvilinear grid file
File contents
The co-ordinates of the orthogonal curvilinear grid at the depth points.
Filetype
ASCII
File format
Free formatted
Filename
<name.grd>
Generated
RGFGRID
Record description:
Record
Record description
Preceding description records, starting with an asterisk (∗), will be
ignored.
1
Record
with
Spherical
Co-ordinate System = Cartesian
or
value
2
The number of grid points in m- and n-direction (2 integers).
3
Three real values (not used).
4 to K+3
A label and record number, the x-component of the world coordinates of all points in m-direction, starting with row 1 to row nmax,
with as many continuation records as required by mmax and the
number of co-ordinates per record. The label and record number are
suppressed on the continuation lines. This set of records is repeated
for each row until n = nmax.
K+4 to 2K+3
A similar set of records for the y -component of the world coordinates.
K is the number of records to specify for all grid points a set of x- or y -co-ordinates.
Restrictions:
The grid must be orthogonal.
Input items in a record are separated by one or more blanks.
Example:
*
* Deltares, Delft3D-RGFGRID Version 4.16.01.4531, Sep 30 2008,
* File creation date: 2008-10-01, 23:19:22
*
Coordinate System = Cartesian
9
7
0 0 0
Eta=
1
0.00000000000000000E+00
1.00000000000000000E+02
5.00000000000000000E+02
6.00000000000000000E+02
Eta=
2
0.00000000000000000E+00
1.00000000000000000E+02
5.00000000000000000E+02
6.00000000000000000E+02
82
23:32:27
2.000000...
7.000000...
2.000000...
7.000000...
Deltares
Files of QUICKIN
A.6
Eta=
3
Eta=
4
Eta=
5
Eta=
6
Eta=
7
Eta=
1
Eta=
2
Eta=
3
Eta=
4
Eta=
5
Eta=
6
Eta=
7
0.00000000000000000E+00
5.00000000000000000E+02
0.00000000000000000E+00
5.00000000000000000E+02
0.00000000000000000E+00
5.00000000000000000E+02
0.00000000000000000E+00
5.00000000000000000E+02
0.00000000000000000E+00
5.00000000000000000E+02
1.00000000000000000E+02
1.00000000000000000E+02
2.00000000000000000E+02
2.00000000000000000E+02
3.00000000000000000E+02
3.00000000000000000E+02
4.00000000000000000E+02
4.00000000000000000E+02
5.00000000000000000E+02
5.00000000000000000E+02
6.00000000000000000E+02
6.00000000000000000E+02
7.00000000000000000E+02
7.00000000000000000E+02
Bathymetry file
File contents
Filetype
File format
Filename
Generated
1.00000000000000000E+02
6.00000000000000000E+02
1.00000000000000000E+02
6.00000000000000000E+02
1.00000000000000000E+02
6.00000000000000000E+02
1.00000000000000000E+02
6.00000000000000000E+02
1.00000000000000000E+02
6.00000000000000000E+02
1.00000000000000000E+02
1.00000000000000000E+02
2.00000000000000000E+02
2.00000000000000000E+02
3.00000000000000000E+02
3.00000000000000000E+02
4.00000000000000000E+02
4.00000000000000000E+02
5.00000000000000000E+02
5.00000000000000000E+02
6.00000000000000000E+02
6.00000000000000000E+02
7.00000000000000000E+02
7.00000000000000000E+02
2.000000...
7.000000...
2.000000...
7.000000...
2.000000...
7.000000...
2.000000...
7.000000...
2.000000...
7.000000...
1.000000...
1.000000...
2.000000...
2.000000...
3.000000...
3.000000...
4.000000...
4.000000...
5.000000...
5.000000...
6.000000...
6.000000...
7.000000...
7.000000...
The bathymetry in the model area, represented by depth values (in
metres) for all grid points.
ASCII
Free formatted or unformatted
<name.dep>
FLOW-GUI (only for uniform depth values).
Offline with QUICKIN and data from digitised charts or GIS-database.
Record description:
Filetype
Record description
Free formatted
Depth values per row, starting at N = 1 to N = Nmax, separated
by one or more blanks. The number of continuation lines is determined by the number of grid points per row (Mmax) and the maximum record size of 132.
Unformatted
Mmax depth values per row for N = 1 to N = Nmax.
Restrictions:
The file contains one M and N line more than the grid dimension.
The maximum record length in the free formatted file is 132.
Depth values from the file will not be checked against their domain.
The input items are separated by one or more blanks (free formatted file only).
The default missing value is: −999.0
Example:
Deltares
83
QUICKIN, User Manual
File containing 16 ∗ 8 data values for a model area with 15 ∗ 7 grid points (free formatted file).
1.0
2.0
3.0
4.0
-5.0 -5.0
-5.0
8.0
9.0 10.0
11.0
12.0
13.0
14.0
-5.0 -999.0
3.0
4.0
5.0
6.0
7.0 -6.0
-6.0 10.0
11.0 12.0
13.0
14.0
15.0
16.0
17.0 -999.0
5.0
6.0
7.0
8.0
9.0 10.0
-7.0 12.0
13.0 14.0
15.0
16.0
17.0
18.0
19.0 -999.0
7.0
8.0
9.0 10.0
11.0 12.0
13.0 14.0
15.0 16.0
17.0
18.0
19.0
-7.0
19.0 -999.0
9.0
10.0
11.0
12.0
13.0
14.0 15.0
16.0 17.0
18.0 19.0
20.0
19.0
18.0
17.0 -999.0
-7.0
12.0
13.0
14.0
15.0
16.0
17.0
18.0
19.0
20.0 19.0
18.0
17.0
16.0
15.0 -999.0
-8.0
-8.0
15.0
16.0
17.0
18.0
19.0
20.0
19.0
18.0 17.0
16.0
15.0
14.0
13.0 -999.0
-999.0 -999.0 -999.0 -999.0 -999.0 -999.0 -999.0 -999.0 -999.0 -999.0 -999.0
-999.0 -999.0 -999.0 -999.0 -999.0
A.7
Grid and depth file
File contents
Filetype
File format
Filename
Generated
The rectilinear grid and bathymetry at cell centres in the model area,
represented by depth values (in metres) for all grid cells.
ASCII
Free formatted
<name.asc>
Extern program
Header description for the Arc-files:
Keywords
Value
Description
ncols
nrows
xllcorner
yllcorner
xllcenter
yllcenter
cellsize
nodata_value
free
free
free
free
free
free
free
free
number of columns used for datafield
number of rows used for datafield
x-co-ordinate of lower left corner of lower left grid cell
y -co-ordinate of lower left corner of lower left grid cell
x-co-ordinate of centre of lower left grid cell
y -co-ordinate of centre of lower left grid cell
gridsize in x-direction and y -direction
value used for input that is to be neglected
Record description:
Filetype
Record description
Free formatted
Ncols values per row, starting at N = 1 to N = N cols, separated
by one or more blanks. The number of continuation lines is equal to
nrows, starting from N = N rows to N = 1.
84
Deltares
Files of QUICKIN
Figure A.1: Example 1, lower left corner is located at (100, 0)
Examples
Two examples are given, one example defining the lower left co-ordinate of the grid and one
defining the lower left corner at the data point. Both examples has a data file containing 16 ∗ 8
data values. The first example has its first data value located at (x, y) = (125, 25) and grid
corner at (x, y) = (100, 0) (see Figure A.1), and the second example has its first data value
located at (x, y) = (100, 0) and grid corner at (x, y) = (75, −25) (see Figure A.2)
Example 1:
ncols
nrows
xllcorner
yllcorner
cellsize
nodata_value
1.0
2.0
2.0
4.0
3.0
6.0
4.0
8.0
5.0 10.0
6.0 12.0
7.0 -8.0
8.0 -8.0
16
8
100
0
50
-9999
3.0
5.0
7.0
9.0
11.0
13.0
15.0
15.0
4.0
6.0
8.0
10.0
12.0
14.0
16.0
16.0
5.0
7.0
9.0
11.0
13.0
15.0
17.0
17.0
6.0
-6.0
10.0
12.0
14.0
16.0
18.0
18.0
7.0
-6.0
-9999
-9999
15.0
17.0
19.0
19.0
8.0
10.0
-9999
-9999
16.0
18.0
20.0
20.0
9.0
11.0
13.0
15.0
17.0
19.0
19.0
19.0
10.0
12.0
14.0
16.0
18.0
20.0
18.0
18.0
11.0
13.0
15.0
17.0
19.0
19.0
17.0
17.0
12.0
14.0
16.0
18.0
20.0
18.0
16.0
16.0
13.0
15.0
17.0
19.0
19.0
17.0
15.0
15.0
14.0
16.0
18.0
-7.0
18.0
16.0
14.0
14.0
15.0
17.0
19.0
19.0
17.0
15.0
13.0
13.0
16.0
17.0
19.0
19.0
17.0
15.0
13.0
13.0
Example 2:
ncols
nrows
xllcenter
yllcenter
cellsize
nodata_value
1.0
2.0
2.0
4.0
3.0
6.0
4.0
8.0
5.0 10.0
6.0 12.0
7.0 -8.0
8.0 -8.0
Deltares
85
QUICKIN, User Manual
Figure A.2: Example 2, lower left corner is located at (75, −25)
A.8
Open boundary file
File contents
Filetype
File format
Filename
Generated
The location and description of open boundaries.
ASCII
Fix formatted for text variables; free formatted for real and integer
values.
<name.bnd>
FLOW-GUI
Record description:
Record
Record description
each record
Name of the open boundary section (20 characters).
Type of boundary (1 character).
Z
C
N
Q
T
R
water level
current
Neumann
discharge per grid cell
total discharge for boundary section
Riemann
Type of data (1 character).
A
H
Q
T
astronomic
harmonic
QH tables (only for water level boundaries)
time-series
Grid indices of the begin and end point of the boundary section (4
integers).
Reflection coefficient (1 real), not for Neumann or Riemann.
86
Deltares
Files of QUICKIN
Record
Record description
Vertical profile (three strings); only for 3D simulations and velocity
type boundaries (C, Q, T and R).
Uniform
Logarithmic
3D profile
Two labels (each 12 characters, no blanks in the label name) referencing to the blocks in the amplitude and phase file <∗.bca>; only if
the type of data is A.
Restrictions:
Maximum record length in the free formatted file is 132.
The boundary section name must start at position one in a record.
The value of the reflection coefficient will not be checked on its domain.
All input items in a record must be separated by one or more blanks.
Astronomic and harmonic forced boundaries must be specified before QH-relation forced
boundaries, which in turn should be specified before time-series forced boundaries.
Astronomic and harmonic forced boundaries cannot be combined.
Example:
Two boundary sections with data type A(stronomic) and one with type T(ime series).
Paradise Bay 1
Paradise Bay 2
Sea Entrance
Q A
C A
Z T
1
16
4
1
3
8
1
16
14
5 0.0 Uniform
Paradise_1A Paradisee_lB
6 0.0 Logarithmic Paradise_2A Paradisee_2B
8 0.0
Remarks:
A label may not contain blanks between non-blank characters.
For the labels 12 characters are read. Be sure the second label starts at least 13
positions after the start of the first.
A.9
Dry points file
File contents
Filetype
File format
Filename
Generated
Index location of (permanently) dry points.
ASCII
Free formatted
<name.dry>
QUICKIN or FLOW-GUI
Record description:
Record
Record description
each record
The grid indices of the begin and end point of a dry section (4
integers).
Restrictions:
Deltares
87
QUICKIN, User Manual
Figure A.3: Dry points in model area
The angle of a line of dry points and the horizontal numerical grid axis can be an integer
multiple of 45 degrees.
Dry points may not be defined along the model boundaries (which by default lie along
the lines M = 1, N = 1, M = Mmax or N = Nmax). Therefore, the indices of these points
must lie between M = 2 and Mmax-1 and N = 2 and Nmax-1, respectively.
The input items are separated by one or more blanks.
The most lower-left dry point has indices (2, 2).
Example:
Five sets of dry points in a model area of 19 ∗ 8 grid points, see Figure A.3.
5
8
13
13
14
A.10
3
4
3
4
6
5
10
14
14
14
6
6
3
4
6
Thin dams file
File contents
Filetype
File format
Filename
Generated
Location and type of thin dams.
ASCII
Free formatted
<name.thd>
QUICKIN or FLOW-GUI
Record description:
Record
Record description
each record
The grid indices of the begin and end point of a line of thin dams (4
integers). A character indicating the type of thin dams (U or V).
88
Deltares
Files of QUICKIN
Figure A.4: Example of thin dams in a model area
Restrictions:
The angle of the line segment and the horizontal numerical grid axis may be an integer
multiple of 45 degrees.
Thin dams can not be defined along the model boundaries (which by default lie along
the lines M = 1, N = 1, M = Mmax or N = Nmax). Therefore, the indices of thin dams
must lie between M = 2 and Mmax-1 and N = 2 and Nmax-1 respectively.
Input items are separated by one or more blanks.
The direction of the dam is perpendicular to the velocity direction over which the dams
are superimposed!
Example:
Three (sets of) thin dams in model area of 19 ∗ 8 grid points, see Figure A.4.
6
7
12
A.11
2 6
4 10
3 12
4 V
7 U
7 U
Observation points file
File contents
Description of observation points characterised by their name and
grid indices.
Filetype
ASCII
File format
Fix formatted for text variables, free formatted for integer values.
Filename
<name.obs>
Generated
FLOW-GUI or manually offline
Record description:
Record
Record description
each record
Name of observation point (20 characters),
Location of the observation point in grid indices (2 integers).
Deltares
89
QUICKIN , User Manual
Restrictions:
One record per observation point.
The name of the observation point must start in position one.
The maximum record length is 132.
Input items in a record must be separated by one or more blanks.
Example:
File containing 5 observation points:
Paradise Bay 1
Paradise Bay 2
Sea Entrance
Port Arthur
Deep Channel
A.12
Annotation file
File contents
Filetype
File format
Filename
Generated
10 11
11 11
4
8
18 85
22 44
File with x and y co-ordinates, string and rgb-colour.
ASCII
Free formatted.
<name.txt>
manually offline
Record description:
Record
Record Description
1
Records starting with a ∗ are comment lines
Character string to define the datablock (nonblank)
2
Number of rows
3–N
real, real, string, integer:
geographical co-ordinates (2 reals),
text between quotes which need to be plotted (string) and
rgb-colour (integer; = 256 ∗ 256 ∗ r + 256 ∗ g + b)
Restriction:
The maximum record length in the file is 132.
Example:
*
BL01
8 4
10.0
10.0
20.0
20.0
30.0
30.0
90
10.0
20.0
10.0
20.0
10.0
20.0
'string-01' 6553625
'string-02' 9830425
'string-03' 13120000
'string-04' 16724480
'string-05'
38425
'string-06'
65305
Deltares
Files of QUICKIN
40.0
40.0
A.13
10.0
20.0
'string-07'
'string-08'
DD Boundary file
File contents
Filetype
File format
Filename
Generated
255
0
Domain decomposition boundaries connecting two grids for the prescribed indices.
ASCII
Fix formatted.
<name.ddb>
RGFGRID, or manually offline
Record description:
Record
Record Description
N
Name of the first grid, followed by four integers indicating the gridline
on which the boundary lies, followed by the name of the second grid
and four integers indicating the gridline on which the boundary lies.
Restrictions:
No space allowed in grid filename.
The maximum record length in the file is 132.
Example:
In the following example 4 sub-domains exist. Domain d01_ns is coupled to oa1_ns, ob1_ns
and oc1_ns. Furthermore oa1_ns is coupled to ob1_ns, and ob1_ns to oc1_ns.
d01_ns.grd
d01_ns.grd
d01_ns.grd
ob1_ns.grd
ob1_ns.grd
A.14
Colour scheme file
File contents
Filetype
File format
Filename
Generated
5
245
245
1
17
16
5
1
5
52 245
4
1
4
17
1
1
1
21
21
oa1_ns.grd
ob1_ns.grd
oc1_ns.grd
oa1_ns.grd
oc1_ns.grd
28
17
1
28
1
35
21
44
3
10
28
1
1
28
1
20
21
27
20
27
The colour scheme
ASCII
Free formatted
<name.clr> or <name.clrmap>
manually
Record description:
Deltares
91
QUICKIN, User Manual
Record
Record description
1
COLORMAP
2
NAME=name
3
SPACE=RGB, RGB is the only allowed space for this program
4–N
one real and three integers.
The first column represent the relative distribution of the defined colours in column 2–4 (representing the RGB values).
Example:
COLORMAP
NAME=copper
SPACE=RGB
0.0000 0
0
0
0.8000 255 159 101
1.0000 255 199 127
A.15
Settings file
File contents
Filetype
File format
Filename
Generated
Settings of the program
ASCII
Fix formatted
<name.ini>
By the program
Record description:
92
Deltares
Files of QUICKIN
Record
Record description
FileInformation
FileCreatedBy
FileCreationDate
FileVersion
QUICKIN version number
creation date and time
version number of <∗.ini> file
QNParameter
name
integer value
TextSettings
name
value (integer or real)
QNsettings
name
value (integer or real)
Colours
name
RGB value (3 integers)
line width
dots sizes
Example:
[FileInformation]
FileGeneratedBy = Deltares, Delft3D-QUICKIN Version 4.20.00.11763:11790M, Jun 16 2010, 14:26:47
FileCreationDate = 2010-06-16, 14:27:41
FileVersion
= 0.02
[RGFSettings]
MGridCells
= 50
NGridCells
= 50
DeltaX
=
1.00000000000000000E+02
DeltaY
=
1.00000000000000000E+02
OriginX
=
0.00000000000000000E+00
OriginY
=
1.00000000000000000E+02
RotationLeft
= 0.00000000000000000E+00
RadiusCurvatureM
=
0.00000000000000000E+00
MFraction
= 1.00000000000000000E+00
MaximumSizeUniformMSize
=
1.00000000000000000E+00
NFraction
= 1.00000000000000000E+00
MaximumSizeUniformNSize
=
1.00000000000000000E+00
[QNParameter]
AutoscaleLegend
=
1
XCoorLegend
= 16
YCoorLegend
= 20
[TextSettings]
Line1
=
Line2
=
Line3
=
Fontsize
=
3.00000000000000000E+00
Xposition
= 0.00000000000000000E+00
Yposition
= 0.00000000000000000E+00
Deltares
93
QUICKIN , User Manual
FontsizeTimeDate
XposTimeDate
YposTimeDate
[QNSettings]
StayOnStartupDirectory
NrDiffusionStep
NrSmoothingSteps
SmoothingFactor
DtCFLNumber
ReferenceLevelZref
SearchCellSizeAveraging
MinAveragingPoints
DtIncrementalImages
ParameterPlotIncremental
NrSamplePerSegment
FixedDistanceSamplePoints
PositionSamples
DisplaySlopeCriterion
DisplayAsNumber
DisplayCriterionCheck
ValueSlopeCheckCriterion
WavePeriod
DepthOffset
ChannelWidthBegin
ChannelDepthBegin
ChannelWidthEnd
ChannelDepthEnd
NrPointsAcrossChannel
MinDepth
RemoveAddSamples
[Colours]
ColourBackground
LegendColourBackground
lineColourText
lineColourLandBoundary
fillColourLandBoundary
lineColourPolygon
fillColourPolygon
lineColourActiveGrid
lineColourActiveCmpBnd
lineColourGrid
lineColourCmpBnd
DryPoints
ThinDams
ObservationPoints
DredgeAndDumpArea
DredgeAndDumpLink
[Width]
lineWidthLandBoundary
lineWidthPolygon
DotSizeSamples
lineWidthActiveGrid
lineWidthActiveCmpBnd
lineWidthGrid
lineWidthCmpBnd
lineWidthThinDams
DredgeAndDump
[Caches]
rest
text
polygons
dad
94
=
=
=
3.00000000000000000E+00
5.00000000000000000E+01
5.00000000000000000E+00
= 0
= 100
= 10
=
5.00000000000000000E-01
= 6.00000000000000000E+01
=
0.00000000000000000E+00
=
1.10000000000000009E+00
=
4
= 1.00000000000000000E+00
=
1
=
9
=
0.00000000000000000E+00
=
0
= 0
=
1
= 0
=
1.00000000000000006E-01
= 6.00000000000000000E+00
= 0.00000000000000000E+00
=
1.00000000000000000E+02
=
1.00000000000000000E+01
=
1.00000000000000000E+02
=
1.00000000000000000E+01
= 5
=
1.00000000000000000E+01
=
0
=
=
=
=
=
=
=
=
=
=
=
=
=
=
=
=
255
255
005
132
255
170
170
000
005
192
050
203
203
227
255
255
=
=
=
=
=
=
=
=
=
1
1
7
1
1
1
1
3
3
=
=
=
=
0
0
0
1
255
255
005
066
182
000
000
000
005
192
050
203
203
227
255
000
210
255
005
000
108
127
127
255
005
192
050
000
000
000
000
000
Deltares
Files of QUICKIN
drythdobs
cmpbound
secdepth
actgrid
actdepth
samples
landboundary
inactgrid
trisample
Deltares
=
=
=
=
=
=
=
=
=
1
1
2
2
3
3
1
4
5
95
QUICKIN, User Manual
96
Deltares
PO Box 177
2600 MH Delft
Rotterdamseweg 185
2629 HD Delft
The Netherlands
+31 (0)88 335 81 88
[email protected]
www.deltaressystems.nl