1
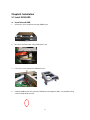
4CH MPEG4 Standalone DVR
ADR-7104
User Manual
Version 1.0
Copyright © 2008 2SAN INC.
Release: May 2008
Copyright and Trademark
The information of the product in this quick guide is subject to change without prior notice and does
not represent a commitment on the part of vendor, who assumes no liability or responsibility for any
errors that may appear in this quick guide.
2SAN is the trademark of 2SAN Inc. Windows is the trademark of Microsoft Corporation. All brands
and trademarks are the properties of their respective owners.
This quick guide contains materials protected under International Copyright Laws. All rights
reserved. No part of this quick guide may be reproduced, transmitted or transcribed without the
written consent of the manufacturer.
2
WEEE Statement
English
In order to cope with the increasing waste electrical and electronic equipment, reduce the use of landfill and
incinerator, and prevent the harmful matter of waste equipment from entering the environment, the European
Union (EU) has set the Directive on Waste Electrical and Electronic Equipment (WEEE) asking manufacturers
to collect, recycle and treat waste electrical and electronic equipment properly. Member nations already
established their free of charge recycle systems of WEEE before August 13, 2005. Accordingly, 2SAN has to
be responsible for recycling all products exported to Germany. You can return your 2SAN product that needs
recycling to a local collector.
WEEE Erklärung
German
Mit dem Ziel die steigende Menge elektrischer und elektronischer Altgeräte zu bewältigen ohne hierzu unnötig
Mülldeponien und Verbrennungsanlagen zu belasten und um die Verschmutzung der Umwelt durch
freiwerdende Stoffe aus den Altgeräten zu vermeiden, hat die Europäische Union (EU) die Richtlinie über
Elektro- und Elektronik-Altgeräte erlassen. Die Richtlinie verpflichtet Hersteller, elektrische und elektronische
Altgeräte umweltgerecht einzusammeln, zu recyceln und zu entsorgen. Die Mitgliedsstaaten der EU haben
bereits ihre kostenfreien Recyclesysteme konform der WEEE vor dem 13. August 2005 eingerichtet.
Entsprechend der Richtlinie ist 2SAN verantwortlich für die umweltgerechte Entsorgung aller nach
Deutschland exportierten 2SAN Produkte. Sie können Ihr zu entsorgendes 2SAN Produkt zu Ihrer örtlichen
Sammelstelle bringen.
AEEA verklaring
Dutch
Met het doel de stijgende hoeveelheid afgedankte elektrische en elektronische apparatuur te beheersen
zonder hiervoor onnodig stortplaatsen en verbrandingsovens te belasten en om de vervuiling van het milieu
door vrijkomende stoffen uit de afgedankte apparatuur te voorkomen, heeft de Europese Unie (EU) de richtlijn
betreffende afgedankte elektrische en elektronische apparatuur besloten. Deze richtlijn verplicht fabrikanten
afgedankte elektrische en elektronische apparatuur in te zamelen, te recyclen en te verwijderen. De lidstaten
van de EU hebben reeds de kosteloze recyclesystemen volgens de AEEA vóór de 13 augustus 2005 ingericht.
Conform de richtlijn is 2SAN verantwoordelijk voor de verwijdering van alle naar Nederland geëxporteerde
2SAN producten. U kunt uw afgedankt 2SAN product naar uw locale inzamelplaats brengen.
Elektrik ve Elektronik Madde Atıkları Demeci
Turkish
Elektrik ve electronik madde atıklarının yukselmesiyle basedebilmek ,arazi doldurma ve cop yakma fırını
kullanımını
azaltmak,atık
madde
zararlarının
cevreye
3
yayılmasını
onlemek
icin
Avrupa
Birligi
(AB),ureticilerden elektrik ve elektronik madde atıklarını gerektigi gibi toplamalarını,geri donusturmelerini ve
kimyasal isleme tabi tutmalarını talep etmek icin Elektrik ve Elektronik Madde Atıkları uzerine bir direktif
hazırladı.Topluluk uyeleri,13 Agustos 2005' ten once elektrik ve elektronik madde atıklarının ucretsiz geri
donusum sistemlerini coktan olusturmuslardı.Bundan dolayı, 2SAN, Almanya'ya ihrac ettigi butun urunlerin
geri donusumunden sorumludur. 2SAN urunleri geri donusum gerektirirse yerel toplayıcılara geri
verebilirsiniz.
WEEE бюлетень
Russian
Чтобы справиться с увеличивающимся ненужным электрическим и электронным
оборудованием, уменьшите использование закапывания мусора и использования установки
для сжигания отходов, препятствуйте вредному выбросам загрязнять окружающую среду,
Европейский союз (ЕС)установил Директиву по
Электронному Оборудованию (WEEE) для того,
Ненужному Электрическому и
чтобы изготовителей собрали,
перерабатывали и вообще проявили внимание к ненужному электрическому и электронному
оборудованию должным образом. Члены нации установили бесплатную систему переработки
WEEE до 13 августа 2005. Соответственно, 2SAN обязан быть ответственным за то, что
переработал все продукты, экспортируемые в Германию. Вы можете возвратить ваш продукт
2SAN, который нуждается в рециркуляции местному сборщику.
WEEE Statement
French
Afin de gérer la quantité croissante de déchets électriques et électroniques, de réduire l’utilisation des
décharges et des incinérateurs et d’éviter que des déchets nocifs ne polluent l’environnement, l’Union
Européenne a publié la directive WEEE sur les déchets électriques et électroniques. Celle-ci spécifie que les
fabricants doivent collecter, recycler et traiter l’équipement électronique et électrique usagé. Depuis le 13 août
2005, les pays membres ont mis en place un système de recyclage gratuit selon le WEEE.
De ce fait, 2SAN est responsable du recyclage de tous les produits exportés vers l’Allemagne. Vous pouvez
mettre au rebut votre équipement 2SAN usagé dans votre centre local de recyclage.
Pour plus d’informations sur les lieux de mise au rebut des équipements usagés destinés au recyclage,
veuillez contacter votre mairie, votre service de traitement des déchets ménagers ou le magasin où vous avez
acheté le produit.
RAEE
Spanish
Con la finalidad de reducir el incremento de residuos eléctricos y de material electrónico, reduciendo el uso
de los vertederos e incineradoras y prevenir el preocupante aumento del contacto de estos residuos con el
medio ambiente. Por este motivo la Unión Europea ha fijado la Directiva de Residuos de Aparatos Eléctricos
y Electrónicos (RAEE) solicitando a los fabricantes la recolección, reciclaje y tratamiento de ests residuos
correctamente. Los paises miembros ya han establecido su sistema de reciclaje gratuito de RAEE antes del
13 de Agosto del 2005. Por este motivo 2SAN es el responsable del reciclaje de todos los productos
exportados a Alemania. Usted puede devolver su producto 2SAN a un punto de recogida local cuando desee
reciclarlo.
4
Dichiarazione WEEE
Italian
Per far fronte all’aumento dei residui delle apparecchiature elettriche ed elettroniche, ridurre l'uso di materiale
di riporto e degli inceneritori, ed impedire che il materiale nocivo delle apparecchiature residue entri a contatto
con l'ambiente, l’ Unione Europea (UE) ha stabilito le Direttive sui Residui delle apparecchiature Elettriche ed
Elettroniche (WEEE) chiedendo ai fornitori di raccogliere correttamente, riciclare e trattare le apparecchiature
elettriche ed elettroniche residue. Le nazioni facenti parte dell’ Unione Europea hanno già stabilito il loro
sistema gratuito di riciclaggio di questo materiale (WEEE) prima del 13 agosto 2005. Di conseguenza, 2SAN
è responsabile del riciclaggio di tutti i prodotti esportati in Germania. Potete restituire il vostro prodotto
acquistato da 2SAN che deve essere riciclato da un’ azienda specifica locale.
5
Table of Contents
Chapter1. About ADR-7104
9
1.1 OVERVIEW ............................................................................................................................. 9
1.2 FEATURES .............................................................................................................................. 9
1.3 SPECIFICATION ....................................................................................................................... 9
1.4 PACKAGE ............................................................................................................................. 10
Chapter2. System Appearance
11
2.1 THE FRONT PANEL ................................................................................................................ 11
2.2 THE REAR PANEL.................................................................................................................. 12
Chapter3. Installation
13
3.2 CONNECT CAMERAS ............................................................................................................. 15
3.3 CONNECT THE MONITOR........................................................................................................ 15
3.4 CONNECT THE POWER ADAPTER ............................................................................................ 15
Chapter4. Menu Flow
17
4.1 LIVE VIEW ............................................................................................................................ 17
Chapter5. SYSTEM 20
5.1 TIME SETUP ...................................................................................................................... 20
5.2 SYSTEM PASSWORD ....................................................................................................... 21
5.3 SYSTEM INFO ................................................................................................................... 21
5.4 VIDEO FORMAT ................................................................................................................ 21
5.5 LOG VIEW ......................................................................................................................... 21
5.6 LOG SET ............................................................................................................................ 22
5.7 FIRMWARE UPGRADE ..................................................................................................... 22
5.8 FACTORY RESET .............................................................................................................. 22
5.9 LANGUAGE ....................................................................................................................... 23
Chapter6. CAMERA 24
6.1 CHANNEL.......................................................................................................................... 24
6.2 COLOR ............................................................................................................................... 24
6.3 TITLE ................................................................................................................................. 24
6.4 PROTOCOL ........................................................................................................................ 25
6.5 PTZ ADDRESS ................................................................................................................... 25
6.6 EVENT POPUP ................................................................................................................... 25
6.7 MAIN ROT. TIME .............................................................................................................. 25
Chapter7. RECORD 26
7.1 CHANNEL.......................................................................................................................... 26
6
7.2 RESOLUTION .................................................................................................................... 26
7.3 PRE RECORD..................................................................................................................... 26
7.4 FPS...................................................................................................................................... 27
7.5 QUALITY ........................................................................................................................... 27
7.6 RECORD MODE ................................................................................................................ 27
7.7 AUDIO ................................................................................................................................ 27
7.8 SCHEDULE ........................................................................................................................ 27
7.9 SCHEDULE RECORD........................................................................................................ 28
Chapter8. MOTION
29
8.1 CAMERA CHANNEL......................................................................................................... 29
8.2 MOTION ENABLE ............................................................................................................. 29
8.3 SENSITIVITY .................................................................................................................... 29
8.4 MOTION AREA.................................................................................................................. 29
8.5 POST-RECORD TIME ........................................................................................................ 31
8.6 BUZZER TIME ................................................................................................................... 31
8.7 ALARM TIME .................................................................................................................... 31
8.8 MOTION TRACE ............................................................................................................... 31
Chapter9. SENSOR 32
9.1 SENSOR CHANNEL .......................................................................................................... 32
9.2 SENSOR TYPE ................................................................................................................... 32
9.3 POST-RECORD TIME ........................................................................................................ 32
9.4 BUZZER TIME ................................................................................................................... 32
9.5 ALARM TIME .................................................................................................................... 32
Chapter10. DISKMAN
33
10.1 DISK FORMAT ................................................................................................................. 33
10.2 SMART COPY MODE ...................................................................................................... 33
10.3 BACKUP ............................................................................................................................. 34
Chapter11. NETWORK
35
11.1 IP MODE ............................................................................................................................ 35
11.2 PORT................................................................................................................................. 35
11.3 IP ....................................................................................................................................... 35
11.4 NETMASK........................................................................................................................ 35
11.5 GATEWAY ........................................................................................................................ 35
11.6 NAME SERVER ................................................................................................................ 36
11.7 DDNS ................................................................................................................................ 36
Chapter12. Search & Playback
37
12.1 SEARCH.............................................................................................................................. 37
7
12.2 PLAYBACK ......................................................................................................................... 38
Chapter13. Network Remote Control 40
13.1 CONNECT ........................................................................................................................... 40
13.2 SETTING ............................................................................................................................. 41
13.3 AVI .................................................................................................................................... 42
13.4 BACKUP ............................................................................................................................. 42
13.5 REC START / REC STOP........................................................................................................ 42
13.6 LIVE................................................................................................................................... 43
13.7 PLAYBACK ......................................................................................................................... 43
13.8 FILEPLAY ........................................................................................................................... 44
Appendix A (FIRMWARE UPGRATE)
)
8
45
Chapter1. About ADR-7104
1.1 Overview
Designed for globally increasing surveillance requirements, ADR-7104 is a high
performance standalone Digital Video Recorder. It takes the advanced MPEG4
compression format to solve the storage problem of huge amount of video, and the friendly
UI design also enables users even unfamiliar with computer operations can easily control
this DVR. Specially, ADR-7104 features the SMART COPY function pioneered by 2SAN
DVR series. With this function, data can be backed up automatically without affecting other
DVR operations even while recording. This product also supports Triplex, which enables
Live, Record, and Network to be performed simultaneously. This high-quality DVR is
absolutely the best choice for your security surveillance.
1.2 Features
•
•
MPEG4 compression format, D1 resolution
4ch all real-time recording & display
•
SMART COPY function for automatic HDD backup
eSATA interface for external storage expansion
SATA HDD hot-swappable
Multiple recording modes
User-friendly GUI & Multi-language OSD
USB Interface for firmware update & data archiving
Mouse control
LCD panel
Triplex:Live, Record & Network
•
Network function
•
•
•
•
•
•
•
•
1.3 Specification
Video
•
•
•
•
•
Video Input:4ch (BNC)
Loop Out:4ch (BNC)
Main Monitor Out:BNC*1, VGA*1 & S-video*1 (Option)
Video Compression Format:MPEG4
Display Mode:Full, 4 & PIP
Audio
•
•
Audio Input:4
Audio Output:1
9
Record
• Resolution (Max.):D1:720x480 (NTSC), D1:720x576 (PAL)
•
FPS:up to 120fps at CIF (NTSC), up to 100fps at CIF (PAL)
•
(Adjustable: 60fps at Half-D1 (NTSC), 50fps at Half-D1 (PAL) ;
30fps at D1 (NTSC), 25fps at D1 (PAL))
Mode:Urgent, Schedule, Alarm, Motion & Always
Storage
• HDDs:Internal SATA HDD*1, Hot-swap SATA HDD*1
• External Storage Expansion:eSATA Interface
Alarm
•
•
Alarm Input:4
Alarm Output:1
Network
• Live video access
• Recorded video access
•
Remote control
Others
• PTZ Control:Pelco-D & Pelco-P protocol
• Power:DC 12V / 5A
• Dimension:430 (W) x 73 (H) x 260(D) mm
1.4 Package
1.
2.
3.
4.
Digital Video Recorder (ADR-7104) x 1
Power Adapter x1
Infrared Remote Controller x1
Quick Installation Guide x1
10
Chapter2. System Appearance
2.1 The Front Panel
1
○
2
○
3
○
11
○
No.
1
2
3
4
5
6
7
8
Name
Hot-swappable HDD Tray
LCD Panel
Setup
Arrow Key
ESC
REC
LOCK
ALARM
NET
HDD
POWER
USB Port
(REC)
(FR)
(PLAY / PAUSE)
(STOP)
(FF)
LOCK
FREEZE
SEARCH
MODE
ROTATE
9
10
11
PTZ
? (HELP)
0 ~ 9 (Channel Key)
F+ / FZ+ / Z-
10
○
4
○
5
○
9
○
6
○
8
○
7
○
Function
For hot-swappable HDD use
Indicates the system status
Used for quick selecting the setup menu
Used for changing the settings or for moving the cursor
up/down/left/right.
Back to the menu.
Shows the recording status
Lights when all the buttons are locked
Lights when event occurs
Indication light for network
Indication light for hard disk
Shows power on/off status
For USB mouse use, archive, and firmware update
Record: emergency recording
Used for quick backward search in playback
Pauses and resumes the video recording in playback
Ends search during playback
Used for quick forward search in playback
Press to lock all the buttons
Runs the FREEZE function in live mode
Popup the search menu to search the video
Press to change different display modes
The single channel mode switches according to the specified
time on the menu
Used for PTZ camera control
Q&A
Press the button to display the single channel.
Used for PTZ camera control: Focus In & Out.
Used for PTZ camera control: Zoom In & Out
11
2.2 The Rear Panel
Video In
Video Loop
Audio In & Out
Video Input
Alarm In & Out
eSATA port
Ethernet
12
Power Fan
Power
Chapter3. Installation
3.1 Install SATA HDD
Install Internal HDD
1.
Remove the cover and pull the hot-swap HDD tray out.
2.
Disconnect the SATA cable & 4-pin HDD power cord.
3.
Loosen the screws and take the HDD bracket out.
4.
Install the HDD into the lower part of the HDD bracket and tighten it. Make sure the HDD is firmly
connected with SATA connector.
13
5.
Put the HDD bracket back, and make sure to fasten the screws firmly.
6.
Put the hot-swap HDD tray back.
Install Hot-Swap HDD:
:
1.
Slightly press the blue plastic tenon (joint) downward, and the silver shaft will spring out.
2.
Pull the silver shaft forward slightly to the end, and the hot-swap tray will slide a bit.
3.
Hold the silver shaft, and pull the whole hot-swap tray out of case.
4.
Install SATA HDD into the Hot-swap tray, and use screws to tighten it.
5.
Insert the hot-swap tray into the case, and push to the end.
14
6.
Follow the direction to get silver shaft & blue tenon geared. After a “click”, DONE.
Install eSATA device (Option):
:
1. External storage device with eSATA Interface can be used for storage expansion.
2. Connect the eSATA cable between the DVR and eSATA storage device.
3.2 Connect Cameras
Connect cameras to the video BNC inputs marked Video In 1~4.
CH 1
CH 2
CH 3
CH 4
3.3 Connect the monitor
ADR-7104 provide BNC, VGA, S-Video (Option) connectors for video out (for main monitor
use)
1. Connect a monitor to the connector marked CVBS.
2. Connect a monitor to the connector marked S-Video (Option).
3. Connect a monitor to the connector marked VGA
3.4 Connect the power adapter
1. Connect the power adapter to the connector marked DC-12V.
15
2. Then the DVR system will boot up automatically and start to record.
16
Chapter4. Menu Flow
4.1 Live view
The Live Display Mode supports 4 Modes, they are signal full picture, quad display
(CH1~CH4) and Picture-in-Picture (PIP) display.
At the bottom is a status bar
FUNCTIONS:
1 MENU options
○
2 Recording Status
○
3 Used HDD capacity shown in percentages
○
4 System date and time
○
1
○
2
○
3
○
4
○
Click the MENU with the mouse or press the ENTER key to open the operation menu as below
17
The operation menu has the following functions:
LIVE:
:2X2 / PIP1 / PIP2,shown below
PIP1
PIP2
SETUP:
:to enter the Main Menu shown below. It includes Camera, Record, Motion,
Sensor, Diskman, Network, Backup and System. These will be described in more
detail in next Chapter.
Note: There are three ways to enter the Main Menu:
(1) Front Panel: Press the SETUP key on the front panel to enter the Main Setup
Menu
(2) IR Remote Controller: Press the SETUP key on the remote controller to enter the
Main Menu
(3) Mouse: Please click on the MENU button in the lower left corner of the interface
then select SETUP to open the Main Setup Menu.
SEARCH: Opens the search options. See Chapter 13 for more information
MOTION: Opens or closes the motion detection grid
ZOOM: Zooms in on the Live display
PTZ: Opens the PTZ icons to control the PTZ camera. Direction Keys Up/Down/Left
Right pans/tilts the camera: Z+/Z- controls the camera zoom; F+/F- changes the
camera focus.
18
ROTATION: Enables display cycling
AUDIO: Turns the Live audio feed on or off
MOUSE_ON: Redetects the USB mouse
QUIT: When pressed, the system will prompt the user to confirm system shutdown. Select
YES to turn off the power.
19
Chapter5. SYSTEM
5.1 TIME SETUP
After starting the system, please set the correct system time through
SETUPSYSTEMTIME SETUP as shown below:
TIME: Year / Month / Day / Hour / Minute / Second
FORMAT:ASIA / EURO / US
20
5.2 SYSTEM PASSWORD
Set the system password. A numerical password can be entered directly from the front
panel or remote controller. Alternatively, click on the "SET" option in the GUI or press the
Menu button to open an on-screen keyboard that can be used to enter the password.
After entering the password, click the Down key "
" then re-enter the password again to
confirm that it is correct (the system will provide a prompt if the passwords do not match).
Press the ENTER key to save the password.
5.3 SYSTEM INFO
This window shows the DVR's firmware version, internal SATA HDD and eSATA HDD
capacity, whether HDD overwrite is enabled and at how much remaining HDD capacity
should a warning be sent.
5.4 VIDEO FORMAT
NTSC or PAL TV formats are available. The user may specify the TV format used for their
region.
5.5 LOG VIEW
The log records the event date, time and type.
21
5.6 LOG SET
There are four types of event logging available: Motion, Sensor, Manual and Booting. The
user can specify which types of events to log or ignore.
5.7 FIRMWARE UPGRADE
Perform firmware upgrade using USB Flash drive. When the system displays the firmware
upgrade prompt, click on "YES" to upgrade. (See Appendix A for details)
5.8 FACTORY RESET
The system will prompt the user to confirm the reset of all settings to their default values.
22
Click on "YES" to re-initialize the system.
(Tip: After the factory reset, the DVR will begin recording)
5.9 LANGUAGE
Four languages are supported in the user interface: English, Chinese, Japanese and
Korean.
23
Chapter6. CAMERA
6.1 CHANNEL
Choose to configure each Channel individually (1~4) or apply the same settings to all
channels (ALL).
6.2 COLOR
Set the contract, brightness, hue, saturation and sharpness of the image.
6.3 TITLE
Set the name for each Channel. Up to 8 characters can be entered using the USB mouse
or remote control.
24
6.4 PROTOCOL
Select the PTZ camera protocol. Two protocols are supported: PELCO-D and PELCO-P.
6.5 PTZ ADDRESS
The address of the PTZ camera (0~255)
6.6 EVENT POPUP
When an event is triggered, the corresponding channel will switch to a full-screen display
for a specified time (1~10 sec/ Off)
6.7 MAIN ROT. TIME
The interval between rotations of channel 1 to 4 in full screen displays (1~10 sec/ Off)
25
Chapter7. RECORD
7.1 CHANNEL
Choose to configure each Channel individually (1~4) or apply the same settings to all
channels (ALL).
7.2 RESOLUTION
Three modes are available: CIF/ Frame/ Field
Note: Only available when Channel is set to All
7.3 PRE RECORD
Enables or disables the pre-recording function
Note: Only available when Channel is set to All
26
7.4 FPS
Different frame rates can be specified depending on the type of resolution selected (CIF/
FIELD/ FRAME)
CIF (Total of 120 fps. Individual FPS settings can be specified for each of the 4
channels)
FIELD (Total of 60 fps. Individual FPS settings can be specified for each of the 4
channels)
FRAME (Total of 30 fps. Individual FPS settings can be specified for each of the 4
channels)
7.5 QUALITY
Sets the recording quality as either LOW, Standard, High or Highest. The higher the
quality, the more space is required for recordings.
7.6 RECORD MODE
Four types of recording modes are available: ALWAYS, ALARM, MOTION, OFF
7.7 AUDIO
Audio recording settings. Recording can be individually enabled or disabled for each
channel.
7.8 SCHEDULE
Five schedules can be defined by the user and one selected as the system schedule.
Note: The user can only choose this item between schedules 1~5 when the Record Mode
is set to Schedule.
27
7.9 SCHEDULE RECORD
Five schedules can be defined by the user to specify the recording mode and duration in
hours.
Blue: Always record
Red: Motion record
Yellow: Alarm Record Green: Stop recording
Setting the schedule:
Using the mouse: select the required schedule type from the bottom then use the mouse
to click or drag the required times. when done, click the circle icon in the top right to save
the setting.
Using the remote control:
Use the number keys 1~4 to select Always, Motion, Sensor or Cancel.
Use the direction keys to move the cursors to the specified times then press the SETUP
key to set the time. Keep pressing to set a continuous time block.
Repeat the above actions to set the other recording schedules.
When done, press the ENTER key. The system will prompt you to confirm the settings.
Press YES to save the changes.
28
Chapter8. MOTION
8.1 CAMERA CHANNEL
Choose to configure each Channel individually (1~4) or apply the same settings to all
channels (ALL).
8.2 MOTION ENABLE
Enables or disables the motion detection function.
8.3 SENSITIVITY
Sets the sensitivity of motion detection. The four parameters are for Sensitivity, Spatial,
Black Level and White Level. Please adjust these to suit the setting.
8.4 MOTION AREA
Specify the area to be monitored by the motion detection function. Press the Setup key on
the remote control or the right mouse button to open a menu as shown below:
29
SELECT: Select the Motion Detection area.
CLEAR: Clear the motion detection area
EXIT: Exit the Motion Area menu
Setting the Motion Detection area:
Step 1: Open the SELECT menu
Step 2: Press the ENTER button on the remote control or the left mouse button to set the
starting point of the motion detection area
Step 3. Use the remote control's direction keys or click and drag with the mouse to draw the
desired area
Step 4: Press the ENTER button on the remote control or the left mouse button to set the
end point of the motion detection area
Step 5: Repeat the same procedure to click and drag multiple motion detection areas
Step 6: Press the Setup button on the remote control or the right mouse button then select
the EXIT option to exit the setup interface.
(Tip: When there is a change in the specified motion detection area, red grids will appear on
screen to indicate the changed areas as shown below.)
30
8.5 POST-RECORD TIME
Specifies how long the system should record once motion is detected. (OFF / 5~60 sec)
If further motion is detected on the same channel during Motion recording, the system will
extend the recording time until no further motion is detected.
An example is provided below (Post-Record Time set to 20 sec)
Trigger 1
When motion is detected, recording
Motion 1
starts. If no further motion is detected in
the next 20 seconds, recording ends.
20 sec
File length is 20 sec.
Trigger 1 Trigger 2
Motion 1
10 sec
When motion is detected,
recording starts. If further motion
is detected after 10 seconds,
continue recording. If no further
motion is detected in the next 20
seconds, recording ends. File
length is 30 sec.
Motion 2
20 sec
8.6 BUZZER TIME
This specifies how long the buzzer will be turned on for when motion is detected (OFF/
5~60 sec)
8.7 ALARM TIME
This specifies how long the alarm will be turned on when motion is detected (OFF/ 5~60
sec)
8.8 MOTION TRACE
Enable or disable the motion detection tracing grid
31
Chapter9. SENSOR
9.1 SENSOR CHANNEL
Choose to configure each Channel individually (1~4) or apply the same settings to all
channels (ALL).
9.2 SENSOR TYPE
Two types of sensor triggers are available: Normal Open (NO)/ Normal Close (NC)
9.3 POST-RECORD TIME
Specifies how long the system should record once sensor is triggered. (OFF / 5~60 sec)
If during sensor recording the same sensor is triggered again, the recording time will be
extended until all alerts are finished.
9.4 BUZZER TIME
This specifies how long the buzzer will be turned on when a sensor is triggered (OFF/ 5~60
sec)
9.5 ALARM TIME
This specifies how long the alarm will be turned on when a sensor is triggered (OFF/ 5~60
sec)
32
Chapter10. DISKMAN
10.1 DISK FORMAT
The system prompt asks the user to confirm the deletion of all data on disk. Press "YES" to
begin formatting the HDD.
10.2 SMART COPY MODE
The Smart Copy Mode can be enabled or disabled. When enabled, the recording data on
the HDD will be automatically backed up to the hot-swappable HDD. We recommend
enabling the SMART COPY function to ensure that data is secure.
SMART COPY MODE:ON
The system will automatically back up the data recorded on the internal HDD to the
Hot-Swap HDD in real-time.
SMART COPY MODE:OFF
Recorded data will only be saved to the internal HDD. The Hot-Swap HDD will not be used
and the automatic data backup feature is disabled.
33
Note: The system will prompt you to use a larger HDD if the Hot-Swap HDD capacity is
smaller than the Internal HDD as the SMART COPY features will not be usable otherwise.
10.3 Backup
Backup as AVI File
Device
Device type – USB interface device.
Channel
Specify the channel to back up (1/2/3/4/ALL). If the data to be backed up is in the AVI file
format, the system will remind the user that only one channel can be backed up each time.
START
Set the start time for backup.
END
Set the end time for backup.
TOTAL
The total size of the backup file. This changes depending on the start and end time.
34
Chapter11. NETWORK
11.1 IP Mode
The IP mode can be set to STATIC IP (fixed IP), DHCP (automatic IP assignment) or OFF.
Please select the mode appropriate to your local network.
11.2 PORT
This is the port to use for the network connection. This can be a value between 0 ~
11.3 IP
If using STATIC IP, the user must manually specify the IP address.
11.4 NETMASK
If using STATIC IP, the user must specify the sub-net mask address
11.5 GATEWAY
If using STATIC IP, the user must specify the gateway address
35
65535.
11.6 NAME SERVER
If using STATIC IP, the user must specify the address of the name server
11.7 DDNS
Configures the Dynamic Domain Name Server (Dynamic DNS). This has 5 parameters.
Server: Use DYNDNS or turn it off (OFF).
Host Name: Specify the address of the DDNS server
User Name: User account name
Password: User password
xDSL-Router: This can be set to ON or OFF.
36
Chapter12. Search & Playback
12.1 Search
Press the SEARCH button on the front panel or on the remote control. A Search window
will appear on screen as shown below:
Three types of video search modes are available (TIME/EVENT/URGENT Search). The
user can choose the required search mode.
Time Search
The user can specify the start time of the recording they wish to search for.
37
Event Search
The user can search for recordings triggered by motion detection or alarms.
Emergency Search
The user can also search through manually triggered emergency recordings.
12.2 Playback
After searching through the past recordings using one of the above three search modes,
click on the conform button and playback will begin.
38
The buttons at the bottom of the screen have the following functions:
Play: Play or pause recording
Stop: Stop playback
Reverse: Play recording backwards at 2X, 4X or 6X speed.
Forward: Play recording forwards at 2X, 4X or 6X speed.
Frame Reverse: Play recording in reverse frame by frame. Hold down to play frames
continuously.
Frame Forward: Play recording frame by frame. Hold down to play frames
continuously.
Audio: Turn the sound on or off.
Historic recording playback time
39
Chapter13. Network Remote Control
Netviewer is a remote management software that supports remote monitoring, playback,
backup and recording. Please refer to Chapter 12 Network to complete the network setup
before use.
The main interface is shown below. It consists of four main areas:
○
1 Live surveillance interface
○
2 Connect/ Setting/ Real-time Remote Backup/ Remote Recording Controls
○
3 Channel Control/ Remote Playback/ Local & USB Backup Playback
○
4 Window Partitioning Mode/ Status Display Bar
1
○
2
○
3
○
4
○
13.1 Connect
Once setup is complete, click on the Connect button on the right side of the main interface
and a login prompt will appear as shown below.
Please manually enter the DVR host IP and password. Once logged in, the remote DVR 's
Live display will appear as shown below:
40
13.2 Setting
There are four main setting categories: Network/ Common/ AVI Save/ AVI Codec:
Network
IP Addr: Specifies the IP address of the DVR host to connect to
TCP Port number: Specifies the port used for connecting to the DVR host. Default is
3100.
Common
Network Speed: Adjusts the network connection speed. There are three modes
available: Don't Care, Low Speed, High Speed.
Max Channel: The maximum number of channels to monitor at the same time
Local rec path: Specifies where video data is to be saved on the local computer
AVI Save
Video Size:Fullsize / Halfsize
Video Source: The source video format. This can be NTSC or PAL.
Frame/Sec: The number of frames to record per second. NTSC is 1~30 frames, PAL is
1~24 frames.
41
AVI Codec
The AVI codec to use when saving a live remote video feed locally as an AVI file. The
following options are available:
Cinepak Codec by Radius
Intel Indeo(R) Video R3.2
Intel Indeo(R) Video 4.5
Intel IYUV codec
Microsoft Video 1
IndeoR video 5.10
13.3 AVI
Press the AVI button on the settings bar at the lower right of the main interface and a
window will appear prompting the user to specify the channels to record and the recording
path.
After updating the settings, the program will immediately begin recording the live
video from the remote DVR. The AVI status icon in the lower right corner will also lit up as
well. Press the AVI button again to stop recording.
Set Rec. Path
Note: Files in the AVI format can be played directly using Windows' built-in Media Player.
13.4 Backup
Press the Backup button on the setting bar at the lower right of the main interface. This will
immediately start backing up the live image from the 4 channels on the remote DVR host to
the system's default save path (see Local rec path in 15.2 Setting for more information).
The Backup icon in the lower right will also light up as well. Press the Backup button again
to stop recording.
Note: The recorded file will have a .dvr file extension. This can only be played using the
included NetViewer program.
13.5 Rec Start / Rec Stop
If the remote DVR host is not currently recording, pressing the Rec Start button on the
setting bar in the lower right of the main interface will notify the remote DVR host to begin
recording. The REC icon in the lower right also lights up as well. Pressing the Rec Stop
42
button on the setting bar in the lower right of the main interface will notify the remote DVR
host to stop recording.
13.6 Live
Once connected to the DVR host, the Play and Stop buttons on the Live control bar in the
lower left can be used to enable or disable the remote video display; the PTZ Control
buttons can be used to control the pan, tilt, zoom and focus operations.
13.7 PlayBack
Once connected to the DVR, the Time Search fields of the PlayBack control bar in the lower
left can be used to find recordings saved on the remote DVR by time and date. Playback of
remote video can be controlled using the Play/Stop/FF/REW buttons.
43
13.8 FilePlay
If after using the Backup function the user wishes to play a local video recording, they must
select the Open button from the FilePlay control bar in the lower left to open the local video
file (with the .dvr file extension).
Note: This function can also be used to play files backed up to a USB device from the DVR.
44
Appendix A (FIRMWARE UPGRATE)
)
STEP 1: Please copy the firmware file named XXXXX.ncf to the root directory on a USB
flash drive.
STEP 2: Insert the USB Flash drive into the USB port on the front panel of the DVR unit (not
the mouse port)
SETP3: Go into the SYSTEM menu and select FIRMWARE UPGRADE UPGRATE.
STEP 4: The system will prompt you to confirm the firmware upgrade. Select YES.
STEP 5: The system will show a prompt that indicates the firmware upgrade is in progress.
When the upgrade is complete, a confirmation message will be shown by the system. Now
press any key to automatically restart the system (Tip: Remember to remove the USB Flash
drive before restarting).
45