1
IST-FP6-034286 SORMA
D5.3
Integrated SORMA system & System Manual
Contractual Date of Delivery to the CEC:
31 January 2009
Actual Date of Delivery to the CEC:
31 January 2009
Author(s):
TXT, BSC, UKA, URE, SUN, UPC, CU
Work package:
5
Est. person months:
93
Security:
public
Nature:
final
Version:
0.9.5
Total number of pages:
104
Abstract:
This deliverable describes the final integrated SORMA system, providing both software and user
guides. The SORMA prototype is described from a technical point of view that covers the integrated
architecture, the behaviour of the main components, and the integration test beds. User guides for the
three main categories of end-users (resource providers, resource consumers and SORMA system
administrators) are provided that detail installation and configuration steps.
The SORMA prototype software is available on the DVD annexed to this document.
Keyword list: (optional)
1
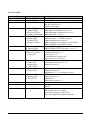
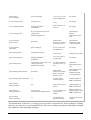
Revision Table:
Revision & Date
0.1 – 10/12/2008
0.2 – 18/12/2008
0.3 – 30/01/2009
Author
M. Villa (TXT)
M. Villa (TXT)
M. Villa (TXT)
0.4 – 09/02/2009
M. Villa (TXT)
M. Macias (BSC)
N. Borissov (UKA)
G. Smith (Uni Reading)
M. Koh (SUN)
G. Smith (URE)
F. Freitag (UPC)
N. Borissov (UKA)
0.5 – 13/02/2009
0.6 – 23/02/2009
0.7 – 25/02/2009
0.8 – 5/03/2009
0.9 – 6/03/2009
N. Borissov (UKA)
M. Macias (BSC)
M. Villa (TXT)
N. Borissov (UKA)
S. Caton (CU)
M. Macias (BSC)
S. Caton (CU)
P. Chacin (UPC)
M. Villa (TXT)
N. Borissov (UKA)
P. Chacin (UPC)
0.9.1&2 – 10/03/09
N. Borissov (UKA)
M. Macias (BSC)
M. Koh (SUN)
0.9.3 – 11/03/09
0.9.4 – 11/03/09
A. Anandasivam
S. Caton (CU)
0.9.5 – 11/03/09
G. Smith (URE)
Comment
Initial ToC
Refined ToC + Action List
Added information about relationship with D5.2
and D5.4 (section 1.3)
Updated action plan
Contributions to section 1
Added BSC contributions section 2.3
Added Reading contribution to sect 1.2
Added Provider’s section 3
Added Security components info
Added section 1.1.1 (DVD structure)
Added contribution to section 2
Added Consumer’s Intelligent Tool to chapt 4
Added SORMA Administrator guides
Updated 5.4.1 (Logging GUI)
Added EERM GUI for Providers – sect 3.3.2
Completed introduction
Completed sections 4.3.2
New section 3.3.2
Contributions to section 4.4.2
New sections 5.2.5 and 5.4.2
Contributions to sect 4.4.1
Contribution to section 2.1, 2.2
Update to setion 2.3
updated 3.1.2 - c.2) Installation
Updated section: 4.2
Updated sect 2.1 – core market services
Small updates in sections 3.3.2 and 4.3.2
Updated section: 2.2
Updated 4.4.1
Added new section 5.3.7
Updated section 2.3.1
Setting of anchors and one new comment for M
Macias
Updated abstract.
Inserted developer user guide
Fixed path references to the DVD
Fixes and updates throughout document
Table 1: Document History
2
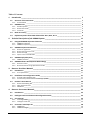
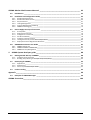
Table of Contents:
1.
Introduction __________________________________________________________________ 7
1.1.
Structure
of
this
Document _________________________________________________________ 7
1.1.1.
Annexed
DVD _________________________________________________________________________ 7
1.2.
SORMA
Actors____________________________________________________________________ 8
1.2.1.
Market
operator _______________________________________________________________________ 8
1.2.2.
Resource
Provider ______________________________________________________________________ 8
1.2.3.
Consumer ____________________________________________________________________________ 9
1.3.
Note
on
Security __________________________________________________________________ 9
1.4.
Explanatory
Notes
about
WP5
deliverables:
D5.2,
D5.3,
D.5.4 _____________________________ 9
2.
Technical
Description
of
the
SORMA
System _______________________________________ 11
2.1.
Integrated
SORMA
System
Architecture ______________________________________________ 11
2.1.1.
SORMA
Architecture ___________________________________________________________________ 11
2.1.2.
SORMA
Components___________________________________________________________________ 12
2.2.
SORMA
Components
Behaviour ____________________________________________________ 15
2.2.1.
2.2.2.
2.2.3.
2.2.4.
Resource
registration __________________________________________________________________
Batch
resource/service
sale _____________________________________________________________
Resource
Usage _______________________________________________________________________
Special
case:
Future
Markets ____________________________________________________________
15
16
17
17
2.3.
SORMA
Deployed
System__________________________________________________________ 18
2.3.1.
SORMA
Test
beds _____________________________________________________________________ 19
2.4.
SORMA
Software
Development
Methodology _________________________________________ 24
2.4.1.
Revision
Control ______________________________________________________________________ 24
2.4.2.
Build
mechanisms
using
Apache
ANT
and
IVY _______________________________________________ 25
3.
Resource
Providers
Manuals ____________________________________________________ 27
3.1.
Introduction ____________________________________________________________________ 27
3.1.1.
Pre‐requirements _____________________________________________________________________ 27
3.2.
Installation
and
Configuration
Guide_________________________________________________ 27
3.2.1.
Provider‐side
intelligent
tools ____________________________________________________________ 27
3.2.2.
Economically
Enhanced
Resource
Manager
(EERM) __________________________________________ 31
3.3.
Provider’s
User
Manual ___________________________________________________________ 46
3.3.1.
Resource
Modelling
GUI ________________________________________________________________ 46
3.3.2.
Offer
Submission
GUI __________________________________________________________________ 47
3.3.3.
EERM
GUI ___________________________________________________________________________ 49
4.
Resource
Consumers
Manuals___________________________________________________ 53
4.1.
Introduction ____________________________________________________________________ 53
4.2.
Intelligent
Tools
Installation
and
Configuration
Guide___________________________________ 53
4.3.
User
Manual ____________________________________________________________________ 54
4.3.1.
User
Registration______________________________________________________________________ 54
4.3.2.
Intelligent
Tools
GUI ___________________________________________________________________ 54
4.4.
Consumers’
Developer
Kit _________________________________________________________ 58
4.4.1.
SORMA
API __________________________________________________________________________ 58
4.4.2.
SORMA
Messages _____________________________________________________________________ 59
3
SORMA
Market
Administrators
Manuals _____________________________________________ 62
4.5.
Introduction ____________________________________________________________________ 62
4.6.
Installation
and
Configuration
Guide_________________________________________________ 62
4.6.1.
4.6.2.
4.6.3.
4.6.4.
4.6.5.
4.6.6.
Market
Exchange
Service _______________________________________________________________
Market
Information
Service _____________________________________________________________
Payment
Service ______________________________________________________________________
Trading
Management __________________________________________________________________
Contract
Management
and
Billing ________________________________________________________
SORMA
Global
Logging _________________________________________________________________
62
66
67
69
72
74
4.7.
How
to
Apply
Security
Infrastructure ________________________________________________ 76
4.7.1.
4.7.2.
4.7.3.
4.7.4.
4.7.5.
4.7.6.
4.7.7.
Prerequisites _________________________________________________________________________
Deploying
the
Services _________________________________________________________________
Configure
to
Trust
the
CA _______________________________________________________________
Get
Host
Credential____________________________________________________________________
Configure
HTTPS
for
Tomcat _____________________________________________________________
Testing
the
Security
services
with
a
Sample
Client____________________________________________
Deployment
of
User
Registration
Web
Form ________________________________________________
76
76
78
78
79
80
81
4.8.
SORMA
Administrator
User
Guide___________________________________________________ 82
4.8.1.
SORMA
Logging
GUI ___________________________________________________________________ 82
4.8.2.
SORMA
SLA
Administration
GUI __________________________________________________________ 84
4.8.3.
SORMA
Security
Management ___________________________________________________________ 84
5.
SORMA
System
developer
guide _________________________________________________ 88
5.1.
Getting
Started
with
Ivy
in
SORMA __________________________________________________ 88
5.1.1.
Configure
the
environment______________________________________________________________ 88
5.1.2.
Building
and
publishing
an
example
component
(library) ______________________________________ 89
5.2.
Developing
for
SORMA____________________________________________________________ 92
5.2.1.
Applications__________________________________________________________________________ 94
5.2.2.
Web
Services _________________________________________________________________________ 94
5.2.3.
Sorma
Ivy
Portlet
Developer
Guide _______________________________________________________ 95
5.3.
Further
reading __________________________________________________________________ 95
Appendix _______________________________________________________________________ 96
5.4.
Examples
of
SORMA
Messages _____________________________________________________ 96
SORMA
Consortium______________________________________________________________ 104
4
Table of Figures:
Figure 1: SORMA Technical Architecture ........................................................................................... 12
Figure 2: Core Market Services ............................................................................................................ 13
Figure 3 Open Grid Market................................................................................................................... 14
Figure 4: Provider’s Tools .................................................................................................................... 14
Figure 5: resource provider registration sequence diagram .................................................................. 15
Figure 6: Resource Sale sequence diagram........................................................................................... 16
Figure 7: job submission sequence diagram ......................................................................................... 17
Figure 8: interactions for reservation of resources................................................................................ 18
Figure 9: high-level components deployment view.............................................................................. 19
Figure 10: Deployed VMs in PC1 ........................................................................................................ 20
Figure 11: Deployed VMs in PC2 ........................................................................................................ 21
Figure 12: CPU Activity of the virtual machines during one hour....................................................... 22
Figure 13: Traffic in the virtual machines during one hour.................................................................. 23
The software development process in SORMA is executed using a well-defined methodology. The
methodology contains the following parts:........................................................................................... 24
Figure 14: Portlet Group Manager ........................................................................................................ 37
Figure 15: New 'Resource Monitoring' group created .......................................................................... 38
Figure 16: Creating a new tab to host the Portlets from the Resource Monitoring Portlet group ........ 38
Figure 17: The Resource Monitoring tab populated with Portlets........................................................ 39
Figure 18: All Portlets have an edit mode which is accessed via the pen icon..................................... 40
Figure 19: Configuring Portlet behaviour using the edit mode ............................................................ 41
Figure 20: Initialisation of Tycho blocking API failed......................................................................... 42
Figure 21: EERM main panel ............................................................................................................... 45
Figure 22: Standard view of the Technical Resource Modelling.......................................................... 46
Figure 23: Sample values...................................................................................................................... 46
Figure 24: JSDL source view................................................................................................................ 47
Figure 25: Economic description of the offered resource..................................................................... 48
Figure 26: Submission of the offer-request to BidGenerator................................................................ 48
Figure 27: Status information ............................................................................................................... 49
Figure 28: EERM resources list ............................................................................................................ 49
Figure 29: adding resources to EERM.................................................................................................. 50
Figure 30: managing virtual machines.................................................................................................. 50
Figure 31: reserving resources manually .............................................................................................. 50
Figure 32: testing batch resources......................................................................................................... 51
Figure 33: showing resource properties ................................................................................................ 51
Figure 34: clients’ properties view........................................................................................................ 52
Figure 35: specifying preferences for resource policies ....................................................................... 52
Figure 36: Standard view of the Job Description section ..................................................................... 55
Figure 37: File selection view with sample file selected ...................................................................... 55
Figure 38: Standard view with file selected.......................................................................................... 56
Figure 39: Economic description of the job.......................................................................................... 56
Figure 40: Submission of the bid-request to BidGenerator .................................................................. 57
Figure 41: Status information ............................................................................................................... 57
Figure 42: Message formats between the SORMA components .......................................................... 60
Figure 43: C-Space Protocol Execution Manager................................................................................. 72
Figure 44: Security screenshot.............................................................................................................. 80
Figure 45: Chainsaw-Log GUI ............................................................................................................. 83
Figure 46: Chainsaw Log properties..................................................................................................... 83
Figure 47: Security initial GUI ............................................................................................................. 84
5
Figure 48: Security preferences ............................................................................................................ 85
Figure 49: Security Log-in.................................................................................................................... 85
Figure 50: Proxy Manager .................................................................................................................... 86
Figure 51: Administrator User Interface............................................................................................... 87
Figure 52: Screenshot of the HTML page generated by the report target showing dependency
resolution information........................................................................................................................... 91
6
1. Introduction
This deliverable describes the final integrated SORMA system, providing both software code and user
guides. The final integrated SORMA prototype is described from a technical point of view by
defining its integrated architecture, by showing how the main components behave, and how the
system is currently deployed for testing. User guides for three main categories of end-users: resource
providers, resource consumers and SORMA system administrators are included. Each user guide
provides install and configuration instructions, and a user-manual. In addition a guide for SORMA
system developers is included. The final prototype software is available on the DVD annexed to this
document.
1.1. Structure of this Document
This document is structured in the following way:
•
•
•
•
•
•
•
Chapter 1 provides relevant information about this document and its relationship within Work
package 5, and provides an overview of the SORMA system’s actors.
Chapter 2 describes the final SORMA prototype architecture, with a special focus on
integration.
Chapter 3 provides manuals for the resource providers, specifying: how to install, configure
and use the SORMA tools in order to offer resources on the SORMA Grid market.
Chapter 4 provides information for resource consumers, specifying: what to install and how
to access the SORMA market via GUIs or how to develop a custom client using the SORMA
API.
Chapter 0 provides information for the SORMA market operators, specifying: how to install
the SORMA Grid market and how to configure and maintain it.
Chapter 5 provides guides for SORMA system developers.
Appendix: contains code and message examples.
1.1.1. Annexed DVD
The annexed DVD contains the SORMA Integrated System.
The DVD content is structured in the following way:
• /README.txt: How to use the DVD
• /docs: A copy of the user guides.
• /src/sorma: A snapshot of the SORMA Subversion source code repository trunk.
• /src/third-party: Existing 3rd party source code that was modified under SORMA.
• /ivy/vendor: 3rd party libraries (binaries) from the Ivy repositories.
• /ivy/sorma: All Sorma-specific binary artifacts (a snapshot of the SORMA Ivy Integration
repository).
• /virtual-machine-images: Virtual Machine images that can be used to test the SORMA and
MOSIX systems (the images come with components already in place, but some configuration
is still required to take into account e.g. network settings).
7
1.2. SORMA Actors
Brokerage of resources over the Grid will benefit Grid consumers, resource owners, outsourcing
providers, and new intermediaries. The SORMA platform offers the necessary tools for all the actors,
providers, consumers and market operators, involved to join the market, participate in transactions
and IT resource realization. SORMA is therefore a complete package making it possible for all types
of users to participate.
1.2.1. Market operator
SORMA provides the Open Grid Market to perform the brokerage of resources over the Grid, match
the users' and brokers' requests and put them into contact with each other.
In a messaging framework user agents and brokers register their requests and capabilities, using the
SORMA messaging protocols. Here, software components create resource requirements specifications
on behalf of the user, and brokers utilize software components that interpret the information about the
available resources, from the resource fabrics, and create the service requested. User agents and
brokers utilize an expressive market language, while brokers and resource fabrics adopt a fabric
specific language to allow brokers to acquire specific resources. The grid market matches the requests
with the advertised capabilities, reports back to the requesting user and generates a Service Level
Agreement (SLA) .
Through the data gathering interfaces along all abstraction levels, and the powerful service description
tools, the Open Grid Market reveals information about demand and supply accurately. Market or
pricing mechanisms are the components that foster information exchange.
SORMA mechanisms ensure a more rigorous allocation of resources and self-organizing resource
management. A simple management interface for virtual resources is provided; the surveillance of the
running nodes is made through a shared information gathering layer to simplify the brokers’ tasks of
discovering and keeping track of nodes and their status.
1.2.2. Resource Provider
SORMA offers to the ICT resource owners, outsourcing providers, and designated utility providers a
complex economically efficient and market-based platform for the supply and trading of their
available resources. This includes computational as well as hardware (idle or unused) resources, over
the Open Grid Market, for example as services.
Sorma provides the means for resource providers to join and leave the market, by enabling the
resource fabrics to register their presence in an Information Gathering Infrastructure. Here, brokers
collect the messages (about the available resources and their status) that the resource fabric node sent
to the Information Gathering Infrastructure, are able to interpret the information correctly, and
communicate back to the user agent; when a broker has received an accept on an offer from the user
agent, it communicates to the resource fabric market/reservation service in order to acquire resources
in accordance with the generated SLA.
8
The SORMA platform provides resource owners with economically sound, sustainable and
customizable business models by providing methods and tools:
•
•
•
•
to express the business model of the resources owners
for capturing users' reserve prices for resources
for determining the bidding strategy consisting of various economic pricing models
to estimate and monitor the quality of the resource management.
1.2.3. Consumer
SORMA offers an economically efficient and market-based platform to the consumers of Grid
computing power or Grid storage infrastructures for the identification and acquisition of the needed
resources. Acquisition and trading support is provided for low-level resources as well as for higherlevel services with dependencies, for applications requiring continuous "real-time" allocation of
resources, pre-planned batch job allocation, and dynamic (re-)allocation. In addition, client demand
can be satisfied not only within an organization but also among multiple administrative domains.
SORMA ensures the means for submitting jobs and monitoring submitted jobs. The user no longer
has to be concerned on which resources their jobs are being completed as long as they are performed
like specified in the consumer preferences and on time. The user agents act on behalf of the user,
being capable to create resource specifications on behalf of the user, communicate with the resource
brokers, match the requirements with the capabilities available on the grid market, and get the services
needed by the user within a market-based business model.
The SORMA platform provides resource users with intelligent tools to access the Open Grid Market
using methods and tools:
•
•
•
•
to express the business model of the users
for capturing users' preferences of each task requiring resources
for determining the bidding strategy consisting of various economic models
to estimate and monitor the quality of the resource management.
1.3. Note on Security
The main concept of SORMA security is the ability to have distributed identity management and
single-sign-on. This is realized in SORMA by using the SAML protocol for the exchange of security
messages and interoperating with other authentication authorities. The vision is that SORMA
customers can authenticate in their own organization, obtaining an SAML assertion, and use this
assertion in exchange for SORMA credential (i.e. proxy certificate).
1.4. Explanatory Notes about WP5 deliverables: D5.2, D5.3, D.5.4
In order to avoid misunderstandings or ambiguities, it is useful to remember which deliverable is
going to deliver the Final software prototypes and related documentation
9
D 5.2: Economic Grid middleware (Prototype/Report): "Description and implementation of
the prototypical economic Grid middleware"
D5.2 contains the technical details of the Core Market Services prototype and the EERM and
Resource Fabrics which are to be installed at the Provider side.
This deliverable IS NOT going to deliver such components’ user guides, which will be delivered into
D5.3
•
D5.3: Integrated SORMA system & System Manual (Prototype/Report): "Description of the
integrations undertaken, detailed definition of all prototypical system components and
manuals are available."
This (very) deliverable, which includes the description and technical overview of the integrated
SORMA system (technical architecture), the role of the components (while their detailed description
can be found in D4.x deliverables), and user manuals (technical guides and user guides) about ALL
SORMA components (excluding Mosix which will be delivered in D5.4).
This deliverable also includes the software prototype of the whole SORMA market and user agents.
Economic Grid middleware prototypes are delivered in D5.2.
•
D 5.4: Market-based Grid OS & System Manual (Prototype/Report): "Description of the
implementation and modifications undertaken, detailed definition of prototypical system
components and manual are available"
This deliverable will include software prototypes and user manuals about Mosix OS
•
10
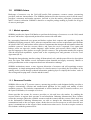
2. Technical Description of the SORMA System
This chapter provides an integrated view on the SORMA system: its final technical architecture and
its main components (section 2.1), how they behave (section 2.2), how they were integrated and how
the whole system was deployed (section 2.3) in order to prepare for testing.
2.1. Integrated SORMA System Architecture
This section describes the final SORMA system architecture from a technical point of view. A highlevel view of the SORMA system can be found in the latest deliverable D2.2 – section 2.
2.1.1. SORMA Architecture
The SORMA system is composed of a set of components that provide the required functionality to
allow the exchange of resources on an open market across multiple organizations. These components
interact following complex communication patterns in a distributed setup.
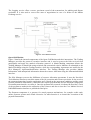
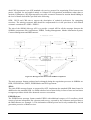
In this section we present the SORMA's technical architecture, Figure 1 shows a high-level view of
the SORMA architecture. How each of those components fulfil the interfaces it exposes will be
discussed in the following sections.
The architecture's main components are the Consumer's and Provider's Tools for trading, the Open
Grid Market that provides the context upon which the exchange of resources takes place, the Core
Market Services, which provide the supporting services for the actual trade to occur and the Security
Manager, which provides the cross-system security mechanisms.
On the consumer's side of the market, the Consumer’s Intelligent Tools provide the grid applications
with the interface SubmitBid to express its preferences, both technical and economical, for resources.
To fulfil the application's requirements, the Provider's Intelligent Tools use the aggregated market
information, like price ranges, provided by the Core Market Service's Information Publish interface
and the Trading interface to submit a bid.
If this bid is successful, the Grid Application receives the credentials to access the resource obtained
by the market and uses the SubmitJob interface of the Provider’s Intelligent Tools to initiate its
utilization. The Provider's Intelligent Tools also provide interfaces to monitor the execution of jobs
(monitoring) and to inform of the valid resource allocations.
The Core Market Services component provides interfaces used by the intelligent tools to Search for
markets,1 query for aggregated information about the market and submit bids (Trading). The Security
component provides interfaces for authentication and digital signature to Core Market Services, which
use them to provide a secure trade environment.
Bids are delivered by the Core Market Services to the Open Grid Market's ProtocolExecutor interface,
to be processed by the corresponding market allocation mechanism (e.g. auction protocol). The Open
Grid Market also offers interfaces to manage the SLAs, which enforce and define the utilization of the
resources, and to make the payments for such resources.
1
It is important to note that this search interface allows the location of markets, i.e. ongoing auctions, but not for
the specific items being traded in them.
11
Figure 1: SORMA Technical Architecture
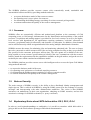
2.1.2. SORMA Components
Core Market Services:
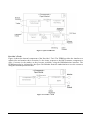
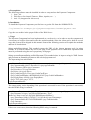
Figure 2 details the internal components of the Core Market Services. It is formed by four services:
the Market Information, Market Exchange, Market Directory and Logging.
The Market Information Service provides the interfaces InformationQuery and InformationPublish to
manage the aggregated information of the market, such as maximum and minimum prices in a certain
market.
The Market Exchange provides the Trading interface to allow participants to engage in negotiations,
exchanging proposals (bids) and eventually reaching an agreement. Bids received from consumers
and providers are forwarded to the Open Grid Market's ProtocolExecutor interface to be processed by
the market's allocation protocol. It also requires the Authentication and DigitalSignature interfaces
provided by the Security Management component to protect the interaction among participants.
The Market Directory offers the Search interface to look for existing markets, which are registered
using the Registry interface by the Market Exchange. To be available to trading agents, markets must
register themselves using the Trade interface.
12
The Logging service offers a secure, persistent record of the transactions for auditing and dispute
resolution. It is also used to recover the state of negotiations in case of a failure of the Market
Exchange service.
Figure 2: Core Market Services
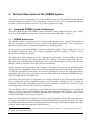
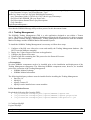
Open Grid Market:
Figure 3 details the internal components of the Open Grid Market and their interactions. The Trading
Manager provides the protocol execution interface and is used to process the bids received from
participants and apply the market's allocation protocol. A Match Making component allows the
Trading Manager to match bids using technical and economical criteria. Matches are submitted to the
Market Exchange using the Trading interface, while the corresponding Agreements are notified to the
SLA Manager's AgreementNotification interface. The Trading Manager also provides Market
Information with anonymized information about the resource allocation using the InformationPublish
interface.
The SLA Manager oversees the fulfilment of resource allocation agreements. It uses the Provider's
Tools Monitor interface to track the status of the job execution and resource provision. It also receives
the payment instruction from the application users. Based on the agreement conditions and the actual
resource utilization information, it calculates the required payment and uses the Payment component's
ExecutePayment interface to realize it. Once the payment has occurred, it informs the Provider's Tools
of the payment to authorize the utilization of the resource and also to uses the Core Market Service's
PublishInformation interface to publish the final price.
The Payment component is a gateway for actual payment mechanisms, for example credit cards,
online payment systems and virtual currencies. Its main function is to control the execution of the
payment transactions.
13
Figure 3 Open Grid Market
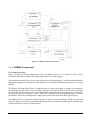
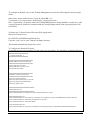
Provider’s Tools:
Figure 4 shows the internal component of the Provider’s Tool. The EERM provides the interfaces to
submit jobs and monitor their execution. It also issues requests to the Bid Generator component to
offer a resource in the market as they become available, using the BidSubmission interface. The
EERM must also be informed by the Open Grid Market about the authorization to use the resources
using the InformPayment interface.
Figure 4: Provider’s Tools
14
2.2. SORMA Components Behaviour
This section shows how the components previously described interact in the SORMA workflow.
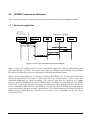
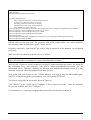
2.2.1. Resource registration
Figure 5: resource provider registration sequence diagram
Figure 5 shows the workflow for the resource registration, where the bold-grey discontinuous line
represents domain separation. The figure shows how the EERM is authenticated in the Identity
Provider to be allowed to send secure messages to SORMA Grid Market domain.
When a new hardware Resource is attached, it notifies the EERM of its existence and sends some
functional information, for example its host name and if the resource hosts a Web Service or a
GridSAM middleware for batch executions. The resource must also be registered on GridRM
gateway, and then GridRM will notify the EERM with the availability of a new Resource. The EERM
is now able to query the Hardware description and Monitoring Data. With the data provided by the
resource and the GridRM gateway, the EERM is now able to create an EJSDL document with the
resource description and some economic auxiliary data. The EJSDL document is sent to the provider’s
Bidding Agent, and the Resource Provider is now ready to start a negotiation for the sale of the
resource or service.
15
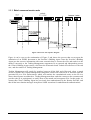
2.2.2. Batch resource/service sale
Figure 6: Resource Sale sequence diagram
Figure 6 can be seen as the continuation of Figure 5 and shows the process that occurs upon the
submission of an EJSDL document to the Provider’s Bidding Agent. Once the Provider’s Bidding
Agent gets the resource information with some economic data, it creates the offer and sends it to the
market, concretely to the Trading Management component. In an external and independent process
the Client’s Bidding Agent creates a bid from the Economical and Technical Preferences of the end
user, and also sends it to Trading Management.
Trading Management will search for matches between all the bids and offers and, when a match
occurs, it notifies the Contract Management component, which will create an SLA, and later send the
generated SLA to SLA Enforcement, which will monitor the constitutional terms on the SLA to
ensure that all terms are adhered to. Trading Management then sends the contract to the consumer and
provider (the SLA participants), to notify them of the match and consequent SLA. In this graph, we
assume that Client’s Bidding Agent has previously been authenticated by the Identity Provider, and
that all the inter-domain messages incorporate SAML assertions for authenticated communications.
16
2.2.3. Resource Usage
Figure 7: job submission sequence diagram
Figure 7, which again can be seen as a continuation of Figure 6, shows the interaction between the
SORMA components when a job is being executed. When the EERM receives an EJSDL from the
Client Application, the EERM must check the correct identity of the Client Application and that it has
attached a valid ContractId. The EERM may need to contact Contract Management to assure the
validity of a contract. After sending the job from EERM to the Resource, the resource notifies
continuously about the changes in the status of the execution, and EERM forwards them to the Client
Application. In addition, the EERM, periodically, response to requests for monitoring data from SLA
Enforcement, to enable the monitoring of SLA adherence by the provider. Specifically, if the terms in
the SLA are being fulfilled correctly and, in case they are not, take reactive measures such as
renegotiation or ask the EERM for a redistribution of the assigned resources. Finally, when the
Resource notifies to the EERM that the task has been finished, the EERM forwards this notification to
the Client Application and the SLA Enforcement. The SORMA cycle is finished here.
2.2.4. Special case: Future Markets
Since the EERM allows the advanced reservation of resources, future markets can be implemented in
SORMA. The main change to support reservations must be implemented in Trading Management
component (see Figure 8). In the technical/economical matchmaking process, when a pair of
bids/offers matches, Trading Management component must ask to the Provider’s Bidding Agent if a
concrete amount of resources could be allocated in a specified time slot. The Bidding Agent will
forward this question to the EERM, which will respond as appropriate, in case of “no”, will provide
an alternative allocation for this concrete petition.
Following this process, Trading Management will confirm/deny the reservation. If both parties arrive
at an agreement, the match is returned and the normal workflow of SORMA continues. If not, the
17
Trading Management component will try to perform a reservation with the next pair of matched
bid/offers.
Figure 8: interactions for reservation of resources
2.3. SORMA Deployed System
Figure 9 shows how the components described in the previous sections are deployed from a logical
point of view. The figure shows the three main stakeholders (Consumers, Resource Providers and the
SORMA Grid Market), and the components that are required for each of them:
• Consumers will be running the client-side Intelligent Tools, and/or having their own client
application accessing the SORMA Market through the SORMA API (see next section 4.4.1)
• Resource Providers will be running the provider-side Intelligent Tools and the EERM, in order to
offer their resources to the SORMA market and to Consumers
• SORMA Market will be running all the other components, namely the Core Market Components
and the Security Services
18
Figure 9: high-level components deployment view
2.3.1. SORMA Test beds
In order to test integration, components have been deployed onto two main test beds: 1) the
development test bed, and 2) the wide-area distributed test bed.
A) Development test bed
For the deployment and testing of components, a test bed consisting of virtual machines was set up in
the second year of SORMA at the UPC.
The test bed consists of two PCs (PC1 and PC2), each with a quad-core processor, 4 GB of RAM, and
250 GB of disk. For the virtualization Xen is used. The operating system is Linux Fedora 8. For the
management of the virtual machines in each PC, a tool developed at UPC called the Local Resource
Manager (LRM) is used.
This type of test bed for the purpose of providing quickly a flexible test bed for SORMA has the
following advantages:
•
With virtual machines, the users can be granted – if needed - root access (Linux) or administrator
access (Windows) to their virtual machine. The root or administrator permissions are sometimes
needed to install software and deploy certain components, which is not possible with the more
19
restricted user access. Traditional approaches not based on virtualization must often apply nontrivial solutions to overcome these limitations.
•
The isolation of virtual machines between each other is an important feature, since then the
activities of some users do not influence on the resources available to other users. In order to
achieve this isolation, the virtualization tools allow making strict resource assignments to each
virtual machine. While with the traditional approach without virtualization, where many users
work within their account simultaneously on the same operating system and the same physical PC,
a computer intensive activity of a certain user does usually affect the resources available to the
other users
•
Virtualization makes it possible to boot different operating systems in the virtual machines. A
share of the physical resources of the PC is assigned to each virtual machine. The practical usage
is that some of the PC’s virtual machines may be configured to have Linux as the operating
system, while others may have Windows.
The Local Resource Manager is a software infrastructure developed at UPC, which allows the
management of virtual machines in desktop PCs. The implementation of the LRM interacts with Xen
for the virtualization of the PC. The Local Resource Manager tool provides a menu-guided access to
the functionalities of Xen, which allows the administrator to perform configuration, setup and
maintenance of the virtual machines.
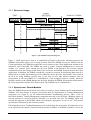
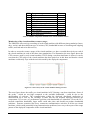
Once all virtual machines are set up, their status can be checked. This is shown in the following
figures where information concerning the different virtual machines set up for the SORMA
developers can be seen. In Figure 10 the information obtained from the LRM is shown for PC1.
Figure 11 shows the virtual machines in PC2. It can be seen that information about the operating
system, status, and assigned MHz of the virtual machines is given. The column QoS type further
indicates one of the 4 operating policies, which can be assigned to the virtual machines. All of the 4
policies assure to the virtual machines the MHz assigned if this CPU usage is needed by the VMs. The
QoS levels are then different in terms of additional CPU, however, which is then assigned to the VMs
from the unused/idle CPU resource.
Figure 10: Deployed VMs in PC1
20
Figure 11: Deployed VMs in PC2
Deployed SORMA components:
SORMA developers have basic access with ssh to the virtual machines, both Linux and Windows.
Alternatively, the access with a graphical interface to the Windows virtual machines is possible using
the Remote Desktop tool, which is available both in Windows and Linux. The graphical access to
Linux virtual machine can be achieved with tools similar to VNC.
The virtual machines are assigned to the developers of SORMA, where each developer works on one
or more virtual machine. The components of the software project are networked. Some apply the
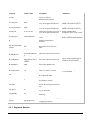
client-server model, others use a Peer-to-Peer infrastructure for communication. Table 3 and Table 4
indicate the components deployed on PC1 and PC2, respectively.
The typical usage of the virtual machines in our use case is for the deployment of the already
developed components, such that the interaction between them can be tested on the test bed. The
development of the software components itself is done locally at the machines of each SORMA
partner. Test runs are therefore the main activity in the test bed.
VM
pc0
pc1
pc2
pc3
pc4
pc5
pc6
pc7
pc8
pc9
Component type
Admin
Admin
Trading Management
Security Service
Market Exchange
Bid Generator
Bid Generator
Trading Management
Testing tools
Bid Generator
OS
Linux
Linux
Linux
Linux
Linux
Linux
Linux
Windows
Windows
Windows
Table 2: SORMA components installed on the virtual machines of PC1
21
VM
pc0
pc1
pc2
pc3
pc4
pc5
pc6
pc7
pc8
pc9
Component type
Admin
Admin
TXT application
MIS
Correlation Sys application
EERM
EERM
Bid Generator
Correlation Sys application
TXT application
OS
Linux
Linux
Linux
Linux
Linux
Linux
Linux
Windows
Windows
Windows
Table 3: SORMA components installed on the virtual machines of PC2.
Monitoring of the virtual machine resource usage:
The LRM tool offers activity recording of each virtual machine with different time granularity (hours,
days, weeks) and about different type of actions (CPU, bandwidth in terms of incoming and outgoing
traffic, and read and write disk access).
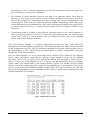
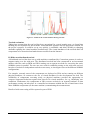
In order to assess the resource usage of the virtual machines, we have recorded the activity on each of
the virtual machines in each of the three time granularities. For illustration, the next figure shows the
CPU resources used by each virtual machine of PC2 during a one hour timeframe is shown. It can be
seen that the CPU usage of the virtual machines has been quite low in this hour and that the virtual
machines could easily cope with the activities made by the deployed components.
Figure 12: CPU Activity of the virtual machines during one hour
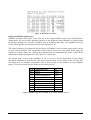
The next figure shows the traffic per virtual machine in PC2 during a one hour timeframe. Some of
the peaks - which are not high compared to the available bandwidth – could be due to the
downloading of software. The communication within the deployed distributed application is
characterized up to now by the exchange of short and not too frequent messages between the
components. Up to now, no performance problem with bandwidth was identified. Given the PC’s
network connection bandwidth, larger traffic could take place and should not produce bandwidth
problems. Extreme scenarios like heavy concurrent communication activities in all the ten virtual
machines, which could potentially bring communication problems, have not yet been part of the usage
pattern of the deployed components in the virtual machines.
22
Figure 13: Traffic in the virtual machines during one hour
Test bed evaluation:
Taking into account that the test bed has been operational for several months now, we found that
building the development test bed with the virtual machine approach was an appropriate solution for
the project’s purpose. It could be set up very quickly, is extensible, and allows flexibly to changing
demands regarding the virtual machine characteristics. The virtual machines of the test bed allow all
components to be networked and make them accessible from the Internet.
B) Wide-area distributed test bed
A distributed test bed has been set up with machines contributed by Consortium partners in order to
support testing over the wide-area. The distributed test bed has been constructed in an incremental
manner with sites such as BFM and UKA starting out as separate test beds for exercising the entire
SORMA system in parallel. The sites are now used for scalability testing on the wide-area test bed,
but also revert back to independent test beds as necessary, to investigate issues with different SORMA
configurations.
For example, currently most of the components are deployed at UKA and are running on different
physical machines, in contrast to the use of virtual machines for the development test bed. The
availability of components executing solely on physical machines provides the opportunity to
compare component behaviour against that observed in virtual machines, for e.g. identifying race
conditions. Furthermore, the components at UKA execute exclusively on separate hardware so that
performance testing can take place in a controlled environment without the risk of interference from
other SORMA components (on the same machine) contaminating the measurements.
Details of wide-area testing will be reported as part of WP6
23
2.4.
SORMA Software Development Methodology
The software development process in SORMA is executed using a well-defined methodology. The
methodology contains the following parts:
• Development Best Practices: Survey of literature, links and common rules for software
development; Specification of a common methodology and rules for software development.
• Management of the SORMA Components’ source code: The source code is structured and
stored in the SORMA SVN (Subversion2); Specification of a common methodology for
structuring the source code of the components’ stable and trial versions, naming and
versioning conventions.
• Management of the Build, Test and Deployment Processes: The build, test and deployment
processes of the SORMA components are managed and executed using Apache ANT3-based
scripts, which incorporate best practices as well as standardize and simplify the processes of
building, testing and deployment. Apache IVY4 is adopted in order to manage and resolve
dependencies between the components and 3rd party java-libraries. Furthermore, the
components, test-clients and test-files are uploaded, versioned and kept up-to-date in SORMA
IVY. For the purpose to automate the continuous integration, build and test processes, we
adopted Cruise Control5.
• Continuous Testing of the SORMA Components: In order to verify the component’s
functionality and to speed up the integration processes, each component has to implement it’s
own unit- and integration tests. The unit-tests (JUnit6) verify the functionality of the target
component. To test an individual component that depends on interaction with other
components, the other components are implemented as a Mock Objects7 or Mock Service
Objects.
• Debugging and Issue Tracking: In order to report, resolve and document the solutions of
issues arose during the software development processes, we selected to adopt Bugzilla8.
2.4.1. Revision Control
The SORMA Subversion revision control repository is structured into the following top-level
directories:
•
•
•
•
.meta: Tools and scripts for project administrators, developers do not need to access these
build-bootstrap: Developers must export this directory to be able to use the standard
SORMA build mechanisms
code: The root of the SORMA source code
notes: This is documentation that is interesting for the project, but not required by users as
part of a source code download.
The code directory has 3 subdirectories:
• branches: Contains component code or component-level code branches (e.g. for release
branches, developer trials, branches for non-trivial bug fixes
• tags: For tagging a particular release of SORMA
2
https://portals.rdg.ac.uk/sorma/svn/src/
http://ant.apache.org/
4
http://ant.apache.org/ivy/
5
http://cruisecontrol.sourceforge.net/
6
http://www.junit.org/
7
http://www.junit.org/taxonomy/term/8
8
http://www.bugzilla.org/
3
24
•
trunk: The latest development version of the SORMA source code and support files are
located under this directory.
NOTE: The trunk and build-bootstrap directories are located on the accompanying DVD
(under
the
src
directory).
The
SORMA
SVN
is
available
at:
https://portals.rdg.ac.uk/sorma/svn/src/.
The structure of the code/trunk SVN folder conforms to the layers of the SORMA architecture:
• common: a library that provides functionality required by all components across the whole of
SORMA. For example base logging classes and custom unit testing assertions.
• coreMarketServices: contains subdirectories for the following components:
marketExchange, marketInformation, logging and marketDirectory
• exampleIvyComponent: an example component that is used to help introduce developers
to the build and component publishing mechanisms.
• intelligentTools: contains subdirectories for components that comprise the intelligent
tools, including: agent services, the bid generator, demand and supply modeling, and
associated portlets that are required at the consumer and provider sides of the market.
• openGridMarket: contains subdirectories for components required for the SORMA
market, including: Trading Management, The Economically Enhanced Resource Manager
(EERM), Matchmaking, Payment services, Security and Contract Management.
• pilotApplications: contains code and test data for the Correlation Systems pilot
application.
• resourceFabrics: contains subdirectories for components related to the management of
resource fabrics.
• shared: contains subdirectories for libraries and services that are shared across multiple
SORMA components, for example SORMA message protocols, shared log4j configuration
files, and the logging service used to demonstrate internal SORMA state for demonstration
and debugging purposes.
Each SORMA-specific component’s source code is packaged under the eu.sormaproject name
space.
2.4.2. Build mechanisms using Apache ANT and IVY
Apache Ant and Apache Ivy are build and dependency tools, respectively, that are used to support a
common and consistent methodology for the SORMA development process.
Apache Ant is a Java-based build tool allowing development of software across multiple platforms9.
Ant provides flexible configuration mechanisms for the build-process by specifying so-called targets
that are implemented using an XML syntax. Targets are defined for tasks such as e.g. build directory
preparation, code compilation and packaging. Adopting best practices for Apache Ant-based
development, SORMA offers various ‘standard’ templates (build files) for building libraries,
applications, Web Services and JSR-168 portlets. The standard build templates (located in the
src/build-bootstrap directory on the DVD) are imported into component-specific build files,
resulting, in the simplest case, in developers only having to create a simplistic 7 line long build file in
order to build, package and publish their component to the SORMA-wide integration testing
repository. The standard build templates reduce redundancy across the project and do not require
developers to become experts in using Apache Ant.
9
http://ant.apache.org/manual/index.html
25
Apache Ivy10 is a tool that enables the automated management – recording, tracking, resolving and
reporting – of software dependencies. Apache Ivy is powerful tool which is tightly integrated with ant
and enables a flexible configuration of dependencies. It provides various Ant-tasks ranging from
dependency resolution to dependency reporting and artifact publication. An important feature is that
Ivy resolves transitive dependencies between components and libraries.
In SORMA we have configured a number of Ivy repositories that contain both SORMA developed
components as well as 3rd party dependencies that are required to build and execute SORMA
components. Repositories include:
1. Release: Contains official SORMA releases that are made available via the SORMA Website.
Releases are generated automatically in response to a request from the developer leading the
release effort. The release is built and packaged directly from Subversion and takes transitive
dependencies from the Vendor repository. The Release repository is read-only via HTTP;
Developers are not able to write artifacts to this Ivy repository directly.
2. Integration: A repository shared over the network that all developers use to publish/retrieve
components as part of the integration testing efforts. A copy of the integration repository
contents can be found on the DVD accompanying this report under the /ivy/sorma
directory.
3. Vendor: SORMA currently has 3 separate vendor repositories that contain 3rd party libraries.
These include:
a. Sorma-vendor: All developers have read-write access so that they can publish new
libraries (jars) as required by their components. A snapshot can be found on the DVD
under /ivy/vendor/sorma-vendor.
b. Maven-mirror: A partial mirror of the public Maven repository with name space and
other meta data issues associated with the public Maven repository resolved. Frequent
down-time and incorrect metadata entries at the public Maven repository prompted
consortium to import and host our own partial mirror. A snapshot can be found on the
DVD under /ivy/vendor/maven-mirror.
c. Riotfamily-mirror: A mirror of the Riot Family project’s Ivy repository. A snapshot
can be found on the DVD under /ivy/vendor/riotfamily-mirror.
4. Local: A private repository located on each developers' machine. Used to publish artifacts for
testing locally as part of single developer integration and unit testing.
5. Cache: Not strictly a repository, the cache is located on each developer's machine and holds
copies of artifacts that have previously been downloaded from each of the repositories listed
above. The cache removes the need to repeatedly download artifacts (that have not changed)
from the remote repositories. Apart from saving bandwidth, the cache allows developers to
continue working when they are offline (e.g. using a laptop at an airport or on a train).
Further details of the build mechanisms can be found in Section 5 SORMA System developer guide.
10
http://ant.apache.org/ivy/history/latest-release/index.html
26
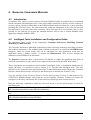
3. Resource Providers Manuals
3.1. Introduction
A Provider who wishes to offer their resources on the SORMA market needs to install and run the
following components:
• Provider Side Intelligent Tools
• Economically Enhanced Resource Manager (EERM)
All components can be found on the SORMA system DVD, as described in section 1.1.1 of this
document
3.1.1. Pre-requirements
The Economically Enhanced Resource Manager and supporting components have been tested on the
following platform:
•
•
Linux kernel 2.6 or later.
Sun Java Development Kit 1.6
A number of network ports need to be open through the provider's organisational firewall in order that
the provider-side components can communicate with the core SORMA services that are running on
the SORMA test bed. In addition a number of ports are required to be open between the machine(s)
hosting the SORMA provider services. During individual components’ installation instructions, ports
will be specified whenever necessary.
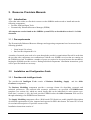
3.2. Installation and Configuration Guide
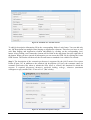
3.2.1. Provider-side intelligent tools
The provider-side Intelligent Tools consist of Business Modelling, Supply
Generator components.
and the Offer
The Business Modelling component provides a message format for describing economic and
technical preferences. The technical and economic preferences are specified in EJSDLPrivate
templates (see section 4.4), which are stored locally and can be individual for each resource type.
Each time a resource is free, the local provider EERM invokes the Offer Generator Web services
through submitting of an EJSDLPrivate document.
The Supply Modelling component offers a Web-based GUI (Portlet) to enable simplified description
of technical requirements for jobs, imported and exported in JSDL data format. The same GUI is used
for a technical description of a provider resource offer.
Installation instructions consist of:
27
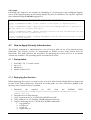
a.
b.
c.
Install, configure and test the installation of the Offer Generator
Use pre-defined EJSDLPrivate templates in case of an application based invocation
Install and configure the Supply Modelling Portlet in case of a web based invocation
a. Install, configure and test the installation of the Offer Generator
a.1) Prerequisites
• Tomcat 5.5 with installed JAX-WS: copy JAX-WS jars into Tomcat's directory /common/lib
• Jakarta's commons-io.jar and commons-fileupload.jar: copy both jars into Tomcat's
/common/lib
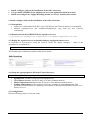
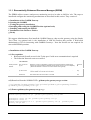
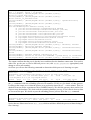
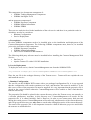
a.2) Download from the SORMA DVD the AgentService.war:
/ivy/sorma/eu.sormaproject/AgentService/LATEST/AgentService.war
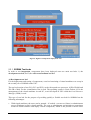
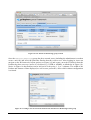
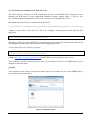
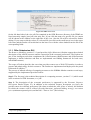
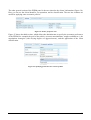
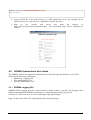
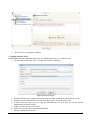
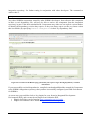
a.3) Deploy the AgentService on an installed and pre-configured tomcat server
As described in Prerequisites using the Tomcat "WAR file deploy manager" - check if the
AgentService is available on:
http://<HOSTNAME>:<PORT>/AgentService/AgentService
This should return information similar to that shown below:
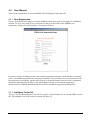
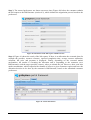
a.4) Setup the agent.properties file in the Tomcat directory:
$CATALINA_HOME/webapps/AgentService/WEB-INF
• AgentService: Set the IP and port of the AgentService
• Core Market Services: Set the IP and port of the Core Market Services
• Market Information Service Set the IP and port of the Market Information Service
• Trading Management Set the target auction name, running on Trading Management. This
should be later automated, by requesting a description of the registered auctions from the Core
Market Services.
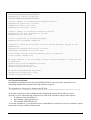
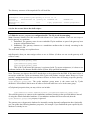
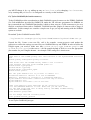
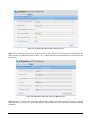
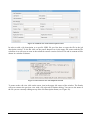
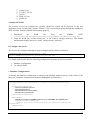
a.5) Configuration
Edit the following values to suit your setup:
28
##################################
#BidGenerator specific properties
##################################
# Public address of the AgentService Request Executor
bidgenerator.public.host localhost
bidgenerator.public.port 8080
bidgenerator.policy.dir policy
# Public address to the Market Information Service
bidgenerator.mis.host pcmargenat.ac.upc.edu
bidgenerator.mis.port 8880
# Static properties for Trading Management
bidgenerator.auctionName theAuction
# Address to which the Core Market Services (Market Exchange) respond to the
BidGenerator
bidgenerator.exchange.service.host localhost
bidgenerator.exchange.service.port 8090
# Core Market Services (Market Exchange) specific properties
client.channel channel.http
## Public address to the Core Market Services (Market Exchange) to which the bid
is submitted
channel.http.param.localAddress localhost
channel.http.param.port 8181
channel.http.param.verbose true
## Define ChannelProvider Properties
channel.http.param.protocol http
channel.http.param.baseUrl
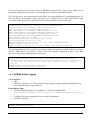
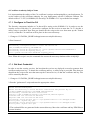
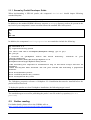
a.6) Test the Installation
Download the AgentService client from the SORMA DVD in order to test the AgentService by
submitting EJSDLPrivate-based provider and consumer requests.
The AgentService client can be found on the DVD at:
/ivy/sorma/eu.sormaproject/BidGenerator/LATEST/AgentServiceClient.tar.gz
To test the correctness of the installation and configuration, unpack and run the test client
AgentServiceTest with following parameters for each of the consumer and provider requests:
• IP Address of the AgentService
• Port Number of the AgentService
• The example EJSDLPrivate file
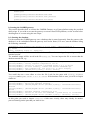
To test the AgentService, you should open two command line consoles for each, the consumer request
and provider request, and do following call:
29
java -cp agentServiceClient.jar:lib/* eu.sormaproject.web.client.AgentServiceTest
<IP-Address-AgentService-Machine> <PORT-NUMBER> <EJSDLPrivate-FILEPATH>
Local tests are executed with the *DUMMY* requests, where the AgentService returns a DUMMY
response
java -cp agentServiceClient.jar:lib/* eu.sormaproject.web.client.AgentServiceTest
147.83.30.215 16789 ConsumerEJSDLPrivateDataDUMMY.xml
java -cp agentServiceClient.jar:lib/* eu.sormaproject.web.client.AgentServiceTest
147.83.30.215 16789 ProviderEJSDLPrivateDataDUMMY.xml
Integration tests are executed with the following requests
java -cp agentServiceClient.jar:lib/* eu.sormaproject.web.client.AgentServiceTest
147.83.30.215 16789 ConsumerEJSDLPrivateData-2.5.5.xml
java -cp agentServiceClient.jar:lib/* eu.sormaproject.web.client.AgentServiceTest
147.83.30.215 16789 ProviderEJSDLPrivateData-2.5.5.xml
When the request are successful, you will see on both consoles the received "match" document in
form of XML-File or receive a status report of the cause, why it was not successful.
b. Use pre-defined EJSDLPrivate templates in case of an application based invocation
Examples of pre-defined EJSDLPrivate templates can be found on the SORMA DVD at e.g.
/src/sorma/trunk/shared/message/test/ProviderEJSDLPrivateData.xml
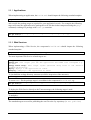
c. Install and configure the Supply Modelling Portlet in case of a web based invocation. The
source code for the portlets can be found on the DVD at :
/src/sorma/trunk/intelligentTools/provider/providerPortlets
c.1) Prerequisites
• Installed Apache Tomcat Application Server Version 5.5 or higher.
• Installed Gridsphere Portlet Container Version 2.2.10.
c.2) Installation
Deploy the Technical Resource Modelling Portlet (TRMP). The portlet war file can be found on the
DVD
at
/ivy/sorma/eu.sormaproject/technical-resource-modellingportlet/LATEST/technical-resource-modelling-portlet.war
Copy the war file to $CATALINA_HOME/webapps/ and restart the servlet container (Tomcat).
Tomcat will extract the Portlet project in webapps in a directory like technicalResourceModeling.
Enter the following command to enable the Technical Resource Modelling Portlet Portlets. If the
name of the directory is called technicalResourceModeling, the command to be executed is like:
touch $CATALAINA_HOME/webapps/gridsphere/WEBINF/CustomPortal/portlets/technicalResourceModeling
c.3) Administration
On first start up the TRMP creates a java properties file called "resources.prop" in the webapp
directory of tomcat. This file contains a variable defining the path where the created JSDL files of the
Portlet are stored. If you want your JSDL files to be saved in a specific location you can set the path
to the directory here. However the path provided must be relative to the base directory of the TRMP.
30
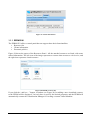
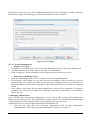
3.2.2. Economically Enhanced Resource Manager (EERM)
The EERM utilises resource and process monitoring services in order to fulfil its' role. The steps to
install and configure the monitoring mechanisms are described in this section. They consist of:
a. Installation of the GridRM Gateway
b. Starting the GridRM
c. Testing the gateway installation
d. Installing and testing the GridRM Portlets (optional task)
e. Installing and running the EERM
f. Installation of the Resource Fabrics
g. Ready
We suggest Administrators first install the GridRM Gateway, then test the gateway using the Simple
Test Client. An optional task is the installation of JSR-168 Portlets that provide a Web-based
administrative GUI for interacting with GridRM Gateways - Note the Portlets are not required for
successful EERM operation.
a. Installation of the GridRM Gateway
a.1) Pre-requisites:
• Bi-directional firewall access for the Tycho port if wide-area communication is required
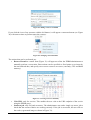
• The following Network ports are required:
Component
Port number
(ServerSocket)
Port description
Container?
GridRM
54321, but can be
gateway's internal
any port
database
Each GridRM gateway has an internal Hypersonic database that it uses. Currently the
database is running as a standalone component (good for development and debugging
purposes; later we will embed the database into the gateway so that a port is not required).
By default the database is located on the same machine as the gateway.
Hypersonic
DB
Tycho Mediator
typically 8080, but
any can be used
Wide-area communication over HTTPS between Tycho mediators on remote machines,
single port. We typically stick to 8080, 80, because most firewalls allow traffic to these ports
to pass by default. Port must be open both ways.
Embedded
Jetty
GridRM Gateway
dynamically
assigned port
Local area socket communications between the GridRM gateway and a Tycho mediator
either located within the same JVM or on the LAN.
Embedded
Jetty
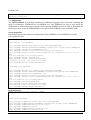
a.2) Download from the SORMA DVD: gridrm-tycho-gateway.tar.gz version:
/ivy/vendor/sorma-vendor/org.gridrm/gridrm-tycho-gateway/LATEST/
gridrm-tycho-gateway.tar.gz
a.3) Extract gridrm-tycho-gateway.tar.gz, e.g.:
gridrm@kat:~/bin$ ls
gridrm-tycho-gateway.tar.gz
gridrm-tycho-gateway.tar.gz.md5
gridrm@kat:~/bin$ tar xzf gridrm-tycho-gateway.tar.gz
gridrm@kat:~/bin$ ls
gridrm-tycho-gateway-0.9.3.1 gridrm-tycho-gateway.tar.gz
gateway.tar.gz.md5
gridrm-tycho-
31
The directory structure of the unpacked file will look like:
gridrm@kat:~/bin$ cd gridrm-tycho-gateway-0.9.3.1/
gridrm@kat:~/bin/gridrm-tycho-gateway-0.9.3.1$ ls -F
classes/
dbservermode.sh gateway.sh LICENSE.txt
sqltool.sh
dbmanager.sh doc/
lib/
log4j.properties
working/
README.txt
server.properties
a.4) Set the execute bit on the shell scripts:
gridrm@kat:~/bin/gridrm-tycho-gateway-0.9.3.1$ chmod 744 *.sh
a.5) Edit the server.properties configuration file. The file is self-documenting.
Note: Gateways interact over the network with clients via a Tycho mediator. There are two ways to
bind a gateway to a mediator:
1. Embedded: The gateway starts its own embedded Tycho mediator as part of the gateway boot
sequence (default behaviour).
2. Standalone: The gateway connects to a standalone mediator that is already executing in the
gateway's LAN.
The associated settings are explained next.
a.6) Properties that you must assign values to are as follows (if these are not set the gateway will
refuse to start):
tycho.gridrm.gateway.name
tycho.mediator.group.name
tycho.gridrm.gateway.name:
This is the Tycho name this gateway is registered with. To ensure uniqueness, it is best to use
a scheme similar to the Internet Domain Name System fully qualified hostnames.
Note: The name you choose does NOT already have to be registered in the DNS. If the name below is
not unique within the Tycho environment, then Tycho will produce a unique name. However, if you
provide a unique name here then your clients will have an easier time of locating a specific gateway,
when they perform a search.
tycho.mediator.group.name: The tycho mediator group name is the name used by Tycho
mediators. All mediators that want to be able to find each other have to be in the same group.
a.7) Optional properties that you may wish to set include:
tycho.mediator.socket.address=socket://<standalone.mediator.name>:3535/.
This tells the gateway to connect to the standalone mediator listening at the specified address instead
of using the default embedded mediator. If a standalone mediator has been selected, then the
tycho.mediator.group.name property is ignored.
The gateway uses a hypersonic database for internally storing data and configuration data. Optionally
you can update the following database properties, for example if you find that the port required by the
database is already in use:
32
server.port
gridrm.gateway.internal.database.user.name
gridrm.gateway.internal.database.user.password
gridrm.gateway.internal.database.url.server
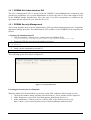
b. Starting the GridRM gateway
This section describes how to execute the GridRM Gateway on a Linux platform using the provided
shell scripts. If you wish to execute the gateway on a non Linux/UNIX platform, see the section below
detailing how to execute using the ant scripts.
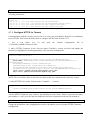
b.1) Starting the database
For the moment the GridRM gateway uses a database that is started separately from the gateway (the
database is to be embedded within the gateway itself in the future). For now, start the database using
the following command:
gridrm@kat:~/bin/gridrm-tycho-gateway-0.9.3.1$ nohup ./dbservermode.sh &
[1] 22198
nohup: appending output to `nohup.out'
Note: The nohup command means that the database will continue running when you log out of your
terminal session.
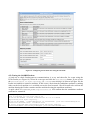
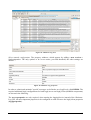
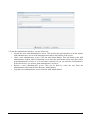
The standard output will be saved in the file nohup.out. You can inspect the file to ensure that the
database started OK, e.g.:
gridrm@kat:~/bin/gridrm-tycho-gateway-0.9.3.1$ tail -6 nohup.out
[Server@16a9d42]: Startup sequence completed in 543 ms.
[Server@16a9d42]: 2009-01-15 13:26:08.779 HSQLDB server 1.8.0 is online
[Server@16a9d42]: To close normally, connect and execute SHUTDOWN SQL
[Server@16a9d42]: From command line, use [Ctrl]+[C] to abort abruptly
[Server@16a9d42]: [Thread[main,5,main]]: start() exiting
You could also use a text editor to view the file. Look for the parts with Startup sequence
completed and HSQLDB server 1.8.0 is online. If the database fails to start, you will see output
similar to:
gridrm@kat:~/bin/gridrm-tycho-gateway-0.9.3.1$ tail -6 nohup.out
[Server@16a9d42]: Initiating shutdown sequence...
[Server@16a9d42]: [Thread[HSQLDB Server @16a9d42,5,main]]: releaseServerSocket()
entered
[Server@16a9d42]: [Thread[HSQLDB Server @16a9d42,5,main]]: releaseServerSocket()
exited
[Server@16a9d42]: Shutdown sequence completed in 8 ms.
[Server@16a9d42]: 2009-01-15 13:34:50.551 SHUTDOWN : System.exit() is called next
[Server@16a9d42]: [Thread[HSQLDB Server @16a9d42,5,main]]: shutdown() exiting...
At this point you need to inspect nohup.out a little more closely; there may already be another
process listening on the port that you want to use:
33
[Server@16a9d42]: [Thread[HSQLDB Server @16a9d42,5,main]]: Value=in milliseconds.
3000 = 3 seconds, 600000 = 10 minutes
[Server@16a9d42]: [Thread[HSQLDB Server @16a9d42,5,main]]:
server.no_system_exit=false
[Server@16a9d42]: [Thread[HSQLDB Server @16a9d42,5,main]]:
server.restart_on_shutdown=false
[Server@16a9d42]: [Thread[HSQLDB Server @16a9d42,5,main]]: openServerSocket()
entered
[Server@16a9d42]: [Thread[HSQLDB Server @16a9d42,5,main]]:
run()/openServerSocket():
java.net.BindException: Address already in use
at java.net.PlainSocketImpl.socketBind(Native Method)
at java.net.PlainSocketImpl.bind(PlainSocketImpl.java:359)
at java.net.ServerSocket.bind(ServerSocket.java:319)
at java.net.ServerSocket.<init>(ServerSocket.java:185)
at java.net.ServerSocket.<init>(ServerSocket.java:97)
at org.hsqldb.HsqlSocketFactory.createServerSocket(Unknown Source)
at org.hsqldb.Server.openServerSocket(Unknown Source)
at org.hsqldb.Server.run(Unknown Source)
at org.hsqldb.Server.access$000(Unknown Source)
at org.hsqldb.Server$ServerThread.run(Unknown Source)
[Server@16a9d42]: [Thread[HSQLDB Server @16a9d42,5,main]]: shutdown() entered
[Server@16a9d42]: Initiating shutdown sequence...
[Server@16a9d42]: [Thread[HSQLDB Server @16a9d42,5,main]]: releaseServerSocket()
entered
[Server@16a9d42]: [Thread[HSQLDB Server @16a9d42,5,main]]: releaseServerSocket()
exited
[Server@16a9d42]: Shutdown sequence completed in 8 ms.
[Server@16a9d42]: 2009-01-15 13:34:50.551 SHUTDOWN : System.exit() is called next
[Server@16a9d42]: [Thread[HSQLDB Server @16a9d42,5,main]]: shutdown() exiting...
The output confirms that the port is already in use and therefore the database cannot start. You need to
either free up the port or find a different port to use (edit server.properties appropriately and
change to a free port number).
On Linux you can use the following command to determine which process is listening on a port:
gridrm@kat:~/bin/gridrm-tycho-gateway-0.9.3.1$
54321/tcp:
22198
gridrm@kat:~/bin/gridrm-tycho-gateway-0.9.3.1$
gridrm
22198 0.0 0.6 1087904 23452 pts/0
./lib/hsqldb-1.8.0.7.jar org.hsqldb.Server
gridrm
22275 0.0 0.0
1952
644 pts/0
fuser -n tcp 54321
ps auxw |grep 22198
Sl
13:26
0:00 java -cp
S+
13:42
0:00 grep 22198
First we used the fuser command to output the ID of the process bound to port 54321. Then we used
the ps command with the offending process's ID number (22198) to get details of that process.
Looking at the output we see that the process was previously started by us .... wait a minute! This is a
database from an earlier experiment with a GridRM Gateway. We shut the gateway down earlier, but
forget to stop the database. We don't need the remaining database process, so let's shut it down so that
we can reuse the port. We decide to pass the offending process' process ID to the kill command:
gridrm@kat:/home/users/rdg/gms$ kill 22198
gridrm@kat:/home/users/rdg/gms$ ps auxw |grep 22198
gridrm
22306 0.0 0.0
1956
648 pts/0
S+
13:54
0:00 grep 22198
Notice that we did not need to use kill -KILL which would have killed the process without letting it
first clean up.)
34
b.2) Starting the GridRM Gateway
Once the gateway's database is running, the gateway can be started:
nohup ./gateway &
Again standard output is redirected to nohup.out and the nohup command means that the gateway
will continue running in the background when you log out of your terminal session. Make sure that
the gateway started successfully by inspecting nohup.out, e.g.:
cat nohup.out for a static snapshot of the file, or tail -f nohup.out to see changes to the file in real-time.
nohup.out will contain a number of messages ending with:
INFO: Driver registration successful:
uk.ac.port.dsg.gridRM.info.providers.gangliaGridRMv2.GangliaGridRMv2Driver
07-Sep-2007 21:47:07 uk.ac.port.dsg.gridRM.info.localLayerCore.GridRMDriverManager
registerDefaultDrivers
INFO: **************DRIVER REGISTRATION PHASE COMPLETE **************************
At this point the gateway is ready for action; it has registered with the Tycho registry, tested access to
the internal database, successfully loaded the default resource drivers and is waiting to receive client
requests
c. Test the gateway installation
The Simple Test Client can be used to test that the GridRM gateway is accessible over the network
and to retrieve sample data.
c.1) Download and unpack the gridrm-simple-test-client from the DVD:
/ivy/vendor/sorma-vendor/org.gridrm/gridrm-simple-test-client/
LATEST/gridrm-simple-test-client.tar.gz
c.2) Edit the config.properties file to point to your gateway (the file is extensively commented)
c.2) Install and run the test client against your gateway, e.g :
yabalka2:gridrm-simple-test-client-0.9.2 gms$ ./simpleTestClient.sh
If you see the following at the end of the Simple Test client's standard output or log file, then you
have successfully managed to contact the gateway and perform a simple query. Depending on whether
you have just installed the gateway or have been using the gateway for some time, you will have 0 or
more resources reported. In this example we have 0 because we have just installed the gateway and
have not registered any resources yet.
35
INFO [main] [SimpleTestClient] - Start off by listing the resources that are already
registered at the gatway:
INFO [main]
gateway...
[SimpleTestClient]
INFO
[main]
[MonitoringImpl]
gateway.obufki2.lan...
-
Requesting
-
the
Resolving
list
of
address
resources
for
registered
gateway:
with
gridrm-
DEBUG [main] [SimpleTestClient] - After requesting the list of registered resources
DEBUG [main] [SimpleTestClient] - Resource length is: 0
INFO [main] [SimpleTestClient] - The gateway does not have any resources registered.
INFO [main] [SimpleTestClient] -
If you experience problems connecting to the gateway, please refer to the GridRM troubleshooting
guide at: https://portals.rdg.ac.uk/gridrm/index.php/GlobalLayerTroubleshootingGuide .
d. Installing and Testing GridRM Portlets (optional task)
An optional task is the installation of JSR-168 Portlets that provide a Web-based administrative GUI
for interacting with GridRM Gateways - Note the Portlets are not required for successful EERM
operation but they can be helpful for administering resources at a provider's site. Operational details
can be found in the resource provider's user guide.
d.1) Download from the SORMA DVD: GridRM Portlets v 0.9.2 war file
/ivy/vendor/sormavendor/org.gridrm/gridrmPortlets/LATEST/gridrmPortlets.war
d.2) Pre-requisites
• Gridsphere 2.2.8 (or a later 2.2 series) installed and working.
• Sun Java 1.5 or later.
• A standalone mediator already configured and running (you need to use a standalone mediator
with the GridRM Portlets. Do not try to an embedded mediator from within Tomcat or you
will experience issues)
• Bi-directional firewall access between the local Portlet mediator and the mediator for any
gateway that you wish to connect to.
The following Network ports need to be open:
Component
Port number
(ServerSocket)
Port description
Container?
Tycho
Mediator
Wide-area communication over HTTPS between Tycho mediators on remote machines,
typically 8080, but any
Embedded
single port. We typically stick to 8080, 80, because most firewalls allow traffic to these ports to
can be used
Jetty
pass by default. Port must be open both ways.
Tomcat port
Typically 80, but any
can be used
Client Web browsers connect to this Tomcat port in order to log in to Gridsphere and access
the Portlets
Apache
Tomcat
36
d.3) Install the GridRM Portlets
Copy the gridrmportlets-0.9.2.war to CATALINA_HOME/webapps/ and restart the servlet container
(Tomcat).
Enter the following command to enable the Gridrm Portlets.
touch $CATALAINA_HOME/webapps/gridsphere/WEBINF/CustomPortal/portlets/gridrmPortlets
Login to GridSphere and create a new Portlet group. The menu can be found under the Administration
tab. This will allow portal users to subscribe to the GridRM Portlets. For this example we use the
group name of Resource Monitoring. In Figure 14, the Portlet group is created by providing a group
name and selecting the Portlets that should be part of the group. In this instance we only select the
GridRM monitoring Portlets, but you can combine Portlets from different sources within a single
group.
Figure 14: Portlet Group Manager
Figure 15 shows the Resource Monitoring group after it has been created. Note the edit users
link: Administrators can assign particular groups to users, so that uses can access the group when they
log in to Gridsphere. Further groups can be created by clicking the Create new group button, and
existing groups can be deleted using the associated Delete button.
37
Figure 15: New 'Resource Monitoring' group created
Once the Resource Monitoring group has been created, users (including the administrator) can then
create a new tab and select the particular Portlets that they wish to use. After logging in, users can
navigate to the Welcome tab, layout option (see Figure 16) and create a new tab in which to host the
Portlets they have access to (access is role based, e.g. USER or ADMIN, as alluded to in Figure 14).
Notice in Figure 16 that Portlets can be laid out in a tab using 1, 2 or 3 columns: The width of the
Portlets and amount of data displayed, as well as user preference, affect which column configuration
is selected.
Figure 16: Creating a new tab to host the Portlets from the Resource Monitoring Portlet group
38
Figure 17 shows the Resource Monitoring tab in action: Notice the controls at the bottom of the
page for adding Portlets to the tab in a user defined order.
Figure 17: The Resource Monitoring tab populated with Portlets
d.4) Configure the GridRM Portlets
The resource monitoring Portlets are now installed, but before they can be used they need to be
configured to connect to a GridRM Gateway. You can achieve this by entering the Portlet edit mode
(by clicking the pen icon as shown Figure 18) and setting appropriate values for the gateway you want
to connect to.
39
Figure 18: All Portlets have an edit mode which is accessed via the pen icon
All Portlets have an edit mode section titled 'Configure Gateway' (see Figure 19). Each Portlet can be
set individually to connect to a different gateway, so you will need to edit the settings for each Portlet
you wish to use:
GridRM Gateway Tycho name: The Tycho name of the gateway you want to connect to. This name
corresponds to the tycho.gridrm.gateway.name property that was set in the gateway's configuration file.
Tycho mediator socket address: This is the socket address of the standalone mediator that you are using
for the Portlets.
Tycho mediator group name: Set this to the group name used by the standalone Tycho mediator.
Distinguished Name (DN): Your user name for the gateway.
Passphrase: Your passphrase.
Depending on the Portlet, the edit mode may also contain other parameters that you can set. For
example, the Portlet shown in next figure has a section titled 'Event Subscriptions' where you can
subscribe to receive events from the associated gateway.
40
Figure 19: Configuring Portlet behaviour using the edit mode
d.5) Testing the GridRM Portlets:
A good test to check Portlet/gateway communications is to try and subscribe for events using the
Event Portlet (see Figure 19). Select an event type and click the Save Details button. If you receive
the Initialisation of Tycho blocking API failed error message (as shown in Figure 20) the
Portlet was unable to contact a mediator. If this occurs, check that the standalone mediator is running
either on the local machine or is available across the local network. Check firewall rules to/from the
machine hosting the Portlet container and the machine hosting the standalone mediator.
A quick check of $CATALINA_HOME/logs/catalina.out will confirm that the standalone mediator
could not be contacted:
Attempting to register with the standalone mediator at socket://localhost:3535/
with a hostname of: kat.acet.rdg.ac.uk
21:59:16.852 EVENT Started SocketServer on 0.0.0.0:38569
Registering with Tycho registry...
21:59:16.854 WARN
ConnectException in socketSend: (java.net.ConnectException:
Connection refused) Dest: localhost:3535
An error occurred when registering with the Tycho registry
7792405484:DEBUG:(PortletLayoutEngine.java:actionPerformed:245)
41
In fact in this example the mediator had not been started. Fix the problem (in this case start the
mediator) and try again.
Figure 20: Initialisation of Tycho blocking API failed
After the first test passes successfully, use the Query Core Attributes Portlet to perform a query
against a gateway. If you do not receive any results, then check the following:
• The specified gateway is running.
• Bi-directional communications between the gateway's mediator and the standalone mediator
used by the Portlets.
• Check with the gateway administrator to determine mediator settings - both mediators should
be in the same group).
• Check the $CATALINA_HOME/logs/catalina.out for signs of problems.
e. Installing and running the EERM
e.1) Pre-requirements
•
•
•
Apache Ant 1.7
Apache Tomcat 5.5 or higher
Java 6 SDK
You should also ensure that the following environment variables are correctly configured:
export JAVA_HOME=/your/jdk6/path
export CATALINA_HOME=/your/tomcat/path
42
e.2) Download from the SORMA DVD EERM.war:
/ivy/sorma/eu.sormaproject/EERM/LATEST/EERM.war
e.3) Unpack EERM.war to $CATALINA_HOME/webapps directory.
e.4) Edit file: $CATALINA_HOME/webapps/EERM/WEB-INF/classes/eermConfig.properties,
and set the next properties:
property name
description
agent.tycho.name
put some agent name for the EERM (e.g. eerm-vm.txt.it)
eerm.proxy.service
http://localhost:18080/EERM/WSProxy <-- change localhost by the IP address of your tomcat server and
18080 by the port number
gridrm.gateway.name
Put the name of the gridRM gateway. It must be the same as specified in the property called
"tycho.gridrm.gateway.name" of the file server.properties in your GridRM gateway directory
tycho.mediator.group.name some name the tycho mediator group, for example sorma-eerm.txt.it
agentservice.url
http://147.83.30.246:17567/AgentService/AgentService?wsdl <-- Change the IP and the port of the
AgentService with the address of the AgentService machine to use.
e.5) Now, to run EERM, you only have to run the tomcat server:
$CATALINA_HOME/bin/catalina.sh start
f. Installation of the Resource Fabrics
f.1) Resource monitoring daemon
There are a number of different ways that resources can be monitored depending on their type and any
existing agents that are present. For the purposes of this guide we will describe how to monitor using
Ganglia the popular cluster monitoring tool used in many Grid installations.
First of all, you need to have installed a ganglia monitoring daemon. In Ubuntu or Debian, it's easy to
install it:
$ sudo apt-get install ganglia-monitor gmetad
To start it, run as root the next commands:
$ gmond start
$ gmetad start
To check that Ganglia is running, type: telnet localhost 8649. You should see a large XML
in the console. Keep in mind the host name (bscib12.bsc.es) in the next XML:
<GANGLIA_XML VERSION="2.5.7" SOURCE="gmond">
<CLUSTER
NAME="unspecified"
LOCALTIME="1232101290"
OWNER="unspecified"
LATLONG="unspecified" URL="unspecified">
<HOST
NAME="bscib12.bsc.es"
IP="84.88.50.91"
REPORTED="1232101271"
TN="19"
TMAX="20" DMAX="0" LOCATION="unspecified" GMOND_STARTED="1232101235">
<METRIC NAME="cpu_nice" VAL="0.4" TYPE="float" UNITS="%" TN="55" TMAX="90"
DMAX="0" SLOPE="both" SOURCE="gmond"/>
The host name of ganglia MUST be the same that the Linux hostname. If you type the command
hostname in the console, the output must be exactly the same (in that example, bscib12.bsc.es). If not,
43
you MUST change it, by .e.g. adding an entry to /etc/hosts, or by changing /etc/hostname,
or by ensuring that you DHCPCD is configured to correctly set the hostname.
f.2) Tycho-GridSAM (for batch resources)
Tycho GridSAM provides a mechanism to bind GridSAM exposed resources to the EERM. GridSAM
is a Grid middleware provided by OMMI UK, under the UK eScience programme. In SORMA we
have extracted the core GridSAM functionality, which we then wrap in a Tycho connector to give us a
flexible event-based front end to GridSAM. GridSAM provides plugins to interact with a range of
middleware. In this example we consider a simple case to get you up and running with the SORMA
system as a whole.
Download Tycho GridSAM from the DVD:
/ivy/sorma/eu.sormaproject/TychoGridSAM/LATEST/TychoGridSAM.tar.gz
Unpack the file. Create a new text file, call it for example, custom.properties and update the
properties to reflect the settings you used for your GridRM Gateway and EERM. In order to utilise the
Ganglia agent, you need to make sure that gridrm.driver.type is set to ganglia and
gridrm.driver.port is either set to 0 (for the ganglia default of 8649, or set to the appropriate
port number for your Ganglia daemon. An example of the config file is shown next:
# The name of the GridRM gateway that this instance of the TychoGridSAM associates
with
gridrm.gateway.name=gridrm-gateway.localhost
# The driver that the GridRM Gateway needs to use to monitor
# the resource that this Tycho GridSAM points to:
gridrm.driver.type=ganglia
#gridrm.driver.type=snmp
#gridrm.driver.type=gridrm_agent
gridrm.driver.port=0
#Set the tycho.mediator.url if you want to connect to a
#standalona mediator. Default is to use an embedded
#mediator. Examples for pointing to a standalone mediator:
#tycho.mediator.url=socket://dom03-lister.acet.rdg.ac.uk:3535
#tycho.mediator.url=
#tycho.mediator.url=socket://10.0.2.200:3535
# The tycho mediator group name must be set correctly in order
# for the embedded mediator to work. Make sure you set this value
# to the same group name that is being used by the EERM, GridRM Gateway,
# and Custom GridRM Agent
tycho.mediator.group.name=
# Do not change this the following value
tycho.gridsam.suffix=_gridsam
To run Tycho-GridSAM, just type:
java -jar TychoGridSAM.jar -properties=custom.properties
44
f.3) Tycho-Services Connector (for Web Services)
The Tycho-Services connector is used to bind Web Services to the EERM. First, you need to have
running your Web Service in your application container (Tomcat, Apache, Jboss...). This is a very
basic operation that will depend on your service, so there are not instructions for this.
Download the Tycho-Services Connector from the DVD:
/ivy/sorma/eu.sormaproject/TychoServices/LATEST/TychoServices.tar.gz
Unpack it and create a new text file, call it for example, custom.properties and add the next
properties:
gridrm.gateway.name=gridrm-gateway.upc.es
tycho.mediator.group.name=sorma-eerm.upc.es
The values of these properties MUST be exactly the same as the properties with the same name in the
GridRM gateway and previously described eermConfig.properties file.
To run Tycho-Services Connector, just type:
java
-jar
TychoServices.jar
url=http://your.service:port/service/path
-properties=custom.properties
-
Change http://your.service:port/service/path by the URL to access locally to your service.
Your machine is ready to accept and serve jobs if you connect via web to the EERM and see your
machine in the main panel.
g. Ready
Your machine is now ready to accept and execute jobs if you connect via web to the EERM and see
your machine in the main panel:
Figure 21: EERM main panel
45
3.3. Provider’s User Manual
This section describes how Resource Provider should use the SORMA components in order to be able
to trade their resources on the SORMA Grid market
The components involved are:
• Intelligent Tools – to model resources and bidding strategies, and to submit offers
• EERM – to monitor job executions (resource usage, etc..)
3.3.1. Resource Modelling GUI
The Technical Resource Modelling Portlet (TRMP) is used to create JSDL-based resource definition
files, so to describe a specific host system (Figure 22):
Figure 22: Standard view of the Technical Resource Modelling
The values for Operating System and CPU Architecture are chosen via drop down menus, CPU
Speed, CPU Count and Disk Space take integer values. Filename represents the name of the JSDL file
you want to create, as shown:
Figure 23: Sample values
A click on the Create JSDL button creates the document.
After a document was created it can be viewed and opened for further editing. To open a document
click on the small pencil-shaped icon in the upper left corner of the Technical Resource Modelling
view. The state of the will change to the view shown in Figure 24:
46
Figure 24: JSDL source view
On the left hand side of the view all files contained in the JSDL Resource directory of the TRMP are
listed (currently sample_host.jsdl is the only file). If you click the name of a specific file, its content
will be shown in the window on the right side of the view. Also the file will be selected for further
editing. If you want to edit the values of a selected file just click on the small arrow icon in the upper
left corner and the Portlet will switch back to the base view with the values loaded from the file to the
corresponding fields.
3.3.2. Offer Submission GUI
The Resource Modelling (section 3.3.1) and provider (Offer Submission) Portlets support the technical
description of the offered resources and the expression of the economic preferences. The Portlets are
part of the intelligent tools that complement the OfferGenerator (BidGenerator and OfferGenerator
implement a similar behaviour and thus we implemented one bidding framework for both cases,
called BidGenerator).
The usage of Portlets describes the case when providers want to use a Web GUI interface in order to
prepare and submit offers for their resources. The Portlets are implemented and deployed in the portal
framework GridSphere11.
The process of manual offering of computing resources to the SORMA-Market contains several steps,
supported by the implemented provider Portlets.
Step 1: The first step is the technical description of a computing resource, (section 3.3.1) which result
in the creation of a JSDL document, res1.jsdl.
Step 2: The description of the economic preferences is supported by the Economic Resource
Description Portlet (Figure 25). In addition to the technical resource description (res1.jsdl), the
provider enters its economic preferences like when to submit the offer (Date to submit), the duration
for which the resource will be offered (Provided duration), preferred bidding strategy, reservation
price (minimum requested price) and the bid’s “Time to Live” (Bid validity).
11
http://www.gridsphere.org/
47
Figure 25: Economic description of the offered resource
Step 3: The entered preferences are shown one more time (Figure 26) before the provider submits the
offer request to the BidGenerator (section 3.2.1), which initiates the negotiation process based on the
preferences.
Figure 26: Submission of the offer-request to BidGenerator
Step 4: Figure 27 shows the result of the offer request. If there is an allocation it shows the economic
data like the reserve price, the generated bid, the calculated payment by the market, allocated job and
consumer.
48
Figure 27: Status information
3.3.3. EERM GUI
The EERM GUI offers a control panel that can support three basic functionalities:
• Resources list
• Clients information
• Economic policies
Figure 28 shows the aspect of the Resources Panel. All the attached resources are listed, with some
related information. The left icon of the image represents a resource that executes a web service, and
the right icon represents a batch resource.
Figure 28: EERM resources list
If you click the “Add new...” button, a window (see Figure 29) for adding a new virtualized resource
to the EERM will be displayed. You only have to specify the desired properties and the EERM will
automatically contact the Virtualization Manager for creating a custom Virtual Machine.
49
Figure 29: adding resources to EERM
If you click the icon of any resource with the left button, it will appear a contextual menu (see Figure
30) with some actions to perform upon the resource.
Figure 30: managing virtual machines
The actions that can be performed are:
• Reserve Resource: a small form (Figure 31) will appear to allow the EERM administrator to
manually perform a reservation. Reservations can be specified as fixed points or as intervals,
the start and end date, and specify one or more resources to reserve (currently, CPU and RAM
memory).
Figure 31: reserving resources manually
•
•
Visit URL: only for services. This enables the user visit to the URL endpoint of the service
using the EERM proxy.
Send test job: only for batch resources. The administrator can send a simple ray-tracer job to
check that the resource fabrics are working correctly. If the job is successful, the user will see
the result (a generated image as shown in Figure 32).
50
Figure 32: testing batch resources
•
Show properties: this opens in a new tab (an example is shown in Figure 33), which is added
to the general panel of the EERM. In this tab, the user can see some information about the
resource:
o System description
o Monitoring information (only CPU at the moment)
o Timetable with the amount of resources reserved (only CPU and memory at the
moment).
Figure 33: showing resource properties
51
The other general section of the EERM panel is the one related to the clients’ information (Figure 34).
Here you can see the client identifier, its reputation, and its classification. The two last columns are
useful for applying some economic policies.
Figure 34: clients’ properties view
Figure 35 shows the third section, which allows the administrator to specify the economic preferences
of the EERM, for example the goal of the policies (revenue maximization, weight workload etc.), the
negotiations strategies (with varying degrees of aggressiveness), and the application of the client
classification.
Figure 35: specifying preferences for resource policies
52
4. Resource Consumers Manuals
4.1. Introduction
A consumer who wants to access resources from the SORMA market is required only to install and
run the consumer-side Intelligent Tools. These tools enable consumers to specify resource requests to
execute a given job and to submit bids to the SORMA Market that will return one or more providers
matching the selection criteria. The same tools allow enable the submission of the job to the selected
Provider and to access the result of the execution. These tools provide a user interface, but it is also
possible for the end-user to by-pass the standard interface and to write a custom SORMA-client
application using the SORMA APIs.
4.2. Intelligent Tools Installation and Configuration Guide
The Intelligent Tools consist of the components Consumer Preferences Modelling, Demand
Modelling and BidGenerator.
The Consumer Preferences Modelling component provides a message format for describing economic
and technical preferences. The technical and economic preferences are specified in EJSDLPrivate
templates, which are stored locally and can be individual for each application. Each time an
application needs a further resource, it invokes the BidGenerator Web services through the
submission of an EJSDLPrivate document.
The Demand component offers a Web-based GUI (Portlet) to enable the simplified description of
technical requirements for jobs, which can be imported and exported in the JSDL data format.
These components are comparable to the Providers’ Intelligent Tools, so installation instructions are
exactly the same: it is possible to refer to section “3.2.1- Provider-side intelligent tools”. The only
difference to be reported is in the deployment of the Technical Resource Portlet. Deploy the Technical
Resource Portlet and Consumer Portlets for Bid Submission as described in section 3.2.2 d).
Copy the war-files of the Technical Resource Portlet and Consumer Portlets for Bid Submission to
CATALINA_HOME/webapps/ and restart the servlet container (Tomcat). Tomcat will extract the
webapps in a directory with a name like technicalResourceModeling and consumerPortlets.
Enter the following command to enable the Technical Resource Portlet and Consumer Portlets for
Bid Submission:
touch $CATALAINA_HOME/webapps/gridsphere/WEBINF/CustomPortal/portlets/technicalResourceModeling
and
touch $CATALAINA_HOME/webapps/gridsphere/WEBINF/CustomPortal/portlets/consumerPortlets
53
4.3. User Manual
This section explains how to use the SORMA GUI (Intelligent Tools) and API
4.3.1. User Registration
For new users that want to apply to join the SORMA market, they need to first apply for a SORMA
account. To do so, they need to use a web browser and go to the URL for the SORMA user
registration. Going to the URL displays a web page as follows:
User has to register by filling out the form with their personal particulars. All fields that are marked
with '*' are mandatory and therefore cannot be left blank. User can choose to use a preferred user ID
but subjecting to availability, another user ID may be assigned instead. Once the form is completed,
submit the application by clicking on the submit button. Doing so will send the application
information to a SORMA administration who will then validate the application information.
4.3.2. Intelligent Tools GUI
The user can use the Intelligent Tools GUI to specify a job description to an existing JSDL resource
file. The standard view of the section is shown in Figure 36.
54
Figure 36: Standard view of the Job Description section
In order to add a job description to a specific JSDL file you first have to open the file in the job
description section. To do this click on the pencil shaped icon in the upper left corner and the file
selection view will open as seen in the technical resource section. Select a file and its content will be
shown in a window as shown:
Figure 37: File selection view with sample file selected
To return to the edit view click on the arrow icon in the upper left corner of the window. The Portlet
will now return to the previous view with a file selected for further editing. You can see the name of
the file you are currently editing on top of the Job Description frame (see: Figure 38).
55
Figure 38: Standard view with file selected
To add job description information fill in the corresponding fields of each frame. You can add only
one Job Description but multiple Data Staging an Application elements. Therefore you have to save
each Data Staging and Application element individually by clicking on the corresponding 'save'
button. After clicking a save button the element will be listed in the drop down list to the right side of
the button. When you have entered all information you can create the JSDL file by clicking the 'create
JSDL' button. The Portlet will then safe the file and return to standard view with no file selected.
Step 2: The description of the economic preferences is supported by the Job Economic Description
Portlet (Figure 39). In addition to the technical job description (job1.jsdl), the consumer enters its
economic preferences like when to submit the offer (Date to submit), the duration for which the
resource is required (Requested duration), preferred bidding strategy, valuation (maximum
willingness to pay) and the bid’s “Time to Live” (Bid validity).
Figure 39: Economic description of the job
56
Step 3: The entered preferences are shown one more time (Figure 40) before the consumer submits
the bid request to the BidGenerator (section 4.2), which initiates the negotiation process based on the
preferences.
Figure 40: Submission of the bid-request to BidGenerator
Step 4: Figure 41 shows the result of the bid request. If there is an allocation the economic data for
example the provider, resource reference, expected completion time, average resource utilization,
valuation, bid price and payment is displayed. Finally, depending on the executed market
mechanisms, the market is executing the allocation and is responding to the consumer (over
BidGenerator) with the target provider resource, where to submit the job. However, there exist also
market mechanisms, which respond with a bundle of offers to a given consumer request and leave the
allocation decision to be done by the consumer’s BidGenerator, based on the submitted consumer
preferences.
Figure 41: Status information
57
4.4. Consumers’ Developer Kit
This section describes how end-users can build or integrate their own application with the SORMA
market and interface it to Resource Providers, using the SORMA API and Messages.
4.4.1. SORMA API
SORMA API can be grouped into four main logical areas:
a- login API
b- Bid Submission API
c- Payment API
d- Job Submission & Monitoring API
a. Login API
The Login API provides a programmatic way of authenticating to the Security service and retrieve the
SAML assertion. Before starting the authentication process, the user's credential has to be created like
the following:
Credential cred = new Credential();
BasicAuthenticationCredential bac = new
BasicAuthenticationCredential();
bac.setUserId("jdoe");
bac.setPassword("changeme");
cred.setBasicAuthenticationCredential(bac);
The authentication can then be carried out by invoking the following methods:
String uri = "https://myhost:8443/sorma-security/SecurityManager";
AuthenticationClient authClient =
new AuthenticationClient(uri,cred);
SAMLAssertion saml = authClient.authenticate();
If the authentication is successful, a SAML assertion will be return by the service. This SAML
assertion has an expiry time and is a proof that the user has been authenticated. At any time in its
validity period, the SAML assertion can be presented to the Security service to exchange for a Grid
proxy credential.
b. Bid Submission API
In order to request or provide resources in an automatic way, the application providers (consumers) as
well as the resource providers will use the BidGenerator’s Web service interface:
submitBid(Credential userCredential, EJSDLPrivate ejsdlPrivate)
The user credentials like certificate, user name and password are specified in the Credential object,
where the bid-requests is submitted in form of an EJSDLPrivate message document, described in next
section
58
c. Payment API
The API specified here is provided by the Contract Management Client Interface.
Payment actions are carried out by invoking the following method:
PaymentResponse makePayment(PaymentDetails paymentDetails)
The PaymentDetails message document encapsulates the information required by the SORMA
Payment Component to instigate a monetary transaction. The consumer does not supply the price
here, as this is calculated by the SORMA Contract Management Component so that any SLA-related
violations, which may have occurred, can be considered.
The invocation of this method will return a PaymentResponse message document, which describes
one of three possible outcomes of the transaction. Namely:
1. Success
2. Failure
3. Not Required
If the payment was successful the response acts as a receipt of the payment, detailing the amount paid
and when. If the payment was unsuccessful the response will contain information describing why the
payment failed. In some rare circumstances a payment will not be required; this will only occur if the
calculated price is zero, which in turn can only occur if all terms in the SLA were violated.
Further details of the Payment protocol are presented in section 4.6.3
d. Job Submission & Monitoring API
The APIs provided by the EERM are:
WSJobManager: this service implements the functionalities related with the batch jobs.
• sendJob: sends a job for being executed in the resource fabrics
o Parameters
Identifier of the resource acquired to execute the job
JSDL with the job description
o Returns: the job identifier or null if the job can not be executed
•
getJobStatus: gets the status of a job
o Parameters
Identifier of the resource that is executing the job
Job identifier
o Returns: the status of the job (running, cancelled, finished, etc…) and a short
explanation of the status
4.4.2. SORMA Messages
In the field of Grid-based scheduling there are several standardized description languages, which we
want to adopt in our scenario. Prominent examples are the Job Submission and Description Language
(JSDL) (Anjomshoaa et al [2005]), GLUE-Schema (Andreozzi et al [2008]), Common Information
Model (CIM) (DMTF [2008]) and WS-Agreement (Andrieux et al [2007]). JSDL and GLUE-Schema
are standard and more general resource description languages, currently used in Grid-Middlewares for
the technical description of provider resources and technical requirements of the consumer jobs. CIM
is a resource description model that aims to describe computing systems and their services in more
59
detail. WS-Agreement is an OGF-standard web services protocol for negotiating SLAs between two
parties, designed for and applied mainly to bilateral SLA-Negotiation mechanisms rather than to
auctions. Furthermore, WS-Agreement does not offer economic elements for auction-based bidding in
the level of detail desired like specified in the following.
JSDL, GLUE and CIM aim to support the description of technical preferences for computing
resources. The missing economic data should be compensated for via the provision of well-defined
economic extensions E*+JSDL= EJSDL*.
The aim of the SORMA Message API is to provide a central API for all the messages between the
SORMA components like Applications, EERM, Trading Management, Market Information System,
Contract Management and BidGenerator.
Figure 42: Message formats between the SORMA components
The main message formats produced and exchanged during the negotiation processes in SORMA are
JSDL, EJSDLPrivate, EJSDL, EJSDLMarket and WS-Agreement
JSDL:
The plain JSDL message format, as proposed by OGF, implements the standard JSDL data format. In
additional to the standard JSDL we added advanced reservation facility in form of start and end times
to support providers which offer advanced resource reservations.
EJSDLPrivate:
The EJSDLPrivate message format extends EJSDL with additional category of PrivateData, which
consist of private information like valuation and strategy, reported by the consumers and providers to
the BidGenerator (see Example 1). This information remains private and is only considered by the bid
generation processes of BidGenerator.
60
EJSDL:
The economically extended JSDL, called also EJSDL, extends the standard JSDL with the economic
category Bid, which adds economic parameters in order to support the bidding process. The EJSDLmessage format is used to describe the bid/offer messages send from the BidGenerator to the
TradingManagement (see Example 2).
Economic extensions, in element <Bid>:
• type - the type of bid message, "bid", "offer", "match"
• participant - unique identifier of the consumer or provider
• bidPrice - the generated bid price of the consumer or provider
• timeout - the time in milliseconds a consumer or provider bid is valid in the order book
• duration - the (upper bound) duration in milliseconds for the provided or requested resource
• serviceType - the type of the requested service, batch job or WebService
• paymentType - the type of payment, before or after job execution
• currency - currency
• penalty type contains the applied penalty function - functionName and normalizationConstant
EJSDLMarket:
The EJSDLMarket message format defines an additional category MarketMessage for describing the
market data like clearing price and contractId, which is created on match by the TradingManagement.
The EJSDLMarket message is than submitted back to the target consumer and provider over the
BidGenerator component (see Example 3)
Elements of <MarketMessage>:
• clearingPrice - The specified monetary value assigned to an artifact on market clearing, also
market-clearing price. This price is determined by the auction, based on the bid and offer
process of providers and consumers interested in trading the artifact.
• contractId - the id of the contract between a provider and a consumer
• bidId - the id of the bid
• offerId - the id of the offer
• consumerId - the unique id of the consumer
• providerId - the unique id of the provider
WS-Agreement:
The EJSDLMarket document is the first result of the (technical and economic) match of a consumer
bid and provider offer. A WS-Agreement document is the second result of a match and represents the
final Service Level Agreement (SLA) between both parties (see Example 4) and is composed of three
main elements:
• Context – the identification of who is participating in the SLA and their roles (i.e. consumer or
provider), the validity period of the SLA can also be defined here.
• Service Terms – what is being provided and how it is accessed
• Guarantee Terms – the promises made by both parties. These are observable properties and are
used to identify the outcome of the agreement. Here, the economic properties associated to the
terms are also quantified. For example, the penalty if the promise is broken.
The EJSDLMarket document is returned to the participants of a match (and therefore also of the SLA)
contains the contract id of the generated WS-Agreement document, which enables each participant to
access the SLA, maintained by Contract Management (see D2.2), if they wish.
SORMA Message Examples:
Examples of SORMA messages are reported in the Appendix of this document
61
SORMA Market Administrators Manuals
4.5. Introduction
The SORMA market is composed by a set of server-side components. Some of these components
offer their own user interface (GUI) that allows SORMA System Administrators to maintain the
system and to monitor what is happening in the SORMA system.
All components can be found on the SORMA system DVD, as described in section 1.1.1 of this
document
4.6. Installation and Configuration Guide
This section of the user guide describes how administrators can install, configure and test SORMA.
The components to be installed are:
1. Market Exchange Service
2. Market Information Service
3. Payment Service
4. Trading Management
5. Contract Management and Billing
6. SORMA Global Logging
The security infrastructure is a horizontal feature and it is explained in the next paragraph (5.3)
4.6.1. Market Exchange Service
a. Pre-requisites
• Linux based platform (i.e. Ubuntu)
• Sun Java Development Kit 1.6
• Apache ant 1.6 and up to use the component launching scripts.
b. Core Market Services Port Requirements
Components that make up the core market services require a number of network ports to be open.
Defaults are given in the following table:
Component
gmm:
exchange
service
Port number
(ServerSocket)
Where this component is
conceptually located? (ConsumerPort description
side, Provider-side, Trusted
Market machines, Portal?)
typically 8090, but
Trusted Market Exchange
any can be used
Port used by clients to
invoke exchange service
using web services to
submit bids
c. Installation and Configuration
The SORMA Market Exchange forms the backbone of SORMA. The Market Exchange can be
installed by following the instructions in this section.
62
The Market Exchange can be installed by downloading the binaries from the SORMA DVD:
/ivy/sorma/eu.sormaproject/market-exchange/LATEST/marketexchange.tar.gz
To install, decompress the binaries:
tar -xvzf market-exchange.tar.gz
You should get the directory market-exchange-<version> created in the current directory. Its structure
should be:
• lib: a directory with the exchange service code (in the market-exchange-<version>.jar file) and its
dependencies
• samples: a directory with the sample applications
• gmm.properties: basic configuration for the GMM
• exchange.properties: default configuration for the exchange service. Must be adapted to the
current execution environment
• log4j.properties: configuration of message logging
• launch.xml: ant file to launch the exchange
d. Configuration Steps
The Exchange Service can be configured using a properties file. The properties that can be configured
are listed on the following page.
63
Property
Default value
Description
Comments
hosting.config.
service.exchange
$service.exchange$
Includes the exchange
service as a service in
the gmm middleware
Don't change
service.exchange.name
ExchangeService
Name of the Exchange
Service
Don't change
service.exchange.builder
edu.upc.cnds.gmm.p2pagent.
configuration.builders.
ServiceBuilder
Define the factory for
this service.
Don't change.
service.exchange.class
edu.upc.cnds.gmm.coreservices.
exchange.impl.
MarketExchangeService
Don't change unless you
are providing an
alternative
implementation of the
service
HttpChannel
Specifies the
communication
transport to be used by
the exchange service
Can be changed to any
of the transports
installed in the gmm
(e.g. PastryChannel)
service.exchange.
config.agent
$agent.exchange$
Adds the Exchange
Service's agent to the
gmm middleware
Don't change.
agent.exchange.name
ExchangeServiceAgent
Name of exchange
service's agent
Informative value. Can
be changed to any name.
agent.exchange.builder
edu.upc.cnds.gmm.p2pagent.
configuration.builders.
AgentBuilder
Factory class used to
create the agent.
Don't change
agent.exchange.class
eu.sormaproject.gmm.coreservices. Class that implements
exchange.cspace.imp.
the exchange service's
ExchangeServiceAgent
agent
Can be changed to use
an alternative
implementation of the
service.
Specifies the
communication
transport to be used by
clients to contact the
exchange service
Can be changed to any
of the transports
installed in the gmm
(e.g. PastryChannel)
agent.exchange.param.cspaceHost N/A
host name used to
contact the CSpace
Change to adapt to your
actual deployment of
SORMA components
agent.exchange.
param.cspacePort
8095
Port used by the
CSpace's web services
container
Change to adapt to your
actual deployment of
SORMA components
agent.exchange.
param.cspaceService
/cspace/services/
ProtocolExecutorAdapterService
Name of the CSpace
services as deployed in
the web services
container
Change to adapt your
actual deployment of the
SORMA components
agent.exchange.
param.conversation
N/A
Name of a conversation Must match the name of
to be automatically
an existing conversation
registered at start up
in CSpace
service.exchange.
param.channel
agent.exchange.param.channel
HttpChannel
The default name of this file is exchange.properties and is expected to be in the exchange's working
directory (the directory it was launched from). This can be changes passing the following command
line arguments when launching exchange:
64
ant exchange -Dapp.args="-config.file <config file path>"
Any property can be overridden, and new properties can be added, passing them in the command line.
ant exchange -Dapp.args="-<property> <value>"
e. Verify the installation
This test application has three components:
• The ExchangeService, which runs the exchange service.
• The Auctioneer, which runs a continuous double sided auction.
• Two clients, a seller and a buyer which ask/offer on the auction.
To start the application, follow the next steps:
1. Be sure that the gmm libraries are in the lib directory
2. Be sure that the following files are in your current directory:
• gmm.properties: basic configuration of the gmm
• Exchange.properties: configuration to launch the exchange service
• client.properties: configuration for clients (including the protocol executor)
3. Launch the Exchange Service with the command
ant -f launch.xml exchange
You should see the message in the console
Initializing Exchange Service Agent
4. Launch the protocol executor with the command:
ant -f launch.xml auctioneer -Dapp.args="<url> <port> <auction>"
where:
• <url> is the url to contact the exchange service
• <port> is the local port used to listen to messages from the exchange
• <auction> is the name of the auction
You should see the following message in the exchange console
Creating session: <auction>
where, <auction> is the auction name as passed to the auctioneer.
Example:
ant -f launch.xml auctioneer -Dapp.args="http://localhost:8090 8099 theAuction"
5. Launch the clients (Seller/Buyer) are launched with the command:
ant -f launch.xml client -Dapp.args="<file> <url>"
where:
• <file>: name of the xml file used to describe the terms of the proposal
• <url>: url to access the exchange service
You should see the following message in the exchange server console
Message: Handling negotiation from <user>
where <user> is the user passed to the client.
Once two clients with matching bids are started, the following message should appear in the console
of each client.
65
Response received
Example:
ant -f launch.xml client -Dapp.args="ask.xml http://localhost:8090"
ant -f launch.xml client -Dapp.args="offer.xml http://localhost:8090"
4.6.2. Market Information Service
a. Pre-requisites
• Java 1.6
• Apache ant 1.6 and up to use the component launching scripts.
b. Download
The configuration files and the library, which are necessary for the testing of the market information
service can be downloaded from the SORMA DVD:
/ivy/sorma/eu.sormaproject/marketInformation/LATEST/marketInformatio
n-config.tar.gz
The Market Information Service package is available on the SORMA DVD:
/ivy/sorma/eu.sormaproject/marketInformation/LATEST/marketInformatio
n.jar
c. Testing
Go to the folder with downloaded marketInformation.jar and run the following command:
java -jar marketInformation.jar mis.properties
where mis.properties is the direction to the properties file.
Alternatively you can type the following command line:
java -cp .:marketInformation.jar:lib/ eu.sormaproject.coreMarketServices.marketInformation.Test
mis.properties
where mis.properties is the direction to the properties file.
d. Configuration
The following table describes the configuration parameters for the MIS (see mis.properties file within
the configuration package of the download section), depending if the MIS is using a database or an
overlay. Using the database allows to connect via HTTP to firewall protected machines and allows
and easier setup of the system.
66
Property
Default value
Description
Comments
Configuration parameters when
using an overlay as
communication protocol
overlay
overlay.port
20000
Includes the exchange service as a the port must be open (not
service in the gmm middleware
behind a firewall or NAT)
overlay.bootport
20000
Includes the exchange service as a the port must be open (not
service in the gmm middleware
behind a firewall or NAT)
overlay.IP
147.83.34.222
Includes the exchange service as a Please consider that
service in the gmm middleware
"localhost" does *not* work
overlay.type
ScribeSimulator
Defines the type of the used
overlay
db
Database configuration
parameters
mis.db.subscriptio
1000
n.delay
Defines the reloading of the
subscription service for new
update
db.table
MIS_Table
name of the table
db.jdbcDriver
org.hsqldb.jdbcDri
Defines the sql connection driver
ver
db.connection
jdbc:hsqldb:http://p
cmargenat.ac.upc.e defines the connection direction
du:8880/
db.filenames
misdb
Name of the database file
db.username
sa
username for the connection
db.createTable
false
Defines if a table is created
test
Configuration parameters to test
and evaluate the MIS
test.max_instance
10
s
defines the number of created
MIS instances (nodes)
test.node
8
defines the instance (node), which
executes the testing actions like a
query
test.query
true
Defines if the test node executes a
query to all nodes
test.publish
false
Defines if the test node does a
publishing
log
log.file
possible types are 'Kad',
'Scribe' and 'ScribeSimulator'
It uses a http connection as
default to pass firewalls
Attention: existing tables will
be overwritten
Defines properties for the logging
log4j.properties
Defines the path to the file with
the logging properties
4.6.3. Payment Service
67
a. Prerequisites
The following software must be installed in order to setup and use the Payment Component:
1. Java 1.6.0
2. Web Server Java based (Tomcat , JBoss, Apache, etc… )
3. Axis 1.2 (integrated in web server)
b. Installation
To install the Payment Component you first have to get the file from the SORMA DVD:
/ivy/sorma/eu.sormaproject/paymentComponent/LATEST/payment.war
Copy the war archive in the proper folder of the Web Server
c. Usage
The Payment Component has been implemented as a web service, so in order to use the component it
is necessary to build a client and invoke the needed methods. Since the client can be built in several
ways this point will be skipped in this manual. Instead the following section will explain the methods
and how to invoke them.
String makeSubscription() This method returns the URL of the chosen payment tool (in string
format). It is used to redirect the user to the page of the payment tool to fulfil those operations that
must be performed using the tool’s proprietary web pages.
String executePayment(String strXmLPayment) This method takes in input a string in XML format
and performs an automatic payment to the selected payment tool.
The input string has such format:
<pay:PaymentDetails xmlns:pay="http://www.sormaproject.eu/message/sla/payment">
<pay:AgreementId>job123-Provider123</pay:AgreementId>
<pay:Consumer>UKA</pay:Consumer>
<pay:Provider>CU</pay:Provider>
<pay:Price>10.0</pay:Price>
<pay:CreditCardType>Visa</pay:CreditCardType>
<pay:CreditCardNumber>4059042064101342</pay:CreditCardNumber>
<pay:ExpiryDate>102010</pay:ExpiryDate>
<pay:CVV2>962</pay:CVV2>
</pay:PaymentDetails>
The output string varies depending if the operation is successful or not. If the operation is successful,
then this XML string is returned:
<pay:PaymentResponse xmlns:pay="http://www.sormaproject.eu/message/sla/payment">
<pay:Outcome xsi:type="pay:SuccessfulOutcome_Type"
xmlns:xsi="http://www.w3.org/2001/XMLSchema-instance">
<pay:Timestamp>2009-01-14T02:57:19.185-08:00</pay:Timestamp>
<pay:TransactionId>4PV764397R589480U</pay:TransactionId>
</pay:Outcome>
</pay:PaymentResponse>
If there are some errors, then the following XML string is returned:
68
<pay:PaymentResponse xmlns:pay="http://www.sormaproject.eu/message/sla/payment">
<pay:Outcome xsi:type="pay:ErrorOutcome_Type"
xmlns:xsi="http://www.w3.org/2001/XMLSchema-instance">
<pay:Timestamp>2009-01-14T02:49:15.857-08:00</pay:Timestamp>
<pay:ErrorCode>ERROR_ID</pay:ErrorCode>
<pay:Description>Internal Error</pay:Description>
</pay:Outcome>
</pay:PaymentResponse>
Note that the SORMA Message API providers parsers for this document format.
4.6.4. Trading Management
The SORMA Trading Management (TM) is a web application designed to run within a Tomcat
server. The TM uses a MySQL database to hold data associated with the protocols it is able to execute
(the so called common storage). Additionally, Trading Management communicates with the SORMA
Market Exchange and the SORMA Market Information System.
To install the SORMA Trading Management is necessary to follow these steps:
1. Configure a MySQL user allowed to create and modify the Trading Management database. (Do
NOT create the database manually)
2. Deploy the C-Space Protocol Executor web application.
3. Configure the Protocol Executor.
4. Upload a JAR file containing the CDA protocol to the Protocol Executor.
5. Create a CDA conversation.
a. Prerequisites
No other SORMA components need to be installed prior to the installation and deployment of the
Trading Management component. The following SORMA components must, however, be installed
prior to the execution of the Trading Management:
• SORMA Market Exchange
• SORMA Market Information
The following third party software must be installed before installing the Trading Management:
• Sun Java 1.6
• MySQL 5
• Apache Tomcat 5.5
• MySQL can be installed on a remote machine.
b. The Installation Process
Dowload the following files from the DVD:
• /ivy/sorma/eu.sormaproject/cspace/LATEST/cspace.war
• /ivy/sorma/eu.sormaproject/cspace/LATEST/cspace.properties
• /ivy/sorma/eu.sormaproject/cspace/LATEST/cda-protocol.jar
1) Configure MySQL
Login to MySQL:
mysql -u root -p
69
To configure a MySQL user for the Trading Management, execute the following line using a mysql
client:
grant select, insert, update, delete, create on cSpaceDB.* to \
"<mysql-user>"@<cspace-host> identified by '<mysql-password>';
Here, <cspace-host> is the host where the Trading Management is being installed. <mysql-user> and
<mysql-password> should be consistent with the corresponding entries in the cspace.properties file
(see below).
2) Deploy the C-Space Protocol Executor Web Application
Start your Tomcat server:
$CATALINA_HOME/bin/catalina.sh start
Copy the cspace.war to your Tomcat's webapps directory
This should automatically deploy the service.
3) Configure the Protocol Executor
Download the properties template file and open it in a text editor. You should see something like this:
##########################
# C-Space Properties #
##########################
################################
# Public address of Protocol Executor
################################
cspace.public.protocol=http
cspace.public.host=193.10.67.191
cspace.public.port=8080
################################
# Database connection properties
################################
cspace.mysql.host=localhost
cspace.mysql.username=cspace_executor
cspace.mysql.password=mammamia
cspace.mysql.port=3306
##################################
# Information Service
##################################
cspace.informationService.namespace=cspace.informationService.sorma
# MIS Information Service
cspace.informationService.sorma.factory.className=eu.sormaproject.cspace.mis.MISInformationServiceFactory
cspace.informationService.sorma.host=pcmargenat.ac.upc.edu
cspace.informationService.sorma.port=8880
# Test Information Service
cspace.informationService.test.factory.className=eu.sormaproject.cspace.information.NullInformationService
70
##################################
# Message Layer
##################################
# Exchange Message Layer
#Note: cspace.messageLayer.sorma.exchange.client.port
#is the first port the client will try to open for
#incoming connections (from the service host).
#If it fails to open this one it will increment the
#port number by 1 and try again, etc.
cspace.messageLayer.sorma.factory.className=eu.sormaproject.cspace.exchange.ExchangeMessageLayer$Factory
cspace.messageLayer.sorma.exchange.service.host=147.83.30.215
cspace.messageLayer.sorma.exchange.service.port=14080
cspace.messageLayer.sorma.exchange.client.port=8090
# Test Message Layer
cspace.messageLayer.test.factory.className=eu.sormaproject.cspace.message.TestMessageLayer$Factory
cspace.messageLayer.test.port=8888
Edit the values to suit your setup. The properties with prefix "cspace.public" are used to determine
how external clients should connect to the C-Space service.
Properties with prefix "cspace.mysql" are used to setup a connection to the database you configured
previously.
Make sure the two following properties are set as follows:
cspace.messageLayer.namespace=cspace.messageLayer.sorma
cspace.informationService.namespace=cspace.informationService.sorma
This will tell C-Space to use the properties with prefix "cspace.messageLayer.sorma" for setting up
the messaging layer, and properties with prefix "cspace.informationService.sorma" for the
information service. Therefore, regarding the message layer and the information service, it is only
necessary to provide values for properties with these prefixes.
Now, point your web browser to the C-Space Manager web page at http://localhost:8080/cspace.
NOTE! You should change the port number to your own tomcat's HTTP port.
You will see a page like the screen shot shown in Figure 43.
Click "Browse" in the section named "Configure C-Space Protocol Executor", select the properties
file you just modified, and click "Configure".
You should now see a message saying that the Protocol Executor has been configured.
71
Figure 43: C-Space Protocol Execution Manager
4) Upload the CDA Conversation Protocol
Download the CDA protocol JAR file.
Again, point your web browser to C-Space Manager web page. Click "Browse" in the "Upload a
Conversation Protocol" section, and select the JAR file you just downloaded. Finally, click the
"Upload" button.
You should now see a message confirming that the upload succeeded, and displaying the "namespace"
of the uploaded jar file. Remember (or copy) the namespace string, as you will need it in order to
create a new conversation in the next step.
5) Create the CDA Auction
On the C-Space Manager web page, in the section named "Create a Conversation", modify the
"Namespace" entry, if the default value is different from the namespace you received when uploading
the CDA protocol jar. The other values should be left as they are. Click "Create".
Now the SORMA Trading Management should be successfully setup. You can reset it by clicking the
"Reset" button on the C-Space Manager web page
4.6.5. Contract Management and Billing
The Contract Management component is responsible for the generation, runtime logic and
enforcement of Service Level Agreements (SLAs). This entails the support of other SORMA
components in respect to SLA-related issues, and the guidance of an SLA through its lifecycle. It is
implemented as a library with a web service front end. This document describes how it can be
deployed as a web service.
72
This component is a downstream component of:
• SORMA Trading Management Component
• SORMA Intelligent Tools
and an upstream component of:
• SORMA Payment Component
• SORMA Market Information
• SORMA EERM
There are two tasks involved in the installation of the web service and there is no particular order in
which they need to be carried out.
• Runtime Configuration
• Service Deployment
a. Prerequisites
No other SORMA components need to be installed prior to the installation and deployment of the
Contract Management component. The following SORMA components must, however, be installed
prior to the invocation of this component:
• SORMA Payment Component
• SORMA Market Information
• One or more SORMA EERM instances
The following third party software must be installed before installing the Contract Management Web
Service:
• Sun Java 1.6
• Apache Tomcat 5.5 with a JAX-WS installation
b. Service Deployment
To deploy the web service, obtain ContractManagement.war from the SORMA DVD:
/ivy/sorma/eu.sormaproject/ContractManagement/LATEST/ContractManagement.war
Place the war file in the webapps directory of the Tomcat server. Tomcat will now explode the war
and install the service.
c. Runtime Configuration
The war file on the SORMA DVD comes with a pre-packaged configuration file, it is not expected
that the configuration will remain consistent over time, and therefore this must be modified. To do
this a new version of the properties file must be supplied. It is very important that the properties file is
placed in the correct location otherwise ContractMangement will be unable to find it and therefore
function incorrectly.
The properties file should be placed in the current directory (where the Tomcat server was started), or
a relevant subdirectory anywhere in this directory tree; ContractMangement will search for the
properties file, if it cannot (initially) find it. However, in order to save unnecessary disk traversal
during the search process ContractMangement will search only subdirectories of the current directory,
and will go up the directory tree only once to search other sibling directories of the current directory.
The name of the properties file is also important it must be called SLARuntime.properties and follow
the structure as outlined below.
73
There are in principal two sections of the SLARuntime.properties file. Firstly, those which are not
expected to change in the short term, and secondly, those which are installation specific.
The fixed properties are presented below and define the implementation of ContractManagement. In
the event that the functionality of the component is to be changed it is the values specified here that
will enable future developers to modify the internal implementation of the component.
#Implementation of the SLARegistry to use
SLARegistry=eu.sormaproject.sla.registry.impl.SLARegistryHD
#The Servicename of the EERM's JobManagement Service
EERM.JobManager.Servicename=WSJobManagerService
#The Servicename of the EERM's SLAEnforcement Service
EERM.SLAEnforcement.Servicename=WSSLAEnforcementService
#The Servicename of the EERM's EconomyManager Service
EERM.EconomyManager.Servicename=WSEconomyManagerService
#The namespace URI for the EERM
EERM.namespaceURI=http://ws.sormaproject.eu/eerm
#ContractManagement Interface to use
ContractManagement=eu.sormaproject.sla.impl.ContractManagementImpl
#SLAEnforcement Interface to use
SLAEnforcement=eu.sormaproject.sla.enforcement.impl.SLAEnforcementImpl
The implementation specific properties are presented below and define the settings which are context
specific. Note: that it is necessary to know where the payment component is prior to the first
invocation of the ContractManagement component.
#Location of the Payment Component
Payment.location==http://147.83.30.246:12080/SORMA_Payment/services/Payment
#Location of the SLA Files for different operating systems, this is important as
it defines where the component will output all documents related to the SLA
lifecycle
SLARegistryHD.location.Linux==/home/scmsjc/
SLARegistryHD.location.Windows\ XP==D:\\
4.6.6. SORMA Global Logging
a. Prerequisites
• log4j
• (Optional) Chainsaw v2 - GUI for displaying the log4j messages, which is running like a logserver and listening to a specified port
b. Installation Steps
• Download and unpackage the LoggingService from the SORMA DVD:
/ivy/sorma/eu.sormaproject/loggingService/LATEST/loggingService.tar.g
z
•
•
Configure the logserver-properties (see section Configuration)
Start the LogServer:
java -cp loggingService.jar:lib/* eu.sormaproject.logging.service.LogServer <PORTNUMBER> logserver.properties
74
Example call:
java -cp loggingService.jar:lib/* eu.sormaproject.logging.service.LogServer 16999
logserver.properties
c. Configuration
The sorma-common java package contains two additional logging levels, based and extending the
log4j Level-interface, SORMALevel and DEMOLevel. The SORMALevel can be used from the
components to submit important messages of the running SORMA System in order to document the
various processes, whereas SORMADemo can be used, when SORMA is used in DEMO mode.
server.properties:
Following properties describes the configuration of the SORMALevel and DEMOLevel in the
server.properties file.
log4j.rootCategory=INFO, Default, DEMO
#
# The default file appender
#
log4j.appender.Default=org.apache.log4j.RollingFileAppender
log4j.appender.Default.Threshold=SORMA#eu.sormaproject.logging.level.SORMALevel
log4j.appender.Default.File=SORMALevel.log
log4j.appender.Default.layout=org.apache.log4j.PatternLayout
log4j.appender.Default.layout.ConversionPattern=%d (${dbUserid}) %c{1} [%p] %x %m%n
# Do not Truncate if it already exists.
log4j.appender.Default.Append=true
log4j.appender.Default.MaxFileSize=1500KB
# Archive log files (one backup file here)
log4j.appender.Default.MaxBackupIndex=10
#
# The DEMO file appender
#
log4j.appender.Default=org.apache.log4j.RollingFileAppender
log4j.appender.Default.Threshold=DEMO#eu.sormaproject.logging.level.DEMOLevel
log4j.appender.Default.File=DEMOLevel.log
log4j.appender.Default.layout=org.apache.log4j.PatternLayout
log4j.appender.Default.layout.ConversionPattern=%d (${dbUserid}) %c{1} [%p] %x %m%n
# Do not Truncate if it already exists.
log4j.appender.Default.Append=true
log4j.appender.Default.MaxFileSize=1500KB
# Archive log files (one backup file here)
log4j.appender.Default.MaxBackupIndex=10
log4j.properties:
log4j.rootCategory=INFO, Default, SORMA
...
# The Socket Appender
log4j.appender.SORMA=org.apache.log4j.net.SocketAppender
log4j.appender.SORMA.Threshold=DEMO#eu.sormaproject.logging.level.SORMALevel
log4j.appender.SORMA.RemoteHost=147.83.30.215
log4j.appender.SORMA.Port=16999
log4j.appender.SORMA.ReconnectionDelay=5000
log4j.appender.SORMA.LocationInfo=true
75
d. Example
Following code snipped is an example for submitting of a log-message to the configured loggingserver. If the log4j.properties are not already bound, they have to initialized. The "special" logs have
to be submitted using the DEMO logging level.
PropertyConfigurator.configure(some_path+"log4j.properties");
logger.log(DEMOLevel.DEMO, "Client submits a bid-request to AgentService");
// ...
logger.log(DEMOLevel.DEMO, "AgentService uses the BiddingFramework to generate a
bid and submit it to Market Exchange");
// ...
logger.log(DEMOLevel.DEMO, "Market Exchange receives the bid and addresses the bid
message to the auction \"theAuction\" ");
// ...
logger.log(DEMOLevel.DEMO, "Trading Management receives the bid and tries to match
it with a stored offer");
4.7. How to Apply Security Infrastructure
The Security component is implemented as a set of services built on top of the Dorian security
framework. The security services are implemented as WSRF services using Globus WS-Core
framework. This guide describes the procedures for deploying the security services in an Apache
Tomcat web container. The operating system is assumed to be Linux.
4.7.1. Prerequisites
1.
2.
3.
4.
Java JDK 1.5.0_17 or later version
Ant 1.6.5
MySQL 5.0
Apache Tomcat 5.5.X
4.7.2. Deploying the Services
Before deploying the services, we need to copy several Jar files from the Globus WS-core framework
to some of the Tomcat directories. From here on in this guide, we refer CATALINA_HOME as the
directory where Apache Tomcat is installed.
1. Download
the
required
Jar
files
from
the
SORMA
DVD:
/ivy/sorma/eu.sormaproject/security/LATEST/sorma-securitytomcat-lib.zip
2. Unzip the file to a temp directory.
3. Copy "cog-tomcat.jar" to "CATALINA_HOME/server/lib".
4. Copy "xalan.jar" to "CATALINA_HOME/common/endorsed".
5. Copy the following files to "CATALINA_HOME/common/lib":
1. cog-jglobus.jar
2. xml-apis.jar
3. cryptix.jar
4. cryptix-asn1.jar
76
5.
6.
7.
8.
9.
cryptix32.jar
jce-jdk13-125.jar
jgss.jar
log4j-1.2.8.jar
puretls.jar
a. Deploy the WAR
The security services are packaged as a generic WAR file, which can be deployed in any web
application server. In this guide, Apache Tomcat 5.5.26 is used. Before going through the installation,
make sure that Tomcat is installed and running properly.
1. Download
the
WAR
file
from
the
SORMA
DVD:
/ivy/sorma/eu.sormaproject/security/LATEST/sorma-security.war
2. Copy the WAR file “sorma-security.war” to the Tomcat webapps directory. This should
automatically deploy the service in the "sorma-security" directory.
b. Configure the Service
The services are configured through a single configuration file which is located at:
CATALINA_HOME/webapps/sorma-security/WEBINF/etc/SORMASecurityService_Dorian/dorian-conf.xml
For simple deployments only the following configuration elements need to be modified.
1. Database Configuration
2. CA Subject Name
c. Database Configurations
To modify the database configuration to interact with MySQL database please set the values of the
host, port, username, and password elements (highlighted in bold below).
<?xml version="1.0" encoding="UTF-8"?>
<DorianConfiguration xmlns="http://cagrid.nci.nih.gov/dorian/conf"
....
<DatabaseConfiguration>
<host>localhost</host>
<port>3306</port>
<username>root</username>
<password></password>
</DatabaseConfiguration>
....
<AutoCreate>
<CASubject>C=EU,O=SORMA,OU=Security,CN=SORMA CA</CASubject>
<CAKeySize>2048</CAKeySize>
<lifetime years="25" months="0" days="0" hours="0" minutes="0"
seconds="0"/>
</AutoCreate>
....
77
d. Certificate Authority Subject Name
It is important that the subject of the CA certificate is unique and meaningful to your deployment. To
set the subject of the certificate authority for your deployment, edit the CASubject element. The
default value of "C=EU,O=SORMA,OU=Security,CN=SORMA CA" is provided as an example.
4.7.3. Configure to Trust the CA
The Security component includes a CA that will be acting as the SORMA CA. In order to use the
security services with this CA, you need to configure for the services to trust the CA. To do this, a
utility script is provided. Note that you should run the script as the user that starts up the Tomcat
service, so that the CA certificate will be place in the correct directory.
1. Change to CATALINA_HOME/webapps/sorma-security/bin directory.
2. Run "trustcert".
# ./trustcert
Succesfully configured Globus to trust the Dorian CA:
C=EU,O=SORMA,OU=Security,CN=SORMA CA
Succesfully wrote CA certificate to /root/.globus/certificates/d2e41d5e.0
Succesfully wrote CA signing policy to
/root/.globus/certificates/d2e41d5e.signing_policy
Note: When this script is run, the command also creates the necessary database tables in MySQL.
4.7.4. Get Host Credential
In order to run the security services, the host that the services are deployed on need to generate host
certificate and private key. To obtain the certificate and key, a utility script is provided. Note that you
should run the script as the user that starts up the Tomcat service, so that the certificate and key files
will be owned by that user.
1. Change to CATALINA_HOME/webapps/sorma-security/bin directory.
2. Run the "gethostcred" script and enter the appropriate values.
# ./gethostcred
Enter the hostname:myhost
Enter the directory to write the host certificate and private key to:.
/C=EU/O=SORMA/OU=Security/OU=SORMA IdP/CN=dorian
Successfully created the host certificate:
Subject: C=EU,O=SORMA,OU=Security,OU=Services,CN=host/myhost
Created: Thu Jan 29 16:29:09 SGT 2009
Expires: Wed Jan 29 16:29:09 SGT 2014
Succesfully wrote private key to /opt/apache-tomcat-5.5.27/webapps/sormasecurity/bin/./myhost-key.pem
Succesfully wrote certificate to /opt/apache-tomcat-5.5.27/webapps/sormasecurity/bin/./myhost-cert.pem
3. The credential files are generated in the current directory. Move the certificate and key PEM files to
a secure location.
78
# mv *.pem /root/.globus/certificates
4. Verify permissions.
# ls -l
total 16
-rw-r--r--rw-r--r--rw-r--r--rw-------
1
1
1
1
root
root
root
root
root 1249 2009-01-29 16:49 d2e41d5e.0
root 111 2009-01-29 16:49 d2e41d5e.signing_policy
root 1090 2009-01-29 14:17 myhost-cert.pem
root 891 2009-01-29 14:17 myhost-key.pem
4.7.5. Configure HTTPS for Tomcat
Communication with the security services has to be over a secured channel, therefore it is mandatory
to use HTTPS. This section describes how to configure HTTPS with Tomcat 5.5.X.
1. Use a text editor (e.g. vi)
"CATALINA_HOME/conf/server.xml".
and
open
the
Tomcat
configuration
file
at
2. Add a HTTPS Connector in the <Service name="Catalina"> section as below and update the
parameters (highlighted in bold) appropriately with your local configuration:
....
<Service name="Catalina">
....
<Connector className="org.globus.tomcat.coyote.net.HTTPSConnector"
port="8443" maxThreads="150" minSpareThreads="25" maxSpareThreads="75"
autoFlush="true"
disableUploadTimeout="true" scheme="https"
enableLookups="true" acceptCount="10" debug="0"
protocolHandlerClassName="org.apache.coyote.http11.Http11Protocol"
socketFactory="org.globus.tomcat.catalina.net.BaseHTTPSServerSocketFactory"
cert="/root/.globus/certificates/myhost-cert.pem"
key="/root/.globus/certificates/myhost-key.pem"
....
NOTE: The cert and key files are the host cert and key that were obtained in the previous section.
3. Add a HTTPS Valve in the <Engine name="Catalina" ... > section:
<Engine name="Catalina" defaultHost="localhost">
....
<Valve className="org.globus.tomcat.coyote.valves.HTTPSValve55"/>
....
4. In the HTTPS Connector (step 2 above), the default port used is 8443. If there is a need to use other
port number (i.e. 443), you also need to modify the Security component's web.xml file located at:
CATALINA_HOME/webapps/sorma-security/WEB-INF/web.xml
Change the defaultPort value (highlighted in bold) to the number you used in the HTTPS Connector
configuration.
79
<web-app>
....
<servlet>
<servlet-name>WSRFServlet</servlet-name>
<display-name>WSRF Container Servlet</display-name>
<servlet-class>
org.globus.wsrf.container.AxisServlet
</servlet-class>
<init-param>
<param-name>defaultProtocol</param-name>
<param-value>https</param-value>
</init-param>
<init-param>
<param-name>defaultPort</param-name>
<param-value>443</param-value>
</init-param>
<load-on-startup>true</load-on-startup>
</servlet>
....
</web-app>
Now the security services should be running. To verify, start a browser window and point it to
"https://localhost:8443/sorma-security/services" (change hostname and port as appropriate) and you
should see a list of services. Scroll through list and look for the SecurityManager service (see the
following screenshot):
Figure 44: Security screenshot
4.7.6. Testing the Security services with a Sample Client
1. Download the binaries of the sample client from the SORMA DVD:
/ivy/sorma/eu.sormaproject/security/LATEST/examples.zip
2. Unzip the archive and cd into the directory.
80
$ unzip examples.zip
$ cd examples
3. Set up the Java classpath by sourcing the setenv.sh file in the etc directory.
$ . etc/setenv.sh
4. Test that your classpath is correct by running the sample client.
$ java eu.sormaproject.security.examples.LoginClient
Please specify the service URL!
5. Create a "certs" directory in the examples directory.
$ mkdir certs
6. Obtain the public certificate of the CA used by the Security service. The CA certificate is obtained
in step 2 of section "Configure to Trust the CA" of this guide (filename is d2e41d5e.0). This
certificate is required to configure the security APIs to trust the CA. Copy this file that contains the
certificate to the certs directory.
$ cp d2e41d5e.0 certs
7. Finally run the sample client again with the service URL.
$ java eu.sormaproject.security.examples.LoginClient
https://<serviceurl>:<port>/sorma-security/services/SecurityManager
4.7.7. Deployment of User Registration Web Form
The registration form is written in PHP and can be deployed in any PHP application server. To deploy
the web form:
1. First
download
the
file
“registration.php”
from
the
Sorma
DVD:
/src/sorma/trunk/openGridMarket/securityManagement/userAccountR
egistration/ registration.php
2. Open the PHP file with a text editor and look for “<[email protected]>” as
below:
...
<?php
$admin_email="<[email protected]>";
$success=0;
...
3. Modify and add a proper email address that belongs to a designated SORMA administrator.
This email address will receive the registration request when someone submits an application.
...
<?php
81
$admin_email="[email protected]";
$success=0;
...
4. Copy the PHP file to the web directory of a PHP application server. For example, for an
Apache web server, copy the file to “httpd/htdocs/sorma” directory.
5. Start
up
the
Apache
web
server
and
point
the
browser
to
“http://your_host:port/sorma/registration.php”. The registration page will be displayed as
follows.
4.8. SORMA Administrator User Guide
The SORMA System can support the Administrator in the following tasks thanks to a set of GUI
offered by the following components:
• Monitoring / logging GUI
• SLA Administrator GUI
• Security Administrator GUI
4.8.1. SORMA Logging GUI
SORMA-Global-Logging provides a functionality to submit (redirect “special”) log messages from
different and distributed SORMA components to a central logging instance (log-server).
Chainsaw is a GUI and server to receive and display log4-log-messages.
Figure 45 shows the main GUI, which displays the arriving messages.
82
Figure 45: Chainsaw-Log GUI
Select manual configuration. The property windows, which appears by adding a new receiver->
SocketAppender. The only options to be set are name, port and threshold, the other settings are
default.
Figure 46: Chainsaw Log properties
In order to submit and maintain "special" messages we defined a new log4j-level called DEMO. The
required additional log4j configurations for both log4j-server and log4j-client (SORMA components)
are shown in the following.
The server.properties are only required, when starting the loggingService instead of the ChainsawLog-GUI, the most important properties to be configured on each client are the log4j-client-properties
(log4j.properties).
83
4.8.2. SORMA SLA Administration GUI
The SLA Administration GUI is packed with the SORMA ContractManagement component, and
provides the capabilities for a system administrator to observe the state of active and complete SLAs
in the SORMA Market Infrastructure. Here, the state of an SLA corresponds to violations in the
agreement and also which life cycle state the SLA is in.
4.8.3. SORMA Security Management
This section describes how to use the administrative GUI to perform management of users, credentials
and trusted identity providers. The administrative GUI used here is the GAARDS UI developed by the
caGrid
a. Starting the Administration UI
1. First download the “Admin-ui.zip” package from the SORMA DVD:
/ivy/sorma/eu.sormaproject/security/LATEST/admin-ui.zip
2. Extract the ZIP files and cd into the admin-ui directory.
$ unzip admin-ui.zip
$ cd admin-ui
3. Lastly, run the command to start the UI.
$ ./bin/start-ui
This will bring up the UI as shown in Figure 47:
Figure 47: Security initial GUI
b. Setting the Security Service Endpoint
When the admin UI is first launched, you need to set the URL endpoint of the Security services.
1. Click on the Window menu, and then select Preferences. A new window will be displayed.
2. Under Preferences, select Grid User Management, then Dorian Service(s).
3. In the Add/Remove Value(s) text box, enter the URL of the Security services (e.g.
https://<host>:<port>/sorma-security/services/SecurityManager) and click Add.
84
Figure 48: Security preferences
4. Click on Save to commit the changes.
c. Logging onto the Grid
Before performing any administration tasks, the administrator has to be authenticated.
1. Click on login in the task menu. A login menu will be displayed.
Figure 49: Security Log-in
2. From the Dorian service drop down menu select the URL pointing to your Security service.
3. Similarly, from Authentication Service drop down menu, select the same URL.
4. If this is the first time you are using the Administrator UI, you have to use the default
administrator account to login.
5. In the User Id text box enter dorian
6. In the Password text box enter DorianAdmin$1
7. Click the Authenticate button.
85
If the login is successful, you will be authenticated and be given your credential. A window similar to
that shown in Figure 50 should pop up containing the details of your credential.
Figure 50: Proxy Manager
d. User Account Management
• Register a New User:
1. To register a new SORMA user, click on Account Management->Local Accounts->Registration.
2. A window should pop up with a form to enter the user's information.
3. Click on Apply to save the information to the database and create the user account.
• Removing or Modifying a User:
1. Select Account Management->Local Accounts->Local Account Management.
2. In the Search Criteria panel, you can enter the specific attributes of the users that you want to
remove/modify. For example, to search for users who have suspended status, select from the User
Status drop down box and choose Suspended. Then click on the Find User button to execute the
search.
3. If the search is successful, the users that matched your criteria will be displayed. To manage a
particular user, select the user and click on Manage User button, or the Remove User button to
remove the user.
e. Managing Administrator
Only users that have been granted administrative access will be able to access the administrative
features of the Security service. The administrative features include Account Management, Managing
Trusted Identity Providers, and the ability to grant administrative access to users.
Administrative access can be managed through the administrator UI.
1. From the top menu bar, select Account Management->Grid Account Management>Administrators. This will bring up the administrative window (see Figure 51).
86
Figure 51: Administrator User Interface
2. From the Administrator window, you are allowed to:
• List all the users with administrative access. This will list the grid identities of all the entities
with administrative access in the Administrators table at the bottom of the screen.
• Grant a user administrative access. Click the add Admin button. This will bring up the Add
Administrator window which will prompt you to enter the grid identity of the user you wish to
grant administrative access to. You can enter it directly or you can click the Find button to
search for the user you wish to grant administrative access to.
• Revoke a user's administrative access. This can be done by select the user from the
Administrators table and click the Remove Admin button.
• To grant a user administrative access click the Add Admin button.
87
5. SORMA System developer guide
This section provides practical information that will be useful to developers contributing to the
SORMA system code base. Section 2.4 of this document titled “SORMA Software Development
Methodology” provides an overview of the development methodology used in SORMA and should be
read prior to proceeding with this section.
5.1. Getting Started with Ivy in SORMA
This section explains how to get started using SORMA's Ivy build mechanism and describes:
• How to configure the build environment for SORMA
• How to build an example component (library) and publish it to the Ivy repository
The prerequisites to use Apache Ant and Apache Ivy are the installation of Java 1.5 or later, Apache
Ant 1.7.0 or later, an SVN client, an account on the SORMA SVN and repository server, and an
Internet connection.
5.1.1. Configure the environment
Before using the SORMA build mechanisms for the first time, you need to configure the development
environment by checking out the build-bootstrap directory from the SORMA Subversion:
svn export https://portals.rdg.ac.uk/sorma/svn/src/build-bootstrap
NOTE: The build-bootstrap directory can also be found on the SORMA DVD at:
/src/sorma/build-bootstrap
The build-bootstrap contains:
• Standard Apache Ant build files that are shared across SORMA,
• Apache Ivy configuration settings,
• An example build.properties file, which has to be copied to your home directory
(${user.home} in Java/Ant parlance) directory
The Ant files contained in build-bootstrap are important because SORMA components import
these into their own Ant build scripts. The use of Ant imports means that the component build scripts
are very simple and can contain as little as 7 lines (as long as the component adheres to the standard
SORMA build layout).
In order to finalize the configuration of the Apache Ant +Ivy building environment the following
steps are required :
1. Copy
build-bootstrap/build.properties
to
the
home
directory
(${user.home}) and edit the file appropriately (the file contains extensive comments).
2. Properties that must be set in ${user.home}/build.properties:
a. build.bootstrap.dir: The absolute path to the location of the checked out
build-bootstrap
directory.
e.g.
build.bootstrap.dir=/home/user/workspace/SORMA/buildbootstrap
88
b. svn+ssh related properties for interacting with the Integration and Vendor
repositories (Account details are required) .NOTE: We only support the use of DSA
certificate-based authentication to connect to the Ivy repositories using Ant.
3. Check that the ant.classpath.dir property points to a directory on the ant class path.
Leave the property commented out to use the default of ${user.home}/.ant/lib
4. Properties that should be set if behind a Corporate Proxy Server *:
a. proxyhost
b. proxyport
c. proxyuser
d. proxypassword
In order to turn on/off Web proxy support, just (un)comment the proxyhost property.
To configure the build environment properties and automatically download and insert the required jars
to the ant classpath, change to the build-bootstrap directory and execute following command:
ant -f configure.xml
The required Jars will now have been installed on your classpath and you are ready to perform a build.
If this step fails then make sure your proxy settings are correct (if you are behind a proxy).
5.1.2. Building and publishing an example component (library)
Checkout the exampleIvyComponent from SVN trunk or copy it from the DVD
src/sorma/trunk/exampleIvyComponent) to a directory where you have read/write
permissions. The directory structure will look like this:
doc: java-docs of the component
src: source code
test: source code of unit and integration tests
build.properties: common build properties of a component
build.xml: contains ant-based configuration with standardized and custom for
building a component
ivy.xml: contains the ivy-based configuration of dependencies and publishing
information
LICENSE.txt: contains license information
README.txt: contains specific information to building and execution of a component
To finding out what ant-targets are available to use, execute following command:
ant -p
The main SORMA targets:
targets:
clean: Clean up all files and directories that were generated by the build
clean-cache: Clean the ivy cache
clean-ivy: Clean the ivy installation
clean-local: Clean the current module from the local repository
compile: Compiles the source
compile-tests: Compiles the unit test source
enviro: Tests that the user's environment is configured to meet SORMA's highlevel
requirements.
package: Packages the component into a jar file that is written to the component's
build directory
89
publish: Publish this component in the SORMA Integration Ivy Repository (publishes
binary version only) for use by other developers
publish-local: Publish this component in the local ivy repository (on this
machine)
report: Generate a report of dependencies processed by Ivy (point your Web browser
at build/logs/
test: Execute Unit tests
The targets are fairly explanatory: clean-local and clean-cache are useful for cleaning out local
artifacts; They has to be called when someone has published a new version of their component
without changing the version id before publishing. The clean target is used to clean up all the artifacts
generated by a component's build.
The enviro target currently tests to see if the java version is 1.5 or 1.6. Over time the environment
tests will evolve as further prerequisites required for SORMA are identified across components. An
example environment check:
ant enviro
Look inside the ivy.xml for the list of dependencies the component requires. In this example only
the sorma-common library is required as shown in the following example:
<ivy-module version="2.0">
<info organisation="eu.sormaproject" module="exampleComponent"/>
<dependencies>
<dependency org="eu.sormaproject" name="sorma-common" rev="latest.integration"/>
</dependencies>
</ivy-module>
Use the following command to prepare the build directory, resolve dependencies listed in the ivy.xml,
compile the source, and then compile and execute the unit tests:
ant
If we want to take a closer look at the dependency resolution that took place the following target can
be called which results in an HTML file being written under the build directory, e.g:
/Users/gms/workspace/sorma-trunk/exampleIvyComponent/build/logs/ivy/
eu.sormaproject-exampleComponent-default.html.
ant report
Pointing a Web browser at the aforementioned HTML file results in something similar to the
screenshot shown in Figure 52.
When all unit tests pass the component’s binary can be published to your local repository for local
integration testing:
ant publish-local
The publish-local command builds from source, tests, packages, and then publishes the binary
version of the component to the local Ivy repository that resides on your workstation. Once in the
local repository, other components that rely on the component just published can be built and tested.
When all local integration tests pass, the component(s) can then be published to the SORMA-wide
90
integration repository, for further testing in conjunction with other developers. The command to
achieve this is:
ant publish
Any other SORMA components owned by other SORMA developers, that reference this component
in their ivy.xml dependency file, will now be able to retrieve the component from the integration
repository as part of the their standard build. Components may either use an explicit version number
to identify the dependency revision they require, or they can always opt to use the very latest version
that is available (by specifying latest.integration in their Ivy dependency line).
Figure 52: Screenshot of the HTML page generated by the report target showing dependency resolution
information
If you successfully resolved dependencies, compiled, tested and published the exampleIvyComponent
to the SORMA integration repository, then you have successfully configured your build environment
for SORMA.
As a next step you could also look at Ivy plugins for your favourite Integrated Development
Environment (IDE), and execute the ant targets from within the IDE.
• Plugins for Eclipse can be found at: http://ant.apache.org/ivy/ivyde/
• Plugins for Netbeans can be found at: http://wiki.netbeans.org/FaqIvy
91
5.2. Developing for SORMA
In this section we aim to provide further detail about the development process.
The src directory contains the component's source code. All code should be located under the
eu.sormaproject root. To date we have been determining package structure based on where a
component appears in the logical architecture. Examples include:
eu.sormaproject.openGridMarket.eerm
eu.sormaproject.coreMarketServices.marketExchange
The test directory contains unit testing (JUnit) and integration test code. The package structure
under test is the same as that under src, which results in the test code being located in a parallel tree
to the source code. The parallel test tree means that package-level visibility restrictions are not an
issue and we keep a clear separation between our component's source code and the test code. The
actual component code should not know anything about the test code.
A corresponding test directory for the example component looks like this:
test/eu/sormaproject/provider/example/AllMockServiceIntegrationTests.java
test/eu/sormaproject/provider/example/AllUnitTests.java
test/eu/sormaproject/provider/example/IntegrationTestSormaWorld.java
test/eu/sormaproject/provider/example/TestHelloSormaWorld.java
Unit tests and Integration tests are logically grouped according to the AllUnitTests.java and
AllMockServiceIntegrationTests.java classes. This is because:
• Unit tests only test local classes and use local mock objects, therefore a test environment does
not have to be specially created as testing never leaves the local JVM.
• Integration tests require the test environment and remote (Mock) Service Objects to be
initialized. Integration tests could take quite a while to complete, where as unit tests should
execute rapidly, so that e.g. thousands of tests can be executed in seconds.
Whereas unit test class names are prefixed with Test (e.g. TestHelloSormaWorld.java), by
convention we prefix integration test classes with IntegrationTest (e.g.
IntegrationTestSormaWorld.java).
XMLUnit12 Tests are unit tests offering methods to test data specified in XML-format. The various
SORMA message protocols are tested using XMLUnit.
Test parameters are passed to the unit testing code via propertysets that are defined in the
component’s build.xml file (more details below).
The component-level build.properties file contains component-specific parameters required to
build and deploy the component. Required properties are given below with example values:
12
http://xmlunit.sourceforge.net/
92
# Short name that is used to refer to this component
app.name=exampleComponent
# Used to identify the component's owning organisation to Ivy
ivy.organisation=eu.sormaproject
# Provides version information for the build and Ivy repository
app.version=0.2
Further properties can be included in build.properties as required by the build.xml.
The ivy.xml file defines:
• where in the repository the component will be published to (i.e. organization and component
names),
• the component version number (read from build.properties),
• which other SORMA components the component depends on and
• which 3rd party libraries your component relies on as first-level dependencies, <dependency>.
An example ivy.xml looks like this:
<ivy-module version="2.0">
<info organisation="eu.sormaproject" module="exampleComponent"/>
<dependencies>
<dependency org="eu.sormaproject" name="sorma-common" rev="latest.integration"/>
</dependencies>
</ivy-module>
The minimum build.xml to build, test and deploy a component is shown next, in this case the
component build :
• adheres to the standard SORMA build layout,
• does not require custom properties to be passed to the unit/integration test code (notice the
empty unit-test-properties and integration-test-properties
propertyset elements),
• does not provide mock object injection (see later in this document),
<project name="exampleComponent" default="test" basedir=".">
<property file="${user.home}/build.properties"/>
<property file="build.properties"/>
<import file="${build.bootstrap.dir}/sorma-lib-build.xml"/>
<import file="${build.bootstrap.dir}/ivy-build.xml"/>
<propertyset id="unit-test-properties"/>
<propertyset id="integration-test-properties"/>
</project>
Any properties that have been set in your ${user.home}/build.properties, take
precedence over your component’s own build.properties, which in turn take precedence over
any properties that are set directly in the component’s build.xml file. For example, the value for
the
${build-bootstrap.dir}
property
is
retrieved
from
the
developer’s
${user.home}/build.properties file (see also 5.1.1).
93
5.2.1. Applications
When implementing an application, the build.xml should import the following standard template:
<import file="${build.bootstrap.dir}/sorma-lib-build.xml"/>
and override the package target as required for your application’s needs. For example, the following
target will cause the application to be packaged in a tar file that is then compressed using the gzip
command, resulting in a package with a tar.gz extension.
<target name="package"
tar.gz file"/>
depends="targz"
description="package
application
in
a
5.2.2. Web Services
When implementing a Web Service, the component’s build.xml should import the following
standard template:
<import file="${build.bootstrap.dir}/webapp-build.xml"/>
The most important Web Service related targets are:
webapp: builds a standard web application structure
webapp.war: this target jars the web application and named like configured e.g.
war-file
webapp.tomcat.setup: This target copies specified setup files to the Tomcat’s
/common/lib directory
deploy: deploys a web application on tomcat
undeploy: undeploys a web application on tomcat
To just build the webapp directory structure (useful for inspection of the structure):
ant webapp
To create a war file the package target is overridden in the component’s build.xml, eg:
<target name="package" depends="webapp.war" description="package application in a
tar.gz file"/>
To deploy the Web Service directly to the Tomcat manager, the following target is used:
ant deploy
To undeploy:
ant undeploy
The standard targets are used for publishing the war file to the Ivy repository (i.e. ant publish).
94
5.2.3. Sorma Ivy Portlet Developer Guide
When implementing a JSR-168 portlet, the compoent’s build.xml should import following
standard template:
<import file="${build.bootstrap.dir}/portlet-build.xml"/>
In addition to the standard SORMA directory structure, a webapp directory needs to be present in the
top-level of your component’s source tree that follows the standard JSR-168 layout of:
css
html
js
jsp
WEB-INF
In addition, the component’s build.properties are extended to include the following:
app.name=gridrmPortlets
app.version=0.9.2
ivy.organisation=org.gridrm
# Is this a JSR 168 or GridSphere/WebSphere webapp (jsr or gs)?
use.jsr=jsr
# location of gridsphere source and build
~/build.properties
gridsphere.home=/home/gms/bin/gridsphere-2.2.8
gridsphere.build=${gridsphere.home}/build
directory.
Override
in
your
# The following are required to workaround a bug in the build script and will be
redundant
# when the bug has been resolved. For now just include the following 3 properties
verbatim.
build.dir=${basedir}/build
build.classes=${build.dir}/classes
build.test=${build.dir}/test
The Gridsphere properties reference a Gridsphere 2.2.8 installation that must be installed before the
portlet build will succeed.
To deploy the portlets to a local Gridsphere-installation, the following target is used:
ant deploy
The standard targets are used for publishing the portlet’s war file to the Ivy repository (i.e. ant
publish).
5.3. Further reading
For further details, please refer to the SORMA wiki at:
https://portals.rdg.ac.uk/sorma/mwiki/index.php/ApacheIvy,
95
Appendix
5.4. Examples of SORMA Messages
<PrivateDefinition requestId="request123" xmlns="http://www.sormaproject.eu/message/ejsdl/beans"
xmlns:add="http://schemas.xmlsoap.org/ws/2004/03/addressing"
xmlns:res="http://ws.sormaproject.eu/eerm/reservation"
xmlns:jsdl="http://schemas.ggf.org/jsdl/2005/11/jsdl">
<add:EndpointReference>
<add:Address>http://10.12.13.14:18080/EERM</add:Address>
</add:EndpointReference>
<res:reservation>
<res:request>
<res:fixed>
<res:startTime>2009-01-10T12:00:00-05:00</res:startTime>
<res:finishTime>2009-01-11T12:10:00-05:00</res:finishTime>
</res:fixed>
</res:request>
</res:reservation>
<jsdl:JobDefinition id="job123">
<jsdl:JobDescription>
<jsdl:JobIdentification>
<jsdl:JobName>JobName</jsdl:JobName>
<jsdl:Description>Description..</jsdl:Description>
<jsdl:JobAnnotation/>
<jsdl:JobProject/>
</jsdl:JobIdentification>
<jsdl:Application>
<jsdl:Description>Appl description..</jsdl:Description>
</jsdl:Application>
<jsdl:Resources>
<jsdl:CandidateHosts>
<jsdl:HostName>www.sorma.eu</jsdl:HostName>
</jsdl:CandidateHosts>
<jsdl:OperatingSystem>
<jsdl:OperatingSystemType>
<jsdl:OperatingSystemName>Windows_XP</jsdl:OperatingSystemName>
</jsdl:OperatingSystemType>
</jsdl:OperatingSystem>
<jsdl:CPUArchitecture>
<jsdl:CPUArchitectureName>sparc</jsdl:CPUArchitectureName>
</jsdl:CPUArchitecture>
<jsdl:IndividualCPUSpeed>
<jsdl:UpperBoundedRange>3333.0</jsdl:UpperBoundedRange>
<jsdl:LowerBoundedRange>233.0</jsdl:LowerBoundedRange>
</jsdl:IndividualCPUSpeed>
<jsdl:IndividualCPUCount>
<jsdl:UpperBoundedRange>5.0</jsdl:UpperBoundedRange>
<jsdl:LowerBoundedRange>2.0</jsdl:LowerBoundedRange>
</jsdl:IndividualCPUCount>
<jsdl:IndividualPhysicalMemory>
<jsdl:UpperBoundedRange>433434.0</jsdl:UpperBoundedRange>
<jsdl:LowerBoundedRange>3455.0</jsdl:LowerBoundedRange>
</jsdl:IndividualPhysicalMemory>
<jsdl:IndividualDiskSpace>
<jsdl:UpperBoundedRange>45455.0</jsdl:UpperBoundedRange>
<jsdl:LowerBoundedRange>3445.0</jsdl:LowerBoundedRange>
</jsdl:IndividualDiskSpace>
</jsdl:Resources>
<jsdl:DataStaging>
<jsdl:FileName>fileName</jsdl:FileName>
<jsdl:FilesystemName>fileSysName</jsdl:FilesystemName>
<jsdl:CreationFlag>append</jsdl:CreationFlag>
</jsdl:DataStaging>
</jsdl:JobDescription>
</jsdl:JobDefinition>
<Penalty>
<functionName>DefaultPenalty</functionName>
<normalizationConstant>0.5</normalizationConstant>
</Penalty>
<PrivateData>
<valuation>100</valuation>
<strategy>QStrategy</strategy>
</PrivateData>
96
<Bid>
<requestType>OFFER</requestType>
<participantId>participant1</participantId>
<timeout>1344</timeout>
<duration>321</duration>
<serviceType>WEBSERVICE</serviceType>
<paymentType>EITHER</paymentType>
</Bid>
</PrivateDefinition>
Example 1: EJSDLPrivate message
<BidDefinition bidId="bid123"
xmlns:add="http://schemas.xmlsoap.org/ws/2004/03/addressing"
xmlns="http://www.sormaproject.eu/message/ejsdl/beans"
xmlns:res="http://ws.sormaproject.eu/eerm/reservation"
xmlns:jsdl="http://schemas.ggf.org/jsdl/2005/11/jsdl">
<add:EndpointReference>
<add:Address>http://localhost:18080/EERM</add:Address>
</add:EndpointReference>
<res:reservation>
<res:request>
<res:fixed>
<res:startTime>2009-01-10T12:00:00-05:00</res:startTime>
<res:finishTime>2009-01-11T12:10:00-05:00</res:finishTime>
</res:fixed>
</res:request>
</res:reservation>
<jsdl:JobDefinition id="job123">
<jsdl:JobDescription>
<jsdl:JobIdentification>
<jsdl:JobName>JobName</jsdl:JobName>
<jsdl:Description>Description..</jsdl:Description>
<jsdl:JobAnnotation/>
<jsdl:JobProject/>
</jsdl:JobIdentification>
<jsdl:Application>
<jsdl:Description>Appl description..</jsdl:Description>
</jsdl:Application>
<jsdl:Resources>
<jsdl:CandidateHosts>
<jsdl:HostName>www.sorma.eu</jsdl:HostName>
</jsdl:CandidateHosts>
<jsdl:OperatingSystem>
<jsdl:OperatingSystemType>
<jsdl:OperatingSystemName>Windows_XP</jsdl:OperatingSystemName>
</jsdl:OperatingSystemType>
</jsdl:OperatingSystem>
<jsdl:CPUArchitecture>
<jsdl:CPUArchitectureName>sparc</jsdl:CPUArchitectureName>
</jsdl:CPUArchitecture>
<jsdl:IndividualCPUSpeed>
<jsdl:UpperBoundedRange>1000.0</jsdl:UpperBoundedRange>
<jsdl:LowerBoundedRange>100.0</jsdl:LowerBoundedRange>
</jsdl:IndividualCPUSpeed>
<jsdl:IndividualCPUCount>
<jsdl:UpperBoundedRange>5.0</jsdl:UpperBoundedRange>
<jsdl:LowerBoundedRange>2.0</jsdl:LowerBoundedRange>
</jsdl:IndividualCPUCount>
<jsdl:IndividualPhysicalMemory>
<jsdl:UpperBoundedRange>1000.0</jsdl:UpperBoundedRange>
<jsdl:LowerBoundedRange>500.0</jsdl:LowerBoundedRange>
</jsdl:IndividualPhysicalMemory>
<jsdl:IndividualDiskSpace>
<jsdl:UpperBoundedRange>10000.0</jsdl:UpperBoundedRange>
<jsdl:LowerBoundedRange>5000.0</jsdl:LowerBoundedRange>
</jsdl:IndividualDiskSpace>
</jsdl:Resources>
<jsdl:DataStaging>
<jsdl:FileName>fileName</jsdl:FileName>
<jsdl:FilesystemName>fileSysName</jsdl:FilesystemName>
<jsdl:CreationFlag>append</jsdl:CreationFlag>
</jsdl:DataStaging>
</jsdl:JobDescription>
</jsdl:JobDefinition>
<Bid>
<bidPrice>50.0</bidPrice>
97
<requestType>BID</requestType>
<participantId>participant1</participantId>
<timeout>100000</timeout>
<duration>2000</duration>
<serviceType>WEBSERVICE</serviceType>
<paymentType>EITHER</paymentType>
</Bid>
</BidDefinition>
Example 2: the bid message EJSDL
<MarketDefinition marketMessageId="bidId-offerId"
xmlns="http://www.sormaproject.eu/message/ejsdl/beans"
xmlns:add="http://schemas.xmlsoap.org/ws/2004/03/addressing"
xmlns:res="http://ws.sormaproject.eu/eerm/reservation"
xmlns:jsdl="http://schemas.ggf.org/jsdl/2005/11/jsdl">
<add:EndpointReference>
<add:Address>http://localhost:18080/EERM</add:Address>
</add:EndpointReference>
<res:reservation>
<res:request>
<res:fixed>
<res:startTime>2008-11-10T12:00:00-05:00</res:startTime>
<res:finishTime>2008-11-10T12:00:00-05:00</res:finishTime>
</res:fixed>
</res:request>
</res:reservation>
<jsdl:JobDefinition>
<jsdl:JobDescription>
<jsdl:JobIdentification>
<jsdl:JobName>JobName</jsdl:JobName>
<jsdl:Description>Description..</jsdl:Description>
<jsdl:JobAnnotation/>
<jsdl:JobProject/>
</jsdl:JobIdentification>
<jsdl:Application>
<jsdl:Description>Appl description..</jsdl:Description>
</jsdl:Application>
<jsdl:Resources>
<jsdl:CandidateHosts>
<jsdl:HostName>www.sorma.eu</jsdl:HostName>
</jsdl:CandidateHosts>
<jsdl:OperatingSystem>
<jsdl:OperatingSystemType>
<jsdl:OperatingSystemName>Windows_XP</jsdl:OperatingSystemName>
</jsdl:OperatingSystemType>
</jsdl:OperatingSystem>
<jsdl:CPUArchitecture>
<jsdl:CPUArchitectureName>sparc</jsdl:CPUArchitectureName>
</jsdl:CPUArchitecture>
<jsdl:IndividualCPUSpeed>
<jsdl:UpperBoundedRange>3333.0</jsdl:UpperBoundedRange>
<jsdl:LowerBoundedRange>233.0</jsdl:LowerBoundedRange>
</jsdl:IndividualCPUSpeed>
<jsdl:IndividualCPUCount>
<jsdl:UpperBoundedRange>5.0</jsdl:UpperBoundedRange>
<jsdl:LowerBoundedRange>2.0</jsdl:LowerBoundedRange>
</jsdl:IndividualCPUCount>
<jsdl:IndividualPhysicalMemory>
<jsdl:UpperBoundedRange>433434.0</jsdl:UpperBoundedRange>
<jsdl:LowerBoundedRange>3455.0</jsdl:LowerBoundedRange>
</jsdl:IndividualPhysicalMemory>
<jsdl:IndividualDiskSpace>
<jsdl:UpperBoundedRange>45455.0</jsdl:UpperBoundedRange>
<jsdl:LowerBoundedRange>3445.0</jsdl:LowerBoundedRange>
</jsdl:IndividualDiskSpace>
</jsdl:Resources>
<jsdl:DataStaging>
<jsdl:FileName>fileName</jsdl:FileName>
<jsdl:FilesystemName>fileSysName</jsdl:FilesystemName>
<jsdl:CreationFlag>append</jsdl:CreationFlag>
</jsdl:DataStaging>
</jsdl:JobDescription>
</jsdl:JobDefinition>
<Penalty>
<functionName>DefaultPenalty</functionName>
<normalizationConstant>0.5</normalizationConstant>
</Penalty>
98
<MarketMessage>
<clearingPrice>33.0</clearingPrice>
<contractId>contractId</contractId>
<ConsumerContext>
<PartipantId>consumerId</PartipantId>
<BidId>bidId</BidId>
</ConsumerContext>
<ProviderContext>
<PartipantId>providerId</PartipantId>
<BidId>offerId</BidId>
</ProviderContext>
<requestType>MATCH</requestType>
<duration>321</duration>
<serviceType>WEBSERVICE</serviceType>
<paymentType>EITHER</paymentType>
</MarketMessage>
</MarketDefinition>
Example 3: Market message EJSDLMarket
<AgreementOffer ws:AgreementId="consumerId-providerId-1234892098656"
xmlns="http://schemas.ggf.org/graap/2007/03/ws-agreement"
xmlns:ws="http://schemas.ggf.org/graap/2007/03/ws-agreement"
xmlns:xsi="http://www.w3.org/2001/XMLSchema-instance">
<Context>
<AgreementInitiator xsi:type="bean:Context_Type"
xmlns:bean="http://www.sormaproject.eu/message/ejsdl/beans"
xmlns:jsdl="http://schemas.ggf.org/jsdl/2005/11/jsdl"
xmlns:add="http://schemas.xmlsoap.org/ws/2004/03/addressing">
<bean:PartipantId>consumerId</bean:PartipantId>
<bean:BidId>bidId</bean:BidId>
</AgreementInitiator>
<AgreementResponder xsi:type="bean:Context_Type"
xmlns:bean="http://www.sormaproject.eu/message/ejsdl/beans"
xmlns:jsdl="http://schemas.ggf.org/jsdl/2005/11/jsdl"
xmlns:add="http://schemas.xmlsoap.org/ws/2004/03/addressing">
<bean:PartipantId>providerId</bean:PartipantId>
<bean:BidId>offerId</bean:BidId>
</AgreementResponder>
<ServiceProvider>AgreementResponder</ServiceProvider>
</Context>
<Terms>
<All>
<ServiceDescriptionTerm ws:ServiceName="myJobId1234" ws:Name="JSDL">
<jsdl:JobDefinition id="myJobId1234" xmlns:jsdl="http://schemas.ggf.org/jsdl/2005/11/jsdl"
xmlns:add="http://schemas.xmlsoap.org/ws/2004/03/addressing">
<jsdl:JobDescription>
<jsdl:JobIdentification>
<jsdl:JobName>POVRAYJob</jsdl:JobName>
<jsdl:Description>Ray Traycing</jsdl:Description>
<jsdl:JobAnnotation>jobPR</jsdl:JobAnnotation>
<jsdl:JobProject>RT</jsdl:JobProject>
</jsdl:JobIdentification>
<jsdl:Application>
<jsdl:ApplicationName>Pov-Ray</jsdl:ApplicationName>
<POSIXApplication xmlns="http://schemas.ggf.org/jsdl/2005/11/jsdl-posix">
<Executable>./povray</Executable>
<Argument>+I${input_file}</Argument>
<Argument>+O${output_file}</Argument>
<Argument>+W${width}</Argument>
<Argument>+H${height}</Argument>
</POSIXApplication>
</jsdl:Application>
<jsdl:Resources />
<jsdl:DataStaging>
<jsdl:FileName>colors.inc</jsdl:FileName>
<jsdl:CreationFlag>overwrite</jsdl:CreationFlag>
<jsdl:DeleteOnTermination>false</jsdl:DeleteOnTermination>
<jsdl:Source>
<jsdl:URI>${input_files_location}/pov/colors.inc</jsdl:URI>
</jsdl:Source>
</jsdl:DataStaging>
<jsdl:DataStaging>
<jsdl:FileName>finish.inc</jsdl:FileName>
<jsdl:CreationFlag>overwrite</jsdl:CreationFlag>
<jsdl:DeleteOnTermination>false</jsdl:DeleteOnTermination>
<jsdl:Source>
99
<jsdl:URI>${input_files_location}/pov/finish.inc</jsdl:URI>
</jsdl:Source>
</jsdl:DataStaging>
<jsdl:DataStaging>
<jsdl:FileName>textures.inc</jsdl:FileName>
<jsdl:CreationFlag>overwrite</jsdl:CreationFlag>
<jsdl:DeleteOnTermination>false</jsdl:DeleteOnTermination>
<jsdl:Source>
<jsdl:URI>${input_files_location}/pov/textures.inc</jsdl:URI>
</jsdl:Source>
</jsdl:DataStaging>
<jsdl:DataStaging>
<jsdl:FileName>povray</jsdl:FileName>
<jsdl:CreationFlag>overwrite</jsdl:CreationFlag>
<jsdl:DeleteOnTermination>false</jsdl:DeleteOnTermination>
<jsdl:Source>
<jsdl:URI>${input_files_location}/povray</jsdl:URI>
</jsdl:Source>
</jsdl:DataStaging>
<jsdl:DataStaging>
<jsdl:FileName>${input_file}</jsdl:FileName>
<jsdl:CreationFlag>overwrite</jsdl:CreationFlag>
<jsdl:DeleteOnTermination>false</jsdl:DeleteOnTermination>
<jsdl:Source>
<jsdl:URI>${input_files_location}/pov/${input_file}</jsdl:URI>
</jsdl:Source>
</jsdl:DataStaging>
<jsdl:DataStaging>
<jsdl:FileName>${output_file}</jsdl:FileName>
<jsdl:CreationFlag>overwrite</jsdl:CreationFlag>
<jsdl:Target>
<jsdl:URI>${output_files_location}/${output_file}</jsdl:URI>
</jsdl:Target>
</jsdl:DataStaging>
</jsdl:JobDescription>
</jsdl:JobDefinition>
</ServiceDescriptionTerm>
<ServiceProperties ws:ServiceName="myJobId1234">
<VariableSet>
<Variable ws:Name="CPUArchitecture" ws:Metric="jsdl:CPUArchitecture">
<Location>/JobDescription/Resources/CPUArchitecture</Location>
</Variable>
<Variable ws:Name="CandidateHosts" ws:Metric="jsdl:CandidateHosts">
<Location>/JobDescription/Resources/CandidateHosts</Location>
</Variable>
<Variable ws:Name="IndividualCPUCount" ws:Metric="jsdl:IndividualCPUCount">
<Location>/JobDescription/Resources/IndividualCPUCount</Location>
</Variable>
<Variable ws:Name="IndividualCPUSpeed" ws:Metric="jsdl:IndividualCPUSpeed">
<Location>/JobDescription/Resources/IndividualCPUSpeed</Location>
</Variable>
<Variable ws:Name="IndividualDiskSpace" ws:Metric="jsdl:IndividualDiskSpace">
<Location>/JobDescription/Resources/IndividualDiskSpace</Location>
</Variable>
<Variable ws:Name="IndividualPhysicalMemory" ws:Metric="jsdl:IndividualPhysicalMemory">
<Location>/JobDescription/Resources/IndividualPhysicalMemory</Location>
</Variable>
</VariableSet>
</ServiceProperties>
<GuaranteeTerm ws:Name="CPUArchitecture" ws:Obligated="ServiceProvider">
<ServiceScope ws:ServiceName="myJobId1234"/>
<ServiceLevelObjective>
<KPITarget>
<KPIName>jsdl:CPUArchitecture</KPIName>
<CustomServiceLevel xsi:type="jsdl:CPUArchitecture_Type"
xmlns:jsdl="http://schemas.ggf.org/jsdl/2005/11/jsdl"
xmlns:add="http://schemas.xmlsoap.org/ws/2004/03/addressing">
<jsdl:CPUArchitectureName>x86</jsdl:CPUArchitectureName>
</CustomServiceLevel>
</KPITarget>
</ServiceLevelObjective>
<BusinessValueList>
<Importance>1</Importance>
<Penalty>
<AssessmentInterval>
<TimeInterval>PT30S</TimeInterval>
</AssessmentInterval>
100
<ValueExpression xsi:type="bean:Penalty_Type"
xmlns:jsdl="http://schemas.ggf.org/jsdl/2005/11/jsdl"
xmlns:add="http://schemas.xmlsoap.org/ws/2004/03/addressing"
xmlns:bean="http://www.sormaproject.eu/message/ejsdl/beans">
<bean:functionName>DefaultPenalty</bean:functionName>
<bean:normalizationConstant>1.0</bean:normalizationConstant>
</ValueExpression>
</Penalty>
<Reward>
<ValueExpression xsi:type="bean:MarketMessage_Type"
xmlns:bean="http://www.sormaproject.eu/message/ejsdl/beans">
<bean:currency xsi:nil="true"/>
<bean:paymentType>EITHER</bean:paymentType>
<bean:clearingPrice>3.3333333333333335</bean:clearingPrice>
</ValueExpression>
</Reward>
</BusinessValueList>
</GuaranteeTerm>
<GuaranteeTerm ws:Name="CandidateHosts" ws:Obligated="ServiceProvider">
<ServiceScope ws:ServiceName="myJobId1234"/>
<ServiceLevelObjective>
<KPITarget>
<KPIName>jsdl:CandidateHosts</KPIName>
<CustomServiceLevel xsi:type="jsdl:CandidateHosts_Type"
xmlns:jsdl="http://schemas.ggf.org/jsdl/2005/11/jsdl"
xmlns:add="http://schemas.xmlsoap.org/ws/2004/03/addressing">
<jsdl:HostName>10.10.10.10</jsdl:HostName>
</CustomServiceLevel>
</KPITarget>
</ServiceLevelObjective>
<BusinessValueList>
<Importance>1</Importance>
<Penalty>
<AssessmentInterval>
<TimeInterval>PT30S</TimeInterval>
</AssessmentInterval>
<ValueExpression xsi:type="bean:Penalty_Type"
xmlns:jsdl="http://schemas.ggf.org/jsdl/2005/11/jsdl"
xmlns:add="http://schemas.xmlsoap.org/ws/2004/03/addressing"
xmlns:bean="http://www.sormaproject.eu/message/ejsdl/beans">
<bean:functionName>DefaultPenalty</bean:functionName>
<bean:normalizationConstant>1.0</bean:normalizationConstant>
</ValueExpression>
</Penalty>
<Reward>
<ValueExpression xsi:type="bean:MarketMessage_Type"
xmlns:bean="http://www.sormaproject.eu/message/ejsdl/beans">
<bean:currency xsi:nil="true"/>
<bean:paymentType>EITHER</bean:paymentType>
<bean:clearingPrice>3.3333333333333335</bean:clearingPrice>
</ValueExpression>
</Reward>
</BusinessValueList>
</GuaranteeTerm>
<GuaranteeTerm ws:Name="IndividualCPUCount" ws:Obligated="ServiceProvider">
<ServiceScope ws:ServiceName="myJobId1234"/>
<ServiceLevelObjective>
<KPITarget>
<KPIName>jsdl:IndividualCPUCount</KPIName>
<CustomServiceLevel xsi:type="jsdl:RangeValue_Type"
xmlns:jsdl="http://schemas.ggf.org/jsdl/2005/11/jsdl"
xmlns:add="http://schemas.xmlsoap.org/ws/2004/03/addressing">
<jsdl:UpperBoundedRange>4.0</jsdl:UpperBoundedRange>
<jsdl:LowerBoundedRange>2.0</jsdl:LowerBoundedRange>
</CustomServiceLevel>
</KPITarget>
</ServiceLevelObjective>
<BusinessValueList>
<Importance>1</Importance>
<Penalty>
<AssessmentInterval>
<TimeInterval>PT30S</TimeInterval>
</AssessmentInterval>
<ValueExpression xsi:type="bean:Penalty_Type"
xmlns:jsdl="http://schemas.ggf.org/jsdl/2005/11/jsdl"
xmlns:add="http://schemas.xmlsoap.org/ws/2004/03/addressing"
xmlns:bean="http://www.sormaproject.eu/message/ejsdl/beans">
<bean:functionName>DefaultPenalty</bean:functionName>
101
<bean:normalizationConstant>1.0</bean:normalizationConstant>
</ValueExpression>
</Penalty>
<Reward>
<ValueExpression xsi:type="bean:MarketMessage_Type"
xmlns:bean="http://www.sormaproject.eu/message/ejsdl/beans">
<bean:currency xsi:nil="true"/>
<bean:paymentType>EITHER</bean:paymentType>
<bean:clearingPrice>3.3333333333333335</bean:clearingPrice>
</ValueExpression>
</Reward>
</BusinessValueList>
</GuaranteeTerm>
<GuaranteeTerm ws:Name="IndividualCPUSpeed" ws:Obligated="ServiceProvider">
<ServiceScope ws:ServiceName="myJobId1234"/>
<ServiceLevelObjective>
<KPITarget>
<KPIName>jsdl:IndividualCPUSpeed</KPIName>
<CustomServiceLevel xsi:type="jsdl:RangeValue_Type"
xmlns:jsdl="http://schemas.ggf.org/jsdl/2005/11/jsdl"
xmlns:add="http://schemas.xmlsoap.org/ws/2004/03/addressing">
<jsdl:UpperBoundedRange>2000.0</jsdl:UpperBoundedRange>
<jsdl:LowerBoundedRange>200.0</jsdl:LowerBoundedRange>
</CustomServiceLevel>
</KPITarget>
</ServiceLevelObjective>
<BusinessValueList>
<Importance>1</Importance>
<Penalty>
<AssessmentInterval>
<TimeInterval>PT30S</TimeInterval>
</AssessmentInterval>
<ValueExpression xsi:type="bean:Penalty_Type"
xmlns:jsdl="http://schemas.ggf.org/jsdl/2005/11/jsdl"
xmlns:add="http://schemas.xmlsoap.org/ws/2004/03/addressing"
xmlns:bean="http://www.sormaproject.eu/message/ejsdl/beans">
<bean:functionName>DefaultPenalty</bean:functionName>
<bean:normalizationConstant>1.0</bean:normalizationConstant>
</ValueExpression>
</Penalty>
<Reward>
<ValueExpression xsi:type="bean:MarketMessage_Type"
xmlns:bean="http://www.sormaproject.eu/message/ejsdl/beans">
<bean:currency xsi:nil="true"/>
<bean:paymentType>EITHER</bean:paymentType>
<bean:clearingPrice>3.3333333333333335</bean:clearingPrice>
</ValueExpression>
</Reward>
</BusinessValueList>
</GuaranteeTerm>
<GuaranteeTerm ws:Name="IndividualDiskSpace" ws:Obligated="ServiceProvider">
<ServiceScope ws:ServiceName="myJobId1234"/>
<ServiceLevelObjective>
<KPITarget>
<KPIName>jsdl:IndividualDiskSpace</KPIName>
<CustomServiceLevel xsi:type="jsdl:RangeValue_Type"
xmlns:jsdl="http://schemas.ggf.org/jsdl/2005/11/jsdl"
xmlns:add="http://schemas.xmlsoap.org/ws/2004/03/addressing">
<jsdl:UpperBoundedRange>2000000.0</jsdl:UpperBoundedRange>
<jsdl:LowerBoundedRange>100000.0</jsdl:LowerBoundedRange>
</CustomServiceLevel>
</KPITarget>
</ServiceLevelObjective>
<BusinessValueList>
<Importance>1</Importance>
<Penalty>
<AssessmentInterval>
<TimeInterval>PT30S</TimeInterval>
</AssessmentInterval>
<ValueExpression xsi:type="bean:Penalty_Type"
xmlns:jsdl="http://schemas.ggf.org/jsdl/2005/11/jsdl"
xmlns:add="http://schemas.xmlsoap.org/ws/2004/03/addressing"
xmlns:bean="http://www.sormaproject.eu/message/ejsdl/beans">
<bean:functionName>DefaultPenalty</bean:functionName>
<bean:normalizationConstant>1.0</bean:normalizationConstant>
</ValueExpression>
</Penalty>
<Reward>
102
<ValueExpression xsi:type="bean:MarketMessage_Type"
xmlns:bean="http://www.sormaproject.eu/message/ejsdl/beans">
<bean:currency xsi:nil="true"/>
<bean:paymentType>EITHER</bean:paymentType>
<bean:clearingPrice>3.3333333333333335</bean:clearingPrice>
</ValueExpression>
</Reward>
</BusinessValueList>
</GuaranteeTerm>
<GuaranteeTerm ws:Name="IndividualPhysicalMemory" ws:Obligated="ServiceProvider">
<ServiceScope ws:ServiceName="myJobId1234"/>
<ServiceLevelObjective>
<KPITarget>
<KPIName>jsdl:IndividualPhysicalMemory</KPIName>
<CustomServiceLevel xsi:type="jsdl:RangeValue_Type"
xmlns:jsdl="http://schemas.ggf.org/jsdl/2005/11/jsdl"
xmlns:add="http://schemas.xmlsoap.org/ws/2004/03/addressing">
<jsdl:UpperBoundedRange>300.0</jsdl:UpperBoundedRange>
<jsdl:LowerBoundedRange>200.0</jsdl:LowerBoundedRange>
</CustomServiceLevel>
</KPITarget>
</ServiceLevelObjective>
<BusinessValueList>
<Importance>1</Importance>
<Penalty>
<AssessmentInterval>
<TimeInterval>PT30S</TimeInterval>
</AssessmentInterval>
<ValueExpression xsi:type="bean:Penalty_Type"
xmlns:jsdl="http://schemas.ggf.org/jsdl/2005/11/jsdl"
xmlns:add="http://schemas.xmlsoap.org/ws/2004/03/addressing"
xmlns:bean="http://www.sormaproject.eu/message/ejsdl/beans">
<bean:functionName>DefaultPenalty</bean:functionName>
<bean:normalizationConstant>1.0</bean:normalizationConstant>
</ValueExpression>
</Penalty>
<Reward>
<ValueExpression xsi:type="bean:MarketMessage_Type"
xmlns:bean="http://www.sormaproject.eu/message/ejsdl/beans">
<bean:currency xsi:nil="true"/>
<bean:paymentType>EITHER</bean:paymentType>
<bean:clearingPrice>3.3333333333333335</bean:clearingPrice>
</ValueExpression>
</Reward>
</BusinessValueList>
</GuaranteeTerm>
<ServiceReference ws:Name="EERMEndpoint" ws:ServiceName="Job ExecutionALL">
<add:EndpointReference xmlns:jsdl="http://schemas.ggf.org/jsdl/2005/11/jsdl"
xmlns:add="http://schemas.xmlsoap.org/ws/2004/03/addressing">
<add:Address>http://localhost:18080/EERM</add:Address>
</add:EndpointReference>
</ServiceReference>
</All>
</Terms>
</AgreementOffer>
Example 4: WS-Agreement example of the contract
103
SORMA Consortium
This document is part of a research project partially funded by the IST Programme of the Commission
of the European Communities as project number IST-FP6-034286.
Barcelona Supercomputing Center
BF/M Bayreuth, Universität Bayreuth
Cardiff University
Correlation Systems Ltd.
FZI Forschungszentrum Informatik
Hebrew University
Institut für Informationswirtschaft und
-management (IISM), Universität Karlsruhe
(TH)
Sun Microsystems
Swedish Institute of Computer Science
TXT e-Solutions
Universitat Politècnica de Catalunya
University of Reading
104