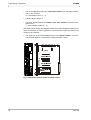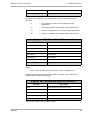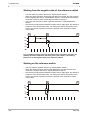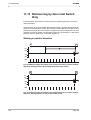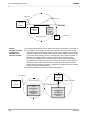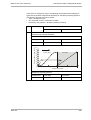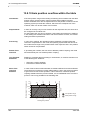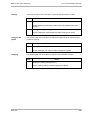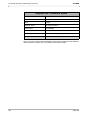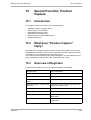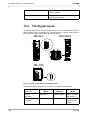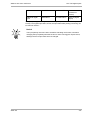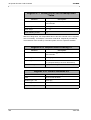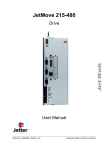
1
JetMove 1xx, 2xx, D203 at the JetControl Drive 60874950 Introduction Item # 60874950 Revision 2.11.4 November 2012 / Printed in Germany Jetter AG reserves the right to make alterations to its products in the interest of technical progress. These alterations will not necessarily be documented in every single case. This user information and the information contained herein have been compiled with due diligence. However, Jetter AG assume no liability for printing or other errors or damages arising from such errors. The brand names and product names used in this document are trademarks or registered trademarks of the respective title owner. 2 Jetter AG JetMove 2xx at the JetControl Introduction How to Contact us: Jetter AG Graeterstrasse 2 71642 Ludwigsburg Germany Jetter AG Phone - Switchboard: Phone - Sales: Phone - Technical Hotline: ++49 7141/2550-0 ++49 7141/2550-433 ++49 7141/2550-444 Fax - Sales: E-Mail - Sales: E-Mail - Technical Hotline: Internet Address: ++49 7141/2550-484 [email protected] [email protected] http://www.jetter.de 3 Introduction Significance of this User Information This user information forms part of the JetMove 105, 2xx and D203 at the JetControl system bus • • and must be kept in a way that it is always at hand until the JetMove will be disposed of. Pass this user information on if the JetMove is sold or loaned/leased out. In any case you encounter difficulties to clearly understand this user information, please contact the manufacturer. We would appreciate any suggestions and contributions on your part and would ask you to contact us. This will help us to produce manuals that are more user-friendly and to address your wishes and requirements. Missing or inadequate knowledge of the user information results in the loss of any claim of liability on part of Jetter AG. Therefore, the operating company is recommended to have the instruction of the persons concerned confirmed in writing. History 4 Revision Comment 23.1 Original issue 24.1 – Additional functions of software version 24.1 are described. – Various amendmends, renaming or additions of several chapters. – Extended register overviews. 24.2 For changes, please refer to revision 24.2, Appendix A 24.3 For changes please refer to revision 24.3, Appendix A 2.10.1 For changes please refer to revision 2.10.1, Appendix A 2.11.1 For changes please refer to revision 2.11.1, Appendix A 2.11.3 For changes please refer to revision 2.11.3, Appendix A 2.11.4 Refer to Appendix A: "Recent Revisions", page 413 Jetter AG JetMove 2xx at the JetControl Introduction Description of Symbols This sign is to indicate a possible impending danger of serious physical damage or death. Warning This sign is to indicate a possible impending danger of light physical damage. This sign is also to warn you of material damage. Caution This sign is to indicate a possible impending situation which might bring damage to the product or to its surroundings. It also identifies requirements necessary to ensure faultless operation. Important You will be informed of various possible applications and will receive further useful suggestions. It also gives you words of advice on how to efficiently use hardware and software in order to avoid unnecessary efforts. Note ·/- Enumerations are marked by full stops, strokes or scores. Operating instructions are marked by this arrow. Automatically running processes or results to be achieved are marked by this arrow. PC and user interface keys. This symbol informs you of additional references (data sheets, literature, etc.) associated with the given subject, product, etc. It also helps you to find your way around this manual. Jetter AG 5 Introduction 6 Jetter AG JetMove 2xx at the JetControl Table of Contents Table of Contents Jetter AG 1 Introduction 15 1.1 Product Description 15 1.2 System Requirements 15 2 Numbering of Registers 17 2.1 JC-24x and JM-D203-JC24x 17 2.2 Submodule JX6-SB-I 17 3 Axis Definitions 19 3.1 Procedure 19 3.2 Register Description 20 4 Axis Settings 25 4.1 Procedure 25 4.2 Register Description 27 5 Motor 35 5.1 General Information 35 5.2 Synchronous Motor 36 5.2.1 5.2.2 5.2.3 5.2.4 Selection of the amplifier Load current carrying capability Parameter setting Parametering example 36 37 37 38 5.3 Asynchronous Motor 40 5.3.1 5.3.2 5.3.3 5.3.4 5.3.5 5.3.6 Wye Selection of the amplifier Load current carrying capability Operation with field weakening Parameter setting Parametering example 40 40 42 42 42 43 5.4 Stepper Motor 46 5.4.1 5.4.2 Parameter setting Parametering example 46 47 5.5 Linear Motor 49 5.5.1 5.5.2 5.5.3 5.5.4 Selection of the amplifier Load current carrying capability Parameter setting Example: Parameter setting 49 50 50 51 5.6 Brush-Type DC Motor 53 5.6.1 Parameter setting 53 7 Table of Contents 8 JetWeb 5.7 2-Phase (Stepper) Motor 54 5.7.1 5.7.2 Parametering a stepper motor Parametering a LinMot 54 55 5.8 Brake 56 5.8.1 Parameter setting 56 5.9 Description of Registers 58 6 Encoder Feedback 67 6.1 Encoder Connection 67 6.1.1 6.1.2 6.1.3 6.1.4 JM-203, JM-206, and JM-215 JM-203B, JM-206B, JM-204, JM-208, JM-215B, and JM-225 JM-D203 JM-105 67 67 68 68 6.2 Resolver 69 6.2.1 Parameter setting 69 6.3 HIPERFACE 69 6.3.1 Parameter setting 69 6.4 Sine Incremental Encoder 69 6.4.1 6.4.2 Parameter setting Commutation finding 70 70 6.5 Incremental Encoder 71 6.5.1 Parameter setting 71 6.6 EnDat 2.2 72 6.6.1 Parameter setting 72 6.7 LinMot 72 6.7.1 Parameter setting 72 6.8 Description of Registers 73 6.9 Second Encoder 77 6.9.1 6.9.2 6.9.3 General configuration Position control by means of the second encoder Register description 77 82 84 7 Monitoring 91 7.1 Procedure 91 7.2 Register Description 92 7.3 I²t Monitoring 99 7.3.1 7.3.2 7.3.3 I²t-monitoring of the DC link voltage infeed I²t monitoring of the motor by means of a motor model I²t monitoring of the motor to UL standard 100 101 104 Jetter AG JetMove 2xx at the JetControl Jetter AG Table of Contents 8 Current Controller 107 8.1 Register Description 109 9 Speed Controller 119 9.1 Overview of Registers 119 9.2 Current Pre-Control 120 9.2.1 Ideal Current Pre-Control 121 9.3 Register Description 123 10 Position Feedback Controller 131 10.1 Register Description 131 11 Referencing 137 11.1 Control Mode 138 11.2 Starting the Reference Run 138 11.3 Interrupting the Reference Run 138 11.4 Status Information 138 11.5 Axis Type 139 11.6 Modes of Referencing 139 11.7 Speed Settings 139 11.8 Speed Reversal 140 11.9 Reference Position 141 11.9.1 Zero pulse ("zero mark") or edge of a switch 11.9.2 One-phase referencing 141 142 11.10 Setting the Specific Reference Position 143 11.11 Referencing by Zero Pulse Only 144 11.12 Referencing by Means of Reference and Limit Switch 145 11.12.1 Positive direction 11.12.2 Negative direction 145 148 11.13 Referencing by One Limit Switch Only 150 11.14 Referencing by Reference Switch Only 151 11.15 Register Description 152 12 Positioning 159 12.1 PtP-Positioning 159 12.2 Endless Positioning 159 12.3 Register Description 160 13 Technological Functions 175 9 Table of Contents 10 JetWeb 13.1 Introduction 175 13.2 Overview 176 13.3 Configuring a Technology Group 177 13.3.1 13.3.2 13.3.3 13.3.4 13.3.5 Overview Which modules can be used as leading and following axis Arrangement of a technology group Several technology groups in one system bus Configuration of a technology group 177 178 179 181 183 13.4 Configuring Synchronizing via System Bus 184 13.4.1 13.4.2 13.4.3 13.4.4 Overview Sample configuration Configuring the synchronizing procedure Description of registers. 184 185 186 188 13.5 Configuring Communication Within the Group 189 13.5.1 13.5.2 13.5.3 13.5.4 199 13.5.5 axes 13.5.6 13.5.7 Overview 189 Configuration with leading axis module JetMove 190 Configuration with leading axis module JX2-CNT1 194 Configuration by virtual position counter and external following axes 13.6 Introduction to Coupling Modes Configuration by virtual position counter without external following 204 Configuration with second encoder as leading axis 206 Description of registers 210 216 13.6.1 Survey 13.6.2 Introduction to the Electronic Gearing coupling mode217 13.6.3 Introduction to the Table coupling mode 13.6.4 Introduction to configuring and operating in the coupling modes223 216 13.7 224 Operating in the Electronic Gearing Mode 220 13.7.1 Overview 13.7.2 Position overflows 13.7.3 Survey: Configuration and operation 13.7.4 Configuring 13.7.5 Referencing the leading axis position 13.7.6 Coupling 13.7.7 Uncoupling options 13.7.8 Immediate uncoupling 13.7.9 Uncoupling by a ramp 13.7.10 Uncoupling by point-to-point positioning 13.7.11 Uncoupling by endless positioning 13.7.12 Changing the gear ratio 13.7.13 Description of registers 224 225 226 227 228 230 232 233 234 235 236 237 238 13.8 239 How the Table Coupling Mode Works Jetter AG JetMove 2xx at the JetControl Jetter AG Table of Contents 13.8.1 Overview 13.8.2 Definition of terms 13.8.3 Calculating the set position 13.8.4 Absolute and relative position coupling 13.8.5 Coupling 13.8.6 Uncoupling 13.8.7 Processing the table 13.8.8 Endless table processing 13.8.9 Changing tables on the fly 13.8.10 Axis position overflow within the table 13.8.11 Moving the table - Configuration offset 13.8.12 Scaling the table - Scaling factor 239 240 241 243 246 250 251 252 254 260 262 263 13.9 Configuring the Table Coupling Mode 264 13.9.1 13.9.2 13.9.3 13.9.4 13.9.5 13.9.6 13.9.7 Overview Axis and table position range Basics on setting the nodes The configuration objects Overview of configurations Configuring the table Description of registers 264 265 266 267 270 271 273 13.10 Carrying out the Table Coupling Mode 277 13.10.1 Overview 13.10.2 Overview of operations 13.10.3 Referencing the leading axis position 13.10.4 Immediate coupling 13.10.5 Conditioned coupling 13.10.6 Uncoupling 13.10.7 Changing tables on the fly 13.10.8 Register description 277 278 279 281 284 287 289 292 13.11 Virtual Position Counter 299 13.11.1 Overview 13.11.2 The modes of the Virtual Position Counter 13.11.3 Operation without a trigger signal 13.11.4 Operation with a trigger signal 13.11.5 Description of registers 299 301 302 304 306 13.12 Precise Following 308 13.12.1 Overview 13.12.2 Inaccuracies of the following axis 13.12.3 Compensating the inaccuracies 13.12.4 Dead time compensation 13.12.5 Dead time compensation - Register description 308 309 310 311 312 14 Special Function: Referencing on the Fly 313 14.1 Introduction 313 14.2 What is Referencing on the Fly? 313 14.3 Overview of Registers 314 11 Table of Contents 12 JetWeb 14.4 How does Referencing on the Fly Function? 315 14.5 Trigger Signal 316 14.6 The P-Correction Control 317 14.7 Sample Program 319 14.8 Description of Registers 321 15 Special Function: Position Capture 325 15.1 Introduction 325 15.2 What does "Position Capture" Imply? 325 15.3 Overview of Registers 325 15.4 The Digital Inputs 326 15.5 What Does this Function Imply? 328 15.6 Sample Program "Length Measurement" 330 15.7 Description of Registers 333 16 Special Function: PID Controller 339 16.1 General Information 339 16.2 Configuration 339 16.2.1 PID Controller with Lower-Level Current Control 16.2.2 PID controller with lower-level speed and current control 339 340 16.3 Commissioning 340 16.4 Optimizing the Controller 340 16.5 Register Description 342 17 Special Function: Position Trigger 351 17.1 Introduction 351 17.2 Overview of Registers 352 17.3 Configuring and Carrying Out the Function 353 17.4 Register Description 355 18 Special Function: Torque-Controlled Shut-Off 363 18.1 Introduction 363 18.2 Overview of Registers 363 18.3 Mode 1 364 18.4 Mode 2 365 18.4.1 Mode 2 - Sequential Program 366 18.5 Accuracy 367 18.6 Mode 1 - Configuring and Operating 367 Jetter AG JetMove 2xx at the JetControl Table of Contents 18.6.1 Configuring 18.6.2 Activating and deactivating the function 18.6.3 Transition to normal operation 367 369 369 18.7 Mode 2 - Configuring and Operating 370 18.7.1 Configuring 18.7.2 Activating and deactivating the function 18.7.3 Transition to normal operation 370 371 372 18.8 Sample Programs 373 18.8.1 Sample program - Mode 1 18.8.2 Sample program - Mode 2 373 374 18.9 Register Description 376 19 Further Functions 381 19.1 Oscilloscope 381 19.2 Trailing Indicator 383 19.2.1 Trailing indicator - As-is position 19.2.2 Trailing indicator - Tracking error 383 384 19.3 Triggered Emergency Stop Ramp 385 20 Generally Valid Parameters 387 20.1 Control Parameters 387 20.2 Diagnostics Parameters 397 20.3 Amplifier Parameters 405 Verzeichnis Anhang Appendix A: Recent Revisions 413 Appendix B: List of Abbreviations 414 Appendix C: Register Overview by Numeric Order 415 Appendix D: Register Overview - Sequence of Functions 444 Appendix E: Overview of Functions 475 Appendix F: Index of Illustrations 476 Appendix G: Index 478 Jetter AG 13 Table of Contents JetWeb 14 Jetter AG JetMove 2xx at the JetControl Inhalt 1 1.1 Product Description Introduction In this description, the following JetMoves are called JetMove 2xx or JetMove 200 series: • JetMove 105 • JetMove 203 • JetMove 204 • JetMove 206 • JetMove 208 • JetMove 215 • JetMove D203 This user information describes the functions of the product JetMove 2xx of the operating system version V 2.11 In this manual, the operation of the JetMove 2xx at the system bus of Jetter AG will be described. Additional information on the contents of this document is given in the instructions for the specific sizes of the JetMove 200 series. 1.1 Product Description The JetMove 200 series by Jetter offers modern servo amplifers for being applied with synchronized servo motors. The servo amplifier JetMove D203 can address two synchronous servo motors. 1.2 System Requirements The JetMove 200 amplifiers can be operated by JetControl 24x controllers and by the JX6-SB-I submodule. The JetMove 2xx amplifiers can directly be connected to the Jetter system bus. It is still possible to simultaneously operate all non-intelligent JX2-IO and all intelligent JX2 slave expansion modules made by Jetter AG at the system bus. The table shows the required software version of the controllers, which are prerequisite for the operation of the JM-2xx at the Jetter system bus according to these instructions. Software Versions of Controllers and the Submodule JX6-SB-I Controller Jetter AG Minimum Software Version JC-241, JC-243, JC-246 No limitation JM-D203-JC24x 1.10 JX6-SB-I 2.10 15 1 Introduction JetWeb 16 Jetter AG JetMove 2xx at the JetControl 2.1 JC-24x and JM-D203-JC24x 2 Numbering of Registers 2.1 JC-24x and JM-D203-JC24x The following register numbering applies to the controllers of the JC-24x series: The registers are addressed with the help of five-digit numbers. The first two digits are made up of the slot number of the JetMove 2xx module plus value 10. Below, the pattern of register numbering is illustrated. REG 1xzzz 1x zzz Module Position 2 .. X Register Number 0 .. 999 Only intelligent modules are counted. X = max. permitted amount of intelligent modules to be connected to the CPU (CPU = position 1) 2.2 Submodule JX6-SB-I The servo amplifier series JetMove 200 can also be operated at a JX6-SB-I submodule withouth changing its range of functions. JX6-SB-I is a submodule of JetControl 647. All intelligent and non-intelligent expansion modules to the Jetter system bus can be connected to the JX6-SB-I submodule. JetMove 2xx is an intelligent expansion module. Description of the register pattern: 3m1xzzz By way of example REG 3m1xzzz, the register numbering pattern is demonstrated below. Jetter AG • The registers are addressed with the help of a 7-digit number. • The first digit is always 3. 17 2 Numbering of Registers JetWeb • The second digit m specifies the submodule socket for the JX6-SB(-I) submodule on the controller: m = submodule socket (1 ... 3). • The third digit is always 1. • The fourth digit x specifies the number of the slave module connected to the system bus: x = slave module number (2 ... 9). The slave module number specifies the position among the intelligent expansion modules connected to the Jetter system bus. The smaller the number, the closer is the module to the controller. • The digits five, six and seven zzz specify the core register number. One of the 100 possible registers is selected by using this register number. JC 647 Fig. 1: Submodule sockets of the controller JC-647 18 Jetter AG JetMove 2xx at the JetControl 3.1 Procedure 3 Axis Definitions 3.1 Procedure The basic properties of an axis have to be set beforehand. Based on the respective axis definition, some registers of the JetMove are assigned validity or other units. Normally, the axis is defined in JetSym under Project Settings and loaded into JetMove by the instruction MotionLoadParameter. The following description refers to manual axis definition. Setting the axis type The axis type has to be set via “Register 191: Axis Type” on page 20. Usually, a machine consists of two kinds of axes: • • Linear axes Rotatory axes In case of a linear axis, the load is moved in linear direction; all positioning parameters have been specified in the [mm] unit. In case of a rotatory axis, the load will be moved on a circular path; for this reason, all positioning parameters have been specified in the [°] unit. It is not relevant for defining the axis type, whether the motor is rotatory. The axis type defines the mechanic design of the load. A rotatory motor, for example, can move a linear axis via a spindle. Sample applications for linear axes: Jetter AG 19 3 Axis Definitions JetWeb Sample applications of rotatory axes: Setting the motion mode In the motion mode, it is defined whether the axis is to run in modulo mode or not. In modulo mode, one axis absolutely exceeds the travel range, which has been defined in registers 182 and 183. This means that there will be a position overflow. Modulo operation will result in the as-is position of register 109 to jump to the maximum, respectively minimum limit defined in R182 respectively 183 at reaching the travel range limits. It is configured by means of register 192. The modulo mode is configured for an axis, for example, which is to be run in endless positioning. 3.2 Register Description Register 191: Axis Type Function Description Read As-is value of the present axis type Write Set value of the present axis type Amplifier status The amplifier has to be deactivated Takes effect Immediately Variable type int / register Value range 1, 2 Value following a reset 2 (rotatory) Here, the motion of the axis is defined: either linear or rotatory. 20 Jetter AG JetMove 2xx at the JetControl 3.2 Register Description Meaning of the values: 1 : linear 2 : rotatory Usually, a machine consists of two kinds of axes: • • Linear axes Rotatory axes In case of a linear axis, the load is moved in linear direction; all positioning parameters have been specified in the [mm] unit. In case of a rotatory axis, the load will be moved on a circular path; for this reason, all positioning parameters have been specified in the [°] unit. These are the positioning parameters: • Positioning parameter • Speed parameter • Acceleration / Deceleration parameter • Parameter for jerk limitation The units for a linear axis shown in detail: • Unit defining a position: [mm] • Unit defining speed: [mm/s] • Unit defining acceleration / deceleration: [mm/s²] • Unit defining jerk: [mm/s³] The units for a rotatory axis shown in detail: • Unit defining a position: [°] • Unit defining speed: [°/s] • Unit defining acceleration / deceleration: [°/s²] • Unit defining jerk: [°/s³] The motion mode is set within the axis section of the project settings within a JetSym ST or JetSym STX project. At establishing a connection, the motion setup checks the settings; after a query, it sets the value accordingly. Jetter AG 21 3 Axis Definitions JetWeb Register 192: Modulo Axis Function Description Read As-is value Write Set value Amplifier status The amplifier has to be deactivated Takes effect Immediately Variable type int / register Value range 0, 1 Value following a reset 0 Here it is defined, whether the axis is a modulo axis or not. Meaning of values: 0 : No modulo axis 1 : Modulo axis What is a modulo axis? The positioning values of a modulo axis are always within a defined modulo travel range (in order to make possible endless positioning, for example), see register 193 "Modulo travel range". If the axis moves in positive direction and reaches the positive travel limit, the position will be set back to the value of the negative travel limit. This means the axis can continue with new positioning values starting from the negative travel range. If the axis moves in negative direction and reaches the negative travel limit, the position will be set back to the value of the positive travel limit. This means the axis can continue with new positioning values starting from the positive travel range. Consequently, modulo axes haven't got any hardware or software limit switches. The following figure will illustrate an endless axis motion in positive direction by a modulo travel range of 200,000 ° (negative travel limit = 0°, positive travel limit = 200,000°). 22 Jetter AG JetMove 2xx at the JetControl 3.2 Register Description Position 200,000 150,000 100,000 50,000 Time t 0 Positioning Cycle 1 Positioning Cycle 2 Positioning Cycle 3 Fig. 2: Example of a modulo axis motion The motion mode is set within the axis section of the project settings within a JetSym ST or JetSym STX project. At establishing a connection, the motion setup checks the settings; after a query, it sets the value accordingly. Jetter AG 23 3 Axis Definitions JetWeb 24 Jetter AG JetMove 2xx at the JetControl 4.1 Procedure 4 Axis Settings 4.1 Procedure Reversal of direction At reversion of direction, the counting direction of the axis can be reversed altogether. Reversion of the direction is set by bit number 5 “Register 540: Drive Mode” on page 392. Polarity of limit and reference switches The hardware limit switch monitoring is active by default. In order to activate the axis without an immediate error message being triggered, the “Register 510: Digital Inputs: Polarity” on page 32 has to be set according to the connected limit and reference switches. The status should now be monitored in “Register 100: Status” on page 397. If monitoring is not required, bit number 7 has to be cleared in “Register 540: Drive Mode” on page 392. Motor / Mechanic transmission factor For using a drive the transmission factor has to be entered via the two parameters “Register 194: Transmission Ratio - Motor” on page 30 and “Register 195: Transmission Ratio - Mechanics” on page 31. If no drive is applied, both parameters are set to value 1. If a linear axis is applied, the “Register 196: Linear / Rotation Ratio” on page 31 has to be set afterwards. Software limit switch The software limit switch monitoring is NOT active by default. If monitoring is required, bit number 6 has to be set in “Register 540: Drive Mode” on page 392. The software limit switches have to be set after referencing in relation to the basic position. During referencing, software limit switch monitoring is internally deactivated. Travel limits The travel limits serve for position limiting for travel instructions in position controlling. The travel limits have to be set after referencing in relation to the basic position. Jetter AG 25 4 Axis Settings JetWeb Maximum speed, acceleration and jerk These parameters limit the dynamic of the entire axis. The maximum speed can be entered according to the required maximum speed. For first commissioning, the parameters for acceleration and jerk have got the default value. At setting the axis to greater dynamics, these parameters can be increased. 26 Jetter AG JetMove 2xx at the JetControl 4.2 4.2 Register Description Register Description Register 180: Maximum Acceleration Function Description Read As-is acceleration value Write New acceleration value Amplifier status The amplifier has to be deactivated Takes effect Wait for the busy-bit in the status to be reset Variable type float Value range 0 ... Pos. float limits [°/s²] oder [mm/s²] (the unit depends on the setting of the axis type) Value following a reset 100,000 [°/s²] Here, the maximum acceleration / deceleration of an axis is specified. The amplifier will limit each acceleration, respectively deceleration, to the specified value, even if a greater value has been specified for positioning purposes. Acceleration / deceleration will only be limited for positioning by means of position control. The axis will also be decelerated according to this parameter, if you issue command 5. Jetter AG 27 4 Axis Settings JetWeb Register 181: Maximum Jerk Function Description Read Value of the as-is jerk Write New value of the jerk Amplifier status The amplifier has to be deactivated Takes effect Wait for the busy-bit in the status to be reset Variable type float Value range 0 ... Pos. float limits [°/s³] oder [mm/s³] (the unit depends on the setting of the axis type) Value following a reset 1,000,000 [°/s³] Here, the maximum permitted jerk for the specific axis is specified. The amplifier will limit the jerk to this value when one kind of motion follows the other one. Jerk limiting is important, especially when linear ramps are applied. The jerk will only be limited for positioning by means of position control. Register 182: Travel Limit, Positive Function Description Read Value of the present limit Write New value of travel limit Amplifier status The amplifier has to be deactivated Takes effect Immediately Variable type float Value range R183 > ... positive float limit [°] or [mm] (the unit depends on the setting of the axis type) Value following a reset 100,000 [°] Here, the positive modulo travel range limit of a modulo axis will be specified. The modulo travel range defined in register 193 "Modulo Travel Range" will automatically be calculated as the difference between the positive and the negative travel range. If your axis is not a modulo axis, this parameter will limit the absolute axis motion in positive direction. This means that, at a positioning run, the target position will always be limited to this value, even if a higher value is entered. Via register 192 "Modulo Axis", the axis will be set to modulo axis. 28 Jetter AG JetMove 2xx at the JetControl 4.2 Register Description Register 183: Travel Limit, Negative Function Description Read Value of the present limit Write New value of travel limit Amplifier status The amplifier has to be deactivated Takes effect Immediately Variable type float Value range negative float limits ... < R182 [°] or [mm] (the unit depends on the setting of the axis type) Value following a reset -100,000 [°] Here, the negative modulo travel range limit of a modulo axis will be specified. The modulo travel range defined in register 193 "Modulo Travel Range" will automatically be calculated as the difference between the positive and the negative travel range. If your axis is not a modulo axis, this parameter will limit the absolute axis motion in negative direction. This means that, at a positioning run, the target position will always be limited to this value, even if a higher value is entered. Via register 192 "Modulo Axis", the axis will be set to modulo axis. Register 184: Maximum Speed Function Description Read Value of the as-is maximum speed Write New value of the maximum speed Amplifier status The amplifier has to be deactivated Takes effect Wait for the busy-bit in the status to be reset Variable type float Value range 0 ... Pos. float limits [°/s] oder [mm/s] (the unit depends on the setting of the axis type) Value following a reset 18,000 [°/s] Here, the maximum speed of the mechanic axis is specified. The amplifier limits the speed to this value, even if a higher speed has been set for positioning. Further, this value is necessary for monitoring the maximum acceleration / deceleration and the maximum jerk. The greatest value that can be input here, is limited by the value in register 118 "Maximum Motor Speed" and by the values of the registers for setting the gearbox factors: Register 194 "Transmission Ratio - Motor", register 195 "Transmission Ratio Mechanics", and register 196 "Transmission Ratio - Linear / Rotatory". Jetter AG 29 4 Axis Settings JetWeb The value must not be greater than the result of the following formula: Greatest value R184 = R118 * R196 * R195 / (R194 * 60) Influences R435 and R436. Register 193: Modulo Travel Range Function Description Read As-is value of the virtual travel range Write Illegal Variable type float Value range Float limits [°] or [mm] (the unit depends on the setting of the axis type) Value following a reset 360 [°] The modulo travel range will automatically be calculated as the difference between the positive travel range, register 182, and the negative travel range, register 183. Attention! If no modulo axis has been set in register 192, the modulo mode is deactivated; this means that the value of this register is not valid and will thus not be calculated as the difference between the values of the travel ranges. Register 194: Transmission Ratio - Motor Function Description Read As-is number of motor revolutions Write New number of motor revolutions Amplifier status The amplifier has to be deactivated Takes effect Immediately Variable type float Value range 0.01 ... pos. float limit [rev.] Value following a reset 1 [rev.] In case of a rotatory axis, the following parameter will be used for calculating the gear ratio: Number of motor rotations (R194) i = -------------------------------------------------------------------------------------------------------------Number of mechanics / load rotations (R195) 30 Jetter AG JetMove 2xx at the JetControl 4.2 Register Description If, for example, the mechanics rotate once, while the motor rotates ten times, the number of motor rotations must also be set to 10, while the number of mechanic revolutions is set to 1. In case of a linear axis, the gear ratio, and the additional parameter "Transmission ratio - linear / rotatory" written in register 196, has to be specified. "Transmission ratio linear / rotatory" defines the transition from rotatory to linear mode. Register 195: Transmission Ratio - Mechanics Function Description Read As-is number of load rotations Write New number of load rotations Amplifier status The amplifier has to be deactivated Takes effect Immediately Variable type float Value range 0.01 ... pos. float limit [rev.] Value following a reset 1 [rev.] Here, the latest rotatory transmission unit must be specified; see description of register 194 "Transmission Ratio - Motor". Register 196: Linear / Rotation Ratio Function Description Read As-is transmission ratio Write New transmission ratio Amplifier status The amplifier has to be deactivated Takes effect Immediately Variable type float Value range 0.01 ... pos. float limit [°/rev.] or [mm/rev.] Value following a reset 360 [°/rev.] The transmission ratio linear /rotatory is only needed for a linear axis; it describes the linear motion of the axis related to a rotation of the latest rotatory transmission unit written in register 195 "Transmission Ratio - Mechanics". The parameters "Transmission Ratio - Mechanics", register 195, and "Transmission Ratio - Motor", register 194, also have to be specified. Jetter AG 31 4 Axis Settings JetWeb Register 510: Digital Inputs: Polarity Function Description Read Value of the as-is input polarity Write New value of the input polarity Amplifier status The amplifier has to be deactivated Takes effect Immediately Variable type int / register Value range Bit-coded, 16 bits Value following a reset 0b 00000001 00001111 Here, the polarity of the digital inputs can be specified. Meaning of values: 0 : 0 V = Logical 1, 24 V = Logical 0 1 : 0 V = Logical 0, 24 V = Logical 1 Meaning of the individual bits: Bit 0: ENABLE (cannot be altered) Bit 1: LIMIT + (positive hardware limit switch) Bit 2: LIMIT - (negative hardware limit switch) Bit 3: REF (reference switch) Bit 5: Select (connector coding) Bit 6: ENABLE1 (cannot be altered) (** Bit 7: ENABLE2 (cannot be altered) (** Bit 8: INPUT (interrupt input, special application) (* (* This bit is only available with JM-D203. (** These bits are only available with the amplifier having got the option "Safe Standstill". 32 Jetter AG JetMove 2xx at the JetControl 4.2 Register Description Register 511: Digital Inputs: Status Function Description Read Value of the as-is input circuit state Write Illegal Variable type int / register Value range Bit-coded, 16 bits Value following a reset 0 The as-is input circuit state of the digital inputs can be read out here. The input circuit state depends on the polarity settings of the digital inputs specified in register 1x510. Meaning of values: 0 : Not active 1 : Activated Meaning of the individual bits: Bit 0: ENABLE Bit 1: LIMIT + (positive hardware limit switch) Bit 2: LIMIT - (negative hardware limit switch) Bit 3: REF (reference switch) Bit 5: Select (connector coding) Bit 6: ENABLE1 (** Bit 7: ENABLE2 (** Bit 8: INPUT (interrupt input, special application) (* (* This bit is only available with JM-D203. (** These bits are only available with the amplifier having got the option "Safe Standstill". Jetter AG 33 4 Axis Settings JetWeb 34 Jetter AG JetMove 2xx at the JetControl 5.1 General Information 5 Motor 5.1 General Information For motor connection, please refer to the operator's manual of the JM-2xx: Setting the commutation offset and the pole pair number: If you apply a motor other than by Jetter, the ´Register 116: Commutation Offset’ on page 58 and the ´Register 123: Pole Pair Number’ on page 60 have to be set at least. The pole pair number of Jetter motors has to be set according to the design: Design Poles Pole Pair Number JL motors 6 3 JK motors 6 3 JH motors* 10 5 * JH2 motors, as well as JL and JK motors, have got 6 poles, respectively 3 pole pairs. Any other JH motors have got 10 poles, respectively 5 pole pairs. The default value of the pole pair number is 3. The default commutation offset value is 0. For a motor made by another company it must possibly be adjusted. If required, an appropriate value must be set by Jetter AG. Setting the back EMF constant: If highly dynamic drives are used, the parameter voltage constant should be adjusted. For this, please refer to the motor data sheet or the rating plate of the motor. For further information, please turn to the register description ´Register 505: Back EMF Constant’ on page 60. Setting the back EMF constant: The torque constant is necessary for displaying a valid as-is torque in ´Register 621: As-is Torque’ on page 118. If the torque constant equals zero, the as-is torque equals zero as well. Jetter AG 35 5 Motor JetWeb 5.2 Synchronous Motor JM-2xx has been designed for operation of synchronous motors. For this, a feedback function is always needed, e.g. resolver, SinCos, HIPERFACE, or EnDat, see chapter 6 "Encoder Feedback", page 67. 5.2.1 Selection of the amplifier For selecting an adequate amplifier, the continuous rated current and the required maximum speed of the motor are decisive factors. The continuous rated current of the motor determines the continuous rated current of the amplifier. The desired speed determines the maximum effective voltage that must be supplied by the amplifier. Because of the motor-back EMF, the synchronous motor will need a certain effective voltage for a certain speed. The greater the speed, the greater must be the effective voltage. In this case, the relation is linear. The amplifier can generate a certain maximum effective voltage out of its DC link voltage: • • • The amplifier JM-105 supplies a maximum effective voltage of approximately 27 Veff at +Vmot = 48 V DC. The amplifiers JM-D203, JM-203 and JM-206 supply a maximum effective voltage of approximately 190 Veff. The amplifiers JM-204, JM-208 and JM-215 supply a maximum effective voltage of approximately 320 Veff. In order to be able to select the amplifier that corresponds to the required maximum speed, the effective voltage, which the motor needs in this case, must be known. For synchronous motors, the voltage constant stands for the required effective voltage per 1,000 rpm. By means of this parameter, the required effective voltage at the desired maximum speed can be calculated in linear positive or negative direction. Note! The effective voltage of the amplifier should have a reserve of approximately 20 % related to the required effective voltage. This reserve is necessary for good controlling. 36 Jetter AG JetMove 2xx at the JetControl 5.2 Synchronous Motor Example 1: Calculating the effective voltage A motor with a continuous rated current In of 5.7 A and a voltage constant KE of 51 Veff/1,000 rpm is to be driven by a maximum speed of 3,000 rpm: Voltage at 3,000 rpm = 51 Veff/1,000 rpm * 3,000 rpm = 153 Veff with a controlled reserve capacity = 153 Veff + 20 % of 153 Veff = 153 Veff + 30.6 Veff = 183.6 Veff For In = 5.7 A and a required effective voltage of 183.6 Veff , a JM-206 of In = 6 A and a supplied effective voltage of 190 Veff is a good choice. 5.2.2 Load current carrying capability Generally, a synchronous motor can be loaded by double the continuous rated current for a short time. 5.2.3 Parameter setting The following motor data are needed for parameterization; they must either be read from the rating plate or taken from the data sheet of the motor: In = Continuous rated current in the unit [Aeff] ZP = Pole pair number LMotor = Inductivity between 2 motor terminals in the unit [H] RMotor = Resistance between 2 motor terminals in the unit [Ohm] The following registers must be adjusted for parameterization of the motor: Function group "Motor" – ´Register 123: Pole Pair Number’ on page 60 Function group "Encoder Feedback": – ´Register 577: Encoder Type’ on page 75 Function group "Current Control": – – – – Jetter AG ´Register 503: Current Control Kp’ on page 112 ´Register 504: Current Control Tn’ on page 115 ´Register 618: Rated Current’ on page 116 ´Register 619: Overload Factor’ on page 117 37 5 Motor JetWeb 5.2.4 Parametering example The nameplate of a JH-0190-42 servo motor displays the following particulars: Parameter Value Continuous stall torque M0 1.9 Nm Rated speed Nn 3000 rev/min Rated voltage UDC 320 V Continuous rated current IN 2.43 A Further particulars of the data sheet: Parameter Value Back EMF constant KE 42 V*min/1000 Torque constant KT 0.69 Nm/A Winding resistance RPH 4 Winding inductance LPH 15.4 mH Motor pole number PMot 10 (1) The pole pair number ZP is calculated as follows: Z P = P Mot 2 The following applies to the operand: PMot = Number of motor poles Sample motor: Z P = 10 2 = 5 (2) The parameter Tn of the unit [ms] is calculated as follows: L Motor T n = --------------R Motor The following applies to the operands: LMotor = Inductivity between 2 motor terminals in the unit [H] -> motor data sheet, or find out by measuring. RMotor = Resistance between 2 motor terminals in the unit [ ] -> Motor data sheet, respectively measuring. 15.4 mH 4.0 Sample motor: T n = ----------------------- = 3.85 ms 38 Jetter AG JetMove 2xx at the JetControl 5.2 Synchronous Motor (3) The proportional amplification of the current controller Kp is calculated as follows: I eff L Motor K P = --------------------------2 T s U DC The following applies to the operands: Ieff = Maximum output current in the unit [Aeff] -> value of register 618 "Rated Current (q)", multiplied by the value of register 619 "Overload Factor" LMotor = Inductivity between 2 motor terminals in the unit [H] -> motor data sheet, or find out by measuring. Ts = The sum of the small time constants in the unit [s] -> Ts is always 0.000042 s in JM-2xx. UDC = UDC = DC link voltage of the amplifier in the unit [V] Sample motor at UDC = 320 V and overload factor = 2: 2 2.43 A 15.4 mH 2 42 s 320 V eff : K P = --------------------------------------------------------- = 2.78 Jetter AG 39 5 Motor JetWeb 5.3 Asynchronous Motor Besides synchronous motors, asynchronous motors can also be driven by the JM-2xx. For this, a feedback function will always be needed, e.g. resolver or incremental encoder, see chapter 6 "Encoder Feedback", page 67. Further, an asynchronous motor is always only permitted to be driven by the JM-2xx as wye. 5.3.1 Wye The motor winding is only permitted to be driven as wye: Wye U1 U1 V 1 W 1 V1 W 2 U2 V 2 W1 a) b) Fig. 3: Wye: a) Motor winding b) Connection terminal plate 5.3.2 Selection of the amplifier For selecting an adequate amplifier, the continuous rated current and the required maximum speed of the motor are decisive factors. The continuous rated current of the motor determines the continuous rated current of the amplifier. Note! The current that is needed for the asynchronous motor, is divided into two components, which are the magnetizing current Id and the active current Iq. The amplifier must always be able to supply the whole amount of current, which is made up by both components. The continuous rated current of the motor is the total amount of current needed with rated load. The desired speed determines the maximum effective voltage that must be supplied by the amplifier. Because of the motor-back EMF, the asynchronous motor will need a certain effective voltage for a certain speed. The greater the speed, the greater must be the effective voltage. In this case, the relation is linear. 40 Jetter AG JetMove 2xx at the JetControl 5.3 Asynchronous Motor The amplifier can generate a certain maximum effective voltage out of its DC link voltage: • • • The amplifier JM-105 supplies a maximum effective voltage of approximately 27 Veff at +Vmot = 48 V DC. The amplifiers JM-D203, JM-203 and JM-206 supply a maximum effective voltage of approximately 190 Veff. The amplifiers JM-204, JM-208 and JM-215 supply a maximum effective voltage of approximately 330 Veff. In order to be able to select the amplifier that corresponds to the required maximum speed, the effective voltage, which the motor needs in this case, must be known. Other than with synchronous motors, there is usually no specification of the voltage constant for asynchronous motors (Ke). Regarding synchronous motors, the voltage that is needed per 1,000 rpm is specified in the unit [Veff]. Note! The speed of asynchronous motors designed for direct 3-phase online-operation has usually been rated to a mains voltage of 400 Veff. In a wye, this motor connected to a JM-204, JM-208 or a JM-215 will not be able to reach the rated speed. For this reason, only asynchronous motors should be used that are apt for operation with a frequency converter. Asynchronous motors that have been designed for operation with frequency converters, have normally got a specification of the effective voltage needed for reaching the rated speed in a wye. From the effective voltage that is needed for reaching the rated speed, linear downward or upward calculation can be made in order to reach the required effective voltage at the desired speed. Note! The effective voltage of the amplifier should have a reserve of approximately 20 % related to the required effective voltage. This reserve is necessary for good controlling. Example 2: Calculation for asynchronous motors With a wye, an asynchronous motor has got the rated current In= 3.15 A and the rated speed nn = 1,370 rpm at a voltage of 133 V eff. The motor is to be driven by a maximum speed of 1,000 rpm: Voltage at 1,000 rpm = 133 Veff/1,000 rpm * 1,370 rpm = 97 Veff with a controlled reserve capacity = 97 Veff + 20 % of 97 Veff = 97 Veff + 19.4 Veff = 116.4 Veff For In = 3.15 A and a required effective voltage of 116.4 Veff , a JM-203 of In = 3 A and a supplied effective voltage of 190 Veff is a good choice. Jetter AG 41 5 Motor JetWeb 5.3.3 Load current carrying capability Generally, an asynchronous motor can be loaded by 1.5 times the continuous rated current for a short time. The normally proportional ratio between current and torque can turn into a non-proportional ratio even before this loading. 5.3.4 Operation with field weakening Field weakening is used for increasing the speed of an asynchronous motor, while the effective voltage remains the same. In turn, the torque decreases. If a JetMove is applied, operation with field weakening is not possible. 5.3.5 Parameter setting The following motor data are needed for parameterization; they must either be read from the rating plate or taken from the data sheet of the motor: Both inductivity and resistance might have to be measured between two motor terminals: fn = Rated frequency in the unit [Hz] (mostly 50 Hz) In = Continuous rated current in the unit [Aeff] Depends on the connections of the motor winding nn = Rated speed in the unit [rpm] Depends on the connections of the motor winding cos phi = Rated service factor LMotor = Inductivity between 2 motor terminals in the unit [H] Depends on the connections of the motor winding RMotor = Resistance between 2 motor terminals in the unit [ ] Depends on the connections of the motor winding Additionally, the following motor data are needed; they can be derived from the data specified above, though: 42 nsync = Synchronous motor speed at a rated speed in the unit [rpm] (auxiliary quantity for calculating fslip) ZP = Pole pair number fslip = Rated slip frequency in the unit [Hz] Iq = Continuous rated current / rated active power generating the torque, in the unit [Aeff] (auxiliary quantity for calculating ld] Id = Rated magnetizing current in the unit [Aeff] Jetter AG JetMove 2xx at the JetControl 5.3 Asynchronous Motor The following registers must be adjusted for parameterization of the motor: Function group "Motor" – ´Register 121: Magnetizing Current’ on page 109 – ´Register 122: Slip Frequency’ on page 59 – ´Register 123: Pole Pair Number’ on page 60 Function group "Encoder Feedback": – ´Register 577: Encoder Type’ on page 75 Function Group "Current Control": – – – – ´Register 503: Current Control Kp’ on page 112 ´Register 504: Current Control Tn’ on page 115 ´Register 618: Rated Current’ on page 116 ´Register 619: Overload Factor’ on page 117 5.3.6 Parametering example The nameplate of an asynchronous motor displays the following particulars: Delta connection Wye Voltage Parameter 135 V 230 V In 16 A 9.3 A cos phi 0.79 fn 50 Hz nn 1420 rpm As for the JetMove only the wye can be applied, the values of the wye are used for calculations. The values for LMotor and RMotor can been specified by measuring. Sample motor: LMotor = 11.6 mH and RMotor = 2 (1) The pole pair number ZP at a rated frequency of 50 Hz can be read out of the following table: ZP nsync [rpm] nn [rpm] 1 3,000 2,760 - 2,910 2 1,500 1,380 - 1,455 3 1,000 920 - 970 4 750 690 - 730 Sample motor: ZP= 2 n –n Z s 60 ---------min sync n P (2) The slip frequency fslip is calculated as follows: f slip = -------------------------------------- Jetter AG 43 5 Motor JetWeb The following applies to the operands: nn = Rated motor speed in the unit [rpm], at a rated frequency (e. g. 50 Hz) and a rated torque as specified on the > nameplate nsync = Synchronous motor speed in the unit [rpm] -> The value is obtained by means of the rated speed (it is about 3 % - 8 % smaller than the synchronous speed, see exemplary numbers below) ZP = Pole pair number, see> motor data sheet, or obtain by means of synchronous speed and rated frequency Sample motor: f slip U U 1500 --------– 1420 ---------- 2 min min = ----------------------------------------------------------------- = 2.66 Hz s 60 ---------min (3) The rated current generating the torque (rated active current) Iq in the unit [Aeff] is calculated as follows: I q = I n cos The following applies to the operands: In = Continuous rated current in the unit [Aeff] -> nameplate, dependent on the motor winding connection cos phi = Rated service factor -> nameplate of the motor Sample motor: I q = 9.3 A eff 0.79 = 7.34 A eff (4) The magnetizing current Id is calculated as follows: Id = 2 In – Iq 2 The following applies to the operands: In = Continuous rated current in the unit [Aeff] -> nameplate, dependent on the motor winding connection Iq = Rated magnetizing current in the unit [Aeff] -> ´Register 618: Rated Current’ on page 116 Sample motor: I d = 44 2 2 9.3 A eff – 7.34 A eff = 5.71 A eff Jetter AG JetMove 2xx at the JetControl 5.3 Asynchronous Motor (5) The parameter Tn of the unit [ms] is calculated as follows: L Motor T n = --------------R Motor 11.6 mH Sample motor: T n = ----------------------- = 5.8 ms 2.0 (6) The proportional amplification of the current controller Kp is calculated as follows: I eff L Motor K P = --------------------------2 T s U DC The following applies to the operands: Ieff = Maximum output current in the unit [Aeff] -> value of register 618 "Rated Current (q)", multiplied by the value of register 619 "Overload Factor" LMotor = Inductivity between 2 motor terminals in the unit [H] -> motor data sheet, or find out by measuring. (In asynchronous motors, the inductivity depends on the motor winding connection. As in a JetMove only the wye can be used, an inductivity has to be used with the wye here.) Ts = The sum of the small time constants in the unit [s] -> Ts is always 000042 s in JM-2xx. UDC = UDC = DC link voltage of the amplifier in the unit [V] Sample motor at UDC = 560 V and overload factor = 1.5: 1.5 7.34 A eff 11.6 mH K P = ------------------------------------------------------------- = 2.71 2 42 s 560 V Jetter AG 45 5 Motor JetWeb 5.4 Stepper Motor 3-phase asynchronous motors can also be driven by the JM-2xx. For this, feedback is not needed. 5.4.1 Parameter setting The following motor data are needed for parameterization; they must either be read from the rating plate or taken from the data sheet of the motor: In = Continuous rated current in the unit [Aeff] ZP = Pole pair number LMotor = Inductivity between 2 motor terminals in the unit [H] RMotor = Resistance between 2 motor terminals in the unit [Ohm] The following registers must be adjusted for parameterization of the motor: Function group "Motor" – ´Register 123: Pole Pair Number’ on page 60 Function group "Encoder Feedback": – ´Register 577: Encoder Type’ on page 75 Function group "Current Control": – – – – ´Register 503: Current Control Kp’ on page 112 ´Register 504: Current Control Tn’ on page 115 ´Register 618: Rated Current’ on page 116 ´Register 619: Overload Factor’ on page 117 Function group "Speed Control": – – – – – ´Register 124: Speed Controller Kp’ on page 125 ´Register 126: Speed Controller Tn’ on page 125 ´Register 231: Current Reduction’ on page 111 ´Register 232: Current Reduction Time’ on page 111 ´Register 506: Speed Controller Preset’ on page 127 For stepper motors, there is no encoder system for position recording. For this reason, the virtual encoder type (value 11) has to be set by means of ´Register 577: Encoder Type’ on page 75. Because of the missing encoder system, there is no physical as-is speed value either. Thus, ´Register 124: Speed Controller Kp’ on page 125 has to be set to "0". This causes the speed control to become ineffective. 46 Jetter AG JetMove 2xx at the JetControl 5.4 Stepper Motor The current setpoint needed for operation has to be predefined by means of ´Register 506: Speed Controller Preset’ on page 127. At activating the controller, the integral-action component of the speed controller is set accordingly, which can be checked via “Register 507: I-Component Speed Controller”. This value is displayed in “Register 125: Current Setpoint” at the current controller. In order to activate current reduction, the desired value has to be written to ´Register 231: Current Reduction’ on page 111. Current reduction is activated, if the position setpoint of the position control remains unchanged over the set time. Current reduction internally accesses ´Register 127: Current Limitation’ on page 110. When it is activated, current reduction limits the current setpoint of the speed control. This limitation is cancelled at the next change of position controller setpoint. Note! At activating current reduction, blocking monitoring has to be deactivated as well. This can be done via ´Register 546: Blocking Protection - Tripping Time’ on page 95 = 65535. When the configuration steps mentioned above have been carried out, the stepper motor axis can be activated and moved as usual. Of course, only functions can be made use of that do not need any physical as-is position and torque value. 5.4.2 Parametering example The nameplate of a motor displays the following particulars: Parameter Value Continuous rated current IN 2.43 A Winding resistance RPH Winding inductance LPH 4,0 15.4 mH Motor pole number PMot 10 (1) The pole pair number ZP is calculated as follows: Z P = P Mot 2 The following applies to the operand: PMot = Number of motor poles Sample motor: Z P = 10 2 = 5 Jetter AG 47 5 Motor JetWeb (2) The parameter Tn of the unit [ms] is calculated as follows: L Motor T n = --------------R Motor The following applies to the operands: LMotor = Inductivity between 2 motor terminals in the unit [H] -> motor data sheet, or find out by measuring. RMotor = Resistance between 2 motor terminals in the unit [ ] -> Motor data sheet, respectively measuring. 15.4 mH Sample motor: T n = ----------------------- = 3.85 ms 4.0 (3) The proportional amplification of the current controller Kp is calculated as follows: I eff L Motor K P = --------------------------2 T s U DC The following applies to the operands: Ieff = Maximum output current in the unit [Aeff] -> value of register 618 "Rated Current (q)", multiplied by the value of register 619 "Overload Factor" LMotor = Inductivity between 2 motor terminals in the unit [H] -> motor data sheet, or find out by measuring. Ts = The sum of the small time constants in the unit [s] -> Ts is always 0.000042 s in JM-2xx. UDC = DC link voltage of the amplifier in the unit [V] Sample motor at UDC = 320 V and overload factor = 2: 2 2.43 A eff 15.4 mH K P = --------------------------------------------------------- = 2.78 2 42 s 320 V (4) The preset value of the speed controller is typically set to the rated motor current. 48 Jetter AG JetMove 2xx at the JetControl 5.5 5.5 Linear Motor Linear Motor JM-2xx has been designed for operation of linear motors. For this, a feedback function will always be needed, e.g. incremental encoder, SinCos, or EnDat, see chapter 6 "Encoder Feedback", page 67. If an absolute encoder has not been attached to a linear motor, either commutation finding has to be carried out, or the application program has to be written to ´Register 116: Commutation Offset’ on page 58. Attention: A linear motor has been designed for high acceleration and speed. Special emphasis has to be laid on machine and occupational safety at commissioning the motor and the attached encoder. 5.5.1 Selection of the amplifier For selecting an adequate amplifier, the continuous rated current and the required maximum speed of the motor are decisive factors. The continuous rated current of the motor determines the continuous rated current of the amplifier. The desired speed determines the maximum effective voltage that must be supplied by the amplifier. Because of the motor-back EMF, the linear motor will need a certain effective voltage for a certain speed. The greater the speed, the greater has to be the effective voltage. In this case, the relation is linear. The amplifier can generate a certain maximum effective voltage out of its DC link voltage: • • • The amplifier JM-105 supplies a maximum effective voltage of approximately 27 Veff at +Vmot = 48 V DC. The amplifiers JM-D203, JM-203 and JM-206 supply a maximum effective voltage of approximately 190 Veff. The amplifiers JM-204, JM-208 and JM-215 supply a maximum effective voltage of approximately 320 Veff. In order to be able to select the amplifier that corresponds to the required maximum speed, the effective voltage, which the motor needs in this case, must be known. In linear motors, the back EMF constant specifies the RMS voltage per speed unit in m/s. By means of this parameter, the required effective voltage at the desired maximum speed can be calculated in linear positive or negative direction. Jetter AG 49 5 Motor JetWeb Note! The RMS voltage of the amplifier should have a reserve of approximately 20 % related to the required RMS voltage. This reserve is necessary for good controlling. Example 3: Calculating the RMS voltage A linear motor with a continuous rated current In of 6.8 A and a voltage constant KE of 91 Veff/m/s is to be driven by a maximum speed of 3 m/s: Voltage at 35 m/s = 91 Veff/m/s * 3 m/s = 273 Veff with a controlled reserve capacity = 273 Veff + 20 % of 273 Veff = 273 Veff + 54.6 Veff = 327 Veff For In = 6.8 A and a required effective voltage of 327 Veff , a JM-208 of In = 8 A and a supplied effective voltage of 320 Veff is a good choice. 5.5.2 Load current carrying capability Generally, a linear motor can be loaded by three to four times the continuous rated current for a short time. 5.5.3 Parameter setting The following motor data are needed for parameterization; they must either be read from the rating plate or taken from the data sheet of the motor: In = Continuous rated current in the unit [Aeff] P = Pole pair pitch [m] LMotor = Inductivity between 2 motor terminals in the unit [H] RMotor = Resistance between 2 motor terminals in the unit [Ohm] The following registers have to be adjusted for parameterization of the motor: Note! In software version 29, parts of parametering have to be converted to revolution values. 50 Jetter AG JetMove 2xx at the JetControl 5.5 Linear Motor Please mind especially the connection to the encoder applied: Registers for encoder adjustment: See chapter 6 "Encoder Feedback", page 67. Function group "Motor" – ´Register 123: Pole Pair Number’ on page 60 Function group "Current Control": – – – – ´Register 503: Current Control Kp’ on page 112 ´Register 504: Current Control Tn’ on page 115 ´Register 618: Rated Current’ on page 116 ´Register 619: Overload Factor’ on page 117 5.5.4 Example: Parameter setting – A linear motor has got a pole pair pitch P (north pole to north pole) of 32 mm. – A sine incremental encoder has been attached to the motor. – The motor has got a back EMF constant KU of 91 Veff/m/s. 1. If the ratio of encoder sine length and pole pitch is an integer value, ´Register 123: Pole Pair Number’ on page 60 should be set to value 1. Otherwise, the lowest common multiple has to be found and the pole pair number increased respectively. 2. The converted value of ´Register 505: Back EMF Constant’ on page 60 is V ----------K U P 1000 91 m s 32 mm 1000 V K E = -------------------------------- = -------------------------------------------------------- = 48.53 -----------------------rev s s 1000 ---------60 ---------60 ---------min min min 3. The maximum motor speed at using a 400 V output stage is m 320 V effective voltage max. speed = ------------------------------------------------ = ------------------- = 3.51 ---s V KU 91 ----------ms 4. The maximum speed is to amount to 3 m/s. The value of ´Register 118: Maximum Motor Speed’ on page 124 is calculated as follows: m 3.0 ---rev rev s max. speed = ------------------ = 93.75 ------- = 5625 ---------min s mm 32 --------rev Jetter AG 51 5 Motor JetWeb Note! For testing the sense of rotation of the motor phases at the motor, the controllers can be switched into operation of a stepper motor of low current. Then, a small speed is set in speed mode, until the sense of motor rotation can be recognized. This sense of rotation can be compared with the counting direction of the connected encoder. 52 Jetter AG JetMove 2xx at the JetControl 5.6 5.6 Brush-Type DC Motor Brush-Type DC Motor The JM-105 is also designed for operation of brush-type DC motors. Generally, in this case, an incremental encoder is applied, see chapter 6.5 "Incremental Encoder", page 71. The DC motor carries out commutation automatically. 5.6.1 Parameter setting The following registers have to be adjusted for parameterization of the motor: Function group "Motor" – If a DC motor is applied, value 6 has to be written to ´Register 608: Motor Type’ on page 64. – If a DC motor is applied, value 1 has always to be written to ´Register 123: Pole Pair Number’ on page 60. Function group "Encoder Feedback": – ´Register 577: Encoder Type’ on page 75 Function group "Current Control": – – – – Jetter AG ´Register 503: Current Control Kp’ on page 112 ´Register 504: Current Control Tn’ on page 115 ´Register 618: Rated Current’ on page 116 ´Register 619: Overload Factor’ on page 117 53 5 Motor JetWeb 5.7 2-Phase (Stepper) Motor The JM-105 is also designed for operation of 2-phase motors. Firstly, a 2-phase motor can be a stepper motor, which is generally applied without feedback. Secondly, linear motors of the LinMot company can be applied. These motors have got a two-channel inductive feedback with 5 Vss, similar to a sin-cos encoder. 5.7.1 Parametering a stepper motor The following registers have to be adjusted for parameterization of the motor: Function group "Motor" – If a 2-phase stepper motor is applied, value 5 has always to be written to ´Register 608: Motor Type’ on page 64. – If a 2-phase stepper motor is applied, value 50 has always to be written to ´Register 123: Pole Pair Number’ on page 60. Function group "Encoder Feedback": – ´Register 577: Encoder Type’ on page 75 Function group "Current Control": – – – – ´Register 503: Current Control Kp’ on page 112 ´Register 504: Current Control Tn’ on page 115 ´Register 618: Rated Current’ on page 116 ´Register 619: Overload Factor’ on page 117 Function group "Speed Control": – ´Register 124: Speed Controller Kp’ on page 125 – ´Register 231: Current Reduction’ on page 111 – ´Register 232: Current Reduction Time’ on page 111 For stepper motors, there is no encoder system for position recording. For this reason, the virtual encoder type (value 11) has to be set by means of ´Register 577: Encoder Type’ on page 75. Because of the missing encoder system, there is no physical as-is speed value either. Thus, ´Register 124: Speed Controller Kp’ on page 125 has to be set to "0". This causes the speed control to become ineffective. The current setpoint needed for operation has to be predefined by means of ´Register 506: Speed Controller Preset’ on page 127. At activating the controller, the integral-action component of the speed controller is set accordingly, which can be checked via “Register 507: I-Component Speed Controller”. This value is displayed in “Register 125: Current Setpoint” at the current controller. 54 Jetter AG JetMove 2xx at the JetControl 5.7 2-Phase (Stepper) Motor In order to activate current reduction, the desired value has to be written to ´Register 231: Current Reduction’ on page 111. Current reduction is activated, if the position setpoint of the position control remains unchanged over the set time. Current reduction internally accesses ´Register 127: Current Limitation’ on page 110. When it is activated, current reduction limits the current setpoint of the speed control. This limitation is cancelled at the next change of position controller setpoint. Note! At activating current reduction, blocking monitoring has to be deactivated as well. This can be done via ´Register 546: Blocking Protection - Tripping Time’ on page 95 = 65535. When the configuration steps mentioned above have been carried out, the stepper motor axis can be activated and moved as usual. Of course, only functions can be made use of that do not need any physical as-is position and torque value. 5.7.2 Parametering a LinMot The following registers have to be adjusted for parameterization of the motor: Function group "Axis": – If a LinMot is applied, value 200 mm has to be written to ´Register 196: Linear / Rotation Ratio’ on page 31. Function group "Motor" – If a 2-phase motor is applied, value 5 has always to be written to ´Register 608: Motor Type’ on page 64. – If a LinMot is applied, value 1 has to be written to ´Register 123: Pole Pair Number’ on page 60. Function group "Encoder Feedback": – The value for "LinMot" (value 16) has to be written to ´Register 577: Encoder Type’ on page 75. Function group "Current Control": – – – – Jetter AG ´Register 503: Current Control Kp’ on page 112 ´Register 504: Current Control Tn’ on page 115 ´Register 618: Rated Current’ on page 116 ´Register 619: Overload Factor’ on page 117 55 5 Motor JetWeb 5.8 Brake The connection of the brake and the electrical data have been described in the operator's manual of the JetMove 2xx. The motor holding brake can optionally be controlled either by the amplifier directly or by hand. The JetMove 105 and the JetMove D203 have got a semiconductor switch to generate an error message at overcurrent. With all other amplifiers of the JetMove 200 series, the brake is controlled via a relay in the amplifier. 5.8.1 Parameter setting The following parameters for handling the brake are available: – – – – – ´Register 540: Drive Mode’ on page 392 ´Register 548: Delay After Locking the Motor Brake’ on page 62 ´Register 547: Delay After Releasing the Motor Brake’ on page 61 ´Register 574: Control Word 2 (Motor Brake Control)’ on page 396 ´Register 575: Status Word 2 (Motor Brake Status)’ on page 396 Via register 540 "Drive Mode 1", a choice can be made between automatic and manual operation of the brake.: Bit 0: 0 = Manual operation of the brake by the user (via register 574 "Control Word 2") 1 = Automatic operation of the brake by the amplifier (The brake will automatically be released, respectively locked, when the amplifier is activated, respectively deactivated) The automatic mode is set by default. If the default values are kept, automatic operation will be set. While selecting the mode of operation, the brake will always be controlled at activating and deactivating the amplifier. At switching on, the relay contacts will be closed; at switching off, the relay contacts will be released again. Release and lock times of various brakes differ dependent on the respective motor manufacturers and motor types. For this reason, it might be necessary to adjust the delay times for releasing and locking the brake to your requirements. For this, please turn to the register description for the parameters ´Register 547: Delay After Releasing the Motor Brake’ on page 61 and ´Register 548: Delay After Locking the Motor Brake’ on page 62. 56 Jetter AG JetMove 2xx at the JetControl 5.8 Brake Please mind the following delay times: Delay time at releasing 100 ms 1 Controller enable 0 Torque Release Brake Lock Force (at the brake) t Delay time at locking 100 ms Fig. 4: Delay time of the motor brake control If there is no brake, automatic mode can be set. This would mean, though, that the relay is always be controlled via the amplifier. Otherwise, you can select the manual mode to prevent the relay from being controlled. If manual operation is selected, the brake can be controlled by bit 0 via register 574 "Control Word 2". In automatic mode, setting and resetting the bit is of no effect. Bit 0: 0 = Lock brake 1 = Release the brake The control state of the brake can be read out of register 575 "Status Word 2" in bit 0 any time: Bit 0: Jetter AG 0 = Brake is locked 1 = Brake has been released 57 5 Motor JetWeb 5.9 Description of Registers In the column "R/W", the type of access to a parameter is identified: R = Read W = Write Register 116: Commutation Offset Function Description Read Value of the as-is offset Write Set value of the offset Amplifier status The amplifier has to be deactivated Takes effect Immediately Variable type float Value range -180 ... 180 [°] Value following a reset 0 [°] Here, the commutating offset of the motor will be specified. This machine parameter has been reserved for special applications. If required, the parameter is defined by the manufacturer. 58 Jetter AG JetMove 2xx at the JetControl 5.9 Description of Registers Register 122: Slip Frequency Function Description Read Value of the as-is slip frequency Write Set value of the slip frequency Amplifier status The amplifier has to be deactivated Takes effect Immediately Variable type float Value range 0 ... 7.8 [Hz] Value following a reset 0 [Hz] Only for asynchronous motors: Here, the rated slip frequency fslip is entered in the unit [Hz]. fslip is calculated as follows: n sync – n n Z P f slip = -------------------------------------s 60 ---------min The following applies to the operands: nn = Rated motor speed in the unit [rpm], at a rated frequency (e. g. 50 Hz) and a rated torque as specified on the > nameplate nsync = Synchronous motor speed in the unit [rpm] -> The value is obtained by means of the rated speed (it is about 3 % - 8 % smaller than the synchronous speed, see exemplary numbers below) ZP = Pole pair number, see> motor data sheet, or obtain by means of synchronous speed and rated frequency Examples of synchronous speeds and pole pair numbers at a rated frequency of 50 Hz: ZP nsync [rpm] nn [rpm] 1 3,000 2,760 - 2,910 2 1,500 1,380 - 1,455 3 1,000 920 - 970 4 750 690 - 730 See also chapter 5.3 "Asynchronous Motor", page 40. Jetter AG 59 5 Motor JetWeb Register 123: Pole Pair Number Function Description Read Value of the as-is pole pair number Write Set pole pair number Amplifier status The amplifier has to be deactivated Takes effect Immediately Variable type int / register Value range 1 ... 200 Value following a reset 3 Here, the pole pair number of the motor is entered. This can be taken from the motor data sheet. For Jetter motors, the pole pair number usually is 3, respectively 5. For asynchronous motors, please refer to the description of register 122 "Slip Frequency". Register 505: Back EMF Constant Function Description Read Value of the as-is voltage constant Write Set value of the voltage constant Amplifier status The amplifier has to be deactivated Takes effect Immediately Variable type int / register Value range 0 ... 120 [V*min/1,000] Value following a reset 0 [V*min/1,000] Here, the voltage constant of the motor is entered. The value of the voltage constant can be taken from the motor parameters. The voltage constant of the Jetter motor has also been specified on the nameplate: Jetter motors of the type JL3-300-25-3 have got a voltage constant of 25 V*min/ 1,000. In case a high dynamic performance is required by the drive, this parameter should be adjusted. 60 Jetter AG JetMove 2xx at the JetControl 5.9 Description of Registers Register 547: Delay After Releasing the Motor Brake Function Description Read As-is delay time Write Set delay time Amplifier status The amplifier has to be deactivated Takes effect Immediately Variable type int / register Value range 0 ... 200 [ms] Value following a reset 0 [ms] Only for motors equipped with a brake: Only for motors equipped with a brake. The motor brake is released immediately after issuing command 1 "Activate Output Stage". This means that the status"Brake Released" is active immediately. Not before the delay time has expired, the motor is energized and the axis controlled. The delay time can differ between various manufacturers or motor types. Attention! The predefined value of this parameter may only be altered by experienced users. The following commands have an impact on releasing the brake: • Issuing command 1 - > The brake is released. • Setting bit 0 in register 574 "Control word 2" - > The brake is released, when the brake control has been set to "manual operation". See also chapter 5.8 "Brake", page 56. Jetter AG 61 5 Motor JetWeb Register 548: Delay After Locking the Motor Brake Function Description Read As-is delay time Write Set delay time Amplifier status The amplifier has to be deactivated Takes effect Immediately Variable type int / register Value range 0 ... 200 [ms] Value following a reset 100 [ms] Only for motors equipped with a brake: Here, the delay time is specified which passes (after issuing command 2 "Deactivate output stage"), until the brake has really been locked. When this time has passed, the brake is in the "Brake has been locked" state. Up to then, the axis will still be controlled. The delay time can differ between various motor manufacturers or motor types. The following commands have an impact on locking the brake: • • Issuing command 2 - The brake is locked Resetting bit 0 in register 574 "Control Word 2" - The brake is locked, when the brake control has been set to "manual operation". See also chapter 5.8 "Brake", page 56. Register 562: Motor Temperature Function Description Read As-is motor temperature Write Illegal Variable type int / register Value range 1 ... 155 [°C] Value following a reset 0 [°C] If a motor with temperature switch is used, 1 °C is displayed for the "locked" state, while 155 °C is displayed for the "released" state. 62 Jetter AG JetMove 2xx at the JetControl 5.9 Description of Registers Register 565: Motor Shaft Position Function Description Read As-is position of the shaft Write Illegal Variable type float Value range -180 ... 180 [°] Value following a reset 0 [°] The as-is position of the motor shaft can be read out by means of this parameter. 0° -90° Fig. 5: Motor shaft position Jetter AG - + +90° -/+180° 63 5 Motor JetWeb Register 608: Motor Type Function Description Read As-is motor type Write Set motor type Amplifier status The amplifier has to be deactivated Takes effect Immediately Variable type int / register Value range 0 ... 6 Value following a reset 0 . Attention! This register has to be changed at a JM-105, if a DC or 2-phase (stepper) motor is applied. Dependent on the motor type, the motor lines are controlled during operation. The following motor types are possible: 64 0 = 3-phase synchronous motor 1 = 3-phase asynchronous motor 4 = 3-phase stepper motor 5 = 2-phase (stepper) motor 6 = DC motor Jetter AG JetMove 2xx at the JetControl 5.9 Description of Registers Register 609: Type of Motor Temperature Sensor Function Description Read As-is type of motor temperature sensor Write Set type of motor temperature sensor Amplifier status No specific status Takes effect Immediately Variable type int / register Value range 0 ... 3 Value following a reset 1 . Attention! This register is only available for JetMove D203. The motor temperature sensor type is entered there. The following sensor types are possible: 0 = Thermostat; display 0° C, respectively 155 °C 1 = KTY83-110; temperature display in °C 2 = KTY84-130; temperature display in °C 3 = PTC; display 0 °C respectively 155 °C The motor temperature can be read out of register 562. Jetter AG 65 5 Motor JetWeb Register 616: Motor Torque Constant Kt Function Description Read As-is torque constant Write Set torque constant Amplifier status No specific status Takes effect Immediately Variable type float Value range 0 ... 2.55 [Nm/A] Value following a reset 0 [Nm/A] Here, the torque constant of the motor will be specified. Specifying the torque constant is necessary for displaying the as-is torque in register 621 "As-is ("Actual") Torque". If the torque constant is 0, 0 is also displayed for the as-is torque. 66 Jetter AG JetMove 2xx at the JetControl 6.1 Encoder Connection 6 Encoder Feedback 6.1 Encoder Connection 6.1.1 JM-203, JM-206, and JM-215 The amplifiers JM-203, JM-206, and JM-215 have to be ordered according to the encoder in use. In this case, a difference is made between amplifiers with resolver evaluation and resolvers with HIPERFACE evaluation. If, for example, a sine incremental encoder is applied, it can only function in combination with an encoder featuring HIPERFACE evaluation, as the signals resemble those of a HIPERFACE encoder. The following list is to show which encoder evaluation will be needed for which encoder type: Encoder Resolver Resolver evaluation HIPERFACE HIPERFACE evaluation SinCos HIPERFACE evaluation Incremental encoder Resolver evaluation In the ordering code, the contraction of the encoder evaluation code is attached to the encoder type number. The ordering code for a JM-203 with resolver evaluation reads as follows: JM-203-230-RS For the same amplifier with HIPERFACE evaluation, this is the ordering code: JM-203-230-HI 6.1.2 JM-203B, JM-206B, JM-204, JM-208, JM215B, and JM-225 The encoders JM-203B, JM-206B, JM-204, JM-208, JM-215B, and JM-225 are equipped with an automatic recognition of the encoder type HIPERFACE. If a HIPERFACE is not recognized, the basic setting is the resolver. A correct recognition can be read out of register 577 "Encoder Type". Encoder Jetter AG Resolver Basic setting HIPERFACE Automatic recognition 1Vss-SinCos Selection via register 577 "Encoder Type" 5 V incremental encoder With the optional module only: JM-200-CNT: Selection via register 577 "Encoder Type" 67 6 Encoder Feedback JetWeb EnDat 2.2 With the optional module only: JM-200-CNT: Selection via register 577 "Encoder Type" Virtual encoder Selection via register 577 "Encoder Type" 6.1.3 JM-D203 The amplifier JM-D203 is equipped with an automatic recognition function for the encoder type HIPERFACE. If a HIPERFACE is not recognized, the basic setting is the resolver. A correct recognition can be read out of register 577 "Encoder Type". Encoder Resolver Basic setting HIPERFACE Automatic recognition 1Vss-SinCos Selection via register 577 "Encoder Type" 5 V incremental encoder Selection via register 577 "Encoder Type" Virtual encoder Selection via register 577 "Encoder Type" 6.1.4 JM-105 The amplifier JM-105 is not equipped with an automatic recognition function. The basic setting is the resolver setting. Encoder 68 Resolver Basic setting 1Vss-SinCos Selection via register 577 "Encoder Type" 5 V incremental encoder Selection via register 577 "Encoder Type" Virtual encoder Selection via register 577 "Encoder Type" LinMot Selection via register 577 "Encoder Type" Jetter AG JetMove 2xx at the JetControl 6.2 6.2 Resolver Resolver In a resolver, a sine and cosine signal is generated by resolver excitation. These signals help to achieve one absolute position per revolution in the JM-2xx. 6.2.1 Parameter setting Parameter setting is carried out by the JM-2xx automatically. 6.3 HIPERFACE After start-up, a HIPERFACE encoder transmits the absolute position. A single-turn encoder can only transmit the absolute position per revolution, whereas a multi-turn encoder can transmit the absolute position for more than 4096 revolutions. After transmitting the absolute position, the HIPERFACE encoder transmits between 128 and 1024 sine and cosine periods per revolution. The HIPERFACE encoder has got the advantage over the resolver that the speed for the speed controller is made use of in a significantly better resolution. For a HIPERFACE encoder, a JM-2xx with HIPERFACE evaluation will be needed. 6.3.1 Parameter setting Parameter setting is carried out by the JM-2xx automatically. 6.4 Sine Incremental Encoder A sine incremental encoder is often used as a linear feedback. A sine incremental encoder transmits a certain number of sine and cosine periods per distance. Attention! The maximum frequency of the SinCos evaluation is limited: A maximum speed of 4 m/s results from a sine incremental encoder with a signal period of 40 µm and a maximum frequency of 100 kHz. Jetter AG 69 6 Encoder Feedback JetWeb 6.4.1 Parameter setting The following registers have to be adjusted for parameterization of the encoder: Function group encoder feedback: – Register 117 "Encoder Resolution" – Register 577 "Encoder Type" The detailed register description can be found in chapter 6.8 "Description of Registers", page 73. Example 1: Parameter setting for a sine incremental encoder at a linear motor A linear motor has got a pole pair pitch (north pole to north pole) of 32 mm. A sine incremental encoder has been attached to the motor. The sine incremental encoder has got a signal period of 40 µm. According to example “Example: Parameter setting” on page 51, the “Register 123: Pole Pair Number” on page 60 is set to value 1. 1. The value of “Register 117: Encoder Resolution” on page 73 is calculated as follows: Encoder Resolution = (Pole Pair Pitch * Pole Pair Number / Signal Period) * 4 = (32 mm * 1 / 40 µm) * 4 = 3200 2. “Register 195: Transmission Ratio - Mechanics” on page 31 is set to value 1. 3. The contents of “Register 196: Linear / Rotation Ratio” on page 31 have to be set to the following value: Linear / Rotatory Ratio = Pole Pair Pitch / Pole Pair Number = 32 mm / 1 = 32 mm/Umdr 6.4.2 Commutation finding In the following cases, measuring the commutation offset is necessary: • Applying a linear motor with a relative position transducer. • At applying a rotatory motor, the phase position of which between motor winding to encoder feedback is not set up according to Jetter standards. • For testing the wiring of motor and feedback. In this case, a commutation offset around "zero" has to be measured. For commutation finding, there is the “Register 559: Commutation Measuring Method” on page 74. Attention! During commutation finding, the motor shaft or the motor itself can move! At applying measurement method 0, the strongest motion can be expected. 70 Jetter AG JetMove 2xx at the JetControl 6.5 Incremental Encoder A rotatory motor has got the following maximum rotation: 360 = --------------2 ZP with: ZP: Pole pair number of the motor winding A linear motor has got the following maximum motion: P s = --2 with: P: Pole pair pitch (north pole to north pole) [mm] Commutation finding is started by command 31 in “Register 101: Command” on page 387. At the end of commutation finding, the axis is deactivated again. As a result of commutation finding, the measured value is written to “Register 116: Commutation Offset” on page 58. At this point of time it is sufficient to write the value of commutation finding into the commutation offset after activating the motion system. 6.5 Incremental Encoder An incremental encoder as a commutation feedback can only be applied in connection with an asynchronous motor without having to carry out commutation finding.. Please note: JM-203, JM-203B, JM-206, JM-206B, JM-204, JM-208, JM-215, JM-215B, and JM-225 Only incremental encoders with a 5 V differential signal can be used. For connection to a JM-2xx, an optional module is needed. This module has been integrated in a JetMove, if it has been ordered with the CNT option. For connecting a 5 V incremental encoder with differential signals to the JM-105 and JM-D203 amplifiers, an additional module is not needed. 6.5.1 Parameter setting The following registers have to be adjusted for parameterization of the encoder: Function group encoder feedback: – Register 117 "Encoder Resolution" – Register 577 "Encoder Type" The detailed register description can be found in chapter 6.8 "Description of Registers", page 73. Jetter AG 71 6 Encoder Feedback JetWeb 6.6 EnDat 2.2 An EnDat encoder is applied as a single- or multi-turn encoder for linear and rotatory axes. It functions as a merely digital interface which cyclically transmits the absolute position in high resolution. Only the EnDat version 2.2 is supported. 6.6.1 Parameter setting The following registers have to be adjusted for parameter setting of the encoder: Function group encoder feedback: – Register 117 "Encoder Resolution" – Register 577 "Encoder Type" The detailed register description can be found in chapter 6.8 "Description of Registers", page 73. 6.7 LinMot As a feedback system, a LinMot has got a two-channel inductive encoder, similar to a sin-cos encoder, with 5 Vss. 6.7.1 Parameter setting The following registers have to be adjusted for parameter setting of the encoder: Function group axis: – If a LinMot is applied, value 20.00 mm has to be written to register 196 "Linear / Rotation Ratio". Function group encoder feedback: – Register 577 "Encoder Type" The detailed register description can be found in chapter 6.8 "Description of Registers", page 73. 72 Jetter AG JetMove 2xx at the JetControl 6.8 Description of Registers 6.8 Description of Registers In the column "R/W", the type of access to a parameter is identified: R = Read W = Write Register 117: Encoder Resolution Function Description Read Value of the present resolution Write Set value of the encoder resolution Amplifier status The amplifier has to be deactivated Takes effect Immediately Variable type int / register Value range 4 ... 65,536 [incr./rev.] Value following a reset Dependent on the connected encoder Dependent on the encoder type, this register has different meanings: Resolver, HIPERFACE: This register specifies the internal resolution of a revolution in increments. This value is dependent on the connected encoder. See register 577 "Encoder Type" Sine incremental encoder: If a sine incremental encoder is applied, the number of sine-periods, multiplied by 4 to the length of the set pole pair number, has to be written to this register. The encoder type in register 577 has to be set to value 5. Quadrature incremental encoder: If a quadrature incremental encoder is applied, the number of lines, multiplied by 4 to the length of the set pole pair number, has to be written to this register. The encoder type in register 577 has to be set to value 4 or 8. Jetter AG 73 6 Encoder Feedback JetWeb Register 559: Commutation Measuring Method Function Description Read Value gained by the present measuring method Write Set value gained by the measuring method Amplifier status The amplifier has to be deactivated Takes effect Immediately Variable type int / register Value range 0, 2, 3 Value following a reset Dependent on the connected encoder These are the following commutation measuring methods: 74 0 The motor has to run smoothly. The drive increases the current via two motor lines up to the peak current (continuous rated current * overload factor). The motor moves up to the magnetic dead center. After stalling the motor, the commutation offset is measured. This is the reliable method. 2 The motor has to run smoothly. The drive increases the current via two motor lines up to the peak current (continuous rated current * overload factor). As soon as the motor starts moving, though, the direction of current supply is twisted in a way, that there is just minimum motion. Twisting the direction of current supply is done by means of a PI controller and the factors of a speed controller. When the maximum current has been reached and the motor has been stalled, the commutation offset is measured. If the friction of the axis is too high, the commutation offset cannot be determined correctly. 3 Special procedure in case of a disturbing force (soft buffers, gravitational force): If there is the risk of not reaching the magnetic dead point, it can be calculated by dual measuring applying half and peak current. Dual measuring should only be applied after consulting Jetter AG. Jetter AG JetMove 2xx at the JetControl 6.8 Description of Registers Register 577: Encoder Type Function Description Read As-is encoder type Write Set encoder type Amplifier status The amplifier has to be deactivated Takes effect Immediately Variable type int / register Value range 1 ... 14 Value following a reset Dependent on the connected encoder By means of this parameter, the encoder type of the connected motor can be specified; please refer to chapter 6 "Encoder Feedback", page 67. Jetter AG 1 = Resolver 2 = HIPERFACE SRS50 (single-turn) 3 = HIPERFACE SRM50 (multiturn) 4 = High voltage incremental encoder 5 = Sine incremental encoder 6 = HIPERFACE SCS50 (single-turn) 7 = HIPERFACE SCM50 (multiturn) 8 = Low voltage incremental encoder 9 = HIPERFACE SKS50 (single-turn) 10 = HIPERFACE SKM50 (multiturn) 11 = Virtual encoder 12 = Incremental encoder with optional module JM-200-CNT 13 = EnDat 2.2 (single-turn) with optional module JM-200-CNT 14 = EnDat 2.2 (multiturn) with optional module JM-200-CNT 15 = EnDat 2.2 (linear) with optional module JM-200-CNT 16 = LinMot encoder (* (** (*** 75 6 Encoder Feedback JetWeb (* JetMove 105: The encoder has to provide 5 V differential signals or 5 V single-ended signals for K0, K1, and K2. JetMove D203: The encoder has to provide 5 V differential signals for K0, K1, and K2. JetMove 2xx series: The encoder has to provide 24 V signals for K0, K1, and K2. For connecting the encoder, a level converter is required. (** JetMove 2xx series: The encoder has to provide 24 V signals of 1 Vss for K0, K1, and K2. 76 Jetter AG JetMove 2xx at the JetControl 6.9 Introduction 6.9 Second Encoder Second Encoder The amplifiers • • • • • • JM-203/JM-203B JM-206/JM-206B JM-204 JM-208 JM-215/JM-215B JM-225 can be ordered with an optional integrated counter card. The counter card option shows in the "...CNT" abbreviation in the article designation of the amplifier. The counter card option allows for a second encoder to be connected. A second encoder can be used as follows: 1. as a load-side encoder for position control of the JetMove; speed control is carried out by means of the first encoder (main encoder) 2. as a leading axis for technological functions First of all, the second encoder has to be generally configured first, independent of where it is to be applied. This sub-chapter describes how the second encoder is generally configured and how it is applied for position control. The usage of the second encoder as a leading axis for technological functions has been described in chapter chapter 13.5.6 "Configuration with second encoder as leading axis", page 206. 6.9.1 Definition of the Power Train General configuration For the motor with the first encoder, the power train is defined via R194 Gear Ratio - Motor, R195 Gear Ratio - Load, etc. The second encoder is connected to the load by another power train in the same way as the first encoder. Very rarely, the power train of the second encoder is identical with the power train of the first encoder. For this reason, the power train of the second encoder is defined via individual registers. If the second encoder is to be used for position control, it is obligatory to define its power train in a way that it has got the same position unit as has the first encoder. Travel Range Jetter AG Further, there are individual registers for the second encoder to define the travel range. The position defined by the second encoder always remains within the limits of the set travel range. At an overflow, the position is continued at the opposite limit of the travel range. If the second encoder is to be used for position control, it is obligatory for the travel range of the second encoder to be equal to the travel range set for the first encoder. 77 6 Encoder Feedback Overview of Registers 78 JetWeb The following registers are available for general configuration tasks: Register Name Short Description R190 Position Control - Selection of As-is Value Selection of the as-is value (first or second encoder) for position control R240 Encoder2 - Status Status of the second encoder R241 Encoder2 - Type Encoder type of the second encoder R242 Encoder2 - Resolution Encoder resolution of the second encoder R244 Encoder2 - Gear Ratio Encoder The number of encoder rotations for defining the gear ratio between the second encoder and its load is set. R245 Encoder2 - Gear Ratio Load The number of encoder rotations for defining the gear ratio between the second encoder and its mechanic load is set. R246 Encoder2 - Gear Ratio Linear/Rotatory Gear ratio between linear motion and one rotation of the load of the second encoder (R245). R247 Encoder2 - Travel Limit Positive Positive travel limit of the load of the second encoder R248 Encoder2 - Travel Limit Negative Negative travel limit of the load of the second encoder R252 Encoder2 - Reversal of Counting Direction The counting direction of the second encoder is reversed. R249 Encoder2 - As-is Position As-is position of the load of the second encoder R250 Encoder2 - Modulo Turns Positive travel limit of the load of the second encoder R251 Encoder2 - As-is Speed As-is speed of the load of the second encoder R243 Encoder2 - Mechanic Angle Mechanic angle of the second encoder Jetter AG JetMove 2xx at the JetControl General Configuration 6.9 Second Encoder The following steps have to be carried out for general configuration of the second encoder after connecting the encoder and defining the axis parameters (see chapter 3 "Axis Definitions", page 19). Step 1 Action If the second encoder has been activated for position control first, set the as-is value selection for position control to the first encoder (main encoder). Action: R190 Position Control - As-is Value Selection = 1 (first encoder) 2 Deactivating the Evaluation for the Second Encoder Action: R241 Encoder2 - Type = 0 (encoder evaluation has been deactivated) Result: R240 Encoder2 - Status = 0 3 Setting the Encoder Type for the Second Encoder Action: R241 Encoder2 - Type enter one of the following values: 12 = Incremental encoder 13 = EnDat single-turn encoder 14 = EnDat multiturn encoder Result: – If R241 Encoder2 - Type = 12: R240 Encoder2 - Status = 0 – If R241 Encoder2 - Type = 13 or 14 and the respective encoder have been detected at the connection of the second encoder: R240 Encoder2 - Status = 3 Please note: If at R241 Encoder2 - Type = 13 or 14 and bit R240.0 Encoder2 - Status has not been set, an encoder has not been found. The encoder cable might be wrongly connected, or else, the encoder could be defective, etc. In this case, configuration cannot be continued, until the problem has been resolved. 4 If in step 3 an incremental encoder (R241 = 12) has been selected as a second encoder, set the resolution value Action: R242 Encoder2 - Resolution = Number of Pulses per Revolution, Multiplied by 4 Result: R240 Encoder2 - Status = 1 Please note: For the EnDat encoders (R241 = 13 or 14), the resolution value is set automatically. It must not be changed by the user. Jetter AG 79 6 Encoder Feedback JetWeb 5 Setting the Gear Ratio between the Second Encoder and the Load Action: Describe the following registers respectively: – R244 Encoder2 - Gear Ratio - Encoder – R245 Encoder2 - Gear Ratio - Load – R246 Encoder2 - Gear Ratio Linear/Rotatory If the second encoder is used for position control, its gear ratio has to be set in a way that the same position unit results as in the first encoder. If R191 Axis Type = 2 (rotatory), R246 Encoder2 - Gear Ratio - Linear/Rotatory must not be written to. Example: The axis is a rotatory axis. The mechanic load rotates once, while the encoder is rotating ten times, i = 10: R244 Encoder2 - Gear Ratio - Encoder = 10 R245 Encoder2 - Gear Ratio - Load = 1 R246 Encoder2 - Gear Ratio Linear/Rotatory is not written to Result: – If R241 Encoder2 - Type = 12: R240 Encoder2 - Status changes from 1 to 3 – If R241 Encoder2 - Type = 13 or 14: R240 Encoder2 - Status remains 3 6 Setting the Travel Range Action: Describe the following registers respectively: – R247 Encoder2 - Travel Limit Positive – R248 Encoder2 - Travel Limit Negative If the second encoder is used for position control, the registers have to be written to as follows: – R247 Encoder2 - Travel Limit Positive = R182 Travel Limit Positive – R248 Encoder2 - Travel Limit Negative = R183 Travel Limit Negative Please note: The following applies: R247 Encoder2 - Travel Limit Positive > R248 Encoder2 - Travel Limit Negative 7 Setting the Parameters for Reversing the Counting Direction, if Necessary Action: R252 Encoder2 - Inversion of Counting Direction is described as follows:: 0 = clockwise rotating encoder provides increasing position values 1 = anti-clockwise rotating encoder provides increasing position values 80 Jetter AG JetMove 2xx at the JetControl 8 6.9 Second Encoder At the Very First Commissioning: Checking for Correct Configuration Action: Check for plausible values in one of the following registers: – – – – Jetter AG R249 Encoder2 - As-is Position R250 Encoder2 - Modulo Turns R251 Encoder2 - As-is Speed R243 Encoder2 - Mechanic Angle 81 6 Encoder Feedback JetWeb 6.9.2 Introduction Below, operating the second encoder by means of position control is described. The following actions are described there: • • Switching from the First to the Second Encoder Position control by means of the second encoder Switching the position control from the first to the second encoder Switching the position control from the second to the first encoder At switching from the first to the second encoder, the operating system displays the following visible behavior: • The following registers of the second encoder are deactivated: - R249 Encoder2 - As-is Position - R250 Encoder2 - Modulo Turns - R251 Encoder2 - As-is Speed • The position changes of the second encoder are written to R109 As-is Position. In this case, the value of R109 is not newly initialized; i.e., the value of R109 is remanent. Then, following position changes of the second encoder change the value of R109 accordingly. • R246 Encoder2 - Gear Ratio Linear/Rotatory is checked and probably newly set as follows: - If R191 Axis Type = 2 (rotatory), then R246 = 360 • The definition of the power drive parameters is basic for positioning. This definition is transferred from the registers of the first encoder to the registers of the second encoder: - Gear Ratio Encoder/Motor: R244 is used instead of R194 - Gear Ratio - Load: R245 is used instead of R195 - Gear Ratio Linear / Rotatory: R246 is used instead of R196 • The travel range set via R182 Travel Range Positive and R183 Travel Range Negative is newly set: - R182 Travel Range Positive takes over the value of R247 Encoder2 - Travel Range Positive - R183 Travel Range Negative takes over the value of R248 Encoder2 - Travel Range Negative Note: The former values of R182 and R183 are stored in the background. They do not get lost. • 82 If the axis has not been defined as a modulo axis (R192 = 1), R193 Modulo Travel Range is newly calculated: - R193 Modulo Travel Range = R182 Travel Limit Positive - R183 Travel Limit Negative Jetter AG JetMove 2xx at the JetControl Behavior of the Operating System during Position Control Switching from the Second to the First Encoder Overview of Registers Jetter AG 6.9 Second Encoder At position control by the second encoder, the operating system displays the following visible behavior: • Position changes of the second encoder change the value of R109 accordingly. • Encoder breakage, respectively malfunctioning of the second encoder causes error F42 and resets bit 100.0 Reference Set. • If the axis has not been defined as a modulo axis, entering the target position (R102) at PtP-positioning is restricted to R247 Encoder2 - Travel Limit Positive respectively R248 Encoder2 - Travel Limit Negative . At switching from the second to the first encoder, the operating system displays the following visible behavior: • The following registers of the second encoder are activated: - R249 Encoder2 - As-is Position - R250 Encoder2 - Modulo Turns - R251 Encoder2 - As-is Speed • The position changes of the first encoder are written to R109 As-is Position. In this case, the value of R109 is not newly initialized; i.e., the value of R109 is remanent. Then, following position changes of the first encoder change the value of R109 accordingly. • The definition of the power drive parameters is basic for positioning. This definition is transferred from the registers of the second encoder to the registers of the first encoder: - Gear Ratio Encoder/Motor: R194 is used instead of R244 - Gear Ratio - Load: R195 is used instead of R245 - Gear Ratio Linear / Rotatory: R196 is used instead of R246 • The travel range set via R182 Travel Range Positive and R183 Travel Range Negative is set to the former values that have been kept in the background: • If the axis has not been defined as a modulo axis (R192 = 1), R193 Modulo Travel Range is newly calculated: - R193 Modulo Travel Range = R182 Travel Limit Positive - R183 Travel Limit Negative The following registers are available for switching between the encoders: Register Name Short Description R190 Position Control - Selection of As-is Value Selection of the as-is value (first or second encoder) for position control 83 6 Encoder Feedback Switching Between the Encoders JetWeb After defing the axis (see chapter 3 "Axis Definitions", page 19) and generally configuring the second encoder, the following step has to be taken for switching from one encoder to the other: Step 1 Action Switching from one encoder to the other Action: R190 Position Control - Selecting the as-is value is described as follows: First encoder = 1 Second encoder = 2 6.9.3 Register description Register 240: Encoder2 - Status Function Description Read Status of the second encoder Write Illegal Variable type int / register Value range Bit-coded, 2 bits Value following a reset 0 Meaning of the individual bits: Bit 0 1 = The second encoder has been initialized The bit is reset at F42 Malfunction of Second Encoder Bit 1 1 = The second encoder is NOT used for position control 0 = The second encoder has not been configured completely yet, or it is being used for position control Register 241: Encoder2 - Type Function 84 Description Read As-is encoder type for second encoder Write Set encoder type for second encoder Amplifier status No specific status Takes effect Immediately Variable type int / register Jetter AG JetMove 2xx at the JetControl 6.9 Second Encoder Value range 0, 12 ... 14 Value following a reset Dependent on the connected encoder By means of this parameter, the encoder type of the second encoder can be specified: 0 = The evaluation for the second encoder has been deactivated 12 = Incremental encoder with optional module JM-200-CNT 13 = EnDat 2.2 (single-turn) with optional module JM-200-CNT 14 = EnDat 2.2 (multiturn) with optional module JM-200-CNT Register 242: Resolution of Encoder 2 Function Description Read As-is encoder type for second encoder Write Set encoder type for second encoder Amplifier status No specific status Takes effect Immediately Variable type int / register Value range 0...2147483647 [incr./rev.] Value following a reset 0 [incr./rev.] Via R242 the resolution for encoder type 12 Incremental Encoder is specified as follows: R242 = pulse number of the incremental encoder, multiplied by 4 Please note: At using an EnDat encoder (R241 Encoder2 - Type), R242 is set automatically and cannot be changed. Register 243: Mechanical Angle of Encoder 2 Function Description Read As-is angle of the second encoder Write Illegal Variable type float Value range -180 ... + 180 ° Value following a reset 0° The mechanic angle of the encoder is output. Jetter AG 85 6 Encoder Feedback JetWeb Register 244: Encoder 2 - Gear Ratio Function Description Read As-is number of encoder revolutions Write New number of encoder revolutions Amplifier status No specific status Takes effect Immediately Variable type float Value range 0.01 ... pos. float limit [rev.] Value following a reset 1 [rev.] For a detailed description, see R246 Encoder2 - Gear Ratio Linear/Rotatory Register 245: Encoder2 - Gear Ratio Load Function Description Read As-is number of load revolutions Write New number of load revolutions Amplifier status No specific status Takes effect Immediately Variable type float Value range 0.01 ... pos. float limit [rev.] Value following a reset 1 [rev.] For a detailed description, see R246 Encoder2 - Gear Ratio Linear/Rotatory Register 246: Encoder 2 - Gear Ratio Linear/Rotatory Function Description Read As-is gear ratio linear/rotatory Write New gear ratio linear/rotatory Amplifier status No specific status Takes effect Immediately Variable type float Value range 0.01 ... pos. float limit [mm/rev.] Value following a reset 360 [mm/rev.] R244 Encoder2 - Gear Ratio and R245 Encoder2 - Gear Ratio Load are used for specifying the rotatory gear ratio between the second encoder and its load. The gear ratio is calculated out of these two registers as follows: 86 Jetter AG JetMove 2xx at the JetControl 6.9 Second Encoder Number of encoder revolutions (R244) i = -----------------------------------------------------------------------------------------------------Number of mechanical revolutions (R245) If, for example, the load rotates once, while the encoder rotates ten times, the number of encoder rotations have to be set to 10, while the number of load rotations is set to 1. If a linear encoder is applied, the gear ratio (R244 and R245) and additionally R246 Encoder2 - Gear Ratio Linear/Rotatory have to be specified. R246 specifies the parameters for the change from rotatory to linear mode. Register 247: Encoder 2 - Travel Limit Positive Function Description Read Value of the as-is travel limit of the second encoder Write New value of the travel limit of the second encoder Amplifier status No specific status Takes effect Immediately Variable type float Value range R248 > ... positive float limit [°] or [mm] (the unit depends on the encoder load) Value following a reset 360 [°] Here, the positive travel limit for the load of the second encoder is specified. Register 248: Encoder 2 - Travel Limit Negative Function Description Read Value of the as-is travel limit of the second encoder Write New value of the travel limit of the second encoder Amplifier status No specific status Takes effect Immediately Variable type float Value range Negative float limits ... < R248 [°] or [mm] (the unit depends on the encoder load) Value following a reset 0 [°] Here, the negative travel limit for the load of the second encoder is specified. Jetter AG 87 6 Encoder Feedback JetWeb Register 249: Encoder 2 - As-is Position Function Description Read As-is position of the second encoder Write New as-is position of the second encoder Amplifier status No specific status Takes effect Immediately Variable type float Value range R248 ... R247 [°] or [mm] (the unit depends on the encoder load) Value following a reset 0 [°] R249 outputs the position changes of the second encoder. R249 is only updated, if the second encoder is not used for position control, that is, if R240.1 = 1 is displayed. Register 250: Modulo Turns Function Description Read Present modulo turns (independent of direction) Write Illegal Variable type int / register Value range - 2,147,483,648 ... 2,147,483,647 Value following a reset 0 R250 outputs the number of modulo turns run by the second encoder up to the present point of time. R250 is only updated, if the second encoder is not used for position control, that is, if R240.1 = 1 is displayed. Register 251: Encoder 2 - As-is Speed Function Description Read As-is speed of the second encoder load Write Illegal Variable type float Value range Float limits [°/s] or [mm/s] (The unit is dependent on the axis type) Value following a reset 0 [°/s] R251 reads and outputs the speed of the second encoder load. 88 Jetter AG JetMove 2xx at the JetControl 6.9 Second Encoder Register 252: Encoder2 - Inversion of Counting Direction Function Description Read As-is counting direction of the second encoder Write New counting direction of the second encoder Amplifier status No specific status Takes effect Immediately Variable type int / register Value range 0 ... 1 Value following a reset 0 Meaning of the values: 0 Reversal of direction deactivated, clockwise rotating encoder provides increasing position values 1 Reversal of direction active, anti-clockwise rotating encoder provides increasing position values This register is for reversing the counting direction of the second encoder. Jetter AG 89 6 Encoder Feedback JetWeb 90 Jetter AG JetMove 2xx at the JetControl 7.1 Procedure 7 Monitoring 7.1 Procedure Setting the tracking error monitoring parameters To prevent the axis from causing damage at first enable, tracking error monitoring parameters have to be limited to an adequate value. Note! If the combination of motor and feedback device have not been wired in the same direction, or if commutating offset is required, the tracking error monitoring detects errors even beyond the limit and can thus cause the axis to be disabled. Setting the motor cable monitoring parameters Setting the motor cable monitoring via register 540 "Drive Mode". Via bit 4 of drive mode 1, motor cable monitoring can be set as follows: Bit 4: 0 = Motor cable monitoring is deactivated by default 1 = Motor cable monitoring is activated Monitoring is activated by default If motor monitoring is active, a motor cable test is carried out at the first activating of the axis after hardware reset. If the motor cable is defect, error F03 is displayed. Possible error causes can be breakage of, or ground fault on the motor cable. If long motor cables are used, error F03 can be recognized through the monitoring function, although none of the listed error causes applies. Only in this case, deactivating the monitoring function is useful. This function is not available for the JM-105. Setting the monitoring of blocking protection In case the motor is mechanically blocked at commissioning, blocking protection monitoring prevents overheating of the motor. Jetter AG 91 7 Monitoring JetWeb 7.2 Register Description Register 114: Positive Software Limit Switch Function Description Read As-is value of the software limit switch Write Set value of the software limit switch Amplifier status The amplifier has to be deactivated Takes effect Immediately Variable type float Value range Float limits [°] or [mm] (the unit depends on the setting of the axis type) Value following a reset 100,000 [°] This parameter contains the position at which the software limit switch in positive direction becomes active. When the limit switch is activated, the axis is stopped and error F17 is displayed. Further, bit 8 is set in register 100 "Status". The software limit switch monitoring can be activated, respectively deactivated, via register 540 "Operating mode 1", bit 6. The software limit switch monitoring should be active in any case, though, especially when axes are driven in manual mode. Attention! The software limit switch monitoring is deactivated by default. The software limit switches are not monitored, unless the reference has been set (for absolute encoders as well). 92 Jetter AG JetMove 2xx at the JetControl 7.2 Register Description The following figure shows the positions of the software limit switches: Fig. 6: Position of the software limit switches Register 115: Negative Software Limit Switch Function Description Read As-is value of the software limit switch Write Set value of the software limit switch Amplifier status The amplifier has to be deactivated Takes effect Immediately Variable type float Value range Float limits [°] or [mm] (the unit depends on the setting of the axis type) Value following a reset -100,000 [°] This parameter contains the position at which the software limit switch in negative direction becomes active. When the limit switch is activated, the axis is stopped and error F17 is displayed. Further, bit 7 is set in register 100 "Status". The software limit switch monitoring can be activated, respectively deactivated, via register 540 "Operating mode 1", bit 6. The software limit switch monitoring should be active in any case, though, especially when axes are driven in manual mode. Jetter AG 93 7 Monitoring JetWeb Attention! The software limit switch monitoring is deactivated by default. The software limit switches are not monitored, unless the reference has been set (for absolute encoders as well). The figure regarding register 114 "Position of the software limit switch" illustrates the positions of the respective software limit switches. Register 544: DC Link Voltage - Max. Trip Function Description Read As-is max. trip Write New value of the max. trip Amplifier status The amplifier has to be deactivated Takes effect Immediately Variable type int / register Value range 0 ... 60 [V] for JM-105 0 ... 480 [V] for JM-D203, JM-203, and JM-206 0 ... 880 [V] for JM-204, JM-208, and JM-215 Value following a reset 60 [V] for JM-105 480 [V] for JM-D203, JM-203, and JM-206 880 [V] for JM-204, JM-208, and JM-215 Here, the error limit for the maximum DC link voltage is entered. If the DC link voltage exceeds the error limit, error 21 "Overvoltage Uzk" is triggered. 94 Jetter AG JetMove 2xx at the JetControl 7.2 Register Description Register 545: DC Link Voltage - Min. Trip Function Description Read As-is min. trip Write Set value of the min. trip Amplifier status The amplifier has to be deactivated Takes effect Immediately Variable type int / register Value range 0 ... 60 [V] for JM-105 0 ... 480 [V] for JM-D203, JM-203, and JM-206 0 ... 880 [V] for JM-204, JM-208, and JM-215 Value following a reset 10 [V] for JM-105 150 [V] for JM-D203, JM-203, and JM-206 400 [V] for JM-204, JM-208, and JM-215 Here, the error limit for the maximum DC link voltage is entered. If the DC link voltage exceeds the error limit, error 20 "Undervoltage Uzk" is triggered. Register 546: Blocking Protection - Tripping Time Function Description Read As-is response time Write Set response time Amplifier status The amplifier has to be deactivated Takes effect Immediately Variable type int / register Value range 0 ... 65,535 [ms] Value following a reset 5,000 [ms] Release time for blocking supervision of the motor brake can be defined in this parameter by preselecting a time. If the motor speed is still lower than 0.5 % after reaching the maximum output current, error F22 "Drive blocked" is triggered. Jetter AG 95 7 Monitoring JetWeb Register 549: Emergency Stop Ramp Function Description Read As-is ramp value Write Set ramp value Amplifier status The amplifier has to be deactivated Takes effect Immediately Variable type int / register Value range 0 ... 65,535 [ms] Value following a reset 500 [ms] The deceleration ramp, which is to be active in case of emergency stop (e.g. reaction to an error or after issuing command 7), can be defined by this parameter. The speed of the axis is decreased in relation to this deceleration ramp. Under fault conditions, which still allow the axis to function (e.g. overtemperature), the axis will be brought to a standstill by this deceleration ramp. If the maximum output current for the deceleration ramp is not sufficient, the ramping time will be increased. Register 600: Device Temperature - Warning Function Description Read As-is device temperature warning threshold Write Illegal Variable type int / register Value range 0 ... 255 [°C] Value following a reset 70 ... 80 [°C], dependent on the amplifier Here, the device temperature warning threshold can be read out. If the device temperature exceeds this value, warning W01 "Warning threshold for device temp." will be triggered. 96 Jetter AG JetMove 2xx at the JetControl 7.2 Register Description Register 601: Device Temperature - Error Function Description Read As-is shutdown threshold for device temp. Write Illegal Variable type int / register Value range 0 ... 255 [°C] Value following a reset 80 ... 85 [°C] dependent on the amplifier Here, the shutdown threshold for device temperature can be read out. If the device temperature exceeds this value, error report F07 "Shutdown threshold for device temp." is triggered. Register 602: Motor Temperature - Warning Function Description Read As-is motor temperature warning threshold Write Illegal Variable type int / register Value range 0 ... 255 [°C] Value following a reset 120 [°C] Here, the motor temperature warning threshold can be read out. If the motor temperature exceeds this value, warning W02 "Warning threshold for motor temp." is triggered. This register is not available for JM-105. Register 603: Motor Temperature - Error Function Description Read As-is motor temperature error threshold Write Illegal Variable type int / register Value range 0 ... 255 [°C] Value following a reset 145 [°C] Here, the shutdown threshold for motor temperature can be read out. If the motor temperature exceeds this value, error report F08 "Shutdown threshold for motor temp." is triggered. This register is not available for JM-105. Jetter AG 97 7 Monitoring JetWeb Register 604: Ballast Load Threshold Warning Function Description Read As-is warning threshold for ballast Write Illegal Variable type int / register Value range 0 ... 100 [%] Value following a reset 80 [%] Here, the warning threshold for ballast can be read out. If the load of the ballast resistor exceeds this value, warning W00 "Warning threshold for ballast" will be triggered. This register is not available for JM-105. Register 605: Ballast Load - Error Function Description Read As-is load error threshold Write Illegal Variable type int / register Value range 0 ... 100 [%] Value following a reset 100 [%] Here, the shutdown threshold for the ballast resistor load error can be read out. If the load of the ballast resistor exceeds this value, error report F06 "Overload internal ballast resistor" is triggered. This register is not available for JM-105. 98 Jetter AG JetMove 2xx at the JetControl 7.3 7.3 I²t Monitoring I²t Monitoring In JetMove, three independent I²t monitoring functions have been implemented. • • • I²t-monitoring of the DC link voltage infeed I²t monitoring of the motor by means of motor model I²t monitoring of the motor to UL standard The respective monitoring function, except for I²t monitoring to UL, has to be activated first. I²t monitoring to UL is always active. The operating system monitors the I²t value of the monitoring functions. When the I²t value exceeds the user-defined warning threshold, the operating system generates a warning. When the I²t value has reached the error threshold, the operating system generates an error message. Whether the operating system is to generate just a warning or rather an error message and the set reaction to this error can be set for both DC link voltage infeed and monitoring of the motor via motor model. Monitoring to UL standard always generates an error message and the set reaction to this error, when the respective I²t value has been reached. The specific warnings and error messages generated by I²t monitoring are displayed as follows: Monitoring Function Display Reaching the warning threshold I²t-monitoring of the DC link voltage infeed - W06 I²t Mains - Bit R580.6 I²t monitoring by means of motor model - W07 I²t Motor - Bit R580.7 I²t monitoring to UL standard - W08 I²t Motor UL - Bit R580.8 Reaching the error threshold Jetter AG I²t-monitoring of the DC link voltage infeed - F29 - Bit R585.29 I²t monitoring by means of motor model - F30 - Bit R585.30 I²t monitoring to UL standard - F31 - Bit R585.31 99 7 Monitoring JetWeb Each of the I²t monitoring functions has got the following parameters for configuration, respectively monitoring: Parameter Brief Description Operating mode This parameter defines, whether monitoring is to be active, and whether just a warning or else an error message followed by the respective reaction is to be generated. At I²t monitoring to UL standard, the operating mode cannot be selected. It is set by default to active monitoring with error message generating. Thermal time constant [s] Thermal time constant of the monitored object. Here, a thermal time constant for I²t monitoring by means of the motor model can be entered. For I²t monitoring of DC-link voltage infeed and monitoring to UL standard, the time constants have been predefined and can thus not be changed. As-is I²t value [%] As-is I²t monitoring value Warning threshold Warning threshold for generating a warning message 7.3.1 I²t-monitoring of the DC link voltage infeed I²t monitoring of the DC-link voltage infeed is for monitoring the device input current R566 by means of I²t calculation. For this, the following registers are available: Register 640: I²t - DC Link - Operating Mode Function 100 Description Read / Write Operating mode of the I²t monitoring function Variable type int / register Value range 0: Inactive 1: Active, with warning (W06) 2: Active, with warning (W06), error message generation and reaction to the error message (F29) Value following a reset 0 Jetter AG JetMove 2xx at the JetControl 7.3 I²t Monitoring Register 642: I²t - DC Link - Time Constant Function Description Read Thermal time constant Variable type float Value range 0 ... 36,000 [s] Value following a reset 0 [s] Register 643: I²t - DC Link - I²t Value Function Description Read As-is I²t value Variable type float Value range 0 ... 200 [%] related to R501 Rated Device Current Value following a reset 0 [%] Register 644: I²t - DC Link - Warning Threshold Function Description Read / Write Warning threshold to generating the warning message Variable type float Value range 0 ... 100 [%] related to R501 Rated device current Value following a reset 80 [%] 7.3.2 I²t monitoring of the motor by means of a motor model The JetMove calculates the model of motor power loss by an I²t calculation. The calculated value is a measure of the average power dissipation of the motor. It is calculated in percent of the maximum motor power dissipation. For this calculation it is important, that the following motor parameters are entered correctly: – R618 Continuous rated motor current (among rated motor or amplifier current, this is the smaller value) – R619 Motor overload factor – R647 I²t - Motor model - Time constant (thermal time constant of the motor) I²t calculation has to be activated via R645 I²t - Motor model - Operating mode. It is possible to parameterize the warning level. The error threshold for F30 is set to 100 % by default. Jetter AG 101 7 Monitoring JetWeb The JetMove calculates the I²t value for the percentage of motor power loss according to the following formula: t – --- average motor current 2 T x t = 100 % ----------------------------------------------------- 1 – e rated current x(t) = Displayed value of the motor power loss in % t= Time since start of motor running it with the average current (in seconds) T= Motor time constant (in seconds) The formula shows that the 100 % value will never be reached as long as the average motor current is lower than the nominal current of the motor. Further, calculating always starts by 0 (at t = 0, the result of the equation is 0). After some time that is by far longer than the motor time constant, the result does virtually not change any more. The time till error stop (x = 100 %) is a result of the following formula: 2 rated current t = – T ln 1 – -------------------------------------------------------- average motor current After reset, the values of the important parameters are: Nominal current: 3A Overload factor: 2 Motor time constant: 1,800 s (30 min) With these parameters the 100 % error level will be reached if, for example the motor is run by a current of 6 A for about 8 minutes and 30 seconds. Important 102 Because of the fact that after reset the I²t calculation always starts with zero, the motor overload calculation is wrong if the motor is already hot when the digital servo amplifier JetMove D203 is switched on (i. e. at the time of parameters of I²t calculation are written after switching on 24 V logic power supply). For this reason, please wait, until the motor has cooled down before re-enabling the axis. Jetter AG JetMove 2xx at the JetControl 7.3 I²t Monitoring The following registers are available for I²t monitoring: Register 645: I²t - Motor Model - Operating Mode Function Description Read / Write Operating mode of the I²t monitoring function Variable type int / register Value range 0: Inactive 1: Active, with warning (W07) 2: Active, with warning (W07), error message generation and reaction to the error message (F30) Value following a reset 0 Register 647: I²t - Motor Model - Time Constant Function Description Read / Write Thermal time constant Variable type float Value range 0 ... 36,000 [s] Value following a reset 1,800 [s] Register 648: I²t - Motor Model - I²t Value Function Description Read As-is I²t value Variable type float Value range 0 ... 200 [%] related to R618 Rated motor current Value following a reset 0 [%] In operating mode 1, the I²t value can become greater than 100 %. Register 649: I²t - Motor Model - Warning Threshold Function Jetter AG Description Read / Write Warning threshold to generating the warning message Variable type float Value range 0 ... 100 [%] related to R618 Rated motor current Value following a reset 80 [%] 103 7 Monitoring JetWeb 7.3.3 I²t monitoring of the motor to UL standard The UL standard prescribes a motor overload detection for a servo amplifier according to the following criteria: The "trip current" is defined to be 1.15 times the user-set continuous rated current. • • • If the average motor current corresponds to the trip current, the overload protection has to switch off the motor after a limited time. If the average motor current is 2 times higher than the trip current the overload protection has to switch off the motor after at least 8 minutes. If the average motor current is six times higher than the trip current, the overload protection must switch off the motor after at least 20 seconds. This protection (error message 31 is activated) can be parameterized only through the rated current value. The motor overload protection is always active and cannot be deactivated. Important Because of the fact that after reset the motor overload calculation always starts with zero, the result is wrong if the motor is already hot when the digital servo amplifier JetMove D203 is switched on (i.e. at establishing the connection to the 24 V logic circuit voltage supply). For this reason, please wait, until the motor has cooled down before re-enabling the axis. The following registers are available for I²t monitoring: Register 650: I²t - UL Standard - Operating Mode Function Description Read Operating mode of the I²t monitoring function Variable type int / register Value range 2: Active, with warning (W08), error message generation and reaction to the error message (F31) Value following a reset 2 Register 652: I²t - UL Standard - Time Constant Function 104 Description Read Thermal time constant Variable type float Value range 0 ... 36,000 [s] Value following a reset 0 [s] Jetter AG JetMove 2xx at the JetControl 7.3 I²t Monitoring Register 653: I²t - UL Standard - I²t Value Function Description Read As-is I²t value Variable type float Value range 0 ... 200 [%] related to R618 Rated Motor Current Value following a reset 0 [%] Register 654: I²t - UL Standard - Warning Threshold Function Jetter AG Description Read / Write Warning threshold to generating the warning message Variable type float Value range 0 ... 100 [%] related to R618 Rated Motor Current Value following a reset 80 [%] 105 7 Monitoring JetWeb 106 Jetter AG JetMove 2xx at the JetControl 8 Current Controller Set current value Current limitation Kp Tn Fig. 7: Current controller Setpoint Values As-is Values Continuous rated current [Aeff] R618 As-is current [Aeff] R561 Overload factor R619 As-is current [%] R620 Current limitation R127 As-is torque [Nm] R621 Current controller Kp R503 Max. output current [Aeff] R502 Current controller Tn R504 Fig. 8: Current controller The values for continuous rated current and overload factor should only be set once, corresponding with the selected motor. Only then, the parameters Kp and Tn are calculated. For temporary current reduction, the "current reduction" parameter is used. Jetter AG 107 8 Current Controller JetWeb Setting the peak value of the output current The peak value of the output current is set by entering the continuous rated current value of the motor and the overload factor of the motor. The continuous rated current value can be taken from the motor parameters written on the nameplate, for example. It can range between 200 % and 50 % of the continuous rated current of the amplifier. The peak value of the output current is the product of the continuous rated current and the overload factor. Note! At value input, please mind the value standardization of individual registers, see register description. Setting the controller parameters Kp and Tn The proportional amplification Kp and the integral-action time Tn of the current control has to be calculated and input. Formulas for parameter calculation can be found in the register description. 108 Jetter AG JetMove 2xx at the JetControl 8.1 Register Description 8.1 Register Description Register 121: Magnetizing Current Function Description Read Value of the as-is magnetizing current Write New value of the magnetizing current Amplifier status No specific status Takes effect Immediately Variable type float Value range 0 ... R502 [Aeff] Value following a reset 0 [Aeff] For asynchronous motors only: Here, the rated magnetizing current Id is entered in the unit [Aeff]. Id is calculated as follows: Id = 2 In – Iq 2 The following applies to the operands: In = Continuous rated current in the unit [Aeff] -> nameplate, dependent on the motor winding connection Iq = Rated magnetizing current in the unit [Aeff] -> see “Register 618: Rated Current” on page 116. See also chapter 5.3 "Asynchronous Motor", page 40. Jetter AG 109 8 Current Controller JetWeb Register 125: Current Setpoint Function Description Read As-is current setpoint Write New current setpoint Amplifier status No specific status Takes effect Immediately Variable type float Value range -R502 ... R502 [Aeff] Value following a reset 0 [Aeff] The current setpoint of the digital speed controller can be read here. When the controller operating mode current control has been preset (in this case, only the current control is active), the current setpoint can also be specified via this register. In case of all other controller operating modes, this parameter must not be written into. Register 127: Current Limitation Function Description Read Value of the present current limiting Write New current limiting value Amplifier status No specific status Takes effect Immediately Variable type float Value range 0 ... R502 [Aeff] Value following a reset R502 [Aeff] Besides registers 618 "Rated current" and register 619 "Overload factor", an additional limitation of the amplifier output current can be defined by means of this parameter. It serves for dynamically adjusting to temporary conditions. Changing one either register 618 "Nominal Current" or 619 "Overload Factor" to another value will also change the current limitation. The value of the current limitation will then be adjusted in a way, that the ratio between the values of the current limitation and of register 502 "Max. Output Current" will remain unchanged. 110 Jetter AG JetMove 2xx at the JetControl 8.1 Register Description Register 231: Current Reduction Function Description Read As-is current reduction value Write New current reduction value Variable type float Value range 0 ... 2 * R501 [Arms] Value following a reset 0 [Aeff] For stepper motors: Here, the value for torque reduction is entered in unis [Arms]. In order to activate current reduction, the desired value has to be written to the "Current Reduction" register. Register 232: Current Reduction Time Function Description Read As-is time value of current reduction Write New time value of current reduction Variable type float Value range 0 ... 65,535 [ms] Value following a reset 0 [ms] For stepper motors: Here, the time for torque reduction is entered in the unit [ms]. Current reduction is activated, if the position setpoint of the position control remains unchanged over the set time. Current reduction internally accesses “Register 127: Current Limitation” on page 110. When it is activated, current reduction limits the current setpoint of the speed control. This limitation is cancelled at the next change of position controller setpoint. Jetter AG 111 8 Current Controller JetWeb Register 502: Maximum Output Current Function Description Read Peak value of the output current Write Illegal Variable type float Value range 0.25 * R501 ... 2 * R501 [Aeff] Value following a reset 2 * R501 [Aeff] The value of this register is the product of the values of register 618 "Rated Current" and register 619 "Overload Factor". For calculation, the respective internally effective rated current and overload factor values is applied. The maximum output current can range between 200 % and 25 % of the continuous rated current of the device. Register 503: Current Control Kp Function Description Read As-is value of the Kp Write New value of the Kp Amplifier status No specific status Takes effect Immediately Variable type float Value range 0 ... min (31.99, R504 * 7.99) for JM-2xx series 0 ... 511.99 for JM-105 and JM-D203 Value following a reset 0.7 Proportional amplification of the current control Kp is entered here. Kp has not got a unit. Kp is calculated as follows: I eff L Motor K P = --------------------------2 T s U DC The following applies to the operands: 112 Ieff = Maximum output current in the unit [Aeff] -> value of R618 "Nominal Current", multiplied by the value of R619 "Overload Factor" LMotor = Inductivity between 2 motor terminals in the unit [H] -> motor data sheet, or find out by measuring. (In asynchronous motors, the inductivity depends on the motor winding connection) Jetter AG JetMove 2xx at the JetControl 8.1 Register Description Ts = The sum of the small time constants in the unit [s] -> Ts is always 000042 [s] in JM-2xx. UDC = DC link voltage of the amplifier in the unit [V] ->; please refer to the following table For the DC link voltage UDC, the following values have got to be considered: Module Type of connection DC link voltage JM-105 1-phase 24/48 V JM-2xx/400 3-phase 560 V JM-2xx/230 3-phase 325 V JM-203B / 230 JM-206B/230 JM-D203 1-phase 325 V (without PFC) JM-203/230 JM-206/230 1-phase 380 V (with PFC) The KP value calculated by the formula above is a suggested value and has to be adjusted to the requirements of the application together with “Register 504: Current Control Tn” on page 115. Tn [ms] 131072 65536 32768 16384 8192 4096 2048 1024 512 256 128 64 32 16 8 4 2 1 1/2 1/4 1/8 Useful Value Range Kp [1] 1/16 1/8 1/4 1/2 1 2 4 8 16 32 Fig. 9: Value range for Kp and Tn of the current controller belonging to the JM-2xx series Jetter AG 113 8 Current Controller JetWeb Tn [ms] 131072 65536 32768 16384 8192 4096 2048 1024 512 256 128 64 32 16 8 4 2 1 1/2 1/4 1/8 1/16 Useful Value Range 1/16 1/8 1/4 1/2 1 2 4 8 16 32 64 128 256 511 Kp [1] Fig. 10: Value range for Kp and Tn of the current controller belonging to the JM-105 and JM-203 114 Jetter AG JetMove 2xx at the JetControl 8.1 Register Description Register 504: Current Control Tn Function Description Read As-is value of the Tn Write New value of the Tn Amplifier status No specific status Takes effect Immediately Variable type float Value range R503 / 7.99 ... 8.192 [ms] for the JM-2xx series 0.0625 ... 8192 for JM-105 and JM-D203 Value following a reset 3 [ms] Here, the parameter Tn is entered in the unit [ms]. Tn is calculated as follows: L Motor T n = --------------R Motor The following applies to the operands: LMotor = Inductivity between 2 motor terminals in the unit [mH] -> motor data sheet, or find out by measuring. (In asynchronous motors, the inductivity depends on the motor winding connection) RMotor = Resistance between 2 motor terminals in the unit [Ohm] -> motor data sheet, or find out by measuring. (In asynchronous motors, the resistance depends on the motor winding connection) Tn serves for calculating the I-factor KI of the current controller. KIis calculated as follows: K K I = ------P Tn The following applies to the operands: KP = Proportional amplification of the current controller -> value of register 503 "Current Control KP" For further information on setting the speed controller, please refer to “Register 503: Current Control Kp” on page 112. Jetter AG 115 8 Current Controller JetWeb Register 561: As-is Current Function Description Read As-is current value Write Illegal Variable type float Value range -R502 ... R502 [Aeff] Value following a reset 0 [Aeff] Register 618: Rated Current Function Description Read As-is rated current Write New rated current, new maximum output current will be calculated Amplifier status The amplifier has to be deactivated Takes effect Immediately Variable type float Value range 0.1 * R501 ... 2 * R501 [Aeff] Value following a reset R501 [Aeff] Here, the rated current that is to be output by the device, is set according to the motor parameters. The peak output current of the amplifier is set by the product of the values of register 618: "Rated Current" and register 619 "Overload Factor". This parameter is usually set once during axis setup. The maximum output current is displayed in “Register 502: Maximum Output Current” on page 112. It can range between 200 % and 25 % of the continuous rated current of the device. The maximum output current is the product of the values of register 618 "Nominal Current" and register 619 "Overload Factor". The output current is newly calculated, if a new value is written into register 618 "Nominal Current" or into register 619 "Overload Factor". 116 Jetter AG JetMove 2xx at the JetControl 8.1 Register Description PLEASE NOTE: If one of the registers 618 "Nominal Current" or 619 "Overload Factor" are changed to another value, all registers containing values with the unit Aeff are newly adjusted according to their relation to the content of register 502 "Max. Output Current". This applies to register 127 "Current Limitation" or register 125 "Current Set Point". For asynchronous motors: Here, the rated current Iqthat is used for creating the torque (rated active current) is entered in the unit [Aeff]. Iq is calculated as follows: I q = I n cos The following applies to the operands: In = Continuous rated current in the unit [Aeff] -> nameplate, dependent on the motor winding connection cos fi = Rated service factor -> nameplate of the motor See also chapter 5.3 "Asynchronous Motor", page 40. Register 619: Overload Factor Function Description Read As-is overload factor Write New overload factor Amplifier status The amplifier has to be deactivated Takes effect Immediately Variable type float Value range 1 ... 10 Value following a reset 2 The peak output current of the amplifier is set by the product of the values of register 618 "Rated Current" and register 619 "Overload Factor". This parameter is usually set once during axis setup. The maximum output current is displayed in “Register 502: Maximum Output Current” on page 112. It can range between 200 % and 25 % of the continuous rated current of the device. The maximum output current is the product of the values of register 618 "Nominal Current" and register 619 "Overload Factor". For calculation, the respective internally effective rated current and overload factor values is applied. The output current is newly calculated, if a new value is written into register 618 "Nominal Current" or into register 619 "Overload Factor". Jetter AG 117 8 Current Controller JetWeb Register 620: As-is Current in % Function Description Read As-is current in % Write Illegal Variable type float Value range 0 ... 100 [%] Value following a reset 0 [%] The percentage is related to the maximum output current, which can be read in register 502 "Maximum Output Current". The maximum output current is the product of the values of register 618 "Rated Current" and register 619 "Overload Factor". Register 621: As-is Torque Function Description Read As-is torque Write Illegal Variable type float Value range Float limits [Nm] Value following a reset 0 [Nm] The display of a valid torque depends on the torque constant of the motor. The torque constant must be written into register 616 "Motor Torque Const. Kt". If the torque constant equals zero, the displayed as-is torque equals zero as well. 118 Jetter AG JetMove 2xx at the JetControl 9 9.1 Overview of Registers Speed Controller Speed setpoint Kp Tn Tf Fig. 11: Speed controller 9.1 Overview of Registers The following registers are available for speed controlling: Jetter AG Register Name Short Description R111 Speed Controller Setpoint Display, respectively specification of the set speed value R112 As-is Motor Speed As-is Motor Speed R113 Speed Controller Tf Filter time constant Tf (see controller diagram above) R118 Speed Controller - Max. Motor Speed Maximum motor speed R124 Speed Controller Kp P-gain Kp of the speed controller R126 Speed Controller Tn Time constant for the integral-action component of the speed controller R128 Speed Limitation The speed controller setpoint can be limited by this controller. R506 Speed Controller Preset The current setpoint value is preset R507 Integral-Action Component Speed Controller The integral-action component of the speed controller is displayed R628 Mass Inertia Load Mass moment inertia of the power train R629 Scaling of the Current PreControl Scaling of the current pre-control 119 9 Speed Controller JetWeb 9.2 Current Pre-Control The current pre-control improves the dynamic performance of the entire system in case of motion profiles of high acceleration values. This is achieved by relieving the speed controller's integral-action component of the responsibility for providing the current setpoint value needed for acceleration. This is because the integral-action component can only be changed via the setpoint-as-is value difference at the controller input. The dynamic performance at changing the integral-active component has been defined by the integral-action time of the speed controller. The current pre-control is deactivated by default. It has to be configured according to the intended usage. The main purpose is to find an adequate value for R628 Inertia of Load and R629 Scaling of Current Pre-Control. Below, the procedure of configuring the current pre-control has been described: Step Action 1 Mechanically connect the motor with the power train and with the load corresponding to the respective axis. 2 Check the motor torque constant Action: Check, if the contents of R616 Motor Torque Constant KT already coincides with the value of the torque constant specified in the motor data sheet. If it does not, R616 has to be adjusted accordingly. 3 Scale the current pre-control to 100 %. Action: Write value 100 to R629 Scaling the Current Pre-Control. 4 Empirical determination of the optimum current pre-control setting for the power train Action: Increase the value of R628 Inertia of Load as of value 0.0, until the integral-action component of the speed controller displays an optimum procedure, see chapter 9.2.1 "Ideal Current Pre-Control", page 121. Please note: For displaying the integral-action component, the oscilloscope function of the JetMove has to be used. 5 Adjust the current pre-control to the procedure, i.e. to the changes of the as-is mass inertia moment during the procedure Action: Write the respective scaling value to R629 Scaling the Current Pre-Control. 120 Jetter AG JetMove 2xx at the JetControl 9.2.1 9.2 Current Pre-Control Ideal Current Pre-Control Without a current pre-control, the integral-action component and the tracking error cause a comparatively high amplitude, see fig.12. Fig. 12: Reversing without current pre-control Legend: – – – – Black Blue Green Red = R112 As-is Motor Speed = R561 As-is Current = R119 As-is Tracking Error = R507 Integral-Action Component Speed Controller If the current pre-control has been set best, the integral-action component of the speed controller only has to equalize the friction in the system. This means, the integral-action component will be approximately proportional to the speed value, see fig.13. The target position is being approached directly and without retraction. The as-is mass inertia is over-compensated, when the axis starts exceeding, and then tracking back to the target position. In this case, the oscilloscope shows how the integral-action component starts partially compensating the current pre-control, i.e. working against the acceleration current. The opposite-sense behavior of the integral-action component can be slightly seen in fig.13. The setting of the current pre-control shown in fig.13, is slightly over-compensated. Jetter AG 121 9 Speed Controller JetWeb Fig. 13: Reversing with current pre-control Legend: see fig.12. 122 Jetter AG JetMove 2xx at the JetControl 9.3 9.3 Register Description Register Description Register 111: Speed Controller Setpoint Function Description Read As-is speed controller setpoint Write New speed controller setpoint Amplifier status No specific status Takes effect Immediately Variable type int / register Value range -12,000 ... 12,000 [rpm] Value following a reset 0 [rpm] From here, the speed reference of the speed controller can be read out. When the operating mode of the controller has been set to speed control, see register 572 Controller Mode, the set speed value can be specified here. In the operating mode "speed control", only the speed controller and the current controller are active. In all other operating modes, the register must not be written into. Register 112: As-is Motor Speed Function Description Read As-is speed Write Illegal Variable type int / register Value range -12,000 ... 12,000 [rpm] Value following a reset 0 [rpm] Here, the as-is motor speed can be read. Jetter AG 123 9 Speed Controller JetWeb Register 113: Filter Time Constant Tf Function Description Read As-is time constant of the smoothing capacitor Write New time constant of the smoothing capacitor Amplifier status No specific status Takes effect Immediately Variable type float Value range 1 ... 32 [ms] Value following a reset 2 [ms] Attention! This parameter is not the Tn for the speed controller, which will be specified in register 126. Register 118: Maximum Motor Speed Function Description Read As-is maximum speed Write New maximum speed Amplifier status The amplifier has to be deactivated Takes effect Immediately Variable type int / register Value range 120 ... 12,000 [rpm] Value following a reset 3,000 [rpm] Here, the maximum motor speed is entered. This value is the absolute speed limit of the motor. Dependent on the maximum motor speed and the gearbox, the speed of the mechanic axis will be limited. 124 Jetter AG JetMove 2xx at the JetControl 9.3 Register Description Register 124: Speed Controller Kp Function Description Read As-is value of the Kp Write New value of the Kp Amplifier status No specific status Takes effect Immediately Variable type float Value range 0 ... 127.99 for the JetMove 2xx series 0 ... 511.99 for JM-105 and JM-D203 Value following a reset 10 Here, the P-gain Kp of the digital speed controller is set. Register 126: Speed Controller Tn Function Description Read As-is value of the Tn Write New value of the Tn Amplifier status No specific status Takes effect Immediately Variable type float Value range 0.25 ... 8.192 [ms] for the JetMove 2xx series 0.125...16.384 [ms] for the JM-105 and JM-D203 series Value following a reset 20 [ms] This parameter serves for calculating the I-factor of the speed controller by means of the following formula: K I = KP / T n For further information on setting the speed controller, please refer to “Register 124: Speed Controller Kp” on page 125. When value 0 is reached, the integral-action component is deactivated, while a mere proportional controller is available. Jetter AG 125 9 Speed Controller JetWeb Tn [ms] 16384 8192 4096 2048 1024 512 256 128 64 32 16 8 4 2 1 1/2 1/4 1/8 Useful Value Range Kp [1] 1 2 4 8 16 32 64 128 Fig. 14: Value range for Kp and Tn of the speed controller belonging to the JM-2xx series Tn [ms] 16384 8192 4096 2048 1024 512 256 128 64 32 16 8 4 2 1 1/2 1/4 1/8 Useful Value Range Kp [1] 1 2 4 8 16 32 64 128 256 511 Fig. 15: Value range for Kp and Tn of the speed controller belonging to the JM-105 and JM-D203 126 Jetter AG JetMove 2xx at the JetControl 9.3 Register Description Register 128: Limitation of Set Speed Function Description Read As-are limits Write New limits Amplifier status No specific status Takes effect Immediately Variable type float Value range 0 ... 105 % * R118 Value following a reset 3,150 [rpm] Register 506: Speed Controller Preset Function Description Read As-is preset value Write New preset value Amplifier status No specific status Takes effect Immediately Variable type float Value range -R502 ... R502 [Aeff] Value following a reset 0 [Aeff] This parameter is for compensating the load torque of a suspended load (vertical axis). If the brake is released for an axis, the following effect usually occurs: The load drops until the I-component of the speed controller has been increased to reach the respective value. This undesired effect can be avoided by parameterizing the speed controller with a preset value. The preset value is determined empirically and contains the connection of static load torque and current setpoint (when the load is at stillstand and the controller is enabled, read the current setpoint from the parameter "current set point" and use it as preset value). The load can be prevented from dropping by correctly setting this value. Jetter AG 127 9 Speed Controller JetWeb For Special Function Torque-Controlled Shut-Off: Here, the preset value is entered to which the integral-action component of the speed controller is to be set after reaching the speed tripping count of R139, see chapter 18 "Special Function: Torque-Controlled Shut-Off", page 363. For Stepper Motors: Here, the rated motor current for the current controller is entered, see “Stepper Motor” on page 46. Register 507: I-Component Speed Controller Function Description Read Value of the as-is I-component Write Illegal Variable type float Value range 0 ... R502 [Aeff] Value following a reset 0 [Aeff] From here, the as-is integral-action component of the speed controller can be read out. Register 628: Inertia of Load Function Description Read As-is torque value Write New torque value Amplifier status No specific status Takes effect Immediately Variable type float Value range 0 ... pos. float limit [kgcm²] Value following a reset 0 [kgcm²] In R628, the moment of inertia for the current pre-control has to be entered. 128 Jetter AG JetMove 2xx at the JetControl 9.3 Register Description Register 629: Scaling of the Current Pre-Control Function Description Read As-is scaling of the current pre-control Write New scaling Amplifier status No specific status Takes effect Immediately Variable type float Value range 0 ... 100 [%] Value following a reset 0 [%] The effect of the moment of inertia is written to R628 Inertia of Load. It is scaled in R629. Jetter AG 129 9 Speed Controller JetWeb 130 Jetter AG JetMove 2xx at the JetControl 10 10.1 Register Description Position Feedback Controller Speed pre-control Position setpoint Kv Fig. 16: Position feedback controller 10.1 Register Description Register 110: Position Feedback Controller KV Function Description Read As-is value of the Kv Write New value of the Kv Amplifier status No specific status Takes effect Immediately Variable type float Value range 0 ... 2.047 [1/s] for the JetMove 2xx series 0 ... 4.095 [1/s] for JM-105 and JM-D203 Value following a reset 10 [1/s] Here, the P-gain Kv of the position feedback controller will be set. Register 119: As-is Tracking Error Function Jetter AG Description Read As-is tracking error Write Illegal Variable type float Value range Float limits [°] or [mm] (the unit depends on the setting of the axis type) Value following a reset 0 [°] 131 10 Position Feedback Controller JetWeb This parameter specifies the difference between set and as-is values of the axis motion, i.e. by how many increments the as-is position of the axis deviates from the set position. If the as-is tracking error is too great, the system concerned has to be checked. The reason might be e.g. an encoder problem, or the dimensioning of the motor has not been calculated correctly. The as-is tracking error should be as small as possible to ensure high accuracy of axis motion. It should be maintained around 0, i.e. should never be only negative or only positive. Via register 120 "Tracking error limit" and register 542 "Tracking error window time", tracking error monitoring can be adjusted. Register 120: Tracking Error Limit Function Description Read As-is tracking error limit Write New tracking error limit Amplifier status No specific status Takes effect Immediately Variable type float Value range 0 ... Positive float limits [°] or [mm] (the unit depends on the setting of the axis type) Value following a reset 10,000 [°] Here, the tracking error limit is specified. This parameter defines, from which tracking error the amplifier should react. If the as-is tracking error exceeds this value, error 23 "Tracking error" will be triggered. Regarding the reaction to the error report, the tracking error window time written in register 542 must also be considered. Register 130: Position Set Point Function 132 Description Read As-is position setpoint Write Illegal Amplifier status No specific status Takes effect Immediately Variable type float Value range Float limit [°] or [mm] (the unit depends on the setting of the axis type) Value following a reset 0 [°] Jetter AG JetMove 2xx at the JetControl 10.1 Register Description From here, the position setpoint can be read. For this, the controller operating mode must have been set to position control via register 572 "JetMove set operating mode". Register 190: Selection: Position Feedback Controller - As-is Value Function Description Read As-is encoder for as-is value Write New encoder for as-is value Amplifier status The amplifier has to be deactivated Takes effect Immediately Variable type int / register Value range 1 ... 2 Value following a reset 1 (first encoder) Meaning of the values: 1 First encoder 2 Second encoder (changing over to the second encoder is only possible with JetMoves that have got an integrated counter board (short form: "JM-2....-CNT") By means of R190, the encoder is set which is to provide the as-is value for position control. For further information on the second encoder, see chapter 6.9 "Second Encoder", page 77. Register 542: Tracking Error Window Time Function Description Read As-is tracking window time Write New tracking window time Amplifier status No specific status Takes effect Immediately Variable type int / register Value range 0 ... 65,535 [ms] Value following a reset 5 [ms] Here, tracking error monitoring can be made dependent on a certain time. Tracking error monitoring will not be active before the as-is tracking error (register 119) has exceeded the tracking error limit (register 120) for at least the tracking error window time. In this case, error report F23 "Tracking error" will be triggered. Jetter AG 133 10 Position Feedback Controller JetWeb The tracking error window time serves for filtering out the tracking error peaks. Attention! Tracking error monitoring will be deactivated at a tracking error window time of 65,535. Register 550: Speed Pre-Control Function Description Read As-is speed feed forward Write New speed feed forward Amplifier status No specific status Takes effect Immediately Value range 0 ... 199 [%] Value following a reset 100 [%] Here, the speed feed forward for the position controller with P-gain is specified. Due to the P-gain for the position controller, a constant tracking error, caused by the controller, will remain during position controlling. This tracking error will be compensated by the speed feed-forward: During each position control cycle, the speed pre-control will add the calculated axis speed to the output value of the position controller with P-gain. Then, the position controller with P-gain will ideally only have to control the mechanically caused tracking error. Register 551: Speed Feed Forward T1 Function Description Read As-is delay time Write New delay time Amplifier status No specific status Takes effect Immediately Value range 2 ... 65,534 [ms] Value following a reset 0 [ms] In R551, the delay time respectively time constant for a T1 controlling device filtering the change of the speed value for speed pre-control is set. The following behavior results: 134 Jetter AG JetMove 2xx at the JetControl • • 10.1 Register Description Increase of delay time -> Increase of filtering effects Decrease of delay time -> Decrease of filtering effects Important! The input of a delay time is only required, • if the JetMove 2xx is used as a following axis with the coupling mode Electronic Gearing or Table and • a JX2-CNT1 or a JM-200-CNT is used as a leading axis module, to which an encoder of low resolution is connected. The delay time can only be set in steps of 2 milliseconds, starting at 2 milliseconds: 2, 4, 6, 8 ... 65,534. Jetter AG 135 10 Position Feedback Controller JetWeb 136 Jetter AG JetMove 2xx at the JetControl 11 Referencing Attention! The axis could crash into the mechanical limits! Limit switches are NOT taken into account in following cases: Caution • • • During reference run "With zero pulse only" If the axis is positioned on the reference switch From the moment of starting the search for the reference position (reference search) to finding it. In case of reverse polarity of the hardware limit switches, the limit switch being positioned in the direction of the reference run will be ignored; this will cause the axis to crash into the mechanical limits. Before starting a reference run during axis setup make sure that the hardware limit switches and the reference switch are performing reliably. Especially pay attention to the polarity and the correct assignment of the negative and positive limit switch. The polarity is defined via register 510 "Digital Inputs - Polarity". Definitions Zero pulse Zero-crossing of the resolver, reset pulse of the incremental encoder "Reference switch active" edge The reference switch signal changes from logical zero to logical one "Reference switch deactived" edge The reference switch signal will change from logical one to logical zero Switch search The first part of referencing: Searching for the reference switch, respectively for a limit switch Searching for the reference position The second part of referencing, after having found the reference or limit switch: Searching for the reference position, e.g. for the zero pulse Key to the following illustrations: Jetter AG N = Negative limit switch Vref = Speed of switch search P = Positive limit switch VZM = Speed of search for reference position R = Reference switch ZM = Zero pulse ("zero mark") SP = Start position NP = Normal position s = Space NP distance = Normal position - Distance 137 11 Referencing JetWeb 11.1 Control Mode For referencing, the position control mode has to be set. This is done via register 572 "Controller Mode". 11.2 Starting the Reference Run A reference run is started by means of command 9: #Include "JM2xxReg32.stp" Var JM_Axis :JM_2XX At %VL 12000; End_Var; // JM2xx RegisterInterface // Axis declaration JM_Axis.JM_nm_Cmd := zkRefSearch; When Bit_CLear (JM_Axis.JM_nw_State, zbBusy) Continue; ... Attention: During the reference run, command 9 "Search for reference" cannot be given again. If the parameters for referencing are changed while a reference run is in process, they will at first have no effect on this reference run. As of the next reference run, the alterations will be effective. 11.3 Interrupting the Reference Run The user can interrupt a reference run by means of the following commands: • • • Command 5 Command 6 Command 7 11.4 Status Information If bit 0 "RefOK" of register 100 "Status" is set at starting the reference run, it is reset. Bit 1 "Stopped" of register 100 is also reset. 138 Jetter AG JetMove 2xx at the JetControl 11.5 Axis Type If referencing has been completed and correct, both bits are set. If referencing has been stopped due to an error or by the user (by command 6, for example), only bit 1 "Stopped" is set, as soon as the axis has come to a standstill again. Those two bits can be used for continuing the PLC program after starting the reference run. Error messages Referencing errors are output in register 170 "Positioning Error". They are not displayed at the amplifier by F and error number. If a referencing error occurs, bit 0 "RefOK" of register 100 "Status" is not set. Bit 1 "Stopped" of register 100 is set in case of an error, when the axis has come to a standstill. 11.5 Axis Type Referencing is possible without any restrictions both with settings for a linear axis and with settings for a rotatory axis via register 191 "Axis Type". If a modulo axis has been set in register 192 "Modulo Axis", there are no restrictions for referencing either. 11.6 Modes of Referencing There are various modes of referencing to choose from: • • • • Referencing only with zero pulse Referencing by reference and limit switch Referencing by limit switch only (there is no reference switch, for example) Referencing by reference switch only The mode of referencing is selected by the switch type parameter of register 161 "Switch Type". The modes of referencing are explained below. 11.7 Speed Settings Two different speed values can be set for referencing: • • Speed of the reference switch search set in register 162 "Speed of Switch Search". Speed of searching for the reference position set in register 166 "Speed of Reference Search". The speed setting for switch search is also used for driving back to the normal position, see "Setting the Specific Reference Position" below. Referencing is started by the speed of switch search. When the switch has been found, the speed of the reference point search is set for driving to the reference position. Jetter AG 139 11 Referencing JetWeb Normally, the speed of the reference point search is lower than the speed of the switch search. These values have also been set by default. For neither of the two speed settings there is a specific limitation. Normally, though, referencing is done in low speed. The speed values are set once before referencing; they cannot be changed during referencing. Fig. 17 shows a typical motions sequence of various speeds: R N +Vref P SP +VZM S - VZM - Vref ZM Fig. 17: Referencing by various speeds 11.8 Speed Reversal Besides setting the direction of referencing via register 160 "Referencing Direction", the rotational direction of the axis can be set via register 540 "Drive Mode 1", Bit 5 "Speed Reversal". This value applies to all axis motions, not only to referencing. Below, referencing for setting a positive rotatory direction will be illustrated. If a negative direction of rotation has been set, the respective graphic referring to positive direction of rotation must be used for illustrating features such as the motion sequence at referencing in negative direction. 140 Jetter AG JetMove 2xx at the JetControl 11.9 Reference Position 11.9 Reference Position 11.9.1 Zero pulse ("zero mark") or edge of a switch The reference position can either be the position of the zero pulse ("zero mark") or the position of the edge of a switch, if referencing is being carried out without zero pulse. Note! If an incremental encoder is used as a commutation feedback for asynchronous motors, referencing by zero pulse cannot be carried out. Register 165 "Reference Mark" defines, whether the reference point is to be the position of the zero pulse or the position of the edge of a switch. We recommend setting the zero pulse ("zero mark") as home position ("reference mark"). Referring to the zero pulse ("zero mark") offers a much greater repeat accuracy. Fig. 18 illustrates referencing with zero pulse for the switch types "reference and limit switch" and "limit switch only": R P +Vref +VZM S - VZM - Vref ZM Fig. 18: Referencing with zero pulse ("zero mark") Jetter AG 141 11 Referencing JetWeb Fig. 19 illustrates referencing without zero pulse for the switch types "reference and limit switch" and "limit switch only": R P +Vref +VZM S - VZM - Vref Fig. 19: Referencing without zero pulse ("zero mark") 11.9.2 One-phase referencing At the referencing mode "Referencing only by Reference Switch", there are two further possibilities for reference position search. This special case is only helpful if modulo axes are applied, which means that only one direction is permitted for the axis to travel. Please compare with “Register 192: Modulo Axis” on page 22. It is recommended that “Register 168: Home Position - Distance” on page 157 has got a referencing direction value leset the axis has to reverse to home position during deceleration. Register 165 "Reference Mark" defines, whether the reference point is to be the position of the zero pulse or the position of the edge of the switch. Fig. 20 shows one-phase referencing with and without zero pulse: Fig. 20: One-phase referencing 142 Jetter AG JetMove 2xx at the JetControl 11.10 Setting the Specific Reference Position 11.10 Setting the Specific Reference Position There is the possibility of driving to another position in the travel range immediately after finding the reference position (register 168 "Home Position - Distance"). This position is called home position or normal position. For a home position value, any position value can be chosen (register 169 "Home Position"). In the following illustration Fig. 21, the motion sequence of the axis when driving towards normal position is shown (NP = normal position, NP distance = normal position - distance): R N +Vref P SP +VZM - VZM - Vref S NP distance NP ZM Fig. 21: Driving towards "normal position" The speed by which the axis is driving towards normal position is the speed of the switch search; it is set in register 162 "Speed Switch Search". Via register 168 "Home Position - Distance", the distance to be covered from reference to home position is input. A negative value causes the axis to move in negative direction, seen from the reference position. Via register 169 "Home Position", the position is input that is to be set as as-is position after having reached the home position. The virtual position is set at the reference position, if there is no "normal position" to be driven to; this means that register 168 = 0. Jetter AG 143 11 Referencing JetWeb 11.11 Referencing by Zero Pulse Only For this reference run, the axis starts in the set referencing direction by the set reference search speed. When the zero pulse ("zero mark") has been recognized, the axis returns towards the position of the zero pulse ("zero mark"). During this travel, the motor makes one revolution as a maximum. The setting of the home position in register 1x165 "Reference Mark" does not take effect here. Attention: During this reference run, limit switches are not monitored. P N +Vref SP +VZM S - VZM - Vref ZM Fig. 22: Referencing only by means of zero pulse ("zero mark") in positive direction; the rotatory direction is positive; the starting position is on the negative side of the zero pulse. 144 Jetter AG JetMove 2xx at the JetControl 11.12 Referencing by Means of Reference and Limit 11.12 Referencing by Means of Reference and Limit Switch Prerequisites for this reference run are a reference switch, as well as the positive and negative limit switch. The reference run with its respective starting positions and directions are explained below. 11.12.1 Positive direction During automatic referencing, the axis is always moved so that reference search is being carried out from the negative side of the reference switch. Starting from the positive side of the reference switch – The axis starts in positive direction by "Speed Switch Search". – When the positive limit switch has been recognized, the axis reverses and continues in negative direction by "Speed Switch Search". – The axis keeps crossing the reference switch, until the "Reference switch deactivated" edge has been recognized. – There, the axis reverses to drive in positive direction by "Speed Reference Search". – After having recognized the "Reference switch active" edge again, the reference position is set to the first zero pulse. For referencing without zero pulse ("zero mark"), the reference position is set to the position of the "Reference switch active" edge. N +Vref R P SP +VZM S - VZM - Vref ZM Fig. 23: Referencing by reference and limit switch in positive direction; the rotatory direction is positive; with zero pulse ("zero mark"), the starting position is on the positive side of the reference switch. Jetter AG 145 11 Referencing JetWeb Starting from the negative side of the reference switch – The axis starts in positive direction by "Speed Switch Search". – When the reference switch active edge has been recognized, the axis will drive back in negative direction by "Speed Switch Search", until it reaches the position, where the reference switch active edge has been recognized. – There, the axis reverses to drive in positive direction by "Speed Reference Search". – After having recognized the "Reference switch active" edge again, the reference position is set to the first zero pulse. For referencing without zero pulse ("zero mark"), the reference position is set to the position of the "Reference switch active" edge. R N P SP +Vref +VZM S - VZM - Vref ZM Fig. 24: Referencing by reference and limit switch in positive direction; the rotatory direction is positive; with zero pulse ("zero mark"), the starting position is on the negative side of the reference switch. Starting on the reference switch – The axis starts in negative direction by "Speed Switch Search". – When the reference switch has become deactivated, the axis reverses and continues in positive direction by "Speed Reference Search". – After having recognized the "Reference switch active" edge again, the reference position is set to the first zero pulse. For referencing without zero pulse ("zero mark"), the reference position is set to the position of the "Reference switch active" edge. N +Vref R P SP +VZM - VZM S - Vref ZM 146 Jetter AG JetMove 2xx at the JetControl 11.12 Referencing by Means of Reference and Limit Fig. 25: Referencing by reference and limit switch in positive direction; the rotatory direction is positive; with zero pulse ("zero mark"), the starting position is on the reference switch. Jetter AG 147 11 Referencing JetWeb 11.12.2 Negative direction During automatic referencing, the axis is always moved in a way that reference search is being carried out from the positive side of the reference switch. Starting from the positive side of the reference switch – The axis starts in negative direction by "Speed Switch Search". – When the reference switch active edge has been recognized, the axis will drive back in positive direction by "Speed Switch Search", until it reaches the position, where the "Reference switch active" edge has been recognized. – There, the axis reverses to drive in negative direction by "Speed Reference Search". – After having recognized the "Reference switch active" edge again, the reference position is set to the first zero pulse. For referencing without zero pulse ("zero mark"), the reference position is set to the position of the "Reference switch active" edge. N +Vref R P SP +VZM S - VZM - Vref ZM Fig. 26: Referencing by reference and limit switch in negative direction; the rotatory direction is positive; with zero pulse ("zero mark"), the starting position is on the positive side of the reference switch. Starting from the negative side of the reference switch – The axis starts in negative direction by "Speed Switch Search". – When the negative limit switch has been recognized, the axis will reverse and continue in positive direction by "Speed Switch Search". – The axis keeps crossing the reference switch, until the "Reference switch deactivated" edge has been recognized. – There, the axis reverses to drive in negative direction by "Speed Reference Search". – After having recognized the "Reference switch active" edge again, the reference position is set to the first zero pulse. For referencing without zero pulse ("zero mark"), the reference position is set to the position of the "Reference switch active" edge. 148 Jetter AG JetMove 2xx at the JetControl 11.12 Referencing by Means of Reference and Limit R N P SP +Vref +VZM S - VZM - Vref ZM Fig. 27: Referencing by reference and limit switch in negative direction; the rotatory direction is positive; with zero pulse ("zero mark"), the starting position is on the negative side of the reference switch. Starting on the reference switch – The axis starts in positive direction by "Speed Switch Search". – When the reference switch has become deactivated, the axis will reverse and continue in negative direction by "Speed Reference Search". – After having recognized the "Reference switch active" edge again, the reference position is set to the first zero pulse. For referencing without zero pulse ("zero mark"), the reference position is set to the position of the "Reference switch active" edge. N +Vref R P SP +VZM S - VZM - Vref ZM Fig. 28: Referencing by reference and limit switch in negative direction; the rotatory direction is positive; with zero pulse ("zero mark"), the starting position is on the reference switch. Jetter AG 149 11 Referencing JetWeb 11.13 Referencing by One Limit Switch Only If the limit switch has been found when driving in referencing direction, the axis is referenced there. The limit switch driving in opposite referencing direction is ignored, until the axis has reversed on the limit switch. When the axis has reversed and the limit switch being positioned in the new direction has been recognized, the axis is stopped and an error message is output in register 170 "Positioning Error" (bit 18 "Reference: Limit switch positive" or bit 19 "Reference: Limit switch negative"). Starting in positive direction P N SP +Vref +VZM S - VZM - Vref ZM Fig. 29: Referencing by limit switch only; positive direction, positive rotatory direction, starting position preceeding the positive limit switch. N +Vref P SP +VZM - VZM S - Vref ZM Fig. 30: Referencing by limit switch only; positive direction, positive rotatory direction, starting position on the positive limit switch. 150 Jetter AG JetMove 2xx at the JetControl 11.14 Referencing by Reference Switch Only Starting in negative direction P N SP +Vref +VZM S - VZM - Vref ZM Fig. 31: Referencing by limit switch only; negative direction, positive rotatory direction, starting position preceeding the negative limit switch. P N +Vref SP +VZM S - VZM - Vref ZM Fig. 32: Referencing by limit switch only; negative direction, positive rotatory direction, starting position on the negative limit switch. 11.14 Referencing by Reference Switch Only The axis drives to the reference switch to be referenced there. When, during the reference run, the limit switch being positioned in the referencing direction has been recognized, the axis will be stopped and an error will be output in register 170 "Positioning Error" (bit 18 "Reference: Limit switch positive" or bit 19 "Reference: Limit switch negative"). The limit switch being positioned in negative direction will be ignored. This referencing mode is used for example with a conveyor belt which has to be calibrated after every turn. For the sequence of motions, please refer to chapter 11.12 "Referencing by Means of Reference and Limit Switch", page 145. Jetter AG 151 11 Referencing JetWeb 11.15 Register Description Register 160: Referencing Direction Function Description Read As-is direction of referencing Write New direction of referencing Amplifier status No specific status Takes effect Next referencing Variable type int / register Value range 0, 1 Value following a reset 0 Here, the direction of referencing is specified. Referencing is then started by issuing command 9. Meaning of the values: 0 : Positive direction 1 : Negative direction Please also read chapter 11 "Referencing", page 137. Register 161: Switch Type Function Description Read As-is switch type Write New switch type Amplifier status No specific status Takes effect Next referencing Variable type int / register Value range 0 ... 3 Value following a reset 1 Here it is specified, which hardware switches are to be used for referencing. 152 Jetter AG JetMove 2xx at the JetControl 11.15 Register Description Meaning of the values: 0 : No switches, only zero pulse of the encoder 1 : Reference and limit switch 2 : Limit switch only 3 : Reference switch only Please also read chapter 11 "Referencing", page 137. Register 162: Speed of Switch Search Function Description Read As-is search speed Write New search speed Amplifier status No specific status Takes effect Next referencing Variable type float Value range 0 ... R184 [°/s] or [mm/s] (the unit depends on the setting of the axis type) Value following a reset 500 [°/s] Here the speed is specified, by which the axis starts referencing by switch search. When the switch has been found, the "reference mark" will be searched for. For searching the "reference mark", a specific speed will be set in register 166 "Speed Reference Search". Which switch is to be used for referencing (reference switch, limit switch, zero pulse) is defined in register 161 "Switch Type". Please also read chapter 11 "Referencing", page 137. Jetter AG 153 11 Referencing JetWeb Register 163: Acceleration Function Description Read As-is acceleration value Write New acceleration value Amplifier status No specific status Takes effect Next referencing Variable type float Value range 0 ... R180 [°/s²] or [mm/s²] (the unit depends on the settings of the axis type) Value following a reset 1,000 [°/s²] Here, the acceleration for referencing is specified. This acceleration value applies to starting and stopping the reference run and to changes of speed. The changes of speed result from various speed settings for the switch search, see register 162 "Speed Switch Search", and to the search for the "reference mark", see register 166 "Speed Reference Search". Attention! If referencing has been interrupted by issuing command 6, the axis will be brought to a standstill by the deceleration defined in register 106 "Deceleration". Please also read chapter 11 "Referencing", page 137. Register 164: Max. Distance Switch Search Function 154 Description Read As-is maximum distance Write New maximum distance Amplifier status No specific status Takes effect Next referencing Variable type float Value range Float limits [°] or [mm] (the unit depends on the setting of the axis type) Value following a reset 100,000 [°] Jetter AG JetMove 2xx at the JetControl 11.15 Register Description Within this maximum distance, the switch signal has to be active. The distance is measured as of the starting position of the reference run. If the maximum distance is exceeded, the axis is stopped and the error "Max. distance switch search" of bit 17 in register 170 "Error Positioning" is reported. Please also read chapter 11 "Referencing", page 137. Register 165: Reference Mark Function Description Read As-is reference mark Write New reference mark Amplifier status No specific status Takes effect Next referencing Variable type int / register Value range 1, 2 Value following a reset 1 Meaning of the values: 1 : Referencing by means of zero pulse 2 : Referencing without zero pulse (this means the reference position will only be the switch edge of the reference switch, respectively of the limit switch) 3 : Referencing by means of zero pulse, one-phase For this kind of referencing, switch type "reference switch only" has to be selected. 4 : Referencing without zero pulse, one-phase (this means the reference position will only be the switch edge of the reference switch, respectively of the limit switch) For this kind of referencing, switch type "reference switch only" has to be selected. Please also read chapter 11 "Referencing", page 137. Jetter AG 155 11 Referencing JetWeb Register 166: Speed Reference Search Function Description Read As-is search speed Write New search speed Amplifier status No specific status Takes effect Next referencing Variable type float Value range 0 ... R184 [°/s] or [mm/s] (the unit depends on the setting of the axis type) Value following a reset 100 [°/s] Here, the speed will be specified, by which the axis approaches the reference position. When the switch signal has been recognized, the reference position will be searched for. The reference position can either be the position of the zero pulse ("zero mark") or the position of the switch edge, if referencing is being carried out without zero pulse. The switch is searched for by the speed, which has been set in register 162 "Speed of Switch Search". Please also read chapter 11 "Referencing", page 137. Register 167: Max. Distance Reference Search Function Description Read As-is max. distance reference search Write New max. distance reference search Amplifier status No specific status Takes effect Next referencing Variable type float Value range Float limits [°] or [mm] (the unit depends on the setting of the axis type) Value following a reset 1,000 [°] Within this maximum distance, the reference mark must be active. The distance will be measured from the starting position of the reference search. If the maximum distance is exceeded, the axis is stopped and the error "Max. distance reference search" of bit 17 in register 170 "Error Positioning" is reported. Please also read chapter 11 "Referencing", page 137. 156 Jetter AG JetMove 2xx at the JetControl 11.15 Register Description Register 168: Home Position - Distance Function Description Read As-is distance Write New distance Amplifier status No specific status Takes effect Next referencing Variable type float Value range Float limits [°] or [mm] (the unit depends on the setting of the axis type) Value following a reset 0 [°] Here, the distance between the virtual normal position and the found reference position is specified. After a successfully completed reference run, the axis is to come to a standstill at the home, respectively normal position. By "distance", the space is specified, which the axis, after having got to the reference position, still has to cover in order to reach home position. Please also read chapter 11 "Referencing", page 137. Register 169: Home Position Function Description Read As-is position Write New position Amplifier status No specific status Takes effect Next referencing Variable type float Value range Float limits [°] or [mm] (the unit depends on the setting of the axis type) Value following a reset 0 [°] Here, the position is specified, which, at home position is to be set in register 109 as as-is position. After a successfully completed reference run, the axis comes to a standstill at the home position. For this, please also refer to the description of register 168 "Home Position - Distance". Please also read chapter 11 "Referencing", page 137. Jetter AG 157 11 Referencing JetWeb 158 Jetter AG JetMove 2xx at the JetControl 12.1 PtP-Positioning 12 Positioning 12.1 PtP-Positioning Ptp positioning stands for point-to-point positioning. Attention! In case of very small target speed values (< 100 °/s | mm/s) and very great as-is position values (> 100,000 °|mm, resp. < -100,000 °|mm), the as-is speed driven by the JetMove can be higher than the target speed value set by the user. The reason for this is internal floating point calculation. At internal floating point calculation, small target speed values are "absorbed" by great as-is position values. Because of this behavior, axis motion would not result, unless the JetMove itself incremented the target speed to a respective value depending on the as-is position. 12.2 Endless Positioning Attention! Endless positioning is only allowed, if the axis is set to modulo mode. Transition can be made from endless positioning to ptp-positioning Yet, it is not possible to make transition from a running ptp-positioning endless positioning. Command 57 "Reversing of endless positioning" does not consider the changes in the positioning parameters, such as speed, which have been made after starting the endless positioning. Jetter AG 159 12 Positioning JetWeb 12.3 Register Description Register 102: Target Position Function Description Read As-is target position Write New target position Amplifier status No specific status Takes effect At the next positioning run or at command 12 Variable type float Value range R183 ... R182 [°] or [mm]. The unit depends on the setting of the axis type. Value following a reset 0 [°] Here, the target position for the next point-to-point positioning is specified. Here, the point-to-point positioning can be either absolute or relative. The register can be written into during a positioning run. The target position is used at the following commands: • • • • • Command 10 "Starting an absolute positioning run" Command 11 "Starting an absolute positioning run related to time" Command 12 "Changing an absolute target position" Command 20 "Starting a relative positioning run" Command 22 "Changing a relative target position" Attention! Positioning is not started yet by writing into the target position. Only the respective command will cause the positioning run to be started. The target position of a positioning run that is already in process can be changed. In order to change the target position, the new target position must be written into the register; then, one of the following commands must be issued: 160 Jetter AG JetMove 2xx at the JetControl 12.3 Register Description Point-to-point positioning - absolute • Command 10 "Starting an absolute positioning run" The entire positioning is recalculated. New general conditions can change the behaviour, e.g. speed, of the new positioning run compared to the former one. • Command 11 "Starting an absolute positioning run related to time" The entire positioning is recalculated. New general conditions can change the behaviour, e.g. speed, of the new positioning run compared to the former one. • Command 12 "Changing an absolute target position" Positioning is only recalculated as far as it concerns the new target position. New general conditions will not be considered; speed, for example, remains unchanged. Point-to-point positioning - relative • Command 20 "Starting a relative positioning run" The entire positioning is recalculated. New general conditions can change the behavior, e.g. speed, of the new positioning run compared to the former one. • Command 22 "Changing a relative target position" Positioning is only recalculated as far as it concerns the new target position. New general conditions are not considered; speed, for example, remains unchanged. Leading over from endless to point-to-point positioning: • Command 10 "Starting an absolute positioning run" The entire positioning has to be recalculated. Yet, it is not possible for a running ptp positioning to be led over to endless positioning. Jetter AG 161 12 Positioning JetWeb Register 103: Target Speed Function Description Read As-is target speed Write New target speed Amplifier status No specific status Takes effect At the next positioning run or at command 13 Variable type float Value range >0 ... R184 [°/s] or [mm/s] (The unit is dependent on the axis type) Value following a reset 200 [°/s] Here, the target speed for all positioning runs, point-to-point positioning and endless positioning is specified. The register can be written into during a positioning run. The target speed is used at the following commands: • • • • Command 10 "Starting an absolute positioning run" Command 13 "Changing a speed" Command 20 "Starting a relative positioning run" Command 56 "Starting endless positioning" Attention! If, during a positioning run, a register is written into, the new target speed will not be of any effect, unless the respective command has been issued. The target speed of a positioning run that is already in process can be changed. For this purpose, the new target speed has to be written to the register, while command 13 "Changing a speed" has to be issued. Changing a target speed value is also considered, when, during a positioning run already in process, the following commands are given: • • • 162 Command 10 "Starting an absolute positioning run" Command 20 "Starting a relative positioning run" Command 56 "Starting endless positioning" This is only permitted, if the running positioning is an endless positioning; during a running point-to-point positioning, this command is not permitted to be issued. Jetter AG JetMove 2xx at the JetControl 12.3 Register Description Register 104: Positioning Time Function Description Read As-is positioning time Write New positioning time Amplifier status No specific status Takes effect Next positioning started by command 11 Variable type float Value range 0 ... 32,767 [s] Value following a reset 0 [s] Instead of issuing a speed via register 103, it is also possible to set a time for pointto-point positioning. Then, the speed results from the as-is position, the target position, the content of register 102, and the time set for this. The amplifier has the calculated speed written to R103 "Target Speed"; it is used at the following positioning run, if the contents of register 103 are not changed. Positioning related to time is started by issuing command 11 "Starting an absolute positioning run related to time". The target speed of a positioning run that is already in process can be changed. For this purpose, the new positioning time has ti be entered into the register, while command 11 has to be issued. It is insignificant, whether the positioning running at that moment has been started by issuing command 11 or not. Please mind, though, that the speed of the new positioning run can be different from the former one. A positioning run started by command 11 can be influenced and altered by changing the positioning parameters and by issuing the respective commands. Jetter AG 163 12 Positioning JetWeb Register 105: Acceleration Function Description Read As-is acceleration Write New acceleration Amplifier status No specific status Takes effect At the next positioning run or at issuing command 15 Value range 0 ... R180 [°/s²] or [mm/s²] (The unit is dependent on the axis type) Value following a reset 500 [°/s²] Here, the acceleration for individual positioning runs is specified. The acceleration value is used for starting a positioning run and for the change of speed during a positioning run. This means that, even if, during positioning, the speed is being decelerated, still the acceleration value is used for this deceleration. The deceleration value of register 106 is only used for deceleration when driving towards the target position, and for carrying out command 6 "Stop positioning (user ramp)". The target speed is used at the following commands: • • • • • Command 10 "Starting an absolute positioning run" Command 11 "Starting an absolute positioning run related to time" Command 15 "Changing an acceleration value" Command 20 "Starting a relative positioning run" Command 56 "Starting endless positioning" Attention! A low value results in a long ramp, while a great value results in a short ramp. Two ramp types can be selected for acceleration: • sine-square ramp (sine-square shaped speed profile) or • linear ramp (linear speed profile) The ramp type can be selected by means of register 140 "Ramp Type". The sinesquare ramp has been set as the default ramp type. A sine-square ramp guarantees a soft and jerk-free start. When driving a sine-square ramp, the specified value is reached while acceleration is still in process. If a linear ramp is driven, acceleration remains constant; there is linear speed increase during the entire acceleration process. 164 Jetter AG JetMove 2xx at the JetControl 12.3 Register Description In the illustration below, various settings for acceleration by sine-square ramp are shown. v in rpm 6,000 The set acceleration value is reached here 0 1,000 2,000 3,000 4,000 t in ms Fig. 33: Acceleration process The acceleration rate of a positioning run that is already in process can be changed. For this purpose, the new acceleration rate has to be written into the register, and command 15 "Changing a speed" has to be issued. Yet, this change does not take effect on the as-is acceleration ramp, but on the ramp that is to follow. Changing an acceleration value is also considered, when, during a positioning run already in process, the following commands are given: • • • • Jetter AG Command 10 "Starting an absolute positioning run" Command 11 "Starting an absolute positioning run regarding time" Command 20 "Starting a relative positioning run" Command 56 "Starting endless positioning" This is only permitted, if the running positioning is an endless positioning; during a running point-to-point positioning, this command is not permitted to be issued. 165 12 Positioning JetWeb Register 106: Deceleration Function Description Read As-is delay Write New delay Amplifier status No specific status Takes effect At the next positioning run or at issuing command 16 Variable type float Value range 0 ... R180 [°/s²] or [mm/s²] (The unit is dependent on the axis type) Value following a reset 500 [°/s²] Here, the deceleration rate when driving towards the target for positioning runs is specified. The deceleration value is only used for decelerated driving towards the target position and for carrying out command 6 "Stop positioning (user ramp)". For a change of speed during positioning, the acceleration value specified in register 105 will be used. This means that, even if, during positioning, the speed is being decelerated, still the acceleration value is used for this deceleration. The deceleration for driving towards the target is used at the following commands: • • • • • Command 6 "Stop positioning (user ramp)" Command 10 "Starting an absolute positioning run regarding time" Command 11 "Starting an absolute positioning run related to time" Command 16 "Changing a deceleration value" Command 20 "Starting a relative positioning run" Attention! A low value results in a long ramp, while a great value results in a short ramp. Two ramp types can be selected for deceleration when driving towards the target: • sine-square ramp (sine-square shaped deceleration profile) or • linear ramp (sine-square shaped speed profile) The ramp type can be selected by means of R140 "Ramp Type". The sine-square ramp has been set as the default ramp type. A sine-square ramp guarantees soft and jerk-free deceleration. When driving a sinesquare ramp, the specified value will be reached in the middle of the deceleration process. 166 Jetter AG JetMove 2xx at the JetControl 12.3 Register Description When driving a linear ramp, the deceleration when driving towards the target (not the deceleration profile) has got a sine-square-shaped speed profile. This way, soft and jerk-free deceleration will be guaranteed as well. When driving a sine-square ramp, the specified value will also be reached in the middle of the deceleration process. In the illustration below, various settings for deceleration by sine-square ramp when driving towards the target will be shown. v in rpm 6,000 The set deceleration value is reached here 0 1,000 0 2,000 3,000 4,000 t in ms Fig. 34: Deceleration process when driving towards the target Register 107: Target Window Function Description Read As-is destination window Write New destination window Amplifier status No specific status Takes effect At the next positioning run or after changing the target position Variable type float Value range 0 ... Positive float limit [°] or [mm] (the unit depends on the setting of the axis type) Value following a reset 1 [°] Here, the destination window for the target area of a point-to-point positioning can be set. If, after positioning, the axis has reached the destination window, bit 2 "Destination window" will be set in R100 "Status". The bit will not be reset, unless a new positioning (point-to-point positioning or endless positioning) has been started. Jetter AG 167 12 Positioning JetWeb Destination window 5 mm around target position 100 mm 95 100 105 s in mm Fig. 35: Example of a destination window Attention! If a point-to-point positioning is stopped before the axis has reached the destination window, the destination window bit will not be set. In this case, bit 1 "Stopped" can be used in R100 "Status". Faster program flow can be achieved by using the destination window range. The program can be continued, as soon as the axis has reached the destination window. The general progression condition in the PLC program would be as follows: #Include „JM2xxReg32.stp" Var JM_Axis :JM_2XX At %VL 12000; End_Var; ... JM_Axis.MC_fm_PosProg := 90000; // JM2xx RegisterInterface // Axis declaration // // JM_Axis.JM_nm_Cmd :=cn_Cmd_StartPosAbs; // Target position 90000 (° or mm) Start ptp-positioning When Bit_Clear (JM_Axis.JM_nm_State, cb_Status_Busy) Continue; When Bit_Set (JM_Axis.JM_nm_State, cb_Status_DestiWindow) Continue; ... Wait for busy-bit to be reset Wait for dest. window bit to be set // // // // Difference between destination window bit and "Stopped" bit The destination window bit is set, as soon as the as-is position of the axis has reached the destination window. The "Stopped" bit will be set, as soon as the internal set position (not the as-is position) has reached the target position. The settings of the destination window take no effect on the "Stopped" bit. 168 Jetter AG JetMove 2xx at the JetControl 12.3 Register Description Register 109: As-is Position Function Description Read As-is Position Write Illegal Variable type float Value range R183 ... R182 [°] or [mm]. The unit depends on the setting of the axis type. Value following a reset 0 [°] From here, the as-is axis position can be read out. This parameter is often used as a progression condition. Example: ... WHEN REG rmActPosition > 10000 THEN OUT 101 ... // // // // Wait, until the as-is pos. is greater than 10000 (° or mm) Set output 101 If the axis has not been set to modulo mode in register 192 "Modulo Axis", the as-is position will not exceed the travel range, which has been set via register 182 "Travel Range Limit Positive" and register 183 "Travel Range Limit Negative". Neither will there be an overflow. At the limits of the travel range, the axis will be stopped automatically. Endless positioning is not permitted here. If the axis has been set to modulo mode in register 192 "Modulo Axis", there will be an overflow of the as-is position, when the travel range limits have been exceeded; the as-is position will be continued at the value of the other travel range limit. The axis will continue travelling as before. Endless positioning is only permitted for a modulo axis. Jetter AG 169 12 Positioning JetWeb Register 129: As-is Speed Function Description Read As-is mechanical speed Write Illegal Variable type float Value range -R184 ... R184 [°/s] or [mm/s] (The unit is dependent on the axis type) Value following a reset 0 [°/s] From here, the as-is axis speed can be read out. Register 135: Modulo Turns Function Description Read Present modulo turns (dependent on direction) Write Illegal Variable type int / register Value range - 2,147,483,648 ... 2,147,483,647 Value following a reset 0 This register reports the number of modulo runs having been carried out up to this instance during ptp positioning or endless positioning. Register 140: Ramp Type Function Description Read As-is ramp type Write New ramp type Amplifier status No specific status Takes effect At the next positioning run Variable type int / register Value range 0, 1 Value following a reset 1 Here, the ramp type will be set for all positioning runs. The ramp type will only be considered when a new positioning run is started; then, it will be valid during the entire positioning process. 170 Jetter AG JetMove 2xx at the JetControl 12.3 Register Description Meaning of the values: 0 : Linear ramps 1 : Sine2 ramps Register 141: Positioning Mode Function Description Read As-is positioning mode Write New positioning mode Amplifier status No specific status Takes effect At the next positioning run or after changing the target position Variable type int / register Value range 1 ... 4 Value following a reset 1 The following only applies to modulo axis: Here it is specified, from which direction the target position is to be approached. Meaning of the values: 1 : Absolute The axis will never exceed the travel range; it can be operated and positioned like a standard axis 2 : Modulo positive The axis will always approach the target position from positive direction 3 : Modulo negative The axis will always approach the target position from negative direction 4 : Modulo auto The axis always approaches the target position over the shortest possible distance Jetter AG 171 12 Positioning JetWeb Register 142: Moving Direction Function Description Read As-is direction of motion Write New direction of motion Amplifier status No specific status Takes effect When the next endless positioning is started Variable type int / register Value range 0, 1 Value following a reset 0 This only applies to an endless positioning run: Here, the direction of motion is specified for an endless positioning run. Meaning of the values: 0 : Positive direction 1 : Negative direction Register 143: Basic Type Function Description Read As-is basic type Write New basic type Amplifier status No specific status Takes effect When the next relative positioning run is started, or when the target position of a relative positioning is changed Variable type int / register Value range 0, 1 Value following a reset 0 This only applies to relative positioning: Here, the basic position (the position, in relation to which values are counted further) is specified for the next relative positioning run. Meaning of the values: 172 0 : Latest target position 1 : As-is position Jetter AG JetMove 2xx at the JetControl 12.3 Register Description Register 149: Absolute Target Position Function Description Read Latest absolute target position Write Illegal Amplifier status No specific status Variable type float Value range R183 ... R182 [°] or [mm]. The unit depends on the setting of the axis type. Value following a reset 0 [°] From here, the absolute target position of the latest ptp positioning can be read. This register is for keeping the absolute ratio at relative positioning. Note! At positioning several modulo travel ranges, the absolute target position and the number of travel ranges are displayed. Each time the travel range limit has been passed, the register value is decremented by the respective travel range value. Jetter AG 173 12 Positioning JetWeb 174 Jetter AG JetMove 2xx at the JetControl 13.1 Introduction 13 Technological Functions 13.1 Introduction Introduction A relatively common task in industrial automation is the coupling of axes to achieve a coordinated motion. So-called "Technological Functions" serve for this purpose. Definition Technological Function A technological function is a motion function encomprising several individual axes bein interdependent within an either continuous or temporary leading/following constellation. A technological function encomprises one leading axis and one or more following axes. In this function, the motion of the following axes depending on the motion of the leading axis, is set for any point in time. A technological function describes the motion sequence of each axis involved. This way, the motion of the following axes depending on the motion of the leading axis, is set for any point in time. This means it defines for any point in time, whether and in which way the following axis is coupled with the leading axis, or whether if uncoupled - it makes an independent positioning run or does not move at all. Examples The following functions are technological functions: • • • • • Electronic gearing Cam disc Flying saw Cross cutter Winding by means of traversing axis and spindle Examples of NonTechnological Functions Special Functions Other than technological functions, special functions refer to one single axis only. Special functions are, for example: Technological Functions Realized by JetMove The JetMove has got a function range corresponding to technological functions. • • • Referencing on the fly Position capture PID controller In order to establish a technological function, one or more so-called technology groups have to be configured first. This does not only concern configuring a JetMove 2xx, but also other JetMoves and/or modules. For axis coupling that is required within a technological function, a JetMove offers the following two coupling modes: • • Jetter AG Coupling mode Electronic Gearing Coupling mode Table 175 13 Technological Functions 13.2 In this Chapter JetWeb Overview The chapter Technological Functions contains any information the user needs for establishing technological functions by means of the JetMove. In the first sub-chapters, the user is informed of what is essential for configuring technology groups and how to carry out these configurations. Take the following three steps for configuring technology groups: • • • Configuring the synchronizing procedure Configuring the communication within the group Configuring the coupling mode In the sub-chapters, in which the coupling modes have been described, we have described extensively, how a JetMove is operated in the respective coupling mode. At the end of this chapter, the Virtual Position Counter is described, which can function as a leading axis. Besides the functions, configuring and operating the Virtual Position Counter are described. Technologcal Function: Flying Saw For establishing a technological function Flying saw by means of JetMoves, there are two additional Application Notes: • • Flying Saw - Axes, general, APN 037 Flying Saw - Axes, JM-2xx, APN 038 These Application Notes provide general and special procedures for realizing a Flying saw technological function. Structure of this Chapter The chapter Technological Functions consists of the following sub-chapters: Subchapter 176 Page Configuring a Technology Group page 177 Configuring Synchronizing via System Bus page 184 Configuring Communication within the Group page 189 Introduction to Coupling Modes page 216 Configuring and Carrying Out the Electronic Gearing Coupling Mode page 224 Function Range and Behavior of the Table Coupling Mode page 239 Configuring the Table Coupling Mode page 264 Carrying out the Table Coupling Mode page 277 Virtual Position Counter page 299 Jetter AG JetMove 2xx at the JetControl 13.3 13.3 Configuring a Technology Group Configuring a Technology Group 13.3.1 Overview Introduction A technological function is realized by configuring one or several technology groups. This sub-chapter describes how a technology group is configured and provides respective know-how. What is a Technology Group? Definition of "Technology Group": • A group of individual axes functioning permanently or only temporarily in a leading, respectively following relationship. Constituents of a Technology Group: • • one leading axis and one or several following axes. The following definitions have to be made for a technology group: • • • In this Chapter Which is the leading axis? Which are the following axes relating to this leading axis? Which is the coupling mode between the individual following axes and the leading axis? The sub-chapter "Configuring a Technology Group" deals with the following topics: Topic Jetter AG Page Which Modules can be Used as Leading and Following Axis page 178 Layout of a Technology Group page 179 Several Technology Groups at One System Bus page 181 Configuring a Technology Group page 183 177 13 Technological Functions JetWeb 13.3.2 Which modules can be used as leading and following axis Introduction Please read below, • • Leading Axes which modules can be used as leading axes, and which modules can be used as following axes. The following table illustrates which modules can be used as leading axes: Leading Axis Module Virtual Position Counter Description JetMove All JetMoves (JM-105, JM-2xx, JM-D203), except for JM-6xx 2. encoder at the JetMove Only JM-2xx with integrated counter card JX2-CNT1 JX2 counter module Virtual Position Counter Special function of a JetMove The Virtual Position Counter is a special function of a JetMove which generates a leading axis position. The JetMove in which the Virtual Position Counter is active, uses this leading position for controlling its own axis as if it were the leading axis position of an external leading axis (e.g. JetMove or JX2-CNT1). This way, in JetMove, leading and following axis have been united. The own axis is called internal following axis. It has got the same range of characteristics and functions as has a following axis which is influenced by an external leading axis position. The leading axis position specified by the virtual position counter can also be output to the system bus as a leading axis value for external following axes. This way, the JetMove, in which the special function is active, also takes over the leading axis function for external following axes. Following Axes The following table illustrates which modules can be used for following axes: Following Axis Module JetMove 178 Description All JetMoves (JM-105, JM-2xx, JM-D203), except for JM-6xx Jetter AG JetMove 2xx at the JetControl 13.3 Configuring a Technology Group 13.3.3 Arrangement of a technology group Introduction For each leading axis module, a sample arrangement is demonstrated below. Sample Arrangement with Leading Axis Module JetMove In this sample arrangement, four JM-2xx have been connected to a controller of the JC-246 type: • Three JM-2xx belong to a technology group, by which synchronous motion of three conveyor belts is to be realized. • The fourth JM-2xx is operated as an individual axis, in order to load one of the three conveyor belts during standstill. The following illustration shows the sample arrangement. JM-206 System bus Following axis Leading axis value JC-246 Controller JM-203 JM-215 Following axis Leading axis Individual axis Technology group 1 JM-203 Sample Arrangement with Leading Axis Module JX2-CNT1 Jetter AG In this sample arrangement, one JM-203 and two JX2-CNT1 are connected to a controller of the type JC-246: • The JM-203 and one JX2-CNT1 belong to a technology group. The JX2-CNT1 is a leading axis for the JM-203 in this case. • The second JX2-CNT1 is applied as a workpiece counter. This is a sample arrangement for realizing a Flying saw function. The following illustration shows the sample arrangement. 179 13 Technological Functions JetWeb System bus Leading axis value JC-246 Controller JM-203 JX2CNT1 Following axis Leading axis Technology group 1 Sample Arrangement with Leading Axis Module Virtual Position Counter JX2CNT1 Part counter In this sample arrangement, three JM-2xx have been connected to a controller of the JC-246 type. This sample arrangement consists of two technology groups: • A JM-203 is the first technology group by itself. By this JetMove, a cam disc is realized by means of the Virtual Position Counter. The Virtual Position Counter is used as a timer setting the time a complete cam disc rotation is to take. In this case, the Virtual Position Counter is started via an external sensor. • The two other JetMoves are combined to serve as the second technology group. By this technology group, two cam discs are realized. These are also moved by means of the Virtual Position Counter. The JM-215 functions as leading axis for the second JetMove. It outputs the position given by the Virtual Position Counter to the system bus. The following illustration shows the sample arrangement. JM-206 System bus Following axis JC-246 Leading axis value Technology group 1 Controller Technology group 2 JM-203 Following axis & Leading axis: Virtual Position Counter 180 JM-215 Following axis & Leading axis: Virtual Position Counter Jetter AG JetMove 2xx at the JetControl 13.3 Configuring a Technology Group 13.3.4 Several technology groups in one system bus Introduction As has already been shown in the sample arrangement with the Virtual Position Counter, it is possible to configure several technology groups in one system bus. Sample Arrangement In the following illustration shows a sample arrangement with two technology groups. Technology group 1 realizes an electronic gearing, for example, move assembly lines for placing bottles on a belt, while technology group 2 takes over screwing the bottles. JM-206 System bus Following axis Separate leading axis value JM-206 Following axis Technology group 2 JC-246 Controller JM-203 Following axis JM-215 Leading axis JM-203 Leading axis Technology group 1 Coupled Technology Groups There is also a way to couple several technology groups. Technology groups are coupled when the leading axis of one technology group moves in dependance from the leading axis on the other technology group. This behavior is achieved by configuring the leading axis of the subordinate technology group to be the following axis relating to the leading axis of the superordinated technology group. This configuration is applied, for example, to processes requiring a technology group moving independently at one time and moving in relation to another one by being coupled with it. This way, you are spared frequent reconfiguring. The following illustration shows a sample arrangement with coupled technology groups. Jetter AG 181 13 Technological Functions JetWeb Technology group 1 System bus JM-206 Following axis JM-206 Individual leading axis values JC-246 Controller Rules for Configuring Several Correlating Technology Groups 182 Following axis Technology group 2 JM-203 JM-215 Following axis Leading axis JM-203 Following axis Leading axis At configuring several technology groups in one system bus, the following rules have to be kept to: • • At a system bus, only one JX2-CNT1 may be used as a leading axis. At a system bus, two modules as a maximum can be configured as a leading axis that outputs its leading axis value to the system bus. Jetter AG JetMove 2xx at the JetControl 13.3 Configuring a Technology Group 13.3.5 Configuration of a technology group Introduction Configuration Steps, Case 1 At configuring a technology group, two different cases can occur. The second case is rare, though. • 1. Case: In the system bus, there is at least one technology group which is made up of at least two modules, e.g. JX2-CNT1 as a leading axis and JetMove as a following axis. • 2. Case: In the system bus, there is only one technology group which is made up of one JetMove being supplied with leading axis positions by either special function Virtual Position Counter or by its second encoder (an intergrated counter board has to be available). The following table shows the steps to be taken for configuring case 1 of a technology group. Step 1 Action Configuring the synchronizing procedure Page page 184 Note: Synchronizing is configured only once. If a technology group has already been configured, this step is left out. Configuration Steps, Case 1 2 Configuring the group communication for leading and following axis of any technology group page 189 3 Configuring the coupling mode for all following axes page 216 The following table shows the steps to be taken for configuring case 2 of a technology group. Step 1 Action • Configuring the communication of the group with Virtual Position Counter without external following axes or • 2 Jetter AG Page page 204 resp. Configuring the communication of the group with second encoder Configuring the coupling mode of the JetMove page 206 page 216 183 13 Technological Functions 13.4 JetWeb Configuring Synchronizing via System Bus 13.4.1 Overview Introduction For synchronizing axis motion, the JetMoves involved have to be synchronized accordingly as regards time. This means synchronizing is necessary. Please read below how synchronizing is configured and what kind of information is needed. How to Synchronize The JetMoves involved are synchronized by a synchronizing pulse. The synchronizing pulse is output to the system bus in cyclic manner by the module setting the pulse. Synchronizing Terms The following two terms are relevant for synchronizing: • • Time-Master Time-Master Time-Slave The module that outputs the synchronizing pulse is called time-master. The timemaster synchronizes all JetMoves at the system bus to its own pulse that are to be used for technological functions. As time-master, either a JetMove, or a JX2-CNT1 (as of firmware version 2.11) can be used. Time-Slave A JetMove synchronizing its internal pulse to the synchronizing pulse is called a time-slave. In this Chapter The subchapter "Configuring Synchronizing" deals with the following topics: Topic 184 Page Sample Configuration page 185 Configuring the synchronizing procedure page 186 Register Description page 188 Jetter AG JetMove 2xx at the JetControl 13.4 Configuring Synchronizing via System Bus 13.4.2 Sample configuration Description In this sample configuration, three JM-2xx have been connected to a controller of the JC-246 type. The sample configuration solves the following axis tasks: • • • Configuration Scheme Technology group 1: Realizing an electronic gearing with three JM-2xx Technology group 2: Realizing a cam disc with two JM-2xx One individual axis with one JM-203 The following illustration shows the scheme of the sample configuration. JM-206 System bus JM-206 Synchronized pulse Time slave Time slave Technology group 2 JC-246 Controller JM-203 Time slave JM-215 JM-203 Time master Time slave Technology group 1 JM-203 What does the Illustration Mean The following statements are based on the illustration: • • • Jetter AG Individual axis The time-master synchronizes all JM-2xx at the system bus independent from which technology group they belong to. There is only one time-master for the entire system bus. The individual axis which is not part of a technology group need not be assigned a synchronizing pulse. 185 13 Technological Functions JetWeb 13.4.3 Configuring the synchronizing procedure Introduction For configuring the synchronizing procedure, the JetMoves being involved in a technological function have to be configured as a time-master, respectively timeslave following distinct rules. Configuration Rules For fault-free synchronizing, the following rules have to be considered: • • Register Overview At the system bus, only one module is permitted to be configured as a timemaster. Only the JetMoves being involved in a technological functions have to be considered for synchronizing. Any JetMove can be configured in a way that it is either time-master or time-slave. For this, the following registers are available: Register Name Brief Description R150 Time Mode Output setting of the synchronizing pulse: 0 = do not output a synchronizing pulse 1 = output a synchronizing pulse R531 Source of Synchronizing Signal Selecting the source of the synchronizing signal: 1 = System bus 2 = Ethernet R537 Synchronizing Controller Frequency Frequency of the synchronizing controller in [Hz] for checking the configuration procedure of synchronizing Configuration One of the following tables shows the steps to be taken for configuring the synchronizing procedure completely. Which table you select depends on whether you apply one technology group with the leading axis module JX2-CNT1 at the system bus or not. With JX2-CNT1 Technology group with leading axis module JX2-CNT1 at the system bus: 186 Step Action 1 Configuring the JX2-CNT1 as leading axis. Note: The configuration of the JX2-CNT1 as a leading axis automatically causes the JX2-CNT one to become the time-master as well. This configuration has been described in the JX2-CNT1 user manual. 2 Configuring any other JetMove being involved in a technology group as time-slave. Action: Writing the following values to R150 Time Mode and R531 Source of Synchronizing in these JetMoves: R150 := 0 R531 := 1 Jetter AG JetMove 2xx at the JetControl 3 13.4 Configuring Synchronizing via System Bus Delay of 500 ms The reason: Synchronizing parameters have to be coordinated 4 Checking the synchronizing controller in all time-slaves for correct functioning. Action: R537 has to contain a value range between 400 and 500 Hz. If these values do not occur: Check, if the modules can be addressed by the controller, and if the correct values have been written to the respective registers. Without JX2-CNT1 Technology group without leading axis module JX2-CNT1 at the system bus: Step 1 Action Selecting and configuring any JetMove that is to be the time-master. Action: Writing the following values to R150 Time Mode and R531 Source of Synchronizing in this JetMove: R150 := 1 R531 := 1 2 Configuring any other JetMove being involved in a technology group as time-slave. Action: Writing the following values to R150 Time Mode and R531 Source of Synchronizing in these JetMoves: R150 := 0 R531 := 1 3 Delay of 500 ms The reason: Synchronizing parameters have to be coordinated 4 Checking the synchronizing controller in all time-slaves for correct functioning. Action: R537 has to contain a value range between 400 and 500 Hz. If these values do not occur: Check, if the modules can be addressed by the controller, and if the correct values have been written to the respective registers. Jetter AG 187 13 Technological Functions JetWeb 13.4.4 Description of registers. Register 150: Time Mode Function Description Read As-is time mode of the system bus Write Set time mode of the system bus Amplifier status No specific status Takes effect Immediately Variable type int / register Value range 0: The JetMove is the time-slave 1: The JetMove is the time-master Value after reset 0 (the JetMove is the time-slave) Register 531: Source Synchronizing Signal Function Description Read As-is source of synchronizing signal Write Set source of synchronizing signal Amplifier status No specific status Takes effect Immediately Variable type int / register Value range 1 = Synchronizing the JetMove via system bus 2 = Synchronizing the JetMove via Ethernet Value after reset 1 = if an Ethernet interface has not been recognized 2 = if an Ethernet interface has been recognized Register 537: Frequency of the Synchronizing Controller Function 188 Description Read As-is frequency Write Illegal Variable type int / register Value range 0 ... 500 [Hz] Value after reset 0 [Hz] Jetter AG JetMove 2xx at the JetControl 13.5 13.5 Configuring Communication Within the Group Configuring Communication Within the Group 13.5.1 Overview Introduction The communication within the group provides the following axes of a technology group with the essential leading values of the leading axis. For each technology group, communication has to be configured. Configuration Take the following steps to configure communication within the group: Step Action 1 The leading axis of a technology group has to be caused to output the leading values to the system bus. Exception: If the Virtual Position Counter is applied which only functions as leading axis for the internal following axis, the leading axis value is not output to the system bus. 2 The following axes of a technology group have to be got to adapt the leading values of their leading axis and to standardize them accordingly. Combination of Leading and Following Axes Because of the possible leading axis modules, the following combinations of leading and following axes result for the technology groups: • JetMove with JetMoves • JX2-CNT1 with JetMoves • Virtual position counter with external following axes • Virtual position counter without external following axes • JetMove with second encoder (in this case, it does not matter whether with or without external following axes) The configuration of each of these combinations has been described in this subchapter. In this Chapter The subchapter "Configuring the Technology Group" deals with the following topics: Topic Jetter AG Page Configuration with leading axis module JetMove page 190 Arrangement with leading axis module JX2-CNT1 page 194 Configuration with Virtual Position Counter and ext. following axes page 199 Configuration with Virtual Position Counter, without external following axes page 204 Configuration with second encoder being the leading axis page 206 Register description page 210 189 13 Technological Functions JetWeb 13.5.2 Configuration with leading axis module JetMove Introduction The technology group communication between leading and following axes is configured by the leading axis module JetMove. This is described below. Register Overview The following registers are available for configuring the leading and following axis. Register Name Brief Description Registers of the Leading Axis R151 Transmit Mode Activating / Deactivating the leading axis value output Registers of the Following Axis Function Plan R152 Receive Mode Activating / Deactivating the leading axis value reception R158 Maximum Leading Axis Position Leading axis position max. R159 Minimum Leading Axis Position Leading axis position min. R188 Leading Axis Position As-is leading axis position R189 Leading Axis Speed As-is leading axis speed The following function plan illustrates both the register functions and the default register values needed for configuration. Leading Axis - JetMove Transmit mode Transmitting deactivated Following Axis - JetMove R151 0 R152 0 Receiving deactivated 0 R109 - As-is position R130 - Position setpoint 101 104 Leading axis of no. 2 R109 - As-is position R130 - Position setpoint 0 Leading axis of no. 1 201 204 System bus Leading axis of no. 1 R109 - As-is position R130 - Position setpoint 101 104 Receive mode Max. leading axis position R158 100000 R188 Speed processing Leading axis of no. 2 R109 - As-is position R130 - Position setpoint 201 204 R159 -100000 Min. leading axis position 190 Leading axis position R189 Leading axis speed Jetter AG JetMove 2xx at the JetControl Description of the Function Plan 13.5 Configuring Communication Within the Group The transmit mode, R151, functions like a switch determining by which leading axis number the leading axis transmits which axis leading type to the system bus. The receive mode, R152, also functions like a switch determining from which leading axis the following axis is to receive the leading axis value from the system bus, and which leading axis value type it is. The value of the transmit mode, R151, and the value of the receive mode, R152, have got data format yxx: y = leading axis number (1 or 2), xx = leading value type (as-is position = 01 or set position value = 04). The leading axis position range of the following axis set by R158 and R159 determines the value range for the leading axis position, R188. The leading axis position has got modulo behavior. This means if it passes the limit at R158 or R159, it will continue at the opposite side. The leading axis speed, R189, is calculated out of the leading axis position. The following rules have to be considered for configuration: • • The following illustration shows how the leading axis position range is determined. Here, the leading axis has got a travel range 0° to 360°. It has been configured as a modulo axis. Leading axis 360 R182 R158 ° 360 315 315 270 270 180 225 R109 = R188 180 135 135 90 90 45 0 Jetter AG Following axis 225 Modulo Leading axis travel range ° 45 R183 R159 Leading axis position in the folowing axis range Determinating the Leading Axis Position The receive mode of the following axis has to have the same value as has the transmit mode of the leading axis. The leading axis position range in the following axis has to be set in a way that exactly corresponds to the travel range of the leading axis (R182 Positive Travel Limit and R183 Negative Travel Limit). Modulo Configuration Rules 0 191 13 Technological Functions Configuration Steps of the Leading Axis JetWeb The following steps have to be carried out for configuring the leading axis. Step 1 Action Deactivating the transmit function Action: Write value 0 to R151 Transmit Mode of the leading axis. Result: This way, the transmit function can be re-configured. Even the previously active transmit function is deactivated now. 2 Setting the transmit mode Action: Write a free leading axis number and the leading axis value type "as-is position" (y01) or "set position" (y04) to R151 Transmit Mode of the leading axis. Result: The leading axis transmits values to the system bus together with the respective leading axis number and leading axis value type. Configuration Steps of the Following Axis The following steps have to be carried out for configuring the following axis. Step 1 Action Deactivating the receive function Action: Write value 0 to R152 Receive Mode of the following axis. Result: This way, re-configuring is achieved. 2 Set the leading axis position range in the following axis by the values of the leading axis travel limits Action: Write the value of leading axis register 183 Travel Limit Negative to R159 Minimum Leading Axis Position of the following axis. Following the same procedure, write the value of R182 Travel Limit Positive to R158 Maximum Leading Axis Position. Important: After writing to R159 and R158, wait for resetting the busybit. 192 Jetter AG JetMove 2xx at the JetControl 13.5 Configuring Communication Within the Group Step 3 Action Setting the receive mode Action: Write the value of leading axis register 151 Transmit Mode to R152 Receive Mode of the following axis. Result: The following axis activates the receive function. The leading axis position specifies the as-is position (R109), respectively the set position (R130) of the leading axis, depending the leading value type of the leading axis. 4 Carry out this step at the very first commissioning of a technology group: Checking the Communication of the Technology Group Action: At turning, respectively reversing, the leading axis, the values of R188 Position Leading Axis and R189 Speed Leading Axis of the following axis are changed. These registers have to report realistic values. Notes on the registers: The position of the leading axis (R188) is in a 1:1 ratio to the as-is position (R109) or to the set position value (R130) of the leading axis. These values depend on the leading value type reported by the leading axis. The speed value of the leading axis (R189) is made up of the difference between the leading axis positions within one second. Thus, it corresponds to the speed reported by the leading axis in R129. Jetter AG 193 13 Technological Functions JetWeb 13.5.3 Configuration with leading axis module JX2-CNT1 Introduction The technology group communication between leading and following axes is configured by the leading axis module JX2-CNT1. This is described below. None Configurating the Leading Axis The configuration of the technology group communication for the JX2-CNT1 has already been carried out at configuring the synchronizing process. For synchronizing, the JX2-CNT1 has already been configured as a leading axis. Register Overview The following registers serve for configuring the following axis: Register Name Brief Description Registers of the Following Axis 194 R152 Receive Mode Activating / Deactivating the leading axis value reception R155 Counting Range JX2-CNT1 Position range of the JX2-CNT1 This is important when using an SSI encoder. R157 Master Position Factor Position of the leading axis Conversion factor of the increments to °, respectively mm R551 Speed Feed Forward T1 Filter time for the speed calculated by the JetMove out of the position values transmitted by the JX2-CNT1 R158 Maximum Leading Axis Position Leading axis position max. R159 Minimum Leading Axis Position Leading axis position min. R188 Leading Axis Position As-is leading axis position R189 Leading Axis Speed As-is leading axis speed Jetter AG JetMove 2xx at the JetControl Function Plan 13.5 Configuring Communication Within the Group The following function plan illustrates both the register functions and the default register, respectively virtual output values needed for configuration. Following Axis - JetMove Leading Axis - JX2-CNT1 Count value R3xx0 Modus 1: JX2-SV1, CAN-DIMA Modus 2: JetMove R3xx5 0 0 1 1 R3xx3 Status / Controller Leading axis number Description of the Function Plan R152 0 Oxx03 System bus Master position output X R155 16777216 Receiving deactivated 0 JX2-CNT1 y02 Receive mode Max. leading axis position R158 100000 R188 Speed processing R157 1.0 Standardizing Counting range factor of the leading axis JX2-CNT1 position Leading axis position R159 -100000 R189 Leading axis speed Min. leading axis position In the JX2-CNT1, bit R3xx3.14 determines the leading-following mode, by which the JX2-CNT1 processes the count value. For the leading-following mode 2 operation by JetMoves - the value of R3xx5 determines the leading axis number added by the JX2-CNT1 to the count value to be reported. Via the virtual output 0xx3, the output of the count value to the system bus is activated, respectively deactivated. At receiving the count value, the following axis determines a leading axis position. For this purpose, the following axis requires the count value range of R155, and the master position factor R157. The count range provides information on the overflow behavior of the count value. The master position factor, though, sets the standardizing of increments to one of the two mechanic reference variables, which are degrees, respectively millimeters. The receive mode, R152 of the following axis, also functions like a switch determining from which leading axis the following axis is to receive the leading axis value, and which leading value type it is. The receive mode R152 has got the data format yxx: y = leading axis number (1 or 2), xx = leading axis value type. In order to receive the leading axis value from a JX2-CNT1, leading axis value type 02 has to be specified. The leading axis position range of the following axis set by R158 and R159 determines the value range for the leading axis position, R188. The leading axis position has got modulo behavior. This means if it passes the limit at R158 or R159, it will continue at the opposite side. The leading axis speed, R189, is calculated out of the leading axis position. Standardizing the Leading Axis Position The JX2-CNT1 transmits the counter value in the shape of encoder increments to the following axis. In order to standardize the encoder elements of the following axis to mechanic units (mm or °), the master position factor (R157) is applied. The master position factor, in this case, specifies the ratio between the encoder increments and the mechanic unit. Jetter AG 195 13 Technological Functions Example of Standardizing JetWeb Example of Standardizing: An incremental encoder has been mounted to a mechanic cam disc. The pulse number is 2,500 per revolution. The following axis is to carry out a motion depending on the cam disc. With the following axis, the leading position is to be used in the unit of degrees. The "Master-Position-Factor" is calculated as follows: Leading axis "Master" position factor = 360° / encoder resolution [increments] Leading axis ("Master") position factor" = 360° / (4 * 2,500 [increments]) = 0360 [° / increments] Note: Because of evaluating the incremental encoder four times, the value of the encoder resolution is the pulse number times four. Below, this example is illustrated. R157 R3xx0 R158 = 360 ° R188 R159 = 0 ° Leading axis - Positioning range Following axis Pos. = 360 ° Inc. = 2500 JX2-CNT1- Counting range Leading axis JX2-CNT1 Setting the Leading Axis Position Range In the following axis, the master position range of the leading axis module JX2CNT1 can be user-defined by means of the maximum leading axis position (R158) and the minimum leading axis position (R159). Filtering the Leading Axis Speed The leading axis speed value (R188) is taken over as speed pre-control value by the position controller. Low leading axis speeds and / or low encoder resolution at the JX2-CNT1 can lead to irregular behavior of the following axis. To prevent this, the speed pre-control value can be filtered. For this, the respective delay time hasto be set in R551 Speed Pre-Control T1. Configuration Steps The following steps have to be carried out for configuring the following axis. Step 1 Action Deactivating the receive function Action: Write value 0 to R152 Receive Mode of the following axis. Result: By this, receiving is disabled, so a new configuration can be made. 196 Jetter AG JetMove 2xx at the JetControl 13.5 Configuring Communication Within the Group Step Action 2 Only carry out this action, if an SSI-encoder has been connected to the JX2-CNT1 which has got a resolution of less than 24 bits (less than 4096 x 4096): Setting the Counting Range of the JX2-CNT1 Action: Write the counting range of the SSI encoder to R155 Counting Range JX2-CNT1 of the following axis. Important: After writing to R155, wait for resetting the busy-bit. Example: SSI encoder of 12 bits: R155 = 4096 3 Setting the master position factor Action: Write the respective master position factor to R157 Master Position Factor of the following axis. Important: After writing to R157, wait for resetting the busy-bit. 4 Setting the leading axis position range Action: Write both maximum and minimum leading axis position to R159 Minimum Leading Axis Position and R158 Maximum Leading Axis Position of the following axis. Important: After writing to R158 and R159, wait for the busy-bit to be reset. 5 Setting the delay time for speed pre-control (this is only required in case of low leading axis speed, respectively low encoder resolution values) Action: Write the respective delay value to R551 Speed Pre-Control T1. Note: The optimum delay time has to be determined empirically during commissioning. Action: Set R551 = 0 and increment, respectively decrement, the value in steps of 2 ms, until the behavior of the following axis is satisfactory. 6 Setting the receive mode Action: Write value 102 or 202, depending on the leading axis number of the JX2-CNT1, to R152 Receive Mode. Result: The following axis activates receiving, while the leading position is automatically set to the middle of the leading position range, e.g. leading position range from - 10,000 to + 10,000: R188 = 0 Jetter AG 197 13 Technological Functions Step 7 JetWeb Action Carry out this step at the very first commissioning of a technology group: Checking the Communication of the Technology Group Action: At turning, respectively reversing, the leading axis, the values of R188 Position Leading Axis and R189 Speed Leading Axis of the following axes are changed. These registers have to report realistic values or value changes. Please note regarding R188 and R189: The leading axis position (R188) has not got any absolute relation to the counter value (R3xx0) of the JX2-CNT. The leading axis position is made up of the counter value and the master position factor (R157). Further, the leading axis position is influenced at overflow as follows: 1. Case: Overflow of the counter value (R3xx0): Leading axis position continues moving up to its own limit position 2. Case: Overflow of the leading axis position value: The leading axis position displays a modulo behavior: It continues at the opposite position limit. The speed value of the leading axis (R189) is made up of the difference between the leading axis positions within one second. It corresponds to the number of increments of the JX2-CNT1 count value within one second, multiplied by the leading axis position factor (R157). 198 Jetter AG JetMove 2xx at the JetControl 13.5 Configuring Communication Within the Group 13.5.4 Configuration by virtual position counter and external following axes Introduction Below, configuring the communication of a technology group with the leading axis module Virtual Position Counter and one or several external following axes. Register Overview The following registers serve for configuring the leading and following axes: Register Name Brief Description Registers of the Leading Axis R151 Transmit Mode Activating / Deactivating the leading axis value output Registers of the Internal Following Axis R158 Maximum Leading Axis Position Leading axis position max. R159 Minimum Leading Axis Position Leading axis position min. R188 Leading Axis Position As-is leading axis position Registers of the External Following Axis Jetter AG R152 Receive Mode Activating / Deactivating the leading axis value reception R158 Maximum Leading Axis Position Leading axis position max. R159 Minimum Leading Axis Position Leading axis position min. R188 Leading Axis Position As-is leading axis position R189 Leading Axis Speed As-is leading axis speed 199 13 Technological Functions Function Plan JetWeb The following function plan illustrates both the register functions and the default register values needed for configuration. Leading Axis and Internal Following Axis - JetMove Transmit mode Transmitting deactivated External Following Axis - JetMove R151 0 R152 0 Receiving deactivated 0 Leading axis of no. 1 103 System bus R188 - Leading axis pos. Leading axis of no. 2 R188 - Leading axis pos. 0 Leading axis of no. 1 203 R188 - Leading axis pos. 103 Receive mode Max. leading axis position R158 100000 Min. leading axis position R158 100000 Speed 203 R159 -100000 Max. leading axis position R188 processing Leading axis of no. 2 R188 - Leading axis pos. Leading axis position R189 Leading axis speed Leading axis position R188 R159 -100000 Min. leading axis position R189 Leading axis speed Virtual Position Counter Virtual Position Counter Description of the Function Plan The JetMove, in which the special function Virtual Position Counter is active, serves both for leading and following axis. There, the Virtual Position Counter, dependent on the leading axis speed (R189), generates the leading axis position (R188) for the internal following axis. The leading axis position displays modulo behavior in the leading position range which is set by R158 and R159. If there are external following axes, the JetMove outputs the leading axis position to the system bus by setting the leading axis number and the leading axis value type in the transmit mode of R151. The transmit mode functions like a switch. This also applies to the receive mode (R152). It is to determine in the external following axis, from which leading axis the following axis is to receive the leading axis value, and which leading value type it is. Both the transmit mode and the receive mode have got data format yxx: y = leading axis number (1 or 2), xx = leading axis value type. Leading axis value 03 is intended for transmitting the leading axis value of the Virtual Position Counter. The leading axis position range of the external following axis set by R158 and R159 determines the value range for the leading axis position, R188. The leading axis position displays modulo behavior in the leading axis position range. The leading axis speed, R189, is calculated out of the leading axis position. 200 Jetter AG JetMove 2xx at the JetControl Configuration Rules The following rules have to be considered for configuration: • • • Configuration Steps of the Leading Axis 13.5 Configuring Communication Within the Group The leading axis position range, which is - in other words - the count range of the Virtual Position Counter, can be freely set in the internal following axis by the maximum leading axis position (R158) and the minimum leading axis position (R159). The receive mode (R152) of an external following axis has to have the same value as has the transmit mode (R151) of the leading axis. In the external following axis, the leading position range has to be set in a way that it exactly corresponds to the leading position range of the leading axis. The following steps have to be carried out for configuring the leading axis. Step 1 Action Deactivating the transmit function Action: Write value 0 to R151 Transmit Mode of the leading axis. Result: This way, the transmit function can be re-configured. Even the previously active transmit function is deactivated now. 2 Setting the transmit mode Action: Write a free leading axis number (1 or 2) and the leading value type for the leading axis position (03) to R151 Transmit Mode of the leading axis. Result: The leading axis transmits the leading axis position together with the corresponding leading axis number to the system bus. Configuration Steps the Internal Following Axis The following steps have to be carried out for configuring the internal following axis. Step 1 Action Deactivating the receive function Action: Write value 0 to R152 Receive Mode of the internal following axis. Result: Any external leading axis value is cleared. Jetter AG 201 13 Technological Functions JetWeb Step 2 Action Setting the leading axis position range Action: Write both maximum and minimum leading axis position to R159 Minimum Leading Axis Position and R158 Maximum Leading Axis Position of the internal following axis. Important: After writing to R158 and R159, wait for the busy-bit to be reset. Result: The counting range of the Virtual Position Counter is set this way. Configuration Steps the External Following Axis The following steps have to be carried out for configuring the external following axis. Step 1 Action Deactivating the receive function Action: Write value 0 to R152 Receive Mode of the external following axis. Result: By this, receiving is disabled, so a new configuration can be made. 2 Setting the leading axis position range in the external following axis by the values of the leading axis position range Action: Write the value of leading axis register 159 Minimum Leading Axis Position to R159 Minimum Leading Axis Position of the external following axis. Also write the value of leading axis register 158 Maximum Leading Axis Position to R158 Maximum Leading Axis Position of the external following axis. Important: After writing to R158 and R159, wait for the busy-bit to be reset. 3 Setting the receive mode Action: Write the value of leading axis register 151 Transmit Mode to R152 Receive Mode of the external following axis. Result: The external following axis activates the receive function. The leading position (R188) of the external following axis shows the leading position (R188) of the leading axis. 202 Jetter AG JetMove 2xx at the JetControl Step 4 13.5 Configuring Communication Within the Group Action Carry out this step at the very first commissioning of a technology group: Checking the communication of the technology group Action: Check, whether the leading position (R188) of the leading axis is displayed as leading position (R188) of the following axis. Note: The leading position (R188) of the external following axis is in 1:1 ratio to the leading position (R188) of the leading axis. Jetter AG 203 13 Technological Functions JetWeb 13.5.5 Configuration by virtual position counter without external following axes Introduction Below, configuring the communication of a technology group by the leading axis module Virtual Position Counter without external following axes is described. This means that the technology group consists of only one JetMove with an active Virtual Position Counter. No Configuration of the Leading Axis As in this technology group the leading axis value is not output to the system bus, configuration of the group communication is not needed for the leading axis. Register Overview The following registers serve for configuring the internal following axis: Register Name Brief Description Registers of the Internal Following Axis Function Plan R158 Maximum Leading Axis Position Leading axis position max. R159 Minimum Leading Axis Position Leading axis position min. R188 Leading Axis Position As-is leading axis position The following function plan illustrates both the register functions and the default register values needed for configuration. Leading Axis and Internal Following Axis - JetMove Max. leading axis position R158 100000 Leading axis position R188 R159 -100000 Min. leading axis position R189 Leading axis speed Virtual Position Counter Virtual Position Counter 204 Jetter AG JetMove 2xx at the JetControl 13.5 Configuring Communication Within the Group Description of the Function Plan In the JetMove, the special function Virtual Position Counter is active. It is both leading and following axis. The Virtual Position Counter, dependent on the leading axis speed (R189), generates the leading axis position (R188) for the internal following axis. The leading axis position displays modulo behavior in the leading position range which is set by R158 and R159. Setting the Leading Axis Position Range In the internal following axis, the leading axis position range, which is - in other words - the count range of the Virtual Position Counter, can be freely set by defining the maximum leading axis position (R158) and the minimum leading axis position (R159). Configuration Steps of the Internal Following Axis The following steps have to be carried out for configuring the internal following axis. Step 1 Action Deactivating the receive function Action: Write value 0 to R152 Receive Mode of the internal following axis. Result: Any external leading axis value is cleared. 2 Setting the leading axis position range Action: Write both maximum and minimum leading axis position to R159 Minimum Leading Axis Position and R158 Maximum Leading Axis Position of the internal following axis. Result: The counting range of the Virtual Position Counter is set this way. Jetter AG 205 13 Technological Functions JetWeb 13.5.6 Configuration with second encoder as leading axis Introduction The technology group communication between leading and following axes is configured, the second encoder being the leading axis. The configuration described here applies to a technology group, either with or without external following axes. Hardware Requirements Only a JM-2xx makes available the functions of the second encoder being the leading axis. Second Encoder at the JetMove Also being the Following Axis The JetMove to which the second encoder has been connected can be used in two ways: Once for setting the leading position for external following axes, further as an axis following the leading position set by its second encoder. If the JetMove also serves as following axis, respectively one of the axes following the leading position of its second encoder, it receives the leading position set by the second encoder via system bus, as if it had been set by an external leading axis. This means that in order to function as a following axis, the following axis registers of the JetMove (see register overview) has to be configured the same way, as if the leading position of the second encoder had been transmitted by an external JetMove functioning as leading axis via system bus. Register Overview The following registers are available for configuring the leading and following axis. Register Name Brief Description Leading Axis Register (JetMove with second encoder) R151 Transmit Mode Activating / Deactivating the leading axis value output Registers of the Following Axis 206 R152 Receive Mode Activating / Deactivating the leading axis value reception R158 Maximum Leading Axis Position Leading axis position max. R159 Minimum Leading Axis Position Leading axis position min. R188 Leading Axis Position As-is leading axis position R189 Leading Axis Speed As-is leading axis speed Jetter AG JetMove 2xx at the JetControl Function Plan 13.5 Configuring Communication Within the Group The following function plan illustrates both the register functions and the default register values needed for configuration. Following Axis - JetMove Leading Axis - JetMove with 2nd Encoder Transmit mode Receive mode R151 0 Receiving deactivated 0 Transmitting deactivated 0 R249 - As-is position encoder 2 105 Leading axis of no. 2 R249 - As-is position encoder 2 205 R249 - As-is position encoder 2 Max. leading axis position R158 100000 Leading axis of no. 1 System bus Leading axis of no. 1 R152 0 105 R188 Speed processing Leading axis of no. 2 R249 - As-is position encoder 2 205 R159 -100000 Min. leading axis position Description of the Function Plan Leading axis position R189 Leading axis speed The transmit mode, R151, functions like a switch determining by which leading axis number the leading axis transmits which axis leading type to the system bus. The receive mode, R152, also functions like a switch determining from which leading axis the following axis is to receive the leading axis value from the system bus, and which leading axis value type it is. The value of the transmit mode, R151, and the value of the receive mode, R152, have got data format yxx: y = leading axis number (1 or 2), xx = leading axis value type. For transmitting the leading value from, and receiving it by the second encoder of a JetMove, leading axis value type 05 has to be specified. The leading axis position range of the following axis set by R158 and R159 determines the value range for the leading axis position, R188. The leading axis position has got modulo behavior. This means if it passes the limit at R158 or R159, it will continue at the opposite side. The leading axis speed, R189, is calculated out of the leading axis position. Configuration Rules The following rules have to be considered for configuration: • • Jetter AG The receive mode of the following axis has to have the same value as has the transmit mode of the leading axis. The leading axis position range of the following axis (determined by R158 and R159) has to be set in a way that it exactly corresponds to the travel range of the second encoder (R247 encoder2 - travel limit positive and R248 encoder2 - travel limit negative) of the leading axis. 207 13 Technological Functions The following illustration shows how the leading axis position range is determined. Here, the leading axis has got a travel range 0° to 360°. It has been configured as a modulo axis. Following axis 360 ° 360 315 315 270 270 180 225 R249 = R188 180 135 135 90 90 45 45 0 Configuration Steps of the Leading Axis R158 R247 225 Modulo Travel range of the second leading axis encoder ° R248 R159 Leading axis position in the following axis range Leading axis Modulo Determinating the Leading Axis Position JetWeb 0 The following steps have to be carried out for configuring the leading axis (JetMove with second encoder). Step 1 Action General configuration of the second encoder Action: See chapter 6.9 "Second Encoder", page 77, in this document. 2 Deactivating the transmit function Action: Write value 0 to R151 Transmit Mode of the leading axis. Result: This way, the transmit function can be re-configured. Even the previously active transmit function is deactivated now. 3 Setting the transmit mode Action: Write a free leading axis number and the leading axis value type "As-is position of the second encoder (y05) to R151 Transmit Mode of the leading axis. Result: The leading axis transmits values to the system bus together with the respective leading axis number and leading axis value type. 208 Jetter AG JetMove 2xx at the JetControl Configuration Steps of the Following Axis 13.5 Configuring Communication Within the Group The following steps have to be carried out for configuring the following axis. Step 1 Action Deactivating the receive function Action: Write value 0 to R152 Receive Mode of the following axis. Result: This way, re-configuring is achieved. 2 Set the leading axis position range in the following axis by the values of the travel limits of the second encoder belonging to the leading axis Action: Write the value of R159 Minimum Leading Axis Position referring to the following axis, which is also in R248 Travel Limit Negative of the leading axis. Following the same procedure, write the value of R247 Travel Limit Positive to R158 Maximum Leading Axis Position. Important: After writing to R159 and R158, wait for resetting the busybit. 3 Setting the receive mode Action: Write the value of leading axis register 151 Transmit Modeto R152 Receive Mode of the following axis. Result: The following axis activates the receive function. The leading axis position represents the as-is position of the second leading axis encoder (R249). 4 Carry out this step at the very first commissioning of a technology group: Checking the communication of the technology group Action: At turning, respectively reversing, the leading axis, the values of R188 Position Leading Axis and R189 Speed Leading Axis of the following axis are changed. These registers have to report realistic values. Notes on the registers: The leading axis position (R188) corresponds 1:1 to the as-is position of the second leading axis encoder (R249). The speed value of the leading axis (R189) is made up of the difference between the leading axis positions within one second. Thus, it corresponds to the speed of the second encoder output by the leading axis in R251 Encoder2 - As-is Velocity. Jetter AG 209 13 Technological Functions JetWeb 13.5.7 Description of registers Register 151: Transmit Mode Function Description Read As-is transmit mode Write Set transmit mode Amplifier status No specific status Takes effect Immediately Variable type int / register Value range 0, 101 ... 205 Value after reset 0 (transmitting has been deactivated) Activating / deactivating the object. Value 0 101 ... 204 Meaning Transmitting has been deactivated Transmitting has been activated by respective leading axis number and leading axis value type. Interpretation of the values by means of the yxx key: y: Leading axis number y = 1: Leading axis number 1 y = 2: Leading axis number 2 xx: Leading axis value type xx = 01: xx = 03: xx = 04: xx = 05: As-is position (R109) Leading axis position (R188), if the Virtual Position Counter is used Set position value (R130) As-is position of the second encoder (R249) Example: Transmitting the as-is position as second leading axis: R151 = 201 210 Jetter AG JetMove 2xx at the JetControl 13.5 Configuring Communication Within the Group Register 152: Receive Mode Function Description Read As-is receive mode Write Set receive mode Amplifier status No specific status Takes effect Immediately Variable type int / register Value range 0, 101 ... 205 Value after reset 0 (receiving is deactivated) Receiving the leading axis value is activated / deactivated. Value 0 101 ... 204 Meaning Receiving has been deactivated Receiving has been activated by the corresponding leading axis number with corresponding leading axis value type. Interpretation of the values by means of the yxx key: y: Leading axis number y = 1: Leading axis number 1 y = 2: Leading axis number 2 xx: Leading axis value type xx = 01: xx = 02: xx = 03: xx = 04: xx = 05: As-is position (R190) Count value (R3xx0) of a JX2-CNT1 serving as leading axis Leading axis position (R188), if the Virtual Position Counter is used in the leading axis Set position value (R130) As-is position of the second encoder (R249) Example: Receiving the count value of a JX2-CNT1 serving as second leading axis: R152 = 202 Jetter AG 211 13 Technological Functions JetWeb Register 155: Counting Range JX2-CNT1 Function Description Read As-is count value Write Set count value Amplifier status No specific status Takes effect Wait for the busy-bit in the status to be reset Variable type int / register Value range 0 ... 16,777,216 [increment] Value after reset 16,777,216 [increment] The counting range defines the modulo position range of the JX2-CNT1. R155 only has to be written to, if an SSI encoder of a > 24 bit resolution has been connected. Examples: Count value 212 Description 16777216 The count value in the JX2-CNT1 has an overflow at 8,388,608, respectively 8,388,607. An incremental or an SSI encoder with a position resolution of 24 bits has been connected to the JX2-CNT1. 4096 The count value in the JX2-CNT1 has an overflow at 0, respectively 4096. An SSI encoder with a position resolution of 12 bits has been connected to the JX2-CNT1. 1024 The count value in the JX2-CNT1 has an overflow at 0, respectively 1024. An SSI encoder with a position resolution of 12 bits has been connected to the JX2-CNT1. Jetter AG JetMove 2xx at the JetControl 13.5 Configuring Communication Within the Group Register 157: Standardizing Factor Function Description Read As-is standardizing factor Write Set standardizing factor Amplifier status No specific status Takes effect Wait for the busy-bit in the status to be reset Variable type float Value range 0 ... Pos. float limits [°/Increment] or [mm/Increment] Value after reset 1 [°/Increment] or [mm/Increment] If a JX2-CNT1 serves as leading axis module, the leading axis position is output in encoder-oriented position units. The leading axis position in the JetMove is outut in mechanics-oriented position units (degrees or millimeter). The standardizing factor serves for calculating the leading axis position in the JetMove.. Register 158: Leading Axis Position Max. Function Description Read As-is maximum leading axis position Write Set maximum leading axis position Amplifier status No specific status Takes effect Wait for the busy-bit in the status to be reset Variable type float Value range Float limits [°] or [mm] Value after reset 100,000 [°] or [mm] Maximum leading axis position in the following axis. Register 159: Leading Axis Position Min. Function Description Read As-is minimum leading axis position Write Set minimum leading axis position Amplifier status No specific status Takes effect Wait for the busy-bit in the status to be reset Variable type float Value range Float limits [°] or [mm] Value after reset -100,000 [°] or [mm] Minimum leading axis position in the following axis Jetter AG 213 13 Technological Functions JetWeb Register 188: Position of the Leading Axis Function Description Read As-is leading axis position Write Set leading axis position (only, if the leading axis module is Virtual Position Counter) Amplifier status No specific status Takes effect Immediately Variable type float Value range R159 ... R158 [°] or [mm] Value after reset 0 [°] or [mm] Leading axis position in the following axis The way the leading axis position is displayed depends on the leading axis module being applied: Leading Axis Module Description JetMove The leading axis position is the as-is position (R109), respectively the set position value (R130) of the leading axis. This depends on whether the JetMove transmits the as-is position or the set position value. JX2-CNT1 The leading axis position (R188) has not got any absolute relation to the counter value (R3xx0) of the JX2-CNT. The leading axis position is made up of the counter value and the master position factor (R157). Further, the leading axis position behaves at overflow as follows: 1. Case: Overflow of the counter value (R3xx0): Leading axis position continues moving up to its own limit position 2. Case: Overflow of the leading axis position value: The leading axis position displays a modulo behavior: It continues at the opposite position limit. Virtual Position Counter • • 214 Internal following axis: Counting value of the Virtual Position Counter External following axis: Its position relates to the position of the leading axis (R188) 1:1. Jetter AG JetMove 2xx at the JetControl 13.5 Configuring Communication Within the Group Register 189: Leading Axis Speed Function Description Read As-is leading axis speed Write Setting the speed for the Virtual Position Counter Amplifier status No specific status Takes effect Immediately Variable type float Value range float limits [°/s] or [mm/s] Value after reset 0 [°/s] or [mm/s] Leading axis speed within the following axis, respectively set speed, if the special function Virtual Position Counter is applied General rule applying to the following axis: The speed value of the leading axis (R189) is made up of the difference between the leading axis positions (R188) within one second. Jetter AG 215 13 Technological Functions 13.6 JetWeb Introduction to Coupling Modes 13.6.1 Survey Introduction At carrying out a technological function, the following axes are coupled with the leading axis. In the following axis, the way of coupling is defined by the coupling mode. Coupling Modes A JetMove supplies the following coupling modes: • • In this Chapter Electronic Gearing Table Mode The subchapter Introduction to the Coupling Modes first of all outlines the way of functioning of each coupling mode. Further, it contains general information on configuring and working in both coupling modes. The subchapter is structured as follows: Topic Further Subchapters on Coupling Modes Page Introduction to the coupling mode Electronic Gearing page 217 Introduction to the coupling mode Table page 220 Introduction to configuring and working in the coupling modes page 223 Configuring and working in the coupling modes, respectively their way of functioning has been described in detail in further subchapters. The function range of the coupling mode Table is by far greater than the function range of the Electronic Gearbox coupling mode. This means there is the additional subchapter How the "Table" coupling mode works. Please find below another survey of these subchapters: Subchapter 216 Page How to operate in the Electronic Gearing coupling mode page 224 How the Table coupling mode works page 239 Configuring the table page 264 Working in Table Mode page 277 Jetter AG JetMove 2xx at the JetControl 13.6 Introduction to Coupling Modes 13.6.2 Introduction to the Electronic Gearing coupling mode Introduction The motion of a following axis that is coupled with the leading axis in the coupling mode Electronic Gearing synchronizes with the motion of the leading axis. A gear ratio that can be set individually defines the proportional ratio between the motions of following and leading axis. Transmission Ratio The gear ratio is a factor that specifies the distance to be covered by the following axis at a certain distance covered by the leading axis. Example The following example is to illustrate the influence of the geear ratio: Both leading and following axis are to be rotatory axes The following axis is coupled to the leading axis in the gear ratio 1:2. This means that if a leading axis rotates twice, the following axis rotates once. 360 0 0 Path of the following axis (R130) Following axis 720 2 rev. Path of the leading axis (R188) Leading axis 1 rev. • • • Transmission (R156) Jetter AG 217 13 Technological Functions Sample Motion JetWeb In the leading - following axis diagram, the gear ratio between the following and leading axis paths of motions is 1:2. 210 200 R156 = 90 mm / 180 ° = 1 mm / 2 ° = 0.5 180 mm ° 160 140 120 90 mm Set position following axis (R130) mm 100 80 60 40 180 ° 360 270 180 0 90 20 ° Leading axis position (R188) Sample Application The coupling mode Electronic Gearing is used in the following application, for example: • Two conveyor belts are to move in the same direction by the same speed to enable packets to be handed over. Packet Conveyor 1 Conveyor 2 v1 v2 v1 = v2 Transmission Precision Although the gear ratio (R156) is specified as a floating-point number, it is not of unlimited precision. A JetMove functions by floating point numbers of single precision. This means that the JetMove calculates the gear ratio by a precision of 7 mantissa digits. Mantissa digits are tens digits inclusively the decimal places. A 2:9 gear ratio allows for specifying by 0.2222222 ( which is 2.222222e-001 in mantissa and exponent representation). Within this gear ratio, there remains a minor imprecision which can yet be decreased or even compensated by appropriate measures. 218 Jetter AG JetMove 2xx at the JetControl Relative Position Coupling 13.6 Introduction to Coupling Modes In the coupling mode Electronic Gearing, the following axis is coupled to the leading axis via the leading axis position (R188). This means that the following axis calculates its set positions and the speed for its position control by the leading axis position. For this, the following axis is coupled with the leading axis position in relative mode. This means that the following axis is coupled to the leading axis position by means of a positioning offset. The following axis automatically calculates this positioning offset when it is coupling. This relative position coupling brings about the following advantage for the Electronic Gearing coupling mode: • Processing by the Following Axis For coupling the following axis, the user need not pay heed to the leading axis position. The user couples the following axis at the as-is leading axis position. This will cause the following axis to move from its as-is set position (R130) related to the leading axis position. In the following axis, this coupling is physically established in three steps. In coupled mode, these steps are run through every two milliseconds. Step 1 Step 2 Leading axis position R188 Transmission ratio Step 3 R156 1.0 Get value by difference Calculate setpoint R130 Position setpoint Step Action 1 Calculating the difference between new and former value of the leading axis position (R188) 2 Multiplication of this difference with the transmission ratio (R156) 3 Calculating the new set position (R130) of the following axis: • Jetter AG Addition of the result of step 2 to the set position calculated last 219 13 Technological Functions JetWeb 13.6.3 Introduction to the Table coupling mode Introduction When in Table coupling mode, a following axis can run any motion path, relating on the leading axis position. Example: Sine-Shaped Motion The resulting motion consisting of individual leading and following axis motions can be sine-shaped, for example, as is shown in the leading and following axis diagram below. Position setpoint - following axis mm 80 70 60 50 40 30 20 10 360 315 270 225 180 135 90 45 0 ° Leading axis position Sample Application The Table coupling mode is used in applications implying the following technological functions: • • • Motion Definition Cam Disc Flying Saw Winding by means of traversing axis and spindle Whithin the physical and safety-related limits, the resulting motion path is userdefined. This motion has to be defined for the following axis by means of an array of interpolation points. The user stores the parameters of the interpolation points representing the motion profile into this array. Each interpolation point contains • • a leading axis position and the desired position of the following axis in relation to this leading axis position. The user has to define the individual leading and following axis position. These positions for complex motions can be calculated in the PC (e.g. in MS Excel). Then, they can be uploaded to the array of interpolation points by means of a DA file transfer. Definition of Terms - Table 220 The definition of motions saved to the array of interpolation points is called "Table". Jetter AG JetMove 2xx at the JetControl Converting the Table into Motion 13.6 Introduction to Coupling Modes The table is converted into a motion by the operating system of the following axis being in coupled status as follows: The operating system continuously generates set position values for the following axis (definition of motions) taken from the table. For this purpose, it takes the steps explained below. They are to illustrate the essentials of the conversion. In practice, some further offset values have to be considered. Step 1 Step 2 Assignment Gradient Calculation Step 3 Position Setpoint Calculation m Yn+1 Yn Xn Xn+1 R188 Leading axis position Step m Y R130 Position setpoint X Y m= X R188 Leading axis position Action 1 Assigning the as-is leading axis position (R188) to two corresponding nodes that are next to each other. X is the leading axis position assigned to the respective node, while Y is the set position of the following axis assigned to the respective node. 2 Calculating gradient m by means of the stored node positions for leading and following axis. 3 Calculating the new set position (R130) for the follower by means of linear interpolation, gradient m and of one of the stored node positions for leading and following axis. Result: The coupled following axis moves the path defined in relation to the leading position (R188). In general, the leading axis is moved by point-to-point or endless positioning. Characteristics of the Motion The resulting motion is characterized as follows: • • • Jetter AG The axis drives to the table nodes. The axis carries out linear interpolation between the nodes. This means that between the nodes, the axis covers straight lines of the respective gradient. The leading axis determines the direction of the motion. 221 13 Technological Functions Sample Motion JetWeb The leading axis - following axis diagram of the example below illustrates the leading and following axis motion resulting in a sine-shaped motion. From the illustration, we learn: • • The axis motion covers to the individual nodes. The axis carries out linear interpolation between the nodes. For better visibility, the straight lines of the illustration that are resulting from linear interpolation are extended beyond the nodes. Position setpoint following axis mm Node 80 70 60 Linear interpolation 50 40 30 20 10 360 315 270 225 180 135 90 45 0 ° Leading axis position 222 Jetter AG JetMove 2xx at the JetControl 13.6 Introduction to Coupling Modes 13.6.4 Introduction to configuring and operating in the coupling modes Coupling mode "Configuring and Operating" Following axes can be driven, a coupling mode has to be selected from a technology group and then configured for each following axis. Various Configurations The respective operating principles of the two available coupling modes are totally different from each other. This is why they have to be configured differently. Each coupling mode has got its own register for configuring. Operating Operating within these coupling modes mainly comprise the following procedures: • Coupling • Uncoupling Coupling and Uncoupling Coupling and uncoupling are explained in the table below: Procedure Please Heed when Operating the Axis: Jetter AG Description Coupling Couples the set position value of the following axis with the leading axis position, depending on the coupling mode selected. Uncoupling Uncouples the set position value of the following axis from the leading position. After uncoupling, the following axis determines the set position value not depending on the leading axis position and the coupling mode selected. When operating the axis in a coupling mode, please heed the following: • At coupling and uncoupling, and in coupled mode, the following axis is not jerk-free. The following factors can cause jerks in the following axis: - e. g. an incorrect coupling position (only with "Table" coupling mode) - e. g. an imprecision in the leading position • Under the following conditions, bits R100.1 cb_Status_Stopped and R100.2 cb_Status_DestiWindow in R100 Status are not processed by the operating system of the following axis. This means that these bits are not considered: - at coupling - in coupled condition • At uncoupling, it depends on the way of uncoupling, whether bits R100.1 cb_Status_Stopped and R100.2 cb_Status_DestiWindow can be considered or not. These bits are applied at uncoupling by point-to-point positioning, for example. 223 13 Technological Functions 13.7 JetWeb Operating in the Electronic Gearing Mode 13.7.1 Overview Introduction This sub-chapter mainly describes the procedure of configuring and operating in the coupling mode Electronic Gearing. For operating in this coupling mode, the most frequent cases of application have been described. The user decides which applications to activate. Further, information on the overflow behavior of leading and following axes in this coupling mode are provided in this chapter. This information is needed, if, during operation, the leading and following axis exceeds its positioning range. At the end of this sub-chapter, all registers especially needed for configuring and operating in this coupling mode are described. In this Chapter This sub-chapter is structured as follows: Topic 224 Page Position overflows page 225 Overview over instructions page 227 Configuring page 227 Referencing the leading axis position page 228 Coupling page 230 Application cases of uncoupling page 232 Immediate uncoupling page 233 Uncoupling by a ramp page 234 Uncoupling by point-to-point positioning page 235 Uncoupling by endless positioning page 236 Modifying the gear ratio page 237 Register description page 238 Jetter AG JetMove 2xx at the JetControl 13.7 Operating in the Electronic Gearing Mode 13.7.2 Position overflows Introduction If, at coupling by the Electronic Gearing coupling mode, the leading or following axis reaches the end of the positioning range, this is automatically processed in the following axis. The way of defining the positioning ranges for both axes and of processing position overflow, is explained below. Position Overflows The position overflows during coupling have been defined for leading and following axis as follows: • • Leading axis: Definition via leading axis positioning range by R158 and R159 Following axis Definition via travel range by R182 and R183 By means of relative position coupling, both axes reach their overflow position independently of each other. This behavior is illustrated in the example below. mm 210 180 160 140 120 Etc. Following axis Modulo cycle 2 Following axis position 200 810 720 630 540 Leading axis position Modulo cycle 2 450 0 Leading axis position Modulo cycle 1 360 20 270 40 180 60 90 Modulo operation 80 Following axis Modulo cycle 1 100 ° Modulo operation Leading axis position Jetter AG 225 13 Technological Functions JetWeb 13.7.3 Survey: Configuration and operation Overview The following structure tree shows all possibilities of configuring and operating in the Electronic Gearing coupling mode, that will be described below. This overview contains the most relevant registers and commands that will be used in the following descriptions. R = Register; C = Command via R101 Configuring Setting the transmission ratio R156 Referencing the leading axis Referencing the leading axis + R188 Leading axis type: JetMove Referencing the leading axis Leading axis type: JX2-CNT1 Leading axis type: Virtual Position Counter R188 Coupling at standstill C44 Coupling while in motion C44 Coupling Operating Coupling Mode C45 by blocking the output stage C02 user-defined ramp (R106) C06 maximum deceleration (R180) C05 emergency stop ramp (R549) C07 point-to-point positioning C10 endless positioning C56 Immediate Electronic Gearing Uncoupling With ramp With positioning Changing the transmission ratio 226 at remaining control function R156 Jetter AG JetMove 2xx at the JetControl 13.7 Operating in the Electronic Gearing Mode 13.7.4 Configuring Introduction The configuration of the Electronic Gearing coupling mode explicitely consists of the definition of the gear ratio. Register Overview In order to define the gear ratio, the following register has been provided in the following axis: Please Heed during Configuration: Register Name Brief Description R156 Gear Ratio Gear ratio To be observed during configuration: • During configuration, the following axis has to be at standstill. • The JetMove calculates the gear ratio by a precision of 7 mantissa digits. Mantissa digits = tens places, post-comma places included • In order to achieve a good coupling behavior of the following axis, it must not move faster than the leading axis. Following axis Leading axis Gear ratio: --------------------------------------- 1 Configuration Step The following step has to be taken for configuration: Step 1 Action Setting the gear ratio Action: Write the value to R156 Gear Ratio Jetter AG 227 13 Technological Functions JetWeb 13.7.5 Referencing the leading axis position Introduction Referencing the leading axis position (R188) in the following axis before coupling may be needed for establishing a relation with the leading axis position. Referencing differs depending on the respective leading axis module. Register Overview For referencing the leading axis position, the following register has been provided in the following axis: Configuration Steps Leading Axis Module JetMove Register Name Brief Description R188 Leading Axis Position Position of the leading axis The following step has to be carried out for referencing the leading axis position by means of the leading axis module JetMove. Step 1 Action Referencing the leading axis Action: Referencing the leading axis, or setting a reference position by command, e.g. command C03 Set Reference. Result: Leading axis position (R188) in the following axis shows the referencing position of the leading axis. Configuration Steps Leading Axis Module JX2-CNT1 The following steps have to be carried out for referencing the leading axis position by means of the leading axis module JX2-CNT1. Step 1 Action Referencing the leading axis Action: Referencing in the leading axis, or else setting a reference position by writing the value to R3xx0 2 Setting the respective leading axis position Action: Corresponding to the reference position (R3xx0) of the leading axis, the leading axis position in the following axis is set by writing to R188. Example: The reference position (R3xx0) is referenced to position 0. The leading axis position (R188) is also to have position 0: R188 := 0 228 Jetter AG JetMove 2xx at the JetControl Configuration Steps Leading axis Module Virtual Position Counter 13.7 Operating in the Electronic Gearing Mode The following steps have to be carried out for referencing the leading axis position by means of the leading axis module Virtual Position Counter. Step 1 Action Setting the leading axis position Action: Writing the desired referencing position to R188 "Leading Axis Position" in the leading axis. Result: Leading axis position (R188) in all external following axes shows the referencing position of the leading axis position (R188). Jetter AG 229 13 Technological Functions JetWeb 13.7.6 Coupling Introduction Here, coupling the following axis with the leading axis is described. There are two options to do this: • • Option 1: Coupling, while leading and following axis are at standstill. Option 2: Coupling, while leading and following axis are in motion. For applying option 2, the following axis has to be moved to endless positioning first by point-to-point or endless posiitoning: Requirements for Option 1 The following conditions have to be met in order to apply option 1 for coupling: • • Requirements for Option 2 The following conditions have to be met in order to apply option 2 for coupling: • • Please Heed during Axis Coupling: • • 230 The following axis has to move in the direction of the leading axis The following axis has to move by the speed of the leading axis Please observe the following at coupling: • Overview of Commands Both leading and following axis have to be at standstill, i.e. the stop bit in status (R100.1) has to be set for both. In the following axis, no bit must be set in R400 Table Status. At coupling, the following axis is not jerk controlled, i.e., if one of the two axes is still in motion, or if there is a difference between the speed of leading axis and following axis, the following axis might jerk. The intensity of the jerk depends on the speed difference and the gear ratio. As coupling of the following axis is a relative position coupling, the following axis can be coupled with any leading axis. The following axis does not change bits R100.1 cb_Status_Stopped and R100.2 cb_Status_DestiWindow in R100 Status at coupling . For coupling, the following command of command register R101 Command is issued: Designation of Command Brief Description C44 Electronic Gearing Coupling by coupling mode Electronic Gearing Jetter AG JetMove 2xx at the JetControl Action 13.7 Operating in the Electronic Gearing Mode The following steps have to be taken for coupling: Step 1 Action Issue command C44 Action: Write 44 to R101 Command and wait for the busy-bit in R100.13 "cb_Status_Busy" to be reset. Result: The following axis is coupled. This is shown by bit cb_Tab_Status_GearLinked (R400) that is "electronic gearing is active", in the status report of the coupling modes. Jetter AG 231 13 Technological Functions JetWeb 13.7.7 Uncoupling options Introduction Uncoupling is not only required in average processes, but it is also essential in emergency situations. Various options of uncoupling are presented below. Uncoupling Options There are various options of uncoupling. They are listed and described below: Uncoupling Option • • • Action 232 Description Immediate uncoupling - control function remains The following axis uncouples immediately without driving a ramp. It remains at this point by position control. - by blocking the output stage The following axis uncouples immediately without driving a ramp. The output stage is blocked. Uncoupling by a ramp - by user-defined ramp The following axis uncouples immediately by the user-defined ramp (R106). After driving the ramp, it remains at this point by position control. - by maximum deceleration The following axis uncouples immediately by maximum deceleration (R180). After driving the ramp, it remains at this point by position control. - by emergency stop ramp The following axis uncouples immediately by driving the emergency stop ramp (R549) in speed-controlled manner. After driving the ramp, the output stage is blocked automatically. Uncoupling by positioning - by point-to-point positioning The following axis uncouples immediately and changes into absolute point-to-point positioning in jerk-free manner. - by endless positioning The following axis uncouples immediately and changes to endless positioning in jerk-free manner. In the following subchapters the procedure of each uncoupling option has been described. Jetter AG JetMove 2xx at the JetControl 13.7 Operating in the Electronic Gearing Mode 13.7.8 Immediate uncoupling Immediate Uncoupling Below, immediate uncoupling by remaining control function remains: Please note: When the following axis is in motion, it can cause a tracking error. - control function remains Procedure: 1. The user issues command C45 2. The following axis carries out these steps: - Immediate position controlling of the motor to as-is position - Resetting bit R400.0 Electronic Gearing active Action 1. Issue command C45 Action: Write value 45 to R101 Command and wait for resetting bit R100.13 Busy and resetting bit R400.0 Electronic Gearing active Immediate Uncoupling Below, immediate uncoupling by blocking the output stage is described: Please note: When the following axis is in motion without having got a brake, it can coast down depending on the moment of inertia. Procedure: 1. The user issues command C02 2. The following axis carries out these steps: - Immediate blocking of the output stage - Resetting bit R400.0 Electronic Gearing active Action 1. Issuing command C02 - by blocking the output stage Action: Write value 45 to R101 Command and wait for resetting bit R100.13 Busy and resetting bit R400 Jetter AG 233 13 Technological Functions JetWeb 13.7.9 Uncoupling by a ramp Uncoupling by a Ramp Below, uncoupling by user-defined ramp (C06), respectively by maximum deceleration (C05) is described: - by userdefined ramp Please note: Maximum deceleration is for driving a ramp in an emergency situation. The following axis drives the ramp by the value of R180 Maximum Acceleration, which usually is very high. or Note: - by maximum deceleration The following axis drives the user-defined ramp by the value of R106 Deceleration. Procedure: 1. The user issues C06, respectively C05 2. The following axis carries out these steps: - Immediate ramp start - Resetting bit R400.0 Electronic Gearing active - Resetting bit R100.1 Stopped - Setting bit R100.16 Deceleration ramp 3. At the end of the ramp, the following axis carries out the following steps: - Resetting bit R100.16 Deceleration ramp - Setting bit R100.1 Stopped Procedure until axis standstill 1. Issuing command C06, respectively C05 Action: Write value 6 to R101 Command and wait for resetting bit R100.13 Busy and resetting bit R400.0 Electronic Gearing active 2. Wait for the ramp to be completed Action: Wait for bit R100.1 Stopped to be set. Uncoupling by a Ramp - by emergency stop ramp Below, uncoupling by emergency stop ramp is described: Please note: At the end of the emergency stop ramp, the output stage is blocked automatically. Note: The following axis drives the emergency stop ramp by the value of R549 Emergency Stop Ramp. Procedure: 1. The user issues command C07 2. The following axis carries out these steps: - Immediate ramp start - Resetting bit R400.0 Electronic Gearing active 3. At the end of the ramp, the following axis carries out the following steps: - Blocking of the output stage Procedure until axis comes to standstill 1. Issuing command C06 Action: Write value 6 to R101 Command and wait for resetting bit R100.13 Busy and resetting bit R400.0 Electronic Gearing active 2. Wait for the ramp to be completed Action: Wait for bit R100.11 Controller enabled to be reset. 234 Jetter AG JetMove 2xx at the JetControl 13.7 Operating in the Electronic Gearing Mode 13.7.10 Uncoupling by point-to-point positioning Introduction Below, uncoupling by point-to-point positioning is described. Note For point-to-point positioning, speed and target position can be user-defined. The target position can also be determined in a way, for example, that the following axis has to change directions. At transition to positioning, the following axis carries out all changes in motion by an acceleration, respectively deceleration ramp. For acceleration and deceleration during axis motion, the following axis takes the value of register R105 Acceleration. For deceleration towards target position, respectively to a direction turning point, the following axis takes over the value of R106 Deceleration. Procedure Uncoupling is carried out as follows: 1. The user determines the parameters of point-to-point positioning 2. The user issues command C10 3. The following axis carries out these steps: - Immediate transition to positioning (mostly this is the ramp) - Resetting bit R400.0 Electronic Gearing active - Resetting bit R100.1 Stopped - Setting bit R100.15 Acceleration ramp, respectively R100.16 Deceleration ramp,respectively R100.14 Maximum speed, depending on which ramp, respectively if at all a ramp has to be driven by the following axis 4. At the destination, the following axis carries out the following steps: - Resetting bit R100.16 Deceleration ramp - Setting bit R100.1 Stopped - Setting bit R100.2 Destination window reached Processing Up to the End The following steps have to be taken in order to carry out uncoupling by point-topoint positioning: Positioning Step Jetter AG Action 1 Setting the positioning parameters Action: Writing to • R102 Target Position and • R103 Speed 2 Starting the positioning run Action: • Write value 10 to R101 Command and wait for • bit R100.13 Busy and • bit R400.0 Electronic Gearing active to be reset 3 Wait for the destination to be reached Action: Wait for • bit R100.2 In Destination Window or • bit R100.1 Stopped to be set 235 13 Technological Functions JetWeb 13.7.11 Uncoupling by endless positioning Introduction Below, uncoupling by endless positioning is described. Note For endless positioning, both speed and direction can be freely determined. The direction can also be determined in a way, for example, that the following axis has to change directions. At transition to endless positioning, the following axis carries out all changes in motion by an acceleration, respectively deceleration ramp. For acceleration and deceleration during axis motion, the following axis takes the value of register R105 Acceleration. Procedure Uncoupling is carried out as follows: 1. The user sets the parameters for endless positioning 2. The user issues command C56 3. The following axis carries out these steps: - Transition to endless positioning (mostly this is the ramp) - Resetting bit R400.0 Electronic Gearing active - Resetting bit R100.1 Stopped - Setting bit R100.15 Acceleration ramp, respectively R100.16 Deceleration ramp,respectively R100.14 Maximum speed, depending on which ramp, respectively if at all a ramp has to be driven by the following axis 4. At the destination, the following axis carries out the following steps: - Resetting bit R100.16 Deceleration ramp - Setting bit R100.1 Stopped - Setting bit R100.2 Destination window reached Processing Up to the End The following steps have to be taken for uncoupling by means of endless positioning: Positioning Step 1 Action Setting the positioning parameters Action: Writing to • R103 Speed • R142 Motion Direction 2 Starting endless positioning Action: • Write value 56 to R101 Command and wait for • bit R100.13 Busy and • bit R400.0 Electronic Gearing active to be reset 3 Wait for the destination to be reached Action: Wait for • bit R100.2 In Destination Window or • bit R100.1 Stopped to be set 236 Jetter AG JetMove 2xx at the JetControl 13.7 Operating in the Electronic Gearing Mode 13.7.12 Changing the gear ratio Introduction The gear ratio (R156) can be changed any time after configuring the coupling mode Electronic Gearing. This change takes effect immediately. Register Overview In order to define the gear ratio, the following register has been provided in the following axis: What has to Be taken Heed of at Changing the Gear Ratio? Configuration Step Register Name Brief Description R156 Gear Ratio Gear ratio Please observe the following at changing the gear ratio: • At changing, the following axis is not jerk controlled, i.e., if the following axis is in motion, it might jerk. The intensity of the jerk depends on the extent to which the gear ratio is changed. • The JetMove calculates the gear ratio by a precision of 7 mantissa digits. The following steps have to be taken for changing the gear ratio: Step 1 Action Changing the gear ratio Action: Write the value to R156 Gear Ratio Jetter AG 237 13 Technological Functions JetWeb 13.7.13 Description of registers Register 156: Gear Ratio Function Description Read As-is gear ratio Write Set gear ratio Amplifier status No specific status Takes effect Immediately Variable type float Value range Float limits Value after reset 1 In this register, the gear ratio between leading axis position and the following axis position is set in the following axis for the coupling mode Electronic Gearing. The JetMove calculates the gear ratio by a precision of 7 mantissa digits. Register 400: Status Function Description Read As-is coupling status Write Illegal Variable type int / register Value range Bit-coded, 32 bits Value after reset 0 Meaning of the individual bits: Bit 0: 238 1 = Coupled in coupling mode "Electronic Gearing" Jetter AG JetMove 2xx at the JetControl 13.8 How the Table Coupling Mode Works 13.8 How the Table Coupling Mode Works 13.8.1 Overview Introduction The coupling mode Table can be applied in many cases. In order to apply this coupling mode correctly, the user has to be acquainted with the functioning principle and the behavior of the operating system, as well as of the leading and the following axis in this coupling mode. In this Chapter The topics of the following sub-chapter provide the needed know-how: Topic Jetter AG Page Definitions and prerequisites page 240 Calculating the set position page 241 Absolute and relative position coupling page 243 Coupling page 246 Uncoupling page 250 Table processing page 251 Endless table processing page 252 Changing tables on the fly page 254 Axis position overflow within the table page 260 Moving the table - configuration offset page 262 Scaling the table - scaling factor page 263 239 13 Technological Functions JetWeb 13.8.2 Definition of terms Introduction In this sub-chapter, the terms needed for understanding the configuring and operating of the Table coupling mode are defined. Term Definition Table mode The definition of a motion stored to an array of nodes Table configuration In the table configuration, the data framework needed by the operating system for processing a table is stored. This could be the information, for example, which nodes of the node array of the table. Table positions The leading and following axis positions that have been stored for the nodes of a table Table limits The first and the last node of the table Table position range The position range between the first and the last node of the table referring to the leading and following axis respectively Axis position range The range in which the leading and following axis positions are located. It has been defined differently for leading and following axis. For the leading axis: The leading axis position range is in the following axis. It is defined by the maximum and minimum leading axis position (R158 and R159). For the following axis: Travel range being defined by positive and negative travel limit (R182, R183). For modulo axes, it is the modulo travel range. Position of the leading axis The position of the leading axis in the following axis (R188). The leading position is within the leading axis posiiton range. Positioning offset The positioning offset in the coupling mode Table is an internal offset which, at certain events when running in the Tablecoupling mode is generated and maintained by the operating system for leading and following axis individually. There are two kinds of this positioning offset: • • Configuration offset 240 Position offset that cannot be corrected Position offset that can be corrected An offset applied to the stored table positions, in order to achieve shifting the table. It is part of the table configuration. Jetter AG JetMove 2xx at the JetControl 13.8 How the Table Coupling Mode Works 13.8.3 Calculating the set position Introduction In this sub-chapter, calculating the set position for the following axis is described extensively. Calculating the Set Position for the Following Axis The operating system of the following axis generates new set positions for the following axis in a cycle of 2 ms, in order to represent the table in the motion. Below, calculation of following axis values is described step by step: Step 2 Step 1 Step 3 Shifting and scaling Leading axis position offset - cannot be compensated Leading axis position offset - can be compensated Y = (P_Tab x R446 ) + R444 F R433 Yn Leading axis position Leading axis position - input R188 Y 2 Y1 X1 X2 Xn X = (P_Tab x R445 ) + R443 L P_Tab = Positions within the table Step 4 Step 5 Step 6 Assignment Calculation of gradient m Yn+1 Yn Y m= X Following axis position offset - can be compensated R434 Jetter AG Leading axis position - input Step 8 Step 7 Following axis position offset - cannot be compensated m X Xn+1 Leading axis position - input Output position setpoint Leading axis position - output Y Xn Calculation of position setpoint Position setpoint R130 241 13 Technological Functions Step JetWeb Action 1 The non-compensable position offset value of the leading axis is added to the leading axis position value put down in R188. 2 The compensable position offset value of the leading axis is added to the result of step 1. The result is the initial leading axis position. 3 The leading axis position and each of the set following axis positions that have been stored in the table by the user are multiplied by the scaling factor of the table. The configuration offset of the table is added to each result. The result is the respective x- and y-position to continue the process with. 4 Assigning the calculated initial leading axis position to two apt neighboring nodes in the x value range. 5 Calculating the gradient m by means of the x- and y-values of the two table nodes. 6 Calculating the resulting set position by linear interpolation by means of gradient m and the x- respectively y-values of the two nodes. 7 The non-compensable position offset value of the following axis is added to the resulting set position value. 8 The compensable position offset value of the following axis is added to the result of step 7. The result is the set position value of the following axis written in R130. Position Offset The non-compensable position offset and the compensable position offset are internal offsets. They are individually generated and managed by the operating system while functioning in the Table coupling mode at certain events. On the following pages, these position offsets are described in detail. Shifting and Scaling By the scaling factor and the configuration offset, which are set for each table individually, the user can even belayed scale and shift a table. On the following pages, shifting and scaling are described in detail. 242 Jetter AG JetMove 2xx at the JetControl 13.8 How the Table Coupling Mode Works 13.8.4 Absolute and relative position coupling Introduction Both leading and following axis can individually be coupled to the table positions either absolutely or relatively. The subchapter below describes the following items: Absolute and relative position coupling, when does which coupling type exist, how can the user influence the respective coupling type? Absolute Position Coupling: At absolute position coupling, the axis positions are coupled with the table positions without a position offset. Relative Position Coupling At relative position coupling, the axis positions are coupled with the table positions via position offset. Positioning Offset A position offset relating to position coupling is an internal offset. It is generated and managed by the operating system for leading and following axis individually during operation by Table coupling mode at certain events. When does Which Type of Position Coupling Exist? Absolute position coupling exists, as long as none of these events occurs. Relative position coupling is needed from the moment, when at least one of these events has occurred. When an absolute position coupling existed before, there is an automatic transition into relative position coupling as soon as one of the events has occurred. Two Position Offsets For each axis, two kinds of position offset can be generated: • • Position offset that cannot be corrected Position offset that can be corrected Position offset that cannot be corrected: The position offset that cannot be corrected remains up to an event by which it is cleared. Position offset that can be corrected: The position offset that can be corrected can automatically be corrected by means of the operating system. Jetter AG 243 13 Technological Functions Events Triggering a Position Offset JetWeb The operating system generates position offsets for leading and following axis individually, if certain events occur during operation in Table coupling mode. In the table below, these events have been listed, grouped into leading and following axis events and into different position offset types. Axis Event Position offset that cannot be corrected Coupling, if the leading axis position is outside the table limits Leading Axis Overflow of the leading axis position within the table limits Reaching the table limit in endless positioning mode, if the leading axis position range <> table position range Position offset that can be corrected Change of tables, if there is a difference between starting node of the table that is following and the reference point of the table presently applied Position offset that cannot be corrected Overflow of the set leading axis position within the table limits Following axis Reaching the table limit in endless positioning mode, if the travel range <> table position range Position offset that can be corrected Coupling by a position difference between as-is set position (R130) and the calculated coupling-in set position Change of tables, if there is a difference between starting node of the table that is following and the reference point of the table presently applied Cumulating the Offset Values and Clearing the Position Offsets If several events referring to one axis occur simultaneously or in sequence before clearing or reaching the position offset values, the operating system cumulates the individual offset values either in position offset that can, or in position offset that cannot be compensated. The Coupling event causes former position offset values for leading and following axis to be cleared and a new cumulating session to be started. If position offsets occur at the Coupling event, their values are the first cumulated values. Displaying the Position Offset The value of the position offset that cannot be compensated is invisible to the user. The position offset that can be compensated is visible to the user. It is displayed for leading and following axis individually by means of the following registers: • • 244 R433 "Position Difference Leading Axis" R434 "Position Difference Following Axis" Jetter AG JetMove 2xx at the JetControl Compensating for Position Offset 13.8 How the Table Coupling Mode Works In default setting, the operating system immediately compensates a position offset that has occurred by the maximum speed of the following axis. The users can influence the compensation. They can specify another compensating speed. They enter the compensating speed both for leading and following axis into the following registers individually: • • R435 "Correction Velocity Leading Axis" R436 "Correction Velocity Following Axis" In default setting, the correction speed is set to maximum speed (R184). The following behavior can be achieved by the correction speed: Behavior Set Speed v No correction (i.e. relative position coupling remains) v=0 Immediate correction, i.e. there might be a jerk of the following axis v = max. speed (R184) Correction within a defined time 0 > v < max. speed Correcting a position offset explicitely results in a motion of the following axis. This means that correcting a position offset of the leading axis also results in a motion of the following axis as well as correction of a position offset of the following axis itself. This motion is linear. The operating system carries out correction overlaying an already existing table motion. If a position offset is corrected for both leading and following axis simultaneously, this results in an additional overlaid motion. A certain correction speed can cause the following axis to briefly change its direction of motion. Maintaining the Absolute Position Coupling Jetter AG The user can keep up absolute position coupling for leading and following axis by giving heed to the following aspects: • Make modulo settings for leading and following axis • Configure the tables for leading and following axis in a way that the table position range is equal to the modulo position range of the axes • The as-is set position (R130) corresponds to the set coupling position • At coupling and table change make sure there is no position offset, e.g. correction speed = max. speed (R184). 245 13 Technological Functions JetWeb 13.8.5 Coupling Introduction This subchapter contains a definition of coupling and describes the processes for various coupling modes in the operating system. Definition Coupling Coupling means that the set position of the following axis is coupled with the set position output value of the Table coupling mode. Coupling Options The Table coupling mode offers two coupling options: • • Immediate coupling Conditioned coupling The main difference of these two coupling options is the following: Coupling Option Difference Immediate coupling Immediate coupling at the as-is leading axis position Conditioned coupling Coupling, when the leading axis position exceeds a set reference leading axis position of the table definition Immediate Coupling At coupling option immediate coupling , the operating system immediately couples the following axis at the as-is leading axis position of the table. Immediate Coupling How does the Operating System Work? The operating system carries out immediate coupling as follows: Step 246 Action 1 All existing position offsets of leading and following axis are set to 0. 2 The operating system checks, whether the as-is leading axis position (R188) < a negative table limit: If so: The operating system keeps adding the table position range to the leading axis position, until a position results, which is inside the table position range. This position is then made the as-is leading axis position for the further process. The total of addition values is stored as uncorrectable position offset. To be continued with step 4. If this is not the case: To be continued with step 3. Jetter AG JetMove 2xx at the JetControl Step 3 13.8 How the Table Coupling Mode Works Action The operating system checks, whether the as-is leading axis position (R188) > a positive table limit: If so: The operating system keeps subtracting the table position range from the leading axis position, until a position results, which is inside the table position range. This position is then made the as-is leading axis position for the further process. The total of subtraction values is stored as uncorrectable position offset. To be continued with step 4. If this is not the case: To be continued with step 4. 4 The operating system assigns the as-is leading axis position (R188) to two corresponding table nodes. 5 The operating system calculates the set coupling position of the following axis by information taken from the table definition. 6 The operating system calculates the position offset that can be corrected between as-is position of the following axis and the calculated as-is position. It stores the position offset to R434 "Position Difference Following Axis". The operating system considers the table position range as a modulo system. This means that table start and end are identical and that any table position can be reached either by covering the table nodes in clockwise or in anti-clockwise direction. In this case, the operating system calculates the position offset marking the shortest distance between the as-is position and the set coupling position from the modulo viewpoint. 7 Conditioned Coupling The operating system couples te set position of the following axis with the set value output in Table coupling mode. At the coupling option conditioned coupling, the operating system causes the following axis to be coupled no sooner than when the as-is leading axis position either exceeds or comes short of a reference leading axis position. The user has to set the reference leading axis position and the coupling condition. It defines, whether the as-is leading axis position is to exceed or come short of the reference leading axis position. To define the reference leading axis position, the user selects a node from the table definition. The leading axis position that has been stored for this node will then be used as reference leading axis position. The coupling condition is defined by the user with the help of the so-called start type. Jetter AG 247 13 Technological Functions Coupling Conditions JetWeb The user can choose one of two coupling conditions: – Condition 1: as-is leading axis position >= reference leading axis position – Condition 2: as-is leading axis position <= reference leading axis position The coupling conditions have been designed for these corresponding purposes: Condition Conditioned Coupling How does the Operating System Work? Purpose Condition 1: The leading axis enters the table position range from the left Condition 2: The leading axis enters the table position range from the right The operating system carries out conditioned coupling as follows: Step Action 1 All existing position offsets, including the correctable position offset, of leading and following axis are set to 0. 2 Wait, until precondition has been met. The pre-condition is the negation of the selected coupling condition. It is needed to first of all get into the stage, where the selected coupling condition has not been met. The pre-conditions relate to the conditions as follows: – Pre-condition for condition 1: as-is leading axis position < reference leading axis position – Pre-condition for condition 2: as-is leading axis position > reference leading axis position In this case, the pre-condition cannot be set by comparing the leading axis positions: – axis position range = table position range – and the reference leading axis position is at one of the table limits In this case, exceeding the respective modulo limit is checked in addition: – At condition 1: Positive modulo limit exceeding is checked – At condition 2: Negative modulo limit exceeding is checked 248 Jetter AG JetMove 2xx at the JetControl Step 3 13.8 How the Table Coupling Mode Works Action Wait, until the selected coupling condition has been met. – Condition 1: as-is leading axis position >= reference leading axis position – Condition 2: as-is leading axis position <= reference leading axis position 4 The operating system calculates the set coupling position of the following axis by information taken from the table definition. 5 The operating system calculates the position offset that can be corrected between as-is position of the following axis and the calculated as-is position. It stores the position offset to R434 "Position Difference Following Axis". The operating system considers the table position range as a modulo system. This means that table start and end are identical and that any table position for an axis can be reached either by covering the table nodes in clockwise or in anti-clockwise direction. In this case, the operating system calculates the position offset marking the shortest distance between the as-is position and the set coupling position from the modulo viewpoint. 6 The operating system couples te set position of the following axis with the set value output in Table coupling mode. Application Conditioned Coupling The coupling option conditioned coupling is mainly used in applications, where the following axis is to be coupled to a leading axis which is continually in motion, such as a flying saw. Error Message at Coupling At coupling, the operating system checks correctness of the respective table. If it detects errors in table configuration or in the set nodes, it issues the following error messages via the following bits: Bit 20 Faulty leading axis position range, respectively bit 21 Table configuration is invalid in R170 Error Referencing / Positioning / Table. In these error cases, the axes are not coupled with the table. Jetter AG 249 13 Technological Functions JetWeb 13.8.6 Uncoupling Introduction Uncoupling is not only required in average processes, but it is also essential in emergency situations. Various options of uncoupling are presented below. Definition Uncoupling Uncoupling means that the set position of the following axis is separated from the set position output value of the Table coupling mode. Uncoupling Options There are various options of uncoupling. They are listed and described below: Uncoupling Option • 250 Immediate Uncoupling - control function remains The following axis uncouples immediately without driving a ramp. It remains at this point by position control. - by blocking the output stage The following axis uncouples immediately without driving a ramp. The output stage is blocked. • Uncoupling at the end of the table • Uncoupling by a ramp • Action The following axis uncouples without a ramp no earlier than at the table end. At this position, it remains in position control. - by user-defined ramp The following axis uncouples immediately by the user-defined ramp (R106). After driving the ramp, it remains at this point by position control. - by maximum deceleration The following axis uncouples immediately by maximum deceleration (R180). After driving the ramp, it remains at this point by position control. - by emergency stop ramp The following axis uncouples immediately by driving the emergency stop ramp (R549) in speed-controlled manner. After driving the ramp, the output stage is blocked automatically. Uncoupling by positioning - by point-to-point positioning The following axis uncouples immediately and changes into absolute point-to-point positioning in jerk-free manner. - by endless positioning The following axis uncouples immediately and changes to endless positioning in jerk-free manner. Jetter AG JetMove 2xx at the JetControl 13.8 How the Table Coupling Mode Works 13.8.7 Processing the table Introduction When the following axis has been coupled, table processing can start. Below, the term "Table Processing" is explained and some options of table processing will be presented. Definition Table Processing Table processing means that leading and following axis are completely covering the defined nodes either by exceeding the table limits or by changing direction within the table limits. Table Processing Options The table can be processed in different ways: They have been listed below: Processing Option Positive, negative processing Change of direction One-time processing Triggered processing Endless processing Changing tables on the fly The individual processing options have been described in detail partially in this and partially in the following two sub-chapters. Positive, Negative Processing The table can be processed both in positive and in negative direction. The motion direction of the leading axis determines the processing direction. Change of Direction At table processing, change of direction is permitted. For a change of table processing direction, the leading axis has to change its direction. One-Time Table Processing The following axis can be coupled in a way that it is automatically uncoupled by the operating system when the leading axis position exceeds a table limit. In this case, the operating system carries out immediate uncoupling at remaining control function. Triggered Table Processing There is the option to start table processing by an external trigger signal. The Virtual Position Counter has to be defined as leading axis in order to make use of this option. This option has been described in detail in the Virtual Position Counter section of this manual. Jetter AG 251 13 Technological Functions JetWeb 13.8.8 Endless table processing Introduction Below, endless table processing has been described and how the operating system handles endless table processing. Definition Endless Table Processing Endless table processing means that, at reaching a table limit, the leading axis continues table processing automaticallly at the opposite table limit and without a jerk of leading or following axis. This way, table processing can be repeated continuously. Requirements The following axis has to be configured as a modulo axis for endless table processing. If a JetMove functions as leading axis module, the leading axis has to be configured as a modulo axis as well. Processing at the Table Limit The operating system processes the change from one table limit to the other depending on the position ranges. It is crucial that the axis position range corresponds to the table position range of the leading, respectively of the following axis. There are two cases for both leading and following axis: • • Processing and Behavior in Case 1 Case 1: Axis position range = table position range Case 2: Axis position range <> table position range If the axis position range = table position range, the operating system does not have to calculate a position offset. If the axis is in absolute position coupling, it remains even after changing from one table limit to the other. The leading/following axis diagram illustrates the behavior of the axis positions at the table limit, if case 1 applies both to leading and following axis. In the leading/following axis diagram, the table is processed in positive direction. The leading axis position has got an axis position range from 0 to 360°, while the following axis has got an axis position range from 0 to 80 mm. For both axes, the table position range is equal to their axis position range. 360 360 270 ° 270 Modulo processing 1 180 0 Modulo processing 2 180 20 20 90 40 Modulo processing 1 80 60 40 Modulo processing 2 60 Table processing 1 mm 90 Position setpoint - following axis 80 Etc. Table processing 2 mm ° Axis position range Table position range Leading axis position 252 Jetter AG JetMove 2xx at the JetControl Processing and Behavior in Case 2 13.8 How the Table Coupling Mode Works If the axis position range <> table position range, the operating system has to calculate a position offset at the following events: Event Overflow of the axis position within the table limits Reaching the table limit The calculated position offset cannot be compensated. If, preceding one of these events, the axis is in absolute position coupling, this mode will automatically turn into relative position coupling. The leading / following axis diagram illustrates the transition behavior of the axis at the table limits, if the following factors apply to leading and following axis: • • Leading axis: Axis position range > table position range Following axis Axis position range > table position range In the leading /following axis diagram, the table is processed in positive direction. The leading axis position has got an axis position range from 0 to 360°, while the following axis has got an axis position range from 0 to 80 mm. The table position range, though, is 0 to 60 mm for the following axis and 0 to 270° for the leading axis. 360 270 90 Modulo processing 2 180 90 Modulo processing 1 Etc. Table processing 3 180 20 ° s Axis position range 360 0 40 270 20 40 0 180 40 60 20 90 60 60 270 80 Modulo processing 1 Position setpoint - following axis Table processing 1 mm s Modulo processing 2 mm 80 Table processing 2 ° Table position range Leading axis position Recommendation Jetter AG For the sake of easy handling, we recommend to process endless mode by case 1. 253 13 Technological Functions JetWeb 13.8.9 Changing tables on the fly Introduction For a following axis, several tables can be created. It is possible to change between these tables on the fly. Below, we give an explanation of what changing tables on the fly means and how it is performed. Definition Changing Tables on the Fly At changing tables on the fly, a changeover between tables is made while a table is being processed, i.e. while leading and following axis are in motion. Application Changing tables on the fly allows for dynamic modification of the motion profile for the following axis. At which Position can the Changeover be Performed? JetMove supports changing tables on the fly at the table limits only. Changeover Process The operating system links the axis positions of the old table and the new table, in order to enable the changeover. For this, it establishes a relation from a leading axis position stored in one table to a leading axis position stored in the other table. It also establishes a relation between two set positions of the following axis that have been stored in the two different tables. These are only positions that have been stored in the first and last node of the respective table. Table processing in positive direction: The last or first node of the first table (depending on the respective axis) must have the same position value as the first node of the new table. Table processing in negative direction: The last node of the new table must have the same position value as the first or last node of the first table (depending on the respective axis). If the positions of a position pair are not identical, the position difference for the axis of the respective position pair is added to a position offset that can be compensated for. Modulo Processing Mainly, changeover means to define, whether, when changing over to a new table, the system is to carry out modulo operation for the leading axis position, respectively for the set position of the following axis. Changeover Types Via R432 Change Type, the user defines the position (leading axis position, respectively set position), for which the operating system is to carry out modulo operation, in other words - which position of the former table is assigned to which position of the new table for the respective axis. 254 Jetter AG JetMove 2xx at the JetControl 13.8 How the Table Coupling Mode Works There are four changeover types. The following list specifies these changeover types and the position assignments depending on the table processing direction. The following symbols are used in the list: • Type = Changeover type • PE = first node, and PL = last node of a table • Fat arrow in the graphics = direction of table processing Type Axis Relation of Positions First Table 0 Set Table Leading Axis: Modulo Operation Following Axis: Modulo Operation Positive Processing Direction First node First node Following axis First node First node Position setpoint - following axis Leading axis mm 80 70 Former table 60 New table 50 40 30 20 PE (0,0) PE (0,0) 10 0 180 360 0 180 360 ° Leading axis position Negative processing direction Jetter AG Leading axis Last node Last node Following axis Last node Last node 255 13 Technological Functions JetWeb Position setpoint - following axis mm 70 60 PL (360,70) PL (360,70) 80 New table Former table 50 40 30 20 10 0 180 360 0 180 360 ° Leading axis position 256 Jetter AG JetMove 2xx at the JetControl 13.8 How the Table Coupling Mode Works Type Axis Position Pairs First Table 1 Set Table Leading Axis: Modulo operation Following Axis No modulo operation Positive processing direction Leading axis First node First node Following axis Last node First node Position setpoint - following axis mm PL (360,70) PE (0,70) 80 70 Former table New table 60 50 40 30 20 PE (0,0) 10 0 180 360 0 180 360 ° Leading axis position Negative processing direction Leading axis Last node Last node Following axis First node Last node Position setpoint - following axis mm PL (360,70) PE (0,70) 80 70 Former table 60 50 40 30 PL (360,0) 20 10 0 180 360 0 180 360 ° Leading axis position Jetter AG 257 13 Technological Functions JetWeb Type Axis Position Pairs First Table 2 Set Table Leading Axis: No modulo operation Following Axis: Modulo operation Positive processing direction Last node First node Following axis First node First node Position setpoint - following axis Leading axis mm PL (180,70) 80 70 Former table 60 New table 50 40 30 20 PE (180,0) PE (0,0) 10 0 90 180 180 270 360 ° Leading axis position Negative processing direction Leading axis First node Last node Following axis Last node Last node Position setpoint - following axis mm 70 60 PL (360,70) PL (180,70) 80 New table Former table 50 40 30 PE (180,0) 20 10 0 90 180 180 270 360 ° Leading axis position 258 Jetter AG JetMove 2xx at the JetControl Type 13.8 How the Table Coupling Mode Works Axis Position Pairs First Table 3 Set Table Leading Axis: No modulo operation Following Axis: No modulo operation Positive processing direction Leading axis Last node First node Following axis Last node First node Position setpoint - following axis mm PL (180,70) = PE(180,70) 80 70 60 New table Former table 50 40 30 20 10 0 90 180 180 270 360 ° Leading axis position Negative processing direction Leading axis First node Last node Following axis First node Last node Position setpoint - following axis mm PL(180,70) = PE(180,70) 80 70 60 New table Former table 50 40 30 20 10 0 90 180 180 270 360 ° Leading axis position Jetter AG 259 13 Technological Functions JetWeb 13.8.10 Axis position overflow within the table Introduction If the axis position range of the leading or following axis is smaller than the table position range, the axis position range overflows during table processing. Please see below which are the requirements for axis position overflow, how the operating system proceeds the overflow, which are the consequences of the overflow, which can be the results of an overflow. Requirements In order to correctly carry out axis overflow for the respective axis, the axis has to be configured as a modulo axis. For the leading axis, this is only required, if the leading axis module is a JetMove. In the leading axis modules JX2-CNT1 and Virtual Position Counter, the modulo setting has been implemented. Processing In case of an overflow, the operating system calculates a position offset that cannot be compensated. In this case, the operating system adds the amount of the modulo travel range to the position offset of the respective axis. This position offset cannot be compensated. Result of the Overflow If, preceding the overflow, the axis was in absolute position coupling, this mode will automatically turn into relative position coupling. Two Overflow Situations Relating to complete table processing in one direction, an overflow results in one of the following two situations: • • In case of a short-time overflow situation, the table is defined for an axis as follows: The axis has an overflow at a certain table position. Later in the process it returns to get back to its last modulo operation. This means that, if absolute position coupling existed before the process started, it is re-established at the end of the process. This is only possible for the following axis. 20 100 60 40 40 20 20 0 ° 360 60 270 80 180 80/0 Position setpoint - following axis - Table - 360 270 180 Leading axis position - table 90 mm 90 Position setpoint - following axis Short-Time Overflow Situation Short-time overflow situation Permanent overflow situation Axis position range Table position range Leading axis position 260 Jetter AG JetMove 2xx at the JetControl Permanent Overflow Situation 13.8 How the Table Coupling Mode Works For a permanent table overflow situation, the overflowing axis has been set to not returning in the further process. This means that the relative position coupling remains set even at the end of the process. This can be applied to both axes. 100 40 40 20 20 0 ° Leading axis position 90 60 360/0 60 270 80 180 80 Position setpoint - following axis - Table - 450 360 270 180 90 mm 90 Position setpoint - following axis Leading axis position - table Axis position range Table position range Jetter AG 261 13 Technological Functions JetWeb 13.8.11 Moving the table - Configuration offset Introduction By means of a configuration offset, a table can be moved in relation to the stored table positions. This way, the table can be adjusted to an axis position range other than the set one. Below, the functioning of moving an axis, as well as the available registers are described. Operating Principle Both for leading and following axis, there is the possibility of specifying a configuration offset. It is added to all saved table positions of the axis. This results in new table positions which are used for coupling instead of the stored ones. A change of a configuration offset will not take effect before the next C46. Example Below, a sample offset is illustrated. The leading axis position is set to an offset of 90°, while the set position of the following axis is set to an offset of 40 mm. This way, the following axis processes the table by the same motion, yet performing the following changes: • The motion does not take place any more in the position range from 0 - 80 mm, but in a position range from 40 - 120 mm. • If absolute position coupling is to be carried out, the starting node of the following axis motion is no more 0, but at 40 mm. 100 80 80 60 60 Offset 360 270 180 0 450 Offset 360 40 20 270 40 180 262 mm 90 Registers mm 120 90 Position setpoint - following axis For the leading axis, there is the following change: • It does not move between 0° and 360°, but between 90° and 450°. • The axis position range between 0° and 90° is now outside the table position range. ° ° Original table Moved table Leading axis position The configuration offset can be specified via the following registers for leading and following axis: • R443 Configuration Offset - Leading Axis Position • R444 Configuration Offset - Following Axis Position Jetter AG JetMove 2xx at the JetControl 13.8 How the Table Coupling Mode Works 13.8.12 Scaling the table - Scaling factor Introduction With the help of the scaling factor, a table can be scaled to be different from the stored table positions. This means it can be compressed, respectively flattened. This way, the table can be adjusted to an axis position range other than the set one. Below, the functioning of scaling, as well as the available registers are described. Operating Principle Both for leading and following axis, there is the possibility of specifying a scaling factor. All stored table position values of the axis are multiplied by this scaling factor. This results in new table positions which are used for coupling instead of the stored ones. A change of a scaling factor will not take effect before the next C46. Example Below, a sample scaling is illustrated. The leading axis position having got the default scaling factor 1 remains unchanged. For the set position of the following axis, a scaling factor of 1.25 has been specified. This way, the following axis processes the table by the original motion profile, yet performing the following changes: • • • The following axis moves in a profile flattened by factor 1.25. The following axis travels a distance longer by factor 1.25. At the same speed as the leading axis has got, the following axis reaches a higher maximum speed. 80 80 40 20 20 0 ° 360 60 40 270 60 Original table Scaled table Leading axis position The scaling factor can be specified via the following registers both for leading and following axis: • • Jetter AG mm 100 180 Registers mm 90 Position setpoint - following axis In this example, no changes result for the leading axis. R445 Scaling Factor - Leading Axis Position R444 Scaling Factor - Following Axis Position 263 13 Technological Functions 13.9 JetWeb Configuring the Table Coupling Mode 13.9.1 Overview Introduction In this subchapter, configuring the Table coupling mode is described in detail. In this Chapter This sub-chapter contains the following topics: Topic 264 Page Axis and table position range page 265 Basics on setting the nodes page 266 The configuration objects page 267 Overview over configurations page 270 Configuring the table page 271 Register description page 273 Jetter AG JetMove 2xx at the JetControl 13.9 Configuring the Table Coupling Mode 13.9.2 Axis and table position range Introduction Below, the rules for defining the axis and table position range for operating a following axis of the Table coupling mode is described. Miscellaneous Options The axis position range of both leading and following axis can be set in a defined relation to the table position range of both leading and following axis as regards the sizes: The axis position range can be • • • equal to, greater or smaller than the table position range. Rules The following rule applies to those two position ranges covering each other in each of the cases listed above: Case Covering equal The axis position range completely covers the table position range. greater The axis position range completely covers the table position range. smaller The table position range completely covers the axis position range. Applying the Configuration Offset If the respective rules have not been complied with, the table position range can be moved by means of the configuration offset in such a way that the desired amount of covering results. Coupling in the Smaller Case In case the axis position range is smaller than the table position range, please note: The following axis cannot be coupled at any table position, but only in a table position range covered by the axis position range. Jetter AG 265 13 Technological Functions JetWeb 13.9.3 Basics on setting the nodes Introduction The purpose of nodes is to define the motion profile resulting from the leading and following axis motions as precisely as possible. Defining motion elements by means of nodes, as well as restrictions and rules to be considered are described below. Straight Lines and Curves A motion consists of the two elements straight line and curve. In the table below, defining these motion elements by means of nodes. Motion Element Action Straight line Two nodes, initial and end point of the straight line Curve Several nodes, all of them being positioned on the curved path The profile of the curve during the process depends on the number of nodes. The greater the density of the nodes, the more differentiated is the profile. Maximum Density of Nodes At the maximum leading axis speed required for an application, not all nodes are considered, if the nodes are too close to each other. In this case, nodes are skipped, which means they do not contribute to the motion profile. After 2 milliseconds max., the operating system switches over to the next node. This switching-over time cannot be influenced. It defines the maximum density of nodes at a given maximum leading axis speed. Minimum Number of Nodes A table has to consist of at least two nodes. Rules of Defining a Leading Axis Position At defining the leading axis positions, please comply to the following rules: Remarks Set Position Please mind when defining the set node positions: 1. The values of the leading axis positions have to be continually increasing from the first to the last node. 2. Each leading axis position may only occur once. 1. The set node position values can be in increasing or decreasing order. 2. Following axis positions are allowed to occur several times, e.g., if the following axis is to remain in one position, while the leading axis is moving. 266 Jetter AG JetMove 2xx at the JetControl 13.9 Configuring the Table Coupling Mode 13.9.4 The configuration objects Introduction For configuring the Table coupling mode, there are configuration objects available which serve as a means of communication with the user. Please read below, which are these configuration objects, how they are structured and how the user can access them. Life of the Data Data which contain the configuation objects remain stored as long as the JetMove is being supplied with power, or until a software reset is triggered. Configuration Objects The following configuration objects are available for configuration: • • Node Array Node array Table configurations The nodes of a table are stored to the node array. The node array is structured as follows: • • It contains 4,096 elements Every element can store two positions as float values: - Leading axis position - Following axis position The following registers are available for the user to access the node array: • • • R440 = Pointer to elements (0 ... 4,095) R441 = Leading axis position of the presently active element R442 = Following axis position of the presently active element The following illustration shows the structure of, and the access to the node array: Leading axis position Following axis position 0 1 2 Element 3 4 ... 100 101 102 103 104 R441 R442 ... 150 151 152 153 ... 4095 R440 = Pointer to the element = 101 Total number of elements Jetter AG 267 13 Technological Functions All Tables in Node Array JetWeb The node array stores the nodes for all defined tables. The number and positions of the nodes and the node array referring to the respective table can be determined at will by the user. The following illustration gives an example of three tables sharing the node array. Registers R410, R411, R413 are registers of this table configuration: R410 = Table pointer, R411, R413 = Index of the first and last node in the node-array. Table 0 R410 = 0 R411 = 0 R413 = 4 0 1 2 Element Table 1 3 4 ... Table 2 R410 = 1 R411 = 100 R413 = 104 100 101 102 103 104 R411 = 100 ... R410 = 2 R411 = 150 R413 = 153 150 151 152 153 ... 4095 R413 = 104 Total number of elements Table Configuration The table configuration is a data structure, to which the entire data framework of the table has been stored. A JetMove provides 24 of these table configurations. A table configuration comprises the following elements: • • • • • • • Index of the first table node in the node array Index of the last table node in the node array Index for the reference node in the node array at conditioned coupling Configuration offset for the leading axis position Configuration offset for the following axis position Scaling factor for the leading axis position Scaling factor for the following axis position These registers are available to the user for accessing the table configuration: Selection of the table configuration: • R410 = Pointer to the Table Configuration (0 ... 23) Access to the individual elements of the table configuration having been selected via R410: • R411 = Index - First Node • R412 = Index - Reference Node • R413 = Index - Last Node • R443 = Configuration Offset - Leading Axis Position • R444 = Configuration Offset - Following Axis Position • R445 Scaling Factor - Leading Axis Position • R446 = Scaling Factor - Following Axis Position The following illustration shows the structure of, and the access to, the table configurations: 268 Jetter AG JetMove 2xx at the JetControl 13.9 Configuring the Table Coupling Mode Index - first node R411 Index - reference node R412 Index - last node R413 Configuration offset - leading axis position R443 Configuration offset - foll. axis position R444 Scaling factor - leading axis position R445 Scaling factor - following axis position R446 0 1 2 3 4 ... 23 R410 = Pointer to table configuration Table configuration Number of table configurations Jetter AG 269 13 Technological Functions JetWeb 13.9.5 Overview of configurations Overview The following structure tree shows all possibilities of configuring the Table coupling mode, that will be described below. This overview contains the most relevant registers and commands that will be used in the following descriptions. R = Register; C = Command via R101 Coupling mode Table 270 Configuration Setting the table configuration R413 R443 Saving the nodes R446 R440 R441 R442 Configuring the table Jetter AG JetMove 2xx at the JetControl 13.9 Configuring the Table Coupling Mode 13.9.6 Configuring the table Introduction Configuring a table implies the two following steps: • • Setting the table configuration Saving the nodes These two steps are described in detail below. Register Overview of the Table Configuration Setting the Table Configuration For setting the table configuration, the data framework of the table is written to the table configuration. The registers for accessing the table configuration have been listed below. Register Name Brief Description R410 Pointer to Table Configuration Pointer to table configuration (0 ... 23) R411 Index - First Table Point Index - first table node R412 Index - Start Table Point Index - reference node R413 Index - Last Table Point Index - last table node R443 Configuration Offset Leading Axis Position Configuration offset of the leading axis position R444 Configuration Offset Following Axis Position Configuration offset of the following axis position R445 Scaling Factor - Leading Axis Position Scaling factor of the leading axis position R446 Scaling Factor - Following Axis Position Scaling factor of the following axis position To set a table configuration in the following axis, take the following steps: Step 1 Action Selecting the table configuration to be applied Action: Writing the respective number to R410 Pointer to Table Configuration 2 Setting the index of the node array, in which the first table node is to be stored Action: Writing to R411 Index - First Table Point the respective index Reaction: R412 Index - Start-Table Point is automatically set to this index as well. Jetter AG 271 13 Technological Functions 3 JetWeb Setting the index of the node array, in which the last table node is to be stored Action: Writing to R413 Index - Last Table Point the respective index 4 Setting the configuration offset for the leading and following axis position Action: Writing the respective offset to R443 Configuration Offset Leading Axis Position and R444 Configuration Offset - Following Axis Position 5 Setting the scaling factor for the leading and following axis position Action: Writing the respective factor to R445 Scaling Factor - Leading Axis Position and R446 Scaling Factor - Following Axis Position Register Overview for Saving Nodes Saving the Nodes For saving nodes to JetMove, the node array is written to at the respective position. Below, the registers for accessing the node array have been listed: Register Name Brief Description R440 Index to Table Node Index to an element of a node array R441 Leading Axis Position Leading axis position of the node R442 Following Axis Position Following axis position of the node To save the nodes in the following axis, take the following steps: Step Action 1 Selecting the index of the node array, to which the first table node is to be saved Action: Writing the respective index to R440 Index to Table Node 2 Saving the leading axis position Action: Writing the respective position value to R441 Leading Axis Position 3 Saving the following axis position Action: Writing the respective position value to R442 Following Axis Position Reaction: R440 Table Node is automatically incremented by 1 4 272 Repeating the procedure starting from step 2, until all the positions of all nodes have been entered Jetter AG JetMove 2xx at the JetControl 13.9 Configuring the Table Coupling Mode 13.9.7 Description of registers Register 410: Table Config Index Function Description Read As-is index of the table configuration that is to be edited Write Set index Amplifier status No specific status Takes effect Immediately Variable type int / register Value range 0 ... 23 Value after reset 0 Register 411: Index - First Table Node Function Description Read Index of the first table node in the node array Write Set index Amplifier status No specific status Takes effect Immediately Variable type int / register Value range 0 ... 4,095 Value after reset 0 Register 412: Index - Start Table Node Function Description Read Index of the reference table node in the node array Write Set index Amplifier status No specific status Takes effect Immediately Variable type int / register Value range 0 ... 4,095 Value after reset 0 The leading axis position of the starting node is used for conditioned coupling as a reference leading axis position. Jetter AG 273 13 Technological Functions JetWeb Register 413: Index - Last Table Node Function Description Read Index of the first table node in the node array Write Set index Amplifier status No specific status Takes effect Immediately Variable type int / register Value range 0 ... 4,095 Value after reset 0 Register 440: Table Node Function Description Read As-is index of the node-array element that is to be edited Write Set table node Amplifier status No specific status Takes effect Immediately Variable type int / register Value range 0 ... 4,095 Value after reset 0 Register 441: Leading Axis Position Function Description Read As-is leading axis position of the selected element Write Set leading axis position Amplifier status No specific status Takes effect Immediately Variable type float Value range Float limits [°] or [mm] This unit depends on the setting of the axis type defined in R191 in the leading axis Value after reset 274 0 [°] Jetter AG JetMove 2xx at the JetControl 13.9 Configuring the Table Coupling Mode Register 442: Following Axis Position Function Description Read As-is following axis position of the selected element Write Set following axis position Amplifier status No specific status Takes effect Immediately Variable type float Value range Float limits [°] or [mm] This unit depends on the setting of the axis type defined in R191 of the following axis. Value after reset 0 [°] Note! When R442 is written into, R440 will be incremented by one automatically. Register 443: Configuration Offset - Leading Axis Position Function Description Read As-is offset for shifting the table in the direction of the leading axis position (abscissa) Write Set offset Amplifier status No specific status Takes effect Next C46 Variable type float Value range Float limits [°] or [mm] This unit depends on the setting of the axis type defined in R191 in the leading axis Value after reset Jetter AG 0 [°] 275 13 Technological Functions JetWeb Register 444: Configuration Offset - Following Axis Position Function Description Read As-is offset for shifting the table in the direction of the following axis position (ordinate) Write Set offset Amplifier status No specific status Takes effect Next C46 Variable type float Value range Float limits [°] or [mm] This unit depends on the setting of the axis type defined in R191 of the following axis. Value after reset 0 [°] Register 445: Scaling Factor - Leading Axis Position Function Description Read Scaling factor for flattening / compressing the table in the direction of the leading axis position (abscissa) Write Set scaling factor Amplifier status No specific status Takes effect Next C46 Variable type float Value range Positive float limits (negative factors are permitted) Value after reset 0 Register 446: Scaling Factor - Following Axis Position Function 276 Description Read Scaling factor for flattening / compressing the table in the direction of the following axis position (ordinate) Write Set scaling factor Amplifier status No specific status Takes effect Next C46 Variable type float Value range Float limits Value after reset 0 Jetter AG JetMove 2xx at the JetControl 13.10 Carrying out the Table Coupling Mode 13.10 Carrying out the Table Coupling Mode 13.10.1 Overview Introduction This sub-chapter describes in detail how the user has to proceed in detail when carrying out the Table coupling mode, and what the user has to know and to consider. In this Chapter This sub-chapter contains the following topics: Topic Jetter AG Page Overview over operations page 278 Referencing the leading axis position page 279 Coupling immediately page 281 Conditioned coupling page 284 Uncoupling page 287 Changing tables on the fly page 289 277 13 Technological Functions JetWeb 13.10.2 Overview of operations Overview The following structure tree shows all possibilities of operating in the Table coupling mode, that will be described below. This overview contains the most relevant registers and commands that will be used in the following descriptions. R = Register; C = Command via R101 Leading axis: JetMove Referencing the leading axis Leading axis: JX2-CNT1 Leading axis: Virtual Position Counter Immediate coupling Coupling Conditioned coupling Referencing the leading axis Referencing the leading axis + R188 R188 R402 R448 R449 C46 R402 R412 R448 R449 C46 Control function remains Coupling Mode R449 C45 Immediately Table Final stage is blocked Operating At the table end Uncoupling With ramp With positioning Changing tables on the fly 278 C02 Control function remains R449 C45 User-defined ramp (R106) C06 Maximum deceleration (R180) C05 Emergency stop ramp (R549) C07 Point-to-point positioning C10 Endless positioning C56 R402 R448 R449 R432 C46 Jetter AG JetMove 2xx at the JetControl 13.10 Carrying out the Table Coupling Mode 13.10.3 Referencing the leading axis position Introduction Referencing the leading axis position (R188) in the following axis before coupling may be needed for establishing a relation with the leading axis position. Referencing differs depending on the respective leading axis module. Register Overview For referencing the leading axis position, the following register has been provided in the following axis: Configuration Steps: Leading Axis Module JetMove Register Name Brief Description R188 Leading Axis Position Leading axis position The following step has to be carried out for referencing the leading axis position by means of the leading axis module JetMove. Step 1 Action Referencing the leading axis Action: Referencing the leading axis, or setting a reference position by command, e.g. command C03 Set Reference. Result: Leading axis position (R188) in the following axis shows the referencing position of the leading axis. Configuration Steps: Leading Axis Module JX2-CNT1 The following steps have to be carried out for referencing the leading axis position by means of the leading axis module JX2-CNT1. Step 1 Action Referencing the leading axis Action: Referencing in the leading axis, or else setting a reference position by writing the value to R3xx0 2 Setting the respective leading axis position Action: Corresponding to the reference position (R3xx0) of the leading axis, the leading axis position in the following axis is set by writing to R188. Example: The reference position (R3xx0) is referenced to position 0. The leading axis position (R188) is also to have position 0: R188 := 0 Jetter AG 279 13 Technological Functions Configuration Steps: Leading Axis Module Virtual Position Counter JetWeb The following steps have to be carried out for referencing the leading axis position by means of the leading axis module Virtual Position Counter. Step 1 Action Setting the leading axis position Action: Writing the desired referencing position to R188 "Leading Axis Position" in the leading axis. Result: Leading axis position (R188) in all external following axes shows the referencing position of the leading axis position (R188). 280 Jetter AG JetMove 2xx at the JetControl 13.10 Carrying out the Table Coupling Mode 13.10.4 Immediate coupling Introduction Immediate coupling of the following axis can be carried out in the following two variants: • • Variant 1: Immediate coupling at table processing once Variant 2: Immediate coupling at endless table processing Below, secondary information regarding both variants are described. Then, the detailed procedure for each variant is described in an individual table. What is to be Given Heed to when Coupling the Axis? Please mind the following details before immediate coupling: In each case: The details listed below have to be considered both in absolute and in relative position coupling: • • Both leading and following axis have to be at standstill. The following axis has to be in uncoupled condition. This can be checked from R400 Status Word of the Coupling Modes . Absolute position coupling: If the following axis is to be coupled by absolute position coupling, please mind the following details: • • The correction speed of the following axis (R436) has to be set to value > 0. The set position (R130) of the following axis has to be at the set coupling position. If the axis position range is smaller than the table position range, and if coupling at the left or right table edge is required, please mind the following as well: • The set position (R130) of the following axis has to be exactly on the respective position at the table edge. The output stage being activated, this can be done by positioning or by setting a reference (command 3) on the respective position at the table edge. • The leading axis has to be set in such a way, that it will transmit (R151 = y04) its set position (R130). The set position (R130) has to be exactly on the position at the table edge, just as the set position of the following axis. As it is with the following axis, this also has to be done by positioning or setting a reference (command 3), the output stage being activated. If those two items are not given heed to, the following axis will jerk. Jetter AG 281 13 Technological Functions JetWeb What is to be Given Heed to when Coupling the Axis? Relative position coupling (continued) • The correction speed of the following axis (R436) has to be set to value = 0. • If the set position of the following axis is outside the table position range, the following applies: The set position of the following axis is only allowed to be outside the table position range by the value of one table position range. Command and Register Overview If the following axis is to be coupled by relative position coupling, please mind the following details: For immediate coupling, the following registers and commands out of command register R101 Command are applied. In this case, the abbreviations have got the following meanings: R = Register, C = Command Name of Command / Register Brief Description C46 Table coupling Coupling by the Table coupling mode R400 Status The status of the coupling modes are displayed R402 Table Start Index Index for selecting the table configuration, the table of which is to be coupled. R420 As-Is Table Index Index for displaying the table configuration, the table of which presently coupled. R432 Change Type Type of changeover between tables R448 Start Type Coupling mode R449 Stop Type Uncoupling mode Error Message at Coupling At coupling, the operating system checks correctness of the respective table. If it detects errors in table configuration or in the set nodes, it issues the following error messages via the following bits: Bit 20 Faulty leading axis position range, respectively bit 21 Table configuration is invalid in R170 Error Referencing / Positioning / Table. In these error cases, the axes are not coupled with the table. Steps at Processing the Table Once The following steps have to be taken at immediate coupling for processing the table once: Step 1 Action Selecting the table to be coupled Action: Writing the respective table configuration index to R402 Table Start Index 282 Jetter AG JetMove 2xx at the JetControl 2 13.10 Carrying out the Table Coupling Mode Setting the mode of immediate coupling and of uncoupling at processing the table once Action: R448 Start Type = 0 R449 Stop Type = 1 3 Activate coupling Action: R101 Command = 46 4 Checking the coupling (optional) Action: Check, whether the corresponding values are displayed: – Bit R400.1 cb_Tab_Status_TabLinked = 1 (table has been coupled) – R420 As-Is Table Index = Table index that has been set in R402 Steps at Endless Table Processing The following steps have to be taken at immediate coupling for endless table processing: Step 1 Action Selecting the table to be coupled Action: Writing the respective table configuration index to R402 Table Start Index 2 Setting the mode of immediate coupling and of uncoupling at endless table processing Action: R448 Start Type = 0 R449 Stop Type = 0 3 Making sure the changeover type has been set to the default value Action: R432 Changeover Type = 0 Comment: The changeover type is needed for changing between tables. If it were not set on the default value, it would influence endless table processing. 4 Activate coupling Action: R101 Command = 46 5 Checking the coupling (optional) Action: Checking, whether the corresponding values are displayed: – Bit R400.1 cb_Tab_Status_TabLinked = 1 (table has been coupled) R420 As-Is Table Index = Table index that has been set in R402 Jetter AG 283 13 Technological Functions JetWeb 13.10.5 Conditioned coupling Introduction Conditioned coupling of the following axis can be carried out in the following two variants: • • Variant 1: Conditioned coupling with the table being processed once Variant 2: Conditioned coupling with endless table processing Below, secondary information regarding both variants is described. Then, the detailed procedure for each variant is described in an individual table. What has to be Given Heed to when Coupling the Axis? Please mind the following details before conditioned coupling: • • • • • The following axis must be at standstill The following axis must be in uncoupled condition. This can be checked from R400 Status. If the following axis is to be coupled by absolute position coupling, please mind the following details: - The correction speed of the following axis (R436) has to be set to value > 0. - The set position (R130) of the following axis has to be at the set coupling position. If the following axis has to be coupled by relative position coupling, the correction speed for the following axis (R436) has to be set to zero. If the set position of the following axis is outside the table position range, the following applies: The set position of the following axis is only allowed to be outside the table position range by the value of one table position range. What has to be Done Before Coupling? Before conditioned coupling, a reference position has to be set the as-is leading axis position is to be compared with. In order to set a reference leading axis position, turn to table configuration register R412 Index - Start Table Point. There, set the index indicating the leading axis position node in the node array for comparison of values. Displaying the "Wait" Condition After issuing the coupling command and as long as the leading axis has not reached the reference leading axis position yet, the coupling procedure is in "Wait" condition. This "Wait" condition is displayed by Bit R400.3 cb_Tab_Status_TabWaitForLink=1. When the leading axis has exceeded the reference position, the bit is automatically reset and bit R400.1 cb_Tab_Status_TabLinked is set. Command and Register Overview For conditioned coupling, the following registers and commands out of command register R101 Command are applied. In this case, the abbreviations have got the following meanings: R = Register, C = Command 284 Name of Command / Register Brief Description C46 Table coupling Coupling by the Table coupling mode Jetter AG JetMove 2xx at the JetControl 13.10 Carrying out the Table Coupling Mode R400 Status The status of the coupling modes are displayed R402 Table Start Index Index for selecting the table configuration, the table of which is to be coupled. R420 As-Is Table Index Index for displaying the table configuration, the table of which presently coupled. R432 Change Type Type of changeover between tables R448 Start Type Coupling mode R449 Stop Type Uncoupling mode Error Message at Coupling At coupling, the operating system checks correctness of the respective table. If it detects errors in table configuration or in the set nodes, it issues the following error messages via the following bits: Bit 20 Faulty leading axis position range, respectively bit 21 Table configuration is invalid in R170 Error Referencing / Positioning / Table. In these error cases, the axes are not coupled with the table. Procedure at Table Processing The following steps have to be taken at conditioned coupling for processing the table once: Step 1 Action Selecting the table to be coupled Action: Writing the respective table configuration index to R402 Table Start Index 2 Reference leading axis position has been set Action: Writing the respective index to R412 Index - Start Table Point 3 Setting the mode of conditioned coupling and of uncoupling at processing the table once Action: – R448 Start Type = 2, if the leading axis position runs from left to right = 3, if the leading axis position runs from right to left – R449 Stop Type = 1 4 Activate coupling Action: R101 Command = 46 5 Checking the coupling (optional) Action: Checking, if the respective values are displayed, after the leading axis has exceeded the reference position: – Bit R400.1 cb_Tab_Status_TabLinked = 1 (table has been coupled) – R420 As-Is Table Index = Table index that has been set in R402 Steps at Endless Table Processing Jetter AG The following steps have to be taken at conditioned coupling for endless table processing: 285 13 Technological Functions JetWeb Step 1 Action Selecting the table to be coupled Action: Writing the respective table configuration index to R402 Table Start Index 2 Reference leading axis position has been set Action: Writing the respective index to R412 Index - Start Table Point 3 Setting the mode of immediate coupling and of uncoupling at endless table processing Action: – R448 Start Type = 2, if the leading axis position runs from left to right = 3, if the leading axis position runs from right to left – R449 Stop Type = 0 4 Making sure the changeover type has been set to the default value Action: R432 Changeover Type = 0 Comment: The changeover type is needed for changing between tables. If it were not set on the default value, it would influence endless table processing. 5 Activate coupling Action: R101 Command = 46 6 Checking the coupling (optional) Action: Checking, if the respective values are displayed, after the leading axis has exceeded the reference position: – Bit R400.1 cb_Tab_Status_TabLinked = 1 (table has been coupled) – R420 As-Is Table Index = Table index that has been set in R402 286 Jetter AG JetMove 2xx at the JetControl 13.10 Carrying out the Table Coupling Mode 13.10.6 Uncoupling Introduction For the Table coupling mode, there are the same uncoupling options, as there are for the coupling mode Electronic Gearing. The procedure of carrying out individual uncoupling options is identical with the coupling mode Electronic Gearing, except for the uncoupling option Immediate Uncoupling at Remaining Control Function. For this reason, in this chapter, only the uncoupling option Immediate Uncoupling at Remaining Control Function, especially for the Table coupling mode, and also the new uncoupling option Uncoupling at the Table End is described. Concerning all the other uncoupling options, please refer to the description of uncoupling as of chapter 13.7.7 "Uncoupling options", page 232. Yet, in order to apply this description to the Table coupling mode, instead of applying bit R400 cb_Tab_Status_GearLinked (i.e. electronic gearing is active), R400.1 cb_Tab_Status_TabLinked (i.e. the table has been coupled) has to be applied. Command and Register Overview Hints for carrying out the following uncoupling options: • Immediate uncoupling at remaining control function and • Uncoupling at the end of the table the following registers and commands are available. In this case, the abbreviations have got the following meanings: R = Register, C = Command Name of Command / Register Brief Description C45 Uncoupling the following axis Uncoupling the following axis from the coupling modes R449 Stop Type Uncoupling mode Immediate Uncoupling Below, immediate uncoupling by remaining control function remains: Please note: When the following axis is in motion, it can cause a tracking error. - control function remains Procedure: 1. The user issues command C45 2. The following axis carries out these steps: - Immediate position controlling of the motor to as-is position - Resetting bit R400.1 cb_Tab_Status_TabLinked Action 1. Setting the stop type to immediate uncoupling Action: Writing value 0 to R449 Stop Type 2. Issuing command C45 Action: Writing value 45 to R101 Command and wait for resetting bit R100.13 cb_Status_Busy and resetting bit R400.1 cb_Tab_Status_TabLinked Jetter AG 287 13 Technological Functions JetWeb Uncoupling at the End of the Table Below, immediate uncoupling at the end of the presently processed table and the control function remaining, is described: - control function remains Please note: When the following axis is in motion, it can cause a tracking error. Procedure: 1. The user issues command C45 2. The following axis carries out these steps: - Immediate position controlling of the motor to as-is position - Resetting bit R400.1 cb_Tab_Status_TabLinked Action 1. Setting stop type to At the table end Action: Writing value 1 to R449 Stop Type 2. Issuing command C45 Action: Writing value 45 to R101 Command and wait for resetting bit R100.13 cb_Status_Busy and resetting bit R400.1 cb_Tab_Status_TabLinked 288 Jetter AG JetMove 2xx at the JetControl 13.10 Carrying out the Table Coupling Mode 13.10.7 Changing tables on the fly Introduction Below, detailed information is provided on changing tables on the fly and on what has to be considered in the process. What has to be Given Heed to Before Changing Tables? Please mind the following details before changing tables on the fly: • • • • • The following axis must have been coupled already. This can be checked from R400 Status. If changing tables for the following axis is to be carried out by absolute position coupling, please mind the following details: - The correction speed of the following axis (R436) has to be set to value > 0. - The first following axis position of the table to follow has to be identical with the reference following axis position of the as-is table. If changing tables for the following axis is to be carried out by relative position coupling, please mind the following details: - The correction speed of the following axis (R436) has to be set to zero. - The first following axis position of the table to follow need not be identical with the reference following axis position of the as-is table. If changing tables for the leading axis is to be carried out by absolute position coupling, please mind the following details: - The correction speed of the leading axis (R435) has to be set to value > 0. - The first leading axis position of the table to follow has to be identical with the reference leading axis position of the as-is table. If changing tables for the leading axis is to be carried out by relative position coupling, please mind the following details: - The correction speed of the leading axis (R435) has to be set to zero. - The first leading axis position of the table to follow need not be identical with the reference leading axis position of the as-is table. Processing Mode of the As-Is Table As far as changing tables on the fly is concerned, it is irrelevant, whether the asis table has been coupled for endless or for one processing. Yet, R449 Stop Type has to be set to zero = endless processing for changing tables. Displaying the Active State As long as the as-is table has not reached the respective table limit yet, changing tables is still in the "active" state. This "Wait" condition is displayed by Bit R400.2 cb_Tab_Status_TabCmdPending (i.e. "changing tables is active") =1. When the table limit has been reached and the operating system has carried out table changeover, this bit is automatically reset. Command and Register Overview For changeover between tables, the following registers and commands out of command register R101 Command are applied. In this case, the abbreviations have got the following meanings: R = Register, C = Command Jetter AG 289 13 Technological Functions Action JetWeb Name of Command / Register Brief Description C46 Table coupling Coupling by the Table coupling mode R400 Status The status of the coupling modes is displayed R402 Table Start Index Index for selecting the table configuration, the table of which is to be coupled. R420 As-Is Table Index Index for displaying the table configuration, the table of which presently coupled. R432 Change Type Type of changeover between tables R448 Start Type Coupling mode R449 Stop Type Uncoupling mode The following steps have to be taken in order to process changing tables on the fly by one or by endless processing of the next table. Step 1 Action Selecting the table to be changed into Action: Writing the respective table configuration index to R402 Table Start Index 2 Setting the coupling mode for table changeover at the end of the table, as well as the mode of uncoupling, in order to change over to the next table Action: – R448 Start Type = 1, change over at the end of the table being presently be processed – R449 Stop Type = 0 Note: For changing between tables, R449 Stop Type always has to be set to 0. 290 Jetter AG JetMove 2xx at the JetControl 3 13.10 Carrying out the Table Coupling Mode Setting the changeover mode Action: R432 Change Type = Value for the respective reference combination: – 0: Leading axis: Modulo operation Following axis: Modulo operation see page 255 – 1: Leading axis: Modulo operation Following axis: No modulo operation see page 257 – 2: Leading axis: No modulo operation Following axis: Modulo operation see page 258 – 3: Leading axis: No modulo operation Following axis: No modulo operation see page 259 4 Activating the change Action: R101 Command = 46 Note: Actually, activating the changeover means re-coupling with the table configuration indicated by R402. 5 Checking the changeover (optional) Action: Wait for – Bit R400.2 cb_Tab_Status_TabCmdPending = 0 and – Bit R400.1 cb_Tab_Status_TabLinked = 1 (table has been coupled) and – R420 As-Is Table Index = Table index that has been set in R402. Jetter AG 291 13 Technological Functions JetWeb 13.10.8 Register description Register 400: Status Function Description Read As-is coupling status Write Illegal Variable type int / register Value range Bit-coded, 32 bits Value after reset 0 Meaning of the individual bits: Bit 0: - Bit 1: 1 = Table has been coupled Bit 2: 1 = Wait for table changeover Bit 3: 1 = Wait for coupling Register 402: Table Start Index Function 292 Description Read Index of the table configuration which will be started next (table changeover) or which is presently being processed Write Index of the table configuration, which will be processed next Amplifier status No specific status Takes effect Immediately Variable type int / register Value range 0 ... 23 Value after reset 0 Jetter AG JetMove 2xx at the JetControl 13.10 Carrying out the Table Coupling Mode Register 420: As-Is Table Index Function Description Read Index to the table configuration, which is presently being processed, respectively which was processed last Write Illegal Variable type int / register Value range 0 ... 23 Value after reset 0 Register 421: As-Is Index - First Table Point Function Description Read Index of the first table node of the as-is table index Write Illegal Variable type int / register Value range 0 ... 4,095 Value after reset 0 Register 422: As-Is Index - Start Table Point Function Description Read Index of the reference table node of the as-is table index Write Illegal Variable type int / register Value range 0 ... 4,095 Value after reset 0 Register 423: As-Is Index - Last Table Point Function Jetter AG Description Read Index of the last table node of the as-is table index Write Illegal Variable type int / register Value range 0 ... 4,095 Value after reset 0 293 13 Technological Functions JetWeb Register 432: Change Type Function Description Read Next, respectively last changeover type Write Type of the next changeover Amplifier status No specific status Takes effect Immediately Variable type int / register Value range 0 Leading Axis Following Axis Modulo operation Modulo operation see page 255 1 Modulo operation No Modulo operation see page 257 2 No Modulo operation Modulo operation see page 258 3 No Modulo operation No Modulo operation see page 259 Value after reset 0 Register 433: Position Difference - Leading Axis Function 294 Description Read As-is position difference Write Illegal Variable type float Value range Float limits [°] or [mm] Value after reset 0 Jetter AG JetMove 2xx at the JetControl 13.10 Carrying out the Table Coupling Mode Register 434: Position Difference - Following Axis Function Description Read As-is position difference Write Illegal Variable type float Value range Float limits [°] or [mm] Value after reset 0 Register 435: Correction Velocity - Leading Axis Function Description Read As-is correction velocity Write Set correction velocity value Amplifier status No specific status Takes effect Immediately Variable type float Value range Float limits [°/s] or [mm/s] Value after reset R184 Is influenced by R184 and R447 Register 436: Correction Velocity - Following Axis Function Description Read As-is correction velocity Write Set correction velocity value Amplifier status No specific status Takes effect Immediately Variable type float Value range Float limits [°/s] or [mm/s] Value after reset R184 Is influenced by R184 and R447 Jetter AG 295 13 Technological Functions JetWeb Register 447: Reference Type Function Description Read As-is type of reference between leading and following axis and the table Write Set reference type Amplifier status No specific status Takes effect Immediately Variable type int / register Value range Value after reset Leading Axis Following Axis 0 Absolute reference Absolute reference 1 Absolute reference Relative reference 2 Relative reference Absolute reference 3 Relative reference Relative reference 0 Influences R435 and R436. This register is an alternative to registers R435 and R436. If in this register a certain reference type is set, the values of R435 and R436 will be set accordingly. Example 1: If reference type = 0, the values of R435 and R436 are set to the value of R184, which is absolute position coupling. Example 2: If reference type = 1, the value of R435 is set to the value of R184. The value of R436 is set to zero. This is absolute position coupling for the leading axis and relative position coupling for the following axis. Register 448: Start Type Function 296 Description Read As-is mode of coupling to start processing the table Write Set coupling mode Amplifier status No specific status Takes effect Immediately Variable type int / register Jetter AG JetMove 2xx at the JetControl 13.10 Carrying out the Table Coupling Mode . Register 448: Start Type - continued Value range Value after reset 0: Immediately at issuing command 46 1: At the end of the table that is just being processed 2: Conditioned coupling with position referencing: As-is leading axis position >= reference leading axis position (if table is processed from left to right) 3: Conditioned coupling with position referencing: As-is leading axis position <= reference leading axis position (if table is processed from right to left) 0 Register 449: Stop Type Function Description Read As-is mode of ending processing the table Write Set mode of uncoupling Amplifier status No specific status Takes effect Immediately Variable type int / register Value range 0 ... 1 (for a detailed description, see below) Value after reset 0 R449 has another effect if applied with command C45 than it has with command C46: Issuing command C45: 0 Immediately after issuing command C45, the following axis is uncoupled and position controlled to the as-is set position. NOTE: If the following axis is still moving at that instant of time, there will be NO ramp to be driven. How the following axis will come to a standstill in this case, mainly depends on the settings of the position controller and the mechanics. Jetter AG 297 13 Technological Functions JetWeb 1 After issuing command C45, the following axis will no sooner be uncoupled than when the table limits have been reached. The following axis is position-controlled to the as-is set position. NOTE: If the following axis is still moving at that instant of time, there will be NO ramp to be driven. How the following axis will come to a standstill in this case, mainly depends on the settings of the position controller and the mechanics. Issuing command C46: 0 After starting processing the table by issuing command C46, the table will be processed in endless mode. Depending on the direction of rotation, a changeover will be made from the last/first interpolation point back to the first/last one. 1 Depending on the direction of rotation, the table will, after issuing command C6, be processed once; also depending on the direction of rotation, processing will automatically be stopped again at the last/first interpolation point. The following axis is position-controlled to the as-is set position. NOTE: If the following axis is still moving at that instant of time, there will be NO ramp to be driven. How the following axis will come to a standstill in this case, mainly depends on the settings of the position controller and the mechanics. 298 Jetter AG JetMove 2xx at the JetControl 13.11 Virtual Position Counter 13.11 Virtual Position Counter 13.11.1 Overview Introduction The Virtual Position Counter is a special function of a JetMove which generates a leading axis position. The JetMove, in which the Virtual Position Counter is active, uses this leading axis position for controlling its own axis. It also uses the leading axis value which is read out from an external leading axis. This way, in JetMove, leading and following axis have been united in one module. Below, the own axis will be called internal following axis. It has got the same range of characteristics and functions as has a following axis which is influenced by an external leading axis value. Leading Axis Value for External Following Axes The leading axis position specified by the virtual position counter can also be output to the system bus as a leading axis value for external following axes. This way, the JetMove, in which the special function is active, also takes over the leading axis function for external following axes. Operating Principle Depending on a set speed (R189), the Virtual Position Counter counts a position value automatically up or down. When the position value has reached the maximum or minimum limit of the leading axis position value (R158 and R159), modulo correction is carried out, in order to get to the leading position value (R188) which is within the set leading axis position limits. The following sequential function chart displays the signal flow and the corresponding special function registers. Leading Axis and Internal Following Axis - JetMove Max. leading axis position R158 100000 Leading axis position R188 R159 -100000 Min. leading axis position R189 Leading axis speed Virtual Position Counter Virtual Position Counter Jetter AG 299 13 Technological Functions JetWeb Unit of the Leading Axis Position The leading axis position value generated by the Virtual Position Counter is without unit. The user standardizes and interprets the leading axis position depending on the application given. Application For example, the Virtual Position Counter can be used as a timer for table processing. Conditions of Usage The following conditions have to be met, in order to make use of the Virtual Position Counter: • The JetMove, in which the Virtual Position Counter is active, must not have been configured as a following axis of a leading axis. This means that the receive mode (R152) of the axis must have got value 0. • Communication between the technology group and the Virtual Position Counter has to be configured: - with external following axes, see chapter 13.5.4 "Configuration by virtual position counter and external following axes", page 199 - without external following axes, see chapter 13.5.5 "Configuration by virtual position counter without external following axes", page 204 In this Chapter The sub-chapter Virtual Position Counter comprises the following topics: Topic 300 Page The modes of the Virtual Position Counter page 301 Operation without a trigger signal page 302 Operation with a trigger signal page 304 Register description page 306 Jetter AG JetMove 2xx at the JetControl 13.11 Virtual Position Counter 13.11.2 The modes of the Virtual Position Counter Introduction The Virtual Position Counter can be operated in the following two modes: • • Mode 1: Operation without a trigger signal Mode 2: Operation with a trigger signal The Virtual Position Counter has to be activated for the respective mode. Mode 1: Without a Trigger Signal In mode 1, the Virtual Position Counter is manually started and stopped by means of the leading axis speed (R189). Here, the following applies: – Leading axis speed = 0: The Virtual Position Counter does not count – Leading axis speed <> 0: Virtual Position Counter counts Mode 2: With Trigger Signal In mode 2, the Virtual Position Counter is started by a trigger signal. In this mode, the Virtual Position Counter runs through the set leading axis position range once, starting from the as-is leading axis position, and it stops automatically, when the leading axis position limit has been reached. If the JetMove receives another trigger signal, while the Virtual Position Counter is still running, table processing will not be terminated at reaching a leading axis position limit. Instead, the leading axis position range is covered a second time. Mode 2 cannot only be started by trigger signal. As an alternative, it can also be started manually. Connection of the Trigger Sensor The trigger sensor is connected with the digital input INPUT. Delay Time and Jitter Starting the Virtual Position Counter by the trigger signal results in two actuating variables: • • Delay time Jitter The Virtual Position Counter compensates both by means of the leading axis speed. Acceleration and Deceleration Ramps Jetter AG In both modes, the Virtual Position Counter does neither generated acceleration nor deceleration ramps for the leading axis position. The user has to take care of this. 301 13 Technological Functions JetWeb 13.11.3 Operation without a trigger signal Introduction In order to operate the Virtual Position Counter without a trigger signal, i.e. in mode 1, the special function has to be activated first accordingly. Then, the following steps can be taken: • • • • Referencing the leading axis position Starting Stopping Deactivating the special function These steps are described in detail below. Register Overview Activating in Mode 1 For operating the Virtual Position Counter in mode 1, the following registers are available: Register Name Brief Description R188 Leading Axis Position Leading axis position R189 Leading Axis Speed Leading axis speed R451 Mode Operating mode of the Virtual Position Counter The following step has to be taken, in order to activate the Virtual Position Counter in mode 1: Step 1 Action Activating mode 1 Action: Writing value 1 into R451 Mode Deactivating The following step has to be taken to deactivate the Virtual Position Counter: Step 1 Action Deactivating the Virtual Position Counter Action: Writing value 0 into R451 Mode 302 Jetter AG JetMove 2xx at the JetControl Starting 13.11 Virtual Position Counter The following steps have to be taken to start the Virtual Position Counter: Step 1 Action Referencing the leading axis position Action: Writing the reference position value into R188 Leading Axis Position 2 Setting the leading axis speed Action: Writing the desired speed to R189 Leading Axis Speed Changing the Speed The following step has to be taken to change the speed while the Virtual Position Counter is running: Step 1 Action Setting a new leading axis speed Action: Writing a new value to R189 Leading Axis Speed. Stopping The following step has to be taken to stop the Virtual Position Counter: Step 1 Action Setting the leading axis speed to 0 Action: Writing value 0 to R189 Leading Axis Speed Jetter AG 303 13 Technological Functions JetWeb 13.11.4 Operation with a trigger signal Introduction In order to operate the Virtual Position Counter with a trigger signal, i.e. in mode 2, the special function has to be activated first accordingly. Then, the following steps can be taken: • • • • Referencing the leading axis position Starting, automatically and manually Stopping, manually Deactivating the special function These steps are described in detail below. Manual Stopping In mode 2, the Virtual Position Counter is automatically stopped by the special function, when a leading axis position limit has been reached. Yet, it can also be stopped before that manually. After manual stopping, there are two options on how to continue: • Continue up to the leading axis position limit • Terminate processing at that point Please observe the following at continuing: If, in further process, the JetMove recognizes another trigger signal, another process will automatically added after reaching the leading axis position limit. Please note when terminating the process: Before the next trigger signal is issued, the leading axis position might have to be referenced again. Register Overview Activating in Mode 2 For operating the Virtual Position Counter in mode 2, the following registers are available: Register Name Brief Description R188 Leading Axis Position Leading axis position R189 Leading Axis Speed Leading axis speed R451 Mode Operating mode of the Virtual Position Counter The following step has to be taken, in order to activate the Virtual Position Counter in mode 2: Step 1 Action Activating mode 2 Action: Writing value 6 to R451 Mode 304 Jetter AG JetMove 2xx at the JetControl Deactivating 13.11 Virtual Position Counter The following step has to be taken to deactivate the Virtual Position Counter: Step 1 Action Deactivating the Virtual Position Counter Action: Writing value 0 to R451 Mode Referencing The following step has to be taken for referencing the leading axis position: Step 1 Action Referencing the leading axis position Action: Writing the reference position value to R188 Leading Axis Position Starting by a Trigger Signal The Virtual Position Counter is automatically started by means of the special function, when a trigger signal has been recognized. Manual Starting The following step has to be taken in mode 2 to start the Virtual Position Counter manually and without a trigger signal: Step 1 Action Software start in mode 2 Action: Writing value 7 to R451 Mode Note: Value 7 remains in R451, until you write another value to this register. Changing the Speed The following step has to be taken to change the speed while the Virtual Position Counter is running: Step 1 Action Setting a new leading axis speed Action: Writing a new value to R189 Leading Axis Speed. Manual Stopping The following step has to be taken to manually stop the Virtual Position Counter: Step 1 Action Setting the leading axis speed to 0 Action: Writing value 0 to R189 Leading Axis Speed Jetter AG 305 13 Technological Functions JetWeb 13.11.5 Description of registers Register 188: Leading Axis Position Function Description Read As-is leading axis position Write Set reference position Amplifier status No specific status Takes effect Immediately Variable type float Value range R159 ... R158 [°] or [mm] Value after reset 0 [°] or [mm] Leading axis position in the following axis: Modulo-corrected position value of the Virtual Position Counter at the leading axis position limits (R158 and R159). Register 189: Leading Axis Speed Function Description Read As-is leading axis speed Write Setting the speed for the Virtual Position Counter Amplifier status No specific status Takes effect Immediately Variable type float Value range Float limits [°/s] or [mm/s] Value after reset 0 [°/s] or [mm/s] The speed value of the leading axis (R189) is made up of the difference between the leading axis positions (R188) within one second. 306 Jetter AG JetMove 2xx at the JetControl 13.11 Virtual Position Counter Register 451: Mode Function Read As-is mode Write Set mode Amplifier status No specific status Takes effect Immediately Variable type int / register Value after reset 0 = Virtual position counter is deactivated Value Jetter AG Description Meaning 0 Virtual position counter is deactivated 1 Virtual position counter has been activated in mode 1 (without trigger signal) 6 Virtual position counter has been activated in mode 2 (with trigger signal) 7 Manual start of the Virtual Position Counter in mode 2 (with trigger signal) 307 13 Technological Functions JetWeb 13.12 Precise Following 13.12.1 Overview Introduction A primary goal of running a following axis in various coupling modes, is to make the following axis follow the leading axis as precisely as possible. This chapter is to explain the possible reasons of following inconsequences and gives tips on how to improve the preciseness. In this Chapter This sub-chapter contains the following topics: Topic 308 Page Inaccuracies of the following axis page 309 Compensating the inaccuracies page 310 Dead time compensation page 311 Dead time compensation - register description page 312 Jetter AG JetMove 2xx at the JetControl 13.12 Precise Following 13.12.2 Inaccuracies of the following axis Introduction Inaccuracies related to coupling modes can have various causes. Below, the most significant causes will be described. Inaccuracies of the Following Axis The following causes can contribute to following axis inaccuracies: • • • • Smooth mechanic coupling (the opposite of rigid mechanism) Calculational inaccurate gear ratios Dead times of set value communication between JetMoves Coupling mode Table: Excessive speed of the master axis Mechanical Flexibility If the mechanics coupled to a JetMove has not got the rigidity needed, system deviations from JetMove cannot be controlled the best way. Gear Ratios Some mechanic gear ratios, such as, for example, 1:3, result in an (indefinitely) long floating point number. For processing floating point numbers, a JetMove offers single accuracy (32 bits). This means that a floating point number is evaluated to an accuracy of 7 significant digits. Significant digits are tens digits, decimal places included. As a result, certain gear ratios cannot be processed in JetMove without a rest being left over. On one hand, this pertains to mechanical gear ratios of the individual axes and to the ratio between leading and following axis. Dead Time Between the instance of calculating the set values of the leading axis and the instance of the following axis processing these set values, there is a dead time of 2 milliseconds. Table: Excess Speed In the Table coupling mode, excessive speed of the leading axis can be the cause of inaccurate following axis performance. In this case, the following axis does not manage to cover all nodes of the motion profile, so certain nodes are left out. Jetter AG 309 13 Technological Functions JetWeb 13.12.3 Compensating the inaccuracies Introduction Some results of follower inaccuracy can be compensated by a JetMove. These possibilities are described below. Cause and Compensation In the table below, previously described causes which can be compensated by JetMove, have been listed. Cause Referencing on the Fly Compensation Gear ratios Referencing on the fly with initiator Dead time Compensation of dead time To compensate for calculational inaccurate gear ratios, the JetMove special function Referencing on the fly may be helpful. For this, a proximity switch is needed, which, at each rotation of the mechanical unit, be it before or after the gearbox, triggers an impulse for the special function to diagnose and compensate for a deviation from the internal as-is position. For a detailed description of the special function, please turn to chapter 14 "Special Function: Referencing on the Fly", page 313. Dead Time Compensation The dead time that arises at transmitting the set values from the leading to the following axis can be compensated by the JetMove function Dead Time Compensation. For this, a dead time is specified in the following axis. It serves for calculating the as-is leading position at the instance of processing withn the following axis. For a detailed description of the function, please turn to chapter 13.12.4 "Dead time compensation", page 311. 310 Jetter AG JetMove 2xx at the JetControl 13.12 Precise Following 13.12.4 Dead time compensation Introduction The dead time that arises at transmitting the set values from the leading to the following axis can be compensated by the JetMove function Dead Time Compensation. Below, the usage of this function has been described. Operating Principle For compensating, the user enters a dead time in milliseconds applied to the following axis which is used for calculating a dead time correction position. The dead time correction position is added to the set value received by the leading axis. The result is the as-is set position taken by the leading axis at the instance of set value position calculation of the following axis. This is based on the assumption that the leading axis has not changed its speed during dead time. Note Dead time compensation renders best results at constant leading axis speed, e.g. coupling mode Electronic Gearing at constant leading axis speed. Register Overview The following register serves for making use of this function. Starting Register Name Brief Description R460 Dead Time Compensation Dead time in milliseconds R461 Dead Time Correction Position Calculated position of dead time correction The following steps have to be taken to make use of dead time compensation: Step Action 1 Determining empirically the ideal dead time for a combination of leading and following axis Action: Writing values from 2 ms upward to R460 in small steps, until the maximum preciseness of the following axis has been reached Jetter AG 311 13 Technological Functions JetWeb 13.12.5 Dead time compensation - Register description Register 460: Dead Time Compensation Function Description Read As-is dead time Write Set dead time Amplifier status No specific status Takes effect Immediately Variable type float Value after reset 0 [ms] Register 461: Position of Dead Time Correction Function 312 Description Read As-is correction position Write Illegal Variable type float [°], resp. [mm] Value after reset 0 [°] Jetter AG JetMove 2xx at the JetControl 14.1 Introduction 14 Special Function: Referencing on the Fly 14.1 Introduction This chapter contains information on the following topics: • • • • What is referencing on the fly? How can this function be made use of? Sample program "Labelling a Package" Description of registers 14.2 What is Referencing on the Fly? "Referencing on the fly" means that, at receiving a trigger signal, the axis is being referenced onto a new position. To achieve this, the position difference between old and new position is adjusted with a correction controller P. For this, the P correction controller changes its as-is position. Due to this adjustment, the axis is set in motion. This compensating motion will overlap the axis motions already going on, such as positioning. This function can be made use of in print mark correction, for example. In a cyclic motion, the processing position relates to a label applied to the product; "on the fly", the axis will be moved to this processing position. Jetter AG 313 14 Special Function: Referencing on the Fly 14.3 JetWeb Overview of Registers Register Register Name Short Description Functional Group: Controller R450 "Function Status" It specifies the number of the correct trigger signals R451 "Function Mode" The function is activated and the mode is defined R514 "INPUT Edge Definition" Edge definition of the additional digital input INPUT R527 "Dead Time for Interrupt Input" = Dead time correction Dead time compensation of the INPUT signal Functional Group: Position Feedback Controller R110 "Position Controller Kv" Correction factor Kv of the position controller Functional Group: Referencing on the Fly R452 "Position Reference" Position, by which the function checks the as-is position value of R454 against the trigger signal R453 "Position Window" Position window in which the as-is position value of R454 must be included, in order to have the function make compensations automatically R454 "As-is Position Value" The as-is position value at the trigger signal is specified R455 "Position Difference" The position difference to be compensated is specified R456 "Correction Factor Kv" Amplification of the correction controller R457 "Max. Correction Speed" Maximum speed of position difference compensation, which must not be exceeded by the correction controller R458 "Correction Speed" As-is correction speed The registers of the "Referencing on the fly" group of functions have been specified in chapter 14.8 "Description of Registers", page 321. All other registers have been explained in the respective chapters. 314 Jetter AG JetMove 2xx at the JetControl 14.4 How does Referencing on the Fly Function? 14.4 How does Referencing on the Fly Function? A positioning reference is set in R452. It is to define which is to be the axis position at the moment of issuing the trigger signal. At that moment, the as-is axis position is measured. This as-is position is displayed by means of R454. This as-is position value will be checked against the position reference specified in R452; then the difference between the two positions will be calculated in R455 according to the formula below in the units [°], respectively [mm]. R455 = R452 – R454 The following applies to the operands: R452 = Position reference in the units [°], respectively [mm] (the unit is dependent on the axis type specified in R191) R454 = Measured as-is position value in the units [°], respectively [mm] (the unit is dependent on the axis type specified in R191) If the difference between the positions is unequal zero, a P-correction controller is automatically triggered to compensate the difference by and by, until the difference between the position is zero again. Please also refer to “The P-Correction Control” on page 317. In R453, a position window for measuring the as-is position can be defined. The reference point of the position window specifies the positioning reference written in R452. This "position reference" is in the middle of the position window, cf. fig.36. If the measured as-is position is within this window, the calculation of the difference and the P-correction controller will be triggered automatically. If the position is outside the window, there will be no reaction to the trigger signal. Position reference R452 90 95 100 105 110 Position in [mm] Position window R453 Fig. 36: Position window for the "Referencing on the fly" function In fig.36, the position reference specified in R452 has got the value 100 mm, while the position window specified in R453 has got the value 12 mm. Function Mode R451 Jetter AG Mode Description 2 Measuring the leading position of the leading axis (this is only possible with JX2-CNT1) 3 The own as-is position is measured 315 14 Special Function: Referencing on the Fly JetWeb 4 See 2, but Single Shot 5 See 3, but Single Shot For the function, a selection among four different modes can be made by means of R451, as has been shown in the table above. In mode 2 and 4, not the own as-is position of the axis is measured, but the leading position of a JX2-CNT1, which serves as a leading axis. For this mode, setting up a technology group is necessary, cf. chapter 13 "Technological Functions", page 175. If every trigger signal is to be reacted to, modes 2 and 3 must be applied. If only specific trigger signals are to be reacted to, single-shot modes 4 and 5 must be applied. In mode 4 and 5, the function will react to the next trigger signal to be automatically deactivated again when the correction process has been completed. For this, the function mode value written in R451 is set to zero. In order to make the function react to a trigger signal again, value 4, respectively 5, has to be written into R451 again. All cycles, of which the measured as-is position has been within the position window defined in R453, are considered for the function status defined in R450. The count value can be reset to zero again by hand. In mode 4 and 5, the count value is automatically reset to zero when the correction process has been completed. 14.5 Trigger Signal X10 X10 The sensor causing the trigger signal is connected to the terminal point INPUT. In the JM-2xx series, the terminal point is on terminal X10, in the JM-D203 it is on terminal X72, respectively X82. By means of the edge definition of R514, the signal edge that is to be reacted to can be specified. ENABLE LIMIT + LIMIT REF INPUT DC 24 V 0,6 A BRAKE 1 BRAKE 2 PE U2 Motor V2 W2 X62 ENABLE LIMIT + LIMIT REF INPUT DC 24 V 0,6 A BRAKE 1 BRAKE 2 PE W1 V1 U1 X1 3 x AC 230 V Fig. 37: Examples: Terminal point INPUT of JM-206, respectively JM-D203 The trigger signal depends on dead time, that is, between the sensor reaction and recognizing the signal change in the operating system of the JetMove, some time will pass. It is caused by processing times in the sensor and by filtering the signal in the JetMove. By means of R527 Dead Time for Interrupt Input = dead time correction, there is the possibility of reducing this dead time to a great deal. 316 Jetter AG JetMove 2xx at the JetControl 14.6 The P-Correction Control 14.6 The P-Correction Control The difference (R455) between the measured as-is position (R454) and the position reference (R452) will be compensated by means of the as-is position value read by the encoder. The as-is position is corrected by the value of the position difference in the respective direction. This correction will not be carried out in one step only, but by means of a P-correction controller, see fig.38. Position feedback control determines as-is position R456 R452 - R454 Starting difference R457 R455 - Position difference R458 Kv Correction factor Lim Correction speed Speed limitation Integrator Fig. 38: P-correction controller of the "Referencing on the fly" function By means of its correction factor Kv specified in R456, the P-correction controller will calculate a correction speed (R458) in the unit [°/s] respectively [mm/s] applying the following formula: R458 = R455 R456 The following applies to the operands: R455 = Position difference in the unit [°] respectively [mm] (the unit depends on the settings of the axis type defined in R191) R456 = Correction factor Kv in the unit [1/s] The correction speed specifies the changes of the as-is position within one second. The integrator in the control circuit (see fig.38), will add the speed values that have already been output, in relation to time. The result will be a position value specifying the amount of the as-is value correction. Substracting this position value from the difference calculated first will result in the new difference of positions that is still to be corrected. During position control, the as-is position difference can be read in R455. The P-correction control loop will be run through every two milliseconds. Jetter AG 317 14 Special Function: Referencing on the Fly JetWeb The correction speed decreases, the more the position difference decreases. The correction factor Kv will determine the steepness of the graph showing the decreasing correction speed, cf. fig.39. The time t (unit [s]) that passes until the position difference equals zero can be calculated by the following formula: 2 t = -----------R456 The following applies to the operands: R456 = Correction factor Kv in the unit [1/s] v Correction speed R458 without limitation 0 R457 with limitation t Fig. 39: Course of the correction speed graph of referencing on the fly Note! A correction speed (R458) that is too high might lead to a short-time conversion of the rotating direction. The correction speed can be limited by means of R457. fig.39 illustrates the behaviour at limitation of the correction speed. Time t is increased by a limitation. The steepness of the decrease in correction speed at the end of the correction run will remain the same with and without the limitation of the correction speed. If for the correction factor Kv value > 500 [1/s] is set, the position difference might not have been compensated completely by the end of the correction run. In this case, the P-correction controller oscillates. The change of the as-is position by the P-correction controller effects the position controller as a disturbance variable. The tracking error increases in relation to the change of the as-is position by means of the P-correction controller. Depending on the correction factor Kv of the position controller (R110), the axis reacts to the influence of the changes in the as-is position value quickly or slowly. Note! For optimum functioning of the P-correction controller, a correctly set Kv of the position controller is required. This way, the tracking error will be decreased best. 318 Jetter AG JetMove 2xx at the JetControl 14.7 14.7 Sample Program Sample Program Address labels are to be applied to packages, see fig.40. In random distances, the packages arrive at the labelling position on the conveyor belt one after the other. At the labelling position, the belt stops for labelling. For positioning on the labelling position, a print-mark is read by a sensor. By means of the trigger signal (24 V active) activated by the sensor, positioning in relation to the respective labelling position is altered by referencing on the fly. The process of loading the packages on the belt guarantees for the print mark of the following packet to be labelled always being on a distance d to the packet being labelled at the moment. 0 mm 2,500 mm 5,000 mm d = 2,500 mm Position Gluing device Sensor Print mark Fig. 40: Sample application of referencing on the fly Labelling a packet is defined to be a cyclic process. The following process per cycle is defined: • • • • • • Setting the as-is position to zero Enabling of the trigger signal Absolute positioning to the target position 5,000 mm Recognizing the print mark within the positioning range Shifting the as-is position to position 2,500 mm, if the as-is position is unequal to position 2,500 mm If the target position has been reached and a trigger signal has been issued, start the labelling process; otherwise continue to the next cycle For implementation, a JC-241 is used for controlling and a JM-206 as an axis for the motion system of the conveyor belt. The JM-206 has got the slave module number 2. Initialization #Include „JM2xxReg32.stp" Var JM_Axis :JM_2XX At %VL 12000; End_Var; ... Jetter AG // JM2xx RegisterInterface // Axis declaration 319 14 Special Function: Referencing on the Fly JetWeb // Basic configuration for the conveyor belt axis: // The axis is defined as a linear axis. // // ... // Setting up the positioning run: // Set corr. factor Kv of the pos. controller: JM_Axis.CtrlP_fm_Kv := 10; // Set dest. window for positioning: JM_Axis.MC_fm_TargetWin := 1; ... // Set Referencing on the fly: // Edge def. for sensor signal: Rising edge JM_Axis.DI_nm_TrigInEdge := 1; // Set pos. reference to 2,500 mm: JM_Axis.FRef_fm_PosRef := 2500; // Set pos. window to 5,000 mm: JM_Axis.FRef_fm_PosWin := 5000; // Set corr. factor Kv of referencing on the fly: JM_2JM_AxisXX.FRef_fm_Kv := 1; // Max. corr. speed of referencing on the fly: // JM_Axis.FRef_fm_CorrSpeedMax := 10; ... Sequence ... // Cycle "Labelling the Package": While True Do // Setting the set position to zero: At command 3, // the as-is position takes over the value of the target position. JM_Axis.MC_fm_PosProg := 0; // Setting the as-is position to zero: JM_JM_Axis2XX.JM_nm_Cmd := cn_Cmd_SetReference; // Wait for the BUSY-bit to be reset. When Bit_Clear (JM_2JM_AxisXX.JM_nm_State, cb_State_Busy) Continue; // Function mode 5: Single shot to its own as-is position. JM_Axis.Vax_nm_Mode := 5; // Set the absolute target position: JM_Axis.MC_fm_PosProg := 5000; // Start absolute positioning: JM_2XJM_AxisX.JM_nm_Cmd := 10; When Bit_Clear (JM_Axis.JM_nm_State, cb_State_Busy) Continue; // Wait, until destination window has been reached: When Bit_Set (JM_Axis.JM_nm_State, cb_State_DestWindow) Continue; // Check, if referencing on the fly is still active: When JM_Axis.Vax_nm_State = 0 Continue; // Check, if referencing on the fly has been carried out: If JM_Axis.Vax_nm_Mode = 0 Then // If desired, carry out labelling process. End_If; // End of the IF branch ... End_While; // Restart cycle ... 320 Jetter AG JetMove 2xx at the JetControl 14.8 Description of Registers 14.8 Description of Registers In the column "R/W", the type of access to a parameter is identified: R = Read W = Write Register 452: Position Reference Function Description Read As-is position reference Write Set position reference Amplifier status No specific status Takes effect Immediately Variable type float Value range Float limits [°] or [mm] (the unit depends on the setting of the axis type, see register 191) Value following a reset 10 [°] Here the positioning reference will be specified, by which the function will compare the measured as-is position (register 544) at the trigger signal, in order to find a possible position difference (register 455). Register 453: Position Window Function Description Read As-is position window Write Set position window Amplifier status No specific status Takes effect Immediately Variable type float Value range Float limits [°] or [mm] (the unit depends on the setting of the axis type, see register 191) Value following a reset 10 [°] Here, the position window is specified, in which the measured as-is position must be included. This position reference value (register 452) is exactly in the centre of the position window. Jetter AG 321 14 Special Function: Referencing on the Fly JetWeb Register 454: As-is Position Value Function Description Read Present as-is position value Write Illegal Amplifier status No specific status Takes effect Immediately Variable type float Value range Float limits [°] or [mm] Value following a reset 0 [°] Here, the as-is position measured at receiving the trigger signal can be read. The measured as-is position must be within the position window (register 453), in order for the function to calculate the position difference (register 455) and to start automatic correction, if the difference is unequal zero. Register 455: Position Difference Function Description Read As-is position difference Write Set position difference Amplifier status No specific status Takes effect Immediately Variable type float Value range Float limits [°] or [mm] Value following a reset 0 [°] Here, the calculated initial position difference before starting the correction run can be read. During the correction run, the remaining position difference can be read in this register. For calculating the position difference, only those measuring values of register 454 are used, which are in the position window of register 453. 322 Jetter AG JetMove 2xx at the JetControl 14.8 Description of Registers Register 456: Correction Factor Kv Function Description Read As-is correction factor Write Set correction factor Amplifier status No specific status Takes effect Immediately Variable type float Value range 0 ... 500 [1/s] Value following a reset 1 [1/s] Here, the correction factor Kv of the P-correction controller is specified. Note! In case of values > 1 there might occur feedback behaviour at the end of a correction run. Feedback will cause the position difference not to decrease any more. Register 457: Maximum Speed Correction Function Description Read As-is maximum correction speed Write Set maximum correction speed Amplifier status No specific status Takes effect Immediately Variable type float Value range Float limits [°/s] or [mm/s] Value following a reset 10 [°/s] Here, the limitation of the correction speed will be set. Note! A correction speed that is too high might lead to a short-time conversion of the rotating direction. Jetter AG 323 14 Special Function: Referencing on the Fly JetWeb Register 458: Correction Speed Function Description Read As-is correction speed Write Illegal Amplifier status No specific status Takes effect Immediately Variable type float Value range -R457 ... +R457 [°/s] or [mm/s] Value following a reset 0 [°/s] Here, the as-is correction speed is displayed. If the result is greater than the limitation value specified in register 457, the limitation value will be output. 324 Jetter AG JetMove 2xx at the JetControl 15.1 Introduction 15 Special Function: Position Capture 15.1 Introduction This chapter contains information on the following topics: • • • • • • What does "Position Capture" imply? Which registers are available? Which digital inputs are used? What does this function imply? Sample program "Length Measurement" Register description 15.2 What does "Position Capture" Imply? By means of the "Position Capture" function, the as-is axis position can be stored independently of a capture event. The as-is position can then be utilized for further calculations, e.g. for calculating the length of an object. The capture event is activated by an input signal edge at one of the digital inputs. The edge is adjustable. The scan rate of the Capture events is 16 kHz. 15.3 Overview of Registers For the Position Capture function, the following registers are available: Jetter AG Register Name Short Description R510 Digital Inputs - Polarity Setting the input polarity R511 Digital Inputs - Circuit State Logic status of the input circuit R513 Digital Inputs - Capture Status Status of the capture events R518 Digital Inputs - Capture Edge Definition Setting the edge of the input signal that is to trigger the Capture event R631 Capture Command Set Activating the "Position Capture" function: R632 Capture Command Clear Deactivating the "Position Capture" function: R521 Capture Position LIMIT+ Position at the capture result of the positive limit switch R522 Capture Position LIMIT- Position at the capture result of the negative limit switch 325 15 Special Function: Position Capture JetWeb R523 Capture Position REF Position at the capture result of the reference switch R524 Capture Position INPUT Position at the capture result of the additional digital input 15.4 The Digital Inputs The digital inputs that can be used for the Capture event, are positioned on terminal X62 of JetMove 105, on terminals X72, respectively X82, of Jetmove D203, and on terminal X10 of JetMove 2xx series devices, see fig.41. JM-D203 X10 JM-2xx X10 ENABLE LIMIT + LIMIT REF ENABLE LIMIT + LIMIT REF INPUT DC 24 V 0,6 A BRAKE 1 BRAKE 2 PE U2 Motor V2 W2 X62 DC 24 V 0,6 A BRAKE 1 BRAKE 2 PE W1 V1 U1 X1 3 x AC 230 V JM-105 X19 BUS OUT U2 V2 W2 BALLAST PE +Vmot +Vlog 0V X61 ENCODER 5 10 15 X18 BUS IN 1 6 11 X62 X62 IN / OUT IP20 0 - 40°C, 32 - 104°F 3 * 5A 3 * 17-34VAC, 0-400Hz Voltage: Motor Current: Enclosure Rating: Ambient Temperature: Output Ratings: Rev.: 1 * 24-48VDC 10A Current: Power Supply: JM-105 Input Ratings: Type: AXARR ERR Jetter AG Gräterstrasse 2 D-71642 Ludwigsburg Part No.: 10000633 Made in Germany X1 SUPPLY & MOTOR Fig. 41: Plug-in connection for the digital inputs The following digital inputs can be used for the Position Capture function: Input Description 326 Designation JM-2xx Designation JM-D203 Designation JM-105 Positive limit switch X62.LIMIT+ X72/X82.LIMIT+ X62.13 (Positive limit switch) Negative limit switch X62.LIMIT- X72/X82.LIMIT+ X62.14 (Negative limit switch) Jetter AG JetMove 2xx at the JetControl 15.4 The Digital Inputs Reference switch X62.REF X72/X82.REF X62.12 (Reference switch) Additional digital input X62.INPUT X72/X82.INPUT X62.15 (Digital input) The input polarity (24 V = logical 1, or 0 V = logical 1) can be set in R510 Input Polarity. The logical input status, that is, the input status after polarity processing, can be read out of R511.. Notice! The input polarity must have been set before activating the function; otherwise changing the input polarity while the function is active can trigger a capture event, although the as-is input status has not changed. Jetter AG 327 15 Special Function: Position Capture 15.5 JetWeb What Does this Function Imply? Via R631 Capture Command Set, one or more than one inputs are activated to serve the Position Capture function. Via R632 Capture Command Clear, the Position Capture function can be deactivated again. R519 Capture Active State displays the inputs, for which the Position Capture Function is active. The activated function will cause the selected inputs to be checked for edge change. The capture event is triggered by a rising, respectively falling, logic edge of the activated input. The edge triggering the Capture event can be defined for each individual input specified in R518 Capture Edge Definition. The edge is called logic, because it is not the edge change of the real input signal that is checked, but the change of state of the respective input in R511 Input State. R511 shows the input circuit state of the input signal after setting the polarity by R510 Input Polarity. Notice! The edge must have been defined before activating the function; otherwise changing the edge definition while the function is active can trigger a capture event, although the as-is input signal has not changed. The capture event is displayed by means of a set bit of the respective input in R513 Digital Inputs - Capture Status. At the same time, the bit of the respective input is reset in R519 Capture Active State, while the Position Capture function is automatically deactivated for this input. This function deals with the Capture event of one input simultaneously with, and independent from, the other inputs. During a Capture event, the as-is position (R109) is stored. Each input, though, has been assigned a specific register for Capture events. Registers R521 through R524 contain the as-is position. For re-activating the Position Capture function, the input has to be re-activated via register R631 Capture Command Set. In fig.42, the "Position Capture" function has been illustrated. 328 Jetter AG JetMove 2xx at the JetControl 15.5 What Does this Function Imply? Capture edge definition R518 Bit 1,2,3,8 Input state Input polarity R511 Bit 1,2,3,8 R510 Bit 1,2,3,8 Dig. inputs Bit 1 = 0 Bit 1 1 Bit 1 = 0 LIMIT+ 1 Bit 2 = 1 Bit 2 1 Bit 2 = 1 LIMIT- 1 Bit 3 = 0 Bit 3 1 Input signal Bit 3 = 0 REF 1 Bit 8 = 1 Bit 8 1 Bit 8 = 1 INPUT 1 Capture position Set of Capture commands R631 Bit 1,2,3,8 Edge evaluation C Q D R521 LIMIT+ C Q D R522 LIMIT- C Q D R523 REF C Q D R524 INPUT LIMIT+ Bit 1 = 0 State: Capture active LIMIT- Bit 2 = 1 REF Bit 3 = 0 Capture state As-is position INPUT R513 Bit 1,2,3,8 Bit 8 = 1 R519 Bit 1,2,3,8 R632 Bit 1,2,3,8 Clearing Capture commands Reset S Q R Bit 1 S Q R Bit 2 S Q R Bit 3 S Q R Bit 8 Fig. 42: Function diagram of the "Position Capture" function Jetter AG 329 15 Special Function: Position Capture 15.6 JetWeb Sample Program "Length Measurement" On a conveyor belt, packets of variable length are being transported. In order to adjust the next station, a handling system, to the individual length of each packet, the packets must be measured, see fig.43. Endless positioning P P X Y L= P - P X Y Position Light barrier Package Fig. 43: Sample application of the "Position Capture" function Measuring is done by means of a light barrier and the "Position Capture" function. At the output, the light barrier displays a high signal (24 V level), when the light beam is interrupted, that is, when the front edge of the packet is recognized. The light barrier displays a low signal (0 V level), when the light beam is can show through, that is, when the rear edge of the packet is recognized. The light barrier signal has been connected to the digital input INPUT. The lengths of the packets are to be calculated in millimeters and stored to a FIFO memory. The handling system will take the length measurements out of the FIFO according to the sequence of the packets. The conveyor belt is only driven in positive direction. JC-24x is used as a controller. The JetMove 2xx driving the conveyor belt has got the slave module number 2. Initialization #include „JM2xxReg32.stp" ... Var JM_Axis :JM_2XX At %VL 12000; CapPos :INT AT %vl 65024 Length :INT AT %vl 65025 Overflow1 :INT AT %vl 65026 Overflow2 :INT AT %vl 65027 End_Var ... 330 // declaration of the axis : : : : Jetter AG JetMove 2xx at the JetControl 15.6 Sample Program "Length Measurement" // Basic configuration of the conveyor belt axis: // The axis is set as a linear modulo axis; i.e. it is an endless axis // of the positioning unit mm. // // // Example of Modulo Setting: JM_Axis.Ax_nm_AxisType:= cn_Ax_AxisType_Lin; JM_Axis.Ax_nm_ModuloAxis := cn_Ax_ModuloAxis_Yes; JM_Axis.Ax_fm_GearRatioMotor := 4; // Gear Ratio - Motor JM_Axis.Ax_fm_GearRatioLoad := 1; // Gear Ratio - Mechanism // Linear / Rotation Ratio: // e.g. 30 mm, i.e. one revolution of the gearbox results in a linear // motion of 30 mm. JM_Axis.Ax_fm_LeadScrewPitch :=30; JM_Axis.Ax_fm_TravelPosMin := 0; // Travel Limit - Negative: JM_Axis.Ax_fm_TravelPosMax := 10000; // Travel Limit - Positive: ... // Setting up the "Position Capture" function: // Deactivate the capture function: JM_Axis.DI_nm_CapCmdClr := 0x10E; When Bit_Clear (JM_Axis.JM_nm_State, cb_State_Busy) Continue; ... Process ... // Cycle: Measure the length of the packet While True Do // Set the polarity of the digital input INPUT to 24 V = logical 1. // This means that the rising edge will trigger the Capture event. JM_Axis.DI_nm_CapEdge := 0x0100; // Activate the "Position Capture" function (R513.Bit8 = 0 is set): JM_Axis.DI_nm_CapCmdSet := 0x0100; // Wait, until the Capture event takes place: When Bit_Set(JM_Axis.DI_nm_CapStatus, 8) Continue; // Temporarily store the first capture position value in a floating// point register. CapPos := JM_Axis.DI_fm_CapPosInt; // Set the polarity of the digital input INPUT to 0 V = logical 1. // This means that the falling edge will trigger the Capture event. JM_Axis.DI_nm_CapEdge := 0x0000; // Activate the "Position Capture" function (R513.Bit8 = 0 is set): JM_Axis.DI_nm_CapCmdSet := 0x0100; // Wait, until the Capture event takes place: When Bit_Set(JM_Axis.DI_nm_CapStatus, 8) Continue; // Calculate the length: // Check for position overflow If JM_Axis.DI_fm_CapPosInt > CapPos Then // No position overflow. Length = JM_Axis.DI_fm_CapPosInt - CapPos; ELSE // Position overflow: // Calculate the difference between the positive maximum // position and the latest measuring. Overflow1 := JM_Axis.Ax_fm_TravelPosMax - REG CapPos; Jetter AG 331 15 Special Function: Position Capture JetWeb // // Add the distance covered since position overflow to the result. Overflow2 := JM_Axis.DI_fm_CapPosInt JM_Axis.Ax_fm_TravelPosMin; Length = Overflow1 + Overflow2; End_If; // End of the IF branch ... Store the length to the FIFO memory ... End_While; // Restart cycle ... 332 Jetter AG JetMove 2xx at the JetControl 15.7 15.7 Description of Registers Description of Registers Register 513: Capture Status Function Description Read Value of the present capture position Write Illegal Variable type int / register Value range bit-coded, 16 bits, only bits 1, 2, 3, and 8 Value following a reset 0 If the "position capture" function has been applied to the selected digital input, this register will inform the user, whether the capture event has taken place, and whether the capture position can be read out of R521 through 524. By writing into R631 Capture Command Set, the respective bit is cleared. Meaning of the values: 0 : The capture event has not taken place at the input yet 1 : The capture event has taken place at the input Meaning of the individual bits: Jetter AG Bit 1: LIMIT + (positive hardware limit switch) Bit 2: LIMIT - (negative hardware limit switch) Bit 3: REF (reference switch) Bit 8: INPUT (additional digital input) 333 15 Special Function: Position Capture JetWeb Register 518: Capture Edge Definition Function Description Read Value of the capture definition Write New value of the capture edge definition Amplifier status No specific status Takes effect Immediately Variable type int / register Value range bit-coded, 16 bits, only bits 1, 2, 3, and 8 Value following a reset 0b000 0001 0000 1110 Here, the edge can be selected for the capture event of the "Position Capture" function. The assignment of the bits to the inputs is identical to the assignment in R513 Capture Status. Meaning of the values: 0 : a logically falling edge has been selected 1 : a logically rising edge has been selected Register 519: Capture Active State Function Description Read As-is input state for which the Position Capture function is active Write Illegal Amplifier status No specific status Takes effect Immediately Variable type int / register Value range bit-coded, 16 bits, only bits 1, 2, 3, and 8 Value following a reset 0 R519 shows, for which inputs the Position Capture function is presently active, respectively deactivated. The bits of R519 are set, respectively reset, by R631 Capture Command Set and R632 Capture Command Clear. The assignment of the bits to the inputs is identical to the assignment in R513 Capture Status. Meaning of the values: 334 0 : The Position Capture function has been deactivated for the input 1 : The Position Capture function is active for the input Jetter AG JetMove 2xx at the JetControl 15.7 Description of Registers Register 521: Capture-Position LIMIT+ Function Description Read Value of the presently active capture position for the positive limit switch Write Illegal Variable type float Value range Float limits [°] or [mm] (the unit depends on the setting of the axis type) Value following a reset 0 [°] Here, the as-is position of the axis at the capture event is entered for the input of the positive limit switch. Register 522: Capture-Position LIMITFunction Description Read Value of the presently active capture position for the negative limit switch Write Illegal Variable type float Value range Float limits [°] or [mm] (the unit depends on the setting of the axis type) Value following a reset 0 [°] Here, the as-is position of the axis at the capture event is entered for the input of the negative limit switch. Register 523: Capture Position REF Function Description Read Value of the presently active capture position for the reference switch Write Illegal Variable type float Value range Float limits [°] or [mm] (the unit depends on the setting of the axis type) Value following a reset 0 [°] Here, the as-is position of the axis at the capture event is entered for the input of the reference switch. Jetter AG 335 15 Special Function: Position Capture JetWeb Register 524: Capture Position INPUT Function Description Read Value of the presently active capture position for the additional digital input Write Illegal Variable type float Value range Float limits [°] or [mm] (the unit depends on the setting of the axis type) Value following a reset 0 [°] Here, the as-is position of the axis at the capture event is entered for the additional digital input. Register 631: Capture Command Set Function Description Read Bit mask of the inputs activated last Write New bit mask of the inputs to be activated Amplifier status No specific status Takes effect Immediately Variable type int / register Value range bit-coded, 16 bits, only bits 1, 2, 3, and 8 Value following a reset 0 R631 is used for activating the Position Capture function for the individual inputs. R631 defines a pattern of setting bits. A bit set in a register means that the input assigned to this bit, is to be activated, respectively has been activated. A bit that has not been set means that the input is not addressed, respectively has not been addressed. The assignment of the bits to the inputs is identical to the assignment in R513 Capture Status. The activated inputs are shown in R519. Register 632: Capture Command Clear Function 336 Description Read Bit mask of the inputs deactivated last Write New bit mask of the inputs to be deactivated Amplifier status No specific status Takes effect Immediately Variable type int / register Value range bit-coded, 16 bits, only bits 1, 2, 3, and 8 Value following a reset 0 Jetter AG JetMove 2xx at the JetControl 15.7 Description of Registers R632 is used for deactivating the Position Capture function for the individual inputs. R632 defines a pattern of resetting bits. A bit set in a register means that the input assigned to this bit, is to be deactivated, respectively has been deactivated. A bit that has not been set means that the input is not addressed, respectively has not been addressed. The assignment of the bits to the inputs is identical to the assignment in R513 Capture Status. The activated inputs are shown in R519. Jetter AG 337 15 Special Function: Position Capture JetWeb 338 Jetter AG JetMove 2xx at the JetControl 16.1 General Information 16 Special Function: PID Controller 16.1 General Information As of operating system version 23, every JetMove 2xx is equipped with a PIDT1 controller, which, in combination with the analog input card JM-IA1, is apt for various process control applications. For the JM-D203, the controller is available as of operating system version 1.00. It makes use of the internal analog inputs on the system bus plug-in connector X18 for axis A, respectively X19 for axis B. By specific parametering, the individual components of the controller (P, I, D and T1 component) can be activated or deactivated. This way, flexible adjustment to individual control tasks is possible. The controller functions by a sample time of TS = 2 ms; it is synchronous with the drive control system, so that interfacing with the drive control system is easy. 16.2 Configuration Before commissioning the PID controller, its interfaces to the periphery must be set properly. This also implies, for example, that in a JetMove 2xx series, an analog input board is available (hardware module JM-IA1 in AnyBus slot 2). This step touches on the following registers: • R211 "PID Selection As-is Value" • R212 "PID Selection Correction" • R213 "PID Selection Set Point" • R572 "JetMove Controller Mode" At the moment, two configurations are useful; they will be described below. 16.2.1 PID Controller with Lower-Level Current Control This configuration, for example, can be applied for controlling a press, if the pressure sensor is connected to the analog input of the JM-IA1. Jetter AG • R211 = 221: The as-is value is taken from the analog input no. 1 of the analog input card JM-IA1 (the input voltage is 0 ... 10 V of a 12 bit resolution) • R213 = 220: The setpoint value is directly taken from register 220 • R212 = 125: The manipulated variable is transmitted to the current control • R572 = 101: Of the entire drive control system, only the current control is active 339 16 Special Function: PID Controller JetWeb 16.2.2 PID controller with lower-level speed and current control This configuration can, for example, be used for controlling the flow rate of liquid media, if the respective sensor has been connected to the analog input of the JM-IA1. • R211 = 221: The as-is value is taken from the analog input no. 1 of the analog input card JM-IA1 (the input voltage is 0 ... 10 V of a 12 bit resolution) • R213 = 220: The setpoint value is directly taken from register 220 • R212 = 111: The manipulated variable is transmitted to the speed controller • R572 = 102: Of the entire drive control system, only the current control is active 16.3 Commissioning For commissioning the above named configurations, the following steps will be required: • R101 = 1: Activate the drive control • R201 = 1: Activate the PID controller • R220 = Specify the desired setpoint value 16.4 Optimizing the Controller As optimizing the controller depends on the selected controller structure, only basic remarks on this topics can be made here. Here, the basically possible controller structures and their respective parametering are still to be listed. 340 Jetter AG Jetter AG Not connected: 0 Not connected: 0 N‐as‐is value: 112 JM_ANA, Pin 1: 221 R211 As-is value selection StandardAct R213 Setpoint selection Set digital value: 220 StandardSet TR R210 As-is value smoothing TF [ms] TF R218 Setpoint smoothing TR [ms] R219 PidXw [%] R209 As-is value [%] ‐ R202 Setpoint value [%] R203 Proportional gain KP [1] R204 Integral time TN [ms] TN 1 T1 TN t KP R214 Sampling time TS [ms] t / TN * KP R200 PID status word R206 Propagation delay T1 [ms] R201 PID control word R205 Derivative time TV [ms] R207 Limitation I‐component [%] KP * TV / T1 R208 Preset I‐component [%] R217 Scaling factor Neg. limit, manipulated value [%] R216 R215 Pos. limit, manipulated value [%] 0: Controller is deactivated completely 1: Acquisition of as‐is value is active 3: Acquisition of as‐is value and the controller are active StandardCorr R225 Manipulated value [%] = 0: Deactivate the controller, deactivate acquisition of as‐is value = 1: Activate the controller, activate acquisition of as‐is value = 2: Deactivate the controller, activate acquisition of as‐is value = 3: Reset the I‐component JetMove 2xx Controller PIDT1 111: Speed setpoint, if R572 = 102 (speed control) R212 Selection of manipulated value 125: Current setpoint, if R572 = 101 (current control) 0: Not connected (default) JetMove 2xx at the JetControl 16.4 Optimizing the Controller Fig. 44: Structure of the PID controller 341 16 Special Function: PID Controller 16.5 JetWeb Register Description Register 200: Status Register Function Description Read Status register of the PID controller Variable type / unit int32 / [-] Value range 0: The controller has been deactivated 1: The controller is active Value following a reset 0 Register 201: PID Command Function Description Read/Write Command register of the PID controller Variable type / unit int32 / [-] Value range 0: (Default value after a reset) 1: Switch controller ON 2: Switch controller OFF 3: Clear integral-action components of the controller Value following a reset 0 Register 202: Setpoint Function Description Read PID setpoint Variable type / unit float / [%] Value range -100 ... +100 Value following a reset 0 This setpoint results of the digital setpoint of R220, which in turn is a result of the standardizing and setpoint filtering value stored to R218. The setpoint value has always got the same standards as the as-is value, see “Register 213: Selection of the Setpoint” on page 347. 342 Jetter AG JetMove 2xx at the JetControl 16.5 Register Description Register 203: Proportional Gain KP Function Description Read/Write Proportional amplification Kp of the PID controller, respectively of the p-component Variable type / unit float / [1] Value range 0 ... MaxFloat 0 = (p-component is deactivated) Value following a reset 1 Register 204: Integral Time Tn Function Description Read/Write Integral-action time TN of the PID controller, respectively the integral-action components Variable type / unit float / [ms] Value range 0 ... MaxFloat 0 = (integral-action component is deactivated) Value following a reset 100 Register 205: Derivative Time TV Function Jetter AG Description Read/Write Derivative-action time TV of the PID controller, respectively of the D-component. Variable type / unit float / [ms] Value range 0 ... MaxFloat 0 = (D-component is deactivated) Value following a reset 0 (D-component is deactivated) 343 16 Special Function: PID Controller JetWeb Register 206: Delay Time T1 Function Description Read/Write Time constant of the T1-constituent in the D-component of the PIDT1 controller Variable type / unit float / [ms] Value range 0 ... MaxFloat 0 = (T1-constituent has been deactivated) Value following a reset 0 (T1-constituent has been deactivated) Register 207: Limitation Integral-Action Component Function Description Read/Write Symmetrical limit of the integral-action component Variable type / unit float / [%] Value range 0 ... +100 Value following a reset +100 Register 208: PID I-Factor Preset Function Description Read/Write Value for initializing the integral-action component of the PID controller. This initializing value is assigned to the integral-action component once by means of controller command 1. Variable type / unit float / [%] Value range -100 ... +100 Value following a reset 0 Register 209: As-is Value Function Description Read As-is PID value Variable type / unit float / [%] Value range -100 ... +100 Value following a reset 0 see “Register 211: Selection of the As-is Value” on page 345. 344 Jetter AG JetMove 2xx at the JetControl 16.5 Register Description Register 210: As-is Value Filtering TF Function Description Read/Write Time constant TF of the as-is value filtering of the PID controller Variable type / unit float / [ms] Value range 0 ... MaxFloat 0 = (as-is value filtering has been deactivated) Value following a reset 0 Register 211: Selection of the As-is Value Function Description Read/Write Source of the as-is PID controller values Variable type / unit int32 / [-] Value range See table below Value following a reset 0 0 There is no feedback of an as-is value. Yet, the as-is value can be written to R209. 112 The as-is value of the PID controller has been connected with the as-is speed value sent by the encoder evaluation (R112). The as-is value has been standardized by the maximum speed of the speed control loop specified in R118. An as-is value of +/- 100 [%] corresponds to +/- R 118 [rpm] 221 The as-is value of the PID controller is connected with analog input 1 of the analog input module JM-IA1 (R221). The as-is value is standardized by the measuring range of the AD converter (0 - 10 V); it is independent from its resolution (12 bit) An as-is value of 0 ... 100 [%] corresponds to 0 ... 10 [V] Jetter AG 345 16 Special Function: PID Controller JetWeb Register 212: Selection of the Manipulated Variable Function Description Read/Write Target for the manipulated variable of the PID controller Variable type / unit int32 / [-] Value range See table below Value following a reset 0 0 The manipulated variable is not connected. It can directly be read out of R219. 111 The manipulated variable of the PID controller has been connected with the nominal speed value of the speed controller (R111). For this purpose, the nominal operation mode of the JetMove must be set to speed control (R572 = 102). This means that the PID controller has got priority over the speed controller. The manipulated variable has been standardized by the maximum speed of the speed control loop specified in R118. An as-is value of +/- 100 [%] corresponds to +/- R118 [rpm] 125 The manipulated variable of the PID controller has been connected with the current setpoint of the current controller (R125). For this purpose, the set operation mode of the JetMove has to be set to current control (R572 = 101). This means that the PID controller has got priority over the current controller. The manipulated variable has been standardized by the peak current of the current control loop specified in R502. A manipulated variable of +/- 100 [%] corresponds to +/- R502 [Arms] 346 Jetter AG JetMove 2xx at the JetControl 16.5 Register Description Register 213: Selection of the Setpoint Function Description Read/Write Source of the setpoint values of the PID controller Variable type / unit int32 / [-] Value range 0 Value following a reset 0 0 The setpoint cannot be input. Yet, it can directly be written via R202. 220 The setpoint of the PID controller is unseparabely connected to R220. Register 214: Sampling Time TS Function Description Read Sampling interval of the PID controller Variable type / unit float / [ms] Value range 2 Value following a reset 2 Register 215: Max. Value of the Manipulated Variable Function Description Read/Write Limitation of the manipulated variable of the PID controller Variable type / unit float / [%] Value range 0 ... +100 Value following a reset +100 Register 216: Min. Value of the Manipulated Variable Function Jetter AG Description Read/Write Limitation of the manipulated variable of the PID controller Variable type / unit float / [%] Value range -100 ... 0 Value following a reset -100 347 16 Special Function: PID Controller JetWeb Register 217: Scaling Factor for the Manipulated Value Function Description Read/Write Scaling factor for the manipulated variable of the PID controller Variable type / unit float / [%] Value range -1 ... +1 Value following a reset +1 With the scaling factor, the manipulated value of the PID controller can be negated. This is necessary, for example, if, because of electrical, respectively mechanical circumstances of the closed-up controlled system, there is a positive feedback. Register 218: Setpoint Value Filtering TR Function Description Read/Write Time constant TR of the setpoint filtering of the PID controller Variable type / unit float / [ms] Value range 0 ... MaxFloat 0 = (setpoint filtering has been deactivated) Value following a reset 0 (setpoint filtering has been deactivated) Register 219: Control Deviation Xw Function 348 Description Read As-is control deviation Variable type / unit float / [%] Value range -100 ... +100 Value following a reset 0 Jetter AG JetMove 2xx at the JetControl 16.5 Register Description Register 220: Digital Setpoint Function Description Read/Write As-is digital PID controller setpoint Variable type / unit float / [1] Value range -100 ... +100 Value following a reset 0 Register 221: Measuring Value Analog Input 1 Function Description Read The reading access directly starts a new measuring at the AD converter. After about 200 µs, the measured value will be reported in the feedback Variable type / unit int32 / [-] Value range 0 ... 32,767 (measuring range of the ADC has been moved to 16 bit left justified) Value following a reset 0 Register 225: Manipulated Variable Function Description Read Manipulated variable of the PID controller Variable type / unit float / [%] Value range -100 ... +100 Value following a reset 0 Manipulated variable of the PID controller after scaling with R217 and after limitation by R215 and R216. Jetter AG 349 16 Special Function: PID Controller JetWeb 350 Jetter AG JetMove 2xx at the JetControl 17.1 Introduction 17 Special Function: Position Trigger 17.1 Introduction JetMoves with digital outputs (JM-204, JM-208, JM-215, JM-225) can change the switching state of their digital outputs at a set as-is position. In this case, the set trigger condition has been fulfilled, that is, if the as-is position exceeds or falls below a set comparative position, the outputs are set, respectively reset. For setting, respectively resetting, a delay time can be set as well. First the trigger condition has to be met, then the delay time has to expire, then setting, respectively resetting can be carried out. There are two registers for defining the output pattern which, after having met the trigger condition, has to be written to the digital outputs. One of these registers specifies the setting pattern, the other one specifies the resetting pattern. The digital outputs have been assigned to corresponding bits of these registers. A bit set in these registers means that the respective output has been selected for setting, respectively resetting. A bit that has not been set means that the corresponding output is not considered. When the condition has been met and the digital outputs have been changed by the JetMove, the function is terminated automatically. If the trigger condition has already been met at activating the function, the procedure is blocked. When the condition is not met any more, the blockage is cleared. This means that the trigger condition has to have the "not met" status first. After releasing the blockage and meeting the trigger condition once more, the procedure is continued. The trigger condition is checked and the outputs are modified by a sampling rate of 16 kHz. The function has got two individually functioning channels. Each of them checks the trigger condition and modifies the digital outputs. The channels are characterized as follows: • • • • Each channel monitors the as-is position (R109) Each channel can modifiy any digital output on connector X31 Each channel has got its individual register set Both channels are operated the same way. They have got analog behavior toward each other. Note! At parameterizing the two channels accordingly, their mutual access to the the digital outputs can coincide. Jetter AG 351 17 Special Function: Position Trigger 17.2 JetWeb Overview of Registers For the Position Trigger function, the following registers are available: Register Name Short Description Registers - Both Channels R515 DigOut-Status The switching state of the digital outputs is displayed. R596 DigOutStatus-Set Setting pattern for manually setting the digital outputs R597 DigOutStatus-Clear Resetting pattern for manually resetting the digital outputs Registers - Channel 1 R525 DigOut-Typ Setting the comparing condition and the delay function R516 DigOut-Set Pattern for setting the digital outputs at exceeding or falling below the comparative position. R517 DigOut-Clear Pattern for resetting the digital outputs at exceeding or falling below the comparative position. R526 DigOut-PosX Comparative position R529 DigOut-Delay Delay time Registers - Channel 2 352 R623 DigOut-Typ2 Setting the comparing condition and the delay function R624 DigOut-Set2 Pattern for setting the digital outputs at exceeding or falling below the comparative position. R625 DigOut-Clear2 Pattern for resetting the digital outputs at exceeding or falling below the comparative position. R626 DigOut-PosX2 Comparative position R527 DigOut-Delay2 Delay time Jetter AG JetMove 2xx at the JetControl 17.3 17.3 Configuring and Carrying Out the Function Configuring and Carrying Out the Function Below, the proceedings for configuring and carrying out the function are described. Initialization: For carrying out the function, the JetMove has to be activated. Then, the output driver has to be initialized. This is done as follows: Step 1 Action Initializing the Digital Outputs Action: Writing any output pattern into R515 DigOut - Status Please note: This way, the output driver component is activated and initialized. Manually Setting and Resetting the Outputs: The outputs can be set and reset manually by means of R596 DigOutStatus-Set and R597 DigOutStatus-Clear, even while the active position trigger function is carried out. If the position trigger function of channel 1 is not active, R516 DigOut - Set and R517 DigOut - Clear can be used as an alternative to R596 and R597. R516 and R517 have got the same function as R596 and R597, if the position trigger function for channel 1 is not active. How to carry out this function: When making use of this function, the procedure described below has to be kept to. It is described for channel 1, yet, the procedure for channel 2 is the same. Step 1 Action Set the comparative position for the changing-over event Action: Write the comparative position to R526 DigOut - PosX. 2 Define the performance characteristic of the function, activate the function Action: Write the respective type to R525 DigOut - Type. 3 Specify the outputs to be set at the event Action: Set the respective bits in R516 DigOut - Set. Jetter AG 353 17 Special Function: Position Trigger Step 4 JetWeb Action Specify the outputs to be reset at the event Action: Set the respective bits in R517 DigOut - Clear. How to deactivate the channel: As long as switching has not been carried out yet, the function in process can deactivated again without modifying the switch status of the outputs. For this, the step described below has to be taken. It is described for channel 1, yet, the procedure for channel 2 is the same. Step 1 Action Deactivating the function Action: - Set R516 DigOut - Set = 0 - Set R517 DigOut - Clear = 0 - Set R525 DigOut - Type = 0 354 Jetter AG JetMove 2xx at the JetControl 17.4 Register Description 17.4 Register Description Register 515: DigOut - Status Function Description Read/Write Switch status of the digital outputs on X31:1-4 Amplifier status No specific status Takes effect Immediately Variable type int / register Value range Bit-coded, 32 bits Value following a reset 0 A write access to R515 causes the digital outputs to be set exactly following the assignments listed below. The initial write access switches the hardware driver to the active state. Meaning of the values: 0 : The output has been / is reset (=0 V) 1 : The output has been set / is set (= +24 V) R515: Assignments of the Bits to the respective Outputs Bit 0 Output 1 at X31:1 Bit 1 Output 2 at X31:2 Bit 2 Output 3 at X31:3 Bit 4 Output 4 at X31:4 Register 596: DigOutStatus - Set Function Jetter AG Description Read/Write Register for setting the digital outputs 1-4 - the position trigger function is active Amplifier status No specific status Takes effect Immediately Variable type int / register Value range Bit-coded, 32 bits Value following a reset 0 355 17 Special Function: Position Trigger JetWeb R596 is used for manually setting the digital outputs. If the position trigger function is active, the outputs can also be set manually via this register. If the position trigger function is not active, either R515 DigOut-Status or R516 DigOut-Set can be used as an alternative to R596 for setting the digital outputs. The bit assignment of R596 to the outputs, as well as the meaning of 0 and 1, is identical with bit assignment and meaning of R515. Register 597: DigOutStatus - Clear Function Description Read/Write Register for resetting the digital outputs 1-4 - the position trigger function is active Amplifier status No specific status Takes effect Immediately Variable type int / register Value range Bit-coded, 32 bits Value following a reset 0 R597 is used for manually resetting the digital outputs. If the position trigger function is active, the outputs can also be set manually via this register. If the position trigger function is not active, either R515 DigOut-Status or R517 DigOut-Clear can be used as an alternative to R597 for resetting the digital outputs. The bit assignment of R596 to the outputs, as well as the meaning of 0 and 1, is identical with bit assignment and meaning of R515. Register 525: DigOut - Type Function 356 Description Read/Write Performance characteristic of the digital outputs channel 1 Amplifier status No specific status Takes effect Immediately Variable type int / register Value range 0 ... 4 Value following a reset 0 Jetter AG JetMove 2xx at the JetControl 17.4 Register Description Value list for R525 DigOut - Type 0 The position trigger function is deactivated 1 Trigger Mode 1: - Trigger condition: R109 As-is Position >= R526 DigOut PosX - R516 DigOut - Set It takes effect on the outputs immediately after meeting the trigger condition. - R517 DigOut - Clear: It does not take effect unless the trigger condition has been met and the delay time specified in R529 has expired. 2 Trigger Mode 2: - Trigger condition: R109 As-is Position <= R526 DigOut PosX - R516 DigOut - Set: It takes effect on the outputs immediately after meeting the trigger condition. - R517 DigOut - Clear: It does not take effect unless the trigger condition has been met and the delay time specified in R529 has expired. 3 Trigger Mode 3: - Trigger condition: R109 As-is Position >= R526 DigOut PosX - R516 DigOut - Set: It does not take effect unless the trigger condition has been met and the delay time specified in R529 has expired. - R517 DigOut - Clear: It takes effect on the outputs immediately after meeting the trigger condition. 4 Trigger Mode 4: - Trigger condition: R109 As-is Position <= R526 DigOut PosX - R516 DigOut - Set It does not take effect unless the trigger condition has been met and the delay time specified in R529 has expired. - R517 DigOut - Clear: It takes effect on the outputs immediately after meeting the trigger condition. Types 1 and 2 The operating system carries out the following program sequence for types 1 and 2: 1. R516 DigOut - Set takes effect on the outputs immediately 2. R517 DigOut - Clear takes effect on the outputs after a delay that has to be set via R529 DigOut - Delay 3. R525 DigOut - Type = 0 Types 1 and 2 can be used for generating the following signal patterns: • Active high pulses of a defined length • Immediate rising edges • Delayed falling edges Jetter AG 357 17 Special Function: Position Trigger JetWeb Types 3 and 4 The operating system carries out the following program sequence for types 3 and 4: 1. R516 DigOut - Set takes effect on the outputs after a delay that has to be set via R529 DigOut - Delay 2. R517 DigOut - Clear takes effect on the outputs after a delay that has to be set via R529 DigOut - Delay 3. R525 DigOut - Type = 0 Types 3 and 4 can be used for generating the following signal patterns: • Active low pulses of a defined length • Delayed rising edges • Immediate falling edges Register 516: DigOut - Set Function Description Read/Write Pattern for setting the digital outputs - channel 1 Amplifier status No specific status Takes effect Immediately Variable type int / register Value range Bit-coded, 32 bits Value following a reset 0 R516 can be used for manually setting the digital outputs, if the position trigger function for channel 1 is not active. If the position trigger function for channel 1 is active, the setting pattern is specified via R516. It is for setting thre respective digital outputs when the trigger condition has been met. The bit assignment of R516 to the outputs, as well as the meaning of 0 and 1, is identical with bit assignment and meaning of R515. Register 517: DigOut - Clear Function 358 Description Read/Write Pattern for resetting the digital outputs - channel 1 Amplifier status No specific status Takes effect Immediately Variable type int / register Value range Bit-coded, 32 bits Value following a reset 0 Jetter AG JetMove 2xx at the JetControl 17.4 Register Description R517 can be used for manually setting the digital outputs, if the position trigger function for channel 1 is not active. If the position trigger function for channel 1 is active, the resetting pattern is specified via R517. It is for resetting thre respective digital outputs when the trigger condition has been met. The bit assignment of R517 to the outputs, as well as the meaning of 0 and 1, is identical with bit assignment and meaning of R515. Register 526: DigOut PosX Function Description Read/Write Comparative position - channel 1 Amplifier status No specific status Takes effect Immediately Variable type float Value range R182 ... R183 [°] respectively [mm] Value following a reset 0 [°] For correct functioning, please make sure the comparison position is within the limits defined for the axis motion (R182 to R183). Register 529: DigOut - Delay Function Description Read/Write Delay time for pulse generation - channel 1 Amplifier status No specific status Takes effect Immediately Variable type float Value range 0 ... 2,000 [ms] Value following a reset 0 [ms] The delay time defines the instance between setting and resetting the digital outputs. Jetter AG 359 17 Special Function: Position Trigger JetWeb Register 623: DigOut Type2 Function Description Read/Write Performance characteristic of the digital outputs channel 2 Amplifier status No specific status Takes effect Immediately Variable type int / register Value range 0 ... 4 Value following a reset 0 Values and behavior by analogy with R525 DigOut - Type. Register 624: DigOut - Set2 Function Description Read/Write Registers for setting the digital outputs - channel 2 Amplifier status No specific status Takes effect Immediately Variable type int / register Value range Bit-coded, 32 bits Value following a reset 0 R624 specifies the setting pattern. When the trigger condition of channel 2 has been met, it sets the respective digital outputs. The bit assignment of R624 to the outputs, as well as the meaning of 0 and 1, is identical with bit assignment and meaning of R515. Register 625: DigOut - Clear2 Function 360 Description Read/Write Clearing register for the digital outputs 1-4 channel 2 Amplifier status No specific status Takes effect Immediately Variable type int / register Value range Bit-coded, 32 bits Value following a reset 0 Jetter AG JetMove 2xx at the JetControl 17.4 Register Description R625 specifies the resetting pattern. When the trigger condition of channel 2 has been met, it resets the respective digital outputs. Register 626: DigOut PosX2 Function Description Read/Write Comparison value - channel 2 Amplifier status No specific status Takes effect Immediately Variable type float Value range R182 ... R183 [°] respectively [mm] Value following a reset 0 [°] Values and behavior by analogy with R526 DigOut-PosX. Register 627: DigOut - Delay2 Function Description Read/Write Delay time for pulse generation - channel 2 Amplifier status No specific status Takes effect Immediately Variable type float Value range 0 ... 2,000 [ms] Value following a reset 0 [ms] Values and behavior in analogy by R529 DigOut-Delay. Jetter AG 361 17 Special Function: Position Trigger JetWeb 362 Jetter AG JetMove 2xx at the JetControl 18 18.1 Introduction Special Function: TorqueControlled Shut-Off In this chapter, behavior, configuration, and applying the special function TorqueControlled Shut-Off will be dealt with. 18.1 Introduction The function Torque-Controlled Shut-Off causes quick stopping of the axis, when a set current (this results in a set torque) is reached. Before being stopped, the axis can be moved by PtP-positioning, endless positioning, or coupling methods such as electronic gearing and table mode. One application of this function is screw capping. Torque-controlled shut-off can be carried out in two different modes. In the individual modes, the axis behaves as follows: Mode 1: The motion is stopped quickly after exceeding the set current. After standstill, the operating system automatically switches to "normal" position control. Mode 2: The motion is stopped quickly after exceeding the set current. Then the system changes to a previously set holding torque. Below, the modes have been described in detail. 18.2 Overview of Registers For this function, the following registers are needed: Jetter AG Register Name Short Description R100 Status Status of the JetMove R101 Command Command register R136 Status - Torque-Controlled Shut-Off Status of the Function R137 Torque-Controlled Shut-Off Value Current shut-off threshold, at which the axis is to be stopped. R138 Torque-Controlled Shut-Off Count Number of the current values measured before torque-controlled shut-off, being greater than the torque-controlled shut-off value. R139 Speed Tripping Value Speed limit, at which the value of R506 Speed Controller Preset is taken over as a new value for the integral-action component of the speed controller (R507). 363 18 Special Function: Torque-Controlled Shut-Off JetWeb R506 Speed Controller Preset Integral-action component, which is taken over as a value for the speed controller integral-action component (R507) at reaching the speed tripping value. R607 Shut-Off Current Tripping current for transition from deceleration to holding torque. The register is only needed for mode 2. R630 Zero Speed Count Number of the measured speed values for which the following applies: Before the operating system internally sets the status "standstill", their as-is speed is smaller than 0.5 % of the maximum possible speed. The register is only needed for mode 1. 18.3 Mode 1 In mode 1, the operating system proceeds as follows when the function is active: Stage Description 1 Wait for as-is current (R561) to reach the current shut-off value (R137). 2 Set internal speed limit = 0. Explanation: This causes the speed controller to immediately control to value 0, that is, to immediate standstill. The speed controller transmits this information togehter with a high current setpoint value to the current control unit in the opposite direction. This leads to an extreme delay of the axis. The maximum current for delay is set via R127 Current Limitation. 3 When the speed tripping value has been reached, set the integral-action component (R507) of the speed control unit to the speed control preset value (R506). Explanation: This results in an abrupt change of current direction which is to lighten the extreme delay, in order to prevent undershooting of the as-is speed at standstill position (speed = 0) causing the axis to change the rotatory direction to standstill. 4 If axis standstill is recognized, adjust the set position control value to the as-is position (R109), then re-integrate the position controller into the controller cascade. Explanation: At the beginning of torque-controlled shut-off, the position control was separated from the controller cascade. A tracking error has resulted. Before re-integrating the position controller in the controller cascade, the tracking error has to be fixed. This is done by adjusting the set and the as-is position value. 364 Jetter AG JetMove 2xx at the JetControl 18.4 Mode 2 After step 4, the axis remains under "normal" position control conditions at the standstill point. From there, it can be driven "normally", that is, by means of PtP positioning, without further steps being necessary, such as resetting the integralaction component of the speed controller. 18.4 Mode 2 In mode 2, the operating system proceeds as follows when the function is active: Stage Description 1 Wait for as-is current (R561) to reach the current shut-off value (R137). 2 Set internal speed limit = 0. Explanation: This causes the speed controller to immediately control to value 0, that is, to immediate standstill. The speed controller transmits this information togehter with a high current setpoint value to the current control unit in the opposite direction. This leads to an extreme delay of the axis. The maximum current for delay is set via R127 Current Limitation. 3 When the set speed tripping value has been reached, proceed as follows: • • • Set the integral-action component (R507) of the speed controller to the preset value of the speed controller (R506) The current limitation (R127) is set to the shut-off current value (R607) The internal speed limitation is cancelled Explanation: This results in an abrupt change of the current direction which is to continually decrease the previously extreme delay. Then, the set holding torque can be kept at standstill (speed = 0) without undershooting and without a change of rotation direction. Attention: The holding torque can only be reached, if there is at least one resistance of the same value as the holding torque. After stage 3, the axis being affected by the holding torque is at standstill. Below, an example of screw-capping by means of torque-controlled shut-off is graphically illustrated. Jetter AG 365 18 Special Function: Torque-Controlled Shut-Off JetWeb 18.4.1 Mode 2 - Sequential Program Fig. 45: Exemplary sequential program - Idealized screw capping Explanations on the Illustration: 366 1. Acceleration phase up to high speed 2. At high speed, the main part of the screwing distance is covered. 3. Deceleration to low speed 4. When low speed has been reached, torque-controlled shut-off can be activated. 5. The capping to be screwed reaches its final position. This way, a torque is generated, as well as a motor current to maintain the speed. 6. The current shut-off value is reached: In R127 Current Limitation, the maximum current value for decelerating the axis is specified. The speed decreases fast. 7. As the difference between the as-is speed value and zero also decreases, the speed controller does not cause the maximum delay current any more. 8. At reaching the speed tripping value, speed limitation is neutralized. The axis is to travel on, which results in a current rise. 9. When the speed tripping value has been reached, a "positive" current has to be output quickly to prevent negative speed, that is, a retraction of the axis. Setting the integral-action component of the speed controller (R507) by the preset value of the speed controller is helpful. 10. The current limitation is set to the shut-off current value. During shut-off time, the cap still slides a small distance to its final position. Jetter AG JetMove 2xx at the JetControl 11. 18.5 Accuracy At the end of the screw-capping procedure, the axis is deactivated by command 2. 18.5 Accuracy The axis can be stopped by torque-controlled shut-off under two possible operating conditions: • • driving by constant speed during acceleration or deceleration The as-is current measured in the JetMove 2xx is basic for torque-controlled shutoff. Depending on the operating condition, this as-is current coincides more or less with the active torque at the end of the power train. The best possible coincidence at applying this method is gained by driving at constant speed. During acceleration, respectively deceleration, additional moments of inertia are created that are made visible in the as-is current. In this case, as-is current and active torque at the end of the power train coincide. This has to be considered at activating the function. 18.6 Mode 1 - Configuring and Operating 18.6.1 Configuring Below, the configuration of torque-controlled shut-off in mode 1 is described. For some parameters, adequate values have to be determined empirically. This requires a respective commissioning period with several test runs. In the following configuration steps, the parameters that are needed for empiric value determination have been marked specifically. For optimum commissioning, applying the oscilloscope function of the JetMove 2xx is necessary. By means of the oscilloscope, the following registers values are registered and evaluated at each deactivation (see also fig.45): • • Jetter AG Speed (R112) As-is Current (R561) 367 18 Special Function: Torque-Controlled Shut-Off JetWeb Torque-controlled shut-off in mode 1 has to be configured as follows: Step 1 Action Specify the current shut-off value Action: Write the respective current value standing for the desired torque into R137 Current Shut-Off Value. During the commissioning phase, do the fine-tuning by adjusting the value upwards or downwards. Please note: The current needed for the desired torque can be calculated with the help of the torque constant specified in the motor data sheet. 2 Specify the current shut-off count Action: Set R138 Torque-Controlled Shut-Off Count to ten, and adjust the value upwards or downwards during commissioning, if needed. 3 Set the speed tripping value Action: Set R139 Speed Tripping Valueto an adequate initial value (e. g. default value). At the subsequent commissioning, adjust the value upwards or downwards. 4 Specify Speed Controller Preset Action: Set Current Preset Value to zero. In the subsequent commissioning phase adjust upwards. Please note: Optimum setting is achieved, if the preset value is determined with the help of R139 Speed Tripping Value. The preset value and the speed tripping value are set best, if there is no siginificant undershooting of speed at the end of a shut-off procedure. 5 Set zero speed recognition Action: Set R630 Zero Speed Count to an adequate initial value (e. g. default value). At the subsequent commissioning, adjust the value upwards or downwards. 368 Jetter AG JetMove 2xx at the JetControl 18.6 Mode 1 - Configuring and Operating 18.6.2 Activating and deactivating the function For each shut-off procedure, the function has to be activated at an adequate point of time as shown in the sample program: Step Action 1 Wait, until the axis in an operating phase, at which no further current rise exceeding the current shut-off value is expected, except for the one leading to torque-controlled shut-off. This is, for example, the operating phase, in which, all acceleration and deceleration processes being completed, the axis is moving at constant speed. 2 Issue command 28 Action: Write value 28 into R101 Command. Result: Bit R136.0 = 1, Bit R136.1 = 0, Bit R136.2 = 0 The function can be deactivated prematurely, that is, if the operating system is not carrying out torque-controlled shut-off yet (bit R136.1 = 0), as follows: Step 1 Action Issue command 29 Action: Write value 29 into R101 Command. Result: R136 = 0 18.6.3 Transition to normal operation After stopping by torque-controlled shut-off in mode 1, the operating system automatically deactivates the function and sets the axis to position control again. In this case, the axis stops in standstill position. The user does not have to carry out further steps, such as resetting the integral-action component of the speed controller, etc. Please read below, how completed transition to position control can be recognized: Step 1 Action Wait for R136 "Shut-Off Status" to display the function status TorqueControlled Shut-Off Ended. Action: Wait for R136.2 = 1. Jetter AG 369 18 Special Function: Torque-Controlled Shut-Off 18.7 JetWeb Mode 2 - Configuring and Operating 18.7.1 Configuring Below, the configuration of torque-controlled shut-off in mode 2 is described. For some parameters, adequate values have to be determined empirically. This requires a respective commissioning period with several test runs. In the following configuration steps, the parameters that are needed for empiric value determination have been marked specifically. For optimum commissioning, applying the oscilloscope function of the JetMove 2xx is necessary. By means of the oscilloscope, the following registers values are registered and evaluated at each deactivation (also see fig.45): • • Speed (R112) As-is Current (R561) Torque-controlled shut-off in mode 2 has to be configured as follows: Step 1 Action Specify the current shut-off value Action: Write the respective current value standing for the desired torque into R137 Current Shut-Off Value. During the commissioning phase, do the fine-tuning by adjusting the value upwards or downwards. Please note: The current needed for the desired torque can be calculated with the help of the torque constant specified in the motor data sheet. 2 Specify the current shut-off count Action: Set R138 Torque-Controlled Shut-Off Count to ten, and adjust the value upwards or downwards during commissioning, if needed. 3 Set the speed tripping value Action: Set R139 Speed Tripping Value to an adequate initial value (e. g. default value). At the subsequent commissioning, adjust the value upwards or downwards. 4 Specify Speed Controller Preset Action: Set Current Preset Value to zero. In the subsequent commissioning phase adjust upwards. Please note: Optimum setting is achieved, if the preset value is determined with the help of R139 Speed Tripping Value. The preset value and the speed tripping value are set best, if there is no siginificant undershooting of speed at the end of a shut-off procedure. 370 Jetter AG JetMove 2xx at the JetControl 5 18.7 Mode 2 - Configuring and Operating Specify the holding torque Action: Set the value of R607 Holding Torque to the desired current value. At the subsequent commissioning, adjust the value upwards or downwards. Please note: The current needed for the desired torque can be calculated with the help of the torque constant specified in the motor data sheet. 18.7.2 Activating and deactivating the function For each shut-off procedure, the function has to be activated at an adequate point of time as shown in the sample program: Step Action 1 Wait, until the axis in an operating phase, at which no further current rise exceeding the current shut-off value is expected, except for the one leading to torque-controlled shut-off. This is, for example, the operating phase, in which, all acceleration and deceleration processes being completed, the axis is moving at constant speed. 2 Issue command 27 Action: Write value 27 into R101 Command. Result: Bit R136.0 = 1, Bit R136.1 = 0, Bit R136.2 = 0 The function can be deactivated prematurely, that is, if the operating system is not carrying out torque-controlled shut-off yet (bit R136.1 = 0), as follows: Step 1 Action Issue command 29 Action: Write value 29 into R101 Command. Result: R136 = 0 Jetter AG 371 18 Special Function: Torque-Controlled Shut-Off JetWeb 18.7.3 Transition to normal operation The operating system does not automatically deactivate the function after stopping by torque-controlled shut-off. The function rather stays active and causes the axis to be moved, respectively pressed against the "blockage", the holding torque being set. Please read below, how completed transition to the holding torque can be recognized: Step 1 Action Wait for R136 "Shut-Off Status" displays the function status TorqueControlled Shut-Off Ended. Action: Wait for R136.2 = 1. There are the following possibilities of completely deactivating the function and setting the axis back to "normal" position control: • • Disabling the axis (issue command 2) Re-initializing the enabled position generator (issue command 4) After this, the axis can be driven as usual. 372 Jetter AG JetMove 2xx at the JetControl 18.8 Sample Programs 18.8 Sample Programs The following sample programs have been based on the following hardware configuration: JC-241 with a JM-2xx, which is directly connected to the system bus interface of the controller. In the JetSym axis definition, the JM-2xx has got the designation Axis1. The following variable declaration applies to the following sample programs: // Variable Declaration: Var JM_nm_Status: JM_nm_Cmd: MC_fm_PosAct: Torq_nm_IqTripState: INT At %VL 12100; INT At %VL 12101; FLOAT At %VL 12109; INT At %VL 12136; // // // // // Torq_fm_IqTripValue: FLOAT At %VL 12137; // // Torq_nm_IqTripCnt: INT At %VL 12138; // // Torq_nm_SpeedTripVal: INT At %VL 12139; // // CtrlV_fm_ISumPreset: FLOAT At %VL 12506; // // Torq_fm_IqHoldValue: FLOAT At %VL 12607; // Torq_nm_ZeroSpeedCnt: INT At %VL 12630; // // End_Var; Status Register Command Register As-is Position Status of Torque Deactivation Current Shut-Off Value Filter of the Shut-Off Value Speed Tripping Value Speed Controller Preset Holding Torque Filter of Zero Speed Count 18.8.1 Sample program - Mode 1 ... // Reset the preset value before enabling the axis: CtrlV_fm_ISumPreset := 0; // Enable the axis MotionPower(Axis1, Enable); // Initialize the parameters for torque-controlled shut-off Torq_fm_IqTripValue := 0.5; // Torque-controlled shut-off value (current) [A] Torq_nm_IqTripCnt := 10; // Torque-controlled shut-off count Torq_nm_SpeedTripVal := 300; // Speed tripping value [rpm] // CtrlV_fm_ISumPreset := 3; // Speed controller preset [A] // Torq_nm_ZeroSpeedCnt := 5; // Filter of zero speed count // // Jetter AG Start motion 373 18 Special Function: Torque-Controlled Shut-Off JetWeb MotionMovePtp(Axis1,<<Target Position>>, <<Speed>>, <<Destination Window>>); // When reaching a defined position, decelerate When MC_fm_PosAct > DEFINED_POSITION Continue; MotionMovePtp(Axis1, New Speed, <<Speed>>); // Wait, until speed has been reached: When MotionReadStatus(Axis1, Maximum Speed) Continue; // Activate torque-controlled shut-off mode 1 JM_nm_Cmd:= 28; When JM_nm_Status.13 Continue; // Wait for busy-bit // Wait, until torque or target position have been reached When Torq_nm_IqTripState <> 1 Or MotionReadStatus(Axis1, In Destination Window) Continue; // Evaluate WHEN statement If Torq_nm_IqTripState <> 1 Then // Torque has been reached, axis is stopped WHEN BitSet(Torq_nm_IqTripState, 2) Continue; // Torque-controlled shut-off has been ended; to be continued by homeward voyage, for example: MotionMovePtp(Axis1, <<Target Position>>); ... Else // Destination window has been reached without reaching the torque. // To be continued by blocking the axis, for example: MotionStop(Axis1); End if; ... 18.8.2 Sample program - Mode 2 ... // Reset the preset value before enabling the axis: CtrlV_fm_ISumPreset := 0; // Enable the axis MotionPower(Axis1, Enable); // Initialize the parameters for torque-controlled shut-off Torq_fm_IqTripValue := 0.5; // Torque-controlled shut-off value (current) [A] Torq_nm_IqTripCnt := 10; // Torque-controlled shut-off count Torq_nm_SpeedTripVal := 300; // Speed tripping value [rpm] // 374 Jetter AG JetMove 2xx at the JetControl CtrlV_fm_ISumPreset := 3; Torq_fm_IqHoldValue := 0.8; 18.8 Sample Programs // // // // Speed controller preset [A] Holding current [A] // Start motion MotionMovePtp(Axis1,<<Target Position>>, <<Speed>>, <<Destination Window>>); // When reaching a defined position, decelerate When MC_fm_PosAct > DEFINED_POSITION Continue; MotionMovePtp(Axis1, New Speed, <<Speed>>); // Wait, until speed has been reached: When MotionReadStatus(Axis1, Maximum Speed) Continue; // Activate torque-controlled shut-off mode 2 JM_nm_Cmd:= 27; When JM_nm_Status.13 Continue; // Wait for busy-bit // Wait, until torque or target position have been reached When Torq_nm_IqTripState <> 1 Or MotionReadStatus(Axis1, In Destination Window) Continue; // Evaluate WHEN statement If Torq_nm_IqTripState <> 1 Then // Torque has been reached, axis is stopped WHEN BitSet(Torq_nm_IqTripState, 2) Continue; // Torque-controlled shut-off has been ended; to be continued for example: // Tripping time Delay(<<Tripping Time>>); // IMPORTANT: For resetting the axis to normal position control JM_nm_Cmd:= 4; // Re-initializing the position generator When JM_nm_Status.13 Continue; // Wait for busy-bit // Homeward voyage MotionMovePtp(Axis1, <<Target Position>>); ... Else // Destination window has been reached without reaching the torque. // To be continued by blocking the axis, for example: MotionStop(Axis1); End if; ... Jetter AG 375 18 Special Function: Torque-Controlled Shut-Off 18.9 JetWeb Register Description Register 136: Status of Torque-Controlled Shut-Off Function Description Read Status of torque-controlled shut-off Write Illegal Variable type int / register Value range Bit-coded, 3 bits Value following a reset 0 Meaning of the individual bits: Bit 0 1 = torque-controlled shut-off is active Bit 1 1 = Current shut-off current has been exceeded; the axis is stopped Bit 2 Torque-controlled shut-off has been ended At command 27 and 28, bit 0 is set, while all other bits are cleared. At command 29, all bits are cleared. Register 137: Current Shut-Off Value Function Description Read As-is shut-off value Write New shut-off value Amplifier status No specific status Takes effect Immediately Variable type float Value range 0 ... R502 [Aeff] Value following a reset 0 The shut-off value can only be set as an amount of current. However, this setting applies to both current directions. With the help of the motor constant KT [Nm/A] specified in the motor data sheet, the shut-off count can be converted into a torque generated by the motor. 376 Jetter AG JetMove 2xx at the JetControl 18.9 Register Description Register 138: Torque-Controlled Shut-Off Count Function Description Read As-is number of measuring values Write New number of measuring values Amplifier status No specific status Takes effect Immediately Variable type int / register Value range 0 ... 32,767 Value following a reset 0 The number of measuring values that have to be greater than the current shut-off value of R137, is written to R138, before torque-controlled shut-off is activated. This is like a filter for the current shut-off value. Even if just one single measured current value is smaller than the current shut-off value, the internal counter for this filter function is reset to zero. The current measuring values are registered in a frequency of 16 kHz. Register 139: Speed Tripping Value Function Description Read As-is torque-controlled shut-off count Write New torque-controlled shut-off count Amplifier status No specific status Takes effect Immediately Variable type int / register Value range 0 ... 32,767 [rpm] Value following a reset 150 At reaching the speed tripping count, the integral-action component of the speed controller is set to the value of R506 Speed Controller Preset. Jetter AG 377 18 Special Function: Torque-Controlled Shut-Off JetWeb Register 607: Holding Current Function Description Read As-is holding current Write New holding current Amplifier status No specific status Takes effect Immediately Variable type float Value range 0 ... R502 [Aeff] Value following a reset 0 R607 is exceptionally reserved for mode 2 of torque-controlled shut-off. After the axis has been stopped by torque deactivation, the holding current moves or presses the axis against the obstacle until the user program ends this. It might, for example, block the axis by issuing command 2. The holding current is entered as a current amount. Accordingly, it will affect both current directions. With the help of the motor constant KT [Nm/A] specified in the motor data sheet, the shut-off count can be converted into a torque generated by the motor. Please Note! When the holding current is 0, the value of R137 Torque-Controlled Shut-Off Value is used as a holding current after incrementation (compatible with older versions). Register 630: Filter of Zero Speed Count Function Description Read As-is number of measuring values Write New number of measuring values Amplifier status No specific status Takes effect Immediately Variable type int / register Value range 0 ... 32.767 Value following a reset 10 R630 is exceptionally reserved for mode 1 of torque-controlled shut-off. 378 Jetter AG JetMove 2xx at the JetControl 18.9 Register Description The number of speed measuring values that have to be smaller than 0.5 % of the maximum motor speed (R118), before the operating system sets bit R136.2 Current shut-off ended. Even if just one single measured speed value is greater than 0.5 % of the maximum motor speed, the internal counter for this filter function is reset to zero. Jetter AG 379 18 Special Function: Torque-Controlled Shut-Off JetWeb 380 Jetter AG JetMove 2xx at the JetControl 19.1 Oscilloscope 19 Further Functions 19.1 Oscilloscope The oscilloscope function can be applied any time with any operating mode of the JetMove. The following registers can also be used with the oscilloscope function in JetSym: Parameters Positioning R109 As-is Position R129 As-is Mechanical Speed R144 Set Speed (Load) Position feedback controller R119 As-is Tracking Error R130 Position Controller Setpoint Speed controller R111 Speed Controller Setpoint R112 As-is Motor Speed R507 I-Component Speed Controller Current controller R125 Current Setpoint R127 Current Limitation R561 As-is Current Motor R562 Motor Temperature R565 As-is shaft position Monitoring Jetter AG R119 As-is Tracking Error R646 I²t Input R648 As-is I²t Input in R647 381 19 Further Functions JetWeb Parameters Amplifiers R560 DC Link Voltage R563 As-is Temperature R564 As-is Ballast Load R566 Input Current R567 Mains Voltage R568 As-is Board Temperature Technological functions R188 Leading Axis Position R189 Leading Axis Speed PID controller R202 Setpoint R209 As-is Value R219 Control Deviation R221 Measuring Value Analog Input 1 R225 Regulated Value Referencing on the fly 382 R455 As-is Position Deviation R458 As-is Speed Correction Jetter AG JetMove 2xx at the JetControl 19.2 Trailing Indicator 19.2 Trailing Indicator The JetMove always evaluates the following tracking indicators: • • Min. / Max. value of the as-is position (R109) Min. / Max. value of the tracking error value (R119) By writing to the trailing indicator registers, the tracking indicators are reset to zero. 19.2.1 Trailing indicator - As-is position The slave pointers referring to the as-is position can be read out of the following registers: Register 438: Trailing Indicator - Max. As-is Position Value Function Description Read/Write Maximum as-is position since last reset to zero Variable type float Value range Float limits [°] or [mm] Value following a reset 0 [°] Register 439: Trailing Indicator - Min. As-is Position Value Function Jetter AG Description Read Minimum as-is position since last reset to zero Variable type float Value range Float limits [°] or [mm] Value following a reset 0 [°] 383 19 Further Functions JetWeb 19.2.2 Trailing indicator - Tracking error By means of the slave pointers referring to the tracking error value, a tolerance band for motions in position differences can be determined. Slave pointer values can be read out of the following registers: Register 538: Trailing Indicator for Tracking Error in Positive Direction Function Description Read Max. tracking error since last reset to zero Variable type float Value range Float limits [°] or [mm] Value following a reset 0 [°] Register 539: Trailing Indicator for Tracking Error in Negative Direction Function 384 Description Read Min. tracking error since last reset to zero Variable type float Value range Float limits [°] or [mm] Value following a reset 0 [°] Jetter AG JetMove 2xx at the JetControl 19.3 19.3 Triggered Emergency Stop Ramp Triggered Emergency Stop Ramp JetMove provides the possibility to trigger an emergency stop ramp by means of the INPUT signal. The operating principle is as follows: While the function is active, the operating system of the JetMove is monitoring INPUT. When the input has been activated (the polarity settings have to be considered!), the operating system automatically carries out an emergency stop ramp. It further blocks the output stage at the end of the emergency stop ramp. To release the output stage again, INPUT has to be reset to "deactivated". The function is activated by writing 1 to R557. It is deactivated by writing 0 to R557. The emergency stop ramp activated by this function is carried out in all operating modes except in the current control mode. Jetter AG 385 19 Further Functions JetWeb 386 Jetter AG JetMove 2xx at the JetControl 20 20.1 Control Parameters Generally Valid Parameters Registers are the interface between the user and the amplifier. Every register has got an unambiguous number and a name. Below, all available registers are explained; they are classified according to function groups and register sets. Description of the register block: Function Description Read Reading action Write Writing action Amplifier status Required amplifier status for the writing action Takes effect Instant or condition of a writing action taking effect Variable type The data type for being placed in the JetSym setup window is specified; it defines, whether decimal positions can be input or not: – float: Decimal positions can be input – int (integer) / register: Decimal positions cannot be input Value range Beginning and end of the permitted value range Value following a reset Register value after activating, respectively resetting the amplifier 20.1 Control Parameters Register 101: Command Function Jetter AG Description Read Latest command Write Giving a new command Amplifier status No specific status Takes effect Wait for the busy-bit in the status to be reset Variable type int / register Value range 0 ... 32,767 Value following a reset 0 387 20 Generally Valid Parameters JetWeb Attention: When a command has been given, the PLC program cannot make another access to the amplifier, unless the busy-bit in the status register has been reset by the amplifier. Commands: The following commands are available: 1 Activate the output stage 2 Deactivate the output stage 3 Set the reference (as-is position = target position, also considering the tracking error) 4 Re-initialize the position generator 5 Stop positioning by the maximum deceleration rate that is permitted (see R180) 6 Stop positioning by the deceleration ramp (R106) 7 Stop an axis motion by the emergency stop ramp (R549) ATTENTION: When the ramp has been covered, the output stage is automatically deactivated. 388 8 Acknowledge an error 9 Search for reference 10 Start an absolute positioning run 11 Start an absolute positioning run related to time 12 Change an absolute target position 13 Change a speed value 14 Reset bit 100.0 Home position is set 15 Change an acceleration value 16 Change a deceleration value 20 Start a relative positioning run 22 Change a relative target position 27 Activate torque-controlled shut-off, mode 2 28 Activate torque-controlled shut-off, mode 1 29 Deactivate torque-controlled shut-off 31 Start commutation finding Jetter AG JetMove 2xx at the JetControl 20.1 Control Parameters The following commands are available: 34 Activate position capture 35 Deactivate position capture 44 Couple the following axis by coupling mode Electronic Gearing 45 Decouple of the following axis from the coupling modes 46 Couple the following axis by coupling mode Table 56 Start an endless positioning run Attention! Endless positioning is only allowed, if the axis is set to modulo mode. The direction of rotation is defined via register 142. 57 Reverse an endless positioning run PLEASE NOTE: Command 57 is used in order to reverse an endless positioning run that has already been started. This means that the as-is motion direction is reversed. Register 450: Status Function Description Read As-is function status Write Set function status Amplifier status No specific status Takes effect Immediately Variable type int / register Value range 0 ... 65,535 Value following a reset 0 In function mode (R451) 2, 3, 4, 5, the number of correct trigger signals is displayed in this register, see “Special Function: Referencing on the Fly” on page 313. This number can be set to zero any time by writing into this register. In function mode 4 and 5 (R451), the register is set to zero automatically at the end of the correction run. Jetter AG 389 20 Generally Valid Parameters JetWeb Register 451: Function Mode Function Description Read As-is function mode Write Set function mode Amplifier status No specific status Takes effect Immediately Variable type int / register Value range 0 ... 5 Value following a reset 0 Meaning of the values: 0 : No function active 1 : Virtual master 2 : Referencing on the fly to the position of the leading axis* (possible for leading axis module JX2-CNT1 only) 3 : Referencing on the fly onto the own position* 4 : see 2, but as Single Shot* 5 : see 3, but as Single Shot* 6 : see 1, but start towards triggering as Single Shot* 7 : Software trigger for mode 6 * see “Special Function: Referencing on the Fly” on page 313. In function mode 4 and 5, the value is automatically reset to zero, when the next correction run of referencing on the fly has been finished. 390 Jetter AG JetMove 2xx at the JetControl 20.1 Control Parameters Register 514: Input Edge Function Description Read As-is input edge Write Set input edge Amplifier status No specific status Takes effect Immediately Variable type int / register Value range 0 ... 3 Value following a reset 1 Meaning of the values: 0 : The input is deactivated; trigger signals are not evaluated 1 : A rising edge is evaluated as a trigger signal 2 : A falling edge is evaluated as a trigger signal 3 : Both a rising and a falling edge are evaluated as a trigger signal (* (* The respective value is not available for JM-D203 On the JM-D203, the terminal point INPUT is on plug-in connectors X72, respectively X82, and on all other JM-2xx on plug-in connector X10. The terminal point INPUT is used for the following special function: • • Referencing on the fly Position capture Register 527: Dead Time Interrupt INPUT = Dead Time Correction INPUT Function Jetter AG Description Read As-is dead time correction Write Set dead time correction Amplifier status No specific status Takes effect Immediately Variable type float Value range 0 ms ... 5 ms Value following a reset 0.4 ms 391 20 Generally Valid Parameters JetWeb Dead time compensation for the additional digital input INPUT. The input INPUT used for the special function Referencing on the fly, for example. Register 540: Drive Mode Function Description Read As-is state value of drive mode 1 Write New state value of drive mode 1 Amplifier status The amplifier has to be deactivated Takes effect Immediately Value range Bit-coded, 16 bits Value following a reset 0b 00000010 1001x011 (* The respective bits are not available for JM-105 and JM-D203 Meaning of the individual bits: Bit 0: Automatic control of the brake by means of the amplifier 0 = Manual control by the user (via R574, bit 0) 1 = Automatic control by the amplifier Value following a reset: 1 Bit 1: Automatic control of the ventilator placed in the amplifier (* 0 = The ventilator is always switched on 1 = Depending on the respective temperature, the ventilator automatically switched off or switched on Value following a reset: 1 Bit 2: RESERVED Bit 3: Phase monitoring Here, the decision is made, whether, in 3-phase-mode, phase monitoring is to be activated or not. If phase monitoring has been activated, yet not all three phases are active, error message F02 is output. 0 = Phase monitoring has been deactivated 1 = Phase monitoring has been activated Value following a reset: JM-204, JM-208, and JM-215: 1; JM-203, JM-206, and JM-206B: 0 Bit 4: 392 Motor cable monitoring (** Jetter AG JetMove 2xx at the JetControl 20.1 Control Parameters Meaning of the individual bits: Here, a decision is made, whether motor cable monitoring is to be carried out or not. Switching off might be necessary in case of long motor cables. When motor cable monitoring has been activated, and when a ground fault of the motor or a motor cable break have been detected, error message F03 is output. 0 = Motor cable monitoring has been deactivated 1 = Motor cable monitoring has been activated Value following a reset: 1 Bit 5: Speed reversal By means of this bit, for all axis motions (position, speed and current control), the direction of rotation is reversed. ATTENTION: Please mind correct assignment of the hardware limit switches 0 = Positive direction of rotation (clockwise rotation of the motor shaft, looking at the shaft from the A-side; the set values are positive) 1 = Negative direction of rotation (counterclockwise rotation of the motor shaft, looking at the shaft from the A-side; the set values are positive) Value following a reset: 0 (positive direction of rotation) Bit 6: Software limit switch 0 = The software limit switch evaluation has been deactivated 1 = The software limit switch evaluation has been activated Value following a reset: 0 Bit 7: Hardware limit switch 0 = The hardware limit switch evaluation has been deactivated 1 = The hardware limit switch evaluation has been activated Value following a reset: 1 Bit 8: Jetter AG RESERVED 393 20 Generally Valid Parameters JetWeb Meaning of the individual bits: Bit 9: JetMove 2xx at the NANO / ConMove This bit is only useful, if the JM-2xx is used in connection with a NANO-CPU or a ConMove. For using a JM-2xx in connection with a JC-24x, the bit must be set to 1; this is also the default value. Value following a reset: 1 (* The respective bits are not available for JM-105 and JM-D203 (** The respective bits are not available for JM-105 Register 541: Operating Mode of the 7-Segment Display Function Description Read Number of the as-is operating mode Write Set number of the operating mode Variable type int / register Value range 0 ... 1 Value following a reset 0 See JetMove 2xx operator's manual This register is not available for JM-105. Meaning of the values: 0 : Normal operation 1 : Installation Register 557: Operating Mode - Trigger Input Function Description Read As-is operating mode of the trigger input Write Set operating mode Amplifier status No specific status Takes effect Immediately Variable type int / register Value range 0 ... 1 Value following a reset 0 Here, the operating mode for the digital input of the JetMove called INPUT is specified. 394 Jetter AG JetMove 2xx at the JetControl 20.1 Control Parameters Meaning of the values: 0 : No function active 1 : Triggered emergency stop ramp is active Register 572: Set Operating Mode Function Description Read Number of the as-is set operating mode Write Set number of the set operating mode Amplifier status The amplifier has to be deactivated Takes effect Next activation of the amplifier Variable type int / register Value range 101, 102, 103 Value following a reset 103 Here, the operating mode for the controller is set. Meaning of the values: 101 : Current control (only the current control is active) A set current value can be input via register 125 102 : Speed control (current control and speed control are active) A set speed value can be input via register 111 103 : Position control (current control, speed control and position control are active) Register 573: As-Is Operating Mode Function Description Read Value of the as-is operating mode Write Illegal Variable type int / register Value range 101 ... 103 Value following a reset 103 Here, the as-is operating mode the controller had when the output stage was switched on last, can be read. Jetter AG 395 20 Generally Valid Parameters JetWeb Meaning of the values: 101 : Current control (only the current control is active) 102 : Speed control (current control and speed control are active) 103 : Position control (current control, speed control and position control are active) Register 574: Control Word 2 (Motor Brake Control) Function Description Read Value of the as-is control word Write Set value of the control word Variable type int / register Value range Bit-coded, 24 bits Value following a reset 0 Meaning of the individual bits: Bit 0: Manual control of the brake 0 = Lock brake 1 = Release the brake (A requirement for manual control: In register 540 "Drive Mode 1", bit 0 must be set to "Manual operation by the user".) Register 575: Status Word 2 (Motor Brake Status) Function Description Read Value of the as-is status word Write Illegal Variable type int / register Value range Bit-coded, 24 bits Value following a reset 0 Meaning of the individual bits: Bit 0: Brake 0 = The brake is locked / the relay contacts have been released 1 = The brake has been released / the relay contacts are locked 396 Jetter AG JetMove 2xx at the JetControl 20.2 Diagnostics Parameters 20.2 Diagnostics Parameters Register 100: Status Function Description Read As-is status Write Illegal Variable type int / register Value range Bit-coded, 24 bits Value following a reset 0 From here, the amplifier status can be read. It contains information on the most important amplifier parameters. Meaning of the individual bits: Bit 0: Home position set Bit 0 is reset at F09 Malfunction encoder 1 respectively F42 Malfunction encoder 2. Resetting due to F09 respectively F42 relates to R190 Position Control - As-is Value as follows: R190 = 1 and malfunction encoder 1 (F09): R100.0 is reset R190 = 1 and malfunction encoder 2 (F42): R100.0 remains unchanged R190 = 2 and malfunction encoder 1 (F09): R100.0 remains unchanged R190 = 2 and malfunction encoder 2 (F42): R100.0 is reset Jetter AG Bit 1: Stopped Bit 2: Target window Bit 3: - Bit 4: Hardware limit switch negative Bit 5: Hardware limit switch positive Bit 6: Reference switch Bit 7: Software limit switch, negative Bit 8: Software limit switch, positive Bit 9: "Safe Standstill" option is available Bit 10: The power section is ready for operation Bit 11: Power has been released Bit 12: Setup mode active 397 20 Generally Valid Parameters JetWeb Meaning of the individual bits: Bit 13: Busy Bit: 1 = Amplifier is busy: Neither can a command be given, nor can a register be read or written into. 0 = Amplifier is ready: A command be given; a register can be read or written into. The busy bit is set for the following actions: Giving a command via R101, and writing into the following registers: R156, R180, R181, R184. Bit 14: The maximum positioning speed has been reached (the axis has driven beyond the range of the ramps) Bit 15: Acceleration ramp Bit 16: Deceleration ramp Bit 17: - Bit 18: Message Bit 19: Errors Bit 20: Warning Bit 21: The pulses havee been released (hardware release) Register 170: Referencing Error / Positioning Error / Table Function Description Read As-are errors Write Illegal Variable type int / register Value range Bit-coded, 24 bits Value following a reset 0 As-are errors can be read here during referencing or positioning. Attention! A number of these errors will NOT be shown on the display of the JetMove 2xx. 398 Jetter AG JetMove 2xx at the JetControl 20.2 Diagnostics Parameters Meaning of the individual bits: Bit 16: Machine referencing: Max. distance reference search The permitted maximum distance of reference search has been exceeded. The distance can be set via register 167 "Max. Distance Reference Search". Bit 17: Machine referencing: Max. distance switch search The permitted maximum distance of switch search has been exceeded. The distance can be set via register 164 "Max. Distance Switch Search". Bit 18: Machine referencing: Positive limit switch Reference switch type consisting of reference and limit switch: The positive limit switch has been found after changing direction at the negative limit switch during a reference run in negative direction. Reference switch type, with limit switch only: The positive limit switch has been found after changing direction at the negative limit switch during a reference run in negative direction. Reference switch type, with reference switch only: The positive limit switch has been found during a reference run in positive direction. Bit 19: Machine referencing: Negative limit switch Reference switch type consisting of reference and limit switch: The negative limit switch has been found after changing the direction at the positive limit switch during a reference run in positive direction. Reference switch type, with limit switch only: The negative limit switch has been found after changing the direction at the positive limit switch during a reference run in positive direction. Reference switch type, with reference switch only: The negative limit switch has been found during a reference run in negative direction. Bit 20: Coupling mode Table: Faulty leading axis positioning range The leading position range that stretches between the first and the last table node is zero. For the operating system, this means that the leading axis is not moving. Table nodes between the first and the last table node are not checked in this case. Bit 21: Coupling mode Table: The table configuration is invalid The table configuration is not correct in the index specifications both in R411 Index - First Table Node and R413 Index - Last Table Node, e.g. R411 >= R413. Jetter AG 399 20 Generally Valid Parameters JetWeb Register 580: Warnings Mask Function Description Read As-is warnings mask Write Set warnings mask (This can only be changed with an expert's access authorization) Variable type int / register Value range Bit-coded, 24 bits Value following a reset 0b 00000000 0000001 11111111 In the warnings mask, a definition can be made of which warnings are to be displayed and which are not. The assignment of bits can be taken out of the description of register 581 "Warnings". Meaning of the values: 0 : The warning is not displayed 1 : The warning is displayed Register 581: Warnings Function Description Read As-is Warnings Write Warnings are reset Variable type int / register Value range Bit-coded, 24 bits Value following a reset 0 Meaning of the individual bits: 400 Bit 0: W00 Warning threshold ballast resistor overload Bit 1: W01 Warning threshold for device temp. Bit 2: W02 Warning threshold for motor temp. Bit 3: W03 Overload PFC Bit 4: W04 Input overcurrent Bit 5: W05 Warning threshold for board temp. Bit 6: W06 Warning threshold mains power (* (* (* (* (* (* Jetter AG JetMove 2xx at the JetControl 20.2 Diagnostics Parameters Meaning of the individual bits: Bit 7: W07 Warning threshold I²t error Bit 8: W08 Warning threshold motor overload protection according to UL Bit 9: W09 Short circuit of the digital outputs (JM-204, JM-208, JM-215, JM-225) (* The respective bits are not available for JM-105 Register 582: AutoClear Mask for Warnings Function Description Read As-is AutoClear mask Write Set AutoClear mask Amplifier status Expert access authorization has to be set Takes effect The access authorization is valid, when the next warning occurs Variable type int / register Value range 24 bit Value following a reset 0b 00000000 00000000 00000001 11111111 Definitions to be made via AutoClear mask: • • Which warnings are to be automatically reset by the amplifier, as soon as they are not relevant any more Which warnings are to be manually reset by the user Manual resetting is carried out by writing into the respective bit in register 581 "Warnings". Meaning of the statuses of each bit: 0 : The warning is manually reset by the user 1 : The warning is automatically reset by the amplifier The bit assignment can be taken from the description of register 581 "Warning"; this means bit 0 = W00 Warning threshold for ballast, bit 1 = W00 Warning threshold device temperature, etc. Jetter AG 401 20 Generally Valid Parameters JetWeb Register 584: Error Mask Function Description Read As-is error message enable mask for errors of numbers 00 through 31 Write Set error message enable mask Amplifier status Expert access authorization has to be set Takes effect The access authorization takes effect, when the next error occurs Variable type int / register Value range Bit-coded, 32 bits Value following a reset 0b 11111111 11111111 11111111 11111111 By means of the error mask, a definition can be made for each error, whether the amplifier is to give an error message in case of an error or not. Meaning of the statuses of each bit: 0 : An error message is not given 1 : An error message is given Please take the bit assignment from the description of register 585 "Error 00 ... 31", which means bit 0 = F00 Hardware error, bit 1 = F01 Internal voltage supply error, etc. Register 585: Error 00 ... 31 Function Description Read As-is errors numbered 00 through 31 Write Illegal Variable type int / register Value range Bit-coded, 32 bits Value following a reset 0 Meaning of the individual bits: 402 Bit 0: F00 Hardware error Bit 1: F01 Internal voltage supply error Bit 2: F02 One mains phase has failed Bit 3: F03 Motor or cable fault (** (* (** Jetter AG JetMove 2xx at the JetControl 20.2 Diagnostics Parameters Meaning of the individual bits: Bit 4: F04 DC link overvoltage UZK Bit 5: F05 Current overload Bit 6: F06 Overload internal ballast resistor Bit 7: F07 Shutdown threshold for device temp. Bit 8: F08 Shutdown threshold for motor temp. Bit 9: F09 Encoder error Bit 10: F10 Overspeed Bit 11: F11 Current overrange Bit 12: F12 Earth fault (* Bit 13: F13 EEPROM failure (** Bit 14: F14 AVR timeout Bit 15: F15 Pulse enable failure Bit 16: F16 Input overcurrent Bit 17: F17 Software limit switch Bit 18: F18 Limit switch hardware error (** (** (** (** Referencing: The same hardware limit switch is pressed twice within a short time. Bit 19: F19 Timeout external error reaction Bit 20: F20 UZK, DC link voltage min. trip Bit 21: F21 UZK, DC link voltage max. trip Bit 22: F22 Drive blocked Bit 23: F23 Tracking error Bit 24: F24 Power supply 24 V failure (* Bit 25: F25 Power supply 15 V failure (* Bit 26: F26 Power supply 5 V failure Bit 27: F27 Power supply AVR failure Bit 28: F28 Error in power charging circuit (this is only possible with JM-D203, JM-203B, JM-204, JM-208, JM-215, and JM-215B) Bit 29: F29 Mains power too high Bit 30: F30 I²t error Bit 31: F31 Motor overload protection according to UL (* (** (** (* These errors do not occur in JM-105 and JM-D203. (** These errors do not occur in JM-105. Jetter AG 403 20 Generally Valid Parameters JetWeb In your amplifier manual, you will find a detailed error description. Register 586: Error 32 ... 63 Function Description Read As-is errors numbered 32 through 63 Write Illegal Variable type int / register Value range Bit-coded, 32 bits Value following a reset 0 Meaning of the individual bits: Bit 0: F32 External error class A Bit 1: F33 External error class B Bit 2: F34 External error class C Bit 3: F35 External error class D Bit 4: F36 External error class E Bit 5: F37 External error class F Bit 6: F38 Encoder signal assymmetric The two encoder signals sine and cosine (presently in the resolver only) differ in their amplitude by more than 5 %. Bit 7: F39 Error at commutation finding Bit 8: F40 Overload motor brake Bit 9: F41 Overload encoder supply Bit 10: F42 Malfunction Encoder 2 (* (* (*** (* These errors only exist in JM-105 and JM-D203 (** This error only exists in JM-D203 (*** These errors do not occur in JM-105 and JM-D203 404 Jetter AG JetMove 2xx at the JetControl 20.3 20.3 Amplifier Parameters Amplifier Parameters Register 500: Rated Voltage of the Device Function Description Read Value of the as-is rated voltage Write Illegal Variable type int / register Value range 48 [V] (JM-105) 230 [V] (JM-203 and JM-206) 400 [V] (JM-204, JM-208 and JM-215) Value following a reset Dependent on the amplifier type (particulars can be found on the identification plate of the respective device) From here, the rated voltage of the device can be read out. Register 501: Rated Current of the Device Function Description Read Value of the as-is rated voltage of the device Write Illegal Variable type float Value range 3 ... 15 [Aeff] Value following a reset Dependent on the amplifier type (particulars can be found on the identification plate of the respective device) From here, the continuous rated current of the device can be read out. Jetter AG 405 20 Generally Valid Parameters JetWeb Register 508: PWM Frequency Function Description Read Value of the as-is PWM frequency Write Set value of the PWM frequency Amplifier status The amplifier has to be deactivated Takes effect Immediately Value range 8, 16 [kHz] Value following a reset 16 [kHz] for JM-105, JM-D203, JM-203, and JM-206 8 [kHz] for JM-204, JM-208, and JM-215 With a JM-105 and JM-D203, the PWM frequency cannot be altered. Here, the frequency of the output pulse can be altered. Attention! Only instructed personnel is to make alterations on the register value. Register 560: DC Link Voltage Function Description Read As-is DC link voltage Write Illegal Variable type int / register Value range 0 ... 640 [V] Value following a reset 0 [V] Here, the latest DC link voltage can be read. 406 Jetter AG JetMove 2xx at the JetControl 20.3 Amplifier Parameters Register 563: As-Is Temperature (of the device) Function Description Read As-is value of the device temperature Write Illegal Variable type int / register Value range 1 ... 95 [°C] Value following a reset 0 [°C] Here, the as-is internal temperature of the device can be read. Register 564: As-Is Ballast Load Function Description Read As-is value of the ballast load Write Illegal Variable type int / register Value range 0 ... 100 [%] Value following a reset 0 [%] Here, the as-is load of the internal ballast resistor can be read. This register is not available for the JM-105. Register 566: Input Current Function Description Read As-is input current Write Illegal Variable type float Value range 0 ... 25.5 [Aeff] Value following a reset 0 [Aeff] The as-is input current value of the supply feed can be read out here. This register is not available for the JM-105. Jetter AG 407 20 Generally Valid Parameters JetWeb Register 567: Mains Voltage Function Description Read As-is mains voltage Write Illegal Variable type int / register Value range 0 ... 520 [Veff] Value following a reset 0 [Veff] The as-is input current value of the supply feed can be read out here. This register is not available for the JM-105. Register 568: As-Is Board Temperature Function Description Read As-is value of the board temperature Write Illegal Variable type int / register Value range 20 ... 75 [°C] Value following a reset 0 [°C] Here, the as-is temperature of the controller board can be read. This register is not available for the JM-105. 408 Jetter AG JetMove 2xx at the JetControl 20.3 Amplifier Parameters Register 576: Interfaces - Access Level Function Description Read As-is access level Write Set access levels Amplifier status The amplifier has to be deactivated Takes effect Immediately Variable type int / register Value range 0 ... 65,535 Value following a reset 0 In this register, access authorization for the register interface is defined. There are two kinds of access authorization: 0 = Standard user access authorization 1 = Expert user access authorization In order to specify expert user access authorization, a respective code must be written into this register. If a new user access authorization has been specified successfully, the respective number, as quoted above, is read out. Certain registers can only be modified, if the user has got the expert access authorization. If for changing the value of a register, expert user access authorization is needed. This is pointed out in the register description. Assigning access authorization is a safety precaution for the protection of persons and assets. Register 606: Ballast Threshold Function Description Read As-is ballast threshold Write Set ballast threshold Variable type int / register Value range 10 ... 60 [V] Value following a reset 55 Starting from the set ballast threshold, excess energy that might be generated at decelerating an axis, is integrated into the externally connected braking resistor. This register is available for the JM-105. Jetter AG 409 20 Generally Valid Parameters JetWeb Register 997: OS Build Version Function Description Read Value of the as-is revision state Write Illegal Variable type int / register Value range 0.0.0.0 ... FF.FF.FF.FF (IP format) Value following a reset Dependent on the revision state From here, the number of the operating system software build version can be read out. It has to be presented in IP format. Interpreting the value: 2.09.0.12 = Version 2.09, Branch 0, Debug-Version 12 2 = Major version 09 = Minor version 0 = Branch 12 = Debug version The version number is combined of the major and minor version number. A branch is an "offshoot" or a parallel development of a function. If the branch number and the debug version number is zero, this is an official operating system version. Attention! When submitting technical support queries, the number of the software version has to be quoted. 410 Jetter AG JetMove 2xx at the JetControl Appendix Appendices Jetter AG 411 Appendix JetWeb 412 Jetter AG JetMove 2xx at the JetControl Appendix Verzeichnis Anhang Appendix A:Recent Revisions Chapter Jetter AG Comment Revised Chapter 13 Technological functions: Second encoder as a leading axis: • German "1." translated by "first" • German "2." translated by "second" Chapter 13 Technological functions: Uncoupling by emergency stop ramp procedure: C07 instead of C06 Added Deleted 413 Appendix JetWeb Appendix B: List of Abbreviations AC Alternating Current Alternating Current DC V Direct Current Voltage: Direct Current Voltage EMC Electro Magnetic Compatibility ELCB Earth-Leakage Current Breaker GND Ground: “Ground HIPERFACE High Performance Interface Hz Hertz IEC International Electrotechnical Commission: "International Electrotechnical Commission" IP International Protection JX2-SBK1 Jetter Extended Module 2 - System buscable 1. The 2 stands for PROCESS-PLC NANO and JetControl 200 LED Light - Emitting Diode: "Light Emitting Diode" n Speed NN Normal Null = Sea Level PE Protective Earth: "Protective Earth", respectively "Protective Earth Conductor" PELV Protective Extra Low Voltage: "Protective Extra Low Voltage" PFC Power Factor Control: "Power Factor Control" PV Power loss ["Verlust" = loss] PWM Pulse Width Modulation: "Pulse Width Modulation" RS-485 RS: Recommended Standard - an accepted industry standard for serial communications connections. RS -485 is used for transmission distances over 15 m, two lines for differential mode evaluation; transmitting and sending on the same line. 414 SELV Safe Extremly Low Voltage: Voltage up to 60 V, galvanically separated from the network. SUB-D Type name of a plug-in connector Temp Temperature U Symbol for voltage (electric potential difference) Jetter AG JetMove 2xx at the JetControl Appendix Appendix C: Register Overview by Numeric Order In the column "R/W", the possibility of access to the parameter has been defined: R = Read W = Write Register Number Jetter AG Name R/ W Description 100 Status R Functional group: Diagnostics Unit: Default value: 0 Variable type: int / register page 397 101 Command R/ W Functional group: Controller Unit: Default value: 0 Variable type: int / register page 387 102 Target Position R/ W Functional group: Positioning Unit: [°] or [mm] Default value: 0 [°] Variable type: float page 160 103 Target Speed R/ W Functional group: Positioning Unit: [°/s] or [mm/s] Default value: 200 [°/s] Variable type: float page 162 104 Positioning Time R/ W Functional group: Positioning Unit: [s] Default value: 0 Variable type: float page 163 105 Acceleration R/ W Functional group: Positioning Unit: [°/s²] or [mm/s²] Default value: 500 [°/s²] Variable type: float page 164 106 Deceleration R/ W Functional group: Positioning Unit: [°/s²] or [mm/s²] Default value: 500 [°/s²] Variable type: float page 166 415 Appendix JetWeb Register Number 416 Name R/ W Description 107 Destination Window R/ W Functional group: Positioning Unit: [°] or [mm] Default value: 1 [°] Variable type: float page 167 109 As-is Position R Functional group: Positioning Unit: [°] or [mm] Default value: 0 [°] Variable type: float page 169 110 Position Feedback Controller Kv R/ W Functional group: Position feedback controller Unit: [1/s] Default value: 10 Variable type: float page 131 111 Speed Controller Setpoint R/ W Functional group: Speed controller Unit: [rpm] Default value: 0 Variable type: int / register page 123 112 As-is Motor Speed R Functional group: Speed controller Unit: [rpm] Default value: 0 Variable type: int / register page 123 113 Filter Time Constant Tf R/ W Functional group: Speed controller Unit: [ms] Default value: 2 Variable type: float page 124 114 Software Limit Switch, Positive R/ W Functional group: Monitoring Unit: [°] or [mm] Default value: 100,000 [°] Variable type: float page 92 115 Software Limit Switch, Negative R/ W Functional group: Monitoring Unit: [°] or [mm] Default value: -100,000 [°] Variable type: float page 93 116 Commutation Offset R/ W Functional group: Motor Unit: [°] Default value: 0 Variable type: float page 60 Jetter AG JetMove 2xx at the JetControl Register Number Jetter AG Appendix Name R/ W Description 117 Encoder Resolution R/ W Functional group: Encoder Unit: [Increments / Revolutions] Default value: Dependent on the encoder Variable type: int / register page 73 118 Maximum Motor Speed R/ W Functional group: Speed controller Unit: [rpm] Default value: 3,000 Variable type: int / register page 124 119 As-is Tracking Error R Functional group: Position feedback controller Unit: [°] or [mm] Default value: 0 [°] Variable type: float page 131 120 Tracking Error Limit R/ W Functional group: Position feedback controller Unit: [°] or [mm] Default value: 10,000 [°] Variable type: float page 132 121 Magnetizing Current R/ W Functional group: Current controller Unit: [Aeff] Default value: 0 Variable type: float page 109 122 Motor Slip Frequency R/ W Functional group: Motor Unit: [Hz] Default value: 0 Variable type: float page 59 123 Pole Pair Number R/ W Functional group: Motor Unit: Default value: 3 Variable type: int / register page 60 124 Speed Controller Kp R/ W Functional group: Speed controller Unit: Default value: 10 Variable type: float page 125 125 Current Setpoint R/ W Functional group: Current controller Unit: [Aeff] Default value: 0 Variable type: float page 110 417 Appendix JetWeb Register Number 418 Name R/ W Description 126 Speed Controller Tn R/ W Functional group: Speed controller Unit: [ms] Default value: 20 Variable type: float page 125 127 Current Limitation R/ W Functional group: Current controller Unit: [Aeff] Default value: R502 Variable type: float page 110 128 Limitation of Set Speed R/ W Functional group: Speed controller Unit: [rpm] Default value: 3150 [rpm] Variable type: float page 127 129 As-is Speed R Functional group: Positioning Unit: [°/s] or [mm/s] Default value: 0 [°/s] Variable type: float page 170 130 Position Setpoint R/ W Functional group: Position feedback controller Unit: [°] or [mm] Default value: 0 [°] Variable type: float page 132 135 Modulo Turns R Functional group: Positioning Unit: Default value: 0 Variable type: int / register page 170 136 Status of TorqueControlled Shut-Off R Functional group: Torque-controlled shut-off Unit: Default value: 0 Variable type: int / register page 376 137 Current Shut-Off Value R/ W Functional group: Torque-controlled shut-off Unit: [Aeff] Default value: 0 [Aeff] Variable type: float page 376 Jetter AG JetMove 2xx at the JetControl Register Number Jetter AG Appendix Name R/ W Description 138 Filter of the Shut-Off Threshold R/ W Functional group: Torque-controlled shut-off Unit: Default value: 0 Variable type: int / register page 377 139 Shut-Off Speed Value R/ W Functional group: Torque-controlled shut-off Unit: [rpm] Default value: 150 Variable type: int / register page 377 140 Ramp Type R/ W Functional group: Positioning Unit: Default value: 1 (Sine square ramps) Variable type: int / register page 170 141 Positioning Mode R/ W Functional group: Positioning Unit: Default value: 1 (absolute) Variable type: int / register page 171 142 Moving Direction R/ W Functional group: Positioning Unit: Default value: 0 (positive direction) Variable type: int / register page 172 143 Basic Type R/ W Functional group: Positioning Unit: Default value: 0 (latest target position) Variable type: int / register page 172 149 Absolute Target Position R Functional group: Positioning Unit: [°] or [mm] Default value: 0 [°] Variable type: float page 173 150 Time Mode R/ W Functional group: Technological functions Unit: [-] Default value: 0 Variable type: int / register page 188 419 Appendix JetWeb Register Number 420 Name R/ W Description 151 Transmit Mode R/ W Functional group: Technological functions Unit: [-] Default value: 0 Variable type: int / register page 210 152 Receive Mode R/ W Functional group: Technological functions Unit: [-] Default value: 0 Variable type: int / register page 211 155 Counting Range JX2-CNT1 R/ W Functional group: Technological functions Unit: [-] Default value: 16777216 Variable type: int / register page 212 156 Gear Ratio R/ W Functional group: Technological functions Unit: [-] Default value: 1 Variable type: float page 238 157 Standardizing Factor Leading Axis Position R/ W Functional group: Technological functions Unit: [°/Ink] or [mm/Ink] Default value: 1 Variable type: float page 213 158 Maximum Leading Axis Position R/ W Functional group: Technological functions Unit: [°] or [mm] Default value: 100,000 [°] Variable type: float page 213 159 Minimum Leading Axis Position R/ W Functional group: Technological functions Unit: [°] or [mm] Default value: -100,000 [°] Variable type: float page 213 160 Referencing Direction R/ W Functional group: Referencing Unit: Default value: 0 (positive direction) Variable type: int / register page 152 Jetter AG JetMove 2xx at the JetControl Register Number Jetter AG Appendix Name R/ W Description 161 SwitchType R/ W Functional group: Referencing Unit: Default value: 1 (Reference switch and limit switch) Variable type: int / register page 152 162 Speed of Switch Search R/ W Functional group: Referencing Unit: [°/s] or [mm/s] Default value: 500 [°/s] Variable type: float page 153 163 Referencing Acceleration R/ W Functional group: Referencing Unit: [°/s²] or [mm/s²] Default value: 1,000 [°/s²] Variable type: float page 154 164 Max. Distance Switch Search R/ W Functional group: Referencing Unit: [°] or [mm] Default value: 100,000 [°] Variable type: float page 154 165 Reference Label R/ W Functional group: Referencing Unit: Default value: 1 (Referencing by zero pulse) Variable type: int / register page 155 166 Speed Reference Search R/ W Functional group: Referencing Unit: [°/s] or [mm/s] Default value: 100 [°/s] Variable type: float page 156 167 Max. Distance Reference Search R/ W Functional group: Referencing Unit: [°] or [mm] Default value: 100,000 [°] Variable type: float page 156 168 Home Position - Distance R/ W Functional group: Referencing on the fly Unit: [°] or [mm] Default value: 0 [°] Variable type: float page 157 421 Appendix JetWeb Register Number 422 Name R/ W Description 169 Home Position R/ W Functional group: Referencing on the fly Unit: [°] or [mm] Default value: 0 [°] Variable type: float page 157 170 Referencing Error / Positioning Error / Table R Functional group: Diagnostics Unit: Default value: 0 Variable type: int / register page 398 180 Maximum Acceleration R/ W Functional group: Axis settings Unit: [°/s²] or [mm/s²] Default value: 100,000 [°/s²] Variable type: float page 27 181 Maximum Jerk R/ W Functional group: Axis settings Unit: [°/s³] or [mm/s³] Default value: 1,000,000 [°/s³] Variable type: float page 28 182 Travel Limit, Positive R/ W Functional group: Axis settings Unit: [°] or [mm] Default value: 100,000 [°] Variable type: float page 28 183 Travel Limit, Negative R/ W Functional group: Axis settings Unit: [°] or [mm] Default value: -100,000 [°] Variable type: float page 29 184 Maximum Speed R/ W Functional group: Axis settings Unit: [°/s] Default value: 18,000 Variable type: float page 29 188 Leading Axis Position R/ W Functional group: Technological functions Unit: [°] or [mm] Default value: 0 [°] Variable type: float page 214 189 Leading Axis Speed R/ W Functional group: Technological functions Unit: [°/s] or [mm/s] Default value: 0 [°/s] Variable type: float page 215 Jetter AG JetMove 2xx at the JetControl Register Number Jetter AG Appendix Name R/ W Description 190 Position Feedback Controller - As-is Value Selection R/ W Functional group: Position controller Unit: Default value: 1 ... 2 Variable type: int / register page 133 191 Axis Type R/ W Functional group: Axis definitions Unit: Default value: 2 (rotatory) Variable type: int / register page 20 192 Modulo Axis R/ W Functional group: Axis definitions Unit: Default value: 0 (no modulo axis) Variable type: int / register page 22 193 Modulo Travel Range R Functional group: Axis settings Unit: [°] or [mm] Default value: 360 [°] Variable type: float page 30 194 Gear Ratio - Motor R/ W Functional group: Axis settings Unit: [rev.] Default value: 1 Variable type: float page 30 195 Gear Ratio - Mechanism R/ W Functional group: Axis settings Unit: [rev.] Default value: 1 Variable type: float page 31 196 Gear Ratio - Linear / Rotatory R/ W Functional group: Axis settings Unit: [°/rev] or [mm/rev.] Default value: 360 [°/rev.] Variable type: float page 31 200 Status Register R Functional group: PID controller Unit: [-] Default value: 0 Variable type: int / register page 342 201 PID Command R/ W Functional group: PID controller Unit: [-] Default value: 0 Variable type: int / register page 342 423 Appendix JetWeb Register Number 424 Name R/ W Description 202 Set Value R/ W Functional group: PID controller Unit: [%] Default value: 0 Variable type: float page 342 203 Proportional Gain KP R/ W Functional group: PID controller Unit: [-] Default value: 1 Variable type: float page 343 204 Integral Time Tn R/ W Functional group: PID controller Unit: [ms] Default value: 100 Variable type: float page 343 205 Derivative Time TV R/ W Functional group: PID controller Unit: [ms] Default value: 0 Variable type: float page 343 206 Delay Time T1 R/ W Functional group: PID controller Unit: [ms] Default value: 0 Variable type: float page 344 207 Limitation Integral-Action Component R/ W Functional group: PID controller Unit: [%] Default value: +100 Variable type: float page 344 208 Preset Integral-Action Component R/ W Functional group: PID controller Unit: [%] Default value: 0 Variable type: float page 344 209 PID As-is Value R/ W Functional group: PID controller Unit: [%] Default value: 0 Variable type: float page 344 210 As-is Value Filtering TF R/ W Functional group: PID controller Unit: [ms] Default value: 0 Variable type: float page 345 Jetter AG JetMove 2xx at the JetControl Register Number Jetter AG Appendix Name R/ W Description 211 Selection of the As-is Value R/ W Functional group: PID controller Unit: [-] Default value: 0 Variable type: int / register page 345 212 Selection of the Manipulated Variable R/ W Functional group: PID controller Unit: [-] Default value: 0 Variable type: int / register page 346 213 Selection of the Setpoint R/ W Functional group: PID controller Unit: [-] Default value: 0 Variable type: int / register page 347 214 Sampling Time TS R Functional group: PID controller Unit: [ms] Default value: 2 Variable type: float page 347 215 Max. Value of the Manipulated Variable R/ W Functional group: PID controller Unit: [%] Default value: +100 Variable type: float page 347 216 Min. Value of the Manipulated Variable R/ W Functional group: PID controller Unit: [%] Default value: -100 Variable type: float page 347 217 Scaling Factor for the Manipulated Variable R/ W Functional group: PID controller Unit: [%] Default value: 1 Variable type: float page 348 218 Setpoint Value Filtering TR R Functional group: PID controller Unit: [ms] Default value: 0 Variable type: float page 348 219 Manipulated Variable R Functional group: PID controller Unit: [%] Default value: 0 Variable type: float page 348 425 Appendix JetWeb Register Number 426 Name R/ W Description 220 Digital Setpoint R Functional group: PID controller Unit: [-] Default value: 0 Variable type: float page 349 221 Measuring Value Analog Input 1 R Functional group: PID controller Unit: [-] Default value: 0 Variable type: float page 349 225 Manipulated Variable R Functional group: PID controller Unit: [%] Default value: 0 Variable type: float page 349 231 Current Reduction R Functional group: Current controller Unit: [Arms] Default value: 0 Variable type: float page 111 232 Current Reduction Time R Functional group: Current controller Unit: [ms] Default value: 0 Variable type: int / register page 111 240 Encoder2 - Status R Functional group: Encoder Unit: Default value: 0 Variable type: int / register page 84 241 Encoder2 - Type R/ W Functional group: Encoder Unit: Default value: 0 Variable type: int / register page 84 242 Encoder2 - Resolution R/ W Functional group: Encoder Unit: [Increments / Revolutions] Default value: 0 Variable type: int / register page 85 243 Encoder2 - Mechanical Angle R Functional group: Encoder Unit: [°] Default value: 0 Variable type: float page 85 Jetter AG JetMove 2xx at the JetControl Register Number Jetter AG Appendix Name R/ W Description 244 Encoder2 - Gear Ratio R/ W Functional group: Encoder Unit: Default value: 1 Variable type: float page 86 245 Encoder2 - Gear Ratio Load R/ W Functional group: Encoder Unit: Default value: 1 Variable type: float page 86 246 Encoder2 - Gear Ratio Linear / Rotatory R/ W Functional group: Encoder Unit: [mm/rev.] Default value: 360 Variable type: float page 86 247 Encoder2 - Travel Limit Positive R/ W Functional group: Encoder Unit: [°] or [mm] Default value: 360° Variable type: float page 87 248 Encoder2 - Travel Limit negative R/ W Functional group: Encoder Unit: [°] or [mm] Default value: 0° Variable type: float page 87 249 Encoder2 - As-is Position R/ W Functional group: Encoder Unit: [°] or [mm] Default value: 0° Variable type: float page 88 250 Encoder2 - Modulo Turns R Functional group: Encoder Unit: Default value: 0 Variable type: int / register page 88 251 Encoder2 - As-is Speed R Functional group: Encoder Unit: [°/s] or [mm/s] Default value: 0 Variable type: float page 88 252 Encoder2 - Inversion of Counting Direction R/ W Functional group: Encoder Unit: Default value: 0 Variable type: int / register page 89 427 Appendix JetWeb Register Number 428 Name R/ W Description 400 Status R Functional group: Technological functions Unit: [-] Default value: 0 Variable type: int / register page 292 402 Table Start Index R/ W Functional group: Technological functions Unit: [-] Default value: 0 Variable type: int / register page 292 410 Table Config Index R/ W Functional group: Technological functions Unit: [-] Default value: 0 Variable type: int / register page 273 411 Index - First Table Node R/ W Functional group: Technological functions Unit: [-] Default value: 0 Variable type: int / register page 273 412 Index - Start Table Node R/ W Functional group: Technological functions Unit: [-] Default value: 0 Variable type: int / register page 273 413 Index - Last Table Node R/ W Functional group: Technological functions Unit: [-] Default value: 0 Variable type: int / register page 274 420 As-is Table Index R/ W Functional group: Technological functions Unit: [-] Default value: 0 Variable type: int / register page 293 421 As-is Index - First Table Node R Functional group: Technological functions Unit: [-] Default value: 0 Variable type: int / register page 293 Jetter AG JetMove 2xx at the JetControl Register Number Jetter AG Appendix Name R/ W Description 422 As-is Index - Start Table Node R Functional group: Technological functions Unit: [-] Default value: 0 Variable type: int / register page 293 423 As-is Index - Last Table Node R Functional group: Technological functions Unit: [-] Default value: 0 Variable type: int / register page 293 432 Change Type R/ W Functional group: Technological functions Unit: [-] Default value: 0 Variable type: int / register page 294 433 Position Difference Leading Axis R/ W Functional group: Technological functions Unit: [°] or [mm] Default value: 0 [°] Variable type: float page 294 434 Position Difference Following Axis R/ W Functional group: Technological functions Unit: [°] or [mm] Default value: 0 [°] Variable type: float page 295 435 Correction Velocity Leading Axis R/ W Functional group: Technological functions Unit: [°/s] or [mm/s] Default value: R184 [°/s] Variable type: float page 295 438 Trailing Indicator Max. As-is Position R/ W Functional group: Trailing indicator Unit: [°] or [mm] Default value: 0 [°] Variable type: float page 383 439 Trailing Indicator Min. As-is Position R/ W Functional group: Trailing indicator Unit: [°] or [mm] Default value: 0 [°] Variable type: float page 383 429 Appendix JetWeb Register Number 430 Name R/ W Description 440 Table Node R/ W Functional group: Technological functions Unit: [-] Default value: 0 Variable type: int / register page 274 441 Leading Axis Position R/ W Functional group: Technological functions Unit: [°] or [mm] Default value: 0 [°] Variable type: float page 274 442 Following Axis Position R/ W Functional group: Technological functions Unit: [°] or [mm] Default value: 0 [°] Variable type: float page 275 443 Configuration Offset Leading Axis Position R/ W Functional group: Technological functions Unit: [°] or [mm] Default value: 0 [°] Variable type: float page 275 444 Configuration Offset Following Axis Position R/ W Functional group: Technological functions Unit: [°] or [mm] Default value: 0 [°] Variable type: float page 276 445 Scaling Factor - Leading Axis Position R/ W Functional group: Technological functions Unit: [-] Default value: 0 Variable type: float page 276 446 Scaling Factor Following Axis Position R/ W Functional group: Technological functions Unit: [-] Default value: 0 Variable type: float page 276 447 Reference Type R/ W Functional group: Technological functions Unit: [-] Default value: 0 Variable type: int / register page 296 Jetter AG JetMove 2xx at the JetControl Appendix Register Number Jetter AG Name R/ W Description 448 Start Type R/ W Functional group: Technological functions Unit: [-] Default value: 0 Variable type: int / register page 297 449 Stop Type R/ W Functional group: Technological functions Unit: [-] Default value: 0 Variable type: int / register page 297 450 Status R/ W Functional group: Controller Unit: [-] Default value: 0 Variable type: int / register page 389 451 Function Mode R/ W Functional group: Controller Unit: [-] Default value: 0 Variable type: int / register page 390 452 Position Reference R/ W Functional group: Referencing on the fly Unit: [°] or [mm] Default value: 10 Variable type: float page 321 453 Position Window R/ W Functional group: Referencing on the fly Unit: [°] or [mm] Default value: 10 Variable type: float page 321 454 As-is Position Value R/ W Functional group: Referencing on the fly Unit: [°] or [mm] Default value: 0 Variable type: float page 322 455 As-is Position Deviation R/ W Functional group: Referencing on the fly Unit: [°] or [mm] Default value: 0 Variable type: float page 322 431 Appendix JetWeb Register Number 432 Name R/ W Description 456 Correction Factor Kv R/ W Functional group: Referencing on the fly Unit: [1/s] Default value: 1 Variable type: float page 323 457 Maximum Speed Correction R/ W Functional group: Referencing on the fly Unit: [°/s] or [mm/s] Default value: 10 Variable type: float page 323 458 As-is Speed Correction R/ W Functional group: Referencing on the fly Unit: [°/s] or [mm/s] Default value: 0 Variable type: float page 324 460 Dead Time Compensation R/ W Functional group: Technological functions Unit: [-] Default value: 0 Variable type: float page 312 461 Position of Dead Time Correction R Functional group: Technological functions Unit: [-] Default value: 0 Variable type: float page 312 500 Rated Voltage of the Device R Functional group: Amplifier Unit: [V] Default value: Dependent on the amplifier type Variable type: int / register page 405 501 Rated Current of the Device R Functional group: Amplifier Unit: [Aeff] Default value: Dependent on the amplifier type Variable type: float page 405 502 Maximum Output Current R Functional group: Current controller Unit: [Aeff] Default value: 2*R501 Variable type: float page 112 Jetter AG JetMove 2xx at the JetControl Register Number Jetter AG Appendix Name R/ W Description 503 Current Controller Kp R/ W Functional group: Current controller Unit: Default value: 0.7 Variable type: float page 112 504 Current Controller Tn R/ W Functional group: Current controller Unit: [ms] Default value: 3 Variable type: float page 115 505 Back EMF Constant R/ W Functional group: Motor Unit: [V*min/1,000] Default value: 0 Variable type: int / register page 60 506 Speed Controller Preset R/ W Functional group: Speed controller Unit: [Aeff] Default value: 0 Variable type: float page 127 507 I-Component Speed Controller R/ W Functional group: Speed controller Unit: [Aeff] Default value: 0 Variable type: float page 128 508 PWM Frequency R/ W Functional group: Amplifier Unit: [kHz] Default value: Dependent on the amplifier type Variable type: float page 406 510 Digital Inputs: Input Polarity R/ W Functional group: Axis settings Unit: Default value: 0b 00000001 00001111 Variable type: int / register page 32 511 Digital Inputs: Status R Functional group: Axis settings Unit: Default value: 0b 00000000 00000000 Variable type: int / register page 33 513 Capture Status R Functional group: Position capture Unit: Default value: 0 Variable type: int / register page 333 433 Appendix JetWeb Register Number 434 Name R/ W Description 514 Input Edge R/ W Functional group: Controller Unit: Default value: 1 Variable type: int / register page 391 515 DigOut-Status R/ W Functional group: Position trigger Unit: Default value: 0 Variable type: int / register page 355 516 DigOut-Set R/ W Functional group: Position trigger Unit: Default value: 0 Variable type: int / register page 358 517 DigOut-Clear R/ W Functional group: Position trigger Unit: Default value: 0 Variable type: int / register page 358 518 Capture edge definition R/ W Functional group: Position capture Unit: Default value: 0b 00000001 00001110 Variable type: int / register page 334 519 Capture active state R Functional group: Position capture Unit: Default value: 0 Variable type: int / register page 334 521 Capture position LIMIT+ R Functional group: Position capture Unit: [°] or [mm] Default value: 0 [°] Variable type: float page 335 522 Capture position LIMIT- R Functional group: Position capture Unit: [°] or [mm] Default value: 0 [°] Variable type: float page 335 523 Capture position REF R Functional group: Position capture Unit: [°] or [mm] Default value: 0 [°] Variable type: float page 335 Jetter AG JetMove 2xx at the JetControl Register Number Jetter AG Appendix Name R/ W Description 524 Capture position INPUT R Functional group: Position capture Unit: [°] or [mm] Default value: 0 [°] Variable type: float page 336 525 DigOut-Type R/ W Functional group: Position trigger Unit: Default value: 0 Variable type: int / register page 356 526 DigOut-PosX R/ W Functional group: Position trigger Unit: [°] or [mm] Default value: 0 [°] Variable type: float page 359 527 Dead Time Interrupt INPUT = Dead Time Correction INPUT R/ W Functional group: Controller Unit: [ms] Default value: 0.4 [ms] Variable type: float page 391 529 DigOut-Delay R/ W Functional group: Position trigger Unit: [ms] Default value: 0 [ms] Variable type: float page 359 538 Trailing indicator Max. tracking error R/ W Functional group: Trailing indicator Unit: [°] or [mm] Default value: 0 [°] Variable type: float page 384 539 Trailing indicator Min. tracking error R/ W Functional group: Trailing indicator Unit: [°] or [mm] Default value: 0 [°] Variable type: float page 384 540 Operating mode 1 R/ W Functional group: Controller Unit: Default value: 0b 00000010 1001x011 Variable type: int / register page 392 541 Operating mode of the 7segment display R/ W Functional group: Controller Unit: Default value: 0 Variable type: int / register page 394 435 Appendix JetWeb Register Number 436 Name R/ W Description 542 Window time of tracking error R/ W Functional group: Position controller Unit: [ms] Default value: 5 Variable type: int / register page 133 544 DC link voltage - Max. trip R/ W Functional group: Monitoring Unit: [V] Default value: Dependent on the amplifier type Variable type: int / register page 94 545 DC link voltage - Min. trip R/ W Functional group: Monitoring Unit: [V] Default value: Dependent on the amplifier type Variable type: int / register page 95 546 Blocking protection tripping time R/ W Functional group: Monitoring Unit: [ms] Default value: 5000 Variable type: int / register page 95 547 Delay after releasing (motor) brake R/ W Functional group: Motor Unit: [ms] Default value: 0 Variable type: int / register page 61 548 Delay after locking (motor) brake R/ W Functional group: Motor Unit: [ms] Default value: 100 Variable type: int / register page 62 549 Emergency stop ramp R/ W Functional group: Monitoring Unit: [ms] Default value: 500 Variable type: int / register page 96 550 Speed pre-control R/ W Functional group: Position controller Unit: [%] Default value: 100 Variable type: float page 134 551 Speed feed forward T1 R/ W Functional group: Position controller Unit: [ms] Default value: 2 [ms] Variable type: int / register page 134 Jetter AG JetMove 2xx at the JetControl Register Number Jetter AG Appendix Name R/ W Description 557 Operating mode - Trigger input R/ W Functional group: Controller Unit: [-] Default value: 0 Variable type: int / register page 394 559 Commutation measuring method R Functional group: Encoder Unit: Default value: Dependent on the encoder Variable type: int / register page 74 560 DC link voltage R Functional group: Amplifier Unit: [V] Default value: 0 Variable type: int / register page 406 561 As-is current R Functional group: Current controller Unit: [Aeff] Default value: 0 Variable type: float page 116 562 Motor temperature R Functional group: Motor Unit: [°C] Default value: 0 Variable type: int / register page 62 563 As-is temperature (of the device) R Functional group: Amplifier Unit: [°C] Default value: 0 Variable type: int / register page 407 564 As-is ballast load R Functional group: Amplifier Unit: [%] Default value: 0 Variable type: int / register page 407 565 Motor shaft position R Functional group: Motor Unit: [°] Default value: 0 Variable type: float page 63 566 Input current R Functional group: Amplifier Unit: [Aeff] Default value: 0 Variable type: float page 407 437 Appendix JetWeb Register Number 438 Name R/ W Description 567 Mains voltage R Functional group: Amplifier Unit: [Veff] Default value: 0 Variable type: int / register page 408 568 As-is board temperature R Functional group: Amplifier Unit: [°C] Default value: 0 Variable type: int / register page 408 572 Set operating mode R/ W Functional group: Controller Unit: Default value: 103 Variable type: int / register page 395 573 As-is operating mode R Functional group: Controller Unit: Default value: 3 Variable type: int / register page 395 574 Control word 2 (motor brake control) R/ W Functional group: Controller Unit: Default value: 0 Variable type: int / register page 396 575 Status word 2 (motor brake status) R Functional group: Controller Unit: Default value: 0 Variable type: int / register page 396 576 Interfaces - access level R/ W Functional group: Amplifier Unit: Default value: 0 Variable type: int / register page 409 577 Encoder type R Functional group: Motor Unit: Default value: Dependent on the encoder Variable type: int / register page 75 580 Warnings mask R/ W Functional group: Diagnostics Unit: Default value: 0 Variable type: int / register page 400 Jetter AG JetMove 2xx at the JetControl Appendix Register Number Jetter AG Name R/ W Description 581 Warnings R/ W Functional group: Diagnostics Unit: Default value: Variable type: int / register page 400 582 AutoClear mask for warnings R/ W Functional group: Diagnostics Unit: Default value: 0b 00000000 00001100 11111111 Variable type: int / register page 401 584 Error mask R/ W Functional group: Diagnostics Unit: Default value: 0xFFFF Variable type: int / register page 402 585 Error 00 ... 31 R Functional group: Diagnostics Unit: Default value: 0 Variable type: int / register page 402 585 Error 32 ... 63 R Functional group: Diagnostics Unit: Default value: 0 Variable type: int / register page 404 596 DigOutStatus - Set R/ W Functional group: Position trigger Unit: Default value: 0 Variable type: int / register page 355 597 DigOutStatus - Clear R/ W Functional group: Position trigger Unit: Default value: 0 Variable type: int / register page 356 600 Device temperature warning R Functional group: Monitoring Unit: [°C] Default value: 70 Variable type: int / register page 96 601 Device temperature error R Functional group: Monitoring Unit: [°C] Default value: 80 Variable type: int / register page 97 439 Appendix JetWeb Register Number 440 Name R/ W Description 602 Motor temperature warning R Functional group: Monitoring Unit: [°C] Default value: 110 Variable type: int / register page 97 603 Motor temperature - error R Functional group: Monitoring Unit: [°C] Default value: 135 Variable type: int / register page 97 604 Ballast Load - warning R Functional group: Monitoring Unit: [%] Default value: 80 Variable type: int / register page 98 605 Ballast Load - error R Functional group: Monitoring Unit: [%] Default value: 100 Variable type: int / register page 98 607 Torque-controlled shutoff current R/ W Functional group: Torque-controlled shut-off Unit: [Aeff] Default value: 0 [Aeff] Variable type: float page 378 608 Motor type R/ W Functional group: Motor Unit: [1] Default value: 0 Variable type: int / register page 64 609 Type of motor temperature densor R/ W Functional group: Motor Unit: [1] Default value: 0 Variable type: int / register page 65 616 Motor torque constant Kt R/ W Functional group: Motor Unit: [Nm/A] Default value: 0 Variable type: float page 65 618 Rated current R/ W Functional group: Current controller Unit: [Aeff] Default value: R501 Variable type: float page 116 Jetter AG JetMove 2xx at the JetControl Register Number Jetter AG Appendix Name R/ W Description 619 Overload factor R/ W Functional group: Current controller Unit: [-] Default value: 2 Variable type: float page 117 620 As-is current in % R Functional group: Current controller Unit: [%] Default value: 0 Variable type: float page 118 621 As-is torque R Functional group: Current controller Unit: [Nm] Default value: 0 Variable type: float page 118 623 DigOut -T ype2 R/ W Functional group: Position trigger Unit: Default value: 0 Variable type: int / register page 360 624 DigOut - Set2 R/ W Functional group: Position trigger Unit: Default value: 0 Variable type: int / register page 360 625 DigOut - Clear2 R/ W Functional group: Position trigger Unit: Default value: 0 Variable type: int / register page 360 626 DigOut - PosX2 R/ W Functional group: Position trigger Unit: [°] or [mm] Default value: 0 [°] Variable type: float page 361 627 DigOut - Delay2 R/ W Functional group: Position trigger Unit: [ms] Default value: 0 [ms] Variable type: float page 361 628 Inertia of load R/ W Functional group: Speed controller Unit: [kgcm²] Default value: 0 [kgcm²] Variable type: float page 128 441 Appendix JetWeb Register Number 442 Name R/ W Description 629 Scaling of the current precontrol R/ W Functional group: Speed controller Unit: [%] Default value: 0 [%] Variable type: float page 129 630 Filter of the zero speed count R/ W Functional group: Torque-controlled shut-off Unit: Default value: 10 Variable type: int / register page 378 631 Capture command set R/ W Functional group: Position capture Unit: Default value: 0 Variable type: int / register page 336 632 Capture command clear R/ W Functional group: Position capture Unit: Default value: 0 Variable type: int / register page 336 640 I²t - DC link Mode R/ W Functional group: Monitoring Unit: Default value: 0 Variable type: int / register page 100 642 I²t - DC link Time constant R Functional group: Monitoring Unit: [s] Default value: 0 Variable type: float page 101 643 I²t - DC link I²t value R Functional group: Monitoring Unit: [%] Default value: 0 Variable type: float page 101 644 I²t - DC link Alarm threshold R/ W Functional group: Monitoring Unit: [%] Default value: 80 Variable type: float page 101 645 I²t - Motor model Mode R/ W Functional group: Monitoring Unit: Default value: 0 Variable type: int / register page 103 Jetter AG JetMove 2xx at the JetControl Register Number Jetter AG Appendix Name R/ W Description 647 I²t - Motor model time constant R/ W Functional group: Monitoring Unit: [s] Default value: 0 Variable type: float page 103 648 I²t - Motor model I²t value R Functional group: Monitoring Unit: [%] Default value: 0 Variable type: float page 103 649 I²t - Motor model Alarm threshold R/ W Functional group: Monitoring Unit: [%] Default value: 80 Variable type: float page 103 650 I²t - UL standard Mode R Functional group: Monitoring Unit: Default value: 2 Variable type: int / register page 104 652 I²t - UL standard time constant R Functional group: Monitoring Unit: [s] Default value: 0 Variable type: float page 104 653 I²t - UL standard I²t value R Functional group: Monitoring Unit: [%] Default value: 0 Variable type: float page 105 654 I²t - UL standard Alarm threshold R/ W Functional group: Monitoring Unit: [%] Default value: 80 Variable type: float page 105 997 OS build version R Functional group: Amplifier Unit: Default value: Dependent on the software version Variable type: int / register page 410 443 Appendix JetWeb Appendix D: Register Overview Sequence of Functions In the column "R/W", the possibility of access to the parameter has been defined: Register Number R = Read W = Write Name R/ W Description Controller 444 101 Command R/ W Functional group: Controller Unit: Default value: 0 Variable type: int / register page 387 450 Function Status R/ W Functional group: Controller Unit: [-] Default value: 0 Variable type: int / register page 389 451 Function Mode R/ W Functional group: Controller Unit: [-] Default value: 0 Variable type: int / register page 390 514 Edge Definition INPUT R/ W Functional group: Controller Unit: Default value: 1 Variable type: int / register page 391 527 Dead Time Correction INPUT R/ W Functional group: Controller Unit: [ms] Default value: 0.4 [ms] Variable type: float page 391 540 Drive Mode 1 R/ W Functional group: Controller Unit: Default value: 0b 00000010 1001x011 Variable type: int / register page 392 541 Operating Mode of the 7Segment Display R/ W Functional group: Controller Unit: Default value: 0 Variable type: int / register page 394 Jetter AG JetMove 2xx an JetControl Appendix Register Number Name R/ W Description 557 Operating Mode - Trigger Input R/ W Functional group: Controller Unit: [-] Default value: 0 Variable type: int / register page 394 572 Set Operating Mode R/ W Functional group: Controller Unit: Default value: 103 Variable type: int / register page 395 573 As-is Operating Mode R Functional group: Controller Unit: Default value: 3 Variable type: int / register page 395 574 Control Word 2 R/ W Functional group: Controller Unit: Default value: 0 Variable type: int / register page 396 575 Status Word 2 R Functional group: Controller Unit: Default value: 0 Variable type: int / register page 396 100 Status R Functional group: Diagnostics Unit: Default value: 0 Variable type: int / register page 397 170 Referencing Error / Positioning Error / Table R Functional group: Diagnostics Unit: Default value: 0 Variable type: int / register page 398 580 Warning Mask R/ W Functional group: Diagnostics Unit: Default value: 0 Variable type: int / register page 400 581 Warnings R/ W Functional group: Diagnostics Unit: Default value: 0 Variable type: int / register page 400 Diagnostics Jetter AG 445 Appendix JetWeb Register Number Name R/ W Description 582 AutoClear Mask for Warnings R/ W Functional group: Diagnostics Unit: Default value: 0b 00000000 00001100 11111111 Variable type: int / register page 401 584 Error Mask R/ W Functional group: Diagnostics Unit: Default value: 0xFFFF Variable type: int / register page 402 585 Error 00 ... 31 R Functional group: Diagnostics Unit: Default value: 0 Variable type: int / register page 402 585 Error 32 ... 63 R Functional group: Diagnostics Unit: Default value: 0 Variable type: int / register page 404 102 Target Position R/ W Functional group: Positioning Unit: [°] or [mm] Default value: 0 [°] Variable type: float page 160 103 Target Speed R/ W Functional group: Positioning Unit: [°/s] or [mm/s] Default value: 200 [°/s] Variable type: float page 162 104 Positioning Time R/ W Functional group: Positioning Unit: [s] Default value: 0 Variable type: float page 163 105 Acceleration R/ W Functional group: Positioning Unit: [°/s2] or [mm/s2] Default value: 500 [°/s2] Variable type: float page 164 Positioning 446 Jetter AG JetMove 2xx an JetControl Register Number Jetter AG Appendix Name R/ W Description 106 Deceleration R/ W Functional group: Positioning Unit: [°/s2] or [mm/s2] Default value: 500 [°/s2] Variable type: float page 166 107 Destination Window R/ W Functional group: Positioning Unit: [°] or [mm] Default value: 1 [°] Variable type: float page 167 109 As-is Position R Functional group: Positioning Unit: [°] or [mm] Default value: 0 [°] Variable type: float page 169 129 As-is Speed R Functional group: Positioning Unit: [°/s] or [mm/s] Default value: 0 [°/s] Variable type: float page 170 135 Modulo Turns R Functional group: Positioning Unit: Default value: 0 Variable type: int / register page 170 140 Ramp Type R/ W Functional group: Positioning Unit: Default value: 1 (sine2 ramps) Variable type: int / register page 170 141 Positioning Mode R/ W Functional group: Positioning Unit: Default value: 1 (absolute) Variable type: int / register page 171 142 Moving Direction R/ W Functional group: Positioning Unit: Default value: 0 (positive direction) Variable type: int / register page 172 143 Basic Type R/ W Functional group: Positioning Unit: Default value: 0 (latest target position) Variable type: int / register page 172 447 Appendix JetWeb Register Number 149 Name Absolute Target Position R/ W Description R Functional group: Positioning Unit: [°] or [mm] Default value: 0 [°] Variable type: float page 173 Referencing 448 160 Referencing Direction R/ W Functional group: Referencing Unit: Default value: 0 (positive direction) Variable type: int / register page 152 161 Switch Type R/ W Functional group: Referencing Unit: Default value: 1 (Reference switch and limit switch) Variable type: int / register page 152 162 Speed of Switch Search R/ W Functional group: Referencing Unit: [°/s] or [mm/s] Default value: 500 [°/s] Variable type: float page 153 163 Referencing Acceleration R/ W Functional group: Referencing Unit: [°/s²] or [mm/s²] Default value: 1,000 [°/s²] Variable type: float page 154 164 Max. Distance Switch Search R/ W Functional group: Referencing Unit: [°] or [mm] Default value: 100,000 [°] Variable type: float page 154 165 Reference Label R/ W Functional group: Referencing Unit: Default value: 1 (Referencing by zero pulse) Variable type: int / register page 155 166 Speed Reference Search R/ W Functional group: Referencing Unit: [°/s] or [mm/s] Default value: 100 [°/s] Variable type: float page 156 Jetter AG JetMove 2xx an JetControl Appendix Register Number Name R/ W Description 167 Max. Distance Reference Search R/ W Functional group: Referencing Unit: [°] or [mm] Default value: 100,000 [°] Variable type: float page 156 168 Home Position - Distance R/ W Functional group: Referencing Unit: [°] or [mm] Default value: 0 [°] Variable type: float page 157 169 Home Position R/ W Functional group: Referencing Unit: [°] or [mm] Default value: 0 [°] Variable type: float page 157 Axis Definitions 191 Axis Type R/ W Functional group: Axis Definitions Unit: Default value: 2 (rotatory) Variable type: int / register page 20 192 Modulo Axis R/ W Functional group: Axis Definitions Unit: Default value: 0 (no modulo axis) Variable type: int / register page 22 Axis Settings Jetter AG 180 Maximum Acceleration R/ W Functional group: Axis settings Unit: [°/s2] or [mm/s2] Default value: 100,000 [°/s2] Variable type: float page 27 181 Maximum Jerk R/ W Functional group: Axis settings Unit: [°/s3] or [mm/s3] Default value: 1,000,000 [°/s3] Variable type: float page 28 182 Travel Limit, Positive R/ W Functional group: Axis settings Unit: [°] or [mm] Default value: 100,000 [°] Variable type: float page 28 449 Appendix JetWeb Register Number Name R/ W Description 183 Travel Limit, Negative R/ W Functional group: Axis settings Unit: [°] or [mm] Default value: -100,000 [°] Variable type: float page 29 184 Maximum Speed R/ W Functional group: Axis settings Unit: [°/s] Default value: 18,000 Variable type: float page 29 193 Modulo Travel Range R Functional group: Axis settings Unit: [°] or [mm] Default value: 360 [°] Variable type: float page 30 194 Gear Ratio - Motor R/ W Functional group: Axis settings Unit: [rev.] Default value: 1 [rev.] Variable type: float page 30 195 Gear Ratio - Mechanism R/ W Functional group: Axis settings Unit: [rev.] Default value: 1 [rev.] Variable type: float page 31 196 Linear / Rotation Ratio R/ W Functional group: Axis settings Unit: [°/rev] or [mm/rev.] Default value: 360 [°/rev.] Variable type: float page 31 510 Digital Inputs: Polarity R/ W Functional group: Axis settings Unit: Default value: 0b 00000001 00001111 Variable type: int / register page 32 511 Digital Inputs: Status R Functional group: Axis settings Unit: Default value: 0 Variable type: int / register page 33 Amplifiers 450 Jetter AG JetMove 2xx an JetControl Register Number Jetter AG Appendix Name R/ W Description 500 Rated Voltage of the Device R Functional group: Amplifier Unit: [V] Default value: Dependent on the amplifier type Variable type: int / register page 405 501 Rated Current of the Device R Functional group: Amplifier Unit: [Aeff] Default value: Dependent on the amplifier type Variable type: float page 405 508 PWM Frequency R/ W Functional group: Amplifier Unit: [kHz] Default value: Dependent on the amplifier type Variable type: int / register page 406 560 DC Link Voltage R Functional group: Amplifier Unit: [V] Default value: 0 Variable type: int / register page 406 563 Device Temperature R Functional group: Amplifier Unit: [°C] Default value: 0 Variable type: int / register page 407 564 Ballast Load R Functional group: Amplifier Unit: [%] Default value: 0 Variable type: int / register page 407 566 Input Current R Functional group: Amplifier Unit: [Aeff] Default value: 0 Variable type: float page 407 567 Mains Voltage R Functional group: Amplifier Unit: [Veff] Default value: 0 Variable type: int / register page 408 568 Board Temperature of the Controller R Functional group: Amplifier Unit: [°C] Default value: 0 Variable type: int / register page 408 451 Appendix JetWeb Register Number Name R/ W Description 576 Interfaces - Access Level R/ W Functional group: Amplifier Unit: Default value: 0 Variable type: int / register page 409 997 OS Build Version R Functional group: Amplifier Unit: Default value: Dependent on the software version Variable type: int / register page 410 116 Commutation Offset R/ W Functional group: Motor Unit: [°] Default value: 0 Variable type: float page 58 122 Motor Slip Frequency R/ W Functional group: Motor Unit: [Hz] Default value: 0 Variable type: float page 59 123 Pole Pair Number R/ W Functional group: Motor Unit: Default value: 3 Variable type: int / register page 60 505 Voltage Constant R/ W Functional group: Motor Unit: [V*min/1000] Default value: 0 Variable type: int / register page 60 547 Delay After Releasing the Motor Brake R/ W Functional group: Motor Unit: [ms] Default value: 0 Variable type: int / register page 61 548 Delay After Locking the Motor Brake R/ W Functional group: Motor Unit: [ms] Default value: 100 Variable type: int / register page 62 562 Motor Temperature R Functional group: Motor Unit: [°C] Default value: 0 Variable type: int / register page 62 Motor 452 Jetter AG JetMove 2xx an JetControl Register Number Appendix Name R/ W Description 565 Motor Shaft Position R Functional group: Motor Unit: [°] Default value: 0 Variable type: float page 63 608 Motor Type R/ W Functional group: Motor Unit: [1] Default value: 0 Variable type: int / register page 64 609 Motor Temperature Sensor Type R/ W Functional group: Motor Unit: [1] Default value: 0 Variable type: int / register page 65 616 Motor Torque Constant Kt R/ W Functional group: Motor Unit: [Nm/A] Default value: 0 Variable type: float page 65 117 Encoder Resolution R/ W Functional group: Encoder Unit: [Increments / Revolutions] Default value: Dependent on the encoder Variable type: int / register page 73 240 Encoder2 - Status R Functional group: Encoder Unit: Default value: 0 Variable type: int / register page 84 241 Encoder2 - Type R/ W Functional group: Encoder Unit: Default value: 0 Variable type: int / register page 84 242 Resolution of Encoder 2 R/ W Functional group: Encoder Unit: [Increments / Revolutions] Default value: 0 Variable type: int / register page 85 243 Mechanical Angle of Encoder 2 R Functional group: Encoder Unit: [°] Default value: 0 Variable type: float page 85 Encoders Jetter AG 453 Appendix JetWeb Register Number 454 Name R/ W Description 244 Gear Ratio of Encoder 2 R/ W Functional group: Encoder Unit: Default value: 1 Variable type: float page 86 245 Gear Ratio of Encoder 2 R/ W Functional group: Encoder Unit: Default value: 1 Variable type: float page 86 246 Linear/Rotatory Ratio of Encoder 2 R/ W Functional group: Encoder Unit: [mm/rev.] Default value: 360 Variable type: float page 86 247 Travel Limit Positive of Encoder 2 R/ W Functional group: Encoder Unit: [°] or [mm] Default value: 360° Variable type: float page 87 248 Travel Limit Negative of Encoder 2 R/ W Functional group: Encoder Unit: [°] or [mm] Default value: 0° Variable type: float page 87 249 As-is Position of Encoder 2 R/ W Functional group: Encoder Unit: [°] or [mm] Default value: 0° Variable type: float page 88 250 Modulo Turns of Encoder 2 R Functional group: Encoder Unit: Default value: 0 Variable type: int / register page 88 251 As-is Speed of Encoder 2 R Functional group: Encoder Unit: [°/s] or [mm/s] Default value: 0 Variable type: float page 88 252 Reversal of Counting Direction of Encoder 2 R/ W Functional group: Encoder Unit: Default value: 0 Variable type: int / register page 89 Jetter AG JetMove 2xx an JetControl Register Number Appendix Name R/ W Description 559 Commutation Measuring Method R Functional group: Encoder Unit: Default value: Dependent on the encoder Variable type: int / register page 74 577 Encoder type R Functional group: Encoder Unit: Default value: Dependent on the encoder Variable type: int / register page 74 114 Software Limit Positive R/ W Functional group: Axis Unit: [°] or [mm] Default value: 100,000 [°] Variable type: float page 92 115 Software Limit Negative R/ W Functional group: Axis Unit: [°] or [mm] Default value: -100,000 [°] Variable type: float page 92 544 DC Link Voltage - Max. Trip R/ W Functional group: Monitoring Unit: [V] Default value: Dependent on the amplifier type Variable type: int / register page 94 545 DC Link Voltage - Min. Trip R/ W Functional group: Monitoring Unit: [V] Default value: Dependent on the amplifier type Variable type: int / register page 95 546 Blocking Tripping Time R/ W Functional group: Monitoring Unit: [ms] Default value: 5,000 Variable type: int / register page 95 549 Emergency Stop Ramp Time R/ W Functional group: Monitoring Unit: [ms] Default value: 500 Variable type: int / register page 96 Monitoring Jetter AG 455 Appendix JetWeb Register Number 456 Name R/ W Description 600 Device Temperature Threshold - Warning R Functional group: Monitoring Unit: [°C] Default value: 70 Variable type: int / register page 96 601 Device Temperature Threshold - Error R Functional group: Monitoring Unit: [°C] Default value: 80 Variable type: int / register page 97 602 Motor Temperature Threshold - Warning R Functional group: Monitoring Unit: [°C] Default value: 110 Variable type: int / register page 97 603 Motor Temperature Threshold - Error R Functional group: Monitoring Unit: [°C] Default value: 135 Variable type: int / register page 97 604 Ballast Load Threshold Warning R Functional group: Monitoring Unit: [%] Default value: 80 Variable type: int / register page 98 605 Ballast Load Threshold Error R Functional group: Monitoring Unit: [%] Default value: 100 Variable type: int / register page 98 640 I²t - DC Link Operating Mode R/ W Functional group: Monitoring Unit: Default value: 0 Variable type: int / register page 100 642 I²t - DC Link Time Constant R Functional group: Monitoring Unit: [s] Default value: 0 Variable type: float page 101 643 I²t - DC Link I²t Value R Functional group: Monitoring Unit: [%] Default value: 0 Variable type: float page 101 Jetter AG JetMove 2xx an JetControl Register Number Appendix Name R/ W Description 644 I²t - DC Link Alarm Threshold R/ W Functional group: Monitoring Unit: [%] Default value: 80 Variable type: float page 101 645 I²t - Motor Model Operating Mode R/ W Functional group: Monitoring Unit: Default value: 0 Variable type: int / register page 103 647 I²t - Motor Model Time Constant R/ W Functional group: Monitoring Unit: [s] Default value: 0 Variable type: float page 103 648 I²t - Motor Model I²t Value R Functional group: Monitoring Unit: [%] Default value: 0 Variable type: float page 103 649 I²t - Motor Model Alarm Threshold R/ W Functional group: Monitoring Unit: [%] Default value: 80 Variable type: float page 103 650 I²t - UL Standard Operating Mode R Functional group: Monitoring Unit: Default value: 2 Variable type: int / register page 104 652 I²t - UL Standard Time Constant R Functional group: Monitoring Unit: [s] Default value: 0 Variable type: float page 104 653 I²t - UL Standard I²t Value R Functional group: Monitoring Unit: [%] Default value: 0 Variable type: float page 105 654 I²t - UL Standard Alarm Threshold R/ W Functional group: Monitoring Unit: [%] Default value: 80 Variable type: float page 105 Position Feedback Controller Jetter AG 457 Appendix JetWeb Register Number 458 Name R/ W Description 110 Position Controller Kv R/ W Functional group: Position Feedback Controller Unit: [1/s] Default value: 1,000 Variable type: float page 131 119 As-is Tracking Error R Functional group: Position Feedback Controller Unit: [°] or [mm] Default value: 0 [°] Variable type: float page 131 120 Tracking Error Limit R/ W Functional group: Position Feedback Controller Unit: [°] or [mm] Default value: 10,000 [°] Variable type: float page 132 130 Position Set Point R/ W Functional group: Position Feedback Controller Unit: [°] or [mm] Default value: 0 [°] Variable type: float page 132 190 Position Feedback Controller - As-is Value Selection R/ W Functional group: Position Feedback Controller Unit: Default value: 1 ... 2 Variable type: int / register page 133 542 Tracking Error Window Time R/ W Functional group: Position Feedback Controller Unit: [ms] Default value: 5 Variable type: int / register page 133 550 Speed Pre-Control R/ W Functional group: Position Feedback Controller Unit: [%] Default value: 100 Variable type: float page 134 551 Speed Feed Forward T1 R/ W Functional group: Position Feedback Controller Unit: [ms] Default value: 2 [ms] Variable type: int / register page 134 Jetter AG JetMove 2xx an JetControl Appendix Register Number Name R/ W Description Speed Controller Jetter AG 111 Speed Set Point R/ W Functional group: Speed controller Unit: [rpm] Default value: 0 Variable type: int / register page 123 112 As-is Motor Speed R Functional group: Speed controller Unit: [rpm] Default value: 0 Variable type: int / register page 123 113 Filter Time Constant Tf R/ W Functional group: Speed controller Unit: [ms] Default value: 2 Variable type: float page 124 118 Speed Controller Maximum Motor Speed R/ W Functional group: Speed controller Unit: [rpm] Default value: 3,000 Variable type: int / register page 124 124 Speed Controller Kp R/ W Functional group: Speed controller Unit: Default value: 10 Variable type: float page 125 126 Speed Controller Tn R/ W Functional group: Speed controller Unit: [ms] Default value: 20 Variable type: float page 125 128 Limitation of Set Speed R/ W Functional group: Speed controller Unit: [rpm] Default value: 3,150 [rpm] Variable type: float page 127 506 Speed Controller Preset R/ W Functional group: Speed controller Unit: [Aeff] Default value: 0 Variable type: float page 127 507 I-Component Speed Controller R/ W Functional group: Speed controller Unit: [Aeff] Default value: 0 Variable type: float page 128 459 Appendix JetWeb Register Number Name R/ W Description 628 Driveline - Moment of Inertia R/ W Functional group: Speed controller Unit: [kgcm²] Default value: 0 [kgcm²] Variable type: float page 128 629 Scaling of the Current Pre-Control R/ W Functional group: Speed controller Unit: [%] Default value: 0 [%] Variable type: float page 129 Current Controller 460 121 Magnetizing Current R/ W Functional group: Current controller Unit: [Aeff] Default value: 0 Variable type: float page 109 125 Current Setpoint R/ W Functional group: Current controller Unit: [Aeff] Default value: 0 Variable type: float page 110 127 Current Limitation R/ W Functional group: Current controller Unit: [Aeff] Default value: R502 Variable type: float page 110 231 Current Reduction R Functional group: Current controller Unit: [Arms] Default value: 0 Variable type: float page 111 232 Time of Current Reduction R Functional group: Current controller Unit: [ms] Default value: 0 Variable type: int / register page 111 502 Max. Output Current R Functional group: Current controller Unit: [Aeff] Default value: 2*R501 Variable type: float page 112 503 Current Controller Kp R/ W Functional group: Current controller Unit: Default value: 0.7 Variable type: float page 112 Jetter AG JetMove 2xx an JetControl Appendix Register Number Name R/ W Description 504 Current Controller Tn R/ W Functional group: Current controller Unit: [ms] Default value: 3 Variable type: float page 115 561 As-is Current R Functional group: Current controller Unit: [Aeff] Default value: 0 Variable type: float page 116 618 Rated Current R/ W Functional group: Current controller Unit: [Aeff] Default value: R501 Variable type: float page 116 619 Overload Factor R/ W Functional group: Current controller Unit: Default value: 2 Variable type: float page 117 620 As-is Current in % R Functional group: Current controller Unit: [%] Default value: 0 Variable type: float page 118 621 As-is Torque R Functional group: Current controller Unit: [Nm] Default value: 0 Variable type: float page 118 Position Capture Jetter AG 513 Capture Status R Functional group: Position capture Unit: Default value: 0 Variable type: int / register page 333 518 Capture Edge Definition R/ W Functional group: Position capture Unit: Default value: 0b 00000001 00001110 Variable type: int / register page 334 519 Capture Active State R Functional group: Position capture Unit: Default value: 0 Variable type: int / register page 334 461 Appendix JetWeb Register Number Name R/ W Description 521 Capture Position LIMIT+ R Functional group: Position capture Unit: [°] or [mm] Default value: 0 [°] Variable type: float page 335 522 Capture Position LIMIT- R Functional group: Position capture Unit: [°] or [mm] Default value: 0 [°] Variable type: float page 335 523 Capture Position REF R Functional group: Position capture Unit: [°] or [mm] Default value: 0 [°] Variable type: float page 335 524 Capture Position INPUT R Functional group: Position capture Unit: [°] or [mm] Default value: 0 [°] Variable type: float page 336 631 Capture Command Set R/ W Functional group: Position capture Unit: Default value: 0 Variable type: int / register page 336 632 Capture Command Clear R/ W Functional group: Position capture Unit: Default value: 0 Variable type: int / register page 336 PID Controller 462 200 PID Status R Functional group: PID controller Unit: [-] Default value: 0 Variable type: int / register page 342 201 PID Command R/ W Functional group: PID controller Unit: [-] Default value: 0 Variable type: int / register page 342 202 Setpoint Value R/ W Functional group: PID controller Unit: [%] Default value: 0 Variable type: float page 342 Jetter AG JetMove 2xx an JetControl Register Number Jetter AG Appendix Name R/ W Description 203 Proportional Gain KP R/ W Functional group: PID controller Unit: [-] Default value: 0 Variable type: float page 343 204 Integral Time Tn R/ W Functional group: PID controller Unit: [ms] Default value: 100 Variable type: float page 343 205 Derivative Time TV R/ W Functional group: PID controller Unit: [ms] Default value: 0 Variable type: float page 343 206 Delay Time T1 R/ W Functional group: PID controller Unit: [ms] Default value: 0 Variable type: float page 344 207 Limitation Integral-Action Component R/ W Functional group: PID controller Unit: [%] Default value: +100 Variable type: float page 344 208 Preset Integral-Action Component R/ W Functional group: PID controller Unit: [%] Default value: 0 Variable type: float page 344 209 As-is PID Value R/ W Functional group: PID controller Unit: [%] Default value: 0 Variable type: float page 344 210 As-is Value Filtering TF R/ W Functional group: PID controller Unit: [ms] Default value: 0 Variable type: float page 345 211 Selection As-is Value R/ W Functional group: PID controller Unit: [-] Default value: 0 Variable type: int / register page 345 463 Appendix JetWeb Register Number 464 Name R/ W Description 212 Selection Manipulated Variable R/ W Functional group: PID controller Unit: [-] Default value: 0 Variable type: int / register page 346 213 Selection Setpoint R/ W Functional group: PID controller Unit: [-] Default value: 0 Variable type: int / register page 347 214 Sampling Time TS R Functional group: PID controller Unit: [ms] Default value: 2 Variable type: float page 347 215 Max. Value of the Manipulated Variable R/ W Functional group: PID controller Unit: [%] Default value: +100 Variable type: float page 347 216 Min. Value of the Manipulated Variable R/ W Functional group: PID controller Unit: [%] Default value: -100 Variable type: float page 347 217 Scaling Factor for the Manipulated Value R/ W Functional group: PID controller Unit: [%] Default value: 1 Variable type: float page 348 218 Setpoint Value Filtering TR R Functional group: PID controller Unit: [ms] Default value: 0 Variable type: float page 348 219 Manipulated Value XW R Functional group: PID controller Unit: [%] Default value: 0 Variable type: float page 348 220 Digital Setpoint Value R Functional group: PID controller Unit: [-] Default value: 0 Variable type: float page 349 Jetter AG JetMove 2xx an JetControl Register Number Appendix Name R/ W Description 221 Measuring Value Analog Input 1 R Functional group: PID controller Unit: [-] Default value: 0 Variable type: float page 349 225 Manipulated Variable R Functional group: PID controller Unit: [%] Default value: 0 Variable type: float page 349 Technological Functions - General Jetter AG 150 Time Mode R/ W Functional group: Technological Functions Unit: [-] Default value: 0 Variable type: int / register page 188 151 Transmit Mode R/ W Functional group: Technological Functions Unit: [-] Default value: 0 Variable type: int / register page 210 152 Receive Mode R/ W Functional group: Technological functions Unit: [-] Default value: 0 Variable type: int / register page 211 155 Counting Range JX2CNT1 R/ W Functional group: Technological functions Unit: [-] Default value: 16,777,216 Variable type: int / register page 212 157 Standardizing Factor Leading Axis Position R/ W Functional group: Technological functions Unit: [°/Ink] or [mm/Ink] Default value: 1 Variable type: float page 213 158 Maximum Leading Axis Position R/ W Functional group: Technological functions Unit: [°] or [mm] Default value: 100,000 [°] Variable type: float page 213 465 Appendix JetWeb Register Number Name R/ W Description 159 Minimum Leading Axis Position R/ W Functional group: Technological functions Unit: [°] or [mm] Default value: -100,000 [°] Variable type: float page 213 188 Leading Axis Position R/ W Functional group: Technological functions Unit: [°] or [mm] Default value: 0 [°] Variable type: float page 214 189 Leading Axis Speed R/ W Functional group: Technological functions Unit: [°/s] or [mm/s] Default value: 0 [°/s] Variable type: float page 215 400 Coupling Status R Functional group: Technological functions Unit: [-] Default value: 0 Variable type: int / register page 292 460 Dead Time Compensation R/ W Functional group: Technological functions Unit: [-] Default value: 0 Variable type: float page 312 461 Position of Dead Time Correction R Functional group: Technological functions Unit: [-] Default value: 0 Variable type: float page 312 Technological Functions - Electronic Gearing 156 Gear Ratio R/ W Functional group: Technological functions Unit: [-] Default value: 1 Variable type: float page 238 Technological Functions - Table 466 Jetter AG JetMove 2xx an JetControl Register Number Jetter AG Appendix Name R/ W Description 402 Table Start Index R/ W Functional group: Technological functions Unit: [-] Default value: 0 Variable type: int / register page 292 410 Table Config Index R/ W Functional group: Technological functions Unit: [-] Default value: 0 Variable type: int / register page 273 411 Index - First Table Node R/ W Functional group: Technological functions Unit: [-] Default value: 0 Variable type: int / register page 273 412 Index - Start Table Node R/ W Functional group: Technological functions Unit: [-] Default value: 0 Variable type: int / register page 273 413 Index - Last Table Node R/ W Functional group: Technological functions Unit: [-] Default value: 0 Variable type: int / register page 274 420 As-is Table Index R Functional group: Technological functions Unit: [-] Default value: 0 Variable type: int / register page 293 421 As-is Index - First Table Node R Functional group: Technological functions Unit: [-] Default value: 0 Variable type: int / register page 293 422 As-is Index - Start Table Node R Functional group: Technological functions Unit: [-] Default value: 0 Variable type: int / register page 293 467 Appendix JetWeb Register Number 468 Name R/ W Description 423 As-is Index - Last Table Node R Functional group: Technological functions Unit: [-] Default value: 0 Variable type: int / register page 293 432 Change Type R/ W Functional group: Technological functions Unit: [-] Default value: 0 Variable type: int / register page 294 433 Position Difference Leading Axis R/ W Functional group: Technological functions Unit: [°] or [mm] Default value: 0 [°] Variable type: float page 294 434 Position Difference Following Axis R/ W Functional group: Technological functions Unit: [°] or [mm] Default value: 0 [°] Variable type: float page 295 435 Correction Velocity Following Axis R/ W Functional group: Technological functions Unit: [°/s] or [mm/s] Default value: R184 [°/s] Variable type: float page 295 440 Table Node R/ W Functional group: Technological functions Unit: [-] Default value: 0 Variable type: int / register page 274 441 Leading Axis Position R/ W Functional group: Technological functions Unit: [°] or [mm] Default value: 0 [°] Variable type: float page 274 442 Following Axis Position R/ W Functional group: Technological functions Unit: [°] or [mm] Default value: 0 [°] Variable type: float page 275 Jetter AG JetMove 2xx an JetControl Register Number Appendix Name R/ W Description 443 Configuration Offset Leading Axis Position R/ W Functional group: Technological functions Unit: [°] or [mm] Default value: 0 [°] Variable type: float page 275 444 Configuration Offset Following Axis Position R/ W Functional group: Technological functions Unit: [°] or [mm] Default value: 0 [°] Variable type: float page 276 445 Scaling Factor - Leading Axis Position R/ W Functional group: Technological functions Unit: [-] Default value: 0 Variable type: float page 276 446 Scaling Factor Following Axis Position R/ W Functional group: Technological functions Unit: [-] Default value: 0 Variable type: float page 276 447 Reference Type R/ W Functional group: Technological functions Unit: [-] Default value: 0 Variable type: int / register page 296 448 Start Type R/ W Functional group: Technological functions Unit: [-] Default value: 0 Variable type: int / register page 296 449 Stop Type R/ W Functional group: Technological functions Unit: [-] Default value: 0 Variable type: int / register page 297 Technological Functions - Virtual Position Counter Jetter AG 469 Appendix JetWeb Register Number 451 Name Mode R/ W Description R/ W Functional group: Technological functions Unit: [-] Default value: 0 Variable type: int / register page 307 Referencing on the Fly 470 452 Position Reference R/ W Functional group: Referencing on the fly Unit: [°] or [mm] Default value: 10 Variable type: float page 321 453 Position Window R/ W Functional group: Referencing on the fly Unit: [°] or [mm] Default value: 10 Variable type: float page 321 454 As-is Position Value R/ W Functional group: Referencing on the fly Unit: [°] or [mm] Default value: 0 Variable type: float page 322 455 Position Difference R/ W Functional group: Referencing on the fly Unit: [°] or [mm] Default value: 0 Variable type: float page 322 456 Correction Factor Kv R/ W Functional group: Referencing on the fly Unit: [1/s] Default value: 1 Variable type: float page 323 457 Maximum Speed Correction R/ W Functional group: Referencing on the fly Unit: [°/s] or [mm/s] Default value: 10 Variable type: float page 323 Jetter AG JetMove 2xx an JetControl Appendix Register Number 458 Name Correction Speed R/ W Description R/ W Functional group: Referencing on the fly Unit: [°/s] or [mm/s] Default value: 0 Variable type: float page 324 Position Trigger Jetter AG 515 DigOut - Status R/ W Functional group: Position trigger Unit: Default value: 0 Variable type: int / register page 355 516 DigOut - Set R/ W Functional group: Position trigger Unit: Default value: 0 Variable type: int / register page 358 517 DigOut - Clear R/ W Functional group: Position trigger Unit: Default value: 0 Variable type: int / register page 358 525 DigOut - Type R/ W Functional group: Position trigger Unit: Default value: 0 Variable type: int / register page 356 526 DigOut - PosX R/ W Functional group: Position trigger Unit: [°] or [mm] Default value: 0 [°] Variable type: float page 359 529 DigOut - Delay R/ W Functional group: Position trigger Unit: [ms] Default value: 0 [ms] Variable type: float page 359 596 DigOutStatus - Set R/ W Functional group: Position trigger Unit: Default value: 0 Variable type: int / register page 355 597 DigOutStatus - Clear R/ W Functional group: Position trigger Unit: Default value: 0 Variable type: int / register page 356 471 Appendix JetWeb Register Number Name R/ W Description 623 DigOut - Type2 R/ W Functional group: Position trigger Unit: Default value: 0 Variable type: int / register page 360 624 DigOut - Set2 R/ W Functional group: Position trigger Unit: Default value: 0 Variable type: int / register page 360 625 DigOut - Clear2 R/ W Functional group: Position trigger Unit: Default value: 0 Variable type: int / register page 360 626 DigOut - PosX2 R/ W Functional group: Position trigger Unit: [°] or [mm] Default value: 0 [°] Variable type: float page 361 627 DigOut - Delay2 R/ W Functional group: Position trigger Unit: [ms] Default value: 0 [ms] Variable type: float page 361 Torque-Controlled Shut-Off 472 136 Status of TorqueControlled Shut-Off R Functional group: Torque-controlled shut-off Unit: Default value: 0 Variable type: int / register page 376 137 Triggering Threshold Current R/ W Functional group: Torque-controlled shut-off Unit: [Aeff] Default value: 0 [Aeff] Variable type: float page 376 138 Filter of the Triggering Threshold R/ W Functional group: Torque-controlled shut-off Unit: Default value: 0 Variable type: int / register page 377 Jetter AG JetMove 2xx an JetControl Register Number Jetter AG Appendix Name R/ W Description 139 Speed Shut-Off Threshold R/ W Functional group: Torque-controlled shut-off Unit: [rpm] Default value: 150 Variable type: int / register page 377 607 Holding Current R/ W Functional group: Torque-controlled shut-off Unit: [Aeff] Default value: 0 [Aeff] Variable type: float page 378 630 Filter of the Zero Speed Count R/ W Functional group: Torque-controlled shut-off Unit: Default value: 10 Variable type: int / register page 378 473 Appendix JetWeb Register Number Name R/ W Description Trailing Indicator 474 438 Trailing Indicator max. as-is position R/ W Functional group: Trailing indicator Unit: [°] or [mm] Default value: 0 [°] Variable type: float page 383 439 Trailing Indicator min. as-is position R/ W Functional group: Trailing indicator Unit: [°] or [mm] Default value: 0 [°] Variable type: float page 383 538 Trailing Indicator Max. Tracking Error R/ W Functional group: Trailing indicator Unit: [°] or [mm] Default value: 0 [°] Variable type: float page 384 539 Trailing Indicator Min. Tracking Error R/ W Functional group: Trailing indicator Unit: [°] or [mm] Default value: 0 [°] Variable type: float page 384 Jetter AG Jetter AG O O O Coupling mode: Table Referencing on the Fly Position Capture Position Trigger Torque-Controlled Shut-Off O = Functions are available at the same time PID Controller O Coupling mode: Electrionic Gearing O Virtual Position Counter O O Positioning Referencing Functions O O O O O O O O O O O = Functions are not available at the same time O O O O O O O O -O r ut te h n S : ou d C e: ing de e e r l l r d r o g u o r ge on tro lle in pt m Gea g m iti ig g n o c r a r s g n g o t T o C en l y in ci in ic lin -C on n pl on up lP er e F on on o en i f C i i u a t r ue r t t i e o e i i t h l o u e q s t D t s s r r C lec C ab R n ef PI Po To Vi T o Po Po R E ff JetMove 2xx at the JetControl Appendix Appendix E: Overview of Functions 475 Appendices JetWeb Appendix F: Index of Illustrations Fig. 1: Fig. 2: Fig. 3: Fig. 4: Fig. 5: Fig. 6: Fig. 7: Fig. 8: Fig. 9: Fig. 10: Fig. 11: Fig. 12: Fig. 13: Fig. 14: Fig. 15: Fig. 16: Fig. 17: Fig. 18: Fig. 19: Fig. 20: Fig. 21: Fig. 22: Fig. 23: Fig. 24: Fig. 25: Fig. 26: Fig. 27: Fig. 28: Fig. 29: Fig. 30: Fig. 31: Fig. 32: 476 Submodule sockets of the controller JC-647 18 Example of a modulo axis motion 23 Wye: a) Motor winding b) Connection terminal plate 40 Delay time of the motor brake control 57 Motor shaft position 63 Position of the software limit switches 93 Current controller 107 Current controller 107 Value range for Kp and Tn of the current controller belonging to the JM-2xx series 113 Value range for Kp and Tn of the current controller belonging to the JM-105 and JM-203 114 Speed controller 119 Reversing without current pre-control 121 Reversing with current pre-control 122 Value range for Kp and Tn of the speed controller belonging to the JM-2xx series 126 Value range for Kp and Tn of the speed controller belonging to the JM-105 and JM-D203 126 Position feedback controller 131 Referencing by various speeds 140 Referencing with zero pulse ("zero mark") 141 Referencing without zero pulse ("zero mark") 142 One-phase referencing 142 Driving towards "normal position" 143 Referencing only by means of zero pulse ("zero mark") in positive direction; the rotatory direction is positive; the starting position is on the negative side of the zero pulse. 144 Referencing by reference and limit switch in positive direction; the rotatory direction is positive; with zero pulse ("zero mark"), the starting position is on the positive side of the reference switch. 145 Referencing by reference and limit switch in positive direction; the rotatory direction is positive; with zero pulse ("zero mark"), the starting position is on the negative side of the reference switch. 146 Referencing by reference and limit switch in positive direction; the rotatory direction is positive; with zero pulse ("zero mark"), the starting position is on the reference switch. 147 Referencing by reference and limit switch in negative direction; the rotatory direction is positive; with zero pulse ("zero mark"), the starting position is on the positive side of the reference switch. 148 Referencing by reference and limit switch in negative direction; the rotatory direction is positive; with zero pulse ("zero mark"), the starting position is on the negative side of the reference switch. 149 Referencing by reference and limit switch in negative direction; the rotatory direction is positive; with zero pulse ("zero mark"), the starting position is on the reference switch. 149 Referencing by limit switch only; positive direction, positive rotatory direction, starting position preceeding the positive limit switch. 150 Referencing by limit switch only; positive direction, positive rotatory direction, starting position on the positive limit switch. 150 Referencing by limit switch only; negative direction, positive rotatory direction, starting position preceeding the negative limit switch. 151 Referencing by limit switch only; negative direction, positive rotatory direc- Jetter AG JetMove 2xx at the JetControl Fig. 33: Fig. 34: Fig. 35: Fig. 36: Fig. 37: Fig. 38: Fig. 39: Fig. 40: Fig. 41: Fig. 42: Fig. 43: Fig. 44: Fig. 45: Jetter AG Appendices tion, starting position on the negative limit switch. Acceleration process Deceleration process when driving towards the target Example of a destination window Position window for the "Referencing on the fly" function Examples: Terminal point INPUT of JM-206, respectively JM-D203 P-correction controller of the "Referencing on the fly" function Course of the correction speed graph of referencing on the fly Sample application of referencing on the fly Plug-in connection for the digital inputs Function diagram of the "Position Capture" function Sample application of the "Position Capture" function Structure of the PID controller Exemplary sequential program - Idealized screw capping 151 165 167 168 315 316 317 318 319 326 329 330 341 366 477 Appendices JetWeb Appendix G: Index A I Asynchronous Motor 40 Incremental encoder 71 Axis settings Limit and reference switches 25 Motor / mechanic transmission factor 25 Reversal of direction 25 Software limit switch 25 Speed, acceleration and jerk 26 Travel limits 25 Blocking protection monitoring 91 Linear motor 49 M 396 Motor cable monitoring 91, 392 C O Commutation Finding 70 Overview of Functions 475 Configuring the PID controller 339 Overview of Registers ordered by functions 444 Overview of registers numeric 415 Controller Brake Ventilator 392 392 D P Description of Symbols 5 Parameters Amplifiers Current Diagnostics Open-loop control Positioning Speed controller E Emergency stop ramp - triggering 385 Encoder selection 67 EnDat 2.2 encoder 72 Endless positioning 159 Error mask 402 Errors 402, 404 478 Limit switch evaluation 393 Motor Back EMF constant 35 Commutation offset and pole pair number 35 Torque constant 35 B Brake Manual control L 405 107 397 387 405 410 Phase monitoring 392 PID controller structure 340 Position capture 325 Position trigger 351 F Ptp-Positioning 159 Flying saw 313 R H Reference run Status bits HIPERFACE 69 Referencing Error messages 139 Home position or normal position 143 138 Jetter AG JetMove 2xx at the JetControl Zero pulse Appendices 141, 142 Resolver 69 Speed reversal 140, 393 Stepper motor 46 Synchronous motor 36, 53, 54 S Second encoder 77 T Setting the axis type 19 Technology group 175 Setting the current controller 108 Torque-controlled shut-off 363 Setting the maximum output current 108 Tracking error monitoring 91 Setting the motion mode 20 W SinCos encoder 69 Slave pointer 383 Jetter AG Warnings 400 479 Jetter AG Graeterstrasse 2 D-71642 Ludwigsburg Germany Phone: Phone Sales: Fax Sales: Hotline: Internet: E-Mail: +49 7141 2550-0 +49 7141 2550-433 +49 7141 2550-484 +49 7141 2550-444 http://www.jetter.de [email protected] Jetter Subsidiaries Jetter (Schweiz) AG Jetter USA Inc. Henauerstrasse 2 CH-9524 Zuzwil 13075 US Highway 19 North Florida - 33764 Clearwater Switzerland U.S.A. Phone: Fax: E-Mail: Internet: Phone: Fax: E-Mail: Internet: 480 +41 71 91879-50 +41 71 91879-59 [email protected] http://www.jetterag.ch +1 727 532-8510 +1 727 532-8507 [email protected] http://www.jetter.de Jetter AG