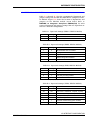
1
®
®
ODMS
Open Data Management Server
Process Control and
Automation Solutions
from Elsag Bailey Group
WARNING notices as used in this instruction apply to hazards or unsafe practices that could result in
personal injury or death.
CAUTION notices apply to hazards or unsafe practices that could result in property damage.
NOTES highlight procedures and contain information that assists the operator in understanding the
information contained in this instruction.
WARNING
INSTRUCTION MANUALS
DO NOT INSTALL, MAINTAIN, OR OPERATE THIS EQUIPMENT WITHOUT READING, UNDERSTANDING,
AND FOLLOWING THE PROPER Elsag Bailey INSTRUCTIONS AND MANUALS; OTHERWISE, INJURY OR
DAMAGE MAY RESULT.
RADIO FREQUENCY INTERFERENCE
MOST ELECTRONIC EQUIPMENT IS INFLUENCED BY RADIO FREQUENCY INTERFERENCE (RFI). CAUTION SHOULD BE EXERCISED WITH REGARD TO THE USE OF PORTABLE COMMUNICATIONS EQUIPMENT IN THE AREA AROUND SUCH EQUIPMENT. PRUDENT PRACTICE DICTATES THAT SIGNS SHOULD
BE POSTED IN THE VICINITY OF THE EQUIPMENT CAUTIONING AGAINST THE USE OF PORTABLE COMMUNICATIONS EQUIPMENT.
POSSIBLE PROCESS UPSETS
MAINTENANCE MUST BE PERFORMED ONLY BY QUALIFIED PERSONNEL AND ONLY AFTER SECURING
EQUIPMENT CONTROLLED BY THIS PRODUCT. ADJUSTING OR REMOVING THIS PRODUCT WHILE IT IS
IN THE SYSTEM MAY UPSET THE PROCESS BEING CONTROLLED. SOME PROCESS UPSETS MAY
CAUSE INJURY OR DAMAGE.
NOTICE
The information contained in this document is subject to change without notice.
Elsag Bailey, its affiliates, employees, and agents, and the authors and contributors to this publication specifically disclaim all liabilities and warranties, express and implied (including warranties of merchantability and fitness for a particular purpose), for the accuracy, currency, completeness, and/or reliability of the information
contained herein and/or for the fitness for any particular use and/or for the performance of any material and/
or equipment selected in whole or part with the user of/or in reliance upon information contained herein.
Selection of materials and/or equipment is at the sole risk of the user of this publication.
This document contains proprietary information of Elsag Bailey, Elsag Bailey Process Automation, and is
issued in strict confidence. Its use, or reproduction for use, for the reverse engineering, development or
manufacture of hardware or software described herein is prohibited. No part of this document may be
photocopied or reproduced without the prior written consent of Elsag Bailey.
Preface
Open Data Management Server (ODMS) is a software platform
for collection, organization, integration and application of
real-time plant data. An industry standard application programming interface (API) such as structured query language
(SQL), dynamic data exchange (DDE), or an ODMS specific
application programming interface can be used to allow open
access to the open data management server system. The
ODMS system can access data from a local platform or a
remote platform using a TCP/IP or DECnet network.
Server platforms supported are:
•
DEC™ Alpha™ AXP™ (Open VMS™ operating system).
•
DEC VAX™ (Open VMS operating system).
•
HP9000® (HP-UX® operating system).
Client platforms supported are:
•
DEC Alpha AXP (Open VMS™ operating system).
•
DEC VAX (VMS™ operating system).
•
HP9000 (HP-UX operating system).
•
486-based personal computer (or higher) with Microsoft®
Windows™ 3.1 or Windows 95.
Network communication protocols for graphic console system
client terminals are:
•
TCP/IP (HP-UX, VAX/Open VMS, DEC Alpha AXP/Open
VMS or PC platforms).
•
DECnet® (VAX/Open VMS, DEC Alpha AXP/Open or PC
platforms).
This instruction provides information on how to install the
required software, hardware requirements, operating instructions and error messages.
WBPEEUI350003B0
®
List of Effective Pages
Total number of pages in this instruction is 239, consisting of the following:
Page No.
Change Date
Preface
List of Effective Pages
iii through ix
1-1 through 1-9
2-1 through 2-6
3-1 through 3-66
4-1 through 4-6
5-1 through 5-45
6-1 through 6-12
7-1 through 7-34
A-1 through A-18
B-1 through B-4
C-1 through C-5
D-1 through D-2
E-1 through E-20
Index-1 through Index-3
Original
Original
Original
Original
Original
Original
Original
Original
Original
Original
Original
Original
Original
Original
Original
Original
When an update is received, insert the latest changed pages and dispose of the superseded pages.
NOTE: On an update page, the changed text or table is indicated by a vertical bar in the outer margin of the page adjacent to the changed area. A changed figure is indicated by a vertical bar in the
outer margin next to the figure caption. The date the update was prepared will appear beside the
page number.
WBPEEUI350003B0
Table of Contents
Page
SECTION 1 - INTRODUCTION ....................................................................................................1-1
OVERVIEW ..................................................................................................................1-1
INTENDED USER .........................................................................................................1-1
SYSTEM DESCRIPTION................................................................................................1-2
SOFTWARE DESCRIPTION...........................................................................................1-2
FEATURES...................................................................................................................1-3
INSTRUCTION CONTENT .............................................................................................1-4
REQUIREMENTS .........................................................................................................1-5
Hardware...............................................................................................................1-5
Software ................................................................................................................1-6
REFERENCE DOCUMENTS..........................................................................................1-7
DOCUMENT CONVENTIONS ........................................................................................1-8
GLOSSARY OF TERMS AND ABBREVIATIONS .............................................................1-9
SECTION 2 - DESCRIPTION AND OPERATION........................................................................2-1
INTRODUCTION ...........................................................................................................2-1
HARDWARE DESCRIPTION..........................................................................................2-1
Configurations .......................................................................................................2-2
INFI 90 OPEN Interface ..........................................................................................2-3
SYSTEM DESCRIPTION................................................................................................2-3
ODMS SYSTEM OPERATION ........................................................................................2-3
ICI Interface ...........................................................................................................2-4
Time Synchronization ............................................................................................2-4
ICI Data Gathering.................................................................................................2-4
SETCIM OPERATION....................................................................................................2-6
Configurable Data Structures ................................................................................2-6
Event Driven Processing.........................................................................................2-6
Client/Server Architecture .....................................................................................2-7
SQL Database Query .............................................................................................2-7
Real-Time and Historical Data................................................................................2-7
Database Access Subroutines ................................................................................2-7
SECTION 3 - INSTALLATION .....................................................................................................3-1
INTRODUCTION ...........................................................................................................3-1
INSTALLATION (OPEN VMS OPERATING SYSTEM) .......................................................3-1
VMS System Requirements ....................................................................................3-2
VMS System Parameters ........................................................................................3-3
User Accounts .......................................................................................................3-5
Network Configuration ...........................................................................................3-5
MOTIF Software Version ........................................................................................3-6
ORACLE Open Installation .....................................................................................3-6
Open Data Management Server Installation (VMS) .................................................3-7
Post Installation Procedure (VMS) ........................................................................3-27
GCS CLIENT INSTALLATION ......................................................................................3-29
POST INSTALLATION PROCEDURE (GCS) ..................................................................3-34
INSTALLATION (HP-UX OPERATING SYSTEM) ...........................................................3-34
HP-UX System Requirements ...............................................................................3-34
HP-UX System Parameters ...................................................................................3-35
Open Data Management Server Installation (HP-UX) ............................................3-37
Post Installation Procedure (HP-UX) .....................................................................3-46
WBPEEUI350003B0
iii
®
Table of Contents (continued)
Page
SECTION 3 - INSTALLATION (continued)
GCS CLIENT INSTALLATION...................................................................................... 3-51
POST INSTALLATION PROCEDURE (GCS CLIENT) ..................................................... 3-54
TSK_CONSOLE SCRATCH RECORDS ........................................................................ 3-55
WINDOWS CLIENT TERMINAL INSTALLATION .......................................................... 3-55
Microsoft Windows Client Terminal Requirements ............................................... 3-56
GCS Console Installation ..................................................................................... 3-56
Personal Computer Client (Wollongong TCP/IP) ............................................. 3-60
Personal Computer Client (DECnet Pathworks) .............................................. 3-61
Personal Computer Client (TCP/IP Pathworks) .............................................. 3-61
VAX Server (TCPware) ................................................................................... 3-62
VAX Server (UCX and SETCIM 4.5A) .............................................................. 3-62
VAX Server (DECnet) ..................................................................................... 3-63
VAX Server (TGV Multinet) ............................................................................ 3-64
HP Server (HP CLIENT) .................................................................................. 3-65
HP Server (PC CLIENT) .................................................................................. 3-66
SECTION 4 - CONFIGURATION .................................................................................................4-1
INTRODUCTION .......................................................................................................... 4-1
OFF-LINE CONFIGURATION ........................................................................................ 4-1
ON-LINE CONFIGURATION.......................................................................................... 4-1
EXAMPLE CONFIGURATION........................................................................................ 4-2
SECTION 5 - OPERATING PROCEDURES................................................................................5-1
INTRODUCTION .......................................................................................................... 5-1
OPEN DATA MANAGEMENT SERVER START UP ......................................................... 5-1
MENU ACCESS ........................................................................................................... 5-2
DEFAULT SECURITY ................................................................................................... 5-2
MENU COLORS ........................................................................................................... 5-2
MAIN MENU ................................................................................................................ 5-3
Open Data Management Server Operations Menu .................................................. 5-3
Summaries and Event Logs ............................................................................. 5-3
Ad Hoc Trending ............................................................................................. 5-7
History Data View Menu .................................................................................. 5-8
Operating Parameters.................................................................................... 5-12
Interface Statistics ........................................................................................ 5-16
Message Output ............................................................................................ 5-19
Ad Hoc Query................................................................................................ 5-21
Applications ........................................................................................................ 5-22
Utilities ............................................................................................................... 5-23
Access........................................................................................................... 5-23
History File Utilities....................................................................................... 5-24
Off-Line Database Loader .............................................................................. 5-24
Off-Line Database To ASCII File ..................................................................... 5-24
Document Definition Records ........................................................................ 5-24
Document Database Records......................................................................... 5-24
Configuration Menu............................................................................................. 5-25
Database....................................................................................................... 5-25
System .......................................................................................................... 5-29
Interface Control ........................................................................................... 5-40
History Data View/Edit ................................................................................. 5-41
Customer Defined Displays.................................................................................. 5-45
iv
WBPEEUI350003B0
Table of Contents (continued)
Page
SECTION 6 - SOFTWARE DETAILS...........................................................................................6-1
INTRODUCTION ...........................................................................................................6-1
SIMULATED KEYS DEFINITION RECORD ....................................................................6-1
AUTOMATING VAX START-UP......................................................................................6-3
Open Data Management Server Start-Up After a Boot ............................................6-3
Adding ODMS Functions to a User Session Manager Menu ....................................6-4
Operator Console Start-Up on User Log-In .............................................................6-5
Operator Console Start-Up After a Boot ..................................................................6-6
AUTOMATING HP START-UP ........................................................................................6-7
Open Data Management Server Start-Up After a Boot ............................................6-7
GCS Console Start-Up on User Log-In ....................................................................6-8
GCS Console Start-Up on System Boot or Log-Out .................................................6-8
TCP/IP Communications to OSM Modules .............................................................6-9
ODMS and ICI Interface Communication Files ........................................................6-9
WINDOWS CLIENT AUTOMATIC START-UP .................................................................6-9
GUIDELINES FOR CREATING CLIENT PROGRAMS ....................................................6-10
OPEN DATA MANAGEMENT SERVER DATABASE FILE FORMAT ...............................6-10
QUALITY PRIORITIES.................................................................................................6-10
OFF-LINE INTERFACE TESTING ................................................................................6-12
PERMANENT LICENSE INSTALLATION ......................................................................6-12
SECTION 7 - ERROR MESSAGES AND RECOVERY ...............................................................7-1
INTRODUCTION ...........................................................................................................7-1
SYSTEM MESSAGES....................................................................................................7-1
ERROR MESSAGES ...................................................................................................7-17
APPENDIX A - QUICK REFERENCE......................................................................................... A-1
INTRODUCTION .......................................................................................................... A-1
VAX/VMS SYSTEM ..................................................................................................... A-1
HP-UX SYSTEM .......................................................................................................... A-7
PERSONAL COMPUTER .............................................................................................A-11
MENU COLORS AND CONVENTIONS .........................................................................A-14
APPENDIX B - HARDWARE CONFIGURATION....................................................................... B-1
INTRODUCTION .......................................................................................................... B-1
INSTALLING THE SOFTWARE KEY ............................................................................. B-1
NTMP01 Termination Unit .................................................................................... B-1
NIMP01 Termination Module ................................................................................. B-1
ICI INTERFACE CONFIGURATION............................................................................... B-3
APPENDIX C - PASSWORD SECURITY ................................................................................... C-1
INTRODUCTION .......................................................................................................... C-1
DEFAULT DISPLAY SECURITY .................................................................................... C-1
APPENDIX D - CONSOLE ALARM CONFIGURATION ............................................................ D-1
INTRODUCTION .......................................................................................................... D-1
SYSTEM GLOBAL ALARM ACKNOWLEDGE/SILENCE ................................................ D-1
PROCESS TAGS .......................................................................................................... D-2
N90STA TAGS ............................................................................................................. D-2
WBPEEUI350003B0
v
®
Table of Contents (continued)
Page
APPENDIX E - ODMS DATABASE............................................................................................ E-1
INTRODUCTION ..........................................................................................................E-1
TAG TYPES..................................................................................................................E-1
QUALITY STATUS DESCRIPTIONS...............................................................................E-2
OPEN DATA MANAGEMENT SERVER DATABASE FIELDS ...........................................E-2
vi
WBPEEUI350003B0
List of Figures
No.
4-1.
4-2.
4-3.
5-1.
5-2.
5-3.
5-4.
5-5.
5-6.
5-7.
5-8.
5-9.
5-10.
5-11.
5-12.
5-13.
5-14.
5-15.
5-16.
5-17.
5-18.
5-19.
5-20.
5-21.
5-22.
5-23.
5-24.
5-25.
5-26.
5-27.
5-28.
5-29.
5-30.
5-31.
5-32.
5-33.
5-34.
5-35.
B-1.
B-2.
B-3.
WBPEEUI350003B0
Title
Page
Database Configuration Tag Selection Screen .........................................................4-3
Tag Configuration Screen .......................................................................................4-4
Tag Specification Configuration Screen ..................................................................4-6
Summaries and Event Logs Screen ........................................................................5-4
Tag Summary Screen .............................................................................................5-5
User Change Log Screen ........................................................................................5-5
Tag Operating Parameter Window ..........................................................................5-7
View History Data Screen .......................................................................................5-9
Tag List Screen (View History Data) ......................................................................5-10
Tag History Summary Screen ...............................................................................5-11
Tag Specification History Detail Window...............................................................5-11
Tag Exception History Detail Window ...................................................................5-12
Operating Parameters Tag Selection Screen ..........................................................5-13
Tag List Screen (Operating Parameters) ................................................................5-14
ICI Status Screen .................................................................................................5-17
ICI Performance Screen........................................................................................5-18
Message Output Display Screen ...........................................................................5-20
ASCII Text Message Detail Window.......................................................................5-21
ANSI Standard SQL Query Screen ........................................................................5-22
Database Configuration Tag Selection Screen .......................................................5-26
Tag List Screen (Database Configuration) .............................................................5-26
Tag Configuration Screen .....................................................................................5-27
Tag Specification Configuration Screen ................................................................5-28
Database Snapshots Screen .................................................................................5-30
Database Snapshot Detail Screen ........................................................................5-30
Disk History File Screen .......................................................................................5-32
Disk History File Detail Window (Page One) ..........................................................5-32
Disk History File Detail Window (Page Two) ..........................................................5-33
Engineering Units Screen.....................................................................................5-34
Logic State Descriptors Screen .............................................................................5-35
Global Switches Screen ........................................................................................5-36
Define ICI Interface Screen ...................................................................................5-37
Set System Time Screen .......................................................................................5-39
INFI 90 OPEN Interface Control Screen ................................................................5-40
Edit History Data Screen......................................................................................5-41
Tag List Screen (History Data View/Edit) ..............................................................5-43
Tag History Summary Screen ...............................................................................5-43
Exception History Detail Window (View and Edit) .................................................5-44
NIMP01 Assignments and Jumper Settings ........................................................... B-2
NTMP01 Assignments and Jumper Settings .......................................................... B-2
INICT03 Module Board Layout .............................................................................. B-4
vii
®
List of Tables
No.
1-1.
1-2.
1-3.
1-4.
1-5.
1-6.
3-1.
3-2.
5-1.
5-2.
5-3.
6-1.
7-1.
7-2.
7-3.
7-4.
7-5.
7-6.
A-1.
A-2.
A-3.
A-4.
B-1.
B-2.
B-3.
B-4.
C-1.
E-1.
E-2.
viii
Title
Page
Server Platforms .................................................................................................... 1-2
Client Platforms..................................................................................................... 1-2
GCS Client/ODMS Server Configurations .............................................................. 1-3
Remote API Applications/ODMS Server Configurations .......................................... 1-3
Reference Documents ............................................................................................ 1-7
Glossary of Terms and Abbreviations ..................................................................... 1-9
Time Zones.......................................................................................................... 3-21
Configuration Options (PC Client to ODMS Server) .............................................. 3-60
Trended Attributes (Ad Hoc Trending) .................................................................... 5-8
Field Definitions (ICI Status Screen) .................................................................... 5-17
Field Definitions (ICI Performance Screen) ........................................................... 5-18
Key Definition Records (Example) .......................................................................... 6-2
ODMS System and Error Messages ........................................................................ 7-1
ODMS Error Messages......................................................................................... 7-17
ICI Error Codes ................................................................................................... 7-23
Sub Level Error Codes ......................................................................................... 7-26
Message Driver Error Codes................................................................................. 7-27
Device Driver Error Codes ................................................................................... 7-29
VAX/Open VMS and Alpha AXP System Keyboard Mapping ................................... A-1
HP-UX System Keyboard Mapping ......................................................................... A-8
Personal Computer Keyboard Mapping ................................................................ A-11
GCS Console Screen Color Definitions ................................................................. A-15
Dipswitch Settings (UMB01, INICT03 Module) .......................................................B-3
Dipswitch Settings (LMB2, INICT03 Module) ..........................................................B-3
Dipswitch Settings (LLB3, INICT03 Module) ...........................................................B-3
Dipswitch Settings (UUB0, INICT03 Module) ..........................................................B-3
ODMS Default Security Levels ...............................................................................C-2
INFI 90 OPEN Tag Types ........................................................................................E-1
Open Data Management Server Database Fields ....................................................E-4
WBPEEUI350003B0
Trademarks and Registrations
Registrations and trademarks used in this document include:
™ Alpha
Trademark of Digital Equipment Corporation.
™ AXP
Trademark of Digital Equipment Corporation.
™ CALC
Trademark of Aspen Technology, Incorporated.
™ DA
Trademark of Aspen Technology, Incorporated.
™ DEC
Trademark of Digital Equipment Corporation.
® DECnet
Registered trademark of Digital Equipment Corporation.
™ DESK
Trademark of Aspen Technology, Incorporated.
™ Ethernet
Trademark of Xerox Corporation.
™ GCS
Trademark of Aspen Technology, Incorporated.
® HP
Registered trademark of Hewlett-Packard Company.
® HP9000
Registered trademark of Hewlett-Packard Company.
® HP-UX
Registered trademark of Hewlett-Packard Company.
® INFI 90
Registered trademark of Elsag Bailey Process Automation.
® INFI-NET
Registered trademark of Elsag Bailey Process Automation.
® Intel
Registered trademark of Intel Corporation.
® Microsoft
Registered trademark of Microsoft Corporation.
™ MOTIF
Trademark of Open Software Foundation, Incorporated.
® MS
Registered trademark of Microsoft Corporation.
™ Open VMS
Trademark of Digital Equipment Corporation.
® ORACLE
Registered trademark of Oracle Corporation.
™ PATHWORKS
Trademark of Digital Equipment Corporation.
™Q
Trademark of Aspen Technology, Incorporated.
™ VAX
Trademark of Digital Equipment Corporation.
™ VMS
Trademark of Digital Equipment Corporation.
® SequeLink
Registered trademark of Techgnosis International, Incorporated.
® SETCIM
Registered trademark of Aspen Technology, Incorporated.
™ SQLplus
Trademark of Aspen Technology, Incorporated.
™ Windows
Trademark of Microsoft Corporation.
™ X Windows
Trademark of Massachusetts Institute of Technology.
™ @aGlance/IT
Trademark of Intuitive Technology Corporation.
WBPEEUI350003B0
ix
SECTION 1 - INTRODUCTION
OVERVIEW
The Open Data Management Server (ODMS) is a software platform for collection, organization, integration and application of
real-time plant data. Industry standard application programming interfaces (API) such as dynamic data exchange (DDE),
structured query language (SQL), or an open data management
server specific application programming interface can be used
to allow open access to the open data management server. An
open data management server user can access open data management server data from a local client or a remote client using
a TCP/IP or DECnet network.
The open data management server provides data management
and historization, client/server based graphical user interfacing, spreadsheet functions for calculations, SPC/SQC functions, SQL query functions, event logging, and report
generation. Additionally, the open data management server
provides the capability to join its database to external relational database files on a local or remote platform and to interface with Windows applications through a DDE or SQL
interface. The open data management server operates on multiple client/server platforms and operating systems.
INTENDED USER
This manual is an open data management server user manual.
The users are intended to be engineering and programming
personnel, plant operators, plant managers and supervisors,
and corporate management and personnel (such as MIS personnel).
Engineers and programmers who maintain, configure, and
modify the system require the highest level of system access.
Installation of SETCIM®, open data management server and
related server software requires an individual with system
administrator experience in the applicable operating system
(Open VMS or HP-UX).
Plant operators require access to the system information that
provides them with the real time and historical data required
in the daily operation of the plant. This information is available
in reports, summary displays, ad hoc queries, etc. Generally,
plant operators can function with a lower security level access
than plant engineers.
Management personnel are usually restricted to a view only
mode, which allows them to view and analyze data and generate reports.
WBPEEUI350003B0
OVERVIEW
1-1
INTRODUCTION
®
SYSTEM DESCRIPTION
The open data management server features are layered on
SETCIM software which provides a flexible client/server architecture. Tables 1-1 through 1-4 list available ODMS client/
server architectures and operating systems.
Table 1-1. Server Platforms
Platform
Operating System
DEC VAX
Open VMS
DEC Alpha AXP
Open VMS
HP9000
HP-UX
Table 1-2. Client Platforms
Platform
DEC VAX
Operating System
Open VMS
DEC Alpha AXP
Open VMS
HP9000
HP-UX
Intel® 486
MS Windows (3.1 and 95)
A VAX/Open VMS, Alpha AXP/Open VMS or HP-UX server can
pass information to and from an INFI 90® OPEN system locally
via an INFI-NET to Computer Interface (INICI03). Server platforms can communicate via RS-232-C or SCSI protocols when
interfacing to the INFI 90 OPEN system. If an INFI-NET to
Ethernet™ Server (INOSM01) is available, communication to
the INFI-NET system can be over a TCP/IP or DECnet network.
Table 1-3 lists GCS™ client to open data management server
communication protocol configurations. Table 1-4 lists ODMS
application client to ODMS server communication protocol
configurations. A server can link to multiple loops or multiple
servers can link to one loop.
SOFTWARE DESCRIPTION
Open data management server is layered on a base SETCIM
software package which includes, SQLplus, base SETCIM,
GCS client, and GCS server. The SQLplus layered product provides ANSI standard SQL query capabilities. The open data
management server layer provides user friendly screens for tag
history summaries, ad hoc SQL queries, ad hoc trending, event
logs, history data manipulation, on-line database generation,
ICI interface performance, status and control, and disk history
archiving. All functions are accessible via the mouse or keyboard.
The base software package (SETCIM) has optional layered
products that provide utilities and tools for customizing open
SYSTEM DESCRIPTION
1-2
WBPEEUI350003B0
INTRODUCTION
data management server operation. This permits a user to
write programs that interface to the open data management
server database using SQL queries. The Q product provides
statistical analysis and alarming of operating data in the real
time database. CALC is a spreadsheet feature that can access
real time open data management server database fields.
Table 1-3. GCS Client/ODMS Server Configurations
Communication
Protocol
DECnet
Local
TCP/IP
ODMS Server
Operating System
GCS Client Operating System
Open VMS
Open VMS, Windows1
HP-UX
N/A
Open VMS
Open VMS
HP-UX
HP-UX
Open VMS
Open VMS, HP-UX,
Windows
HP-UX
HP-UX, Open VMS, Windows
NOTE: 1. Requires DECnet Pathworks® software.
Table 1-4. Remote API Applications/ODMS Server
Configurations
Communication
Protocol
DECnet
Local
TCP/IP
ODMS Server
Operating System
Application Client
Operating System
Open VMS
N/A
HP-UX
N/A
Open VMS
Open VMS
HP-UX
HP-UX
Open VMS
Open VMS, HP-UX
HP-UX
Open VMS, HP-UX
FEATURES
WBPEEUI350003B0
•
Exception report processing uses computer resources more
efficiently, thus reducing hardware costs.
•
On-line database tag configuration enables database
changes to be made while the system is operating, reducing
downtime.
•
Client/server architecture allows multiple distributed consoles to access numerous databases, distributing both real
time data and computer system loading.
•
Application program interfacing is straightforward, thus
lowering development costs.
•
Industry specific applications provide immediate benefits
by minimizing raw material usage, tracking product quality
FEATURES
1-3
INTRODUCTION
®
on-line, identifying critical down-time problems, and other
industry specific solutions.
•
The ODMS interface supports all INFI 90 OPEN tag types
(except trend block and text selector), redundant INICI03
INFI-NET to Computer Interfaces (ICI) or INOSM01 Open
System Manger, and controlled multitask access to the
INICI03 or INOSM01 interfaces.
INSTRUCTION CONTENT
Introduction
Gives an overview of the open data management server, lists
hardware and software requirements, features, nomenclatures
and reference documents.
Description and
Operation
Provides a detailed description of how the open data management server operates.
Installation
Explains how to install the open data management server software on a VAX, Alpha AXP, or HP9000 computer, and a GCS
client on a VAX, Alpha AXP, HP9000, or personal computer.
Configuration
Explains how to load and configure the open data management
server database and provides a database tag configuration
example.
Operating Procedures
Provides instructions on how to operate the open data management server.
Software Details
Covers defining a simulated keys definition record, how to
setup GCS consoles to start-up automatically on log-in, using
C program include files, setting alarm priorities, off-line interface testing, and permanent license installation.
Error Messages and
Recovery
Lists open data management server configuration and operation error messages and recovery steps.
Quick Reference
Contains open data management server keyboard guides for
VAX/Open VMS systems, Alpha AXP/Open VMS systems,
HP-UX systems and personal computers. Additionally, this
appendix contains a table of open data management server
screen color definitions.
Hardware Configuration
Provides installation instructions for the software key (dongle)
that is shipped with the open data management server software package and the required termination unit or module
jumper settings and required interface module dipswitch settings.
Password Security
Lists the default security levels of all open data management
server screens and explains how to assign or modify screen
security levels.
INSTRUCTION CONTENT
1-4
WBPEEUI350003B0
INTRODUCTION
Console Alarm
Configuration
Contains instructions on how to configure the OIS global alarm
acknowledge and silence functions.
ODMS Database Fields
Lists open data management server database field definitions
and other information that are required when configuring a
database such as the INFI 90 OPEN tag types that are supported, default values, and database field format.
REQUIREMENTS
The following details the hardware and software requirements
for open data management servers and clients.
Hardware
An open data management server VAX-based system and client
platform requires:
•
A DEC VAX system.
•
A four millimeter digital audio tape (DAT) drive (required for
software installation).
•
An RS-232-C or SCSI port if using an INICI03 INFI-NET to
Computer Interface. A TCP/IP or DECnet network connection if using an INOSM01 INFI-NET to Ethernet Server.
A open data management server Alpha AXP-based system and
client platform requires:
•
A DEC Alpha system.
•
A four millimeter digital audio tape (DAT) drive (required for
software installation).
•
An RS-232-C or SCSI port if using an INICI03 INFI-NET to
Computer Interface. A TCP/IP or DECnet network connection if using an INOSM01 INFI-NET to Ethernet Server.
A open data management server HP-based system and client
platform requires:
•
An HP9000 system.
•
A four millimeter DAT drive (required for software installation).
•
An RS-232-C or SCSI connection to an INICI03 INFI-NET to
Computer Interface. A TCP/IP network connection if using
an INOSM01 OPEN Data Manager.
A personal computer client terminal requires:
WBPEEUI350003B0
REQUIREMENTS
1-5
INTRODUCTION
®
•
A 486DX-based computer minimum.
•
At least 8 megabytes of memory for GCS console and MS®
Windows software.
•
At least 40 megabytes of hard disk drive space.
Memory requirements for VAX, Alpha AXP, and HP9000 servers and client platforms are dependent upon the SETCIM software license size and tag configuration. Hard disk drive space
requirements are based on the SETCIM software license size,
tag configuration and tag event summary and historian
requirements. Contact your Elsag Bailey representative for
help on determining memory and disk space requirements.
Software
DEC VAX server software requirements are:
•
The open data management server software package
(includes ODMS client).
•
An Open VMS 6.1 operating system or higher.
•
MOTIF™ 1.2 software.
Alpha AXP server software requirements are:
•
The open data management server software package
(includes ODMS client).
•
An Open VMS 6.2 operating system or higher.
•
MOTIF 1.2 software.
HP9000 server software requirements are:
•
The open data management server software package
(includes one ODMS client).
•
An HP-UX 9.x.x operating system.
•
MOTIF 1.2 software.
VAX/Open VMS client software requirements are:
REQUIREMENTS
1-6
•
The ODMS client software.
•
A VMS 6.1 operating system or higher.
•
MOTIF 1.2 software.
WBPEEUI350003B0
INTRODUCTION
Alpha AXP\Open VMS client software requirements are:
•
The ODMS client software.
•
An Open VMS 6.2 operating system or higher.
•
MOTIF 1.2 software.
HP-UX client software requirements are:
•
The ODMS client software.
•
An HP-UX 9.x.x operating system.
•
MOTIF 1.2 software.
Personal computer client software requirements are:
•
Microsoft Windows 3.1 or Windows 95.
•
TCP/IP network software (for HP®, VAX, or Alpha AXP
interface), or DECnet (for VAX and Alpha AXP interface).
•
The ODMS client software.
•
An X Windows™ software package (optional).
NOTE: Some open data management server functions cannot be
accessed via a personal computer client without X Windows (i.e.,
utilities and application). Application products which cannot be
accessed without X Windows are SQLplus and CALC.
REFERENCE DOCUMENTS
Table 1-5 lists the SETCIM manuals that are included with the
open data management server software package and other useful reference documents.
Table 1-5. Reference Documents
Number
Title
I-E96-610
INFI-NET to Computer Interfaces (INICI01/03)
I-E96-630
Open System Manager (INOSM01)
I-E96-729-001
Open Data Management Server
WBPCEUI900001A0
SETCIM User’s Manual
SETCIM Developer’s Manual
SETCIM Data Base Management Tool User’s
Manual
WBPEEUI350003B0
WBPCEUI900002A0
SETCIM VAX/VMS System Specifics Manual
WBPCEUI900003A0
SETCIM HP-UX System Specifics Manual
REFERENCE DOCUMENTS
1-7
INTRODUCTION
®
Table 1-5. Reference Documents
Number
(continued)
Title
WBPCEUI900004A0
SETCIM Open VMS AXP System Specifics
Manual
WBPCEUI900006A0
SETCIM Library Reference Manual
WBPCEUI900008A0
SETCIM SQLplus User’s Manual
WBPCEUI900009A0
Layered Application Q™ Users Manual
WBPCEUI900010A0
Layered Application CALC Users Manual
WBPCEUI900011A0
Layered Application GCS 2.5A Users Manual
WBPCEUI900013A0
Layered Application @aGlance Server Users
Manual for Infoplus-X and SETCIM
WBPCEUI900020A0
Layered Application @aGlance/IT™ Installation
and Operations Manual
WBPCEUI900014A0
Layered Application @aGlance/IT Client Users
Manual
WBPCEUI900015A0
Layered Application Distributed Applications Reference Manual
DOCUMENT CONVENTIONS
This document uses standard text conventions throughout to
represent keys, fixed and variable user data inputs, filenames
and display items. The following conventions apply:
y
key
Example:
Display Item
Examples:
File Name
Example:
BOLD
Identifies a keyboard key.
Press
Enter
Any item that displays on the screen appears as italic text.
ODMS OPERATIONS (menu selection)
Tag Definition (display title)
Invalid format (message)
Enter password: (prompt)
File names and file extensions appear as bold-italic text.
SETUP.EXE
User input that must be entered exactly as shown.
italic
User input that is a variable parameter; user supplies actual
term or value.
[]
User input that is optional. Text within the brackets still follows the standard conventions.
Examples:
$ @SYS$UPDATE:VMSINSTALL * source, Username, Password, filename.ex
DOCUMENT CONVENTIONS
1-8
WBPEEUI350003B0
INTRODUCTION
GLOSSARY OF TERMS AND ABBREVIATIONS
Table 1-6 contains those terms and abbreviations that are
unique to Elsag Bailey or have a definition that is different
from standard industry usage.
Table 1-6. Glossary of Terms and Abbreviations
Term
Definition
Engineering unit
Unit of measure of the process value (tag).
Engineering unit
descriptor
A description of an engineering unit used in the console configuration (tag
list). Deg F, GPM, and lb/hr are some examples.
Function code (FC)
An algorithm which manipulates specific functions. These functions are linked
together to form the control strategy.
GCS
Graphic Console System.
ICI
INFI-NET to Computer Interface.
INFI-NET
Advanced data communication highway.
Logic state descriptor
A character string which is associated with the state of a digital point.
Node
A point of interconnection to a network.
ODMS
Open Data Management Server.
WBPEEUI350003B0
GLOSSARY OF TERMS AND ABBREVIATIONS
1-9
SECTION 2 - DESCRIPTION AND OPERATION
INTRODUCTION
This section gives a brief description of the Open Data Management Server (ODMS). The open data management server is a
client/server based software product for collection, organization, integration and application of real-time plant data. An
industry standard application programming interface (API)
such as dynamic data exchange (DDE) or structured query language (SQL) and an open data management server specific
application programming interface can be used by Elsag Bailey
or other industry application programs to access data from the
open data management server. An ODMS client can access
open data management server data from a local or remote open
data management server using an Ethernet (TCP/IP or DECnet) communication network.
The open data management server provides data management
and historization, graphical user interface spreadsheet functions for calculations, SPC/SQC functions, batch reporting,
SQL query functions, alarm logging, and report writing. In
addition, the open data management server with SQLplus and
other optional relational database software provides the capability to join its database to external relational database files
on a local or remote platform and to interface with Windows
applications through an optional (DDE) interface. The open
data management server operates on multiple client/server
platforms and operating systems.
HARDWARE DESCRIPTION
There are numerous hardware configuration choices available
for implementing open data management server. Server platforms supported are:
•
•
•
DEC VAX (Open VMS operating system).
Alpha AXP (Open VMS operating system).
HP9000 (UNIX operating system).
Client platforms supported are:
•
•
•
•
WBPEEUI350003B0
DEC VAX (Open VMS operating system).
Alpha AXP (Open VMS operating system).
HP9000 (UNIX operating system).
486-based personal computer (or higher) with Windows 3.1
or Windows 95 installed.
INTRODUCTION
2-1
DESCRIPTION AND OPERATION
®
Network communication protocols for graphic console system
client terminals are:
•
•
Ethernet (TCP/IP).
DECnet (VAX only).
Configurations
A number of hardware configurations can be implemented
because of the SETCIM and open data management server layered software structure.
•VAX/Open
VMS and Alpha AXP/Open VMS servers can link to
an INFI 90 OPEN system (INFI-NET® communication network) via an INFI-NET to computer (ICI) interface
(RS-232-C or SCSI link). VAX/Open VMS and Alpha AXP/
Open VMS servers can also link to an INFI 90 OPEN cabinet via an INOSM01 Open System Manager and a TCP/IP
or DECnet network. Linking to multiple INFI 90 OPEN
loops with multiple interfaces is possible.
•
VAX/Open VMS and Alpha AXP/Open VMS servers can
link to other servers and clients via Ethernet TCP/IP
(HP-UX, VAX/Open VMS, or Alpha AXP/Open VMS) or
DECnet (VAX/Open VMS and Alpha AXP/Open VMS only)
networks.
•
HP-UX servers can link to an INFI 90 OPEN system
(INFI-NET communication system) via an INFI-NET to computer (ICI) interface (RS-232-C or SCSI link). HP-UX servers can also link to an INFI 90 OPEN cabinet via an
INOSM01 INFI-NET to Ethernet Server and a TCP/IP network. Linking to multiple INFI 90 OPEN loops with multiple
interfaces is possible.
•
HP-UX servers can link to other servers and clients via
Ethernet TCP/IP (HP-UX or Open VMS).
•
Personal computer clients using Windows can be linked to
servers on an Ethernet TCP/IP network (also DECnet network for VAX/Open VMS and Alpha AXP/Open VMS servers). These client platforms can be set up to operate as GCS
terminals or they can be used to obtain server data for Windows applications such as Excel and Lotus spreadsheets
using optional @aGlance/IT software.
•
VAX/Open VMS and Alpha AXP/Open VMS systems and
HP-UX systems can also be set up as client terminals with
a GCS graphical link or X windows.
HARDWARE DESCRIPTION
2-2
WBPEEUI350003B0
DESCRIPTION AND OPERATION
INFI 90 OPEN Interface
The INFI 90 OPEN interface consists of an INFI-NET to Computer Interface (INICI03). Refer to the INFI-NET to Computer
Interface (INICI03) instruction for a physical description of
the ICI interface (refer to Table 1-5 for document numbers).
The INOSM01 Open System Manager is an optional INFI 90
OPEN interface. Refer to the Open System Manager
(INOSM01) instruction for a physical description of the interface.
SYSTEM DESCRIPTION
The open data management server operates on multiple platforms and operating systems. SETCIM software provides the
client/server technology foundation that the open data management server utilizes to provide open access to Elsag Bailey
INFI 90 OPEN system data.
The open data management server stores historical tag data
and provides access to this data by other applications. Industry standard application programming interfaces such as DDE
and SQL are used by Elsag Bailey programmed applications
and third party programmed applications to access data from
the open data management server database. The open data
management server expands upon a third party information
management system (SETCIM). Elsag Bailey layers applications onto this software product to produce the open data
management server.
ODMS SYSTEM OPERATION
The open data management server is a user-friendly database
management tool. The open data management server database
can be configured on-line or off-line. On-line system setup and
configuration is done through easy to use (point and click with
a mouse) configuration displays.
The open data management server operates in a manner that
requires the user to make a minimum number of configuration
decisions. Because it is layered on the SETCIM system, it is a
configured application package which allows for flexibility in
incorporating site specific requirements. For example, while
the SETCIM database is highly configurable, the open data
management server database has all INFI 90 OPEN tag types
and all database tag attributes predefined. The database
design is such that future tag types (user defined) and
attributes can be easily added to the system.
Tag history summaries are viewed through user friendly displays. Specification data and exception data for every tag can
be viewed and edited. Tag summaries are arranged by tag type
groups. Event logs are provided for historical data and user
WBPEEUI350003B0
SYSTEM DESCRIPTION
2-3
DESCRIPTION AND OPERATION
®
modifications to the configuration. Events include alarms,
boolean state changes, and actions by the user which include
enabling or disabling tag data access, manual substitution of
attributes and enabling or disabling tag messages.
ICI Interface
The ICI interface is embedded within the open data management server. This program provides access to INFI 90 OPEN
exception data, general tag data I/O functions and a time synchronization function. It also accesses the open data management server database through SETCIM furnished API routines.
The ICI interface exception data access function populates the
open data management server database with real-time
dynamic data. Additionally, the ICI interface provides the capability of outputting real-time data from the open data management server database to the INFI 90 OPEN system.
Time Synchronization
Time synchronization setup is done via the open data management server. Time synchronization can be configured by the
user to be driven by the open data management server software or by the INFI 90 OPEN system. If the INFI 90 OPEN system synchronizes time, the open data management server
receives the INFI 90 OPEN time messages and updates its
clock. If the open data management server synchronizes the
time, a time synchronization message is transmitted to the
INFI 90 OPEN system periodically or whenever a system time
setting is made.
ICI Data Gathering
ICI data access function updates the open data management
server periodically to obtain exception report data and other
messages (such as INFI 90 OPEN module status and module
configuration changes). The data access function interprets
these exception reports and messages and populates the associated open data management server dynamic real-time database with the data received. This includes such items as value,
quality, station status, ASCII string values, etc. Static open
data management server database information, defined in the
INFI 90 OPEN block specifications, is obtained by the ICI interface and by exception messages on interface start-up, and populated into the open data management server static tag
attribute database.
The open data management server supplies a display function
for ICI interface activity (including exceptions per second from
each interface, loading, and data access function loading). This
data is also made available in database tags and is available
ODMS SYSTEM OPERATION
2-4
WBPEEUI350003B0
DESCRIPTION AND OPERATION
via an application programming interface. The open data management server allows manual ICI interface restarts and indicates the status of the interfaces. ICI interfaces are
automatically restarted when an off-line status is detected or
when they recover from a failure.
The data access function provides a selectable option to time
stamp incoming data with open data management server time
or to use the INFI 90 OPEN time stamps contained within the
INFI 90 OPEN messages. This option is selectable on an interface basis. When the INFI 90 OPEN time stamp option is chosen, the millisecond time stamp is converted to tenth of a
second time stamp supported by the open data management
server. However, the millisecond offset (i.e., 1/100 and 1/1000
second) is also stored as a separate database attribute. This
attribute is historically archived in the open data management
server database with the tenth of a second time stamp.
The data access function is capable of recognizing when INFI
90 OPEN communication to or from an ICI interface is lost and
changes the qualities of affected open data management server
database tags to indicate a loss of communication. Additionally, a message can be generated to the open data management
server event/alarm log indicating the ICI number and status.
When communications are restored, the open data management server insures that all database values and states represent the current state of the process and system. A message is
generated to the open data management server event/alarm
log when ICI communications are restored.
The data access function prevents data loss when the data
input from the ICI interfaces is at a rate that cannot be accommodated by the open data management server. The data access
function can buffer several minutes of data. The data access
function can feed data to the open data management server
database as quickly as the open data management server database is capable of receiving it.
A single open data management server can support multiple
data access functions. The data access function can share ICI
interfaces with other applications, but sharing ICI interfaces
can affect performance.
The data access function allows multiple ICI device drivers
(and ICI interfaces) to be configured for redundant operation
(hot standby). The built in capability of the INFI 90 OPEN interface routines and ICI device drivers to handle redundancy is
utilized. Failure recovery is automatic. A failure of any ICI
interface results in a message being sent to the data access
function. This message is sent to the event log in the open data
management server.
WBPEEUI350003B0
ODMS SYSTEM OPERATION
2-5
DESCRIPTION AND OPERATION
®
SETCIM OPERATION
SETCIM software provides a number of features which are
available through the open data management server including:
data management and historization, client/server based
graphical user interfacing, spreadsheet capability to perform
sophisticated calculations (CALC), SPC/SQC capability (Q),
SQL Query capability (SQLplus), alarming capability (base
SETCIM), and report writing capability (CALC, SQLplus,
@aGlance/IT, and DESK™). In addition, SETCIM software provides capability to join its database to external relational database files on either local or remote platforms and capability to
interface with Windows applications through @aGlance/IT
software.
NOTE: Some of the software products mentioned are optional.
Configurable Data Structures
Data structures within the database can be modified two ways.
First, the repeat areas in an individual data record may be
expanded or contracted while the system is in operation. The
repeat areas contain historical values and time stamps for
each point. Data may be stored in random access memory
(RAM) or on disk at the option of the user. For each point in the
open data management server database, the user can decide
how many historical values to retain and whether to retain
these on disk, in RAM memory, or some combination of both.
The user has the ability to adjust the way historical values are
stored so that changing circumstances can be accommodated
without any interruption of normal open data management
server activities.
The second method involves the creation of custom definition
records. A definition record defines the structure or template
that other records are built against. It specifies the fields
included, their order in the record and the types of processing
available on each field. It defines both fixed and repeat areas
for each record. All data records defined against an individual
definition record will have the same types of fixed and repeat
areas, although the data in each field may differ. SETCIM software allows new definition records to be defined by the user or
developer.
Event Driven Processing
Acquiring, processing, and displaying data is event driven.
Therefore, data is processed internally and displayed on the
graphic console system to provide immediate notification of a
system change. Immediate display update is achieved using
dynamic GCS display fields instead of fields that are updated
on a poll. In some applications, scheduling tasks at regular
intervals may be desirable. With open data management server
SETCIM OPERATION
2-6
WBPEEUI350003B0
DESCRIPTION AND OPERATION
event driven data processing, a scheduling parameter can be
setup to increment periodically.
Client/Server Architecture
Open data management server software provides a flexible
graphic console system (GCS) client/server architecture that
eliminates problems in response time and resource problems.
ODMS database files reside on a host that acts as a data server
for GCS clients. The GCS display files can reside on the local
client or on the server. When the display files reside locally,
only data, not graphics are transmitted over the communication link. Additionally, data is transmitted to objects that are
updated only when a value changes in the database. This
architecture produces rapid response time because it is faster
to access graphic displays from a local disk than from a network system. There is less network traffic because only event
driven data is sent, not graphic displays. When display files
reside on the data server, any device that can support X Windows and TCP/IP or DECnet can be used as a GCS client.
SQL Database Query
SQLplus is a base SETCIM product that provides for ANSI
standard SQL queries into any data in the database. It can
look at historical data, current (real-time) data, and configuration data. This is an X Window-based interface that provides
fast ad hoc access to information. When a query is developed it
can be stored as a record in a SETCIM database and executed
by an operator action or by a database event. Stored queries
can be tied to a graphic display and executed as menu options
by users who are unfamiliar with SQL syntax. The results of an
SQL query can be displayed, written to files, or written to database records. A GCS screen can be used to enter an SQL query.
Real-Time and Historical Data
Historical data and real-time data are stored in the same
record, resulting in the integration of current and real-time
data. The repeat areas of a record store historical values and
time stamps. The number of repeat areas is determined by the
user and can be modified on-line. All of the SETCIM database
management tools (Q, SQLplus, and CALC) are compatible
with both historical and real-time data.
Database Access Subroutines
The open data management server software provides an open
database by including a library of optional database access
routines and remote procedure calls. These subroutines are
used to develop interfaces to other programs or devices. SQL
based routines are also included.
WBPEEUI350003B0
SETCIM OPERATION
2-7
SECTION 3 - INSTALLATION
INTRODUCTION
This section contains software installation procedures for
installing SETCIM and the Open Data Management Server
(ODMS) software on the following systems:
•
•
•
Alpha AXP/Open VMS.
VAX/Open VMS.
HP-UX.
It also includes instructions for installing GCS clients on the
following systems:
•
•
•
•
Alpha AXP/Open VMS.
VAX/Open VMS.
HP-UX.
Personal computer with MS Windows (3.1 or 95).
The SETCIM software installation requires a software license
code. Refer to the release documentation for details on obtaining the required license code. Software installation also
requires a password. This password is supplied with the software package. Installation will fail without this password.
All INFI-NET interface connections require a software key (dongle), otherwise any installed software will not function. A software key is provided with the open data management server
software package for each interface connection purchased.
Refer to Appendix B for information on installing the software
key. It is recommended that the software key be installed and
all INFI-NET to Computer Interface (ICI) hardware be configured prior to software installation.
INSTALLATION (OPEN VMS OPERATING SYSTEM)
This section covers the following installation stages:
•
General VMS requirements including modifying VMS operating system parameters.
•
Installing the base SETCIM software and the open data
management server software.
•
Installing the GCS client and the open data management
server client software.
NOTE: The procedures in this section apply to both Alpha AXP and
VAX installations. Procedural differences are noted as required.
WBPEEUI350003B0
INTRODUCTION
3-1
INSTALLATION
®
VMS System Requirements
The following hardware and software are required to install
and operate the open data management server software package:
•
A VAX system with at least an Open VMS 6.1 operating system or a DEC Alpha system with at least an Open VMS 6.2
operating system.
•
MOTIF version 1.2 software.
•
Sufficient system memory (16 Mbytes of memory minimum). Contact Elsag Bailey for specific memory requirements.
•
60 Mbtyes of disk space on target disk drive. This does not
include any additional space required for historical data
storage. Contact Elsag Bailey for specific memory requirements.
•
30 Mbytes of free disk space on the system disk. This disk
space is required temporarily. It is used by the installation
process.
If installing and using a remote GCS client the server should
include at least one of the following:
•
DECNET_VAX for Open VMS 6.0.
- or -
•
TCPware for VMS or Open VMS, version 4.0 or higher.
- or -
•
TCP/IP services for VMS or Open VMS, version 2.0B or
higher.
If using TCPware, make sure the USC$IPC.OLB library is in
the SYS$LIBRARY path.
Software is distributed on digital audio (DAT) tape, therefore an
appropriate tape drive is required. Installation of these software packages requires a familiarity with the use of the tape
drive.
It is recommended that the system manager perform any
required adjustments of system setup parameters (SYSGEN). A
knowledge of the VMS operating system is required.
INSTALLATION (OPEN VMS OPERATING SYSTEM)
3-2
WBPEEUI350003B0
INSTALLATION
VMS System Parameters
The following SYSGEN parameters should be checked (these
parameters apply to only the server unless otherwise noted):
GBLPAGFIL. Increase this parameter by the size of the
database. To calculate the number of pages needed to contain the database, for VAX systems divide the database
word size by 256 words, for DEC Alpha systems divide the
database word size by the page size (256, 512, 1,024, or
2,048 words). For example a 1,500,000 word database
requires that the GBLPAGFIL parameter be increased by
5,860 pages (1,500,000/256). If the size of the database is
not known, use the size listed on the tape label. The size
listed on the tape is the maximum license size purchased.
SYSGEN parameters can be adjusted later if needed.
VIRTUALPAGECNT. This parameter must exceed twice the
global page-file size (GBLPAGFIL) by 8,192. Using the
example of a 1,500,000 word database, VIRTUALPAGECNT
is at least 19,912 pages (5,860 x 2 + 8,192). On Alpha/AXP
platforms, ignore the internal values number.
MAXPROCESSCNT. The open data management server creates one detached process for every file specified in the
SETCIM.RUN file. Additionally, one task is active for every
GCS console. For a typical system, MAXPROCESSCNT
should be 30 greater than the number of tasks active when
the open data management server system is not running.
MAXBUF. This parameter must be at least 4,096 to meet
the requirements of the INFI 90 OPEN communication
interface.
PQL_DFILLM. This parameter is the maximum number of
files a process can open. It should be large enough to allow
the process with the heaviest use to open all required files.
The SETCIM task DHISARM (the historical data collection
program) opens three files plus one file for every archive file
listed in the TSK_DHIS task record repeat area. For a
default configuration this number would be three plus ten
automatic archive files plus five manual archive files (18
files total). This allows for historical data storage, which
maintains the last ten automatically generated archive files
on-line and up to five manually selected archive files. An
alternative to setting this parameter is to modify the
DHISARM line in the SETCIM.RUN file to include a parameter /FILE_LIMIT=XX, where XX is the maximum number
of files required.
WBPEEUI350003B0
INSTALLATION (OPEN VMS OPERATING SYSTEM)
3-3
INSTALLATION
®
System parameters can be checked using the following commands:
$
MCR
SYSGEN
SYSGEN>
ter)
SHOW
SYSGEN>
EXIT
Enter
MAXBUF
Enter
(or any other parame-
Enter
If any of these parameters require adjustment, the system
MODPARAMS.DAT file should be updated. The following is an
example of how to update the MODPARAMS.DAT file using a
standard screen editor.
$
set
$
edit
def
SYS$SYSTEM
Enter
MODPARAMS.DAT
Enter
Add the following lines to the end of the file.
ADD_GBLPAGFIL
=
5860
!ODMS
Enter
19,912
!ODMS
MIN_VIRTUALPAGECNT
=
MIN_MAXBUF
!ODMS
=
4096
To end the edit session, press
Enter
Enter
Ctrl -Z,
then type EXIT.
The ADD_ command increases the current value by the
amount specified and the MIN_ command increases the parameter to the specified value if the current value is less. Explicitly
setting parameter values in MODPARAMS.DAT is not recommended, other packages installed on the computer may have
greater requirements. Always set values using the MIN_ and
ADD_ commands.
To update the VMS operating system to the new parameters,
from a DCL prompt, use AUTOGEN to verify that the parameters are correct. To invoke AUTOGEN, type:
$
@SYS$UPDATE:AUTOGEN SAVPARAMS
GENPARAMS CHECK_FEEDBACK Enter
This procedure generates a report (usually named SYS$SYSTEM:AGEN$PARAMS.REPORT) that should be reviewed. In
particular, check the SCSI system ID. This parameter should
be:
(DECNET area) x 1024 + (DECNET sub-address)
For example, a DECnet address of 10.188 would have a SCSSYSTEMID of 10428 (1024 x 10 + 188). This parameter must
be set correctly for the system to work properly.
INSTALLATION (OPEN VMS OPERATING SYSTEM)
3-4
WBPEEUI350003B0
INSTALLATION
If all parameters are satisfactory, at the DCL prompt enter:
$
@SYS$UPDATE:AUTOGEN
SETPARAMS
REBOOT
Enter
This will set the system parameters and reboot the system.
Take care when rebooting a system. Have all users log off the
system and allow all applications to complete their tasks and
exit.
User Accounts
For existing user accounts that will be accessing the open data
management server database, set the PGFLQUOTA parameter
to at least 10,000 greater than the number of 256 word pages
needed for the database. Check and modify this parameter
using the standard VMS AUTHORIZE utility:
$ set
$ run
UAF>
UAF>
UAF>
def SYS$SYSTEM Enter
authorize Enter
sh odms_user Enter
modify odms_user/PGFLQUO=XX
exit Enter
Enter
where odms_user is the name of the existing VMS account
accessing the open data management server and XX is the calculated PGFLQUO size (XX > GLBPAGFIL + 10,000). Refer to
VMS System Parameters for information on calculating
GLBPAGFIL.
The UIC number associated with SETCIM users should be
noted because it is required later in the installation procedure.
Network Configuration
If DECnet is being used for console communication or the INFI
90 OPEN interface communication protocol adjust the following parameters:
MAX LINKS. The maximum number of active links for the
system. The open data management server requires 24
links for each INFI 90 OPEN interface. Increase this parameter by the number of required links. Typically, this parameter defaults to 32 and should be reset to 100.
ALIAS MAX LINKS. This parameter parallels the MAX
LINKS parameter and should be increased in proportion
MAX LINKS parameter.
MAX OBJECTS. The total number of network objects that
can be active on a system. Every INFI 90 OPEN interface
that is configured for DECnet requires five network objects.
Every GCS client that connects to this server using DECnet
WBPEEUI350003B0
INSTALLATION (OPEN VMS OPERATING SYSTEM)
3-5
INSTALLATION
®
requires one object. The SQLplus system requires one
object for every interface configured for DECnet (see SQLplus installation for details). Typically this parameter
defaults to 30 and should be increased to 50.
To check or modify these parameters, use the command:
$ MCR NCP Enter
NCP> SHOW EXECUTOR
CHARACTERISTICS
Enter
Executing this command generates a list of parameters including the network configuration parameters. Use the SET command to update the system during operation. Use the DEFINE
command to update the system configuration permanently.
NCP> SET EXECUTOR MAX OBJECT 50 Enter
NCP> DEFINE EXECUTOR MAX OBJECT 50 Enter
NCP> SET EXECUTOR MAX LINKS 100 Enter
NCP> DEFINE EXECUTOR MAX LINKS 100 Enter
NCP>
SET
EXECUTOR
ALIAS
MAX LINKS
100
Enter
NCP>
DEFINE
EXECUTOR
ALIAS MAX
LINKS
100
Enter
NCP>
EXIT
Enter
MOTIF Software Version
Check the version of MOTIF software loaded on the system
using the following command:
$
analyse/image/header sys$system:decw$uilmotif.exe
Enter
This provides information about the MOTIF executable, including the version of MOTIF software. This information is near the
top of the output, under the sub-heading Image Identification Information. The image file identification number should
be DW V1.2-(xxxxx), where xxxxx are internal revision and
date information.
ORACLE Open Installation
The open data management server provides the SQLplus package, This package can link to ORACLE databases using an
ORACLE open access module. If the ORACLE open access
module is being installed, the ORACLE logical names must be
defined. To check for defined names:
$
SHOW
LOGICAL
INSTALLATION (OPEN VMS OPERATING SYSTEM)
3-6
ORA_RDBMS
Enter
WBPEEUI350003B0
INSTALLATION
Open Data Management Server Installation (VMS)
This installation procedure contains two parts. The first part
retrieves a command procedure. The second part uses the
command procedure to perform several VMSINSTAL commands to install the SETCIM software and the open data management server software.
ODMS installation requires that all previous versions of
ODMS/SETCIM be removed from the system prior to installing
the current version. If this is an upgrade of an existing ODMS
system the following steps should be taken before installation.
1. Save a snapshot file of the database using DBMT or Engcon.
2. Shut down the ODMS system.
3. Save the snapshot file made in Step 1 in another directory
(outside of the ODMS and SETCIM directory trees).
4. Save the SETCIM.RUN file (if customized features exist) in
the same outside directory.
5. Save any disk history data files and archive files in the
same outside directory.
6. Delete all files in the GCS and SETCIM directory trees
including the directories themselves.
7. Edit SYS$MANAGER:SYSTARTUP_VMS.COM and remove
all ODMS and SETCIM related items.
8. Reboot the system to remove all references to ODMS. The
standard installation procedure can now be started.
When installation is complete, follow the upgrade instructions
provided by SETCIM to restore any tags or other configuration.
NOTE: Only modify records listed in to OKTOMODIFY.INP file.
To install the base server software:
1. Log-in to the SYSTEM account on the computer on which
the open data management server is being installed.
2. Load the tape entitled LDODM Server in the tape drive.
3. Issue this command at the DCL prompt:
$ @SYS$UPDATE:VMSINSTAL
source Enter
WBPEEUI350003B0
ODMSSY_SRV
INSTALLATION (OPEN VMS OPERATING SYSTEM)
3-7
INSTALLATION
®
where source is the name of the tape drive (for example,
MKA500) containing the product kits to be installed.
4. The system generates warnings for users that do not have
certain privileges and quotas. If your account does not have
sufficient privileges or quotas, then exit the procedure and
adjust the account before starting the procedure. Verify the
SYSTEM account is being used for this installation.
If other users or nonsystem processes are currently active on
the system, a list of these users and processes is displayed.
% VMSINSTAL-W-ACTIVE, The following processes are still
active:
a list of processes and/or users
•
•
•
Do you want to continue anyway [NO]?
Type N, then press Enter to cancel software installation, or type
Y, then press Enter to continue.
5. If continuing, the system responds with:
Are you satisfied with the backup of the your system disk
[YES]?
If a backup is required, type N to cancel installation so that a
backup can be done. Type Y or press Enter to continue.
6. The system responds with:
Please mount the first volume of the set on XXXXXX:
* Are you ready?
where XXXXXX is the name of the tape drive. To start the open
data management server installation process, type Y when the
tape is ready to be accessed. The VMS installation procedure
should conclude, without any further prompts or questions,
and load a command procedure to finish the remainder of the
installation.
7. To continue the installation process enter the commands:
$
$
set def sys$update Enter
@ODMS_INSTALL_SERVER source
INSTALLATION (OPEN VMS OPERATING SYSTEM)
3-8
Enter
WBPEEUI350003B0
INSTALLATION
where source is the tape device used in Step 3. This command
procedure performs several installations and other miscellaneous work, which includes:
•
•
•
•
•
Installs SequeLink® software (if required).
Process all SETCIM kits (including SQLplus).
Creates a SETCIM group.
Process the open data management server kit.
Perform post installation steps.
8. The installation
SequeLink software.
procedure
prompts
to
install
the
Should SequeLink software be installed [Y]?
Press Enter if this software is to be installed. If this software is
already installed, then type N and the procedure skips to Step 15.
If other users or nonsystem processes are currently active on
the system, a list of these users and processes is displayed.
% VMSINSTAL-W-ACTIVE, The following processes are still
active:
list of services
•
•
•
9. The system then responds with:
Please mount the first volume of the set on XXXXXX:.
* Are you ready?
where XXXXXX is the name of the tape drive specified in Step
7. Answer Y when the tape is ready to be accessed.
NOTE: Several messages appear during the installation of the SETCIM system. These are informational messages and should be
expected.
WBPEEUI350003B0
INSTALLATION (OPEN VMS OPERATING SYSTEM)
3-9
INSTALLATION
®
The screen lists the software products that are loaded during
this procedure. The following products are processed:
DNSRV V_._
UCXTCPSRV V_._
(SequeLink only)
(SequeLink only)
where V_._ is the revision number of the SequeLink software.
10. As the installation continues, the system responds with:
Do you want to purge files replaced by this installation [YES]?
Type Y to continue.
11. A prompt requests the disk/directory location to load the
SequeLink software. If there was a previous installation the
user can override it.
Do you want to use existing SQLNK$ROOT definition [y]?
If this is a new installation:
Rooted Directory name [SYS$SPECIFIC]:
This is the directory into which the SequeLink software is
installed. The default can be accepted or another directory
assigned. If a user supplied directory is entered, it must be a
rooted directory (i.e., it must end in a period). For example,
DKA100:[SQLNK.] is a rooted directory.
12. A prompt requests the account that will own the installed
files. This UIC number can be any account, but usually it is the
SYSTEM account. Using the SYSTEM account insures that the
account is available and has the required privileges and quotas.
UIC for created directory and files [[SYSTEM]]:
Press
Enter
to accept the default.
13. The SequeLink installation continues with a series of notes
and the following prompt. At each prompt:
Press Enter to continue [YES]?
Press
Enter
to continue with the installation.
Update SequeLink.Ins_Log ...
Decnet server for SequeLink installation completed successfully.
14. When the SequeLink installation completes, the procedure
continues by installing the UCXTCPSRV product. At each
prompt, press Enter to accept the default?
INSTALLATION (OPEN VMS OPERATING SYSTEM)
3 - 10
WBPEEUI350003B0
INSTALLATION
Do you want to purge file replace by this installation [YES]?
Are DEC TCP/IP services for Open VMS installed [Y]? Y
Do you want to use existing SQLNK$ROOT definition [Y]?
As the UCXTCPSRV product is being installed a series of notes
will be displayed. At the prompt:
Press RETURN to continue
Press
Enter
to continue.
SequeLink UCX Server installation completed successfully.
15. The system continues with:
Process all SETCIM kits
OpenVMS VAX Software Product Installation Procedure V6.2
•
•
Please mount the first volume of the set on XXXXX:
Are you ready?
where XXXXXX is the name of the tape drive. Answer Y when
the tape is ready to be accessed.
The screen lists the software products that are loaded during
this procedure.
%MOUNT-I-MOUNTED, ODMS mounted on _PIMS90$MKA400:
The following products will be processed:
$SETCIM V4.6
$SETCIM_BATCHTRACK V4.6
$SETCIM_CIMCALC V4.6
$SETCIM_CIMCC V4.6
$SETCIM_CIMIO V 4.6
$SETCIM_CIMIOEX V4.6
$SETCIM_CIMNET V4.6
$SETCIM_CIMQ V4.6
$SETCIM_DAC V4.6
(for VAX only)
$SETCIM_DAS V4.6
(for VAX only)
$SETCIM_DBMT V4.6
$SETCIM_GCSLINK V4.6
$SETCIM_SQLPLUS V4.6
16. The user is required to enter password information. Refer
to the customer order form (Sheet 2) for the password that is
initially required.
WBPEEUI350003B0
INSTALLATION (OPEN VMS OPERATING SYSTEM)
3 - 11
INSTALLATION
®
This installation procedure will exit if you do not know your
SETCIM license password.
Do you know your SETCIM license password? [YES]?
After pressing Enter or typing YES to continue, the following
prompt is shown:
Enter SETCIM license password:
where the license password is provided with the system. Enter
the license code as it appears on the customer order form to
activate all products for a limited time.
This process can be repeated if necessary by using the following command and entering the original password.
RUN
SETCIMCODE:makelicense
Enter
Entering the initial password generates a license code. Enter
the license code in the white background box on the customer
order form (Sheet 2). Fax or mail the customer order to the
Elsag Bailey Open Data Management Server Coordinator at the
following address:
Elsag Bailey
29801 Euclid Ave.
Wickliffe, Ohio 44092
ATTENTION: Open Data Management Server Coordinator,
Mail Stop 3N3
FAX the form to:
Open Data Management Server Coordinator
Mail Stop 3N3
FAX No. (216) 585-8756
The Open Data Management Server Coordinator assigns final
license numbers and returns them to the customer contact
identified on Sheet 1 of the customer order form. The final
license numbers are placed in the gray boxes on Sheet 2 of the
customer order form.
NOTE: The initial license provided on the customer order form is
valid for approximately 60 days. All system functions cease operation after 60 days unless a final license code is entered into the system. Refer to PERMANENT LICENSE INSTALLATION in Section 6
for information on installing the final license code.
17. As the installation continues, the system responds with:
Do you want to purge files replaced by this installation [YES]?
INSTALLATION (OPEN VMS OPERATING SYSTEM)
3 - 12
WBPEEUI350003B0
INSTALLATION
Existing versions of SETCIM files should be purged to free disk
space. Type Y to continue. This prompt is repeated for all products installed.
18. At the prompt, enter the name of the disk device where
SETCIM is to be loaded (i.e., DKA200).
Enter disk device for SETCIM [SYS$SYSDEVICE:]:
19. When prompted, enter a root directory for the base SETCIM
system.
Enter directory name for SETCIM root [[SETCIM]]:
SECTIM is offered as the default directory. Either accept the
default directory name or enter a directory name. Then answer
the following prompt to define the scope of the open data management server.
Should SETCIM logical names also be defined in the system
table? [YES]:
If all users are accessing the same version of SETCIM and open
data management server software, the logical names should be
defined in the system table. Answer yes by typing Y. If multiple
versions of SETCIM and open data management server software are being installed, answer no by typing N. The logical
names are defined in the group logical table for multiple versions of SETCIM and open data management server software.
This allows multiple copies of the open data management
server to be installed on the same machine. Each version (and
its users) require a unique VMS group.
20. When each product begins to load there is a prompt to
purge existing files. Existing files should always be purged.
Do you want to purge files replaced by this installation [YES]?
21. Layered products may generate questions or prompts
depending on which layered products are provided on the tape.
In general, accept the defaults for questions or prompts until
the
SETCIM_CIMIO
package
is
reached.
For
the
SETCIM_CIMIO package, the following prompt is generated:
Do you want to purge files replaced by this installation [YES]?
A program is provided with CIM I/O to test the systems API.
Should this test program be installed [YES]?
Typically, the CIMIO package is not used and the test program
is not required. Answer the prompt by typing N unless this
package is to be used. If this package is being installed type Y
to install the test program.
WBPEEUI350003B0
INSTALLATION (OPEN VMS OPERATING SYSTEM)
3 - 13
INSTALLATION
®
22. For the SETCIM_CIMIOEX package the following prompts
are generated:
Do you want to purge files replaced by this installation [YES]?
Do you wish to install source without building executables [NO]?
Type Y to only install the source code but not the executables.
Type N or Enter to create and install the executables.
23. For VAX systems only, the SETCIM_DAC product is
installed at the prompts:
Do you want to purge files replaced by this installation [YES]?
Enter device for SETCIM DA client [DKA500:]:
Enter directory name for SETCIM DA root [[SETCIM]]:
Accept the defaults for these prompts, and allow this part of
the installation to complete.
24. For the SETCIM_GCSLINK package, the following prompt
appears:
Do you wish to install all of these communications options [NO]?
When prompted to select the communication methods offered
(RS-232-C, DECnet, and TCPware/UCX) by the layered product, select all by typing YES. This loads all communication
methods. The actual communication method to be used is
selected later in the installation.
Proceeding with installation of the SETCIM_DDELINK interface...
Do you wish to use the same communications options as for
GCS [YES]?
Select the same communications options that were selected for
GCSLINK by pressing Enter or type Y.
25. The next product to be installed is the SQLplus product.
The SQLplus product supports links to a number of other
products. Prompts are generated for the links to be installed.
Only select links for products that are licensed for the
machine. Some of the prompts may not appear if the required
software is not available.
Do you want install the ORACLE Open Access Module [N]?
The ORACLE Open Access Module allows the SQLplus product
to link to an ORACLE database. This product requires that
ORACLE software be installed on the system.
Do you want install the RDB Open Access Module [N]?
INSTALLATION (OPEN VMS OPERATING SYSTEM)
3 - 14
WBPEEUI350003B0
INSTALLATION
The RDB Open Access Module allows the SQLplus product to
link to an RDB database. This product requires that RDB software be installed on the system.
Do you want install the SETCIM Open Access Module [N]?
The SETCIM Open Access Module allows the SQLplus product
to link to other SETCIM databases. These databases can be
remote open data management servers. This product is provided with SQLplus software and is usually installed, if multiple SETCIM systems are configured.
Do you want install the DESK Server [N]?
The DESK Server allows the SQLplus product to be accessed
by the DESK PC product. The DESK product requires that this
link be installed.
Type Y at the appropriate prompts to install a link, or type N to
continue.
NOTE: Warnings for missing platform libraries are issued if any links
are selected that require software that has not been installed. These
warnings do not affect the ODMS installation.
26. The following procedure is activated following the installation of all SETCIM products. This procedure creates a SETCIM
group and completes the setup of the base SETCIM system.
Enter UIC group number (octal) for SETCIM [200]:
At the prompt enter the UIC group number or press Enter to
accept the default group number (200). This is the group identifier of all the SETCIM users. UIC group numbers can be
viewed using the VMS authorize utility, or using the VMS command $ show process Enter .
27. The initial database for the base SETCIM system is configured.
Creating SETCIM:[GROUP200] directory ...
The following standard .RLD files are in the SETCIM:[ETC] directory:
Load CIMVALS.RLD
Load CIMDCOM.RLD
Do NOT load CIMMVDEG.RLD
Load CIMCALC.RLD
Load CIMNETC.RLD
Load CIMNETS.RLD
Load CIMSYSCMD.RLD
Load CIMCC.RLD
Load CIMCCSCHED.RLD
WBPEEUI350003B0
INSTALLATION (OPEN VMS OPERATING SYSTEM)
3 - 15
INSTALLATION
®
Load CIMIO.RLD
Load CIMIOSIMUL.RLD
Load SQLPLUS.RLD (?)
The .RLD files contain an ASCII version of various database
records. These records comprise the initial open data management server database. Answer no by typing NO at the next
prompt and take the default for all products until the prompt
for the CIMIO.RLD file. If the CIMIO package was not installed,
answer NO to this prompt. This prevents the recload file from
being processed. In general, if any optional SETCIM package is
not to be used, its recload file should not be processed.
If the CIMIO.RLD file is processed and the CIMIO executable
was not built, then the open data management server will not
start. The SETCIM.RUN file will have an entry for CIMIO tasks
that do not exist. Correct this by removing the entries from the
SETCIM.RUN file.
Do you agree with the default recommendations for .RLD files
[YES]?
Do you wish to load CIMVALS.RLD [YES]?
Do you wish to load CIMDCOM.RLD [YES]?
Do you wish to load CIMMVDEG.RLD [NO]?
Do you wish to load NEWCIMQ.RLD [YES]?
Do you wish to load CIMCALC.RLD [YES]?
Do you wish to load CIMNETC.RLD [YES]?
Do you wish to load CIMNETS.RLD [YES]?
Do you wish to load CIMSYSCMD.RLD [YES]?
Do you wish to load CIMCC.RLD [YES]?
Do you wish to load CIMCCSCHED.RLD [YES]?
Do you wish to load CIMIO.RLD [YES]?
Do you wish to load CIMSQLPLUS.RLD [YES]?
28. At the prompt for the database sizing information, enter
the maximum size that the database is expected to reach (usually the size that was purchased). This size determines the
upper limit of the database. A typical number for a small open
data management server is 1,000,000. The size of the database
purchased is listed on the tape.
What is the maximum expected database size in words
[300000]? 1000000
Now starting SETCIM and loading .RLD files ...
NOTE: It is very important to enter the correct database size. The
database size must be greater than 700,000. If the default is
accepted, the installation will fail in a later step.
At this point the SETCIM system is started, and the various
.RLD files are loaded. When the loading is complete a message
INSTALLATION (OPEN VMS OPERATING SYSTEM)
3 - 16
WBPEEUI350003B0
INSTALLATION
similar to that shown below is displayed. The actual database
sizes may differ.
TOTAL WORDS have been increased from 185819 to 189828
Text Records Loaded from File SETCIM:[ETC]CIMSQLPLUS.RLD
(1418 lines)
Finished loading records from .RLD files
29. The next sequence generates a new disk history file. This
file is required to collect historical data and to store system
information.
Do you wish to create a new disk history file [YES]?
Press
Enter
or type YES to create a disk history file.
Enter new disk history file name [DHISTORY.DAT]:
The default file name can be accepted by pressing
enter another name.
Enter
or
DKA200: has 50349 free blocks
Enter disk history file size (blocks) [200]? 2000
The size of the file should be 2,000 blocks. This file contains
only standard system historical information. Point historical
information is stored in a historical file automatically created
later in the installation.
30. At the prompt for the database snapshot file name, enter a
name, or accept the default by pressing Enter .
Enter database snapshot file to be created [SETCIM.SNP]:
The open data management server stores information in a
database that is loaded from a snapshot at start-up time. A
snapshot is a copy of the database as it exists in system memory and is taken at scheduled intervals.
NOTE: The name of the snapshot file, setcim.snp by default, is
listed in the setcim.run file in the group directory in the SETCIM
directory tree. This snapshot is loaded into the database on subsequent open data management server start-ups. To insure there is no
data loss, take periodic snapshots to update this file. Take a database snapshot after any major database change and before system
shut down (minimum). Failure to do so could result in the loss of all
changes made to the database since the last snapshot was taken.
31. The installation procedure checks for existing accounts
that have access to the UIC group selected in Step 26. If any
accounts are found, they are listed. At least one account must
exist. This account is used later in the installation.
WBPEEUI350003B0
INSTALLATION (OPEN VMS OPERATING SYSTEM)
3 - 17
INSTALLATION
®
Do you wish to create one or more accounts [No]?
Type N or press Enter to not create new accounts and to skip to
Step 32. Type Y if there are no accounts found or if there are
more accounts to be added and the following will occur:
The account creation procedure requests the following information:
•
A unique member number (must be an octal number less
than or equal to 777).
•
The account name (any character string without embedded
spaces).
•
The name of the user (the full name of the user or any character string including spaces),
•
The initial password for the account.
•
The default device and directory for the account.
The actual device can be any location, but in general each user
should have a unique location and this location should not be
within the SETCIM or open data management server directory
trees.
Enter the requested information as each of the following
prompts appear. Some of the prompts show an example user
input.
There are no accounts with UIC group number 200
Do you wish to create one or more accounts [YES]?
Enter a unique UIC member number (octal): 1
Enter user name: ODMS_USER
Creating ODMS_USER account now with UIC [200,1] ...
%UAF-I-ADDMSG, user record successfully added
%UAF-I-RDBADDMSGU,
identifier
ODMS_USER
[000200,000001] added to rights data base
value:
Modifying privileges and quotas...
%UAF-I-MDFYMSG, user record(s) updated
%UAF-I-MDFYMSG, user record(s) updated
Enter owner name [ODMS_USER]: John Smith
INSTALLATION (OPEN VMS OPERATING SYSTEM)
3 - 18
WBPEEUI350003B0
INSTALLATION
%UAF-I-MDFYMSG, user record(s) updated
Enter password (not echoed to terminal):
%UAF-I-MDFYMSG, user record(s) updated
Setting password to expire after first login.
%UAF-I-MDFYMSG, user record(s) updated
Enter login device [SYS$SYSDEVICE:]: DKA200
Enter login directory [ [ODMS_USER] ]: [USER.ODMS_USER]
Creating DKA200:[USER.ODMS_USER] directory ...
%UAF-I-MDFYMSG, user record(s) updated
Do you wish to create another account [NO]?
32. The SETCIM/open data management server needs to be
operating for the user account that is entered in this step for
the remainder of the installation procedure. The following
prompt will verify that the system is ready for start-up:
Found group xxx, OK to startup ODMS system for it [Y/N]:
where xxx is the UIC for the SETCIM group for start-up. The
user must be a member of this group. Type Y to start-up the
open data management server system.
33. The procedure continues with the open data management
server specific installation, which includes processing another
VMS installation kit.
The system generates warnings for users that do not have certain privileges and quotas. If your account does not have sufficient privileges or quotas, then exit the procedure and adjust
the account before starting the procedure.
If other users or nonsystem processes are currently active on
the system, a list of these users and processes is displayed.
ODMS tasks are displayed in the form TSK_XXX as shown in
the example below.
% VMSINSTAL-W-ACTIVE, The following processes are still
active:
a list of processes and/or users
TSK_DBCLOCK
TSK_DHIS
TSK_DHIS_ARM
TSK_SAVE
WBPEEUI350003B0
INSTALLATION (OPEN VMS OPERATING SYSTEM)
3 - 19
INSTALLATION
®
The system responds with:
Please mount the first volume of the set on XXXXXX:.
* Are you ready?
where XXXXXX is the name of the tape drive. To continue, type
Y when the tape is ready to be accessed.
The following products will be processed:
$ODMSSY_SRV v_._
NOTE: Some informational messages and warnings may appear
during this part of the installation. They may be safely ignored.
34. At the prompt, enter the name of an ODMS account that
was assigned in Step 31.
Account to run SETCIM from [ODMS_USER]:
35. If a single version of SETCIM and open data management
server software is being installed, define the logical names in
the system table. If multiple versions of SETCIM and open data
management server are being installed, define the logical
names in the group logical table. Additional versions of SETCIM and open data management server software must be
installed under a unique VMS groups.
Should ODMS logical names also be defined in the system table
[Y]?
At the prompt, type Y or press Enter for single version installation or type N for a multiple version installation.
36. Next the installation procedure loads the open data management server database, modifies the SETCIM start-up file
(SETCIM.RUN) and creates an initial disk history file. It will
then update time zone configuration information for the system.
Enter the time zone for the ODMS system:
Enter a number between -12 and 12 for the time zone. This
number represents the hours east of Greenwich mean time,
(for example, -5 is the Eastern Standard Time Zone in the
United States). Table 3-1 lists the time zones of the world and
the appropriate number to enter for that time zone.
This procedure updates any INFI 90 OPEN interfaces that are
defined in the database. If any interfaces are predefined, the
following prompts will appear. If no interfaces are predefined,
skip to Step 37.
INSTALLATION (OPEN VMS OPERATING SYSTEM)
3 - 20
WBPEEUI350003B0
INSTALLATION
Table 3-1. Time Zones
Time Zone
Number
Greenwich Mean Time, London, Edinburgh, Dublin, Monrovia,
Casablanca
0
Azores, Cape Verde Island
-1
Mid-Atlantic
-2
Buenos Aires, Georgetown, Brasilia
-3
Atlantic Time (Canada), Caracas, La Paz
-4
Eastern Time (US and Canada), Bogota, Lima
-5
Central Time (US and Canada), Saskatchewan, Mexico City,
Tegucigalpa
-6
Mountain Time (US and Canada), Arizona
-7
Pacific Time (US and Canada), Tijuana
-8
Alaska
-9
Hawaii
-10
Midway Island, Samoa
-11
Eniwetok, Kwajalein
-12
Fiji, Kamchatka, Marshall Island, Wellington, Auckland
12
Magadan, Solomon Island, New Calelonia
11
Guam, Port Moresby, Vladivostok, Hobart, Brisbane, Melbourne, Sydney
10
Tokyo, Osaka, Sapparo, Seoul, Yakutsk
9
Beijing, Chongping, Urumqi, Hong Kong, Perth, Singapore,
Taipai
8
Bangkok, Jakarta, Hanoi,
7
Almaty, Dhaka
6
Islamabad, Karachi, Ekaterinberg, Tashkent
5
Abu Dhabi, Muscat, Tbilisi, Kazan, Volgograd
4
Moscow, St. Petersburg, Baghdad, Kuwait, Nairobi, Riyadh
3
Eastern Europe, Athens, Helsinki, Istanbul, Cairo, Israel,
Harare, Pretoria
2
Berlin, Stockholm, Bern, Brussels, Vienna, Amsterdam, Lisbon,
Warsaw, Paris, Madrid, Prague
1
Enter the time zone for ICI ici_1 :
where ici_1 is the interface to an INFI 90 OPEN loop. Currently
all interfaces have the same time zone as the base ODMS system.
Additionally, the time synchronization information for a given
interface can be initialized at the prompt:
Should time sync data for ici_1 be initialized (Y/N)?
WBPEEUI350003B0
INSTALLATION (OPEN VMS OPERATING SYSTEM)
3 - 21
INSTALLATION
®
This information should be initialized before the interface is
placed on-line, but it should not be initialized once the interface is on-line. If the interface is time synchronizing the INFI 90
OPEN system and the time synchronization information is initialized, the INFI 90 OPEN system will reset all trend information, resulting in data loss. Type Y to initialize time or type N to
proceed.
If an ICI interface is defined later, the following program can be
executed to perform time synchronization setup.
$
run
pimsexe:initsync
Enter
37. The privileges and quotas given to SETCIM accounts must
be modified for open data management server to operate. The
accounts that were created in Step 31 are listed in a table.
Modify the privileges and accounts of all required accounts as
needed.
The following accounts have UIC group number 200
Owner Username
UIC
Account
Privs Pri
ODMS ODMS_USER
[200,1]
SYSTEM All
4
Directory
DKA100:[USER.ODMS_
USER]
* Enter account to modify : ODMS_USER
Modifying privileges and quotas for the ODMS account
%UAF-I-MDFYMSG, user record(s) updated
%UAF-I-MDFYMSG, user record(s) updated
When prompted for the accounts to modify, enter the same
accounts created earlier in the SETCIM installation (or any
other account that will be using open data management server
software).
38. If the names of the system devices that connect to ICI interfaces are known, device setup can be done at this time.
At the prompts:
Do you want to setup system devices now? [N]:
Type y to set up system devices.
Will you be connecting any ICI's via serial ports? [N]:
Type y, if any serial interfaces are configured.
The system prompts for the names of system serial devices that
connect to ICI interfaces. After the serial device names are
INSTALLATION (OPEN VMS OPERATING SYSTEM)
3 - 22
WBPEEUI350003B0
INSTALLATION
entered, the system prompts for the operating parameters of
each serial device that was entered. The operating parameters
entered for each serial device must match those of the connecting ICI interface. At the prompt:
Enter a VMS system serial device that will connect to an ICI.
(RETURN if no more devices):
Type a device name, such as tta2 and press Enter . The previous
prompt appears again. Enter another device name and repeat
until all device names are entered. Press Enter at the prompt
after all the system serial devices have been entered.
Enter the system serial device operating parameters at the
prompts:
Please enter the required parameters for serial port TTA2.
Baud rate:
Parity (EVEN,ODD or NONE):
Enter 19200 for the baud rate, then press
parity, then press Enter .
Enter .
Enter none for
Will you be connecting any SCSI ICI's? [N]:
Type y, if any SCSI interfaces are configured.
The system asks for the device names of the SCSI ICI interfaces.
SCSI device names have the following form: DDCU:.
where DD is a two-letter device code, C is a one-letter controller
designator, and U is a unit number between 0 and 65535.
Although the device code can consist of any two letters that do
not conflict with the device code for any existing installed
device Elsag Bailey recommends using the DEC device code
naming standard for VMS by using the device code letters GK
for all installed SCSI ICI interfaces. This prevents a possible
conflict if two separate device drivers attempt to use the same
device code.
A controller designator is a single alpha character (A to Z). The
specific SCSI bus in which the ICI interface is installed determines the controller designator. For systems with only one
SCSI bus, the controller designator is A. For systems with more
than one SCSI bus, the controller designators are A, B, C etc.,
up to the number of SCSI buses installed in the system. The
physical location of the SCSI buses associated with controller
designators varies with each system model. Consult the system
documentation to verify the physical location of the system
SCSI buses.
WBPEEUI350003B0
INSTALLATION (OPEN VMS OPERATING SYSTEM)
3 - 23
INSTALLATION
®
Setting the ICI interface SCSI address determines the device
unit number. Determine the device unit number using the following formula:
device unit number = (ICI SCSI address) * 100
For example, if the ICI interface SCSI address is set to 7 and it
is installed in SCSI bus B, then the correct device name would
be GKB700:. For more information on determining SCSI device
names refer to the VMS system documentation.
Do you wish to re-read this message [N]:
Type N to continue, type Y to read this message again.
Enter a SCSI device name that will be associated with a SCSI
ICI. (RETURN if no more devices):
Enter a SCSI device name, such as GKA400, then press Enter .
The prompt appears again. Either enter another SCSI device
name or press Enter to complete the ICI configuration.
Future changes to the current ICI device configuration can be
made by editing two files. Edit the file NCPORT.COM to make
changes to serial device operating parameters. Edit the file
SETUP.COM to make changes to access protection of serial
devices or changes to SCSI device names. To add new devices,
copy the commands in these files and replace the current
device names with new device names.
39. This step covers ICI device configuration. The installation
procedure proceeds to prompt for INFI 90 OPEN interface configuration information. This information includes the number
of ICI modules, their physical device types and names, and the
communication interfaces to these devices.
If this information is not available, it can be manually entered
at a later time. To manually execute this program type:
$
run
pimsexe:iciconf
Enter
If you are manually configuring the ICI interface setup, there
are two files should be edited to match the data entered in the
iciconf file. Edit the files:
pimsexe:ncports.com
pimsexe:setup.com
The following prompts will appear.
Define ICI Logical Configuration (Y/N)?
Type Y to display a list of currently configured devices (if any
exists). Type N to exit.
INSTALLATION (OPEN VMS OPERATING SYSTEM)
3 - 24
WBPEEUI350003B0
INSTALLATION
Enter Logical ICI to update/define (0=exit):
Each interface should be defined. The number selected for the
interface is arbitrary, but it must match the ICI_X records
defined in the database. For example an ICI_1 record, appears
on a display as interface 1. This record requires that a logical
ICI be defined with number 1. The following provides an example for logical ICI1 defined as a serial interface. The appropriate
input is shown with the screen prompts.
Enter Logical ICI to update/define (0=exit): 1
Physical ICI: TTA2
ICI Node Name:
ICI Network Type (0-DECNET,1-TCPIP,2-LOCAL): 0
Physical ICI Backup:
ICI Backup Node:
ICI Backup Network Type (0-DECNET,1-TCPIP,2-LOCAL):
The Physical ICI must be an existing device. This includes
RS-232-C ports (such as TTA2:), LAT type devices (such as
LTA19:), SCSI devices (such as A400:), and ENET if connecting
to an INOSM01 interface.
NOTE: SCSI devices will appear in the system as GKA400 but
should be entered as A400 in this program.
The ICI node should be filled in with the open data management server node name (DECnet name if network type is 0,
TCP/IP host if network type is 1, or can be left blank if network
type is 2). This field allows the interface to communicate with
remote ICI devices. If the ICI node is an INOSM01 it should be
OSM node name.
The network type can be any of the valid choices. For TCP/IP,
the DEC product TCP/IP services or the TCPware product
must be installed. For DECnet, the DEC product DECnet must
be installed.
If a redundant INFI 90 OPEN interface is required, the backup
device should be entered. For nonredundant interfaces all
remaining fields can be left blank.
To blank a field that has an entry, enter a single space in the
field.
Is this correct (Y/N)?
At the prompt, verify that the entries are correct. Type Y to
accept the entries or type N to continue editing the entries.
Enter Logical ICI to update/define (0=exit):
WBPEEUI350003B0
INSTALLATION (OPEN VMS OPERATING SYSTEM)
3 - 25
INSTALLATION
®
Enter any other logical ICI interfaces that need defining. After
all logical ICI interfaces are defined, enter 0 to exit and begin
defining ICI physical properties.
This section allows a user to define the physical port characteristics for a given port.
Define ICI Physical Properties for an ICI (Y/N) ?
Type Y to define ICI physical properties, type N to exit.
Enter the Physical ICI: TTA2
If this physical device is already defined, a listing of its definition is displayed and a prompt asks for new values to be
entered. Press Enter for any input to keep the current value. If
the device is not defined, the following prompts are displayed:
TCP/IP port for this device:
This is the TCP/IP port assigned to the ICI interface. The open
data management server INFI 90 OPEN interface does not use
the TCP/IP protocol to connect to the ICI interface. Therefore,
set this value to 0.
Connection Type (3 - Serial,4 - SCSI):
The ICI interface connection type is either serial or SCSI. Select
the number that matches the type of hardware in use. If the
SCSI is selected, no more prompts appear. If serial is selected,
prompts for the communication parameters defined by the ICI
interface hardware appears.
RS-232 Baud Rate:
Enter the baud rate of the ICI hardware notifies (usually
19,200).
Refer to Table B-1 for BAUD rate dipswitch settings.
Data Bits:
This prompt is asking for the number of data bits in each word
received by or sent from the ICI interface. This is usually set for
8 bits.
(1 - NONE, 2 - EVEN, 3 - ODD)
Parity:
Enter the parity for the port as it is configured on the ICI interface. Usually this is configured for NONE.
Stop Bits:
INSTALLATION (OPEN VMS OPERATING SYSTEM)
3 - 26
WBPEEUI350003B0
INSTALLATION
This prompt asks for the number of stop bits associated with
the communication channel. This is usually set to 1.
Is this correct (Y/N)?
At the prompt, verify that the entries are correct. Type Y to
accept the entries or type N to continue editing the entries.
Define ICI Physical Properties for an ICI (Y/N) ?
Type Y to define additional physical devices, type N to exit.
This completes the installation of SETCIM and open data management server software.
Post Installation Procedure (VMS)
The following steps contain instructions for configuring the
open data management server system. Do these steps after all
installation operations are complete. Some of the post installation steps require that the database be loaded and all points
configured before they are performed.
1. Add the following line to the LOGIN.COM file of every
account that uses the open data management server system.
This command sets up symbols and other settings required to
run the SETCIM and open data management server software.
$
@SETCIMCOM:SETCIMSYLOGIN
Enter
2. A proxy account must be defined if ICI interface communication is via DECnet or a GCS client communicates via DECnet. Any of the defined open data management server user
accounts can be used. The following commands define a proxy
account and create the proxy database if one does not exist:
$ set def sys$system Enter
$ run authorize Enter
UAF> show /proxy * Enter
This requires SYSPRV (or system account).
If an error results, the proxy database must be created using
the command:
UAF> create/proxy
Enter
If the server node does not have a proxy for internal access,
create one. An internal access proxy is for the open data management server node name. (i.e., if the DECnet node name is
server1 then a proxy could be server1::* odms_user (D))
UAF> add/proxy server1::*
UAF> exit Enter
WBPEEUI350003B0
odms_user/default
Enter
INSTALLATION (OPEN VMS OPERATING SYSTEM)
3 - 27
INSTALLATION
®
This command creates a proxy for all users (*) to the
ODMS_USER account on node server1, where ODMS_USER is
the name of a valid Open VMS account. If this does not provide
enough security, add individual proxies for each user that will
be using the ODMS system (including the system account for
installation).
3. Complete the remaining steps (3 through 7) from one of the
valid open data management server user accounts established earlier in this procedure. After all installation operations
are complete and all points are configured in the system, verify
that the historical files are sized correctly. To do this, execute
the file:
$
run
setcimcode:sizedhis
Enter
This program will prompt for the disk history task record
name. Check at least the following records:
TSK_DHIS
TSK_DHS1
(corresponds to dhistory.dat file)
(corresponds to dhistor1.dat file)
If any additional historical task records are configured, they
should be checked. This program reports the required disk
sizes. To verify the disk history file sizes, check the size of the
actual disk history file. The file names can be viewed using the
disk history file display. To display the current disk file sizes
use the command:
$
dir/siz
setcimgrp:*.dat
Enter
The following commands can be invoked, to increase the size of
a disk history file if the open data management server is shut
down.
$
$
set def setcimgrp Enter
run setcimcode:incrdhis
Enter
This program displays prompts asking for a disk history file
name. Enter the disk history file name requiring a size
increase. When prompted for a new size, enter a size that is
larger than the size specified by the sizedhis program.
If the ODMS system is active this file can be resized on-line
using the disk history configuration screens that are provided
by the GCS software. Refer to Disk History Files in Section 5
for information on how to use the disk history configuration
screens.
4. For all GCS client connections, task console scratch
records are required. Create one set of task console scratch
records for each GCS client prior to client installation. Create
these records using the tsk_console.com procedure (refer to
TSK_CONSOLE SCRATCH RECORDS).
INSTALLATION (OPEN VMS OPERATING SYSTEM)
3 - 28
WBPEEUI350003B0
INSTALLATION
5. Verify that all updates have been completed, then save a
snapshot file using the DBMT utility.
6. Restart the open data management server using the following command:
$
@setcimcom:startsetcim
Enter
This command will stop the open data management server and
start it. It will also start-up any ICI interfaces and GCS server
(allowing incoming GCS client connections).
7. This installation procedure generates an X Windows
resource default file which sets the fonts and colors for the
windows interface. Fonts or colors can be changed by copying
this file to the log-in directory and modifying it.
Enter the following command:
$ COPY
sys$common:[DECW$DEFAULTS.USER]IQ.DAT
SYS$LOGIN Enter
GCS CLIENT INSTALLATION
The open data management server should be available and
operating when installing the GCS client software. If the server
is not operating, errors result. These errors are not fatal to the
system, but require manual intervention to correct.
1. Log in to the SYSTEM account.
2. Load the LSGCS Graphic Client tape in the tape drive.
3. Use this command at the DCL prompt:
$
@SYS$UPDATE:VMSINSTAL ODMSSY_CLT
source Enter
where source is the name of the tape device in Step 2.
The system issues warnings for users that do not have certain
privileges and quotas. If other users are currently on the system, a list of users is shown at the prompt:
% VMSINSTAL-W-ACTIVE, The following processes are still
active:
list of services/programs
•
•
•
Do you want to continue anyway [NO]?
WBPEEUI350003B0
GCS CLIENT INSTALLATION
3 - 29
INSTALLATION
®
If any of the processes listed are standard GCS processes, such
as ACCESS or OPCON, press Enter and exit the installation
procedure. These processes are installed again by this procedure and should not be operating during this installation procedure. Other processes that are operating should not cause
any problems.
Type N, then press
Enter
to cancel software installation.
Type Y, then press
Enter
to continue.
If continuing, the system responds with:
Are you satisfied with the backup of the your system disk
[YES]?
If a system backup is required, type N to cancel installation so
that a system backup can be done. Type Y or press Enter to
continue with the installation. The procedure will check to
insure that the tape is ready to process.
Are you ready?
Enter Y at the prompt when the tape is ready.
4. When the installation of ODMSSY_CLT is completed, enter
the following commands:
$
$
SET DEF SYS$UPDATE
@ODMS_INSTALL_CLIENT
Enter
source
Enter
where source is the name of the drive used in Step 2. This command procedure processes the various save sets needed to
install the GCS client software. This includes custom GCS and
open data management server features. The save sets are
installed using the VMSINSTALL command.
The system generates warnings for users that do not have certain privileges and quotas. If other users are currently on the
system, a list of users is shown at the prompt:
% VMSINSTAL-W-ACTIVE, The following processes are still
active:
list of services/programs
•
•
•
Please mount the first volume of the set on XXXXX:
Are you ready?
GCS CLIENT INSTALLATION
3 - 30
WBPEEUI350003B0
INSTALLATION
where XXXXX is the name of the tape source used in Step 3.
Type Y when the tape is ready to be accessed, then press Enter
to continue.
5. At this point, the GCS system begins installation of GCS
v-2.5. The installation procedure prompts for required information:
Do you want to purge files replaced by this installation [YES]?
If this installation is replacing a previous GCS release, old files
can be purged to recover disk space. If disk space is not an
issue, old files can be retained. Answer Y to purge the replaced
files.
6. The installation procedure prompts for the device where
the GCS software is to be installed.
Enter disk device for GCS [SYS$SYSDEVICE:]: DKAXXX:
where DKAXXX is the name of the disk device where the GCS
software is being installed (for example DKA200).
7. The installation procedure prompts for the directory name
in which the GCS is to be installed.
Enter directory name for GCS root [[GCS]]:
The system provides the default name of [GCS], If this default
is acceptable, press Enter . Otherwise, enter the name of a directory.
8. The following prompt is displayed.
Should GCS logicals names also be defined in the system table?
[YES]?
The GCS system requires that certain logical names be defined.
These names can be defined in the system logical name table
or in a group table. If the names are defined in the system
name table, all users will be accessing the same GCS system. If
individual user groups wish to operate their own personal copies of the GCS system, use group logical tables. To use a system table to define GCS logicals answer Y. If group logical
tables are being used answer N.
At this point, the installation procedure creates the required
directories and installs the software.
9. A prompt for the database option is displayed. The only
valid options for a open data management server are SETCIM,
NONE, or other for Alpha/AXP.
Choose a local database option [NONE]?
WBPEEUI350003B0
GCS CLIENT INSTALLATION
3 - 31
INSTALLATION
®
If the SETCIM database option is selected, the GCS package is
locally linked. A local link allows the GCS system to only communicate with a given product/version such as SETCIM 4.2. In
general, the GCS package is not locally linked (NONE). This
permits the database interface to communicate over a physical
communication link (i.e., DECnet or TCP/IP). Accept the
default for DECnet or TCP/IP connections. If the GCS software
is being installed on a remote client, the NONE option must be
chosen.
NOTE: If GCS is locally linked, the display validation performed in
Step 13 will fail. Use ACCESS to modify all the displays to have their
default node set to 0 instead of 1. After this change, all displays
need to be validated manually.
The following prompts appear:
Found group 200 OK to startup ODMS system for it [Y/N]?
Answer Y
10. The next procedure installs the open data management
server specific files:
Please mount the first volume of the set on XXXXX:
Are you ready?
where XXXXX is the name of the tape source used in Step 3.
Type Y when the tape is ready to be accessed, then press Enter
to continue.
A user account is required to access the GCS functions.
Account to run GCS from [ODMS_USER]?
Enter the name of an account using the GCS system. This
account must exist on the system. If the system has an
ODMS_USER account, the default can be accepted.
11. The GCS system requires the name of the directory that
contains all displays.
Directory that contains GCS displays [DISPLAYS]?
Enter a directory name. The directory [DISPLAYS] is the
default, but any existing GCS display directory can be used.
12. If desired, include the standard SETCIM displays in the
directory selected above.
Should Base SETCIM displays be copied to the display directory? [Y]:
GCS CLIENT INSTALLATION
3 - 32
WBPEEUI350003B0
INSTALLATION
In general, the base SETCIM displays should be included.
However, it is possible to limit the number of displays in the
display system, not all the base SETCIM displays are required.
If you answer N to this prompt, then manually update the display directory with the required displays.
13. The GCS system requires configuration to connect to a
open data management server. Any existing configuration is
saved prior to creating an initial configuration in CONSOLE.DAT_SAVE. If no initial configuration exists an error
message may occur. The following steps provide an initial configuration.
Valid server connection types are DECNET or LOCAL.
Enter the type of connection to server: [DECNET]
Select the appropriate server connection. The link to the open
data management server can be via a locally linked GCS client,
a DECnet connection or a TCP/IP connection. The appropriate
option must be installed from Step 9. The default for VMS systems is DECnet.
For network connections, the name of the server node is
required.
Enter the ODMS server node name?
When DECnet or TCP/IP is selected, specify the name of a open
data management server that can be accessed for database
information. The name, for DECnet systems, is the DECnet
Node name of the server. For a TCP/IP connection the name is
the host name of the server.
14. The installation process finishes moving any displays. It
converts the displays from .ASC to .DSP files. The display files
are validated against the database on the open data management server. These steps can require several minutes to several
hours depending on the CPU and type of connection. Some displays may generate validation errors if the displays are for a
package that was not installed (such as CIMIO), the message
should be expected. SETCIM displays are generally named
after its package. If the open data management server is not
available, the displays will not validate. When the server is
available, the displays can be manually validated using the
ACCESS utility. If the display validation fails and the open data
management server was available, check the connection to the
open data management server. Use the ACCESS utility to
check the connection. Refer to the GCS Users Manual for
information on using the ACCESS utility.
WBPEEUI350003B0
GCS CLIENT INSTALLATION
3 - 33
INSTALLATION
®
POST INSTALLATION PROCEDURE (GCS)
1. Add the following line to the LOGIN.COM file of every
account using the GCS system.
$
@GCS:[COMMANDS]GCSLOGIN.INC
This command sets up symbols and other settings required by
the GCS software.
2. Task console scratch records are required, for all GCS client connections. These records can be created using the
tsk_console.com procedure (refer to
TSK_CONSOLE
SCRATCH RECORDS).
INSTALLATION (HP-UX OPERATING SYSTEM)
This section covers the following installation stages:
•
Modifying HP-UX operating system parameters.
•
Installing the base SETCIM and open data management
server software (including SQLplus software).
•
Installing the GCS client and the open data management
server client only software.
HP-UX System Requirements
Installing and operating the SETCIM and open data management server software requires
•
A Hewlett-Packard HP9000 Series 800 computer.
•
An HP system with a HP-UX 9.x.x operating system.
•
A tape drive and device file for it.
•
The HP computer should have the following amounts of
disk space free: 100,000 blocks for SETCIM and the open
data management server, and 60,000 blocks for GCS-client.
NOTE: These are the installation requirements. The software packages require less disk space after installation is complete.
Software is distributed on DAT tape. Therefore, an appropriate
tape drive is required. A familiarity with the use of the tape
drive is required.
It is recommended that the system manager perform any
required adjustments of system parameters. These parameters
are changed using the System Administration Manager utility
POST INSTALLATION PROCEDURE (GCS)
3 - 34
WBPEEUI350003B0
INSTALLATION
(SAM). The HP-UX System Administration Tasks Manual gives
a full explanation of how to use the SAM utility. A knowledge of
the HP-UX operating system is required.
HP-UX System Parameters
NOTE: HP-UX systems are case sensitive. All examples use the
required case. Type all commands and files in the correct case.
The following kernel parameters may require changes or
updates:
semmni. The number of semaphore identifiers available to
the users. This parameter should be increased by 64 for
each SETCIM/open data management server installed.
semmap. The number of semaphore maps. These maps are
directly related to the semaphores described above. This
parameter should be set to semmni plus 2.
semmns. The total number of semaphores available to the
users of the system. This parameter should be increased by
68 for each SETCIM/open data management server
installed.
semmnu. The number of semaphore undo structures. This
is the number of processes which can have undos pending
on a given semaphore. This parameter should be set to the
same value as semmni.
msgmni. The number of message queue identifiers. A message queue identifier is needed for each message queue in
the system. Each network connection to the open data
management server/ SETCIM system requires a message
queue. This parameter should be increased by the number
of network connected GCS consoles.
maxuprc. The maximum number of simultaneous processes a user may have. A user is identified by the user ID
number, not by the number of log-in instances. The user
doing SETCIM/open data management server system
start-ups should be able to start-up at least 60 processes.
It is recommended that this parameter be set to 200.
shmmax. The shared memory maximum. This parameter
should be at least 32 megabytes.
nproc. The maximum number of processes that can exist
simultaneously in the system. Typically, this parameter is
sized using an equation. The default is (20 + (8 x MAXUSRS
+ NGCSP). This equation should be adjusted to support
open data management server software. Open data management server users use considerably more processes
WBPEEUI350003B0
INSTALLATION (HP-UX OPERATING SYSTEM)
3 - 35
INSTALLATION
®
than the eight listed in the default equation. This equation
should be updated to allow 30 processes per user. The
nproc parameter is used in equations for several kernel
parameters.
dst. This parameter is a flag indicating Daylight Saving
Time. This parameter should be set to 0. Open data management server time synchronization and module time
stamping require that this option be disabled.
timezone. This parameter is the time zone for this computer system. This time zone is entered in minutes west of
Greenwich mean time. This parameter is the opposite of
the time zone entered in during the open data management
server installation (open data management server requests
minutes east of Greenwich mean time). A typical value for
this time zone would be 300 for Eastern Standard Time
Zone in the United States.
The SETCIM/open data management server software requires
user accounts that are members of the same group. Each
group has an ID associated with it. The group ID is used to
establish ownership of certain files in the HP-UX operating system. The following steps explain how to examine the user
groups, and modify the kernel parameters if necessary. If a
group already exists, it can be used.
1. Log in to the system as root.
2. At the # prompt, type sam to open the system administrator manager (SAM) window and wait for the window to open.
3. Select Users and Groups option from the list.
4. Select the Groups option.
5. When the groups window opens, select Add under the
actions menu and click OK.
6. Enter the name of the new group (for example, SETCIM).
7. Select the newly created group name in the list.
8. Select Modify under the actions menu.
9. Select a user name from the Non-members list and click
Add to place the user into the group. Repeat this step for each
user that belongs to the group. Click OK when finished.
10. Return to the SAM main menu.
11. Select Previous Level.
INSTALLATION (HP-UX OPERATING SYSTEM)
3 - 36
WBPEEUI350003B0
INSTALLATION
12. Select Kernel Configuration from the system administration
manager window.
13. Select Configurable Parameters.
14. From HP-UX System Parameters select the parameter that
requires updating, then select Modify Configurable Parameter
under the actions menu. Modify the parameter as needed, then
click OK to update. Repeat this process for all parameters that
require updates.
15. If any of the operating system parameters are modified, the
system administration manager prompts to generate a new
kernel when exiting the Kernel Configuration screen. Specifically, the system administration manager prompts to mark one
of the following three options with an X and click OK.
Create a New Kernel Now.
Defer Kernel Creation Until Later.
Cancel All Kernel Modifications.
If the option to create a new kernel is selected, another set of
options appears. These options are:
Move Kernel Into Place and Reboot the System Now.
Exit Without Moving the Kernel Into Place.
Choosing the first option and clicking OK causes the new kernel to be created and the system reboots. Before rebooting,
shut down all applications and have all users log off the system.
16. To check the version of MOTIF loaded on the HP system,
enter the command:
cd /usr/lib/X11 Enter
more system.mwmrc
Enter
The first screen displays the version of MOTIF loaded on the HP
computer. MOTIF 1.2 is required. To exit the display, type q.
Open Data Management Server Installation (HP-UX)
ODMS installation requires that all previous versions of
ODMS/SETCIM be removed from the system prior to installing
the current version. If this is an upgrade of an existing ODMS
system the following steps should be taken before installation.
1. Save a snapshot file of the database using DBMT or Engcon.
2. Shut down the ODMS system.
WBPEEUI350003B0
INSTALLATION (HP-UX OPERATING SYSTEM)
3 - 37
INSTALLATION
®
3. Save the snapshot file made in Step 1 in another directory
(outside of the ODMS and SETCIM directory trees).
4. Save the SETCIM.RUN file (if customized features exist) in
the same outside directory.
5. Save any disk history data files and archive files in the
same outside directory.
6. Delete all files in the GCS and SETCIM directory trees
including the directories themselves.
7. Delete all /tmp/*LOCK files. These files relate to ODMS and
ICI interface communication.
8. Reboot the system to remove all references to ODMS. The
standard installation procedure can now be started.
When installation is complete, follow the upgrade instructions
provided by SETCIM to restore any tags or other configuration.
NOTE: Only modify records listed in to OKTOMODIFY.INP file.
To install the SETCIM/open data management server software:
1. Log in to the system as root.
2. An empty temporary directory is required to receive the
tape distribution. To create the temporary directory, enter the
command:
mkdir
/temp
Enter
where temp is the name of the directory being created.
3. Load the SETCIM tape titled LDODM Server in the tape
drive.
4. Change directories to the temporary directory using the
command:
cd
/temp
Enter
where temp is the name of the directory created in Step 2.
5. Load the files from the tape into the temporary directory by
entering:
tar -xv
- or tar -xf
/dev/rmt/Nm
INSTALLATION (HP-UX OPERATING SYSTEM)
3 - 38
Enter
WBPEEUI350003B0
INSTALLATION
where /dev/rmt is the device name for the tape drive and Nm is
the tape drive logical unit number such as 0m. This command
loads a command file and directory structure into the temporary directory.
tar is a standard UNIX command where:
-x indicates extract file.
-v indicates verbose, list all files as they are extracted.
-f indicates from listed devices.
If the -f option is omitted and only one device is present it will
default to that device.
6. At the # prompt, start the installation shell script by typing:
./odms_install_server.sh
Enter
This script prompts for information to be entered, then loads
the SETCIM and open data management server systems.
7. After the installation begins, password information is
required. The initial required password is included in the distribution package.
Do you know your SETCIM license password? [YES]?
After pressing Enter or typing YES to continue, the following
prompt appears:
Enter SETCIM license password:
where the license password is provided with the system. The
license password should be entered as it appears on the customer order form. The password permits operation of all products for a limited time.
This process can be repeated if necessary by using the following command and entering the original password.
makelicense
Entering the initial password generates a license code. Enter
the license code in the white background box on the customer
order form (Sheet 2). Fax or mail the customer order to the
Elsag Bailey Open Data Management Server Coordinator at the
following address:
Elsag Bailey
29801 Euclid Ave.
Wickliffe, Ohio 44092
ATTENTION: Open Data Management Server Coordinator,
Mail Stop 3N3
WBPEEUI350003B0
INSTALLATION (HP-UX OPERATING SYSTEM)
3 - 39
INSTALLATION
®
FAX the form to:
Open Data Management Server Coordinator
Mail Stop 3N3
FAX No. (216) 585-8756
The Open Data Management Server Coordinator assigns final
license numbers and returns them to the customer contact
identified on Sheet 1 of the customer order form. The final
license numbers are in the gray boxes on Sheet 2 of the customer order form.
NOTE: The initial license provided on the customer order form is
valid for approximately 60 days. All system functions cease operation after 60 days unless a final license number is entered into the
system. Refer to PERMANENT LICENSE INSTALLATION in
Section 6 for information on installing the final license code.
8. SETCIM files are copied to subdirectories of the SETCIM
root directory. The SETCIM root directory and its subdirectories are created by this installation procedure. At the prompt:
where should the SETCIM root directory be created [/setcim]:
Press Enter will accept the default directory /setcim. Enter a
new base directory if a different disk device or name is desired,
then press Enter .
The installation script creates the required directory tree and
installs the SETCIM software.
9. The ODMS specific installation process is invoked. The
SQLplus product supports links to a number of other products. Prompts are generated for the links to be installed. Only
select the products that are licensed for the machine. Some
prompts may not appear if the required software is not available.
Do you want install the ORACLE Open Access Module [N]?
The ORACLE Open Access Module allows the SQLplus product
to link to an ORACLE database. This product requires that
ORACLE software be installed on the system.
Do you want install the RDB Open Access Module [N]?
The RDB Open Access Module allows the SQLplus product to
link to an RDB database. This product requires that RDB software be installed on the system.
Do you want install the SETCIM Open Access Module [N]?
The SETCIM Open Access Module allows the SQLplus product
to link to other SETCIM databases. These databases can be
INSTALLATION (HP-UX OPERATING SYSTEM)
3 - 40
WBPEEUI350003B0
INSTALLATION
remote SETCIM or open data management server systems.
This product is provided with SQLplus software and is usually
installed, if multiple SETCIM systems are configured.
Do you want install the DESK Server [N]?
The DESK server allows the SQLplus product to be accessed by
the DESK PC product. The DESK server requires that this
interface be installed.
Type Y at the appropriate prompts to install a link, or type N to
continue.
10. The installation procedure loads the SequeLink software
needed for network communication.
Enter the full path of the SequeLink Root Directory [/setcim/
sequelink]:
The default directory is the root directory selected during the
SETCIM software installation and the /SequeLink subdirectory.
The default directory can be accepted in most cases.
If CIMDESK was selected in Step 9 a prompt is displayed
requesting the license code.
Enter SequeLink license key for CIMDESK (26 characters long):
Enter the license code as it appears on the license. The license
code is displayed and prompt is displayed to verify the license
code.
Is this correct (Y/N) ? [Y]
If the license code is incorrect type N to enter the license code
again. If it is correct press enter Enter to continue.
11. If SETCIM was selected in Step 9 a prompt is displayed
requesting a SequeLink license key for SETCIM:
Enter SequeLink license key for SETCIM (26 characters long):
Enter the license code as it appears on the license. The license
code is displayed and prompt is displayed to verify the license
code.
Is this correct (Y/N) ? [Y]
If the license code is incorrect, type N to enter the license code
again. If it is correct press enter Enter to continue.
12. The installation software prompts to create a group directory for the SETCIM/open data management server system if
one is needed.
WBPEEUI350003B0
INSTALLATION (HP-UX OPERATING SYSTEM)
3 - 41
INSTALLATION
®
Create a new SETCIM group (y/n)?
This group must be defined prior to executing SETCIM. Type Y
to create a new group and enter the group name at the prompt.
Enter name of an existing group: xxxxxx
where xxxxxx is the group name established in HP-UX System
Parameters.
13. The initial database for the base SETCIM system is configured. The standard .RLD files from the $SETCIM/etc directory
are listed. These .RLD files contain an ASCII version of various
database records. These records will comprise the initial open
data management server database.
Load CIMVALS.RLD
Load CIMDCOM.RLD
Do NOT load CIMMVDEG.RLD
Load CIMGCS.RLD
Load NEWCIMQ.RLD
Load CIMCALC.RLD
Load CIMNETC.RLD
Load CIMNETS.RLD
Load CIMSYSCMD.RLD
Load SQLPlus.RLD
Do you agree with the default recommendations for .RLD files
[YES]?
Type YES at the prompt to accept the default .RLD files.
14. A prompt for the database sizing information is displayed
next.
What is the maximum expected database size in words
[300000]? 1000000
Enter the maximum size that the database is expected to reach
(usually the size that was purchased). The maximum size
determines the upper limit of the database. A typical number
for a small open data management server is 1,000,000. The
size of the database purchased is listed on the tape. After the
database size is entered the system continues.
NOTE: It is very important to enter the correct database size. The
database size must be greater than 600,000. If the default is
accepted, the installation will fail in a later step.
Now starting SETCIM and loading .RLD files ...
The SETCIM system is started and the various .RLD files are
loaded. When the loads are complete, a message similar to the
INSTALLATION (HP-UX OPERATING SYSTEM)
3 - 42
WBPEEUI350003B0
INSTALLATION
one shown is displayed. The actual database sizes and file
names may differ.
TOTAL WORDS has been increased from 126791 to 128170
Text Records Loaded from File /setcim/etc/CIMSQLPLUS.RLD
(470 lines)
Finished loading records from .rld files
15. The next sequence generates a new disk history file. This
file is required to collect historical data and to store system
information.
Do you wish to create a new disk history file [YES]?
Press
Enter
or type YES to create a disk history file.
Enter new disk history file name [DHISTORY.DAT]:
The default file name can be accepted by pressing
enter another name.
Enter
or
This file contains only standard system historical information.
Point historical information is stored in a historical file automatically created later in the installation. Enter a file size of
approximately 2000 blocks at the next prompt.
Enter disk history file size (blocks) [200]?
16. At the prompt for the database snapshot file name, enter a
name, or accept the default by pressing Enter .
Enter database snapshot file to be created [SETCIM.SNP]:
The open data management server stores information in a
database that is loaded from a snapshot at start-up time. A
snapshot is a copy of the database as it exists in system memory and is taken a scheduled intervals.
NOTE: The name of the snapshot file, setcim.snp by default, is
listed in the SETCIM.RUN file in the group directory in the SETCIM
directory tree. This snapshot is loaded into the database on subsequent open data management server start-ups. To insure there is no
data loss, take periodic snapshots to update this file. Take a database snapshot after any major database change and before system
shut down (minimum). Failure to do so will result in the loss of all
changes made to the database since the last snapshot was taken.
17. The SETCIM/open data management server installation
procedure continues with the open data management server
specific installation. Enter a user name assigned to operate the
open data management server system. This user should
default to an HP group that has access to a SETCIM system.
WBPEEUI350003B0
INSTALLATION (HP-UX OPERATING SYSTEM)
3 - 43
INSTALLATION
®
Enter user name: (default: odms, <quit> to exit):
where the user name is from the HP-UX System Parameters
section. The procedure uses this account to install various
open data management server sections.
18. The installation procedure displays the action that it is
ready to perform and provides a prompt to continue or abort
the action.
Do you want to continue (y/n)?
Type Y to continue or type N to exit the installation procedure
and abort the entire installation process.
19. The installation procedure creates two script files to source
on HP log-in. Refer to Post Installation Procedure (HP-UX) for
more information on these script files.
20. The system executes several command procedures. These
procedures install the ODMS specific database. All messages
are logged to .err files in the /ODMS/com subdirectory of the
SETCIM directory tree. This provides access to the files to
review the messages at a later time.
21. Prompts for INFI 90 OPEN interface configuration information are displayed. The information requested by various
prompts includes the number of ICI modules, their physical
device types and names, and the communication interface to
these devices. If this information is not available it can be manually entered at later time. The following prompt will appear.
Define ICI Logical Configuration (Y/N)?
Answer by typing Y to this prompt to display a list of currently
configured devices (if any).
Each interface requires definition. The number of the interface
is arbitrary, but it must match the ICI_X records defined in the
database. For example, an ICI_1 record appears on a display as
interface 1. This record requires that a logical ICI interface be
defined as number 1. The user inputs shown at the prompts
provides an example of how to define logical ICI_1 as a serial
interface. Entries for prompts with no user input shown are
also explained.
Enter Logical ICI to update/define (0=exit): 1
The Physical ICI must be an existing device (RS-232 ports)
such as ttya.
Physical ICI: ttya
INSTALLATION (HP-UX OPERATING SYSTEM)
3 - 44
WBPEEUI350003B0
INSTALLATION
The ICI node name can be left blank. This field allows the interface to communicate with remote ICI devices.
ICI Node Name:
The Network Type can be any of the valid choices, a local connection is recommended.
ICI Network Type (0-DECNET,1-TCPIP,2-LOCAL): 2
If a redundant INFI 90 OPEN interface is required, the backup
device should be defined using the same network type input
used for the primary interface. For nonredundant interfaces,
the remaining fields can be left blank.
Physical ICI Backup:
ICI Backup Node:
ICI Backup Network Type (0-DECNET,1-TCPIP,2-LOCAL):
Is this correct (Y/N)?
At the prompt, verify that the entries are correct. Type Y to
accept the entries or type N to continue editing the entries.
Enter Logical ICI to update/define (0=exit):
Enter any other logical ICI interfaces that need defining. After
all logical ICI interfaces are defined, enter 0 to exit and begin
defining ICI physical properties.
Define ICI Physical Properties for an ICI (Y/N) ?
Type Y to define ICI physical properties, type N to exit.
This section allows a user to define the physical port characteristics for a given port.
Enter the Physical ICI: ttya
If this physical device is already defined, a listing of its definition is displayed and a prompt asks for new values to be
entered. Press Enter for any input to keep the current value. If
the device is not defined, the following prompts are displayed:
Connection Type (3 - Serial,4 - SCSI):
The ICI interface connection type is either serial or SCSI. Select
the number that matches the type of hardware in use. If the
SCSI is selected, no more prompts appear. If serial is selected,
prompts appear for the communication parameters defined by
the ICI interface hardware.
RS-232 Baud Rate:
WBPEEUI350003B0
INSTALLATION (HP-UX OPERATING SYSTEM)
3 - 45
INSTALLATION
®
Enter the baud rate of the ICI interface (usually 19200).
Data Bits:
This prompt is asking for the number of data bits in each word
received by or sent from the ICI interface. This is usually set for
8 bits.
(1 - NONE, 2 - EVEN, 3 - ODD)
Parity:
Enter the parity for the port as it is configured on the ICI. Usually this is configured for NONE.
Stop Bits:
This prompt asks for the number of stop bits associated with
the communication channel. This is usually set to 1.
Is this correct (Y/N)?
At the prompt, verify that the entries are correct. Type Y to
accept the entries or type N to continue editing the entries.
Define ICI Physical Properties for an ICI (Y/N)?
Type Y to define additional physical devices, type N to exit.
vices.
22. The user is given the option to configure the services file for
a port number for GCS link to the SETCIM/open data management server.
Enter the port number for GCS Links?
The value of the port number should be a unique value in the
/etc/services file greater than 5000 and less than 32767. This
number will be updated into the services file in the PIMSEXE
directory. This file is an example of the lines that should be
defined in the /etc/services file.
Post Installation Procedure (HP-UX)
All open data management server users are required to complete the following steps.
1. Change to the default directory of each open data management server user, and add start-up commands to the .login
and .profile files of each user. On HPVUE systems the filename .vueprofile should be edited to uncomment a reference
INSTALLATION (HP-UX OPERATING SYSTEM)
3 - 46
WBPEEUI350003B0
INSTALLATION
to one of the previously mentioned files. Using your editor of
choice, edit these files as follows:
a. For Bourne and Korn shell user, add the following
lines to the end of the .profile file, immediately before the #
done line:
# Run base SETCIM/ODMS login file
if [ -f /setcim/commands/setcimlogin.sh
./setcim/commands/setcimlogin.sh Enter
fi
# Set ODMS variables Enter
if [ -f /setcim/ODMS/odms.sh
./setcim/ODMS/odms.sh Enter
fi
# done with ODMS setup
];
then
Enter
];
then
Enter
Enter
Enter
b. For C shell users, add the following lines to the .login
file:
# Set
source
# Set
source
#
up the SETCIM environment Enter
/setcim/commands/setcimlogin.csh Enter
the ODMS
environment Enter
/setcim/ODMS/odms.csh Enter
done with
odms
setup
Enter
These command scripts append directories to the path. The
path should not be explicitly set by the .login file or by the
.cshrc file.
If time synchronization is required, all ODMS users should
define the TZ variable in their environment. For example:
TZ = EST5
To add these lines to the .profile file using the vi editor. Use
the following commands:
cd (change to the home directory)
vi .profile
↑
Use
to move to the end of the file.
i (enter insert mode)
Type the commands as listed in Step 1a.
Press
Esc
escape to exit insert mode.
: (for line mode)
WBPEEUI350003B0
INSTALLATION (HP-UX OPERATING SYSTEM)
3 - 47
INSTALLATION
®
w (to write change to file)
q (to quit the editor)
The following command may be useful when editing a file:
dd (deletes a line)
2. Update the /etc/services file for ICI connections and for
GCS connections. Examples of these updates for ICI connections are:
DD_ttya 20000/tcp
DD_ttyb 20001/tcp
where 20000 and 20001 are port numbers. Examples of these
updates for GCS connections are:
gcsberk 5401/tcp
cim200 5402/tcp
3. Log in to an ODMS user account for the following steps.
Start up the SETCIM/open data management server system.
Use the following command to start the system:
startsetcim.sh
This command starts all open data management server processes including GCS client support and ICI interface support.
4. For all GCS client connections, task console scratch
records are required. Create a set of task console scratch
records for each GCS client prior to installation of the client.
These records can be created using the tsk_console.sh procedure (refer to TSK_CONSOLE SCRATCH RECORDS).
5. When all updates are complete, use the DBMT utility to
save a snapshot file.
6. After all installation operations are complete and all points
are configured in the system, verify that the historical files are
sized correctly. To do this, execute the file:
$ cd $SETCIMCODE
$ sizedhis Enter
Enter
NOTE: Execute these programs from one of the valid SETCIM/open
data management server user accounts established earlier in this
procedure.
INSTALLATION (HP-UX OPERATING SYSTEM)
3 - 48
WBPEEUI350003B0
INSTALLATION
This program will prompt for the disk history task record
name. Check at least the following records:
TSK_DHIS
TSK_DHS1
(corresponding to dhistory.dat file)
(corresponding to dhistor1.dat file)
If any additional historical task records are configured, they
should be checked also. This program reports the required
disk sizes. To verify the disk history file sizes, check the size of
the actual disk history file. The file names can be viewed using
the historical configuration display. Divide the file size by 512
to get the block size. Compare the block size to the block size
set in Step under Open Data Management Server Installation (HP-UX). To display the current disk file sizes:
$
$
cd /setcim/group200
ls -l *.DAT Enter
Enter
where /setcim is the directory in which SETCIM is installed
and group200 is the group directory created during the installation procedure. The group number may be different if
another HP-UX group was used to install the open data management server software. The files are the files that are listed in
the history display.
The following commands can be invoked, to increase the size of
a disk history file if the open data management server is shut
down.
$
$
cd /setcim/group200 Enter
$SETCIMCODE/incrdhis Enter
This program displays prompts asking for a disk history file
name. Enter the disk history file name requiring a size
increase. When prompted for a new size, enter a size that is
larger than the size specified by the sizedhis program.
If the ODMS system is active this file can be resized on-line
using the disk history configuration screens that are provided
by the GCS software. Refer to Disk History Files in Section 5
for information on how to use the disk history configuration
screens.
7. To set the ICI time zone information, enter the commands:
$
$
cd $PIMSEXE
initsync Enter
Enter
It will then update time zone configuration information for the
system.
Enter the time zone for the ODMS system:
WBPEEUI350003B0
INSTALLATION (HP-UX OPERATING SYSTEM)
3 - 49
INSTALLATION
®
Enter a number between -12 and 12 for the time zone. This
number represents the hours east of Greenwich mean time,
(for example, -5 is the Eastern Standard Time Zone in the
United States). Refer to Table 3-1 for a list of time zones worldwide.
This procedure updates any INFI 90 OPEN interfaces that are
defined in the database. If any interfaces are predefined, the
following prompts will appear. If no interfaces are predefined,
the prompts will not appear.
Enter the time zone for ICI ici_1 :
where ici_1 is the interface to an INFI 90 OPEN loop. Currently
all interfaces have the same time zone as the base ODMS system.
Additionally, the time synchronization information for a given
interface can be initialized at the prompt:
Should time sync data for ici_1 be initialized (Y/N)?
This information should be initialized before the interface is
placed on-line, but it should not be initialized once the interface is on-line. If the interface is time synchronizing the INFI 90
OPEN system and the time synchronization information is initialized, the INFI 90 OPEN system will reset all trend information, resulting in data loss. Type Y to initialize time or type N to
proceed.
8. If DESK software is added to the system at a later date,
update the SequeLink licenses. These licenses are in the following file:
/setcim/sequelink/servermap.tcp
where /setcim is the directory into which SETCIM was loaded.
This file contains the licenses listed:
CIMDESK*LSPCIMDES*license
SETCIM*LSPSETCIM*license
where license is the 26 character SequeLink license.
9. The SequeLink server must be started before either DESK
or the SETCIM Open Access Modules can be used. To start the
SequeLink server, log in as root and type the following commands:
cd $SETCIM/sequelink
./starttcpserver Enter
INSTALLATION (HP-UX OPERATING SYSTEM)
3 - 50
Enter
WBPEEUI350003B0
INSTALLATION
When the server starts, it checks the licenses in servermap.tcp. To verify that the licenses are valid, check the $SETCIM/sequelink/tcpsrv.log file.
GCS CLIENT INSTALLATION
To install a GCS client:
1. Log in to the system as the root user.
NOTE: For those installing the GCS client only (i.e., this was not
already done under Open Data Management Server Installation
(HP-UX)), delete the existing GCS directory before creating a new
one. Use the command rm -r gcs to delete the gcs directory.
2. Create a temporary directory to contain the tape distribution, if needed. A temp directory should exist from the SETCIM
installation procedure. If not, create the directory by entering
the command:
mkdir
/temp
Enter
where temp is the name of the directory being created.
3. Load the LSGCS client tape in the tape drive.
4. Change directories to the temporary directory using the
command:
cd
/temp
Enter
5. Load the files from the tape into the temporary directory by
entering:
tar -xv
- or tar -xf
/dev/rmt/Nm
Enter
where /dev/rmt is the device name for the tape drive and Nm is
the tape drive logical unit number such as 0m. The command
loads a command file and directory structure into the temporary directory.
6. At the # prompt, start the installation command file by typing:
./odms_install_client.sh
The script generates various prompts and loads the GCS client
system.
WBPEEUI350003B0
GCS CLIENT INSTALLATION
3 - 51
INSTALLATION
®
7. At the prompt enter the root GCS directory name, if it is not
defined.
Enter the directory that is to contain the GCS Package?
The directory should be a complete directory, such as /gcs. If
this directory does not exist, the installation procedure
prompts the user to create it.
Directory does not exist, create it (y/n)?
Type Y to create a new directory. A no response causes the system to prompt for a valid directory.
The installation procedure verifies that the directory is set correctly. The GCS directory is defined as follows:
$GCS=/gcs
Do you want to continue with this value? (y/n)
If this is the correct directory, type Y. The script will create all
needed subdirectories and expand the archives.
8. The GCS system can be defined to access any SETCIM/
open data management server system or it can be locked to a
local SETCIM/open data management server system.
Do you want GCS to be locally linked? (y/n)
This local linkage allows the GCS system to only communicate
with a given product version (such as SETCIM 4.2). In general,
the GCS system is not locally linked and the user should enter
an N, to allow for the database interface to communicate over a
physical communications link (i.e., TCP/IP).
NOTE: If GCS is locally linked, the display validation that is done
later in the installation will fail. Use ACCESS to modify all the displays to have their default node set to 0 instead of 1. After this
change, all displays need to be validated manually.
9. The installation procedure processes the open data management server specific items. These items require the name of
the directory that will contain the displays.
Enter the directory that contains the standard displays
Default will be 'displays'?
The default is usually accepted. The installation procedure creates this directory, the only time a different directory is valid is
if this system is being updated and a different directory was
used by the old version.
10. Enter the name of an ODMS user who will be using GCS to
access the open data management server system.
GCS CLIENT INSTALLATION
3 - 52
WBPEEUI350003B0
INSTALLATION
Enter user name?
This user must be a valid user. The activities that are to be performed are displayed and a prompt asks for confirmation to
continue or exit.
Do you want to continue (y/n)?
Exiting the installation procedure requires that the installation
procedure be started again at the beginning. A prompt asks for
the type of connection to the open data management server.
Will connection to server be via locally linked GCS (Y/N)?
If the GCS client was installed as locally linked in Step 8,
answer yes by typing Y. Typically, the GCS is not locally linked.
If this is the case with this installation answer no by typing N.
11. If responding with no in Step 10, enter the name of the
open data management server that connects to the GCS client
at the next prompt. This name is the network host name of the
open data management server.
Enter the name of the host server?
12. Copy the standard SETCIM displays to the GCS displays
directory.
Should standard SETCIM displays be loaded into /gcs/displays?
where /gcs/displays is the name of the GCS display directory
enter in Step 9. This step is recommended, although it can
take several minutes to several hours. The standard displays
provide access to functions such as easy trending.
NOTE: During the course of display validation the screen may not
update. To check the progress of display validation, open another
terminal, access the display directory to examine the date and time
for the display files.
The installation procedure processes all displays, converting
them from .asc to .dsp and validating them. This procedure
may take several minutes to several hours depending on the
CPU in use. Any resulting errors are echoed to the screen and
to the files /gcs/odms/gcsconv.err and /gcs/odms/gcsname.err.
WBPEEUI350003B0
GCS CLIENT INSTALLATION
3 - 53
INSTALLATION
®
POST INSTALLATION PROCEDURE (GCS CLIENT)
All users who are to be GCS client users are required to perform the following steps.
1. Change to the default directory of each user, and add
start-up commands to the .login and .profile files of each
open data management server user. Using any text editor, edit
these files as follows:
a. For Bourne and Korn shell users, add the following
lines to the end of the .profile file, just before the '# done'
line:
# GCS Login/Startup variables Enter
if [ -f /gcs/odms/odms_gcs.sh ] then
. /gcs/odms/odms_gcs.sh Enter
fi
Enter
b. For C shell users, add the following to the .login file:
# Set up the GCS Login/Startup environment
source /gcs/odms/odms_gcs.csh Enter
Enter
These command scripts append directories to the path. The
path should not be explicitly set by the .login file or by the
.cshrc file.
To add these lines to the .profile file using the vi editor, the
use the following commands:
cd (change to the home directory)
vi .profile
↑
Use
to move to the end of the file.
i (enter insert mode)
Enter the commands that are listed in Step 1a.
Press
Esc
to exit the insert mode.
: (to get to line mode)
w (to write change to file)
q (to quit the editor)
The following command may be useful when editing a file:
dd (deletes a line)
POST INSTALLATION PROCEDURE (GCS CLIENT)
3 - 54
WBPEEUI350003B0
INSTALLATION
2. Log out of the root account and log in as a GCS user. For all
GCS client connections, task console scratch records are
required. It is recommend that each GCS client have at least
two sets of scratch records defined. These records can be created using the tsk_console.sh procedure (refer to
TSK_CONSOLE SCRATCH RECORDS).
TSK_CONSOLE SCRATCH RECORDS
The open data management server requires that all GCS client
systems have a set of scratch records defined in the server.
These records can be defined using one of the following commands depending on the system. These commands must be
executed while the ODMS system is running. If the system is
not running, start it using following the commands:
$ @setcimcom:startsetcim
startsetcim.sh
Enter
for VAX systems
for HP-UX systems
Enter
To define scratch records:
For VAX based servers:
@PIMS$COM:TSK_CONSOLE
"node_name" c_type
Enter
where node_name is the node name of the GCS client enclosed
in quotation marks and c_type is the type of connection (only
DECNET or TCPIP connections are valid).
NOTE: For TCP/IP connections the node name is case sensitive.
For HP based servers:
tsk_console.sh
node_name
Enter
where node_name is the node name of the GCS client. All connections to an HP host must use a TCP/IP connection.
These commands updates the open data management server
database. After the TSK_CONSOLE scratch records are created, take a database snapshot to insure these changes are not
lost. Snapshots can be saved using the DBMT tool or ENGCON
utility, see the SETCIM Users Manual for more information.
The default name of the snapshot file for open data management server systems is listed in the SETCIM.RUN file.
WINDOWS CLIENT TERMINAL INSTALLATION
This section covers the following information:
WBPEEUI350003B0
•
Microsoft Windows client terminal requirements.
•
Installing a GCS console on a personal computer.
TSK_CONSOLE SCRATCH RECORDS
3 - 55
INSTALLATION
®
•
Guidelines for configuring a GCS console on a personal
computer using Wollongong TCP/IP software.
•
Guidelines for configuring a GCS console on a personal
computer using DECnet Pathworks software.
•
Guidelines for configuring a GCS console on a personal
computer using TCP/IP Pathworks software.
•
Guidelines for connecting a PC-based console to a GCS
console on a VAX server using TCPware software.
•
Guidelines for connecting a PC-based console to a GCS
console on a VAX server using UCX software.
•
Guidelines for connecting a PC-based console to a GCS
console on a VAX server using DECnet software.
•
Guidelines for connecting a PC-based console to a GCS
console on an HP server.
Microsoft Windows Client Terminal Requirements
Installing and operating a GCS console from a Windows client
terminal requires:
•
A 486DX-based computer minimum.
•
At least 8 megabytes of memory for GCS console and Windows software.
•
At least 40 megabytes of hard disk drive space.
•
An X Windows software package.
•
TCP/IP (VAX/VMS or HP-UX open data management servers) or DECnet Pathworks (VAX/VMS open data management servers) networking software.
GCS Console Installation
This procedure is an example procedure that explains how to
setup a GCS console on a personal computer using Wollongong
Pathways TCP/IP software to communicate with a open data
management server on a VAX using TCPware software. Other
installations may use different protocols or software packages,
but the concepts are similar.
NOTE: Install the TCPware (VAX) and Pathways TCP/IP (PC) software before proceeding with the GCS console installation procedure. Refer to the instruction guides for those software packages for
installation instructions.
WINDOWS CLIENT TERMINAL INSTALLATION
3 - 56
WBPEEUI350003B0
INSTALLATION
To install GCS console for windows:
1. Insert the first GCS console floppy disk into the floppy disk
drive.
2. From within Windows, select run from the file pulldown
menu.
3. Enter a:/setup and click on the OK button to start the
installation process.
4. The installation process opens several windows. Each window asks for information to be entered. The requested information is:
•
The target drive and directory.
•
The default cursor size: none, small cross hair or large
cross hair.
•
The object focus option: (standard, no default focus or follow cursor).
•
The communication type: DECnet, NETBIOS, TCP/IP
[3COM], TCP/IP [Lan Workplace], TCP/IP [Wollongong] or
NETIPC/ARPA.
For this configuration select TCP/IP [Wollongong].
•
The name of a scratch drive for temporary files.
•
If the system should write communication errors to a log
file.
•
Switch mouse buttons for left-handed people.
After all prompts have been answered, the installation will
automatically process disks 1 through 5. Insert each disk as
the system requests it.
5. The installation process (if permitted) updates the config.sys and autoexec.bat files for GCS console required variables. It creates a program group and start-up icon and
concludes installation.
6. When the installation completes, install disk 6 in the drive
and bring up a DOS window and enter the following commands:
cd c:\gcswin\displays
a:\scdisps Enter
a:\odmdisps Enter
install.bat Enter
WBPEEUI350003B0
Enter
WINDOWS CLIENT TERMINAL INSTALLATION
3 - 57
INSTALLATION
®
where c:\gcswin is the directory where the GCS console is
installed, \display is the default display directory and a: is the
floppy disk drive.
These steps extract the open data management server displays
and add them to the GCS displays directory, convert the displays from .ASC file format to .DSP file format, and set up the
console configuration. The scdisps.exe file is a self extracting
zip file that loads the SETCIM specific displays. The odmdisps.exe file is a self extracting zip file that loads the base
open data management server displays. The script file will
replace several base SETCIM display files. The install.bat file
converts the displays and provides an initial GCS console configuration.
7. Type exit to return to Windows.
8. Exit Windows, remove the floppy disk from the floppy disk
drive, boot the system, and start-up Windows.
9. Click on the GCS icon. Do the following steps to complete
the GCS configuration and validate the displays.
a. From the ACCESS main menu, select Setup.
b. Select GCS from the setup menu and wait for the System Configuration Utility display.
c. Select the Node-Names option.
d. Set up at least one logical node for the open data management server. The following example is for a VAX open
data management server named ODMSRV using TCPWARE
for a TCP/IP connection.
This server has a communications task named BGCSBERK. The individual communications tasks depend on
the type of network connection (DECnet or TCP/IP), server
type (HP or VAX) and the actual network software running
on the server and host. Refer to the GCS Users Manual for
more information. Refer to the appropriate section for
information on various connection types following the GCS
console installation procedure.
Select a unique node driver address between 82 and 99. An
example entry for Wollongong TCP/IP is:
1
ODMSRV//BGCSBERK
85
LOGICAL NODES
1NODE TASK IDENTIFIER
NODE DRIVER ADDRESS
Refer to Table 3-1 for a summary of the available options,
and the required SETCIM.RUN file server line and GCS
Configuration line for those options.
WINDOWS CLIENT TERMINAL INSTALLATION
3 - 58
WBPEEUI350003B0
INSTALLATION
Refer to the GCS User Manual for more information on
configuring the interface. Verify that any other configuration aspects of connecting a personal computer client to a
HP or VAX server are completed.
e. When completed, exit this display using the cancel
mouse button and quit the System Configuration Utility
menu.
10. After communications are established, all the system displays must be validated to connect the client displays to the
server database.
NOTE: The server must be up and operating the open data management server application while proceeding with this activity.
The display validation operation attempts to establish a communications connection (for example, via TCP/IP) with the
server that was defined earlier in the GCS setup (node name =
ODMSRV in the example in Step 9). If this connection is not
established, the display validation appears to be working, but
all displays will report validation errors.
Verify that the message Remote connection established...
appears in the access messages window during Step d. If it
does not, verify that the client and server platforms are correctly configured and validate the display again. To validate
displays:
a. Enter the GCS Access Utility.
b. Select the Utilities option, then select the Validation
option.
c. From the validation menu, select Names to open the
Validate Tag Names.
d. Select the All option, then select the Use option to begin
the validation process. Verify there is a Remote connection
established... message as the validation process begins.
e. Successful validation of the displays takes several minutes to several hours, depending on the types of client and
server platforms.
f.
Exit to the access utility main menu.
g. Select the Console option and verify that the client connects to the server again, and executes the open data management server/GCS console displays.
This will conclude the GCS portion of the setup.
WBPEEUI350003B0
WINDOWS CLIENT TERMINAL INSTALLATION
3 - 59
INSTALLATION
®
Table 3-2. Configuration Options (PC Client to ODMS Server)
Host/
Communication
Protocol
GCS Configuration Line
(PC Client)
SETCIM.RUN File Server Line
VAX on
DECnet
See note 1.
ODMSRV/user/pass//ngcslink
VAX on
TCP/IP (UCX)
$@setcimcom:start_bgcsnet
bgcslink_ucx ucx
ODMSRV/user/pass//bgcslink_ucx
VAX on
TCP/IP (TCPWARE)
$@setcimcom:start_bgcsnet
bgcslink_tcpw tcpware
ODMSRV/user/pass/bgcs/link_tcpw
HP on TCP/IP
bgcsnet gcsberk
/SETCIM/COMMANDS/bgcslink.sh
ODMSRV/user pass//cim200
NOTE: 1. No updates to the SETCIM.RUN file are needed, setcimcom:ngcslink.com must be defined as a DECnet object.
PERSONAL COMPUTER CLIENT (Wollongong TCP/IP)
These steps provide a general guideline for configuring a personal computer client using Wollongong TCP/IP software. To
configure the personal computer for TCP/IP access to the host
and define SERVICES:
1. Edit or create the file c:\pathways\SERVICES. to include
the following lines:
For a VAX open data management server using TCPWARE:
BGCSLINK_TCPW 5201/TCP
BDDELINK_TCPW 5202/TCP
Enter
Enter
For a VAX open data management server using UCX:
BGCSLINK_UCX 5201/TCP
BDDELINK_UCX 5202/TCP
Enter
Enter
For an HP open data management server:
GCSBERK
5201/TCP
Enter
The numbers entered must be the same as the service port
numbers assigned in the server configuration commands.
Depending on the TCP/IP implementation, these lines may
be case sensitive.
2. Copy winsock.dll from the pathways directory to the Windows root directory.
3. Copy wtcp.dll from the GCS directory to the Windows root
directory.
4. In the Windows root directory, copy wtcp.dll to stptcomm.dll.
WINDOWS CLIENT TERMINAL INSTALLATION
3 - 60
WBPEEUI350003B0
INSTALLATION
5. Create or edit a file named hosts (no extension) in the pathway directory to include the names and IP addresses of all
open data management servers.
PERSONAL COMPUTER CLIENT (DECnet Pathworks)
These steps provide a general guideline for configuring a personal computer client using DECnet Pathworks software. To
configure the personal computer for access to the host:
1. Make sure that DECnet Pathworks is configured and that
the client computer is fully configured.
2. Using the NCP utility
NCP>
define
node
ODMS_SRV address 10.670
Enter
where ODMS_SRV is the name of the open data management
server node and 10.670 is the address of the server.
3. No other steps should be required on the personal computer for DECnet type connections.
PERSONAL COMPUTER CLIENT (TCP/IP Pathworks)
These steps provide a general guideline for configuring a personal computer client using TCP/IP Pathworks. To configure
the personal computer to access the host.
1. Make sure that TCP/IP Pathworks is configured and that
the client computer is fully configured.
2. Edit the hosts file in the pathworks directory to include the
name of the client and of the open data management server.
3. Edit the services file in the pathworks directory to include
the following lines:
For a VAX open data management server using TCPWARE:
BGCSLINK_TCPW 5201/TCP
BDDELINK_TCPW 5202/TCP
Enter
Enter
For a VAX open data management server using UCX:
BGCSLINK_UCX 5201/TCP
BDDELINK_UCX 5202/TCP
Enter
Enter
For an HP open data management server:
GCSBERK
GCSBERK
WBPEEUI350003B0
5201/TCP
5202/TCP
Enter
Enter
WINDOWS CLIENT TERMINAL INSTALLATION
3 - 61
INSTALLATION
®
The numbers entered must be the same as the service port
numbers assigned in the server configuration commands.
4. No other steps should be required on the PC for TCP/IP
type connections.
VAX SERVER (TCPware)
These steps provide a guideline for connecting a VAX server
using TCPware software to a GCS console.
1. Edit the file device:[tcpware]services by adding the following lines:
BGCSLINK_TCPW 5201/tcp #GCSLINK TCP/IP
BDDELINK_TCPW 5202/tcp #DDELINK TCP/IP
Enter
Enter
where any unused service port numbers are used for the port
numbers in the command lines.
2. Edit the file SETCIM.RUN by adding the following commands:
$
@SETCIMCOM:start_bgcsnet bgcslink_tcpw
tcpware Enter
$ @SETCIMCOM:start_bddenet bddelink_tcpw
tcpware Enter
where SETCIM.RUN is the open data management server
start-up file found in the group directory.
3. Edit the TCPware HOSTS file to include the IP addresses
and names of all clients.
VAX SERVER (UCX and SETCIM 4.5A)
These steps provide a guideline for connecting a VAX server
using UCX software to a GCS console.
WINDOWS CLIENT TERMINAL INSTALLATION
3 - 62
WBPEEUI350003B0
INSTALLATION
1. Issue the following commands from the system account:
$ UCX
UCX> SET SERVICE BGCSLINK_UCX - Enter
_UCX> /FILE=DISK1:[SETCIM.COMMANDS]
BGCSLINK_UCX.COM- Enter
_UCX> /PORT=5201 /PROCESS_NAME =
BGCSLINK_UCX - Enter
_UCX> /USER_NAME=ODMS_USER Enter
UCX> SET SERVICE BSPDDE_UCX - Enter
_UCX> /FILE=DISK1:[SETCIM.COMMANDS]
BSPDDE_UCX.COM Enter
_UCX> /PORT=5202 /PROCESS_NAME =
BSPDDE_UCX - Enter
_UCX> /USER_NAME=ODMS_USER Enter
UCX> ENABLE SERVICE BSPDDE_UCX Enter
UCX> EXIT Enter
where DISK1: is the disk device and SETCIM. is the directory
into which SETCIM was installed, 5201 is a unique port number that corresponds to the port numbers used in the GCS
console (PC), and ODMS_USER is the name of any valid SETCIM/ODMS user created during server installation.
2. Edit the file SETCIM.RUN by adding the following commands:
$
$
@SETCIMCOM:start_bgcsnet bgcslink_ucx ucx
@SETCIMCOM:start_bddenet bspdde_ucx ucx
Enter
Enter
where SETCIM.RUN is the open data management server
start-up file found in the group directory.
3. Edit the UCX HOSTS file to include the IP addresses and
names of all clients.
VAX SERVER (DECnet)
These steps provide a guideline for connecting a VAX server
using DECnet software to a GCS console.
1. Configure the operating system for network objects to support GCS connections. The following commands will create a
GCS connection:
$ MCR NCP Enter
NCP> def obj ngcslink number 0 file
setcimcom:ngcslink.com Enter
NCP> set obj ngcslink number 0 file
setcimcom:ngcslink.com Enter
NCP> exit Enter
WBPEEUI350003B0
WINDOWS CLIENT TERMINAL INSTALLATION
3 - 63
INSTALLATION
®
where ngcslink is the name of the service that remote clients
are using for a connection.
2. Make sure that all clients are defined in the DECnet (NCP)
database. Use the following commands to show and define new
nodes.
$ MCR NCP Enter
NCP> show know nodes Enter
NCP> def node 10.670 name ODMS_CLT
NCP> set node 10.670 name ODMS_CLT
NCP> exit Enter
Enter
Enter
where ODMS_CLT is the node name of the client.
3. No additional configuration is required for a DECnet type
connection.
VAX SERVER (TGV Multinet)
TGV Multinet support requires that the UCX support library
UCX$IPC.OLB be copied from MULTINET_COMMON_ROOT:
[MULTINET .LIBRARY] to SYS$LIBRARY directory, prior to
installation of the ODMS system. When installing the ODMS
client system, select Multinet as the communication option.
1. Multinet must be configured to support the bgcslink service. To configure, issue the following commands at the appropriate screen prompts shown:
$ MULTINET CONFIGURE/SERVICE
MultiNet Server configuration Utility
[Reading in configuration from MULTINET:SERVICES.
MASTER_SERVER]
SERVER-CONFIG> addbgcslink
[Adding new configuration entry for service “BGSLINK”]
Protocol: [TCP]
TCP Port number: 5001
Program to run: NONE
[Added service BGCSLINK to configuration]
[Selected service is now BGCSLINK]
SERVER-CONFIG> set service none
[Service action of BGCSLINK set to NONE]
SERVER-CONFIG> set program
[Program to run for BGCSLINK set to NONE]
SERVER-CONFIG> diable bgcslink
SERVER-CONFIG> show/full bgcslink
Service “BGCSLINK”: ***DISABLED***
TCP socket (AF_INET, SOCK_STREAM), port 5001
WINDOWS CLIENT TERMINAL INSTALLATION
3 - 64
WBPEEUI350003B0
INSTALLATION
Socket Options = SO_KEEPALIVE
INIT () = TCP_Init
LISTEN () = TCP_Listen
CONNECTED() = TCP_Connected
SERVER-CONFIG> exit
[writing configuration to MULTINET_COMMON_ROOT:
[MULTINET] SERVICES. MASTER_SERVER]
2. Edit the file SETCIM.RUN by adding the following commands:
$
$
@SETCIMCOM:start_bgcsnet bgcslink_ucx ucx
@SETCIMCOM:start_bddenet bspdde_ucx ucx
Enter
Enter
where SETCIM.RUN is the open data management server
start-up file found in the group directory.
3. Edit the UCX HOSTS file to include the IP addresses and
names of all clients.
HP SERVER (HP CLIENT)
These steps provide a guideline for connecting an HP server to
an HP-based GCS consoles:
1. Edit the /etc/services file on both the server and client by
adding the following line:
gcsberk 5401/tcp
#GCSLINK
TCP/IP (HP client)
where any unused service port number is used for the service
port number in the command.
2. On the server, edit the SETCIM.RUN file by adding the following line:
bgcsnet
gcsberk
/SETCIM/COMMAND/bgcslink.sh
where SETCIM.RUN file is the open data management server
start-up file found in the group directory.
3. Edit the /etc/hosts file to include the IP addresses and
names of all clients.
WBPEEUI350003B0
WINDOWS CLIENT TERMINAL INSTALLATION
3 - 65
INSTALLATION
®
HP SERVER (PC CLIENT)
These steps provide a guideline for connecting an HP server to
an PC-based GCS consoles:
1. Edit the /etc/services file on the server by adding the following line:
cim200 5402/tcp
#GCSLINK
TCP/IP (PC client)
where any unused service port number is used for the service
port number in the command.
2. On the server, edit the /etc/inetd.conf file by adding the
following line:
cim200 stream tcp nowait
cimgcsi_bs.sh cimgcsi
odms
/setcim/commands/
where odms is a valid user account.
3. Edit the /etc/hosts file to include the IP addresses and
names of all clients.
4. Reset the TCP/IP process with the following command:
inetd -c.
WINDOWS CLIENT TERMINAL INSTALLATION
3 - 66
WBPEEUI350003B0
SECTION 4 - CONFIGURATION
INTRODUCTION
This section explains how to configure a tag in the open data
management server database. Tag configuration can be done
on-line via the Open Data Management Server (ODMS) database configuration screens or off-line using SETCIM utility
programs RECSAVE and RECLOAD. The configuration example provided in this section explains how to do an on-line tag
configuration using the open data management server database configuration screens.
OFF-LINE CONFIGURATION
An INFI 90 OPEN tag database can be prepared off-line and
then loaded into the open data management server using SETCIM utility programs RECSAVE and RECLOAD. The RECSAVE
program saves the open data management server database
record as an ASCII file. The RECLOAD program is used to load
the ASCII representations of the open data management server
database records into the open data management server database. For information on how to set up database records to be
saved as ASCII files, formatting requirements, options, loading
database files, and using the utility programs, refer to the SETCIM Users Manual. To be sure that all ODMS tags and fields
are set up properly, off-line configuration should be done by
Elsag Bailey.
ON-LINE CONFIGURATION
INFI 90 OPEN tags can be individually configured on-line and
placed into the open data management server database via the
database configuration screens. Tag configuration is easy and
straightforward using this method. The database configuration
screens provide user entry fields (gray fields with green foreground) that show what database fields can be configured,
updated or deleted by the user. Each of these screen fields correspond to an open data management server database field
that must be defined by the user. All database fields are listed
in Table E-2 with the following information provided:
WBPEEUI350003B0
•
The database field name.
•
Tag type supported.
•
If the field is on-line changeable.
•
The database field default value.
INTRODUCTION
4-1
CONFIGURATION
®
•
If user definition is required.
•
If the field is updated by the INFI 90 OPEN system.
•
The required format or restrictions of the field.
•
A description of the database field and further explanation
of the format (if required).
After the tag database fields have been configured, the record
can be updated or created. Additionally, existing tags can be
deleted using the tag configuration screen. All open data management server screens can be accessed without a password
for viewing only. An engineers level password is required to create, update, or delete tag database records.
EXAMPLE CONFIGURATION
The following steps provide an example configuration that
shows how to create and configure a station tag record for the
open data management server database. This example uses a
station tag which is a complex tag to configure. All other tags
are configured using the same steps, but may require less configuration information and steps. Whenever configuring a particular open data management server database tag type, refer
to the Function Code Applications Manual for information
that relates to its use or application within an INFI 90 OPEN
control system. Refer to Appendix E for information on how the
tag needs to be configured within the open data management
server.
To configure an open data management server station tag
record:
1. From the main menu, highlight Configuration and click
with the mouse or press Enter , or press F4 to access the configuration menu.
2. Highlight Database and click with the mouse or press
Enter , or press F1 to access the database configuration tag
selection screen (Fig. 4-1).
3. There are three entry fields on the database tag configuration selection screen, Tag Name, Tag Type, History Area.
a. Enter the desired tag name for the tag being created by
highlighting the gray field next to Tag Name and type in the
name. A Tag does not exist in the database message
appears below the tag name if this tag name does not
belong to any tag already existing in the database.
If an existing tag name is not known, highlight View Tag
Listings and click with the mouse or press Enter , or press
EXAMPLE CONFIGURATION
4-2
WBPEEUI350003B0
CONFIGURATION
TPS1150B
Figure 4-1. Database Configuration Tag Selection Screen
F1 to access a tag list. From the tag list screen click < or >
to select a tag type, domain, and page (if the tag list is more
than one page). From the tag list screen, highlight the tag
name to configure and click Tag Configuration or press F1
to go to the tag configuration screen (Fig. 4-2).
b. To enter a tag type, either use < or > to click through
the available tag types or highlight the gray field and type
the tag type and press Enter or click the field entry with the
mouse.
c. Enter a disk history area to be used for this tag. Highlight the gray field and enter the disk history area number
and press Enter or click the field entry with the mouse.
4. Highlight Tag Configuration and click with the mouse or
press Enter , or press F2 to open the tag configuration screen
(Fig. 4-2). Information that was entered on the database configuration tag selection screen appears in cyan text at the top of
this screen and it is noted under the tag name that this is a
new tag.
Tag exception configuration data is at the bottom of the screen
in blue text and can only be viewed. Current tag exception data
is displayed when the screen is entered. The screen does not
dynamically update during configuration. It can be updated by
exiting and re-entering the screen. Some of these fields are
configured in the INFI 90 OPEN tag and some show default settings of fields that can be changed on-line from the operating
parameters screen.
WBPEEUI350003B0
EXAMPLE CONFIGURATION
4-3
CONFIGURATION
®
Some of the user entry fields will have default values in them.
These values can be used or changed to a different value allowable by the field format.
a. From the tag configuration screen enter a customer tag
ID. Highlight the appropriate gray field and type the tag ID
then press Enter or click the field entry with the mouse.
b. Highlight the Domain field to enter a user-defined
domain to which this tag will be logically associated. This
field is usually selected from a list of defined domains.
c. Use the default value supplied for the value format field
or select one of the valid formats from Table E-2. Highlight
the field to enter the desired value format then press Enter
or click the field entry with the mouse. This field determines how the tag value is displayed and is used by other
database fields.
TPS1151B
Figure 4-2. Tag Configuration Screen
d. The initial value field contains a value that is loaded
into the value field if the open data management server
cannot establish communication with the INFI 90 OPEN on
start-up. Enter the desired initial value in this field then
press Enter or click the field entry with the mouse.
e. The ICI field is a name corresponding to an ICI interface
or open system manager. To change this field, highlight the
field and enter a valid ICI interface or open system manager
number then press Enter or click the field entry with the
mouse. If there are no ICI interface or OSM server numbers
EXAMPLE CONFIGURATION
4-4
WBPEEUI350003B0
CONFIGURATION
available, refer to Define ICI Interface in Section 4 to create an ICI interface.
f. The ICI index field points to the internal memory location where exception data is stored in an ICI interface or
OSM interface. Each tag should be assigned a unique ICI
index number. It is best to use ICI indices that are grouped
in a low number range. It may take several minutes to
update the database when there are large gaps between ICI
indices. During this time, the tag configuration screen is
unavailable. Gaps between ICI index numbers also affect
ICI interface start-up time. Highlight this field and enter an
ICI index number then press Enter , or click the field entry
with the mouse.
g. The Loop, Node, Module, and Block fields all relate to
the INFI 90 OPEN hardware addresses where the tag is
located. In each field enter the loop, node, module and
block address. Press Enter or click the field entry with the
mouse after entering an address in each field.
h. Select a maximum and minimum value to enter the
Graph Maximum and Graph Minimum fields. These fields
determine the upper and lower limit values of the trends
and bar chart used in the operating parameters detail window.
The format of these fields is determined by the value format. For example, entering a 1.0 using a F12.7 value format results in 1.0000000 being displayed in the field. If
values other than the default values are desired enter those
values in the fields. Press Enter or click the field entry with
the mouse after entering each value.
i. The Bad Qual Value field provides a value for the value
field when the tag bad quality option is selected and the tag
quality value is bad. Enter one of the valid entries listed in
Table E-2 and press Enter or click the field entry with the
mouse.
5. From the tag configuration screen, a tag specification configuration screen can be opened (Fig. 4-3). This screen contains
user entry fields for tag specifications. To open the tag specification configuration screen, highlight Specs and click with the
mouse or press Enter , or press F3.
Many of the fields on the tag specification screen are automatically set to the same value that the tag possesses in the INFI 90
OPEN system. Refer to Table E-2 for an explanation of these
fields and the required format. This screen functions similarly
to the tag configuration screen. To change a particular field,
highlight the field, enter a value and press Enter or click the
field with the mouse. Unless the tag is taken off scan, the specification fields obtained from the INFI 90 OPEN system are
modified when they change in the INFI 90 OPEN system.
WBPEEUI350003B0
EXAMPLE CONFIGURATION
4-5
CONFIGURATION
®
TPS1152B
Figure 4-3. Tag Specification Configuration Screen
6. When both the tag configuration and tag specification configuration screens have been completed satisfactorily, highlight
Update and click with the mouse or press Enter , or press F1 to
create the tag.
7. Confirmation is required to create the tag record or abort it
by clicking on yes or no when prompted. If there is an error in
the tag record an error message is displayed and the tag is not
created.
8. Delete tag records by highlighting delete and click with the
mouse or press Enter , or press F2 .
9. Confirmation is required to delete the tag record or abort
deletion by clicking on yes or no when prompted. If the tag
does not exist an error message is displayed stating the tag was
never created.
10. Configure another tag from this screen by highlighting
select tag and click with the mouse or press Enter , or press
F4 to return to the database configuration tag selection screen.
11. Use the right button on the mouse or click
the database configuration screens.
EXAMPLE CONFIGURATION
4-6
Previous
to exit
WBPEEUI350003B0
SECTION 5 - OPERATING PROCEDURES
INTRODUCTION
This section explains how to use the open data management
server manager. The open data management server software is
menu driven and user friendly. The steps presented show how
to use the open data management server functions. For information on operating the SETCIM layered products refer to the
appropriate SETCIM instruction manual. The applications covered in separate manuals include:
•
•
•
•
•
•
•
•
CALC™.
Q.
SQLplus.
ACCESS utility.
Database management tool (DBMT).
DA™.
DESK.
@aGlance/IT.
OPEN DATA MANAGEMENT SERVER START UP
To start up the open data management server manager:
1. Log-in to the server as an open data management server
Open VMS or Alpha AXP user. For VAX systems, enter the command @SETCIMCOM:STARTSETCIM. For HP systems, enter the
command startsetcim.sh.
NOTE: The open data management server can be configured to
start up automatically on a system boot. Refer to Section 6.
2. Start up the GCS operator console. For VAX systems, enter
the command OPCON from any directory. For HP systems,
change to the GCS directory by entering cd $GCSDIS, then
enter the command opcon.
NOTE: The GCS operator console can be configured to start up
automatically on login. Refer to Section 6.
3. Use the mouse to click F1 or press Enter to access the main
menu. The cover screen accesses the main menu automatically
after 15 seconds if no action is taken.
4. To exit the GCS operator console, go to the ODMS title
screen, click the right button on the mouse (click the left button on a left handed mouse), then type e and press Enter .
WBPEEUI350003B0
INTRODUCTION
5-1
OPERATING PROCEDURES
®
MENU ACCESS
There are several ways to access menu items.
•
Press the associated function key (refer to Appendix A for
VAX/Open VMS, Alpha AXP/Open VMS, HP-UX and PC
terminal key assignments).
•
Use the mouse pointer to highlight a menu item description, then click with the mouse, or press Enter .
•
To escape a screen or menu, click Previous which returns
the user through the display hierarchy. Selecting the undo
key or clicking the right button on the mouse returns the
user to the previous screen.
•
There are hot keys which can be used to access functions
on the screens. Shift-function keys are dedicated display
keys. Shift-control keys are user defined keys. Refer to
Appendix A for a list of all the hot key assignments for each
operating system. Refer to the GCS Users Manual for
information on how to assign functions to user-defined
keys using the ACCESS utility.
DEFAULT SECURITY
All open data management server displays have default security levels. Some displays are accessible without a password.
Others require either an operator password or an engineer
password. There are 10 possible security levels which can be
assigned to passwords. The highest security level is 10. The
lowest security level is one. A security level zero has no password security.
Refer to Appendix C for a list of the default security levels for
all open data management server display screens. It also
explains how to assign or modify security level passwords and
change the number of password security levels using the
ACCESS utility.
MENU COLORS
The GCS console screen fields and text have color assignments
that make functional identification easy and consistent from
screen to screen. Refer to Appendix A for a list of GCS console
screen color assignments and style guide.
MENU ACCESS
5-2
WBPEEUI350003B0
OPERATING PROCEDURES
MAIN MENU
There are five selections from the main menu. Those selection
are:
Operations
Applications
Utilities
Configuration
Customer defined
Open Data Management Server Operations Menu
There are seven selections from the open data management
server operations menu. Those selections are:
Summaries and event logs
Ad hoc trending
History data view
Operating parameters
Interface statistics
Message output
Ad hoc query
SUMMARIES AND EVENT LOGS
Selecting summaries and event logs from the open data management server operations menu opens the summaries and
event logs screen. Refer to Figure 5-1.
The summaries and event logs are divided into the following
groups:
WBPEEUI350003B0
•
Summary of all tags for a selected tag type (tag type summaries).
•
Summary of bad quality tag types listed by time of occurrence (condition list summary).
•
Summary of manually substituted tags listed by time of
occurrence (condition list summary).
•
Summary of off scan tags (condition list summary).
MAIN MENU
5-3
OPERATING PROCEDURES
®
TPS1102A
Figure 5-1. Summaries and Event Logs Screen
•
Summary of tags with messages disabled (condition list
summary).
•
Master history event log (event log).
•
User changes history log (event log).
Tag summaries list all tags of a selected tag type. Tag exception
report information listed in the tag summary includes the time
and date of the exception report, and the value and quality of
the tag. Additionally, the tag summary lists the tagname,
description, and engineering units (from specification exceptions) assigned to the tag when it is configured. This information is viewed on a tag summary screen (Fig. 5-2).
Each tag summary can hold up to 10,000 tags. It is recommended that no more than 10,000 tags of any one type are
configured. If a print screen function is set up for the operating
system being used, printouts of any page in the tag summary
can be generated. Tag summaries are not archived.
The master historical event log lists system events including
acknowledged and unacknowledged alarms, digital tag state
changes, off scan tags, manually substituted tags, bad quality
tags, system messages, user initiated change messages, and
system events (Fig. 5-3). Each event log can hold up to 1000
events in history. The latest event is at the top of the log.
Events occurring prior to the last 1000 events are stored in
archive files. Events stored in history or archived can be viewed
or printed.
MAIN MENU
5-4
WBPEEUI350003B0
OPERATING PROCEDURES
TPS1103A
Figure 5-2. Tag Summary Screen
TPS1104A
Figure 5-3. User Change Log Screen
The user change history log lists changes made to the open
data management server through functions contained in the
open data management server operations menu and the open
data management server configuration menu. When a user
change occurs, the recorded data are the name of the changed
parameter, the values of the parameter before and after the
WBPEEUI350003B0
MAIN MENU
5-5
OPERATING PROCEDURES
®
change occurred, the console name, time of message, and the
time the change occurred. Like the historical event log, this log
holds up to 1,000 events in history with the latest event at the
top of log. User change messages that occurred prior to the last
1,000 events are archived and can be printed or viewed. Automatic printing of events requires additional database record
configuration.
A specific tag can be selected from any of the tag type summary
screens or tag condition summary screens for a detailed display of tag parameters. Tag parameters are displayed on an
operating parameters screen (Fig. 5-4).
To use the summaries and event logs:
1. From the open data management server operations menu
press F1 , or highlight the selection and click with the mouse.
Figure 5-1 shows the summaries and event logs screen.
2. Use the mouse to click the appropriate selection for a tag
type summary or event log, or use the arrow keys to highlight a
selection, then press Enter .
3. There are two event logs, one that lists historical events
(event log), and one that lists user changes (user log). Access
these logs by clicking the appropriate selection or use the
arrow keys to highlight a selection, then press Enter .
If a tag type summary is selected, a screen appears that lists all
the tags of the selected tag type. Tag type summary tags are
listed in the order they are created (Fig. 5-2). For all other tag
summaries and event logs, tags and messages are listed by the
time of occurrence (Fig. 5-3).
For tag summaries such as Off-line or Bad Quality, tags are
listed in those summaries in the order received (i.e., the most
recent on top). Therefore, time stamps will not be in chronological order. For example, if an exception is received for a tag
already on the list, its entry displays a time stamp for the latest
exception but its position on the list does not change.
Each tag summary can hold up to 10,000 entries. Event logs
can hold up to 1,000 messages in history order, additional
messages can be stored in archival files. The most recent message written to an event log or any tag summary is at the top of
the log. When the number of messages exceeds the limit of the
summary or log, the oldest message is overwritten.
Column width allocation for tag summaries varies with tag
type. Therefore, summaries such as Off-line will not appear in
alignment.
4. Click a tag with the mouse and a tag operating parameter
window opens (Fig. 5-4). From that window, all of the operat-
MAIN MENU
5-6
WBPEEUI350003B0
OPERATING PROCEDURES
ing parameter functions are listed and displayed. Refer to
OPERATING PARAMETERS for information on how to configure operating parameters.
TPS1125B
Figure 5-4. Tag Operating Parameter Window
AD HOC TRENDING
Ad hoc trending is a SETCIM function (Easy Trending) that
permits setting up trend displays for a chosen group of tags.
Ad hoc trending provides a means to display trend plots for
integer or floating point values that are stored in history without defining a custom GCS console trend plot for the specific
data. Table 5-1 lists the attributes of INFI 90 OPEN tag types
that are set up for ad hoc trending. Ad hoc trending allows the
user to do the following operations.
WBPEEUI350003B0
•
View ad hoc data.
•
Scroll forward and backwards in time.
•
Zoom a particular point in time.
•
Fetch values at a particular point in time.
•
Display data in a step format.
•
Specify the trend start time.
•
Specify the trend view time.
MAIN MENU
5-7
OPERATING PROCEDURES
®
•
Store up to eight plots in a plot group.
•
Recall previously defined plot groups.
•
Turn individual plots on and off.
Plot characteristics are set up on the easy trending record
detail screen (refer to the SETCIM Users Manual for figures
that show the various easy trending screens). Plot group characteristics are set up on the easy trending group configuration
screen. For information on how to use easy trending and the
functions available refer to the SETCIM Users Manual.
Table 5-1. Trended Attributes (Ad Hoc Trending)
Tag
Attributes
ANALOG
Value and time
ANALOG OUT
Value and time
DIGITAL
Value and time
DIGITAL OUT
Value and time
DAANG
Value and time
DADIG
Value and time
RCM
Value, override value, feedback value, and time
RMSC
Value and time
RMC
Value, feedback 1 value, feedback 2 value, and time
STATION
PV, SP,CO, RI, and time
DD
Value, feedback 1 value, feedback 2 value, and time
MSDD
Value, feedback 1 value, feedback 2 value, feedback 3
value, and feedback 4 value and time
BATCH BLOCK
Value and time
HISTORY DATA VIEW MENU
There are two selections from the history data view menu.
Tags type history
Statistics history
These menu selections permit viewing of a tag type history and
statistics tag history. From tag type history, view the most
recent history of an INFI 90 OPEN tag type history by entering
a tag name or by selecting a tag from a tag list screen. A statistics tag history can be viewed in a similar manner (i.e., enter a
tag name or select from a list of tags).
MAIN MENU
5-8
WBPEEUI350003B0
OPERATING PROCEDURES
There is no edit of tag history data through any of the history
data view menu functions. Figure 5-5 shows the view history
data display screen. To use this screen.
1. From the open data management server operations menu,
highlight history data view then press Enter or click with the
mouse, or press F3 to access the history data view menu.
2. From the history data view menu, highlight tag types history then press Enter or click with the mouse, or press F1 to
access the view history data display screen.
3. Highlight the gray field to the right of tag name and type in
the name of a tag to view, then highlight view tag history summary and press Enter or click with the mouse, or press F2 to
view the history summary display screen (Fig. 5-7).
TPS1108B
Figure 5-5. View History Data Screen
4. Instead of using the view tag history summary, view a
detailed list of specifications history or exceptions history
attributes for a specific tag by entering a tag name, a time and
selecting F3 or F4 . Highlight the gray field to the right of history
time (Fig. 5-5). The exact history time is not required, the
occurrence prior to the history time entered is selected. Type in
the desired history time using the configured format, the following format is the default format.
dd-AAA-yy hh:mm:ss.t
Where dd is the day, AAA is the month abbreviation (alpha
characters), yy is the last two digits of the year, hh is hours, mm
WBPEEUI350003B0
MAIN MENU
5-9
OPERATING PROCEDURES
®
is minutes, ss is seconds, and t is tenth of seconds. Entering
seconds and tenth of seconds are optional. Alpha character
entries are not case sensitive. Hyphens and colons should be
entered as shown.
5. If the tag name is not known, from the view history data
display click view tag listings or press F1 and a tag list screen
appears which can be used to select a tag (Fig. 5-6).
TPS1107B
Figure 5-6. Tag List Screen (View History Data)
6. To use the tag list screen enter a tag type or use the mouse
to click the scroll arrows to select the desired tag type. The
domain and page number of the tag list can also be selected by
entering the domain, the page number, or using the mouse and
scroll arrows to find the selection. When the desired tag type is
entered or found all tag names of that type are listed on the
screen.
Click the desired tag name, then select tag history summary
and click with the mouse or press F1 to bring up a tag history
summary display screen (Fig. 5-7).
There are two summaries shown in the tag history summary
display (Fig. 5-7). The upper box is a summary of the tag specification history. The lower box is a summary of the tag exception history. Click the desired line (listed by date and time) to
open a detail window with the tag specification history or tag
exception history for that date and time. Refer to Figures 5-8
and 5-9.
MAIN MENU
5 - 10
WBPEEUI350003B0
OPERATING PROCEDURES
TPS1109A
Figure 5-7. Tag History Summary Screen
7. Either F1 or F2 can be used (or click on the desired function) to open the specification history detail window or exception history detail window respectively for a specific tag name
when a time is entered from the tag history summary display.
TPS1110A
Figure 5-8. Tag Specification History Detail Window
WBPEEUI350003B0
MAIN MENU
5 - 11
OPERATING PROCEDURES
®
8. Use the print screen function of the console or terminal to
obtain printouts of tag specification history or tag exception
history details.
OPERATING PARAMETERS
An operator can view and edit the operating parameters of any
tag. This function provides a tag selection screen from which a
tag can be selected by tag name (Fig. 5-10). When a tag name
is entered, its tag type and domain is shown on the screen
TPS1111A
Figure 5-9. Tag Exception History Detail Window
Tags can also be selected from an operating parameters tag list
(Fig. 5-11). The tag list screen lists all the tags in the database
for a selected tag type. A tag list can be further refined by
selecting a specific domain. Selecting a tag from the tag list (or
from the tag selection screen) opens an operating parameters
detail window (Fig. 5-4). From the operating parameters detail
window, there are three functions available.
Manual substitute
On/Off scan
Message enable/Disable
When manually substituting a value for output point types.
Refer to TAG TYPES in Appendix E for information on point
types. Either local or INFI 90 OPEN substitution can be
selected. Local substitutions changes the value within open
data management server only. INFI 90 OPEN substitution
MAIN MENU
5 - 12
WBPEEUI350003B0
OPERATING PROCEDURES
TPS1130B
Figure 5-10. Operating Parameters Tag Selection Screen
changes the value within the INFI 90 OPEN system blocks
associated with this tag. To output a manually substituted
value to the INFI 90 OPEN system the following tag configuration is required. The INFI 90 OPEN substitution option will not
appear unless the conditions are met.
•
System output is enabled.
•
Tag output is enabled.
•
The tag is on scan.
•
The tag is not red tagged.
•
Enabled tag output is set to INFI 90 OPEN.
Tags can be configured in the database to be inhibited from
being manually substituted to the INFI 90 OPEN system by
disabling system outputs in the tag specification configuration
or by disabling one of the other gating factors. Refer to
Section 4 for information on a tag specification configuration.
Tags that are manually substituted are listed in the manual
substitution tag summary, historical log, and user change log.
Off scan tags that have a substituted value will retain the substituted value until the tag is placed on scan and an INFI 90
OPEN exception report is received. On scan tags that have a
substituted value replace the substituted value with the input
received at the next exception report.
WBPEEUI350003B0
MAIN MENU
5 - 13
OPERATING PROCEDURES
®
TPS1132B
Figure 5-11. Tag List Screen (Operating Parameters)
When a tag is on scan, updates are made to information in the
tag database. When a tag is off scan, information in the tag
database is not updated and updated information is not sent to
the INFI 90 OPEN system. The off scan tag summary lists the
tags that are off scan. The historical log and user change log
list messages for when a tag is placed off scan.
Messages to log is enabled or disabled from the operating
parameters detail window. If messages to log is enabled, any
messages sent by the tag are recorded in the historical log. Disabling message to log prevents messages from being sent to the
historical log. Tags that have messages disabled are listed in
the messages disabled tag summary. If the tag specification
configuration is set up to log messages (tag messages to log is
enabled), the ICI or OSM interface is configured to log state
changes, and the global tag state change switch is set to yes,
digital tags will log state changes in the historical and user
change log.
To use the operating parameters functions:
1. Use the mouse pointer to point to the gray background field
next to Tag Name on the operating parameters tag selection
screen (Fig. 5-10). Type the tag name and press Enter , or click
the tag name to view the operating parameters detail window. If
the tag name is not known, click view tag list or press F1 to
bring up a tag list screen and continue with the next step. Otherwise, go to Step 6.
MAIN MENU
5 - 14
WBPEEUI350003B0
OPERATING PROCEDURES
2. Select a tag type by clicking < or > , or type in a tag type in
the green highlighted tag type field and press Enter . All tag
names for that tag type are listed on the screen.
3. If the tag has been assigned a specific domain, the domain
can be selected by clicking < or > , or entering the domain in
the green highlighted field and press Enter . This filters the list
of tags displayed to the tags grouped in that domain.
4. If more than one page of tags exists, the page can be
selected by clicking < or > , or by entering a page number in
the green highlighted field and press Enter .
5. From the tag list, click a tag name to view the operating
parameters detail window (Fig. 5-4).
6. To change a tag attribute click the appropriate selection to
manually substitute a value, put a tag on or off scan, and
enable or disable messages. A high level operator password is
required to change any tag or display attribute.
7. Click the scan icon to turn on or off exception reporting for
the given tag. The state shown in black text on the face of the
scan icon indicates the action that will take place when the
icon is activated. The current state is displayed in green text.
Whenever the scan icon is activated, a message is shown in
yellow text that indicates the action taken.
8. Click the messages icon to enable or disable sending messages to the event log and user change log. Like the scan icon,
the message icon toggles this function. Whenever the messages
icon is activated, a message is shown (in yellow text) that indicates if sending messages to log is enabled or disabled. Additionally, the cyan text updates to show if messages to log is
enabled or disabled.
9. Click Substitute Value or press F1 to manually substitute a
value for the tag output. Three editable fields may appear
depending on the type of action or point type desired, Subs
Value, Subs Quality Status, and Output Enable (fields vary with
tag type). Make the appropriate entry in each field then click
yes to confirm and execute the manual substitution. Action
types include local substitution or outputting to INFI 90 OPEN.
In local substitution, the value is inserted into the ODMS database where it is accessible to all ODMS and SETCIM applications, but it is not reported to the INFI 90 OPEN system. In
outputting to INFI 90 OPEN, the value is written via the interface to the INFI 90 OPEN system. The INFI 90 OPEN system
will generate an exception report. This exception report will
then update the ODMS database. This form of outputting is
available for all point types except module status, ext module
status, ICI status, batch blocks, analog, and digital. Analog
and digital point types support local substitution.
WBPEEUI350003B0
MAIN MENU
5 - 15
OPERATING PROCEDURES
®
10. The trending view field can be edited to change the time
span of the trend view graph. This requires a level 6 password.
To change the trend view time, click the trend view time field so
that it is highlighted and type in a new entry in with the following format.
phhhhh:mm:ss.t
Where p is a sign indicating direction (a plus sign for time
future and a minus sign for time past), h is hours, m is minutes, s is seconds, and t is tenth of seconds.
11. The graph maximum and graph minimum attributes at the
top and bottom of the bar graph can be modified by typing a
new attribute in those fields. This requires level 6 password.
Point to the attribute fields to highlight and type in an entry.
12. To exit the tag detail window, click the right button on the
mouse or click Previous.
INTERFACE STATISTICS
The ICI interface maintains general performance statistics.
These statistics include the number of exceptions received and
sent, the exception report rate, ICI access rate and time synchronization status. These statistics are available via the open
data management server database. From the interface statistics menu there are two selections.
ICI status
ICI performance
ICI Status
The ICI status screen lists the status of an ICI interface and
time synching information (Fig. 5-12). Table 5-2 lists the ICI
status screen fields and provides an explanation of field content.
To view the ICI interface status:
1. Select ICI status from the interface statistics menu.
2. Enter an ICI number to view the status of that particular
ICI interface.
3. To exit the ICI status screen, click the right button on the
mouse or click Previous.
MAIN MENU
5 - 16
WBPEEUI350003B0
OPERATING PROCEDURES
TPS1112B
Figure 5-12. ICI Status Screen
Table 5-2. Field Definitions (ICI Status Screen)
Field
Definition
ICI Number
The logical ICI number whose status is provided in the remainder of the screen.
The ICI number is entered by the user.
Last Restart Time
The most recent time of an ICI interface restart.
Last Reset Time
The most recent time of an ICI interface reset.
Active ICI
For a logical ICI number, which of two possible configured ICI interfaces is currently active (primary or secondary).
Primary ICI Status
The status of the primary ICI interface. Possible status states are: On-line, failing, dying, or dead.
Primary ICI Name
The name of the physical port that is configured as the primary ICI interface.
Secondary ICI Config
Indicates if a secondary ICI interface is configured for this logical ICI interface
(yes or no).
Secondary ICI Status
The status of the backup ICI interface. Possible status states are: On-line, failing, dying, dead, or standby. If a secondary ICI interface does not exist, this field
is blank.
Secondary ICI Name
The name of the physical port that is configured as the secondary ICI interface.
Time Synch
Displays the five most recent times the INFI-NET communication loop and the
current logical ICI interface time synchronized. Listed is the time stamp information to millisecond resolution, and the loop and node location of the time synchronization source.
ICI Performance
The ICI performance screen lists the number of exceptions
received by the ICI interface per second, total number of exceptions since start up, and ICI status (Fig. 5-13). Table 5-3 lists
WBPEEUI350003B0
MAIN MENU
5 - 17
OPERATING PROCEDURES
®
the ICI performance screen fields and provides an explanation
of field content.
TPS1134B
Figure 5-13. ICI Performance Screen
To view ICI interface performance:
1. Select ICI performance from the interface statistics menu to
access the ICI performance screen (Fig. 5-13). Table 5-3 contains an explanation of each of the statistic fields on the ICI
performance screen.
2. Highlight the ICI number field and enter an ICI number to
view the performance of a particular ICI interface.
3. To exit the ICI performance screen click the right button on
the mouse or click Previous.
Table 5-3. Field Definitions (ICI Performance Screen)
Field
Definition
XR rate
Number of exception reports received per second.
Total XR
Number of exception reports received since the last start up or interface reset.
Poll rate
Number of ICI polls for exceptions performed per second.
Total output msg
Number of outputs issue to the ICI since the last start up or interface reset.
Total XR spec recv
Number of exception report specifications containing block specifications (i.e., EU's,
alarm limits, etc) received since the last start up or interface reset.
Total GMI msg recv
Number of general messages which includes alarm acknowledge messages and
other general messages received from the interface since the last restart or interface
reset.
MAIN MENU
5 - 18
WBPEEUI350003B0
OPERATING PROCEDURES
Table 5-3. Field Definitions (ICI Performance Screen)
Field
(continued)
Definition
Buffer avail avg1
Average amount of buffer space available to the interface.
Buffer available
The instantaneous amount of buffer space currently available.
Buffer size
The current size of the buffer.
App mess sent
The total number of messages sent to the ICI interface.
App mess recv
The total number of messages received from the ICI interface.
App unsolicited
The total number of messages received from the ICI interface that were not
requested. These messages contain status information regarding the ICI interface.
Back mess
The total number of messages sent to the backup ICI interface.
Bytes processed
The total number of bytes processed in all messages, since the last start up or interface reset.
App mess s primary
The total number of messages sent to the primary ICI.
App mess r primary
The total number of messages received from the primary ICI.
App unsol primary
The total number of unsolicited messages received from the primary ICI.
Bytes processed
The total number of bytes received from the primary ICI.
MD mess tot primary
The total number of messages sent to the open data access client.
ICI mes tot primary
The total number of messages sent to the ICI by the open data access client.
Ser mes tot primary
The total number of informational messages sent from the open data access client.
These messages include ICI interface connection request and general usage information.
Uns mes tot primary
The total number of unsolicited messages processed by the open data access client.
This includes ICI status information and other automatic updates.
Bytes ICI primary
The total number of bytes processed by the open data access client for communicating with the primary ICI interface.
Bytes ser primary
The total number of bytes processed by the open data access client driver for communicating with the open data management server interface.
NOTE: 1. This buffer is used to handle periods of high data throughput. Available buffer space should not be zero. A zero indicates that data
could be lost.
MESSAGE OUTPUT
Message output provides a means to select and send ASCII text
string tags to the INFI 90 OPEN system (INFI 90) or to the open
data management server (local). ASCII text string tags can be
set up in the database to have read and write access or read
only access. Additionally, ASCII text strings messages can be
set up as alarms. Whenever an ASCII text string tag is modified, the change is logged in the event log.
To write a message using an ASCII string text tag and send the
message:
1. Select message output from the main menu to access the
message output display screens. Figure 5-14 shows the message output display screen.
WBPEEUI350003B0
MAIN MENU
5 - 19
OPERATING PROCEDURES
®
TPS1114B
Figure 5-14. Message Output Display Screen
2. Type a tag name in the message ID field and press Enter to
select an ASCII text string tag and view its current message or
scroll through the available tags and make a selection.
3. If the tag is set up so that the message can be modified,
change the message by using the mouse to point to the enter
message field and type a message. The message is concatenated from 2 lines with 40 characters on each line. The message will appear in the current message field after pressing
Enter . Messages sent to INFI 90 OPEN consoles are truncated
to 64 characters.
4. To send the message, press
F2
or click send message.
If INFI 90 OPEN enable and the tag global enable is set to yes,
and the tag is on scan, a request appears to select local or global output enable. Select the desired output enable. When the
message is sent, the screen shows what output is enabled for
the tag (local or INFI 90) and requests a confirmation (yes or
no) to send the message. Click yes to send the message, click
no to cancel sending the message.
5. Press
field.
F1
or click clear message to clear the enter message
Clicking the ASCII text string tag name opens the tag detail
window which lists the attributes of the tag and the current
ASCII text string message (Fig. 5-15).
MAIN MENU
5 - 20
WBPEEUI350003B0
OPERATING PROCEDURES
TPS1115B
Figure 5-15. ASCII Text Message Detail Window
6. The tag can be placed on or off scan, and have history log
messages enabled or disabled via this window.
7. Use Previous or click the right button of the mouse to return
to the open data management server operations menu.
8. To send an ASCII text string message as an alarm, make
the first character of the message a minus (-) sign. For example:
- A message preceded by a minus sign is sent as an alarm.
AD HOC QUERY
Selecting this function opens an ANSI standard SQL query
utility. This is a SETCIM GCS display that works with SQLplus
to allow the operator to make database queries using standard
SQL statements. This function provides query capability only
and does not allow any modification of the database.
For information on how to use ad hoc query refer to the SQLplus USER MANUAL. Figure 5-16 shows the ANSI standard
SQL query screen.To use:
1. Enter a query of up to 3 lines in the keyboard entry field
under Query.
2. Select and click on execute or press F1 . This executes the
query. The query results will appear in the query output summary box. This box may contain multiple pages of query
WBPEEUI350003B0
MAIN MENU
5 - 21
OPERATING PROCEDURES
®
results. To select a page, highlight the page number in the
upper right hand corner of the box. Either type in a page number and press Enter or click with the mouse to increment the
page number.
TPS1116A
Figure 5-16. ANSI Standard SQL Query Screen
Applications
The applications menu is the second selection available on the
main menu. The selections from the applications menu are:
On-line Data Base query
On-line Spreadsheet
SPC/SQC functions
NOTE: On-line spreadsheet and SPC/SQC functions will only
appear on the application menu if they have been purchased and
configured to appear on the menu.
These applications are open data management server
stand-alone application packages that are provided by layered
SETCIM programs. To access the on-line functions from a personal computer, the personal computer must have an active X
Windows system installed. The on-line database query and
on-line spreadsheet drive their own X Windows displays. These
displays will not function if the client computer does not support X Windows or does not allow incoming windows.
MAIN MENU
5 - 22
WBPEEUI350003B0
OPERATING PROCEDURES
Selecting on-line database query executes the SQLplus program. This program has read and write access to the database
via a standard SQL queries. This program generates its own
displays. Refer to the appropriate SETCIM instruction for information on how to use the SQLplus program.
Selecting on-line spreadsheet query executes the CALC program. All displays for the program are generated by the program. The CALC program can generate a spreadsheet using
Elsag Bailey tag type attributes as cell values. Refer to the
appropriate SETCIM instruction for information on how to use
the CALC program.
Selecting SPC/SPQ functions allows access to the Q program.
This program is used to develop charts and histograms from
system statistics. The charts and histograms are used to analyze plant performance. All displays for the program are generated by the Q program. Refer to the appropriate SETCIM
instruction for information on how to use the Q program.
Utilities
The utilities menu invokes a number of SETCIM programs that
can be used for the utility functions listed.
ACCESS
History File Utilities
Off-line database loader
Off-line database to ASCII file
Document definition records
Document database records
NOTE: Client platforms that are not equipped with active X Windows
software cannot use the utilities from the utility menu. Detailed information on the use of utilities can be found in SETCIM documentation.
ACCESS
ACCESS is a SETCIM utility program that can be used to create and custom design GCS console screens and assign functions to certain keyboard keys. This program operates
independently of the open data management server. Refer to
the GCS Graphics Console System Users Manual for information on using ACCESS. When accessing this function from a
remote GCS client, all display modifications are performed at
the server display level.
WBPEEUI350003B0
MAIN MENU
5 - 23
OPERATING PROCEDURES
®
HISTORY FILE UTILITIES
The history file utility has two selections.
Fix Disk History File
Estimate History File Size
Each of the selections are SETCIM programs. When selected,
the SETCIM program provides prompts explaining what action
(i.e., disk history file name) is required to start up the program.
OFF-LINE DATABASE LOADER
The off-line database loader utility moves ASCII data into the
open data management server database. To use the off-line
database load utility, select it from the utilities menu and follow the program prompts.
OFF-LINE DATABASE TO ASCII FILE
The off-line database to ASCII file utility moves data from the
open data management server database to an ASCII file. To use
the off-line database to ASCII file utility, select it from the utilities menu and follow the program prompts.
DOCUMENT DEFINITION RECORDS
The document definition records utility documents the structure of definition records in the open data management server
database. To use the document definition records utility, select
it from the utilities menu and follow the program prompts.
DOCUMENT DATABASE RECORDS
The document database records utility documents the contents of open data management server database records
(including open data management server tags). To use the document database records utility, select it from the utilities menu
and follow the program prompts.
MAIN MENU
5 - 24
WBPEEUI350003B0
OPERATING PROCEDURES
Configuration Menu
The open data management server configuration menu contains the following selections.
Database
System
Interface Control
History Data View/Edit
The functions in this menu allow the user to configure open
data management server specific databases and system
parameters. An engineer security level password is required to
create, modify and delete all tag types. No password is required
for viewing. Refer to Appendix C for a complete list of functions
accessible at each password security level. Section 5 provides
information on how to create, configure, add, or update an INFI
90 OPEN tag in a database and gives an example configuration. This section provides an overview of how the database
configuration screens operate.
DATABASE
The database configuration function contains four displays.
•
Database configuration tag selection display (Fig. 5-17).
•
Tag list display (Fig. 5-18).
•
Tag configuration display (Fig. 5-19).
•
Tag specification configuration display (Fig. 5-20).
The database configuration display is accessed by selecting
database from the configuration menu. This display allows:
•
Requesting a tag list display to view a list of tags for the
selected tag type.
•
Entering a tag name and then requesting the database configuration of that tag.
•
Entering a new tag to create the tag.
NOTE: Statistics tag types such as averaging, totalizing, summing
integrating, and weighted average must be created off-line using the
DBMT or ENGCON tool.
The tag list display is accessed by clicking view tag listing or
pressing F1 on the database configuration tag selection display
(Fig. 5-17). The tag list is used if the tag name is not known,
WBPEEUI350003B0
MAIN MENU
5 - 25
OPERATING PROCEDURES
®
TPS1117B
Figure 5-17. Database Configuration Tag Selection Screen
TPS1135B
Figure 5-18. Tag List Screen (Database Configuration)
otherwise tag configurations can be selected directly from the
database configuration tag selection display. The tag list display has three fields to select from, tag type, domain, and page.
The list of tags can be filtered by domain. The page field is used
to select the display page if a particular tag type has more than
MAIN MENU
5 - 26
WBPEEUI350003B0
OPERATING PROCEDURES
one page of tag names in the database The tag type field is used
to select a tag name from a list of all tags of that type.
To use the database configuration tag selection display:
1. Enter a tag name in the tag name field (gray background). If
the tag name does not exist, the tag configuration display will
show that the tag selected is a new tag. Enter the tag type and
history area then click tag configuration or press F2 to access
the tag configuration screen.
- or Click view tag listing or press F1 to access the tag list. Tag
names are listed in groups by tag type.
TPS1118B
Figure 5-19. Tag Configuration Screen
To use the tag list display:
1. Scroll through the tag type selections by clicking the display scroll arrow or type in the tag type in the tag type field. A
list to tag names is displayed if they exist for the tag type.
2. If there is more than one page of tag names for a tag type.
Click the scroll arrow to select a page or type in the desired
page in the page field.
3. If tags are divided into various domains. The domain can be
selected in a similar fashion as the tag name and page.
WBPEEUI350003B0
MAIN MENU
5 - 27
OPERATING PROCEDURES
®
4. Select a tag name by using the scroll arrow to select the
desired tag type. Move the cursor to the tag desired in the list
of tags, then click tag configuration or press F1 to access the
tag configuration display.
The tag configuration display is accessed through the database
tag configuration selection screen or through the tag list
screen. After a password for the appropriate security level is
entered, any field on the tag configuration display can be
edited except for tag name and tag type and data labeled view
only. There are four selections on the tag configuration display,
F1 through F4 . The fields that can be edited appear with gray
backgrounds.
NOTE: All fields are updated on tag callup only (i.e., they do not
change if the database values are updated by another source such
as the interface). The display represents a static snapshot of the
database.
After the desired modifications are made, use the four to perform the desired action to the tag. Icon functions are:
1. Press F1 to update the tag after changes to the tag configuration are made.
2. Press F2 to delete the tag configuration. This action
requires a confirmation. When prompted reply by clicking the
yes or no prompt.
3. Press F3 to access the tag specification configuration display (Fig. 5-20).
TPS1119B
Figure 5-20. Tag Specification Configuration Screen
MAIN MENU
5 - 28
WBPEEUI350003B0
OPERATING PROCEDURES
4. Use this display to configure additional tag attributes.
Enter the desired attributes in each of the fields for this tag.
Attributes will vary depending on the tag type selected. To
return to the tag configuration screen click main or press F3 .
5. Press F4 to access the database configuration tag selection
display so that another tag can be selected for configuration.
6. Use Previous to return to the database configuration tag
selection.
SYSTEM
The system configuration menu provides access to system
parameters that can be modified on-line. These functions are
secured by an engineer level password. There are seven selections from the system configuration menu.
Database Snapshots
Disk History Files
Engineering Units
Logic States
Global Message Switches
Define ICI Interface
Set System Time
Database Snapshots
This feature provides a summary of all database snapshots
that are created (Fig. 5-21). A database snapshot saves a copy
of the database to the hard disk drive, providing a periodic
backup of the open data management server database. This
prevents loss of information within the database. On system
start up, the open data management server system loads the
current database snapshot. The database snapshot entries
shown in Figure 5-21 are the default database snapshots.
The default snapshots can be modified by clicking on a database snapshot entry to activate a database snapshot detail
window. (Fig. 5-22). To minimize lockout time, the database is
copied to memory. After it is copied to memory, the database is
unlocked and transferred to disk. File name, schedule time,
and reschedule interval are editable fields in the snapshot
detail file window. Additional database snapshots can be created using the DBMT or ENGCON tool.
The database is locked when the system takes a database
snapshot. The time interval at which a database snapshot is
WBPEEUI350003B0
MAIN MENU
5 - 29
OPERATING PROCEDURES
®
TPS1120A
Figure 5-21. Database Snapshots Screen
scheduled should not be less than 10 minutes or poor performance could result. A database snapshot entry with no interval time will take a snapshot on ODMS shutdown.
TPS1121A
Figure 5-22. Database Snapshot Detail Screen
MAIN MENU
5 - 30
WBPEEUI350003B0
OPERATING PROCEDURES
There are two database snapshots configured during installation (SAVE_DAY and SAVE_HOUR). These snapshots are executed on system start up. Thereafter, the SAVE_HOUR
snapshot is taken hourly and the SAVE_DAY snapshot is taken
at midnight. These snapshots can be used to recover prior
database states if on-line database changes need to be made.
Configure additional database snapshot records using the
DBMT tool.
To use this function:
1. Select database snapshots from the system configuration
menu.
2. Click the database snapshot to be viewed. The snapshot file
detail window opens (Fig. 5-22). The default database snapshots can be modified from this window.
3. Any modifications can be made by highlighting the desired
field (gray background fields) and typing a new entry. Click the
mouse or press Enter for the field to update. Use the right button on the mouse to exit the snapshot file detail window.
Disk History Files
This feature provides a summary of all disk history files that
are created (Fig. 5-23). From this summary, a disk history file
detail window can be opened that allows set up of a backup file
name, archive file name, and a backup and archive schedule
(Fig. 5-24). A second page of this window shows the disk status such as disk history status, disk blocks used, lost blocks,
file errors, etc. (Fig. 5-25). Disk history files are created using
the DBMT or ENGCON tool. Once the disk history files are set
up, take a snapshot of the database so that the disk history
file configuration is saved for the next start up.
Using the disk history file screens is similar to the other open
data management server screens.
1. Select disk history files from the system configuration
menu.
2. Click the disk history to be viewed. The disk history file
detail window will open.
3. Modifications can be made by highlighting the desired field
(gray fields, green when highlighted) and typing a new entry.
Click the mouse for the entry to update.
To increase the size of a disk history file, select the File Inc Max
Blocks field and enter the new maximum size for the disk history file. This function does not check if enough disk space is
available for the new file size.
WBPEEUI350003B0
MAIN MENU
5 - 31
OPERATING PROCEDURES
®
TPS1146B
Figure 5-23. Disk History File Screen
TPS1147B
Figure 5-24. Disk History File Detail Window (Page One)
4. Use the right button on the mouse to exit the disk history
file detail window or click Previous .
MAIN MENU
5 - 32
WBPEEUI350003B0
OPERATING PROCEDURES
TPS1148B
Figure 5-25. Disk History File Detail Window (Page Two)
To archive the disk history file configuration:
1. Verify that the disk history task record is configured for
#_AUTO_ARCHIVE_FILES greater than three.
2. Highlight the archive file name field, then enter the archive
file name and press Enter .
3. Verify that the archive interval field is set to zero.
4. Enter a date and time for the next archive in the reset
archive start field and wait for the system to update the next
archive start field (approximately 10 to 20 seconds).
5. After the next archive start field is updated, reset the
archive start time field by entering ? and press Enter .
6. Set the archive interval to a value greater than zero. When
an archive ends, the archive interval is added to the expired
next archive start time to set up the next archive start time.
7. Use the right button on the mouse to exit the disk history
file detail window.
8. Use the right button on the mouse or click
the disk history file screen.
WBPEEUI350003B0
Previous
to exit
MAIN MENU
5 - 33
OPERATING PROCEDURES
®
Engineering Units
This function is a table of defined engineering unit descriptors
(Fig. 5-26). Engineering units descriptors relate to tag types
that present analog values. They describe the unit of measurement (e.g., DEG F, GPM, AMPS, LB/HR) for a tag value. These
descriptors show the unit of measurement related to a particular value received from the process. A descriptor follows the tag
value throughout all open data management server configurations.
TTPS1122A
Figure 5-26. Engineering Units Screen
The first 16 engineering unit descriptors listed in this table
cannot be changed. They are identical to operator interface
station (OIS) console engineering unit descriptors. Any unused
entry field can have engineering units entered. After an engineering unit is entered it cannot be altered from any of the
open data management server displays. The new engineering
unit index can be used by applying it to a tag through the INFI
90 OPEN system. The table holds 256 entries. An index number for each tag is stored in a tag history file and used to determine the correct engineering units name to apply to the
engineering units field on various displays. Click the next page
icon to view entries on other pages. An engineering level password is required to add engineering unit descriptors.
To define an engineering unit descriptor:
1. Select Engineering Units from the System Configuration
Menu.
MAIN MENU
5 - 34
WBPEEUI350003B0
OPERATING PROCEDURES
2. Use the mouse pointer to highlight the engineering unit
entry field (gray field) next to the desired engineering unit index
number.
3. Enter up to six alphanumeric characters that represent the
engineering unit, then press Enter .
4. Use the right button on the mouse or click
this screen.
Previous
to exit
Logic States
This function is a table of defined logic state descriptor units
(Fig. 5-27). Logic state descriptors relate to tag types that
TPS1149A
Figure 5-27. Logic State Descriptors Screen
present logic states for digital devices. These descriptors show
the current logic state (e.g., on or off, zero or one, run or stop,
and closed or on) of a device. A descriptor, once defined for a
tag, follows the tag through open data management server
functions.
The first 16 logic state descriptor units listed in this table cannot be changed. They are identical to OIS console logic state
descriptions. Any unused entry field can have logic state
descriptors entered. After a logic state is entered it cannot be
altered through any of the open data management server displays. A logic state descriptor is selected for each state of a tag
during tag configuration. The table holds 256 entries. Use the
next page icon to view entries on other pages. An engineering
WBPEEUI350003B0
MAIN MENU
5 - 35
OPERATING PROCEDURES
®
level password is required to add logic state descriptors. To
define an logic state descriptor:
1. Select Logic State Descriptor from the system configuration
menu.
2. Use the mouse pointer to highlight the logic state descriptor entry field (gray field) next to the desired logic state descriptor index number.
3. Enter up to six alphanumeric characters in the that represent the logic state descriptor, then press Enter .
4. Use the right button on the mouse or click
this screen.
Previous
to exit
Global Switches
This menu selection provides functions that enable or disable
global messages, global tag state changes and global output
switches (Fig. 5-28). To enable global switches, place the
TPS1123A
Figure 5-28. Global Switches Screen
mouse pointer in the gray field to the right of the switch
description and type yes and press Enter . Type no and press
Enter to disable the global switch.
If the global message switch is disabled, no messages will be
sent to logs or summaries. Messages affected include messages
MAIN MENU
5 - 36
WBPEEUI350003B0
OPERATING PROCEDURES
for configuration changes, alarms, quality changes, state
changes, etc.
The global tag state switch controls if digital tag state information is sent to the history event log. This switch will not allow
tag state changes to be sent to the history event log even if the
tags ICI is configured to allow tag state change logging. If the
switch is enabled, ICI interfaces that are configured to record
state changes will send those changes (only from tags configured for messages to log) to the history event log.
The global output switch controls whether outputs are sent to
the INFI 90 OPEN system or not. If the global output switch is
disabled, outputs are only sent locally (open data management
server only). This function only affects tags that are output
type tags.
Define ICI Interface
This selection accesses the define ICI interface screen (Fig.
5-29). Any ICI interface configuration can be viewed from this
TPS1124A
Figure 5-29. Define ICI Interface Screen
screen by entering a valid ICI number. Modifications to the ICI
interface configuration (access to the configuration fields)
requires an engineer level password. To use this function:
1. Select define ICI interface from the system configuration
menu.
WBPEEUI350003B0
MAIN MENU
5 - 37
OPERATING PROCEDURES
®
2. To view an ICI configuration, highlight the ICI number field
with the mouse pointer. Enter the ICI number and press Enter .
3. To modify an existing configuration, highlight the desired
field with the mouse pointer. Enter a configuration choice in
each field. Configuration choices are:
•
Loop type is Plant Loop or INFI-NET.
•
Interface type is local or remote.
•
Time sync source is INFI 90, local (open data management
server), or none.
•
Minimum time difference is selected by the user in milliseconds. This is the minimum time difference between the
remote time synchronization source and the local timebase
that will be corrected. If set to zero this function is off.
•
Maximum time difference is selected by the user in minutes.
This is the maximum time difference between the remote
time synchronization source and the local time base that
will be corrected. If set to zero this function is off.
•
Time zone is based on Greenwich Mean Time (GMT) and is
set by the user. This number can be negative (number of
time zones to the west of GMT time) or positive (number of
time zones to the east of GMT time). Valid entries are -12 to
12 hours. For example, -5 sets the time zone for Eastern
Standard Time in the United States.
•
Time stamp source is INFI 90 or local (open data management server).
•
Events logged, tag state change events, and alarm transfer
support are set to yes or no to enable or disable the function.
•
The interface node name is used to specify remote interfaces. Currently this option is not supported. This field
should be configured for the server node name.
4. When the ICI interface configuration is set up as desired,
click update or press F1 to update the configuration and
restart the ICI interface using the new configuration.
5. If the ICI number entered does not currently exist, there is
a confirmation prompt for creating a new record. Highlight yes
or no, and click with the mouse or press Enter to create a new
record or abort the process.
System messages may be displayed if certain fields have
invalid entries. Refer to Section 7 for a list of system messages
and corrective actions.
MAIN MENU
5 - 38
WBPEEUI350003B0
OPERATING PROCEDURES
6. Use the right button on the mouse or click
this screen.
Previous
to exit
Set System Time
This selection provides a screen from which to set system time
(open data management server time) (Fig. 5-30). When using
this screen to set system time, large negative time changes
should be avoided because they can lock up the open data
management server system. Whenever time is set back, many
time driven programs that execute on a schedule will not execute until the next scheduled execute time is reached. For
example, if it is currently 1159 and a program is scheduled to
execute every minute and the time is set back to 1100, the program may not execute until 1200. An engineering level password is required to set system time.
TPS1129A
Figure 5-30. Set System Time Screen
To use:
1. Select set system time from the system configuration
menu.
2. Use the mouse pointer to highlight the system time field
and enter the desired time. The default format for system time
is:
dd-AAA-yy hh:mm:ss:t
WBPEEUI350003B0
MAIN MENU
5 - 39
OPERATING PROCEDURES
®
Where dd is the day, AAA is the month abbreviation (alpha
characters), yy is the last two digits of the year, hh is hours, mm
is minutes, ss is seconds, and t is tenth of seconds. Alpha character entries are not case sensitive. Hyphens and colons
should be entered as shown.
3. When the time is set correctly click set system time or press
F1 . If an invalid format is entered an error message replies
(invalid data). Valid entries reply with a data valid message.
4. Confirm or abort the time setting by highlighting yes or no
at the confirm prompt, and click with the mouse or press Enter.
5. Use the right button on the mouse or click
this screen.
Previous
to exit
INTERFACE CONTROL
This selection provides an INFI 90 OPEN interface control
screen for ICI interface restarts and resets (Fig. 5-31).
TPS1126B
Figure 5-31. INFI 90 OPEN Interface Control Screen
To use this function:
1. Select interface control from the open data management
server configuration menu.
2. Use the mouse pointer to highlight the desired field and
select the interface to reset or restart.
MAIN MENU
5 - 40
WBPEEUI350003B0
OPERATING PROCEDURES
3. Type yes in the applicable field to either restart the module
or reset the ICI interface. The restart option is not normally
required. The ICI interface will automatically restart itself after
a failure. The reset interface option can be used to start up an
interface that was unavailable at ODMS start up.
4. Use the right button on the mouse or click
this screen.
Previous
to exit
HISTORY DATA VIEW/EDIT
This function permits manipulation of history data until it is
sent to an archive file. An engineer level password is required.
History data view/edit works in a similar manner as the history data view function from the open data management server
operations menu except that all fields can be edited in addition
to being viewed. To modify history data:
1. Select history data view/edit from the open data management server configuration menu to access the edit history data
display (Fig. 5-32).
TPS1127B
Figure 5-32. Edit History Data Screen
2. From the edit history data display, highlight the gray background field to the right of tag name and type in the name of a
tag to view.
a. A history time is required to access a particular specification or exception history detail window. Highlight the
gray field to the right of History Detail Time (Fig. 5-32) and
WBPEEUI350003B0
MAIN MENU
5 - 41
OPERATING PROCEDURES
®
type in the desired history time. The following format is the
default format.
dd-AAA-yy hh:mm:ss.s
Where dd is the day, AAA is the month abbreviation (alpha
characters), yy is the last two digits of the year, hh is hours,
mm is minutes, ss is seconds, and t is tenth of seconds.
Alpha character entries are not case sensitive. Hyphens
and colons should be entered as shown. This format can be
changed using DBMT or ENGCON.
b. Use F3 or F4 , or highlight and click Edit Specification
History Detail or Edit Exception History Detail to open the
specification history detail window or exception history
detail window
3. If the tag name is not known, select a tag by clicking View Tag
Listings or press F1 from the edit history data display and a tag
list screen appears which can be used to select a tag (Fig. 5-33).
a. To use the tag list screen click < or > in the tag type
field to scroll through and select the desired tag type. The
domain or page number of the tag list can also be selected by
clicking < or > in the domain or page fields to scroll
through the selections. When the desired tag type is found
all tag names of that type are listed on the screen (Fig. 5-33).
b. Click the desired tag name then click Tag History Summary or press F1 to bring up a tag history summary display
screen (Fig. 5-34).
4. If the tag name is known but the time is not known, click
View Tag History Summary, on the edit history data screen, or
press F2 to bring up the tag history summary display screen.
5. Two summaries appear on the tag history summary display
screen. The upper box is a summary of the tags specification
history. The lower box is a summary of the tag exception history. Click the desired line (listed by date and time) to open a
detail window with the tag specification history detail or tag
exception history detail for that date and time. Figure 5-35
shows the exception history detail window.
With the history time entered, the specification history detail
window or exceptions history detail window can be opened by
pressing F1 or F2 , or highlight and click Edit Specification History Detail or Edit Exception History Detail.
6. From the exception history detail window or specification
detail window, any of the gray background fields can be edited
by highlighting that field with the mouse pointer and typing the
desired modification.
MAIN MENU
5 - 42
WBPEEUI350003B0
OPERATING PROCEDURES
TPS1107B
Figure 5-33. Tag List Screen (History Data View/Edit)
TPS1109A
Figure 5-34. Tag History Summary Screen
Tag histories can be added to a tag summary by entering a
time from the tag history summary display (Fig. 5-34) and
selecting a summary line, or by selecting a history detail time
WBPEEUI350003B0
MAIN MENU
5 - 43
OPERATING PROCEDURES
®
TPS1128B
Figure 5-35. Exception History Detail Window (View and Edit)
on the edit history data display (Fig. 5-32), and one of the history detail displays by pressing F3 or F4 .
a. To add an entry for a previously unrecorded time, enter
the time from either the tag history summary display or the
edit history data display. Then select one of the history
detail displays by clicking Edit Specification History Detail
or Edit Exception History Detail, or pressing the appropriate
function key. The data shown in the history detail display
is the data that was recorded closest to and prior to the
selected time. If a summary line is selected from the tag
history summary display, the data in the selected summary
line appears on the history detail display.
b. To update the changes made in a history detail display,
click update or press F1 and confirm by clicking yes. Click
no to cancel the operation. Updated history data is given a
quality status of amended.
c. To delete the information from history for the tag and
time displayed, from the tag specification history detail
window or tag exception history detail window, press F2
and either confirm or cancel by clicking yes or no. Deleted
data is retained in the system and marked as deleted.
7. Use the print screen function of the console or terminal to
obtain printouts of tag specification history or tag exception
history details.
MAIN MENU
5 - 44
WBPEEUI350003B0
OPERATING PROCEDURES
Customer Defined Displays
This selection from the main menu is available for customer
defined displays or menu of displays created with the ACCESS
utility. This blank display is stored under the display file name
custdef. Either modify the existing custdef display or create a
new one. Refer to the GCS Graphic Console System Users
Manual for information on how to create and define a display.
WBPEEUI350003B0
MAIN MENU
5 - 45
SECTION 6 - SOFTWARE DETAILS
INTRODUCTION
This section contains procedures that can be used to customize how the SETCIM and open data management server software packages will operate. Set up procedures in this section
include:
•
How to invoke an initial display other than the open data
management server display by defining a simulated keys
definition record.
•
How to add open data management server functions to a
session manager menu (VAX/Open VMS, Alpha AXP/Open
VMS, and HP-UX servers).
•
How to set up a MS Windows 3.1 client terminal to automatically start up as a GCS console.
•
How to set up an operator console to automatically start up
as a GCS console on user log-in (VAX/Open VMS, Alpha
AXP/Open VMS, and HP-UX servers).
•
How to set up an operator console to automatically start up
as a GCS console on boot-up (VAX/Open VMS, Alpha AXP/
Open VMS, and HP-UX servers).
•
General guidelines for creating custom database applications.
•
Setting alarm priorities using QualToStruct records.
•
Performing off-line interface testing.
•
How to install a permanent software license.
SIMULATED KEYS DEFINITION RECORD
Users may modify their console records to invoke a display
other than the open data management server main menu ( pimmenu). One simulated keys definition record is required for
each GCS console in the system. The record is called InvMenuXxXxXxN, where XxXxXx is the console identifier (i.e.,
node-name) and N the console number (i.e., 1, 2 or 3 etc.). This
record invokes the primary display on the console. Table 6-1
lists the record fields and gives a description of the field content. The information in Table 6-1 is an example of how the
simulated keys record invokes the file semodm which contains
the desired display.
WBPEEUI350003B0
INTRODUCTION
6-1
SOFTWARE DETAILS
®
The first simulated keystroke (keycode 154) maps to the
Inv-Display key file, which looks for a display name to be
entered. Simulated keystrokes two through seven are the
ASCII values of the characters that make up the file name
semodm. Simulated keystroke eight is the ASCII value of a
carriage return.
Table 6-1. Key Definition Records (Example)
Record Field
Description
InvMenuKIRK
Record name and console identifier
TSK_NET_KIRK
Console record, last error (0=none), last update
8
Number of simulated keystrokes
154
1st simulated keystroke (invoke command)
115
2nd simulated keystroke (ASCII value of s character)
101
3rd simulated keystroke (ASCII value of e character)
109
4th simulated keystroke (ASCII value of m character)
111
5th simulated keystroke (ASCII value of o character)
100
6th simulated keystroke (ASCII value of d character)
109
7th simulated keystroke (ASCII value of m character)
13
8th simulated keystroke (ASCII value of carriage
return)
To modify the primary display:
1. Replace simulated keystrokes with ASCII values for each
letter in the file name of the alternate display (one letter per
occurrence).
NOTE: HP users need to be aware that the HP-UX operating system
is case sensitive and must enter the display name exactly as the file
name is stored.
2. Modify the number of keystroke fields according to the
number of ASCII characters that make up the file name, the
invoke display function (ASCII code 154) and a carriage return
(ASCII code 13).
NOTE: Values are decimal representations of the ASCII characters.
For a detailed description of GCS keyboard functions (i.e., the
full range of keys and their corresponding key codes) refer to
the GCS Users Manual.
NOTE: The F1 key definition on the cover display must also be modified to invoke the new display.
SIMULATED KEYS DEFINITION RECORD
6-2
WBPEEUI350003B0
SOFTWARE DETAILS
AUTOMATING VAX START-UP
This section contains instructions on configuring a VAX system
to:
•
Automatically start up the ODMS software after a system
boot.
•
Configure a user session manager menu to include frequently used open data management server functions. This
procedure assumes that OPA0: and the client terminals
can support X Windows.
•
Automatically bring up the open data management server
operator console on user log-in.
•
Automatically bring up the open data management server
operator console on OPA0: after a system reboot.
Open Data Management Server Start-Up After a Boot
This procedure will insure the open data management server is
running and available to any open data management server
user after a boot operation.
1. Append the file PIMS$COM:AUTOSTART_ODMS.COM to
the file SYS$MANAGER:SYSTARTUP_V5.COM.
2. Edit SYSTARTUP_V5.COM or SYSTARTUP_VMS.COM and
replace the USER = ****** wildcard with the valid name of a valid
open data management server user (i.e., USER = ODMS_USER).
Where ODMS_USER is the name of a valid ODMS user account.
Save the file and exit.
3. Set the SYSGEN parameter USERD1 to a nonzero value. A
nonzero value enables this feature. For example, enter:
$ MCR SYSGEN Enter
SYSGEN> SET USERD1 1 Enter
SYSGEN> WRITE CURRENT Enter
SYSGEN> EXIT Enter
4. Shut down the operating system, then do a boot operation.
When the system is available, log-in and enter show sys to verify the system is running.
WBPEEUI350003B0
AUTOMATING VAX START-UP
6-3
SOFTWARE DETAILS
®
Adding ODMS Functions to a User Session Manager Menu
To add open data management server menu items to the session manager menus, do the following:
1. Log in to the users account.
2. Issue the following commands to copy the files required to
configure the session manager. These files are copied to the
users log-in directory.
SET
COPY
COPY
COPY
COPY
COPY
DEF
SYS$LOGIN
Enter
PIMS$COM:vue$gcs.com *.* Enter
PIMS$COM:vue$dd.com *.* Enter
PIMS$COM:vue$terminal.com *.* Enter
PIMS$COM:vue$gcsll.com *.* Enter
PIMS$COM:vue$tool_mgr *.* Enter
3. Under the session manager OPTIONS menu, select the
MENU option and define the menu items in Steps 3a to 3i. The
GCS system is installed as a remote link or local link to the
open data management server database (i.e., none or SETCIM,
respectively, was specified as the link option at GCS installation). The DCL commands for both types of GCS systems
(remote or local) are given with the menu items listed below.
The first line in Steps 3 a to 3i is a suggested menu title.
a. GCS OPERATOR CONSOLE
Remote DCL command: @sys$login:vue$gcs.com opcon
Local DCL command: @sys$login:vue$gcsll.com opcon
b. GCS ACCESS
Remote DCL command: @sys$login:vue$gcs.com
access
Local DCL command: @sys$login:vue$gcsll.com access
c. GCS DISPLAY DEFINITION
Remote DCL command: @sys$login:vue$dd.com
dd
d. DBMT TOOL MANAGER
DCL command: @setcimdbmt:tool_mgr.com
e. ENGINEERING CONSOLE
DCL command: @sys$login:vue$terminal engcon
"ENGCON"
f. START ODMS
DCL command: @setcimcom:startsetcim
g. STOP ODMS
DCL command: @setcimcom:stopsetcim
AUTOMATING VAX START-UP
6-4
WBPEEUI350003B0
SOFTWARE DETAILS
h. CIMCALC
DCL command: @sys$login:vue$terminal cimcalc
"CIMCALC"
i. SQLPLUS
DCL command: run setcimcode:iq
Other terminal applications which do not require X Windows
may be defined as menu items in a similar fashion as the engineering console. The DCL command is:
sys$login:vue$terminal application_name
“window_name” application_directory
Where application_name is what the user would enter at a terminal to activate the application (e.g., CIM-CALC). window_name
is the name given to the X Window terminal and its icon (e.g.,
CIM-CALC). application_directory is the directory the application
should be run from (e.g., setcim:[spreadsheet]).
4. Create a menu named ODMS and add the menu items
defined in Step 3 to this menu. The menu and menu item
names may be configured as desired.
5. Open the ODMS menu from the options menu bar.
6. Save the session manager.
7. End the session, then log in to the user account. Verify that
the session manager has the open data management server
options and that the open data management server selections
function properly.
NOTE: There is no need to create the GCS operator console menu
item in this step if it was created to support operator console start up
on user log-in.
Operator Console Start-Up on User Log-In
To configure a user account to bring up the open data management server operator console on log-in, perform the steps
below. This will not affect log-in from a non X Windows terminal.
1. Add a GCS operator console menu item by following the
steps in Adding ODMS Functions to a User Session Manager Menu.
2. Log-in to the users account. Under the Session Manager
OPTIONS menu, select the automatic start up option. Select the
item named GCS OPERATOR CONSOLE.
WBPEEUI350003B0
AUTOMATING VAX START-UP
6-5
SOFTWARE DETAILS
®
3. Add this menu item to the automatic start up menu. Save
the session manager, exit, log-in to the users account, and verify that the GCS operator console starts up.
An optional method of configuring the operator console to start
up on user log-in is to use one of the configured sessions
included with the open data management server software.
The configured sessions are in the files:
PIMS$COM:vue$profile.vue$profile
PIMS$COM:vue$profile.ver2
For a secures system, copy PIMS$COM:vue$profile.vue$profile to the users log-in directory. Rename the file as vue$profile.vue$dat. This session has limited access to other system
functions.
For a less secure system, copy PIMS$COM:vue$profile.ver2
to the users log-in directory and rename it as vue$profile.vue$dat.
Operator Console Start-Up After a Boot
This option will causes the GCS operator console to be automatically displayed on OPA0: after a reboot. OPA0: will be dedicated to the GCS operator console function. A log-in window is
provided for access to other functions. A open data management server account name for log-in at reboot is required to
configure this option. Additionally, this account must be configured for automatic operator console start up on user log-in.
The system must be configured for automatic open data management server start up after a boot (refer to Operator Console
Start-Up on User Log-In and Open Data Management
Server Start-Up After a Boot).
1. Add the commands in PIMS$COM:SYSTARTUP_V5.ADD to
SYSTARTUP_V5.COM (VMS 5.X) or SYSTARTUP_VMS.COM
(Open VMS 6.X or higher). The commands should be executed
after the VMS options and open data management server have
been started. Edit the file to assign the AUTOSTRTUP$ACCOUNT logical to the open data management server
account that will be logged into at start up and assign
AUTOSTRTUP$DIR and AUTO$DEFDIR to the account default
directory.
2. Copy
PIMS$COM:DECW$PRIVATE_APPS_SET UP.COM.
SYS$MANAGER:DECW$PRIVATE_APPS_SET UP.COM.
to
3. Copy
PIMS$COM:AUTOSTRTUP$STARTAPPS.COM,
PIMS$COM:AUTOSTRTUP$APPS.COM,
AUTOMATING VAX START-UP
6-6
WBPEEUI350003B0
SOFTWARE DETAILS
PIMS$COM:AUTOSTRTUP$STARTSM.COM, and
PIMS$COM:LOGIN_WINDOW.COM to the default directory for
the account that will be logged into at reboot.
4. Set the SYSGEN parameter USERD2 to a nonzero value. A
zero value disables this feature. The SYSGEN parameter
USERD1 (to automatically start up open data management
server after a reboot) should also be set to a nonzero value.
5. The session manager for the log-in account needs to be
customized as a secure user, refer to Operator Console
Start-Up on User Log-In.
6. To allow a shutdown of the system from the log-in window,
comment out the STOP/QUEUES/ON_NODE command in
SYS$SYSTEM:SHUTDOWN.COM.
7. To disable operator console messages, add the following
lines to the system start up file SYSTARTUP_VMS.COM (for
Open VMS 6.0 or greater) or SYSTARTUP_V5.COM (for VMS
5.5-2):
$ Define/user sys$command OPAO:
$ Reply/Display
$ Set terminals/pers/Nobro OPAO:
AUTOMATING HP START-UP
This section contains procedures to configure an HP console
to:
•
Start up open data management server automatically on
system boot.
•
Start up a GCS console automatically on log-in.
•
Start up a GCS console screen automatically on a system
boot or log-out.
Additional information includes:
•
How to set up TCP/IP communication to OSM modules.
•
How to remove *LOCK files prior to ODMS system start-up.
Open Data Management Server Start-Up After a Boot
To configure an HP console to start up open data management
server automatically after a system boot:
1. Change the directory to /etc.
WBPEEUI350003B0
AUTOMATING HP START-UP
6-7
SOFTWARE DETAILS
®
2. Edit the file RC by adding the following line to the local RC
function, as one line in the file, where nnn is the SETCIM group
number such as 200.
/setcim/odms/exe/cmd nnn ‘sh-c “.
/setcim/commands/setcimlogin.sh;. /setcim/odms/
odms.sh; startsetcim.sh” ‘ Enter
Where the directory /setcim is the default directory chosen during installation. If another directory is used, substitute that
directory in place of /setcim.
GCS Console Start-Up on User Log-In
To configure a GCS console to start up on user log-in:
1. Change the directory to /etc.
2. Edit the file Passwd. Modify any accounts that are to
become dedicated GCS consoles to start up the operators console as part of the shell. The end of each line in the file is the
shell script to start for the given user. Once the shell script
start up is modified, the user will only be able to start up as a
GCS operators console.
If the user starts sh., change the end of the line from /bin/sh to
/gcs/ODMS/shell_gcs.sh where /gcs is the directory where GCS
is installed.
To make this a secure user account, the user account should
have a /.VUE directory that contains the VUEWMRC file.
For example, mv /gcs/ODMS/vuewmrc /user/Dedicated_1/
.VUE where /gcs is the directory into which GCS is installed
and /user is the default directory for the new user. If the .VUE
subdirectory does not exist, it can be created by issuing the following command:
mkdir /user/Dedicated_1/.VUE
where /user/Dedicated_1/.VUE is the default directory of the
given user.
GCS Console Start-Up on System Boot or Log-Out
To automatically start up a GCS console on a system boot or
log-out:
1. Do the steps under Operator Console Start-Up on User
Log-In and GCS Console Start-Up on User Log-In.
2. Change the directory to /usr/vue/config.
AUTOMATING HP START-UP
6-8
WBPEEUI350003B0
SOFTWARE DETAILS
3. Edit the file Xaccess, adding the line:
Hostname.domain.com BYPASS_LOGIN account
where Hostname.domain.com is usually just the HP computer
node name, and account is the user login as Dedicated_1.
TCP/IP Communications to OSM Modules
For TCP/IP communication (between the ODMS interface tasks
and/or the OSM modules), the user needs to have a blind
rshell. A blind rshell does not require a password for remote
execution of a command on a target machine. For example, the
following command should not require password entry:
remsh “host_name” ls
where “host_name” is the target machine.
To add a blind rshell, add the “host_name” to the /etc/hosts
file.
ODMS and ICI Interface Communication Files
The ODMS and ICI interface create *LOCK files at the /tmp
directory on ODMS start up. These files should only exist when
the ODMS system is running. Any existing *LOCK files must be
removed prior to ODMS start up using the following command:
rm -r /tmp/*LOCK
WINDOWS CLIENT AUTOMATIC START-UP
This procedure assumes that the GCS console software and all
other open data management server software are loaded in
Windows. To set up a Windows client for automatic start up:
1. If there is a Windows start up group, open it. If not, create
one and open it.
2. Copy the icons for the various open data management
server programs to the start up group.
a. Copy the GCS for Windows icon to the start up group.
b. Copy the DDELINK icon to the start up group.
c. For CIMDESK installation, follow the procedures in the
CIMDESK Users Manual.
3. Restart Windows in the enhanced 386 mode to activate the
automatic start up installation. If there is sufficient memory
and swapfile available, Windows will automatically start in this
WBPEEUI350003B0
WINDOWS CLIENT AUTOMATIC START-UP
6-9
SOFTWARE DETAILS
®
mode by typing WIN at the DOS prompt. Otherwise type WIN/3
to start Windows and click on the GCS console icon to start up
the client terminal.
GUIDELINES FOR CREATING CLIENT PROGRAMS
The configuration file read by the client program contains connection information and other client and server parameters for
one or more SETCIM database nodes. When a client program
calls INISETC () a configuration file is read to obtain connection
information and other client and server parameters for each
node. The configuration file is located by the SETCIMRPC environment variable in UNIX systems or the SETCIMRPC logical
in VMS systems. If the SETCIMRPC environment variable or
logical is not defined, the client program will assume that a file
named SETCIMRPC.CFG is in the current directory. If the configuration file is not found then the INISETC () call will fail. The
configuration file consists of one or more lines in a text file. The
first line in a configuration file is the default node. For access
routines, such as NAME2RECID, that search all nodes to find
data, the nodes are searched in the order listed in the configuration file. Refer to the SETCIMRPC Users Manual for information on how to set up a configuration file.
OPEN DATA MANAGEMENT SERVER DATABASE FILE FORMAT
Refer to Appendix E for a list of open data management server
database field names. A listing of file format and other information such as default value, tag types supported, and field size
are listed in Table E-2.
QUALITY PRIORITIES
QualToStruct records (QualToStruct01 through QualToStruct19)
are provided with open data management server which allow
someone with an engineer level password to modify the priority
associated with individual qualities. Refer to Table E-1 in
Appendix E for a list of the QualToStruct record numbers and
their corresponding tag type. The quality priority determines
which qualities will be reported on various displays. In the event
that multiple qualities for a given point occur simultaneously,
the quality with the lowest priority number (highest priority) will
be displayed. Priority numbers are set by the engineer using
DBMT or ENGCON. Refer to the appropriate SETCIM product
instruction for information on how to use DBMT or ENGCON.
Each record contains a repeat area that contains a block for
every quality attribute that is available for the given point type.
When modifying QualToStruct records, only the PRIORITY field
should be changed. The PRIORITY field should contain a unique
number for each quality attribute in a given point type.
The following record structure is an example of a QualToStruct
record. The PRIORITY field in this record can be changed to set
GUIDELINES FOR CREATING CLIENT PROGRAMS
6 - 10
WBPEEUI350003B0
SOFTWARE DETAILS
the precedence of the quality strings. No other field should be
changed.
Record Contents
Definition Record
QualToStruct01
QualToStructdef
QualToStruct01 NAME
Quality-Status01 QUALITY_STATUS_FIELD
10 REPEAT_AREA_INDEX
1 1 PRIORITY
Manual Sub 1 QUALITY STATUS
d-AnalogB eMANUAL SUBSTITUTION 1 FIELD_LOCATION
1 1 VALUE
2 2 PRIORITY
Off Scan 2 QUALITY STATUS
d-AnalogB eOFF SCAN
2 FIELD_LOCATION
1 2 VALUE
3 3 PRIORITY
Bad Qual 3 QUALITY STATUS
d-AnalogB eQUALITY
3 FIELD_LOCATION
1 3 VALUE
4 4 PRIORITY
HiLimAlarm 4 QUALITY STATUS
d-AnalogB eLIMIT ALARM
4 FIELD_LOCATION
2 4 VALUE
5 5 PRIORITY
LoLimAlarm 5 QUALITY STATUS
d-AnalogB eLIMIT ALARM
5 FIELD_LOCATION
1 5 VALUE
6 6 PRIORITY
HiDevAlarm 6 QUALITY STATUS
d-AnalogB eDEVIATION ALARM
6 FIELD_LOCATION
2 6 VALUE
7 7 PRIORITY
LoDevAlarm 7 QUALITY STATUS
d-AnalogB eDEVIATION ALARM
7 FIELD_LOCATION
1 7 VALUE
8 8 PRIORITY
CalibrtnVl 8 QUALITY STATUS
d-AnalogB eCALIBRATION VALUES 8 FIELD_LOCATION
1 8 VALUE
9 9 PRIORITY
Red Tagged 9 QUALITY STATUS
d-AnalogBeRED TAGGED
9 FIELD_LOCATION
1 9 VALUE
10 10 PRIORITY
Tracking 10 QUALITY STATUS
d-AnalogB eTRACKING
10 FIELD_LOCATION
1 10 VALUE
WBPEEUI350003B0
QUALITY PRIORITIES
6 - 11
SOFTWARE DETAILS
®
OFF-LINE INTERFACE TESTING
The ICI interface should be tested prior to the initial start up of
the ODMS server or any time problems occur using the icitest
program. This program will allow the user to connect to an ICI
interface and obtain general information about the interface.
PERMANENT LICENSE INSTALLATION
After entering the temporary license password and the resulting license code has been sent to the Open Data Management
Server Coordinator at Elsag Bailey, a series of permanent
license codes will be received.
To install the permanent license:
1. Enter these license codes into ODMS using the following
program.
For VAX and Alpha AXP type:
$ RUN SETCIMCODE: UPDATELICENSE
For HP-UX type:
cd SETCIMCODE
UPDATELICENSE
The program will respond with prompts for entering the license
code.
Do you want to enter a product code (Yes/No) [Yes?]
2. Press
Enter
to enter the product code.
Please enter product code
3. Enter the 16 character license code and repeat for all
license codes received when prompted.
4. Restart the ODMS system to activate the new licenses.
OFF-LINE INTERFACE TESTING
6 - 12
WBPEEUI350003B0
SECTION 7 - ERROR MESSAGES AND RECOVERY
INTRODUCTION
This section provides a listing of error messages and error
codes that are generated by the Open Data Management Server
(ODMS) and INFI-NET to Computer Interface (ICI). Corrective
action (or meaning) is provided for each error message or error
code.
SYSTEM MESSAGES
Table 7-1 lists open data management server and error messages that may occur during system configuration and normal
operation.
Table 7-1. ODMS System and Error Messages
Message
Corrective Action
All required data not entered
Enter all the required data. Press Enter after entering
each field of data.
Allocation error; message tags missing
Call Elsag Bailey technical support for assistance.
Area read error; message tags missing
Block is red tagged - cannot output to it
Output to red tag value is prohibited.
BLOCK out of range
Use a block number that is within the allowable INFI 90
OPEN range. Enter a block number between 1 and 9990.
Cannot create - NO FREE IDs !!!
Use the database management tool (DBMT) or the engcon utility program to increase the number of free record
IDs.
Change may have been lost
Verify that the update has been completed.
Could not clear confirm set time flag in record xx Call Elsag Bailey technical support for assistance.
Could not clear ICI status data in scratch record
Could not clear number of time repeat areas
Could not convert ICI value xx in field xx
Could not create new ICI record
Verify that the default ICI record is available and that the
new ICI record does not already exist as an unusable
record.
Could not create selector record
Verify that database has free space and that record does
not already exist. Call Elsag Bailey technical support for
assistance.
Could not find DELETE INDEX record
Verify that DELETE INDEX RECORD is available in database. Call Elsag Bailey technical support for assistance.
Could not find record with this plant area
Verify that the correct plant area is entered and try again.
WBPEEUI350003B0
INTRODUCTION
7-1
ERROR MESSAGES AND RECOVERY
®
Table 7-1. ODMS System and Error Messages
Message
Could not load ICI data into scratch record
(continued)
Corrective Action
Call Elsag Bailey technical support for assistance.
Could not make new logic state sel rec usable;
ID
Could not make new selector record usable
Could not make record xx usable
Could not read ICI number from scratch record
Could not read ICI number
Could not read ICI record ID xx (ICI_x)
Verify that the open data management server database is
available and that the given ICI record is usable.
Could not read number of time repeat areas
Call Elsag Bailey technical support for assistance.
Could not read scan setting from tag record
Could not read Set Time scratch record xx
Could not read tag type of message record
Could not read value for logic state 0
Could not read value for logic state 1
Could not refresh ICI record data; restart ICI
after updating
Verify that the logic state descriptor is available. Call
Elsag Bailey technical support for assistance.
Call Elsag Bailey technical support for assistance.
Could not send xx request
Could not store activation record ID xx
Verify that record xx exists. Call Elsag Bailey technical
support for assistance.
Could not store activation record ID xx
Call Elsag Bailey technical support for assistance.
Could not update ICI record
Could not write ICI record ID to scratch record
Could not write ICI status data into scratch
record
Could not write initial data to screen; number
OK:
Could not write message to ICI configuration
screen
Could not write new system time to record
Could not write number of selections
Could not write number of selections to new LS
sel rec; ID:
Could not write number of time repeat areas
Call Elsag Bailey technical support for assistance.
Could not write old system time to record
Could not write set system time flag to record
Could not write time data into scratch record
Could not write to confirm attribute field
Create logic state selector record failed; ID: x
Verify that the record does not exist. Call Elsag Bailey
technical support for assistance.
Creation of new ICI record CANCELLED
Normal return message if operation was canceled.
Data has been archived - no changes
Changes to data are not allowed. Historical data cannot
be modified when it is archived to long term storage it.
SYSTEM MESSAGES
7-2
WBPEEUI350003B0
ERROR MESSAGES AND RECOVERY
Table 7-1. ODMS System and Error Messages
Message
(continued)
Corrective Action
Data out of range
The value entered is outside of the allowable range. Enter
a value within the allowable range of the field or attribute.
DECNET interface not available on this host
The DECNET interface option is available only on VAX/
VMS protocol machines. HP-UX machines will not support this communication protocol.
Default read error; message tags missing
Call Elsag Bailey technical support for assistance.
Detail not allowed
No corrective action required. The open data management server does not provide additional information for
the highlighted item.
Err inserting History in EX RA of Rec
Verify that the disk history program is active for the given
record. Call Elsag Bailey technical support for assistance.
Err obtaining History Seq # from Rec
Err obtaining Spec History Seq #
Err reading #Entries/Page (TAGLISTSCR)
Call Elsag Bailey technical support for assistance.
Err reading #Selected Tags (TAGLISTSCR)
Err reading Default Rec < 0 from Rec
Err reading Default Rec field
Err reading Desc, Plant Area, or Tag Type
Err reading Enable Global from PIMSBase
Err reading Ex History Seq # from Rec
Err reading Ex Repeat Area from Rec
Err reading F1 value format record ID
Err reading F2 value format record ID
Verify that the disk history program is active for the given
record. Call Elsag Bailey technical support for assistance.
Verify that a valid value format has been defined. Call
Elsag Bailey technical support for assistance.
Err reading F3 value format record ID
Err reading F4 value format record ID
Err reading fixed tag data from Record
Call Elsag Bailey technical support for assistance.
Err reading Global Message Switch (PIMSBase)
Err reading Global Message Switch
Err reading HISSUMSCR record
Err reading History Data Scratch Record
Err reading Log Control Record ID
Err reading Log Control Record ID (PIMSBase)
Verify that a valid log control record has been defined.
Call Elsag Bailey technical support for assistance.
Err reading Message Output Scratch rec
Call Elsag Bailey technical support for assistance.
Err reading New Message from MSG ID rec
Err reading P1 value format record ID
Err reading P2 value format record ID
Verify that the logic state descriptor is available. Call
Elsag Bailey technical support for assistance.
Err reading Plant Area from MSG ID rec
Call Elsag Bailey technical support for assistance.
Err reading Scratch record
Err reading sEnable Global from MSG ID
Err reading sMessages to Log from MSG ID
Err reading sMessages to Log from Rec
WBPEEUI350003B0
SYSTEM MESSAGES
7-3
ERROR MESSAGES AND RECOVERY
®
Table 7-1. ODMS System and Error Messages
Message
Err reading Spec/Ex His Summ from Rec
Err reading Spec History Seq # from Rec
(continued)
Corrective Action
Verify that the disk history program is active for the given
record. Call Elsag Bailey technical support for assistance.
Err reading Spec Repeat Area from Rec
Err reading Tag List Scratch record
Call Elsag Bailey technical support for assistance.
Err reading value format record ID
Err retrieving records from the database
Verify that the open data management server is operational (all programs are running). Call Elsag Bailey technical support for assistance.
Err writing #Entries/Page (TAGLISTSCR)
Call Elsag Bailey technical support for assistance.
Err writing #Selected Tags (TAGLISTSCR)
Err writing Ex Repeat Area to Record
Err writing F1 value format record ID
Err writing F2 value format record ID
Err writing F3 value format record ID
Err writing F4 value format record ID
Data out of range
Verify that the data entered is within range for applicable
field.
ICI number _ does not exist; Press update to
create
Normal message that occurs during ICI configuration.
Highlight and click update to create the ICI number.
ICI number must be greater than 0 and less than The ICI number entered is out of range. Enter an ICI num16
ber between 1 and 15.
Err writing History to Ex RA of Rec
Call Elsag Bailey technical support for assistance.
Err writing History to Ex RA of Rec
Err writing History to Spec RA of Rec xx
Err writing P1 value format record ID xx
Err writing P2 value format record ID xx
SYSTEM MESSAGES
7-4
Verify that the logic state descriptor is available. Call
Elsag Bailey technical support for assistance.
WBPEEUI350003B0
ERROR MESSAGES AND RECOVERY
Table 7-1. ODMS System and Error Messages
Message
Err writing Spec Repeat Area to Record xx
(continued)
Corrective Action
Call Elsag Bailey technical support for assistance.
Err writing TAG ID to Scratch Record
Err writing tag type to record xx
Err writing to HISDATAMANSCR record
Err writing to Message ID record
Err writing to MSGOUTSCR record
Err writing to New Message in MSGOUTSCR
Err writing to TAGLISTSCR record
Err writing value format record ID
Err reading Ex Display from xx
Err reading Spec Display from xx
Err reading Summary Display from xx
Err xx deleting new selector record ID xx after
error
Err xx making new selector record ID xx unusable after error
Err xx reading FT_sMESSAGESTOLOG as
ASCII; FT: ID:
Err xx reading field count from definition record;
ID:
Err xx reading field name record ID xx from def
rec
Err xx reading field number from field name
record
Err xx reading ICI index from tag
Err xx reading ICI record ID from tag xx
Err xx reading IS data as ASCII; FT: ID:
Err xx reading IS data; FT: ID:
Err xx reading old ICI record
Err xx reading summary line record ID from def
rec ID
Err xx reading tag logging switch; rec ID:
Err xx reading TAG NAME from old ICI's repeat
area
Verify that the historical data collection task is operational.
Call Elsag Bailey technical support for assistance.
Err xx reading TAG NAME from new ICI's target
repeat area
Err xx reading WAS data as ASCII; FT: ID:
Call Elsag Bailey technical support for assistance.
Err xx reading WAS data; FT: ID:
Err xx when clearing xx field; rec ID:, FT:
Err xx writing TAG NAME to new ICI
Err xx writing TAG NAME to old ICI
Verify that the historical data collection task is operational.
Call Elsag Bailey technical support for assistance.
Err xx writing to message log; REC ID: LOG ID: Call Elsag Bailey technical support for assistance.
Err xx reading fixed area of new ICI record
WBPEEUI350003B0
SYSTEM MESSAGES
7-5
ERROR MESSAGES AND RECOVERY
®
Table 7-1. ODMS System and Error Messages
Message
(continued)
Corrective Action
Err xx writing default record name into blank
fields
Verify that the historical data collection task is operational.
Call Elsag Bailey technical support for assistance.
Err another tag occupies ICI INDEX
Only one tag can occupy any ICI index. Correct ICI index
to insure that all indices are unique. If all indexes are
unique run the REBUILDICI program to validate and correct any ICI configuration errors.
Err: reading occurrence from tag name
Call Elsag Bailey technical support for assistance.
Error allocating memory for new linked list element
Error clearing display field
Error creating record xx (ID: xx) against def rec
ID xx
Verify that the database has sufficient free space. Call
Elsag Bailey technical support for assistance.
Error creating record xx
Error deleting record ID xx
Call Elsag Bailey technical support for assistance.
Error deleting tag reference from record xx, field
tag xx
Error filling in blank tag name fields
Error inserting xx; FT:, occsok: HISTORY in
spec repeat area of record
Verify that the historical data collection program is active.
Verify that the historical data is not archived data. Call
Elsag Bailey technical support for assistance.
Error inserting xx; FT: xx, occsok: HISTORY in
ex repeat area of record
Error making deleted record ID xx unusable
Call Elsag Bailey technical support for assistance.
Error making record xx (ID: xx) usable
Error obtaining SPEC HISTORY SEQUENCE
NUMBER from record
Verify that the historical data collection program is active.
Call Elsag Bailey technical support for assistance.
Error obtaining xx;, SPEC HISTORY
SEQUENCE NUMBER from record
Error obtaining xx;, EX HISTORY SEQUENCE
NUMBER from record
Error obtaining xx;, HISTORY SEQUENCE
NUMBER from record
Error on return from TAGSPAGE; numrecs:
Call Elsag Bailey technical support for assistance.
Error reading FT_sMESSAGESTOLOG as
ASCII for logging
Error reading config display from DBCONFGSCR; Rec: FT:
Error reading default flags for GETRECLIST()
list
Error reading DEFAULT field from ICI rec; Rec:
Error reading DEFAULT REC from TAG ID
record; FT:
Error reading DEFAULT REC from tag record
Error reading DEFAULT REC xx, MSGID: xx,
from MESSAGE ID record; FT:
Error reading DELETE INDEX RECORD from
PIMSBASE record
SYSTEM MESSAGES
7-6
Verify that a delete index record is defined in the PIMSBASE record.
WBPEEUI350003B0
ERROR MESSAGES AND RECOVERY
Table 7-1. ODMS System and Error Messages
Message
(continued)
Corrective Action
Error reading eHistory Seq no from DeleteIndex Verify that the historical data collection program is active.
record
Call Elsag Bailey technical support for assistance.
Error reading eHistSeq# from DeleteIndex rec
Error reading ENABLE GLOBAL from PIMSBASE record; FT:
Verify that the PIMSBASE record is defined and available.
Error reading ENABLE GLOBAL from record
Verify that the given record is defined and available. Call
Elsag Bailey technical support for assistance.
Error reading eOFFSCAN from record xx, FT:
Error reading eOUTPUT ENABLE from record
Error reading eREDTAGGED from record xx,
FT: x
Error reading EX HIS DETAIL DISPLAY; FT:
Error reading exception data from record
Error reading exception data from DB; FT:,DB
Rec:, Numok:
Error reading field count from def rec
Verify that the historical data collection program is active.
Call Elsag Bailey technical support for assistance.
Verify that the historical data collection program is
active. Call Elsag Bailey technical support for assistance.
Call Elsag Bailey technical support for assistance.
Error reading field number from field record
Error reading fixed area of new ICI record
Error reading FIXED AREA xx; FT: xx, numok:
Tag Data of record
Error reading from old ICI record
Error reading from xx, numok: #ENTRIES/PAGE
in TAGLISTSCR record; FT:
Error reading FT_eOFFSCAN
Error reading global output enable flag
Error reading GLOBAL MESSAGE SWITCH xx, Verify that the PIMSBASE record is defined and available.
from PIMSBASE record; FT:
Error reading History Seq no from DeleteIndex
record
Verify that the historical data collection program is active.
Call Elsag Bailey technical support for assistance.
Error reading ICI INDEX from tag record
Call Elsag Bailey technical support for assistance.
Error reading ICI INDEX from TAG ID rec xx
before deletion
Error reading ICI rec ID from TAG ID rec xx
before deletion
Error reading ICI rec ID from tag record
Error reading ICI record ID from tag
Error reading ICI RECORD ID from record
Error reading ICI record's DEFAULT field
Error reading LOG CONTROL RECORD ID xx,
from PIMSBASE record; FT
Verify that the pimsbase record is available. Verify that the
LOG CONTROL RECORD is valid and available. Call
Elsag Bailey technical support for assistance.
Error reading lowest allowed id from PIMSBASE Verify that the PIMSBASE record is available. Call Elsag
Bailey technical support for assistance.
WBPEEUI350003B0
SYSTEM MESSAGES
7-7
ERROR MESSAGES AND RECOVERY
®
Table 7-1. ODMS System and Error Messages
Message
(continued)
Corrective Action
Error reading max lines from summary record;
rec ID:
Verify that the record is defined and available. Call Elsag
Bailey technical support for assistance.
Error reading MSGOUTSCR record; FT: xx,
numok:
Call Elsag Bailey technical support for assistance.
Error reading new data as ASCII for logging
Error reading new data for logging
Error reading old data as ASCII for logging
Error reading old data for logging
Error reading one state desc in ASCII
Error reading OPPARSCR record; FT: xx,
numok: x
Error reading plant areas for GETRECLIST() list
Error reading PLANT AREA xx, MSGID: from
MESSAGE ID record; FT:
Error reading QUALSTAT from record
Error reading scan setting from TAG NAME
record
Error reading selection choices
Error reading sENABLE GLOBAL MSGID: from Verify that the given record is defined and available. Call
MESSAGE ID record; FT:
Elsag Bailey technical support for assistance.
Error reading sENABLE GLOBAL from record
Error reading sMESSAGES TO xx, MSGID:
LOG from MESSAGE ID record; FT:
Error reading spec data from DB; FT:, DB Rec:, Verify that the historical data collection program is active.
Numok:
Call Elsag Bailey technical support for assistance.
Error reading spec data from record
Error reading summary line record
Error reading summary line rec ID
Verify that the given record is defined ad available. Call
Elsag Bailey technical support for assistance
Error reading sVALUE FORMAT from record
Verify that a valid value format is defied for the given
record. Call Elsag Bailey technical support for assistance.
Error reading tag fixed (common) data
Call Elsag Bailey technical support for assistance.
Error reading tag fixed (common) data; Rec:,
FT:, numok:
Error reading tag fixed data
Error reading tag fixed data; Rec:, FT:, numok:
Error reading tag logging switch
Error reading tag name from ICI repeat area
Verify that the historical data collection program is active.
Call Elsag Bailey technical support for assistance.
Error reading tag record's quality status
Call Elsag Bailey technical support for assistance.
Error reading tag type definition record
Error reading tag type fixed data; Rec:, FT:,
numok:
Error reading tag type from tag record
SYSTEM MESSAGES
7-8
WBPEEUI350003B0
ERROR MESSAGES AND RECOVERY
Table 7-1. ODMS System and Error Messages
Message
Error reading tag type of message record ID
(continued)
Corrective Action
Call Elsag Bailey technical support for assistance.
Error reading TAG TYPE from TAGNAME
record; FT:
Error reading tag's enable global flag
Error reading tag's ICI record ID
Error reading tag's output enable flag
Error reading TAGDEFLIST RECORD ID from
PIMSBASE
Verify that a valid open data management server database is loaded. Verify that a valid TAGDEFLIST record is
defined in PIMSBASE. Call Elsag Bailey technical support for assistance.
Error reading TAGLISTSCR record; FT: xx,
numok:
Call Elsag Bailey technical support for assistance.
Error reading TAGTYPE from record xx, FT:
Error reading VALUE FORMAT from record
Error reading whether tag is on or off scan
Error reading xx LOG CONTROL RECORD ID
from PIMSBASE record; FT:
Verify that a valid open data management server database is loaded. Verify that a valid TAGDEFLIST record is
defined in PIMSBASE. Call Elsag Bailey technical support for assistance.
Error reading xx, numok: xx, SCRATCH
RECORD; FT:
Call Elsag Bailey technical support for assistance.
Error reading xx, numok: xx, SPEC/EX HIS
SUMM from HISDATAMANSCR record; FT:
Verify that the historical data collection program is active.
Call Elsag Bailey technical support for assistance.
Error reading xx, numok: NEW MESSAGE
repeat area in MSGOUTSCR; FT:
Call Elsag Bailey technical support for assistance.
Error reading xx, TAGID: xx, DEFAULT REC
from TAG ID record; FT:
Error reading xx, TAGNAME: xx, TAG TYPE
from TAGNAME record; FT:
Error reading xx, TAGID: xx, sMESSAGES TO
LOG from TAG ID record; FT:
Error reading xx; FT: F1VALUE FORMAT
RECORD ID from record
Verify that the value format is available. Call Elsag Bailey
technical support for assistance.
Error reading xx; FT: numok: xx, SPEC REPEAT Verify that the historical data collection program is active.
AREA from record
Call Elsag Bailey technical support for assistance.
WBPEEUI350003B0
SYSTEM MESSAGES
7-9
ERROR MESSAGES AND RECOVERY
®
Table 7-1. ODMS System and Error Messages
Message
Error reading xx; FT: sF2VALUE FORMAT
RECORD ID from record
(continued)
Corrective Action
Verify that the value format is available. Call Elsag Bailey
technical support for assistance.
Error reading xx; FT: sF3VALUE FORMAT
RECORD ID from record
Error reading xx; FT: sF4VALUE FORMAT
RECORD ID from record
Error reading xx; FT: sP1VALUE FORMAT
RECORD ID from record
Error reading xx; FT: sP2VALUE FORMAT
RECORD ID from record
Error reading xx; FT: sVALUE FORMAT
RECORD ID from record
Error reading xx; FT: VALUE FORMAT
RECORD ID from record
Error reading xx; FT: xx, numok: EX REPEAT
AREA from record
Verify that the historical data collection program is active.
Call Elsag Bailey technical support for assistance.
Error reading xx; FT: xx, SUMMARY DISPLAY
from
Call Elsag Bailey technical support for assistance.
Error reading xx, SPEC HIS DETAIL DISPLAY;
FT:
Error reading xx FT: xx, GLOBAL MESSAGE
SWITCH from PIMSBASE record;
Error reading xx FT: xx, numok: #SELECTED
TAGS in TAGLISTSCR record;
Error reading xx, numok: #SELECTED TAGS in
TAGLISTSCR record; FT:
Error reading xx, numok: xx HISDATAMANSCR
record; FT:
Error reading zero state desc in ASCII
Error removing reference to deleted tag
Using DBMT, remove all references to the given tag. Call
Elsag Bailey technical support for assistance.
Error substituting value in tag record
Verify that the logic state descriptor is available. Call
Elsag Bailey technical support for assistance.
Error substituting value in batch tag record
Verify that the record is usable. Call Elsag Bailey technical
support for assistance.
Error substituting value in analog output record
Error substituting value in RCM record
Error substituting value in device driver record
Error substituting value in DADIG record
Error substituting value in digital tag record
SYSTEM MESSAGES
7 - 10
WBPEEUI350003B0
ERROR MESSAGES AND RECOVERY
Table 7-1. ODMS System and Error Messages
Message
Error substituting value in MSDD record
Error substituting value in station record
(continued)
Corrective Action
Verify that the record is usable. Call Elsag Bailey technical
support for assistance.
Error substituting value in analog tag record
Error substituting value in RMCB record
Error substituting value in RMSC record
Error substituting value in digital output record
Error substituting value in DAANG record
Error writing # index (value: xx) to DeleteIndex
Verify that database has free space. Call Elsag Bailey
technical support for assistance.
Error writing common data to record
Call Elsag Bailey technical support for assistance.
Error writing current time into tag record
Error writing DEFAULT REC field in TAG ID rec
xx
Error writing deleted record ID to DeleteIndex
Verify that database has free space. Call Elsag Bailey
technical support for assistance.
Error writing e # of Disk Vals to TAG ID rec xx
after deletion
Call Elsag Bailey technical support for assistance.
Error writing e # of Memory Vals to DB; Rec:,
Val:
Error writing e# of Memory Vals to record
Error writing ex timestamp to TAG NAME record
Error writing exception data to DB; FT:, DB
Rec:, Numok:
Error writing fixed (common) data to record
Error writing ICI index to DeleteIndex
Error writing ICI record ID to DeleteIndex
Verify that database has free space. Call Elsag Bailey
technical support for assistance.
Error writing init evalue data to record
Call Elsag Bailey technical support for assistance.
Error writing init evalue to DB; FT:, DB Rec:,
Numok:
Error writing init values data to record
Error writing init values to DB; FT:, DB Rec:,
Numok:
Error writing IS message to log
Verify that database has free space. Call Elsag Bailey
technical support for assistance.
Error writing logging switch to tag record
Call Elsag Bailey technical support for assistance.
Error writing logic state 0 desc
Error writing logic state 1 desc
Error writing max lines to summary record; rec
ID:
WBPEEUI350003B0
Verify that database has free space. Call Elsag Bailey
technical support for assistance.
SYSTEM MESSAGES
7 - 11
ERROR MESSAGES AND RECOVERY
®
Table 7-1. ODMS System and Error Messages
Message
Error writing message inhibit setting to tag
record
(continued)
Corrective Action
Call Elsag Bailey technical support for assistance.
Error writing message switch to tag record
Error writing message to log
Error writing new max lines to summary rec
Error writing new scan setting to tag record
Error writing OFF/ON SCAN to TAG NAME
record
Error writing s # of Disk Vals to TAG ID rec xx
after deletion
Verify that the historical data collection program is active.
Call Elsag Bailey technical support for assistance.
Error writing s # of Memory Vals to DB; Rec:,
Val:
Error writing s# of Memory Vals to record
Error writing spec data to record
Error writing spec data to DB; FT:, DB Rec:,
Numok:
Error writing spec timestamp to TAG NAME
record
Call Elsag Bailey technical support for assistance.
Error writing tag common data to DB; FT:, DB
Rec:, Numok:
Error writing tag fixed data to DB; FT:, DB Rec:,
Numok:
Error writing tag type fixed data to DB; FT:, DB
Rec:, Numok:
Error writing tag type into new record
Error writing TAG NAME to old ICI
Error writing TAG TYPE into new record xx (ID:
xx)
Error writing TAGTYPE to record xx; FT:
Error writing timestamp into tag record
Error writing to FT_pdpdpdworkingpdpdpd
Error writing to DB Config Scratch record
Error writing to DBCONFGSCR; l_act_id:, FT:,
numok:
Error writing to DEFAULT REC field
Error writing to display record
Error writing to e#ofDiskVals field
Verify that the historical data collection program is active.
Call Elsag Bailey technical support for assistance.
Error writing to FT_sTIME field (xx) of DB Rec:
Call Elsag Bailey technical support for assistance.
Error writing to HISDATAMANSCR record; FT:
xx, numok: x
Error writing to OPPARSCR record
Error writing to s#ofDiskVals field
SYSTEM MESSAGES
7 - 12
Verify that the historical data collection program is active.
Call Elsag Bailey technical support for assistance.
WBPEEUI350003B0
ERROR MESSAGES AND RECOVERY
Table 7-1. ODMS System and Error Messages
Message
Error writing to TAGLISTSCR record; FT: xx,
numok:
(continued)
Corrective Action
Call Elsag Bailey technical support for assistance.
Error writing to xx, numok: MSGOUTSCR
record; FT:
Error writing to xx, numok: #ENTRIES/PAGE in
TAGLISTSCR record; FT:
Error writing value format field; Rec:, FT:,
numok:
Error writing WAS log message
Error writing xx at Recid; Value =
Error writing xx, numok: to MESSAGE ID record;
FT:
Error writing xx, TAGID: xx, TAG ID to HISDATAMANSCR record; FT:
Error writing xx to target record
Error writing xx; FT:, Format: VALUE FORMAT
RECORD ID to record
Verify that the value format is correct. Call Elsag Bailey
technical support for assistance.
Error writing xx; FT: Format: sF1VALUE FORMAT RECORD ID to record
Error writing xx; FT: Format: xx, sF2VALUE
FORMAT RECORD ID to record
Error writing xx; FT: Format: xx, sF3VALUE
FORMAT RECORD ID to record
Error writing xx; FT: Format: xx, sP1VALUE
FORMAT RECORD ID to record
Error writing xx; FT: Format: xx, sF4VALUE
FORMAT RECORD ID to record
Error writing xx; FT: Format: xx, sP2VALUE
FORMAT RECORD ID to record
Error writing xx; FT: numok: xx, SPEC REPEAT Verify that the historical data collection program is active.
AREA to record
Call Elsag Bailey technical support for assistance.
Error writing xx; FT: xx, occsok: HISTORY to ex
repeat area of record
Error writing xx; FT: xx, occsok: HISTORY to
spec repeat area of record
Error writing xx; FT: xx, numok: EX REPEAT
AREA to record
Error writing xx, numok: #SELECTED TAGS in
TAGLISTSCR record; FT:
Call Elsag Bailey technical support for assistance.
Error writing value format field
Verify that the value format is correct. Call Elsag Bailey
technical support for assistance
ERROR reading Config Display
Call Elsag Bailey technical support for assistance.
ERROR: new ICI INDEX > MAX TAGS
ALLOWED
The new ICI index is greater then the maximum allowed
for this ICI. Change the ICI index to be within the range of
valid ICI indices.
WBPEEUI350003B0
SYSTEM MESSAGES
7 - 13
ERROR MESSAGES AND RECOVERY
®
Table 7-1. ODMS System and Error Messages
Message
Ex history delete not successful
Ex history update not successful
(continued)
Corrective Action
Verify that the historical data collection program is active.
Call Elsag Bailey technical support for assistance.
FIRST_FREE_ID in record PIMS Base is 0
Verify that the PIMSBASE record is correctly configured.
The first free record should be assigned to the first blank
record following the open data management server.
History area not configured; Defaulting to 1
Call Elsag Bailey technical support for assistance.
History error code xx reading TAG NAME from
old ICI
Verify that the historical data collection program is active.
Call Elsag Bailey technical support for assistance.
History error code xx reading TAG NAME from
new ICI
History error xx writing TAG NAME to old ICI
History error xx writing TAG NAME to new ICI
History time later than current time
Verify that the time entered is valid for the data range.
ICI & ICI INDEX: one is zero, one is not zero
The ICI index and the ICI both must be defined, if either is
defined.
ICI INDEX out of range
A valid ICI must be entered. Correct the ICI index. If the
index is valid, run the program rebuild ICI and try again.
ICI must be entered
An ICI must be defined for this point type. Enter a valid ICI
for the given point.
ICI number xx does not exist; Press Update to
create
A normal ICI message. This ICI does not exist, if update is
entered a new ICI record will be created for the selected
ICI number.
ICI record updated; reset request submitted
A normal ICI message. The changes to the ICI will require
the ICI to be reset. This will occur automatically. This
reset will briefly interrupt exception report processing.
ICI xx not configured
The requested ICI is not configured.
Invalid format
The input entered is invalid or is not recognized by the
system. Make the correct entry required for the field or
attribute.
Invalid ICI (used as default record)
This ICI record cannot be modified, it is defined as a
default record.
Invalid MSG ID (not message record)
Call Elsag Bailey technical support for assistance.
Invalid MSG ID (used as default record)
Invalid page
The selected page number is beyond the number of available pages. Enter a lower page number.
Invalid tag (used as default record)
Call Elsag Bailey technical support for assistance.
Invalid TAG NAME (used as default record)
The tag name has been used by another record in the
database. This record is marked as a default record and
as such it will not be displayed on any display. It may be
examined using DBMT or engcon.
SYSTEM MESSAGES
7 - 14
WBPEEUI350003B0
ERROR MESSAGES AND RECOVERY
Table 7-1. ODMS System and Error Messages
Message
Logic state 0 descriptor ASCII read failed; FT:
ID:
(continued)
Corrective Action
Verify that the Logic state descriptor is correct. Call Elsag
Bailey technical support for assistance.
Logic state 0 descriptor read failed; FT: ID:
Logic state 1 descriptor read failed; FT: ID:
Logic state descriptor 1 ASCII read failed; FT:,
ID:
Logic state selector 0 write failed; ID:
Logic state selector 1 write failed; FT:, ID:
LOOP out of range
The value entered for loop is out of range. Verify that the
value entered is within the range of 1 to 250.
Major error; details in record TSK_DBCF
Use DBMT or engcon to review the errors encountered in
the record TSK_DBCF.
MODULE out of range
The value entered for the module is out of range. Verify
that the value entered is within the range of 1 to 31.
Must select a tag (click on tag)
The user must select a tag prior to activating this function.
Must select a TAG TYPE
The user must select a valid tag type. Enter a valid tag
type and retry.
Name used by a non-tag record in database
The name enter is already used by another record in the
database. All records in the database must have a unique
name. Enter a different name and try again.
no LOG CONTROL RECORD in PIMS Base
PIMSBASE record incorrectly configured. Verify PIMSBASE record configuration. Call Elsag Bailey technical
support for assistance.
No changes were made
This is just an informational message, no action is
required.
No detail display for record
No corrective action required. The open data management server does not provide additional information for
the highlighted item.
No free ID for new desc record; using I 2
Verify that database has free records. Call Elsag Bailey
technical support for assistance.
No LOG CONTROL RECORD in PIMS Base
Verify that a log control record is defined in the PIMSBASE record.
No records match Plant Area
This message is just informational, attempt the operation
with a different plant area.
No such record
The tag name that was entered does not exist or cannot
be found in the open data management server database.
Enter the correct tag name.
No System Time value entered
Call Elsag Bailey technical support for assistance.
No TagDefList Record in PIMS Base
Verify that a tagdeflist record is defined in the PIMSBASE
record.
No TagDHIS Selector in xx
Call Elsag Bailey technical support for assistance.
NODE out of range
Reenter, with a valid node address, must be 1-250.
NOT DELETED: no Del Index Rec in PIMS Base Verify that a delete index record is defined in the PIMSBASE record.
NOT UPDATED: No TAG to update
WBPEEUI350003B0
Enter a valid tag name. This operation requires a valid tag
name.
SYSTEM MESSAGES
7 - 15
ERROR MESSAGES AND RECOVERY
®
Table 7-1. ODMS System and Error Messages
Message
(continued)
Corrective Action
Page valid
No corrective action required. Normal system message.
PIMS Base record (x) does not exist
Verify that an open data management server database is
loaded. Call Elsag Bailey technical support for assistance.
Record created in invalid location
Call Elsag Bailey technical support for assistance.
REPEAT AREA not defined for record x
Scratch console record not configured
Run task console scratch record procedure. Create
scratch record for the given console. If problem persists
then call Elsag Bailey technical support for assistance.
Security level not high enough
Enter the password that has the security level required to
access the screen functions. To enter a password:
1. Press Ctrl -P.
2. Type in the password that has the required security
level and press Enter .
SEQ: xx, CURRENT SEQ: xx, STOPCODE:
Normal exit message.
Spec history delete not successful
Spec history update not successful
Verify that the historical data collection program is active.
Call Elsag Bailey technical support for assistance.
Substitute value not entered
A value must be entered for substitution.
Summary line record read failed; FT:, ID:
Call Elsag Bailey technical support for assistance.
SummaryDef record does not exist !!!
Verify that an open data management server database is
loaded. Call Elsag Bailey technical support for assistance.
Tag defined as an Internal Point
Tags must have an unique name. Any tag name that
matches a internal point is not allowed.
Tag does not exist in database
The tag name that was entered does not exist or cannot
be found in the open data management server database.
Enter the correct tag name.
Tag scratch record not listed
Call Elsag Bailey technical support for assistance.
TAG NAME must be entered
This screen requires the tag name to function. Enter a
valid open data management server tag name.
TAG TYPE invalid; select another tag
This tag type is invalid. Select a valid tag type.
TAG-TYPES2 xx Config Display is blank
No configuration display is configured for this tag type.
Time zone must be between -12 and 12
The time zone entered is not valid. Verify that the time
zone is between -12 and 12.
Transmission error #309
The scratch records are corrupt or do not exist and there
is a free space limitation.
Unknown tag type in type fixed data list
Call Elsag Bailey technical support for assistance.
Unknown tag type xx for field tag
xx does not have history configured
Configure history for the given point and verify that the
history data collection task is active (TSK_DHS?).
xx Ex Display blank in TAG-TYPES2
No display was specified for the given tag type. define a
display for the given tag type. Call Elsag Bailey technical
support for assistance.
xx Spec Display blank in TAG-TYPES2
xx Summary Display blank in TAG-TYPES2
xx Tag Scr Record not configured in xx
SYSTEM MESSAGES
7 - 16
Call Elsag Bailey technical support for assistance.
WBPEEUI350003B0
ERROR MESSAGES AND RECOVERY
ERROR MESSAGES
Table 7-2 lists open data management server error messages.
Tables 7-3 through 7-6 lists ICI interface related error codes.
ICI interface error codes may be generated as part of an open
data management server error message .
Table 7-2. ODMS Error Messages
Message
Corrective Action
Activation by unexpected record.
Call Elsag Bailey technical support for assistance.
Bad CBD msg; message overrun.
Check the ICI_X record. Execute Rebuild ICI to recreate
the ICI_X record.
Bad CBD msg; undefined opcode.
Bad COS event.
Bad ICI def record: mismatched ICI number, tag
count.
Bad ICI index error in tag list.
Check the system manager/resource configuration. Call
Elsag Bailey technical support for assistance if required.
Bad nc msg; undefined opcode.
Ignore if this error message appears once. If it recurs,
call Elsag Bailey technical support for assistance.
Bad OP_ICIDEF message.
Bad OP_TAGSCAN or OP_TAGMSGLOG message.
Bad point type in CBD msg; aborted XR process- Check record or tag in question if identified. If the record
ing for that msg.
does not exist, reset the ICI interface. Call Elsag Bailey
technical support for assistance.
Bad tag: mismatched tag info encountered.
Bad tag index in CBD msg.
Check the ICI_X record. Execute Rebuild ICI to recreate
the ICI_X record.
Bad tag type in CBD msg.
Base error number for BUF errors.
Call Elsag Bailey technical support for assistance.
BUF quality status init error.
Verify that SETCIM is running. Verify that open data
management server records are available in the database.
BUF task aborting.
Byte count field held impossibly high value.
Call Elsag Bailey technical support for assistance.
Circular buffer error; bad length fatal.
Circular buffer to BUF task full.
Could not allocate memory for new linked list ele- Check the operating system configuration, call Elsag
ment.
Bailey technical support for assistance.
Could not create new ICI record.
Could not convert value in ICI record.
Could not clear record ID field before deleting.
Could not find ID of PIMSBase record.
Could not make newly created ICI record usable.
WBPEEUI350003B0
Using the DBMT tool or ENGCON utility, verify that the
database has several hundred bytes of free space available. Verify that the database has free records available.
Verify that the disk history task associated with the
record is active.
Verify that SETCIM is running. Verify that open data
management server records are available in the database.
ERROR MESSAGES
7 - 17
ERROR MESSAGES AND RECOVERY
Table 7-2. ODMS Error Messages
Message
®
(continued)
Corrective Action
Could not obtain EX/SPEC HISTORY SEQ # from Verify that SETCIM is running. Verify that open data
tagname record.
management server records are available in the dataCould not read count of synch time repeat areas base.
from ICI record.
Could not read data from PIMSBase record.
Could not read DEFAULT REC field from tag
record.
Could not read ICI number from display scratch
record.
Could not read ICI record ID from display scratch
record.
Could not read ID from tag record.
Could not read field types from database.
Could not read from display scratch record.
Could not read global output permissive from tag
record.
Could not read quality status from tag record.
Could not read scan setting from tag record.
Could not read red tagged field from tag record.
Could not read tag type from tag record.
Could not read value format from tag record.
Could not store ID of activation record in changed
record ID list.
Could not store new values in ICI record.
Could not write action request into ICI record.
Could not write data from ICI record into display
scratch record.
Could not write data into newly created ICI
record.
Could not write ICI record ID into scratch record.
Could not write ICI status pointers into display
scratch record.
Could not write initial values to screen scratch
record.
Could not write new log permissive setting into
tag record.
Could not write repeat area count into scratch
record.
ERROR MESSAGES
7 - 18
WBPEEUI350003B0
ERROR MESSAGES AND RECOVERY
Table 7-2. ODMS Error Messages
Message
Could not write to scratch records CONFIRM
ATTR field.
Could not write to screen message field.
(continued)
Corrective Action
Verify that SETCIM is running. Verify that open data
management server records are available in the database.
Could not write synchronization times into scratch
record repeat area.
Could not write ICI status pointer into display
scratch record.
Could not write time to tag record.
Could not update scratch record.
DAI init okay.
Call Elsag Bailey technical support for assistance.
DAI task aborting.
DAI task exiting.
Database read error.
To be provided.
Database write error.
DBConfgScrxx record not defined.
DBConfgScrxx record write error.
DESCxxx/DESCyyy create error.
Verify that SETCIM is running. Verify that open data
management server records are available in the database.
DESCxxx/DESCyyy make usable error.
DESCxxx/DESCyyy write error.
DeleteIndex record read error.
DeleteIndex record write error.
Disk hist record read failed.
Display field clearing error.
Encountered error during event log processing.
Ignore if this error message appears once. If it recurs,
call Elsag Bailey technical support for assistance.
Encountered error when trying to get current time Call Elsag Bailey technical support for assistance.
of system.
Error from EXTASKCHK.
Verify that SETCIM is running. Verify that open data
management server records are available in the database.
Error getting process name or ICI number.
Call Elsag Bailey technical support for assistance.
Error parsing arguments in HP.
Error reading default rec < 0 field from message
ID record.
Error reading default rec < 0 field from HISDATAMANSCR record.
Verify that SETCIM is running. Verify that open data
management server records are available in the database.
Error reading EX detailed display.
Error reading Ex repeat area to record.
Error reading fields in scratch record.
Error reading GMI message.
WBPEEUI350003B0
Call Elsag Bailey technical support for assistance.
ERROR MESSAGES
7 - 19
ERROR MESSAGES AND RECOVERY
®
Table 7-2. ODMS Error Messages
Message
Error reading log control record ID, global message switch or enable global from PIMSBase
record.
(continued)
Corrective Action
Verify that SETCIM is running. Verify that open data
management server records are available in the database.
Error reading Messages to Log field from message ID record.
Error reading SPEC detailed display.
Error reading Spec repeat area to record.
Error reading TAG ID msgs to log field.
Error reading tag type of message record.
Error reading the HISDATAMANSCR record activated the task
Error reading the MSGOUTSCR record that activated the task.
Error reading Plant Area filed from message ID
record.
Error reading repeat area (new msg field) from
message ID record.
Error reading the TagListScr record that activate
the task.
Call Elsag Bailey technical support for assistance.
Error reading #ENTRIES/PAGE field in TagListScr Verify that SETCIM is running. Verify that open data
record.
management server records are available in the database.
Error reading #SELECTED TAGS field in
TagListScr record.
Error reading value format from record.
Error sending alarm ack message to BUFF.
Call Elsag Bailey technical support for assistance.
Error writing Ex repeat area to record.
Verify that SETCIM is running. Verify that open data
management server records are available in the database.
Error writing Spec repeat area to record.
Error writing TAG ID, SPEC/EX HIS SUMM or all
fields to scratch rec (HISDATANAMSCR).
Error writing to the ...working... field in the scratch
record.
Error writing to message ID record.
Error writing to repeat area (new msg field) in
scratch record.
Error writing to scratch record MSGOUTSCR that
activated task.
Error writing to the #ENTRIES/PAGE field in
TagListScr record.
Error writing to the #SELECTED TAGS field in the
TagListScr record.
Error writing to the TagListScr record.
Error writing value format to record.
Event log write error.
ERROR MESSAGES
7 - 20
WBPEEUI350003B0
ERROR MESSAGES AND RECOVERY
Table 7-2. ODMS Error Messages
Message
(continued)
Corrective Action
EXTASKCHK error (database).
Check the ICI_X record. Execute Rebuild ICI to recreate
the ICI_X record.
From tag read error.
Verify that SETCIM is running. Verify that open data
management server records are available in the database.
From tag write error.
FT_DEFAULTRECl to read error.
FT_DEFAULTRECl to write failed.
ICI device restart error.
Check the LEDs on the ICI interface and follow correction action listed for the ICI error code. Verify the ICI
interface is available and functioning using the ICI test
program.
ICI_xx read error.
Verify that SETCIM is running. Verify that open data
management server records are available in the database.
ICI_xx write error.
IMH circular buffer init error.
Check the operating system configuration. Call Elsag
Bailey technical support for assistance.
IMH init okay.
Normal initialization message.
IMH task aborting.
Review previous error messages and call Elsag Bailey
technical support for assistance.
IMH/BUF circular buff init err.
IMH/DAI circular buff init err.
Check the operations system configuration. Call Elsag
Bailey technical support for assistance.
Init task message sequence err.
Call Elsag Bailey technical support for assistance.
Invalid field tag received by V_procevent log().
Check record or tag in question if identified. If the record
does not exist, reset the ICI interface. Call Elsag Bailey
technical support for assistance.
ITM external task interface connection to database failed.
Verify that SETCIM is running. Verify that open data
management server records are available in the database.
ITM init to database failed.
ITM setup to interface x error 1: bldprocname
error.
Use ICI test program to verify that the given ICI interface
is available and functioning. Call Elsag Bailey technical
ITM setup to interface x error 2: nc connect error. support for assistance if required.
ITM setup to interface x error 3: i_graginfo error.
ITM setup to interface x failed.
ITM task aborting.
ITM task exiting.
ITM database error.
Verify that SETCIM is running. Verify that open data
management server records are available in the database.
Check the ICI_X record. Execute Rebuild ICI to recreate
the ICI_X record.
Loop was not synched because absolute time not Insure that the INFI 90 OPEN system is configured with
known.
absolute time. Refer to the appropriate OIS console
operation and configuration instruction for more
information.
Memory allocation error in tag entry hash function.
WBPEEUI350003B0
Check the operating system configuration. Call Elsag
Bailey technical support for assistance if required.
ERROR MESSAGES
7 - 21
ERROR MESSAGES AND RECOVERY
®
Table 7-2. ODMS Error Messages
Message
NC communication error.
(continued)
Corrective Action
Call Elsag Bailey technical support for assistance.
No routine defined to handle the current GMI
message.
No routine defined to pars the current GMI message.
Number of records returned from function TAGSPAGE was < zero.
Open msg error.
Check the operating system configuration. Call Elsag
Bailey technical support for assistance if required.
Output to INFI 90 OPEN was bypassed because
block was red tagged.
Outputs to red tag variable are not allowed. Reset red
tag field.
PIMSBase record not defined.
Verify that SETCIM is running. Verify that open data
management server records are available in the database.
PIMSBase record read error
PIMSBase record does not exist.
Requested ICI does not exist.
Insure that the ICI number is correct. Enter a corrected
ICI number if necessary.
STOPTASK message received during initialization.
Normal message if a shutdown request is made shortly
after start-up. Call Elsag Bailey technical support for
assistance.
Summary definition record does not exist.
Verify that SETCIM is running. Verify that open data
management server records are available in the database.
Summary definition record not defined.
Summary line record read error.
Summary record read error.
Summary record write error.
System service error. Service name and status
embedded in message text.
Check the operating system error code, then call Elsag
Bailey technical support for assistance.
Tag create error.
Verify that SETCIM is running. Verify that open data
management server records are available in the database.
Tag DefList record read error.
Tag DHis xx selector read failed.
Tag DHisxx selector write error.
Tag fixed area read error.
Tag fixed area write error.
Tag ICI data read error.
Tag ICI data write error.
Tag IS data read error.
Tag list memory alloc error.
ERROR MESSAGES
7 - 22
Check the operating system configuration. Call Elsag
Bailey technical support for assistance if required.
WBPEEUI350003B0
ERROR MESSAGES AND RECOVERY
Table 7-2. ODMS Error Messages
(continued)
Message
Corrective Action
Tag logic state descriptor error.
Verify that SETCIM is running. Verify that open data
management server records are available in the database.
Tag make usable error.
Tag record delete error.
Tag record read error.
Tag type definition field name record read error.
Tag type definition record read error.
Tag type scratch record write error.
Tag type write error.
Tag WAS data read error.
Tag # disk values write error.
There are no free records available to create a
new ICI record.
Using the DBMT tool or ENGCON utility, verify the
amount of free space available in the database. Increase
the database size if the available free space is less than
1,000 bytes.
Time synch received from loop ignored because
exceeded max allowable time difference.
Check the open data management server manager time
setting against INFI 90 OPEN time. Manually reset the
open data management server manager time to be
within the correct time range.
Unknown GMI message ID
Call Elsag Bailey technical support for assistance.
Unknown GMI message type.
Unknown tag type.
Verify that SETCIM is running. Verify that open data
management server records are available in the database.
User did not enter a time or entered an invalid
time.
Enter a time or verify that the entered time is formatted
correctly.
Warning returned when reading GMI message.
Call Elsag Bailey technical support for assistance.
WDBVALS error.
Verify that SETCIM software is running. Verify that open
data management server records are available in the
database.
XR circular buffer init error.
Check the operating system configuration. Call Elsag
Bailey technical support for assistance if required.
XR data error (should not happen) - encountered Call Elsag Bailey technical support for assistance.
unrecognized tag type. Aborted XR processing
from that CB msg.
Table 7-3. ICI Error Codes
Value
Reply Code
Meaning/Possible Corrective Action
0
GMI_STATUS_OK
or
ICI_OK
GMI successful.
1
ICI_WAIT_LOOP
Command queue to computer interface, waiting for reply.
2
ICI_INV_FORMAT
Improper format for command.
3
ICI_ILL_COMMAND
Illegal command issued.
4
ICI_IND_ALL_EST
Index already established in computer interface.
5
ICI_BLK_ALL_EST
Block already established as another point.
WBPEEUI350003B0
ICI Successful.
ERROR MESSAGES
7 - 23
ERROR MESSAGES AND RECOVERY
®
Table 7-3. ICI Error Codes
Value
Reply Code
(continued)
Meaning/Possible Corrective Action
6
ICI_CMD_TO_LONG
Command is too long.
7
ICI_BD_NODE_REP
Bad reply from node interface.
8
ICI_EXP_AS_IMP
Export used as import.
9
ICI_RESTART_REP
Second RESTART needed.
10
ICI_UND_INDEX
Undefined index.
11
ICI_MEM_FULL
Memory full.
12
ICI_HOST_COM
Host communication error.
13
ICI_IN_MOD_NOT_REP
Computer interface internal module not responding.
14
ICI_IMP_AS_EXP
Import used as export.
15
ICI_TIMOUT_PL
Time-out of Plant Loop response.
16
ICI_NUM_RANGE
Number out of range.
17
ICI_ILL_KEY
Illegal key used.
18
ICI_NEED_RESTART
Computer interface requires RESTART.
19
ICI_MOD_STA_AS_IMP
Module status point used as import.
20
ICI_WAIT_REPLY
Message is active on loop.
21
ICI_INV_MOD_STAT
Import or export used as a module status.
22
ICI_EXC_SPEC_LOST
Exception report specifications.
23
ICI_NOTH_QUEUED
No message queued.
24
ICI_REP_TOO_LARGE
Reply too large.
25
ICI_ILL_STA_MOD
Illegal station mode command.
26
ICI_ILL_MOD_NUM
Illegal module number in command.
27
ICI_TIM_CMD
Time-out between bytes in command.
28
ICI_IND_EST_HOST
Index already established.
29
ICI_PT_TYP_INCM
Point type incompatible.
30
ICI_WATCH_TIME
Watchdog time-out.
31
ICI_CHECKSUM_ERR
Checksum compare error.
32
ICI_DEST_NODE_OFF
Destination node is off-line.
33
ICI_CALLUP_REQ
CALLUP command is required. Refer to the appropriate
open data access client instruction for information on the
CALLUP command.
34
ICI_COMP_ERR
Computer interface internal error.
35
ICI_COMP_BUSY
Computer interface is busy.
36
ICI_IS_OFFLINE
Computer interface has gone off-line.
37
ICI_CON_MON_MOD
Conflict with monitor mode.
38
ICI_POINT_TYPE
Point type does not match computer interface point type.
39
ICI_DEST_LOOP_OFF
Destination loop is off-line.
40
ICI_DEST_NOD_BUSY
Destination node is busy.
41
ICI_DEST_LOOP_BUSY
Destination loop is busy.
42
ICI_ENH_TRD_EST
Enhanced trend point is not established.
43
ICI_UDXR_NOT_ESTAB
User defined exception report point was not established.
ERROR MESSAGES
7 - 24
WBPEEUI350003B0
ERROR MESSAGES AND RECOVERY
Table 7-3. ICI Error Codes (continued)
Value
Reply Code
Meaning/Possible Corrective Action
44
ICI_INV_WALLCLOCK
Wall clock time is not valid. Error returned when the ICI is
restarted with time stamps enabled and adding the wall
clock offset enabled but the ICI has not received a time
synch message from either the host computer or the INFI
90 OPEN system.
100
ICI_UND_MESS_TYPW
Undefined message type.
101
ICI_BUSY
Module is busy, cannot reply.
102
ICI_MODE_CONFLICT
Module mode conflicts with command.
103
ICI_ILL_DATA
Illegal message data.
104
ICI_INV_BLK_NUM
Function block is not valid.
105
ICI_UND_BLK_NUM
Function block is not configured.
106
ICI_BLK_NOT_READ
Function block has no readable parameters.
107
ICI_INV_FUNC_CODE
Invalid function code specified for module.
108
ICI_FUNC_BLK_MISS
Function code and block number not compatible.
109
ICI_INS_MEM
Insufficient memory in module to write block.
110
ICI_MOD_NOT_RESP
Module is not responding.
128
ICI_WAIT_MOD_REP
Waiting for module reply.
200
NO_SEC_DEV_PRESENT
Software key does not exist on the termination unit.
201
RETRY_COMMAND
Retry the open data access client command. Refer to the
appropriate open data access client instruction for more
information.
202
INVALID_API_DETECTED
INFI 90 OPEN communication module detected an invalid
open data access client command attempting to access the
INFI 90 OPEN system. Refer to the appropriate open data
access client instruction for more information
203
WAIT_AND_RETRY_COMMAND
Wait one second and try the open data access client command again. Refer to the appropriate open data access client instruction for more information
204
INVAL_SEC_DEV_PRESENT
INFI 90 OPEN communication module has detected a software key but it is invalid.
301
ICI_GMISTATUS_BUSY
MFP or file is in use.
302
ICI_GMISTATUS_BUSY
No buffers available.
303
ICI_GMISTATUS_SMALL
Buffers are too small.
304
ICI_GMISTATUS_NOT_OPENED
MFP file or buffer is not open.
305
ICI_GMISTATUS_WRITE_PROT
File is write protected.
306
ICI_GMISTATUS_OFFSET_OUT
Offset is out of range.
307
ICI_GMISTATUS_OPENED
File is already open.
308
ICI_GMISTATUS_INV
Invalid operation.
309
ICI_GMISTATUS_MODE
Wrong mode specified.
310
ICI_GMISTATUS_ERRORIN
File has an error in data.
311
ICI_GMISTATUS_EXIST
File does not exist.
313
ICI_GMISTATUS_UNABLE
Could not create file.
WBPEEUI350003B0
ERROR MESSAGES
7 - 25
ERROR MESSAGES AND RECOVERY
®
Table 7-4. Sub Level Error Codes
Value
Reply Code
Meaning/Possible Corrective Action
1
SUB_INVAL_LOG_ICI
Invalid logical computer interface unit. This indicates that the
application is not connected to the computer interface unit or the
inactivity timer has expired and the application has been disconnected from the computer interface unit.
2
SUB_INVAL_INDEX
Invalid index.
3
SUB_INVAL_NUM_PTS
Invalid number of points.
4
SUB_INVAL_NODE_TYPE
Invalid node type.
5
SUB_INVAL_NUM_NODES
Invalid number of nodes.
6
SUB_INVAL_INDEX_ORDER
Invalid index order.
7
SUB_INVAL_AUTO_DISCON
Invalid auto disconnect.
8
SUB_INVAL_INFI90_ADDR
Invalid INFI 90 OPEN address.
9
SUB_INVAL_POINT_TYPE
Invalid point type.
10
SUB_INVAL_NUM_EXCPTS
Invalid number of exceptions.
11
SUB_NULL_POINTER
Null data pointer.
12
SUB_INVAL_ICI_TYPE
Invalid computer interface type.
13
SUB_INVAL_REPLY_SIZE
Invalid reply size.
14
SUB_NULL_ST_BUFFER
st_buffer is set to null.
15
SUB_INVAL_REPLY_CODE
Bad reply code from computer interface.
16
SUB_INVAL_ARGS
General invalid arguments.
17
SUB_INVAL_NUM_GROUP
Too many elements for group.
18
SUB_ALLOC_ERROR
Unable to allocate memory.
19
SUB_INVAL_NUM_LIST
Too many elements for list.
20
SUB_ALREADY_CONN
Already connected to computer interface.
21
SUB_CONN_FAIL
Connect to computer interface failed.
22
SUB_USERDATA_
TOOSMALL
User data area too small.
23
SUB_RESTART_LOCK
Unable to lock computer interface for restart.
24
SUB_CONF_READ
Unable to read configuration.
25
SUB_CONNECT_W
Error establishing connection to computer interface.
26
SUB_CONNECT_Q
Error establishing connection to computer interface.
27
SUB_CON_INIT_W
Error initializing connection to computer interface.
28
SUB_CON_INIT_Q
Error initializing connection to computer interface.
29
SUB_DISCONN_W
Error disconnecting from computer interface.
30
SUB_DISCONN_Q
Error disconnecting from computer interface.
31
SUB_DISCONN_DD
Error disconnecting from server.
32
SUB_ENV_FAIL
Error obtaining environmental information.
33
SUB_BUFF_BOUNDRY_EXCE Buffer length insufficient for reply.
DED
34
SUB_EST_MESS
Error establishing message system.
35
SUB_RETURN_RSTRT
Error returning restart lock.
36
SUB_RETURN_ONOFF
Error returning on/off-line lock.
37
SUB_ONOFF_LOCK
Unable to lock computer interface for on/off line.
ERROR MESSAGES
7 - 26
WBPEEUI350003B0
ERROR MESSAGES AND RECOVERY
Table 7-4. Sub Level Error Codes
Value
Reply Code
(continued)
Meaning/Possible Corrective Action
38
SUB_RETURN_LOCK
Error returning locks.
39
SUB_SET_CONF
Error defining configuration (R) to server.
40
SUB_SET_INDEX
Error defining configuration (I) to server.
41
SUB_FAIL_ON
Error failing over to back up computer interface.
42
SUB_RESTART
Error on automatic restart of computer interface.
43
SUB_GET_ONOFF_L
Unable to lock interface for on/off-line command (p).
44
SUB_GET_RESTART_L
Unable to lock computer interface for restart command.
45
SUB_GET_MANAGER_L
Unable to lock computer interface for manager command.
46
SUB_NO_FAIL
Failover is not valid for the configuration.
47
SUB_NOT_CONNECTED
Disconnect without preceding connect.
48
SUB_DISCONN_W_B
Error disconnecting from computer interface (backup).
49
SUB_DISCONN_Q_B
Error disconnecting from computer interface (backup).
50
SUB_DISCONN_DD_B
Error disconnecting from server (backup).
51
SUB_BACKUP_COMM
Error communicating to backup.
52
SUB_UPDATE_USERA
Error updating user list (add).
53
SUB_UPDATE_USERD
Error updating user list (delete).
54
SUB_MORE_EXCEPTIONS
More exceptions returned that did not fit in the user data space.
56
SUB_WAIT_WATCHDOG
Waiting on watchdog time to timeout.
57
SUB_INIT_ERROR
Error initializing sub layer in connect.
58
SUB_TAGNAME_
UNDEFINED
Tagname is not defined in the database.
59
SUB_CHKLIST
Errors exist in some but not all of the tags. Check the tag status
code array to determine the reason for failure.
60
SUB_INVAL_REQUEST
Illegal request was sent to Open System Manager (INOSM01).
61
SUB_ILLEGAL_COMMAND
Illegal command was sent to Open System Manager (INOSM01).
62
SUB_INVAL_NUM_TAGS
An invalid number of tags was specified in the request.
63
SUB_INVAL_NUM_
EXPORTS
An invalid number of exports was specified in the request.
64
SUB_INVAL_OPTION
An invalid option was specified when defining or undefining
export points.
65
SUB_INVAL_REPLY
An invalid reply code was returned from the Open System Manager (INOSM01).
Table 7-5. Message Driver Error Codes
Value
Reply Code
Meaning/Possible Corrective Action
1
MD_NULL_RESPONSE
Null pointer passed to decode by message driver.
2
MD_INIT_ERROR
Message driver communication failed to initialize.
3
MD_GET_TOKEN
Unable to get the requested token.
4
NULL_DECODE
Null decode function received.
5
INBUF_ERR
Error checking in buffer.
6
ILLEGAL_RETRIEVE
Illegal retrieve command.
7
NO_MSG_ERR
No message on the pending list.
WBPEEUI350003B0
ERROR MESSAGES
7 - 27
ERROR MESSAGES AND RECOVERY
®
Table 7-5. Message Driver Error Codes
Value
Reply Code
(continued)
Meaning/Possible Corrective Action
8
CHECK_MSG_ERR
Error checking message.
9
LIST_ERR
Error putting message on list.
10
PARSE_ERR
Error parsing information flag.
11
GET_NODE_ERR
Error getting node off list.
12
NULL_BUF_ERR
Null buffer structure received.
13
NO_RESPONSE
No response from the device driver.
14
NO_MSG_NUM
No message number returned.
15
HEADER_ERR
Encoding header error.
16
PUT_TOK_ERR
Error returning token.
17
NO_TOKEN
Unable to get token for message.
18
ACK_FAILURE
Message did not receive and acknowledge.
19
ACK_RETRY
Message had retry on acknowledge list.
20
SEND_FAILED
Unable to send message to network connect.
21
MAKE_ACK_ERR
Error putting message on acknowledge list.
22
MALLOC_ERR
Error allocating memory for the message.
23
CONNECT_ERR
Error connecting to computer interface.
25
MD_NC_ALRDY_CONCTED
Network connect already connected.
26
MD_NC_INV_CALL
Invalid network connect function call.
27
MD_NC_REV_MISMATCH
Network connect software revision mismatch.
28
MD_NC_NO_LINK_AVAIL
Network connect no link (maximum clients connected).
29
MD_MSG_NOT_FOUND
Error message not found.
30
MD_FREE_LIST
Error putting onto free list.
31
MD_DD_INFO_ERR
Error setting server information.
32
MD_ALLOC_ERR
Error getting buffer from message.
33
MD_INV_BYTE_CNT
Invalid byte count in receiving message.
34
MD_MSG_CHK_ERR
Error checking message.
35
MD_WATCHDOG_ERR
Error scheduling watchdog timer.
36
MD DOWNLOAD_ERR
Error downloading computer interface point table.
37
MD_RESTART_ERR
Error restarting the computer interface.
38
MD_ONOFFLINE_ERR
Error putting computer interface on or off-line.
39
MD_STOP_DD_ERR
Error stopping the device driver.
40
MD_COPY_INEX_ERR
Error copying the index file.
41
RESTORE_INDEX_ERR
Error restoring indices to the device driver.
42
MD_DEL_KEY_ERR
Error deleting key.
43
MD_PRODID_INVALID
Product ID in software key is invalid.
44
MD_NUMUSERS_INVALID
Number of users in software key is invalid.
45
MD_UNSUPPORTED_
MODULE
The INFI 90 OPEN communication module is not supported by the
open data access client software.
46
ICK_CMD_ERR
Error sending ICK command to device driver.
ERROR MESSAGES
7 - 28
WBPEEUI350003B0
ERROR MESSAGES AND RECOVERY
Table 7-6. Device Driver Error Codes
Value
Reply Code
Meaning/Possible Corrective Action
1
DD_OWNED_EXCL
Another user owns computer interface as exclusive.
2
DD_ALREADY_SHARED
Computer interface shared, exclusive not allowed.
3
DD_UNKNOWN_CONNECTION
Unknown connection type requested.
4
NOT_CONNECTED
User quick connect without preceding connect.
5
MSG_FORMAT_ERR
Invalid Information flag in transaction.
6
INVAL_MSG_TYPE
Invalid service message code. This may indicate that the
target module does not support the open data access client command.
10
DD_HEADER_ERR
Error putting message driver header on.
11
FILL_TRANS_ERR
Error filling transaction structure.
13
CHECK_REPLY
Error communicating to computer interface.
14
CHECK_SUM_ERR
Checksum did not match reply.
15
NO_RESP_BYTES
No response bytes received.
16
EXCLUSIVE_EXISTS
Exclusive user already exists.
17
INVAL_TYPE_CONNECT
Invalid type connection.
18
TOKEN_NOT_AVAIL
Token not available.
20
ICI_SEND
Error sending to computer interface.
31
INIT_ICI_NC
Error initializing computer interface network connect.
32
INIT_MD_NC
Error initializing message driver and network connect.
33
READ_COM_FILE
Reading communication file.
34
INIT_DD
Initializing device driver.
35
GOING_TO_SLEEP
Going to sleep.
36
CHECKING_ACTIVE
Checking the active list.
37
CHECKING_RESP
Checking the response list.
38
ROUTING_MSG
Routing message.
39
NO_NODES
No nodes left on list.
40
NO_ST_TRANS
No transaction structure.
41
FREE_LIST
Error putting onto free list.
42
SENDING_REPLY
Error sending reply.
43
QRCV_ERR
Error doing quick receive.
44
TOK_NOT_RETURNED
Token not returned.
45
TOK_OWN_NOT_AVAIL
Token owners not available.
46
DISCONNECT_ERR
User disconnect error.
47
GET_PERFORM_ERR
Get performance data error.
48
QCONNECT_ERR
Quick connect error.
49
SEND_INDEX_ERR
Send index error.
50
GET_INDEX_ERR
Get index list error.
51
GET_INDEX_LIS_ERR
Get index error.
52
CLEAR_INDEX_ERR
Clear index error.
53
ILL_TYP_CON
Invalid connection (exclusive or shared).
54
NO_CONNECTIONS
No wait connection found for quick.
WBPEEUI350003B0
ERROR MESSAGES
7 - 29
ERROR MESSAGES AND RECOVERY
®
Table 7-6. Device Driver Error Codes
Value
Reply Code
(continued)
Meaning/Possible Corrective Action
55
RESP_TOO_BIG
Unsolicited response too large for buffer.
56
RESP_LIST_ERR
Cannot put unsolicited response on list.
57
INIT_USER_ERR
Cannot initialize a new user.
58
CALLOC_USER_ERR
Cannot allocate memory for a new user.
59
ACTIVE_TRANS_ERR
Error getting active transaction.
60
GET_USER_ERR
Error getting user information.
61
DD_ILL_INDEX
Illegal index received.
62
DD_REVISION_MATCH
Client/server software mismatch.
63
DELETE_KEY_ERR
Error deleting key message.
64
DD_NO_KEYS
Error all keys are in use.
65
DD_SEC_DEV_CHANGED
The ICK device (software key) changed during normal
operations.
66
DD_SEC_CHK_FAIL
The security check command failed to the ICI module.
ERROR MESSAGES
7 - 30
WBPEEUI350003B0
APPENDIX A - QUICK REFERENCE
INTRODUCTION
This appendix is a quick reference that contains information
on key functions for all supported platforms and GCS console
screen color assignments. There are tables that list key functions for a VAX/Open VMS and Alpha AXP system keyboard,
HP-UX system keyboard and personal computer keyboard, and
GCS console screen color definitions.
NOTE: Keyboard labels vary by platform and may not reflect the
actual use or function of the keys. Refer to the Tables in this section
for key functions.
VAX/VMS SYSTEM
Table A-1 lists the key functions for a VAX/Open VMS and
Alpha AXP system keyboard. Keys such as the letter and number keys which are mapped for their expected function are not
listed.
Table A-1. VAX/Open VMS and Alpha AXP
System Keyboard Mapping
Key
Ctrl-A
Function
Undefined
Ctrl-B
Ctrl-C
Cancel password
Ctrl-D
Dedicated display
Ctrl-E
Print screen
Ctrl-F
Undefined
Ctrl-G
Ctrl-H
Ctrl-I
Ctrl-J
Ctrl-K
Ctrl-L
Ctrl-M
Display menu
Ctrl-N
Undefined
Ctrl-O
Ctrl-P
WBPEEUI350003B0
Enter password
Ctrl-Q
Undefined
Ctrl-R
Reconnect
INTRODUCTION
A-1
QUICK REFERENCE
®
Table A-1. VAX/Open VMS and Alpha AXP
System Keyboard Mapping (continued)
Key
Ctrl-S
Function
Undefined
Ctrl-T
Ctrl-U
Ctrl-V
Ctrl-W
Ctrl-X
Ctrl-Y
Ctrl-Z
Del
Backspace
Shift-Del
Undefined
Return
Enter
Shift-Return
Undefined
Tab
Shift-Tab
Spacebar
VAX/VMS SYSTEM
A-2
Space
Shift-Spacebar
Undefined
PF1
Display menu 1
PF2
Display menu 2
PF3
Display menu 3
PF4
Display menu 4
KP0
Zoom out
KP1
Move screen down left
KP2
Move screen down
KP3
Move screen down right
KP4
Move screen left
KP5
Zoom in
KP6
Move screen right
KP7
Move screen up left
KP8
Move screen up
KP9
Move screen up right
Enter
Enter
KPminus
-
KPcomma
,
KPperiod
.
Up
Last entry
Down
Next entry
Left
Move left
Right
Move right
F1
Display menu 1
F2
Display menu 2
WBPEEUI350003B0
QUICK REFERENCE
Table A-1. VAX/Open VMS and Alpha AXP
System Keyboard Mapping (continued)
Key
Function
F3
Display menu 3
F4
Display menu 4
F5
Display menu 5
F6
Display menu 6
F7
Display menu 7
F8
Display menu 8
F9
Display menu 9
F10
Display menu 10
F11
Undefined
F12
F13
F14
WBPEEUI350003B0
Help
Help
Do
Do
F17
Last
F18
Next
F19
Undo
F20
Do
Find
Invoke display
Insert_Here
Cursor toggle
Remove
Up right
Select
Down left
Prev_Screen
Cursor cancel
Next_Screen
Down right
Ctrl-PF1
Get info
VAX/VMS SYSTEM
A-3
QUICK REFERENCE
®
Table A-1. VAX/Open VMS and Alpha AXP
System Keyboard Mapping (continued)
Key
Ctrl-PF2
Function
Undefined
Ctrl-PF3
Ctrl-PF4
Ctrl-KP0
Ctrl-KP1
Ctrl-KP2
Ctrl-KP3
Ctrl-KP4
Ctrl-KP5
Ctrl-KP6
Ctrl-KP7
Ctrl-KP8
Ctrl-KP9
Ctrl-Enter
Ctrl-KPminus
Ctrl-KPcomma
Ctrl-KPperiod
Ctrl-Up
Ctrl-Down
Ctrl-Left
Ctrl-Right
Ctrl-F1
Ctrl-F2
Ctrl-F3
Ctrl-F4
Ctrl-F5
Ctrl-F6
Ctrl-F7
Ctrl-F8
Ctrl-F9
Ctrl-F10
VAX/VMS SYSTEM
A-4
Ctrl-F11
Last
Ctrl-F12
Next
Ctrl-F13
Undo
Ctrl-F14
Do
WBPEEUI350003B0
QUICK REFERENCE
Table A-1. VAX/Open VMS and Alpha AXP
System Keyboard Mapping (continued)
Key
Ctrl-Help
Function
Undefined
Ctrl-Do
Ctrl-F17
Ctrl-F18
Ctrl-F19
Ctrl-F20
Ctrl-Find
Ctrl-Insert_Here
Ctrl-Remove
Ctrl-Select
Ctrl-Prev_Screen
Ctrl-Next_Screen
Shift-PF1
Shift-PF2
Shift-PF3
Shift-PF4
Shift-KP0
Shift-KP1
Shift-KP2
Shift-KP3
Shift-KP4
Shift-KP5
Shift-KP6
Shift-KP7
Shift-KP8
Shift-KP9
Shift-Enter
Shift-KPminus
Shift-KPcomma
Shift-KPperiod
Shift-Up
Shift-Down
Shift-Left
Shift-Right
WBPEEUI350003B0
Shift-F1
Dedicated display 1
Shift-F2
Dedicated display 2
Shift-F3
Dedicated display 3
Shift-F4
Dedicated display 4
Shift-F5
Dedicated display 5
Shift-F6
Dedicated display 6
VAX/VMS SYSTEM
A-5
QUICK REFERENCE
®
Table A-1. VAX/Open VMS and Alpha AXP
System Keyboard Mapping (continued)
Key
Function
Shift-F7
Dedicated display 7
Shift-F8
Dedicated display 8
Shift-F9
Dedicated display 9
Shift-F10
Dedicated display 10
Shift-F11
Undefined
Shift-F12
Shift-F13
Shift-F14
Shift-Help
Shift-Do
Shift-F17
Shift-F18
Shift-F19
Shift-F20
Shift-Find
Shift-Insert_Here
Shift-Remove
Shift-Select
Shift-Prev_Screen
Shift-Next_Screen
Ctrl-Shift-PF1
Ctrl-Shift-PF2
Ctrl-Shift-PF3
Ctrl-Shift-PF4
Ctrl-Shift-KP0
Ctrl-Shift-KP1
Ctrl-Shift-KP2
Ctrl-Shift-KP3
Ctrl-Shift-KP4
Ctrl-Shift-KP5
Ctrl-Shift-KP6
Ctrl-Shift-KP7
Ctrl-Shift-KP8
Ctrl-Shift-KP9
VAX/VMS SYSTEM
A-6
WBPEEUI350003B0
QUICK REFERENCE
Table A-1. VAX/Open VMS and Alpha AXP
System Keyboard Mapping (continued)
Key
Ctrl-Shift-Enter
Function
Undefined
Ctrl-Shift-KPminus
Ctrl-Shift-KPcomma
Ctrl-Shift-KPperiod
Ctrl-Shift-Up
Ctrl-Shift-Down
Ctrl-Shift-Left
Ctrl-Shift-Right
Ctrl-Shift-F6
Ctrl-Shift-F7
Ctrl-Shift-F8
Ctrl-Shift-F9
Ctrl-Shift-F10
Ctrl-Shift-F11
Ctrl-Shift-F12
Ctrl-Shift-F13
Ctrl-Shift-F14
Ctrl-Shift-Help
Ctrl-Shift-Do
Ctrl-Shift-F17
Ctrl-Shift-F18
Ctrl-Shift-F19
Ctrl-Shift-F20
Ctrl-Shift-Find
Do
Ctrl-Shift-Insert_Here
Undefined
Ctrl-Shift-Remove
Ctrl-Shift-Select
Ctrl-Shift-Prev_Screen
Ctrl-Shift-Next_Screen
Pointer1
Do
Pointer2
Undo
Pointer3
Pointer4
Next
HP-UX SYSTEM
Table A-2 lists the key functions for a HP-UX system keyboard.
Keys such as the letter and number keys which are mapped for
their expected function are not listed.
WBPEEUI350003B0
HP-UX SYSTEM
A-7
QUICK REFERENCE
®
Table A-2. HP-UX System
Keyboard Mapping
Key
Function
Ctrl-A
Undefined
Ctrl-B
Backspace
Ctrl-C
Cancel password
Ctrl-D
Dedicated display
Ctrl-E
Print screen
Ctrl-F
Undefined
Ctrl-G
Ctrl-H
Ctrl-I
Insert toggle
Ctrl-J
Undefined
Ctrl-K
Ctrl-L
Ctrl-M
Display menu
Ctrl-N
Undefined
Ctrl-O
Ctrl-P
Enter password
Ctrl-Q
Undefined
Ctrl-R
Reconnect
Ctrl-S
Undefined
Ctrl-T
Ctrl-U
Ctrl-V
Ctrl-W
Ctrl-X
Ctrl-Y
Ctrl-Z
Del
Backspace
Shift-Del
HP-UX SYSTEM
A-8
Return
Enter
Shift-Return
Undefined
Tab
Next
Shift-Tab
Last
Spacebar
Space
Shift-Spacebar
Undefined
KP0
Zoom out
KP1
Move screen down left
KP2
Move screen down
KP3
Move screen down right
KP4
Move screen left
KP5
Zoom in
WBPEEUI350003B0
QUICK REFERENCE
Table A-2. HP-UX System
Keyboard Mapping (continued)
Key
Function
KP6
Move screen right
KP7
Move screen up left
KP8
Move screen up
KP9
Move screen up right
Enter
Enter
KPminus
Backspace
Up
Last entry
Down
Next entry
Left
Move left
Right
Move right
F1
Display menu 1
F2
Display menu 2
F3
Display menu 3
F4
Display menu 4
F5
Display menu 5
F6
Display menu 6
F7
Display menu 7
F8
Display menu 8
F9
Display menu 9
F10
Display menu 10
F11
Undefined
F12
Ctrl-KP0
Ctrl-KP1
Macro key 1
Ctrl-KP2
Macro key 2
Ctrl-KP3
Macro key 3
Ctrl-KP4
Macro key 4
Ctrl-KP5
Macro key 5
Ctrl-KP6
Macro key 6
Ctrl-KP7
Undefined
Ctrl-KP8
Ctrl-KP9
Ctrl-Enter
Ctrl-KPminus
WBPEEUI350003B0
Ctrl-Up
Begin buffer
Ctrl-Down
End buffer
Ctrl-Left
Delete buffer
HP-UX SYSTEM
A-9
QUICK REFERENCE
®
Table A-2. HP-UX System
Keyboard Mapping (continued)
Key
Ctrl-Right
Function
Undefined
Ctrl-F1
Ctrl-F2
Ctrl-F3
Ctrl-F4
Ctrl-F5
Ctrl-F6
Ctrl-F7
Ctrl-F8
Undefined
Ctrl-F9
Last
Ctrl-F10
Next
Ctrl-F11
Undo
Ctrl-F12
Do
Shift-KP0
Undefined
Shift-KP1
Shift-KP2
Shift-KP3
Shift-KP4
Shift-KP5
Shift-KP6
Shift-KP7
Shift-KP8
Shift-KP9
Shift-Enter
Shift-KPminus
HP-UX SYSTEM
A - 10
Shift-Up
Up
Shift-Down
Down
Shift-Left
Left
Shift-Right
Right
Shift-F1
Dedicated display 1
Shift-F2
Dedicated display 2
Shift-F3
Dedicated display 3
Shift-F4
Dedicated display 4
Shift-F5
Dedicated display 5
Shift-F6
Dedicated display 6
Shift-F7
Dedicated display 7
Shift-F8
Dedicated display 8
Shift-F9
Dedicated display 9
Shift-F10
Dedicated display 10
Shift-F11
Undefined
WBPEEUI350003B0
QUICK REFERENCE
Table A-2. HP-UX System
Keyboard Mapping (continued)
Key
Function
Shift-F12
Invoke display
Ctrl-Shift-KP0
Undefined
Ctrl-Shift-KP1
Ctrl-Shift-KP2
Ctrl-Shift-KP3
Ctrl-Shift-KP4
Ctrl-Shift-KP5
Ctrl-Shift-KP6
Ctrl-Shift-KP7
Ctrl-Shift-KP8
Ctrl-Shift-KP9
Ctrl-Shift-Enter
Ctrl-Shift-KPminus
Ctrl-Shift-Up
Ctrl-Shift-Down
Ctrl-Shift-Left
Ctrl-Shift-Right
Ctrl-Shift-F6
Ctrl-Shift-F7
Ctrl-Shift-F8
Ctrl-Shift-F9
Ctrl-Shift-F10
Ctrl-Shift-F11
Ctrl-Shift-F12
Pointer1
Do
Pointer2
Undo
Pointer3
Undo
Pointer4
Next
PERSONAL COMPUTER
Table A-2 lists the key functions for a personal computer system keyboard. Keys such as the letter and number keys which
are mapped for their expected function are not listed.
Table A-3. Personal Computer
Keyboard Mapping
Key
WBPEEUI350003B0
Function
Up
Last entry
Down
Next entry
PERSONAL COMPUTER
A - 11
QUICK REFERENCE
®
Table A-3. Personal Computer
Keyboard Mapping (continued)
Key
Function
Left
Move cursor left
Right
Move cursor right
PgUp
Move cursor up
PgDn
Move cursor down
Home
Begin buffer
End
End buffer
Ins
Toggle insert
Del
Delete
Enter
Enter
Backspace
Backspace
Esc
Undo
Enter
Enter
Tab
Move cursor right
Spacebar
Space
F1
Display menu 1
F2
Display menu 2
F3
Display menu 3
F4
Display menu 4
F5
Display menu 5
F6
Display menu 6
F7
Display menu 7
F8
Display menu 8
F9
Display menu 9
F10
Display menu 10
Ctrl-A
Move screen down left
Ctrl-B
Undefined
Ctrl-C
Cancel password
Ctrl-D
Dedicated display
Ctrl-E
Undefined
Ctrl-F
Ctrl-G
Ctrl-H
Ctrl-I
Insert toggle
Ctrl-J
Undefined
Ctrl-K
Ctrl-L
Ctrl-M
Display menu
Ctrl-N
Undefined
Ctrl-O
Ctrl-P
PERSONAL COMPUTER
A - 12
Enter password
WBPEEUI350003B0
QUICK REFERENCE
Table A-3. Personal Computer
Keyboard Mapping (continued)
Key
Function
Ctrl-Q
Move screen up left
Ctrl-R
Reconnect
Ctrl-S
Move screen down right
Ctrl-T
Undefined
Ctrl-U
Ctrl-V
Ctrl-W
Move screen up right
Ctrl-X
Undefined
Ctrl-Y
Ctrl-Z
Ctrl-0
Ctrl-1
Enter password
Ctrl-2
Undefined
Ctrl-3
Ctrl-4
Ctrl-5
Ctrl-6
Ctrl-7
Ctrl-8
Ctrl-9
Ctrl-Left
Move screen left
Ctrl-Right
Move screen right
Ctrl-PgUp
Move screen up
Ctrl-PgDn
Move screen down
Ctrl-Home
Zoom out
Ctrl-End
Zoom in
Ctrl-Enter
Undefined
Ctrl-Backspace
Delete buffer
Ctrl-Print Screen
Undefined
Ctrl-F1
Ctrl-F2
Ctrl-F3
Ctrl-F4
Ctrl-F5
Ctrl-F6
Ctrl-F7
WBPEEUI350003B0
Ctrl-F8
Enter password
Ctrl-F9
Last
Ctrl-F10
Next
Ctrl-F11
Undo
PERSONAL COMPUTER
A - 13
QUICK REFERENCE
®
Table A-3. Personal Computer
Keyboard Mapping (continued)
Key
Function
Ctrl-F12
Do
Shift-F1
Dedicated menu 1
Shift-F2
Dedicated menu 2
Shift-F3
Dedicated menu 3
Shift-F4
Dedicated menu 4
Shift-F5
Dedicated menu 5
Shift-F6
Dedicated menu 6
Shift-F7
Dedicated menu 7
Shift-F8
Dedicated menu 8
Shift-F9
Dedicated menu 9
Shift-F10
Dedicated menu 10
Alt-F1
Cancel password
Alt-F2
Enter password
Alt-F3
Undefined
Alt-F4
Alt-F5
Alt-F6
Alt-F7
Alt-8
Alt-F9
Alt-F10
MENU COLORS AND CONVENTIONS
The GCS console screen fields and text have color assignments
that make functional identification easy and consistent from
screen to screen. Table A-4 lists the GCS console screen colors
and defines them by function.
All fields that permit keyboard entry are displayed with at least
the background color visible. Select a keyboard entry field by
placing the cursor anywhere within the field and press the do
function. The proper security clearance is required to use some
of the keyboard entry fields.
All displays, except the detail displays, show the current time
in the upper left corner. Areas enclosed by a push button will
trigger on a mouse click. These areas are light gray when they
are not selected and dark gray when selected.
MENU COLORS AND CONVENTIONS
A - 14
WBPEEUI350003B0
QUICK REFERENCE
Table A-4. GCS Console Screen Color Definitions
Color1
Function
Black foreground on light gray
Main screen title text.
Cyan foreground on light gray
Static text
Green foreground on light gray
Dynamic data field such as date and
time
Green foreground on dark gray
background
Keyboard entry field
Light gray
All screen backgrounds
White foregound on light gray
Labels and any fixed text on the display screen
Yellow
System messages, alarms and error
messages
NOTE: 1.The field colors are inverted when a selected field becomes the active field.
WBPEEUI350003B0
MENU COLORS AND CONVENTIONS
A - 15
APPENDIX B - HARDWARE CONFIGURATION
INTRODUCTION
The Open Data Management Server (ODMS) software requires
a software key (provided with the software) to enable system
operation. The software key (a dongle) is installed on one of the
termination units or modules of an INFI-NET to Computer
Interface or Open System Manager. This section contains the
required hardware jumper settings and provide installation
instructions. This section also includes dipswitch and jumper
settings that are recommended for the INICI03 interface configuration.
INSTALLING THE SOFTWARE KEY
The software key is used with either the NTMP01 termination
unit or the NIMP01 termination module of an INICI03 or
INOSM01 interface. Use the appropriate procedure to install
the software key and to set the jumpers.
NTMP01 Termination Unit
If using an NTMP01 termination unit:
1. Connect the male end of the software key to the port
labeled P6 (printer port) on the NTMP01 termination unit.
Refer to Figure B-1 for the location of P6.
2. Set jumpers J1, J3, J8, J9, J10 and J18 on the NTMP01 termination unit as shown in Figure B-1.
NIMP01 Termination Module
If using an NIMP01 termination module:
1. Connect the male end of the software key to the 25 pin end
of the 9-to-25 pin adapter.
2. Connect the 9 pin end of the 9-to-25 pin adaptor to the port
labeled P6 (printer port) on the NIMP01 termination module.
Refer to Figure B-1 for the location of the port.
3. Set jumpers J1, J8, J9, J10, J13 and J20 on the NIMP01
termination module as shown in Figure B-1.
WBPEEUI350003B0
INTRODUCTION
B-1
HARDWARE CONFIGURATION
®
J6
J5
J7
J20
J2
CR2
J2
J6
J5
J7
J20
J16
J17
J14
J15
P3
P5
J1
J8
J9
J10
J13
J19
J18
P6
SOFTWARE
KEY
J11
J1
P8
P7
SPARE
P8'
J12
J8
J9
J10
J13
J19
P1
P4
P11
P2
TP25567A
Figure B-1. NIMP01 Assignments and Jumper Settings
J2
J4
J5
J6
J7
NTMP01
P2
J2
J16
J17
CR1
P5
J4
J5
J6
J7
RS-232-C
COMPUTER
PORT
J12
J13
E2
P4
SPARE
P8
P7
E1
P3
J1
CR2
E3
J14
J15
SOFTWARE
KEY
J3
J9
J8
J10
J18
J11
P6
P1
J1
SPARE
J3
J9
J8
J10
T00157A
Figure B-2. NTMP01 Assignments and Jumper Settings
INSTALLING THE SOFTWARE KEY
B-2
WBPEEUI350003B0
HARDWARE CONFIGURATION
ICI INTERFACE CONFIGURATION
Table B-1 through B-4 list the recommended dipswitch and
jumper settings for the INICT03 INFI-NET to Computer Transfer Module. Figure B-3 shows the location of dipswitches and
jumpers on the INICT03 module circuit board. Refer to
INFI-NET to Computer Interfaces (INICI01/03) for other
required dipswitch and jumper settings that are dependent on
the user’s network configuration.
Table B-1. Dipswitch Settings (UMB01, INICT03 Module)
Pole
Setting
Function
1/2/3/4
1/1/1/1
Port 0 set to 19,200 baud
5/6/7/8
0/1/1/1
Port 1 set to 9,600 baud
NOTE: 0 = Closed (on), 1 = Open (off).
Table B-2. Dipswitch Settings (LMB2, INICT03 Module)
Pole
Setting
1
0
Function
NIS handshake time-out enabled
2
0
NIS diagnostic disabled
3
0
Diagnostic utilities disabled
4
0
Hardware diagnostics disabled
5-8
0
Not used
NOTE: 0 = Closed (on), 1 = Open (off).
Table B-3. Dipswitch Settings (LLB3, INICT03 Module)
Pole
Setting
Function
1
0
SCSI port disabled
2/3/4
1/0/0
SCSI address = 4
5
1
SCSI parity checking enabled
6/7/8
0
Not used
NOTE: 0 = Closed (on), 1 = Open (off).
Table B-4. Dipswitch Settings (UUB0, INICT03 Module)
Pole
Setting
Function
1
0
2/3
0/0
4
1
Port 1 in utility mode (TALK 90)
5
0
Modem password protection disabled
ROM checksumming enabled
Ports 0 and 1: 8 data bits, 1 stop bit, no parity
6
0
Port addressing mode disabled
7
1
Command checksumming option enabled
8
0
Not used
NOTE: 0 = Closed (on), 1 = Open (off).
WBPEEUI350003B0
ICI INTERFACE CONFIGURATION
B-3
HARDWARE CONFIGURATION
®
P1
MODB
CR17
J4
J5
30V
P5
P3
OPTION
SWITCH
SW4
J1
SW6
BAUD
RATE DIAGNOSTICS SCSI
SWITCH
SWITCH
SWITCH
SW1
SW2
SW3
1 2 3 4 5 6 7 8
1 2 3 4 5 6 7 8
1 2 3 4 5 6 7 8
1 2 3 4 5 6 7 8
OPEN
OPEN
OPEN
OPEN
UUB0
UMB1
LMB2
LLB3
2MBIT
4MBIT
16 15 14 13 12 11 10 9
P4
1 2 3 4 5 6 7 8
HW SETUP
1MBIT
J2
P2
T00200A
Figure B-3. INICT03 Module Board Layout
ICI INTERFACE CONFIGURATION
B-4
WBPEEUI350003B0
APPENDIX C - PASSWORD SECURITY
INTRODUCTION
This appendix lists the default security levels of all open data
management server display screens. It also explains how to
assign or modify security level passwords.
DEFAULT DISPLAY SECURITY
Default security levels are put on all Open Data Management
Server (ODMS) displays. Some displays are accessible without
a password. Others either require either an operator password
or an engineer password. There are 10 security levels which
can be assigned to passwords. The highest security level is 10.
The lowest security level is one. A security level zero has no
password security.
•
All open data management server operations menu functions can be accessed without a password. Changing data
from the operations menu requires an operator level password.
•
All application menu functions require an operator password except on-line query (SQLplus) which requires an
engineering password.
•
From the utility menu, active menu selections which
include: ACCESS, history file utilities, off-line database
loader, and off-line database to ASCII file require an engineer password. Active menu selections, document definition records, and document database records require an
operator password.
•
All open data management server configuration menu
functions require an engineer password to change values.
The operator (low level) password is assigned a security level
four default. The operator (high level) password is assigned a
security level six default. The engineer password is assigned a
security level eight default.
Table C-1 lists the open data management server menus and
functions within each menu, and their default security level.
Every display has a name that identifies it. Display names
appear in white text in the lower left hand side of each display
(above the history summary events log window). In Table C-1,
display names are listed in bold lowercase text (i.e., pimtitle).
Icons, functions, or fields within a display are listed after the
name of the display in normal text.
WBPEEUI350003B0
INTRODUCTION
C-1
PASSWORD SECURITY
®
Use the ACCESS utility to change the default security levels
and assign passwords. To assign passwords to security levels:
1. Select Utilities from the main menu.
2. Select ACCESS from the utilities menu with the mouse or
press F1 . An engineer level password is required to use the
ACCESS utility.
If a security level not high enough message is displayed while
attempting to execute the ACCESS utility, press Ctrl - P and
enter the engineer password at the Password>< prompt.
3. Start up the access utility.
4. Use the mouse or ← and → to highlight Setup at the bottom of the of ACCESS utility screen. Click on the selection
using the mouse or press Enter .
5. Select GCS using the mouse or keyboard.
6. From the System Configuration Utility screen select Security to bring up the password definition screen.
The top entry shows the number of passwords available. This
entry can be modified from zero to 10 to set up the number of
password levels to use. If zero is entered in the number of passwords field there is no password security for any screen or
function. To the left of each password level listed is a four character field in which a password can be defined.
7. To define a password, highlight a password field by pointing to it with the mouse, then type in the password to be used
for that security level, then press Enter . Define as many password security levels as desired.
8. When finished click, the left button on the mouse to exit
the password definition screen.
9. To exit the ACCESS Utility, select quit using the mouse or
keyboard to exit a particular menu level.
Table C-1. ODMS Default Security Levels
Display Name or Icon
Security Level
Data1
Display
Icon2
pimtitle
N/A
0
N/A
F1
N/A
N/A
0
pimmenu
N/A
0
N/A
F1 Operations
N/A
N/A
0
F2 Applications
N/A
N/A
0
F3 Utilities
N/A
N/A
0
DEFAULT DISPLAY SECURITY
C-2
WBPEEUI350003B0
PASSWORD SECURITY
Table C-1. ODMS Default Security Levels
Display Name or Icon
Security Level
Data1
Display
Icon2
F4 Configuration
N/A
N/A
0
F5 User Display
N/A
N/A
0
pimops
N/A
0
N/A
F1 Summaries & Event Logs
N/A
N/A
0
F2 Ad-Hoc Trending
N/A
N/A
0
F3 History Data View
N/A
N/A
0
F4 Operating Parameters
N/A
N/A
0
F5 Interface Statistics
N/A
N/A
0
F6 Message Output
N/A
N/A
0
F7 Ad-Hoc Query (SQLplus)
N/A
N/A
0
pimappl
N/A
0
N/A
F1 On-Line Database Query (SQLplus, if available)
N/A
N/A
8
F2 On-line Spreadsheet (CALC, if
available)
N/A
N/A
8
F3 SPC/SQC Functions (Q, if available)
N/A
N/A
6
pimutil
N/A
0
N/A
F1 ACCESS
N/A
N/A
8
F2 History File Utilities
N/A
N/A
8
F3 Off-Line Database Loader
N/A
N/A
8
F4 Off-Line Database-to-ASCII
N/A
N/A
8
F5 Document Definition Rec
N/A
N/A
6
F6 Document Database Rec
N/A
N/A
4
pimconf
N/A
0
N/A
F1 Database
N/A
N/A
0
F2 System Menu
N/A
N/A
0
F3 Interface Control
N/A
N/A
0
F4 History Data View/Edit
N/A
N/A
0
pimsumm and all icons on this display
N/A
0
0
All operating parameters detail displays
6
0
0
Ad hoc trending (easy trends)
0
0
0
pimhism
WBPEEUI350003B0
(continued)
N/A
0
0
pimhistv and all displays accessed
from within
0
0
0
pimstats and all displays accessed
from within
0
0
0
pimopar
0
0
0
pimolist
0
0
0
pimintst
N/A
0
0
DEFAULT DISPLAY SECURITY
C-3
PASSWORD SECURITY
®
Table C-1. ODMS Default Security Levels
Display Name or Icon
(continued)
Security Level
Data1
Display
Icon2
pimstici
0
0
0
pimpfici
0
0
0
pimmsout
N/A
0
0
Message ID and plant area fields
0
N/A
N/A
Message entry fields F1 and F2
4
N/A
N/A
0
0
3
pimquery
0 and 4
pimdbcon
0
0
0
pimtlist
0
0
0
0 and 84
0
0
pimsyscf
N/A
0
0
pimdbsnp
N/A
0
0
8
0
0
pimdhfil
N/A
0
0
dhistory
8
0
0
pimengu1
8
0
0
pimlsd1
8
0
0
pimglmsg
8
0
0
0
0
Detailed tag configuration screens
dbsnp
pimcfici
0 and 8
5
pimstime
8
0
0
pimictrl
8
0
0
pimhiste
0
0
0
pimhdata
0
0
0
0
0
Exception and specification history
detail displays
0 and 8
6
NOTES:
1. The security level to change data by prompts, icons or data entry fields in the display.
2. The security level on the icon to access another display.
3. A 0 security level permits query entry, a 4 security level is required for query execute.
4. A 0 security level permits access to all functions except update and delete, an 8 security level is
required to update and delete.
5. A 0 security level permits ICI number entry, an 8 security level is required for all other icons and
fields.
6. A 0 security level can use the data entry fields, an 8 security level is required for the update and
delete icons.
DEFAULT DISPLAY SECURITY
C-4
WBPEEUI350003B0
APPENDIX D - CONSOLE ALARM CONFIGURATION
INTRODUCTION
The Open Data Management Server (ODMS) is capable of
receiving operator interface station (OIS) alarm acknowledge
and silence messages. This appendix contains instructions on
how to configure the OIS global alarm acknowledge and silence
function. The console global alarm acknowledge and silence
function requires configuration of three distinct attributes:
•
•
•
System global alarm acknowledge/silence.
Process tags.
Console/computer Network 90 status tags.
For detailed information refer to the OIS configuration section
of the appropriate OIS operation and configuration manual.
SYSTEM GLOBAL ALARM ACKNOWLEDGE/SILENCE
To configure system global alarm acknowledge/silence:
From the general functions menu, select A: OIS CONFIGURATION to access the OIS configuration menu.
From the OIS configuration menu, select E: SYSTEM to access
the system configuration menu.
1. From the system configuration menu, select A: SYSTEM to
access the OIS system configuration menu.
2. Select B or C: GLOBAL ALARM ACKNOWL/SILENCE from
the OIS system configuration menu to access the alarm management - global alarm acknowledge/silence screen and the
appropriate node list page.
NOTE: Selecting B or C is based on which node list is being defined.
Refer to the appropriate OIS operation and configuration manual for
information on defining node lists.
From this screen configure the four selections at the top of the
screen to meet the system requirements.
A: Receive Global Alarm Acknowledge (Yes/No)
B: Send Global Alarm Acknowledge (Yes/No)
C: Receive Global Silence (Yes/No)
D: Send Global Silence (Yes/No)
WBPEEUI350003B0
INTRODUCTION
D-1
CONSOLE ALARM CONFIGURATION
®
PROCESS TAGS
To configure process tag attributes:
1. From the general functions menu, select A: OIS CONFIGURATION to access the OIS configuration menu.
2. Select A: DATABASE from the OIS configuration menu to
access the database configuration menu.
3. Select A: TAG from the database configuration menu to
access the tag database.
4. Set the Broadcast Tag Ack field to yes for each tag in the
database to be broadcasted to other nodes.
N90STA TAGS
To configure N90STA tags:
1. From the general functions menu, select A: OIS CONFIGURATION to access the OIS configuration menu.
2. Select A: DATABASE from the OIS configuration menu to
access the database configuration menu.
3. Select A: TAG from the database configuration menu to
access the tag database.
4. Set the Broadcast Tag Ack field to yes for each N90STA tag
in the database to be broadcasted to other nodes.
5. Set the Broadcast - Ack Sil field to yes for each N90STA tag
in the database to be broadcasted to other nodes and require
the receipt of an acknowledge or silence.
NOTE: The global acknowledge/silence function requires that all
nodes participating in the broadcast process have Network 90 status
tags for all other nodes, plus itself.
PROCESS TAGS
D-2
WBPEEUI350003B0
APPENDIX E - ODMS DATABASE
INTRODUCTION
This appendix lists the Open Data Management Server (ODMS)
database fields and other information that can be used to
define how the open data management server database fields
are used and displayed on open data management server
screens. This information is needed when configuring a open
data management server database.
TAG TYPES
Table E-1 lists the INFI 90 OPEN tag types supported by the
open data management server, specifies if they are inputs or
outputs, and lists the tag type number. The tag type number is
used to define the quality status selector record associated
with a tag type (refer to QUALITY STATUS DESCRIPTIONS).
Table E-1. INFI 90 OPEN Tag Types
Tag Type
WBPEEUI350003B0
Input/Output
Tag Type Number
ANALOG
Input
1
ANALOG OUT
Output
2
DIGITAL
Input
3
DIGITAL OUT
Output
4
DAANG
Input and output
5
DADIG
Input and output
6
RCM
Input and output
7
RMSC
Input and output
8
RMCB
Input and output
9
STATION
Input and output
10
DD
Input and output
11
MSDD
Input and output
12
ASCII STRING
Input and output
13
MODULE STATUS
Input
14
EXT MOD STATUS
Input
15
TREND BLOCK
Input
16
TEXT SELECTOR
Input
17
BATCH BLOCK
Input
18
ICI STATUS
Input
19
INTRODUCTION
E-1
ODMS DATABASE
®
QUALITY STATUS DESCRIPTIONS
Quality status descriptions are defined or modified in the
QUALITY-STATUSXX selector record, where XX is a number
that represents the tag type (refer to Table E-1 ). Each tag type
uses different status descriptions. Some typical quality status
state descriptions are: Bad, Clamped Low, Clamped High, Suspect, No Status, Good, Initial, Manual Sub, Off Scan, Bad
Quality, Red Tagged, Tracking, etc.
Quality status state descriptions can be given display priorities. Refer to SOFTWARE DETAILS in Section 6 for information on configuring displays using quality to structure record
display priorities.
OPEN DATA MANAGEMENT SERVER DATABASE FIELDS
Table E-2 lists the open data management server database
fields that are used to build a open data management server
database and information on each of the field. The information
in Table E-2 includes:
ODMS Database Field
Name
The database field name or attribute that is contained in a
database record.
Supported Tag Type
Lists the open data management server tag types that support
the database field name.
Changeable On-line
Some database fields can be changed on-line. This column lists
those fields and any restrictions to modifying the tag on-line.
Tags that are fully changeable on-line can be changed via the
open data management server tag configuration or operating
parameters screens.
Default Value
Shows what appears on applicable screens when the open data
management server is first started. Some database fields can
have their default values configured to other values before a
system start-up. When a change to a default value is made, it
applies to all such tags.
User Defined
List of database fields that must be initially defined by the user
before a system start-up.
INFI 90 OPEN Update
Lists the open data management server database fields that
are updated by INFI 90 OPEN exception reports.
Format
An explanation of how the database field must be formatted.
Fields that cannot be modified by the user may list not applicable as the field format or indicate how the field is defined. Some
fields are defined by other attributes or database fields.
QUALITY STATUS DESCRIPTIONS
E-2
WBPEEUI350003B0
ODMS DATABASE
Description
WBPEEUI350003B0
Provides a description of the field, explains how the database
field works, and gives additional information on the field format if needed.
OPEN DATA MANAGEMENT SERVER DATABASE FIELDS
E-3
Database Field Name1
Change
On-line
Tag Types Supported
Default Value
User
Defined
Updated
by INFI
90 OPEN
Format or Restrictions
Description
WBPEEUI350003B0
NAME2
All
Add or delete
tags only
NA
Yes
No
Up to 16 alphanumeric
characters3
A name used to identify the tag.
sDESCRIPTION
All
Yes
Blank
Yes
No
Up to 32 alphanumeric
character
A description of the tag.
CUSTOMER TAG ID2
All
Yes
Blank
Yes
No
Up to 32 alphanumeric
characters
An additional tag identifier that can be used to
describe a field tag.
SECURITY2
All
No
0000000000000000
NA
No
16 decimal digits
Assigns the tag to a security group. The security
field is not implemented.
TAG TYPE2
All
Only when tag
is
created
Blank
When tag
is created
No
NA
An INFI 90 OPEN tag type. This field is selected
from a list of available tag types. Refer to TAG
TYPES for a complete list.
DOMAIN2
All
Yes
Unassigned
Yes
No
NA
The geographical or functional area to which this
tag is logically associated. This field is selected
from a list of user defined domains.
PLANT AREA
All
No
Unassigned
Per
domain
No
NA
A text string that describes the plant area for the
applicable domain.
UNIT
All
No
Unassigned
Per
domain
No
NA
A text string that describes the unit for the applicable domain.
ACCOUNTING
All except module status, extended module
status, and ICI status
Indirectly
through process accounting
No
No
No
No/Yes
Flag used to determine if process accounting is
configured for this point.
ACTG REC
All except module status, extended module
status, and ICI status
Indirectly
through process accounting
0
No
No
Record ID
Reference to process accounting record.
ICI2
All
Yes
None
Yes
No
NA
A name corresponding to a local ICI interface number. This field is selected from a list of valid ICI
names defined for this system.4
ICI INDEX2
All
Yes
0
Yes
No
1 to 29,999
An index to the internal memory location where
exception data is stored in an ICI or OSM interface.
Each tag is assigned a unique ICI index number in
combination with an ICI number.
sMESSAGES TO LOG
All
Yes
No
Yes
No
No or yes.
This field is a flag to determine if messages associated with this tag are to be logged in the system
logs. This includes alarm messages, system messages, user change messages, change of state
messages.
sTIME
All
History only or
indirectly 5
??????????
No
Yes6
DD-MMM-YY
HH:MM:SS.T
The time that specification data is recorded. Where
DD is the day, MMM is the month, YY is the year,
HH is the hour, MM is the minutes, SS is the seconds, and T is tenth of seconds.
NOTE: This database field
is stored in history as
SPEC TIME.
ODMS DATABASE
OPEN DATA MANAGEMENT SERVER DATABASE FIELDS
E-4
Table E-2. Open Data Management Server Database Fields
WBPEEUI350003B0
Table E-2. Open Data Management Server Database Fields
Database Field Name1
Change
On-line
Tag Types Supported
Default Value
User
Defined
Updated
by INFI
90 OPEN
(continued)
Format or Restrictions
Description
All
History only or
indirectly7
??????????
No
Yes6
DD-MMM-YY
HH:MM:SS.T
The time that exception data is recorded. Where
DD is the day, MMM is the month, YY is the year,
HH is the hour, MM is the minutes, SS is the seconds, and T is tenth of seconds.
eMSECS
All
History only
0
No
Yes6
mmm
Time in milliseconds between the actual time of an
exception and the recorded time in tenths of seconds. Where mmm is time in milliseconds. Updated
only if time stamping is from the INFI 90 OPEN system.
TREND VIEW TIME2
All except ASCII string
Yes
+00000:30:00.0
Yes
(optional)
No
+HHHHH:MM:SS.T
The time period proceeding the current time to be
viewed in a trend graph. Where HHHHH is hours,
MM is minutes, SS is seconds, and T is tenth of
seconds.
eQUALITY
All except module status, extended module
status, and ICI status
History only
Bad
No
Yes
Good or Bad
Values are determined by the INFI 90 OPEN interface and represent good or bad quality of a tag.
eQUALITY STATUS
All except module status, extended module
status, and ICI status
Partially8
Initial
No
Yes10
NA
This field is used to display a composite quality status for the tag using the quality value with the highest priority. Refer to QUALITY STATUS
DESCRIPTIONS for more information.
DEFAULT REC<02
All
No
0
No
No
0 or -1
All INFI 90 OPEN tags have a value of 0. If this field
is a -1, it is a default record used in the definition of
detail displays as record place holders and defines
the permissible tag type of the record to be substituted for the default record.
INITIAL VALUE2
All except ASCII string,
module status,
extended module
status, and ICI status
Yes
????????
Yes
No
Defined by VALUE
FORMAT
On start-up, the VALUE field is loaded with the initial value contained in this field if the ODMS system
cannot communicate with the INFI 90 OPEN system.
ACKNOWLDGEMENT2
All
No
Unack
No
Yes
Unack or ack
This field is ack when an alarm is acknowledged at
the console. This field is unack when the alarm is
not acknowledged.
s# OF DISK VALS2
All
Yes
0
Yes
No
0 to 231 values decimal
Defines the number of specification history occurrences for a tag to be stored on disk in the history
file. This value must not include history to be stored
in disk based archive files.
s# OF MEMORY VALS2
All
No
2
No
No
2
Defines the number of specification history occurrences for this tag to be stored in memory.
e# OF DISK VALS2
All
Yes
0
Yes
No
0 to 231 values decimal
Defines the number of exception history occurrences for a tag to be stored on disk in the history
file. This value must not include history to be stored
in disk based archive files.
e# OF MEMORY VALS2
All
No
Dependent on tag type
No
No
NA
Defines the number of exception history occurrences for this tag to be stored in memory. This field
is defined by Elsag Bailey.
ODMS DATABASE
OPEN DATA MANAGEMENT SERVER DATABASE FIELDS
E-5
eTIME
Database Field Name1
Change
On-line
Tag Types Supported
Default Value
User
Defined
Updated
by INFI
90 OPEN
(continued)
Format or Restrictions
Description
WBPEEUI350003B0
sHIST SEQUENCE #2
All
No
NA
No
No
NA
A unique number defining the most recent history
occurrence in a specification repeat area. Older
occurrences are identified by the history sequence
number minus the occurrence number in the repeat
area minus one.
eHIST SEQUENCE #2
All
No
0
No
No
NA
A unique number defining the most recent history
occurrence in a specification repeat area. Older
occurrences are identified by the history sequence
number minus the occurrence number in the repeat
area minus one.
eMANUAL SUBSTITUTION All except module status, extended module
status, and ICI status
By manual
substitution7
No
No
Yes10
Yes or no
This field is yes when a tag value is manually substituted, no when a tag value is an actual INFI 90
OPEN value.
eOFF SCAN
All
Yes
On
No
No
No or yes
This field is no when a tag is off scan (disconnected
from the INFI 90 OPEN system), yes when a when
a tag is on scan (connected to the INFI 90 OPEN
system).
eVALUE
All except station,
ASCII string, module
status, extended module status, and ICI status
Yes7
???????
No
Yes
Defined by VALUE
FORMAT
This field contains the current value or state of the
tag.
LOOP2
All except analog output and digital output
Yes
0
Yes
No
0 to 254
Part of the INFI-NET communication hardware
address identifying the communication loop on
which the tag resides.
NODE2
All except analog output and digital output
Yes
0
Yes
No
0 to 254
Part of the INFI-NET communication hardware
address identifying the node where the tag resides.
MODULE2
All except analog output and digital output
Yes
0
Yes
No
0 to 31
Part of the INFI-NET communication hardware
address identifying the communication module on
the node where the tag resides.
BLOCK2
All except analog output and digital output
Yes
0
Yes
No
0 to 9998
Part of the INFI-NET communication hardware
address identifying the module function block
where the tag resides.
B QUALITY
PROCESSING2
All except analog output, digital output,
ASCII string, module
status, extended module, status, and ICI status
Yes
Use value
Yes
No
Use value, keep last good
value, or use override
value
Describes the contents that are inserted in the
VALUE field when the quality of a tag is bad.
B QUALITY OVERRIDE
VALUE2
All except analog output, digital output,
ASCII string, module
status, extended module, status, and ICI status
Yes
???????
Yes
No
Defined by VALUE
FORMAT
The value to be placed in the VALUE field when the
tag quality is bad and the use override value option
is selected for B QUALITY PROCESSING.
ODMS DATABASE
OPEN DATA MANAGEMENT SERVER DATABASE FIELDS
E-6
Table E-2. Open Data Management Server Database Fields
WBPEEUI350003B0
Table E-2. Open Data Management Server Database Fields
Database Field Name1
Change
On-line
Tag Types Supported
Default Value
User
Defined
Updated
by INFI
90 OPEN
(continued)
Format or Restrictions
Description
Analog input, analog
output, DAANG,
RMSC, batch block,
and station
Yes12
Blank
Yes
Yes
6 alphanumeric
characters
The engineering units that correspond to a VALUE
field. The EUDESC labels are defined in the engineering unit table and associated with an index
number. The index number is specified in the INFI
90 OPEN system.
sZERO
Analog input, analog
output, RMSC, and
batch block.
Yes12
Blank
Yes
Yes
Decimal number
The user defined low process limit value. This field
should be set to the actual INFI 90 OPEN low process limit value. The value format field determines
the format to use.
sSPAN
Analog input, analog
output, batch block,
and RMSC
Yes12
???????
Yes
Yes
Decimal number
The range of values determined by the user. The
sZERO field value plus the sSPAN field value
equals the high process limit value. This field
should be set to the actual INFI 90 OPEN low process limit value. The VALUE format field determines the format to use.
sHIGH ALARM LIMIT
Analog input, analog
output, DAANG,
RMSC, batch block,
and station
Yes12
???????
Yes
Yes
Decimal number
The user defined high alarm limit. This field should
be set to the actual INFI 90 OPEN high process
limit value. The VALUE FORMAT field determines
the format to use.
sLOW ALARM LIMIT
Analog input, analog
output, DAANG,
RMSC, batch block,
and station
Yes12
???????
Yes
Yes
Decimal number
The user defined low alarm limit. This field should
be set to the actual INFI 90 OPEN low process limit
value. The VALUE FORMAT field determines the
format to use.
sSIGNAL CHANGE%
Analog input, analog
Yes12
output, and batch block
???????
Yes
Yes
Decimal number
The INFI 90 OPEN exception report change limit.
This field defines the amount of change in signal
span (in percent) required to trigger an exception
report. This field should be set to the actual INFI 90
OPEN signal change percent.
sCOMP RECORD
Analog input, analog
output, DAANG,
RMSC, batch block,
and station
Yes
No data compression for
applicable tags or
Station. No data
compression for station
tags
Yes
No
No data compression or
boxcar/slope.
For station tags only: station no data compression
or station boxcar/slope.
Identifies a processing record which defines the
type of data compression processing.
sCOMP SIGNIF CHG
Analog input, analog
output, DAANG,
RMSC, batch block,
and station
Yes
???????
Yes
No
Defined by VALUE
FORMAT
Determines the maximum amount the current value
(in engineering units) can change from the last
recorded value without violating boxcar limits.
sCOMP INTERVAL
Analog input, analog
output, DAANG,
RMSC, batch block,
and station
Yes
00000:00:00.0
Yes
No
HHHHH:MM:SS:T
The maximum time that can elapse before a new
compressed value is recorded. Where HHHHH is
hours, MM is minutes, SS is seconds and T is tenth
of seconds. If this value is negative then a compressed value is always recorded.
eLIMIT ALARM
Analog input, analog
output, DAANG,
RMSC, batch block,
and station
No
OK
No
Yes
OK, high, or low
Indicates if a tag is in high or low alarm, or no
alarm.
eDEVIATION ALARM
Analog input, analog
output, DAANG, batch
block, and station
No
OK
No
Yes
OK, high, or low
Indicates if a tag is in high or low alarm, or no
alarm.
ODMS DATABASE
OPEN DATA MANAGEMENT SERVER DATABASE FIELDS
E-7
sEUDESC
Database Field Name1
Change
On-line
Tag Types Supported
Default Value
User
Defined
Updated
by INFI
90 OPEN
(continued)
Format or Restrictions
Description
eCALIBRATION VALUES
Analog input, analog
output, DAANG,
RMSC, batch block,
and station
No
OK
No
Yes
OK or bad
Indicates if a tag is in calibration (OK) or out of calibration (bad).
eRED TAGGED
Analog input, analog
output, DAANG,
DADIG, RCM, RMSC,
RMCB, station, DD,
MSDD, batch block,
and ASCII string
No
No
No
Yes
Yes or no
This field is used to indicate that a tag has a red
tagged status. A tag is red tagged from an OIS console and indicates that equipment is done for maintenance or repair.
eTRACKING
Analog input, analog
output, RMSC, batch
block, and station
No
Normal
No
Yes
Normal or tracking
Indicates if a tag is in normal or tracking mode in
the INFI 90 OPEN system.
eCOMP VALUE
Analog input, analog
output, DAANG, batch
block, and RMSC
No
???????
No
Indirectly
Defined by VALUE
FORMAT
The current compressed value for the tag after boxcar backslope processing. If the tag is not set up for
boxcar backslope processing, this value is the
same as the eVALUE attribute.
Station
No
???????
No
Indirectly
Defined by VALUE
FORMAT
The current compressed value for the tag after boxcar backslope processing. If the tag is not set up for
boxcar backslope processing, this value is the
same as the ePV station tag database field.
Analog input, analog
output, DAANG,
RMSC, batch block,
and station
Yes8
Initial
No
Yes9
NA
This field is used to display a composite quality status for the tag having a quality value with the highest priority. Refer to QUALITY STATUS
DESCRIPTIONS for more information.
Analog input, analog
output, DAANG,
RMSC, batch block and
station
No
No violation
No
No
No violation, spike, maybe
spike, slope, or boxcar
This field contains the status of the last recorded
value as determined by the boxcar backslope algorithm.
Analog input, analog
output, DAANG,
NOTE: This database field
RMSC, batch block,
is stored in history as TIME.
and station
Yes
00000:00:00.0
No
No
HHHHH:MM:SS:T
This field shows the time that the current compressed value (eCOMP VALUE or eCOMP PV) was
last updated. Where HHHHH is hours, MM is minutes, SS is seconds and T is tenth of seconds.
GRAPH MAXIMUM2
Analog input, analog
output, DAANG, and
RMSC
Yes
??????
Yes
(optional)
No
Defined by VALUE
FORMAT
This field defines the upper limit value for trends
and bar charts associated with this tag.
GRAPH MINIMUM2
Analog input, analog
output, DAANG, and
RMSC
Yes
??????
Yes
(optional)
No
Defined by VALUE
FORMAT
This field defines the lower limit value for trends
and bar charts associated with this tag.
GRAPH MAXIMUM PV2
Station
Yes
??????
Yes
(optional)
No
Defined by VALUE
FORMAT
This field defines the upper limit value for trends
and bar charts associated with the process variable
value of the tag.
GRAPH MINIMUM PV2
Station
Yes
??????
Yes
(optional)
No
Defined by VALUE
FORMAT
This field defines the lower limit value for trends
and bar charts associated with the process variable
value of the tag.
NOTE: This database field
is stored in history as
VALUE.
eCOMP PV
NOTE: This database field
is stored in history as PV.
eCOMP QUALITY
STATUS
NOTE: This database field
is stored in history as
QUALITY STATUS.
eCOMP STATUS
eCOMP TIME
ODMS DATABASE
OPEN DATA MANAGEMENT SERVER DATABASE FIELDS
E-8
Table E-2. Open Data Management Server Database Fields
WBPEEUI350003B0
WBPEEUI350003B0
Table E-2. Open Data Management Server Database Fields
Database Field Name1
Change
On-line
Tag Types Supported
Default Value
User
Defined
Updated
by INFI
90 OPEN
(continued)
Format or Restrictions
Description
Station
Yes
??????
Yes
(optional)
No
Defined by VALUE
FORMAT
This field defines the upper limit value for trends
and bar charts associated with the set point value
of the tag.
GRAPH MINIMUM SP2
Station
Yes
??????
Yes
(optional)
No
Defined by VALUE
FORMAT
This field defines the lower limit value for trends
and bar charts associated with the set point value
of the tag.
s0 STATE DESC
Digital input, digital out- Yes
put, DADIG, RCM,
RMCB, DD, and MSDD
Blank
Yes
No
6 ASCII string characters
Values are defined via the logic state descriptor list
using up to 6 alphanumeric characters. The field is
an ASCII string that describes a logic zero digital
state.
s1 STATE DESC
Digital input, digital out- Yes
put, DADIG, RCM,
RMCB, DD, and MSDD
Blank
Yes
No
6 ASCII string characters
Values are defined via the logic state descriptor list
using up to 6 alphanumeric characters. The field is
an ASCII string that describes a logic one digital
state.
s2 STATE DESC
MSDD
Yes
Blank
Yes
No
6 ASCII string characters
Values are defined via the logic state descriptor list
using up to 6 alphanumeric characters. The field is
an ASCII string that describes a logic two digital
state.
s3 STATE DESC
MSDD
Yes
Blank
Yes
No
6 ASCII string characters
Values are defined via the logic state descriptor list
using up to 6 alphanumeric characters. The field is
an ASCII string that describes a logic three digital
state.
sALARM VALUE
Digital input and digital
output
Yes12
No alarm
Yes15
Yes12
No alarm, 0 alarm, or 1
alarm
This field contains the tag logical state that represents an alarm.
sALARM COMMENT
INDEX
Digital input
Yes
0
Yes
No
An integer from 0 to
65,535
This field contains an index number that corresponds to a list of messages. This field is not currently implemented.
sRTN COMMENT INDEX
Digital input
Yes
0
Yes
No
An integer from 0 to
65,535
This field contains an index number that corresponds to a list of messages. This field is not currently implemented.
sHI COMMENT INDEX
Analog input, DAANG,
batch block, and station
Yes
0
Yes
No
An integer from 0 to
65,535
This field contains an index number that corresponds to a list of messages. This field is not currently implemented.
sLO COMMENT INDEX
Analog input, DAANG,
batch block, and station
Yes
0
Yes
No
An integer from 0 to
65,535
This field contains an index number that corresponds to a list of messages. This field is not currently implemented.
sVALUE FORMAT
Digital input, digital out- No
put, DADIG, RCM,
RMCB, DD, and MSDD
DESC000/DESC001
No
No
NA
This field describes a selector record containing the
logic state descriptors for the tag. The selector
record is automatically created (unless one already
exists) by the on-line database configuration function and contains logic state descriptors for the tag
based on user input.
VALUE FORMAT2
Analog input, analog
output, DAANG,
RMSC, station, and
batch block
F9.3
Yes
No
F5.2, F6.1, F6.2, F6.3,
F7.1, F7.2, F7.3, F7.4,
F7.5, F9.3, F10.3, F10.4,
F10.7, F12.7, F15.0,
F15.8, F22.1
This field describes the Fortran format type used to
display the tag value.
Yes
ODMS DATABASE
OPEN DATA MANAGEMENT SERVER DATABASE FIELDS
E-9
GRAPH MAXIMUM SP2
Database Field Name1
Change
On-line
Tag Types Supported
sENABLE GLOBAL
Analog output, digital
output, DAANG,
DADIG, RCM, RMSD,
RMCB, station, DD
MSDD, and ASCII
string
Yes
eALARM STATE
Digital input, digital out- No
put, DAANG, DADIG,
RCM, RMSD, RMCB,
DD, MSDD, and ASCII
string
eOUTPUT ENABLE
Analog output, digital
output, DADIG,
DAANG, RCM, RMSC,
RMCB, station, DD,
MSDD, and ASCII
string
sHI2 COMMENT INDEX
Default Value
User
Defined
Updated
by INFI
90 OPEN
(continued)
Format or Restrictions
Description
WBPEEUI350003B0
No
Yes
No
Yes or no
If this field is set to yes, the outputs are enabled for
transmission to the INFI 90 OPEN system. However, a logical sequence of conditions must exist
before outputs are sent to the INFI 90 OPEN system.
Normal
No
Yes
Normal or alarm
This field shows if the tag is in a normal state or in
alarm.
Yes11
Local
Yes14
No
INFI 90 OPEN or local
The fields provides a prompt on the operating
parameters screen to allow a manually substituted
output to be sent to the INFI 90 OPEN system or
database only (local).
DAANG
Yes
0
Yes
No
An integer from 0 to
65,535
This field contains an index number that corresponds to a list of messages. This field is not currently implemented.
sHI3 COMMENT INDEX
DAANG
Yes
0
Yes
No
An integer from 0 to
65,535
This field contains an index number that corresponds to a list of messages. This field is not currently implemented.
sLO2 COMMENT INDEX
DAANG
Yes
0
Yes
No
An integer from 0 to
65,535
This field contains an index number that corresponds to a list of messages. This field is not currently implemented.
sLO3 COMMENT INDEX
DAANG
Yes
0
Yes
No
An integer from 0 to
65,535
This field contains an index number that corresponds to a list of messages. This field is not currently implemented.
sHI ROC COMMENT INDX
DAANG
Yes
0
Yes
No
An integer from 0 to
65,535
This field contains an index number that corresponds to a list of messages. This field is not currently implemented.
sLO ROC COMMENT
INDX
DAANG
Yes
0
Yes
No
An integer from 0 to
65,535
This field contains an index number that corresponds to a list of messages. This field is not currently implemented.
sHI DEV COMMENT INDX
DAANG and station
Yes
0
Yes
No
An integer from 0 to
65,535
This field contains an index number that corresponds to a list of messages. This field is not currently implemented.
sLO DEV COMMENT
INDEX
DAANG and station
Yes
0
Yes
No
An integer from 0 to
65,535
This field contains an index number that corresponds to a list of messages. This field is not currently implemented.
sRTN COMMENT INDEX
DAANG and station
Yes
0
Yes
No
An integer from 0 to
65,535
This field contains an index number that corresponds to a list of messages. This field is not currently implemented.
sH2 DELTA
DAANG
Yes12
???????
Yes15
Yes12
Defined by VALUE
FORMAT
The value of this field is added to the high alarm
limit to define the level 2 high alarm limit (high-high)
when the tag is in a multi-level alarming mode.
ODMS DATABASE
OPEN DATA MANAGEMENT SERVER DATABASE FIELDS
E - 10
Table E-2. Open Data Management Server Database Fields
WBPEEUI350003B0
Table E-2. Open Data Management Server Database Fields
Database Field Name1
Change
On-line
Tag Types Supported
Default Value
User
Defined
Updated
by INFI
90 OPEN
(continued)
Format or Restrictions
Description
DAANG
Yes12
???????
Yes15
Yes12
Defined by VALUE
FORMAT
The value of this field is added to the sH2DELTA
field and the high alarm limit to define the level 3
high alarm limit (high-high-high) when the tag is in a
multi-level alarming mode.
sL2 DELTA
DAANG
Yes12
???????
Yes15
Yes12
Defined by VALUE
FORMAT
The value of this field is subtracted from the low
alarm limit to define the level 2 low alarm limit
(low-low) when the tag is in a multi-level alarming
mode.
sL3 DELTA
DAANG
Yes12
???????
Yes15
Yes12
Defined by VALUE
FORMAT
The value of this field plus the sL2DELTA field is
subtracted from the low alarm limit to define the
level 3 low alarm limit (low-low-low) when the tag is
in a multi-level alarming mode.
eNEXT HIGHER ALM LMT
DAANG
No
???????
No
Yes
Defined by VALUE
FORMAT
The value of this field represents the next higher
alarm limit when multi-level alarming is active.
eNEXT LOWER ALM LMT
DAANG
No
???????
No
Yes
Defined by VALUE
FORMAT
The value of this field represents the next lower
alarm limit when multi-level alarming is active.
eAUTO/MANUAL MODE
DAANG, Station and
ASCII string
No
Manual
No
Yes
Auto or manual.
If this field contains manual, the value of the
DAANG tag is taken from the manual input to the
DAANG block. Otherwise, the value of the DAANG
block is the normal input or the alternate input
depending on the DAANG block logic.
eALARM LEVEL
DAANG
No
Undefined
No
Yes
Undefined, level 1, level 2
or level 3
This field is used in conjunction with the high and
low alarm fields to determine the level of the high or
low alarm.
eALARM SUPPRESSION
DAANG and DADIG
No
No
No
Yes
No or yes
If this field is no, a tag has alarming. If this field is
yes, alarming is suppressed for a tag.
eVALUE CALCULATED
DAANG
No
No
No
Yes
No or yes
If this field is yes, the calculated input to the
DAANG input is being used.
eHW FAULT/BAD SIGNAL
DAANG
No
No
No
Yes
No
If this field is yes, it indicates there is a hardware
failure and results in the having a bad quality status.
eHIGH ALARM
DAANG
No
No
No
Yes
No or yes
If this field is yes, the tag is in high alarm for
multi-level alarming. The eALARM LEVEL field
defines the alarm level.
eHIGH DEVIATION
ALARM
DAANG
No
No
No
Yes
No or yes
If this field is yes, it indicates the tag is in high deviation alarm.
eHIGH RATE
DAANG
No
No
No
Yes
No or yes
A yes in this field indicates the tag is in high rate of
change alarm.
eLOW ALARM
DAANG
No
No
No
Yes
No or yes
A yes in this field indicates the tag is in low alarm
for multi-level alarming. The eALARM LEVEL field
defines the alarm level.
eLOW DEVIATION ALARM
DAANG
No
No
No
Yes
No or yes
A yes in this field indicates the tag is in low deviation alarm.
eLOW RATE
DAANG
No
No
No
Yes
No or yes
If this field is yes, the tag is in low rate of change
alarm.
ODMS DATABASE
OPEN DATA MANAGEMENT SERVER DATABASE FIELDS
E - 11
sH3 DELTA
Database Field Name1
Change
On-line
Tag Types Supported
Default Value
User
Defined
Updated
by INFI
90 OPEN
(continued)
Format or Restrictions
Description
eLIMITED
DAANG
No
No
No
Yes
No or yes
If this field is yes, the value of the tag is being constrained by either the high or low constraint limits.
eVALUE OUT OF RANGE
DAANG and DADIG
No
No
No
Yes
No or yes
If this field is yes, the value of the tag is unconstrained and out of range.
eREALARM
DAANG, DADIG, and
ASCII string
No
No
No
Yes
No or yes
If this field is yes, re-alarming for this tag is enabled
and the tag will be alarmed after a specified time
contained in the function block.
eSCAN STATUS
DAANG and DADIG
No
On
No
Yes
On or off
If this field is on, the function block is sending
exceptions. Scan status is set within the function
block by a source external to the function block.
eVARIABLE ALARMS
DAANG
No
No
No
Yes
No or yes
A yes in this field indicates that variable alarms are
active in the DAANG block.
eEXTENDED STATUS
CHG
DAANG
No
0
No
Yes
0 or 1
A yes in this field indicates that the extended status
of the DAANG block has changed.
eINPUT SELECT PERM
DAANG and DADIG
No
No
No
Yes
No or yes
A yes in this field indicates that the input selection
permissive is set allowing the input mode to be
changed.
eCONSTRAINTS
DAANG
No
No
No
Yes
Enabled or disabled
If this field is enabled, the value limit constraints are
active at the DAANG block.
eMULTI-LEVEL ALARM
DAANG
No
No
No
Yes
Enabled or disabled
If this field is enabled, multi-level alarming is active
for the tag.
eQUALITY OVERRIDE
DAANG, DADIG, and
ASCII string
No
Disabled
No
Yes
Enabled or disabled
If this field is enabled, the quality signal is overridden at the INFI 90 OPEN block.
VALUE OUT2
DAANG, DADIG,
RCM, RMSC, and
ASCII string
Yes11
0
No
No
Defined by VALUE FORMAT (DAANG and RMSC
tag)
The contents of this field is sent to the INFI 90
OPEN system through operating parameters as an
output of the function block. The tag must be set up
to accept manually substituted values.
Use inserted value or
reset inserted value
(DADIG tag)
Set or reset (RCM tag)
80 character ASCII text
string (ASCII string)13
WBPEEUI350003B0
QUALITY OUT2
RMSC
Yes11
Good
No
No
Good or bad
This field is used to manually set the INFI 90 OPEN
tag quality to good or bad.
MODE OUT2
DAANG and DADIG
Yes11
Varies
No
No
NA
This field contains a selected input type from the
DAANG modes selector record or DADIG modes
selector record. Input type selections for a DAANG
tag are: input go to auto, calc go to auto, suppress
alarm, no suppress alarm, off scan, on scan, force
exception update, or manual. Input type selections
for a DADIG tag are select user inserted value, and
select primary input value.
LIMIT ALARM OUT2
RMSC
Yes11
OK
No
No
Low, high, or OK
This field contains an alarm value used for manual
substitution.
ODMS DATABASE
OPEN DATA MANAGEMENT SERVER DATABASE FIELDS
E - 12
Table E-2. Open Data Management Server Database Fields
WBPEEUI350003B0
Table E-2. Open Data Management Server Database Fields
Database Field Name1
Change
On-line
Tag Types Supported
Default Value
User
Defined
Updated
by INFI
90 OPEN
(continued)
Format or Restrictions
Description
RMSC
Yes11
OK
No
No
Low, high, or OK
This field contains a deviation alarm value used for
manual substitution.
RED TAGGED OUT2
RMSC
Yes11
No
No
No
Yes or no
This field contains a red tagged value used for
manual substitution.
TRACKING OUT2
RMSC
Yes11
Normal
No
No
Tracking or normal
This field contains a tracking value used for manual
substitution.
eVALUE LATCHED
DADIG
No
No
No
Yes
Yes or no
A yes in this field indicates that the reported value
and status are latched.
eALTER INPUT SELECT
DADIG
No
No
No
Yes
Yes or no
A yes in this field indicates the alternate input is
being used in the DADIG block.
eSET PERMISSV IN REC
DADIG
No
No
No
Yes
Yes or no
A yes in this field indicates input selection is permitted.
eLOGIC SET IN RECD
RCM
No
NA
No
Yes
Yes or no
A yes in this field indicates that a set input has been
received at the RCM block from control logic.
eSET PERMISSV IN REC
RCM
No
No
No
Yes
Yes or no
If this field is yes, the RCM block has permission to
change to a logic one state.
eLOGIC RESET IN RECD
RCM
No
No
No
Yes
Yes or no
If this field is yes, it indicates that the RCM block
received a reset input from control logic.
eOVERRIDE VALUE
RCM
No
Blank
No
Yes
Defined by VALUE
FORMAT
If both the set and reset inputs to the RCM block
are logic one, the override value to the RCM block
is selected.
eFEEDBACK VALUE
RCM
No
Blank
No
Yes
Determined by VALUE
FORMAT
The value of a feedback input to the RCM block
which indicates the actual state of the controlled
device.
eSET COMMAND RECD
RCM
No
No
No
Yes
Yes or no
A yes in this field indicates that a console generated set command was received by the RCM block.
eRESET COMMAND
RECD
RCM
No
No
No
Yes
Yes or no
A yes in this field indicates that a console generated reset command was received by the RCM
block.
DURATION OUT2
RCM
Yes11
Pulsed
No
No
Sustained or pulsed
The contents of this field determines the block output type. The output signal can be a single pulsed
logic one or a sustained logic one signal.
sP1 VALUE FORMAT
RMCB
Not directly
DESC000/DESC001
No
No
Selector record name
For digital tag types, this field contains the name of
a selector record containing the zero and one logic
state descriptors for P1. This is the only field stored
in history which defines the zero and one state
descriptors. The selector record is generated by
ODMS (unless one already exists) when the logic
state descriptors are selected in the database configuration function for P1.
sP1 0 STATE DESC
RMCB
Yes
Blank
Yes
No
6 ASCII characters
An ASCII string representing up to six characters
defined in the logic descriptor list. This field contains the defined logic zero state for an RCMB
block pulse on output on P1.
ODMS DATABASE
OPEN DATA MANAGEMENT SERVER DATABASE FIELDS
E - 13
DEVIATION ALARM OUT 2
Database Field Name1
Tag Types Supported
Change
On-line
Default Value
User
Defined
Updated
by INFI
90 OPEN
(continued)
Format or Restrictions
Description
WBPEEUI350003B0
sP1 1 STATE DESC
RMCB
Yes
Blank
Yes
No
6 ASCII characters
An ASCII string representing up to six characters
defined in the logic descriptor list. This field contains the defined logic one state for an RCMB block
pulse on output on P1.
sP2 VALUE FORMAT
RMCB
Not directly
DESC000/DESC001
No
No
Selector record name
For digital tag types, this field contains the name of
a selector record containing the zero and one logic
state descriptors for P2. This is the only field stored
in history which defines the zero and one state
descriptors. The selector record is generated by
ODMS (unless one already exists) when the logic
state descriptors are selected in the database configuration function for P2.
sP2 0 STATE DESC
RMCB
Yes
Blank
Yes
No
6 ASCII characters
An ASCII string representing up to six characters
defined in the logic descriptor list. This field contains the defined logic zero state for an RCMB
block pulse off output for P2.
sP2 1 STATE DESC
RMCB
Yes
Blank
Yes
No
6 ASCII characters
An ASCII string representing up to six characters
defined in the logic descriptor list. This field contains the defined logic one state for an RCMB block
pulse off output for P2.
sF1 VALUE FORMAT
RMCB, DD, and MSDD Not directly
DESC000/DESC001
No
No
Selector record name
For digital tag types, this field contains the name of
a selector record containing the zero and one logic
state descriptors for F1. This is the only field stored
in history which defines the zero and one logic state
descriptors. The selector record is generated by
ODMS (unless one already exists) when the logic
state descriptors are selected in the database configuration function for F1.
sF1 0 STATE DESC
RMCB, DD, and MSDD Yes
Blank
Yes
No
6 ASCII characters
An ASCII string representing up to six characters
defined in the logic descriptor list. This field contains the defined logic zero for feedback 1 signal.
sF1 1 STATE DESC
RMCB, DD, and MSDD Yes
Blank
Yes
No
6 ASCII characters
An ASCII string representing up to six characters
defined in the logic descriptor list. This field contains the defined logic one state for feedback signal
1.
sF2 VALUE FORMAT
RMCB, DD, and MSDD Not directly
DESC000/DESC001
No
No
Selector record name
For digital tag types, this field contains the name of
a selector record containing the zero and one logic
state descriptors for F2. This is the only field stored
in history which defines the zero and one logic state
descriptors. The selector record is generated by
ODMS (unless one already exists) when the logic
state descriptors are selected in the database configuration function for F2.
sF2 0 STATE DESC
RMCB, DD, and MSDD Yes
Blank
Yes
No
6 ASCII characters
An ASCII string representing up to six characters
defined in the logic descriptor list. This field contains the defined logic zero state for feedback signal 2.
ODMS DATABASE
OPEN DATA MANAGEMENT SERVER DATABASE FIELDS
E - 14
Table E-2. Open Data Management Server Database Fields
WBPEEUI350003B0
Table E-2. Open Data Management Server Database Fields
Database Field Name1
Change
On-line
Tag Types Supported
Default Value
User
Defined
Updated
by INFI
90 OPEN
(continued)
Format or Restrictions
Description
RMCB, DD, and MSDD Yes
Blank
Yes
No
6 ASCII characters
An ASCII string representing up to six characters
defined in the logic descriptor list. This field contains the defined logic one state for feedback signal
2.
sF3 VALUE FORMAT
MSDD
Not directly
DESC000/DESC001
No
No
Selector record name
For digital tag types, this field contains the name of
a selector record containing the zero and one logic
state descriptors for F3. This is the only field stored
in history which defines the zero and one logic state
descriptors. The selector record is generated by
ODMS (unless one already exists) when the state
logic descriptors are selected in the database configuration function for F3.
sF3 0 STATE DESC
MSDD
Yes
Blank
Yes
No
6 ASCII characters
An ASCII string representing up to six characters
defined in the logic descriptor list. This field contains the defined logic zero state for feedback signal 3.
sF3 1 STATE DESC
MSDD
Yes
Blank
Yes
No
6 ASCII characters
An ASCII string representing up to six characters
defined in the logic descriptor list. This field contains the defined logic one state for feedback signal
3.
sF4 VALUE FORMAT
MSDD
Not directly
DESC000/DESC001
No
No
Selector record name
For digital tag types, this field contains the name of
a selector record containing the zero and one logic
state descriptors for F4. This is the only field stored
in history which defines the zero and one logic state
descriptors. The selector record is generated by
ODMS (unless one already exists) when the state
logic descriptors are selected in the database configuration function for F4.
sF4 0 STATE DESC
MSDD
Yes
Blank
Yes
No
6 ASCII characters
An ASCII string representing up to six characters
defined in the logic descriptor list. This field contains the defined logic zero state for feedback signal 4.
sF4 1 STATE DESC
MSDD
Yes
Blank
Yes
No
6 ASCII characters
An ASCII string representing up to six characters
defined in the logic descriptor list. This field contains the defined logic one state for feedback signal
4.
sERROR LIST
RMCB
No
No error
No
Yes
NA
This field defines the selector record that contains
10 predefined error code text messages.
eFEEDBACK 1 VALUE
RMCB, DD, and MSDD No
F1 zero state descriptor
No
Yes
Defined by sF1 VALUE
FORMAT
The actual feedback 1 state as a logic state
descriptor.
eFEEDBACK 2 VALUE
RMCB, DD, and MSDD No
F2 zero state descriptor
No
Yes
Defined by sF2 VALUE
FORMAT
The actual feedback 2 state as a logic state
descriptor.
eFEEDBACK 3 VALUE
MSDD
No
F3 zero state descriptor
No
Yes
Defined by sF3 VALUE
FORMAT
The actual feedback 3 state as a logic state
descriptor.
eFEEDBACK 4 VALUE
MSDD
No
F4 zero state descriptor
No
Yes
Defined by sF4 VALUE
FORMAT
The actual feedback 4 state as a logic state
descriptor.
eBAD START
RMCB
No
No
No
Yes
Yes or no
A yes in this field indicates a bad start.
ODMS DATABASE
OPEN DATA MANAGEMENT SERVER DATABASE FIELDS
E - 15
sF2 1 STATE DESC
Database Field Name1
Change
On-line
Tag Types Supported
Default Value
User
Defined
Updated
by INFI
90 OPEN
(continued)
Format or Restrictions
Description
WBPEEUI350003B0
eERROR
RMCB
No
No error
No
Yes
Defined by sERROR LIST
This field contains an error number from the INFI
90 OPEN system for a text message from the error
list.
eFAULT
RMCB
No
No
No
Yes
Yes or no
If this field is yes, a fault exists for the RMCB block.
eSTART PERMISSIVE 1
RMCB
No
No
No
Yes
Yes or no
If this field is yes, start permissive 1 is set.
eSTART PERMISSIVE 2
RMCB
No
No
No
Yes
Yes or no
If this field is yes, start permissive 2 is set.
ACK FAULT QUAL2
RMCB
Yes11
No
No
No
Yes or no
An output from the ODMS system to the INFI 90
OPEN system to acknowledge a fault.
RESET 2
RMCB
Yes11
Unchanged
No
No
Stopped or unchanged
An output from the ODMS system to the INFI 90
OPEN system to stop control of the process.
SET2
RMCB
Yes11
Unchanged
No
No
Start or unchanged
An output from the ODMS system to the INFI 90
OPEN system to start control of the process.
sDEVIATION
Station
Yes12
???????
Yes
Yes
Defined by VALUE
FORMAT
This field contains the alarm limit for the absolute
value of deviation between set point and process
variable. This field should be set to the INFI 90
OPEN value format defined by VALUE FORMAT.
sPV ZERO
Station
Yes12
???????
Yes
Yes
Defined by VALUE
FORMAT
This field contains the process variable zero value
for the range of operation. This field should be set
to the INFI 90 OPEN value format defined by
VALUE FORMAT.
sPV SPAN
Station
Yes12
???????
Yes
Yes
Defined by VALUE
FORMAT
This field contains the process variable span. This
field should be set to the INFI 90 OPEN value format defined by VALUE FORMAT.
sSP ZERO
Station
Yes12
???????
Yes
Yes
Defined by VALUE
FORMAT
This field contains the set point zero for the range
of operation. This field should be set to the INFI 90
OPEN value format defined by VALUE FORMAT.
sSP SPAN
Station
Yes12
???????
Yes
Yes
Defined by VALUE
FORMAT
This field contains the set point span. This field
should be set to the INFI 90 OPEN value format
defined by VALUE FORMAT.
sSTATION TYPE
Station
Yes12
Basic_w_setpoint
Yes
Yes
Basic_w_setpoint,
basic_no setpnt, cascade, basic_with_bias, or
ration_index
This field defines the tag station type.
ePV
Station
No
???????
No
Yes
Defined by VALUE
FORMAT
The process variable value from the INFI 90 OPEN
system.
eSP
Station
No
???????
No
Yes
Defined by VALUE
FORMAT
The current station set point value.
eCO
Station
No
???????
No
Yes
Defined by VALUE
FORMAT
The current station control output value.
eRI
Station
No
???????
No
Yes
Defined by VALUE
FORMAT
The current station ratio control value.
eSTATION BYPASS MODE Station
No
No
No
Yes
Yes or no
If this field is yes, the station is in the local bypass
mode.
ODMS DATABASE
OPEN DATA MANAGEMENT SERVER DATABASE FIELDS
E - 16
Table E-2. Open Data Management Server Database Fields
WBPEEUI350003B0
Table E-2. Open Data Management Server Database Fields
Database Field Name1
Change
On-line
Tag Types Supported
Default Value
User
Defined
Updated
by INFI
90 OPEN
(continued)
Format or Restrictions
Description
eMODE INTERLOCK
Station and ASCII
string
No
No
No
Yes
Yes or no
If this field contains yes, the station mode is interlocked.
ASCII string
No
No PDT
No
Yes
PDT or no PDT
If this field is PDT, data is interlocked.
Station
No
No
No
Yes
Yes or no
A yes in this field indicates the station output is
tracking.
eSTATION STATUS
Station, module status,
extended module status, ICI status
No
Good
No
Yes
Good or bad
For digital stations a bad in this field represents a
failure. For modules a bad in this field represents a
summary station status.
eCOMPUTER STATUS
Station
No
Bad
No
Yes
Good or bad
If this field is good, the tag can be controlled from
the computer.
eSTATION LEVEL
Station
No
Local
No
Yes
Local or computer
The station level of operation. A computer level is
required to output values from the ODMS system to
the INFI 90 OPEN system.
eCASCADE RATIO
Station
No
Normal
No
Yes
Normal or cascade
This field indicates the station mode of operation,
normal or cascade. If the field is cascade, the station can be in cascade or ratio mode depending on
the station type.
SP OUT2
Station
Yes11
?????
No
No
Defined by VALUE
FORMAT
The desired set point output value.
CO OUT2
Station
Yes11
?????
No
No
Defined by VALUE
FORMAT
The desired control output value.
RI OUT2
Station
Yes11
?????
No
No
Defined by VALUE
FORMAT
The desired ratio index output value.
MODE OUT2
Station and DD
Yes11
Go to local manual
No
No
Selected from operating
parameters screen
The desired station mode output. Operating parameter screen selections are:
For station tags:
Go to local manual, go to local auto, go to local cascade/ratio, go to computer manual, go to computer
auto, go to computer cascade/ratio, go to local level
computer level, go to computer OK, or go to previous state.
For DD tags:
Auto or manual.
To change to computer control, the mode must first
be set to computer OK, then a go to computer command must be issued.
eFEEDBACK STATUS
DD
No
Normal
No
Yes
Normal or bad
A bad in this field indicates the feedback values
corresponding to a given state do not correspond to
the control output for that state.
eSTATUS OVERRIDE
DD and MSDD
No
Normal
No
Yes
Normal or everriden.
This field indicates if a status override has
occurred.
ODMS DATABASE
OPEN DATA MANAGEMENT SERVER DATABASE FIELDS
E - 17
eDATA INTERLOCK
eOUTPUT TRACKING
Database Field Name1
Change
On-line
Tag Types Supported
Default Value
User
Defined
Updated
by INFI
90 OPEN
(continued)
Format or Restrictions
Description
WBPEEUI350003B0
eOPERATING MODE
DD and MSDD
No
Manual
No
Yes
Auto, remote (DD tag
only), or manual.
This field contains the tag operating mode. In auto
mode, the INFI 90 OPEN logic controls the block
output requests. In manual mode, the outputs are
modified by a console or the ODMS system. In
remote mode, the device driver tracks an INFI 90
OPEN signal.
RESET CONTROL OUT2
DD
Yes11
No change
No
No
No change or set to 0
A set to 0 indicates a ODMS requested output
reset.
SET CONTROL OUT2
DD
Yes11
No change
No
No
No change or set to 1
A set to 1 indicates a ODMS requested output set.
eCONTROL OVERRIDE
MSDD
No
Normal
No
Yes
Normal or overridden
If this database field is overridden, an override condition exists.
eCONTROL OUTPUT
MSDD
No
Zero
No
Yes
Zero or one
If this field is one, a control output is requested.
eREQUESTED STATE
MSDD
No
Mask 0
No
Yes
Mask 0, mask 1, mask 2,
or mask 3
This field reflects the requested mask values existing in the MSDD tag.
AUTOMATIC MODE2
MSDD
Yes11
No
No
No
Yes or no
This field is used to request the device driver output
to change to automatic mode. A yes indicates the
block is in automatic mode.
MANUAL MODE2
MSDD
Yes11
No
No
No
Yes or no
This field is used to request the device driver output
to change to manual mode. A yes indicates the
block is in manual mode.
REQUESTED MASK2
MSDD
Yes11
Mask 0
No
No
Mask 0, mask 1, mask 2,
or mask 3
This field contains a user requested MSDD block
output mask. The mask is selected via the operating parameters screen and output to the MSDD.
eSUPPRESS ALM ACTIVE ASCII string
No
Unsuppress
No
No
Unsuppress or suppress
If this field is set to suppress, alarms are suppressed.
eDATA TYPE
ASCII string
No
Normal
No
No
Normal or echo
This field is internal to INFI 90 OPEN. Refer to
function code 194 in the Function Code Applications Manual.
eERROR SUMMMARY
Module status,
extended module status, and ICI status
No
No error
No
Yes
No error or error
If the field contains error, it indicates the module
has errors.
eMODE
Module status,
extended module status, and ICI status
No
Module fail
No
Yes
Module fail, config mode,
exec mode, or error mode
This field describes the current mode of the module.
eMODULE TYPE
Module status,
extended module status, and ICI status
No
Reserved
No
Yes
See note 5
This field defines the module type.
eIST TIME IN EXECUTE
Module status,
extended module status, and ICI status
No
No
No
Yes
Yes or no
If this field is yes, the module is in execute mode for
the first time.
eMISCELLANEOUS
Module status,
extended module status, and ICI status
No
?????
No
Yes
OK backup/memory or
bad bkup/memfaild
This field indicates the status of the backup memory, OK or bad.
ODMS DATABASE
OPEN DATA MANAGEMENT SERVER DATABASE FIELDS
E - 18
Table E-2. Open Data Management Server Database Fields
WBPEEUI350003B0
Table E-2. Open Data Management Server Database Fields
Database Field Name1
Change
On-line
Tag Types Supported
Default Value
User
Defined
Updated
by INFI
90 OPEN
(continued)
Format or Restrictions
Description
Module status,
extended module status, and ICI status
No
Good
No
Yes
Good or bad
If this field is bad, remote I/O modules have problems.
eLOCAL I/O STATUS
Module status,
extended module status, and ICI status
No
Good
No
Yes
Good or bad
If this field is bad, local I/O problems exist within the
module.
eCALIB QUAL STATUS
Module status,
extended module status, and ICI status
No
Good
No
Yes
Good or bad
If this field is bad, module calibration is incorrect.
eAUTO INIT IN STATUS
Module status,
extended module status, and ICI status
No
Reset
No
Yes
Set or reset
If this field is set, in status is automatically initiated.
eROM MEM DEF CONFIG
Module status,
extended module status, and ICI status
No
No
No
Yes
Yes or no
Yes indicates the ROM memory is being configured.
eBYTE 3
Module status and
extended module status
No
Depends on module
type17
No
Yes
Depends on module
type17
Description is dependent upon tag type.
eBYTE 4
Module status and
extended module status
No
Depends on module
type17
No
Yes
Depends on module
type17
Description is dependent upon tag type. Refer to
the Function Code Application Manual.
eBYTE 5
Module status and
extended module status
No
Depends on module
type17
No
Yes
Depends on module
type17
Description is dependent upon tag type. Refer to
the Function Code Application Manual.
eBYTE 6
Extended module status
No
Depends on module
type17
No
Yes
Depends on module
type17
Description is dependent upon tag type. Refer to
the Function Code Application Manual.
eBYTE 14
Extended module status
No
Depends on module
type17
No
Yes
Depends on module
type17
Description is dependent upon tag type. Refer to
the Function Code Application Manual.
eBYTE 15-16
Extended module status
No
Depends on module
type17
No
Yes
Depends on module
type17
Description is dependent upon tag type. Refer to
the Function Code Application Manual.
eNODES OFFLINE
ICI status
No
None
No
Yes
None, or one or more
If the field is one or more, it indicates that one or
more nodes communicating with the ICI interface
are off-line. None indicates that none of the nodes
are off-line.
eMEMORY FULL
ICI status
No
No
No
Yes
Yes or no
There is a memory overflow when this field is yes.
eNODE ENVIRON FAIL
ICI status
No
No
No
Yes
Yes or no
A yes in this field indicates there is a failure in the
node cabinet (e.g., open fuse)
eLOOPS OFFLINE
ICI status
No
None
No
Yes
None, or one or more
If the field is one or more, it indicates that one or
more connected loops are off-line.
eNODE CONTAINING REF ICI status
No
Interface unit
No
Yes
OIS console, MCS console, or interface unit
This field describes the type of host node.
ODMS DATABASE
OPEN DATA MANAGEMENT SERVER DATABASE FIELDS
E - 19
eREMOTE I/O STATUS
Database Field Name1
Change
On-line
Tag Types Supported
Default Value
User
Defined
Updated
by INFI
90 OPEN
(continued)
Format or Restrictions
Description
eINTERNAL PROBLEM
ICI status
No
No
No
Yes
Yes or no
If this field is yes, an internal computer interface
problem exists.
eRECEIVE ERR CHAN 1
ICI status
No
No
No
Yes
Yes or no
This field indicates the receive error status for
channel 1.
eRECEIVE ERR CHAN 2
ICI status
No
No
No
Yes
Yes or no
This field indicates the receive error status for
channel 2.
eTRANSMIT ERR CHAN 1
ICI status
No
No
No
Yes
Yes or no
This field indicates the transmit error status for
channel 1.
eTRANSMIT ERR CHAN 2
ICI status
No
No
No
Yes
Yes or no
This field indicates the transmit error for channel 2.
eLOOP CHANNEL 1
ICI status
No
Idle
No
Yes
Busy or idle
This s field indicates the status of channel 1.
eLOOP CHANNEL 2
ICI status
No
Idle
No
Yes
Busy or idle
This field indicates the status of loop channel 2.
eLOCAL LOOP COM FAIL
ICI status
No
Good
No
Yes
Good or fail
A fail in this field indicates the local loop has experienced a communication failure.
eHOST COMPUTER
VALUE
ICI status
No
0
No
Yes
0 to 255
This field contains a node value assigned to the
host computer.
NOTES:
1. The history storage name for each ODMS database field is the same as the database field name minus the initial letter. Database fields that have a history storage name that is different from the database
field name are noted in this table.
2. History storage name does not apply to this database field.
3. A tag name must begin with an alphanumeric character. Use 14 alphanumeric characters to be consistent with consoles.
4. Valid ICI names and numbers are defined ICI records created by using the ICIDEF record. ICI names can be ICI_N where N is 1 through 10. For example, ICI_1 and ICI_2 are valid ICI names.
5. This field changes indirectly when a change is made to a specification field in the database.
6. If time stamping is from the INFI 90 OPEN system.
7. This field changes indirectly through operating parameters.
8. Partially by changing tag status through operating parameters.
9. Updated by tag status which is determined from INFI 90 OPEN and ODMS quality status attributes.
10. For DAANG and DADIG tag types only.
11. Via the operating parameters screen.
12. If the ICI or OSM interface is reading specification exceptions, this value is updated from the INFI 90 OPEN system. It always reflects the value being used in the INFI 90 OPEN system because changing ODMS values do not change the way the value is used in the INFI 90 OPEN system.
13. This output is truncated to 64 characters for consoles.
WBPEEUI350003B0
14. While substituting a value via the operating parameters screen.
15. This field should reflect the actual value used by the INFI 90 OPEN system.
16. Refer to the Function Code Application Manual for module type and module status byte information.
ODMS DATABASE
OPEN DATA MANAGEMENT SERVER DATABASE FIELDS
E - 20
Table E-2. Open Data Management Server Database Fields
Index
A
Access routines .......................................................... 2-7
ACCESS utility ................................................ 5-23, 5-45
Ad hoc query ............................................................ 5-21
Ad hoc trending .......................................................... 5-7
Alarm acknowledge ....................................................D-1
Alarm priorities ......................................................... 6-10
Alarm transfer support .............................................. 5-38
ALIAS MAX LINKS ..................................................... 3-5
Alpha AXP ........................................................... 1-2, 2-1
Installation............................................................. 3-1
ASCII text string messages ...................................... 5-19
Modifying ............................................................ 5-20
C
CALC ................................................................. 2-6, 5-23
Client architecture ...................................................... 2-7
Client platforms ............................................... 2, 1-2, 2-1
Client terminal
Automatic start-up................................................. 6-9
Installation........................................................... 3-55
Program configuration files ................................. 6-10
Requirements .............................................. 1-5, 3-56
Communication loop................................................. 5-38
Communication protocol............................................. 2-2
Configuration
Files .................................................................... 6-10
Network set-up...................................................... 3-5
Configuring
Communication loop type ................................... 5-38
Database snapshots ........................................... 5-29
Database tags..................................................... 5-25
Disk history files.................................................. 5-31
Engineering units ................................................ 5-34
Global messages ................................................ 5-36
Global output switches........................................ 5-36
Global tag state changes .................................... 5-36
Interface type ...................................................... 5-38
Logic states......................................................... 5-35
Time stamp source ............................................. 5-38
Time sychronization source ................................ 5-38
Time zone ........................................................... 5-38
Customer defined displays ....................................... 5-45
D
Data access function .................................................. 2-4
Data processing ......................................................... 2-6
Data structures ........................................................... 2-6
Database
ASCII file utility.................................................... 5-24
WBPEEUI350003B0
Configuration.......................................................5-25
Documenting records ..........................................5-24
Query ..................................................................5-22
Snapshots ...........................................................5-29
Utilities.................................................................5-24
DBMT........................................................................6-10
DDE ............................................................................2-3
DEC VAX ................................................................... 2-1
DECnet .......................................................................1-1
Defining key records ...................................................6-1
Example ................................................................6-2
DHISARM ...................................................................3-3
Digital audio tape ........................................................1-5
Disk history file
Configuring..........................................................5-29
Rebuilding ...........................................................5-24
Resizing ..............................................................5-24
Summary.............................................................5-31
Document conventions ...............................................1-8
Documentation............................................................1-7
Documenting
Database records................................................5-24
Definition records ................................................5-24
E
Enabling alarm transfer support................................5-38
Enabling tag state change events.............................5-38
ENGCON ..................................................................6-10
Engineering units ...............................................1-9, 5-29
Defining ...............................................................5-34
Error codes
Device driver .......................................................7-29
Message driver....................................................7-27
Sub level .............................................................7-26
Error messages...........................................................7-1
EUD ............................................................................1-9
Event logs ............................................................2-4, 5-6
Enabling ..............................................................5-38
Entry capacity........................................................5-6
F
Function code .............................................................1-9
G
GBLPAGFIL ................................................................3-3
GCS ............................................................................1-9
Client installation ........................................3-29, 3-51
Console installation .............................................3-55
Graphical link ........................................................2-2
Global
Index - 1
®
Index (continued)
Alarm acknowledge .............................................. D-1
Message switches ...............................................5-29
Messages ............................................................5-36
Output switches...................................................5-36
Tag state changes...............................................5-36
Glossary ......................................................................1-9
H
Hardware configurations .............................................2-1
Hardware requirements...............................................1-5
Historical data .............................................................2-7
History data
Time format .........................................................5-41
Viewing................................................................5-41
History file utility ........................................................5-24
HP9000 ...................................................................... 2-1
HP-UX
Automatic start-up .................................................6-7
Installation ...........................................................3-34
Keyboard key functions ........................................ A-7
Requirements ...............................................1-5, 3-34
System parameters .............................................3-35
TSK_CONSOLE records.....................................3-55
I
ICI interface.................................................................2-3
Control.................................................................5-40
Defining ......................................................5-29, 5-37
Number................................................................5-37
Performance........................................................5-16
Redundancy ..........................................................2-5
Status ..................................................................5-16
INFI 90 OPEN .............................................................2-4
INFI-NET .....................................................................1-9
Installation ...................................................................3-1
Alpha AXP systems...............................................3-1
GCS client ........................................ 3-29, 3-51, 3-55
HP-UX .................................................................3-34
Software key......................................................... B-1
VAX/VMS systems ................................................3-1
Windows client terminal.......................................3-55
Intended user ..............................................................1-1
Interface type ............................................................5-38
Invoking displays.........................................................6-1
L
Logic state descriptor ...............................1-9, 5-29, 5-35
M
Master history event log ............................................. 5-4
MAX LINKS ................................................................ 3-5
MAX OBJECTS .......................................................... 3-5
MAXBUF..................................................................... 3-3
Maximum time difference ......................................... 5-38
MAXPROCESSCNT ................................................... 3-3
Menu color definitions........................................5-2, A-14
Minimum time difference .......................................... 5-38
MS windows client
Automatic start-up................................................. 6-9
N
N90STA tags ..............................................................D-2
O
ODMS
Applications ................................................. 5-3, 5-22
Configuration ............................................... 5-3, 5-25
Database ..............................................................E-1
Error messages .................................................... 7-1
Installation............................................................. 3-1
Off-line configuration............................................. 4-1
Operation .............................................................. 5-1
Start-up ................................................................. 5-1
Utilities ......................................................... 5-3, 5-23
On-line database query ............................................ 5-22
On-line spreadsheet ................................................. 5-22
Open system manager ........................................ 1-2, 2-2
Operating system ....................................................... 1-2
P
Passwords ..................................................................C-1
PC terminal keyboard mapping ................................A-11
PQL_DFILLM.............................................................. 3-3
Q
Q........................................................................ 2-6, 5-23
Qual_to_Struct records............................................. 6-10
K
Keyboards .................................................................. A-1
Key record definitions............................................6-1
Index - 2
R
Real time data ............................................................ 2-7
RECLOAD .................................................................. 4-1
WBPEEUI350003B0
Index (continued)
RECSAVE .................................................................. 4-1
Redundancy ............................................................... 2-5
Reference documents ................................................ 1-7
Requirements
Client platform....................................................... 1-5
Server platform ..................................................... 1-5
Software................................................................ 1-6
RS-232-C ................................................................... 1-5
S
SCSI ........................................................................... 1-5
Security levels .....................................................5-2, C-1
Server architecture ..................................................... 2-7
Server platforms .............................................. 2, 1-2, 2-1
Session manager menu ............................................. 6-4
Setting alarm priorities.............................................. 6-10
Setting time
Maximum time difference.................................... 5-38
Minimum time difference..................................... 5-38
Silence messages ......................................................D-1
Software configuration................................................ 6-1
Software key............................................................... 3-1
Software key installation............................................. B-1
Software license registration .................................... 3-12
Software requirements ............................................... 1-6
SPC/SPQ functions .................................................. 5-22
Spreadsheet query ................................................... 5-23
SQL ............................................................................ 2-3
SQL query ......................................................... 2-7, 5-21
SQLplus............................................................. 2-6, 5-23
System administrator.................................................. 1-1
System configuration ................................................ 5-29
System parameters
HP-UX................................................................. 3-35
VAX/VMS.............................................................. 3-3
System time.............................................................. 5-29
Format ................................................................ 5-39
Setting................................................................. 5-39
WBPEEUI350003B0
T
Tag history summaries............................... 2-3, 5-6, 5-42
Entry capacity........................................................5-6
Tag state change events...........................................5-38
Termination module jumper settings.......................... B-1
Termination unit jumper settings................................ B-1
Time stamp ..........................................................2-5, 2-6
Source.................................................................5-38
Time synchronization .........................................2-4, 5-38
Time zone .................................................................5-38
TSK_CONSOLE records ..........................................3-55
Creating...............................................................3-55
U
User changes history log ............................................5-4
V
VAX/VMS
Automatic start-up .................................................6-3
Installation .............................................................3-1
Keyboard key functions........................................ A-1
Requirements ........................................................1-5
Session manager menu ........................................6-4
System parameters ...............................................3-3
System requirements ............................................3-2
TSK_CONSOLE records.....................................3-55
VIRTUALPAGECNT ...................................................3-3
W
Windows ..............................................................1-2, 1-7
X
X Windows ..................................................................1-7
Index - 3
Visit Elsag Bailey on the World Wide Web at http://www.bailey.com
Our worldwide staff of professionals is ready to meet your needs for process automation.
For the location nearest you, please contact the appropriate regional office.
AMERICAS
29801 Euclid Avenue
Wickliffe, Ohio USA 44092
Telephone 1-216-585-8500
Telefax 1-216-585-8756
ASIA/PACIFIC
152 Beach Road
Gateway East #20-04
Singapore 189721
Telephone 65-391-0800
Telefax 65-292-9011
EUROPE, AFRICA, MIDDLE EAST
Via Puccini 2
16154 Genoa, Italy
Telephone 39-10-6582-943
Telefax 39-10-6582-941
Form WBPEEUI350003B0 Litho in U.S.A. 397
Copyright © 1997 by Elsag Bailey Process Automation, As An Unpublished Work
® Registered Trademark of Elsag Bailey Process Automation
™ Trademark of Elsag Bailey Process Automation
GERMANY
Graefstrasse 97
D-60487 Frankfurt Main
Germany
Telephone 49-69-799-0
Telefax 49-69-799-2406