1
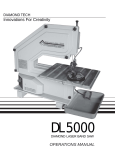
SPEEDSTER-XL INSTRUCTION MANUAL DIAMOND TECH INTERNATIONAL Innovations For Creativity SPEEDSTER-XL DIAMOND LASER BAND SAW OPERATIONS MANUAL SPEEDSTER-XL INSTRUCTION MANUAL PAGE 1 Before You Begin Read and follow all instructions carefully. • After unpacking all components, assemble band saw on a firm level surface, to prevent saw from tilting and rocking. • Be sure the power switch is in the OFF position before plugging in the band saw. • Always disconnect band saw from electrical outlet before setting up or servicing. • Wear proper apparel. Never wear loose fitting clothes, neckties, jewelry and gloves that may get caught in the saws moving parts. • Remove all wrenches before using band saw. Leaving keys and wrenches attached while operating this tool may result in damage to the machine and/or operator. • Always wear safety goggles. Everyday eyeglasses have only impact resistant lenses; they are not safety glasses. • Never turn on band saw while glass or working materials are touching the blade. • Always hold material being cut firmly against cutting table. • Feed materials at a slow easy pace into the blade. Avoid sudden twisting of the blade; which may cause kinking or breaking. • Keep out of reach of children • Never leave saw running unattended. Turn power OFF when not in use. • Do not operate while under the influence of medication or alcohol. • To ensure top performance keep band saw properly maintained. Contents Your Speedster-XL™ has been shipped partially assembled. Carefully remove saw and parts from their packaging. 1- Band Saw Body 4 1 2- Cutting Table 2 3- Straight Edge/Angle Cutting Guide 4-Water Reservoir 5-Adjusting Wrenches 6-Extra Diamond Laser Band Saw Blade 5 Assembly Instructions 6 3 A. Table Installation 1) Remove table mounting bolts and washers located directly behind the blade with a hex wrench (Fig.1). Loosen and remove the table alignment screw and wing nut, on the front of the cutting table. PAGE 2 - SPEEDSTER-XL INSTRUCTION MANUAL 2) While holding the table with the slot opening directly behind the blade, carefully slide the diamond blade through the slot (fig.2). 3) Secure cutting table to the saw body with the table mounting bolts. Return alignment screw and wingnut to the front of the cutting table and tighten. B. Blade Installation Blade comes pre-installed, however should it become loose in shipment or you need to replace a blade, follow these instructions. 1) Remove cutting table alignment screw and wingnut. 2) Loosen thumb screws, located on the left side and back of the saw, until upper wheel/blade cover can be removed easily. Tilt saw backwards and loosen screw at the base of the saw until the tab holding the lower wheel/blade cover can be rotated away from the basin bottom. Slide lower wheel/blade cover off. 3) Place a hand over the top of the upper blade wheel and press firmly downward on the upper wheel tensionassembly (fig. 3) to remove the worn blade. 4) To install a new blade, center it on the upper wheel (diamond side facing toward you) (fig.4). While holding the top of the upper wheel and blade, press firmly down on the upper wheel tension assembly while wrapping blade around lower wheel; then slowly release. 5) Ensure blade is centered in the upper and lower blade guide grooves (See Blade Guide Adjustment and Black Tracking for further adjustment details.). 7) Once the blade is properly installed, reinstall upper and lower wheel/blade covers, table alignment screw and wingnut. Fig.1 Remove Table Mounting Bolts Fig.2 Press down firmly to release blade C. Water Systems The Speedster-XL comes equipped with a water supply nozzle and large capacity reservoir, offering better water flow to the front to the blade increasing cooling and lubrication. 1) Remove water reservoir cap and fill with approximately 24 oz. of water. Replace cap but do not screw on tightly. A moderately loose lid will prevent a vacuum from occurring. 2) Open water valve on bottom of bottle. Water should begin to flow freely from the water nozzle mounted on the blade guide block assembly. Adjust position of nozzle so water flow is directed at the front of the blade, by loosening the hex screw (fig.5) and moving the brass nozzle into proper position. Retighten screw. The water should drain off the work surface, through the 2 holes of the left side of the table, and drain into the lower wheel reservoir. It is equipped with a plug which can be removed, allowing water to drain away to a collection tray, bucket or sink. WARNING: Never operate saw if there is insufficient water at the point of cutting, as this will cause damage to the blade. Fig.3 Fig.4 Center blade on upper and lower wheels Fig.5 Upper blade guide Adjust water nozzle using hex screw SPEEDSTER-XL INSTRUCTION MANUAL - PAGE 3 Band Saw Use and Maintenance A. Blade Guide Adjustment The Speedster-XL comes with lower and upper blade guides. Proper alignment of these guides are essential to proper glass cutting and extending blade life. 1) The blade should pass through the grooves of the upper and lower Fig.6 blade guide with the back edge of the blade resting slightly Upper set screw against the deepest part of the grooves. To adjust, use a small hex wrench and loosen the set screw located on the right side of the lower and upper blade guide blocks (Fig.6). Slide the blade guides back or forward to achieve proper position. The Speedster’s blade guides can be rotated 3 times for extended guide wear. NOTE: Blade guides should be adjusted after approximately 3 hours of use. Frequent replacement of blade guides is recommended to maintain cutting accuracy and extend blade life. Lower set screw B. Speed Control The new Speedster-XL is equipped with dual speed for improved cutting control. Most standard cuts utilize high (Fig.7). speed for fast and smooth results. Narrow slices, sharp curves or delicate glass are best cut on the low setting (Fig.8). Fig.7 Fig.8 C. Straight Edge / Angle Guide For moderate straight edge cutting, place work material against the straight edge guide and feed the material slowly. The band saw is designed for intricate cutting, however the straight edge guide will permit straight edge cutting when needed. Fig.9 D. Blade Tracking Each Speedster™ is fully tested and adjusted before it is shipped. Occasionally, additional tracking adjustments are necessary due to shipping. 1) Turn OFF power switch. 2) Remove upper and lower wheel/blade covers. 3) Slightly loosen the hex bolt located on the left of the upper wheel support bar (Fig. 9). Tilt the upper wheel and adjust tracking accordingly. If the blade is riding too far forward, tilt the upper wheel slightly backward. If the blade is riding too far back tilt the upper wheel slightly forward. Tighten bolt and test tracking by hand after each small adjustment. 4) Further blade tracking adjustments may be necessary to properly align blade in guides. To do this, remove water bottle from rear bracket. Loosen top tracking bolt (Fig.10). Move wheel back or forward until blade lines up properly in guides. Retighten top tracking bolt. Quick Tips 1) Do not force materials into the blade. Ease the materials into the blade, turning as you go to create your pattern. Avoid twisting the blade on tight curves. Black Hex Bolt Fig.10 Top tracking bolt PAGE 4 - SPEEDSTER-XL INSTRUCTION MANUAL 2) To back out of a cut, turn the saw off and ease the material away from the blade. 3) Clean band saw after each use with lukewarm water. 4) When storing for extended periods, remove blade and drain water supply system. 5) Use a waterproof pen to mark your pattern on material. For added protection allow the ink to dry and use a Chap Stick over line before cutting. Troubleshooting Problem: Work material becomes jammed. Cause: Twisted blade from forcing work materials into the blade. Solution: Before freeing any jammed materials, turn OFF power switch and wait until all moving parts have stopped. Remove upper wheel cover and rotate the top wheel counter clockwise until blade is freed from work material. Gently free work materials, holding blade against the blade guides, preventing the blade from stretching or badly twisting. Problem: Saw runs slowly or stops while cutting Cause: Blade is “gummed-up” due to cutting soft materials or tape. Solution: Cut several inches of clear window glass, this will clean the residue off the blade surface. Problem: Excessive water splash. Cause: Too much water in the basin. Solution: Remove lower wheel reservoir plug and allow to drain in collector tray, bucket or sink Additional Parts Item SPEEDSTER-XL BLADE GUIDES SPEEDSTER-XL STAINLESS STEEL BLADE Item Number #DL0513 #DL3320 Blade Repair Service DTI offers a blade repair service should a blade break with ample diamond remaining. Return blade, indicating saw model and payment to Diamond Tech International, Blade Repair Service, 5600-C Airport Blvd., Tampa, FL 33634. For International and special handling, please include extra postage and shipping instructions Blade Repair Fees (U.S. Dollars): Speedster, DL1000, DL3000..........................................................................$25.00 DL5000..........................................................................................................$45.00 SPEEDSTER-XL INSTRUCTION MANUAL Diamond Tech International Diamond Laser Series 3 Year Warranty All Diamond Tech International band saws and accessories are manufactured to high quality standards and are serviced by highly qualified technicians. To obtain additional information regarding our quality products, parts, service or warranty assistance, please call toll-free 800-937-9593. The Speedster-XL™ is warranted to the original purchaser for three full years from the original purchase date. During the three year period, a defective Speedster-XL™ will be repaired or replaced when the machine is returned, prepaid to Diamond Tech International. If the Speedster-XL™ suffers damage due to customer modifications and/or is used for any application other than that for which it was designed, this warranty is void. The Speedster-XL™ is warranted against defective materials or workmanship. This warranty does not include damage due to: (A) neglect (B) accident (C) unreasonable use (D) improper maintenance (E) any other causes not attributed to defects in material or workmanship. This warranty specifically excludes the Diamond Laser Stainless Steel Blade and Blade Guide Sets. Any implied or otherwise explicit guarantees made through merchandiser of this product are not covered in this warranty coverage agreement and are expressly disclaimed. IMPORTANT NOTE: This machine was designed for certain applications only. Diamond Tech International strongly recommends that this machine NOT be modified and/or used for any application other than that for which it was designed. If you have any questions relative to its application, please contact us and we will advise as to it proper use. Diamond Tech International, USA 5600-C Airport Blvd., Tampa, Florida 33634 Tech Support: 800-937-9593 (inside the USA) 813-806-2923 (outside the USA) Fax: 813-806-1988, Email: [email protected] www.dticrafts.com 02/2002