1
Belgacom_Couv_uk.qxd
15/04/04
08:04
Page 1
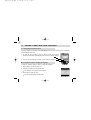
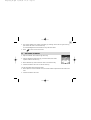
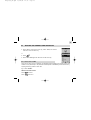
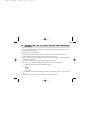
Twist 605
The pack contains the following components:
- the base,
- the telephone cord and a five-pin interconnection plug,
- the handset,
- the power supply,
- the battery cover and batteries,
- the user's guide.
To find out about the basics of your Twist 605 phone, we recommend that you read this
guide carefully.
Belgacom_Couv_uk.qxd
15/04/04
08:04
Page 2
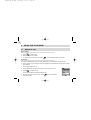
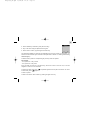
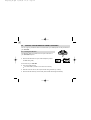
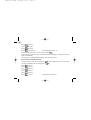
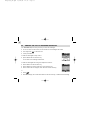
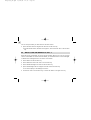
Twist
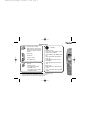
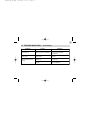
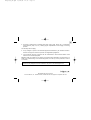
Handset Keys
Left menu key / Confirm
Right menu key / Back (short
press: return to previous menu,
long press: return to welcome
screen)
Pick up line
Hands-free
Hang up + Back
Open SMS menu
Intercom
In standby mode:
- Long press: lock keypad
In the SMS menu:
- Long press: switch to Eatoni
LetterWise® mode
Navigator
In standby mode:
- In the menu: scroll up/down (press
upwards or downwards)
- Press upwards: open Dialled Calls
List
- Press downwards: open Missed
Calls List*
- Press leftwards: direct access to
PhoneMail**
- Press rightwards: direct access to
1919
During a call:
- Press upwards: increase handset
volume
- Press downwards: reduce handset
volume
* If the caller line identification service is available on the telephone line.
** If the PhoneMail service is available on the telephone line.
*** If the SMS service is available on the telephone line.
Belgacom_Couv_uk.qxd
15/04/04
08:04
st 605
Page 3
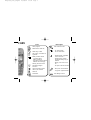
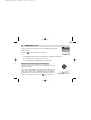
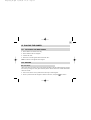
Icons
Call in progress
Missed calls in Calls List*
"
"
""
"
"
Within range of base
Out of range, or handset not
registered
Steady: handset off base
- 3 coloured stripes:
battery charged up
- fewer than 3 coloured stripes:
batteries need recharging
Base lights
Red: handset on base
- On: missed call(s)
- Off: no missed calls
- Flashing rapidly: registration
mode / voice mail
- Flashing slowly: locating
handset and during copy of
SIM card
Flashing: handset on base
- Steady: power cord connected
New SMS messages
received***
- Off: power cord disconnected
Calls List contains missed
calls not yet consulted
- Short press: locate handset
- Long press: register handset
Alarm set
PhoneMail**
New SMS(s) received
Belgacom_uk.qxd
15/04/04
12:32
Page 1
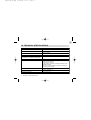
1
A HANDSET FOR EVERY USER . . . . . . . . . . . . . . . . . . . . . . . . . . . . . . . . . . . . . . . . .
1.
1.1
1.2
1.3
2.
2.1
2.2
2.3
2.4
2.5
2.6
2.7
2.8
2.9
3.
3.1
3.2
3.3
3.4
3.5
3.6
4.
4.1
4.2
GETTING STARTED . . . . . . . . . . . . . . . . . . . . . . . . . . . . . . . . . . . . . . . . . . . . .
Installing the base . . . . . . . . . . . . . . . . . . . . . . . . . . . . . . . . . . . . . . . . . . . . . . .
Installing the handset . . . . . . . . . . . . . . . . . . . . . . . . . . . . . . . . . . . . . . . . . . . . .
Getting to grips with your telephone . . . . . . . . . . . . . . . . . . . . . . . . . . . . . . . . . .
USING THE TELEPHONE . . . . . . . . . . . . . . . . . . . . . . . . . . . . . . . . . . . . . . . . .
Making a call . . . . . . . . . . . . . . . . . . . . . . . . . . . . . . . . . . . . . . . . . . . . . . . . . . .
Receiving a call . . . . . . . . . . . . . . . . . . . . . . . . . . . . . . . . . . . . . . . . . . . . . . . . .
Using hands-free mode . . . . . . . . . . . . . . . . . . . . . . . . . . . . . . . . . . . . . . . . . . .
Redialling one of the last numbers called (redial) . . . . . . . . . . . . . . . . . . . . . . . .
Adjusting the volume during a call . . . . . . . . . . . . . . . . . . . . . . . . . . . . . . . . . . .
Secrecy function (turning off the microphone) . . . . . . . . . . . . . . . . . . . . . . . . . . .
Displaying the call duration . . . . . . . . . . . . . . . . . . . . . . . . . . . . . . . . . . . . . . . .
Locating a handset (paging function) . . . . . . . . . . . . . . . . . . . . . . . . . . . . . . . . .
Locking the keypad . . . . . . . . . . . . . . . . . . . . . . . . . . . . . . . . . . . . . . . . . . . . . .
YOUR PHONEBOOK . . . . . . . . . . . . . . . . . . . . . . . . . . . . . . . . . . . . . . . . . . . .
Creating a contact page . . . . . . . . . . . . . . . . . . . . . . . . . . . . . . . . . . . . . . . . . . .
Associating a ringtone with a name . . . . . . . . . . . . . . . . . . . . . . . . . . . . . . . . . .
Using the phonebook to make a call . . . . . . . . . . . . . . . . . . . . . . . . . . . . . . . . . .
Modifying an entry . . . . . . . . . . . . . . . . . . . . . . . . . . . . . . . . . . . . . . . . . . . . . . .
Deleting an entry . . . . . . . . . . . . . . . . . . . . . . . . . . . . . . . . . . . . . . . . . . . . . . . .
Copying the phonebook from a SIM card . . . . . . . . . . . . . . . . . . . . . . . . . . . . . .
SENDING / RECEIVING TEXT MESSAGES (SMSs) . . . . . . . . . . . . . . . . . . . . .
The SMS menu . . . . . . . . . . . . . . . . . . . . . . . . . . . . . . . . . . . . . . . . . . . . . . . . .
Writing and sending SMS messages . . . . . . . . . . . . . . . . . . . . . . . . . . . . . . . . .
4
5
5
6
8
12
12
13
14
14
15
15
16
16
17
18
18
21
22
22
23
24
28
28
29
Belgacom_uk.qxd
15/04/04
12:32
Page 2
2
4.3
4.4
4.5
4.6
4.7
4.8
4.9
5.
5.1
5.2
5.3
6.
6.1
6.2
6.3
6.4
7.
7.1
7.2
7.3
7.4
7.5
7.6
7.7
7.8
7.9
Viewing the list of draft and/or sent messages (outbox) . . . . . . . . . . . . . . . . . . .
Viewing the list of received messages . . . . . . . . . . . . . . . . . . . . . . . . . . . . . . . .
User accounts . . . . . . . . . . . . . . . . . . . . . . . . . . . . . . . . . . . . . . . . . . . . . . . . . .
Allocating an SMS terminal number . . . . . . . . . . . . . . . . . . . . . . . . . . . . . . . . .
Activating and deactivating the SMS alert . . . . . . . . . . . . . . . . . . . . . . . . . . . . . .
What if the SMS memory is full ? . . . . . . . . . . . . . . . . . . . . . . . . . . . . . . . . . . . .
Service centres . . . . . . . . . . . . . . . . . . . . . . . . . . . . . . . . . . . . . . . . . . . . . . . . .
IDENTIFYING CALLERS . . . . . . . . . . . . . . . . . . . . . . . . . . . . . . . . . . . . . . . . .
How to read the caller ID data . . . . . . . . . . . . . . . . . . . . . . . . . . . . . . . . . . . . . .
Consulting the missed calls list . . . . . . . . . . . . . . . . . . . . . . . . . . . . . . . . . . . . . .
Calls lists: memorising / deleting a call . . . . . . . . . . . . . . . . . . . . . . . . . . . . . . . .
DIRECT ACCESS TO OPERATOR SERVICES . . . . . . . . . . . . . . . . . . . . . . . .
PhoneMail (1230) . . . . . . . . . . . . . . . . . . . . . . . . . . . . . . . . . . . . . . . . . . . . . . .
Per-call caller ID block . . . . . . . . . . . . . . . . . . . . . . . . . . . . . . . . . . . . . . . . . . .
Call forwarding . . . . . . . . . . . . . . . . . . . . . . . . . . . . . . . . . . . . . . . . . . . . . . . . . .
Belgacom services . . . . . . . . . . . . . . . . . . . . . . . . . . . . . . . . . . . . . . . . . . . . . . .
CUSTOMISING YOUR HANDSET . . . . . . . . . . . . . . . . . . . . . . . . . . . . . . . . . . .
Setting the date and time . . . . . . . . . . . . . . . . . . . . . . . . . . . . . . . . . . . . . . . . . .
Using the alarm feature . . . . . . . . . . . . . . . . . . . . . . . . . . . . . . . . . . . . . . . . . . .
Key beeps . . . . . . . . . . . . . . . . . . . . . . . . . . . . . . . . . . . . . . . . . . . . . . . . . . . . .
Adjusting the volume . . . . . . . . . . . . . . . . . . . . . . . . . . . . . . . . . . . . . . . . . . . . .
Selecting an internal/external ringtone . . . . . . . . . . . . . . . . . . . . . . . . . . . . . . . .
Changing the automatic pick-up settings . . . . . . . . . . . . . . . . . . . . . . . . . . . . . .
Naming a handset . . . . . . . . . . . . . . . . . . . . . . . . . . . . . . . . . . . . . . . . . . . . . . .
Choosing the display language . . . . . . . . . . . . . . . . . . . . . . . . . . . . . . . . . . . . .
Customising the display . . . . . . . . . . . . . . . . . . . . . . . . . . . . . . . . . . . . . . . . . . .
35
36
37
44
45
46
47
48
48
49
50
52
52
53
54
56
57
57
57
58
59
59
60
61
61
62
Belgacom_uk.qxd
15/04/04
12:32
Page 3
3
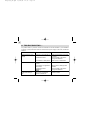
8.
8.1
8.2
8.3
8.4
8.5
9.
9.1
9.2
9.3
9.4
9.5
9.6
9.7
BASE SETTINGS . . . . . . . . . . . . . . . . . . . . . . . . . . . . . . . . . . . . . . . . . . . . . . .
Choosing the ringtone . . . . . . . . . . . . . . . . . . . . . . . . . . . . . . . . . . . . . . . . . . . .
Adjusting the ringer volume . . . . . . . . . . . . . . . . . . . . . . . . . . . . . . . . . . . . . . . .
Selecting a base . . . . . . . . . . . . . . . . . . . . . . . . . . . . . . . . . . . . . . . . . . . . . . . .
Changing the PIN . . . . . . . . . . . . . . . . . . . . . . . . . . . . . . . . . . . . . . . . . . . . . . .
Line settings . . . . . . . . . . . . . . . . . . . . . . . . . . . . . . . . . . . . . . . . . . . . . . . . . . .
USING YOUR TELEPHONE WITH MORE THAN ONE HANDSET . . . . . . . . . .
Adding a new handset . . . . . . . . . . . . . . . . . . . . . . . . . . . . . . . . . . . . . . . . . . . .
Uninstalling a handset . . . . . . . . . . . . . . . . . . . . . . . . . . . . . . . . . . . . . . . . . . . .
Using the intercom feature . . . . . . . . . . . . . . . . . . . . . . . . . . . . . . . . . . . . . . . . .
Transferring an external call to another handset / shuttling between
two correspondents . . . . . . . . . . . . . . . . . . . . . . . . . . . . . . . . . . . . . . . . . . . . . .
Three-way conference (2 internal parties and one external) . . . . . . . . . . . . . . . .
Taking an external call during an internal communication . . . . . . . . . . . . . . . . . .
Setting the handset priority . . . . . . . . . . . . . . . . . . . . . . . . . . . . . . . . . . . . . . . . .
64
64
64
65
65
67
68
68
69
69
70
71
71
72
10.
TECHNICAL SPECIFICATIONS . . . . . . . . . . . . . . . . . . . . . . . . . . . . . . . . . . . .
73
11.
TROUBLESHOOTING ... . . . . . . . . . . . . . . . . . . . . . . . . . . . . . . . . . . . . . . . . . .
74
12.
SAFETY . . . . . . . . . . . . . . . . . . . . . . . . . . . . . . . . . . . . . . . . . . . . . . . . . . . . . .
76
13.
GUARANTEE TERMS . . . . . . . . . . . . . . . . . . . . . . . . . . . . . . . . . . . . . . . . . . . .
78
14.
ENVIRONMENT . . . . . . . . . . . . . . . . . . . . . . . . . . . . . . . . . . . . . . . . . . . . . . . .
80
15.
PLAYING THE GAMES . . . . . . . . . . . . . . . . . . . . . . . . . . . . . . . . . . . . . . . . . . .
81
Belgacom_uk.qxd
15/04/04
12:32
Page 4
4
A HANDSET FOR EVERY USER
You can associate up to 5 handsets with the base of your Twist 605 telephone.
With the multi-handset facility, you can:
l
make free calls between associated handsets,
l
make an outside call while two other group handsets are in communication with each other,
l
transfer calls from one handset to another,
l
bring another handset in on your conversation with an external correspondent (3-way
conference),
l
customise each handset with its own ringtone and 200-number phonebook.
Belgacom_uk.qxd
15/04/04
12:32
Page 5
5
1. GETTING STARTED
1.1
INSTALLING THE BASE
1.1.1 Precautions
The quality of communication depends on the location and environment of the base and the
handset. Your Twist 605 telephone must be kept away from sources of excessive heat (radiators,
direct sunlight, etc.) and protected against vibrations and dust. Never allow your telephone to
come into contact with water or other liquids or with aerosols. To reduce the risk of interference
and optimise reception, take particular care to keep it away from the immediate vicinity of
windows, large metal objects, reinforced concrete, televisions, music centres, halogen lamps or
heating devices, fluorescent lighting, burglar alarms, microwave ovens, computers, etc.
To clean your Twist 605, use a lightly moistened antistatic cloth.
Information:
Your Twist 605 telephone is compliant with the DECT™* standard. It is designed to transmit and
receive telephone calls and be connected to the Belgacom public switched telephone network.
* DECT is a trademark registered by ETSI.
15/04/04
12:32
Page 6
6
1.1.2 Connecting the base
l
Connect the telephone cable and the power cable to the rear of the base as shown.
l
Connect the telephone plug to the wall socket.
l
Connect the mains adapter to a 230 V / 50 Hz power outlet.
l
The Line icon
l
After a few seconds, the base beeps to confirm the operation.
1.2
on the base comes on.
INSTALLING THE HANDSET
1.2.1 Fitting the batteries and charging up for the first time
l
Place the handset on the base. The red light on the
base comes on and it beeps once.
" The battery charge icon appears on the handset.
- 3 coloured stripes: batteries fully charged,
- fewer than 3 coloured stripes: batteries need recharging.
-
Once the base is connected, insert the batteries into the
compartment at the back of the handset. Follow the signs
telling you which way round the batteries go.
+
+
-
Belgacom_uk.qxd
Belgacom_uk.qxd
15/04/04
12:32
Page 7
7
Before you use it for the first time, we recommend that you leave the handset to charge up on
the base for 24 hours in order to optimise battery life and performance.
!
It is perfectly normal for accumulator batteries like these to get warm when recharging.
Take the line
.
The tone confirms that your Twist 605 telephone is working. Check that the range symbol
not flashing. If it is flashing, re-register the handset as shown in paragraph 9.1.
is
Note: When the telephone is in sleep mode, the display is not lit up. To wake the handset, press
any key.
When the batteries are flat, the display will not light up. Place the handset on the base. You will
hear two beeps when the handset starts charging up.
!
Only use rechargeable batteries with exactly the same specifications as those
supplied with the product. Using non-rechargeable or non-conforming batteries
can damage the product (see the "Technical Specifications" chapter).
Failure to comply with this recommendation will invalidate the manufacturer's
warranty.
The batteries could split or leak if incorrectly inserted, opened or exposed to heat.
Never dispose of batteries in a fire: they could explode.
Belgacom_uk.qxd
15/04/04
12:32
Page 8
8
1.3
GETTING TO GRIPS WITH YOUR TELEPHONE
1.3.1 Navigating through the menus
It's easy to adjust and customise your Twist 605 telephone using the scrolling menu feature and
the two context-menu keys.
l
To open the menu, press the menu key below the side of the screen
where the word "Menu" is displayed (on the left, in the standby screen).
l
You can now scroll through a series of icons using the navigator.
Handset 1
Menu
Names
Menu navigation example: changing the language
To enter the "Handset" menu in order to change the language:
l
Select "Menu" with the left menu key.
l
Press the navigator key downwards twice.
Handset
" The "Handset" icon appears on the display.
l
Select "OK" to enter the menu.
" The screen displays the handset menu.
Effacer
John Smith ?
OK
Back
Belgacom_uk.qxd
15/04/04
12:32
Page 9
9
Use the navigator key to scroll through the menu and select "Language".
The ▲ and ▼ arrows indicate that further options are available.
l
To confirm "Language", select "OK".
l
Choose the language you want and confirm by selecting "OK".
" The screen displays "English saved" if you have chosen English. Your handset's menus will
be in English.
l
To return to the previous menu, select "Back".
Belgacom_uk.qxd
15/04/04
12:32
Page 10
10
Menu overview
SMS
Write Message
Inbox
Outbox
Delete Messages
Settings
Calls lists
Received calls
Missed calls
Dialled calls
Delete Calls List
Handset
Ringtone
Ring Volume
Handset Name
Language
Picture
Menu Colour
Auto Talk
Base settings
Base Ringtone
Base Volume
Handset Priority
Recall Mode
System PIN
Belgacom_uk.qxd
15/04/04
12:32
Page 11
11
Time settings
Alarm
Set Time & Date
Services
PhoneMail
Uncond. Call Forw.
Anonymous call
Phone Manager
100
101
Météo
Weerbericht
1207
1307
1407
Service réveil
Wekdienst
Weck Dienst
Registration
Register Handset
Select Base
De-register
Games
Hector
Bowling
Belgacom_uk.qxd
15/04/04
12:32
Page 12
12
2. USING THE TELEPHONE
2.1
MAKING A CALL
Direct dialling
l
Press
l
Dial the number to be called.
to obtain a line.
l
To hang up at the end of the call, press
or put the handset back on the base.
Pre-dialling
With the pre-dialling feature you can enter and modify a number before making the call.
l
Dial a number of up to 25 digits. Press the navigator key upwards and hold to insert a pause
when dialling.
" The screen displays a "P".
l
l
Select "Clear" with the right menu key to correct any input errors.
Press
to initiate the call.
" The screen displays: "Calling 02 222 22 22".
l
To hang up at the end of the call, press
back on the base.
or put the handset
Calling
022222222
Secrecy
Belgacom_uk.qxd
15/04/04
12:32
Page 13
13
2.2
RECEIVING A CALL
When you receive an external call, the screen displays: "External Call".
To take the call:
l
Press
(if the handset is not on its base).
or
l
Lift the handset off its base (if the Auto Talk option is active) (see Section 7.6).
" The "External Call" icon appears on the screen.
" The call duration is displayed after about 15 seconds.
Adjusting the ring volume during an incoming call
You can adjust the ring volume with the navigator while the
telephone is ringing.
The ring volume is displayed on the screen. There are 5 volume
levels as well as the option of turning the ringer off altogether, in
which case "Volume Off" is displayed and an icon appears,
representing two notes crossed out. This information remains on
screen for about 3 seconds, or until the
key is pressed.
External Call
Belgacom_uk.qxd
15/04/04
12:32
Page 14
14
2.3
USING HANDS-FREE MODE
You can press
"The icon
at any time to switch to hands-free mode.
appears on the screen.
l
To quit hands-free mode during a call, press
l
To set the hands-free volume, press the navigator up or down accordingly.
2.4
.
REDIALLING ONE OF THE LAST NUMBERS CALLED (REDIAL)
The last 20 numbers dialled on your Twist 605 telephone are memorised in the calls list.
The correspondents' names appear if they are listed in the phonebook. Otherwise, only the
number dialled is displayed.
There are 2 ways to recall a correspondent:
Either:
l
Use the navigator (press up).
" The last 20 numbers dialled are listed on the screen.
l
Scroll through the names or numbers using the navigator.
Belgacom_uk.qxd
15/04/04
12:32
Page 15
15
To initiate the call, just press
l
when you reach the name or number you want.
or:
l
Select "Menu" with the left menu key.
l
Select "Calls lists" with the navigator.
l
Select "OK" with the left menu key.
l
Select "Dialled calls" with the navigator and "OK" with the left menu key.
l
Scroll to the number you want and press
2.5
to initiate the call.
ADJUSTING THE VOLUME DURING A CALL
You can use the navigator to adjust the ear volume in the handset
during a call. There are 5 volume levels.
2.6
SECRECY FUNCTION (TURNING OFF THE MICROPHONE)
To talk to someone next to you without your correspondent hearing:
l
Select "Secrecy" using the right menu key.
"The handset microphone is now deactivated.
Belgacom_uk.qxd
15/04/04
12:32
Page 16
16
""Secrecy On" appears on the screen. Your correspondent can no longer hear you and you
can talk to those around you confidentially.
l
Press the right menu key to reactivate the microphone.
2.7
DISPLAYING THE CALL DURATION
16:39
The call duration is displayed about 15 seconds after obtaining the line.
It remains on screen for about 5 seconds after the call has ended.
2.8
LOCATING A HANDSET (PAGING FUNCTION)
Forgotten where you left your handset?
l
Press the
key on the base.
" All the handsets associated with the base will ring for about 30 seconds.
" The Line LED on the base flashes.
l
To stop the ringer, press any key on the handset.
03:27
John Smith
Belgacom_uk.qxd
15/04/04
12:32
Page 17
17
2.9
LOCKING THE KEYPAD
Locking the keypad prevents accidental dialling.
Lock/Unlock the keypad
l
To lock the keypad, do a long press on
.
" The screen displays "Keypad locked" and the lock icon appears.
l
To unlock the keypad, select "Unlock" by pressing the left menu key.
Belgacom_uk.qxd
15/04/04
12:32
Page 18
18
3. YOUR PHONEBOOK
Each handset contains a phonebook capable of storing your 200 most useful contacts.
Each contact page in the phonebook consists of a name (max. 16 characters) and a number
(max. 20 digits).
3.1
CREATING A CONTACT PAGE
With your Twist 605 telephone you can key in letters as well as digits. Handy for entering names
in the phonebook!
3.1.1 Quick contact creation
l
Open the "Names" menu using the right menu key.
To create an entry for the first time:
l
Select "Add Entry" then "OK" to confirm (left menu key).
l
Key in the name and "OK" to confirm.
l
Key in the number and "OK" to confirm.
If you have already created entries:
l
Select "Options" with the left menu key.
Belgacom_uk.qxd
15/04/04
12:32
Page 19
19
Add Entry
l
Select "Add Entry" followed by "OK" (left menu key).
l
Key in the name using the alphanumeric keypad.
l
Select "OK" to confirm, by pressing the left menu key.
Name:
OK
Back
The characters available on each key are displayed at the top of the screen. For each letter, you
have the choice between upper and lower case (see table in Section 4.2 "Writing and Sending
SMS Messages").
To select a letter, press the corresponding key as many times as required.
For example:
- for S, press the "7" key 4 times.
- for E, press the "3" key twice.
If the next letter you want is on the same key, wait for the cursor to move on first, or use the
navigator to move on to the next letter.
To change to upper case, press
to lower case, press
again.
. A padlock appears at the top left of the screen. To return
To enter a space: 1.
To make a correction: select "Clear" by pressing the right menu key.
Belgacom_uk.qxd
15/04/04
12:32
Page 20
20
l
Key in the number and confirm with "OK" on the left menu key.
You can insert a pause when you are dialling a number by pressing the navigator key
upwards and holding.
" The screen displays a "P".
l
To quit the menu: select "Back" with a long press on the right menu key.
3.1.2 Creating an entry from the calls list
For more details, see Chapter 5 on caller identification.
l
Select "Menu" with the left menu key. Use the navigator key to select the "Calls list" icon.
l
Select "OK" with the left menu key to enter the "Calls lists" menu.
l
Select "Received calls" then select "OK" with the left menu key.
""No entry stored" is displayed if you have no calls, or are not signed up to the caller or num-
ber identification service. In this case, you will not be able to create an entry from the calls
list.
If you have received calls and are subscribed to the relevant service, use the navigator to
scroll through the list.
l
Select "Options" by pressing the left menu key.
l
Select "Add Entry", then confirm with "OK" on the left menu key.
Belgacom_uk.qxd
15/04/04
12:32
Page 21
21
Key in or modify the name and select "OK" to confirm (left menu key).
l
" The number appears on the screen. Select "OK" to confirm by pressing the left menu key.
3.2
ASSOCIATING A RINGTONE WITH A NAME*
l
Open the phonebook by selecting "Names" with the right menu key.
l
Select the name to which you want to assign a given ringtone.
l
Select "Options" by pressing the left menu key.
l
Select "Ringtone".
" You have the choice of 5 ringtones and the "Off" option.
l
Select one of the 5 ringtones proposed and confirm with "OK".
l
To cancel your personalised ringtone, select "Off" and confirm with "OK".
* This option will function if you subscribe to Belgacom's caller line identification service and provided the service is available.
Belgacom_uk.qxd
15/04/04
12:32
Page 22
22
3.3
USING THE PHONEBOOK TO MAKE A CALL
l
Open the phonebook by selecting "Names" with the right menu key.
l
Key in the first letter of the name. The first name starting with this letter, or the nearest
alphabetically, is highlighted.
or
l
Scroll through the list of names with the navigator until the arrow is next to the name you
want.
l
Press
3.4
to initiate the call.
MODIFYING AN ENTRY
l
Open the "Names" menu by pressing the right menu key and use the navigator to select the
entry to be modified.
l
Select "Options" with the left menu key.
l
Select "Edit Entry" with the navigator, confirm with "OK" on the left menu key.
" The name appears (modify if necessary by selecting "Clear" with the right menu key).
l
Confirm with "OK" on the left menu key.
Belgacom_uk.qxd
15/04/04
12:32
Page 23
23
The number appears next: modify if necessary by selecting "Clear" with the right menu key,
and confirm with "OK" on the left menu key.
l
" An acknowledgement confirms that the entry has been stored.
l
3.5
Press
to return to the main screen.
DELETING AN ENTRY
l
Open the "Names" menu with the right menu key.
l
Use the navigator to select the entry you want to delete, then select
"Options" with the left menu key.
l
Select "Delete Entry" and confirm with "OK" on the left menu key.
l
Confirm the deletion with "Yes" on the left menu key.
Names
Delete
John Smith ?
Yes
No
You can also delete all the entries recorded.
l
Select "Options" from the "Names" menu, the select "Delete all phonebook" and confirm with
"OK".
l
Confirm the deletion with "Yes".
Belgacom_uk.qxd
15/04/04
12:32
Page 24
24
3.6
COPYING THE PHONEBOOK FROM A SIM CARD
You can copy the phonebook stored on the SIM card of your GSM phone into the phonebook of
your Twist 605.
3.6.1 Inserting the SIM card
The SIM card reader is located in the front part of the base of
your Twist 605 telephone.
l
Remove the SIM card from your mobile telephone (consult
the GSM user guide).
On the base of your Twist 605:
l
Pull out the SIM card tray.
" The word "SIM" is printed on one side of the card tray.
l
Slide the card into the slot; the chip should be facing outwards (i.e. visible).
l
Reinsert the SIM card tray into the base (with the SIM card facing downwards).
SIM
Belgacom_uk.qxd
15/04/04
12:32
Page 25
25
3.6.2 Copying the content of the SIM card
!
Your Twist 605 telephone is compatible with 3-volt SIM cards. It may not be able to
read other types of card.
l
Open the "Names" menu by pressing the right menu key.
l
If the phonebook is empty, use the navigator to select "Copy from SIM". "OK" to confirm.
l
Otherwise, select "Options", validate with "OK", and select "Copy from SIM".
l
Confirm with "OK" on the left menu key.
If your mobile telephone operator has activated password protection:
l
Enter your PIN code and select "OK" with the left menu key.
!
If you enter the wrong PIN code, you get the following message:
"Incorrect PIN
SIM could be blocked".
l
Remove the SIM card from the holder and check that you are using the right SIM card and
the right PIN code.
!
After 3 successive PIN code errors, the SIM card becomes blocked.
Belgacom_uk.qxd
15/04/04
12:32
Page 26
26
If your card becomes blocked, you will have to contact your mobile telephone operator.
!
Mobile telephone operators make a service charge for PIN reactivation.
" The phonebook on the SIM card is copied onto your handset.
Additional information on copying SIM cards
The process can be interrupted at any time by pressing
.
Entries are copied in the order in which they are stored on the SIM card.
If your SIM card has a storage capacity of 50 names and numbers and is not full, the Twist 605
will not copy the "empty" entries onto your SIM card.
Any international numbers stored on your SIM card may be prefixed by "+". The "+" will be
automatically replaced by the international prefix "00".
Once the SIM card has been copied, you can modify or delete the copied entries just like any
other entry stored on your Twist 605.
You can copy the contents of several SIM cards, within the limit of 200 entries.
Belgacom_uk.qxd
15/04/04
12:32
Page 27
27
The number of entries stored on your SIM card may exceed the number of free places in the
handset's phonebook. When the memory of your Twist 605 telephone reaches saturation, the
message "Memory Full" is displayed and the copying process is interrupted.
!
If copying lasts more than 15 seconds, the screen goes into sleep mode. It can be
reactivated by pressing any key.
3.6.3 Removing the SIM card
l
Pull the SIM card tray out from the base.
l
Remove the SIM card from its slot.
l
Push the SIM card firmly with your thumb.
Belgacom_uk.qxd
15/04/04
12:32
Page 28
28
4. SENDING / RECEIVING TEXT MESSAGES (SMSs)*
You can send and receive SMSs with your Twist 605 telephone. This section tells you how to
use the SMS feature.
You can store a total of 45 SMS messages sent and received, each with up to 160 characters.
4.1
THE SMS MENU*
Write Message
è to create a new message
Inbox
è contains all your received messages
Outbox
è contains all the messages you have sent, or that are waiting to be sent
Delete Messages è to delete the messages in the inbox or in the outbox, or both
Settings
*
è contains service centre, terminal number, SMS alert, and user data
To activate the reception of text mode SMSs on your line, contact Belgacom.
They can always be sent.
Belgacom_uk.qxd
15/04/04
12:32
Page 29
29
4.2
l
WRITING AND SENDING SMS MESSAGES
Select "Menu" with the left menu key, select "SMS", and confirm
with "OK" on the left menu key.
or
l
Press
.
l
Select "Write Message" and "OK" with the left menu key.
Messages
Write Message
Inbox
Outbox
Delete Messages
Settings
4.2.1 How to write an SMS
OK
Back
There are two ways to write messages: the standard method (identical to entering names and
numbers in the phonebook) or the predictive method (Eatoni LetterWise®), which saves time by
requiring fewer key presses to enter text.
E.g. to write "thanks"
With the standard method:
Press
once for t
Press
twice for h
Belgacom_uk.qxd
15/04/04
12:32
Page 30
30
Press
once for a
Press
twice for n
Press
twice for k
Press
four times for s
Total keystrokes required: 12.
To enter a space and move on to the next word, press
.
To go quickly to the next letter, either press downwards on the navigator, or wait for the cursor to
move on automatically.
For each key, the available characters appear at the top of the screen.
With the Eatoni LetterWise® method:
To switch to Eatoni mode, do a long press on
(To return to standard mode, do a long press on
Press
once for t
Press
once for h
Press
once for a
Press
once for n
Press
once for k
Press
once for s
. "Eatoni" appears at the top of the screen.
.)
Total keystrokes required: 6.
Belgacom_uk.qxd
15/04/04
12:32
Page 31
31
If the letter that appears is not the one you want, just press
letter.
as necessary to get the right
You can move around within the message using the navigator:
- press up or down: go to previous or next line,
- press left or right: go to previous or next character.
To change to upper case, press
to lower case, press
again.
. A padlock appears at the top left of the screen. To return
You can also insert symbols: when you are writing your SMS, go to "Options", select "Insert
Symbol" and confirm with "OK".
4.2.2 How to send an SMS
l
Key in the message to be sent.
l
To correct the text, press "Clear" with the right menu key.
l
When you have finished, select "Options" with the left menu key.
You now have three possibilities:
- Send to
- Save
- User Name
Belgacom_uk.qxd
15/04/04
12:32
Page 32
32
Sending the message
l
Select "Send to" with the navigator (down), then "OK" with the left menu key.
You need to enter the correspondent's number first.
If the number is not in the phonebook:
Send to
Number
0779123456|
l
Enter the full number with its sub-address. Correct if necessary by
pressing "Clear" with the right menu key.
If the number is in the phonebook:
l
Send
Start by deleting the number on the screen (the number you sent
your last SMS to) if necessary.
l
Then select "Search" with the left menu key.
l
Select the name, using the navigator, add the sub-address then
"Send" with the left menu key. The message is sent.
" The screen displays "Sending SMS".
Clear
Names
Send
Back
Belgacom_uk.qxd
15/04/04
12:32
Page 33
33
4.2.3 Modifying the message before sending it
To modify the message before you send it:
l
Select "Back" with the right menu key.
l
Correct the text.
4.2.4 Deleting the message without sending it
To erase a message completely:
l
Select "Clear" with a long press on the right menu key or press
" The message is totally erased and you return to the main screen.
4.2.5 Standard mode character table
Key
Characters available in standard mode
0
Space
@
. , : ; ! ? ¡ ¿ ' " 1
A
B C a b c 2 ?
D
E F d e f 3 %
.
Belgacom_uk.qxd
15/04/04
12:32
Page 34
34
G
H I g h i 4 _
J
K L j k l 5 -
M
N O m n o 6 (
P
Q R S p q r s 7 /
T
U V t u v 8 :
W
X Y Z w x y z 9 )
*
€ £ $ ¥
#
4.2.6 Saving the message
Once you have written the message, you can save it rather than send it straight away.
l
Select "Options" (left menu key) and confirm with "OK".
l
Select "Save" with the navigator.
l
Confirm with "OK" on the left menu key.
" Your message is saved in the "Outbox" list.
Belgacom_uk.qxd
15/04/04
12:32
Page 35
35
4.3
VIEWING THE LIST OF DRAFT AND/OR SENT MESSAGES
(OUTBOX)
The "Outbox" contains all the messages you have saved earlier and/or already sent. You can
save up to 50 SMS messages.
To read the draft or sent messages:
l
Select "Menu" with the left menu key, select "SMS", then confirm with the left menu key.
l
Select "Outbox" with the navigator, and "OK" with the left menu key.
l
Select a message with the navigator (the beginning of the message is listed, with the date
and time it was written).
l
To read the whole message, select "Read" with the left menu key.
l
When you have opened the message, select "Options" with the left menu key.
" You can scroll through the options with the navigator:
-
Edit
Send to
Delete
User Name
l
If no message was selected for editing or sending, press "Back" to return to the "Outbox"
menu.
l
To quit the menu, do a long press on "Back" with the right menu key.
Belgacom_uk.qxd
15/04/04
12:32
Page 36
36
4.4
VIEWING THE LIST OF RECEIVED MESSAGES
Your Twist 605 telephone tells you when you have new messages:
l
An icon is shown on the screen, with the number of new messages still unread.
l
The orange LED
l
A beep is emitted.
on the base is lit.
To read new messages as they come in:
l
Select "Read" with the left menu key.
" The most recent message is listed first.
You have 2
new messages
Read
Back
To read new messages after using other telephone functions:
l
Select "Menu" with the left menu key.
l
Select "SMS", then confirm with "OK" on the left menu key.
l
Select "Inbox" with the navigator, then "OK" with the left menu key.
or
Handset 1
Menu
Names
l
Press
l
Select a message, then confirm with "Read" on the left menu key, to read the whole message.
.
Belgacom_uk.qxd
15/04/04
12:32
Page 37
37
To answer, forward or delete a received message:
l
Select "Options" with the left menu key.
l
Select the action (Reply, Forward or Delete) and confirm with "OK" on the left menu key.
l
To quit the "Inbox" menu, do a long press on "Back" with the right menu key.
4.5
USER ACCOUNTS
With your Twist 605 telephone you can create up to 4 different "user" accounts. You can send
and receive SMS messages with a user account. Messages received in a user account are
protected by a password. In order to receive SMSs in your personal user account, you must give
your correspondents the user account number that they need to add to your standard telephone
number (see "Receiving SMSs in your personal user account").
4.5.1 Default User
The Default User is a public account without password protection. You can delete the "Default
User" option so that it no longer appears in the "User Name" sub-menu when you want to send
an SMS from a user account.
l
Go into the "Settings" menu from the "SMS" menu.
l
Select "Users".
l
Then select "Default User".
Belgacom_uk.qxd
15/04/04
12:32
Page 38
38
l
Enter the system PIN (0000 by default) and confirm with "OK".
l
Select "Denied" and confirm with "OK".
4.5.2 Creating a user account
l
Select "Menu" with the left menu key.
l
Select "SMS", then confirm with "OK" on the left menu key.
l
Select "Settings" with the navigator, then "OK" with the left menu key.
l
Select "Users" with the navigator and "OK" with the left menu key.
l
Select "Add User" with the navigator and confirm with "OK" on the left menu key.
l
Enter the name you want to use for the account (max. 10 characters) and confirm with "OK"
on the left menu key.
" This is the name that will be used from now on to identify messages intended for this user
account.
l
Enter a password of 1 to 5 digits and confirm with "OK" on the left menu key.
l
Confirm the password by selecting "OK" on the left menu key.
l
If the password entered for confirmation is different from the initial password, the handset
beeps and the account is not saved. Repeat the operation to create a new user.
Belgacom_uk.qxd
15/04/04
12:32
Page 39
39
4.5.3 Receiving SMSs in your personal user account
To receive SMS messages in your personal user account, you must give your user number to
your correspondents.
To find your user number:
l
Select "SMS" and confirm with "OK" on the left menu key.
l
Select "Settings" with the navigator, then "OK" with the left menu key.
l
Select "Users" with the navigator, then "OK" with the left menu key.
" Your user name appears in the list.
l
Select your user name with the navigator and confirm with "OK" on the left menu key.
l
Enter your password and confirm with "OK" on the left menu key.
l
Select "Terminal Number" with the navigator and "OK" with the left menu key.
" Your user number appears on the screen.
You correspondents will need to add this user number to your telephone number when they want
to send SMSs to your personal user account.
E.g. If your personal user number is "1" and your telephone number is 022 222 222, your
correspondents should send their SMS messages to:
02 222 22 22 1
!
This is the number you need to remember and give to your correspondents.
Belgacom_uk.qxd
15/04/04
12:32
Page 40
40
4.5.4 Changing an SMS user account number
User numbers are between 1 and 9. The Twist 605 assigns user numbers automatically, but you
can change the number manually.
l
Select "Menu" with the left menu key.
l
Select "SMS" and confirm with "OK" on the left menu key.
l
Select "Settings" with the navigator and "OK" with the left menu key.
l
Select "Users" with the navigator and confirm with "OK" on the left menu key.
" Your user name appears in the list.
l
Select your user name and confirm with "OK" on the left menu key.
l
Enter your password (if the account is password protected).
l
Confirm with "OK" on the left menu key.
l
Select "Terminal Number" with the navigator and "OK" with the left menu key.
" Your user number appears on the screen.
l
Enter a new number and select "OK" with the left menu key.
" If the new number is already assigned to another user, the handset beeps and the modification fails. If so, enter another number.
Belgacom_uk.qxd
15/04/04
12:32
Page 41
41
4.5.5 Reading SMSs in your personal user account
When a new message comes in, your Twist 605 emits a beep. The screen shows an envelope,
followed by the number of new messages.
l
Select "Read" with the left menu key.
In the SMS list, private messages are flagged with a "p" in front of the name or number. After
selecting a private SMS, the user name appears on the screen.
l
Enter the password and confirm with "OK".
" You can now read the SMS.
4.5.6 Sending SMSs from your personal user account
Your Twist 605 lets you send SMSs from a personal user account. Once you have written the
SMS:
l
Select "Options" with the left menu key.
l
Select "User Name" with the navigator and confirm with "OK" on the left menu key.
l
Select the account that you want to send the message from, and confirm with "OK" on the left
menu key. You can choose between the personal user accounts that have been created and
the Default User. If you have prevented SMSs from being sent by the Default User (cf.
chapter 4.5.1), this option will no longer be visible in this menu.
Belgacom_uk.qxd
15/04/04
12:32
Page 42
42
l
Enter your password (if prompted) and confirm with "OK" on the left menu key.
l
Select "Send to" with navigator and "OK" with the left menu key.
l
Enter the correspondent's telephone number, or look it up in the phonebook, and select
"Send" with the left menu key.
If you select a "personal user account", the SMS will be sent using your standard telephone
number plus the user account number.
E.g. If your personal user number is "1" and your telephone number is 022 222 222, your
correspondents will receive an SMS from: 02 222 22 22 1.
Caution: SMS messages sent from personal user accounts are automatically saved in the
Outbox. This copy is not password protected.
4.5.7 Saving sent SMSs in the Outbox
All SMS messages, whether from the main account or from a personal user account, are
automatically saved in the Outbox.
Belgacom_uk.qxd
15/04/04
12:32
Page 43
43
4.5.8 Deleting a personal user account
l
Select "SMS" and confirm with "OK" on the left menu key.
l
Select "Settings" with the navigator and "OK" with the left menu key.
l
Select "Users" and confirm with "OK" on the left menu key.
l
Select "Delete User" with the navigator and "OK" with the left menu key.
" All the personal user accounts appear on the screen.
l
Using the navigator, select the account to be removed, then "OK" with the left menu key.
l
Enter the system PIN (the factory setting is 0000), and select "OK" with the left menu key.
" The account is deleted. All the SMS messages received by the account are deleted; those
sent from the account are still saved in the Outbox.
Belgacom_uk.qxd
15/04/04
12:32
Page 44
44
4.6
ALLOCATING AN SMS TERMINAL NUMBER
It is possible for several SMS-enabled telephones to be connected up to the same line. So that
each telephone can continue to receive SMSs, they must be allocated different SMS terminal
numbers.
To allocate a number:
l
Select "Menu".
l
Select "SMS" and confirm with "OK" on the left menu key.
l
Select "Settings" with the navigator and "OK" with the left menu key.
l
Select "Terminal Number" with the navigator and "OK" with the left menu key.
The number "0" is pre-set. To change it:
l
Enter the preferred number (from 0 to 9).
l
Confirm with "OK" on the left menu key.
If you have already created personal user accounts, your Twist 605 will not allow you to allocate
a terminal number that corresponds to an existing user number.
If two SMS-enabled telephones connected up to the same line have the same terminal number,
neither will be able to receive SMSs. They must be given differing numbers.
E.g. If you have already created a user account with the number "2", you must allocate a terminal
number other than "2".
Belgacom_uk.qxd
15/04/04
12:32
Page 45
45
If you keep the pre-set terminal number "0" in your Twist 605 and your telephone number is
022 222 222, your correspondents can continue to send you SMSs at 022 222 222.
If you give the terminal a number other than "0", you must tell your correspondents so that they
can continue to send you SMS messages: they will need to affix the terminal number to your
telephone number.
E.g. If you give your Twist 605 the terminal number "3" and your telephone number is
022 222 222, your correspondents will need to send their SMSs to: 02 222 22 22 3.
4.7
ACTIVATING AND DEACTIVATING THE SMS ALERT
Your Twist 605 can beep to tell you when a new SMS has arrived.
To activate the feature:
l
Select "Menu" with the left menu key, and confirm with "OK".
l
Select "SMS" and confirm with "OK" on the left menu key.
l
Select "Settings" with the navigator and "OK" with the left menu key.
l
Select "SMS Alert" with the navigator and "OK" with the left menu key.
l
Select "On" (to activate the feature) or "Off" (to deactivate it) with the navigator and confirm
with "OK" on the left menu key.
Belgacom_uk.qxd
15/04/04
12:32
Page 46
46
You can also personalise your alerts with the "Set Alert" feature.
Select "Set Alert" with the navigator and "OK" with the left menu key.
l
" Choose between Morse, Discreet and Polyphonic, and confirm with "OK" on the left menu
key.
4.8
WHAT IF THE SMS MEMORY IS FULL ?
When the memory is saturated, you get the screen message "Memory Full". You can no longer
send or receive SMSs. To continue to receive SMSs, you can delete some or all of the messages.
To delete all the messages stored in the "Inbox" and "Outbox":
l
Select "Menu" with the left menu key.
l
Select "SMS" and confirm with "OK" on the left menu key.
l
Select "Delete Messages" and "OK" with the left menu key.
l
Select "All Messages" with the navigator and "OK" with the left menu key.
" The screen displays: " All Messages: Confirm?".
l
Confirm with "OK" on the left menu key, or cancel with "Back" on the right menu key.
Belgacom_uk.qxd
15/04/04
12:32
Page 47
47
4.9
SERVICE CENTRES
The sending and receive service centres enable you to receive and send SMSs. The number of
the receive service centre is 01717. The number of the sending service centre is 1717. If you
need to modify these numbers:
l
Select "Menu" with the left menu key.
l
Select "SMS" and confirm with "OK" on the left menu key.
l
Select "Settings" and confirm with "OK" on the left menu key.
l
Select "Service Centres" and confirm with "OK" on the left menu key.
l
Select "Receive Centres" or "Sending Centres" and confirm with "OK".
l
To delete, press the right menu key, enter the number again and confirm with "OK".
Belgacom_uk.qxd
15/04/04
12:32
Page 48
48
5. IDENTIFYING CALLERS
5.1
HOW TO READ THE CALLER ID DATA
The "Caller Line Identification" service enables you to see your correspondent's number or name
if it is recorded in your directory. You can also see his or her name if it is transmitted by the
network ("Caller Name Display" service).
Received calls are recorded in a log which stores the last 50 caller numbers along with their
dates and times.
During the call the following network messages are displayed:
- the caller's name if the caller number is stored in your phonebook,
- the caller's name if transmitted by the network,
- the caller's number if transmitted by the network,
- "Withheld" if the correspondent does not allow the number to be presented.
In the Calls List, the following network messages are displayed:
- the caller name if the caller number is stored in your phonebook,
- the caller name or number if transmitted by the network, as well as the date and time of the call.
Belgacom_uk.qxd
15/04/04
12:32
Page 49
49
5.2
CONSULTING THE MISSED CALLS LIST
If you subscribe to Belgacom's "Caller Line Identification" service, your Twist 605 telephone will
log the last 50 calls received, along with the date and time of each call.
Missed calls are signalled by an icon on the screen and by the symbol
on the base.
To listen to the calls:
l
Select "Read" by pressing the left menu key.
l
Scroll through the list with the navigator.
" The
missed calls that you have not yet consulted are
flagged by a star.
You have 1
missed call
Read
Back
Note: When you go into call consultation mode, the stars
associated with these calls are no longer displayed.
To consult missed calls after activating other telephone functions:
l
Select "Menu" by pressing the left menu key.
l
Select "Calls lists" and confirm with "OK" on the left menu key.
Handset 1
Menu
Names
Belgacom_uk.qxd
15/04/04
12:32
Page 50
50
l
Select "Missed calls" with the navigator and confirm with "OK" on the left menu key.
For each entry in the Calls List, the following information is displayed:
- the caller number or name (or "Withheld", if the number is withheld),
- the date and time of the call.
5.3
CALLS LISTS: MEMORISING / DELETING A CALL
To access the Calls Lists:
l
Select "Menu" by pressing the left menu key.
l
Select "Calls lists" and confirm with "OK" on the left menu key.
The Calls List in your Twist 605 telephone is subdivided into three lists: "Received calls", "Missed
calls" and "Dialled calls".
l
Select one of the lists and confirm with "OK" on the left menu key.
l
Scroll through the list with the navigator.
Calling back a correspondent from the Calls List
l
Once you have selected a call, just press
.
Belgacom_uk.qxd
15/04/04
12:32
Page 51
51
Deleting an entry from the list
l
Press "Options" with the left menu key.
l
Select "Delete" then "OK" (left menu key) to confirm.
Storing the call details
l
Press "Options" with the left menu key.
l
Select "Add Entry", then "OK" (left menu key) to confirm.
l
Enter the caller name, then "OK" (left menu key) to confirm.
l
Repeat "OK" to validate the number shown, or correct the number by pressing "Clear" (right
menu key), then re-enter it and press "OK" (left menu key) to confirm.
If you have subscribed to caller line identification but not to a caller name display service, you
will need to enter a name before storing the data in the phonebook.
Belgacom_uk.qxd
15/04/04
12:32
Page 52
52
6. DIRECT ACCESS TO OPERATOR SERVICES
Your Twist 605 telephone gives you direct access to certain operator services:
- PhoneMail.
- Per-Call Caller ID Block.
- Call Forwarding.
Your handset comes with a set of services provided by Belgacom:
- Phone Manager (1987).
- Emergency.
- Weather.
- Directory Enquiries.
- Wake-Up Call Service.
6.1
PHONEMAIL (1230)
If this service is activated on your line, you can have your calls diverted to a voicemail box when
you are away or already on the line.
Belgacom_uk.qxd
15/04/04
12:32
Page 53
53
6.1.1 Receiving voice mail
When you get a new message:
- The Line LED on the base flashes,
- The "PhoneMail" icon appears on the screen
.
6.1.2 Listening to voice mail
l
Do a short press on the left of the navigator.
l
Your Twist 605 telephone automatically dials up the PhoneMail voice server. Follow the voice
prompt to obtain your messages.
6.2
PER-CALL CALLER ID BLOCK
This feature enables you to withhold your name and telephone number when calling
correspondents who have Caller ID.
l
Select "Menu" with the left menu key.
l
Select "Services" with the navigator and "OK" with the left menu key.
l
Select "Anonymous call" with the navigator and "OK" with the left menu key.
Belgacom_uk.qxd
15/04/04
12:32
Page 54
54
Dial your correspondent's number and confirm with "OK" on the left menu key.
l
" The screen displays "Anonymous call 022 222 222 ?".
Select "Yes" with the left menu key.
l
" You can now call your correspondent with being identified in advance.
At the end of the call, the "Anonymous call" feature is automatically deactivated.
6.3
CALL FORWARDING
With this feature, you can have your calls diverted to another fixed or mobile telephone number.
To be able to use call forwarding, you must first subscribe to the service with Belgacom.
6.3.1 Programming the number to forward calls to, and activating the service
l
Select "Menu" with the left menu key.
l
Select "Services" with the navigator and "OK" with the left menu key.
l
Select "Uncond. Call Forw." with the navigator and "OK" with the left menu key.
l
Select "Activation" with the navigator and confirm with "OK" on the left menu key.
l
Enter the number to which calls should be forwarded and confirm with "OK" on the left menu
key.
" The screen displays "Uncond. Call Forw. 022 222 222 ?"
Belgacom_uk.qxd
15/04/04
12:32
Page 55
55
l
Confirm with "Yes" on the left menu key.
"Your Twist 605 telephone automatically activates call forwarding by dialling up your operator's voice server.
l
Wait for audible confirmation that the call forwarding service has been enabled.
l
Hang up.
" All your calls will be redirected to the number you indicated.
6.3.2 Deactivating the call forwarding service
l
Select "Menu" with the left menu key.
l
Select "Services" with navigator and "OK" with the left menu key.
l
Select "Uncond. Call Forw." with the navigator and "OK" with the left menu key.
l
Select "Deactivation" with the navigator, and confirm with "OK".
" Your Twist 605 telephone automatically deactivates call forwarding.
l
Wait for audible confirmation that the call forwarding service has been disabled.
l
Hang up.
Belgacom_uk.qxd
15/04/04
12:32
Page 56
56
6.4
BELGACOM SERVICES
6.4.1 Accessing the built-in services
When your Twist 605 telephone is not on line:
l
Select "Menu" with the left menu key, select "Services" with the navigator, and confirm with
"OK" on the left menu key.
" Use the navigator to scroll through the list of services.
l
Select the service you want and confirm with "OK"
6.4.2 List of services
- PhoneMail (1230).
- Phone Manager (1987).
- Emergency Services: 100
- Police: 101.
- Weather: 0900 27 003 or 0900 27 002 (depending on call area).
- Belgacom Directory Enquiries: 1207, 1307 or 1407 (depending on call area).
- Wake-Up Call.
Belgacom_uk.qxd
15/04/04
12:32
Page 57
57
7. CUSTOMISING YOUR HANDSET
7.1
SETTING THE DATE AND TIME
l
Select "Menu" with the left menu key. With the navigator, scroll to "Time settings" and confirm
with "OK" on the left menu key.
l
Select "Set Time & Date" with the navigator and "OK" with the left menu key.
l
Enter the date (format: DD/MM).
l
Confirm with "OK" on the left menu key.
l
Enter the time (format: HH:MM).
l
Confirm with "OK" on the left menu key.
!
If you are subscribed to a caller line identification service, the first incoming call will
automatically update the date and time.
7.2
USING THE ALARM FEATURE
You can program your telephone's "Alarm" function.
l
Select "Menu" by pressing the left menu key.
l
Select "Time settings" with the navigator and "OK" with the left menu key.
Belgacom_uk.qxd
15/04/04
12:32
Page 58
58
l
Select "Alarm" with the navigator and "OK" with the left menu key.
l
Select "On/Off" with the navigator and "OK" with the left menu key.
Using the navigator, choose one of the 3 types of setting: On Once, On Daily or Off. Confirm with
"OK" on the left menu key.
If you choose On Once or On Daily, the screen will look like this:
Time (24 Hr):
00:00
l
Enter the time when you want the telephone to ring and confirm with "OK" on the left menu
key.
To deactivate the Alarm function, select "Off" and confirm with "OK" on the left menu key.
!
7.3
The alarm rings for 60 seconds, starting soft and getting progressively louder.
KEY BEEPS
The key beeps confirm that the keystrokes have been registered. They cannot be deactivated.
Belgacom_uk.qxd
15/04/04
12:32
Page 59
59
7.4
ADJUSTING THE VOLUME
7.4.1 Ring Volume
l
Select "Menu" with the left menu key.
l
Select "Handset" using the navigator, then confirm with "OK" on the left menu key.
l
Select "Ring Volume" with the navigator and "OK" with the left menu key.
l
Set the desired volume by pressing the navigator up or down accordingly. There are 5 volume
levels plus "Volume Off" (obtained by turning the volume right down). Confirm with "OK" on
the left menu key.
7.4.2 Earpiece volume
l
Press the Line key
l
Then press the navigator to turn the volume up or down.
l
Choose the desired volume from the 5 levels available and hang up.
7.5
.
SELECTING AN INTERNAL/EXTERNAL RINGTONE
l
Select "Menu" with the left menu key.
l
Select "Handset" using the navigator, then confirm with "OK" on the left menu key.
Belgacom_uk.qxd
15/04/04
12:32
Page 60
60
l
Select "Ringtone" and "OK" with the left menu key.
l
Select "External Calls" (to choose the melody for external calls) or "Internal Calls" (for the
intercom ringtone) and "OK" with the left menu key.
l
Choose a melody from the 5 available and "OK" with the left menu key.
You can also set the ringtone and ringer volume for the base (see Sections 8.1 and 8.2).
7.6
CHANGING THE AUTOMATIC PICK-UP SETTINGS
By default, the automatic pick-up feature is active.
This means that when you lift the receiver off the base to answer a call, you automatically pick
up the line without having to press
.
To turn off this feature:
l
Select "Menu" by pressing the left menu key.
l
Select "Handset" with the navigator and "OK" with the left menu key.
l
Select "Auto Talk" and "OK" with the left menu key.
l
Select "Off" and "OK" with the left menu key.
l
To turn the feature back on, follow the same procedure and press "On".
Belgacom_uk.qxd
15/04/04
12:32
Page 61
61
7.7
NAMING A HANDSET
You can assign a new name to your handset.
l
Select "Menu" by pressing the left menu key.
l
Select "Handset" with the navigator and "OK" with the left menu key.
l
Select "Handset Name" with the navigator and "OK" with the left menu key.
l
Clear the old name with "Clear" by pressing the right menu key.
l
Enter the new name (maximum 8 characters) and "OK" with the left menu key.
7.8
CHOOSING THE DISPLAY LANGUAGE
Your Twist 605 telephone has 3 menu languages. To change the language:
l
Select "Menu" by pressing the left menu key.
l
Select "Handset" with the navigator and "OK" with the left menu key.
l
Select "Language" with the navigator and "OK" with the left menu key.
l
Choose the language and "OK" with the left menu key.
Belgacom_uk.qxd
15/04/04
12:32
Page 62
62
7.9
CUSTOMISING THE DISPLAY
7.9.1 Menu screen colour
You can choose between three menu screen colours: blue, green and pink.
l
Select "Menu" by pressing the left menu key.
l
Select "Handset" with the navigator and "OK" with the left menu key.
l
Select "Menu Colour" with the navigator and "OK" with the left menu key.
l
Choose the preferred colour (blue, green or pink) using the navigator and save by pressing
the left menu key.
7.9.2 Main screen picture
You can also customise the main screen on your telephone.
l
Select "Menu" by pressing the left menu key.
l
Select "Handset" with the navigator and "OK" with the left menu key.
l
Select "Picture" with the navigator and "OK" with the left menu key.
Belgacom_uk.qxd
15/04/04
12:32
Page 63
63
You have a choice of 5 pictures.
l
Use the navigator to scroll between the 5 pictures. You can view the picture by selecting
"View" with the left menu key; select "Back" with the right menu key to go back to the picture
list.
l
When you have chosen a picture, select "Use" by pressing the left menu key.
"The screen displays "Saved".
l
To return to the main screen, select "Back" with a long press on the right menu key.
Belgacom_uk.qxd
15/04/04
12:32
Page 64
64
8. BASE SETTINGS
8.1
CHOOSING THE RINGTONE
l
Select "Menu" by pressing the left menu key.
l
Select "Base settings" with the navigator and "OK" with the left menu key.
l
Select "Base Ringtone" with the navigator and "OK" with the left menu key.
l
Choose one of the 5 melodies and "OK" with the left menu key.
8.2
ADJUSTING THE RINGER VOLUME
l
Select "Menu" by pressing the left menu key.
l
Select "Base settings" with the navigator and "OK" with the left menu key.
l
Select "Base Volume" with the navigator and "OK" with the left menu key.
l
Using the navigator, choose the preferred volume level from 1 to 5, or "Volume Off" by turning
the sound right down ("Volume Off" appears on the screen), then confirm with "OK" on the left
menu key.
Belgacom_uk.qxd
15/04/04
12:32
Page 65
65
8.3
SELECTING A BASE
Each handset can be associated ("registered") with up to 4 different bases.
To change the base:
l
Select "Menu" by pressing the left menu key.
l
Select "Registration" with the navigator and "OK" with the left menu key.
l
Select "Select Base" with the navigator and "OK" with the left menu key.
l
Select the base number - from 1 to 4 - and confirm with "OK" on the left menu key or select
"Automatic" and confirm with "OK". If you select "Automatic", the handset will automatically
be registered with the base with the strongest signal.
" The bases for which the handset is registered are flagged by a star.
8.4
CHANGING THE PIN
The system PIN is used for registering new handsets with your Twist 605 telephone.
l
Select "Menu" by pressing the left menu key.
l
Select "Base settings" with the navigator and "OK" with the left menu key.
Belgacom_uk.qxd
15/04/04
12:32
Page 66
66
l
Select "System PIN" with the navigator and "OK" with the left menu
key.
" The screen displays "Enter Old PIN:".
l
System PIN
Enter Old PIN:
Enter the 4 digits of the current PIN (0000 by default) and "OK" with
the left menu key.
OK
Back
System PIN
The screen now reads "Enter New PIN:".
l
Enter New PIN:
Enter the 4 digits of the new code and "OK" with the left menu key.
OK
Back
System PIN
The screen now reads "Confirm New PIN:".
l
Confirm New PIN:
Enter the new PIN again for validation and "OK" with the left menu
key.
OK
Back
Belgacom_uk.qxd
15/04/04
12:32
Page 67
67
8.5
LINE SETTINGS
8.5.1 Selecting the flash time (Recall Mode)
l
Select "Menu" by pressing the left menu key.
l
Select "Base settings" with the navigator and "OK" with the left menu key.
l
Select "Recall Mode" with the navigator and "OK" with the left menu key.
l
Select "Recall 2" with the navigator for a 120 ms recall and confirm with "OK" by pressing the
left menu key.
or
l
Select "Recall 1" with the navigator for a 250 ms recall and confirm with "OK" by pressing the
left menu key.
l
Confirm with "OK" by pressing the left menu key.
You should only modify this parameter if you are connecting your Twist 605 to a PABX that
requires a 250 ms cut-off. The value used when a Twist 605 is directly connected to the
Belgacom network is "Recall 2".
Belgacom_uk.qxd
15/04/04
12:32
Page 68
68
9. USING YOUR TELEPHONE WITH MORE THAN ONE
HANDSET
9.1
ADDING A NEW HANDSET
You can group together up to 5 handsets on your Twist 605 base. If you already have 5 handsets
and want to change one of them, you must first uninstall a handset before installing the new one.
On the base:
l
Put the base into registration mode by holding down the
key until you hear two beeps.
on the base starts to flash. Your Twist 605 base is now ready for
" The orange LED
registration with a new handset. This operation must be carried out within 90 seconds of
the double beep.
On the handset:
l
Select "Menu" by pressing the left menu key.
l
Select "Registration" with the navigator and "OK" with the left menu key.
l
Select "Register Handset" with the navigator and "OK" with the left menu key.
l
Select the number of the base to be associated with the handset (1 to 4).
l
Confirm with "OK" on the left menu key.
Belgacom_uk.qxd
15/04/04
12:32
Page 69
69
l
Enter the system PIN (0000 by default) and confirm with "OK".
" A series of numbers appears on the screen, representing the base ID.
l
Confirm with "OK" on the left menu key.
" Your handset is registered.
9.2
UNINSTALLING A HANDSET
This procedure needs to be carried out on a different handset from the one you want to uninstall.
l
Select "Menu" by pressing the left menu key.
l
Select "Registration" with the navigator and "OK" with the left menu key.
l
Select "De-register" with the navigator and "OK" with the left menu key.
l
Enter the system PIN (0000 by default) and "OK" with the left menu key.
l
Select the handset to uninstall with the navigator and "OK" with the left menu key.
9.3
USING THE INTERCOM FEATURE
Calling an internal handset
l
Press
.
" The screen displays "Internal Call".
l
Enter the internal handset number.
Belgacom_uk.qxd
15/04/04
12:32
Page 70
70
Answering an internal call
11:38
When you receive an internal call, the screen displays "Internal Call"
and the number of the calling handset.
l
Press
l
To hang up at the end of the call, press
9.4
Internal Call
Handset1
to answer.
.
TRANSFERRING AN EXTERNAL CALL TO ANOTHER HANDSET /
SHUTTLING BETWEEN TWO CORRESPONDENTS
To transfer a call to another handset:
l
Press
l
Enter the number of the handset you want to call. Your external correspondent is placed on
hold.
.
l
When the internal correspondent answers, press
l
If the internal correspondent doesn't answer, press
correspondent or to go from one to the other (shuttle function).
to transfer the call.
to retrieve the external
Belgacom_uk.qxd
15/04/04
12:32
Page 71
71
9.5
THREE-WAY CONFERENCE (2 INTERNAL PARTIES AND ONE
EXTERNAL)
You can talk with an internal correspondent and an external correspondent at the same time.
When you are on line with an external correspondent:
l
Press
l
Enter the number of the handset you want to call. Your external correspondent is placed on
hold.
l
When the internal correspondent answers, press
l
If the internal correspondent doesn't answer, press
correspondent.
9.6
.
for 2 seconds.
to retrieve the external
TAKING AN EXTERNAL CALL DURING AN INTERNAL
COMMUNICATION
When you are on intercom with another handset, you can still pick up outside calls.
To take an incoming call:
l
Press
.
" The internal communication is interrupted.
Belgacom_uk.qxd
15/04/04
12:32
Page 72
72
Then press
l
.
" You are in communication with the outside caller.
9.7
SETTING THE HANDSET PRIORITY
You can decide which station - the base, or one of its five potential handsets - will be the first to
ring when a call comes in. You can also specify the number of times the priority station will ring
in advance of the others.
l
Select "Menu" by pressing the left menu key.
l
Select "Base settings" with the navigator and "OK" with the left menu key.
l
Select "Handset Priority" with the navigator and "OK" with the left menu key.
You have two options: "All Handsets" or "Select Handset".
If you choose "All Handsets" and confirm with "OK" by pressing the left menu key, all the
handsets will ring at once.
If you choose "Select Handset" and confirm with "OK" by pressing the left menu key, you can
then use the navigator to select the base or one of the 5 handsets as the priority station. Confirm
with "OK" on the left menu key.
l
Choose the number of advance rings and "OK" with the left menu key.
" The screen displays "Handset priority saved".
Belgacom_uk.qxd
15/04/04
12:32
Page 73
73
10. TECHNICAL SPECIFICATIONS
Free field range
Up to 300 meters *
Indoor range
Up to 50 meters *
Handset battery life (average values)
10 hours talktime **
90 hours standby
Number of handsets
Up to 5
Communication between handsets
Yes
Three-way conference (1 outside
correspondent + 2 internal correspondents)
Yes
Weight of handset
105 grams
Electrical connection / Mains adapter
Input: AC 230V/50 Hz
Output 1: DC 8 V/300 mA
Output 2: DC 9 V/120 mA
Single-phase AC excluding IT installations defined by the
EN 60950 standard.
Caution: the network voltage is classified as a hazard by
the criteria of this standard.
Telephone connection
Appliance designed for connection to a Belgacom
analogue telephone line.
Rechargeable batteries
1.2 V / 750 mAh/Ni-MH AAA x 2
Operating temperature
from ± 5 to ± 40°C
* Value may vary according to environment.
** Depends on initial battery charge.
Belgacom_uk.qxd
15/04/04
12:32
Page 74
74
11. TROUBLESHOOTING ...
If a problem arises, try this first: remove the batteries from all the handsets in your installation
for about 1 minute; disconnect and then reconnect the power supply to the base; reinstall the
batteries.
Problems
Nothing appears on the
display.
Causes
Solutions
The device is not powered up. Check that the adapter is plugged
in properly.
The batteries are flat.
Put the handset on its base to
recharge the batteries.
The handset is in sleep mode. Press any key to reactivate it.
There is no dial tone.
The reception quality
deteriorates during a
call.
The handset is out of range of
the base.
Move nearer to the base.
The handset is not registered
with the base.
See the section "Adding a New
Handset".
The batteries are flat
(
icon).
Put the handset on its base to
recharge the batteries.
You are out of range of the
base or in an environment
subject to interference.
Move nearer to the base, or move
the base 1 meter.
Belgacom_uk.qxd
15/04/04
12:32
Page 75
75
11. TROUBLESHOOTING ... (CONTINUED)
Problems
Causes
Solutions
Your correspondent
can't hear you.
The microphone is off: the
Secrecy function is activated.
See the Section "Secrecy
Function (turning off the
microphone)".
The handset or base
doesn't ring.
The base and/or handset ring
volume is off.
See Section 7.4 "Adjusting the
Volume".
The batteries are still flat The base or charger is not
after several hours on
powered up.
charge.
The handset batteries are
defective.
Check your power supply
connections.
Ask your reseller to supply you
with new batteries.
Belgacom_uk.qxd
15/04/04
12:32
Page 76
76
12. SAFETY
In the event of danger, the mains adapter acts as 230V power isolating device. It should
therefore, as a precaution, be installed close to the appliance and be easily accessible.
If the mains adapter fails, it must be replaced by an identical model.
If not connected to the mains power or if there is a mains power failure, installations with cordless
handsets will no longer work. You will then be unable to make or receive calls in the event of an
emergency. This is why we recommend that you also have a conventional telephone as a
backup.
The appliance is designed for connection to an analogue telephone line class TRT3
(telecommunications network voltage).
!
Do not use your telephone to notify a gas leak when you are in the vicinity of the leak.
It is recommended that you avoid using this device during electrical storms.
Belgacom_uk.qxd
15/04/04
12:32
Page 77
77
Belgacom_uk.qxd
15/04/04
12:32
Page 78
78
13. GUARANTEE TERMS
The Equipment you have bought has been carefully selected by Belgacom and is covered by a
two-year warranty on spare parts and labor in the event of any material or manufacturing defect,
unless otherwise specified. The warranty shall be valid from the date on which the equipment is
collected or delivered.
If you have any problems with the equipment, you should take it to a Teleboutique or to one of
our authorized agents, in its entirety and in its original packaging, or in packaging providing the
same degree of protection, together with the original receipt. The addresses for our
Teleboutiques and authorized agents are given in the Information Section of the White Pages.
Your equipment will be repaired or replaced free of charge, on presentation of the receipt, in the
event of any material or manufacturing defect.
Belgacom alone shall determine what repairs and/or replacements are necessary. The warranty
on the repaired or replaced equipment shall end on the date on which the original warranty on
the purchased equipment expires, but shall not be less than 3 months.
The warranty shall not cover:
l
damage of any kind that does not predate the sale;
l
any damage, faults or defects attributable to the Customer or to causes unrelated to the
Equipment: lightning, power surges, humidity, accidental damage, improper use or poor
maintenance, failure to comply with the instructions in the user manual, and force majeure;
Belgacom_uk.qxd
15/04/04
12:32
Page 79
79
l
the repair or replacement of movable parts (cords, wires, plugs, aerials, etc.), consumables
(cells, batteries, paper, ink, etc.) needing regular replacement and the supply of cleaning
products.
The warranty shall not apply:
l
to any changes or repairs to the terminal Equipment undertaken by the Customer himself /
herself or through the services of persons not designated by Belgacom;
l
if the Customer removes or tampers with the manufacturer's serial numbers and/or brand
names on the terminal Equipment.
Belgacom shall not be liable for any indirect or immaterial loss sustained by the Customer as a
result of the malfunctioning of the terminal Equipment, such as any loss of production, revenue
or contracts.
The General Terms and Conditions for the Sale of Terminal Equipment can be obtained on
request from any Belgacom service available to the public or at www.belgacom.be.
BELGACOM SA under public law,
bd du Roi Albert II, 27 - B-1030 Brussels, VAT BE 202 239 951, Register of Companies 587.163
Belgacom_uk.qxd
15/04/04
12:32
Page 80
80
14. ENVIRONMENT
Used handset batteries must be disposed of in compliance with current environmental
protection regulations. You should dispose of them at an approved recycling centre.
Do not attempt to open the batteries, as they contain chemical substances. In the
event of leakage, avoid contact with the skin, eyes and mouth. In the event of contact,
rinse the affected part for several minutes in running water. Clean the product with
absorbent paper or a dry cloth.
Belgacom_uk.qxd
15/04/04
12:32
Page 81
81
15. PLAYING THE GAMES
15.1 TO ACCESS THE MINI-GAMES
l
Select "Menu" with the left menu key.
l
Select "Games" with the navigator.
l
Confirm with "OK".
l
Select one of the two games and confirm with "OK".
Note: The menus of the games are in English.
15.2 HECTOR
Aim of the Game
Hector is an insect. He has to carry a lump of fresh soil back to his den, weaving his way through
the forest by moving the other (pink and blue) insects. Stones cannot be crossed and leaves
cannot be moved.
l
Once in the "Hector" menu, press the left menu key to start the game.
l
Scroll up or down with the navigator to select a menu line, and press
to confirm.
Belgacom_uk.qxd
15/04/04
12:32
Page 82
82
To carry the soil ball and the insects, Hector first has to seize them. To grab an object:
l
Press
.
" Hector clambers onto the object.
l
To detach Hector from the object, press
again.
To get Hector to pull or push the object:
l
Use the navigator or the
,
,
or
.
" When Hector gets the soil ball back to his den, he progresses to the next level.
Quitting the Game
Press the right menu key to stop the game at any time.
Belgacom_uk.qxd
15/04/04
12:32
Page 83
83
15.3 BOWLING
Aim of the Game
Royal Bowling is a classic bowling game. The aim is to knock over the pins with the bowling ball.
How to Play
To set the shooting power, press up or down on the navigator. The aiming marker accelerates as
you increase the power.
To move the ball, press left or right on the navigator.
When the marker is in the centre of the pins, press
Quitting the Game
Press the right menu key to stop the game at any time.
to launch the ball.