1
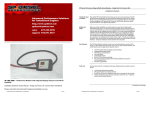
FORM #33001.06-121703 PRINTED IN U.S.A. Flip the toggle switch on the side of the TruSpeed to setting 2. Following the same procedure used to calibrate setting 1, calibrate setting 2 now. PAGE 10 OF 11 IMPORTANT: Be absolutely sure to switch the TruSpeed setting when tire changes are made. Failure to do so will cause false speedometer readings and may affect ABS function. NOTE: The TruSpeed is shipped with both settings in the “neutral” position, which will have no effect on speedometer reading. Therefore, if the vehicle will occasionally run stock tires and no gear ratio changes are made, there is normally no need to calibrate Setting 2. However, it is important to verify that the speedometer reading is accurate (refer to step 12) with stock tires. It has been our experience that speedometer readings on a completely stock vehicle can be off by as much as 10 percent. FINAL PROCEDURES 10) MARK THE SETTINGS… Use a permanent marker to indicate the tire diameters calibrated for setting 1 and setting 2 in the space provided on the label. 11) NOTIFICATION TO DRIVER DECAL... Install the NOTIFICATION TO DRIVER decal on the inside of the windshield, or on the dash, within driver’s view. Refer to the “NOTICE TO DEALER AND VEHICLE OWNER” section below. 12) FINAL CHECK… Double-check all connections made for proper contact and strength. Be especially wary of “cold” solder connections that are easily broken. Also verify all wires are routed away from sharp edges, high heat sources, and moving parts. 13) NOTE TRUSPEED LOCATION… Note the exact location of the TruSpeed module in the space below for future reference: _________________________________________________________________________ _________________________________________________________________________ _________________________________________________________________________ 14) VERIFICATION AND / OR FINE TUNING OF CALIBRATION… NOTE: This step details fine-tuning the TruSpeed calibration. Small adjustments can be made by remembering that a ¼ turn of the adjustment screw equals a 1 percent correction. A counterclockwise turn “speeds up” the reading of the speedometer; a clockwise turn “slows down” the reading of the speedometer. Test drive the vehicle to verify proper speedometer operation and readings for settings 1 and 2. This can be done a number of ways: Drive the vehicle at a steady speed for one mile using highway milemarkers for reference. Note the odometer reading at the beginning and end of each mile. If the odometer reads more or less than 1 mile, the speedometer is not calibrated properly. Determine the percentage of error (if any) and recalibrate as necessary until odometer (and therefore speedometer) reading is accurate.