1
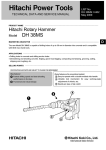
MODEL
G 13YD
G 13V
POWER TOOLS
ELECTRONIC DISC GRINDER
G 13YD
G 13V
LIST Nos. E241, E242
TECHNICAL DATA
AND
SERVICE MANUAL
Feb. 2001
SPECIFICATIONS AND PARTS ARE SUBJECT TO CHANGE FOR IMPROVEMENT
G
Notice for use
Specifications and parts are subject to change for improvement.
Refer to Hitachi Power Tool Technical News for further information.
CONTENTS
Page
1. PRODUCT NAME ........................................................................................................................... 1
2. MARKETING OBJECTIVE ............................................................................................................. 1
3. APPLICATIONS .............................................................................................................................. 1
4. SELLING POINTS .......................................................................................................................... 1
5. SPECIFICATIONS .......................................................................................................................... 3
6. COMPARISONS WITH SIMILAR PRODUCTS .............................................................................. 4
6-1. Specification Comparisons ............................................................................................................. 4
6-2. Comparisons in Torque vs. Rotation Speed and Stator Coil Temperature Rise ............................. 5
7. PRECAUTIONS IN SALES PROMOTION ..................................................................................... 6
7-1. Handling Instructions ...................................................................................................................... 6
7-2. Caution on Name Plate ................................................................................................................... 6
7-3. Precautions on Usage .................................................................................................................... 6
7-4. Operation Phenomena to Be Noted in Sales Promotion ................................................................ 7
8. FUNCTION AND OPERATION OF THE CONTROL CIRCUIT ...................................................... 8
8-1. Control Circuit (Block Diagram) ...................................................................................................... 8
8-2. Function of Each Block ................................................................................................................... 8
8-3. Motor Characteristics and Voltage Applied to the Motor ................................................................. 9
9. PRECAUTIONS IN DISASSEMBLY AND REASSEMBLY .......................................................... 10
9-1. Precautions in Maintenance and Repair ....................................................................................... 10
9-2. Disassembly .................................................................................................................................. 11
9-3. Reassembly .................................................................................................................................. 13
9-4. Connecting Internal Wires and Wiring Diagrams .......................................................................... 16
9-5. Lubrication Points and Types of Lubricant .................................................................................... 17
9-6. Tightening Torque ......................................................................................................................... 17
9-7. Insulation Tests ............................................................................................................................. 17
9-8. No-load Current Value .................................................................................................................. 17
10. STANDARD REPAIR TIME (UNIT) SCHEDULES ..................................................................... 18
Assembly Diagrams for D 13YD and D 13V
1. PRODUCT NAME
Hitachi Electronic Disc Grinder, Model G 13YD [125 mm (5")]
Model G 13V
[125 mm (5")] (Variable speed)
2. MARKETING OBJECTIVE
Market research indicates that many users require more compact and more powerful disc grinder.
In order to meet the requirement and also to meet the rival products, we developed the new electronic disc grinder
Models G 13YD and G 13V equipped with the most powerful motor in this class.
G 13V has been introduced to meet the demand for variable speed. Our market share is expected to grow with
the release of these new models which broaden our lineup of disc grinders.
3. APPLICATIONS
Removal of casting fin and finishing of various types of steel, bronze, aluminum and various other metallic
materials
Grinding of welds, or sections cut by means of a cutting torch
Grinding of synthetic resins, slate, brick, marble, etc.
4. SELLING POINTS
Wear resistance of armature coil:
2 times higher than B2
Equipped with four electronic control devices
1 Constant speed control
2 Soft start speed control
3 Overload protection control
4 Variable speed control (G 13V only)
High power
(with maximum output of 1,730 W)
B1 and B2: 1,330 W
Excellent overload durability:
1.1 times higher than B1 and B2
--- 1 ---
Excellent overload durability
The Models G 13YD and G 13V provide excellent overload durability thanks to an improved cooling
mechanism and a high-power motor.
Practical test data: Comparison of torque when the stator coil temperature rise is 200 K
100
G 13YD, G 13V
90
B1, B2
0
100
50
Fig. 1
Wear resistance of armature coil
Both ends of the armature coil are sealed with heat-resistant adhesive in addition to varnish treatment to
minimize wear of the armature coil caused by dust.
G 13YD and G 13V: Varnish and adhesive
B1 and B2: Varnish
Coating of heat-resistant adhesive
Fig. 2
--- 2 ---
5. SPECIFICATIONS
Model
Item
G 13YD
G 13V
O.D. 125 mm (5")
Depressed
center
wheel
Dimensions
x Thickness 6 mm (1/4")
x I.D. 22 mm (7/8")
Max. practical
peripheral speed
4,800 m/min (15,756 ft/min, 80 m/s)
Type
A, 36, Q, BF
Power source
AC single phase 50 or 60 Hz
Voltage, current and input
No-load speed
Voltage (V)
Current (A)
Power input (W)
230
5.1
1,110
240
4.9
1,110
10,000/min
2,800 --- 10,000/min
Type of motor
AC single phase commutator motor
Type of switch
Slide switch
Material: Housing (Green)
............ Glassfiber reinforced polyamide resin
Tail cover (Black)
Enclosure
Gear cover, packing gland ... Aluminum alloy die casting
Painting: Gear cover, packing gland ... Metallic silver
Weight
Net
1.7 kg (3.7 lbs.)
Gross
2.9 kg (6.3 lbs.)
Packaging
Corrugated cardboard box
Depressed center wheel 125 mm (5") ................. 1
Side handle ......................................................... 1
Wrench ................................................................ 1
Standard accessories
* Net weight excludes cord, side handle, depressed center wheel, wheel nut, wheel washer and wheel guard.
Rotation speed of spindle (/min)
Relationship between dial settings and rotation speeds of the Model G 13V (reference)
10,000
8,000
6,000
4,000
2,000
1
2 3 4
Dial
--- 3 ---
5 6
6. COMPARISONS WITH SIMILAR PRODUCTS
6-1. Specification Comparisons
HITACHI
Maker
Model
G 13YD
B1
G 13V
B2
Wheel diameter
mm
125 (5")
125 (5")
Power input
W
1,110
1,020
Output
W
720
570
Max. output
W
1,730
1,330
No-load speed
10,000
/min
2,800 --- 11,000
11,000
2,800 --- 10,000
(2-5/16")
59 dia.
(2-1/2")
63 dia.
mm
Grip perimeter
mm
207 (8-5/32")
195 (7-11/16")
L
mm
290 (11-7/16")
285 (11-1/4")
H
mm
63 (2-1/2")
73 (2-7/8")
W
mm
72 (2-27/32")
76 (3")
62 dia.
(2-7/16")
66 dia.
(2-19/32")
Grip diameter
Dimensions
Weight *
○
○
○
○
○
○
○
○
○
○
○
○
○
○
○
○
○
○
○
○
○
kg
1.6 (3.5 lbs.)
1.7 (3.7 lbs.)
○
○
○
○
○
○
○
○
○
○
○
○
○
○
○
○
○
○
○
○
○
○
W
○
○
○
○
L
H
Grip diameter
Grip perimeter
*Weight excludes cord, side handle, depressed center wheel, wheel washer and wheel guard.
--- 4 ---
○
○
○
○
1.6 (3.5 lbs.)
1.8 (4.0 lbs.)
Actual weight
○
○
○
○
○
○
○
○
6-2. Comparisons in Torque vs. Rotation Speed and Stator Coil Temperature Rise
Fig. 3 shows comparisons of the rotation speed and the stator coil temperature rise between some competitive
models with respect to torque. Torque represents the magnitude of load, i.e., the amount of pressing force,
cutting depth and forward force in actual cutting jobs. This shows that a powerful motor has both a minimum drop
of rotation speed even at a higher torque and a lower stator coil temperature rise at the same torque.
G 13V, B2
Dial: 6 • • • Maximum speed
Dial: 1 • • • Minimum speed
Rotation speed of spindle
10,000
8,000
6,000
B1, B2 (dial: 6)
HITACHI
G 13V (dial: 1)
HITACHI G 13YD
G 13V (dial: 6)
B1, B2 (dial: 6)
B2 (dial: 1)
4,000
200
HITACHI
G 13V (dial: 1)
100
2,000
B2 (dial: 1)
Stator coil temp. rise (k)
Rotation speed of spindle (/min)
HITACHI
G 13YD, G 13V (dial: 6)
Stator coil temp. rise
0
0
Load
Fig. 3 Comparison in torque vs. rotation speed and stator coil temperature rise (G 13YD, G 13V)
Fig. 3 indicates:
(1) Because the Models G 13YD and G 13V are equipped with high-power motors and improved cooling
mechanisms, the stator coil temperature rise is lower than that of B1 and B2 at the same torque and the
motors are resistant to be burnt out.
(2) The rotation speed of the Models G 13YD and G 13V is higher than that of B1 and B2 at the same torque
under heavy load conditions. This shows that the Models G 13YD and G 13V ensure excellent performance.
--- 5 ---
7. PRECAUTIONS IN SALES PROMOTION
In the interest of promoting the safest and most efficient use of the Models G 13YD and G 13V Electronic Disc
Grinders by all of our customers, it is very important that at the time of sale, the salesperson carefully ensures that
the buyer seriously recognizes the importance of the contents of the Handling Instructions, and fully understands
the meaning of the precautions listed on the Name Plate or Caution Plate attached to each tool.
7-1. Handling Instructions
Although every effort is made in each step of design, manufacture and inspection to provide protection against
safety hazards, the dangers inherent in the use of any electric power tool cannot be completely eliminated.
Accordingly, general precautions and suggestions for the use of electric power tools, and specific precautions and
suggestions for the use of the disc grinders are listed in the Handling Instructions to enhance the safe and efficient
use of the tool by the customer. Salespersons must be thoroughly familiar with the contents of the Handling
Instructions to be able to offer appropriate guidance to the customer during sales promotion.
(1) Check the power source voltage:
Ensure that the power source voltage conforms with the power specifications listed on the Name Plate.
Never operate the Models G 13YD and G 13V on a direct current (DC) power source. The control circuit in
this tool functions through a phase-control system utilizing a triac, and will not function if DC power is applied.
Subsequent uncontrolled increase of motor rotation speed could be extremely hazardous.
7-2. Caution on Name Plate
Each tool is provided with a Name Plate which contains the following basic safety precautions in the use of the
tool.
7-3. Precautions on Usage
(1) The wheel guard must be aligned in relation to the side handle mounting position.
As illustrated in Figs. 4 and 5, the customer should be instructed that the wheel guard mounting angle must be
aligned and fixed in accordance with the side handle mounting position so that the operator's hand will not
contact the depressed center wheel.
Fig. 4
Fig. 5
--- 6 ---
(2) Never press the pushing button while the depressed center wheel is rotating.
If the pushing button is pressed while the depressed center wheel is rotating, the spindle will stop immediately.
In such a case, there is a danger that the wheel nut may be loosened so that the depressed center wheel flies
off unexpectedly to cause possible serious injury.
7-4. Operation Phenomena to Be Noted in Sales Promotion
(1) The overload protection circuit tends to be easily actuated by certain types of work. If excessive pressure is
applied on the tool during cutting or similar heavy-duty operation, the overload protection circuit will be
actuated and the motor will be automatically stopped. This is because the overload protection circuit detects
the increased flow of current caused by the excessive pressure on the tool, and automatically turns off the
motor to protect it from possible overload burnout. The customer should be advised that the Models G 13YD
and G 13V are specifically designed to perform more efficiently and faster with considerably less applied
pressure than is required for conventional disc grinders, and that skillful use of the tools with minimal applied
pressure will avoid actuating the overload protection circuit.
(2) The customer should be advised to immediately remove the tool from the workpiece when the overload
protection circuit has been actuated, and not to resume operation until the tool has again reached normal
rotation speed. In this case, it takes slightly longer for the tool to reach normal rotation speed than at the time
of soft start (about three seconds). If the user attempts to resume operation before the tool has reached
normal rotation speed, the overload protection circuit will immediately reactuate.
(3) When beginning operation, if the Depressed-Center Wheel or cut-off wheel is pressed against the workpiece
before the tool has reached full rotation speed, there is a chance that the overload protection circuit will be
actuated. Instruct the customer never to turn the switch on with the Depressed-Center Wheel in contact with
the workpiece, or to press the wheel against the workpiece immediately after the switch has been turned on.
(It is strongly recommended that operation be begun only after a constant, normal rotation speed has been
attained).
(4) Failure of the control circuit may result in abnormally high rotation speed. If the control circuit in the tool
should malfunction, the rotation speed may increase excessively, and continued use of the tool would be
extremely hazardous. In such a case (when rotation speed increases abnormally), the operator will become
aware of abnormal noise from the motor and/or gears. Should such a phenomenon occur, the customer is
advised to immediately shut off the tool, and bring it to the nearest Hitachi authorized sales outlet or repair
center for inspection and repair.
(5) There may be minor variation in the operation of the overload protection circuit. Although the tool is designed
to minimize variation of the operation of the overload protection circuit, there may nonetheless be some
variation caused by fluctuation in the power supply or ambient temperature. Accordingly, the following points
should be noted:
a. When the ambient temperature is low, the point (current load ) at which the overload protection circuit
activates will be higher.
b. After several minutes of operation, when the main body of the tool becomes warm, the overload protection
circuit will activate at a load current approximately 15% lower than immediately after starting operation.
--- 7 ---
8. FUNCTION AND OPERATION OF THE CONTROL CIRCUIT
8-1. Contorl Circuit (Block Diagram)
* Model G 13V only
8-2. Function of Each Block
(1) Rotation speed detector:
Generates a frequency signal proportionate to the actual rotation speed of the motor. A magnetic sensor in the
controller monitors changes in the magnetic flux from a magnet, and generates a frequency signal.
(2) F-V converter:
Converts the frequency signal produced by the rotation speed detector into DC voltage.
(3) Standard voltage circuit:
Generates a standard voltage which determines the no-load rotation speed of the motor and serves as a
reference in maintaining constant rotation speed even when there are fluctuations in the load.
(4) Ramp generator:
Generates the voltage which determines the acceleration of the motor. The soft start function when the motor
is turned on is achieved through a gradual increase of the voltage generated by this circuit. When fully
charged, the voltage of the ramp generator becomes equal to the standard voltage (above).
(5) Differential amplifier:
Compares the voltage from the ramp generator voltages received from the F-V converter (which is
proportionate to the actual motor rotation speed), and amplifies the result.
This circuit functions as follows to maintain a constant rotation speed:
Motor rotation speed decreases (or increases)
(or increases)
frequency signal decreases
output voltage of the F-V converter decreases (or increases)
output voltage of the differential amplifier increase (or decreases).
--- 8 ---
(6) Load current detecting circuit:
Detects the load current by means of a low resistance resistor which is in series with the motor and the triac.
(7) Load current control circuit:
When the detected load is excessive (overload), this circuit sends a command (control signal) to reduce power
to the motor.
(8) Phase control circuit:
Generates the trigger signals necessary to turn the triac on, and delivers them to the gate of the triac. The
conductive angle of the triac is determined by the timing of the generated trigger signals.
When starting the tool: Controlled by the soft start circuit, the phase control circuit generates trigger
signals to gradually increase the conductive angle of the triac.
Constant speed operation: When there are variations in the rotation speed, the phase control circuit
generates trigger signals to keep the rotation speed as close as possible to the
present rotation speed determined by the standard voltage circuit. In short, when
the load increases and causes the rotation speed to decrease, the conductive angle
of the triac is increases, and the voltage applied to the motor is increased. In this
way, the rotation speed is kept as close as possible to the standard rotation speed.
Overload function:
When the load increases and load current exceeds a predetermined value, the load
current control circuit causes the phase control circuit to generate a trigger signal
equal to the conductive angle.
8-3. Motor Characteristics and Voltage Applied to the Motor
Phase control voltage waveform
G 13V
Dial
6, G 13YD
G 13V
Dial
3
G 13V
Dial
1s
--- 9 ---
9. PRECAUTIONS IN DISASSEMBLY AND REASSEMBLY
The [Bold] numbers in the descriptions below correspond to the numbers in the Parts List and the exploded
assembly diagram for G 13YD, and the <Bold> numbers to those in the Parts List and the exploded assembly
diagram for G 13V.
9-1. Precautions in Maintenance and Repair
(1) Without fail, remove the plug from the power outlet to prevent accidental starting of the tool.
(2) Remove the depressed-center wheel to prevent it from being damaged.
(3) Do not strike the main body of the tool with a hammer or similar tool. The electronic control circuit built into the
Controller Set [45] <45> can be damaged by the impact of a hammer or similar tool. Under no circumstances
should such tools be used when the controller set is assembled in the main body.
(4) Do not attempt to remove or replace internal parts of the Controller Set [45] <45>. The controller set is the
very "brain" of the tool, and should never be disassembled.
(5) When reassembling the tool, ensure without fail that the Magnet [38] <38> is properly installed. Also, note that
the magnet is left-hand threaded, and must be turned counterclockwise to mount it on the Armature [9] <9>.
On reassembly, tighten the magnet onto the armature with a rated torque of 1.27
0.9
0.29 N•m (13
3 kgf•cm,
0.2 ft-lb).
(NOTE) When disassembled, never place the Magnet [38] <38> in the vicinity of metal particles or shavings.
Should such metal particles adhere to the magnet, they could cause malfunction of the control circuit and/or
serious damage to the commutator-side ball bearing of the armature.
(6) Controller troubleshooting chart:
--- 10 ---
9-2. Disassembly
(1) Disassembly of the armature
1) Loosen the Tapping Screw (W/Flange) D4 x 20 (Black) [53] <53> to pull out the Tail Cover [52] <52>.
2) Remove the two Carbon Brushes [40] <40> from the Brush Holders [41] <41>.
3) Loosen the four Tapping Screws D5 x 25 [1] <1> which fix the Gear Cover Ass'y [4] <4> to remove the
Armature [9] <9> from the Housing [35] <35> together with the Bearing Holder [8] <8>.
4) Loosen the Special Nut M7 [5] <5> which fixes the Pinion [6] <6> to remove the Pinion [6] <6>.
5) Insert the hooks of the J-204 bearing puller between the Ball Bearing [7] <7> and the Bearing Holder [8]
<8> from both sides and fix the hooks with the wing bolts.
6) Place the J-204 bearing puller on a supporting jig and push down on the tip of the armature shaft with a
hand press to remove the Ball Bearing [7] <7>. Then remove the Bearing Holder [8] <8>.
(2) Disassembly of the dust seal
1) Remove the Magnet [38] <38>. (Note that the magnet is left-hand threaded.)
2) Insert the hooks of the J-204 bearing puller between the commutator and the Dust Seal [14] <14> from both
sides, and fix the hooks with the wing bolts.
3) Place the J-204 bearing puller on a supporting jig and push down on the armature shaft with a hand press
to remove the Dust Seal [14] <14> together with the Ball Bearing [15] <15>. Replace the Dust Seal [14]
<14> with new one because it is damaged by the removal of the Ball bearing [15] <15>.
(3) Disassembly of the controller
1) Remove the Tail Cover [52] <52>. Disconnect the internal wire from the Switch [59] <59> and remove the
Connector [51] <51> and the Terminal [48] <48> from the internal wire.
2) Remove the neutral conductor of the Noise Suppressor [50] <50> from the Housing [35] <35>.
3) Remove the Tapping Screws [47] <47>, [56] <56>, [56A] <56A>, [60] <60>.
(NOTE) When removing the Tapping Screw (W/Flange) D4 x 16 [60] <60>, use a small-diameter screwdriver
(3.5 mm to 4.5 mm in diameter).
(4) Disassembly of the stator ass'y
1) Remove the Armature [9] <9> and then pull out the two Brush Holders [41] <41> from the Housing [35]
<35>.
2) Remove the Controller Set [45] <45> from the Housing [35] <35>.
3) Remove the internal wire coming from Stator (A) [12] <12> from the Brush Holder [41] <41>.
4) Remove the Fan Guide [10] <10> from the Housing [35] <35>.
5) Loosen the two Hex. Hd. Tapping Screws D4 x 70 [11] <11> to remove Stator (A) [12] <12> from the
Housing [35] <35>. If Stator (A) [12] <12> cannot be removed easily, heat the Housing [35] <35> to
about 60˚C. Then Stator (A) [12] <12> can be removed.
--- 11 ---
(5) Disassembly of the slide knob
1) Loosen the Tapping Screw (W/Flange) D4 x 20 (Black) [53] <53> to pull out the Tail Cover [52] <52>.
2) Hold the Housing [35] <35> and raise the Slide Bar [43] <43> until the Slide Knob [34] <34> moves to the
"ON" position.
3) Check that the Slide Knob [34] <34> has not moved to the "ON-LOCK" position, and push down the Slide
Knob [34] <34> until it clicks while keeping the Slide Bar [43] <43> raised.
4) Raise the Slide Knob [34] <34> straight up and remove it keeping the Slide Bar [43] <43> raised.
(6) Disassembly of the gear (Fig. 6)
1) Loosen the four Seal Lock Screws (W/SP. Washer) M4 x 12 [23] <23> fixing the Packing Gland [22] <22>,
and remove the Packing Gland [22] <22> from the Gear Cover Ass'y [4] <4>.
2) Support the bottom of the Packing Gland [22] <22> with a jig, and push down on the upper portion of the
Spindle [25] <25> with a hand press until the end surface of the Woodruff Key [24] <24> contacts the Ball
Bearing [20] <20> and the Spindle [25] <25> cannot be pushed down any more. Be careful not to deform
the Fringer [26] <26>.
3) Turn the Packing Gland [22] <22> upside down and fix it, then push down the Spindle [25] <25>.
4) Insert the J-128 gear puller (use of a steel plate is permitted as a substitute) between the Gear [17] <17>
and the Packing Gland [22] <22>, and push down the Spindle [25] <25> with a hand press to remove it.
Replace the Ball Bearing [20] <20> with new one every time should the gear be disassembled
because the stress while pulling out the gear is applied to the Ball Bearing [20] <20>.
[25] <25>
[24] <24>
[25] <25>
[25] <25>
[24] <24>
Gear puller J-128
(Steel plate)
[17] <17>
[20] <20>
[22] <22>
[20] <20>
[22] <22>
[26] <26>
[20] <20>
[22] <22>
[24] <24>
Step 2)
Step 3)
Fig. 6
--- 12 ---
Step 4)
9-3. Reassembly
Push the parts together in the reverse order of disassembly, with the precautions given below.
(1) Generously lubricate the teeth of Gear [17] <17> and Pinion [6] <6> with grease. Rub grease onto the teeth
with your fingers so that the grease reaches each tooth bottom. Note that the Gear [17] <17> and Pinion [6]
<6> if under-lubricated may wear at a faster rate.
(2) Be sure to soak the inner diameter of the Felt Packing [21] <21> with machine oil. Otherwise, its dust-sealing
function will fail to work properly, resulting in an earlier damage of the Ball Bearing [20] <20>.
(3) When replacing the Armature [9] <9> or the Ball Bearing [15] <15>
at the commutator side, be sure to replace the Dust Seal [14] <14>
Press-fitting position:
5.7 to 6.0 mm
with new one together. The Dust Seal [14] <14> is an important part
to ensure the dust resistance of the ball bearing.
Replace the Dust Seal [14] <14> with new one without fail.
Press-fit the Ball Bearing [15] <15> to the position specified in Fig. 7.
Thrust Washer [13] <13>
Dust Seal [14] <14>
Ball Bearing [15] <15>
Armature shaft
Magnet [38] <38>
Fig. 7
(4) Tighten the Tapping Screw (W/Flange) D4 x 16 [60] <60> with a small-diameter screwdriver (3.5 mm to
Outs
i
of th de diame
e scr
3.5 m
ew ter
m to driver:
4.0 m
m
4.0 mm in diameter) as shown in Fig. 8.
Fig. 8
--- 13 ---
(5) When connecting the Earth Terminal [49] <49> to the internal wire (the middle wire among three) of the Noise
Suppressor [50] <50>, strip the insulation sheath on the internal wire by about 6 mm and press connect it
together with the Earth Terminal [49] <49> with a clamping tool available on the market.
Solderless connection
Fig. 9
(6) Check that the spring end does not hold the pigtail when mounting the carbon brush. Do not catch the pigtail
in the tail cover when mounting the tail cover.
Pigtail
Spring end
Fig. 10
(7) When replacing the Gear Cover Ass'y [4] <4>, lubricate the metal part with mixed oil.
Mixed oil: Mixture of Hitachi power tool grease No. 2 (Unilube No. 00) and turbine oil
Mixture ratio ... 1:1 (weight ratio)
Volume ... 0.5 cc
--- 14 ---
(8) Precautions in replacing the Controller Set [45] <45>, Cord Clip [55] <55> [55A] <55A> and Tapping Screws
[56] <56> [56A] <56A>:
Note that the Controller Set [45] <45>, Cord Clip [55] <55> [55A] <55A> and Tapping Screws [56] <56> [56A]
<56A> vary depending on the production months.
MODEL
NAME
G 13YD
ITEM CODE
NO. NO.
45
55
56
(A) THROUGH JAN. 2001
PART NAME
SUPPLY
319372 CONTROLLER
930108 CORD CLIP
305720 TAPPING SCREW
(W/FLANGE) D4 X 12
INTERCHANGE- ITEM CODE
ABILITY
NO. NO.
DISCONTINUED NOT
CONTINUED
INTERCHANGECONTINUED
(B) SINCE FEB. 2001
REMARKS
PART NAME
45 319372
55A 937631
56A 984750
ABLE
56
56A
55
55A
CONTROLLER
CORD CLIP
TAPPING SCREW
(W/FLANGE) D4 X 16
INCLUD. 54, 55
CONTROLLER
CORD CLIP
TAPPING SCREW
(W/FLANGE) D4 X 16
INCLUD. 54, 55
45
45
G 13V
45
55
56
319377 CONTROLLER
930108 CORD CLIP
305720 TAPPING SCREW
(W/FLANGE) D4 X 12
DISCONTINUED NOT
CONTINUED
INTERCHANGECONTINUED
45 319377
55A 930108
56A 305720
ABLE
56A
56
55A
55
45
45
--- 15 ---
9-4. Connecting Internal Wires and Wiring Diagrams
Connect the internal wires according to Figs. 11 to 13.
Noise Suppressor
[50] <50>
Numbers 1 to 4 in the following figures correspond to
the internal wires of Stator (A).
Brush Holder [41] <41> (Side A)
3
1
Connect to the Brush
Holder [41] <41> (Side A)
Connector [51] <51>
Connect to the Brush
Holder [41] <41> (Side B)
Side B
2
4
Terminal
[48] <48>
Side A
Brush Holder [41] <41> (Side B)
Fig. 11
Pillar Terminal [46] <46>
Fig. 12
Stator (A)
[12] <12>
Black
Pillar Terminal
[46] <46>
Connector
[51] <51>
Blue
or
Black
Black
Blue
White
Noise
Suppressor
[50] <50>
Controller Set
[45] <45>
Cord
[54] <54>
Black
Switch
[59] <59>
Black
Black
Terminal
[48] <48>
Fig. 13
--- 16 ---
Brown
or
Black
9-5. Lubrication Points and Types of Lubricant
Pinion chamber of Gear Cover Ass'y [4] <4> .....................
Nippeco grease (SEP-3A) 6 g
Generously rub grease onto the gear and pinion.
Metal .................................................................................... Mixed oil 0.5 cc
Mixed oil: Mixture of Hitachi power tool grease No. 2
(Unilube No. 00) and turbine oil
Mixture ratio 1:1 (weight ratio)
9-6. Tightening Torque
Tapping Screws D4 [47] <47> [53] <53> [56] <56> [56A] <56A> [60] <60>
...................................................................................................... 2.0
0.5 N•m (20 5 kgf•cm, 1.5
0.4 ft-lbs.)
Seal Lock Screws (W/SP. Washer) M4 [18] <18> [23] <23> ........ 1.8
0.5 N•m (18 4 kgf•cm, 1.3
0.3 ft-lbs.)
Tapping Screw D5 x 25 [1] <1> .................................................... 2.9
0.5 N•m (30 5 kgf•cm, 2.2
0.4 ft-lbs.)
Machine Screw M5 x 20 [27] <27> ............................................... 1.6
0.4 N•m (16 4 kgf•cm, 1.2
0.3 ft-lbs.)
Magnet [38] <38> (M6 left-hand thread) ....................................... 1.3
0.3 N•m (13 3 kgf•cm, 0.9 0.2 ft-lbs.)
Special Nut M7 [5] <5> ................................................................. 2.0
0.5 N•m (20 5 kgf•cm, 1.5
0.4 ft-lbs.)
9-7. Insulation Tests
On completion of disassembly and repair, measure the insulation resistance, and conduct the dielectric strength
test.
Insulation resistance: 7 M Ω or more with DC 500 V Megohm Tester
Dielectric strength test: AC 4,000 V/1 minute, with no abnormalities ................... 230 V --- 240 V products
9-8. No-load Current Value
After no-load operation for 30 minutes, the no-load current value should be as follows.
Voltage (V)
230
240
Current (A) max.
2.9
2.8
--- 17 ---
10. STANDARD REPAIR TIME (UNIT) SCHEDULES
MODEL
Variable
Fixed
10
20
30
40
Work Flow
G 13YD
G 13V
Wheel Guard
Ass'y
General Assembly
Pinion
Ball Bearing
(628VV)
Bearing Holder
Armature
Dust Seal
Ball Bearing
(608VV)
Pushing Button Bearing Cover
Gear Cover Ass'y Ball Bearing
(6201DD)
Lock Pin
Felt Packing
Controller Set Gear
Packing Gland
Switch
Key
Carbon Brush
x2
Spindle
Spring x 2
Fringer
Tail Cover
Cord
Cord Armor
--- 18 ---
Housing
Stator
Slide Bar
Spring
50
60 min.
LIST NO. E241
ELECTRIC TOOL PARTS LIST
ELECTRONIC DISC GRINDER
Model G 13YD
2000 • 12 • 25
(E1)
PARTS
ITEM
NO.
CODE NO.
DESCRIPTION
1
937-807
TAPPING SCREW D5X25
4
2
317-807
GUARD PLATE
1
3
301-944
PUSHING BUTTON
1
4
316-484
GEAR COVER ASS’Y
1
5
301-941
SPECIAL NUT M7
1
6
316-437
PINION
1
7
628-VVC
BALL BEARING 628VVC2PS2-L
1
8
316-480
BEARING HOLDER
1
9
360-540E
ARMATURE 230V
1
10
316-479
FAN GUIDE
1
11
982-021
HEX. HD. TAPPING SCREW D4X70
2
12
340-484E
STATOR (A) 230V
1
13
311-737
THRUST WASHER
1
14
319-386
DUST SEAL
1
15
608-VVM
BALL BEARING 608VVC2PS2L
1
16
301-943
LOCK PIN
1
17
316-438
GEAR
1
18
997-263
SEAL LOCK SCREW (W/SP. WASHER) M4X10
2
19
316-490
BEARING COVER
1
20
620-1DD
BALL BEARING 6201DDCMPS2L
1
21
301-946
FELT PACKING
1
22
317-823
PACKING GLAND
1
23
307-127
SEAL LOCK SCREW (W/SP. WASHER) M4X12
4
24
940-220
WOODRUFF KEY 2.5X8
1
25
317-804
SPINDLE
1
26
301-945
FRINGER
1
27
949-241
MACHINE SCREW M5X20 (10 PCS.)
1
28
949-454
SPRING WASHER M5 (10 PCS.)
1
29
994-323
WHEEL GUARD ASS’Y
1
30
937-817Z
WHEEL WASHER
1
31
316-822
D. C. WHEELS 125MM A36Q (25 PCS.)
1
32
994-324
WHEEL NUT M14
1
33
316-436
GEAR ASS’Y
1
34
314-428
SLIDE KNOB
1
35
317-802
HOUSING
1
36
*
G 13YD
NO.
USED
NAME PLATE
1
37
995-662
RUBBER RING
1
38
318-721
MAGNET
1
HITACHI LABEL
1
999-076
CARBON BRUSH (AUTO STOP TYPE) (1 PAIR)
2
39
40
41
317-810
BRUSH HOLDER
2
42
308-536
SPRING
2
43
319-370
SLIDE BAR
1
44
314-429
SPRING
1
45
319-897
CONTROLLER SET
1
46
938-307
PILLAR TERMINAL
1
47
301-653
TAPPING SCREW (W/FLANGE) D4X20 (BLACK)
1
48
311-741
TERMINAL
1
49
314-854
EARTH TERMINAL
1
50
317-491
NOISE SUPPRESSOR
1
51
959-140
CONNECTOR 50091 (10 PCS.)
1
--- 2 ---
* ALTERNATIVE PARTS
REMARKS
INCLUD.3,16
INCLUD.27,28
INCLUD.6,17
INCLUD.55A,56A
12 -- 00
PARTS
ITEM
NO.
G 13YD
CODE NO.
NO.
USED
1
DESCRIPTION
52
319-371
TAIL COVER
53
301-653
TAPPING SCREW (W/FLANGE) D4X20 (BLACK)
REMARKS
1
*
54
500-409Z
CORD
1
(CORD ARMOR D8.8)
*
54
500-447Z
CORD
1
(CORD ARMOR D8.8) FOR SUI
*
54
500-247Z
CORD
1
(CORD ARMOR D8.8) FOR NOR,SWE,DEN
55
930-108
CORD CLIP
1
TILL 1.2001
55A
937-631
CORD CLIP
1
SINCE 2.2001
56
305-720
TAPPING SCREW (W/FLANGE) D4X12
2
TILL 1.2001
56A
984-750
TAPPING SCREW (W/FLANGE) D4X16
2
SINCE 2.2001
57
980-063
TERMINAL
1
58
953-327
CORD ARMOR D8.8
1
59
314-603
SWITCH (1P SOLDER TYPE)
1
60
984-750
TAPPING SCREW (W/FLANGE) D4X16
1
12 -- 00
* ALTERNATIVE PARTS
--- 3 ---
G 13YD
STANDARD ACCESSORIES
ITEM
NO.
CODE NO.
501
938-332Z
WRENCH
502
302-142
SIDE HANDLE
NO.
USED
1
DESCRIPTION
REMARKS
1
OPTIONAL ACCESSORIES
ITEM
NO.
CODE NO.
601
937-825Z
RUBBER PAD
1
602
937-826Z
WASHER NUT
1
603
314-062
SANDING DISCS 125MM C-P16 (10 PCS.)
1
604
314-063
SANDING DISCS 125MM C-P20 (10 PCS.)
1
605
314-064
SANDING DISCS 125MM C-P24 (10 PCS.)
1
606
314-065
SANDING DISCS 125MM C-P30 (10 PCS.)
1
607
314-066
SANDING DISCS 125MM C-P36 (10 PCS.)
1
608
314-067
SANDING DISCS 125MM C-P40 (10 PCS.)
1
609
314-068
SANDING DISCS 125MM C-P50 (10 PCS.)
1
610
314-069
SANDING DISCS 125MM C-P60 (10 PCS.)
1
611
314-070
SANDING DISCS 125MM C-P80 (10 PCS.)
1
612
314-071
SANDING DISCS 125MM C-P100 (10 PCS.)
1
613
314-072
SANDING DISCS 125MM C-P120 (10 PCS.)
1
614
310-392
DIAMOND WHEEL (SEGMENT) 125MM-D22 HOLE
1
615
310-338
SUPER WASHER
1
--- 4 ---
NO.
USED
DESCRIPTION
* ALTERNATIVE PARTS
REMARKS
Printed in Japan 12 -- 00
(001225N)
LIST NO. E242
ELECTRIC TOOL PARTS LIST
ELECTRONIC DISC GRINDER
Model G 13V
2000 • 12 • 25
(E1)
PARTS
ITEM
NO.
1
G 13V
CODE NO.
937-807
NO.
USED
4
DESCRIPTION
TAPPING SCREW D5X25
2
317-807
GUARD PLATE
1
3
301-944
PUSHING BUTTON
1
4
316-484
GEAR COVER ASS’Y
1
5
301-941
SPECIAL NUT M7
1
6
316-437
PINION
1
7
628-VVC
BALL BEARING 628VVC2PS2-L
1
8
316-480
BEARING HOLDER
1
9
10
360-540E
ARMATURE 230V
1
319-898
FAN GUIDE
1
11
982-021
HEX. HD. TAPPING SCREW D4X70
2
12
340-484E
STATOR (A) 230V
1
13
311-737
THRUST WASHER
1
14
319-386
DUST SEAL
1
15
608-VVM
BALL BEARING 608VVC2PS2L
1
16
301-943
LOCK PIN
1
17
316-438
GEAR
1
18
997-263
SEAL LOCK SCREW (W/SP. WASHER) M4X10
2
19
316-490
BEARING COVER
1
20
620-1DD
BALL BEARING 6201DDCMPS2L
1
21
301-946
FELT PACKING
1
22
317-823
PACKING GLAND
1
23
307-127
SEAL LOCK SCREW (W/SP. WASHER) M4X12
4
24
940-220
WOODRUFF KEY 2.5X8
1
25
317-804
SPINDLE
1
26
301-945
FRINGER
1
27
949-241
MACHINE SCREW M5X20 (10 PCS.)
1
28
949-454
SPRING WASHER M5 (10 PCS.)
1
29
994-323
WHEEL GUARD ASS’Y
1
30
937-817Z
WHEEL WASHER
1
31
316-822
D. C. WHEELS 125MM A36Q (25 PCS.)
1
32
994-324
WHEEL NUT M14
1
33
316-436
GEAR ASS’Y
1
34
314-428
SLIDE KNOB
1
35
317-802
HOUSING
1
36
NAME PLATE
1
37
995-662
RUBBER RING
1
38
318-721
MAGNET
1
HITACHI LABEL
1
39
40
999-076
CARBON BRUSH (AUTO STOP TYPE) (1 PAIR)
2
41
317-810
BRUSH HOLDER
2
42
308-536
SPRING
2
43
319-370
SLIDE BAR
1
44
314-429
SPRING
1
45
319-899
CONTROLLER SET
1
46
938-307
PILLAR TERMINAL
1
47
301-653
TAPPING SCREW (W/FLANGE) D4X20 (BLACK)
1
48
311-741
TERMINAL
1
49
314-854
EARTH TERMINAL
1
50
994-273
NOISE SUPPRESSOR
1
51
959-140
CONNECTOR 50091 (10 PCS.)
1
--- 2 ---
* ALTERNATIVE PARTS
REMARKS
INCLUD.3,16
INCLUD.27,28
INCLUD.6,17
INCLUD.55A,56A
FOR NOISE SUPPRESSOR
12 -- 00
PARTS
G 13V
ITEM
NO.
CODE NO.
52
319-376
TAIL COVER
53
301-653
TAPPING SCREW (W/FLANGE) D4X20 (BLACK)
NO.
USED
1
DESCRIPTION
REMARKS
1
*
54
500-409Z
CORD
1
(CORD ARMOR D8.8)
*
54
500-247Z
CORD
1
(CORD ARMOR D8.8) FOR NOR,SWE,DEN
*
54
500-447Z
CORD
1
(CORD ARMOR D8.8) FOR SUI
*
54
500-439Z
CORD
1
(CORD ARMOR D8.8) FOR AUS
55
930-108
CORD CLIP
1
TILL 1.2001
55A
937-631
CORD CLIP
1
SINCE 2.2001
56
305-720
TAPPING SCREW (W/FLANGE) D4X12
2
TILL 1.2001
56A
984-750
TAPPING SCREW (W/FLANGE) D4X16
2
SINCE 2.2001
FOR CORD
*
*
57
980-063
TERMINAL
1
58
953-327
CORD ARMOR D8.8
1
59
314-603
SWITCH (1P SOLDER TYPE)
1
59
955-509
SWITCH (1P SCREW TYPE)
1
60
984-750
TAPPING SCREW (W/FLANGE) D4X16
1
12 -- 00
* ALTERNATIVE PARTS
FOR AUS
--- 3 ---
G 13V
STANDARD ACCESSORIES
ITEM
NO.
CODE NO.
501
938-332Z
WRENCH
502
302-142
SIDE HANDLE
NO.
USED
1
DESCRIPTION
REMARKS
1
OPTIONAL ACCESSORIES
ITEM
NO.
CODE NO.
601
937-825Z
RUBBER PAD
602
937-826Z
WASHER NUT
1
603
314-062
SANDING DISCS 125MM C-P16 (10 PCS.)
1
604
314-063
SANDING DISCS 125MM C-P20 (10 PCS.)
1
605
314-064
SANDING DISCS 125MM C-P24 (10 PCS.)
1
606
314-065
SANDING DISCS 125MM C-P30 (10 PCS.)
1
607
314-066
SANDING DISCS 125MM C-P36 (10 PCS.)
1
608
314-067
SANDING DISCS 125MM C-P40 (10 PCS.)
1
609
314-068
SANDING DISCS 125MM C-P50 (10 PCS.)
1
610
314-069
SANDING DISCS 125MM C-P60 (10 PCS.)
1
NO.
USED
1
DESCRIPTION
611
314-070
SANDING DISCS 125MM C-P80 (10 PCS.)
1
612
314-071
SANDING DISCS 125MM C-P100 (10 PCS.)
1
613
314-072
SANDING DISCS 125MM C-P120 (10 PCS.)
1
614
310-392
DIAMOND WHEEL (SEGMENT) 125MM-D22 HOLE
1
615
310-338
SUPER WASHER
1
--- 4 ---
* ALTERNATIVE PARTS
REMARKS
Printed in Japan 12 -- 00
(001225N)