1
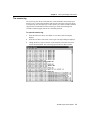
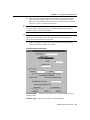
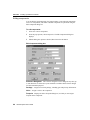
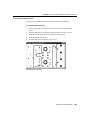
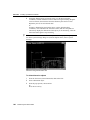
Chapter 5
Creating and editing obstacles
Pin attachment When creating an obstacle in the library manager, it is
automatically attached to the footprint that you are editing or creating. Also, a copy
of the obstacle displays at the same relative location attached to every component
that uses that footprint. Only electrical obstacles (free track, copper area, and copper
pour) can be attached to pins, at which point they acquire the electrical properties of
the pin.
Selecting obstacles
To select an entire obstacle
1
Choose the obstacle toolbar button.
2
Press the CTRL key and select an obstacle.
or
Press and hold the left mouse button while dragging across a portion of an
obstacle.
You can select multiple obstacles by pressing the CTRL key and clicking on the
additional obstacles that you want to select. Selected obstacles are highlighted.
To select a segment of an obstacle
1
Choose the obstacle toolbar button.
2
Click on a segment with the left mouse button.
Editing obstacles
Use the Edit Obstacle dialog box to edit obstacles. Using the dialog box, you can
choose the obstacle type and set physical properties, such as width, layer, and hatch
pattern. You can also specify attachments for the obstacle, including footprints,
components, pins, and net attachments.
O
Note You can use the Edit Obstacle dialog box to set the properties for an
obstacle before creating it, as described in Creating obstacles in this chapter.
To edit an obstacle
1
Choose the obstacle toolbar button.
2
Press the CTRL key and select an obstacle.
3
From the pop-up menu, choose Properties. The Edit Obstacle dialog box
displays.
4
Edit the options as desired, then choose the OK button.
OrCAD Layout User’s Guide
63