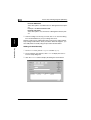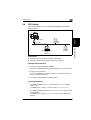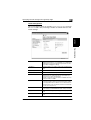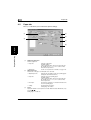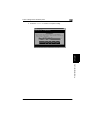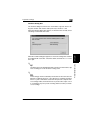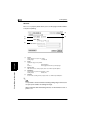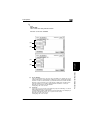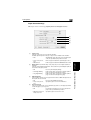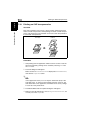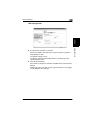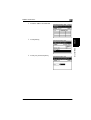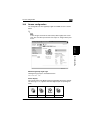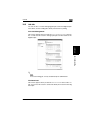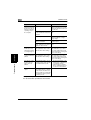
1
4341-7704-02 User Manual Pi4700e Printer Controller Contents Contents 1 2 Before Using the Printer Driver 1.1 Features of the Controller ............................................................1-1 1.2 Configuration.................................................................................1-6 1.3 Connecting the Controller............................................................1-7 1.4 Settings Made on the Machine.....................................................1-8 Priority Device .................................................................................1-8 On Line / Ready ..............................................................................1-8 1.5 Installing the Printer Drivers ........................................................1-9 Installing the Printer Driver 2.1 Windows 95/98/Me ........................................................................2-1 Operating Environment ...................................................................2-1 Installing ..........................................................................................2-2 Making General Settings Before Using the Printer .........................2-6 Displaying a Properties dialog box..................................................2-6 Displaying a Properties dialog box from the Printers window .........2-7 Displaying a Properties dialog box from an Application Menu ........2-7 2.2 Windows 2000/XP..........................................................................2-8 Operating Environment ...................................................................2-8 Installing ..........................................................................................2-9 Making General Settings Before Using the Printer .......................2-13 Displaying a Properties dialog box................................................2-13 Displaying a Properties dialog box from the Printer Folder...........2-14 Displaying a Properties dialog box from an Application Menu ......2-14 2.3 Windows NT 4.0...........................................................................2-15 Operating Environment .................................................................2-15 Installation .....................................................................................2-16 Making General Settings Before Using the Printer .......................2-20 Displaying a Properties dialog box................................................2-21 Displaying a Properties dialog box from the Printer Folder...........2-21 Displaying a Properties dialog box from an Application Menu ......2-21 Pi4700e i Contents 3 ii Network Settings 3.1 Introduction................................................................................... 3-1 3.2 Specifying the IP Address From the Printer’s Touch Panel..... 3-2 Setting procedure ........................................................................... 3-2 3.3 Peer-to-Peer Printing with TCP/IP............................................... 3-5 Configuration Procedure (Windows 95/98/Me)............................... 3-5 Installing the printer (Windows 95/98/Me) ...................................... 3-6 Configuration Procedure (Windows NT 4.0)................................... 3-7 Installing the printer (Windows NT 4.0) .......................................... 3-7 3.4 Peer-to-Peer Printing Program (Windows)................................. 3-8 Installing the IP Peer-to-Peer Printing Program ............................. 3-8 Setting Up the Peer-to-Peer Printing Program ............................... 3-9 Adding a Printer Manually ............................................................ 3-10 3.5 Peer-to-Peer Printing with IPX/SPX .......................................... 3-12 Configuration Procedure............................................................... 3-12 To install the printer ...................................................................... 3-12 3.6 IPX Peer-to-Peer Printing Program (Windows)........................ 3-14 Installing the IPX Peer-to-Peer Printing Program ......................... 3-14 3.7 LPR Printing................................................................................ 3-17 Configuration Procedure (Windows NT 4.0)................................. 3-17 Installing the printer (Windows NT 4.0) ........................................ 3-18 Configuration Procedure (Windows 2000/XP).............................. 3-19 Installing the printer (Windows 2000/XP) ..................................... 3-19 3.8 IPP Printing ................................................................................. 3-21 Configuration Procedure............................................................... 3-21 Installing the printer ...................................................................... 3-21 3.9 Specifying network settings from PageScope Light............... 3-23 Access .......................................................................................... 3-23 Operation...................................................................................... 3-23 Logging In to the Admin Mode...................................................... 3-23 Network Tab ................................................................................. 3-24 Pi4700e Contents 4 5 Properties Settings 4.1 Description of each tab ................................................................4-1 4.2 Device Options Setting tab ..........................................................4-2 Mailbox Setting dialog box <when Mailbin Finisher is installed> ...............................................4-4 4.3 Functions common to various tabs ............................................4-5 Functions of the Save Easy Set Name dialog box ..........................4-6 4.4 Setup tab........................................................................................4-7 Functions of the Detail of Paper Source dialog box ......................4-11 Functions of the Detail of Output Setting dialog box .....................4-13 4.5 Paper tab......................................................................................4-16 Functions of the Edit Custom Paper or Custom Paper dialog box ................................................................................................4-19 4.6 Quality tab....................................................................................4-21 PCL6 version.................................................................................4-21 PS version.....................................................................................4-22 Functions of the Halftoning dialog box ..........................................4-23 4.7 Job Management tab ..................................................................4-24 4.8 Overlay tab...................................................................................4-27 Functions of the Watermark dialog box.........................................4-28 4.9 PostScript tab..............................................................................4-31 Functions of the Font Substitution Table dialog box .....................4-33 Functions of the Send Fonts As dialog box...................................4-34 Functions of the Advanced PostScript dialog box.........................4-35 4.10 Conflicts dialog box....................................................................4-36 Printer Driver for Linux 5.1 Installing the printer driver...........................................................5-1 Operating environment....................................................................5-1 Installation .......................................................................................5-2 5.2 Printer setting with X window System ........................................5-4 Making general settings before using the printer ............................5-4 Redhat Linux ...................................................................................5-4 Turbo Linux .....................................................................................5-7 Open Linux....................................................................................5-10 SuSE Linux ...................................................................................5-12 How to display Printer Utility dialog box ........................................5-15 dipjl command ...............................................................................5-16 Printing method (dilpr command) ..................................................5-16 didialog command .........................................................................5-17 Pi4700e iii Contents 5.3 6 iv Properties settings ..................................................................... 5-18 Description of each tab................................................................. 5-18 Device Options Setting tab ........................................................... 5-19 Functions that are common to various tabs.................................. 5-21 Setup tab ...................................................................................... 5-23 Paper tab ...................................................................................... 5-31 Job Management tab.................................................................... 5-33 Conflicts dialog box ...................................................................... 5-35 Printer Driver for Macintosh 6.1 Installing the printer driver .......................................................... 6-1 Operating environment ................................................................... 6-1 Installation (Macintosh OS 7/8/9) ................................................... 6-1 Installation (Mac OS X)................................................................... 6-9 6.2 Print options ............................................................................... 6-14 Print options (Macintosh OS 7/8/9)............................................... 6-14 Installable Options ........................................................................ 6-15 Page Attributes ............................................................................. 6-16 PostScript Options........................................................................ 6-17 General......................................................................................... 6-18 Background Printing ..................................................................... 6-19 Cover Page................................................................................... 6-20 Color Matching ............................................................................. 6-21 Layout........................................................................................... 6-22 Error Handling .............................................................................. 6-23 Save as File.................................................................................. 6-24 Printer Specific Options ................................................................ 6-25 Conflicts dialog box ...................................................................... 6-32 Print options (Mac OS X).............................................................. 6-33 Paper & Quality Settings .............................................................. 6-34 Paper Source Settings.................................................................. 6-35 Job Management.......................................................................... 6-36 Finishing Settings ......................................................................... 6-37 Summary ...................................................................................... 6-39 Pi4700e Contents 7 Convenient Functions 7.1 Introduction ...................................................................................7-1 7.2 Printing on both sides of the paper.............................................7-2 Overview .........................................................................................7-2 Procedure........................................................................................7-2 7.3 Printing more than one copy at a time........................................7-4 Overview .........................................................................................7-4 Procedure........................................................................................7-4 7.4 Specifying N-up printing ..............................................................7-6 Overview .........................................................................................7-6 Procedure........................................................................................7-6 7.5 Printing in reduced/enlarged size................................................7-8 Overview .........................................................................................7-8 Procedure........................................................................................7-8 7.6 Printing pages with watermarks ................................................7-10 Overview .......................................................................................7-10 Procedure......................................................................................7-10 7.7 Specifying booklet printing........................................................7-12 Overview .......................................................................................7-12 Procedure......................................................................................7-12 7.8 Printing pages with a distribution number ...............................7-14 Overview .......................................................................................7-14 Procedure......................................................................................7-14 7.9 Using the copy track function....................................................7-16 Overview .......................................................................................7-16 Procedure......................................................................................7-16 7.10 Printing on OHP transparencies................................................7-18 Overview .......................................................................................7-18 Procedure......................................................................................7-18 7.11 Adding a cover to each copy set ...............................................7-20 Overview .......................................................................................7-20 Procedure......................................................................................7-20 7.12 Using the lock job (print PC confidential) function .................7-22 Overview .......................................................................................7-22 Procedure on the printer driver side..............................................7-22 Procedure on the machine side (Unlocking a job) ........................7-23 Procedure on the machine side (Deleting a job) ...........................7-25 7.13 Using the folding function..........................................................7-27 Overview .......................................................................................7-27 Pi4700e v Contents Procedure ..................................................................................... 7-27 8 vi 7.14 Using the settings function ....................................................... 7-29 Overview....................................................................................... 7-29 Procedure ..................................................................................... 7-29 Using the settings stored for a current print job............................ 7-29 Storing settings............................................................................. 7-30 Deleting settings which have been stored .................................... 7-32 7.15 Confirming that the data has been transferred to the machine ....................................................................................... 7-34 Overview....................................................................................... 7-34 Procedure ..................................................................................... 7-34 Network Interface Card 8.1 Outline ........................................................................................... 8-1 8.2 Getting ready ................................................................................ 8-1 Utility software (on the CD-ROM) ................................................... 8-2 System requirements...................................................................... 8-3 8.3 Setting up the network card ........................................................ 8-4 Connecting a network cable ........................................................... 8-4 Configuring the network card.......................................................... 8-4 8.4 Windows configuration................................................................ 8-5 8.5 NetWare configuration ................................................................. 8-5 Using NWSetup .............................................................................. 8-5 Using NetWare Client ..................................................................... 8-5 NetWare 4.x Configuration Using Bindery Emulation..................... 8-5 Configuration Using Novell Directory Services ............................... 8-8 Configuring NetWare Enterprise Print Services (NDPS) .............. 8-16 8.6 Macintosh configuration............................................................ 8-27 Setting Up AppleTalk.................................................................... 8-27 Selecting and Setting Up the Printer ............................................ 8-27 Network Card Configuration ......................................................... 8-28 8.7 Using the utility software........................................................... 8-28 Management Access Program (Windows) ................................... 8-28 BOOTP (Windows) ....................................................................... 8-32 NIManage for AppleTalk (Macintosh) ........................................... 8-34 NWSetup (Windows) .................................................................... 8-38 8.8 Troubleshooting ......................................................................... 8-46 LED Status Indicators................................................................... 8-46 Troubleshooting............................................................................ 8-47 Resetting to Factory Defaults ....................................................... 8-49 Pi4700e Contents 9 8.9 Jumper switch setting ................................................................8-50 Network Card and Jumper Pin Positions ......................................8-50 Resetting to Factory Defaults........................................................8-50 Address Selection .........................................................................8-52 Bus Handshaking ..........................................................................8-52 8.10 Specifications..............................................................................8-53 Network Card ................................................................................8-53 10/100BaseT Cable ......................................................................8-53 Scanner Mode 9.1 Outline............................................................................................9-1 E-Mail (Scan to E-mail) ...................................................................9-1 FTP (Scan to Server) ......................................................................9-2 URL .................................................................................................9-3 HDD (Scan to HDD) ........................................................................9-4 Necessary Settings .........................................................................9-5 Necessary Devices (servers) ..........................................................9-5 9.2 Network Setting.............................................................................9-6 Accessing to PageScope Light .......................................................9-6 Operation ........................................................................................9-6 Logging In to the Admin Mode ........................................................9-6 SMTP & FTP Configuration.............................................................9-7 HDD Configuration ..........................................................................9-9 LDAP Setting.................................................................................9-10 9.3 E-mail Destinations.....................................................................9-12 Configuring an E-Mail destination .................................................9-13 Checking/changing registration (PageScope Light) ......................9-14 Deleting registration (PageScope Light) .......................................9-14 New registration (touch panel of the digital copier) .......................9-14 Checking/changing registration (touch panel of the digital copier) ...........................................................................................9-16 Registering LDAP Search Criteria.................................................9-17 Deleting registration (touch panel of the digital copier) .................9-19 9.4 File destinations..........................................................................9-21 Configuring a File Destination .......................................................9-22 New registration (touch panel of the digital copier) .......................9-24 Checking/changing registration (touch panel of the digital copier) ...........................................................................................9-25 Deleting registration (touch panel of the digital copier) .................9-26 9.5 Mailbox Destinations ..................................................................9-28 New registration (touch panel of the digital copier) .......................9-28 Checking/changing registration (touch panel of the digital copier) ...........................................................................................9-29 Pi4700e vii Contents Deleting registration (touch panel of the digital copier) ................ 9-30 Direct Input ................................................................................... 9-32 Scanning double-sided original: ................................................... 9-33 Scanning with size specified:........................................................ 9-34 Scanning with density changed: ................................................... 9-35 Scanning with Image Type changed: ........................................... 9-36 Scanning with file format changed:............................................... 9-36 Scanning with resolution changed:............................................... 9-37 The operation of Capturing Images by TWAIN............................. 9-37 Installing the TWAIN Driver .......................................................... 9-37 Capturing Images by TWAIN........................................................ 9-38 9.6 How to input characters............................................................. 9-40 10 PageScope Light viii 10.1 System requirements ................................................................. 10-1 10.2 Access ......................................................................................... 10-2 Operation...................................................................................... 10-2 Entering the password.................................................................. 10-2 10.3 Screen configuration.................................................................. 10-3 10.4 System tab .................................................................................. 10-5 ➀ Summary .................................................................................. 10-5 ➁ Details....................................................................................... 10-5 ➂ Preference ................................................................................ 10-6 ➃ Save Setting ............................................................................. 10-6 ➄ Online Assistance ..................................................................... 10-6 10.5 Job tab......................................................................................... 10-7 Print Job Management ................................................................. 10-7 File Download............................................................................... 10-7 10.6 Printer tab.................................................................................... 10-8 Settings......................................................................................... 10-8 Printer Front Panel ..................................................................... 10-11 Test Print .................................................................................... 10-12 Font Information ......................................................................... 10-13 Printer Reset............................................................................... 10-14 Maintenance ............................................................................... 10-15 Local Interface ............................................................................ 10-16 10.7 Scanner tab ............................................................................... 10-17 10.8 Network tab ............................................................................... 10-18 Pi4700e Contents 11 Troubleshooting 11.1 Unable to Print.............................................................................11-1 Unable to Make Correct Settings / Unable to Print Exactly as Set.................................................................................................11-3 Poor Print Quality ..........................................................................11-6 Error List........................................................................................11-6 12 Appendix 12.1 Function combination matrix (Windows)..................................12-1 12.2 Function combination matrix (Macintosh)................................12-4 12.3 Function combination matrix (Linux)........................................12-7 12.4 Number of registrations .............................................................12-9 Number of registrations/Usable range for Easy Set......................12-9 Number of registrations/Usable range for Watermark.................12-10 Number of registrations/Usable range for Custom Paper ...........12-11 12.5 Preview Listing..........................................................................12-12 [Page Layout] ..............................................................................12-12 [Printer Figure] ............................................................................12-15 [Setting Preview] .........................................................................12-16 Specifications for the controller ...................................................12-19 Accessories.................................................................................12-24 Glossary ......................................................................................12-25 12.6 UNIX Configuration ...................................................................12-29 Host-based lpd ............................................................................12-29 Printer-based lpd.........................................................................12-30 Printer-based lpd Configuration ..................................................12-31 BSD System................................................................................12-32 AIX Version 2.5 ...........................................................................12-33 AIX 4.0 ........................................................................................12-34 HP-UX .........................................................................................12-34 AS/400 ........................................................................................12-35 DEC ULTRIX 4.3 RISC, OSF1/ALPHA .......................................12-36 SCO UNIX...................................................................................12-37 System V Release 4, Solaris 2.x.................................................12-38 LPSYSTEM Installation...............................................................12-38 Linux............................................................................................12-39 Configuring the Printer Using the printtool Command.................12-39 Configuring the Printer by Editing the printcap File.....................12-40 Host-based lpd Configuration......................................................12-41 Loading the Program...................................................................12-41 Selecting Filters...........................................................................12-42 Selecting a Filter Manually ..........................................................12-42 Pi4700e ix Contents Solaris Version 1, OSF1 ............................................................. 12-42 DEC ULTRIX 4.3 ........................................................................ 12-44 HP-UX System ........................................................................... 12-45 System V (Solaris Version 2), System V Release 4/386 Base Machine ...................................................................................... 12-47 SCO UNIX .................................................................................. 12-49 AIX RISC System/6000 .............................................................. 12-51 Virtual Printer Commands .......................................................... 12-52 AIX Print Command.................................................................... 12-52 12.7 Setting Up IP Parameters......................................................... 12-53 Bundled Utility Programs ............................................................ 12-53 Other Methods............................................................................ 12-53 Assigning IP Addresses Using ARP (For Windows)................... 12-54 Assigning IP Addresses Using ARP (For UNIX)......................... 12-56 Assigning IP Addresses Using the BOOTP Daemon (For UNIX) .................................................................................. 12-57 Assigning IP Addresses Using the RARP Daemon (For UNIX) .................................................................................. 12-59 Using the DHCP Daemon (For UNIX) ........................................ 12-60 12.8 Using Telnet to Make Settings ................................................ 12-61 Establishing a Telnet Connection ............................................... 12-61 Menu Items................................................................................. 12-62 IP Parameters............................................................................. 12-62 LPD Printers ............................................................................... 12-62 Protocols..................................................................................... 12-62 Reset Unit................................................................................... 12-62 Restore Factory Defaults............................................................ 12-63 Change Password ...................................................................... 12-63 Exiting Telnet (Exit) .................................................................... 12-63 12.9 FTP Printing .............................................................................. 12-64 13 Index x Pi4700e Foreword Limited Software Warranty For the USA and Canada Users Limited Warranty Minolta warrants that the software will perform in accordance with the accompanying written materials for a period of (90) ninety days from the date of purchase. Minolta does not warrant that the operation of the program will meet your requirements. This limited warranty gives you specific legal rights. You may have others, which vary from state/jurisdiction to state/jurisdiction. Purchase Remedies Minolta’s entire liability and your exclusive remedy with respect to the software shall be at Minolta’s option either, repair or replacement of the software. The software must be returned to Minolta with a copy of your proof of purchase. The Limited Warranty is void if failure of the software has resulted from accident, abuse, or misapplication. Any replacement software will be warranted for the remainder of the original warranty period or (30) thirty days, whichever is longer. The remedies provided herein are customer’s sole and exclusive remedies. In no event shall Minolta Corporation be liable for any lost profits, direct, indirect, special, incidental, or consequential damages, whether based on contract, tort, or any other legal theory. Minolta Network Card Warranty Warranty Term Minolta Network Cards have a (1) One Year Warranty. The Network Card must be returned to Minolta for repair or replacement at Minolta’s discretion. Warranty Coverage Minolta Corporation warrants this product to be free from defects in workmanship and materials for a period of one year from the date of receipt of the unit. If the unit fails to function as written in the User’s manual, Minolta will repair or replace the unit at no charge. Minolta will ship at their expense an exchange unit overnight to replace the defective unit. The remedies provided herein are the customer’s sole and exclusive remedies. In no event shall Minolta Corporation be liable for any lost profits, direct or indirect, special, incidental, or consequential damages, whether based on contract, tort, or other legal history. Pi4700e xi Foreword User Instructions For the U.S.A. Users FCC Part 15-Radio Frequency Devices This device complies with Part 15 of the FCC Rules. Operation is subject to the following two conditions: (1) This device may not cause harmful interference, and (2) this device must accept any interference received, including interference that may cause undesired operation. NOTE This equipment has been tested and found to comply with the limits for a Class A digital device, pursuant to Part 15 of the FCC Rules. These limits are designed to provide reasonable protection against harmful interference when the equipment is operated in a commercial environment. This equipment generates, uses, and radiate radio frequency energy and if not installed and used in accordance with the instruction manual, may cause harmful interference to radio communications. Operation of this equipment in a residential area is likely to cause harmful interference in which case the user will be required to correct the interference at his own expense. WARNING The design and production of this unit conform to FCC Regulations, and any changes or modifications must be registered with the FCC and are subject to FCC control. Any changes made by purchaser or user without first contacting the manufacturer will be subject to penalty under FCC regulations. FCC-F02 This device must be used with shielded interface cables. The use of non-shielded cables is likely to result in interference with radio communications and is prohibited under FCC rules. For Canada Users Interference-Causing Equipment Standard (ICES-003 Issue 3) This Class A digital apparatus complied with Canadian ICES-003 Cet appareil numérique de la classe A est conforme à la norme NMB-003 du Canada. IC-F03 For European Users CE Marking (Declaration of Conformity) This product complies with the following EU directives: 89/336/EEC, 73/23/EEC and 93/68/EEC directives. This declaration is valid for the area of the European Union. This device must be used with shielded interface cables. The use of non-shielded cables is likely to result in interference with radio communications and is prohibited under EU directives. xii Pi4700e Foreword For Users of the Class B regulation’s countries This device must be used with shielded interface cables. The use of non-shielded cables is likely to result in interference with radio communications and is prohibited under CISPR 22 rules and local rules. For Users except the Class B regulation’s countries WARNING This is a Class A product. In a domestic environment this product may cause radio interference in which case the user may be required to take adequate measures. This device must be used with shielded interface cables. The use of non-shielded cables is likely to result in interference with radio communications and is prohibited under CISPR 22 rules and local rules. Pi4700e xiii Foreword Welcome Congratulations on your selection of Minolta Pi4700e printer controller and Network Interface Card for Pi4700e. This User Manual explains how to run print cycles on the machine, to which the controller is connected. It also provides information about how to setup the Network Interface Card and operate the Digital Copier in a network environment. First read this manual carefully and thoroughly; then, keep it close at hand so you can refer to it whenever it becomes necessary. Some of the screens shown in this manual may look different from what you will view in actual applications. Trademark Acknowledgements Minolta is a registered trademark of MINOLTA CO., LTD. Page Scope is a trademark of MINOLTA CO., LTD. Apple, AppleTalk, and Macintosh are registered trademarks of Apple Computer, Inc. Ethernet is a registered trademark of Xerox Corporation. PCL, HP LaserJet III, HP LaserJet IIISi, HP LaserJet 4Si, are registered trademarks of Hewlett-Packard Company. HP UNIX is a trademark of Hewlett-Packard Company. Linux is a registered trademark of Linus Torvalds. Microsoft, Windows, and Windows NT are registered trademarks of Microsoft Corporation. Netscape Communications, the Netscape Communications logo, Netscape Navigator, Netscape Communicator, and Netscape are trademarks of Netscape Communications Corporation. Novell and NetWare are registered trademarks of Novell, Inc. PostScript is a registered trademark of Adobe Systems, Inc. Red Hat is a registered trademark of Red Hat, Inc. Sun and Solaris are trademarks of Sun Microsystems, Inc. All other product names are trademarks or registered trademarks of their respective holders. Copyright 2003 MINOLTA CO., LTD The information contained in this manual is subject to change without notice. xiv Pi4700e Before Using the Printer Driver 1.1 Features of the Controller Chapter 1 1 1 The controller is an image controller designed to use the machine as a printer, allowing you to print documents directly to the machine from a computer to which the controller is connected. The printer driver, which is used during printing, is equipped with various functions that make the most out of the features of the machine. They enable you to use the same functions as those offered by the machine. When actually running a print cycle, you can specify various functions of the machine on your computer screen. ✎ Note When using the controller, be sure to set the machine to the On Line state. Some functions offered by the machine cannot be combined, such as Staple and Hole-Punch, and some others may not be used because of a paper size involved. The functions that cannot be selected appear dimmed. Further, if functions that are incompatible with each other are specified, the Conflicts dialog box will appear, prompting you to change the settings. When this dialog box appears, check the details and reselect the functions to ensure function compatibility. Some settings, which are defied by the machine for the restricted combinations of different functions, can at times be accepted by the printer driver. If a print command is issued from the personal computer with such settings made, the machine does not produce the output correctly or abandons the job to produce nothing. Make sure that you make correct settings. Pi4700e 1-1 Before Using the Printer Driver Features of the Controller Features of the Controller Chapter 1 1 Before Using the Printer Driver Various Printing Functions G Makes prints that are sorted into complete sets of the originals or grouped into uncollated groups, each containing prints of one original. (p. 7-4) G Prints two pages of originals on both front and back sides of a single sheet of paper. (p. 7-2) Long Edge Binding G Enlarges or reduces the image on the original. (p. 7-8) G Prints two pages or four pages of originals on a single sheet of paper. Maximum of 16 pages of originals can be printed on a single sheet of paper. (p. 7-6) 2 up 1-2 Short Edge Binding 4 up Pi4700e 1 Prints four pages of originals to both front and back sides of a single sheet of paper. (p. 7-12) G Places text in the background. (p. 7-10) G Makes prints of complete sets of the originals, stapled together or punched for filing. (p. 4-13) Before Using the Printer Driver G By combining Collate with other finishing capabilities, you can make complete sets of documents for immediate delivery without having to do any further processing. G Pi4700e Chapter 1 Features of the Controller Adds a reference number (Distribution Number) to each document set during printing. (p. 7-14) 1-3 Features of the Controller Before Using the Printer Driver Chapter 1 1 G Prints only the cover on a different type of paper (such as colored paper). (p. 7-20) G Capable of printing on OHP transparencies. You can also insert interleaves, either blank or printed with the same contents as those on the OHP transparencies. (p. 7-18) G Folds copies during finishing. (p. 4-13) Crease 1-4 Half Folding Z-Folding Pi4700e Administrative Functions Pi4700e G Different accounts can be managed for printing records, just as when using the machine as a copier. G Printing of confidential documents may be withheld until a legitimate password is entered on the machine. 1-5 Chapter 1 1 Before Using the Printer Driver Features of the Controller Configuration 1.2 Configuration The controller may be configured with the following options. Before Using the Printer Driver Chapter 1 1 1-6 G Memory (64MB/128MB, Option) Expands the memory capacity of Pi4700e. G Controller Allows you to use the machine as a printer controlled by your personal computer. G Hard Disk Drive (Option) For downloading Mac PS fonts and storing them. Stores the Scan to HDD data. G NIC Board (Option) Allows you to use the machine as a printer in a network environment. Pi4700e Chapter 1 1 ✎ Note The NIC Board must be mounted to use the scanner functions. 1.3 Connecting the Controller The controller is installed inside the machine. The installation procedures are to be performed by service personnel. The controller is connected to the computer by a printer cable or network cable. Power to the controller is supplied from the machine. ✎ Tip If you cannot print from your computer, make sure that the printer cable or network cable is connected to the corresponding connectors. Pi4700e 1-7 Before Using the Printer Driver Connecting the Controller Settings Made on the Machine 1.4 Settings Made on the Machine The following functions must be set on the machine using its Utility Mode, as they relate to the controller. Priority Device Before Using the Printer Driver Chapter 1 1 Select the priority use of the machine, either as a copier or printer. G Copier: The machine is used as a copier. The machine starts the print cycle only after it has received the entire data of a particular print job. The machine can be used for copying, since it starts printing only after it has received the entire data of the job for printing. This means that more time is available to you for copying, but you have to wait for a longer time before a particular print job is done. G Printer: The machine is used as a printer. The machine starts the print cycle before it completes receiving the entire data of a particular print job. On receiving the data for one page, the machine starts printing, accepting no other job for copying. This means that less time is available to you for copying, but you do not have to wait long before a particular print job is done. On Line / Ready 1-8 G On Line key This function is the same as that available in ordinary printers as On Line/Off Line. Select On Line normally. A lit lamp indicates that the machine is in the On Line mode. G Ready Lamp Data can be transferred while this lamp stays lit up. The lamp remains blinking while data is being transferred. Pi4700e 1.5 1 Installing the Printer Drivers To make 100% use of the functions offered by the machine mounted with the controller, install the attached printer drivers in your computer. G PCL6 printer driver for Windows 95 G PCL6 printer driver for Windows 98/Me G PCL6 printer drive for Windows NT 4.0 G PCL6 printer driver for Windows 2000/XP G PS printer driver for Windows 95/98/Me G PS printer driver for Windows NT 4.0 G PS printer driver for Windows 2000/XP G PPD file for Macintosh G PPD Plugin for Mac OS X G PS print utility for Linux (Redhat, SuSE, Turbo, Open) Before Using the Printer Driver The controller is furnished with the following printer drivers: Install the printer driver suitable for the operating system that runs on your computer. For installation procedures, see the relevant page as detailed below: Pi4700e G Installing the Windows printer driver: Windows 95/98/Me (p. 2-1) Windows 2000/XP (p. 2-8) Windows NT 4.0 (p. 2-15) G Installing the Macintosh PPD file and PPD Plugin file: See “6.1 Installing the printer driver” on page 6-1. G Installing the Linux print utility: See “5.1 Installing the printer driver” on page 5-1. Chapter 1 Installing the Printer Drivers 1-9 Installing the Printer Drivers Before Using the Printer Driver Chapter 1 1 1-10 Pi4700e Windows 95/98/Me This chapter describes the procedure for installing the printer driver on a Windows operating system. For details on installation for Linux, refer to chapter 5. For details on installation for a Macintosh, refer to chapter 6. 2.1 Windows 95/98/Me Operating Environment This section explains the required environment for the printer driver. Before installing the printer driver, check that your computer meets the following requirements. If it doesn’t, the printer driver may not function properly. Personal computer IBM PC or compatible with Pentium 200MHz or higher CPU Operating system Windows 95 (English), Windows 98 (English) or Windows Me (English) Memory I/O interface 64MB or more Parallel Network Free space on hard disk Pi4700e Chapter 2 Installing the Printer Driver Centronics interface (Conforming to IEEE1284) 10/100BaseT (UTP) 10MB or more (PCL6) 2MB or more (PS) G Windows 2000/XP For the operating environment and installation procedure for the Windows 2000/XP printer driver, see page 2-8. G Windows NT 4.0 For the operating environment and installation procedure for the Windows NT 4.0 printer driver, see page 2-15. 2-1 Installing the Printer Driver 2 2 Windows 95/98/Me 2 Installing Chapter 2 ✎ Installing the Printer Driver This section explains the installation procedure for the Windows 98 printer driver. ✎ Note Before starting to install the printer driver, be sure first to quit all other applications. Tip The following procedure assumes that the machine is a Digital Copier and that the printer driver is PCL6: Read the specific proper names accordingly if the machine is a model other than the Digital Copier and if, for example, the OS is Windows 95 and the printer driver is PS. 1 Click the Start button. From the menu that appears, select Settings, then click Printers. 2 The Printers window will appear. Double-click the Add Printer icon. 3 The Add Printer Wizard will appear. Click the Next> button. 2-2 Pi4700e Windows 95/98/Me 2 4 A window will appear, asking how the printer is to be connected. If your ✎ Note When installing the printer driver in a computer connected to the machine via a network, be sure to consult the network administrator. This is a request to be made of the network administrator. To install the printer driver in a computer connected to a network, select Network printer and click the Next> button. Then, a window will appear prompting you to enter the network path: Enter the path. 5 A window will appear, prompting you to select the manufacturer and model of your printer. Click the Have Disk... button on the lower right part of the screen. Pi4700e 2-3 Installing the Printer Driver Chapter 2 computer is directly connected to the machine, select Local printer and then click the Next> button. Windows 95/98/Me 2 6 The Install From Disk dialog box will appear. Install the controller driver CD-ROM that is included with the controller in the CD-ROM drive of your computer. Chapter 2 7 Click the Browse button, select the file corresponding to the type of printer driver to be installed and the operating system being used, and then click the OK button. 8 A Printers list appears. Installing the Printer Driver Select the driver to be installed and click the Next> button. ✎ Tip PS driver is different for each model: Select according to model of the machine used. 9 A window that prompts you to select the port will appear. Select the port (normally LPT:) to which the printer cable has been connected, then click the Next> button. 10 A window that asks you to confirm the printer name will appear. Check the printer name. If you want to designate this printer as the default printer, select Yes. Click the Next> button. 11 A screen that allows you to select printing of a test page will appear. If you want to print a test page, select Yes (recommended). If you elect not to, select No. It is recommended that a test page be printed to ensure that the printer driver has been installed properly. Now, click the Finish button. 2-4 Pi4700e Windows 95/98/Me 2 12 Installation will start. When all the files have been copied from the CD-ROM, the corresponding icon will be added to the Printers window. Installing the Printer Driver Chapter 2 This completes the installation. Pi4700e 2-5 Windows 95/98/Me 2 Making General Settings Before Using the Printer Chapter 2 The printer driver requires setting of items that are common to all print jobs, including the port to which the printer cable is connected and optional devices configured with the machine. These settings must be made using properties dialog box available from the Properties command after the printer driver has been installed or whenever the operating environment is changed. Installing the Printer Driver The most common settings were made when the printer driver was installed, meaning that you do not usually bother to change them. Some items must, however, be changed in the following cases. Cases where changes are necessary Applicable property tab You want to add a comment to distinguish the printer from others General The computer’s connecting port has been changed You want to change the conditions for the display of a timeout error You want to designate a port to which the machine is connected via a network (this setting must be made on a computer connected to the machine via a network) Details This setting is not related to printing. Color Management You want to share the machine with other computers connected to the same network (this setting must be made on the computer directly connected to the machine) Sharing For details of “Device Options Setting tab”, see page 4-2. Displaying a Properties dialog box There are two different steps to take to display a properties dialog box. The contents of a particular properties dialog box slightly differ depending on how you access it. Select the appropriate one according to your need. (1) To display a properties dialog box from the Printers window (2) To display a properties dialog box from an application menu Below are the detailed procedures for each approach. 2-6 Pi4700e Windows 95/98/Me 2 Displaying a Properties dialog box from the Printers window 1 Click the Start button and select Settings. Then, click Printers. 3 Select Properties from the menu that will appear. This shows the properties dialog box. It allows you to set the environment in which you will use the printer. The settings made through this method are valid in all applications. Displaying a Properties dialog box from an Application Menu As an example, the procedure for the PCL6 printer driver is described below. 1 Select Print... from the File menu of the application. 2 Make sure that the Name of the Printer is Minolta Di470 PCL6: If Minolta Di470 PCL6 is not listed, click ▼ and, from the menu that will then appear, select Minolta Di470 PCL6. 3 Click the Properties button. This shows the properties dialog box. This method allows you to set the number of copies and paper for each document. Note that the settings made on the properties dialog box accessed through the application are valid only for that particular application. ✎ Tip To set the Device Options Setting, which need not be changed unless device is changed, open it from the Printers window to set. To show a properties dialog box other than Setup, click the corresponding tab located on the top part of the screen. ✎ Note The steps to display a properties dialog box may be different depending on the application. Follow the correct procedure according to the application. The procedure above is based on the application WordPad. Pi4700e 2-7 Installing the Printer Driver Chapter 2 2 Right-click the appropriate printer icon (ex. Minolta Di470 PCL6). Windows 2000/XP 2 2.2 Windows 2000/XP Operating Environment Chapter 2 This section explains the required environment for the printer driver. Installing the Printer Driver Before installing the printer driver, check that your computer meets the following requirements. If it doesn’t, the printer driver may not function properly. Personal computer IBM PC or compatible with Pentium 200MHz or higher CPU Operating system Windows 2000 (English) or Windows XP (English) Memory 64MB or more I/O interface Parallel Centronics interface (Conforming to IEEE1284) Network 10/100BaseT (UTP) Free space on hard disk 2-8 10MB or more (PCL6) 2MB or more (PS) G Windows 95/98/Me For the operating environment and installation procedure for the Windows 95/98/Me printer driver, see page 2-1. G Windows NT 4.0 For the operating environment and installation procedure for the Windows NT 4.0 printer driver, see page 2-15. Pi4700e Windows 2000/XP 2 Installing Note When starting up the operating system, log in with administrator privileges. Before starting to install the printer driver, be sure first to quit all other applications. ✎ Tip The following procedure assumes that the machine is a Digital Copier and that the printer driver is PCL6: Read the specific proper names accordingly if the machine is a model other than the Digital Copier and if, for example, the OS is Windows XP and the printer driver is PS. 1 Click the Start button. From the menu that appears, select Settings, then click Printers. 2 The Printers window will appear. Double-click the Add Printer icon. 3 Start the Add Printer Wizard. Click the Next> button. Pi4700e 2-9 Installing the Printer Driver ✎ Chapter 2 This section explains the installation procedure for the Windows 2000/XP printer driver. Windows 2000/XP 2 4 A screen that allows you to select the type of connection made of the printer will appear. If the printer is directly connected to the computer, select Local Printer and click the Next> button. Chapter 2 ✎ Installing the Printer Driver Note When installing the printer driver in a computer connected to the machine via a network, be sure to consult the network administrator. 5 A window the prompts you to select the port will appear. Select the name of the port to be used and click the Next> button. 2-10 Pi4700e Windows 2000/XP 2 6 A window will appear, prompting you to select the manufacturer and 7 The Install From Disk dialog box will appear. Install the controller driver CD-ROM that is included with the controller in the CD-ROM drive of your computer. 8 Click the Browse button, select the file corresponding to the type of printer driver to be installed and the operating system being used, and then click the OK button. 9 A Printers list appears. Select the driver to be installed and click the Next> button. 10 A window that asks you to confirm the printer name will appear. Check the printer name. If you want to designate this printer as the default printer, select Yes. Click the Next> button. 11 Follow the instructions that appears on your computer screen. 12 As the last step, click the Finish button. Pi4700e 2-11 Installing the Printer Driver Chapter 2 model of your printer. Click the Have Disk... button on the lower right part of the screen. Windows 2000/XP 2 13 Installation will start. Installing the Printer Driver Chapter 2 When all the files have been copied from the CD-ROM, the corresponding icon will be added to the Printers window. This completes the installation. 2-12 Pi4700e Windows 2000/XP 2 The most common settings were made when the printer driver was installed, meaning that you do not usually bother to change them. Some items must, however, be changed in the following cases. Cases where changes are necessary Applicable property tab You want to add a comment to distinguish the printer from others General You want to share the machine with other computers connected to the same network (this setting must be made on the computer directly connected to the machine) Sharing The computer’s connecting port has been changed You want to change the conditions for the display of a timeout error You want to designate a port to which the machine is connected via a network (this setting must be made on a computer connected to the machine via a network) Ports You want to restrict use condition of printer. You want to change settings in spool condition. You want to change OS-dependent settings. Advanced This setting is not related to printing. Color Management You want to restrict access to the machine You want to check the accounts of the machine users Security This setting is not related to printing. Processing For the details of “Device Options Setting tab”, see page 4-2. Displaying a Properties dialog box You have two different steps to take to display a properties dialog box. The contents of a particular properties dialog box slightly differ depending on how you access it. Select the appropriate one according to your need. (1) To display a properties dialog box from the Printers window (2) To display a properties dialog box from an application menu Below are the detailed procedures for each approach. Pi4700e 2-13 Installing the Printer Driver The printer driver requires setting of items that are common to all print jobs, including the port to which the printer cable is connected and optional devices configured with the machine. These settings must be made using property sheets available from the Properties command after the printer driver has been installed or whenever the operating environment is changed. Chapter 2 Making General Settings Before Using the Printer Windows 2000/XP 2 Displaying a Properties dialog box from the Printer Folder 1 Click the Start button and select Settings. Then, click Printers. Chapter 2 2 Click the appropriate printer icon (ex. Minolta Di470 PCL6). 3 <To display the General dialog box> Click Properties from the File menu. 4 <To display Printing Preferences dialog box> Installing the Printer Driver Click Printing Preferences… from the File menu. It allows you to set the environment in which you will use the printer. The settings made through this method are valid in all applications. Displaying a Properties dialog box from an Application Menu As an example, the procedure for the PCL6 printer driver is described below. 1 Select Print... from the File menu of the application. 2 Make sure that the Select Printer of the General is Minolta Di470 PCL6: If Minolta Di470 PCL6 is not listed, click ▼ and, from the menu that will then appear, select Minolta Di470 PCL6. This method allows you to set the number of copies and paper for each document. Note that the settings made on the properties dialog box accessed through the application are valid only for that particular application. ✎ Tip To set the Device Options Setting, which need not be changed unless device is changed, open it from the Printers window to set. To show a properties dialog box other than Setup, click the corresponding tab located on the top part of the screen. ✎ Note The steps to display a properties dialog box may be different depending on the application. Follow the correct procedure according to the application. The procedure above is based on the application WordPad. With PostScript printer driver, the contents are different between when the properties dialog box is accessed from Print Manager and when it is accessed from an application. 2-14 Pi4700e Windows NT 4.0 2.3 2 Windows NT 4.0 Before installing the printer driver, make sure that your computer meets the following requirements. If it doesn’t, the printer driver may not function properly. Personal computer IBM PC or compatible with Pentium 200MHz or higher CPU Operating system Windows NT 4.0 (English) Memory 64MB or more I/O interface Parallel Centronics interface (Conforming to IEEE1284) Network 10/100BaseT (UTP) Free space on hard disk Pi4700e 10MB or more (PCL6) 2MB or more (PS) G Windows 95/98/Me For the operating environment and installation procedure for the Windows 95/98/Me printer driver, see page 2-1. G Windows 2000/XP For the operating environment and installation procedure for the Windows 2000/XP printer driver, see page 2-8. 2-15 Installing the Printer Driver This section explains the required environment for the printer driver. Chapter 2 Operating Environment Windows NT 4.0 2 Installation This section explains the installation procedure for the Windows NT 4.0 printer driver. Chapter 2 ✎ Installing the Printer Driver Note When starting up the operating system, log in with administrator privileges. Before starting to install the printer driver, be sure first to quit all other applications. ✎ Tip The following procedure assumes that the machine is a Digital Copier and that the printer driver is PCL6: Read the specific proper names accordingly if the machine is a model other than the Digital Copier and if, for example, the printer driver is PS. 1 Click the Start button. From the menu that appears, select Settings, then click Printers. 2 The Printers window will appear. Double-click the Add Printer icon. 3 Start the Add Printer Wizard. If the printer is directly connected to the computer, select My Computer and click the Next> button. ✎ Note When installing the printer driver in a computer connected to the machine via a network, be sure to consult the network administrator. 2-16 Pi4700e 2 4 A window that prompts you to select the port will appear. Select the name of the port to be used and click the Next> button. Pi4700e 2-17 Installing the Printer Driver Chapter 2 Windows NT 4.0 Windows NT 4.0 2 5 A window will appear, prompting you to select the manufacturer and Installing the Printer Driver Chapter 2 model of your printer. Click the Have Disk... button on the lower right part of the screen. 6 The Install From Disk dialog box will appear. Install the controller driver CD-ROM that is included with the controller in the CD-ROM drive of your computer. 7 Click the Browse button, select the file corresponding to the type of printer driver to be installed and the operating system being used, and then click the OK button. 8 A Printers list appears. Select the driver to be installed and click the Next> button. 9 A window that asks you to confirm the printer name will appear. Check the printer name. If you want to designate this printer as the default printer, select Yes. Click the Next> button. 10 Follow the instructions that appears on your computer screen. 11 As the last step, click the Finish button. 2-18 Pi4700e Windows NT 4.0 2 12 Installation will start. Installing the Printer Driver Chapter 2 When all the files have been copied from the CD-ROM, the corresponding icon will be added to the Printers window. This completes the installation. Pi4700e 2-19 Windows NT 4.0 2 Making General Settings Before Using the Printer Chapter 2 The printer driver requires setting of items that are common to all print jobs, including the port to which the printer cable is connected and optional devices configured with the machine. These settings must be made using property dialog box available from the Properties command after the printer driver has been installed or whenever the operating environment is changed. Installing the Printer Driver The most common settings were made when the printer driver was installed, meaning that you do not usually bother to change them. Some items must, however, be changed in the following cases. Cases where changes are necessary Applicable property tab You want to add a comment to distinguish the printer from others General The computer’s connecting port has been changed You want to change the conditions for the display of a timeout error You want to designate a port to which the machine is connected via a network (this setting must be made on a computer connected to the machine via a network) Ports You want to specify a time frame for the machine operation Scheduling You want to share the machine with other computers connected to the same network (this setting must be made on the computer directly connected to the machine) Sharing You want to restrict access to the machine You want to check the accounts of the machine users Security This setting is not related to printing. Pressing For the details of “Device Options Setting tab”, see page 4-2. 2-20 Pi4700e Windows NT 4.0 2 (1) To display a properties dialog box from the Printers window (2) To display a properties dialog box from an application menu Below are the detailed procedures for each approach. Displaying a Properties dialog box from the Printer Folder 1 Click the Start button and select Settings. Then, click Printers. 2 Click the appropriate printer icon (ex. Minolta Di470 PCL6). 3 <To display the General tab> Select Properties from the File menu. 4 <To display Printing Preferences dialog box> Click Document Defaults… from the File menu. It allows you to set the environment in which you will use the printer. The settings made through this method are valid in all applications. Displaying a Properties dialog box from an Application Menu As an example, the procedure for the PCL6 printer driver is described below. 1 Select Print... from the File menu of the application. 2 Make sure that the Name of Printer is Minolta Di470 PCL6: If Minolta Di470 PCL6 is not listed, click ▼ and, from the menu that will then appear, select Minolta Di470 PCL6. 3 Click the Properties button. This shows the properties dialog box. This method allows you to set the number of copies and paper for each document. Note that the settings made on the properties dialog box accessed through the application are valid only for that particular application. Pi4700e 2-21 Installing the Printer Driver There are two different steps to take to display a properties dialog box. The contents of a particular properties dialog box slightly differ depending on how you access it. Select the appropriate one according to your need. Chapter 2 Displaying a Properties dialog box Windows NT 4.0 2 ✎ Chapter 2 Tip To set the Device Option Setting, which need not be changed unless device is changed, open it from the Printers window to set. To show a properties dialog box other than Setup, click the corresponding tab located on the top part of the screen. Installing the Printer Driver ✎ Note The steps to display a properties dialog box may be different depending on the application. Follow the correct procedure according to the application. The procedure above is based on the application WordPad. With PostScript printer driver, the contents are different between when the properties dialog box is accessed from Print Manager and when it is accessed from an application. 2-22 Pi4700e Introduction 3 3 Network Settings 3.1 Introduction This chapter consists of the sections listed below. (1) Specifying the IP address from the printer’s touch panel ✎ Note In order to specify the IP address in a TCP/IP environment, the BootP and Map Utility are used in addition to entering the address from the printer’s touch panel. For details, refer to “8.7 Using the utility software” on page 8-28. (2) Using the printing functions Windows 95/98/Me G Peer-to-peer printing with TCP/IP See “3.3 Peer-to-Peer Printing with TCP/IP” on page 3-5. G Peer-to-peer printing with IPX/SPX See “3.5 Peer-to-Peer Printing with IPX/SPX” on page 3-12. Windows NT 4.0 G Peer-to-peer printing with TCP/IP See “3.3 Peer-to-Peer Printing with TCP/IP” on page 3-5. G LPR printing See “3.7 LPR Printing” on page 3-17. Windows 2000/XP G LPR printing See “3.7 LPR Printing” on page 3-17. G IPP printing See “3.8 IPP Printing” on page 3-21. (3) Specifying network settings from PageScope Light Pi4700e 3-1 Network Settings Chapter 3 Though this Network Card does not support NetBEUI protocol, it supports TCP/IP and IPX/SPX, which provides plenty of connection flexibility for the Windows computer. 3 Specifying the IP Address From the Printer’s Touch Panel A Windows 95/98/Me network printer can be used by going through a Novell NetWare or Windows 2000/NT server. This Network Card, however, can be configured with its bundled peer-to-peer printing programs for peer-to-peer printing without a server. Peer-to-peer printing can be performed using TCP/IP or IPX/SPX. There are two ways you can print from Windows 2000/XP with TCP/IP: using the Windows 2000/XP standard LPR printing function, and using the Windows 2000/XP standard IPP printing function. 3.2 Network Settings Chapter 3 There are two ways you can print from Windows NT 4.0 with TCP/IP: using the bundled IP Peer-to-Peer Printing Program, and using the Windows NT standard LPR printing function. Specifying the IP Address From the Printer’s Touch Panel Setting procedure 1 Press the [Utility] key. 2 Touch [Administrator Mode] and input the Administrator code. 3 Touch [NetworkSet]. 3-2 Pi4700e Specifying the IP Address From the Printer’s Touch Panel 3 Chapter 3 4 Touch [IP Address]. 5 With the keypad in the operation panel, type in the IP address, and Network Settings then touch [Enter]. 6 With the keypad in the operation panel, type in the subnet mask, and then touch [Enter]. Pi4700e 3-3 Specifying the IP Address From the Printer’s Touch Panel 3 7 With the keypad in the operation panel, type in the default gateway, Chapter 3 and then touch [Enter]. Network Settings 8 In order to activate the address settings, turn the digital copier off, then on again. ✎ Note The specified IP address cannot be confirmed from the copier panel. Confirm it from the network configuration sheet. 3-4 Pi4700e Peer-to-Peer Printing with TCP/IP 3.3 3 Peer-to-Peer Printing with TCP/IP Use the bundled IP Peer-to-Peer Printing Program for TCP/IP peer-topeer printing under Windows. Chapter 3 Digital Copier Network Card Network Settings TCP/IP Windows TCP/IP IP Peer to Peer Printing Program Configuration Procedure (Windows 95/98/Me) 1 Install TCP/IP under Windows. Refer to the applicable Windows documentation for more information. 2 Assign the IP parameters. See “3.2 Specifying the IP Address From the Printer’s Touch Panel” (p. 3-2) for more information. 3 Install the IP Peer-to-Peer Printing Program. Use the IP Peer-to-Peer Printing Program for peer-to-peer printing. See “3.4 Peer-to-Peer Printing Program (Windows)” (p. 3-8) for more information. 4 Use the procedure below to install the printer. Pi4700e 3-5 Peer-to-Peer Printing with TCP/IP 3 Installing the printer (Windows 95/98/Me) 1 On the Start menu, point to Settings and then click Printers. 2 Double-click Add Printer and install the printer. Make the new printer the default printer. See “2 Installing the Printer Driver” (p. 2-1) for details about how to install it. Chapter 3 3 Right-click the new printer icon and select Properties from the menu. 4 Display the Details tab. 5 Click the Print to the following port box and then select the port add- Network Settings ed by the IP Peer-to-Peer Printing Program. 6 Click the Apply button of the Properties dialog box. 7 Display the General tab and print a test page. 8 If the test prints normally, complete the procedure by clicking OK to close the Properties dialog box. After you finish installing a printer with the above procedure, you can use it just as you would any standard local printer. The printer can also be used as a network printer by other Windows computers on your network whose Windows 95/98/Me systems are configured the same way as described above. 3-6 Pi4700e Peer-to-Peer Printing with TCP/IP 3 Configuration Procedure (Windows NT 4.0) 1 Install TCP/IP under Windows NT 4.0. Refer to the applicable Windows documentation for more information. 2 Assign the IP parameters. 3 Install the IP Peer-to-Peer Printing Program. Use the IP Peer-to-Peer Printing Program for peer-to-peer printing. See “3.4 Peer-to-Peer Printing Program (Windows)” (p. 3-8) for more information. Chapter 3 See “3.2 Specifying the IP Address From the Printer’s Touch Panel” (p. 3-2) for more information. Installing the printer (Windows NT 4.0) 1 On the Start menu, point to Settings and then click Printers. 2 Double-click Add Printer and install the printer. Make the new printer the default printer. See “2 Installing the Printer Driver” (p. 2-1) for details about how to install it. 3 Right-click the new printer icon and select Properties from the menu. 4 Display the Ports tab. 5 From the Print to the following port(s) list, select the port where the Digital Copier IP address is displayed. 6 Click the OK button of the Properties dialog box to close it. 7 Right-click the printer icon again to display its Properties dialog box, display the General tab, and then perform a Test Print operation. 8 If the test prints normally, complete the procedure by clicking OK to close the Properties dialog box. After you finish installing a printer with the above procedure, you can use it just as you would any standard local printer. The printer can also be used as a network printer by other Windows computers on your network whose Windows NT 4.0 systems are configured the same way as described above. Pi4700e 3-7 Network Settings 4 Use the procedure below to install the printer. Peer-to-Peer Printing Program (Windows) 3 3.4 Peer-to-Peer Printing Program (Windows) Peer-to-Peer Printing Program is a Windows utility that lets you output directly to a printer from a computer on a network, without going through a server. Use this program for peer-to-peer printing under TCP/IP. Chapter 3 Requirements G Computer must have TCP/IP installed and enabled. G Network Card must have valid IP parameters assigned. ✎ Network Settings Note Refer to the applicable Windows documentation for information about installing TCP/IP under Windows. Installing the IP Peer-to-Peer Printing Program Use the following procedure to install the IP Peer-to-Peer Printing Program. 1 Load the CD-ROM into the CD-ROM drive of the computer you want to use. 2 Start Setup.exe in the lp-p2p folder on the CD-ROM. 3 Follow the instructions that appear on the screen to complete the installation. The default installation directory is C:\Program Files\Ip-p2p. You can change this to any other directory during the installation procedure. ✎ Note The message Use the Add Printer Wizard in the Printer Group to add new Peer to Peer IP Printers. appears on the screen at the end of the installation procedure. The installation procedure does everything required to install the program correctly, so simply click OK to clear this message. 3-8 Pi4700e Peer-to-Peer Printing Program (Windows) 3 Setting Up the Peer-to-Peer Printing Program 1 On the Start menu, point to Programs and then Ip-p2p. 2 On the submenu that appears, click IP-P2P. Network Settings Chapter 3 Make the settings you want on the dialog box that appears. ❍ ❍ ❍ Pi4700e Max Hops for Search Input a value for the maximum number of hops for the search. The initial default value is 2. See the precautions under “Management Access Program (Windows)” (p. 8-28) for more information about the maximum number of hops. IP Port Base Input the print server initial port number. The initial value is 10000 (TCP/IP port 10001), but you can change this setting if you need to. Printer Names Select the printer port name display format. based on Serial Numbers Select this option to use Network Card serial numbers to distinguish between printers. The serial number is displayed as follows: MLT_<serial number> When a Network Card serial number is SN991354, for example, the printer port name becomes MLT_991354. based on IP Address Default display format. Select this option to use IP addresses to distinguish between printers. When the IP address is 199.99.92.99, for example, the printer port name becomes 199.99.92.99. 3-9 Peer-to-Peer Printing Program (Windows) 3 based on DNS Name Select this option to use DNS names to distinguish between printers. Example: PTR-MKTG.DOMAIN.COM based on unit name Select this option to use unit names to distinguish between printers. 3 After the settings are the way you want, click OK to close the dialog Chapter 3 box. Restart Windows to put your settings into effect. Network Cards may be undetectable with certain routers and maximum hops settings made with the above procedure. When this happens, you must add printers manually using the procedure describe below. Network Settings Adding a Printer Manually 1 On the Start menu, point to Programs and then Ip-p2p. 2 On the submenu that appears, click IP-P2P to display the Peer-toPeer IP Setup dialog box. 3 Click the Printers button to display the dialog box shown below. 3-10 Pi4700e Peer-to-Peer Printing Program (Windows) 3 4 Input the required information for the printer you want to add into the ❍ ❍ ❍ IP Address Input the IP address of the printer you want to add. Name Input the name you want to assign to the printer. Use an easily understandable name. Port Input the printer port number. The default port number is 10001. Descriptions Input a description of the printer. 5 After making all the settings, click Add to close the dialog box. 6 After you are finished adding printers, click OK. Printers you add using IP Peer-to-Peer printing are added to the PORT list of the printer properties dialog box and can be selected for printing. Pi4700e 3-11 Network Settings ❍ Chapter 3 fields provided. Peer-to-Peer Printing with IPX/SPX 3 3.5 Peer-to-Peer Printing with IPX/SPX Use the bundled IPX Peer-to-Peer Printing Program for IPX/SPX peer-topeer printing under Windows. With IPX Peer-to-Peer Printing Program, there is no need to run NetWare Client. Chapter 3 Digital Copier Network Card Network Settings IPX/SPX Windows 95/98/Me IPX/SPX-compatible Protocol IPX Peer to Peer Printing Program Configuration Procedure 1 Install IPX/SPX-compatible Protocol under Windows. Refer to the applicable Windows documentation for more information. 2 Install the IPX Peer-to-Peer Printing Program. Use the IPX Peer-to-Peer Printing Program for peer-to-peer printing. See “3.6 IPX Peer-to-Peer Printing Program (Windows)” (p. 3-14) for more information. 3 Use the procedure below to install the printer. To install the printer 1 On the Start menu, point to Settings and then click Printers. 2 Double-click Add Printer and install the printer. Make the new printer the default printer. See “2 Installing the Printer Driver” (p. 2-1) for details about how to install it. 3-12 Pi4700e Peer-to-Peer Printing with IPX/SPX 3 3 Right-click the new printer icon and select Properties from the menu. 4 Display the Details tab. 5 Click the Print to the following port box and then select the port added by the IPX Peer-to-Peer Printing Program. 8 If the test prints normally, complete the procedure by clicking OK to close the Properties dialog box. After you finish installing a printer with the above procedure, you can use it just as you would any standard local printer. The printer can also be used as a network printer by other Windows computers on your network whose Windows 95/98/Me systems are configured the same way as described above. Pi4700e 3-13 Network Settings 7 Display the General tab and print a test page. Chapter 3 6 Click the Apply button of the Properties dialog box. IPX Peer-to-Peer Printing Program (Windows) 3 3.6 IPX Peer-to-Peer Printing Program (Windows) Use this program for peer-to-peer printing under IPX/SPX. Just by installing this program, you can specify an IPX-based printer on the network as a printer port. Requirements G Computer must have IPX/SPX-compatible protocol installed. Chapter 3 ✎ Note Refer to the applicable Windows documentation for information about installing IPX/SPX under Windows. Network Settings Installing the IPX Peer-to-Peer Printing Program Use the following procedure to install the IPX Peer-to-Peer Printing Program. 1 Load the CD-ROM into the CD-ROM drive of the computer you want to use. 2 Start Setup.exe in the lp-p2p folder on the CD-ROM. 3 Follow the instructions that appear on the screen to complete the installation. The screen shown below appears automatically after installation is complete. 3-14 Pi4700e IPX Peer-to-Peer Printing Program (Windows) 3 Pi4700e OK Clicking this button applies the changed settings and exits the program. G Cancel Clicking this button exits the program without applying the changed settings. G Clear Clicking this button clears the contents of the Available Printers list, except for printers whose permanent flag is turned on. G Delete Clicking this button deletes the currently selected printer from the Available Printers list. A deleted printer no longer appears in the printer PORT list. A deleted printer can be re-added using the Find Printers button. G Permanent Clicking this button toggles the permanent flag setting on and off for the printer that is currently selected in the Available Printers list. A printer whose permanent flag is turned on is not cleared from the Available Printers list by the Clear or Delete button, even if the printer is physically removed from the network. G Find Printers Clicking this button searches for available printers on the network and displays the corresponding print server names in the Available Printers list. G Select Clicking this button toggles the S flag setting on and off for the printer that is currently selected in the Available Printers list. A printer whose S flag is turned on appears in the PORT list of the printer Properties dialog box, where it can be selected. The initial start up default is S flag on for all printers in the Available Printers list. Up to 30 S flags can be turned on at any one time. G Available Printers This is a list of all the printers detected on the network. You can clear this list by clicking the Clear button. Then you can update the list by clicking the Find Printers button. The following describes the three fields of the Available Printers list. 3-15 Network Settings G Chapter 3 You can use this screen to configure the IPX Peer-to-Peer Printing program. If you do not want to change any settings, simply click OK to quit the program. The following describes the contents of this screen. IPX Peer-to-Peer Printing Program (Windows) 3 ❍ ❍ Network Settings Chapter 3 ❍ Unit name This field shows Network Card names. The format for the default name of this Network Card is MLT_<serial number>. Description This field displays a description of the printer. Normally, this field shows the manufacturer name and printer model name. Flags An S flag displayed here means the select flag is turned on, so the printer is included in the PORT list of the printer Properties dialog box. A P flag displayed here means the permanent flag is turned on, so the printer cannot be deleted from the list by the Clear List button or Delete button. 3-16 Pi4700e LPR Printing 3.7 3 LPR Printing This section explains how to use the Windows NT 4.0/2000/XP standard LPR printing function. Chapter 3 Digital Copier Network Card Network Settings TCP/IP Windows NT 4.0/2000/XP TCP/IP Microsoft TCP/IP Printing Requirements G Computer must have TCP/IP installed and enabled. G Network Card must have valid IP parameters assigned. Configuration Procedure (Windows NT 4.0) 1 Install TCP/IP and Microsoft TCP/IP Printing service under Windows NT. Refer to the applicable Windows documentation for more information. 2 Assign the IP parameters. See “3.2 Specifying the IP Address From the Printer’s Touch Panel” (p. 3-2) for more information. 3 Use the procedure below to install the printer. Pi4700e 3-17 LPR Printing 3 Installing the printer (Windows NT 4.0) 1 On the Start menu, point to Settings and then click Printers. 2 Double-click Add Printer and install the printer. Make the new printer the default printer. See “2 Installing the Printer Driver” (p. 2-1) for details about how to install it. Chapter 3 3 Right-click the new printer icon and select Properties from the menu. 4 Display the Ports tab. 5 Click Add Port. Network Settings This displays a list of enabled port types. 6 Select LPR Port and then click New Port. 7 On the Add LPR compatible printer dialog box, type the IP address of the Network Card into the Name or address of server providing lpd box. If the network you are on uses DNS (Domain Name Services), type in the DNS name instead of the IP address. 8 Type PORT 1 into the Name of printer or print queue on that server box, and then click OK to close the dialog box. 9 Click the Close button of the Printer Ports dialog box, and then click the OK button of the Properties dialog box to close it. 10 Right-click the printer icon again to display its Properties dialog box, display the General tab, and then print a test page. 11 If the test prints normally, complete the procedure by clicking OK to close the Properties dialog box. After you finish installing a printer with the above procedure, you can use it just as you would any standard local printer. The printer can also be used as a network printer by other Windows computers on your network whose Windows NT 4.0 systems are configured the same way as described above. 3-18 Pi4700e LPR Printing 3 Configuration Procedure (Windows 2000/XP) 1 Install TCP/IP under Windows 2000/XP. Refer to the applicable Windows documentation for more information. 2 Assign the IP parameters. 3 Use the procedure below to install the printer. Installing the printer (Windows 2000/XP) 1 Install the printer driver following the instructions that come with the in- Chapter 3 See “3.2 Specifying the IP Address From the Printer’s Touch Panel” (p. 3-2) for more information. 2 Right-click the new printer icon and select Properties from the menu. 3 Display the Ports tab. 4 Click Add Port. This displays a list of available port types. 5 Select Standard TCP/IP Port from the list, and then click New Port. This starts Add Standard TCP/IP Printer Port Wizard. 6 Click Next on the introduction page of the wizard. 7 On the Add Port page, type the IP address of the Network Card into the Printer Name or IP Address box. If the network you are on uses DNS (Domain Name Services), type in the DNS name instead of the IP address. 8 Type the name of the port you want into the Port Name box, and then click Next. ✎ Note When you type the IP address into the Printer Name or IP Address box, the name of the port is automatically entered in the Port Name box as IP_<IP address>, but you can change the port name as you want. Pi4700e 3-19 Network Settings staller. Make the new printer the default printer. LPR Printing 3 9 On the Additional Port Information Required page, select Custom, and then click Settings. 10 On the Configure Standard TCP/IP Port Monitor dialog box, select LPR from the LPR Settings box. 11 Type PORT1 in the name of the queue you want into the Queue Name box, and then check the LPR Byte Counting Enabled check box. Chapter 3 12 Click OK to return to the Additional Port Information Required page. 13 Click Next to display the next wizard page, and then click Finish. 14 Click the Close button of the Printer Ports dialog box, and then click Network Settings the Apply button of the Properties dialog box. 15 Display the General tab, and then print a test page. 16 If the test prints normally, complete the procedure by clicking OK to close the Properties dialog box. After you finish installing a printer with the above procedure, you can use it just as you would any standard local printer. The printer can also be used as a network printer by other Windows computers on your network whose Windows 2000/XP systems are configured the same way as described above. 3-20 Pi4700e IPP Printing 3.8 3 IPP Printing This section explains how to use the Windows 2000/XP standard IPP printing function. Chapter 3 Digital Copier Network Card Network Settings IPP Windows 2000/XP TCP/IP IPP Client Requirements G Computer must have TCP/IP installed and enabled. G Network Card must have valid IP parameters assigned. Configuration Procedure 1 Install TCP/IP under Windows 2000/XP. Refer to the applicable Windows documentation for more information. 2 Assign the IP parameters. See “3.2 Specifying the IP Address From the Printer’s Touch Panel” (p. 3-2) for more information. 3 Use the procedure below to install the printer. Installing the printer 1 For Windows 2000, on the Start menu, point to Settings and then click Printers. For Windows XP, on the Start menu, click Printers and Faxes. 2 For Windows 2000, double-click the Add Printer icon to start the Add Printer Wizard. For Windows XP, click the Add Printer icon to start the Add Printer Wizard. Pi4700e 3-21 IPP Printing 3 3 Click Next on the introduction page of the wizard. 4 On the Local or Network Printer page, select the Network printer option, and then click Next. 5 On the Locate Your Printer page, select the Connect to a printer on the Internet or your intranet option. 6 Type the IPP printer’s URL into the URL field as shown below, and Chapter 3 then click Next. http://<IP address of the printer>:631/nic/Print (Example) When the IP address of the Digital Copier is 192.9.200.200: http://192.9.200.200:631/nic/Print Network Settings 7 Click OK on the confirmation dialog box that appears. 8 In the Manufacturers and Printers lists, select the printer you want to use, and then click OK. If the name of the printer you want to use does not appear in the lists, load the Printer Drivers CD-ROM that comes with your Digital Copier into your computer’s CD-ROM drive and then click the Have Disk button. Next, specify the location of the printer’s INF file on the CD-ROM. 9 Select whether you use this printer as the default printer or not, and then click Next. 10 Click Finish to exit the wizard. 11 Click the icon of the newly added printer to select it, and then click Properties on the File menu. 12 Display the General tab and then print a test page. 13 If the test prints normally, complete the procedure by clicking OK to close the Properties dialog box. After you finish installing a printer with the above procedure, you can use it just as you would any standard local printer. The printer can also be used as a network printer by other Windows computers on your network whose Windows 2000/XP systems are configured the same way as described above. 3-22 Pi4700e Specifying network settings from PageScope Light 3.9 3 Specifying network settings from PageScope Light Access PageScope Light for Pi4700e can be accessed directly from a Web browser. 1 Start the Web browser. 2 In the URL field, enter the IP address of the printer controller as shown Chapter 3 below. http://<IP address of printer controller>/ (Example) When the IP address of the printer controller is 192.9.200.200: 3 This causes PageScope Light for Pi4700e screen to appear. Operation PageScope Light for Pi4700e operation is identical to that for Internet Web pages. Clicking a hot link jumps to the link destination, and the Back and Forward buttons scroll through pages backwards and forward. Logging In to the Admin Mode After you log in to PageScope Light in the Admin Mode, you can change the configuration of the Digital Copier settings. 1 Type the administrator password into the Admin Password box. The initial default administrator password is sysadm. See “Preference” for information about how to change the password. 2 Click the Log-in button to log in to the Admin Mode. 3 When you want to log out, click the Log-out button. ✎ Note Log out is performed automatically if no operation is performed for more than 10 minutes. On the Network tab, a password input text box appears on each setting screen. You must be able to input the correct password in order to change Network tab settings. The password you should input here is the same as the Admin Password you input on other tabs. Pi4700e 3-23 Network Settings http://192.9.200.200/ Specifying network settings from PageScope Light 3 Network Tab Use the Network tab for configuring the Pi4700e network interface. ✎ Chapter 3 Note On the Network tab, you must type the password into the Password box that appears on the setting screen you select on the menu. Note, however, that you need to input the password on the Network tab only once per session. After you input the password, the Password box does not appear any more on other Network tab setting screens during the current session. Summary Network Settings This screen appears when you click the Summary menu on the Network tab. Use this screen to view a summery of the network interface card. 3-24 ROM Version Network interface card firmware version IP Address IP address assigned to the current network interface card Hardware Address MAC address of network interface card Serial Number Serial number of network interface card Pi4700e Specifying network settings from PageScope Light 3 TCP/IP Configuration Network Settings Chapter 3 This screen appears when you click the TCP/IP Configuration menu on the Network tab. It lets you change a number of network interface card TCP/IP settings. Pi4700e Password Input the password assigned to the network interface card. The initial factory default is sysadm. Clicking the Apply button after inputting the wrong password displays a password error message without changing the settings. IP Address Input the IP address you want to assign to the network interface card. Subnet Mask Input the network subnet mask. Default Gateway If the network has a router, input the IP address of the router. Base Port Number Type in the base port number for RAW port printing. A port number that in one greater than the base port number you specify here is used for actual printing. Example: Specifying a base port number of 10000 results in an actual port number of 10001. DHCP Checking this option sends a DHCP (Dynamic Host Configuration Protocol) request whenever the network interface card is powered up. When there is a DHCP server on the network, the network interface card can obtain IP parameters automatically from the server at power up. IP Address in NVRAM When this option is checked, the network interface card uses the IP address stored in NVRAM when the card is powered up. Apply button Click this button to apply any settings you have input up to this point. Clear button Click this button to cancel any settings you have input up to this point. 3-25 Specifying network settings from PageScope Light 3 ✎ Note Use only IP parameters that have been specified or approved by your network administrator. Chapter 3 The network interface card does not send DHCP requests when DHCP is disabled. If there is no IP address assigned to the network interface card or if IP Address in NVRAM is turned off, the network interface card sends a BOOTP request. A DHCP request is sent when the network interface card is reset or powered up (while DHCP is enabled and no IP address assigned to the network interface card or if IP Address in NVRAM is turned off). Network Settings When DHCP is enabled, an IP address is assigned to the network interface card, and IP Address in NVRAM is turned on, the network interface card uses the IP address stored in NVRAM. In this case, the network interface card does not send a DHCP request. In a DHCP environment, it is necessary to specify an unlimited lease period for the IP address assigned to the network interface card or the IP address must be reset a fixed address within a range that is not leased. 3-26 Pi4700e Specifying network settings from PageScope Light 3 NetWare Configuration Network Settings Chapter 3 Sub-menus appear when you click the NetWare Configuration menu on the Network tab. Use the sub-menus to display and configure the network interface card settings for NetWare printing. NetWare Setting This screen appears when you click the NetWare Setting sub-menu under the NetWare Configuration menu. It lets you change a number of NetWare environment settings. Pi4700e Password Input the password assigned to the network interface card. The initial factory default is sysadm. Clicking the Apply button after inputting the wrong password displays a password error message without changing the settings. Enable NetWare Check this option to enable IPX/SPX on the network interface card. The NetWare environment is disabled while this option is unchecked. Print Server Name Input the print server name you want. The default print server name when this field is left blank is: MLT_<Network Interface Card serial number>. Print Server Password When you want to use a password for logging into the network interface card, type the password you want to specify into the field. Type the same password into the Password Retype field for confirmation. The password you specify must be the same as the bindery and NDS-based print server password. 3-27 Specifying network settings from PageScope Light Network Settings Chapter 3 3 Preferred File Server Type in the name of the preferred file server when setting up for bindery and bindery emulation. See “8 Network Interface Card” for more information about the preferred file server. The print server must always be configured on a preferred file server. Failure to properly configure the preferred file server can cause incorrect printing results. Preferred NDS Context Input the print server for NDS operation. In this case, always input the entire context, without inputting a period at the beginning of the path. Example: ou=standard.ou=organization_1 Preferred NDS Tree Input the print server for NDS operation. If you do not know what the tree is, input whoami at the DOS command line. Print Queue Scan Rate Specify the print server’s queue scan interval in seconds. The default scan rate is 1 second. Ethernet Frame Type Specify the frame type being used by Ethernet. Normally, the frame type being used by NetWare is determined by monitoring the network interface card. When the frame type is determined, it is assumed that the network interface card is the same frame type. Once you select a frame type, network interface card operation supports that NetWare frame type only. Frame type monitoring normally starts from IEEE 802.3, and then moves to Ethernet II and then 802.3 SNAP. When the network you are on uses multiple Ethernet frame types, use the pull-down menu to select the frame type to be recognized. Disable Bindery Check this option to disable bindery when only the NDS mode is used. When bindery is disabled, the network interface card no longer supports the print server on the bindery file server. Apply button Click this button to apply any settings you have input up to this point. Clear button Click this button to cancel any settings you have input up to this point. The settings you make on this screen do not become valid until you reset the network interface card or power it down and then back up again. See “Reset” (p. 3-34) for more information on resetting the network interface card. 3-28 Pi4700e Specifying network settings from PageScope Light 3 NetWare Status Network Settings Chapter 3 This screen appears when you click the NetWare Status sub-menu under the NetWare Configuration menu. Use this screen to check the status of the file server and queue to which the network interface card is attached. File Server Pi4700e Name of the NetWare server to which the printer is currently attached File Server Status Status of connection to NetWare server Queue Name Name of NetWare print queue to which the printer is currently allocated Queue Status NetWare print queue status 3-29 Specifying network settings from PageScope Light 3 AppleTalk Configuration Network Settings Chapter 3 This screen appears when you click the AppleTalk Configuration menu on the Network tab. It lets you change a number of AppleTalk environment settings. 3-30 Password Input the password assigned to the network interface card. The initial factory default is sysadm. Clicking the Apply button after inputting the wrong password displays a password error message without changing the settings. Enable AppleTalk Check this option to enable AppleTalk on the network interface card. Printer Name Input the printer name you want. Zone Name Input the name of AppleTalk zone in which you want to locate the printer. Apply button Click this button to apply any settings you have input up to this point. Clear button Click this button to cancel any settings you have input up to this point. Pi4700e Specifying network settings from PageScope Light 3 IPP Configuration Network Settings Chapter 3 This screen appears when you click the IPP Configuration menu on the Network tab. It lets you change Internet Printing Protocol (IPP) settings. You can configure the printer functions that are controlled by IPP and the printer information that can be seen from IPP clients. ✎ Note Standard access for IPP printing is: http://<IP Address>:631/nic/Print For details about IPP printing, see “8 Network Interface Card”. Pi4700e Password Input the password assigned to the network interface card. The initial factory default is sysadm. Clicking the Apply button after inputting the wrong password displays a password error message without changing the settings. Enable IPP Check this option to enable IPP on the network interface card. You cannot use IPP print unless this option is checked. 3-31 Specifying network settings from PageScope Light 3 Network Settings Chapter 3 The following items are returned when attributes are requested from an IPP client. 3-32 Printer Name Type in a name to identify the printer during IPP printing. Printer Location Type in the location of the printer. Printer Information Type in a description of the printer. More Printer Information Specify a URL where detailed information about this particular printer can be found. Printer Driver Installer Specify a URL where the printer driver installer can be found. Printer Make and Model Type in the printer manufacturer name and model name. More Printer Information Manufacturer Specify a URL where detailed information about the printer manufacturer particular printer can be found. Operations Supported Use these settings to specify the IPP printing operations supported by the printer. Unchecking an item means that it is not supported for IPP printing. Document Format Supported Put a check mark next to the document data formats that the printer supports for IPP printing. Document Format Select the default document data format. The uses this data format for IPP printing when no data format is specified by the client. Message from Operator Type in a message from the printer administrator to users. job-k-octets-supported Specify, in kilo-octet units, the upper limit and lower limit of the total job size that the printer can receive. Apply button Click this button to apply any settings you have input up to this point. Clear button Click this button to cancel any settings you have input up to this point. Pi4700e Specifying network settings from PageScope Light 3 WINS Configuration Network Settings Chapter 3 This screen appears when you click the WINS Configuration menu on the Network tab. It lets you change WINS settings. WINS (Windows Internet Name Service) makes it possible for a device, such as your network interface card, to register a NetBIOS name (like MLT_995243) along with its current IP address (like 192.9.200.200). A client wanting to contact the printer uses the WINS server to match the NetBIOS name with an IP address. Most users will find it easier to remember the NetBIOS name for the printer rather than its IP address. Pi4700e Password Input the password assigned to the network interface card. The initial factory default is sysadm. Clicking the Apply button after inputting the wrong password displays a password error message without changing the settings. NetBIOS Name The NetBIOS name for the network interface card is shown on this screen. The default NetBIOS name is the Network Interface Card’s serial number (for example, MLT_995243), unless you previously configured a name for the network interface card with DHCP. You may change the NetBIOS name here, by entering a new name. The name can be up to 15 characters long. Primary WINS Server If you previously configured a DHCP server to provide the network interface card with the IP address of the primary WINS server, this item shows the address. Otherwise, enter the IP address of the primary NetBIOS name server here. Secondary WINS Server You may also enter the IP address of a secondary NetBIOS name server, if you want. If you configured your DHCP server to provide the address of a secondary WINS server to the network interface card, the address fields are filled in with the appropriate information automatically. 3-33 Specifying network settings from PageScope Light 3 Primary Server Logged in Name of the Primary WINS Server to which the printer is currently logged in. Secondary Server Logged in Name of the Secondary WINS Server to which the printer is currently logged in. Apply button Click this button to apply any settings you have input up to this point. Clear button Click this button to cancel any settings you have input up to this point. Chapter 3 After you configure the NetBIOS (WINS) settings, restart the printer. Network Settings The network interface card’s status page should now show that the network interface card is successfully registered with the WINS server. The items labeled Primary Server Logged in and Secondary Server Logged in on the WINS Configuration screen now indicate which WINS server(s) the network interface card is registered with. Under normal circumstances, your network interface card automatically renews its registration with the WINS server before its lease expires. Reset This screen appears when you click the Reset menu on the Network tab. Use this screen to reset the network interface card so new settings can take effect. 3-34 Password Input the password assigned to the network interface card. The initial factory default is sysadm. Clicking the Apply button after inputting the wrong password displays a password error message without changing the settings. Reset button Click this button to reset the network interface card. Pi4700e Specifying network settings from PageScope Light 3 Maintenance Network Settings Chapter 3 This screen appears when you click the Maintenance menu on the Network tab. Use this screen to restore the network interface card to its initial factory default settings. Password Input the password assigned to the network interface card. The initial factory default is sysadm. Clicking the Apply button after inputting the wrong password displays a password error message without changing the settings. Restore Factory Defaults Click the Restore button to restore the network interface card to its initial factory defaults. ✎ Note After performing a Reset or Maintenance, turn the digital copier off, then on again. Pi4700e 3-35 Specifying network settings from PageScope Light Network Settings Chapter 3 3 3-36 Pi4700e Description of each tab 4 4 Properties Settings 4.1 Description of each tab Each tab enables you to change the settings indicated below. For a detailed description of each function, see the corresponding reference page. Setup Allows you to set the paper take-up tray and paper exit tray. Also allows you to set high level printing functions such as two-sided printing, booklet creation, N-up printing, OHP interleaving, Watermark, Cover Mode, Staple, Punch, and Folding. p. 4-7 Paper Allows you to set basic printing items such as number of copies, paper size, print orientation and print zoom ratio. Also allows you to set functions related to sorting. p. 4-16 Quality Allows you to set general items related to graphics, such as resolution, halftone processing and image processing method. Also allows you to set TrueType fonts. p. 4-21 Device Options Setting Allows you to set option equipment installed on the machine. p. 4-2 Job Management Sets the copy track function. Allows you to lock a printing job. Also allows you to print the distribution number. p. 4-24 PostScript (PS driver only Allows you to make detailed settings related to PostScript. p. 4-31 – Allows you to save and read the contents of the settings on a Setup, Paper, Quality, Job Management, Device Options Setting or PostScript tab. p. 4-5 ✎ Note Refer to Chapter 2 for the procedure for displaying Properties. Note that different settings must be made for each driver. The differences between each driver are indicated based on the PCL6 version driver for Windows 98. Details of OS-dependent functions are not given. Pi4700e 4-1 Properties Settings Outline of settings that can be changed Chapter 4 Reference page Property tab Device Options Setting tab 4 4.2 Device Options Setting tab This tab allows you to set the options installed on the machine. Make sure you select the options correctly. Otherwise, some functions may be unusable or printing errors may occur. The settings must match the machine configuration. PCL6 version Properties Settings Chapter 4 (1) (3) PS version (1) (2) (3) 4-2 Pi4700e Device Options Setting tab Device Options Set the options installed in the machine. This is a list of installable options. Select the desired options from this list. Available settings: Dup+2way Tray, Dup+LCC, Duplex Cabinet, LCT, Mailbin Finisher, Multi-staple Finisher, Single-staple Finisher, Folding Finisher, Hard Disk Drive in Copier • Add Pressing this button adds the selected option. • Remove Pressing this button removes the selected option. • Installed Options This is a list of currently installed options. Select it when you wish to remove an option. • Mailbox Setting <when Mailbin Finisher is installed> You can add a name to each mailbin of Mailbin Finisher. For details, see page 4-4. (2) User Name The user name set in the printer driver is displayed as the job user name on the machine’s touch panel. Setting range: 8 characters max. (3) About… Click to display the manufacturer and version number of the printer driver. ✎ Note If the Dup+2way Tray, Duplex Cabinet, and Dup+LCC are not correctly selected, it may not be possible to select the Finisher correctly. Pi4700e 4-3 Chapter 4 • Installable Options Properties Settings (1) 4 Device Options Setting tab 4 Mailbox Setting dialog box <when Mailbin Finisher is installed> Allows you to set the names of the mailbins in Mailbin Finisher. (1) (2) Chapter 4 (3) Properties Settings (1) MailBox This is the bin name editing box. Setting range: 4-4 max. 20 characters (PCL6) max. 32 characters (PS) (2) Apply Press to finalize a changed name. (3) Bin list Displays a list of names of currently set bins. To change the name of a bin, select the name you wish to change. Pi4700e Functions common to various tabs 4.3 4 Functions common to various tabs These functions are common to tabs from the Setup tab to the Job Management tab and also the Overlay tab or the PostScript tab. (2) (1) (2) Pi4700e Easy Set Allows you to call and use the settings stored in each tab. • Easy Set Name Allows you to call the settings stored in each tab. • Save (Delete) Used to save/delete the settings of tabs.When you touch the Save button to save the contents of a tab, the Save Easy Set Name dialog box appears. For details, see page 4-6. When you touch Delete, the stored set contents are deleted. Paper preview/Machine preview Allows you to display/change over the paper preview and machine preview. • Page Layout The layout of the printed data on a single page is displayed as an image. This allows you to check the status for N-up printing and two-sided printing, for example. See page 12-12 for the Page Layout list. • Printer Figure When the paper take-up tray and the paper exit tray are set, the paper take-up tray and paper exit tray are displayed in green. See page 12-15 for the Printer Figure list. 4-5 Properties Settings Chapter 4 (1) Functions common to various tabs 4 ✎ Note for (1) Depending on environment used, contents of Save/Delete will be different: Refer to Appendix A for details. (p. 12-9). Watermark, Custom Paper, Mailbox Name, and Font Substitution Table are not set. ✎ Tips for (1) If the set contents have changed, the Save button will appear. Chapter 4 If the set contents are the Easy Name contents, the Delete button will appear. Functions of the Save Easy Set Name dialog box Use to save print setting data. Properties Settings Before pressing the Save button, be sure to set the contents of each tab. (1) (1) 4-6 Easy Set Name Add a name to the stored contents. Number of registrations Depending on environment used, number of registrations will be different: Refer to Appendix A for details (p. 12-9). Number of characters max. 10 characters Pi4700e Setup tab 4.4 4 Setup tab This tab allows you to set the paper take-up tray, paper exit tray and various high grade printing functions. PCL6 version (1) (3) Properties Settings (4) PS version (1) (3) (4) (2) Pi4700e Chapter 4 (2) 4-7 Setup tab 4 ✎ Note With the PS driver, the Watermark option is included on the Setup tab. For details, refer to “Overlay tab” on page 4-27. (1) N-up Outputs multiple originals on one sheet of paper. • N-up Set the N-up number. Available settings: Off, 2up, 4up, 6up, 9up, 16up Sets the layout border • N-up Style Sets the printing layout Properties Settings Chapter 4 • Border line Horiz. Ascending (2) (3) 4-8 Horiz. Descending Vert. Ascending Vert. Descending Duplex / Booklet <when Dup + 2way Tray, Dup + LCC or Duplex Cabinet is installed> Specifies two-sided printing and Booklet printing. • Off Not set • Short Edge Binding Two-sided printing takes place so that the short edge is bound. • Long Edge Binding Two-sided printing takes place so that the long edge is bound. • Booklet Left Binding Four pages are printed on both sides of a single sheet of paper so that when the sheet is folded in the middle it forms a booklet (left bound). • Booklet Right Binding Four pages are printed on both sides of a single sheet of paper so that when the sheet is folded in the middle it forms a booklet (right bound). Paper Source Selects the machine tray to be used. Sets the cover page function and the OHP interleaving function. • Paper Source Select the machine tray to be used. The selectable paper sizes are limited by the types of paper take-up trays installed in the machine. Available settings: Auto, Manual Feed, Tray1 to 4, LCC, LCT • Detail of Paper Source Set the cover page function and OHP interleaving function. For details, see page 4-11. Pi4700e Setup tab 4 (4) Output Setting This function selects the tray in the machine to which the paper is to be distributed. Settings can also be made for finishing functions including stapling, hole punching, and folding. • Paper exit destination Select the machine tray to which you wish to distribute the prints. The selectable paper exit trays are limited by the type of finisher installed in the machine. Mailbin Finisher Except Mailbin Finisher • Mailbin paper exit destination If Mailbin is selected as the paper exit destination, set the mailbin to which you wish to distribute the paper. • Detail of Output Setting Set stapling, punching or folding. For details, see page 4-13. ✎ Tip for (1) The printing layout is displayed on the Page Layout. ✎ Notes for (2) If you print a document that contains pages of different sizes and/or different directions in the same job, the image may be partially cut or images may overlap each other. Two-sided printing and OHP interleaving cannot be set simultaneously. ✎ Tips for (2) The sizes for which you can perform two-sided printing are from 140 × 182 mm to 297 × 432 mm. Short Edge Binding, Long Edge Biding, Booklet Left Binding and Booklet Right Binding are displayed on the Page Layout. ✎ Note for (3) Some paper sizes cannot be selected. For details, refer to the User Manual of the machine. Pi4700e 4-9 Properties Settings Note for (1) If you print a document that contains pages of different sizes and/or different directions in the same job, the image may be partially cut or images may overlap each other. Chapter 4 ✎ Setup tab 4 ✎ Tips for (3) Set the paper take-up tray using Device Options Setting. The paper take-up tray used is displayed in green on the Printer Figure. ✎ Note for (4) Some paper sizes cannot be selected. For details, refer to the User Manual of the machine. Chapter 4 ✎ Tips for (4) Set the type of finisher using Device Options Setting. Properties Settings The paper take-up tray used is displayed in green on the Printer Figure. 4-10 Pi4700e Setup tab 4 Functions of the Detail of Paper Source dialog box (2) (1) Cover Page This function is used to print a document with front and back cover pages. You can print on the front cover, or leave it blank. (2) • Front Cover Page Activates the front cover function. • with Image (Front Cover Page) Prints on the front cover. • Back Cover Page Adds a back cover. • with Image (Back Cover Page) Prints on the back cover. • Cover Paper Source Select the tray for the front cover and back cover papers. Available settings: Manual Feed, Tray1 to Tray4, LCC, LCT Interleaving Paper This function inserts sheets (interleaving sheets) between sheets of OHP film when printing on OHP film. You can either leave these sheets blank or print the same image as that printed on the OHP film. • OHP Interleaving Activates the OHP interleaving function. • with Image Prints an image on the interleaving sheet. • Interleaving Paper Source Select the tray for the interleaving paper. Available settings: Tray1 toTray4, LCC, LCT ✎ Notes for (1) When using special paper, such as thick paper, the paper sometimes fails to be distributed to the selected paper exit destination. You can set Manual Feed, Tray1 to Tray4, LCC and LCT using Paper Source. Pi4700e 4-11 Properties Settings (1) Chapter 4 This function sets the cover page function and the OHP interleaving function. Setup tab 4 ✎ Tip for (1) The tray containing the paper on which the body of the document is to be printed is displayed in green on the Printer Figure. ✎ Notes for (2) When using the OHP interleaving function, set the number of sets of prints to “1”. Chapter 4 You cannot select the same paper take-up port for both Paper Source and Interleaving Paper Source. You can set Manual Feed only using Paper Source. OHP interleaving and two-sided printing cannot be set simultaneously. Properties Settings ✎ Tip for (2) The OHP film tray is displayed in green on the Printer Figure. 4-12 Pi4700e Setup tab 4 Functions of the Detail of Output Setting dialog box Settings can be made for finishing functions including stapling, hole punching, and folding. (3) (1) (2) (3) Pi4700e Staple <when Mailbin Finisher, Single-staple Finisher, Multi-staple Finisher or Folding Finisher is installed> This function allows you to staple one set of printed documents at a time. • Off Printed documents are not stapled. • Corner staple Printed documents are stapled at their corners. • Long Edge <when Multi-staple Finisher or Folding Finisher is installed> The documents are stapled along the long edge. • Short edge <when Multi-staple Finisher or Folding Finisher is installed> The documents are stapled along the short edge. • Center <when Folding Finisher is installed> The documents are stapled at the center. Punch <when Mailbin Finisher, Multi-staple Finisher or Folding Finisher is installed> This function allows you to punch holes in the printed document. • Off The document is not punched. • Short Edge The document is punched along the short edge. • Long Edge The document is punched along the long edge • Punch Holes <Inch area only> Set the number of holes to be punched. Folding <when Folding Finisher is installed> Select the desired paper folding function. • Off Printed pages are not folded. • Just Output Size [ZFold] Printed pages are folded into three parts. • Half Folding Printed pages are folded in two at their center. • Crease A crease is made in printed pages. 4-13 Properties Settings (1) Chapter 4 (2) Setup tab 4 ✎ Notes for (1) If Staple is set, printed pages are fed out into the Elevator Tray. The stapling position is either the top left corner or the top right corner depending upon the direction of the paper and the printing direction. If the capacity of Mailbin Finisher, Single-staple Finisher, Multi-staple Finisher or Folding Finisher is exceeded, the stapling operation may be canceled. Refer to the User Manual of the machine. Chapter 4 Take care when printing a document consisting of pages facing different directions, since the stapling position will be determined by the direction of the first page. Properties Settings If you print a document consisting of pages of different sizes in the same printing job, stapling may be canceled. Only Center Staple can be set with Booklet. You cannot set certain sizes or kinds of paper. For details, refer to the User Manual of the machine. ✎ Tip for (1) You can check the stapling positions using the icons in the dialog box. ✎ Notes for (2) Number of punch holes can be specified only when Multi-staple Finisher is installed. Punch Holes is not displayed for Metric area. You cannot punch certain sizes of paper. Also, you may be unable to punch the paper at certain positions. For details, refer to the User Manual of the machine. If you select Long Edge in the manual bypass take-up mode, the paper may sometimes fail to be punched. Punch and OHP interleaving cannot be set simultaneously. Punch and Booklet cannot be set simultaneously. 4-14 Pi4700e Setup tab 4 ✎ Tip for (2) The punching positions are displayed on the icons in the dialog box. ✎ Properties Settings Chapter 4 Note for (3) If Folding is combined with Hole-Punch or Staple, the Hole-Punch or Staple function to be used is restricted depending on the specific type of the Folding function combined. For details, see Appendix A (page 12-1) for details. Pi4700e 4-15 Paper tab 4 4.5 Paper tab The Paper tab allows you to make basic printer settings. (3) (1) (4) (2) (5) Properties Settings Chapter 4 (6) (1) (2) (3) 4-16 Original Document Size Sets the original size. • Paper size Select the original size. Available settings: Letter, Legal, Executive, A3, A4, A5, A6, JIS B4, JIS B5, JIS B6, Invoice, 11 × 17, 11 × 14, FLS1, FLS2, FLS3, FLS4, Special sizes • Edit Custom Used to set a special size. For details, see page 4-19. Output Paper Size Sets the size of the paper on which prints are to be made. • Output Paper Size Activates the specification of the size of printing paper. (Displayed only with the PS driver) • Paper size Select the size of the printing paper. Available settings: Letter, Legal, Executive, A3, A4, A5, A6, JIS B4, JIS B5, JIS B6, Invoice, 11 × 17, 11 × 14, FLS2, FLS3, FLS4, Special size • Fit to Paper The prints are output at a zoom ratio that matches the size of the printing paper. • Scaling Specify the print zoom ratio. Setting range: 25 to 400% Copies Specify the number of sets of prints to be made. Enter the value either directly or by pressing ▲ or ▼. Setting range: 1 to 999 sets Pi4700e Paper tab 4 (6) • Uncollated All of the pages are printed one after the other. For example, if you make five sets of prints, each page is printed in sequence five copies at a time. • Collated Prints are output one set at a time. For example, if you make five sets of prints of a 10-page document, the prints will be output one set at a time. Sorting Select the sorting method. • Unsorted Prints are not sorted. • Sorted Prints are sorted. Orientation Select the orientation of the image. You can check the selected direction using Page Layout. • Portrait Printing takes place lengthwise. • Landscape Printing takes place crosswise. ✎ Note for (1) Depending on environment used, contents of Save/Delete will be different: Refer to Appendix A (p. 12-11) for details. ✎ Notes for (2) If you select a size of paper not loaded in the machine or Manual Feed, the machine will give a message prompting you to add paper to Tray1, Tray2, or the manual bypass port and enter into a standby state. If the setting made in Original Document Size does not match the size specified in the application with Fit to Paper selected, the machine takes the paper size set in the application. Fit to Paper cannot be selected if Custom Paper is selected in Original Document Size. ✎ Note for (3) When using the OHP interleaving function, set the number of sets of prints to 1. ✎ Note for (4) Keep Collate (Sort) on the application side set to “OFF” at all times. Pi4700e 4-17 Chapter 4 (5) Collate Use this function when making multiple sets of prints of the same document, to specify whether or not to print one set at a time. Properties Settings (4) Paper tab 4 ✎ Tips for (5) If you output prints to the Elevator Tray when the Single-staple Finisher, Multi-staple Finisher or Mailbin Finisher is installed, the prints are output in a sawtooth manner. When the Folding Finisher is installed or if none of the finishing options is installed, the prints are output in a criss-cross manner. The following are the minimum requirements for permitting criss-cross sorting using the Collated setting: Chapter 4 Stacks of paper of the same size are loaded in the lengthwise and crosswise directions. The Staple, Punch or Cover mode is not set. When Collated is selected, Sorting is dimmed. Properties Settings ✎ Tip for (6) A Portrait or Landscape print appears on the Page Layout. 4-18 Pi4700e Paper tab 4 Functions of the Edit Custom Paper or Custom Paper dialog box The name of the dialog box is Custom Paper for PCL6, Edit Custom Paper for PS. Use this dialog box to set special sizes of paper. (1) (2) (3) Paper Name Select the paper name from the Custom Paper list. (2) New... This function allows you to set a special size of paper. When it is selected, the dialog box changes to the Custom Paper Setting Dialog Box. Depending on environment used, number of registrations will be different: Refer to Appendix A (p. 12-11) for details. (3) Edit... Edits Custom Paper selected in (1). When it is selected, the dialog box changes to the Custom Paper Setting Dialog Box. (4) Delete Deletes Custom Paper selected in (1). 4-19 Properties Settings (1) Number of registrations Pi4700e Chapter 4 (4) Paper tab 4 Custom Paper Setting dialog box (PCL 6 version) Edit Custom Paper Setting dialog box (PS version) (5) (7) (6) (5) Chapter 4 (6) (5) Name Enter the Name of the Custom Paper Setting range: Properties Settings (6) Max 20 characters Size Set the paper size. Setting range: (7) 4-20 Width: 4 to 11 11/16 (Unit = inch) 100 to 297 (Unit = mm) Height: 5 13/16 to 17 (Unit = inch) 148 to 432 (Unit = mm) Unit Switches input units of paper size between inch and metric. Pi4700e Quality tab 4.6 4 Quality tab PCL6 version (2) (1) Resolution Select the printing resolution. Setting range: 600 × 600 dpi (2) Smoothing Correct the edges of the printed image. Available settings: On, Off Properties Settings Chapter 4 (1) ✎ Note for (2) This function is used with a document whose contents are mainly text. Using the function with a photo image could even dirty the produced image. Pi4700e 4-21 Quality tab 4 PS version (1) (2) (4) (5) Properties Settings Chapter 4 (3) 4-22 (1) Resolution Refer to PCL6 version. (2) Smoothing Refer to PCL6 version. (3) Brightness Perform brightness adjustment. Setting range: 0 to100 (4) Half Toning... Specify the method of dithering to express gray. (5) Reversal Specify reversal, Negative or Mirror, or both. • Negative Reverses black and white. • Mirror Reverses left and right. Pi4700e Quality tab 4 Functions of the Halftoning dialog box (1) (2) (1) Pi4700e Halftoning Select the method to set halftones. • User Printer’s settings Uses the setting value of the printer when the halftone image is printed. This setting is normally recommended. • Use settings below Uses the optional setting value (the setting of optional value) instead of the setting value of the printer when the halftone image is printed. If a moire pattern occurs using Use printer’s settings, you should print with adjusting Screen frequency and Screen angle. (2) Screen frequency Set the number of lines on the screen. Setting range: 0.1 to 999.9 (in 0.1 steps) (3) Screen angle Set the screen angle: 0 to 360° (in 0.1° steps) 4-23 Properties Settings Chapter 4 (3) Job Management tab 4 4.7 Job Management tab PCL6 version (1) (2) (4) Properties Settings Chapter 4 (3) PS version (1) (2) (3) 4-24 Pi4700e Job Management tab (3) (4) • Account Code Makes the copy track function valid. • Access Number Enter the access number set in the machine. Setting range: 0002 to 9999 (4 digits) Lock Job Check this box when locking a printing job. When using Lock Job, set a password in Password. A locked printing job will be printed when it is unlocked using the Job List display on the panel of the machine. In this case, a password is necessary. • Lock Job Make the lock job function valid. • Password Enter the password of the lock job. Setting range: 0000 to 9999 (4 digits) Distribution <when Hard Disk Drive in Copier is installed> Specifies adding a distribution in the background during printing, and also sets the conditions for adding distribution number. A distribution number is added for each set of prints. • Distribution Number Select the distribution number function. • 1st Page Only Select whether to print the distribution number on only the first page, or on all pages. • Starting Number Specify the starting number of the distribution numbers to be printed. Setting range: 001 to 999 Job Owner • Default User Name The user name set in the printer driver is displayed as the job user name on the machine’s touch panel. Setting range: 8 characters max ✎ Note for (1) To clear the Account Code function when PCL6 is used, type any number in the Access Number box. If no number is typed in the Access Number box, the message “Access Number Error” will appear and you might not be able to exit from the function. ✎ Note for (2) To clear the Lock Job function when PCL6 is used, type any number in the Password box. If no number is typed in the Password box, the message “Password Error” will appear and you might not be able to exit from the function. Pi4700e 4-25 Chapter 4 (2) Account Code Check this box when using the copy track function. An account code is attached to each printing job, enabling you to carry out management at the machine. In order to use this function, copy track function must be set at the machine. When the copy track function is set at the machine, printing may sometimes fail to take place until the access number designated at the machine is correctly set. Properties Settings (1) 4 Job Management tab 4 ✎ Notes for (3) When using this function in combination with the cover page function, if you set printing of the cover page to “No” using the cover page function, and set serial number printing to “Yes”, a distribution number will be printed on the cover page. The orientation of the screen sometimes fails to match the orientation of the distribution number. ✎ Properties Settings Chapter 4 Tip for (3) When the distribution number reaches 999, the next number returns to 000. 4-26 Pi4700e Overlay tab 4.8 4 Overlay tab This tab is only displayed with the PCL driver. (1) Watermark Prints a specific word in the background as a watermark. • Text Select the word to be entered as the watermark from the list. Available settings: NONE, CONFIDENTIAL, COPY, DO NOT COPY, DRAFT, FINAL, PROOF, TOP SECRET, or a word set by the user • 1st Page Only Select whether to insert a watermark on only the first page or on all pages. • Edit Watermark Set the format, position, and so on, of the watermark characters. For details, see page 4-28. ✎ Notes When using this function together with the cover page function, if you set printing to None with the cover page function and choose setting to print a watermark on only the first page, the watermark will be printed on the second page. This function may not operate with some applications. Depending on environment used, contents of Save/Delete will be different: Refer to Appendix A (p. 12-10) for details. Pi4700e 4-27 Properties Settings Chapter 4 (1) Overlay tab 4 ✎ Tip The condition of the watermark is displayed on the Page Layout. Functions of the Watermark dialog box Chapter 4 This dialog box allows you to set the text to be inserted using the Watermark function, and also the text style. (1) Properties Settings (2) (3) (4) (5) (1) Preview This is the watermark preview. (2) Name Select a registered watermark from the list. Available settings: 4-28 <NONE>, CONFIDENTIAL, COPY, DRAFT, FINAL, PROOF, TOP SECRET, DO NOT COPY, user setting (3) New Used to create new text. When you select this item, a dialog box for making detailed settings appears. (4) Edit... Used to edit text selected in (2). When you select this item, a dialog box for making detailed settings appears. (5) Delete... Deletes text selected in (2). Pi4700e Overlay tab 4 Watermark detailed settings (6) (7) (1) (8) (9) (10) (11) (12) (6) (7) Name Enter the name under which you wish to register the watermark. Number of registrations Depending on environment used, number of registrations will be different: Refer to Appendix A (p. 12-10) for details. Number of characters max. 20 characters String Enter the text to be printed as a watermark. Number of characters (8) (9) Type Face Face Specify a font from String to be printed as a watermark. PCL6 Specify a font from the fonts (PC font) installed in the OS. PS Specify a font from device fonts (controller font). Size Specify the font size of the characters. Setting range (10) (11) 8pt to 200 pt (in 1pt steps) Style Specify the font style of the characters. • Bold Prints bold characters. • Italic Prints italic characters. Shading Specify the density of the characters. Setting range Pi4700e PCL6: max. 63 characters PS: max. 255 characters 5% to 100% (in 5% steps) 4-29 Properties Settings Chapter 4 (13) Overlay tab 4 (12) Angle Specify the angle of the characters with respect to the paper. • Fixed Angle Standard fixed angle of the driver. Available settings: • User Setting If you select User Setting from Fixed Angle, you can set any desired angle. Setting range: Chapter 4 (13) Horizontal, Diagonal, Vertical, User Setting -180°to +180° (A – (minus) value rotates the characters clockwise, 0 leaves the characters parallel to the paper, and a + (plus) value rotates the characters counterclockwise.) Position Specify the position at which you wish to print a watermark. • Center The watermark is printed at the center of the paper. • User Setting You can specify a position by entering numbers in the Horizontal and Vertical boxes. Setting values: Horizontal: -999pt to 999pt (in 1pt steps) Vertical: -999pt to 999pt (in 1pt steps) (72pt = 1inch) Properties Settings ✎ Tips Specify the position from the center. The Horizontal positive direction is to the right, and the Vertical position direction is upward. You can check the set contents using (1) Preview. 4-30 Pi4700e PostScript tab 4.9 4 PostScript tab This tab enables you to set all items related to PostScript. (1) (5) (1) (2) Pi4700e (7) PostScript output Set the output format of PostScript. • PostScript (optimize for speed) Performs optimization for faster printing processing. • PostScript (optimized for portability-ADSC) Performs optimization for reducing error. • Encapsulated PostScript (EPS) Select this item when you wish to embed this file as an image in a document that is to be printed using a different program. • Archive format Saves the data stream of PostScript to a file. Postscript header Set the method of sending the header. • Download header with each print job This item sends header information each time a document is printed. We recommend that you use this setting when sharing a network printer. • Assume header is downloaded and retained Sends header information only once to the printer, in order to shorten the printing time. • Send Header Now Sends header information to the controller. (3) Print PostScript error information Set the PostScript error information printing. (4) Compress bitmap images Send graphics in compressed form. 4-31 Properties Settings (6) (3) (4) Chapter 4 (2) PostScript tab 4 Fonts Set TrueType font. • Send TrueType fonts to printer according to the Font Substitution Table Replaces TrueType fonts for the printer fonts, or downloads TrueType fonts in accordance with the Font Substitution Table. For editing the Font Substitution Table, you should open the “Properties...” from the Control Panel and select “Edit the Table” button. • Edit the Table Sets the Font Substitution Table. • Always use PostScript fonts instead of TrueType fonts Always prints replacing TrueType fonts for the printer fonts. The printing speed becomes faster, but the printed result may not be the same as the display. • Always use TrueType fonts Always prints downloading TrueType Fonts to the printer. The printed result will be the same as the display, but the printing speed becomes slower. (6) Send Fonts As... Sets sending method of fonts. (7) Advanced... Performs detailed settings of PostScript. Properties Settings Chapter 4 (5) 4-32 Pi4700e PostScript tab 4 Functions of the Font Substitution Table dialog box (1) Pi4700e (1) For this TrueType font Used to display and select the substitution table settings. (2) Printer font for Select the substitution printer font. Properties Settings Chapter 4 (2) 4-33 PostScript tab 4 Functions of the Send Fonts As dialog box (1) Properties Settings Chapter 4 (2) 4-34 (1) TrueType fonts Select the method of sending TrueType fonts. Available settings: Don’t Send, Outlines, Bitmaps, Type42 (2) Set the reference font size of the TrueType font for changing over from a Bitmap font to an Outline font. Setting range: 0 to 999 pixels Pi4700e PostScript tab 4 Functions of the Advanced PostScript dialog box (1) (1) PostScript language level Selects PostScript language level. Set Value 2: PostScript level 2 3: PostScript level 3 (2) Pi4700e Data format Sets data format of PostScript. • ASCII data Transmits the data in the ASCII format (7-bit). When you select this format, it takes more time for transmission, but any I/O channel, such as the parallel port or the network port, is available. • Tagged binary communications protocol (TBCP) Transmits the data in the binary format (8-bit). When the data is transmitted from the parallel port, it can be transmitted faster than in the ASCII format. This binary format is not available when you use the option for the archiving form or create the EPS file. • Send CTRL+D before job Transmits Ctrl+D before job. • Send CTRL+D after job Transmits Ctrl+D after job. 4-35 Properties Settings Chapter 4 (2) Conflicts dialog box 4 Conflicts dialog box Properties Settings Chapter 4 4.10 When the Conflicts dialog box appears, it shows the settings that could not be combined with each other. Check the details, and click the Resolve button or the Cancel button to quit. ✎ Note Some settings, which are defied by the machine for the restricted combinations of different functions, can at times be accepted by the printer driver. If a print command is issued from the personal computer with such settings made, the machine does not produce the output correctly or abandons the job to produce nothing. Make sure that you make correct settings. ✎ Tip The dialog box looks slightly differently from this one when Device Options Setting is being set or the PS driver is being used. 4-36 Pi4700e Installing the printer driver 5 5 Printer Driver for Linux 5.1 Installing the printer driver Operating environment This section explains the required environment for the printer driver. Before installing the printer driver, make sure that your computer meets the following requirements. If it does not, the printer driver may not function properly. Personal computer IBM PC or a compatible with a Pentium 200MHz or higher CPU Operating system Redhat Linux ver.6.1, 6.2 Turbo Linux ver.4.0, 6.0 Open Linux ver. 2.3, 2.4 SuSE Linux ver. 6.3, 6.4 64MB or more Parallel Network Free space on hard disk Chapter 5 I/O interface Centronics interface (Conforming to IEEE1284) 10/100 Base-T (UTP) 2MB or more under /opt In this section, installation procedure is explained, referring to Redhat Linux. If a different procedure is used (depending on each OS), explanation is separately given for that section. Pi4700e 5-1 Printer Driver for Linux Memory Installing the printer driver 5 Installation This section explains the installation procedure. X window System is described here. ✎ Note Before installing the printer driver, quit all other applications. 1 Log in with root when starting OS. 2 Start Terminal window. 3 Install the controller Driver CD-ROM provided with controller in the CD-ROM drive of your personal computer. 4 Copy RPM file to optional directory. The file has been stored in “/Linux/ Chapter 5 PrintUtility” of the CD-ROM. 5 Input the following command to Terminal window and execute: # rpm –ivh diutil_pack_file ✎ Printer Driver for Linux Note Input file name to “diutil_pack_file”. 6 Installation will start when the above command has been executed. ✎ Note The installation procedure shown above cannot be used for the following Operating Systems. Use the installation procedure given on the next page: Open Linux ver. 2.4 SuSE Linux ver. 6.4 5-2 Pi4700e Installing the printer driver 5 After installation is complete, the screen shown below will appear. If an error is output during installation, execute the following commands in sequence: # rpm -ivh diutil_pack_file --nodeps # ln -s /usr/lib/libtcl8.0.so /usr/lib/libtcl.so # ldconfig -n /usr/lib/ # ldconfig -n /usr/X11R6/lib/ ✎ Note Input file name to “diutil_pack_file”. By executing the above commands in sequence, installation can be performed correctly. Pi4700e 5-3 Printer Driver for Linux Chapter 5 # ln -s /usr/lib/libtk8.0.so /usr/X11R6/lib/libtk.so Printer setting with X window System 5 5.2 Printer setting with X window System Making general settings before using the printer The printer driver requires setting of items that are common to all print jobs, including the port to which the printer cable is connected and any optional devices configured with the machine: Note that these settings must be made only after the printer driver has been installed. See page 5-19 if you refer to Device Options Setting in dialog box. Redhat Linux With Redhat Linux, setting is performed from Printer Configuration in the control panel. The following shows how to display Printer Configuration: ✎ Chapter 5 Tip With Redhat Linux, Printer Configuration window can also be displayed by executing printtool command from Terminal window. 1 Click menu button and open System – Control Panel. 2 When control panel is opened, click the Printer Configuration button. Printer Driver for Linux Printer system manager will open. 3 First, click the Add button of the printer manager. 5-4 Pi4700e Printer setting with X window System 5 4 When the personal computer has been directly connected to the machine, select Local Printer. ✎ To the network administrator: When the setting of the driver is to be selected via network with Remote Printer, Remote Unix (1pd) Queue, etc., printer queue, printer name, IP address, etc. are necessary. Input “PORT1” for printer queue. Printer Driver for Linux 5 The printer device will be detected. Click the OK button. If not detected, check to see if the port is already in use. Pi4700e Chapter 5 Note If you install a printer driver to the computer which has been connected via network, be sure to consult the network administrator. 5-5 Printer setting with X window System 5 ✎ Note When network connection has been selected, detection result dialog box will not be output. 6 Edit screen will open. First, set optional printer name. 7 Specify the SPOOL directory to be prepared: It is acceptable to leave default value as it is. 8 Click the Select button of input filter, and select PostScript Printer Printer Driver for Linux Chapter 5 here. No other settings are required. 9 Click the OK button. 10 Click the OK button in edit window of the printer to complete setting. 5-6 Pi4700e Printer setting with X window System 5 Turbo Linux With Turbo Linux, execute command from Terminal window for setting printer. The following shows the display method of the setting screen: 1 First, execute turboprintcfg command from Terminal window: Terminal window will change to printer setting screen. Chapter 5 2 Select the Add button. Printer Driver for Linux 3 Select Local Printer for printer type. ✎ Note When network printer is to be used, select Remote LPD Queue. Pi4700e 5-7 Printer setting with X window System 5 4 Specify optional name for printer queue. 5 Make sure that positions where SPOOL directory is to be prepared Printer Driver for Linux Chapter 5 and printer device are specified. After checking is complete, select the OK button. ✎ Note When setting is performed using network printer, LPD setting (Remote Hostname, Remote Queue) should be made in addition to above setting. Input “PORT1” for Remote Queue. With Turbo Linux4.0, some other setting should be made on Edit Printer Setting screen. For setting of printer type, select Postscript Printer. Other settings can be left as default settings. 5-8 Pi4700e Printer setting with X window System 5 Printer Driver for Linux Chapter 5 6 Select the Save & Exit button to complete setting. Pi4700e 5-9 Printer setting with X window System 5 Open Linux With Open Linux, printer setting can be performed using dialog box. The setting method using dialog box is given here. 1 Open KDE menu. Select COAS – Peripherals – Printer. Chapter 5 The dialog box shown below will appear. 2 Select Add from Printer at the left top on the dialog box. 3 Select printer model dialog box will appear. Select Generic post- Printer Driver for Linux script printer. ✎ Note Whenever network printer is to be used, select Generic remote printer. At this time, input “PORT1” for Remote Queue. 5-10 Pi4700e Printer setting with X window System 5 4 Printer name dialog box will appear: Input optional name and click the OK button. 5 Printer attributes dialog box will appear: Make certain that correct de- 6 Select the OK button. 7 System will ask you whether to save changes, to create printer queue, etc.: Select the OK button. 8 Return to Printer Configuration dialog box. Once the added printer is displayed, select the OK button to complete. Pi4700e 5-11 Printer Driver for Linux Chapter 5 vice is displayed here, but do not change any other items. Printer setting with X window System 5 SuSE Linux With SuSE Linux, command should be executed from Terminal window to set printer. 1 Execute command shown below from Terminal window with current directory: # /var/lib/apsfilter/SETUP Printer Driver for Linux Chapter 5 Terminal window will change as shown below after execution of command. 2 Screen will change as shown below by pressing the return key. Select Entry – Device. 5-12 Pi4700e Printer setting with X window System 5 3 Printer interface setting screen will appear. Select Parallel. Note When network is used, select Remote instead of Parallel. Then, set HostName and printer queue. Input “PORT1” for printer queue. Printer Driver for Linux 4 Make sure that Interface is set to parallel port. Chapter 5 ✎ Pi4700e 5-13 Printer setting with X window System 5 5 Screen for specifying each setting will appear. Select Postscript for printer type. Chapter 5 Screen will change to resolution setting screen, but it is not necessary to change from default value. Printer Driver for Linux 6 Specify printer name, paper and color. 5-14 Pi4700e Printer setting with X window System 5 7 Select the Add button for complete. Confirmation screen will appear. Input the following command on the Terminal window and execute: The dialog box will appear. # /opt/diutil/bin/didialog –m [Model name] –P [Printer name] –a [Area] G Specify the printer name which was designated during setting. G Input model name (di550) for [Model name]. G Specify [Area]; select [us] for Inch area, [ec] for Metric area. Refer to “5.3 Properties settings” (p. 5-18) for setting method concerning the printing. ✎ Tip Specifying [Model name] and [Area] is necessary only when didialog command is executed first. Pi4700e 5-15 Printer Driver for Linux If you use X window, printer utility setting can be specified from dialog box. Dialog box can be displayed only with command operation, so didialog command is used here. Chapter 5 How to display Printer Utility dialog box Printer setting with X window System 5 dipjl command dipjl command is a printer setting command used for environment in which X window cannot be used: Refer to “dipj1.1” file in “/opt/diutil/man/ manl” for detailed description. To display “man” file, execute the following command: # man /opt/diutil/man/manl/dipj1.1 ✎ Note If you are able to use X window environment, this command is not necessary. Since the settings using this command are only temporary settings for printing, they cannot be saved. Printing method (dilpr command) Chapter 5 dilpr command is used for printing method. Printing of PS file is performed by executing this command. Note that this cannot be printed from application. Refer to “dilpr.1” file in “/opt/diutil/man/manl” for detailed description. To display “man” file, execute the following command. # man /opt/diutil/man/manl/dilpr.1 Printer Driver for Linux Example option of dilpr command -P printer name: Specifies printer name -y set option: Used when a particular part of set option is to be changed. -J Job name: Set when a name other than file name is to be set as a job name. Example of printing method # /opt/diutil/bin/dilpr –P [Printer name] [File name] ✎ Note With this command, only PS file can be printed. Non-PS files must be converted to PS for printing. groff command, etc. can be used to convert to PS file. 5-16 Pi4700e Printer setting with X window System 5 didialog command didialog command is used to display dialog box for setting printer utility. Refer to “didialog” file in “/opt/diutil/man/manl” for detailed description. To display “man” file, execute the following command: # man /opt/diutil/man/manl/didialog.1 Example of dialog box display method # /opt/diutil/bin/didialog –m [Model name] –P [Printer name] –a [Area] ✎ Printer Driver for Linux Chapter 5 Tip Specifying [Model name] and [Area] is necessary only when didialog command is executed first. Pi4700e 5-17 Properties settings 5 5.3 Properties settings Description of each tab Chapter 5 Each tab enables you to change the settings indicated below. For a detailed description of each function, see the corresponding reference page. Property tab Outline of settings that can be changed Reference page Setup Allows you to set the paper take-up tray and paper exit tray. Also allows you to set high level printing functions such as two-sided printing, OHP interleaving, Cover Mode, Staple, Punch, and Folding. p. 5-23 Paper Allows you to set basic printing items such as number of copies, paper size and print orientation. Also allows you to set functions related to sorting. p. 5-31 Device Options Setting Allows you to set option equipment installed on the machine. p. 5-19 Job Management Sets the copy track function. Allows you to lock a printing job. Also allows you to print the distribution number. p. 5-33 – Allows you to save and read the contents of the settings on a Setup, Paper, Job Management or Device Options Setting property sheet. p. 5-21 Printer Driver for Linux ✎ Note Refer to “5.2 Printer setting with X window System” (p. 5-4) for the procedure for displaying “dialog box.” Differences between each OS are indicated based on Redhat Linux ver. 6.2. Details of OS-dependent functions are not given. 5-18 Pi4700e Properties settings 5 Device Options Setting tab This tab allows you to set the options installed on the machine. Be sure to select the options correctly otherwise some functions may be unusable or printing may not take place correctly. The settings must match the machine configuration. (1) (1) Device Options Set the options installed in the machine. • Installable Options Pi4700e This is a list of installable options. Select the desired options from this list. Available settings: Duplex Cabinet, Dup + 2way Tray, LCT, Dup + LCC, Mailbin Finisher, Multi-staple Finisher, Single-staple Finisher, Folding Finisher, Hard Disk Drive in Copier • Add Pressing this button adds the selected option. • Remove Pressing this button removes the selected option. • Installed Options This is a list of currently installed options. Select it when you wish to remove an option. • Mailbox Setting <when Mailbin Finisher is installed> You can add a name to each mailbin of Mailbin Finisher. For details, see page 5-20. (2) User Name The user name set in the printer driver is displayed as the job user name on the machine’s touch panel. Setting range: 8 characters max. (3) About… Click to display the manufacturer and version number of the printer driver. 5-19 Printer Driver for Linux (3) Chapter 5 (2) Properties settings 5 ✎ Note If the Dup + 2way Tray, Dup + LCC, and Duplex Cabinet are not correctly selected, it may not be possible to select the Finisher correctly. Mailbox Setting dialog box <when Mailbin Finisher is installed> Allows you to set the names of the mailbins in Mailbin Finisher. (1) (2) Printer Driver for Linux Chapter 5 (3) 5-20 (1) MailBox This is the bin name editing box. Setting range: max. 32 characters (2) Apply Press to finalize a changed name. (3) Bin list Displays a list of names of currently set bins. To change the name of a bin, select the name to be changed. Pi4700e Properties settings 5 Functions that are common to various tabs These functions are common to tabs from Setup tab to Job Management tab. (1) (2) Easy Set Allows you to call and use the settings stored in each tab. • Easy Set Name Allows you to call the settings stored in each tab. • Save (Delete) Used to save/delete the settings of tabs. When you touch the Save button to save the contents of a tab, the Save Easy Set Name dialog box appears. For details, see page 5-22. When you touch Delete, the stored set contents are deleted. Paper preview/Machine preview Allows you to display/change over the paper preview and machine preview. • Page Layout The layout of the printed data on a single page is displayed as an image. This allows you to check the status for two-sided printing, for example. See page 12-12 for the Page Layout list. • Printer Figure When the paper take-up tray and the paper exit tray are set, the paper take-up tray and paper exit tray are displayed in green. See page 12-15 for the Printer Figure list. ✎ Tip If the set contents were changed, the Save button will appear. If the set contents are the Easy Name contents, the Delete button will appear. Pi4700e 5-21 Printer Driver for Linux (1) Chapter 5 (2) Properties settings 5 Functions of the Save Easy Set Name dialog box Use to save print setting data. Before pressing the Save button, set the contents of each tab. (1) (1) Easy Set Name Add a name to the stored contents. Number of registrations: 32 max. Printer Driver for Linux Chapter 5 Number of characters: 10 characters max. 5-22 Pi4700e Properties settings 5 Setup tab This tab allows you to set the paper take-up tray, paper exit tray and various high grade printing functions. (1) (3) (4) (1) (2) (3) Paper Source Selects the machine tray to be used. Sets the cover page function and the OHP interleaving function. • Paper Source Select the machine tray to be used. The selectable paper sizes are limited by the types of paper take-up trays installed in the machine. Available settings: Auto, Manual Feed, Tray1 to 4, LCC, LCT • Detail of Paper Source Set the cover page function and OHP interleaving function. For details, see page 5-26. Output Setting This function selects the tray in the machine to which the paper is to be exited. Settings can also be made for finishing functions including stapling, hole punching, and folding. • Paper exit destination Select the machine tray to which you wish to exit the prints. The selectable paper exit trays are limited by the type of finisher installed in the machine. Mailbin Finisher: Auto, Mailbin Excepting Mailbin Finisher: Auto • Mailbin paper exit destination If Mailbin is selected as the paper exit destination, set the mailbin to which you wish to exit the paper. • Detail of Output Setting Set stapling, punching or folding. For details, see page 5-28. Duplex <when Dup + 2way Tray, Dup + LCC or Duplex Cabinet is installed> Specifies two-sided printing. • Off Pi4700e Not set 5-23 Printer Driver for Linux Chapter 5 (2) Properties settings 5 (4) • Short Edge Binding Two-sided printing takes place in such a way that the short edge is bound. • Long Edge Binding Two-sided printing takes place in such a way that the long edge is bound. Smoothing Correct the edges of the printed image. Available settings: On, Off ✎ Note for (1) Some paper sizes cannot be selected. For details, refer to the User Manual of the machine. ✎ Tip for (1) Set the paper take-up tray using Device Options Setting. Chapter 5 ✎ Printer Driver for Linux The paper take-up tray used is displayed in green on the Printer Figure. ✎ Note for (2) Some paper sizes cannot be selected. For details, refer to the User Manual of the machine. Tip for (2) Set the type of finisher using Device Options Setting. The paper take-up tray used is displayed in green on the Printer Figure. ✎ Note for (3) If you print a document that contains pages of different sizes and/or different directions in the same job, the image may be partially cut or images may overlap each other. Two-sided printing and OHP interleaving cannot be set simultaneously. 5-24 Pi4700e Properties settings 5 ✎ Tip for (3) The sizes for which you can perform two-sided printing are from 140 × 182mm to 297 × 432 mm. Short Edge Binding and Long Edge Binding are displayed on the Page Layout. ✎ Printer Driver for Linux Chapter 5 Note for (4) This function is used with a document whose contents are mainly text. Using the function with a photo image could even dirty the produced image. Pi4700e 5-25 Properties settings 5 Functions of the Detail of Paper Source Dialog Box This function sets the cover page function and the OHP interleaving function. (1) Printer Driver for Linux Chapter 5 (1) (2) (2) Cover Page This function is used to print a document with front and back cover pages. You can print on the front cover, or leave it blank. • Front Cover Page Activates the front cover function. • with Image (Front Cover Page) Prints on the front cover. • Back Cover Page Adds a back cover. • with Image (Back Cover Page) Prints on the back cover. • Cover Paper Source Select the tray for the front cover and back cover papers. Available settings: Tray1 to Tray4, LCC, LCT, Manual Feed. Interleaving Paper This function inserts sheets (interleaving sheets) between sheets of OHP film when printing on OHP film. You can either leave these sheets blank or print the same image as that printed on the OHP film. • OHP Interleaving Activates the OHP interleaving function. • with Image Prints an image on the interleaving sheet. • Interleaving Paper Source Select the tray for the interleaving paper. Available settings: Tray1 to Tray4, LCC, LCT ✎ Note for (1) When using special paper such as thick paper, the paper sometimes fails to be exited to the selected paper exit destination. You can set Tray1 to Tray4, LCC, LCT and Manual Feed using “Paper Source”. 5-26 Pi4700e Properties settings 5 ✎ Tip for (1) The tray containing the paper on which the body of the document is to be printed is displayed in green on the Printer Figure. ✎ Note for (2) When using the OHP interleaving function, set the number of sets of prints to “1”. You cannot select the same paper take-up port for both Paper Source and Interleaving Paper Source. You can set only Manual Feed using Paper Source. OHP interleaving and two-sided printing cannot be set simultaneously. Chapter 5 ✎ Printer Driver for Linux Tip for (2) The OHP film tray is displayed in green on the Printer Figure. Pi4700e 5-27 Properties settings 5 Functions of the Detail of Output Setting Dialog Box Settings can also be made for finishing functions including stapling, hole punching, and folding. (3) (1) (2) Chapter 5 (1) Staple <when Mailbin Finisher, Single-staple Finisher, Multi-staple Finisher or Folding Finisher is installed> This function allows you to staple one set of printed documents at a time. Printer Driver for Linux • Off (2) (3) 5-28 Printed documents are not stapled. • Corner Printed documents are stapled at their corners. • Long Edge <when Multi-staple Finisher or Folding Finisher is installed> The documents are stapled along the long edge. • Short edge <when Multi-staple Finisher or Folding Finisher is installed> The documents are stapled along the short edge. • Center <when Folding Finisher is installed> The documents are stapled at the center. Punch <when Mailbin Finisher, Multi-staple Finisher or Folding Finisher is installed> This function allows you to punch holes in the printed document. • Off The document is not punched. • Short Edge The document is punched along the short edge. • Long Edge The document is punched along the long edge • Punch Holes <Inch area only> Set the number of holes to be punched. Folding <when Folding Finisher is installed> Select the desired paper folding function. • Off Printed pages are not folded. • Just Output Size [ZFold] Printed pages are folded into three parts. • Half Folding Printed pages are folded in two at their center. • Crease A crease is made in printed pages. Pi4700e Properties settings 5 ✎ Note for (1) If “Staple” is set, printed pages are fed out into the Elevator Tray. The stapling position is either the top left corner or the top right corner depending upon the direction of the paper and the printing direction. If the capacity of Mailbin Finisher, Single-staple Finisher, Multi-staple Finisher or Folding Finisher is exceeded, the stapling operation may be canceled. Refer to the User Manual of the machine. If you print a document consisting of pages of different sizes in the same printing job, stapling may be canceled. ✎ Tip for (1) You can check the stapling position by using the icon in the dialog box or Page Layout. ✎ Note for (1) Number of punch holes can be specified only when Multi-staple Finisher is installed. You cannot punch certain sizes of paper. Also, you may be unable to punch the paper at certain positions. For details, refer to the User Manual of the machine. If you select Long Edge in the manual bypass take-up mode, the paper may sometimes fail to be punched. Punch and OHP interleaving cannot be set simultaneously. Punch Holes is not displayed for Metric area. Pi4700e 5-29 Printer Driver for Linux You cannot set certain sizes and kinds of paper. For details, refer to the User Manual of the machine. Chapter 5 Be careful when printing a document consisting of pages facing different directions because the stapling position will be determined by the direction of the first page. Properties settings 5 ✎ Tip for (2) You can check the punching positions by using the icon in the dialog box or Page Layout. ✎ Printer Driver for Linux Chapter 5 Note for (3) If Folding is combined with Hole-Punch or Staple, the Hole-Punch or Staple function to be used is restricted depending on the specific type of the Folding function combined. For details, see Appendix A (p. 12-7). 5-30 Pi4700e Properties settings 5 Paper tab The Paper tab allows you to make basic printer settings. (5) (1) (2) (3) Original Document Size Sets the Original Document Size. • Paper size (2) Select the Original Document Size. Available settings: Letter, Legal, Executive, A3, A4, A5, A6, JIS B4, JIS B5, JIS B6, Invoice, Ledger, 11 × 14, FLS1, FLS2, FLS3, FLS4 Copies Specify the number of sets of prints to be made. Enter the value either directly or by pressing ▲ or ▼. Setting range: 1 to 999 sets (3) (4) (5) Pi4700e Collate Use this function when making multiple sets of prints of the same document, to specify whether or not to print one set at a time. • Uncollated All of the pages are simply printed one after the other. For example, if you make five sets of prints, each page is printed in sequence five copies at a time. • Collated Prints are output one set at a time. For example, if you make five sets of prints of a 10-page document, the prints will be output one set at a time. Sorting Select the sorting method. • Unsorted Prints are not sorted. • Sorted Prints are sorted. Orientation Select the orientation of the image. You can check the selected direction using Page Layout. • Portrait Printing takes place lengthwise. • Landscape Printing takes place crosswise. 5-31 Printer Driver for Linux (1) Chapter 5 (4) Properties settings 5 ✎ Note for (1) If you select a size of paper not loaded in the machine or Manual Feed, the machine will give a message prompting you to add paper to Tray1, Tray2, or Manual Feed and enter into a standby state. ✎ Note for (2) When using the OHP interleaving function, set the number of sets of prints to 1. ✎ Note for (3) Keep Collate (Sort) on the application side set to OFF at all times. Chapter 5 ✎ Tip for (4) If you exit prints to the Elevator Tray when the Single-staple Finisher, Multi-staple Finisher or Mailbin Finisher is installed, the prints are exited in a sawtooth manner. Printer Driver for Linux When the Folding Finisher is installed or if none of the finishing options is installed, the prints are exited in a criss-cross manner. The following are the minimum requirements for permitting criss-cross sorting using the Collated setting. Stacks of paper of the same size are loaded in the lengthwise and crosswise directions. The Staple, Punch or Cover mode is not set. ✎ Tip for (5) A Portrait or Landscape print appears on the Page Layout. 5-32 Pi4700e Properties settings 5 Job Management tab (1) (2) (2) (3) Pi4700e Account Code Check this box when using the copy track function. An account code is attached to each printing job, enabling you to carry out management at the machine. In order to use this function, copy track function must be set at the machine. When the copy track function is set at the machine, printing may sometimes fail to take place until the access number managed at the machine is correctly set. • Account Code Makes the copy track function valid. • Access Number Enter the access number set in the machine. Setting range: 0002 to 9999 (4 digits) Lock Job Check this box when locking a printing job. When using Lock Job, set a password in “Password.” A locked printing job is printed when it is unlocked using the Job List display on the panel of the machine. In this case, a password is necessary. • Lock Job Make the lock job function valid. • Password Enter the password of the lock job. Setting range: 0000 to 9999 (4 digits) Distribution <when Hard Disk Drive in Copier is installed> Specifies to add a distribution in the background during printing, and also sets the conditions for adding distribution number. A distribution number is added for each set of prints. • Distribution Number Select the distribution number function. • 1st Page Only Select whether to print the distribution number on only the first page, or on all pages. • Starting Number Specify the starting number of the distribution numbers to be printed. Setting range: 001 to 999 5-33 Printer Driver for Linux (1) Chapter 5 (3) Properties settings 5 ✎ Note When using this function in combination with the cover page function, if you set printing of the cover page to No using the cover page function, and set serial number printing to Yes, a distribution number will be printed on the cover page. The orientation of the screen sometimes fails to match the orientation of the distribution number. ✎ Printer Driver for Linux Chapter 5 Tip When the distribution number reaches 999, the next number returns to 000. 5-34 Pi4700e Properties settings 5 Conflicts dialog box The Conflicts dialog box, like the one shown below, appears when a setting that conflicts with another made previously is made on a tab. ✎ Tip The dialog box looks slightly differently from this one when Device Options are being set or the PS driver is being used. ✎ Note Some settings, which are defied by the machine for the restricted combinations of different functions, can at times be accepted by the printer driver. If a print command is issued from the personal computer with such settings made, the machine does not produce the output correctly or abandons the job to produce nothing. Make sure that you make correct settings. Pi4700e 5-35 Printer Driver for Linux When the Conflicts dialog box appears, it shows the settings that could not be combined with each other. Check the details, and click the Cancel button to quit. Chapter 5 When the following dialog box appears, it shows that the currently selected settings conflict with each other. Printer Driver for Linux Chapter 5 5 5-36 Properties settings Pi4700e Installing the printer driver 6 6 Printer Driver for Macintosh 6.1 Installing the printer driver Operating environment Apple Macintosh System 7.5.3 or later, 8.x, 9.x or Mac OS X 10.2 or later Personal computer Apple Macintosh computer or a Macintosh-compatible computer I/O interface Ethernet port Memory 16MB or more Disk drive CD-ROM drive is required for installation only. Free space on hard disk 2MB or more Recommended printer software LaserWriter 8.5.1. or later, LaserWriter 8.6 or later ✎ Note Do not use an Ethernet cable of low quality: Defective printing could result. Installation (Macintosh OS 7/8/9) This section explains the installation procedure for the Macintosh printer driver under Macintosh OS 7, 8 or 9. ✎ Note For details on the procedure for installing the printer driver on a Mac operating system, refer to “Installation (Mac OS X)” on page 6-9. Pi4700e 6-1 Printer Driver for Macintosh Operating system Chapter 6 Before installing the printer driver, make sure that your computer meets the following requirements. If it doesn’t, the printer driver may not function properly. Installing the printer driver 6 The following procedures are concerned with Apple Macintosh system 7.5.5 and LaserWriter 8.5.1. ✎ Note When OS with other version or LaserWriter is used, procedures may vary slightly. Make sure that the controller and computer are properly connected to each other with an Ethernet cable. 1 Turn ON the machine. 2 Turn ON the computer and start the Macintosh OS. 3 Install the printer controller CD-ROM in the CD-ROM drive of your computer. 4 Double-click the Macintosh HD icon on the desktop. 5 Double-click the System Folder. 6 Double-click Extensions folder. Chapter 6 7 Double-click Printer Description folder. 8 Drag the Minolta Di****-PS.ppd file in the PPD folder of the CD-ROM to the Printer Description folder opened in step 7 to copy the file. Printer Driver for Macintosh ✎ Note Specify proper file according to the machine used. Minolta Di****-PS.ppd Specification (U: Inch area, E: Metric area) Model name of the machine 6-2 Pi4700e Installing the printer driver 6 9 Remove the CD-ROM from the CD-ROM drive. ✎ Printer Driver for Macintosh Note The steps that follow will apply when the LaserWriter printer driver has previously been installed in the Macintosh computer. Chapter 6 10 Select Chooser from the Apple menu. Pi4700e 6-3 Installing the printer driver 6 11 The Chooser dialog box will appear. Printer Driver for Macintosh Chapter 6 Click the LaserWriter icon. 6-4 Pi4700e Installing the printer driver 6 12 The printer name set up with the NIC appears in the list under Select a PostScript Printer. Select the printer and click the Create button. 13 The Select a PostScript Printer Description File dialog box will ap- ✎ Printer Driver for Macintosh Note The following procedure is explained for Di470, specified for inch area, as an example: Use by specifying proper file according to the machine used. Chapter 6 pear. Select Minolta Di470U-PS.ppd from the dialog box and click the Select button. Pi4700e 6-5 Installing the printer driver 6 14 After the installation procedures have been completed, a small printer icon will appear to the left of the printer name. 15 Click the Setup... button. Printer Driver for Macintosh Chapter 6 16 Click the Configure button. 6-6 Pi4700e Installing the printer driver 6 17 Set the operating environment of the controller and click the OK button. ✎ Tip For details of the screen components, see “Print options” on page 6-14. Printer Driver for Macintosh Chapter 6 18 Click the OK button. Pi4700e 6-7 Installing the printer driver 6 19 The Chooser dialog box will reappear. Close the Chooser dialog box. Printer Driver for Macintosh Chapter 6 20 A printer icon will appear on the desktop. 6-8 Pi4700e Installing the printer driver 6 Installation (Mac OS X) This section explains the installation procedure for the Macintosh printer driver for Mac OS X. ✎ Note This printer driver is compatible with Mac OS X version 10.2 or later. 1 Turn on the machine. 2 Turn on the computer and start up the Mac OS. ❍ When starting up Mac OS, log in with administrator privileges. 3 Install the printer controller CD-ROM in the CD-ROM drive of your computer. 4 Copy Minolta Di470U-PS.ppd, Minolta Di470E-PS.ppd and MinoltaPPDPlugin.dmg to the desktop from the PPD folder on the CDROM. 5 Double-click MinoltaPPDPlugin.dmg, which was copied to the desktop. Chapter 6 6 Double-click MinoltaPPDPlugin.pkg to start it. The Pi4700 PPD Plugin installer starts up. Printer Driver for Macintosh 7 Click the Continue button. Pi4700e 6-9 Installing the printer driver 6 8 Select the partition where the software will be installed, and then click the Continue button. As an example, the dialog box below shows the installation on the OSX disk. Chapter 6 9 Click the Install button. Printer Driver for Macintosh The plugin for Di470PPD is installed. 6-10 Pi4700e Installing the printer driver 6 10 Click the Close button. This completes the installation of the PPD plugin. Next, install the printer driver. 11 Double-click the MacOSX icon on the desktop. 12 Click the Application icon. 13 Double-click the Utility folder. 14 Double-click the PrintCenter icon. Chapter 6 15 Click the Add... button. Printer Driver for Macintosh 16 Select Other... beside Printer Model:. Pi4700e 6-11 Installing the printer driver 6 17 Select either Minolta Di470U-PS.ppd (for measurements in inches) or Minolta Di470E-PS.ppd (for metric measurements), which were copied to the desktop in step 4, and then click the Choose button. 18 Select the appropriate printer model, and then click the Add button. Printer Driver for Macintosh Chapter 6 The printer driver is installed. 6-12 Pi4700e Installing the printer driver 6 19 From the Printers menu, click Show Info. The Printer Info property dialog box appears. 20 Select Installable Options. Printer Driver for Macintosh Chapter 6 21 Enter the printer settings, and then click the Apply Changes button. ✎ Note For details on the screen components, see “Print options” on page 6-14. 22 Close the Print Center dialog box. Pi4700e 6-13 Print options 6 6.2 Print options This section describes the print settings available in the application’s Print dialog box (displayed by clicking Print in the File menu). Print options (Macintosh OS 7/8/9) Printer Driver for Macintosh Chapter 6 Each print option allows you to make specific settings as detailed below. For a detailed description of each function, see the corresponding reference page. Reference Page Print Option Available Settings Installable Options Allows you to make settings for options installed on the machine. p. 6-15 Page Attributes Allows you to make the basic settings for printing. p. 6-16 PostScript Options Allows you to make visual-effect and font-related settings. p. 6-17 General Allows you to set the pages and the number of copies for printing. p. 6-18 Background Printing Allows you to make settings for background printing. p. 6-19 Cover Page Allows you to print out a page of descriptive data about each print job. p. 6-20 Color Matching Allows you to set color data output. p. 6-21 Layout Allows you to set the printing layout. p. 6-22 Error Handling Allows you to set the handling of error information. p. 6-23 Save as File Allows you to make settings for saving data in files. p. 6-24 Printer Specific Options Allows you to make not only such basic settings, such as paper source and exit port, but also enhanced functions, including duplex printing, OHP interleaving, and Cover mode. It further allows you to set finishing capabilities, including sort, staple, punch, and folding, for those occasions when you need to make multiple complete sets of the original document. p. 6-25 ✎ Note The dialog box samples given throughout the subsequent pages are taken from LaserWriter version 8.5.1. The dialog boxes may vary in appearance, showing different functions depending on the particular version of the LaserWriter you are using. See the documentation provided for LaserWriter. 6-14 Pi4700e Print options 6 Installable Options The Installable Options dialog box allows you to set the options installed on the machine. Make sure that the correct settings are made; otherwise, some printer functions may not function properly or printing cannot be performed correctly. The settings should match the machine configuration. (1) (2) (3) Installed Trays Set the tray configuration of the machine. Setting values (3) Dup+2way Tray, Dup+LCC, Duplex Cabinet LCT Set whether the Large Capacity Cassette is installed or not. Not Installed, Installed Finisher Set the specifications of the finishing option installed on the machine. Setting values Not Installed, Mailbin Finisher, Folding Finisher, Multistaple Finisher, Single-staple Finisher ✎ Note If Installed Trays has not been properly set, it may be impossible to select Finisher properly. Pi4700e 6-15 Chapter 6 Setting values (2) Printer Driver for Macintosh (1) Print options 6 Page Attributes The Page Attributes property sheet allows you to make the basic settings for printing. (1) (2) (3) (4) (1) Format for Specify the name that represents Pi4700e set up with the NIC. (2) Paper Select the size of the paper to be used for printing. Chapter 6 Setting values (3) Orientation Select the orientation of the image with the corresponding icon. Setting values (4) Portrait, Landscape Scale Specify the image size of the print. Setting range Printer Driver for Macintosh Ledger, 11×14, Legal, Letter, Executive, Invoice, A3, A4, A5, A6, JIS B4, JIS B5, JIS B6, FLS1, FLS2, FLS3, FLS4 25 to 400% ✎ Note If you select a size of paper not loaded in the machine or Manual Feed, the machine will give a message prompting you to add paper to Tray1, Tray2, or the manual bypass port and enter into a standby state. 6-16 Pi4700e Print options 6 PostScript Options The PostScript Options property sheet allows you to make visual-effect and font-related settings. (1) (2) Visual Effects Allows you to turn over the image or apply other visual effects. (2) Prints the image as if the original were viewed in a mirror. • Flip Vertical Prints the image upside down from the original. • Invert Image Reverses tonal arrangements of the original, producing a negative image. Image & Text Allows you to set the output quality of text and graphics and make font-related settings. • Substitute Fonts Sets font substitution if a printer font is similar to or under the same name as the screen font. It is enabled at installation. • Smooth Text Smooths bitmapped fonts. It is enabled at installation. • Smooth Graphics Smooths the graphic image. It is enabled at installation. • Precision Bitmap Alignment Adjusts bitmapped images to the printer resolution. • Unlimited Downloadable Fonts Enables downloading of as many fonts as required. ✎ Tip The functions of LaserWriter itself are being used. See the documentation provided for LaserWriter. Pi4700e 6-17 Chapter 6 • Flip Horizontal Printer Driver for Macintosh (1) Print options 6 General The General property sheet allows you to set the pages and the number of copies for printing. (4) (1) (5) (2) (3) (1) Copies Set the number of copies to be made. Setting range Printer Driver for Macintosh Chapter 6 (2) 1 to 999 sets Pages Specify the pages to be printed. All Prints all pages. From: to: Prints pages between the specified pages. (3) Paper Source This cannot be set on this property sheet. Use Printer Specific Options. (4) Destination Select whether to print to the machine or a file. Setting values (5) Printer, File Collated Do not make a setting on this property sheet. Use Printer Specific Options. ✎ Note It is possible to enter a number exceeding setting range: However, do not specify the number exceeding the range. When using the OHP interleaving function, set the number of sets of prints to “1”. 6-18 Pi4700e Print options 6 Background Printing The Background Printing property sheet allows you to make settings for background printing. (1) (2) • Foreground (no spool file) Does not allow the user to use the application while the document is printing. • Background Allows the user to use the computer even while a document is printing. Print Time Set the conditions for background printing. • Urgent Prints a job ahead of any others. • Normal Sets for printing at the end of the print queue. • Print at Sets the date and time-of-day for printing. • Put Document on Hold Places a job in the print queue without printing. ✎ Tip The functions of LaserWriter itself are being used. See the documentation provided for LaserWriter. Pi4700e 6-19 Chapter 6 (2) Print in Specify whether to enable background printing or not. Printer Driver for Macintosh (1) Print options 6 Cover Page The Cover Page property sheet allows you to print out a page of descriptive data about each print job. This function differs from Front Cover Page in Printer Specific Options. (1) (2) Chapter 6 (1) (2) Print Cover Page Select whether to add the Cover Page or not, or how the Cover Page is to be added. None Does not add a Cover Page. Before Document Adds the Cover Page at the beginning of the document. After Document Adds the Cover Page at the end of the document. Cover Page Paper Source Unavailable. The same paper source as that selected for “Paper Source” in “Printer Specific Options” is used. Printer Driver for Macintosh ✎ Tip The functions of LaserWriter itself are being used. See the documentation provided for LaserWriter. 6-20 Pi4700e Print options 6 Color Matching The Color Matching property sheet allows you to make settings for color data output. (1) (2) (3) (2) • Color/Grayscale Prints with gray scale. • Grayscale This function is not supported. • Black and White Prints in monochrome. • ColorSync Color Matching Prints with color reproduction data. • PostScript Color Matching Prints with printer color characteristics. Intent Sets matching style. Setting Values (3) Chapter 6 Print Color Select gray scale or monochrome. Auto selection, Perceptual matching, Relative colorimetric, Saturation, Absolute colorimetric Printer Profile Selects profile. ✎ Tip The functions of LaserWriter itself are being used. See the documentation provided for LaserWriter. Pi4700e 6-21 Printer Driver for Macintosh (1) Print options 6 Layout The Layout property sheet allows you to set the printing layout. (1) (2) (3) (1) Pages per sheet Specify the number of pages assigned to a single sheet of paper. Chapter 6 Setting values 1, 2, 4, 6, 9, 16, 4 (Down Before Across), 6 (Down Before Across), 9 (Down Before Across), 16 (Down Before Across) (2) Layout Direction Specify the layout direction by clicking the appropriate icon. (3) Border Specify the type of border line. Setting values None, Single hair line, Single thin line, Double hair line, Double thin line Printer Driver for Macintosh ✎ Tip The layout direction can be checked on the paper illustration on the left. The functions of LaserWriter itself are being used. 6-22 Pi4700e Print options 6 Error Handling The Error Handling property sheet allows you to make settings for handling error information. (1) • No special reporting Does not display Error information. • Summarize on screen Displays Error information on the screen. • Print detailed report Prints Error information. ✎ Tip The functions of LaserWriter itself are being used. See the documentation provided for LaserWriter. Pi4700e 6-23 Chapter 6 If there is a PostScript error Set the method for handling error information. Printer Driver for Macintosh (1) Print options 6 Save as File The Save as File dialog box allows you to choose settings for file format when you save data as a file, but without printing. (1) (2) (3) (4) (1) Format Specify the file format. Chapter 6 Setting Values (2) PostScript Level Specify the version of PostScript. Setting values Printer Driver for Macintosh (3) (4) PostScript Job, EPS Mac Standard preview, EPS Mac Enhanced preview, EPS No Preview, Acrobat PDF Level 1 Compatible, Level 2 and 3 Data Format Specify the data format. • ASCII Saves as a text file. • Binary Saves as a binary file. Font inclusion Set the font to be saved in the file. Setting Values None, All, All But Standard 13, All But Fonts in PPD file ✎ Tip The functions of LaserWriter itself are being used. See the documentation provided for LaserWriter. 6-24 Pi4700e Print options 6 Printer Specific Options The Printer Specific Options property sheet allows you to make not only such basic settings as the paper source and exit port, but also enhanced functions including duplex printing, OHP interleaving, and Front Cover. It also allows you to specify Sort, Staple, Punch, Folding, and other finishing functions. (1) (2) (3) (4) (5) (6) (7) (1) (2) Pi4700e Paper Source Select the paper source to be used by the machine. Available options depend on the type of paper source available on the machine. • Auto Automatically selects the paper source in which paper of the size specified by Paper Size is loaded. • Tray1 to Tray4, LCC, LCT Prints on paper loaded in the specified paper source. • Manual Feed Prints on paper loaded in the Multi Manual Feed Tray. Output Setting Select the machine exit tray into which the prints are to be fed. Available options are limited by the type of finishing option configured with the machine. • Mailbin Finisher Auto, bin1 to bin5 • Except Mailbin Finisher Auto 6-25 Printer Driver for Macintosh Note With LaserWriter 8.5.1, used for this explanation, all items in Printer Specific Options can be displayed as one page by scrolling. With some other LaserWriter versions, contents in Printer Specific Options are divided into two pages as Printer Specific Options 1 and Printer Specific Options 2. Contents of function for each item are the same, however. Chapter 6 ✎ Print options 6 (3) (4) (5) Chapter 6 (6) (7) Orientation Select the orientation of the image on the paper. • Portrait Prints the document across the narrower dimension of the paper. • Landscape Prints the document across the wider dimension of the paper. • Rotated Landscape Outputs landscape orientation upside down. Duplex Print <only when the Dup + 2way Tray, Dup + LCC or Duplex Cabinet is mounted> Select the desired duplex print function. The results of the specified duplex print can be viewed on the paper preview. • Off Does not perform duplex printing. • Short Edge Binding Prints on both sides of each page so that the printed pages can be bound along the short edge. • Long Edge Binding Prints on both sides of each page so that the printed pages can be bound along the long edge. Collate Select whether printed pages are to be sorted into copy sets when printing more than one copy of the same document. Collated Pages into copy sets. For instance, when printing 5 sets of a document consisting of 10 pages, printed pages are sorted by copy (i.e., 5 sets of a 10-page document are output). Uncollated Prints the specified number of pages one page at a time. For instance, when printing 5 sets of a document, pages are printed five times, one page at a time. Sorting Select the sorting method: • Unsorted Prints are not sorted. • Sorted Prints are sorted. Smoothing Correct the edges of the printed image. Setting values Off, On ✎ Printer Driver for Macintosh Note for (1) It is possible that an option cannot be selected because of the paper size. For details, see the User Manual of the machine. ✎ Tip for (1) The paper source is set with Installable Options. The paper source options to be selected are limited depending on the function or functions to be used (e.g., OHP Interleaving, Front Cover, etc.). 6-26 Pi4700e Print options 6 ✎ Note for (2) It is possible that an option cannot be selected because of the paper size. For details, see the User Manual of the machine. ✎ Tip for (2) The finishing option is set with Installable Options. ✎ Note for (3) Staple and Punch positions will not be correct if this function is selected improperly. ✎ Tip for (3) Rotated Landscape is handy for positioning Punch or Staple on the opposite side. ✎ Note for (5) Always set Collated in General screen to OFF. ✎ Note for (6) When sorting is used, set Collate item to Uncollated. ✎ Tip for (6) If Elevator Tray is selected when the machine is equipped with a Multi-staple Finisher, Single-staple Finisher or Mailbin Finisher, sets or stacks will be stacked in a sawtooth manner so that each is easy to identify. If Folding Finisher is mounted, or if none of the finishing options is mounted, sets or stacks will be stacked in a crisscross manner. Pi4700e 6-27 Printer Driver for Macintosh Tip for (4) The paper sizes that enable Duplex Print are Ledger, 11 × 14, Legal, Letter, Executive, Invoice, A3, A4, A5, JIS B4, JIS B5, FLS1, FLS2, FLS3, and FLS4. Chapter 6 ✎ Print options 6 Following are the minimum requirements for enabling crisscross sorting: Stacks of paper of the same size, loaded in both lengthwise and crosswise direction. Staple, Punch or Front Cover Page is not set. Chapter 6 (8) Staple <only when Multi-staple Finisher, Single-staple Finisher, Mailbin Finisher or Folding finisher is mounted> Select whether to staple each copy set of the document. Printer Driver for Macintosh • Off (9) (10) 6-28 Does not staple the printed pages. • Corner Staples together each copy set at its corner. • Short Edge <only when Multi-staple Finisher or Folding Finisher is mounted> Stapled along the short edge of the document. • Long Edge <only when Multi-staple Finisher or Folding Finisher is mounted> Stapled along the long edge of the document. • Center <only when Folding Finisher is mounted> Stapled at the center of the document. Punch <only when Multi-staple Finisher, Mailbin Finisher or Folding Finisher is mounted> Select whether to punch holes in the printed pages. • Off Does not punch holes. • Short Edge Punches holes along the short edge of the document. • Long Edge Punches holes along the long edge of the document. Folding <only when Folding Finisher is mounted> Set the folding functions for finishing. • Off Does not fold the printed page. • Crease Makes a crease in the printed page. • Crease + Staple Staples the printed page at the center with a crease made in it. • Half Folding Folds the printed page in two. Pi4700e Print options 6 • Half Folding + Staple Folds printed pages in two, staples them together, and punches holes in them. • Z-folding Folds printed pages into three parts. • Z-folding + Corner Staple Folds printed pages into three parts and staples them at the corner. • Z-folding + Long Edge Staple Folds printed pages into three parts and staples them together. • Z-folding + Punch Folds printed pages into three parts and punches holes in them. • Z-folding + Corner Staple, Punch Folds printed pages into three parts, staples them at the corner, and punches holes in them. • Z-folding + Long Edge Staple, Punch Folds printed pages into three parts, staples them together, and punches holes in them. OHP Interleaving Select whether to insert a sheet of paper between sheets of OHP transparencies on which prints have been made. • Off Does not perform OHP Interleaving. • Tray1 to Tray4, LCC, LCT Specify the paper source for the interleaves. Front Cover Page Lets you use paper for the cover of a different type (such as colored paper) from that for the text pages of your copy sets. • Off Feeds paper for all pages of your copy sets from the paper source specified in Paper Source. • Manual Feed, Tray1 to Tray4, LCC, LCT Specify the paper source for the cover. ✎ Note for (8) If the Folding function is to be used, turn Off Staple and make the Staple setting under Folding. If Staple is set, printed pages are fed out into the Elevator Tray. The stapling position may be at the upper left or upper right corner depending on the orientation of the paper and printing. If the number of sheets of paper exceeds the limit that the Multi-staple Finisher, Single-staple Finisher or Mailbin Finisher can handle, the stapling function may be canceled. For details, see the machine User Manual. If the original document for a print job contains a page of a different size from the others and this document is printed, the Staple setting may be canceled. If the original document for a print job contains a page with a different orientation from the others, care should be used because the stapling position is determined according to the direction of the first page. It is possible that an option cannot be selected because of the paper size. For details, see the User Manual of the machine. Pi4700e 6-29 Chapter 6 (12) Folds printed pages in two and punches holes in them. • Half Folding + Staple, Punch Printer Driver for Macintosh (11) Folds printed pages in two and staples them together. • Half Folding + Punch Print options 6 ✎ Note for (9) If the Folding function is to be used, turn Off Punch and make the Punch setting under Folding. It is possible that an option cannot be selected because of the paper size. Some paper sizes do not allow you to select the hole position. For details, see the User Manual of the machine. Holes may not be punched if Long Edge is selected with manual feed copying. The Multi-staple Finisher for the inch areas offers three punch holes. ✎ Note for (10) If Staple or Punch is to be used with Folding, be sure to turn Off Staple or Punch. ✎ Note for (11) Set 1 in Copies when using OHP Interleaving. Chapter 6 Use Paper Source to specify OHP transparencies. The paper source that can be selected is Manual Feed. The same paper source cannot be selected for OHP Interleaving and Paper Source. Printer Driver for Macintosh ✎ Tip for (11) The interleaves are blank pages. ✎ Note for (12) This function differs from LaserWriter standard Cover Page function (p. 6-20). Use Paper Source to specify OHP transparencies: The paper source can be selected from Manual Feed, Tray1 to Tray4, LCC and LCT. If thick paper or other special paper is selected, the machine may not feed prints out into the selected exit tray. 6-30 Pi4700e Print options 6 ✎ Tip for (12) The covers have data printed on them. No back covers are available. (13) (14) (15) Pi4700e (13) Access Number If the copy track function is to be used, enter a four-digit access number. An access number is attached to each printing job, enabling you to carry out management at the machine. In order to use this function, copy track function must be set at the machine. When the copy track function is set at the machine, printing may sometimes fail to take place until the access number designated at the machine is correctly set. Enter the access number set in the machine. Setting range: 0 to 9 for each box (14) Password If Lock Job is to be used, enter a four-digit lock job password. Entering 0 for all four digits indicates that there is no password. A locked printing job will be printed when it is unlocked using the Job List display on the panel of the machine. In this case, a password is necessary. Enter the password of the lock job. Setting range: 0 to 9 for each box 6-31 Printer Driver for Macintosh Chapter 6 (14) Print options 6 (15) User Name The user name set in the printer driver is displayed as the job user name on the machine’s touch panel. Setting range: 4 numbers max ✎ Note If nothing is entered, the setting is turned off. Conflicts dialog box A message as shown below will appear when functions that are incompatible with each other are specified. It appears when you have made a wrong selection. Printer Driver for Macintosh Chapter 6 The message gives the detail of the functions that are incompatible with each other. Check the detail and click Continue or Cancel to exit the message. 6-32 Pi4700e Print options 6 Print options (Mac OS X) Each print option allows you to make specific settings as detailed below. For a detailed description of each function, see the corresponding reference page. Copies & Pages Allows you to set the pages and the number of copies for printing. — Layout Allows you to set the printing layout. — Error Handling Allows you to set the handling of error information. — Paper & Quality Settings Allows your to make the basic settings for printing. p. 6-34 Paper Source Settings Allows you to set the paper source. p. 6-35 Job Management Allows you to print out a page of descriptive data about each print job. p. 6-36 Finishing Settings Allows you to set finishing capabilities, including sort, staple, punch, and folding, for those occasions when you need to make multiple complete sets of the original document. p. 6-37 Summary Displays a list of the current print settings. p. 6-39 ✎ Note The Copies & Pages, Layout, Output Options and Error Handling settings are supported by Print Center. Refer to the document corresponding to the operating system being used. No conflict warnings will appear, indicating that incompatible functions are specified. Pi4700e 6-33 Printer Driver for Macintosh Available Settings Chapter 6 Reference Page Print Option Print options 6 Paper & Quality Settings The Paper & Quality Settings property sheet allows your to make the basic settings for printing. (1) (2) (3) Chapter 6 (4) (1) Orientation Select the orientation of the image. Setting values Printer Driver for Macintosh (2) (3) (4) Collated Pages into copy sets. For instance, when printing 5 sets of a document consisting of 10 pages, printed pages are sorted by copy (i.e., 5 sets of a 10-page document are output). Uncollated Prints the specified number of pages one page at a time. For instance, when printing 5 sets of a document, pages are printed five times, one page at a time. Sorting Select the sorting method: • Unsorted Prints are not sorted. • Sorted Prints are sorted. Smoothing Correct the edges of the printed image. Setting values 6-34 Portrait, Landscape Collate Select whether printed pages are to be sorted into copy sets when printing more than one copy of the same document. Off, On Pi4700e Print options 6 Paper Source Settings The Paper Source Settings property sheet set the paper source. (1) (2) (3) (4) (3) (4) Pi4700e • Auto Automatically selects the paper source in which paper of the size specified by Paper Size is loaded. • Tray1 to Tray4, LCC, LCT Prints on paper loaded in the specified paper source. • Manual Feed Prints on paper loaded in the Multi Manual Feed Tray. Duplex Print <only when the Dup + 2way Tray, Dup + LCC or Duplex Cabinet is mounted> Select the desired duplex print function. The results of the specified duplex print can be viewed on the paper preview. • Off Does not perform duplex printing. • Short Edge Binding Prints on both sides of each page so that the printed pages can be bound along the short edge. • Long Edge Binding Prints on both sides of each page so that the printed pages can be bound along the long edge. OHP Interleaving Select whether to insert a sheet of paper between sheets of OHP transparencies on which prints have been made. • Off Does not perform OHP Interleaving. • Tray1 to Tray4, LCC, LCT Specify the paper source for the interleaves. Front Cover Page Lets you use paper for the cover of a different type (such as colored paper) from that for the text pages of your copy sets. • Off Feeds paper for all pages of your copy sets from the paper source specified in Paper Source. • Manual Feed, Tray1 to Tray4, LCC, LCT Specify the paper source for the cover. 6-35 Chapter 6 (2) Paper Source Select the paper source to be used by the machine. Available options depend on the type of paper source available on the machine. Printer Driver for Macintosh (1) Print options 6 Job Management The Job Management property sheet allows you to print out a page of descriptive data about each print job. (1) (2) Printer Driver for Macintosh Chapter 6 (3) (1) Access Number If the copy track function is to be used, enter a four-digit access number. An access number is attached to each printing job, enabling you to carry out management at the machine. In order to use this function, copy track function must be set at the machine. When the copy track function is set at the machine, printing may sometimes fail to take place until the access number designated at the machine is correctly set. Enter the access number set in the machine. Setting range: 0 to 9 for each box (2) Lock Job Password If Lock Job is to be used, enter a four-digit lock job password. Entering 0 for all four digits indicates that there is no password. A locked printing job will be printed when it is unlocked using the Job List display on the panel of the machine. In this case, a password is necessary. Enter the password of the lock job. Setting range: 0 to 9 for each box (3) User Name The user name set in the printer driver is displayed as the job user name on the machine’s touch panel. Setting range: 4 numbers max ✎ Note If nothing is entered, the setting is turned off. 6-36 Pi4700e Print options 6 Finishing Settings The Finishing Settings property sheet allows you to set finishing capabilities, including sort, staple, punch, and folding, for those occasions when you need to make multiple complete sets of the original document. (1) (2) (3) OutputBins <only when Mailbin Finisher is mounted> Select the machine exit tray into which the prints are to be fed. Available options are limited by the type of finishing option configured with the machine. Setting range: Auto, Bin1 to Bin5 (2) Staple <only when Multi-staple Finisher, Single-staple Finisher, Mailbin Finisher or Folding finisher is mounted> Select whether to staple each copy set of the document. • Off (3) (4) Pi4700e Does not staple the printed pages. • Corner Staples together each copy set at its corner. • Short Edge <only when Multi-staple Finisher or Folding Finisher is mounted> Stapled along the short edge of the document. • Long Edge <only when Multi-staple Finisher or Folding Finisher is mounted> Stapled along the long edge of the document. • Center <only when Folding Finisher is mounted> Stapled at the center of the document. Punch <only when Multi-staple Finisher, Mailbin Finisher or Folding Finisher is mounted> Select whether to punch holes in the printed pages. • Off Does not punch holes. • Short Edge Punches holes along the short edge of the document. • Long Edge Punches holes along the long edge of the document. Folding <only when Folding Finisher is mounted> Set the folding functions for finishing. • Off Does not fold the printed page. • Crease Makes a crease in the printed page. 6-37 Printer Driver for Macintosh (1) Chapter 6 (4) Print options 6 • Crease + Staple Staples the printed page at the center with a crease made in it. • Half Folding Folds the printed page in two. • Half Folding + Staple Folds printed pages in two and staples them together. • Half Folding + Punch Folds printed pages in two and punches holes in them. • Half Folding + Staple, Punch Folds printed pages in two, staples them together, and punches holes in them. Folds printed pages into three parts. • Z-folding + Corner Staple Folds printed pages into three parts and staples them at the corner. • Z-folding + Long Edge Staple Folds printed pages into three parts and staples them together. • Z-folding + Punch Folds printed pages into three parts and punches holes in them. • Z-folding + Corner Staple, Punch Folds printed pages into three parts, staples them at the corner, and punches holes in them. • Z-folding + Long Edge Staple, Punch Folds printed pages into three parts, staples them together, and punches holes in them. Printer Driver for Macintosh Chapter 6 • Z-folding 6-38 Pi4700e Print options 6 Summary Printer Driver for Macintosh Chapter 6 Displays a list of the current print settings. Pi4700e 6-39 Printer Driver for Macintosh Chapter 6 6 6-40 Print options Pi4700e Introduction Convenient Functions 7.1 Introduction In this chapter, you will learn how to print your document, guiding you through steps from start to end of printing. WordPad, a Windows 98 standard application, is used as an example to show the steps to follow for using Windows 98 PCL6 version driver. Though the screen format differs from one driver to another, the given procedure may be used as reference for a driver other than the Windows 98 PCL6. If a different procedure is applicable to a specific driver, that is included with the text. ✎ Tips Different procedures apply to start a property sheet depending on the application. This chapter is concerned only with the procedure to be used with WordPad. A single application may offer two or more different procedures to follow to open a property sheet. If, for example, WordPad is used on Windows 98 PCL6 driver, the text that follows will instruct you to open a property sheet by opening the Print dialog box with Print in the File menu. Another procedure that may be used is: Open the Page Setup dialog box with Page Setup in the File menu, and then click the Printer button to open the Page Setup dialog box before opening a property sheet. To open the dialog box with Windows 2000, select Print... from File menu, and select Minolta Di470 PCL6 from Printer selection in General. Pi4700e 7-1 Convenient Functions 7 Chapter 7 7 Printing on both sides of the paper 7.2 Printing on both sides of the paper Overview This section explains how to print a multi-page document which has been created with an application using both sides of a sheet. It also shows the steps to be followed when stapling the two-sided pages. Convenient Functions Chapter 7 7 To use this function, a Dup + 2way Tray, Dup + LCC or Duplex Cabinet must be mounted on the machine. Print data Printout Procedure 1 Start printing from the application which has been used to create the document: Normally, printing can be started by selecting Print from the File menu. 2 The Print dialog box will appear. Make sure that Minolta Di470 PCL6 is displayed for Name in Printer, and click the Properties button. ✎ Note Some applications allow you to set Copies and Collate (Sort) in the Print dialog box. To ensure proper printing operation, however, turn OFF these items of the application, and make the necessary settings in each property sheet of the printer driver. 3 The Minolta Di470 PCL6 Properties dialog box will appear. 4 Make sure that the size of the document created with the application is displayed in Original Document Size on the Paper tab. 5 Click the Setup tab. 7-2 Pi4700e Printing on both sides of the paper Booklet. If Long Edge Binding is selected, printing will be performed on both sides of each page so that the printed pages form a book when they are bound along the long edge. If Short Edge Binding is selected, printing will be performed on both sides of each page so that the printed pages form a book when they are bound along the short edge. Long Edge Binding Short Edge Binding ✎ Tip The Duplex/Booklet icon shows which edge is to be bound. 7 If you want to staple the printed pages, click Detail Of Output Setting to open the dialog box and select Corner Staple in Staple. Then, click the OK button. ✎ Note When Long Edge Binding is selected, Short Edge cannot be selected for punch hole. When Short Edge Binding is selected, Long Edge cannot be selected for punch hole. ✎ Tip To make holes in the printed pages, select Long Edge or Short Edge in Punch on Detail of Output Setting. 8 Make other settings as necessary and click the OK button. 9 The Print dialog box will reappear. Click the OK button. 10 The data will then be transferred to the machine and printing will soon start. Pi4700e 7-3 Convenient Functions 6 Select Long Edge Binding or Short Edge Binding from Duplex/ Chapter 7 7 Printing more than one copy at a time 7.3 Printing more than one copy at a time Overview This section explains how to print two or more copies of a document that has been created with an application. Most applications allow this function to be executed from the Print dialog box. This section explains how to print two or more set copies of documents created with an application. Most applications allow this function to be executed from the Print dialog box. The steps described in the following are use to print two or more collated sets of copies by using the Collate function on the printer driver. Convenient Functions Chapter 7 7 Print data Printout Procedure 1 Start printing from the application which has been used to create the document: Normally, printing can be started by selecting Print from the File menu. 2 The Print dialog box will appear. Make sure that Minolta Di470 PCL6 is displayed for Name in Printer, and click the Properties button. ✎ Note Some applications allow you to set Copies and Collate (Sort) in the Print dialog box. To ensure proper printing operation, however, turn OFF these items of the application, and make the necessary settings in each tab of the printer driver. 7-4 Pi4700e 7 3 The Minolta Di470 PCL6 Properties dialog box will appear. If the Paper tab is not displayed, click the Paper tab. 4 Make sure that the size of the document created with the application Chapter 7 Printing more than one copy at a time 5 In Copies, set the number of copies to be printed. 6 In Collate, select Collated so that the printed pages will be sorted into copy sets. ✎ Tip When Uncollated is selected, printed pages will be sorted into groups of identical pages. 7 Make other settings as necessary and click the OK button. 8 The Print dialog box will reappear. Click the OK button. 9 The data will then be transferred to the machine and printing will soon start. Pi4700e 7-5 Convenient Functions is displayed in Original Document Size. Specifying N-up printing 7.4 Specifying N-up printing Overview This section explains how to print two pages on one side of a sheet of paper (2 up). The same procedure is applicable when you want to perform 4 up, 6 up, 9 up or 16 up printing. Convenient Functions Chapter 7 7 Print data 2up printout Procedure 1 Start printing from the application which has been used to create the document: Normally, printing can be started by selecting Print from the File menu. 2 The Print dialog box will appear. Make sure that Minolta Di470 PCL6 is displayed for Name in Printer, and click the Properties button. ✎ Note Some applications allow you to set Copies and Collate (Sort) in the Print dialog box. To ensure proper printing operation, however, turn OFF these items of the application, and make the necessary settings in each tab of the printer driver. 3 The Minolta Di470 PCL6 Properties dialog box will appear. 4 Make sure that the size of the document created with the application is displayed in Original Document Size on the Paper tab. 5 Click the Setup tab. 6 Select 2 up in N-up. 7 Click N-up style to open the dialog box and set the Page Location. 7-6 Pi4700e 7 Chapter 7 Specifying N-up printing 8 Make other settings as necessary and click the OK button. 9 The Print dialog box will reappear. Click the OK button. start. ✎ Note Void image and image overlap may result in printing of a document that contains pages of assorted sizes and directions. Pi4700e 7-7 Convenient Functions 10 The data will then be transferred to the machine and printing will soon Printing in reduced/enlarged size 7.5 Printing in reduced/enlarged size Overview This section explains how to enlarge or reduce the image on a document created with an application for printing on paper of a designated output size. Convenient Functions Chapter 7 7 Printout Print data Procedure 1 Start printing from the application which has been used to create the document: Normally, printing can be started by selecting Print from the File menu. 2 The Print dialog box will appear. Make sure that Minolta Di470 PCL6 is displayed for Name in Printer, and click the Properties button. ✎ Note Some applications allow you to set Copies and Collate (Sort) in the Print dialog box. To ensure proper printing operation, however, turn OFF these items of the application, and make the necessary settings in each tab of the printer driver. 3 The Minolta Di470 PCL6 Properties dialog box will appear. If the Paper tab is not displayed, click the Paper tab. 4 Make sure that the size of the document created with the application is displayed in Original Document Size. 5 Specify Output Paper Size in Output Paper Size item and select the print page size. 6 Select Fit to Paper and specify the zoom ratio matching the output paper. 7-8 Pi4700e ✎ Tip When Fit to Paper is not specified, zoom ratio in scaling will be effective. 7 Make other settings as necessary and click the OK button. 8 The Print dialog box will reappear. Click the OK button. 9 The data will then be transferred to the machine and printing will soon start. ✎ Note If a paper size that does not match the paper loaded in the machine is selected, the machine will display a message that prompts you to load paper in the manual feed port, entering standby state. Fit to Paper cannot be selected if Custom Paper is selected in Output Paper Size. To enlarge or reduce the image, directly input the zoom ratio in Scaling. Pi4700e 7-9 Chapter 7 7 Convenient Functions Printing in reduced/enlarged size Printing pages with watermarks 7.6 Printing pages with watermarks Overview This section explains how to print pages with text (e.g. Confidential, Draft) in the background. Convenient Functions Chapter 7 7 Watermark print Procedure Depending on environment used, Watermark may not be edited. If registration is necessary, perform registration first, referring to Appendix A (p. 12-1). 1 Start printing from the application which has been used to create the document: Normally, printing can be started by selecting Print from the File menu. 2 The Print dialog box will appear. Make sure that Minolta Di470 PCL6 is displayed for Name in Printer, and click the Properties button. ✎ Note Some applications allow you to set Copies and Collate (Sort) in the Print dialog box. To ensure proper printing operation, however, turn OFF these items of the application, and make the necessary settings in each tab of the printer driver. 3 The Minolta Di470 PCL6 Properties dialog box will appear. 7-10 Pi4700e Printing pages with watermarks correctly set on the Paper tab. 5 Click the Setup tab and select DO NOT COPY in Watermark. 6 Select the page on which to print the watermark. 7 If you want to change the position or style of an existing watermark, click the Edit button: Watermark dialog box, from which you can edit text, will appear. Specify Text and text style, Angle, and Position. ✎ Tip If you cannot find an appropriate watermark, click New button: You can create new watermark. For the position, specify the distance from the center. 8 After the settings have been made, click the OK button to close the dialog box. 9 Make other settings as necessary and click the OK button. 10 The Print dialog box will reappear. Click the OK button. 11 The data will then be transferred to the machine and printing will soon start. ✎ Note This function may not be effective in some applications. Pi4700e 7-11 Convenient Functions 4 Make sure that all setting items, such as Original Document Size, are Chapter 7 7 Specifying booklet printing 7.7 Specifying booklet printing Overview This section explains how to layout and print four pages of a document on both sides of a single sheet of paper so that the printout may be folded at its center to form a booklet. Convenient Functions Chapter 7 7 To use this function, a Dup + 2way Tray, Dup + LCC or Duplex Cabinet must be mounted on the machine. Print data Printout Procedure 1 Start printing from the application which has been used to create the document: Normally, printing can be started by selecting Print from the File menu. 2 The Print dialog box will appear. Make sure that Minolta Di470 PCL6 is displayed for Name in Printer, and click the Properties button. ✎ Note Some applications allow you to set Copies and Collate (Sort) in the Print dialog box. To ensure proper printing operation, however, turn OFF these items of the application, and make the necessary settings in each tab of the printer driver. 3 The Minolta Di470 PCL6 Properties dialog box will appear. 4 Make sure that the size of the document created with the application is displayed in Original Document Size on the Paper tab. 5 Select Collated for Collate. 6 Click the Setup tab. 7-12 Pi4700e 7 Chapter 7 Specifying booklet printing 7 Select Booklet Left Binding in Duplex/Booklet. 8 Make other settings as necessary and click the OK button. 10 The data will then be transferred to the machine and printing will soon start. ✎ Note If the original document for a printing job contains a page of a different size or different direction from the others, and this document is printed, a void image or overlapped image could result. Pi4700e 7-13 Convenient Functions 9 The Print dialog box will reappear. Click the OK button. Printing pages with a distribution number 7.8 Printing pages with a distribution number Overview This section explains how to print a distribution number in the background for each copy set. Convenient Functions Chapter 7 7 To use this function, a Hard Disk Drive in Copier must be mounted on the machine. Print data Printout ✎ Note The orientation of the distribution number may not match that of the print image. Procedure 1 Start printing from the application which has been used to create the document: Normally, printing can be started by selecting Print from the File menu. 2 The Print dialog box will appear. Make sure that Minolta Di470 PCL6 is displayed for Name in Printer, and click the Properties button. ✎ Note Some applications allow you to set Copies and Collate (Sort) in the Print dialog box. To ensure proper printing operation, however, turn OFF these items of the application, and make the necessary settings in each tab of the printer driver. 3 The Minolta Di470 PCL6 Properties dialog box will appear. 7-14 Pi4700e 4 Make sure that all setting items, such as Original Document Size, are correctly set on the Paper tab. 5 Select Collated for Collate. 6 Click the Job Management tab and check the Distribution Number. 7 Select the page on which to print the distribution number, either 1st Page only or All Pages. 8 Specify the starting distribution number for Starting Number. 9 Make other settings as necessary and click the OK button. 10 The Print dialog box will reappear. Click the OK button. 11 The data will then be transferred to the machine and printing will soon start. Pi4700e 7-15 Chapter 7 7 Convenient Functions Printing pages with a distribution number Using the copy track function 7.9 Using the copy track function Overview It is possible to keep track of the number of prints produced by each account. Convenient Functions Chapter 7 7 Setting of the machine specifies 100-account management or 1000-account management. Procedure 1 Start printing from the application which has been used to create the document: Normally, printing can be started by selecting Print from the File menu. 2 The Print dialog box will appear. Make sure that Minolta Di470 PCL6 is displayed for Name in Printer, and click the Properties button. ✎ Note Some applications allow you to set Copies and Collate (Sort) in the Print dialog box. To ensure proper printing operation, however, turn OFF these items of the application, and make the necessary settings in each tab of the printer driver. 3 The Minolta Di470 PCL6 Properties dialog box will appear. 4 Make sure that the size of the document created with the application is displayed in Original Document Size on the Paper tab. 5 Click the Job Management tab. 6 Apply check mark to Account Code. 7 Input Access Number. 8 Make other settings as necessary and click the OK button. 9 The print dialog box will reappear. Click the OK button. 10 The data will then be transferred to the machine and printing will soon start. 7-16 Pi4700e ✎ Note When Account Code is used, printing may not take place unless the account number has been correctly set. To clear the Account Code function, type any number in the Access Number box. If no number is typed in the Access Number box, the message “Access Number Error” will appear and you might not be able to exit from the function. Pi4700e 7-17 Chapter 7 7 Convenient Functions Using the copy track function Printing on OHP transparencies 7.10 Printing on OHP transparencies Overview This section explains how to insert a sheet of paper (interleaf) between sheets of OHP transparencies when printing on sheets of OHP transparencies. This interleaf may be left blank or have the same data printed on it as the OHP transparencies. Convenient Functions Chapter 7 7 Print data Printout Procedure 1 Start printing from the application which has been used to create the document: Normally, printing can be started by selecting Print from the File menu. 2 The Print dialog box will appear. Make sure that Minolta Di470 PCL6 is displayed for Name in Printer, and click the Properties button. ✎ Note Some applications allow you to set Copies and Collate (Sort) in the Print dialog box. To ensure proper printing operation, however, turn OFF these items of the application, and make the necessary settings in each tab of the printer driver. 3 The Minolta Di470 PCL6 Properties dialog box will appear. 4 Make sure that all setting items, such as Original Document Size, are correctly set on the Paper tab. 7-18 Pi4700e 5 Click the Setup tab and select the paper source for OHP transparencies in Paper Source. ✎ Note Paper source for OHP film is Manual Feed only. 6 Click the Detail of Paper Source: Detail of Paper Source dialog box will appear. 7 Apply check mark to OHP Interleaving. 8 Select the with Image box if you want the OHP data printed on the interleaves. 9 Select the paper source for interleaves in Interleaving Paper Source. ✎ Note The same paper source as that used for OHP transparencies cannot be specified as paper source for interleaves. 10 Click the OK button. 11 Make other settings as necessary and click the OK button. 12 The Print dialog box will reappear. Click the OK button. 13 The data will then be transferred to the machine and printing will soon start. Pi4700e 7-19 Chapter 7 7 Convenient Functions Printing on OHP transparencies Adding a cover to each copy set 7.11 Adding a cover to each copy set Overview This section explains how to add a front cover and/or a back cover to each of your copy sets. Four different modes are available to choose from. Select the appropriate one according to your needs. Convenient Functions Chapter 7 7 Print data Printout Procedure 1 Start printing from the application which has been used to create the document: Normally, printing can be started by selecting Print from the File menu. 2 The Print dialog box will appear. Make sure that Minolta Di470 PCL6 is displayed for Name in Printer, and click the Properties button. ✎ Note Some applications allow you to set Copies and Collate (Sort) in the Print dialog box. To ensure proper printing operation, however, turn OFF these items of the application, and make the necessary settings in each tab of the printer driver. 3 The Minolta Di470 PCL6 Properties dialog box will appear. 4 Make sure that all setting items, such as Original Document Size, are correctly set on the Paper tab. 5 Click the Setup tab and select the paper source for text in Paper Source. 7-20 Pi4700e ✎ Note Paper sources for text are Manual Feed, Tray 1, 2, 3, 4, LCC and LCT. 6 Click the Detail of Paper Source: Detail of Paper Source dialog box will appear. 7 Apply check mark to Front Cover Page. 8 Select the with Image box if you want data printed on the front cover. 9 Select whether to add a back cover and, if the back cover is to be added, select whether to print data on the back cover using Back Cover Page and with Image. 10 Select the paper source for the front/back cover under Cover Paper Source. ✎ Note Paper sources for cover page are Manual Feed, Tray 1, 2, 3, 4, LCC and LCT. 11 Click the OK button. 12 Make other settings as necessary and click the OK button. 13 The Print dialog box will reappear. Click the OK button. 14 The data will then be transferred to the machine and printing will soon start. Pi4700e 7-21 Chapter 7 7 Convenient Functions Adding a cover to each copy set Using the lock job (print PC confidential) function 7.12 Using the lock job (print PC confidential) function Overview Lock Job allows you to keep a particular document confidential so that document can be printed only after a password is entered on the machine. Convenient Functions Chapter 7 7 Procedure on the printer driver side 1 Start printing from the application which has been used to create the document: Normally, printing can be started by selecting Print from the File menu. 2 The Print dialog box will appear. Make sure that Minolta Di470 PCL6 is displayed for Name in Printer, and click the Properties button. ✎ Note Some Applications allow you to set Copies and Collate (Sort) in the Print dialog box. To ensure proper printing operation, however, turn OFF these items of the application, and make the necessary settings in each tab of the printer driver. 3 The Minolta Di470 PCL6 Properties dialog box will appear. 4 Make sure that all setting items, such as Original Document Size, are correctly set on the Paper tab. 5 Click the Job Management tab. 6 Apply check mark to Lock Job. 7-22 Pi4700e Using the lock job (print PC confidential) function 7 Input password. ✎ Note To clear the Lock Job function, type any number in the Password box. If no number is typed in the Password box, the message “Password Error” will appear and you might not be able to exit from the function. ✎ Tip Password is 4-digit number, from 0002 to 9999. If you enter a 3-digit number for password, it will be regarded as 4-digit number, automatically adding “0” to the head. 8 Make other settings as necessary and click the OK button. 9 The Print dialog box will appear. Click the OK button. 10 The data will be transferred to the machine, but printing will not yet start. Procedure on the machine side (Unlocking a job) After the data has been transferred to the machine, operate the machine to start printing. 1 Press the [Job List] key on the control panel. Pi4700e 7-23 Convenient Functions Chapter 7 7 Using the lock job (print PC confidential) function Chapter 7 7 2 Touch the [Unlock] key. ✎ Convenient Functions Note If the Job List does not appear, touch [Next] or [Back Up]. 3 Input password. ✎ Note All jobs, whose preprogrammed passwords match the password entered, are “unlocked.” 4 The job is “unlocked” and printing will start. 7-24 Pi4700e 7 Procedure on the machine side (Deleting a job) After the data has been transferred to the machine, it can be deleted without being printed. Convenient Functions 1 Press the [Job List] key on the control panel. 2 Touch the [Delete] key. ✎ Note If the Job List does not appear, touch [Next] or [Back Up]. Pi4700e Chapter 7 Using the lock job (print PC confidential) function 7-25 Chapter 7 7 Using the lock job (print PC confidential) function Convenient Functions 3 Select job to be deleted. 4 Enter a 4-digit password from the 10-key Pad. 5 This deletes the job from the job list. 7-26 Pi4700e Chapter 7 7.13 7 Using the folding function Overview A multi-page document prepared in an application can be finished into a book form through Half Folding and Staple. To use this function, a Folding Finisher must be mounted on the machine. The function is enabled only when the PS driver is used. Procedure 1 Start printing from the application which has been used to create the document: Normally, printing can be started by selecting Print from the File menu. 2 The Print dialog box will appear. Make sure that Minolta Di470 PS is displayed for Name in Printer, and click the Properties button. ✎ Note Some Applications allow you to set Copies and Collate (Sort) in the Print dialog box. To ensure proper printing operation, however, turn OFF these items of the application, and make the necessary settings in each tab of the printer driver. 3 The Minolta Di470 PS Properties dialog box will appear. 4 Make sure that Original Document Size is correctly set on the Paper tab. 5 Check the Output Paper Size box and select 11 × 17. 6 Select 2 up in N-up. Pi4700e 7-27 Convenient Functions Using the folding function Using the folding function Chapter 7 7 7 Click N-up Style to open its dialog box. Then, set Page Location to Horiz. Ascending and click the OK button. 8 Click “Detail Of Output Setting” to open the dialog box. Convenient Functions 9 Specify Half Folding under Folding. 10 Specify Long Edge under Staple. 11 Click the OK button. 12 Make other settings as necessary and click the OK button. 13 The Print dialog box will reappear. Click the OK button. 14 The data will then be transferred to the machine and printing will soon start. 7-28 Pi4700e Using the settings function Chapter 7 Using the settings function Overview Frequently used groupings of print settings can be stored and called up as necessary for application in actual print jobs. Procedure Operations with “Easy Set” are storing, calling up and deleting. Depending on environment used, number of registrations will be different: Refer to Appendix A (p. 12-9) for details. Using the settings stored for a current print job 1 Start printing from the application which has been used to create the document: Normally, printing can be started by selecting Print from the File menu. 2 The Print dialog box will appear. Make sure that Minolta Di470 PCL6 is displayed for Name in Printer, and click the Properties button. ✎ Note Some Applications allow you to set Copies and Collate (Sort) in the Print dialog box. To ensure proper printing operation, however, turn OFF these items of the application, and make the necessary settings in each tab of the printer driver. 3 The Minolta Di470 PCL6 dialog box will appear. 4 Click the down-arrow ▼ of Easy Set Name and from subsequent menu, select the Title name to be used. Pi4700e 7-29 Convenient Functions 7.14 7 Using the settings function Chapter 7 7 5 Dialog box for confirmation will appear. Click the OK button. The setting data will then be read to the driver software. 6 Click the OK button. Convenient Functions 7 The Print dialog box will appear. Click the OK button. 8 The data will then be transferred to the machine and printing will soon start. Storing settings 1 Start printing from the application which has been used to create the document: Normally, printing can be started by selecting Print from the File menu. 2 The Print dialog box will appear. Make sure that Minolta Di470 PCL6 is displayed for Name in Printer, and click the Properties button. ✎ Note Some Applications allow you to set Copies and Collate (Sort) in the Print dialog box. To ensure proper printing operation, however, turn OFF these items of the application, and make the necessary settings in each tab of the printer driver. 3 The Minolta Di470 PCL6 Properties dialog box will appear. 4 Make settings in Setup, Paper, Quality, Job Management and PostScript properties as necessary. 5 Click the Save button. ✎ Tip If setting is changed as in step 4, the Easy Set Name becomes Untitled and the Save button will appear. 7-30 Pi4700e 7 6 The Save Easy Set Name dialog box will appear. Input the Easy Set Convenient Functions Name to be registered and click the OK button. ✎ Tip If the same Easy Set Name already exists, a dialog box asking whether it should be over-written or not will appear. 7 Click the OK button. 8 The Print dialog box will then reappear. To start printing immediately, click the OK button: The data will be transferred to the machine and printing will soon start. If printing is not to be done now, click the Cancel button. ✎ Note Settings can be stored from the printer properties dialog box opened from the Printers window. With PS, it is not possible to save the settings if the function has been activated from the application. Start the function using the printer icon. The same procedure also applies when the printer properties dialog box is used. However, be sure to click the Cancel button to close the properties dialog box: If it is closed by clicking the OK button, the settings will become the default values when the properties dialog box is accessed from the application. Pi4700e Chapter 7 Using the settings function 7-31 Using the settings function Chapter 7 7 Deleting settings which have been stored 1 Start printing from the application which has been used to create the Convenient Functions document: Normally, printing can be started by selecting Print from the File menu. 2 The Print dialog box will appear. Make sure that Minolta Di470 PCL6 is displayed for Name in Printer, and click the Properties button. ✎ Note Some Applications allow you to set Copies and Collate (Sort) in the Print dialog box. To ensure proper printing operation, however, turn OFF these items of the application, and make the necessary settings in each property sheet of the printer driver. 3 The Minolta Di470 PCL6 Properties dialog box will appear. 4 Click the down arrow ▼ of Easy Set Name and, from subsequent menu, select the name to be used. 5 Dialog box for confirmation will appear. Click the OK button: The setting data will then be read to the driver software. 6 Click the Delete button. 7 Dialog box for confirmation will appear. Click the OK button: The title name will disappear and the setting data will be deleted. 7-32 Pi4700e ✎ Note If the setting contents are changed before deleting, the Easy Set Name will change to Untitled and the Delete button will change to the Save button. Deleting cannot be performed in this status. 8 Click the OK button. 9 The print dialog box will then reappear. Click the Cancel button. ✎ Note Settings can also be deleted from the printer icon property sheet opened from the Printers window. With PS, it is not possible to save the settings if the function has been activated from the application: Start the function using the printer icon. The detailed print settings remain valid even after the Easy Set Name has been cleared from the options list. Pi4700e 7-33 Chapter 7 7 Convenient Functions Using the settings function Confirming that the data has been transferred to the machine Chapter 7 7 7.15 Confirming that the data has been transferred to the machine Convenient Functions Overview Status of data transferred from the personal computer will be displayed in Job List. Procedure 1 Press the [Job List] key on the control panel. 2 Job list will be displayed. 7-34 Pi4700e ✎ Note For printing a lock job, refer to “Procedure on the machine side (Unlocking a job)” (p. 7-23) in “7.12 Using the lock job (print PC confidential) function”. For unlocking the job, refer to “Procedure on the machine side (Deleting a job)” (p. 7-25) in “7.12 Using the lock job (print PC confidential) function”. Pi4700e 7-35 Chapter 7 7 Convenient Functions Confirming that the data has been transferred to the machine Confirming that the data has been transferred to the machine Convenient Functions Chapter 7 7 7-36 Pi4700e Outline 8 Network Interface Card 8.1 Outline Chapter 8 8 G “Getting ready” G “Setting up the network card” Network Interface Card The following shows the general outline of this chapter. Read the section that covers your particular network environment. G “Windows configuration” G “NetWare configuration” G “Macintosh configuration” Refer to these sections as required. G “Using the utility software” Read the following sections when necessary. 8.2 G “Troubleshooting” G “Jumper switch setting” G “Specifications” Getting ready This Network Card is a multi-protocol network card that provides Ethernet connection for the Minolta Pi4700e printer controller and offers the following features. G Automatic Ethernet type detection (10BaseT, 100BaseT) G Fully transparent AppleTalk printing support for the Macintosh, including support for binary PostScript printing. G Peer-to-peer printing program allows printing on a network without going through a server ❍ Peer-to-Peer Printing with TCP/IP (Windows 95/98/Me/NT 4.0) Peer-to-Peer Printing with IPX/SPX (Windows 95/98/Me) ❍ Pi4700e G Novell NetWare PSERVER support under bindery base or Novell Directory Services (NDS) G lpr/lpd functions under TCP/IP G SNMP control using MIB-II and private MIB SNMP support using standard MIB on a compatible printer or printerspecific MIB 8-1 Getting ready Chapter 8 8 G Onboard HTTP server allowing configuration of network function settings using a Web browser G Direct printing from an IPP client G SLP (Service Location Protocol) support Utility software (on the CD-ROM) Network Interface Card The following items are contained in the nicutlty folder on the CD-ROM that comes with the printer controller. G Discovery Program ❍ IPX/IP Management Access Program (MAP) G Peer-to-Peer Printing Programs See “3 Network Settings” for details. ❍ ❍ IP Peer-to-Peer Printing Program IPX Peer-to-Peer Printing Program G BOOTP Program ❍ BootPL32.exe G NetWare Setup Utility Program ❍ NWSetup G Macintosh Utility Program ❍ NIManage (AppleTalk Utility) G UNIX TCP/IP Utility Programs G MIB Setting File The ReadMe file on the CD-ROM contains the latest information about each of the network software applications. Be sure to read the ReadMe file before using the network software. 8-2 Pi4700e Getting ready 8 System requirements Novell NetWare Version 4.x or 5.x Macintosh System 7.x, 8.x, 9.x, Mac OS X Version of Protocol or NOS Windows, or LAN Server systems supporting lpr over TCP/IP Chapter 8 The following table describes the system requirements for using the Network Card hardware and software. Novell NetWare printing requires NetWare Capture, NPRINT and PCONSOLE (later than 1.0) utilities. NWSetup requires Windows 95/98/Me/2000 or Windows NT 4.0, and the Novell 32-bit client. The IP Peer-to-Peer utility requires Windows NT 4.0; Windows 95/98/Me. The IPX Peer-to-Peer utility requires Windows 95/98/Me. Software The MAP utility requires Windows NT 4.0; Windows 95/98/Me/ 2000. MAP also requires a browser such as Microsoft Internet Explorer or Netscape. TCP/IP setup and maintenance may be done with Telnet. Monitoring and maintenance with HTTP requires a suitable Internet Web browser program supporting HTML. AppleTalk printing requires printer PPD appropriate to the Digital Copier. AppleTalk NIManage Utility Program is provided for setup and maintenance (except Mac OS X). Hardware Support for 10 or 100 megabit Ethernet networks: 10/ 100BaseT (twisted pair cables) and hardware CD-ROM drive Pi4700e 8-3 Network Interface Card Red Hat Linux 6.1 or later, SuSE Linux 6.3 or later, OpenLinux 2.3 or later, Turbolinux 4.0 or later. Setting up the network card 8 8.3 Setting up the network card Chapter 8 Connecting a network cable 1 Make sure that Digital Copier power is turned off. 2 Connect the network cable to the Network Card. Network Interface Card Network cable 10/100BaseT port ❍ Insert the plug into the 10-100BaseT port on the rear panel of the network card and press it in until you hear it click securely into place. 3 Power up the Digital Copier and check for abnormalities. ✎ Important! Use only Category 5 shielded 10/100BaseT cable. Configuring the network card You must first configure the Network Card and your computer before you can print using the Network Card. The settings you need to make depend on the configuration of your network environment. sections 4 through 6 of this chapter describe configurations for the environments listed below. Follow the configurations procedure for the operating system you are using. 8-4 G Section 4 - Windows configuration Network printing in a Windows 95/98/Me/2000/XP/NT environment G Section 5 - NetWare configuration Network printing in a NetWare environment G Section 6 - Macintosh configuration Network printing in a Macintosh environment Pi4700e Windows configuration 8.4 8 Windows configuration NetWare configuration This section provides details on how to configure a Novell NetWare server in order to print from a NetWare client. Follow the procedures listed below to configure the NetWare server from a NetWare client. Using NWSetup NWSetup is a utility program that comes bundled with the Network Card, which simplifies configuration of the NetWare file server and Network Card. See “NWSetup (Windows)” (p. 8-38). Using NetWare Client G NetWare 4.x configuration in bindery services emulation This section describes how to configure the Network Card with NetWare 4.x bindery services emulation. See “NetWare 4.x Configuration Using Bindery Emulation” (p. 8-5). G Novell Directory Services configuration This section describes how to configure the Network Card with NetWare 4.x directory services. See “Configuration Using Novell Directory Services” (p. 8-8). NetWare 4.x Configuration Using Bindery Emulation Novel NetWare 4.x supports two operation modes: NDS and bindery services emulation. This chapter explains how to configure NetWare 4.x using bindery emulation. For information about NDS, see “Configuration Using Novell Directory Services” (p. 8-8). These two services run simultaneously and transparently to each other. The Network Card can be configured to operate in the bindery services mode only or under NDS. Under NDS, the Network Card will also service older file servers operating in bindery mode. ✎ Note The Network Card will not be able to find its file servers if it is not correctly configured for NDS operation and the bindery services mode is not running. You can use MAP or a Web browser to check the configuration of the Network Card. See “Management Access Program (Windows)” (p. 8-28) for more information. Pi4700e 8-5 Network Interface Card 8.5 Chapter 8 Refer to “3 Network Settings” (p. 3-1) for details on how to perform network printing in a Windows environment. NetWare configuration 8 Confirming the Bindery Context Chapter 8 Before installing the Network Card under Novell NetWare 4.x in the bindery emulation mode, you should first confirm whether the server has a bindery context (name assigned to the server by the bindery services mode). If it doesn’t, install in the NDS mode. Bindery context is required to install the Network Card in the bindery emulation mode. Use the following procedure to confirm whether your server has bindery context. Network Interface Card 1 On the NetWare 4.x server, type: load install Enter 2 Select Maintenance/Selective Install from the menu. 3 On the Installation Options menu, select NCF File Options. 4 From the menu of available NCF file options, select Edit AUTOEXEC.NCF. 5 Search the file and check to see if it contains a statement similar to the one shown below. SET BINDERY CONTEXT=OU=ENG OU=ENG is an example file server context. Use your own file server context in place of OU=ENG. 6 At the console prompt, type the SET BINDER CONTEXT statement exactly as you entered it in your AUTOEXEC.NCF file. ✎ Note The command you type at the console prompt takes effect immediately. The contents defined in the AUTOEXEC.NCF file take effect when the server is shut down and then restarted. 8-6 Pi4700e NetWare configuration 8 Configuring in the Bindery Mode 1 Log into the server where you want to install the print server as supervisor or as a user with equivalent privileges. 2 Type PCONSOLE and press Enter to display the Available Options Chapter 8 After you confirm that your server has a bindery context, use the following procedure to configure the Network Card. 3 Press F4 to enter the bindery mode. ✎ Note If a message appears telling you to log in with bindery connection, it means that the attached server does not have bindery mode enabled. Either perform the procedure under “Confirming the Bindery Context” or log onto a server with bindery services enabled. 4 On the Available Options screen, select Quick Setup and then press Enter . Use Quick Setup to connect the print server, print queue, and printer you want to use. You will be able to change this settings later if you want. 5 Select Print Server and then press F3 to modify the entry. 6 Type the name of the print server you want to use into the New print server field, and then press Pi4700e Enter . 8-7 Network Interface Card screen. NetWare configuration 8 ✎ Chapter 8 Note You can use MAP or a Web browser to change the print server name. See “Management Access Program (Windows)” (p. 8-28) for more information. The initial default print server name is: MLT_<serial number>. 7 Press Network Interface Card to move the cursor to New printer, type the printer name, and then press Enter . 8 Press to move the cursor to New print queue, type the print queue name, and then press Enter . 9 Press to move the cursor to Printer type and then press Enter . From the printer type list, select Other/Unknown and then press Enter . 10 After all the settings are the way you want, press F10 to save the configuration. Repeat steps 5 through 10 for each file server that the print server services. After you are finished, select Print Queues or Print Servers on the Available Options screen when you want to view, delete, or edit print server or queue settings. Configuration Using Novell Directory Services Novell Directory Services (NDS) provides a more advanced approach to network management than previous versions of NetWare. It stores and tracks all network objects. A Version 4.x or 5.x server must have NDS installed in order to function. This means every NetWare 4.x or 5.x server is a directory server, because it services printers, print servers, print queues, and other named directory objects. With appropriate privileges, you can create a print server object and assign them network-wide contexts (or locations), which eliminates the need to perform troublesome setup of print servers on each individual network server. NDS provides true enterprise networking based not on individually defined physical sites, but rather on a shared network database. The result is vastly improved print server setup and management. The Directory Information Base (DIB) is used to store information about servers and services, users, printers, gateways, etc. It is a distributed database that allows access to data anywhere on the network, regardless of where it is stored. Pre-4.x NetWare versions provide the same data as DIB, but the data is stored in the NetWare bindery. 8-8 Pi4700e DIB is designed for more flexible access, more specific security, and, because it is distributed, a design that allows partitioning. Unlike bindery’s flat file structure, the DIB directory uses an object-oriented structure, enabling network-oriented access as opposed to bindery’s server-oriented access. The bindery emulation mode provides the directory with downward compatibility with NetWare bindery. This section explains operation of the print server with a 4.x NetWare system in bindery emulation mode. Once bindery emulation is enabled, NDS receives bindery requests and responds just as if a bindery existed on the NetWare server being accessed. It should be noted here that information obtained from a bindery query may not be stored on the server because the directory is a partitioned and distributed database. Though a NetWare 4.x server is not operating from a bindery, applications making bindery requests do not know the difference. NWADMIN can be used to configure the printer in NDS. Before printing, you must use the procedures below to configure NDS, and to set up the Network Card with NDS context and tree. The procedures for using NWADMIN to create the printer, print server, and other print queue objects are provided below. After you create these objects you must then associate them with each other. Under NetWare 4.x you can keep bindery resources on any server if you want by declaring a SET statement in your AUTOEXEC.NCF file. If you want, you can also use PCONSOLE instead of NWADMIN. PCONSOLE can also be used to set up static print server information, such as which queues to service and whom to notify in case of problems. See the Novell NetWare documentation for details about using PCONSOLE for NDS. ✎ Note Some NetWare servers require that bindery context be configured on the file server, even when using the NDS mode. Pi4700e 8-9 Chapter 8 8 Network Interface Card NetWare configuration NetWare configuration 8 Creating a Printer Object 1 Click the NWADMIN icon in the NetWare Tools group in Windows. Chapter 8 This displays the NetWare Administrator dialog box. To access your directory tree, open a browser window by clicking the Tools menu item and then the Browse item. 2 Highlight the organizational unit or organization where you want to cre- Network Interface Card ate the print service in the directory tree, select Object, and then on the pop up menu select Create. ✎ Note If you want, you can also create objects in NWADMIN by selecting an organizational unit, right-clicking to display a pop-up menu, and leftclicking Create to display the New Object window. Then you would continue with the steps below. 3 When the New Object window shown below appears, select the Printer icon on the Class of New Object list and then click the OK button. 4 On the Create Printer window that appears, type the printer name you want into the Printer Name field and then click the Create button. 8-10 Pi4700e NetWare configuration 8 Creating a Print Server Object up menu that appears. 3 On the New Object window, select the Print Server Name icon on the Class of New Object list, and then click the OK button. 4 On the Create Print Server window that appears, type the print server name you want into the Print Server Name field and then click the Create button. Creating a Print Queue Object 1 Highlight Organizational Unit again. 2 Select Object from the main menu, and then select Create on the pop up menu that appears. 3 On the New Object window that appears, select the Print Queue icon on the Class of New Object list, and then click the OK button. 4 Click the Directory Services Queue button, type the names you want into the Print Queue Name and Print Queue Volume fields, and then click the Create button. ❍ ❍ Pi4700e If you do not know the print queue volume name (the name of the hard disk you will be accessing), click the icon to the right of the Print Queue Volume field to display the Select Object window shown below. Objects lists volumes that you can choose. If you cannot find the volume you want in the list, click Directory Context items until you find the volume where you want the queue to reside. 8-11 Network Interface Card 2 Select Object from the main menu, and then select Create on the pop Chapter 8 1 Highlight Organizational Unit again. NetWare configuration 8 5 Click the object (hard drive) you want and it appears in the Selected Object field. 6 Click OK and the full volume appears in the Print Queue Volume Network Interface Card Chapter 8 field. Finally, click the Create button. Assigning a Printer Object 1 Navigate to the directory tree, and double-click a printer object you just created. This displays the Printer window. 8-12 Pi4700e NetWare configuration 8 2 Click the Assignments button, and then click the Add button to dis- 3 From the Objects list, select a print queue you just created and then click the OK button to add the print queue to the Print Queues box in the Printer window. 4 Click the OK button again. Pi4700e 8-13 Network Interface Card Chapter 8 play the Select Object window. NetWare configuration 8 Assigning a Print Server Object 1 At the directory tree, double-click a print server object you just created. Network Interface Card Chapter 8 This displays the Print Server window. 2 Click the Assignments button, and then click the Add button to display the Select Object window. 3 From the Objects list, select the printer object you just created and then click the OK button to add the printer (with its context) to the Prints box in the Print Server window. 4 Click the OK button again. 8-14 Pi4700e NetWare configuration 8 Checking Assignments 1 At the directory tree, double-click a print queue object you just created. Network Interface Card Chapter 8 This displays the Print Queue window. 2 Click the Assignments button. The print queue and printer will appear in the proper boxes of the Printer Queue window if they are properly configured. 3 Check the contents of the window and then click the Cancel button. Printer Configuration and Reset After you finish making the NWADMIN settings described above, you must configure and reset the Digital Copier (by powering it down and then back up again) before you can start printing. Pi4700e 8-15 NetWare configuration 8 Configuring NetWare Enterprise Print Services (NDPS) Chapter 8 NetWare Enterprise Print Services is a Novell software solution built on the Novell Distributed Print Services (NDPS) architecture. NDPS is an advanced printing architecture that can be run on either an IPX or an IP network. NDPS over IP is the native printing approach for NetWare 5.x systems. Network Interface Card NDPS is not yet implemented on printer resident print servers. Instead, a NetWare server includes a gateway that translates between NDPS and a printer-supported protocol or protocols. Gateways exist for PSERVER on IPX, for LPD, and for raw binary sockets printing on IP. Some gateways support NDPS configuration and status information capabilities using SNMP. The following sections describe the NDPS configuration using Novell-supplied gateways. For networks running NDS over IPX, the gateways use the NetWare PSERVER function implemented on the printer Network Cards. For networks using IP, the Novell-supplied gateway uses the printer LPD capability. Novell is developing an NDPS gateway for printers implementing the IPP protocol; update information on how to set this up will be provided when the capability is released and verified with these printers. Creating NDPS Manager An NDPS Manager provides a platform for Printer Agents that reside on the server. An NDPS Manager must be created as an object in the NDS tree before you can create server-based Printer Agents. This procedure is necessary regardless of the gateway or underlying network protocol used. To create an NDPS Manager object 1 In NetWare Administrator, select the container where you want the NDPS Manager object to reside. 2 Choose Object — Create — NDPS Manager. This causes the Create NDPS Manager Object dialog box to appear. 3 Type a name in the NDPS Manager Name field. 4 Browse for the Resident Server where you want this manager assigned. This can be any server in the current NDS tree in which you have installed NDPS. This will be the only server on which you will be able to load this NDPS Manager. The NDPS Manager will store its database on a volume of this server. 8-16 Pi4700e NetWare configuration 8 Configuring Queue-Based Printers Prerequisites: ✔ The print queue you want to reference must already exist. ✔ On a Novell 4.x or 5.x network using IPX, install the printer and the print server. 1 In NetWare Administrator, select the container where you want the NDPS Manager object to reside. 2 Choose Object — Create — NDPS Printer. This causes the Create NDPS Printer dialog box to appear. 3 Type a name in the NDPS Printer Name field. 4 In the Printer Agent Source field, select Create a New Printer Agent and click the Create button. This causes the Create Printer Agent dialog box to appear. 5 Confirm the Printer Agent name (default is the name of the new printer you are creating) and browse to select the NDPS Manager you want to assign it to. 6 At the Gateway Types window, select the Novell Printer Gateway. This causes the Novell PDS dialog box to appear. 7 Configure the Novell PDS by selecting the Printer Type and Port Handler Type and click the OK button. This starts the Configure Novell Port Handler configuration wizard. 8 In the Connection Type field, click Forward Jobs to a Queue and then click the Next button. (The Port Type options are grayed out when you select the Queue connection type.) This displays a screen with the Queue Name and Queue User Name fields. 9 Provide the queue name and queue user name. Pi4700e 8-17 Network Interface Card The Novell NDPS gateway for IPX is compatible with queue-based NetWare printing technologies. The following procedure describes how to set up and configure NDPS to interface with the printer via queue-based printing. Chapter 8 Configuring an NDPS Gateway for IPX NetWare configuration 8 Chapter 8 Browse for the target print queue. If no queues are listed, no queues exist in the current context. Browse the tree to find a queue in a different context. The queue you select must exist in the current tree; otherwise, you will need to create a “bindery reference queue” in your own container to allow access to the actual queue. See “Bindery Reference Queues” on page 8-19. ✎ Network Interface Card Note The user you specify may need to log in to the server on which this queue resides. This user must have full privileges to manage this queue. 10 Click the Finish button. This causes the Select Printer Drivers dialog box to appear. 11 Select the printer driver for each client operating system. ❍ ❍ When users install this printer, these drivers will be automatically downloaded to their workstations. If the driver you need is not listed, rather than adding the driver to the RMS, you can choose None from the top of each list. Users will then be asked to provide a disk with the appropriate driver the first time they install this printer on their workstations. 12 Click the Continue button. The main browser window appears with your new controlled-access printer listed. 8-18 Pi4700e NetWare configuration 8 A bindery reference queue serves as a pointer to a real NetWare queue on both types of servers. After you have created a bindery reference queue to point to a real bindery queue on a target server, you can then configure a Printer Agent to send jobs to that queue just as you would if the queue actually resided on a NetWare 4.x or NetWare 5.x server in the same tree. The following section explains how to accomplish this procedure using NetWare Administrator. ✎ Note If a bindery reference queue already exists, you can use it with NDPS with no modification. A new reference queue object does not need to be created in NDS. Configuring Bindery Reference Queues Prerequisites Before you can create a bindery reference queue, the following requirements must be met: ✔ The print queue you want to reference must already exist on the server you want to point to. ✔ A bindery object of the same name as the one you are using must exist on that server and must have rights to the print queue you are referencing. 1 In NetWare Administrator, select the container where you want the reference queue to reside. 2 Choose Object — Create. This causes the New Object dialog box to appear. 3 Select Print Queue. This causes the Create Print Queue dialog box to appear. Pi4700e 8-19 Network Interface Card Novell suggests that you upgrade all of your printers to NDPS as soon as possible. However, you may still want to provide your users with access to queue-based printing resources for a variety of reasons. While connecting to queue-based printers controlled by NetWare 4 or NetWare 5 servers in the current NDS tree can be accomplished directly when you configure a Printer Agent, you may need to create one or more “bindery reference queues” to provide access to printers controlled by a NetWare 3 file server or printers controlled by a NetWare 4 or NetWare 5 server in a different NDS tree. Chapter 8 Bindery Reference Queues NetWare configuration 8 4 Select Reference a bindery queue. (Notice that the dialog box changes when you select this option.) 5 If you want to assign a bindery reference queue name different from Chapter 8 the queue’s name on the legacy server, enter the reference name in the Print Queue Name field. If you do not want to assign a different reference name, leave the field blank. Network Interface Card 6 Browse for a bindery server and queue. This causes the Network Server and Queue dialog box to appear. 7 Click List Only Attached Servers to specify whether you want this option turned on or off. ❍ To see a list of all available servers, turn off this option. Select the name of the server you want to attach to. Log in to this server at the prompt. 8 Double-click the server you want to use. A list of queues available on that server appears in the Queues list. If you are not attached, you must authenticate to that server. ✎ Note To complete this procedure, you must have rights to the print queue you are referencing and a bindery object of the same name as the one you are using must exist on that server. If no queue names appear, no queues have been defined on that server. 9 Select the queue for which you want to create a reference and click the OK button. This causes the Create Print Queue dialog box to appear again. 10 Click the Create button. The bindery reference queue now appears in your NDS tree. 11 Return to Step 10 of the procedure for configuring a queue-based printer as a controlled-access printer. (See “Configuring Queue-Based Printers” on page 8-17.) Now that this queue is created, you can configure a Printer Agent to service jobs from a queue or to submit jobs to a queue. 8-20 Pi4700e NetWare configuration 8 Configuring the Queue-Based Printer Option at the Server Console 1 Do the steps described in “Creating Public-Access Printers in Net- This causes the Port Handler Configuration: Queue-Based Printing Mode screen to appear. 3 Select Distinguished Queue Name, press Enter, and type an existing queue name. This is the name of the print queue where you want the Printer Agent to place jobs. ❍ If you press Enter or Insert again, you can browse the network tree to search for a queue. 4 Highlight User Name, press Enter or Insert, and type the name of the user who will manage the queue just specified. ❍ To browse the network tree for a valid user, press Enter or Insert. 5 Click Accept and Exit. This causes Printer Agent with its associated Print Device Subsystem (PDS) and Port Handler string to be loaded. The Port Handler configuration utility closes and control returns to the NDPS Manager. Configuring an NDPS Gateway for IP Configuring Remote Printers Running in lpr Mode ✎ Note LPR mode works only if TCP/IP is configured correctly. See the documentation on configuring TCP/IP on a NetWare server. 1 From the browser’s Object menu for the organization or organizational unit, choose Create. This causes the New Object dialog box to appear. 2 Choose Object — Create — NDPS Printer. This causes the Create NDPS Printer dialog box to appear. 3 Type a name of your choice in the NDPS Printer Name field. Pi4700e 8-21 Network Interface Card 2 Choose Connection Type — Queue-Based Printer. Chapter 8 Ware Administrator”. NetWare configuration 8 4 At the Printer Agent Source field, select Create a New Printer Agent and click the Create button. Chapter 8 This causes the Create Printer Agent dialog box to appear. 5 Confirm the Printer Agent name (default is the name of the new printer you are creating) and browse to select the NDPS Manager you want to assign it to. 6 In the Gateway Types window, select the Novell Printer Gateway. Network Interface Card The Novell PDS dialog box opens. 7 Configure the Novell PDS by selecting the Printer Type and Port Type. Then click the OK button. This starts the Configure Novell Port Handler configuration wizard. 8 Configure the Connection Type as Remote (LPR on IP) and click the Next button. 9 Specify the IP address of your host and click the Finish button. 10 Select the printer driver for each client operating system. ❍ ❍ ❍ When users install this printer, these drivers will be automatically downloaded to their workstations. If you choose a Windows 3.x driver but not a Windows 95 or Windows NT driver, a 16-bit driver will be selected. Normally this does not create problems. If the driver you need is not listed, rather than adding the driver to the RMS, you can choose None from the top of each list. Users will then be asked to provide a disk with the appropriate driver the first time they install this printer on their workstations. 11 Click the Continue button. The main browser window appears with your new controlled-access printer listed. 8-22 Pi4700e NetWare configuration 8 Using the Remote Printer LPR/TCPIP Option at the Server Console A workstation or a remote file server G Directly to the network, running in lpr mode in a TCP/IP environment and for which no gateway is available A Printer Agent configured in this mode will emulate a legacy print server (PServer Emulation), and will no longer require the pserver.nlm file. 1 Perform the steps described in “Creating Public-Access Printers in NetWare Administrator”. 2 Choose Connection Type — Remote Printer LPR/TCPIP. This causes the Port Handler Configuration: Remote Printer LPR/ TCPIP Mode screen to appear. 3 Choose IP Host, select Host Type, and provide the information requested. 4 Click Accept and Exit. The Printer Agent with its associated Print Device Subsystem and Port Handler string are then loaded. The Port Handler configuration utility closes and control returns to the NDPS Manager. Public-Access Printers and Controlled-Access Printers Creating Public-Access Printers in NetWare Administrator 1 Double-click the NDPS Manager object you will be using to control this Printer Agent. 2 In the Identification page for the NDPS Manager object you want to use, choose the Printer Agent List and click New. This causes the Create Printer Agent dialog box to appear. 3 Type the name of the Printer Agent in the Printer Agent Name field. 4 At the Gateway Types window, select the Novell Printer Gateway. This causes the Novell PDS dialog box to appear. 5 Configure the Novell PDS by selecting the Printer Type and Port Handler Type and click the OK button. Pi4700e 8-23 Network Interface Card G Chapter 8 At the server console, you can create a Printer Agent to represent a printer attached to one of the following: NetWare configuration 8 6 Select the printer driver for each client operating system. ❍ Chapter 8 ❍ When users install this printer, these drivers will be automatically downloaded to their workstations. If the driver you need is not listed, rather than adding the driver to the RMS, you can choose None from the top of each list. Users will then be asked to provide a disk with the appropriate driver the first time they install this printer on their workstations. 7 Click Continue. Network Interface Card The new Printer Agent will now appear in the Printer Agent List window. Converting Public-Access Printers to Controlled-Access Printers To take full advantage of the security and management features provided by NDS, you may want to convert public-access printers to controlled-access printers. For example, if you have used a third-party gateway to get a printer up and running immediately (plug-and-print), the gateway automatically creates a public-access printer. Later, you may want to convert that printer to a controlled-access printer. The following procedure explains how to convert a public-access printer to controlled-access. Prerequisites To create a controlled-access printer on your network, you must meet the following prerequisites: ✔ Have at least Read, Write, Modify, and Create privileges for the destination container where its associated Printer object will reside ✔ Be designated as a manager of the NDPS Manager that will control this Printer Agent ✔ Have a Broker running ✔ Have an NDPS Manager object ✔ Have a public-access printer created 1 In NetWare Administrator, select the container where you want the printer to reside. 2 Choose Object — Create — NDPS Printer. This causes the Create NDPS Printer dialog box to appear. 3 Type a name in the Printer Name field. 4 In the Printer Agent Source field, select Public Access Printer. 8-24 Pi4700e NetWare configuration 8 5 When the Select Public Access Printers list appears, click the CreA warning message appears saying that all clients will need to reinstall this printer after it is converted. 6 Click the OK button. 7 Select the public-access printer you want to convert to a controlled-ac- Chapter 8 ate button. 8 Click the Create button. ✎ Note Novell NetWare Client 4.7 for Windows NT displays a transport error when you try to add an NDPS Manager or an Agent using Netware Admin. This problem does not exist with Client 4.6 for Windows NT. Adding NDPS Printers from Windows Clients Once an NDPS printer had been created, you can add it to the available printer resources of Windows clients as follows. To add a printer from a Windows NT 4.x workstation 1 Choose Start — Settings — Printers. 2 Double-click Add Printer. 3 Select Network Print Server and click the Next button. 4 Select NDPS Printers, find the name of your printer, and click the OK button. Pi4700e 8-25 Network Interface Card cess printer and click the OK button. NetWare configuration 8 For example: Network Interface Card Chapter 8 ❍ 5 Finish your printer configuration. 8-26 Pi4700e Macintosh configuration 8.6 8 Macintosh configuration Chapter 8 This chapter describes how to configure for network printing in a Macintosh environment. Setting Up AppleTalk Use the following procedure to make AppleTalk settings. Talk. 2 Select Ethernet. 3 Close the AppleTalk dialog box. Selecting and Setting Up the Printer You must use the following procedure to configure the driver before printing for the first time. 1 Install the PostScript printer driver and the PPD file for the Digital Copier. ❍ See the documentation that comes with the Digital Copier for information about how to install it. 2 Select Chooser from the Apple menu. 3 Use the field in the upper left of the dialog box to select the appropriate printer driver for your Digital Copier. 4 Use the field in the lower left of the dialog box to select the zone where the Digital Copier is connected. ❍ You do not need to select a zone if your network is configured without using zones. 5 In the printer list on the right side of the dialog box, select your Digital Copier. The default name of this Digital Copier is MLT_<serial number>. 6 Click the Create button. (If the dialog box on your screen does not have a Create button, click the Setup button instead.) Pi4700e 8-27 Network Interface Card 1 On the Apple menu, point to Control Panel and then select Apple- Using the utility software 8 7 Close the Chooser. Network Interface Card Chapter 8 This completes configuration of the network and printer. The printer can now be used for printing from different applications. Note that you do not need to open the Chooser and click the Setup button again once you complete the above procedure. Network Card Configuration The Network Card comes with NIManage for AppleTalk, which is a Macintosh utility program for configuring the Network Card. (Except Mac OS X) See “NIManage for AppleTalk (Macintosh)” for information about installing NIManage for AppleTalk and using its various features and functions. 8.7 Using the utility software Management Access Program (Windows) Management Access Program (MAP) is a Windows utility that automatically detects IP and IPX-based Network Cards on a network and provides a Web browser-based setting and management environment. MAP automatically detects all the Network Cards on the network and lists them on a Web browser page. Clicking one of the Network Cards listed on the Web browser page accesses the Network Card’s built-in HTTP server. The Web browser can then be used to make Network Card settings. Requirements G Computer must have TCP/IP installed and enabled. G Computer must have IPX/SPX-compatible protocol installed. (Required only when using the IPX search function.) G Computer must have a Web browser installed. G Operating system: Windows 95, 98, Me, NT 4.0 or 2000. ✎ Note See Appendix A - Installing and Setting Up Network Protocol (Windows) and the applicable Windows documentation for information about installing TCP/IP and IPX/SPX under Windows. 8-28 Pi4700e Using the utility software 8 Installing MAP 1 Load the CD-ROM into the CD-ROM drive of the computer you want to use. 2 Start Setup.exe in the Map folder on the CD-ROM. Chapter 8 Use the following procedure to install MAP. stallation. ❍ The default installation directory is C:\Program Files\Map. You can change this to any other directory during the installation procedure. Using MAP Setting Up MAP 1 On the Start menu, point to Programs and then Map. 2 On the submenu that appears, click MAP Setup. 3 Make the settings you want on the dialog box that appears. Settings Pi4700e G Search for IPX based printers Check this option when you want to detect IPX/SPX-based printers. G Search for IP based printers Check this option when you want to detect TCP/IP-based printers. G Max Hops for IP Search Input a value for the maximum number of hops for the search. The initial default value is 2. 8-29 Network Interface Card 3 Follow the instructions that appear on the screen to complete the in- Using the utility software 8 ✎ Network Interface Card Chapter 8 Note The maximum number of hops value defines the maximum number of subnetworks the program searches for Network Cards. When a value of zero is set here, the search does not include any subnetworks to which the computer is connected. A value of 2 searches all networks that can be accessed through no more than two routers. Specifying a value of 15 or greater automatically detects all connected Network Cards, but such a high setting greatly increases traffic, and so it is not recommended. After the settings are the way you want, click the OK button to apply them and close the dialog box. Running MAP 1 On the Start menu, point to Programs and then Map. 2 On the submenu that appears, click MAP. 3 A list of Network Cards found by MAP appears on a Web browser page. 4 Click the URL or the serial number of the Network Card whose settings you want to change. 5 This displays a Web page for managing the printer where the Network Card is installed. You can use the Web page to make various Network Card settings. See “10 PageScope Light” for more information. 8-30 Pi4700e Using the utility software 8 Network Interface Card Note If you start up the Digital Copier with its initial factory default setup without assigning a Digital Copier IP address, ATIP (Automatic Temporary IP Address) automatically assigns an IP address and subnet mask. You can use IP address assigned by ATIP to detect the Digital Copier with the MAP utility. To change the current IP address and subnet mask setting, first access the Digital Copier’s Web setup page from MAP, and then make the changes you want. Chapter 8 ✎ Pi4700e 8-31 Using the utility software 8 BOOTP (Windows) Chapter 8 BOOTP is a Windows utility for assigning IP parameters to a Network Card. When BOOTP is run on a computer, a BOOTP request from a Network Card causes IP parameters that match the MAC address of the Network Card to be assigned to the Network Card. Network Interface Card Requirements G Computer must have TCP/IP installed and enabled. G Network Card must be connected to the same subnetwork as the computer running BOOTP. G Operating system: Windows 95, 98, Me, NT 4.0 or 2000. ✎ Note See Appendix A - Installing and Setting Up Network Protocol (Windows) and the applicable Windows documentation for information about installing TCP/IP under Windows. BOOTP does not operate properly on a computer running a DHCP server. Using BOOTP 1 On the computer you want to use, maneuver to the directory you want and copy Bootpl32.exe to it. ❍ Bootpl32.exe is located in the Bootp folder on the CD-ROM. 2 Double-click Bootpl32.exe. 3 On the BOOTP dialog, select Configure from the Admin menu. 4 Input the following parameters. ❍ ❍ ❍ ❍ 8-32 IP address assigned to the Network Card Subnet mask (Must match subnet of connected network.) Default gateway (Router IP address of connected network.) Network Card MAC address (Recorded on a label on back of the Network Card.) Pi4700e Using the utility software 8 5 Reset the Digital Copier by powering it down and then back up again. The above step outputs a fixed-period BOOTP request. 6 Click the Go button on the BOOTP dialog. 7 Wait for about five minutes until the Network Card resets. 8 Select Verify from the Admin menu. You should get a response that indicates whether or not your unit is active. ❍ ❍ If you get a message stating that the unit is active, you should be able to ping to the Network Card using the steps below. If you get a message stating that the unit is not active, check whether TCP/IP is enabled on the status page. 9 Display the MS-DOS prompt and type the following: ping <Network Card IP address> 10 Repeat step 8 until a response is received. Configuration is complete when a response starting with the words Reply from... is returned. 11 Quit BOOTP. ✎ Note You cannot use BOOTP to assign an IP address if the Network Card has already been assigned an IP address by ATIP. Pi4700e 8-33 Network Interface Card Note Use colons to delimit each octet in the MAC address as shown on the Network Card’s status page. Chapter 8 ✎ Using the utility software 8 NIManage for AppleTalk (Macintosh) Network Interface Card Chapter 8 This program lets you change Network Card settings on a Macintosh. It provides the following functions. G Modification of printer name and zone name using AppleTalk G Enabling and disabling of status page output G Error log referencing G Enabling and disabling of other protocols, along with display of TCP/ IP address, subnet mask, and default gateway address (all of which can be changed) G Operating System: Macintosh System 7.5.3 to 9.x, except Mac OS X Using NIManage 1 On the computer you want to use, copy AppleTalk NIManage Utility Program to the folder you want. ❍ AppleTalk NIManage Utility Program is located in the APPLTLK folder on the CD-ROM. 2 Double-click the AppleTalk NIManage Utility Program to start up the program and display the screen shown below. ❍ ❍ Zone shows the names of the zones on the network. Device shows the Network Cards available in each zone. ✎ Note The Device display panel is blank if there are no zones on the network. 3 On the Zone display panel, select a zone name. 8-34 Pi4700e Using the utility software 8 ❍ Selecting this Network Card on the Device display panel enables the Options menu bar, which you can use to select various functions. A command is appears dimmed on the Options menu when it is not available for some reason. Configuration Network Interface Card Selecting Configuration on the Option menu displays a dialog box for changing the Network Card device name and AppleTalk zone. Chapter 8 4 On the Device display panel, select this Network Card. 1 To change the device name, input the new name into the Printer Name field. 2 To change the AppleTallk zone, use the AppleTalk Zone field pulldown menu to select the zone you want. ✎ Note You cannot change the zone on a network that does not have any zones. 3 After making the settings you want, click the OK button. 4 To enable the new settings, power the printer down and then back up again. You can then check the settings on the status sheet. Error Log The error log function can be used to reference the event log stored on the Network Card. The error log is referenced whenever a Network Card problem occurs. Selecting Error Log on the Options menu displays error log contents. You can save the error log as a text file by selecting Save As on the File menu. You can also print out log contents by selecting Print on the File menu. Pi4700e 8-35 Using the utility software 8 ✎ Chapter 8 Note The above procedure is not registered in the error log when it is performed. Powering the Digital Copier down clears log contents. Setting Up the Protocol Network Interface Card You can use the Protocol setup command to configure non-AppleTalk network protocols. On the Option menu, select Protocol setup to display the dialog box shown below. You can use the radio buttons on the dialog box to enable and disable protocols. We recommend that you select off for protocols that are not used on your network. After enabling TCP/IP, you can set or change IP parameters. Input the values for your network environment into the IP Address, Subnet Mask, and Default Gateway fields on the dialog box. ✎ Note Check with your network administrator if you are not sure of the IP parameter settings you should make for your network environment. In some cases, the IP parameters all show zeros. This indicates that IP parameters are not set, it does not indicate the current IP parameters. 1 After making the settings you want, click the OK button. 2 To enable the new settings, power the Digital Copier down and then back up again. You can then check the settings on the status page. 8-36 Pi4700e Using the utility software 8 Check the Enable radio button to enable printing of the status page at power up. After making the setting, click the OK button. The setting you make will be applied from the next time you power up the Digital Copier. Pi4700e 8-37 Network Interface Card You can enable and disable printing of the status page each time the Digital Copier is powered up. On the Options menu, select Options to display the dialog box shown below. Chapter 8 Setting Up the Status Page Using the utility software 8 NWSetup (Windows) NWSetup is a program that simplifies setup of the Network Card in a NetWare environment. Network Interface Card Chapter 8 Requirements G A NetWare server on the network G IPX/SPX-compatible protocol installed on the computer G Novel NetWare Client 32 installed on the computer G Operating system: Windows 95, 98, Me, NT 4.0 or 2000 ✎ Note See Appendix A - Installing and Setting Up Network Protocol (Windows) and the applicable Windows documentation for information about installing IPX/SPX under Windows. Installing NWSetup Use the following procedure to install NWSetup. 1 Load the CD-ROM into the CD-ROM drive of the computer you want to use. 2 Start Setup.exe in the Nwsetup folder on the CD-ROM. 3 Follow the instructions that appear on the screen to complete the installation. The default installation directory is C:\Program Files\Nwsetup. You can change this to any other directory during the installation procedure. 8-38 Pi4700e Using the utility software 8 Using NWSetup Note When setting up NDS (directory server), make sure you are logged in under the correct tree and context before launching the program. Selecting a Print Server 1 On the Start menu, point to Programs, and then Nwsetup. 2 On the submenu that appears, click NWSETUP. This displays a list of all Network Cards available on your network. 3 Click the serial number of the Network Card you want to configure, and then click Select button. 4 The Print Server Settings dialog box appears. This screen lets you set up your version of Novell NetWare for the Network Card. See “Novell NetWare Settings” on page 8-40. Pi4700e 8-39 Network Interface Card ✎ Chapter 8 Installation creates a shortcut to NWSetup on the desktop. You can launch the program by double-clicking the shortcut icon. Using the utility software 8 Novell NetWare Settings Network Interface Card Chapter 8 This section explains the contents of the Print Server Settings dialog box. Print Server Settings has two screens for setting, and you must input settings for both to configure a Network Card for Novell NetWare. Each screen lets you set up your version of Novell Netware for the Network Card, including directory and bindery services. 8-40 G Print Server Name Specifies the NetWare print server name. This name is used when the Network Card logs into NetWare. Make sure the name you input is different from anything in the network directory and server bindery. This field accepts input of up to 48 characters. G Print Queue Scan Rate Specifies the rate when the Network Card polls the print queue. Specifying 1 for this field, for example, polls for a new print job once every second. You can specify a value within the range of 1 to 250. G Print Server Password and Print Server Password Retype Specifies the password when the Network Card logs into NetWare. Changing the contents of this field changes the password for both NetWare and the Network Card. This field accepts input of up to 32 characters. This dialog box does not close if the contents of the Password and Password Retype fields are not identical. Pi4700e Using the utility software G 8 Ethernet Frame Type Specifies the Ethernet frame type used as the default by the NetWare protocol stack. Only one frame type can be selected. Network Interface Card Chapter 8 Clicking the Next button displays the screen show below. G Enable NDS Mode Enables and disables support off directory services by the Network Card. ❍ Checking this option enables directory services support. Unchecking this option disables directory services support, and causes all other settings on the dialog box to appear dimmed. ❍ G Preferred NDS Context Input a character string showing the NDS directory context to be used by the Network Card when logging into the network. This field accepts input of up to 128 characters. ✎ Note Input the entire context, regardless of type. Pi4700e G Preferred NDS Tree Input a character string showing the NDS tree to be used by the Network Card when logging into the network. This field accepts input of up to 48 characters. G Enable Bindery Mode Enables and disables bindery NetWare network services by the Network Card. ❍ Checking this option enables bindery. 8-41 Using the utility software 8 ✎ Chapter 8 Note Disabling this option also disables the Primary File Server field. Network Interface Card G Primary File Server Specifies the NetWare file server used by the Network Card as the primary file server. When no primary file server is selected yet or when the selected server cannot be used for some reason, the first file server on the list is selected automatically. Print Server Settings Use the settings on this dialog box to configure a print server printer. This information is normally input using the NetWare NWADMIN or the PCONSOLE utility. NWSetup can also be used to make Network Card printer settings, even though it does not include the above NetWare utilities. The following explains each of the settings. G Enable Printer Enables and disables a Network Card and printer support. ❍ Checking this box enables the printer. Unchecking this box disables the printer and causes all other fields on this dialog box to appear dimmed. ❍ G Printer Name Queues Serviced by Printer Shows the printer name. You cannot change the content of this field. It lists all the queues serviced by the printer. ❍ A bindery connection queue is shown using the syntax: bindery server name: queue name. An NDS connected queue entry includes the distinguished name. ❍ Example: When the printer services a queue named YOURPTR_Q on a bindery server named OLD_SERVER, this list shows the entry OLD_SERVER:YOURPTR_Q. When the printer services a queue named ENGINEERING_Q on an NDS server with the distinguishing name ENGINEERING.CORP, this list shows the entry ENGINEERING_Q.ENGINEERING.CORP. G User/Groups Notified by Printer This field lists all of the users and user groups to which notification is sent when a printer error is detected. ❍ A bindery connected user or user group is shown using the syntax: bindery server name:user/group name. An NDS connected user or user group entry includes the distinguished name. ❍ 8-42 Pi4700e Using the utility software 8 Example: Double clicking an entry in the list displays its Notify Setting dialog box. See “Setting Up Notification” (p. 8-44) for more information. ✎ Note The Network Card supports notification in bindery mode only. G Add Queue Click this button to display the Adding a Queue dialog box, which contains the fields described below. ❍ Connection/Server Specifies the server connection. This list includes NDS connections associated with the current user, and all bindery file server connections. NDS connections are always listed first by default. Selecting a new connection automatically updates the list. NDS Context Specifies the NDS context of the queue. It lists all of the contexts or sub-contexts of the Queue field. This field is activated only when NDS support is enabled. By default, NDS Context should be set to the often-used NDS connections from among those specified in the Print Server Settings dialog box. Queue Lists the names of all the queues of the currently selected connections. ❍ ❍ When an NDS connection is specified, the queue names of the selected context and all sub-contexts are displayed. Changing the NDS Context field context or the Connection/ Server field connection causes the Queue list to change and reflect the new connection or context. Double-clicking a listed queue automatically adds the printer’s services to that queue and closes this dialog box. G Pi4700e Delete Queue Selecting a queue and then clicking the Delete Queue button displays a dialog box to confirm whether you really want to delete the queue. Click Yes to delete or No to abort without deleting anything. 8-43 Network Interface Card When user Albert of NDS context ENGINEERING.CORP is to notified of errors on a printer, this list shows the entry ALBERT.ENGINEERING.CORP. Chapter 8 When user Susan is to be notified about errors on a bindery server named OLD_SERVER, this list shows the entry OLD_SERVER:SUSAN. Using the utility software 8 ✎ Network Interface Card Chapter 8 Note Deleting a queue from the list does not physically delete the object from the file server. You must use the NetWare utility to physically delete the queue from the queue list. G Create Queue The following explains the meaning of each field. ❍ Queue Name Type in the name of the new queue. You must input a queue name here whenever creating a new field. This field accepts input of up to 48 characters. File Server Volume Specifies the volume for creation of a queue. This field is enabled only when the current connection is an NDS connection, and lists all available volumes. In the case of a bindery services volume, the default volume name is SYS. NDS Context Specifies the NDS context for creation of a queue. This field is enabled only when the current connection is an NDS connection. The initial default for this field is the NDS context specified by the Add Queue dialog box. Changing the contents of this field displays a confirmation message asking whether a check should be performed to determine whether the new context exists in the directory tree. Click the OK button to start the check. ❍ ❍ Setting Up Notification The Notify Settings dialog box appears whenever you double-click an item listed in the Users/Groups Notified by Printer field on the Print Server dialog box. Use this dialog box to define users and groups to receive notifications. ✎ Note The Network Card supports notification in bindery mode only. The following explains the fields on this dialog box. G 8-44 User/Group name Specifies the name of the user or group whose notification settings are being edited. You cannot change the content of this field. Pi4700e Pi4700e G Delay in minutes for first message Specifies the amount of time a print job is delayed, in minutes, after which the Network Cards concludes an error has occurred and sends a notification message. The default value for this setting is 5 minutes, and the setting range is 1 to 60 minutes. G Delay in minutes for repeat messages Specifies the amount of time a print job is delayed a second or subsequent times, in minutes, after which the Network Card concludes an error has occurred and sends a notification message. The default value for this setting is 30 minutes, and the setting range is 1 to 60 minutes. 8-45 Chapter 8 8 Network Interface Card Using the utility software Troubleshooting 8 8.8 Troubleshooting Chapter 8 This chapter explains the Network Card’s LED status indicators and tells you what to do when experiencing problems with the Network Card. If the information presented here does not solve your problem, contact your nearest Support Center or Technical Service Representative. LED Status Indicators Network Interface Card The Network Card has two LED status indicators amber and green in color. The amber LED shows the progress of normal print jobs. It flashes while the Network Card is sending or receiving data, and goes out when there is no data send or receive operation in progress. The green LED shows normal Network Card operation, as described in the table below. 8-46 LED Operation Digital Copier Status Network Card Status Normal/ Abnormal Green LED lit Power on Self-test in progress Normal Print job standby Normal operation Normal Green LED flashes 3 times, then remains lit Self-test finished Prints status page Normal Green LED flashes quickly Self-test in progress RAM abnormality detected Abnormal Green LED flashes 4 times, then pauses Self-test in progress Ethernet hardware self-test failed. Check your network. Abnormal Amber LED flashes at short interval for 10 seconds. Amber LED goes out, green LED flashes continuously. Flash memory selftest in progress Checksum test failed. Automatically enters download mode and waits for flash memory refresh. Abnormal Green LED flashes slowly After power up, goes into print job standby after a short while. Broken connection between NetWare and file server Abnormal Green LED and amber LED flash alternately Power up sequence complete Factory initial default reset complete. Power down and move jumper JP2 to OFF position. See “Resetting to Factory Initial Defaults”. Abnormal Pi4700e Troubleshooting 8 Troubleshooting 1 Is the Digital Copier on line? Check whether the Digital Copier is on line. Nothing can be printed while the Digital Copier is off line. 2 Is the Digital Copier control panel display normal? See the documentation that comes with the Digital Copier for information about its control panel. 3 Is the Network Card LED status indicator normal? Check the LED indicators for abnormalities. See “LED Status Indicators” (p. 8-46) for more information. 4 Is the network cable connected securely? Check to make sure the network cable is securely connected to the 10/ 100BaseT port. Try changing to another cable to find out if the problem is due to a damaged cable. 5 Are Network Card control settings correct? Check the protocol that is enabled on for the Network Card. Make sure that the protocol being used by the Network Card is also enabled on the computer. 6 Has there been any change in network configuration? Check to make sure that settings are correct for any network hardware that has been added, modified or removed. 7 Has there been any change in the computer’s applications? If you have recently added an application to the computer, check to make sure that the application is not interfering with network settings. 8 Can you print from other applications? If you can print successfully from other applications, perform the proper troubleshooting procedures for the application with which you are experiencing problems. 9 Can you print from other computers? If you can print successfully from other printers, perform the proper troubleshooting procedures for the operating system of the computer on which you are experiencing problems. Pi4700e 8-47 Network Interface Card General Troubleshooting Checklist Chapter 8 Check the points described below whenever you experience problems with Network Card operation. Troubleshooting 8 NetWare Troubleshooting Checklist Chapter 8 Check the following points whenever you are experiencing problems while using NetWare. 1 Is the print server name input correctly? The default printer name is MLT_<serial number>. The serial number is recorded on the Network Card. 2 Is a proper print queue assigned to the printer? Network Interface Card We recommend that you do not assign a print queue that is also assigned to other printers. Doing so can cause a print job to be sent to another printer. 3 Is Remote Other/Unknown selected as the printer type? If PCONSOLE settings are correct, the problem may be due to a break in the connection between the Digital Copier and network. Power down the Digital Copier, start up PCONSOLE, and wait until the Not Connected message appears. Next, power the Digital Copier back up again. The connection is normal if the displayed message changes to Waiting for Job. Otherwise there is a problem with the connection. 4 Is there enough disk space on the file server and is the server operating normally? 5 Is the printer associated with the correct file server? Use PCONSOLE to check. 6 Do you have the proper privileges for setting up printers? 7 Are the file server and print server communicating normally? On any computer on the network, run the NetWare COMCHECK utility to check for proper communication. 8 Are there sufficient user positions on the file server? The print server logs on as a user. 9 Is bindery context set up on the file server? With some versions of NetWare, you must set up the bindery context on the file server even when you are using the NDS Mode. 10 Is the network loaded on the client computer? See the NetWare documentation for more information. 11 Are client application settings correct? For example, check to make sure that the correct client driver is being used. 8-48 Pi4700e Troubleshooting 8 12 Is the computer connected correctly to the print queue? queue become active? 14 Are you using the correct version of PCONSOLE? Network Card configuration is impossible with PCONSOLE Version 1.0. 15 Is AUTO ENDCAP enabled? Data can be sent to the network using AUTO ENDCAP. Use PRINTCON to check if AUTO ENDCAP is enabled. If it is disabled, enable it. ✎ Note Whenever the connection between the Network Card and file server is broken for any reason, it takes from about five to ten minutes to re-establish a connection. If a connection is not established within this time, check for errors and correct any problems you discover. The Network Card cannot print from any other context other than that which is installed. When you want to print from another context, you must create an alias queue. See the related NetWare documentation for more information. Resetting to Factory Defaults You can reset the Network Card so all of its parameters return to the initial factory default settings. Be sure to reset the Network Card before moving the Digital Copier to a different network environment (NetWare file server, IP subnet, etc.) Reset can be performed using a Web browser. For details, see “10 PageScope Light”. If, for some reason, you cannot access the Network Card using a Web browser, you can reset it using a jumper switch on the Network Card. Pi4700e 8-49 Network Interface Card 13 Does a sample print job sent directly from PCONSOLE to the assigned Chapter 8 Print a file and confirm that the job is sent to the print queue. If the job is sent correctly, check for a problem in the connection between the computer and print server. Jumper switch setting 8 8.9 Jumper switch setting Chapter 8 This chapter explains how to change the settings of the Network Card’s jumper switch settings. Normally, the Network Card automatically makes network configuration settings, so you do not need to change jumper switch settings. There may be certain situations, however, where it becomes necessary to change jumper switch settings. Network Interface Card ✎ Important! Special care is required when handling the Network Card. The Network Card is designed to protect components from electrostatic discharge during normal operation. Be sure to take proper electrostatic protection measures whenever handling the Network Card. Be sure to unplug the Digital Copier from its power outlet before starting work. For full details on handing the Network Card, see the Setup Instructions that comes with the Network Card. Network Card and Jumper Pin Positions The illustration below shows the positions of the jumper switches on the Network Card. * Default pin positions are indicated in gray. Resetting to Factory Defaults Jumper switch OP2 can be used to reset all Network Card parameters to their initial factory default settings. The function of OP2 is to reconfigure 8-50 Pi4700e Jumper switch setting 8 1 Power down the Digital Copier and unplug it from its power outlet. 2 Disconnect the network cable from the Network Card. 3 Remove the Network Card from the printer by performing the steps in Setup Instructions in reverse. 4 Locate the reset jumper switch (labeled OP2) on the Network Card. See the illustration under “Network Card and Jumper Pin Positions”. 5 Change the OP2 jumper switch to its FACT position (OP2 set to pins 1 and 2). 6 Use the procedures in Setup Instructions to re-install the Network Card. Do not connect the network cable to the Digital Copier at this time. 7 Plug in the Digital Copier and power it up. The Network Card performs a self-test, indicated by the green LED flashing three times, following by the green LED and amber LED flashing alternately. After the green and amber LEDs start to flash, power down the Digital Copier and unplug it from its power outlet. 8 Remove the Network Card from the Digital Copier again. 9 Return the OP2 jumper switch to pins 2 and 3. 10 Use the procedures in Setup Instructions to re-install the Network Card. Pi4700e 8-51 Network Interface Card Network Card Reset Procedure Chapter 8 NVRAM. Reset the Network Card before moving the printer to another environment or any other time is becomes necessary to reconfigure it to suit another environment. Jumper switch setting 8 Address Selection Chapter 8 Either one of two memory address blocks can be used to access the common memory interface. The two memory address blocks are named CS1 and CS2. The CS1 space is used when only one card is being used. Use jumper switch JP2 to select the address space. Setting the jumper switch pin to 1-2 selects CS2, while pin setting 2-3 selects CS1. Bus Handshaking Network Interface Card The bus handshake signal can be changed to match the print controller being used. In the case of this Digital Copier, the handshake signal is the WAIT signal (OP3 pin 2 and 3 setting). 8-52 Pi4700e Specifications 8.10 8 Specifications 123.7 mm (L) × 95 mm (H) Weight 225 g Environmental Temperature: 0 to 50°C Humidity: 5% to 80% Buttons/Indicators Green LED, Amber LED (1 each) Configuration Setup Onboard non-volatile memory Connector: Ethernet RJ45 10/100Base T (8-wire) 10/100BaseT Cable Be sure to use Category 5 shielded 10/100BaseT cable that conforms with the pinouts shown below. Pi4700e Pin No. Color 8 Blue/White 7 Blue 6 Orange/White 5 Green/White 4 Green Ethernet Receive - 3 Orange Receive + 2 Brown/White Send - 1 Brown Send + 8-53 Network Interface Card Dimensions Chapter 8 Network Card Network Interface Card Chapter 8 8 8-54 Specifications Pi4700e Outline 9 9 Scanner Mode 9.1 Outline There are two scan modes you can use with this machine: Use the one appropriate to the network environment and purpose of use. E-Mail (Scan to E-mail) Pi4700e G Transmits scanned document as attached file with E-mail. G Suitable for sending low-resolution data. G Environment of Network with Mail server is necessary. G Acquires scan data with mail software. 9-1 Scanner Mode Note You can search for E-mail addresses registered on the LDAP server. In order to use the scanning function, the optional network interface card must be installed. Chapter 9 ✎ Outline 9 FTP (Scan to Server) Transmits scanned document to the specified by FTP server. G Suitable for sending high-resolution data. G Environment of Network with FTP server is necessary. G Acquires scan data with FTP client software. Scanner Mode Chapter 9 G 9-2 Pi4700e Outline 9 URL Transmits scanned document to the specified by FTP server. G At the same time, transmits URL of FTP server with E-Mail. G Suitable for sending high-resolution data. G Environment of Network with Mail server and FTP server is necessary. Scanner Mode Chapter 9 G ✎ Note If a key previously programmed with a destination for Scan to E-Mail or Scan to Server is touched at the same time and the scanning is performed, this URL operation is performed. Pi4700e 9-3 Outline 9 HDD (Scan to HDD) ✎ G Saves scanned data to the hard disk drive of the printer controller. G Suitable for sending high-resolution data. G Acquires scan data with TWAIN driver. G No additional server, such as a mail/FTP server, is required. Scanner Mode Chapter 9 Note In addition to the optional network interface card, the optional hard disk drive is also required. 9-4 Pi4700e Outline 9 Necessary Settings To use the Scanner Mode, it is necessary to perform the following network settings first. Set Item E-mail FTP HDD IP Address ❍ ❍ ❍ Subnet Mask ❍ ❍ ❍ SMTP Server Address ❍ − − Reply Address ❍ − − SMTP Connection Timeout ❍ − − Default Compression ❍ − − FTP Proxy Server Address − − Proxy Port No. − − E-mail Destination List ❍ − − File Destination List − ❍ − Chapter 9 You use PageScope Light to make these settings. For the details of PageScope Light, see “10 PageScope Light”. * ❍ : Necessary : Necessary depending on environment Scanner Mode Default Gateway − : Not necessary Necessary Devices (servers) Set Item E-mail FTP HDD Network Interface Card ❍ ❍ ❍ SMTP Server ❍ − − FTP Server − ❍ − Hard Disk Drive − − ❍ * ❍ : Necessary Pi4700e : Necessary depending on environment − : Not necessary 9-5 Network Setting 9 9.2 Network Setting Accessing to PageScope Light PageScope Light for Pi4700e can be accessed directly from a Web browser. 1 Start the Web browser. Chapter 9 2 In the URL field, enter the IP address of the printer controller as shown Scanner Mode below. http://<IP address of printer controller>/ (Example) When the IP address of the printer controller is 192.9.200.200: http://192.9.200.200/ 3 This causes PageScope Light for Pi4700e screen to appear. Operation PageScope Light for Pi4700e operation is identical to that for Internet Web pages. Clicking a hot link jumps to the link destination, and the Back and Forward buttons scroll through pages backwards and forward. Logging In to the Admin Mode After you log in to PageScope Light in the Admin Mode, you can change the configuration of the Digital Copier settings. 1 Type the administrator password into the Admin Password box. The initial default administrator password is sysadm. See “Preference” (p. 10-6) for information about how to change the password. 2 Click the Log-in button to log in to the Admin Mode. 3 When you want to log out, click the Log-out button. 9-6 Pi4700e Network Setting 9 ✎ On the Network tab, a password input text box appears on each setting screen. You must be able to input the correct password in order to change Network tab settings. The password you should input here is the same as the Admin Password you input on other tabs. Contact your network administrator for full details about each of the settings. Chapter 9 Note Log out is performed automatically if no operation is performed for more than 10 minutes. This screen appears when you click SMTP & FTP Configuration on the Scanner tab. Use this screen to make SMTP and FTP settings. SMTP Configuration Section ✎ Note The SMTP Server Address and FTP Proxy Server Address are displayed only when you are logged into the Admin Mode. Pi4700e 9-7 Scanner Mode SMTP & FTP Configuration Network Setting 9 ✎ Scanner Mode Chapter 9 Important! You must provide information for the SMTP Server Address and Reply Address when you are using the Send to E-mail function. E-mail cannot be sent if these settings are left blank. SMTP Server Address Type in the IP address of the SMTP server. Default Subject for E-mail Attachment Type in the default subject when distributing scanner data as E-mail attachments. Default Subject for FTP Notification Type in the default subject when informing by E-mail the URL of the FTP site where scan data is left. Reply Address Type in the mail address for a mail replay showing the error message when a send error is generated. SMTP Connection Timeout Input the SMTP server connection timeout in seconds. You can input a value from 1 to 120 seconds. Default Compression Select the default compression method to be used when distributing scanned data as direct mail. ✎ Note If you haven’t logged on in Admin mode, “***” appears as the IP address in SMTP Server Address and FTP Proxy Server Address. FTP Proxy Configuration Section 9-8 FTP Proxy Server Address Type in the IP address of the FTP proxy server. Remote Port Number of Proxy Type in the proxy port number. You can input a value from 1 to 65535. Apply button Click this button to apply any settings you have input up to this point. Clear button Click this button to cancel any settings you have input up to this point. Pi4700e Network Setting 9 G A maintenance time limit of scan data Specify the length of time that data saved on the printer controller’s hard disk drive is kept. The default setting is 7 days. The printer controller automatically deletes scan data kept for the specified length of time. G Clear All Scanned Data All scan data on the printer controller’s hard disk drive can be manually deleted. Deleting all of the scan data can only be performed by a user logged on with Administrator privileges. Pi4700e 9-9 Scanner Mode Chapter 9 HDD Configuration Network Setting 9 Scanner Mode Chapter 9 LDAP Setting 9-10 LDAP Function Use this setting to turn LDAP search on or off. The setting you make here does not go into effect until you turn the copier off and then back on again. The initial default setting is OFF. LDAP Server Address Input the LDAP server address. The initial default setting is blank. Only an IP address can be typed in. Port Number Enter the LDAP server port number. The initial default setting is 389. Search Root Input the search start point. The initial default setting is blank. Search Timeout(s) Input a timeout value (seconds) for LDAP communication. The initial default setting is 60 seconds. Max hit of Number Input a value that specifies the maximum number of hits that can be accepted for LDAP search results. The initial default setting is 100. Anonymous Login Selecting this check box enables configuration of anonymous login settings. If the Anonymous Login check box is selected, Login Name and Password become unavailable. Login Name(Dn) Input the user name. Password Input the password. Check LDAP settings Click this button to check whether the server can be accessed (logged into) using the currently configured settings. If the server is accessed but the settings are incorrect, an error appears. Refer to the “Error List” on page 11-6. Pi4700e Network Setting 9 Supported LDAP Servers LDAP Server Exchange 5.5 Windows NT Server 4.0 Exchange 2000 (on ActiveDirectory) Windows 2000 Server Lotus Domino Server 5.x, 6.x Windows 2000 Server or Windows NT Server 4.0 Novell eDirectory 8.6, 8.7 [Groupwise 5.5, 6] Windows 2000 Server and NetWare(5 or 6) Scanner Mode Chapter 9 Microsoft Supported Operating Systems Pi4700e 9-11 E-mail Destinations 9 9.3 E-mail Destinations ✎ Note When registering a destination, it must first be entered in PageScope Light, and then registered from the touch panel of the digital copier. Scanner Mode Chapter 9 This screen appears when you click the E-mail Destinations sub-menu under the Destination menu. It lists the E-mail Destinations that are currently registered. 9-12 G Clicking an unused cell inside the E-mail Destination List displays a screen for registering a new E-mail Destination. See “Configuring an E-Mail destination” (p. 9-13) for more information. G Clicking an existing E-mail Destination number or name displays a screen showing the details of that destination. See “Configuring an EMail destination” (p. 9-13) for more information. G To delete an E-mail Destination, click the del button next to the destination you want to delete. Pi4700e E-mail Destinations 9 Configuring an E-Mail destination Scanner Mode Chapter 9 This section describes the settings you can make on the screens for registering a new E-mail destination and for changing the configuration of an E-mail destination. E-mail Destination Section No. E-mail Destination number Destination Name Type in the name of the E-mail Destination. You can input up to 72 characters. Destination Address Type in the E-mail address of the destination. You can input up to 72 characters. Scanning Mode Section Compression Select the compression method to be used when scanned data is sent as an E-mail attachment. Apply Button Click this button to apply any settings you have input up to this point. Clear Button Click this button to cancel any settings you have input up to this point. Icon Pi4700e Click to return to the previous screen. 9-13 E-mail Destinations 9 Checking/changing registration (PageScope Light) 1 Start PageScope Light. 2 Click Scanner. 3 Click E-mail Destination. Chapter 9 4 Enter your admin. password, then click Log-in. 5 Click the number assigned to the destination to be checked or modified. Deleting registration (PageScope Light) Scanner Mode 1 Start PageScope Light. 2 Click Scanner. 3 Click E-mail Destination. 4 Enter your admin. password, then click Log-in. 5 Click the del. button of the destination to be deleted. New registration (touch panel of the digital copier) 1 Press the [Utility] Key. 2 Touch [Job/Image/Scan Input]. 9-14 Pi4700e E-mail Destinations 9 Chapter 9 3 Touch [Scanner Addr. Input]. Scanner Mode 4 Touch the key to be registered. 5 Type in the name that will appear on the key (for example, “NANCY”). Touch [Next]. 6 Touch [E-mail]. 7 Touch [Next]. Pi4700e 9-15 E-mail Destinations 9 8 Type in the destination. ✎ Chapter 9 Note Type in the destination name that was entered when the E-mail destination was specified with PageScope Light. In the screen shown at the right, the name “Nancy” is entered for the example with the E-mail address “[email protected]” in the screen shown on page 9-12. Or type in the E-mail address directly without using PageScope Light. Scanner Mode 9 Touch [Enter]. Checking/changing registration (touch panel of the digital copier) 1 Press the [Utility] Key. 2 Touch [Job/Image/Scan Input]. 3 Touch [Scanner Addr. Input]. 9-16 Pi4700e E-mail Destinations 9 5 Confirmation screen will appear. If you touch an item to be changed, you will change the content. Chapter 9 4 Touch the address to be changed. ✎ Note PageScope Light settings must be configured in order to perform an LDAP search. 1 Press the [Scan] Key. 2 Touch [Address]. 3 Touch [LDAPsearch]. Pi4700e 9-17 Scanner Mode Registering LDAP Search Criteria E-mail Destinations 9 4 Touch the item you want to search Chapter 9 for. 5 Type the search text, and then touch Scanner Mode [Enter]. 6 Change the search condition as required, touch [Enter], and then touch [LDAPsearch]. 7 Touch [Addr. Input], select the address you want to register. 9-18 Pi4700e E-mail Destinations 9 8 Select the on one touch button Chapter 9 where you want to register the criteria. 9 Type the criteria name and then Scanner Mode touch [Enter]. Deleting registration (touch panel of the digital copier) 1 Press the [Utility] Key. 2 Touch [Job/Image/Scan Input]. 3 Touch [Scanner Addr. Input]. Pi4700e 9-19 E-mail Destinations 9 Chapter 9 4 Touch the address to be deleted. Scanner Mode 5 Touch [Delete]. 6 Touch [Yes] and touch [Enter]. 9-20 Pi4700e File destinations 9.4 9 File destinations ✎ Scanner Mode This screen appears when you click the File Destinations sub-menu under the Destination menu. It lists the File Destinations that are currently registered. Chapter 9 Note When registering a destination, it must first be entered in PageScope Light, and then registered from the touch panel of the digital copier. Pi4700e G Clicking an unused cell inside the File Destination List displays a screen for registering a new File Destination. See “Configuring a File Destination” (p. 9-22) for more information. G Clicking an existing File Destination number or name displays a screen showing the details of that destination. See “Configuring a File Destination” (p. 9-22) for more information. G To delete an File Destination, click the del button next to the destination you want to delete. 9-21 File destinations 9 Configuring a File Destination Scanner Mode Chapter 9 This section describes the settings you can make on the screens for registering a new file destination and for changing the configuration of a file destination. File Destination Section 9-22 File Destination No. File Destination number Destination Name Type in the name of the File Destination. You can input up to 72 characters. FTP Server Address Type in the IP address of the FTP site. Directory Type in the directory of the FTP site where the scan data is located. You can input up to 128 characters. Use Proxy Put a check mark into this box to enable access of the FTP site via a proxy. Remote Port Number When not using a proxy, input the FTP port number. You can input a value from 1 to 65535. Pi4700e File destinations 9 Select this option to enable log in to the FTP site using an anonymous account. Private Site Make the following settings for non-anonymous account log in on the FTP site. • User Name: Type in the user name for logging in to the FTP site. You can input up to 64 characters. • Password: Type in the password for logging in to the FTP site. You can input up to 40 characters. • Confirm: Re-input the password to confirm it. Scanning Mode Section Pi4700e Compression Select the compression method to be used when scanned data is send by FTP. Apply Button Click this button to apply any settings you have input up to this point. Clear Button Click this button to cancel any settings you have input up to this point. Icon Click to return to the previous screen. 9-23 Scanner Mode Anonymous Chapter 9 Account Information Section File destinations 9 New registration (touch panel of the digital copier) 1 Press the [Utility] Key. Chapter 9 2 Touch [Job/Image/Scan Input]. Scanner Mode 3 Touch [Scanner Addr. Input]. 4 Touch the key to be registered. 5 Type in the name that will appear on the key (for example, “ANNIE”). 9-24 Pi4700e File destinations 9 7 Touch [Next]. 8 Type in the destination. ✎ Note Type in the destination that was entered when the file destination was specified with PageScope Light. In the screen shown at the right, the destination ftp://192.168.10.12/pub is entered for the example with the name “annie_file” in the screen shown on page 9-21. 9 Touch [Enter]. Checking/changing registration (touch panel of the digital copier) 1 Press the [Utility] Key. 2 Touch [Job/Image/Scan Input]. Pi4700e 9-25 Scanner Mode Chapter 9 6 Touch [FTP]. File destinations 9 Chapter 9 3 Touch [Scanner Addr. Input]. Scanner Mode 4 Touch the address to be changed. 5 Confirmation screen will appear. If you touch an item to be changed, you will changed, you will change the content. Deleting registration (touch panel of the digital copier) 1 Press the [Utility] Key. 2 Touch [Job/Image/Scan Input]. 3 Touch [Scanner Addr. Input]. 9-26 Pi4700e File destinations 9 Chapter 9 4 Touch the address to be deleted. Scanner Mode 5 Touch [Delete]. 6 Touch [Yes] and touch [Enter]. Pi4700e 9-27 Mailbox Destinations 9 9.5 Mailbox Destinations New registration (touch panel of the digital copier) ✎ Note This procedure cannot be performed from PageScope Light. Chapter 9 1 Press the [Utility] Key. Scanner Mode 2 Touch [Job/Image/Scan Input]. 3 Touch [Scanner Addr. Input]. 4 Touch the key to be registered. 9-28 Pi4700e Mailbox Destinations 9 5 Type in the name that will appear on the key (for example, “TONY”). Chapter 9 Touch [Next]. Scanner Mode 6 Touch [HDD]. 7 Touch [Next]. 8 Input the scan to address. (0000 ~ 9999) ✎ Note Box numbers entered as “1”, “01”, “001” or “0001” will be treated as the same box. 9 Touch [Enter]. Checking/changing registration (touch panel of the digital copier) 1 Press the [Utility] Key. 2 Touch [Job/Image/Scan Input]. Pi4700e 9-29 Mailbox Destinations 9 Chapter 9 3 Touch [Scanner Addr. Input]. Scanner Mode 4 Touch the address to be changed. 5 Confirmation screen will appear. If you touch an item to be changed, you will changed, you will change the content. Deleting registration (touch panel of the digital copier) 1 Press the [Utility] Key. 2 Touch [Job/Image/Scan Input]. 3 Touch [Scanner Addr. Input]. 9-30 Pi4700e Mailbox Destinations 9 Chapter 9 4 Touch the address to be deleted. Scanner Mode 5 Touch [Delete]. 6 Touch [Yes] and touch [Enter]. Pi4700e 9-31 Mailbox Destinations 9 Direct Input 1 Press the [Scan] Key. Scanner Mode Chapter 9 2 Set Original. 3 Touch [address]. 4 Touch [Direct]. 9-32 Pi4700e Mailbox Destinations 9 5 Select [E-mail], [HDD] or [FTP], 6 Press the [Start] Key. ✎ Note For the destination FTP server address, input the address whose settings you configured with PageScope Light. Scanning double-sided original: Double-sided original can be scanned when Duplexing Document Feeder is attached. 1 Touch [Original]. 2 Touch [Double-Sided]. Pi4700e 9-33 Scanner Mode Chapter 9 touch [Scan Address], and then input the address. Next, press [Enter]. If there are two or more addresses, proceed to the next Direct Input page (2/5) and input the next address. Mailbox Destinations 9 3 Touch [Margin] and select the file Chapter 9 margin position of the original. 4 Touch [Enter]. 5 Touch [Original Direction] and se- Scanner Mode lect the direction of the original. 6 Touch [Enter]. 7 Touch [Enter]. Scanning with size specified: 1 Touch [Scan Size]. 9-34 Pi4700e Mailbox Destinations 9 When [Inch] or [Metric] is selected, the corresponding size will be displayed. Scanner Mode You can also select [Custom Size] to numerically specify the scan size. Scanning with density changed: 1 Touch [Image Type]. 2 Touch [Lighter] or [Darker] to select density. 3 Touch [Enter]. Pi4700e Chapter 9 2 Touch the size to be scanned. 9-35 Mailbox Destinations 9 Scanning with Image Type changed: Chapter 9 1 Touch [Image Type]. 2 Touch [Text], [Text/Photo], or [Pho- Scanner Mode to] to select Image Type. 3 Touch [Enter]. Scanning with file format changed: 1 Touch [File Form]. 2 Select [TIFF] or [PDF]. ✎ Note If [HDD] was selected as the recipient, this selection is not available. 3 Touch [Enter]. 9-36 Pi4700e Mailbox Destinations 9 Scanning with resolution changed: 1 Press the [Clear] Key. 2 Enter the resolution (100 dpi to 600 Chapter 9 dpi) from the 10-Key Pad. TWAIN is the interface that allows images captured by a specific device to be input through a computer of a different platform. To use TWAIN, it is necessary that a TWAIN driver be installed in the PC. The function described in this step is valid only for use in network environment. Installing the TWAIN Driver Compatible operating systems: Windows 98/Me/2000/XP ✎ Note With Windows 2000 and XP, be sure to log in with administrator privileges. 1 Open the location of the printer driver CD-ROM, in which the TWAIN driver is stored. 2 Execute SETUP.EXE. Pi4700e 9-37 Scanner Mode The operation of Capturing Images by TWAIN Mailbox Destinations 9 Capturing Images by TWAIN 1 Select scan by TWAIN from the application. 2 Click the Scanner change button, and then click the Add button. In Scanner Address, type the IP address of the printer controller, and then specify an appropriate name in Scanner Name. Chapter 9 ✎ Note The Scanner Name box can be left blank. Scanner Mode Click the OK button, and then click the Connect button. 3 In Box Number, type the four-digit address that was entered when the document was scanned with the digital copier, and then click the Renewal of Mail box button. 9-38 Pi4700e Mailbox Destinations 9 ✎ Note Box numbers entered as “1”, “01”, “001” or “0001” will be treated as the same box. 5 The scan image data is automatically deleted after the specified length of time has passed. To delete the data, select the file, and then click the Delete File button. Pi4700e 9-39 Scanner Mode The data is downloaded and the scan data is displayed in the application. Chapter 9 4 Select the file, and then click the Taking In button. How to input characters 9 9.6 How to input characters Input alphabet letters and symbols by touching keys on screen. Input numerals using numeric keys. Display input character. Scanner Mode Chapter 9 Input capital letters by touching it to highlight. Back space key 9-40 Switches screen for inputting symbols. Pi4700e System requirements 10 10 PageScope Light 10.1 System requirements The following items are required to use this utility. Computer G Software Operating System Windows 95/98/Me/NT 4.0/2000 Web Browser Internet Explorer 5.0 or higher Macintosh System 7 or higher Chapter 10 Netscape Communicator 4.7 or higher Internet Explorer 4.5 or higher Solaris 2.5.1/2.6/7 (2.7) Netscape Navigator 4 or higher Linux Netscape Navigator 4 or higher G NIC (Network Interface Card) G Ethernet G TCP/IP Protocol PageScope Light Netscape Navigator 4 or higher Digital Copier Pi4700e Printer Controller ✎ Note If “Proxy Server” of the Web browser is set to “ON”, it may not be possible to access PageScope Light. Pi4700e 10-1 Access 10 10.2 Access PageScope Light for Pi4700e can be accessed directly from a Web browser. 1 Start the Web browser. 2 In the URL field, enter the IP address of the printer controller as shown below. http://<IP address of printer controller>/ (Example) When the IP address of the printer controller is 192.9.200.200: http://192.9.200.200/ Chapter 10 3 This causes PageScope Light for Pi4700e screen to appear. Operation PageScope Light PageScope Light for Pi4700e operation is identical to that for Internet Web pages. Clicking a hot link jumps to the link destination, and the Back and Forward buttons scroll through pages backwards and forward. Entering the password After you log in to PageScope Light in the Admin Mode, you can change the configuration of the Digital Copier settings. 1 Type the administrator password into the Admin Password box. The initial default administrator password is sysadm. 2 Click the [Log-in] button to log in to the Admin Mode. 3 When you want to log out, click the [Log-out] button. ✎ Note Log out is performed automatically if no operation is performed for more than 10 minutes. On the Network tab, a password input text box appears on each setting screen. You must be able to input the correct password in order to change Network tab settings. The password you should input here is the same as the Admin Password you input on other tabs. 10-2 Pi4700e Screen configuration 10.3 10 Screen configuration The configuration of the PageScope Light for Pi4700e screen is shown below. ✎ PageScope Light Chapter 10 Note Screen images shown in this manual may differ slightly from actual ones. Also note that specifications are subject to change without prior notice. Minolta PageScope Light Logo Clicking the logo jumps to the Website below. www.minolta.com Status Display The current status of the Digital Copier is indicated by both icons and text. The message Ready appears when the Digital Copier is operating normally. Ready Pi4700e Error Caution Fatal 10-3 Screen configuration 10 Tabs Use the tabs to select the category of items you want to display. See the following sections of this document for detailed information about each tab. Menus Use the menus to select information or setting items. The menus that appear depend on the currently selected tab. See the following sections of this document for detailed information about each menu. Information and Settings Display Chapter 10 This display shows information or settings in accordance with the selected menu item. Admin Password PageScope Light Inputting the admin password provides access to the Admin Mode. See “Entering the password” (p. 10-2) for more information. 10-4 Pi4700e System tab 10.4 10 System tab On the System tab, information concerning the system structure for the Digital Copier can be checked and set, Checking and setting can be performed with the ➀ Summary, ➁ Details, ➂ Preference, ➃ Save Setting and ➄ Online Assistance menus. ➀ Summary A summary of the status and the system structure of the Digital Copier is displayed. ➁ Details The details of the status and the system structure of the Digital Copier and displayed. G Input Tray It shows the current status of all the Input Trays installed on the Digital Copier G Output Tray In shows the current status of all the Output Trays installed on the Digital Copier Pi4700e 10-5 PageScope Light Chapter 10 ➀ ➁ ➂ ➃ ➄ System tab 10 G Hard Disk It shows the status of the hard disk installed on the printer controller. This information is not displayed when there is no hard disk installed on the printer controller. G ROM Version It shows version of firmware installed on the Digital Copier and printer controller. G Interface Info It shows information about network interface and local interface. G Consumable Chapter 10 It shows the current status of Digital Copier consumables. ➂ Preference The environment settings such as the refresh rate time and the system language can be specified. PageScope Light ➃ Save Setting This screen appears when you click the Save Setting menu on the System tab. You can use the screen that appears to save the Digital Copier setup to a file. Note that only settings you can make with PageScope Light are saved to the file. Saved setups can be recalled to set up the Digital Copier when required. ➄ Online Assistance Enter information concerning product support and check it when necessary. 10-6 Pi4700e Job tab 10.5 10 Job tab You can use the Job tab for managing print jobs sent to the Digital Copier from clients, and for sending files directly from clients for printing. Print Job Management PageScope Light Chapter 10 This screen appears when you click the Print Job Management menu on the Job tab. Use this screen to manage print jobs sent from clients to the Digital Copier. ✎ Note A Secure Printing job can only be deleted by the administrator. File Download This screen appears when you click the File Download menu on the Job tab. You can use this screen to send a file directly from a client to the Digital Copier. Pi4700e 10-7 Printer tab 10 10.6 Printer tab The Printer tab shows information and settings for printing on the Digital Copier. Settings Sub-menus appear when you click the Settings menu on the Printer tab. Click the sub-menus to display screens for changing the printer setup. G Paper Handling PageScope Light Chapter 10 This screen appears when you click the Paper Handling sub-menu under the Settings menu. Use this screen to configure the input tray and output bins. Input Section Copies Input a value indicating the number of copies. Priority Source Specify the default input tray. The menu shows only the trays that are currently available for selection. Output Section 10-8 Bin Bin names when mail bin manager is installed Bin Name Type in the name of the user of each bin. You can input up to 32 characters. Restore Factory Default Button Click this button to return settings to their initial factory defaults. Apply Button Click this button to apply any settings you have input up to this point. Clear Button Click this button to cancel any settings you have input up to this point. Pi4700e Printer tab G 10 Page Layout Pi4700e Paper Size Select the page layout paper size to be used when printing is performed without a paper size specified by the client. Duplex Use this setting to turn two-side printing on and off, and to specify either long-edge binding or short-edge binding. Restore Factory Default Button Click this button to return settings to their initial factory defaults. Apply Button Click this button to apply any settings you have input up to this point. Clear Button Click this button to cancel any settings you have input up to this point. 10-9 PageScope Light Chapter 10 This screen appears when you click the Page Layout sub-menu under the Settings menu. Use this screen to configure the print document page layout. Printer tab 10 G Printer Setting PageScope Light Chapter 10 This screen appears when you click the Printer Setting sub-menu under the Settings menu. Use this screen to configure the printer controller. Printer Settings Section Printer Language Select the printer control code type. Download Font/PS Header Hold on RAM When the box next to this option is checked, downloaded fonts and PostScript header remain in printer controller RAM as long as power is supplied to the printer controller. This option appears after printer controller memory has been increased. PostScript Settings Section Error Print When the box next to this option is checked, an error message is printed whenever a PostScript error is generated. PCL Settings Section 10-10 Orientation Specify the orientation of the printed page. Font Size Type in a value specifying the size in points for proportional fonts. Pitch Type in a value specifying the number of characters per horizontal inch for uniform space fonts. Font No. Type in a font number. Symbol Set Select the symbol set you want to use with the font. The default symbol set is used if the symbol set you select is currently not available. Form Length Type in a value specifying the number of lines per page. Restore Factory Default Button Click this button to return settings to their initial factory defaults. Apply Button Click this button to apply any settings you have input up to this point. Clear Button Click this button to cancel any settings you have input up to this point. Pi4700e Printer tab 10 Printer Front Panel Pi4700e Display This area shows the printer controller message display. Messages are the same as the Status Display messages that appear in the upper part of the window. Online Button Toggles the printer controller network connection on line and off line Proceed Button Click this button to force printing of the job whose data is still in the controller. 10-11 PageScope Light Chapter 10 This screen appears when you click the Operational Panel menu on the Printer tab. It provides on-screen emulation of the printer controller’s operational panel. Printer tab 10 Test Print PageScope Light Chapter 10 This screen appears when you click the Test Print menu on the Printer tab. It lets you select a test print page and execute a test print operation. 10-12 Config Page Insert a check mark into the box to print the printer controller setup page. PCL Font List Insert a check mark into the box to print the PCL font list. PostScript Font List Insert a check mark into the box to print the PostScript font list. Network Config Insert a check mark into the box to print the network configuration. Print Button Click this button to execute a test print operation. Pi4700e Printer tab 10 Font Information Pi4700e PCL Internal Font PCL fonts built into the printer controller PCL Download Font PCL fonts downloaded from the computer to the printer controller PostScript Font PostScript fonts built into the printer controller PostScript Download Font PostScript fonts downloaded from the computer to the printer controller Font Name Font name Font ID Unique control number for each downloaded font Font # Downloaded font number Location Storage location of the font (ROM, RAM, HDD) 10-13 PageScope Light Chapter 10 This screen appears when you click the Font Info menu on the Printer tab. It shows a list of PCL fonts and PostScript fonts built into the printer controller. Printer tab 10 Printer Reset PageScope Light Chapter 10 This screen appears when you click the Printer Reset menu on the Printer tab. Use this screen to reset the printer controller. Printer Controller 10-14 Clicking the Reset button displays a confirmation message asking if you want to perform the reset. Click Yes to reset the printer controller. Applicable users are informed if a reset is executed while a print operation or data receive operation is in progress. Pi4700e Printer tab 10 Maintenance HDD Format Section HDD Format Use this section to format the hard disk drive. Clicking the Format button displays a confirmation screen. Click Yes to format the hard disk. Firmware Update Section File Name Type in the full path to the firmware definition file you want to download to the printer controller. You can also click the Browse button to display a dialog box for selecting the file. Send new Firmware to Printer Click the Send button to download the firmware to the printer controller. Restore Factory Default Section Printer Controller FW Pi4700e Use this section to return printer controller settings to their initial factory defaults. Clicking the Restore button displays a confirmation screen. Click the Yes button to restore the initial factory default settings. 10-15 PageScope Light Chapter 10 This screen appears when you click the Maintenance menu on the Printer tab. Use this screen to format the hard disk drive and to update the printer controller firmware. Printer tab 10 Local Interface PageScope Light Chapter 10 This screen appears when you click the Local I/F menu on the Printer tab. Use this screen to view and configure local interface information. 10-16 Timeout Input a value specifying how much time, in seconds, should be allowed to pass after data is received through the parallel port before it is decided that a job is finished. I/O Buffer Size I/O buffer size Bi-Directional Bi-directional communication setting Timing Printer data read timing Pi4700e Scanner tab 10.7 10 Scanner tab PageScope Light Chapter 10 The Scanner tab contains settings for configuration of the Digital Copier scanner function. For details about the scanner function, see the “9 Scanner Mode” section. Pi4700e 10-17 Network tab 10 10.8 Network tab PageScope Light Chapter 10 The Network tab contains settings for configuration of the Digital Copier Network function. For details about the network function, see the “Printer Driver” section (p. 3-23). 10-18 Pi4700e Unable to Print 11 11 Troubleshooting 11.1 Unable to Print Possible Cause Action A message appears on the computer screen, saying something to the effect that “no printer is connected”, “no paper is loaded.” or “LPT1 write error”. An error is present in the machine. Check the control panel of the machine: If an error is displayed, identify the error and take the necessary action by referring to the “Error List” on page 11-6. The printer cable or network cable is disconnected. Check that the printer cable or network cable is connected properly to the computer and controller. Printing does not start despite the completion of printing setup on the computer. An error is present in the machine. Check the control panel of the machine: If an error is displayed, identify the error and take the necessary action by referring to the “Error List” on page 11-6. The printer cable or network cable is disconnected. Check that the printer cable or network cable is connected properly to the computer and controller. The printer driver selected for printing is not for the Pi4700e. Check the printer name. A print job yet to be processed is loaded in the machine, causing the printer to wait. Refer to the Job List on the machine control panel to check for print order. (for Linux) File to be printed is not a PS file. Pi4700e Delete job and check to see if it is PS file. 11-1 Troubleshooting Symptom Chapter 11 This section explains about the troubleshooting procedures for possible malfunctions. Perform the troubleshooting procedures given below in that order when the machine is unable to print even if you execute a print command from your computer. Unable to Print Troubleshooting Chapter 11 11 Symptom Possible Cause Action Continued from the previous page (Printing does not start despite the completion of printing setup on the computer.) The print job is locked. Refer to the Job List on the machine control panel to see if the print job in question is locked. If so, unlock it. The connection of the controller to the network has not been established. Consult the network administrator. The print job was canceled. Check the status on the “Incompleted Job Queue” of “Page Scope Light”. Machine memory space available is not sufficient. Add the machine memory to expand its space. If the copy track function is enabled, an illegal access number might have been entered. Enter the correct access number. Multiple copy sets are mistakenly sorted and stapled together as a single large set. The settings in certain DTP software applications may conflict with the printer driver settings. In the application, turn OFF Collate and set the copy count to one. In the printer driver, make the desired Collate, Sorting and copy count settings. A large number of copies are mistakenly printed. The settings in certain DTP software applications may conflict with the printer driver settings. In the application, turn OFF Collate and set the copy count to one. In the printer driver, make the desired Collate, Sorting and copy count settings. A document containing more than 40 pages cannot be printed. The maximum number of document pages that can be stored in the standard memory is 40. • Decrease the number of document pages or add memory to expand its capacity. • Select “Printer” for “Priority Device” available in 6/6 of User’s Choice on the machine. A PS error print is output. Some applications allow you to select either “Binary” or “ASCII” mode when the PS driver is being used. A PS error could result if an attempt is made to print in the “Binary” mode. Select the “ASCII” mode. If the problem persists even after these checks have been made, refer to the documentation provided for the machine. 11-2 Pi4700e Unable to Print 11 Unable to Make Correct Settings / Unable to Print Exactly as Set Perform the troubleshooting procedures given below in the order when you cannot make proper settings in the printer driver or when the print results do not represent what has been set. Symptom Possible Cause Action The options are dimmed on the computer screen. An illegal combination of functions has been made. Reselect functions. The “Conflicts” dialog box is displayed on the computer screen. An illegal combination of functions has been made. Check for combination and make a correct combination of functions. Unable to print exactly as set. Incorrect settings are made. Check the setting for each item of the printer driver. The watermark cannot be printed. The watermark is not correctly set. Check the watermark setting. The “Darkness” setting of the watermark is low. Check the “Darkness” setting of the watermark. (for Windows, Linux) Staple can be specified only when the type of Finisher you are using is selected on the “Device Options Setting” tab and “Auto” is selected for “Output Setting” on the “Setup” tab. Select the type of Finisher you are using on the “Device Options Setting” tab, and select “Auto” for “Output Setting” on the “Setup” tab. (for Macintosh) Staple can be specified only when the type of Finisher you are using is selected on the “Installable Options” property sheet and “Auto” is selected for “Output Setting” on the “Printer Specific Options” property sheet. Select the type of Finisher you are using on the “Installable Options” property sheet, and select “Auto” for “Output Setting” on the “Printer Specific Options” property sheet. No stapling can be effected in the following case: Paper size other than 182 × 182 mm to 297 × 432 mm is specified, paper source is manual feed port, exit port other than Auto is selected, Booklet is specified, OHP Interleaving is specified, Uncollated is specified. Pi4700e Check the setting of the paper size, paper source, exit port, Booklet, OHP Interleaving, and Collated. 11-3 Chapter 11 Troubleshooting Unable to specify Staple. The combination of the functions, though valid on the printer driver, is invalid on the machine. (for Linux) Certain items can be set only by root user in “Device Options Setting”. Unable to Print 11 Symptom Possible Cause Action Unable to staple properly. No stapling can be effected if the type of paper is thick paper or OHP transparencies. Check the type of paper. When Mailbin Finisher or Multistaple Finisher is installed, no stapling can be effected if number of prints to be made exceeds 50. Check the number of prints to be made. When Single-staple Finisher is installed, no stapling can be effected if number of prints to be made exceeds 30. No stapling can be effected if the number of pages to be printed is 50 or more when a Folding Finisher is mounted. Center Staple is also disabled if the number of pages to be printed is 15 or more. The stapling position is opposite to what is expected. The paper direction and N-up do not match the setting made for Orientation. Change the setting for Orientation. Unable to specify Punch. Either a Multi-staple Finisher, Mailbin Finisher or Folding Finisher must be mounted to enable the setting of Punch, and “Multistaple Finisher”, “Mailbin Finisher” or “Folding Finisher” must be selected from “Installable Options” to specify Punch. Select “Multi-staple Finisher” “Mailbin Finisher” or “Folding Finisher” from “Installable Options.” Punch cannot be specified if Booklet or OHP interleaving is specified. Check the setting of Booklet and OHP Interleaving. No holes can be made if the type of paper is thick paper or OHP transparencies. Check the type of paper. Prints can at times be fed out without being punched if the direction of the paper loaded in the paper source is not appropriate. Check the direction of the paper. The paper direction and N-up do not match the setting made for Orientation. Change the setting for Orientation. Troubleshooting Chapter 11 No stapling can be effected if original document contains pages of different sizes. Unable to effect Punch. The hole punch position is opposite to what is expected. 11-4 Pi4700e Unable to Print 11 Folding cannot be specified. (for Windows) The optional Folding Finisher is necessary for you to specify Folding. “Folding Finisher” must be selected on “Device Options Setting” tab. (for Macintosh) The optional Folding Finisher is necessary for you to specify Folding. “Folding Finisher” must be selected on “Installable Options.” Pi4700e Action Select “Folding Finisher” on “Device Options Setting” tab. Select “Folding Finisher” on “Installable Options.” Folding may be disabled when Staple or Punch is specified. Check the settings made. (See “Function combination matrix” (p. 12-1, p. 12-4, p. 12-7).) Folding is not effected. Folding cannot be effected if the type of paper is Thick Paper or OHP. Check the type of paper. Unable to print image properly. Machine memory space available is not sufficient. Add machine memory to expand its space, or simplify the image to reduce the amount of data handled. Unable to specify the exit port. No exit port can be specified if the paper size is A6 or B6, or OHP Interleaving is specified. Check the setting of the paper size and OHP Interleaving. Unable to properly feed prints out to the specified port. Prints with paper size of B6 or smaller cannot be fed out if paper exit port is Mailbin. Check the paper type and paper size. Paper is not fed from the specified paper source. Paper may not be fed from the specified paper source if that paper source is loaded with paper of a different size and direction. Load the paper source with paper of the appropriate size and in the appropriate direction. Watermark is not printed. Watermark may not be printed in graphics applications. No watermark can be printed in this case. Unable to print exactly as set. The paper size, paper direction, and other settings made on the application takes precedence over those made in the driver. Make the correct settings on the application. Error dialog box is output instead of Setting dialog box. Unusable combination of device and settings with Easy Set being stored could have been achieved by changing of device installed. Open file specified in the error dialog box, delete applicable settings. Distribution cannot be specified. To specify Distribution, a “Hard Disk Drive in Copier” that is optional on the machine is necessary. “Hard Disk Drive in Copier” must be specified in “Device Options Setting.” Select “Hard Disk Drive in Copier” on “Device Options Setting.” 11-5 Chapter 11 Possible Cause Troubleshooting Symptom Unable to Print 11 Poor Print Quality Perform these troubleshooting procedures when you get poor print quality. Symptom Possible Cause Action Shades of gray are not clear. Halftone setting is improperly set. Check the setting made in “Halftone” in the “Quality” property sheet. If the problem persists even after these checks have been made, refer to the documentation provided for the machine. Error List When an error occurs, the machine control panel gives the message of “Controller failure → 18xx or 19xx.” Troubleshooting Chapter 11 The table below lists the meanings of different error codes, together with the appropriate remedial procedures. Should an error occur, identify the detail of the error and take the necessary action. 11-6 Code Description Action 18A0 NVRAM error Issued when a fault is found in the condition of the setting values saved in the NVRAM of the controller. Turn OFF the power, then turn it ON. If error persists, consult your Tech. Rep. 18A1 NIC initialization error 18A3 Version error 18A7 ROM update data load failure 18A8 ROM update data write failure 18F1 Machine communications error 18F2 Controller fatal error 18D0 Hard disk being formatted This error is eliminated as soon as formatting is completed. 18D1 Hard disk format error Execute formatting from PageScopeLight again. If error persists, consult your Tech. Rep. 18B8 Scan job canceled for short of machine memory space 18C0 Memory short during image conversion Recovers 10 minutes later, or when next scan job starts. If error persists, consult your Tech. Rep. 18C1 Scan job NIC processing error Pi4700e Unable to Print 11 Code Description Action 18C2 Scan job controller processing error Recovers 10 minutes later, or when next scan job starts. If error persists, consult your Tech. Rep. 18A4 ROM update data loading 18A5 ROM update data writing Recovers as time passes, or by conducting job. 18A6 ROM update data completed 18CC LDAP server connection refused 18CD LDAP server connection terminated These codes should cancel after 10 minutes or with the start of the next scan job. If the error does not cancel normally, contact the LDAP server administrator. This manual contains the specifications for the controller. Refer to the documentation provided for the machine for the machine specifications. Pi4700e Description operationsError 1902 protocolError 1903 timeLimitExceeded 1904 sizeLimitExceeded 1907 authMethodNotSupported 1908 strongAuthRequired 1909 (reserved) 190A referral 190B adminLimitExceeded 190C unavailableCriticalExtension 190D confidentialityRequired 190E saslBindInProgress 190F (reserved) 1910 noSuchAttribute 1911 undefinedAttributeType 1912 inappropriateMatching 1913 constraintViolation 1914 attributeOrValueExists 1915 invalidAttributeSyntax 1916-1919 (reserved) 1920 noSuchObject (No searchable object) Troubleshooting Code 1901 Chapter 11 A 19xx code appears only during an LDAP search. 11-7 Unable to Print Code Description 1921 aliasProblem 1922 InvalidDNSyntax 1923 (reserved) 1924 aliasDereferencingProblem 1925-192F (reserved) 1930 inappropriateAuthentication 1931 invalidCredentials (Wrong password) 1932 insufficientAccessRights 1933 busy 1934 unavailable 1935 unwillingToPerform 1936 loopDetect 1937-193F (reserved) 1946 (reserved) 1948-194F (reserved) 1950 other 1951-195A (reserved) Troubleshooting Chapter 11 11 11-8 Pi4700e Function combination matrix (Windows) 12 12 Appendix 12.1 Function combination matrix (Windows) Finishing Paper Source Manual Feed × × × × × × Manual Feed × × × Uncollated ❍ ❍ ❍ ❍ ❍ ❍ ❍ ❍ ❍ × ❍ × ❍ ❍ × Collated ❍ ❍ ❍ ❍ ❍ × ❍ ❍ ❍ ❍ ❍ ❍ × × × × Crease Half Folding Z-Fold Off Short Edge Long Edge Off Short Edge Long Edge Corner Center × ❍ ❍ × ❍ × × ❍ ❍ ❍ ❍ ❍ ❍ ● ● ❍ ❍ ● ❍ × Sorted Folding Off × ❍ ❍ ❍ ❍ ❍ ❍ × LCC Punch Sorted Collated × ❍ ❍ ❍ ❍ ❍ ❍ ❍ ❍ ❍ ❍ ❍ ❍ × ❍ ❍ Uncollated × ❍ ❍ ❍ ❍ ❍ ❍ ❍ ❍ ❍ ❍ ❍ ❍ ❍ ❍ ❍ × LCT × × × × ● ❍ × × ❍ ❍ ❍ ❍ ❍ ❍ ❍ × ❍ ❍ ❍ ❍ ❍ ❍ ❍ ❍ ❍ ❍ ❍ ❍ ❍ × × × × ❍ ❍ ❍ ❍ ❍ ❍ ❍ × × × × ❍ ❍ ❍ ❍ ❍ ❍ ❍ × × × ❍ ❍ ❍ ❍ ❍ × × × ❍ ❍ × ❍ ❍ ❍ × Off ❍ ❍ ❍ ❍ ❍ ❍ ❍ ❍ Corner ❍ ❍ ❍ ❍ × ❍ × × Long Edge ❍ ❍ ❍ ❍ × ❍ × × × Short Edge ❍ ❍ × ● × ❍ × × × × Center ❍ ❍ × ● × ❍ × × × × × ❍ × ❍ ❍ × Off ❍ ❍ ❍ ❍ ❍ ❍ ❍ ❍ ❍ ❍ ❍ ❍ ❍ Long Edge ❍ ❍ ❍ ❍ ❍ ❍ ❍ ❍ ❍ ❍ × × × ❍ ❍ ❍ ❍ ❍ × ❍ × × ❍ × × × × ❍ × × × ❍ × ❍ ❍ ❍ ❍ × ❍ ❍ ❍ × Short Edge ❍ ❍ × ● Off ❍ ❍ ❍ ❍ ❍ ❍ ❍ ❍ ❍ ❍ ❍ ❍ ❍ ❍ ❍ ❍ Z-Fold ❍ × × ❍ ❍ ❍ ❍ ❍ ❍ × × × × × ❍ ❍ × ❍ × × × × × × × × × × Half Folding ❍ ❍ × × ❍ ❍ ❍ ❍ × × × × ❍ × × × × Crease ❍ ❍ × ● ❍ ❍ ❍ ❍ × × × ❍ ❍ × × × × × × × 1-sided 1up ❍ ❍ ❍ ❍ ❍ ❍ ❍ ❍ ❍ ❍ ❍ ❍ ❍ ❍ ❍ ❍ ❍ ❍ ❍ ❍ 2-sided 1up ❍ ❍ ❍ ❍ 1-sided 2, 4, 6, 9, 16up ❍ ❍ ❍ ❍ ❍ ❍ ❍ ❍ ❍ ❍ ❍ ❍ ❍ ❍ ❍ ❍ ❍ ❍ ❍ ❍ 2-sided 2, 4, 6, 9, 16up ❍ ❍ ❍ ❍ Scaling ❍ ❍ ❍ ❍ ❍ ❍ ❍ ❍ ❍ ❍ ❍ ❍ ❍ ❍ ❍ ❍ ❍ ❍ ❍ ❍ Booklet ❍ ❍ ❍ ❍ ❍ ❍ ❍ ❍ ❍ ❍ ❍ ❍ ❍ ❍ ❍ ❍ ❍ × ❍ ❍ ❍ ❍ ❍ ❍ ❍ ❍ ❍ ❍ ❍ ❍ ❍ ❍ × ❍ × ❍ × ❍ × × × ❍ ❍ × × ❍ × × A Distribution Number ❍ ❍ ❍ ❍ ❍ × ❍ × ❍ ❍ ❍ ❍ ❍ ❍ ❍ ❍ ❍ ❍ ❍ ❍ Watermark ❍ ❍ ❍ ❍ ❍ ❍ ❍ ❍ ❍ ❍ ❍ ❍ ❍ ❍ ❍ ❍ ❍ ❍ ❍ ❍ × × × × ❍ × × ❍ × × Cover mode × ❍ ❍ ❍ ❍ ❍ ❍ ❍ ❍ ❍ ❍ ❍ ❍ ❍ ❍ ❍ ❍ × Pi4700e × × ❍ ❍ ❍ ❍ ❍ × OHP Interleaving × × × ❍ 12-1 Chapter 12 Printer Specific Options × LCT Staple Layout × × Appendix Tray1, 2, 3, 4 Folding LCC Paper Source Auto Punch Tray1, 2, 3, 4 Auto Staple Function combination matrix (Windows) 12 OHP Interleaving Cover mode ❍ ❍ ❍ ❍ ❍ × Collated ❍ ❍ ❍ ❍ ❍ ❍ ❍ ❍ ❍ ❍ Paper Source Printer Specific Options Punch ❍ ❍ ❍ ❍ ❍ ❍ ❍ ❍ ❍ ❍ ❍ × Off Watermark ❍ Uncollated Folding × ❍ ❍ ❍ × ❍ ❍ ❍ ❍ ❍ ❍ ❍ ❍ ❍ ❍ ❍ ❍ ❍ Corner ❍ ❍ ❍ ❍ ❍ × ❍ ❍ × ❍ Long Edge ❍ ❍ ❍ ❍ ❍ × ❍ ❍ × ❍ Short Edge ❍ ❍ ❍ ❍ ❍ × ❍ ❍ × ❍ Center ❍ ❍ ❍ ❍ ❍ ❍ ❍ ❍ × ❍ Off ❍ ❍ ❍ ❍ ❍ ❍ ❍ ❍ ❍ ❍ Long Edge ❍ ❍ ❍ ❍ ❍ × ❍ ❍ × ❍ Short Edge ❍ ❍ ❍ ❍ ❍ × ❍ ❍ × ❍ Off ❍ ❍ ❍ ❍ ❍ ❍ ❍ ❍ ❍ ❍ Z-Fold ❍ ❍ ❍ ❍ ❍ × ❍ ❍ × × Half Folding ❍ × ❍ × ❍ × ❍ ❍ × × Crease ❍ ❍ ❍ ❍ ❍ A ❍ ❍ × ❍ 1-sided 1up Layout Distribution Number ❍ ❍ ❍ ❍ ❍ ❍ ❍ ❍ × ❍ Manual Feed Booklet ❍ ❍ ❍ ❍ ❍ ❍ ❍ ❍ × ❍ LCT Scale LCC Sorted Chapter 12 2-sided 2, 4, 6, 9, 16up × ❍ ❍ ❍ ❍ ❍ ❍ ❍ ❍ × ❍ 2-sided 1up ❍ ❍ ❍ ❍ ❍ ❍ ❍ ❍ × 1-sided 1up Auto Tray1, 2, 3, 4 Staple Appendix 1-sided 2, 4, 6, 9, 16up Layout × × × × ❍ ❍ ❍ ❍ ❍ × × × × ❍ ❍ × × × × ❍ ❍ ❍ ❍ × × ❍ ❍ × ❍ 2-sided 1up × 1-sided 2, 4, 6, 9, 16up × × 2-sided 2, 4, 6, 9, 16up × × × Scale × × × × Booklet ❍ × × × × ❍ ❍ ❍ ❍ × ❍ ❍ × ❍ Distribution Number ❍ ❍ ❍ ❍ ❍ ❍ Watermark ❍ ❍ ❍ ❍ ❍ ❍ ❍ OHP Interleaving ❍ × ❍ × ❍ × Cover mode ❍ ❍ ❍ ❍ ❍ ❍ ❍ ❍ × 12-2 ❍ ❍ × ❍ ❍ ❍ × ❍ × Pi4700e Function combination matrix (Windows) 12 ❍ : The combination is possible. × : The combination is impossible. (The settings made are rejected.) ● : Cannot be used if the LCT rejects loading of paper in the lengthwise direction. : Does not function if special paper setting has been made. A : Can be set on the PS driver, but not on the PCL driver. ✎ Appendix Chapter 12 Note Some combinations may not function properly depending on the size and direction of the paper. Pi4700e 12-3 Function combination matrix (Macintosh) 12 Function combination matrix (Macintosh) Printer Specific Options Paper Source Printer Specific Options Chapter 12 Layout Appendix × LCT × × × Manual Feed × × × Uncollated ❍ ❍ ❍ ❍ ❍ ❍ × ❍ ❍ × ❍ ❍ ❍ ❍ ❍ × ❍ ❍ ❍ ❍ ❍ ❍ × × × × ❍ × × ❍ ❍ ❍ ❍ ❍ ❍ ❍ ❍ × × × × × × × ❍ ❍ ❍ ❍ ❍ ❍ ❍ × × × ❍ ❍ ❍ ❍ ❍ × × × × ❍ ❍ × ❍ ❍ × × × ❍ × ❍ ❍ × × ❍ ❍ ❍ ❍ ❍ ❍ ❍ ❍ Corner ❍ ❍ ❍ ❍ × ❍ × × Long Edge ❍ ❍ ❍ ❍ × ❍ × × × × ❍ ❍ ❍ ❍ ❍ ❍ ❍ Short Edge ❍ ❍ × ● × ❍ × × × × Center ❍ ❍ × ● × ❍ × × × × Off ❍ ❍ ❍ ❍ ❍ ❍ ❍ ❍ ❍ ❍ ❍ ❍ ❍ Long Edge ❍ ❍ ❍ ❍ ❍ ❍ ❍ ❍ ❍ ❍ × × × Short Edge ❍ ❍ × ● ❍ ❍ ❍ ❍ ❍ × ❍ × × ❍ × × × × ❍ × × ❍ ❍ ❍ ❍ × ❍ × × × ❍ ❍ ❍ ❍ ❍ ❍ ❍ ❍ ❍ ❍ ❍ ❍ ❍ ❍ ❍ ❍ Z-Fold ❍ × × ❍ ❍ ❍ ❍ ❍ ❍ × × × ❍ × ❍ ❍ × Off × ❍ ❍ × × × × × × × Half Folding ❍ ❍ × × ❍ ❍ ❍ ❍ × × × × ❍ × × × × Crease ❍ ❍ × ● ❍ ❍ ❍ ❍ × × × ❍ ❍ × × × × × × ❍ ❍ ❍ ❍ ❍ × × × × ❍ × × × ❍ × × × × × OHP Interleaving × Cover mode × ❍ ❍ ❍ ❍ ❍ ❍ ❍ ❍ ❍ ❍ ❍ ❍ ❍ ❍ ❍ ❍ × 1-sided 1up ❍ ❍ ❍ ❍ ❍ ❍ ❍ ❍ ❍ ❍ ❍ ❍ ❍ ❍ ❍ ❍ ❍ ❍ ❍ ❍ 2-sided 1up ❍ ❍ ❍ ❍ 1-sided 2, 4, 6, 9, 16up ❍ ❍ ❍ ❍ ❍ ❍ ❍ ❍ ❍ ❍ ❍ ❍ ❍ ❍ ❍ ❍ ❍ ❍ ❍ ❍ 2-sided 2, 4, 6, 9, 16up ❍ ❍ ❍ ❍ Scale ❍ ❍ ❍ ❍ ❍ ❍ ❍ ❍ ❍ ❍ ❍ ❍ ❍ ❍ ❍ ❍ ❍ ❍ ❍ ❍ 12-4 × × × ● × ❍ ❍ ❍ ❍ ❍ ❍ ❍ ❍ ❍ ❍ ❍ ❍ Off × Crease Half Folding Z-Fold Off Short Edge Long Edge Center Short Edge ❍ ❍ ❍ ❍ × Collated Folding × ❍ ❍ × ❍ × × ❍ ❍ ❍ ❍ ❍ ❍ ● ● ❍ ❍ ● ❍ × Sorted Punch Long Edge × ❍ ❍ ❍ ❍ ❍ ❍ × × Corner × ❍ ❍ ❍ ❍ ❍ ❍ ❍ ❍ ❍ ❍ ❍ ❍ × ❍ ❍ × LCC Off × ❍ ❍ ❍ ❍ ❍ ❍ ❍ ❍ ❍ ❍ ❍ ❍ ❍ ❍ ❍ × Sorted × × Collated Manual Feed × × Uncollated LCT × Tray1, 2, 3, 4 Staple Folding LCC Paper Source Auto Punch Tray1, 2, 3, 4 Auto Staple Off 12.2 × × ❍ ❍ ❍ ❍ ❍ ❍ ❍ ❍ ❍ ❍ ❍ ❍ ❍ ❍ × ❍ ❍ ❍ ❍ ❍ ❍ ❍ ❍ ❍ ❍ ❍ ❍ ❍ ❍ × ❍ Pi4700e Function combination matrix (Macintosh) 12 Scale LCC × ❍ ❍ ❍ ❍ ❍ ❍ LCT × ❍ ❍ ❍ ❍ ❍ ❍ Manual Feed ❍ ❍ ❍ Uncollated ❍ ❍ ❍ ❍ ❍ ❍ ❍ Collated ❍ ❍ ❍ ❍ ❍ ❍ ❍ ❍ ❍ Folding ❍ ❍ ❍ ❍ ❍ ❍ ❍ Corner × ❍ ❍ ❍ ❍ ❍ ❍ Long Edge × ❍ ❍ ❍ ❍ ❍ ❍ Short Edge × ❍ ❍ ❍ ❍ ❍ ❍ Center × ❍ ❍ ❍ ❍ ❍ ❍ Off ❍ ❍ ❍ ❍ ❍ ❍ ❍ Long Edge × ❍ ❍ ❍ ❍ ❍ ❍ Short Edge × ❍ ❍ ❍ ❍ ❍ ❍ Off ❍ ❍ ❍ ❍ ❍ ❍ ❍ Z-Fold × ❍ ❍ ❍ ❍ ❍ ❍ × ❍ × ❍ × ❍ Half Folding × Crease × ❍ ❍ ❍ ❍ ❍ ❍ × ❍ × OHP Interleaving × Appendix Punch Off Chapter 12 ❍ ❍ ❍ ❍ ❍ ❍ ❍ Staple Printer Specific Options 2-sided 2, 4, 6, 9, 16up × ❍ ❍ ❍ ❍ ❍ Sorted Layout 1-sided 2, 4, 6, 9, 16up × × ❍ ❍ ❍ ❍ ❍ ❍ 2-sided 1up Cover mode Auto Tray1, 2, 3, 4 1-sided 1up OHP Interleaving Paper Source Layout × ❍ ❍ ❍ ❍ ❍ ❍ Cover mode × 1-sided 1up ❍ ❍ 2-sided 1up × 1-sided 2, 4, 6, 9, 16up ❍ ❍ × × 2-sided 2, 4, 6, 9, 16up × ❍ × × × Scale ❍ ❍ × × × × ❍ × × × × × × × × × × × ❍ : The combination is possible. × : The combination is impossible. (The settings made are rejected.) ● : Cannot be used if the LCT rejects loading of paper in the lengthwise direction. : Does not function if special paper setting has been made. Pi4700e 12-5 Function combination matrix (Macintosh) 12 ✎ Note Some combinations may not function properly depending on the size and direction of the paper. ✎ Appendix Chapter 12 Tip 1Side and 2Side of Layout mean the following. 1Side: Duplex Print = Off 2Side: Duplex Print = Short Edge or Long Edge 12-6 Pi4700e Function combination matrix (Linux) Function combination matrix (Linux) Finishing Paper Source × × × × × × Manual Feed × × × ❍ ❍ ❍ ❍ ❍ ❍ ❍ ❍ ❍ ❍ × ❍ × ❍ ❍ × × × Crease Half Folding Z-Fold Off Short Edge Long Edge Short Edge Long Edge Corner Off Center × ❍ ❍ × ❍ × ❍ × ❍ ❍ ❍ ❍ × Uncollated Folding Sorted × ❍ ❍ ❍ ❍ ❍ ❍ × × ❍ ❍ ❍ ❍ ❍ ❍ ● ● ❍ ❍ ● ❍ × Collated Punch Collated Uncollated × ❍ ❍ ❍ ❍ ❍ ❍ ❍ ❍ ❍ ❍ ❍ ❍ × ❍ ❍ × ● ❍ × × ❍ ❍ ❍ ❍ ❍ ❍ ❍ × ❍ ❍ ❍ ❍ ❍ ❍ ❍ ❍ ❍ ❍ ❍ ❍ ❍ ❍ ❍ ❍ ❍ ❍ × ❍ × × × × ❍ ❍ ❍ ❍ ❍ ❍ ❍ × × × × ❍ ❍ ❍ ❍ ❍ ❍ ❍ × × × ❍ ❍ ❍ ❍ ❍ × × × × ❍ ❍ × ❍ ❍ × × × ❍ × ❍ ❍ × × Off ❍ ❍ ❍ ❍ ❍ ❍ ❍ ❍ Corner ❍ ❍ ❍ ❍ × ❍ × × Long Edge ❍ ❍ ❍ ❍ × ❍ × × × Short Edge ❍ ❍ × ● × ❍ × × × × Center ❍ ❍ × ● × ❍ × × × × Off ❍ ❍ ❍ ❍ ❍ ❍ ❍ ❍ ❍ ❍ ❍ ❍ ❍ Long Edge ❍ ❍ ❍ ❍ ❍ ❍ ❍ ❍ ❍ ❍ × × × Short Edge ❍ ❍ × ● ❍ ❍ ❍ ❍ ❍ × ❍ × × ❍ × × × × ❍ × × ❍ ❍ ❍ ❍ × ❍ ❍ × × ❍ × × × Off ❍ ❍ ❍ ❍ ❍ ❍ ❍ ❍ ❍ ❍ ❍ ❍ ❍ ❍ ❍ ❍ Z-Fold ❍ × × ❍ ❍ ❍ ❍ ❍ ❍ × × × ❍ × ❍ ❍ × × × × × Half Folding ❍ ❍ × × ❍ ❍ ❍ ❍ × × × × ❍ × × × × Crease ❍ ❍ × ● ❍ ❍ ❍ ❍ × × × ❍ ❍ × × × × × × × × × × × Long Edge Binding ❍ ❍ ❍ ❍ ❍ ❍ ❍ ❍ ❍ ❍ × ❍ ❍ ❍ × ❍ ❍ × ❍ Short Edge Binding ❍ ❍ ❍ ❍ ❍ ❍ ❍ ❍ ❍ × ❍ ❍ ❍ × ❍ ❍ × Distribution Number × × × ❍ ❍ × ❍ ❍ × × × × ❍ × × ❍ × OHP Interleaving × × ❍ ❍ ❍ ❍ ❍ ❍ ❍ ❍ ❍ ❍ ❍ ❍ ❍ ❍ ❍ ❍ × Pi4700e × ❍ ❍ ❍ ❍ ❍ ❍ × ❍ × ❍ ❍ ❍ ❍ ❍ ❍ ❍ ❍ ❍ ❍ ❍ ❍ Cover mode Chapter 12 Manual Feed × ❍ ❍ ❍ ❍ ❍ ❍ ❍ ❍ ❍ ❍ ❍ ❍ ❍ ❍ ❍ × LCT × × LCC Staple Printer Specific Options × LCT Sorted Duplex × × × × × ❍ 12-7 Appendix Tray1, 2, 3, 4 Folding LCC Paper Source Auto Punch Tray1, 2, 3, 4 Auto Staple Off 12.3 12 Function combination matrix (Linux) 12 Cover mode ❍ ❍ ❍ × × Tray1, 2, 3, 4 ❍ ❍ ❍ × ❍ LCC ❍ ❍ ❍ × ❍ LCT ❍ ❍ ❍ × ❍ ❍ ❍ ❍ Manual Feed Uncollated ❍ ❍ × ❍ ❍ Collated ❍ ❍ ❍ × ❍ ❍ ❍ × ❍ ❍ Printer Specific Options Staple Punch Folding Duplex Chapter 12 Distribution Number Auto Sorted Appendix Short Edge Binding OHP Interleaving Paper Source Long Edge Binding Duplex Off ❍ ❍ ❍ ❍ ❍ Corner ❍ ❍ ❍ × ❍ Long Edge ❍ × ❍ × ❍ Short Edge × ❍ ❍ × ❍ Center ❍ ❍ ❍ × ❍ Off ❍ ❍ ❍ ❍ ❍ Long Edge ❍ × ❍ × ❍ Short Edge × ❍ ❍ × ❍ Off ❍ ❍ ❍ ❍ ❍ Z-Fold ❍ × ❍ × × Half Folding × × ❍ × × Crease ❍ ❍ ❍ × ❍ Long Edge Binding Short Edge Binding Distribution Number × ❍ × ❍ ❍ × ❍ × ❍ ❍ × × ❍ OHP Interleaving × Cover mode ❍ ❍ ❍ × × × ❍ : The combination is possible. × : The combination is impossible. (The settings made are rejected.) ● : Cannot be used if the LCT rejects loading of paper in the lengthwise direction. : Does not function if special paper setting has been made. 12-8 Pi4700e Number of registrations 12.4 12 Number of registrations Number of registrations/Usable range for Easy Set Registration Use Printer icon – – • 16/1 driver ❍ Application – – • 16/1 driver ❍ Printer icon – – × ❍ Application – – × ❍ Printer icon • 16/1 driver ❍ × ❍ Application • 16/1 driver ❍ × ❍ Printer icon – – • 32/1 driver ❍ Application – – × ❍ Printer icon – – • 32/1 driver ❍ Application – – × ❍ Printer icon • 32/1 driver ❍ × ❍ Application × ❍ × ❍ Chapter 12 Administrator Power Users Users Power Users Administrator Users PCL6 PS Pi4700e Windows 2000/XP/NT 4.0 Use Appendix Windows 95/98 Registration 12-9 Number of registrations 12 Number of registrations/Usable range for Watermark Windows 95/98 Power Users Administrator Power Users Users PS Appendix Chapter 12 Users PCL6 Administrator Registration 12-10 Use Windows 2000/XP/NT 4.0 Registration Use Printer icon – – • Common: 16 • Personal: 16 • Common • Personal • [All users] Personal Application – – • Common: 16 • Personal: 16 • Common • Personal • [All users] Personal Printer icon – – • Common: 0 • Personal: 16/1 user • Personal • [Administrator] Common Application – – • Common: 0 • Personal: 16/1 user • Personal • [Administrator] Common Printer icon • 32/1 driver ❍ • Common: 0 • Personal: 16/1 user • Personal • [Administrator] Common Application • 32/1 driver ❍ • Common: 0 • Personal: 16/1 user • Personal • [Administrator] Common Printer icon – – • 32/1 driver ❍ Application – – × ❍ Printer icon – – • 32/1 driver ❍ Application – – × ❍ Printer icon • 32/1 driver ❍ × ❍ Application × ❍ × ❍ Pi4700e Number of registrations 12 Number of registrations/Usable range for Custom Paper Windows 95/98 Pi4700e Use Windows 2000/XP/NT 4.0 Registration Use – – • Common: 16 • Personal: 16 • Common • Personal • [All users] Personal Application – – • Common: 16 • Personal: 16 • Common • Personal • [All users] Personal Printer icon – – • Common: 0 • Personal: 16/1 user • Personal • [Administrator] Common Application – – • Common: 0 • Personal: 16/1 user • Personal • [Administrator] Common Printer icon • 32/1 driver ❍ • Common: 0 • Personal: 16/1 user • Personal • [Administrator] Common Application • 32/1 driver ❍ • Common: 0 • Personal: 16/1 user • Personal • [Administrator] Common Printer icon – – • 32/1 driver ❍ Application – – × ❍ Printer icon – – • 32/1 driver ❍ Application – – × ❍ Printer icon • 32/1 driver ❍ × ❍ Application × ❍ × ❍ Chapter 12 Printer icon Appendix Power Users Power Users Users PS Administrator Users PCL6 Administrator Registration 12-11 Preview Listing 12 12.5 Preview Listing [Page Layout] Appendix Chapter 12 Value Defined for Print Setting Item Screen Specifications Value Defined for Print Setting Item Orientation= Portrait Orientation= Landscape Duplex/Booklet= Long Edge Binding, Orientation= Portrait Duplex/Booklet= Short Edge Binding, Orientation= Portrait Duplex/Booklet= Short Edge Binding, Orientation= Landscape Duplex/Booklet= Long Edge Binding, Orientation= Landscape Duplex/Booklet= Booklet Left Binding, Orientation= Portrait Duplex/Booklet= Booklet Right Binding, Orientation= Portrait Duplex/Booklet= Booklet Left Binding, Orientation= Landscape Duplex/Booklet= Booklet Right Binding, Orientation= Landscape 12-12 Screen Specifications Pi4700e Preview Listing Value Defined for Print Setting Item N-up=2up, Orientation= Portrait N-up=2up, Orientation= Landscape N-up=4up, Orientation= Portrait, PageLocation= Vert. Ascending N-up=4up, Orientation= Portrait, PageLocation= Vert. Descending N-up=4up, Orientation= Portrait, PageLocation= Horiz. Ascending N-up=4up, Orientation= Portrait, PageLocation= Horiz. Descending N-up=6up, Orientation= Portrait, PageLocation= Horiz. Ascending N-up=6up, Orientation= Portrait, PageLocation= Horiz. Descending N-up=6up, Orientation= Portrait, PageLocation= Vert. Ascending N-up=6up, Orientation= Portrait, PageLocation= Vert. Descending Pi4700e Screen Specifications Chapter 12 Screen Specifications Appendix Value Defined for Print Setting Item 12 12-13 Preview Listing 12 Appendix Chapter 12 Value Defined for Print Setting Item Screen Specifications Value Defined for Print Setting Item N-up=9up, Orientation= Portrait, PageLocation= Vert. Ascending N-up=9up, Orientation= Portrait, PageLocation= Vert. Descending N-up=9up, Orientation= Portrait, PageLocation= Horiz. Ascending N-up=9up, Orientation= Portrait, PageLocation= Horiz. Descending N-up=16up, Orientation= Portrait, PageLocation= Horiz. Ascending N-up=16up, Orientation= Portrait, PageLocation= Horiz. Descending N-up=16up, Orientation= Portrait, PageLocation= Vert. Ascending N-up=16up, Orientation= Portrait, PageLocation= Vert. Descending Screen Specifications Watermark 12-14 Pi4700e Preview Listing 12 [Printer Figure] Screen Specifications Value Defined for Print Setting Item No Installed Options Dup + 2way Tray Dup + LCC or Duplex Cabinet LCT (Dup + LCC) Mailbin Finisher (Dup + LCC) Single-Staple Finisher or Multi-Staple Finisher (Dup + LCC) Screen Specifications Chapter 12 Value Defined for Print Setting Item Appendix Folding Finisher (Dup + LCC) Pi4700e 12-15 Preview Listing 12 [Setting Preview] Value Defined for Print Setting Item Duplex/Booklet Appendix Chapter 12 Detail of Output Setting (Staple) Detail of Output Setting (Punch) 12-16 Screen Specifications Value Defined for Print Setting Item Short Edge Binding Long Edge Binding Booklet Left Binding Booklet Right Binding Corner Staple Center Long Edge Short Edge Long Edge Short Edge Screen Specifications Pi4700e Preview Listing 12 Value Defined for Print Setting Item Detail of Output Setting (Folding) Justify Output Size [Z-fold] Screen Specifications Value Defined for Print Setting Item Screen Specifications Half folding Crease Uncollated Collated Sorting Unsorted Sorted Orientation Portrait Landscape All Raster Off On Appendix Chapter 12 Collate Pi4700e 12-17 Preview Listing 12 Value Defined for Print Setting Item Off Value Defined for Print Setting Item Screen Specifications On Appendix Chapter 12 Smoothing Screen Specifications 12-18 Pi4700e Preview Listing 12 Specifications for the controller The basic specifications for Pi4700e are given below. Transfer Image Density : 600 × 600 dpi Interface (on host) : Centronics Interface Networks : 10/100BaseT (UTP) Network Protocol Network Management Weight : TCP/IP, IPX/SPX, AppleTalk : To be managed from SNMP-compatible Web browser : 5V±5% 5A max, 3.3V±3% 2A max : 20W max. : Width: 8-5/8 in. (220 mm) × Depth: 12-5/8 in. (320 mm) × Height: 2-3/8 in. (60 mm) : 4 lbs. (1.8 kg) Operating Environment Temperature Humidity : 50°F (10°C) to 95°F (35°C) : 15 to 85% RH (no condensation) Power Requirements Power Consumption Exterior Dimensions Fonts Pi4700e : PCL5e/PCL6, 80 Adobe PostScript Level 3 Emulation Type 1 font, 136 Symbol Set, 8 12-19 Chapter 12 CPU ROM RAM : Pi4700e : Built-in controller : PCL5e, PCL6, PostScript level 3 Emulation : Determined by the specifications of the digital copier : PowerPC 740 (200 MHz) : 8 MB : 32 MB (on Board) : Max. 160 MB (DIMM) Appendix Model Name Type Printer Language Print Speed Preview Listing 12 Font Appendix Chapter 12 PCL font, 80 12-20 Courier Courier Italic CG Times Courier Bold CG Times Bold Courier Bold Italic CG Times Italic Letter Gothic CG Times Bold Italic Letter Gothic Bold CG Omega Letter Gothic Italic CG Omega Bold ITC Avant Garde Gothic Book CG Omega Italic ITC Avant Garde Gothic Book Oblique CG Omega Bold Italic ITC Avant Garde Gothic Demi Coronet ITC Avant Garde Gothic Demi Oblique Clarendon Condensed ITC Bookman Light Univers Medium ITC Bookman Light Italic Univers Bold ITC Bookman Demi Univers Medium Italic ITC Bookman Demi Italic Univers Bold Italic CourierPS Univers Medium Condensed CourierPS Oblique Univers Bold Condensed CourierPS Bold Univers Medium Condensed Italic CourierPS Bold Oblique Univers Bold Condensed Italic Helvetica Antique Olive Helvetica Oblique Antique Olive Bold Helvetica Bold Antique Olive Italic Helvetica Bold Oblique Garamond Antiqua Helvetica Narrow Garamond Halbfett Helvetica Narrow Oblique Garamond Kursiv Helvetica Narrow Bold Garamond Kursiv Halbfett Helvetica Narrow Bold Oblique Marigold New Century Schoolbook Roman Albertus Medium New Century Schoolbook Italic Albertus Extra Bold New Century Schoolbook Bold Arial New Century Schoolbook Bold Italic Arial Bold Palatino Roman Arial Italic Palatino Italic Arial Bold Italic Palatino Bold Times New Roman Palatino Bold Italic Times New Roman Bold SymbolPS Times New Roman Italic Times Roman Times New Roman Bold Italic Times Italic Symbol Times Bold Wingdings Times Bold Italic ITC Zapf Chancery Medium Italic ITC Zapf Dingbats Pi4700e Preview Listing 12 Pi4700e Eurostile Bold Albertus MT Light Eurostile Extended Two Albertus MT Italic Eurostile Bold Extended Two Antique Olive Italic Geneva Antique Olive Bold Gill Sans Antique Olive Compact Gill Sans Italic Antique Olive Roman Gill Sans Bold Arial MT Gill Sans Bold Italic Arial Italic MT Gill Sans Condensed Arial Bold MT Gill Sans Bold Condensed Arial Bold Italic MT Gill Sans Extra Bold Avant Garde Book Gill Sans Light Avant Garde Book Oblique Gill Sans Light Italic Avant Garde Demi Goudy Avant Garde Demi Oblique Goudy Italic Bodoni Goudy Bold Bodoni Italic Goudy Bold Italic Bodoni Bold Goudy Extra Bold Bodoni Bold Italic Helvetica Bodoni Poster Helvetica Bold Bodoni Poster Compressed Helvetica Bold Oblique Bookman Demi Helvetica Oblique Bookman Demi Italic Helvetica Condensed Bookman Light Helvetica Condensed Oblique Bookman Light Italic Helvetica Condensed Bold Apple Chancery Helvetica Condensed Bold Oblique Chicago Helvetica Narrow Clarendon Helvetica Narrow Bold Clarendon Light Helvetica Narrow Bold Oblique Clarendon Bold Helvetica Narrow Oblique Cooper Black Hoefler Text Regular Cooper Black Italic Hoefler Text Italic Coronet Regular Hoefler Text Black Courier Hoefler Text Black Italic Courier Bold Joanna MT Courier Bold Oblique Joanna MT Italic Courier Oblique Joanna MT Bold Eurostile Joanna MT Bold Italic Appendix Albertus MT Chapter 12 PostScript font, 136 12-21 Preview Listing 12 Appendix Chapter 12 Letter Gothic Times Roman Letter Gothic Slanted Times Italic Letter Gothic Bold Times Bold Letter Gothic Bold Slanted Times Bold Italic Lubalin Graph Book Times New Roman MT Lubalin Graph Book Oblique Times New Roman Italic MT Lubalin Graph Demi Times New Roman Bold MT Lubalin Graph Demi Oblique Times New Roman Bold Italic MT Marigold Univers Monaco Univers Oblique Mona Lisa Recut Univers Bold New York Univers Bold Oblique New Century Schlbook Bold Univers Condensed New Century Schlbook Bold Italic Univers Condensed Oblique New Century Schlbook Italic Univers Condensed Bold New Century Schlbook Roman Univers Condensed Bold Oblique Optima Univers Light Optima Italic Univers Light Oblique Optima Bold Univers Extended Optima Bold Italic Univers Extended Oblique Oxford Univers Bold Extended Palatino Roman Univers Bold Extended Oblique Palatino Italic Zapf Chancery Medium Italic Palatino Bold Zapf Dingbats Palatino Bold Italic Wingdings Stempel Garamond Roman Candid (emulates Carta) Stempel Garamond Italic Taffy (emulates Takton) Stempel Garamond Bold Copperplate Gothic ThirtyTwo BC Stempel Garamond Bold Italic Copperplate Gothic ThirtyThree BC Symbol Hoefler Text Ornaments Symbol Sets No. 1 12-22 Symbol Set Name Roman 8 2 PC-8 3 PC-8 D/N 4 IBM 850 5 ECMA Latin 1 6 Legal 7 Latin 2 8 Latin 5 Pi4700e Preview Listing 12 Selectable Paper Sizes Letter / 11 × 17 / 11 × 14 / Legal / Invoice Executive / A6 / A5 / A4 / A3 / B6 / B5 / B4 Appendix Chapter 12 FLS1 / FLS2 / FLS3 / FLS4 Pi4700e 12-23 Preview Listing 12 Accessories Pi4700e Quick Start Guide Appendix Chapter 12 Printer Driver (CD-ROM) for Pi4700e Controller 12-24 Pi4700e Preview Listing 12 Glossary 10BASE-T A network data transfer standard established by the IEEE. The network uses a twisted-pair cable carrying 10 megabits per second (10Mbps). 100BASE-T A network data transfer standard established by the IEEE. The network uses a twisted-pair cable carrying 100 megabits per second (Mbps). application A software program that performs a particular function, such as generating graphics or spreadsheets. click To press and release a mouse button quickly. Often used to select an object. SEE double-click. control panel A bank of indicators that show the current status of the printer. Panel buttons that are located on the control panel make it possible to perform a variety of different operations. double-click Pressing a mouse button twice in quick succession while keeping the mouse in place. Often used to open a dialog or enable a function. SEE click. display A visual output device of a computer. resolution The fineness of detail of the output print, expressed in the number of dots per inch (dpi, or dots per inch). Higher resolution produces text and graphics with greater sharpness and fineness of detail, but results in a greater amount of data involved. EtherTalk The AppleTalk protocol supporting Ethernet. It allows Macintosh users to use the Ethernet. Pi4700e 12-25 Appendix A box that appears in order for the user to input information or settings required for the printer to operate. Chapter 12 dialog box Preview Listing 12 font A complete set of characters in a given typeface and style. The size of characters is specified in points (1/72 inches). Typeface is the distinctive design of types, such as gothic, while style is an ornament, such as italic. halftone Gradations of tones expressed by means of varying densities of dots. hard disk drive A device that is contained in a computer and peripheral equipment and used to save data and files. In the printer controller, it is used to save fonts downloaded from the computer. Its data is retained even when the main power is turned OFF. Stores the Scan to HDD data. icon A graphic image on the screen that represents an element. interface A standard that governs the ways for two different systems to exchange information. It specifies the format of data to be transmitted, communications protocols, and physical configurations for connection. Chapter 12 IPX/SPX The communications protocols used by NetWare. landscape (paper orientation) Appendix A horizontal print orientation, in which printing is oriented so that the long edges of a sheet of paper are on top and bottom. local printer The printer that is directly connected to the computer being used. A printer connected to a network is called the remote printer. memory The place in a computer where data can be stored and retrieved. The amount of data stored is expressed in bytes. Memory can either be RAM or ROM. Generally, the data stored in RAM is lost when power is turned OFF, while that in ROM is retained even when power is turned OFF, but cannot be rewritten. Network Interface Card (NIC) An optional card to which network interface can be added, used for connecting a printer to network environment. 12-26 Pi4700e Preview Listing 12 offline The state of the printer controller, in which it does not receive data or execute any processing. online The state of the printer controller, in which it is capable of receiving data and processing jobs. operation system A program or group of programs that control the functions of the computer and its peripheral devices such as the printer. parallel interface A type of standards that govern the ways for two different systems to exchange information, in which multiple bits are transmitted at one time. Because of that, synchronization is necessary, which makes the scheme not right for data transmission over a long distance. The most common parallel interface is Centronics. portrait (paper orientation) A vertical print orientation, in which printing is oriented so that the short edges of a sheet of paper are on top and bottom. PostScript font A scalable outline font standard, widely adopted in the printing industry. By downloading PostScript fonts in a PostScript-compatible printer, it is possible to produce smoother letters than bit-mapped fonts can. PostScript printer software The program that is used on the computer to enable printing on PostScript printers. printer driver Software that enables controlling printer operations. print job A single batch of job for printing specified at one time from an application. It may be directly transmitted to the printer, or temporarily stored in a print queue. Pi4700e 12-27 Appendix A connector through which data is exchanged between a computer and peripheral equipment. The parallel port permits multiple-bit data to be transmitted at one time, commonly used in printers. The serial port is generally used to connect a modem or other device. Chapter 12 port Preview Listing 12 print manager An application that manages the print queue and print files. resolution See dpi. SIMM An acronym for Single In-line Memory Module. TCP/IP The standard data transfer protocol over the Internet. Data is transferred by breaking up data messages into packets, to which IP addresses are attached. TrueType font A soft font standard the system has. TrueType is a font technology that ensures that the printed output is identical to what you see on-screen. It is also scalable, capable of producing characters in varying sizes. gray scale The method of representing color data on a monochrome device by approximating the data with shades of gray (halftone). paper Appendix Chapter 12 The medium on which the printer can print data. Varieties include OHP transparencies, labels, letterhead, and postcards, in addition to plain paper and recycled paper. 12-28 Pi4700e UNIX Configuration 12.6 12 UNIX Configuration Printing is possible with this Network Card by using the LPD/LPR commands, which are general commands in the following UNIX system. For details on creating print data in UNIX, refer to your UNIX system administrator. ✎ G All UNIX systems supporting lpd/lpr G System V Rel.4 (386 Platform) G DEC ULTRIX RISC Versions 4.3, 4.4 G DEC OSF/1 Versions 2.0, 3.0 G Solaris Version 1.1.3 (SunOS 4.1.3) Version 2.3 (SunOS 5.3) Versions 2.4, 2.5 G HP-UX 700, 800 Series Versions 9.01, 10.0 G IBM AIX Version 3.2.5 G SCO UNIX Version 3.2 G AS/400 Either of the two connection configurations described below can be used. Chapter 12 Note Only PostScript or text files can be printed from UNIX. In this configuration, a supplied line printer daemon is run on one or more workstations and print data is sent to the Network Card via a TCP/IP port. Digital Copier Network Card TCP/IP TCP/IP LPD UNIX Pi4700e 12-29 Appendix Host-based lpd UNIX Configuration 12 Printer-based lpd In this configuration, the printer appears as a host running a line printer daemon. Digital Copier UNIX LPD Network Card TCP/IP TCP/IP UNIX UNIX Generally, printer-based lpd is easiest to use on BSD UNIX systems that require an entry in the printcap file once the Network Card has its IP information. Some UNIX System V systems place restrictions on support of remote lpr/lpd printers, requiring that the host-based lpr/lpd approach be used. Appendix Chapter 12 On many UNIX systems, you can choose between host-resident printing or print server-resident printing. The following shows the differences between the two types of printing. Item Host-resident Print server-resident Banner Page • User name and file name are printed on the banner page. • Host name printed on the banner page. lpd Installation • lpd must be installed on every host computer used for printing. • Single installation of lpd when print server is installed. ✎ Note The Network Card also operates with other host-resident print supervisor/spooler programs that provide a print image to the printer over a TCP/IP port. The base TCP/IP port number can be changed using Telnet, MAP, or a Web browser. The actual port is always one higher than the base port number. The status page shows the actual port number. With both the host-based and printer-based lpd, you must assign IP parameters to the Network Card. See “12.7 Setting Up IP Parameters” (p. 12-53) for more information. 12-30 Pi4700e UNIX Configuration 12 Printer-based lpd Configuration lpd/lpr is an implementation of the standard UNIX line printer daemon. It lets you print across a TCP/IP network without needing to install software on your workstation. All filtering and banners are done by the Network Card. Remote printing uses the same commands (lpr, lpq, lpc) as local printing. An lpr request from a workstation references the remote (rm) entry in the /etc/printcap file, where it finds the printer on a remote system. lpr opens a connection with the network lpd/lpr process on the remote system, and sends the data file to the remote printer. The printer-based lpd then filters the data and prints the job in accordance with information contained in the control file and its own printcap file. The Network Card lpd recognizes the format of certain printer emulations and filters the data, if possible, so it can be printed on the printer type you specify. Either of the following two methods can be used to inform the Network Card lpd of what type of printer is connected. 1. Using the default port setting (PCL, PostScript, etc.) Appendix The following sections describe how to give specific lpd/lpr setup instructions for various systems. Chapter 12 2. Using Telnet or the Network Card HTML settings page to change the listed emulation types (Network Card HTML settings page can be accessed using MAP or a Web browser.) Pi4700e 12-31 UNIX Configuration 12 BSD System This section describes how to set up a remote printer on the host that sends jobs to the Network Card using printer resident lpd. This is accomplished by adding an entry to the host’s /etc/printcap file for each printer you use. 1 Use an editor to open /etc/printcap. 2 Make entries that name the Network Card name as the remote host, and assign any name to the remote printer. The following is an example of typical printcap entries. <printer name>:\ (Example: “lprprinter”) :lp=:\ rm=<remote host>:\ (Host name from /etc/hosts) :rp=<remote printer name>:\ (Any name) :sd=/usr/spool/lpd/<printer name>: (Specifies spool directory for where the system can spool data and perform other spool control.) Chapter 12 This entry sends jobs spooled in /usr/spool/lpd/<printer name> to the printer specified by <printer name> for printing by the Network Card specified by <remote host>. 3 Create the spooling directory. mkdir /usr/spool/lpd/<printer name> Appendix 4 Use the lpr command to print something. lpr -P<printer name> <file name> Installation is complete if the file you specify prints correctly. 12-32 Pi4700e UNIX Configuration 12 AIX Version 2.5 This section describes how to set up a remote printer on the host that sends jobs to the Network Card using the Network Card’s lpd. 1 At the prompt, type: #smit spooler 2 On the window that appears, select Manage Remote Printers. 3 On the menu, select Client Services. 4 On the next menu, select Remote Printer Queues. 5 On the next menu, select Add a Remote Queue. 6 Change the values on the window that appears to the settings for the Example Input Data Description Name of queue to add print1 Local printer name queue Destination Host printfast Network Card IP address Short Form Filter /usr/lpd/bsdshort Required value Long Form Filter /usr/lpd/bsdlong Required value Name of remote printer queue PORT1 Network Card queue (You can use any name you want here.) Queue Name of device to add print1 Local queue name 7 After inputting all the values you want, press Enter to complete the configuration. Pi4700e 12-33 Appendix Item Chapter 12 Network Card. The values that first appear on the window are initial defaults. You must replace the short and long form filter values with the values shown below. UNIX Configuration 12 AIX 4.0 Use the following procedure to install a Network Card on an AIX 4.0 system. 1 Run SMIT Printer. 2 Select Print Spooling. 3 Select Add a Print Queue. 4 Select Remote. 5 Use Standard Processing. 6 Assign the queue name. 7 Use the Network Card host address for Remote System. 8 Assign an appropriate name (like PORT1) for the queue on the remote system. 9 Type in a description of the printer. This information is optional. Chapter 12 10 Press Enter to apply what you have input and create the queue. 11 Execute the following command to produce a test print. lp -d<queue name> <file name> Appendix Configuration complete if the test prints without any problems. HP-UX Use the following procedure to set up a remote computer on the host that sends jobs to a Network Card using Network Card lpd. 1 At the prompt, type: sam 2 On the window that appears, select Printer/Plotter Manager. 3 On the menu, select List printer and plotters. 4 On the list that appears, select Actions from the title bar and then select Add Remote Printer on the menu that appears. 12-34 Pi4700e UNIX Configuration 12 5 Type the appropriate Network Card values on the window that appears. The following table shows some sample settings. Item Example Input Data Description Printer Name myprinter Name used in the lp command Remote System Name fastprint Network Card host name recorded in /etc/ hosts Remote printer Name PORT1 lpd queue name (You can use any name you want here.) 6 From the three settings at the bottom of the window, select Remote Printer is on BSD System. 7 Click OK. 8 Ping the Network Card to check the connection. ping <Network Card IP address> When ping causes the message shown below to return, it means the IP address is setup correctly. <Network Card IP address> is alive. When working with the output queue description (WORKOUTQD), you must provide information for a number of fields in order to allow the Network Card to function properly as a remote printer device. 1 When prompted for the remote system, type INTNETADR so the AS/ Chapter 12 AS/400 2 Input an appropriate name (like PORT1) for the remote printer queue name. 3 Connection type must be IP. 4 Internet address must be the Network Card IP address. 5 Destination Type must be OTHER. 6 In response to the message asking if you want to convert SCS to ASCII, type YES. This tells the AS/400 system to convert text. 7 For Manufacturer type and model, specify the printer driver that comes with the printer controller. Pi4700e 12-35 Appendix 400 system recognizes the device as an IP device. UNIX Configuration 12 DEC ULTRIX 4.3 RISC, OSF1/ALPHA Use the following procedure to set up a remote printer on the host that sends jobs to a Network Card. 1 At the prompt, type: lprsetup 2 Select add. 3 Type a printer name and then press Enter . 4 When the following message appears, press Enter . “Do you want more information on specific printer types?” 5 This displays a list of printers supported by ULTRIX. Type the following: remote Enter 6 Type the printer synonym (alias) and then press Enter . 7 Specify the spooler directory and then press Chapter 12 Enter . If you want to use the default spooler directory shown on the screen, press Enter without inputting anything. 8 Specify the remote system name and then press Enter . 9 Type an appropriate name (like PORT1) for the remote system printer, and then press Enter . Appendix 10 From the list that appears on the display, select the printcap symbol name. Next, type the following. Q Enter 11 This displays the configuration. If it is correct, type Y. If something is wrong, type N. The following table shows some sample settings. Item 12-36 Type Input Data Description lp (line printer) STR rm (remote host) STR Network Card host name rp (remote printer) STR PORT1 (You can use any name you want here.) sd (spooler directory) STR /usr/spool/lpd7 Pi4700e UNIX Configuration 12 12 Add any comments you want to the printcap file. For example, you could type something like the following. Dick’s printer is down the hall. 13 Select exit to save your settings and then press Enter to complete the procedure. SCO UNIX Use the following procedure to set up a remote printer on the host that sends jobs to a Network Card using lpd. 1 At the prompt, type: mkdev rlp ✎ Note You cannot run mkdev rlp twice. To add another printer, use the rlpconf command. 2 Type the responses shown below for the questions that appear. Chapter 12 Do you want to install or remove a remote printer? Type: I 3 Do you want to change printer description file /etc/printcap? Type: Y 4 Write a printer name. Appendix Type the name of the printer. Example: lprprinter1 5 Is lprprinter1 a remote printer or a local printer? Type: R 6 Enter remote host name. Type the Network Card host name recorded in the printcap file. Example: lprprinter 7 Confirm the information you have entered. Type: Y 8 Confirm the preceding connection as your system default. Type: Y Pi4700e 12-37 UNIX Configuration 12 9 Enter another printer name or quit setup. Type: Q 10 Do you want to start the remote daemon now? Type: Y 11 Use a line editor to open the /etc/printcap file and replace the :rp= entry with the appropriate remote queue name. The following shows an example of how this is done when the remote port is named PORT1. printer1:\ :lp=:\ (This field is used for specification of the local printer device name. This field must be left empty.) :rm=lprpriter:\ (Network Card host name recorded in /etc/hosts) :rp=PORT1:\ (Any remote queue name you want) :sd=/usr/spool/lpd/printer1: (Name of spool directory on client) System V Release 4, Solaris 2.x Chapter 12 You can use lpd/lpr if your system recognizes the LPSYSTEM command is available. Settings can also be made using admintool if the system supports it. LPSYSTEM Installation ✎ Appendix Note The following procedure must be performed from the Bourne Shell. 1 At the prompt, type: lpsystem -t bsd <Network Card host name recorded in /etc/hosts> Some systems require input of the remote host IP address instead of the remote host name. 2 Type the following command: lpadmin -p <local printer name> -s <Network Card host name>!<remote queue name> 12-38 Pi4700e UNIX Configuration 12 ✎ Note Do not input a space after the remote host name. Enable <local printer name> Accept <local printer name> Linux With Red Hat Print System Manager, you can configure the printer on a graphical setup screen. See Configuring the Printer Using the printtool Command for more information. If your system does not have Red Hat Print System Manager installed, you can configure the printer by editing the contents of the /etc/printcap file. See Configuring the Printer by Editing the printcap File for more information. Configuring the Printer Using the printtool Command 1 Start x terminal. 2 At the command prompt, enter the printtool command. This causes Chapter 12 the Red Hat Print System Manager window to appear. 3 Click the Add button. This causes the Add Printer Entry window to appear. This causes the Edit Remote Unix Queue Entry window to appear. 5 Specify the printer name. 6 Select or add the spool directory (typically, /usr/spool/lpd/<printer name>) 7 In the Remote Host field, specify the IP address of the Print Server Card. 8 In the Remote Queue field, specify PORT1. 9 Optionally, specify an input filter. 10 When you finish, click OK. Pi4700e 12-39 Appendix 4 Choose Remote Unix (lpd) Queue and click OK. UNIX Configuration 12 11 Restart the daemon by choosing lpd → Restart lpd in the Print Server Manager. Configuring the Printer by Editing the printcap File 1 Use an editor to open /etc/printcap. 2 Make entries that name the Network Card name as the remote host, and assign any name to the remote printer. The following is an example of typical printcap entries. <printer name>:\ (Example: “lprprinter”) :lp=:\ :rm=<remote host>:\ (Host name from /etc/hosts) :rp=<remote printer name>:\ (Any name) :sd=/usr/spool/lpd/<printer name>: (Specifies spool directory for where the system can spool data and perform other spool control.) Chapter 12 3 Create the spooling directory. Appendix This entry sends jobs spooled in /usr/spool/lpd/<printer name> to the printer specified by <printer name> for printing by the Network Card specified by <remote host>. 5 Use the lpr command to print something. mkdir /usr/spool/lpd/<printer name> 4 Shut down and restart the lpd daemon. lpr -P<printer name> <file name> Installation is complete if the file you specify prints correctly. 12-40 Pi4700e UNIX Configuration 12 Host-based lpd Configuration You need the CD-ROM that comes bundled with the printer controller to use host-based lpd. It contains install scripts for various types of UNIX. This section describes how to install TCP/IP printing to the Network Card on any of the operating systems listed below. G DEC ULTRIX 4.3 RISC G System V Release 4 G Solaris (Version 1.x, 2.x) G SCO UNIX G OSF1/ALPHA G IBM/AIX G HP-UX Once the Network Card has its IP parameters loaded, you must perform the following steps to enable host-based TCP/IP printing. 1 Load the print server software on your workstation. This software is provided as a tar file in the TCP/IP directory. 2 Run the appropriate installation script, if one is available. The following procedures are necessary only when using the supplied host-based lpr. You do not need to load the software if you are using printer-based lpr. 1 Log in as superuser to the system that spools directly to the print server. 2 Load the CD-ROM that comes with the printer controller into the CDROM drive of the computer you want to use. 3 Create a program installation directory and copy the program to it. For example, type the following. mkdir /usr/MLT_install ✎ Note If you already have a Network Card printer at your site and you are now installing another one, delete the files in the installation directory (not /usr/nic). If these files remain, they can prevent the installation of a subsequent print server. Pi4700e 12-41 Appendix Loading the Program Chapter 12 3 Complete the configuration of your operating system. UNIX Configuration 12 4 Use the tar command to load the software from the CD-ROM. At this time the system displays a list of Network Card files copied by tar. 5 Run the installation script for your system in accordance with appropriate procedure below. Selecting Filters There are a number of options available when executing the script for each type of system. When you run an installation script, it first asks if the printer is a PostScript printer. If you reply no to this question, the install script uses an input filter (infilter) that performs CR/LF translation for printing of ASCII files on a PCL printer. If you reply yes, the printcap file references psfilter, which provides easy ASCII-to-PostScript conversion. Normal PostScript format files are not affected. Proprietary and public domain filters are also available for more versatile filtering capabilities. Selecting a Filter Manually Chapter 12 The Network Card comes with an input filter named psfilter, and an output filter named psbanner for printing of PostScript banners. To use these filters, you must change the infilter (:if=) and outfilter (:of=) entries in /etc/ printcap. The following shows an example of how this is done. <printer name> | Print Server Card printer:\ :lp=/dev/nic/<printer name>:\ :if=/usr/nic/psfilter:\ Appendix :of=/usr/nic/psbanner:\ :sd=/usr/spool/<printer name>: Solaris Version 1, OSF1 1 Type the following to run the installation script: nicinst The script automatically downloads the appropriate Network Card utilities for your system and displays questions to prompt you for the information it needs. 2 What is the node name of the Print Server Unit? Input the host name recorded in /etc/hosts. For example, type printfast and then press Enter . 12-42 Pi4700e UNIX Configuration 12 3 What is the printer name? Type the printer name and press Enter . 4 Here, the script displays the information you have input up to this point. Node name of the Print Server Card: printfast Printer name to be used: <printer name> The printer is attached on: PORT 1 Check these settings and make sure they are correct. If they are correct, type yes and press Enter . Otherwise, type no and press Enter . 5 Is this printer PostScript? Type yes and press Enter if the printer is a PostScript printer. Otherwise type no and press Enter . <printer name> | Print Server Card printer:\ :lp=/dev/<printer name>:\ :if=/usr/nic/infilter:\ :sd=/usr/spool/<printer name>: * All printcap entries start with a tab except for the first. 7 The script creates a spool directory in /usr/spool and starts a daemon for the newly configured printer. At this time, the script displays the path you should use if you ever need to restart the daemon. Example: /usr/nic/lpr_print /dev/nic/<printer name> printfast 10001 & 8 Run the ps command to view all your lpd/lpr processes. ps -ax | grep lpd Pi4700e 12-43 Appendix play and the script confirms whether you want the entries written into the /etc/printcap file. Type yes if you want the entries added to printcap and then press Enter . If you do not want them added, type no, press Enter and then manually make the required changes to the entries. Do not change the device name in the /etc/printcap file, which was given to the Network Card in step 3. The lp command line must reference the :lp entry recorded in the printcap file. The following shows an example entry. Chapter 12 6 The printcap entries you have made up to this point appear on the dis- UNIX Configuration 12 9 Next, input the following to kill all your lpd/lpr processes. kill -9 <Process ID> This stops all printing. 10 Next, type the following to restart the daemon. /usr/lib/lpd 11 This completes installation. In response to the message about whether you want to install another printer, input yes or no and then press Enter . Ping the Network Card to test communication. DEC ULTRIX 4.3 1 Type the following to run the installation script: nicinst The script automatically downloads the appropriate Network Card utilities for your system and displays questions to prompt you for the information it needs. 2 What is the node name of the Print Server Unit? Chapter 12 Input the host name recorded in /etc/hosts. For example, type printfast and then press Enter . 3 What is the printer name? Type the printer name and press Enter . Appendix 4 Here, the script displays the information you have input up to this point. Node name of the Print Server Card: printfast Printer name to be used: <printer name> The printer is attached on: PORT 1 Check these settings and make sure they are correct. If they are correct, type yes and press Enter . Otherwise, type no and press Enter . 5 Is this printer PostScript? Type yes and press Enter if the printer is a PostScript printer. Otherwise type no and press Enter . 12-44 Pi4700e UNIX Configuration 12 6 The printcap entries you have made up to this point appear on the display and the script confirms whether you want the entries written into the /etc/printcap file. Type yes if you want the entries added to printcap and then press Enter . If you do not want them added, type no, press Enter and then manually make the required changes to the entries. <printer name> | Print Server Card printer:\ :lp=/dev/<printer name>:\ :if=/usr/nic/infilter:\ :sd=/usr/spool/<printer name>: 7 This completes the installation. In response to the message about whether you want to install another printer, input yes or no and then press Enter . Like all BSD systems, ULTRIX uses the /etc/printcap file to configure a printer. The interface to the installation script is the same for all BSD systems, but the printcap entry is different. HP-UX System 1 Type the following command to run the installation script. The script automatically downloads the appropriate Network Card utilities for your system and displays questions to prompt you for the information it needs. 2 What is the node name of the Print Server Unit? Appendix Type the host name recorded in /etc/hosts. For example, type printfast and then press Enter . 3 What is the printer name? Type the printer name and press Enter . 4 Here, the script displays the information you have input up to this point. Node name of the Print Server Card: printfast Printer name to be used: <printer name> The printer is attached on: PORT 1 Check these settings and make sure they are correct. If they are correct, type yes and press Enter . Otherwise, type no and press Enter . Pi4700e Chapter 12 nicinst 12-45 UNIX Configuration 12 5 The script automatically starts the daemon for the newly configured printer. At this time, the script displays the path you should use if you ever need to restart the daemon. Example: /usr/nic/lpr_print /dev/nic/<printer name> printfast 10001 & The above example reflects the name supplied to the script earlier. After the installation script is complete, you must then configure the printer and make it known to the lp system. The HP-UX lp system uses the lpadmin command used to configure a printer. There is no /etc/printcap file. The following are the commands used for printer configuration. lpadmin -p <printer name> -v /dev/nic/<printer name> enable <printer name> accept <printer name> You can also use other options in the lpadmin command. See your system documentation for details. ✎ Chapter 12 Note The printer name must be the same as the one you specified during Network Card installation. HP also provides the sam program, which can be used to configure the printer. If you use sam, make all specifications just as if the printer were connected directly to /dev/lprinter/<printer name>. Appendix The software installed with your HP system should be sufficient to satisfy most printing needs. HP supplies ASCII-to-PostScript filters that are invoked automatically whenever PostScript is specified as the content type. The HP-UX lp system also supplies interface scripts that generate PostScript banners. When necessary, you can use the lpfilter command to define new filters and content types. The installation provides you with the full power and flexibility of the lp print service, and the fact that you are printing across the network is totally transparent. 12-46 Pi4700e UNIX Configuration 12 System V (Solaris Version 2), System V Release 4/386 Base Machine System V Solaris and SVR4 i386 base machines use a network direct filter called nicfilter. The system invokes nicfilter directly from the printer interface file. To load the software, create a /usr/nic directory and then tar the TCP/IP software into it. 1 Type the following to navigate to the /usr/nic directory. cd /usr/nic 2 Next, type the following command to run the installation script: nicsinst Once the operating system is identified, the script downloads the applicable files to the /usr/nic directory and displays questions to prompt you for the information it needs. 3 Type: cd /usr/spool/lp/model/standard/usr/nic/ port1_interface Note The default interface is generally sufficient for most PostScript, PCL, and ASCII files. To use a printer-specific interface other than the default interface script (named standard), you must have a copy of that printer interface edited and installed in the /usr/nic directory. Chapter 12 ✎ 4 Next you must edit the printer interface program you created in step 3. Appendix Type: cd /usr/nic 5 Use a text editor to open and edit the port1_interface file. 6 Search for the expression FILTER=0, and insert the following line above or below the section #FILTER-0${LPCAT}. FILTER=“/usr/nic/infilter | /usr/nic/<nicfilter print server name> 10001” Pi4700e 12-47 UNIX Configuration 12 ✎ Note <print serve name> must be the same as the one recorded in /etc/ hosts. Optional arguments inserted between the 10001 entry and before the trailing 0 are ${banner}, ${user_name}, ${request_ID}, and ${files}. For details, see the System V Release 4 System Administration Manual. 7 Save the file and quit the editor. 8 You need to use lpadmin to configure the host printer. Type the following: lpadmin -p <printer name> -v /dev/null -i /usr/nic/port1_interface ✎ Note lpadmin configures the printer name and associates it with a given device and printer interface program. There is no /etc/printcap file involved with this method of configuration. 9 Next, initialize the printer. Type the following commands: Chapter 12 accept <printer name> enable <printer name> Enter Enter ✎ Appendix Note After each entry, lpadmin acknowledges the invoked command. 10 Next, type the following command: lp -d<printer name> /etc/hosts Enter 11 Check for output or type the following: lpstat <printer name> Or: lpstat -t 12-48 Pi4700e UNIX Configuration 12 SCO UNIX The installation procedure for SCO UNIX is similar to that for HP-UX. The Network Card solution uses a network direct filter named nicfilter. The system invokes nicfilter directly from the printer interface file. After performing the procedure under Loading the Program, you must configure the printer and make it known to the lp system. 1 Type the following to run the installation script: nicinst The script automatically downloads the appropriate Network Card utilities for your system and displays questions to prompt you for the information it needs. 2 Select your system you are using from the list of options that appears and then press Enter . 1) AT&T/SVR4; 386 2) SCO UNIX System V 3) None of the above 3 What is the node name of the Network Card? 4 What is the printer name for this Network Card-linked printer? Type the printer name and press Enter . 5 Here, the script displays the information you have input up to this point. Node name of the Printer Server Card: printfast Printer name to be used: <printer name> The printer is attached on: PORT 1 Check these settings and make sure they are correct. If they are correct, type yes and press Enter . Otherwise, type no and press Enter . 6 Is this printer PostScript? Type yes and press Enter if the printer is a PostScript printer. Otherwise type no and press Enter . Pi4700e 12-49 Chapter 12 . For Enter Appendix Input the host name recorded in /etc/hosts and then press example, type printfast. UNIX Configuration 12 7 The script automatically starts the daemon for the newly configured printer. At this time, the script displays the path you should use if you ever need to restart the daemon. /usr/nic/lpr_print /dev/nic/<printer name> printfast 10001 & The above example reflects the name supplied to the script earlier. After the installation script is complete, you must configure the printer and make it known to the lp system. The SCO UNIX lp system uses the lpadmin command used to configure a printer. There is no /etc/printcap file. The following are the commands used for printer configuration. lpadmin -p <printer name> -v /dev/nic/<printer name> ✎ Note Your host may require you to use the -i command to specify the model. enable <printer name> accept <printer name> You can use other options in the lpadmin command. See your system documentation for full details. Chapter 12 ✎ Appendix Note The printer name must be the same as the one you specified during Network Card installation. SCO also provides the sam program, which can be used to configure the printer. If you use sam, make all specifications just as if the printer were connected directly to /dev/lprinter/<printer name>. The software installed with your SCO system should be sufficient to satisfy most printing needs. SCO supplies ASCII-to-PostScript filters that are invoked automatically whenever PostScript is specified as the content type. The SCO UNIX lp system also supplies interface scripts that generate PostScript banners. When necessary, you can use the lpfilter command to define new filters and content types. The installation provides you with the full power and flexibility of the lp print service, and the fact that you are printing across the network is totally transparent. 12-50 Pi4700e UNIX Configuration 12 AIX RISC System/6000 The AIX printing subsystem is driven by the qdaemon program, which uses data in the /usr/lpd/qconfig file to manage queues and route jobs to the proper devices. This information includes entries for each physical virtual printer and physical device known to the system. Simply stated, an AIX virtual printer is a high-level software view of a data stream, queue, and device that controls how a given job is to be processed. A different virtual printer should be defined for each data stream that is supported by a real printer. Even when PostScript and PCL jobs are destined for the same printer, for example, each job uses a different virtual printer. Configuring a Network Card printer on an AIX system approximates configuration of a local printer as nearly as possible. The one point where it differs is that the physical device only difference is that the physical device associated with the Network Card printer must be a named pipe used by the print daemon to route data to the Network Card. The following shows the most straightforward way to add a printer to the system. 1 Type the following to run the installation script: nicinst Input the host name recorded in /etc/hosts. For example, type printfast and then press Enter . 3 What is the printer name? Enter . 4 Here, the script displays the information you have input up to this point. The following shows example information. Node name of the Print Server Card: printfast Printer name to be used: <printer name> The printer is attached on: PORT 1 Check these settings and make sure they are correct. If they are correct, type yes and press Enter . Otherwise, type no and press Enter . 5 Configure a virtual printer using <printer name> as the physical device. For <printer name>, use the same printer name that you specified when installing the printer. 6 Use the following command to shut down qdaemon. stopsrc -s qdaemon Pi4700e 12-51 Appendix Type the printer name and press Chapter 12 2 What is the node name of the Print Server Unit? UNIX Configuration 12 7 Edit /usr/lpd/qconfig to change the special file for device printername from /dev/<printer name> to /dev/nic/<printer name>. 8 Use the following command to restart the daemon. startsrc -s daemon After this, the installation script creates a named pipe and starts up a print daemon based on the printer name and Network Card information you supplied. The AIX System Management Interface Tool (SMIT) does not accept the named pipe as a printer device, so the install script also creates a null character device in /dev/<printer name>. Virtual Printer Commands Virtual printers can be added using SMIT or by using the mkvirprt command. The device name printer name is entered for confirmation purposes. During this process, you also select a particular printer type for the new printer, which inherits the set of predefined attributes for that printer type. The set of attributes is sufficient for most cases, but settings can be changed using SMIT or the chvirprt command. See the AIX RISC System/ 6000 documentation in cases where a printer requires even more extensive settings. Chapter 12 After adding a virtual printer, a stanza that looks like the following will be in /usr/opf/qconfig for device printer name. <printer name>: file=/dev/<printer name> backend=/usr/lpd/piobe Appendix Edit file=/dev/<printer name> to file=/dev/nic/<printer name>. Output spooled on the previously specified virtual printer is sent to the named pipe, and routed to the Network Card. Before editing the files named above, make sure the following daemon is running. /usr/nic/lpr_print /dev/nic/<printer name> printfast 10001 & AIX Print Command The AIX lp command works slightly differently from other System V Release 4 lp commands. The following lp commands can be used to print files. lp -d<queue name> <file name> Or: lp -d<queue name>:<device name> <file name> 12-52 Pi4700e Setting Up IP Parameters 12.7 12 Setting Up IP Parameters Before you can use TCP/IP for network printing, you must first assign the following IP parameters to the Network Card: IP address, subnet mask, default gateway. You can use any of the following methods for assigning IP parameters to the Network Card. Bundled Utility Programs G Management Access Program (MAP) (Windows) or a Web browser See “8.7 Using the utility software” Note that your computer must have IPX/SPX conversion protocol installed in able to use MAP. G BOOTP (Windows) See “8.7 Using the utility software”. ARP command (Windows) See “Assigning IP Addresses Using ARP (For Windows)”. G ARP command (UNIX) See “Assigning IP Addresses Using ARP (For UNIX)”. G BOOTP daemon (UNIX) See “Assigning IP Addresses Using the BOOTP Daemon (For UNIX)”. G RARP daemon (UNIX) See “Assigning IP Addresses Using the RARP Daemon (For UNIX)”. G DHCP daemon (UNIX) See “Using the DHCP Daemon (For UNIX)”. ✎ Note If you start up the Digital Copier with its initial factory default setup without assigning a Digital Copier IP address, ATIP (Automatic Temporary IP Address) automatically assigns an IP address and subnet mask. You can use IP address assigned by ATIP to detect the Digital Copier with the MAP utility. To change the current IP address and subnet mask setting, first access the Digital Copier’s Web setup page from MAP, and then make the changes you want. Pi4700e 12-53 Appendix G Chapter 12 Other Methods Setting Up IP Parameters 12 Assigning IP Addresses Using ARP (For Windows) 1 On a computer associated with the same network segment as the Digital Copier, click Start, point to Programs, and then click MS-DOS Prompt (Command Prompt). 2 Type the command shown below. arp -s <IP address assigned to Network Card> <MAC address> Example: Network Card MAC Address: 00:20:6b:aa:bb:cc IP Address: 192.9.200.200 arp -s 192.9.200.200 00-20-6b-aa-bb-cc This stores the MAC address and IP address data in the cache. 3 Next, type the command shown below. ping <IP address assigned to Network Card> Example: IP address assigned to Network Card: 192.9.200.200 ping 192.9.200.200 Chapter 12 This command sends the IP address to the Network Card. A timeout message is returned until the Network Card recognizes this IP address and restarts. 4 The Network Card waits for auto reset. Otherwise, restart the Digital Copier. Appendix 5 After the Network Card restarts, type the command from step 3 again. ping <IP address assigned to Network Card> Example: IP Address: 192.9.200.200 ping 192.9.200.200 Repeat step 5 until a response is returned. IP address assignment is complete when a response is returned. 12-54 Pi4700e Setting Up IP Parameters 12 ✎ Note ARP can be used to assign an IP address only. Other IP parameters must be set using Telnet or a Web browser. For details, see “12.8 Using Telnet to Make Settings” (p. 12-61) and PageScope Light for Pi5501 Operator’s Manual. There are problems with the ARP command in earlier versions of Windows 95, so the command may not function properly if the ARP entry is blank. To check for and prevent such problems, enter the following at the MS-DOS prompt. arp -a If the ARP entry is blank, ping another valid device on the network as shown below. ping <valid IP address for device other than the Network Card> Next, perform the above procedure starting from step 2. Appendix Chapter 12 You cannot use ARP to assign an IP address if the Network Card has already been assigned an IP address by ATIP. Pi4700e 12-55 Setting Up IP Parameters 12 Assigning IP Addresses Using ARP (For UNIX) 1 On a computer associated with the same network segment as the Digital Copier, log on as root. 2 Type the command shown below. arp -s <IP address assigned to Network Card> <MAC address> Example: Network Card MAC Address: 00:20:6b:aa:bb:cc IP Address: 192.9.200.200 arp -s 192.9.200.200 00:20:6b:aa:bb:cc This stores the MAC address and IP address data in the cache. 3 Next, type the command shown below. ping <IP address assigned to Network Card> Example: IP address assigned to Network Card: 192.9.200.200 ping 192.9.200.200 Chapter 12 This command sends the IP address to the Network Card. A timeout message is returned until the Network Card recognizes this IP address and restarts. 4 The Network Card waits for auto reset. Otherwise, restart the Digital Copier. 5 After the Network Card restarts, input the command from step 3 again. Appendix ping <IP address assigned to Network Card> Example: IP Address: 192.9.200.200 ping 192.9.200.200 The following response is returned when the IP address is assigned. 192.9.200.200 is alive 6 When assignment is complete, type the command below to delete the arp cache entry. arp -d <IP address assigned to Network Card> Example: IP Address Assigned to Network Card: 192.9.200.200 arp -d 192.9.200.200 12-56 Pi4700e Setting Up IP Parameters 12 ✎ Note When the Network Card host name is already registered in the hosts file (/etc/hosts), you can use the host name in place of the IP address. Example: When the entry below is registered in the hosts file. 192.9.200.299 printfast arp -s printfast 00:20:6b:aa:bb:cc ✎ Note ARP can be used to assign an IP address only. Other IP parameters must be set using Telnet or a Web browser. For details, see “12.8 Using Telnet to Make Settings” (p. 12-61) and PageScope Light for Pi5501 Operator’s Manual. Assigning IP Addresses Using the BOOTP Daemon (For UNIX) 1 Power down the Digital Copier. 2 On a computer associated with the same network segment as the Dig- Chapter 12 You cannot use ARP to assign an IP address if the Network Card has already been assigned an IP address by ATIP. Appendix ital Copier, log on as root. 3 If the BOOTP daemon is already running, stop it. 4 Edit /etc/bootptab by adding the following. <NIC host name>:\ :ht = <hardware type>:\ :ha = <ethernet Address>:\ :ip = <IP address>:\ :sm = <subnet mask>:\ :gw = <gateway address>: Example: RFC 1048 Standard MAC Address: 00:20:6B:AA:BB:CC IP Address: 192.19.200.200 Subnet Mask: 255.255.255.0 Gateway Address: 192.9.200.10 Pi4700e 12-57 Setting Up IP Parameters 12 printfast:\ :ht = ether:\ :ha = 00206BAABBCC:\ :ip = 192.9.200.200:\ :sm = 255.255.255.0:\ :gw = 192.9.200.254: Under SCO UNIX, add the following line to activate the BOOTP daemon :vm = rfc1048: 5 Start up the BOOTP daemon. bootpd -s 6 Power up the Digital Copier. The Digital Copier initializes, recognizes the IP address, and stores it in non-volatile memory. 7 After the Digital Copier is fully started, power it down again. 8 Power up the Digital Copier again, and use the following command to ping the Network Card. ping <IP address assigned to Network Card> Chapter 12 Example: IP Address: 192.9.200.200 ping 192.9.200.200 Appendix The following response is returned when the IP address is assigned. 192.9.200.200 is alive 9 After assignment is complete, delete the lines you added to /etc/bootptasb. You can also stop the BOOTP daemon. ✎ Note When the Network Card host name is already registered in the hosts file (/etc/hosts), you can use the host name in place of the IP address. You cannot use BOOTP to assign an IP address if the Network Card has already been assigned an IP address by ATIP. 12-58 Pi4700e Setting Up IP Parameters 12 Assigning IP Addresses Using the RARP Daemon (For UNIX) 1 Power down the Digital Copier. 2 On a computer associated with the same network segment as the Digital Copier, log on as root. 3 Edit /etc/ethers by adding the Network Card MAC address and the IP address you want to assign. Example: MAC Address: 00:20:6B:AA:BB:CC IP Address: 192.19.200.200 00:20:6B:AA:BB:CC 192.19.200.200 4 If the RARP daemon is already running, stop it. 5 Power up the Digital Copier. The Digital Copier initializes, recognizes the IP address, and stores it in non-volatile memory. 6 After the Digital Copier is fully started, power it down again. 7 Power the Digital Copier back up, and use the following command to Example: IP Address: 192.9.200.200 ping 192.9.200.200 The following response is returned when the IP address is assigned properly. 192.9.200.200 is alive 8 After assignment is complete, delete the lines you added to /etc/ethers. You can also stop the RARP daemon. ✎ Note When the Network Card host name is already registered in the hosts file (/etc/hosts), you can use the host name in place of the IP address. RARP can be used to assign an IP address only. Other IP parameters must be set using Telnet or a Web browser. For details, see “12.8 Using Telnet to Make Settings” (p. 12-61) and PageScope Light for Pi5501 Operator’s Manual. Pi4700e 12-59 Appendix Chapter 12 ping the Network Card. ping <IP address assigned to Network Card> Setting Up IP Parameters 12 You cannot use RARP to assign an IP address if the Network Card has already been assigned an IP address by ATIP. Using the DHCP Daemon (For UNIX) Under DHCP (Dynamic Host Configuration Protocol), the server automatically provides IP addresses to clients. It is very similar to BOOTP. Appendix Chapter 12 This Network Card has an onboard DHCP client. If there is a DHCP server on the network, the DHCP client automatically obtains IP parameters from the server at power up. See PageScope Light for Pi5501 Operator’s Manual for more information. 12-60 Pi4700e Using Telnet to Make Settings 12.8 12 Using Telnet to Make Settings In addition to the MAP and Web browser combination for making settings, this Network Card also supports use of Telnet for setting up the environment. Network Card settings can be make from a Telnet client platform. The following settings can be made over a Telnet connection. G IP parameter changes G LPD settings G Protocol changes G Unit reset G Factory setting restore G Password changes ✎ Note The Network Card must be assigned a valid IP address before you can use a Telnet connection to make settings. Also, the computer you are using for the Telnet connection must have TCP/IP enabled, and must be able to operate as a Telnet client. See “12.7 Setting Up IP Parameters” (p. 12-53) for more information about assigning IP parameters to the Network Card. Chapter 12 Establishing a Telnet Connection 1 Start up the Telnet client. 2 Specify the IP address of the Network Card and connect. ID Password To check settings: guest guest To change settings: sysadm sysadm Appendix 3 At the login: prompt, use one of the ID’s shown below to log in. 4 This displays the Main Menu shown below. The Configuration Utility Unit Serial no. 460121 V5.04 Main Menu 1. IP Parameters 2. LPD Printers 3. Protocols 4. Reset Unit 5. Restore Factory Defaults Pi4700e 12-61 Using Telnet to Make Settings 12 6. Change Password E. Exit 5 Input the number of the menu item you want check, set, or change, and then press Enter . Menu Items IP Parameters Select this menu item to change the Network Card IP address, subnet mask, default gateway, and base port number. Whenever the Network Card detects that IP parameters have been changed, it automatically starts a soft reset. ✎ Note The base port number is a number that is one less than the actual TCP/IP port number used by the printer. To set a port number of 10001, for example, you would specify 10000 as the base port number. Chapter 12 LPD Printers Appendix The Telnet connection is cut when a soft reset is performed. Because of this, you should make other settings first and leave IP parameter settings until later. Protocols Select this menu item to specify the emulation (printer interpreter language) supported by the printer. Changing this setting lets you make changes so lpd can print for other emulations. Select this menu item to specify the emulation (printer interpreter language) supported by the printer. You can also disable NetWare or AppleTalk. Reset Unit Select this menu item to reset the Network Card. Note that resetting the Network Card initializes the network interface without effecting the printer interface. 12-62 Pi4700e Using Telnet to Make Settings 12 Restore Factory Defaults Select this menu item to restore the Network Card to its initial factory defaults. All of the parameters stored in NVRAM are restored to their initial factory defaults. ✎ Note Initial factory default values do not take effect until you finish the Telnet session or power the Network Card down and then power it up again. Change Password Select this menu item to change the password used for Telnet connection and access to the HTTP server. In response to the New Password prompt, type in up to eight characters for the new password and then press Enter . In response to the Retype New Password prompt, input the new password again for confirmation, and then press Enter . ✎ Exiting Telnet (Exit) Inputting E while at Main Menu after changing settings causes the menu shown below to appear. Appendix The Configuration Utility Unit Serial no. 460121 V5.04 Exit 1. Save Changes and Exit 2. Save Changes and Reset 3. Exit Without Saving Changes Select 1 to save your changes without applying them. Select 2 to save your changes and reset the Network Card, which applies the changes. Select 3 to discard your changes. Pi4700e Chapter 12 Note The password you specify here is used for both Telnet and Web page access. Changing the password using one type of access (Telnet or a Web browser) also changes the password for the other type of access. 12-63 FTP Printing 12 12.9 FTP Printing Use the following procedure for using FTP (File Transfer Protocol) to print. 1 Start up the FTP client and look into the Network Card using the following setting. Host Name:<NIC IP address> Login Name:port1 Password:port1 2 Upload (PUT) the file you want to print. 3 The printer prints the uploaded (PUT) file. ✎ Note FTP Printing does not support selecting multiple file names. Appendix Chapter 12 Only one person can be logged on to a port at any particular time. 12-64 Pi4700e Index A AIX ....................................................................................... 12-29, 12-41 AIX 4.0 .......................................................................................12-34 AIX RISC System/6000 ..............................................................12-51 AIX Version 2.5 ..........................................................................12-33 ARP ..................................................................................... 12-54, 12-56 Entry ...........................................................................................12-55 AS/400 ................................................................................. 12-29, 12-35 B Booklet printing ..................................................................................7-12 BOOTP .................................................................................. 8-32, 12-57 Bourne Shell ....................................................................................12-38 BSD UNIX ............................................................................ 12-30, 12-32 C Collate .................................................................................................7-4 Conflicts dialog box ................................................................. 4-36, 5-35 Controller .............................................................................................1-6 connecting ......................................................................................1-7 Copy track .........................................................................................7-16 Cover page ........................................................................................7-20 D DEC OSF .........................................................................................12-29 Host-based lpd ...........................................................................12-41 Printer-based lpd ........................................................................12-36 DEC ULTRIX ...................................................................................12-29 Host-based lpd ............................................................... 12-41, 12-44 Printer-based lpd ........................................................................12-36 Default gateway ...............................................................................12-53 Address ......................................................................................12-57 Telnet .........................................................................................12-62 Device Options Setting tab ........................................................ 4-2, 5-19 Pi4700e 13-1 Index 13 Chapter 13 13 Chapter 13 13 DHCP .............................................................................................. 12-60 Distribution number ........................................................................... 7-14 Duplex printing .................................................................................... 7-2 Index Dynamic Host Configuration Protocol See DHCP ........................... 12-60 E Easy set ............................................................................................ 7-29 E-mail destinations ............................................................................ 9-12 Enlarging ............................................................................................. 7-8 Error list ............................................................................................. 11-6 F Factory default Telnet ........................................................................................ 12-63 Features of the controller .................................................................... 1-1 File destinations ................................................................................ 9-21 configuring ................................................................................... 9-22 new registration ..................................................................9-24, 9-28 Filter ................................................................................................ 12-42 Folding function ................................................................................. 7-27 Function combination matrix Linux ............................................................................................ 12-7 Macintosh .................................................................................... 12-4 Windows ...................................................................................... 12-1 G Gateway address ............................................................................ 12-57 Glossary .......................................................................................... 12-25 H Hard disk drive .................................................................................... 1-6 HDD .................................................................................................... 9-4 HDD configuration ............................................................................... 9-9 hosts ....................................................................................12-57, 12-59 How to input characters .................................................................... 9-40 HP-UX ............................................................................................. 12-29 Host-based lpd ...............................................................12-41, 12-45 Printer-based lpd ....................................................................... 12-34 13-2 Pi4700e Password ...................................................................................12-63 I infilter ...............................................................................................12-42 Installing the printer driver ...................................................................2-1 Linux ..............................................................................................5-2 Mac OS X .......................................................................................6-9 Macintosh OS 7/8/9 .......................................................................6-1 Windows 2000/XP ..........................................................................2-9 Windows 95/98/Me ........................................................................2-2 Windows NT 4.0 ...........................................................................2-16 Interpreter Language ...................................................................................12-62 IP Address specifying from the touch panel .....................................................3-2 IP address .......................................................................................12-53 ARP ................................................................................ 12-54, 12-56 BOOTP ......................................................................................12-57 DHCP .........................................................................................12-60 RARP .........................................................................................12-59 Telnet ............................................................................. 12-61, 12-62 IPP printing ........................................................................................3-21 IPX Peer-to-Peer Printing Program ...................................................3-14 J Job list ...............................................................................................7-34 Job Management tab ............................................................... 4-24, 5-33 L LDAP setting ......................................................................................9-10 Line printer daemon See lpd ...........................................................12-29 Linux ................................................................................................12-39 Lock job function ................................................................................7-22 Log in ...............................................................................................12-61 lpd ........................................................................................ 12-29, 12-31 Host-based lpd ............................................................... 12-29, 12-41 LPD emulation ...........................................................................12-62 Printer-based lpd ........................................................................12-30 lpr ......................................................................................... 12-29, 12-31 Pi4700e 13-3 Index HTTP server Chapter 13 13 Chapter 13 13 LPR printing ...................................................................................... 3-17 LPSYSTEM ..................................................................................... 12-38 Index M MAC address ARP ................................................................................12-54, 12-56 RARP ........................................................................................ 12-59 Mailbox destinations ......................................................................... 9-28 Management Access Program .......................................................... 8-28 MAP .......................................................................................8-28, 12-31 Memory ............................................................................................... 1-6 N Named pipe ..................................................................................... 12-52 NDPS ................................................................................................ 8-16 NDS .................................................................................................... 8-8 Network card jumper switch setting ................................................................... 8-50 specifications ............................................................................... 8-53 troubleshooting ............................................................................ 8-46 Network settings BOOTP (Windows) ...................................................................... 8-32 Macintosh configuration .............................................................. 8-27 MAP ............................................................................................. 8-28 NetWare configuration ................................................................... 8-5 NIManage .................................................................................... 8-34 NWSetup (Windows) ................................................................... 8-38 system requirements ..................................................................... 8-3 Windows configuration .................................................................. 8-5 NIC board ............................................................................................ 1-6 NIManage for AppleTalk ................................................................... 8-34 Novell Directory Services .................................................................... 8-8 Novell Distributed Print Services ....................................................... 8-16 Number of registrations ..................................................................... 12-9 N-up printing ....................................................................................... 7-6 NWSetup ........................................................................................... 8-38 13-4 Pi4700e OHP interleaving ...............................................................................7-18 Operating environment Linux ..............................................................................................5-1 Macintosh .......................................................................................6-1 Windows 2000/XP ..........................................................................2-8 Windows 95/98/Me ........................................................................2-1 Windows NT 4.0 ...........................................................................2-15 outfilter .............................................................................................12-42 Overlay tab ........................................................................................4-27 P PageScope Light access ..........................................................................................10-2 Job tab .........................................................................................10-7 network setting .............................................................................3-23 Network tab ................................................................................10-18 password ......................................................................................10-2 Printer tab ....................................................................................10-8 Scanner tab ................................................................................10-17 system requirements ....................................................................10-1 System tab ...................................................................................10-5 Paper tab ................................................................................. 4-16, 5-31 Password Changing ....................................................................................12-63 PCL6 printer driver installing .........................................................................................2-1 Peer-to-Peer printing IPX/SPX .......................................................................................3-12 TCP/IP ...........................................................................................3-5 Peer-to-Peer Printing Program ............................................................3-8 Poor print quality ................................................................................11-6 Port Number .......................................................................... 12-30, 12-62 Setting ........................................................................................12-31 TCP/IP ........................................................................... 12-30, 12-62 PostScript printer driver installing .........................................................................................2-1 PostScript tab ....................................................................................4-31 Preview list ......................................................................................12-12 Pi4700e 13-5 Index O Chapter 13 13 Chapter 13 13 Print option Installable options ........................................................................ 6-15 Print options Index Background Printing .................................................................... 6-19 Color Matching ............................................................................ 6-21 Conflicts dialog box ..................................................................... 6-32 Cover Page ................................................................................. 6-20 Error Handling ............................................................................. 6-23 Finishing Settings ........................................................................ 6-37 General ........................................................................................ 6-18 Job Management ......................................................................... 6-36 Layout .......................................................................................... 6-22 Page Attributes ............................................................................ 6-16 Paper & Quality Settings ............................................................. 6-34 Paper Source Settings ................................................................ 6-35 PostScript Options ....................................................................... 6-17 Printer Specific Options ............................................................... 6-25 Save as File ................................................................................. 6-24 Summary ..................................................................................... 6-39 Print options (Mac OS X) .................................................................. 6-33 Print options (Macintosh OS 7/8/9) ................................................... 6-14 printcap .................................................................... 12-31, 12-37, 12-42 BSD UNIX ................................................................................. 12-32 DEC ULTRIX ............................................................................. 12-45 HP/UX ....................................................................................... 12-46 Linux .......................................................................................... 12-40 SCO UNIX ................................................................................. 12-38 Solaris ....................................................................................... 12-43 Printer driver displaying a properties dialog box .............................. 2-6, 2-13, 2-21 general settings .......................................................... 2-6, 2-13, 2-20 Printer setting with X window system Open Linux .................................................................................. 5-10 Redhat Linux ................................................................................. 5-4 SuSE Linux .................................................................................. 5-12 Turbo Linux ................................................................................... 5-7 printtool ........................................................................................... 12-39 Properties settings account code ......................................................................4-25, 5-33 advanced PostScript ................................................................... 4-35 brightness .................................................................................... 4-22 collate .................................................................................4-17, 5-31 compress bitmap images ............................................................ 4-31 copies .................................................................................4-16, 5-31 13-6 Pi4700e Q qdaemon ..........................................................................................12-51 Quality tab .........................................................................................4-21 R RARP ...............................................................................................12-59 Reducing .............................................................................................7-8 Pi4700e 13-7 Index cover page ......................................................................... 4-11, 5-26 custom paper ...............................................................................4-19 device options ...................................................................... 4-3, 5-19 distribution .......................................................................... 4-25, 5-33 duplex ..........................................................................................5-23 duplex/booklet ................................................................................4-8 easy set ................................................................................ 4-5, 5-21 folding ................................................................................ 4-13, 5-28 font substitution ............................................................................4-33 fonts .............................................................................................4-32 half toning .......................................................................... 4-22, 4-23 job owner .....................................................................................4-25 lock job ............................................................................... 4-25, 5-33 mailbox setting ..................................................................... 4-4, 5-20 N-up ...............................................................................................4-8 OHP interleaving ................................................................ 4-11, 5-26 orientation .......................................................................... 4-17, 5-31 original document size ....................................................... 4-16, 5-31 output paper size .........................................................................4-16 output setting ....................................................................... 4-9, 5-23 paper source ........................................................................ 4-8, 5-23 PostScript header ........................................................................4-31 PostScript output ..........................................................................4-31 print PostScript error information .................................................4-31 punch ................................................................................. 4-13, 5-28 resolution ........................................................................... 4-21, 4-22 reversal ........................................................................................4-22 screen angle ................................................................................4-23 screen frequency .........................................................................4-23 send fonts as ................................................................................4-34 smoothing .................................................................4-21, 4-22, 5-24 sorting ................................................................................ 4-17, 5-31 staple ................................................................................. 4-13, 5-28 user name ............................................................................ 4-3, 5-19 watarmark ....................................................................................4-27 Properties settings (Linux) .................................................................5-18 Chapter 13 13 Chapter 13 13 Reset Telnet ........................................................................................ 12-62 Index S Scaling ................................................................................................ 7-8 Scan to E-mail ..................................................................................... 9-1 Scan to HDD ....................................................................................... 9-4 Scan to Server .................................................................................... 9-2 SCO UNIX ....................................................................................... 12-29 Host-based lpd ...............................................................12-41, 12-49 Printer-based lpd ....................................................................... 12-37 Setting up the network card ................................................................ 8-4 Setup tab ....................................................................................4-7, 5-23 SMIT ....................................................................................12-34, 12-52 SMTP & FTP configuration ................................................................. 9-7 Solaris ............................................................................................. 12-29 Host-based lpd ...............................................................12-41, 12-42 Printer-based lpd ....................................................................... 12-38 Specifications .................................................................................. 12-19 Spooling directory ................................................................12-32, 12-40 Status page ..................................................................................... 12-30 Subnet mask ................................................................................... 12-53 BOOTP ...................................................................................... 12-57 Telnet ........................................................................................ 12-62 System Management Interface Tool See SMIT .............................. 12-52 System V ......................................................................................... 12-29 Host-based lpd ...............................................................12-41, 12-47 Printer-based lpd ............................................................12-30, 12-38 T TCP/IP ............................................................................................ 12-31 Directory .................................................................................... 12-41 Port number ....................................................................12-30, 12-62 Printing ...................................................................................... 12-41 Telnet ........................................................................................ 12-61 Telnet ...................................................................................12-31, 12-61 Log in ......................................................................................... 12-61 Troubleshooting ................................................................................ 11-1 TWAIN .............................................................................................. 9-37 13-8 Pi4700e Unable to make correct settings ........................................................11-3 Unable to print ...................................................................................11-1 Unable to print exactly as set ............................................................11-3 UNIX ................................................................................................12-29 URL .....................................................................................................9-3 V Virtual printer ....................................................................... 12-51, 12-52 W Watermarks .......................................................................................7-10 Web browser ...................................................................................12-31 WORKOUTQD ................................................................................12-35 Pi4700e 13-9 Index U Chapter 13 13 Index Chapter 13 13 13-10 Pi4700e Copyright 2003 MINOLTA CO., LTD. The information contained in this manual is subject to change without notice to incorporate improvements made on the product or products the manual covers. 2003. 6 MINOLTA CO., LTD. 3-13, 2-chome, Azuchi-Machi, Chuo-ku, Osaka. 541-8556, Japan