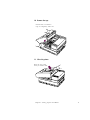
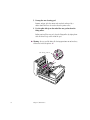
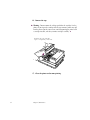
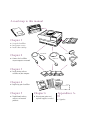
1
Chapter 1 Setting Up the LaserWriter I nside your printer’s packaging, in addition to the printer installation disks, you should find ■ a U.S. letter-size paper cassette for 110V printers, or an A4 paper cassette for 220V printers ■ a cassette top with sliding guides for inserting printer paper manually ■ a power cord for the printer You should also have obtained a LaserWriter® II Toner Cartridge from your authorized Apple® dealer. 1 Choosing a place for the LaserWriter Before you set up, choose a work area that meets the physical requirements of the printer. Make sure the surface on which you place the printer is flat and stable. The LaserWriter runs on ordinary household or office current. Choose a well-ventilated area away from direct sunlight and sources of heat, cold, or humidity. The printer works best at temperatures between 64° and 77° F (18° and 25° C) and at a relative humidity of between 30 percent and 70 percent. Choose a safe place Like almost all laser printers and photocopiers, the LaserWriter produces a small amount of ozone. Be sure to locate the printer in a well-ventilated area where its exhaust does not blow directly into anyone’s work area. See Appendix B for important information about ozone emissions. Don’t use devices that produce open flames, such as Bunsen burners or welding torches, near the LaserWriter. Don’t use ammonia-based cleaners, which can react chemically with the toner, on or around the LaserWriter. Exhaust vent 40 cm (15.7") min. 20 cm (7.9") min. 50 cm (19.7") min. Leave room to insert and remove the paper cassette and to open the face-up delivery tray. 2 Chapter 1: Setting Up the LaserWriter Setting up the printer If you haven’t already done so, take the printer out of the box and remove the packing materials. Once you have the printer out of the box and the plastic bag, pull the packing materials out of the paper cassette slot. Save the packing materials. They provide the best protection for the printer if you ever need to move it. Preparing the printer 1. Press the release button on the top of the printer. This releases the top section of the printer. Press the release button to open. Chapter 1: Setting Up the LaserWriter 3 2. Lift the top up as far as it will go. Don’t touch the exposed electrical contacts or gears in the boxed areas. 3. Peel off the filament tape and remove the packing material from inside the printer. 4 Chapter 1: Setting Up the LaserWriter 4. Remove the orange tabs on either side of the inner cavity. Installing the first toner cartridge The toner cartridge contains the printer’s powdered ink. The first time you install a toner cartridge, follow the steps provided here. After that, each time you install a cartridge, follow the instructions in Chapter 6, “Maintenance.” Each cartridge lasts for approximately 4,000 pages, depending on the kind of printing you do. If you use the LaserWriter to produce more graphic images than text, you may need to change cartridges more often. ▲ Warning: Use only an Apple LaserWriter II Toner Cartridge with the LaserWriter IIf and IIg. Other cartridges may not fit, and may impair the printer’s ability to produce high-quality images. ▲ Chapter 1: Setting Up the LaserWriter 5 1. Take the cleaning pad out of its packaging. The cleaning pad that comes with the toner cartridge continuously cleans the fixing rollers (which fuse the toner to the paper) while you print. 2. Remove the felt tip from the end of the cleaning pad. When you change the cartridge and cleaning pad in the future, you’ll use the felt tip on the end of the pad to clean the fixing rollers, but since the printer is new and doesn’t need cleaning, just remove the tip and discard it. 6 Chapter 1: Setting Up the LaserWriter 3. Lift the cover that protects the fixing rollers and fit the cleaning pad into the groove. 4. Close the fixing roller cover. Chapter 1: Setting Up the LaserWriter 7 5. Check the print density dial. 5 You’ll use this dial later if your prints are too light or too dark. The dial should be set to 5. 6. Take the cartridge out of its packaging. Don’t touch this area. 8 Chapter 1: Setting Up the LaserWriter 7. Distribute the toner powder. Slowly rock the cartridg 45 degrees four or five 8. Close the printer halfway and insert the cartridge. Make sure the cartridge is seated firmly. ▲ Warning: Do not insert or remove a toner cartridge when the printer’s top is in a completely open, vertical position. This can cause toner to spill into the printer. ▲ Chapter 1: Setting Up the LaserWriter 9 9. Loosen the tape tab. Flex the tab back, but don’t tear it off; you’ll need it to pull out the tape. ▲ Warning: Do not remove the sealing tape before the cartridge is inserted in the printer. If you insert the cartridge with the tape removed, toner may spill into the printer. For the same reason, avoid transporting the printer with a cartridge installed, and always remove cartridges carefully. ▲ 10 Chapter 1: Setting Up the LaserWriter 10. Remove the tape. Pull the tab out until the tape is completely removed. 11. Close the printer. Push the top gently until you hear a click. Chapter 1: Setting Up the LaserWriter 11 Loading paper into the cassette The 110V LaserWriter comes with one U.S. letter-size paper cassette (except in Japan, where the 110V printer comes with an A4 paper cassette). The 220V LaserWriter comes with one A4 paper cassette. You can order additional letter-size cassettes, as well as legal-size, international-size, and envelope cassettes, from your authorized Apple dealer. You can expect excellent printing results from photocopier paper or most standard typewriter stocks. Best results are obtained from paper that is labeled “laser-quality.” 1. Remove the packing material from the cassette. Peel the filament tape off the cassette, take the top off, and remove the packing material. 2. Prepare a stack of paper for insertion. You can load up to 200 sheets of most papers, including 20-pound photocopier and typewriter paper. Make sure the edges are even on all sides before inserting the stack of paper. 12 Chapter 1: Setting Up the LaserWriter 3. With the rear of the cassette toward you, slide the stack into the cassette from the right. The rear of the cassette is wider than the front. The front has a piece cut out. 4. Slide the paper beneath the clip at the front of the cassette. Push the paper down if necessary, but don’t overload the cassette, or the paper may jam when you print. Front of cassette Clip Load three-hole punched paper face up, with the holes toward the left side of the cassette. Load letterhead paper face up, with the tops of the pages at the front of the cassette. ▲ Warning: Never try to load a cassette with paper of the wrong size. Doing so could cause a paper jam, damage the printer drum, or cause toner to spill into the printer. ▲ 5. Put the cover on the paper cassette. Chapter 1: Setting Up the LaserWriter 13 Inserting the paper cassette 1. Slide the front of the cassette into the slot as shown. 2. Push the cassette in until it locks into place. Important safety instructions Before you plug in your LaserWriter, read these important safety instructions. ▲ Warning: This equipment is intended to be electrically grounded. The LaserWriter is equipped with a three-wire grounding plug—a plug that has a third (grounding) pin. As a safety feature, this plug will fit only a grounded AC outlet. If this plug does not fit any available outlet, contact a licensed electrician to install a properly grounded outlet. Do not defeat the purpose of the grounding plug. ▲ 14 Chapter 1: Setting Up the LaserWriter For your own safety and the safety of your equipment, always take the following precautions. Be sure to disconnect the power plug if ■ the power cord or plug is frayed or otherwise damaged ■ you spill anything into the case ■ the printer is exposed to rain or any other excess moisture ■ the printer has been dropped or if the case has been otherwise damaged ■ you suspect that the printer needs servicing or repair Be sure that you always ■ keep the printer away from sources of liquids, such as a sink or other water faucet ■ protect the printer from dampness or wet weather ■ read all the installation instructions carefully before you plug the printer into a wall socket ■ replace the ozone filter, or ask your authorized Apple dealer to replace it, every 50,000 pages to ensure continued low ozone emissions ■ follow all instructions and warnings dealing with your system ▲ Warning: Electrical equipment may be hazardous if misused. Operation of the LaserWriter or similar products must always be supervised by an adult. Do not allow children access to the interior of any electrical product and do not permit them to handle any cables. ▲ Chapter 1: Setting Up the LaserWriter 15 Chapter 2 Connecting the LaserWriter T he LaserWriter IIf and IIg offer several connection options, which can be used individually or in combination: ■ You can connect the printer to a network or directly to a computer with LocalTalk® cables and connectors. ■ You can connect the printer to a network or directly to a computer with Ethernet cables and connectors (on the LaserWriter IIg model only). ■ You can connect the printer directly to a computer by using a serial connection to the printer’s 8-pin or 25-pin port. 17 Connection ports A significant new feature of the LaserWriter IIf and IIg printers is their ability to be connected through multiple ports and to be accessible to users through these ports at the same time. While the printer prints only one user’s job at a time, it can be registered on a LocalTalk network (and on the LaserWriter IIg, an Ethernet network also) while connected directly to a computer through a serial connection. The printer manages incoming print jobs from all ports so that no collisions or overlaps occur. SCSI port for external disk Ethernet port (IIg model only) RS-232 serial port Push-button 8-pin port for LocalTalk or RS-422 serial switch The push-button switch on the back panel of the printer has a numeric display with which you select how each port will be used. The switch is set to zero at the factory. ▲ Important: If you plan to connect the printer with a standard LocalTalk or Ethernet connection, verify that the switch is set to zero and connect the printer as described in this chapter. If the switch is not set to zero, or if you plan to use a serial connection or to modify the standard settings, refer to the section “Port Settings” later in this chapter. ▲ 18 Chapter 2: Connecting the LaserWriter Connecting the printer with LocalTalk cables You can connect the LaserWriter to one or more computers with LocalTalk network cables and LocalTalk connector boxes, which are available from your Apple dealer. LocalTalk hardware and software are built into every Macintosh® and Apple IIGS® computer, and can also be added, by installing expansion cards, to the Apple IIe, most MS-DOS computers, and other types of computers. There are three ways to connect the printer with LocalTalk cables: ■ Connect the printer directly to your computer. ■ Connect the printer to the end of an existing network. ■ Connect the printer anywhere along the length of a network. You can obtain a LocalTalk locking connector kit with cables in a variety of lengths, from 2 meters to 100 meters. Connector box Cable extender ❖ LocalTalk cable (2 meter) LocalTalk on your computer: If you are using a computer, such as an Apple IIe or an MS-DOS computer, that doesn’t have a built-in LocalTalk port, you will need to obtain the appropriate expansion card, software, and connection instructions, in addition to the LocalTalk cabling and connectors. ❖ Chapter 2: Connecting the LaserWriter 19 Connecting the printer directly to your computer If you are connecting the LaserWriter directly to your computer rather than sharing it with other users on a network, you can still use LocalTalk network cables to make the connection between the printer and your computer. 1. Plug the short cable extending from a LocalTalk connector box into the LocalTalk port on the LaserWriter. The LocalTalk port is on the left side of the connector panel on the back of the LaserWriter. 2. Plug the short cable extending from a LocalTalk connector box into the LocalTalk port on your computer. On a Macintosh computer, the LocalTalk port is the printer port, indicated by a small printer icon. If that port is being used for another purpose, you can use the modem port (indicated by a telephone receiver icon). 3. Connect the two LocalTalk connector boxes together with a LocalTalk cable, as shown below. 20 Chapter 2: Connecting the LaserWriter Connecting the printer to the end of a LocalTalk network Connecting the LaserWriter to the end of a network will not interrupt communication among network users. You do not need to shut down any computers or notify users before adding the printer to the network. 1. Plug the short cable extending from a LocalTalk connector box into the LocalTalk port on the LaserWriter. The LocalTalk port is on the left side of the connector panel on the back of the LaserWriter. 2. Use a LocalTalk cable to connect the LocalTalk connector box to the network as shown below. ▲ Warning: There should be only one cable plugged into the printer’s LocalTalk connector box, since the printer is connected at the end of the network. Do not leave a dangling cable plugged into the connector box’s second opening, as this will cause transmission problems for all network users. ▲ Chapter 2: Connecting the LaserWriter 21 Connecting the printer between two devices on a LocalTalk network When you connect the LaserWriter between two devices on a network, you’ll need to briefly interrupt communication between network users on both sides of the connection, unless they are linked through some other network route. Be sure to notify users before adding the printer to the network. 1. Plug the short cable extending from a LocalTalk connector box into the LocalTalk port on the LaserWriter. The LocalTalk port is on the left side of the connector panel on the back of the LaserWriter. 2. Disconnect one LocalTalk cable from the connector box of the network device immediately to the left or right side of the LaserWriter. 3. Plug one end of a LocalTalk cable into the socket you have just freed and the other end into one of the sockets of the printer’s LocalTalk connector box. 4. Plug the LocalTalk cable you disconnected in step 2 into the remaining socket of the printer’s LocalTalk connector box. 22 Chapter 2: Connecting the LaserWriter Connecting the LaserWriter IIg with Ethernet cables You can connect the LaserWriter IIg to one or more computers with an Apple Ethernet connector and any of a variety of standard Ethernet cable types. Ethernet is a widely used communication standard that supports very high transmission speeds (several times the maximum transmission speed of LocalTalk cables). Ethernet hardware and software are available for Macintosh computers and many other types of computers. Apple Ethernet media adapters allow you to connect to any standard Ethernet cabling system through the Apple universal Ethernet port on the LaserWriter IIg. Supported media types include thick, thin, and twisted-pair Ethernet cables. Apple Ethernet thin coax transceiver Apple Ethernet AUI adapter Apple Ethernet twisted-pair transceive ▲ Important: The LaserWriter IIg connection software supports AppleTalk® Phase 2, which is the current standard for AppleTalk network software. If you are using an Ethernet connection, your network software must support AppleTalk Phase 2. On a Macintosh computer, you need the EtherTalk® driver version 2.0 or later; on other computers, check with your network support provider. (If you connect the printer using a LocalTalk or serial connection, you don’t need to be concerned about the version of network software on your computer or network; it can be AppleTalk Phase 1 without conflict). ▲ There are three ways to connect the printer with Ethernet cables and 23 connections: Connecting the printer directly to your computer ■ Connect the printer directly to your computer. ■ Connect the printer to the end of an existing network. ■ Connect the printer anywhere along the length of a network. ❖ Note: The Ethernet illustrations in this chapter show the thin coaxial connector type. The connector you use may be different. ❖ Although the Ethernet port is used most often to connect the printer to a network, if you are using a stand-alone computer that has an Ethernet port, you can use this port to create a direct, high-speed connection (this creates a small Ethernet network consisting of the workstation and printer). 1. Plug the short cable extending from an Apple Ethernet connector into the Ethernet port on the LaserWriter. The Ethernet port is at the center of the connector panel on the back of the LaserWriter. 2. Plug an Ethernet connector into the Ethernet port on your computer. 3. Connect the two Ethernet connectors with an Ethernet cable, as shown. 24 Chapter 2: Connecting the LaserWriter Connecting the printer to the end of an Ethernet network Connecting the LaserWriter to the end of a network will not interrupt communication among network users. You do not need to shut down any computers or notify users before adding the printer to the network. 1. Plug the short cable extending from an Apple Ethernet connector box into the Ethernet port on the LaserWriter. The Ethernet port is at the center of the connector panel on the back of the LaserWriter. 2. Use an Ethernet cable to connect the connector box to the network as shown. ▲ Warning: There should be only one cable plugged into the printer’s Ethernet connector, since the printer is connected at the end of the network. Do not leave a dangling cable plugged into the connector box’s second opening, as this will cause transmission problems for all network users. ▲ Chapter 2: Connecting the LaserWriter 25 Connecting the printer between two devices on an Ethernet network When you connect the LaserWriter IIg between two devices on a network, you’ll need to briefly interrupt communication between network users on both sides of the connection, unless they are linked through some other network route. Be sure to notify users before adding the printer to the network. 1. Plug the short cable extending from an Apple Ethernet connector box into the Ethernet port on the LaserWriter. The Ethernet port is at the center of the connector panel on the back of the LaserWriter. 2. Disconnect one Ethernet cable from the connector box of the network device immediately to the left or right side of the LaserWriter. 3. Plug one end of an Ethernet cable into the socket you have just freed and the other end into one of the sockets of the printer’s Ethernet connector box. 4. Plug the Ethernet cable you disconnected in step 2 into the remaining socket of the printer’s Ethernet connector box. 26 Chapter 2: Connecting the LaserWriter Port settings If you plan to use a serial connection or to modify the standard LocalTalk or Ethernet connection, you may need to reset the push-button switch first. The table below lists the alternate settings for the switch. (Ethernet listings apply only to the LaserWriter IIg.) Port Type Switch Connection settings type* Communication* 8-pin 0-4 LocalTalk PostScript® RS-422 5 Serial @ 9600 baud PostScript Per setting 6-9 User configurable RS-232 0,5 Serial @ 9600 baud PostScript 1 Serial @ 9600 baud HP LaserJet emulation† 2 Serial @ 19200 baud PostScript 3 Serial @ 9600 baud Nonprinting input†† 4 Serial @ 1200 baud PostScript 6-9 User configurable User configurable 0-5 EtherTalk PostScript 6-9 User configurable User configurable 0-9 SCSI For external disk only Ethernet SCSI User configurable * The settings listed as “User configurable” are configured by using the LaserWriter Utility program provided with the printer or by sending PostScript programs to the printer. A complete list of available settings is provided in Appendix B, “LaserWriter IIf and IIg Specifications.” † The HP LaserJet emulation mode is described in Appendix D. †† Nonprinting input is used when a device—such as an automatic sheet feeder—is connected to the serial port and receives special commands from a computer connected through another of the printer’s ports. ▲ Important: You can determine the exact configuration of the printer even if the switch is set to a user-configurable setting. To do so, print a configuration page by using the Macintosh LaserWriter Utility program, as described in Chapter 3, “Installing and Using Printer Software.” ▲ Chapter 2: Connecting the LaserWriter 27 Setting the push-button switch The buttons are recessed behind the surface of the connection panel to reduce the risk of inadvertently bumping the switch and changing the settings. Use a ballpoint pen or a straightened paper clip to press the selector buttons on the switch. - + ▲ Warning: Choosing a serial setting for the 8-pin port while it is connected to a LocalTalk network will cause the network to malfunction. If you change the push-button setting while the printer is in use, documents that the printer is working on will not be printed and will have to be sent to the printer again. ▲ When you use the push-button switch to select a new setting, the printer will wait 2 seconds before putting the setting into effect. The 2-second delay allows you to cycle through several settings until reaching your desired setting without activating each intermediate selection. 28 Chapter 2: Connecting the LaserWriter Connecting the printer with serial cables As noted earlier, you can connect the LaserWriter directly to your computer by using a serial connection to the printer’s 25-pin RS-232 port or to the 8-pin RS-422 port that is normally used for LocalTalk. (A direct serial connection to the Macintosh is not recommended; use LocalTalk or Ethernet cables instead.) 25-pin RS-232 8-pin RS-422 Different serial cables are wired differently. Get help from your dealer or service representative when purchasing a cable. If your computer has a standard serial port, like that of the IBM PC, you should be able to use standard cables. If not, you may have to purchase a special cable or have a cable built for you. The table below provides a description of the pin assignments on the RS-232 port of the LaserWriter. The person who builds your cable will need this information. To obtain the serial port pin assignments for the end of the cable connected to your computer, refer to the computer manual. Pin Circuit Description 1 or 7* 2* 3* 4 5 6 8 20 22 SGnd TxD RxD RTS CTS DSR DCD DTR Ring Signal ground Transmit data Receive data Request to send Clear to send Data set ready Data carrier detect Data terminal ready Ring indicator * The LaserWriter needs only pins 1 (or 7), 2, and 3, but a connected device may require the others. For example, to exchange information with an MS-DOS computer using the DSR/DTR handshake, pins 6 (DSR) and 20 (DTR) on the RS-232 port of the LaserWriter must be connected to their counterparts on the MS-DOS computer. 29 Connecting the power and turning on the printer Once the communication port is connected, you’re ready to start up the printer. Follow these steps to make sure everything is working correctly. 1. Make sure that the printer is switched off. The on/off switch is on the left corner of the printer’s connector panel. 2. Plug in the printer and turn it on. Insert the power cord into the receptacle. Plug the other end into a grounded (three-hole) AC outlet, and press the on/off switch. ! is on; " is off. Power cord receptacle 3. Check the startup page. The printer takes a minute or two to warm up, and then it automatically prints a startup page. It prints the startup page every time you restart unless you turn the startup page off (see “Turning the Startup Page On or Off ” in Chapter 3). The startup page contains large icons that indicate how the printer is set up, including the network connection type and whether a hard disk is attached to the printer. 30 Chapter 2: Connecting the LaserWriter The startup page should look clear and sharp. If it is spotty or otherwise unclear, switch the printer off and on to print a second page. Try this two or three times if necessary. If the output doesn’t improve or is too light or too dark, or if the printer won’t print the startup page, refer to Chapter 5, “Troubleshooting.” 4. Check the status lights. The green Ready/In Use light will flash until the startup page is printed. It then glows steadily. All other lights should be off. If any other lights are on, see Chapter 5, “Troubleshooting.” Low Toner Level light Ready/In Use light Chapter 2: Connecting the LaserWriter Paper Out light Paper Jam light 31 Chapter 3 Installing and Using Printer Software T he LaserWriter comes with software and fonts for use with a Macintosh computer. This chapter describes how to install and use this software. From a computer other than the Macintosh, you may be able to print to the LaserWriter by using one of the many application programs that support PostScript printing, but you should also contact your computer vendor to determine whether any special software is needed. While many printing functions are controlled by the application software on your computer, there may be a LaserWriter driver, or control program, available for your computer. 33 Installing the Macintosh software To install the necessary printer software on a Macintosh, you need the disks that came with your LaserWriter: ■ LaserWriter II Installation disk contains the Installer program, which manages the software installation, and the LaserWriter Utility program, which lets you control the printer’s settings. ■ LaserWriter II Fonts disks contain the fonts that the Installer will install on your hard disk. It’s recommended that you first make backup copies of the installation and fonts disks and use the copies in the installation process. Store the originals in a safe place. ▲ Important: The LaserWriter IIf and IIg are designed to work with system software version 6.0.7 or later. If your system software is an earlier version, you need to obtain a system software upgrade from your authorized Apple dealer. ▲ Follow these steps to install the Macintosh software. 1. Insert the LaserWriter II Installation disk and open the disk icon. A window appears, showing the contents of the disk. 34 Chapter 3: Installing and Using Printer Software 2. Open the Installer icon. The LaserWriter II Installer Welcome screen describes the items that will be installed on your disk. 3. Click OK to clear the Welcome screen and display the Installer dialog box. 4. In the Installer dialog box, click Install. A status box appears and keeps you informed of progress during installation. 5. Insert any additional disks when the Installer prompts you. 6. When you see a message reporting that the installation was successful, click Restart. 35 Using the LaserWriter Utility Opening the LaserWriter Utility The LaserWriter Utility program supplied with the printer allows you to control various aspects of how the LaserWriter works. Use the LaserWriter Utility to ■ name the printer ■ turn the printer’s startup page on and off ■ see the total number of pages the LaserWriter has printed ■ turn the printer’s FinePrint™ feature on and off ■ control the PhotoGrade™ feature ■ view or change the printer’s communication settings ■ send PostScript files and programs to the printer ■ restart the printer ■ initialize any hard disks connected to the printer ■ download fonts to the printer or to any attached hard disks ■ see or print samples of the fonts available on the printer The utility will operate on the printer that is currently selected in the Macintosh Chooser. To set up or change the functions of your LaserWriter, first make sure the printer is selected in the Chooser (see “Selecting the Printer” in Chapter 4). 1. Insert the LaserWriter II Installation disk. You can use the LaserWriter Utility directly from the floppy disk or copy the program to your hard disk. 2. Double-click the LaserWriter Utility icon. The program takes a few seconds to check the settings of the selected printer before starting up and then presents the menu options listed in the following sections. ❖ 36 Reverting to factory settings: In most of the LaserWriter Utility’s dialog boxes, you can click a button labeled Use Default to restore the options presented to their original factory settings. ❖ Chapter 3: Installing and Using Printer Software Naming the printer Each LaserWriter can be given an individual name. If the printer is connected to a network, this name allows users to identify the printer and select it from their computers. You can use the procedure below to rename any LaserWriter on the network. Be sure to tell everyone who uses the network what the new names are, so they can find the printers they want to use. 1. Choose Name Printer from the Utilities menu. You’ll see the selected printer’s current name in the Rename dialog box. 2. Type the new name for the printer. 3. Click Rename. A message alerts you to select the printer’s new name in the Chooser. You will be unable to print or to use other LaserWriter Utility functions before you do so. 4. Click OK. 5. Use the Chooser to select the printer’s new name. Turning the startup page on or off The LaserWriter normally prints a sample page when you turn the printer on. This page shows the printer’s name; the total number of pages printed; and the amount of memory, number of internal fonts, and communication settings. You can turn this feature off if you wish. 1. Choose Set Startup Page from the Utilities menu. A dialog box appears in which you can turn the startup page on or off. 2. Click On or Off. 3. Click OK. Chapter 3: Installing and Using Printer Software 37 Viewing the page count The LaserWriter stores a running total of the number of pages it has printed. This total is printed on the startup page when you start the printer (if the startup page is turned on). You can also display the current page count from the LaserWriter Utility. 1. Choose Get Page Count from the Utilities menu. A dialog box appears with the current page count of the selected printer. 2. Click OK when you are finished viewing. Turning FinePrint on or off You can turn the LaserWriter’s FinePrint feature on and off. FinePrint is normally turned on, but you may wish to turn it off to maintain the standard 300-dpi look for a special purpose. 1. Choose Set FinePrint from the Utilities menu. A dialog box appears with two radio buttons labeled On and Off. 2. Click the setting you want. 3. Click OK. 38 Chapter 3: Installing and Using Printer Software Controlling PhotoGrade You can change the way PhotoGrade prints images by increasing or decreasing the number of gray levels. More levels of gray produce a more natural looking photographic quality. However, increasing the number of grays will decrease the resolution of the image. For each level of gray, a unique pattern of laser pulses is required to produce a printed dot. More gray levels require more variations in such patterns, which in turn requires the printer to use larger, more noticeable dots. You can experiment with various settings to find the balance that suits your needs. 1. Choose Set PhotoGrade from the Utilities menu. The PhotoGrade control dialog box appears. 2. Drag the slider in the direction you want, or click Use Default to automatically reposition the slider as it was when the printer was originally shipped. 3. Click OK. ▲ Important: When printing from a Macintosh, PhotoGrade will work only if the Color/Grayscale option is selected in the Print dialog box (see “Printing” in Chapter 4). ▲ Chapter 3: Installing and Using Printer Software 39 Calibrating PhotoGrade The appearance of a PhotoGrade image can vary depending on a number of factors, including the amount of toner remaining in your toner cartridge, the paper you use, and the relative humidity. You can adjust the PhotoGrade system to get the best results in different conditions. 1. Choose Calibrate Printer from the Utilities menu. A dialog box appears, asking you if you want to print the calibration page. 2. Click OK. Three versions of the calibration page, numbered 1, 2, and 3, are printed (this may take a few minutes). Each contains the same PhotoGrade image with a different calibration setting. 3. Follow the instructions printed on the calibration page to determine which of the three settings you wish to use. 4. Click the radio button next to the number of the calibration page you picked. 5. Click OK. 40 Chapter 3: Installing and Using Printer Software Viewing or changing communication settings If you use the LaserWriter with a computer other than a Macintosh, you may need to change the printer’s communication settings to enable the computer and printer to communicate properly. Refer to “Port Settings” in Chapter 2 for additional information about communication settings, and Appendix B for a complete list of the available settings. You don’t need to change any of the printer’s settings unless the documentation for your computer specifies communication settings that are different from the ones already set. You can refer to Appendix B for brief explanations of these settings if you wish, but you do not need to know what each one means. You need only to make sure that the settings you choose match the ones specified for your computer. 1. Choose Configure Communications from the Utilities menu. The dialog box lists the settings for each of the ten positions (0–9) of the push-button switch on the back panel of the printer. The highlighted number shows the actual position of the push-button switch, which can only be changed manually. PrinterÕs actual setting Currently displayed setting 2. Click a switch position to display its settings. Switch positions 0 through 5 are fixed; you can choose them, but you cannot change their settings. You can change the settings of switch positions 6 through 9. 3. Choose the communication parameters you want to use. Change the settings as necessary to match the parameters of the computer you are connecting. 4. Click OK. Chapter 3: Installing and Using Printer Software 41 Printing the communication settings You can print out a listing of the current communication settings for each of the printer’s ports. This page serves as a useful reference whenever you connect a computer to the printer. This is particularly useful if you set the printer’s communication switch to a user-configurable setting (switch positions 6–9) and change the parameters to settings other than the default factory settings. 1. Choose Print Configuration Page from the Utilities menu. A dialog box appears asking you to confirm the command. 2. Click Print. Downloading PostScript files You can download PostScript files to the printer to print a PostScript program or Encapsulated PostScript (EPS) file, or to run a PostScript program to change the internal settings of the LaserWriter. The PostScript file can be created in a variety of text-editing programs. 1. Choose Download PostScript File from the Utilities menu. A dialog box appears in which you can select the file. 2. Select the file you wish to download. 3. Click Open. A second dialog box appears, in which you indicate where on your disk to save any PostScript response from the printer. 4. Choose a folder in which to save the PostScript log file. You can enter a new name for the file if you wish. 5. Click OK. The file is downloaded to the LaserWriter, and any PostScript response from the printer is saved on your disk. 42 Chapter 3: Installing and Using Printer Software Removing TrueType fonts and software You can use this command to remove TrueType™ fonts and software that have been downloaded to any hard disks attached to the LaserWriter. 1. Choose Remove TrueType from the Utilities menu. A dialog box appears asking you to confirm that you want to remove TrueType from any hard disks attached to the selected printer. 2. Click Remove. Restarting the printer You may need to restart the printer to clear its memory if you have any problems printing. Chapter 5, “Troubleshooting,” describes when this may be necessary. 1. Choose Restart Printer from the Utilities menu. A dialog box appears asking you to confirm that you want to restart the selected printer. 2. Click Restart. It will take a few minutes for the printer to restart and be ready to print. The same effect can be achieved by physically turning the printer off and then on again. ▲ Important: If the LaserWriter is on a network shared by other users, make sure no one is attempting to use the printer before you restart it. ▲ Chapter 3: Installing and Using Printer Software 43 Initializing a hard disk attached to the printer If you connect an external hard disk to the printer, you may need to prepare (initialize) the disk. See Appendix A, “LaserWriter IIf and IIg Upgrades,” for information about adding an external disk. ▲ Warning: The LaserWriter IIf and IIg will not recognize any disks formatted for use with an earlier model LaserWriter printer. If you attach such a disk to the LaserWriter IIf or IIg, you will need to reinitialize the disk before you can use it and then reload any fonts from your computer, from their original floppy disk, or from another source. Reinitializing will erase all fonts previously stored on the disk. ▲ To initialize an external hard disk: 1. Choose Initialize Printer’s Disk from the File menu. A dialog box appears in which you can select the hard disk or disks to initialize. 2. Click All Disks to intialize all connected disks or click the checkboxes next to the SCSI ID numbers of the disks you wish to initialize. 3. Click Initialize. It will take some time for the initialization process to be completed. The printer will not be available for printing until the hard disk is initialized. 44 Chapter 3: Installing and Using Printer Software Downloading fonts to the printer You can download additional fonts to the printer or to the printer’s hard disk to speed up printing. You do not have to download fonts to use them in printed documents, but doing so can make printing faster than storing fonts only on your computer. There will be room for more downloaded fonts in the printer if you install additional memory or connect an external disk drive to the printer. 1. Choose Download Fonts from the File menu. A dialog box appears listing any fonts already downloaded to the printer. (This list does not include the standard set of Apple fonts installed in the printer; you can view a list of those fonts as described in the next section, “Displaying a List of Printer Fonts.”) 2. Click the radio button labeled Printer’s Disk if you wish to download the fonts to a disk attached to your printer. 3. Click Add. A file selection dialog box appears. You can choose any fonts that are installed on a disk connected to your computer. 4. Select the fonts you want to download. Double-click the font name in the list or select the name and click Add. 5. Click Done when you have finished selecting fonts. If you change your mind about any font you’ve added to the list, select the font and click Remove. 6. Click Download. A dialog box will inform you of the status of the procedure until downloading is completed. 7. Click OK. Displaying a list of printer fonts You can view a list of the fonts currently stored in the printer’s memory, or on any hard disks attached to the printer, to see whether the fonts you need are available. Chapter 3: Installing and Using Printer Software 45 1. Choose Display Available Fonts from the File menu. 2. Click Printer’s Disk(s) if you want to list fonts on any disks attached to the printer. 3. Click the close box when you are finished viewing. Removing a font from the printer's disk You can delete one or more fonts that have been downloaded to a hard disk attached to the printer. 1. Choose Display Available Fonts from the File menu. 2. Click Printer’s Disk(s). 3. Select the font or fonts that you wish to delete. 4. Click Delete. A dialog box asks you to confirm your selection. 5. Click OK. 6. Click the close box when you are finished. Printing a list of printer fonts You can print a list of the fonts currently stored in the printer’s memory and on any hard disks attached to the printer. 1. Choose Print Font Catalog from the File menu. The Macintosh Print dialog box is displayed. 2. Click Print. Printing samples of printer fonts You can print samples of the fonts currently stored in the printer’s memory and on any hard disks attached to the printer. 1. Choose Print Font Samples from the File menu. The Macintosh Print dialog box is displayed. 2. Click Print. 46 Chapter 4 Using the LaserWriter T his chapter describes the basic operations that are common to using the LaserWriter from any computer, such as how to use the paper cassette and to feed paper manually. The specific way you control the printer from your computer depends on the type of computer and application program you are using. On a Macintosh computer, all applications handle printing in a standardized way, which is described in this chapter. 47 Selecting the printer If the LaserWriter is connected to a network, you need to select the printer from your computer when you want to print for the first time or after using another printer. On a Macintosh computer, you select a printer on an AppleTalk network by using a program called the Chooser. MS-DOS systems using AppleShare® PC and Apple II computers also use versions of the Chooser. Other types of computers may have their own specific software for choosing printers. The illustration below shows the Macintosh Chooser (for more information, see the manuals that came with your Macintosh). Click the name of the printer you want to use. Click the LaserWriter icon. If your network contains zones, find out in which zone the printer is registered and select the zone from this list. Make sure the AppleTalk software is active. 48 Chapter 4: Using the LaserWriter Turn on Background Printing to resume your work without having to pause during printing. Printing How you send a print job to the LaserWriter is determined by the type of computer and application program you are using. On the Macintosh, printing functions are controlled through the Page Setup and Print dialog boxes, which are accessed through the File menu (for more information, see the manuals that came with your Macintosh). The Macintosh Page Setup dialog box The Macintosh Page Setup dialog box allows you to specify certain aspects of your document, such as its size format and orientation, as well as the settings for several print effects. Most Macintosh application programs use a version of the standard Page Setup dialog box, although the exact options presented may vary between programs. (See the manuals that came with your Macintosh for details.) Choose the size format of the paper. Enter a new size for the image if desired. Choose whether the page is printed in horizontal or vertical format. Choose whether to print in the coarse dot pattern of the screen or to print smoother lines and curves. More options to control the size and orientation of the image ▲ Important: A memory upgrade is required to use the full dimensions of legal-size paper on the LaserWriter IIf or to print PhotoGrade images in full legal size on the LaserWriter IIg. See Appendix A, “LaserWriter IIf and IIg Upgrades,” for details. ▲ Chapter 4: Using the LaserWriter 49 The Macintosh Print dialog box When printing from a Macintosh computer, most application programs use the LaserWriter printer driver, which displays the following dialog box. (See the manuals that came with your Macintosh for details.) Choose the number of copies of the document. Print only specified pages if desired. Print an identification sheet at the start or end of the document. Choose the paper cassette or manual feed printing. Print colors and grays as dot screens, or print all shades as black and white only. (To print using PhotoGrade, the Color/Grayscale option must be selected.) Printing color or grayscale documents 50 Save the document to the printer or save the file in PostScript format. When you print a document containing colors or shades of gray, you can choose to maximize either print quality or speed. On both the LaserWriter IIf and IIg, setting the printer to print Color/Grayscale produces higher quality but slower printing. ■ If you set the printer to Black & White, all colored areas in the original document will be printed in either black or white, depending on the darkness of the original. Gray areas in the original that are produced by black dot patterns rather than by the color gray will be printed in similar dot patterns. ■ If you set the printer to Color/Grayscale, the printer will print black dots to approximate the darkness of the colored or gray areas in the original document. The PhotoGrade feature increases the available number of gray levels. You can control this feature by using the LaserWriter Utility as described in Chapter 3, “Installing and Using Printer Software.” Chapter 4: Using the LaserWriter Face-up delivery The face-up tray delivers paper in a straight, flat path rather than turning it over (which can cause some types of paper to curl). This is especially useful if you are printing on heavy paper, envelopes, or transparency film. Most programs print the first page of a document first, so that as the printer delivers each page face down the entire document collates properly. Some programs print the first page last, in which case face-up delivery is needed for a correctly collated document. You’ll need to experiment to find out which way your own programs print. The tray can hold up to 20 sheets of 20-pound paper. ▲ Warning: Never open or close the face-up tray when printing is in progress. Changing the position of the tray during printing can cause a paper jam. ▲ Chapter 4: Using the LaserWriter 51 Using the paper cassette The printer will automatically print from the paper cassette unless you insert paper through the manual feed guides on top of the cassette (see “Manual Feed Printing” later in this chapter). To refill the paper cassette, insert paper as shown below. Standard paper Slide the paper beneath the clip at the front left of the cassette. Push the paper down if necessary, but don’t overload the cassette, or the paper may jam when you print. Front of cassette Clip 52 Chapter 4: Using the LaserWriter Letterhead paper Insert letterhead paper into the paper cassette face up, with the top of the letterhead entering the printer first. M P& E end of the cassette oes into the printer. Top of letterhead paper Three-hole punched paper Insert three-hole punched paper into the paper cassette so the holes are toward the left side of the cassette. end of the cassette oes into the printer. Holes on this side Chapter 4: Using the LaserWriter 53 Manual feed printing Printing single sheets You can use manual feed printing for several purposes: ■ to print single sheets of paper (if, for example, you are using paper that is different from the paper in the cassette) ■ to print envelopes ■ to print on both sides of a sheet of paper (duplex printing) The cover of the paper cassette is also the manual feed guide. When you insert a single sheet in this guide, the printer feeds this sheet rather than the paper in the cassette. 1. Adjust the manual feed guide to fit your paper. Adjust the sliding paper guides so that your paper fits snugly— not so loose that it can slide around or so tight that it bows. 2. Set your application program to print using Manual Feed. The printer will feed the sheet in the manual feed guide even if it is not set to Manual Feed, but this setting lets you control exactly when the sheet will feed. On a Macintosh, choose Print from the File menu, click the Manual Feed button, and click OK. 3. When the printer’s Paper Out indicator light flashes, insert the first sheet of paper and slide it forward until it stops. If you’re feeding letterhead paper, insert each sheet right side up, top edge first. If you’re feeding three-hole punched paper, insert each sheet with the holes along the left side. On a Macintosh, if Background Printing is turned on in the Chooser, a PrintMonitor message will prompt you to insert a sheet of paper. 4. If you are printing several pages, insert the next sheet when the Paper Out light flashes again. Do not feed the next sheet before the light prompts you to, or the paper may jam. 54 Chapter 4: Using the LaserWriter Printing envelopes You can use manual feed to print envelopes one at a time, by adjusting the manual feed guides on the paper cassette to the size of the envelope. ❖ If you print many envelopes: You can obtain an envelope cassette from your authorized Apple dealer that allows you to feed envelopes automatically. ❖ Positioning the address block For best results, be sure to position your address block properly. You’ll need to print in landscape (horizontal) orientation and to adjust the top and left margins in your word-processing program’s page formatting controls. The sample settings below work for a standard #10 envelope in the Claris® word-processing program MacWrite® II. Once you’ve set the top and left margins, type the return address, skip a few lines (the exact number depends on the font you’re using and the way you like your envelopes to look, so you’ll have to experiment), and type the address block. Chapter 4: Using the LaserWriter 55 Printing the envelope 1. Set your program to print lengthwise on the envelope. On a Macintosh, choose Page Setup from the File menu, select the lengthwise orientation icon, and click OK. 2. Open the face-up tray. 3. Adjust the manual feed guide to fit the envelope. 4. Tuck the envelope flap inside the envelope. This helps prevent the flap from causing a paper jam. (Some envelopes come unglued when subjected to the heat inside the printer. High-quality envelopes are likely to hold up better during the printing process.) MP &E MP&E 5. Set your program to print using Manual Feed. On a Macintosh, choose Print from the File menu, click the Manual Feed button, and click OK. The printer will feed the envelope in the manual feed guide even if it is not set to Manual Feed, but this setting lets you control exactly when the envelope will feed. 56 Chapter 4: Using the LaserWriter 6. When the printer’s Paper Out indicator light flashes, insert the first envelope and slide it forward until it stops. Insert the envelope face up with the top edge to the right as it enters the printer. On a Macintosh, if Background Printing is turned on in the Chooser, a PrintMonitor message will prompt you to insert an envelope. 7. If you are printing several envelopes, insert the next envelope when the Paper Out light flashes again. Do not feed the next envelope before the light prompts you to, or the envelope may jam. Two-sided (duplex) printing Follow these steps when you want to print on both sides of the paper. 1. Open the face-up tray to minimize paper curling. 2. Following the directions for manual feed, print a page and take it out of the output tray. 3. Insert the paper again, printed side down, with the top of the printed side entering the printer first. Insert printed side down, top edge first. Chapter 4: Using the LaserWriter 57 Choosing paper The LaserWriter produces the best results on standard laser-quality paper (20- to 24-pound stock). With the face-up tray open, the printer can accept stock of up to 36 pounds. You can also expect excellent results on most colored and textured papers. The LaserWriter produces high-quality transparencies for overhead projection. Medium-weight photocopier transparencies work best. If you experience difficulties when attempting to print transparencies with automatic feed, use manual feed instead. Always open the face-up tray before printing transparencies. ▲ Warning: Do not use heat-transfer (thermal) transparencies in the LaserWriter. They will not print properly and may separate in the printer. ▲ To avoid paper problems, be aware of the following potential trouble sources: 58 ■ Temperature. Some letterheads are printed with low-temperature dyes that vaporize and smear at the temperatures inside the printer. Some glossy, coated letterheads may lose their coating in the printer. Similarly, some envelopes may seal or come unglued during printing. Using high-quality stationery and envelopes should ensure satisfactory results. ■ Paper texture. The LaserWriter may not print well on rough or highly textured paper. Try a few sheets to test the quality. ■ Paper finish. The LaserWriter may not print well on some papers with a glossy finish. Again, test a few sheets of any unusual paper stock you wish to use. Chapter 4: Using the LaserWriter Chapter 5 Troubleshooting T his chapter provides solutions to some common problems you may encounter while using your LaserWriter. The first section provides general troubleshooting techniques to help you identify and solve problems with the printer and printer connections. The rest of the chapter covers specific problems that can occur when starting up the printer or printing a document. 59 General troubleshooting Reading the indicator lights This section lists techniques to help you identify and solve common problems, including how to ■ read the indicator lights ■ check for and clear paper jams ■ check for problems with the printer connections The lights on the front panel of the LaserWriter indicate the printer’s operating status. Use the following table to determine the status of your printer. Light On Off Flashing Ready/In Use Printer is ready to use. Printer cannot print due to an error condition, or the cover is open. Printer is warming up, printing a startup page, or processing data for the next print job. Low Toner Level Toner is low or needs to be redistributed. Toner level is OK. Toner cartridge is installed incorrectly. Paper Out* Paper cassette is empty. Paper supply is OK. Printer is ready for next sheet of manual-feed paper. Or printer may require service. Paper Jam* There is a paper jam. Paper is OK. Printer requires service. *If the Paper Out and Paper Jam lights both flash, or if they both stay on, the printer requires service. 60 Chapter 5: Troubleshooting Checking for and clearing paper jams Occasionally a piece of paper may get stuck inside the printer during the printing process. Follow these steps to find and clear a paper jam. 1. Open the printer to see where the jam is. 2. If the jam is in the paper cassette area, pull the cassette out of the printer and release or pull out the paper. 3. If the jam is around the print feed area, open the transfer paper lock and free the paper. The transfer paper lock Caution: Hot area Chapter 5: Troubleshooting 61 4. If the jam is in the fixing rollers, open the roller cover and pull the paper out. Caution: Hot area ▲ Warning: If the printer has been in use, the roller cover may be hot, and the fixing rollers will be very hot. ▲ Checking the connections If you are unable to get the printer to respond from your computer, the problem may be caused by a fault in the network or connection. Try the following remedies: 1. Check to make sure that the connector and cable are firmly attached to the printer. 2. Make sure the push-button switch on the connection panel is set correctly for the desired connection. 3. If the printer is on a network, check all connections in the affected section of the network. 62 Chapter 5: Troubleshooting 4. Check the layout of the network. ■ Check for cables not attached to a network connector box, and reconnect as necessary. ■ Make sure that the network cable has two distinct ends and is not reconnected to itself in a loop. ■ Check to make sure that the first and last network connector boxes each have only one cable attached. 5. Make sure all computers are using the correct versions of the LaserWriter driver. Trouble starting up the LaserWriter Unless you’ve turned off the startup page with the LaserWriter Utility program, the LaserWriter will print a startup page every time you turn it on. (See “Connecting the Power and Turning On the Printer” in Chapter 2.) No startup page prints when you turn on the printer If no startup page is printed, check the indicator lights (as described earlier in this chapter) and take appropriate steps: ■ If the Ready/In Use light is off, the printer is disconnected or switched off, the cover is open, or an error condition exists. Check the power cord, the cover, and the on/off switch. ■ If the Paper Out light is on, the printer is out of paper, or the paper tray is not securely in place. Refill and replace the paper tray. ■ If the Paper Jam light is on, see “Checking for and Clearing Paper Jams” earlier in this chapter. ■ If the Paper Jam and Paper Out lights are flashing or glowing steadily, the printer requires service. Contact your authorized Apple dealer. The startup page is blank Chapter 5: Troubleshooting 63 Check the toner cartridge. If the Low Toner Level light is on, the cartridge may be out of toner powder, or the powder may need redistribution. If you have just changed the cartridge, check to make sure that you have removed the sealing tape. (See “Replacing the Toner Cartridge” in Chapter 6.) Problems with printed documents This section provides remedies for visible problems in the appearance of a printed document. Paper curls when you print on it Use only 20- to 24-pound laser-quality or photocopy bond paper for automatic feed and 20- to 36-pound paper for manual feed printing. If you are using the correct weight and the paper still curls, try using a different brand of paper. Toner does not stay fixed on the paper If the toner does not seem to stick well to the paper, try using different paper. Best results are obtained with laser-quality or photocopy bond paper. The printer prints on only part of the paper Make sure that you have selected the appropriate paper size and orientation in your printing software (on the Macintosh, use the Page Setup dialog box; if you want to narrow the margins to print on more of the page, you can select Larger Print Area in the Options portion of the Page Setup dialog box). A memory upgrade is required to use the full dimensions of legal-size paper on the LaserWriter IIf or to print PhotoGrade images in full legal size on the LaserWriter IIg. 64 Chapter 5: Troubleshooting The printing is off-center, or images are out of place One of three things could be causing this problem: ■ The margins set in your document are incorrect. ■ You are using a type of paper that is causing a feeding problem. ■ The paper cassette is too full. Nothing is printed on the paper If you get a blank document, try the following: ■ Make sure that the sealing tape has been removed from the toner cartridge (see “Replacing the Toner Cartridge” in Chapter 6 for details). ■ Check the Low Toner Level light. If it’s on, the toner needs to be redistributed, or the cartridge needs replacing. The image prints in black and white although the original document is in color or grayscale If the printed image contains only black and white areas instead of grays, try the following: ■ Check to make sure that grayscale printing is turned on (from a Macintosh, check the Color/Grayscale button in the Print dialog box). ■ Check to make sure that enough random-access memory (RAM) is installed to print the desired image in PhotoGrade (the page will print in black and white if memory is insufficient). A U.S. letter-size or A4size page requires 5 megabytes of RAM to print in PhotoGrade; a full legal-size page requires 8 megabytes of RAM. Chapter 5: Troubleshooting 65 The image is too light If the printed images are too light, try the following: ■ Check the Low Toner Level light. If it’s on, you may need to replace the toner cartridge (see “Replacing the Toner Cartridge” in Chapter 6 for details). ■ If the Low Toner Level light is not on, turn the print density dial one step counterclockwise (one number lower). 5 The print density dial is inside the printer, in the corner of the interior cavity as shown below. The dial should be set to 5. 66 Chapter 5: Troubleshooting The image is too dark If the image is too dark, try the following: ■ Turn the print density dial one step clockwise (one number higher). ■ Replace the toner cartridge; it may be defective. The page prints solid black If your document prints black, your toner cartridge is defective and must be replaced (see “Replacing the Toner Cartridge” in Chapter 6 for instructions). Unwanted lines or stripes appear If white or dark vertical or horizontal lines or stripes appear on the page, try the following remedies. Each procedure is described in detail in the section “Replacing the Toner Cartridge” in Chapter 6. ■ Clean the transfer guide, transfer corona wire, and discharging pins exactly as you would if you were installing a new toner cartridge. ■ Clean the primary corona wire. ■ Redistribute the toner in the cartridge. ■ Replace the toner cartridge. The image is wavy or distorted If a gray shaded area appears wavy or distorted, the toner cartridge may be low, or the toner may need to be redistributed (see “Replacing the Toner Cartridge” in Chapter 6 for instructions). Chapter 5: Troubleshooting 67 Stains appear on output If stains appear on the paper, try the following: ■ Clean the rollers, transfer guide, transfer corona wire, and discharging pins exactly as you would if you were installing a new toner cartridge (see “Replacing the Toner Cartridge” in Chapter 6 for details). ■ Clean the primary corona wire. There are faded areas or white voids on the page If portions of your page that should be printed appear faded, or there are void areas in which nothing printed, try the following: 68 ■ Turn the print density dial clockwise (one number higher). ■ Use different paper or transparency material. ■ Use paper that has been in a sealed wrapper; the paper may have too much moisture in it. Chapter 5: Troubleshooting ■ Redistribute the toner in the cartridge (see “Replacing the Toner Cartridge” in Chapter 6 for details). ■ Replace the toner cartridge (see “Replacing the Toner Cartridge” in Chapter 6 for details). There are blotchy areas or ghost images on the page If there are blotchy areas within a gray area, or if you see ghosting of images within printed areas (particularly on the top few inches of the page), try the following: ■ Macintosh troubleshooting Print two or three more copies of your page; these problems often occur only on the first rotation of the photosensitive drum inside the printer. If you are using the LaserWriter from a Macintosh computer, use this section to troubleshoot printer problems you might have while trying to select a printer in the Chooser or while trying to print a document. The Chooser does not appear in the Apple menu If the Chooser isn’t listed in the Apple menu, the System file on your startup disk may be outdated, or you may have removed the Chooser from the System file on your startup disk. You can obtain the current system software from your authorized Apple dealer. Also make sure that you have only one System Folder on your startup disk. Chapter 5: Troubleshooting 69 No LaserWriter icon appears in the Chooser Make sure that the LaserWriter driver is properly installed. The printer driver may be on your startup disk but may have been moved to the wrong location. If necessary, move the driver into the System Folder icon. Make sure you have only one System Folder on the disk. If you have more than one, consolidate everything you need in the folder with the more current version of the System file and discard the other folder. The printer is not listed in the Chooser If you’ve selected the LaserWriter icon but your LaserWriter is not named in the list of printers, one of the following may be the cause: ■ The printer has been turned off. Make sure it is plugged in and turned on, and wait for the startup page to print. ■ The switches are not set correctly. See “Port Settings” in Chapter 2 for the correct settings. ■ If your computer is connected to a network, someone may have renamed the printer. ■ If you are using an AppleTalk network that contains zones, you haven’t selected the correct zone for the printer. ■ There’s a problem in the network cable system somewhere between your computer and the printer you want to use. Make sure that all the cables are properly connected. See “Checking the Connections” earlier in this chapter. If you still can’t resolve the problem, the printer’s electronics or the LocalTalk connector boxes may not be functioning properly. Call your authorized Apple dealer. 70 Chapter 5: Troubleshooting Nothing is printed; no paper comes out of the printer If you don’t seem to get any response from the printer after you try to print a document, try the following: ■ Check PrintMonitor if you are using background printing. ■ Check the Chooser to be sure the printer is selected. Be sure to select the printer’s name, as well as the LaserWriter icon and, if necessary, the AppleTalk network zone. ■ Check the Paper Out light. If it is on, add paper and replace the paper cassette. If it is blinking, make sure the paper cassette is securely in place. ■ Check for a paper jam as described earlier in this chapter. ■ Check the network cables as described in this chapter. ■ Check the position of the port configuration switch as described in “Setting the Push-button Switch” in Chapter 2. ■ Turn the printer off and back on. Check the startup page. ■ Reinstall the printer driver on the startup disk. A message on the screen says the printer can’t print If you get such a message, try the following: ■ Make sure that the printer is turned on. ■ Check the network cables as described in “Checking the Connections,” earlier in this chapter. ■ Make sure your startup disk has the LaserWriter driver in the System Folder. ■ Check the Chooser to make sure the printer is selected. Be sure to select the printer’s name as well as the LaserWriter icon and, if necessary, the AppleTalk network zone. Chapter 5: Troubleshooting 71 Chapter 6 Maintenance T he LaserWriter is designed for trouble-free service. Maintenance involves little more than putting in a new toner cartridge every 4000 pages or so and performing a few minor cleaning tasks. The recommended service interval is 100,000 pages. This service can be arranged through your authorized Apple dealer. 73 Safety first You should replace the ozone filter in your LaserWriter and check the ozone emission control system every 50,000 pages. Your authorized Apple dealer can arrange to have this service performed. You can replace the ozone filter yourself (if you upgraded an older LaserWriter II to a LaserWriter IIf or IIg, the ozone filter may need to be replaced by a dealer). Refer to the section “Replacing the Ozone Filter,” later in this chapter, for details. The fixing roller assembly in the LaserWriter operates at very high temperatures—around 204° C (400° F). If possible, allow the rollers to cool before performing maintenance and troubleshooting. The fixing rollers 74 Chapter 6: Maintenance Precautions during maintenance To prevent damage to the printer while performing maintenance, observe the following precautions: ■ Don’t lubricate the printer. ■ Don’t attempt to disassemble the printer. ■ Don’t place anything on top of the printer. Don’t touch the exposed electrical contacts or gears in the boxed area Don’t open the drum-protection shutters (on the bottom of the cartr Don’t open the light-blocking shutters. Chapter 6: Maintenance 75 Regular maintenance Low toner level The toner cartridge holds the toner powder—the printer’s “ink”—that forms the printed images. Each cartridge should yield about 4000 pages. If you print many graphic images, you may need to change cartridges more often. If your pages start to look too light, or if you see thin vertical white lines in dark images, it may be time to change the cartridge. When the Low Toner Level light glows orange, it can mean one of two things: ■ The toner powder needs to be redistributed inside the toner cartridge. ■ The cartridge needs replacing. If the light comes on in the middle of a printing job, and the output is still satisfactory, continue printing if you wish. You won’t harm the printer by doing so. When the light comes on, take the cartridge out, rock it gently back and forth a few times (as in the cartridge installation procedure) to redistribute the toner, and reinsert it. If the light goes out, you can continue to use the same cartridge. If the light stays on, change the cartridge and perform the maintenance procedures described in the following sections. ▲ Warning: Use only an Apple LaserWriter Toner Cartridge with the LaserWriter IIf and IIg. Other cartridges may not fit and may produce lower-quality results. Using refilled toner cartridges may impair the printer’s ability to produce high-quality images. ▲ 76 Chapter 6: Maintenance Replacing the toner cartridge Whenever you install a new toner cartridge, you should also clean the interior of the printer and replace the cleaning pad. A replacement pad is supplied with each cartridge. Follow these steps to replace the cartridge and clean the interior of the printer. 1. Open the printer halfway and remove the used cartridge. ▲ Warning: Do not insert or remove a toner cartridge when the printer’s top is in a completely open, vertical position. This can cause toner to spill into the printer. ▲ Keep the cartridge horizontal so no toner spills into the printer. 2. Raise the top of the printer to a completely open position. 3. Open the cover that protects the fixing rollers. If you have not allowed the printer adequate time to cool after shutting it down, the roller cover may be hot, and the fixing rollers will be very hot. 4. Remove and discard the used cleaning pad. Chapter 6: Maintenance 77 5. Unwrap the new cleaning pad. Remove and put aside the cotton swab attached to the pad by a rubber band. You’ll use the swab to clean the printer wires. 6. Use the white felt tip on the end of the new pad to clean the fixing rollers. Before you install the new pad, clean the fixing rollers by wiping them with the white felt tip at the end of the pad. ▲ Warning: Be very careful during all cleaning operations not to break any of the wires inside the printer. ▲ The fixing rollers 78 Chapter 6: Maintenance 7. Remove and discard the white felt tip. 8. Insert the new cleaning pad into the fixing roller assembly and close the cover. Chapter 6: Maintenance 79 9. Clean the discharging pins with the cleaning brush. The small, green-handled brush snaps into a holder inside the printer. Use the cleaning brush to remove dust from the discharging pins. Replace the brush in the printer when you’re finished. The cleaning brush The discharging pins 10. Gently wipe the transfer corona wire with the cotton swab. The transfer corona wire consists of the very thin diagonal wires in the midsection of the LaserWriter and the thin straight wire below them. Wipe the wires very gently with the cotton swab supplied with the new cleaning pad. 80 Chapter 6: Maintenance ▲ Warning: The transfer corona wire is fragile. Be careful not to break it when cleaning. ▲ The cotton swab The transfer corona wire 11. Wipe the transfer guide with a clean, soft, damp cloth. The transfer guide Chapter 6: Maintenance 81 12. Take the new cartridge out of its packaging. Don’t touch this area. 13. Distribute the toner powder. Slowly rock the cartridge 45 degrees four or five times. 82 Chapter 6: Maintenance 14. Close the printer halfway and insert the cartridge. Make sure the cartridge is seated firmly. 15. Loosen the tape tab. Flex the tab back, but don’t tear it off; you’ll need it to pull out the tape. Chapter 6: Maintenance 83 16. Remove the tape. ▲ Warning: Do not remove the sealing tape before the cartridge is in the printer. If you insert the cartridge with the tape removed, toner may spill into the printer. For the same reason, avoid transporting the printer with a cartridge installed, and always remove cartridges carefully. ▲ Pull the tab out until the tape is completely removed. 17. Close the printer and resume printing. 84 Chapter 6: Maintenance Cleaning the exterior Unplug the power cord and then wipe the exterior of the printer with a clean, soft, damp cloth. Use a mild soap or detergent if necessary, but never use an ammonia-based cleaner. Be careful not to get any liquid in the power cord port. ▲ Warning: Never use ammonia-based cleaners on or around the LaserWriter. They may react chemically with the toner. ▲ Replacing the ozone filter The ozone filter should be replaced every 50,000 pages. The LaserWriter IIf and IIg printers have user-replaceable ozone filters, but if you upgraded an older LaserWriter II, your ozone filter may have to be replaced by an authorized Apple service provider. See Appendix B, “LaserWriter IIf and IIg Specifications,” for important information about ozone emissions. ▲ Important: Use only an Apple LaserWriter II ozone filter in the LaserWriter IIf and IIg. If you replace the ozone filter yourself, make sure that the exhaust fan is working by checking for air coming out of the exhaust vent when the printer is printing. If the fan is not working properly, have it repaired by an authorized Apple service provider. (See the location of the exhaust vent in the illustration that follows.) ▲ Chapter 6: Maintenance 85 To determine whether your printer contains a user-replaceable ozone filter, and to replace the filter, follow these steps: 1. Locate the ozone filter cover, on the right side of the interior of the printer. Exhaust vent Caution: Hot area If the ozone filter cover is a plastic door latched at the top, your printer has a user-replaceable filter. If the ozone filter cover is fastened with a screw, you must have your printer’s ozone filter replaced by an authorized Apple service provider. 2. Open the ozone filter cover by unlatching it at the top and swinging it down. 3. Pull the clear plastic tab to remove the filter. 4. Replace the filter with a new filter, making sure the clear plastic tab faces out. Close the filter cover and the printer. 86 Chapter 6: Maintenance Appendix A LaserWriter IIf and IIg Upgrades T o upgrade a LaserWriter IIf or IIg, you have the option of increasing the printer’s memory and of adding one or more dedicated hard disks for font management. The benefits and procedures for doing so are described in this chapter. 87 Memory upgrades You can install up to 32 MB (megabytes) of random-access memory (RAM) in the LaserWriter IIf or IIg. RAM upgrades provide the following benefits: ■ the ability to print very complex documents (graphics or engineering documents, for example) that might not print on printers with less memory ■ faster performance on complex documents ■ faster performance when using downloaded fonts ■ faster performance when printing documents that have been scaled down from larger originals (complex organization charts, maps, and flow charts, for example) ■ the ability to increase the imageable area of a document (you can use more of a sheet of legal paper, for example) ■ on the LaserWriter IIf, the ability to print pages larger than standard letter size ■ on the LaserWriter IIf, the ability to print using the PhotoGrade feature for increased gray levels ■ on the LaserWriter IIg (and IIf if upgraded), the ability to print larger PhotoGrade images Adding RAM provides these benefits by allowing more fonts to be downloaded to the printer at one time, by providing more space to store the calculations needed for large or complex images, and by increasing the space available for font caching, or maintaining recently used fonts in memory for faster access the next time they are needed. ▲ Important: A memory upgrade to at least 5 MB of RAM is required to use the full dimensions of legal-size paper on the LaserWriter IIf, or 8 MB to print PhotoGrade images in full legal size on the LaserWriter IIg. ▲ 88 Appendix A: LaserWriter IIf and IIg Upgrades RAM expansion You can purchase RAM for the LaserWriter in packages of 1 megabyte or 4 megabytes, to upgrade memory to the 32-megabyte maximum. Upgrade kits should be installed by your authorized Apple dealer. ▲ Important: The RAM used in the LaserWriter IIf and IIg is not the same type of RAM used in earlier LaserWriter II printers. The two are not interchangeable. ▲ The RAM used in LaserWriter IIf and IIg is the same as in the Macintosh IIci. The expansion kits are named as follows: ■ Macintosh 1 MB Memory Expansion Kit (Part No. M0291LL/A) ■ Macintosh 4 MB Memory Expansion Kit (Part No. M0292LL/A) The LaserWriter controller board contains two banks of RAM labeled bank 0 and bank 1. The possible memory configurations are as follows: Total RAM Bank 0* Bank 1 2 megabytes 4 megabytes 5 megabytes 8 megabytes 16 megabytes 17 megabytes 20 megabytes 32 megabytes 1 MB 4 MB 4 MB 4 MB 16 MB 16 MB 16 MB 16 MB 1 MB — 1 MB 4 MB — 1 MB 4 MB 16 MB * If the two banks do not contain the same amount of RAM, be sure that the larger set of memory chips is in bank 0. Appendix A: LaserWriter IIf and IIg Upgrades 89 Adding hard disks You can attach up to seven SCSI hard disks to the LaserWriter IIf or IIg. The hard disk provides space for font storage and font caching. There are several benefits of connecting one or more hard disks to your printer: ■ You’ll have a large, permanent storage space for downloadable fonts. ■ Background art (watermark images and letterhead backgrounds that you use on many of your print jobs, for example) can be stored at the printer. ■ By storing downloadable fonts on your printer’s hard disk instead of on individual users’ hard disks, you save disk space on their computers. ■ Because hard disks work over a very fast SCSI connection, you’ll get fast performance on documents that use downloadable fonts. ■ You’ll improve network performance because less information is transferred over network cables. When you download a font, you can choose to download it either to a hard disk or to the LaserWriter’s RAM. Downloading it to a disk stores it there permanently (or until you remove it). You initialize the disks and download fonts to them by using the LaserWriter Utility program on the LaserWriter II Installation disk (see “Downloading Fonts to the Printer” in Chapter 3). 90 Appendix A: LaserWriter IIf and IIg Upgrades Connecting a previously used hard disk The LaserWriter IIf and IIg will not recognize any disks that have been formatted for use with an earlier model LaserWriter printer. If you attach such a disk to the LaserWriter IIf or IIg, you will need to reinitialize the disk before you can use it and then reload any fonts from your computer, from their original floppy disks, or from other sources. Reinitializing will erase all fonts previously stored on the disk. Connecting the disks For each hard disk you connect to the LaserWriter, you will need a SCSI peripheral cable, which links two SCSI devices. You’ll also need a SCSI cable terminator for the hard disk farthest from the printer. Although a set of connected SCSI devices usually requires two cable terminators, the LaserWriter IIf and IIg each has its own internal SCSI terminator, so you’ll only need to add one. The kind of SCSI cable terminator to use with disks connected to the LaserWriter IIf or IIg is black rather than tan or platinum and is not interchangeable with other SCSI terminators. Be sure to obtain the correct model from an authorized Apple dealer: ■ Apple SCSI Cable Terminator (Service Part No. 590-0705) SCSI cable and SCSI terminator Before you connect your hard disks, make sure that each one has a unique SCSI ID number. Do not turn on or attempt to use the printer or any attached hard disk until each disk has been assigned its own number. Setting the ID number Appendix A: LaserWriter IIf and IIg Upgrades 91 Each SCSI device attached to the printer must have a unique ID number. The hard disk with the lowest ID number is the startup disk. You assign a SCSI ID number by setting the SCSI ID switch on the back panel of the disk. Follow these steps: 1. Make sure the hard disk is turned off. 2. Insert a straightened paper clip into the hole below the SCSI ID indicator (some SCSI devices have push-buttons instead of holes). 3. Push gently until the number you want appears in the indicator. 4. If you go past the number you want, keep pushing until it comes around again. ▲ Warning: The printer will not recognize any attached disk unless the disk is turned on before you start up the printer. Wait at least 10 seconds after turning on the hard disks before you turn on the printer. ▲ To connect a single hard disk 1. Attach either end of a peripheral cable to the SCSI port on the LaserWriter. Be sure to snap the wire clips into the clip brackets to secure the connection. 2. Attach the other end of the peripheral interface cable to either SCSI port on the hard disk. 3. Attach a cable terminator to the other SCSI port on the hard disk. To connect multiple hard disks 1. Attach either end of a peripheral cable to the SCSI port on the 92 Appendix A: LaserWriter IIf and IIg Upgrades LaserWriter. 2. Attach the other end of the cable to either SCSI port on the first hard disk. 3. Attach a second peripheral cable to the other SCSI port on the first hard disk. 4. Attach the other end of the peripheral cable to either SCSI port on the next hard disk. 5. Repeat steps 3 and 4 for each additional hard disk. 6. Attach a cable terminator to the unused SCSI port on the last hard disk. Appendix A: LaserWriter IIf and IIg Upgrades 93 Using hard disks from manufacturers other than Apple Initializing hard disks 94 If you are considering connecting non-Apple hard disks to your LaserWriter, keep these points in mind: ■ The LaserWriter must be able to tell how much storage space is available on the disk. This is not possible with some hard disks from manufacturers other than Apple. You cannot use these disks with the LaserWriter. ■ Some non-Apple disks have internal SCSI terminators. Since the LaserWriter has an internal terminator, put any disk with an internal terminator at the other end of the chain, and do not use any external terminator. There should be no more than two terminators in any SCSI chain. To prepare a hard disk connected to a LaserWriter, use the LaserWriter Utility provided on the LaserWriter II Installation disk. See “Initializing a Hard Disk Attached to the Printer” in Chapter 3. Appendix A: LaserWriter IIf and IIg Upgrades Appendix B LaserWriter IIf and IIg Specifications Specifications Marking engine Controller Canon LBP-SX laser-xerographic. LaserWriter IIf controller hardware contains a 20 MHz 68030 CPU, 2 MB of ROM, 2 MB of RAM (expandable to 32 MB), LocalTalk interface, RS-232 and RS-422 serial interfaces, SCSI interface. LaserWriter IIg controller hardware contains a 25 MHz 68030 CPU, 2 MB of ROM, 5 MB of RAM (expandable to 32 MB), LocalTalk interface, RS-232 and RS-422 serial interfaces, Ethernet interface, SCSI interface. 95 Printer fonts The following fonts are provided: ITC Avant Garde, ITC Bookman, Courier, Helvetica, Helvetica Narrow, New Century Schoolbook, Palatino, Symbol, Times, ITC Zapf Chancery, and ITC Zapf Dingbats. The LaserWriter supports printing in plain, bold, italic, and bold italic, with additional styles depending on the application. Printable font sizes are limited only by the resolution of the printer and the size of the paper. The following TrueType fonts are provided: Chicago, Geneva, Monaco, and New York. The LaserWriter can print TrueType fonts at any size, limited only by the resolution of the printer and the size of the paper. The LaserWriter can support additional TrueType and PostScript fonts from other suppliers. Speed Interfaces Recommended duty cycle Print feed 96 Eight pages per minute maximum. Actual speed depends on the images printed. LocalTalk, RS-232, and RS-422 on both the LaserWriter IIf and IIg; Ethernet on the LaserWriter IIg only. Minimum life expectancy is 300,000 pages, with no monthly page limit. Recommended service interval is 100,000 pages. Automatic with 200-sheet paper cassette. Manual with single-sheet feeder. Appendix B: LaserWriter IIf and IIg Specifications Printing materials 20- to 24-pound laser-quality bond (60 to 80 g/m2) in normal mode; up to 36-pound (135 g/m2) stock in manual mode with face-up tray open. Accepts most textured and colored stock. Accepts medium-weight photocopier transparencies. Envelopes can be printed with manual feed or from the envelope cassette. Labels can be printed with manual feed. The paper used should not scorch, melt, transfer material, or release hazardous emissions when heated to 200° C (393° F) for 0.1 seconds. Paper sizes and capacity Supports U.S. letter, U.S. legal, A4, B5, and envelope cassettes. Each paper cassette holds 200 sheets of 20-pound (80 g/m2) paper. The optional envelope cassette holds 15 envelopes. A memory upgrade is required to use the full dimensions of letter-size paper on the LaserWriter IIf or to print PhotoGrade images in full letter size on the LaserWriter IIg. See Appendix A, “LaserWriter IIf and IIg Upgrades,” for details. Dimensions Weight Height 22 cm (8.6 in.) Width 51.3 cm (20 in.) Width with letter-size cassette 67.8 cm (26.4 in.) Depth 47.5 cm (18.5 in.) 20.5 kg (45 lb.) Appendix B: LaserWriter IIf and IIg Specifications 97 Imageable area Maximum printable line: 205.9 mm (8.1 in.). Minimum top and bottom margins: 5.0 mm (0.197 in.). Minimum left margin: 5.0 mm (0.197 in.). Minimum right margin: 5.0 mm (0.197 in.). The printer senses cassette size and adjusts to maintain these margins. In the manual feed or envelope cassette mode, the operator must prevent printing beyond the margin to avoid depositing toner on the transfer corona. Actual imageable area may vary, depending on the application and the installed RAM. Operating environment Voltage requirements Power consumption 98 Temperature 10° to 32° C (50° to 90° F) Humidity 20 to 80 percent Toner cartridge transit environment –20° to +40° C (–4° to +104° F) U.S./Japan 90V to 126V AC 50 to 60 Hz Europe/Australia 198V to 264V AC 50 Hz Standby 170 W average Operating 900 W maximum at 115V 780 W maximum at 220V 880 W maximum at 240V Appendix B: LaserWriter IIf and IIg Specifications Ozone emission Ozone gas is emitted by almost all laser printers and photocopiers. In the LaserWriter, the primary source of ozone is the corona wire, which produces an electrical discharge while the printer is printing. The LaserWriter has an ozone filter so that the ozone emissions from the printer comply with Underwriters Laboratory (UL) safety limits. Depending on the levels of concentration, ozone can be a mild-to-severe irritant with known effects ranging from dry throat and nose, headache, and sore eyes to nausea, vomiting, and pulmonary congestion. For this reason various regulatory agencies have established limits regarding the amount of ozone to which employees may be exposed. The current OSHA permissible exposure limit for ozone is 0.1 parts of ozone per million parts of air (ppm). The employer is responsible for providing a work environment that meets these standards. You can usually identify ozone by its characteristic odor, even in concentrations well below the permissible exposure limit. However, as the concentration of ozone or the duration of exposure increases, your ability to smell it may decrease. To minimize ozone exposure, install the LaserWriter in a well-ventilated area and keep the equipment properly maintained. If there are other laser printers or photocopying machines in the same area, additional air circulation may be required. Do not place the LaserWriter in a small, enclosed space that lacks adequate ventilation. Position the printer so that the fan exhaust does not blow directly into an individual’s face. Finally, maintain the relative humidity between 30 and 70 percent. Extremely low humidity can slow the natural breakdown of ozone in the air. Appendix B: LaserWriter IIf and IIg Specifications 99 The ozone filter in the LaserWriter is designed to operate effectively for up to 50,000 pages of use. However, filter effectiveness can diminish over time, primarily due to dust accumulation. Apple recommends checking the entire ozone emission control system and replacing the ozone filter after every 50,000 pages (more frequently if the printer is used in dusty conditions). The maintenance check and filter replacement can be done by any authorized Apple service provider. You may have a model of the LaserWriter that is designed so that you can replace the ozone filter yourself if you wish. See Chapter 6 for information about determining whether your ozone filter is userreplaceable, and for instructions about replacing the filter. Communication settings The table on the following page shows the communication settings in effect when the printer is new. The push-button switch on the printer’s connector panel can be set to positions 0–9. Switch positions 0–5 are fixed, and the settings for these positions cannot be changed. Positions 6–9 are user-configurable; you can change the settings for these positions to match the needs of the computer you are connecting. The section “Available Settings,” at the end of this appendix, lists all the options available for each setting. From a Macintosh computer, you use the LaserWriter Utility program to display and change communication settings. From a computer other than a Macintosh, you can send PostScript commands to the printer to change the communication settings. Contact your Apple dealer or technical representative for assistance. 100 Appendix B: LaserWriter IIf and IIg Specifications Switch Position Port Name Type of Baud Connection Rate Parity Data Bits Stop Bits Flow Control Protocol Mode 0 8-pin/RS-422 RS-232 Ethernet LocalTalk Serial EtherTalk — 9600 — — None — — 8 — — 1 — — XON/XOFF — — Normal — PostScript PostScript PostScript 1 8-pin/RS-422 RS-232 Ethernet LocalTalk Serial EtherTalk — 9600 — — None — — 8 — — 1 — — DTR — — Raw — PostScript HP PCL 4 PostScript 2 8-pin/RS-422 RS-232 Ethernet LocalTalk Serial EtherTalk — 19200 — — None — — 8 — — 1 — — XON/XOFF — — Normal — PostScript PostScript PostScript 3 8-pin/RS-422 RS-232 Ethernet LocalTalk Serial EtherTalk — 9600 — — None — — 8 — — 1 — — XON/XOFF — — Raw — PostScript Nonprinting PostScript 4 8-pin/RS-422 RS-232 Ethernet LocalTalk Serial EtherTalk — 1200 — — None — — 7 — — 1 — — XON/XOFF — — Normal — PostScript PostScript PostScript 5 8-pin/RS-422 RS-232 Ethernet Serial Serial EtherTalk 9600 9600 — None None — 8 8 — 1 1 — XON/XOFF XON/XOFF — Normal Normal — PostScript PostScript PostScript 6 8-pin/RS-422 RS-232 Ethernet Serial Serial EtherTalk 19200 19200 — None None — 8 8 — 1 1 — XON/XOFF XON/XOFF — Normal Normal — PostScript PostScript PostScript 7 8-pin/RS-422 RS-232 Ethernet LocalTalk Serial EtherTalk — 1200 — — None — — 8 — — 1 — — DTR — — Normal — PostScript PostScript PostScript 8 8-pin/RS-422 RS-232 Ethernet LocalTalk Serial EtherTalk — 1200 — — None — — 8 — — 1 — — XON/XOFF — — Raw — PostScript HP PCL 4 PostScript 9 8-pin/RS-422 RS-232 Ethernet LocalTalk Serial EtherTalk — 9600 — — None — — 8 — — 1 — — XON/XOFF — — Binary — PostScript PostScript PostScript Appendix B: LaserWriter IIf and IIg Specifications 101 Available settings 102 The following table briefly describes the communication settings and lists the options available for each. Setting Description Options Baud rate The speed of transmission between the computer and printer 300, 600, 1200, 1800, 2400, 3600, 4800, 7200, 9600, 19200, 57600 Parity The method used to compare transmitted and received data to check for errors None, odd, even, mark, space Data bits The number of bits used to represent each character 7, 8 Stop bits The number of bits used to indicate the end of a character 1, 2 Flow control The method used to prevent transmitted data from exceeding the rate at which the receiving end can accept it XON/XOFF, DTR, ETX/ACK Protocol The digital format in which the data is presented Normal, Raw, Binary Mode The communication standard used to transmit data PostScript, HP Printer Command Language 4, and Nonprinting Input (not intended for a computer connection) Appendix B: LaserWriter IIf and IIg Specifications Appendix C Service and Support T o help you get the best performance from your LaserWriter, Apple Computer, Inc., has established a worldwide network of full-support authorized Apple dealers. If you need answers to technical questions or information about product updates, your authorized Apple dealer can help you. Apple’s Technical Support organization backs each dealer and international technical support group via the AppleLink® network, a stateof-the-art on-line electronic information service, to ensure prompt, reliable assistance. Your dealer has the latest information on new hardware and software products, as well as on product updates. If you wish to upgrade your system, your dealer can help you select compatible components. 103 If your product requires service, your local authorized Apple dealer is trained and ready to support you. Apple provides factory-quality parts and the latest available diagnostic equipment to the more than 3000 authorized Apple service centers throughout the world. Apple guarantees parts and warranty labor. (Regulations in each country determine the length of warranty. Some restrictions may apply, depending on the country of original purchase.) If for some reason you cannot return to the authorized dealer from whom you purchased your system, go to the nearest service location. For the location nearest you, in the United States or Canada, call or write one of the following: Apple Computer, Inc. Customer Relations 20525 Mariani Avenue Cupertino, CA 95014 U.S.A. 800-538-9696 Apple Canada, Inc. 7495 Birchmount Road Markham, Ontario, L3R 5G2 Canada 800-268-7796 or 800-268-7637 For locations in other countries, either call the Apple headquarters in your country or write to the United States address given above. Apple also offers service options designed to meet your needs. One of these is the AppleCare® Service Agreement (available in the United States, Canada, and Australia only), which extends full warranty coverage up to three years. Your AppleCare contract will be honored at any participating authorized Apple dealer within the country of purchase—an added benefit if you relocate. Local service means time saved in getting your Apple system back to work. You can purchase AppleCare at any time, but it’s a good idea to purchase it with your system, or at least before your warranty has expired, to avoid an inspection at your own expense. 104 Appendix C: Service and Support Appendix D HP LaserJet Printer Emulation T his appendix describes the communication setting for the LaserWriter IIf and IIg that allows the printer to emulate the Hewlett-Packard LaserJet IIP printer. 105 When you need to use emulation The LaserWriter is normally used in PostScript communication mode, which means that it accepts page description information from your computer in the PostScript language. This language also includes all the necessary control information to set the printer’s printing and communication features from your computer. If your computer’s software is not able to communicate in the PostScript language, you can use the printer’s emulation mode to accept printing commands in a different form, the HP PCL4 language, which is commonly supported by many kinds of computer software. How to set the printer to use emulation The HP PCL4 (LaserJet emulation) mode is one of the standard communication settings available on the LaserWriter. You control the printer’s communication settings through the push-button switch on the printer’s connector panel, as well as through software commands from the Macintosh LaserWriter Utility. For information about port settings and how to set the printer’s communication switch, see Chapter 2, “Connecting the LaserWriter.” For information about controlling the settings with the LaserWriter Utility, see Chapter 3, “Installing and Using Printer Software.” 106 Appendix D: HP LaserJet Printer Emulation LaserJet IIP emulation In this mode you can print both text and bitmapped graphics by using the LaserJet’s font selection and positioning commands. The LaserWriter responds to commands from the LaserJet IIP printer driver software. (You need to install the LaserJet IIP printer driver following the instructions in the manual that came with the software.) The LaserJet IIP emulator contained in the LaserWriter allows you to print just about anything you can print on the LaserJet IIP, with these differences: ■ The LaserJet IIP omits characters that overlap the left margin of the paper, but the emulator prints the portion of the character that does not extend into the margin. ■ The LaserJet IIP allows you to insert commands to halt printing so that you can insert paper or envelopes manually. The emulator interprets those commands as form feeds. ■ Applications that produce justified text with the LaserJet IIP versions of Helvetica (Helv) and Times Roman (Tms Rmn) fonts may generate slightly ragged output on the emulator. ■ While the LaserJet IIP prints characters in the closest available point size and pitch for each font, the emulator scales the font to the specified size. ■ The line printer font, which is 16.67-pitch Courier, appears with a height of 7.2 points when printed with the emulator, rather than 8.5 points as printed by the LaserJet IIP. ■ The Control-C and Control-T key combinations, which you can normally use to interrupt printing or query the status of the LaserJet IIP, cannot be used with the emulator. Appendix D: HP LaserJet Printer Emulation 107 ■ The emulator does not print nine characters from the LaserJet IIP Roman-8 symbol set. These characters are shown in the following table. Decimal code Symbol description 176 179 227 228 240 241 247 248 254 overline* degree symbol uppercase D with stroke (Eth) lowercase D with stroke (eth) uppercase Thorn lowercase thorn one-fourth symbol one-half symbol plus/minus sign * The emulator will print the overline symbol in the Courier typeface. ▲ Important: When printing documents in close succession, make sure that each one ends with an end-of-file command so they do not run together. (The LaserWriter interprets the Control-D key combination as an end-of-file command.) If your document does not end with a Control-D character and no other document is ready to print, the printer waits for 30 seconds after last receiving data before printing the last page. If another print job immediately follows the document without the end-of-file character, the first page of the new job will begin on the last page of the first document. ▲ 108 Appendix D: HP LaserJet Printer Emulation Index A C adapters, Ethernet AUI 23 address block, positioning for envelopes 55 A4 paper cassette 12 A4-size paper 65 AppleCare Service Agreement 104 AppleLink network 103 AppleShare PC, choosing LaserWriter for 48 AppleTalk networks activating 48 AppleTalk Phase 1 and Phase 2 23 choosing LaserWriter for 48 zones 70 Apple II computers, choosing LaserWriter for 48 Apple IIe, LocalTalk and 19 AUI adapter, Ethernet 23 cables Ethernet 23–26, 29 LocalTalk 19–22, 29 SCSI peripheral cable 91–93 serial 29 troubleshooting 63 cable terminator, SCSI 91, 93 Calibrate Printer command (Utilities menu) 40 calibrating PhotoGrade 40 cartridge. See toner cartridge cassettes. See envelope cassette; paper cassette Chooser selecting LaserWriter printer in 48 failure to appear in Apple menu 69 LaserWriter icon fails to appear in 70 naming printer with 37 printer is not listed in 70 cleaners, ammonia-based (do not use) 2 cleaning discharging pins 80 exterior of printer 85 fixing rollers 77–79 interior of printer 77 toner cartridge 6–7, 77–79 transfer corona wire 80–81 B background printing 48, 54, 57 baud rate 101–102 bitmapped graphics 107 black-and-white printing 50 blank documents 65 bond, paper 58, 97 109 cleaning pad for toner cartridge 6–7, 77–79 clearing memory 43 closing face-up tray 51 fixing roller cover 7 LaserWriter 11 ozone filter cover 86 colored paper 58 Color/Grayscale option 50 color printing 50 communication settings changing 41, 100–102 list of 27, 100–102 printing 42 viewing 41 computers. See specific computer Configure Communications command (Utilities menu) 41 connecting 17–22 hard disks 91–93 LaserWriter IIg with Ethernet cables 23–26 non-Apple hard disks 94 options for 17 peripheral cable to SCSI port 92 ports and 18, 27–28 power cord 30 connection ports. See ports connections, troubleshooting 62–63 connector box Ethernet 25–26 LocalTalk 19–22, 70 connector kit, LocalTalk locking 19 connectors, Ethernet 24 controller specifications 95 controlling PhotoGrade 39–40 corona wire, ozone and 99 cover fixing rollers 7 printer, open 60, 63 D 110 Index daisy-chaining hard disks 93 dark images, troubleshooting 67 data bits 101–102 dealers, service and 104 default settings, restoring 36 delivery tray. See face-up delivery tray dial. See print density dial dimensions of printer 97 discharging pins, cleaning 80 disconnecting power 15 disks. See also hard disks; software LaserWriter II Fonts 34 LaserWriter II Installation 34 Display Available Fonts command (File menu) 46 distributing toner powder 9, 82 documents black-and-white 50 blank 65 color 50 grayscale 50, 65 printing in close succession 108 problems printing 64–69 saving in PostScript format 50 DOS computers. See MS-DOS computers dots per inch, enhanced xi–xii Download Fonts command (File menu) 45 downloading fonts to printer 45 PostScript files 42 Download PostScript File command (Utilities menu) 42 drum-protection shutters 75 duplex printing 57 duty cycle, recommended 96 E 8-pin port, appearance of 29 location of 18 serial setting for 28 switch settings for 27 electrical precautions 14–15, 75 electrical requirements 2 emulation of HP LaserJet IIP 105–108 Encapsulated PostScript files, printing 42 end-of-file command 108 envelope cassette 55, 97 envelopes positioning address block on 55 printing on 51, 55–58, 97 temperature and 58 trouble with 58 error messages, meaning of 71 Ethernet xi, 18, 23–27 modifying standard connection 27, 41 Ethernet AUI adapter 23 Ethernet cables connecting LaserWriter IIg with 23–26 types of 23 Ethernet connector 24 Ethernet connector box 25–26 Ethernet port (LaserWriter IIg) xi, 23–27 Ethernet thin coax transceiver 23 Ethernet twisted-pair transceiver 23 EtherTalk 23, 101 exhaust fan 85, 99 exhaust vent 2, 85–86 exterior, cleaning 85 external hard disks. See hard disks F face-up delivery tray capacity of 51 duplex printing and 57 leaving room for 2 factory settings, reverting to 36 fan 85, 99 File menu Display Available Fonts command 46 Download Fonts command 45 Initialize Printer’s Disk command 44 Print Font Catalog command 46 Print Font Samples command 46 files PostScript, downloading 42 problems printing 64–69 film, transparency 51, 58, 97 filter. See ozone filter FinePrint purpose of xi–xii turning on or off 38 fixed-size fonts xiv fixing rollers 74 cleaning pad for 6–7, 78 cover, opening and closing 7, 62 paper jams in 62 flow control 101–102 fonts displaying list of 46 distinguishing TrueType from fixed-size xiv downloading to printer 45 fixed-size xiv font families xii introduction to xiii–xiv LaserWriter II Fonts disk and 34 PostScript 96 printing list of 46 printing samples of 46 removing from printer’s disks 46 specifications 96 TrueType xiv, 43, 96 formatting disks. See initializing hard disks Index 111 G Get Page Count command (Utilities menu) 38 glossy paper, trouble with 58 graphics, bitmapped 107 grayscale documents, printing 50, 65 gray shades enhanced xii increasing or decreasing number of 39–40 grounding plug 14 H hard disks 90–94 connecting 91–93 downloading fonts to 45 initializing 44 multiple 93 non-Apple 94 printer recognition of 92 removing fonts from 46 removing TrueType fonts and software from 43 SCSI ID number for 92 heavy paper, printing on 51 Hewlett-Packard LaserJet IIP emulation 105–108 high-resolution technology xi–xii. See also FinePrint; PhotoGrade horizontal orientation 49, 55 hot areas in printer 61–62, 77, 86 HP LaserJet IIP emulation 105–108 humidity 2, 98–99 I icon, LaserWriter 48 identification sheet, printing 50 ID number, SCSI 91–92 imageable area 98 indicator lights. See lights Initialize Printer’s Disk command (File menu) 44 initializing hard disks attached to printer 44 ink. See toner powder 112 inserting paper cassette into printer 14 paper into cassette 12–13, 52–53, 57 toner cartridge into printer 9, 83 Installer program 34–35 installing printer software 33–35 toner cartridge 5–11, 83 interface specifications 96 interference, radio and television viii J, K jammed paper. See paper jams L landscape orientation 55 LaserJet emulation mode 102, 105–108 laser-quality paper 12, 64 LaserWriter icon 48 LaserWriters, earlier models of 44 LaserWriter IIf and IIg. See also specific topic choosing a place for 2 closing 11 connecting 17–22 connecting power and turning on printer 30–31 controlling with LaserWriter Utility 36–46 fonts and xii–xiv, 45 hot areas in 61–62, 77, 86 HP LaserJet IIP printer emulation and 105–108 introduction to xi–xiii life expectancy of 96 maintenance of 73–86 moving 3, 10, 84 naming 37 110V model 12 opening 3 printer software and 33–46 printing with 47–58 restarting 43 restoring factory settings for 36 selecting with Chooser 48 Index setting up 1–15 service and support 103–104 specifications 95–98 systems compatible with ix troubleshooting 59–71 turning on/off 30–31 220V model 12 upgrading 87–94 LaserWriter II Fonts disk 34 LaserWriter IIg connection software for 23 Ethernet networks and 18, 23–26 Ethernet port on xi PhotoGrade and xi-xii, 39–40, 50, 64–65, 88 LaserWriter II Installation disk 34 LaserWriter Utility program 36–46 Calibrate Printer command (Utilities menu) 40 Configure Communications command (Utilities menu) 41 Display Available Fonts command (File menu) 46 Download Fonts command (File menu) 45 Download PostScript File command (Utilities menu) 42 Get Page Count command (Utilities menu) 38 Initialize Printer’s Disk command (File menu) 44 Name Printer command (Utilities menu) 37 opening 36 Print Configuration Page command (Utilities menu) 42 Print Font Catalog command (File menu) 46 Print Font Samples command (File menu) 46 Remove TrueType command (Utilities menu) 43 Restart Printer command (Utilities menu) 43 Set FinePrint command (Utilities menu) 38 Set PhotoGrade command (Utilities menu) 39 Set Startup Page command (Utilities menu) 37 Use Default button 36 legal-size paper memory and 88 printing on 49, 64–65 letterhead paper loading 13, 52 printing on 54 trouble with 58 light-blocking shutters 75 light images, troubleshooting 66 lights 60 Low Toner Level 31, 60, 64–66 meaning of 60 Paper Jam 31, 60, 63 Paper Out 31, 54, 57, 60, 63 Ready/In Use light 31, 60, 63 lines, unwanted on printed page 67 loading paper 12–13, 52–53 for duplex printing 57 letterhead 13, 52 three-hole punched 13 LocalTalk cables connecting printer to computer with 20 connecting printer with 19–22 serial connections with 29 LocalTalk connector box 19–22, 70 LocalTalk locking connector kit 19 LocalTalk networks Apple IIe and 19 connecting printer to 21–22 modifying standard connection 27, 41 LocalTalk port 18, 20–22 Low Toner Level light 31, 60, 64–66 Index 113 M N Macintosh installing printer software on 34–35 system software version 6.0.7. or later 34 troubleshooting 69–71 Macintosh Page Setup dialog box 49 Macintosh Print dialog box 50 maintenance 73–86 cleaning discharging pins 80 cleaning exterior 85 cleaning fixing rollers 77–79 cleaning interior of printer 77 cleaning toner cartridge 6–7, 77–79 cleaning transfer corona wire 80–81 replacing cleaning pad 77–79 replacing ozone filter 74, 85–86 replacing toner cartridge 76–84 safety precautions for 74–75 manual feed guide, adjusting 54–55 manual feed printing 50, 54–57 margins 98 adjusting 55 trouble with 65 marking engine 95 memory 95 clearing 43 configurations of 89 expansion kits 89 PhotoGrade and 65 upgrading 49, 64, 88–89, 97 modem port 20 modes 101–102 HP PCL4 (LaserJet emulation) 102, 105–108 nonprinting input 101–102 PostScript 106 moving the printer 3, 10, 84 MS-DOS computers Choosing LaserWriter for 48 connecting to 29 LocalTalk and 19 Name Printer command (Utilities menu) 37 naming the printer 37 networks. See also AppleLink; AppleTalk; cables; Ethernet; LocalTalk connecting printer to 18–26 naming printer on 37 problems with 21, 25 selecting printer for 48 troubleshooting 62–63 zones 48, 70 non-Apple hard disks 94 nonprinting input mode 27, 101–102 number of copies printed 50 number of pages printed 38 114 Index O 110V LaserWriter 12 on/off switch 30 open cover 63 opening face-up tray 51 fixing roller cover 7, 62 Installer 35 LaserWriter 3 LaserWriter Utility 36 ozone filter cover 86 transfer paper lock 61 operating environment 98 ozone emission 99–100 irritation from 99 ventilation and 2 ozone filter 99 life span of 100 opening and closing cover 86 replacing 15, 74, 85–86, 100 P, Q package, contents of 1 packing materials removing from inside printer 4 removing toner cartridge from 8 saving 3 page count, viewing 38 page ranges, selecting 50 Page Setup dialog box 49 paper A4-size 65 blotchy areas or ghost images on 69 capacity 97 colored 58 curls when printed on 64 face-up delivery of 2, 51, 57 faded areas or white voids on 68 fails to come out of printer 71 glossy 58 heavy 51 inserting into paper cassette 12–13, 52–53 jams. See paper jams laser-quality 12, 64 legal-size 49, 64–65, 88 letterhead 13, 53–54, 58 loading into cassette 12–13, 52–53 moisture and 68 orientation of 64 photocopy bond 12, 64 preparing for insertion 12–13 printing on both sides of 57 single sheets, printing 54 sizes of 49, 64, 97 stains on 68 standard 52 supply, monitoring 60 textured 58 three-hole punched 13, 53–54 troubleshooting 51, 54, 58, 61–64, 68–69 types of 12, 58 typewriter 12 U.S. letter-size 65 weight of 58, 97 paper cassette. See also envelope cassette A4 12 capacity of 97 inserting 14 leaving room for 2 loading 12–13, 52–53 manual feed guides on 54–55 printing from 50, 52–53 removing packing material from 12 too full 65 types of 12 U.S. letter-size 12 Paper Jam light 31, 60, 63 paper jams 31, 60–63 avoiding 51, 54 checking for and clearing 61–62 Paper Out light 31, 54, 57, 60, 63 paper tray, face-up delivery 2, 51, 57 parity 101–102 peripheral cables, SCSI 91–93 photocopy bond paper 12, 64 PhotoGrade calibrating 40 Color/Grayscale option 50 controlling 39–40 memory and 64–65, 88 purpose of xi–xii ports 18 8-pin 27, 29 Ethernet (LaserWriter IIg) xi, 23–27 LocalTalk 18, 20–22 modem (Macintosh) 20 printing list of settings for 42 RS-232 18, 27, 29 RS-422 18, 27, 29 SCSI 27, 93 settings for 27–28, 100–102 25-pin 29 types of 27 Index 115 PostScript xiii, 33 files, downloading 42 files, saving 50 PostScript mode 101–102, 106 powdered ink. See toner powder power connecting 30 disconnecting 15 specifications 98 power cord 30 power plug, damaged 15 Print Configuration Page command (Utilities menu) 42 print density dial 8, 66, 68 Print dialog box 49–50 printer. See LaserWriter IIf and IIg or specific topic printer drivers, version number of 63 printer drum, damage to 13 printer fonts. See fonts printer software installing 33–35 LaserWriter Utility program 36–46 version number of 63 print feed specifications 96 Print Font Catalog command (File menu) 46 Print Font Samples command (File menu) 46 printing 47–58 addresses on envelopes 55 background 48, 54, 57 bitmapped graphics 107 black-and-white 50 color documents 50, 65 documents in close succession 108 Encapsulated PostScript files 42 face-up delivery 51 font samples 46 grayscale documents 50, 65 horizontal format 49, 55 HP LaserJet IIP emulation 105–108 landscape orientation 55 list of fonts 46 manual feed 50, 54–57 multiple copies 50 networks and 18–26 options for 49–50 paper cassette and 52–53 PostScript programs or Encapsulated PostScript files 42 printer effects, selecting 49 resolution and xi–xii single sheets 54 specified pages 50 speed of 96 startup page 30–31 troubleshooting 64–69 two-sided (duplex) 57 vertical format 49 problems. See troubleshooting programs. See Installer; LaserWriter Utility; software protocols 101–102 push-button switch displaying settings of 41 location of 18 settings for 28, 101–102 troubleshooting 62 116 Index R radio interference viii RAM. See memory RAM expansion kits 89 Ready/In Use light 31, 60, 63 release button 3 Remove TrueType command (Utilities menu) 43 removing fonts from printer’s disk 46 packing material from paper cassette 12 packing material from printer 4 toner cartridge from packaging 8 toner cartridge sealing tape 10–11 TrueType fonts and software 43 renaming the printer 37 replacing cleaning pad 77–79 ozone filter 15, 74, 85–86, 100 toner cartridge 76–84 resolution, enhanced with FinePrint xii with PhotoGrade xii, 39–40 Restart Printer command (Utilities menu) 43 restoring factory settings 36 rollers. See fixing rollers RS-232 port 18, 27, 29 RS-422 port 18, 27, 29 S safety precautions hot areas inside printer 61–62, 77, 86 maintenance 74–75 ozone 99–100 setting up printer 14–15 sample page. See startup page saving documents to printer 50 SCSI cable terminator 91, 93 SCSI hard disks, adding 90–94 SCSI ID number 91–92 SCSI ID switch 92 SCSI peripheral cable 91–93 SCSI port 27, 92–93 sealing tape on toner cartridge 10–11 selecting LaserWriter as printer of choice 48 paper 58 print options 49–50 serial cables, connecting printer with 29 serial connection 101 serial ports 18, 27, 29 service 103–104 identifying need for 60, 63 recommended interval for 73, 96 Set FinePrint command (Utilities menu) 38 Set PhotoGrade command (Utilities menu) 39 Set Startup Page command (Utilities menu) 37 setting push-button switch 28, 101–102 SCSI ID number 91–92 setting up LaserWriter 1–15. See also connecting; installing choosing work area 2 inserting paper cassette 14 installing first toner cartridge 5–11 loading paper cassette 12–13 preparing printer 3–5 safety instructions for 14–15 shades of gray, enhanced xii shutters 75 single sheets, printing 54 software applications 33, 54, 56 installing printer software 33–46 LaserWriter Utility 36–46 printer software 33–46, 63 system software 34, 69 TrueType, removing 43 speed of printer 96 spilled toner, avoiding 9–10, 13, 77 spills into printer case 15 stains on printed page 68 starting LaserWriter, trouble with 63–64 startup page blank 64 does not print 63 page count on 38 printing 30–31 turning on or off 37 status lights. See lights stop bits 101–102 stripes on printed page 67 support and service 103–104 switch. See push-button switch switch settings for ports 27 System Folder, use only one 69–70 system software, upgrading 34 Index 117 T technical support 103 television interference viii temperature 2, 58, 98 test page. See startup page textured paper 58 thin coax transceiver, Ethernet 23 three-hole punched paper 13, 53–54 300-dpi printing with FinePrint xi–xii toner cartridge cleaning pad for 6–7, 77–79 distributing toner powder in 9, 82 installing 5–11, 83 life span of 5 non-Apple (do not use) 5 problems with 60 removing from packaging 8 replacing 76–84 sealing tape on 10–11 spills, avoiding 9–10 transit environment for 98 trouble with 64, 67 toner powder 5 distributing in cartridge 9, 82 level of 60 spills, avoiding 13, 77 troubleshooting 64 top section of printer, releasing 3 transceivers, Ethernet 23 transfer corona wire, cleaning 80–81 transfer guide 81 transfer paper lock, opening 61 transmission, speed of 102 transparencies 51, 58, 97 transporting the printer 3, 10, 84 tray. See face-up delivery tray troubleshooting 59–71 blotchy areas or ghost images on page 69 Chooser does not appear in Apple menu 69 color or grayscale printing 65 connections 62–63 118 envelopes 58 faded areas or white voids on page 68 general problems 60–63 images out of place 65 images too dark 67 images too light 66 LaserWriter icon fails to appear in Chooser 70 letterhead paper 58 Macintosh problems 69–71 message says printer can’t print 71 network problems 21, 25, 28 nothing prints 65, 71 page prints solid black 67 paper curls 64 paper does not come out of printer 71 paper jams 13, 51, 54, 61–62 paper problems 58 printed documents 64–69 printer is not listed in Chooser 70 printing off-center 65 printing on only part of paper 64 stains on output 68 starting up LaserWriter 63–64 startup page does not print 63 startup page is blank 64 toner does not stay fixed on paper 64 transmission problems 21, 25 unwanted lines or stripes 67 TrueType fonts xiv, 43 turning FinePrint on or off 38 turning printer on and off 30–31, 37, 43 trouble with 63–64 turning startup page on or off 37 25-pin RS-232 port 29 twisted-pair transceiver, Ethernet 23 220V LaserWriter 12 two-sided (duplex) printing 57 typewriter paper 12 Index U upgrading LaserWriters 87–94 memory 49, 64, 88–89, 97 system software 34, 69 Use Default command 36 U.S. letter-size paper cassette 12 Utilities menu Calibrate Printer command 40 Configure Communications command 41 Download PostScript File command 42 Get Page Count command 38 Name Printer command 37 Print Configuration Page command 42 Remove TrueType command 43 Restart Printer command 43 Set FinePrint command 38 Set PhotoGrade command 39 Set Startup Page command 37 V vent, exhaust 2, 85–86 ventilation 2, 99 version number of system software 34 vertical format 49 viewing communication settings 41 page count 38 voltage requirements 98 W, X, Y weight of paper 58 of printer 97 work area, setting up 2 Z zones, network 48, 70 Index 119 ® LaserWriter IIf and IIg Owner's Guide ® F.P. Apple Computer, Inc. This manual and the software described in it are copyrighted, with all rights reserved. Under the copyright laws, this manual or the software may not be copied, in whole or part, without written consent of Apple, except in the normal use of the software or to make a backup copy of the software. The same proprietary and copyright notices must be affixed to any permitted copies as were affixed to the original. This exception does not allow copies to be made for others, whether or not sold, but all of the material purchased (with all backup copies) may be sold, given, or loaned to another person. Under the law, copying includes translating into another language or format. You may use the software on any computer owned by you, but extra copies cannot be made for this purpose. The Apple logo is a registered trademark of Apple Computer, Inc. Use of the “keyboard” Apple logo (Option-Shift-K) for commercial purposes without the prior written consent of Apple may constitute trademark infringement and unfair competition in violation of federal and state laws. © Apple Computer, Inc., 1991 20525 Mariani Avenue Cupertino, CA 95014-6299 (408) 996-1010 Apple, the Apple logo, Apple IIGS, AppleLink, AppleShare, AppleTalk, EtherTalk, LaserWriter, LocalTalk, and Macintosh are registered trademarks of Apple Computer, Inc. Agfa is a registered trademark of Agfa-Gevaert, AG. Microsoft and MS-DOS are registered trademarks of Microsoft Corporation. Claris and MacWrite are registered trademarks of Claris Corporation. QMS is a registered trademark, and ColorScript is a trademark, of QMS, Inc. Compugraphic is a registered trademark of Agfa Corporation. Exposure is a registered trademark of Preferred Publishers, Inc. FinePrint, PhotoGrade, and TrueType are trademarks of Apple Computer, Inc. Hewlett-Packard and LaserJet are registered trademarks of Hewlett-Packard Corporation. AppleCare is a registered service mark of Apple Computer, Inc. ITC Avant Garde, ITC Bookman, ITC Zapf Chancery, and ITC Zapf Dingbats are registered trademarks of International Typeface Corporation. Adobe, Adobe Illustrator, and PostScript are registered trademarks, and Adobe Garamond is a trademark, of Adobe Systems Incorporated. Helvetica, Palatino, and Times are registered trademarks of Linotype Co. QuarkXPress is a registered trademark of Quark, Inc. SuperPaint is produced by Silicon Beach Software. Simultaneously published in the United States and Canada. Mention of third-party products is for informational purposes only and constitutes neither an endorsement nor a recommendation. Apple assumes no responsibility with regard to the performance or use of these products. Contents Radio and television interference viii Preface The LaserWriter IIf and IIg ix A road map to this manual x About the LaserWriter IIf and IIg xi FinePrint xii PhotoGrade xii How the printer works xiii LaserWriter fonts xiii About TrueType xiv Chapter 1 Setting Up the LaserWriter 1 Choosing a place for the LaserWriter 2 Choose a safe place 2 Setting up the printer 3 Preparing the printer 3 Installing the first toner cartridge 5 Loading paper into the cassette 12 Inserting the paper cassette 14 Important safety instructions 14 iii Chapter 2 Connecting the LaserWriter 17 Connection ports 18 Connecting the printer with LocalTalk cables 19 Connecting the printer directly to your computer 20 Connecting the printer to the end of a LocalTalk network 21 Connecting the printer between two devices on a LocalTalk network 22 Connecting the LaserWriter IIg with Ethernet cables 23 Connecting the printer directly to your computer 24 Connecting the printer to the end of an Ethernet network 25 Connecting the printer between two devices on an Ethernet network 26 Port settings 27 Setting the push-button switch 28 Connecting the printer with serial cables 29 Connecting the power and turning on the printer 30 Chapter 3 Installing and Using Printer Software 33 Installing the Macintosh software 34 Using the LaserWriter Utility 36 Opening the LaserWriter Utility 36 Naming the printer 37 Turning the startup page on or off 37 Viewing the page count 38 Turning FinePrint on or off 38 Controlling PhotoGrade 39 Calibrating PhotoGrade 40 Viewing or changing communication settings 41 Printing the communication settings 42 Downloading PostScript files 42 Removing TrueType fonts and software 43 Restarting the printer 43 iv Contents Initializing a hard disk attached to the printer 44 Downloading fonts to the printer 45 Displaying a list of printer fonts 46 Removing a font from the printer’s disk 46 Printing a list of printer fonts 46 Printing samples of printer fonts 46 Chapter 4 Using the LaserWriter 47 Selecting the printer 48 Printing 49 The Macintosh Page Setup dialog box 49 The Macintosh Print dialog box 50 Printing color or grayscale documents 50 Face-up delivery 51 Using the paper cassette 52 Standard paper 52 Letterhead paper 53 Three-hole punched paper 53 Manual feed printing 54 Printing single sheets 54 Printing envelopes 55 Positioning the address block 55 Printing the envelope 56 Two-sided (duplex) printing 57 Choosing paper 58 Chapter 5 Troubleshooting 59 General troubleshooting 60 Reading the indicator lights 60 Checking for and clearing paper jams 61 Checking the connections 62 Trouble starting up the LaserWriter 63 No startup page prints when you turn on the printer 63 The startup page is blank 64 Contents v Problems with printed documents 64 Paper curls when you print on it 64 Toner does not stay fixed on the paper 64 The printer prints on only part of the paper 64 The printing is off-center, or images are out of place 65 Nothing is printed on the paper 65 The image prints in black and white although the original document is in color or grayscale 65 The image is too light 66 The image is too dark 67 The page prints solid black 67 Unwanted lines or stripes appear 67 The image is wavy or distorted 67 Stains appear on output 68 There are faded areas or white voids on the page 68 There are blotchy areas or ghost images on the page 69 Macintosh troubleshooting 69 The Chooser does not appear in the Apple menu 69 No LaserWriter icon appears in the Chooser 70 The printer is not listed in the Chooser 70 Nothing is printed; no paper comes out of the printer 71 A message on the screen says the printer can’t print 71 Chapter 6 Maintenance 73 Safety first 74 Precautions during maintenance 75 Regular maintenance 76 Low toner level 76 Replacing the toner cartridge 77 Cleaning the exterior 85 Replacing the ozone filter 85 vi Contents Appendix A LaserWriter IIf and IIg Upgrades 87 Memory upgrades 88 RAM expansion 89 Adding hard disks 90 Connecting a previously used hard disk 91 Connecting the disks 91 Setting the ID number 92 To connect a single hard disk 92 To connect multiple hard disks 93 Using hard disks from manufacturers other than Apple 94 Initializing hard disks 94 Appendix B LaserWriter IIf and IIg Specifications 95 Specifications 95 Ozone emission 99 Communication settings 100 Available settings 102 Appendix C Service and Support 103 Appendix D HP LaserJet Printer Emulation 105 When you need to use emulation 106 How to set the printer to use emulation 106 LaserJet IIP emulation 107 Index Contents 109 vii Radio and television interference The equipment described in this manual generates, uses, and can radiate radiofrequency energy. If it is not installed and used properly—that is, in strict accordance with Apple’s instructions—it may cause interference with radio and television reception. This equipment has been tested and found to comply with the limits for a Class B digital device in accordance with the specifications in Part 15 of FCC rules. These specifications are designed to provide reasonable protection against such interference in a residential installation. However, there is no guarantee that interference will not occur in a particular installation. You can determine whether your computer system is causing interference by turning it off. If the interference stops, it was probably caused by the computer or one of the peripheral devices. If your computer system does cause interference to radio or television reception, try to correct the interference by using one or more of the following measures: ■ Turn the television or radio antenna until the interference stops. ■ Move the computer to one side or the other of the television or radio. ■ Move the computer farther away from the television or radio. ■ Plug the computer into an outlet that is on a different circuit from the television or radio. (That is, make certain the computer and the television or radio are on circuits controlled by different circuit breakers or fuses.) If necessary, consult your authorized Apple dealer or an experienced radio/television technician for additional suggestions. You may find helpful the following booklet, prepared by the Federal Communications Commission: Interference Handbook (stock number 004-000-00345-4). This booklet is available from the U.S. Government Printing Office, Washington, DC 20402. ▲ Important: Changes or modifications to this product not authorized by Apple Computer, Inc., could void the FCC Certification and negate your authority to operate the product. This product was tested for FCC compliance under conditions that included the use of shielded cables and connectors between system components. It is important that you use shielded cables and connectors to reduce the possibility of causing interference to radios, television sets, and other electronic devices. For Apple peripheral devices, you can obtain the proper shielded cables from your authorized Apple dealer. For non-Apple peripheral devices, contact the manufacturer or dealer for assistance. ▲ viii Preface The LaserWriter IIf and IIg T his manual is your reference guide for the Apple® LaserWriter® IIf and IIg printers. All instructions for setup, operation, and maintenance apply to both printers, except where noted otherwise. The LaserWriter IIf and IIg work with any Macintosh® computer, as well as with Apple II, MS-DOS, Windows, OS/2, and other computer systems. Be sure to set up your computer and familiarize yourself with its basic operations before setting up the LaserWriter. ix A road map to this manual Chapter 1 ■ ■ ■ Set up the LaserWriter Load a paper cassette Install a toner cartridge LocalTalk Serial Chapter 2 ■ Connect the LaserWriter to your computer or network Ethernet Chapter 3 ■ Install printing software and fonts on your computer Chapter 4 ■ Begin using your LaserWriter Chapter 5 ■ Troubleshoot hardware, software, and network problems Chapter 6 ■ Maintain your printer and replenish supplies as needed Appendixes AD ■ Upgrades About the LaserWriter IIf and IIg The LaserWriter IIf and IIg belong to the third generation of Apple laser printers. They use a new technology that greatly increases the effective resolution of a 300 dot-per-inch (dpi) printer to produce sharper text and higher-quality graphics. This high-resolution technology provides the basis for two new LaserWriter features: ■ the FinePrint™ system, which produces smoother lines and curves in text ■ the PhotoGrade™ system—standard on the LaserWriter IIg— which increases the number of gray levels to enhance the quality of images In addition to higher print quality, the LaserWriter IIg adds an Ethernet port to extend connection options to different types of computers and networks. And for maximum flexibility in networked environments, both the LaserWriter IIf and IIg can use all their communication ports concurrently. These features are described in Chapter 2, “Connecting the LaserWriter.” Preface: The LaserWriter IIf and IIg xi FinePrint The LaserWriter IIf and IIg incorporate Apple’s FinePrint technology. FinePrint smooths out lines and curves that would normally appear jagged. Most laser printers have a fixed resolution of 300 dpi. If you look closely at curves or diagonal lines printed on such a printer, you can see tiny jagged edges. For each line or curve, the LaserWriter calculates the best possible edge to a very high degree of accuracy, and then renders that edge using FinePrint technology for a noticeably smoother printed result. Standard 300-dpi printing 300-dpi printing with FinePrint The vertical dot siz unchanged, but th horizontal increme are much finer. A PhotoGrade xii A Optimum edge Apple PhotoGrade technology allows you to produce near-photographicquality images from your desktop. Laser printers, including the LaserWriter, create shades of gray by printing a pattern of black dots in an area. If these dots are arranged in an appropriate pattern, the area appears to be a uniform shade of gray. The more variations in the size and pattern of dots a printer can print, the more shades of gray the printer can produce, resulting in smoother, more natural gray transitions. Using the enhanced resolution of the LaserWriter II, the PhotoGrade system can produce many more shades of gray than previously possible on a 300-dpi laser printer. Preface: The LaserWriter IIf and IIg How the printer works The LaserWriter uses laser light, electric charges, and plastic toner powder to produce a page of text and graphics. Your computer communicates with the LaserWriter by using a language called PostScript® to tell the printer what to print and how to print it. When you give your computer a command to print, the computer transmits a PostScript description of the page to the printer. The internal computer in the printer translates this page description into an arrangement of dots that represents the letters and images on the page. The printer then activates the laser, and the pulses of the laser beam match this “map” dot for dot. A series of mirrors reflects the laser light onto a rotating photosensitive drum. As the pulses of laser light scan across the drum, each pulse that represents a printed dot produces an electric charge to which the black toner particles adhere. The toner is then transferred onto the paper as it passes under the rotating drum, and finally the image is fused onto the paper by fixing rollers at a temperature of about 400° F. Once the printer has a page description in its memory, it can produce printed pages at a rate of about eight per minute. LaserWriter fonts The Macintosh disks provided with your LaserWriter IIf or IIg contain many widely used font families, including ITC Avant Garde®, ITC Bookman®, Courier, Helvetica®, Helvetica Narrow, New Century Schoolbook, Palatino®, and Times®—as well as four Apple fonts—Chicago, Geneva, Monaco, and New York—and three specialpurpose fonts: Symbol, ITC Zapf Chancery®, and ITC Zapf Dingbats®. You can also obtain a wide array of additional fonts from both commercial and public-domain sources. Preface: The LaserWriter IIf and IIg xiii About TrueType The fonts supplied with the LaserWriter IIf and IIg include several TrueType™ fonts. TrueType is the new font technology from Apple Computer designed to optimize character shapes on both the screen and the printed page. Each TrueType font contains a set of coordinates that describe all the characteristics of the letterforms in the particular font. The computer’s system software uses these coordinates to calculate and display characters in any size you specify. (On a Macintosh, you can distinguish TrueType fonts from fixed-size fonts installed in your system by their names: each fixed size font name contains a number, for example Geneva 24, while a TrueType font name does not.) In addition to TrueType fonts, the LaserWriter IIf and IIg work with all other fonts produced for LaserWriter printers. xiv Preface: The LaserWriter IIf and IIg