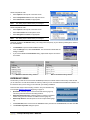
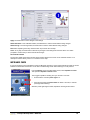
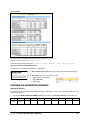
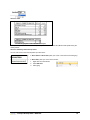
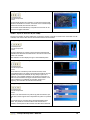
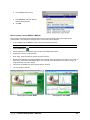
1
Software Manual Thought Technology Ltd. 8205 Montreal/ Toronto Blvd. Suite 223, Montreal West, QC H4X 1N1 Canada Tel: +1 (800) 361-3651 ۰ +1 (514) 489-8251 Fax: +1 (514) 489-8255 E-mail: [email protected] Webpage: http://www.thoughttechnology.com For use with version 5.1 or later ProComp & FlexComp Infiniti Rehab Suite CLASSIFICATION Type BF Equipment Internally powered equipment Continuous operation Read Instruction Manual US Federal Law restricts this device to sale by or on order of licensed health care practitioners. CAUTION WARNING ATTENTION Do not operate active sensor within 10 feet (3m) of an operating cellular phone, similar radio transmitting device, other powerful radio interference producing sources such as arc welders, radio thermal treatment equipment, x-ray machines or any other equipment that produces electrical sparks. All encoders are totally isolated from line (110 or 220VAC) power due to battery operation and fiber optic connections to computers. However, many hospitals and the FDA require that computers, printers and any other equipment used with medical devices be electrically isolated from line voltage to UL or CSA medical safety standards. Do not connect inputs or outputs of the encoder or sensors to line powered devices, except through the fiber optic cable. The PC used with the encoder must be placed outside the patient/client environment (more than 3 meters or 10 feet) or the PC must comply with EN60601-1.1 (system safety). After use, the disposable electrodes may be a potential biohazard. Handle and, when applicable, dispose of these materials in accordance with accepted medical practice and any applicable local, state and federal laws and regulations. To diminish the risk of spreading communicable diseases, always use good hygiene practices with reusable EMG electrodes, particularly if abrasive substances are used. In all cases, refer to your facility’s infection control procedure. Do not use in the presence of a flammable anesthetic mixture with air or with Oxygen or Nitrous Oxide. Not to be immersed in water. Take care in arranging patient and sensor cables to avoid risk of patient entanglement or strangulation. The operator is responsible for ensuring the safety of any devices controlled or triggered by Infiniti equipment or software, or by any software or hardware receiving data from Infiniti equipment. Infiniti equipment must not be configured or connected in such a way that failure in its data acquisition, processing or control functions can trigger patient feedback stimulus that poses an unacceptable level of risk. Use of any equipment in a biofeedback context should be immediately terminated upon any sign of treatment-related distress or discomfort. Not to be connected to a patient undergoing MRI, Electro surgery or defibrillation. To prevent static discharge from damaging the sensor and/or encoders, use anti-static mats or sprays in your working area. A humidifier may also be used to help prevent static environments by conditioning hot, dry air. Not for diagnostic purposes. Not defibrillator proof. Not for critical patient monitoring. To prevent voiding warranty by breaking connector pins, carefully align white guiding dot on sensor plug with slot on sensor input. Sharp bends or winding the fiber optic cable in a loop smaller than 4 inches (10cm) may destroy the cable. A fiber optic cable not fully pushed into its receptacle may cause the unit not to operate; make sure that both ends of the cable are fully inserted into their receptive jacks and the nuts are tightened firmly. Make sure to remove electrodes from sensor snaps immediately after use. Apply conductive gel only to electrodes; never put gel directly on sensor snaps. Always use electrodes between the subject and the sensor. Sharp bends or winding the fiber optic cable in a loop smaller than 4 inches (10cm) may destroy the cable. ProComp & FlexComp Infiniti Rehab Suite i A fiber optic cable not fully pushed into its receptacle may cause the unit not to operate; make sure that both ends of the cable are fully inserted into their receptive jacks and the nut is tightened firmly. Do not plug third party sensors directly into instrument inputs. Plug only Thought Technology active sensor cable connectors into instrument inputs. All EMG electrodes and third party sensors must be connected to active sensors, either directly or through an adapter. Remove batteries when the device is not being used for extended period of time. Please dispose of battery following national regulations. INTENDED PURPOSE Biofeedback, relaxation and muscle re-education purposes. CONTRAINDICATIONS Patients with limited or impaired physical and mental capacity NOTE No preventative inspections required; maintenance must be performed by qualified personnel. The supplier will make available, upon request, circuit diagrams, component parts lists and description or other information required for the repair of product by qualified personnel. If a fiber optic or patient cable is damaged or breaks, please replace it. Due to the essential performance and intended use of the device, testing for immunity to electromagnetic disturbances was not required and was not performed. The device may be susceptible at levels below IEC60601-1-2 immunity test levels. The operator must be familiar with typical characteristics of signals acquired by this equipment, and be able to detect anomalies in the acquired signal that could interfere with treatment effectiveness. Depending on the importance of signal integrity, it may be advisable to continuously monitor the raw signals, in time and/or frequency domain, while the device is being used for biofeedback or other purposes. If anomalies are observed on acquired signals, and if you suspect a problem with electromagnetic interference, contact Thought Technology for a technical note on identification and remediation. MAINTENANCE AND CALIBRATION Wipe encoder with a clean cloth. Factory testing and calibration ensure equipment accuracy and frequency response. The user may invoke a self-calibration function that will recalibrate certain device parameters (see the section Self-Calibration on page Error! Bookmark not defined. of this manual). Contact Thought Technology for factory recalibration if necessary. STORAGE Store in its original case at up to 90% humidity / 85°F (30°C). TRANSPORTATION Transport in its original case. Guidance and manufacturer’s declaration – electromagnetic emissions The Infiniti system is intended for use in the electromagnetic environment specified below. The customer or the user of the Infiniti system should assure that it is used in such an environment. Emissions test Compliance Electromagnetic environment – guidance The Infiniti system uses RF energy only for its RF emissions internal function. Therefore, its RF emissions are Group 1 CISPR 11 very low and are not likely to cause any interference in nearby electronic equipment. RF emissions Class B The Infiniti system is suitable for use in all CISPR 11 establishments, including domestic establishments Harmonic emissions Not applicable and those directly connected to the public lowIEC 61000-3-2 voltage power supply network that supplies Voltage fluctuations/flicker emissions buildings used for domestic purposes. Not applicable IEC 61000-3-3 Manual No. SA7972 Revision 5.1 ProComp & FlexComp Infiniti Rehab Suite ii TABLE OF CONTENTS Introduction ................................................................................................... 1 Installation and System Requirements ................................................................ 2 First Time Run ................................................................................................ 3 STARTING THE PROGRAM ...................................................................................................................................................3 VERIFYING SETTINGS ...........................................................................................................................................................3 ENTERING KEY CODES ........................................................................................................................................................4 Hardware Set-up ............................................................................................. 6 The Encoder ...........................................................................................................................................................................6 Connecting TT-USB and the encoder .................................................................................................................... 6 Battery Placement .................................................................................................................................................. 6 Caring For the Fiber Optic Cable ........................................................................................................................... 7 Electromagnetic Electrical Interference .................................................................................................................. 7 Sensors and Accessories .....................................................................................................................................................7 Electromagnetic interferences ................................................................................................................................ 7 Electrostatic discharges ......................................................................................................................................... 7 Connecting the sensors ......................................................................................................................................... 8 Correct orientation of sensors ................................................................................................................................ 8 MyoScan/ MyoScan-Z EMG Sensor(P/N: SA9503M/SA9503Z) ............................................................................. 9 MyoScan-Pro EMG (P/N: SA9401M-60 or SA9401M-50) ...................................................................................... 9 InclinoTrac/Dual-InclinoTrac (P/N: T7650/T7655) .................................................................................................. 9 ForceTrac (P/N: T7640) ......................................................................................................................................... 9 HR/BVP Sensor (P/N: SA9308M) ........................................................................................................................ 10 EKG-Z Sensor (P/N: SA9306M) ........................................................................................................................... 10 Respiration Sensor (P/N: SA9311M) .................................................................................................................... 10 Skin Temperature Sensor (P/N: SA9310M) ......................................................................................................... 10 Skin Conductance Sensor (P/N: SA9309M) ......................................................................................................... 11 EKG Wrist Straps (P/N: SA9325) ......................................................................................................................... 11 Disposable EKG/EMG electrodes ........................................................................................................................ 11 Static EMG electrodes (P/N: SA9327) ................................................................................................................. 11 Foot Pedal (P/N: SA7551) .................................................................................................................................... 11 Tele-Infiniti CF™ (P/N: SA9600) - Optional .......................................................................................................... 12 Software Overview ........................................................................................ 13 RECORDING SESSIONS ......................................................................................................................................................13 Start the Program ................................................................................................................................................. 13 Starting a session from a Favorite ........................................................................................................................ 13 Starting a Script Session ...................................................................................................................................... 14 Starting an Open Display Session ........................................................................................................................ 16 Sensor Connections ............................................................................................................................................. 17 STOPPING A SESSION ........................................................................................................................................................17 REPLAYING SESSIONS .......................................................................................................................................................18 REVIEWING SESSIONS .......................................................................................................................................................19 Review ................................................................................................................................................................. 19 Rejecting Artifacts ................................................................................................................................................ 20 Calculating Statistics ............................................................................................................................................ 20 Generating Session Reports ................................................................................................................................ 21 TOOL BAR OPTIONS ...........................................................................................................................................................22 ProComp & FlexComp Infiniti Rehab Suite iii Toggling Between Screens .................................................................................................................................. 22 Adjusting Scales and Threshold ........................................................................................................................... 22 USING A WEB CAMERA ......................................................................................................................................................23 USING A DVD .......................................................................................................................................................................23 SENSOR CALIBRATION AND ZEROING ............................................................................................................................23 IMPEDANCE CHECK ............................................................................................................................................................25 General SEMG Assessment .............................................................................. 27 OVERVIEW ...........................................................................................................................................................................27 CLINICAL GUIDE REFERENCE ...........................................................................................................................................27 GENERAL PROCEDURE......................................................................................................................................................27 Starting the Session ............................................................................................................................................. 27 Measuring ............................................................................................................................................................ 28 Reviewing the session ......................................................................................................................................... 28 Generating a report .............................................................................................................................................. 28 G.SEMG01 – BASELINE ASSESSMENT .............................................................................................................................28 G.SEMG02 – MAXIMAL FORCE ASSESSMENT .................................................................................................................29 G.SEMG03 – ENDURANCE ASSESSMENT ........................................................................................................................29 G.SEMG04 – FAST FLICK ASSESSMENT ..........................................................................................................................30 G.SEMG05 – GLOBAL SEMG ASSESSMENT 1 MUSCLE ..................................................................................................31 SEMG ASSESSMENT – GENERAL PURPOSE (G.SEMG06 and up) .................................................................................31 G.SEMG06 - SEMG Assessment with 2 EMG ..................................................................................................... 31 G.SEMG07 - SEMG Assessment with 4 EMG (FlexComp Infiniti only) ................................................................ 32 G.SEMG08 - SEMG Assessment with 6 EMG (FlexComp Infiniti only) ................................................................ 33 G.SEMG09 - SEMG Assessment with 10 EMG (FlexComp Infiniti only) .............................................................. 33 Static SEMG Assessment ................................................................................. 34 OVERVIEW ...........................................................................................................................................................................34 CLINICAL GUIDE REFERENCE ...........................................................................................................................................34 PROCEDURE ........................................................................................................................................................................34 Starting the Session ............................................................................................................................................. 34 Measuring ............................................................................................................................................................ 35 Generating a report .............................................................................................................................................. 36 Dynamic SEMG Assessment ............................................................................. 38 OVERVIEW ...........................................................................................................................................................................38 CLINICAL GUIDE REFERENCE ...........................................................................................................................................38 GENERAL PROCEDURE......................................................................................................................................................38 Starting the Session ............................................................................................................................................. 38 Measuring ............................................................................................................................................................ 39 Reviewing the session ......................................................................................................................................... 39 Generating a report .............................................................................................................................................. 41 PROCEDURE FOR LUMBAR SPINE ASSESSMENT ..........................................................................................................41 Starting the Session ............................................................................................................................................. 41 Measuring ............................................................................................................................................................ 42 Reviewing the session ......................................................................................................................................... 43 Generating a report .............................................................................................................................................. 44 PROCEDURE FOR CERVICAL SPINE ASSESSMENT .......................................................................................................45 Starting the Session ............................................................................................................................................. 45 Measuring ............................................................................................................................................................ 46 Reviewing the session ......................................................................................................................................... 47 Generating a report .............................................................................................................................................. 47 PROCEDURE FOR ANTERIOR KNEE ASSESSMENT ........................................................................................................49 ProComp & FlexComp Infiniti Rehab Suite iv Starting the Session ............................................................................................................................................. 49 Measuring ............................................................................................................................................................ 51 Reviewing the session ......................................................................................................................................... 52 Generating a report .............................................................................................................................................. 52 Muscle Fatigue Monitoring.............................................................................. 54 OVERVIEW ...........................................................................................................................................................................54 CLINICAL GUIDE REFERENCE ...........................................................................................................................................54 GENERAL PROCEDURE......................................................................................................................................................54 Starting the Session ............................................................................................................................................. 54 Measuring ............................................................................................................................................................ 55 SEMG Biofeedback ......................................................................................... 56 OVERVIEW ...........................................................................................................................................................................56 CLINICAL GUIDE REFERENCE ...........................................................................................................................................56 GENERAL PROCEDURE......................................................................................................................................................56 Starting the Session ............................................................................................................................................. 56 CATEGORY: PRO/FLEX SUITE – SEMG BIOFEEDBACK – RELAXATION ...................................................... 57 CATEGORY: PRO/FLEX SUITE – SEMG BIOFEEDBACK – STRENGTHENING .............................................. 60 CATEGORY: PRO/FLEX SUITE – SEMG BIOFEEDBACK – CONTROL ........................................................... 63 CATEGORY: PRO/FLEX SUITE – SEMG BIOFEEDBACK – EQUILIBRATION ................................................. 65 CATEGORY: PRO/FLEX SUITE – SEMG BIOFEEDBACK – TRAINING ............................................................ 69 UNSTABLE SHOULDER ......................................................................................................................................................71 MOTOR FUNCTION RESTORATION ...................................................................................................................................72 Respiration Training ...................................................................................... 74 OVERVIEW ...........................................................................................................................................................................74 CLINICAL GUIDE REFERENCE ...........................................................................................................................................74 PROCEDURE ........................................................................................................................................................................74 Heart Rate Monitoring and HRV ....................................................................... 77 OVERVIEW ...........................................................................................................................................................................77 CLINICAL GUIDE REFERENCE ...........................................................................................................................................77 PROCEDURE ........................................................................................................................................................................77 Skin Conductance and Temperature Biofeedback .................................................. 80 OVERVIEW ...........................................................................................................................................................................80 CLINICAL GUIDE REFERENCE ...........................................................................................................................................80 PROCEDURE ........................................................................................................................................................................80 Static Range of Motion Assessment ................................................................... 83 OVERVIEW ...........................................................................................................................................................................83 CLINICAL GUIDE REFERENCE ...........................................................................................................................................83 GENERAL PROCEDURE......................................................................................................................................................83 Preparing the instrumentation .............................................................................................................................. 83 Measuring ............................................................................................................................................................ 85 Generating a report .............................................................................................................................................. 86 Dynamic Range of Motion Assessment ............................................................... 88 OVERVIEW ...........................................................................................................................................................................88 CLINICAL GUIDE REFERENCE ...........................................................................................................................................88 ProComp & FlexComp Infiniti Rehab Suite v GENERAL PROCEDURE......................................................................................................................................................88 Starting the Session ............................................................................................................................................. 88 Measuring ............................................................................................................................................................ 89 Reviewing the session ......................................................................................................................................... 89 Generating a report .............................................................................................................................................. 91 PROCEDURE FOR LUMBAR SPINE ASSESSMENT ..........................................................................................................91 Starting the Session ............................................................................................................................................. 91 Measuring ............................................................................................................................................................ 92 Reviewing the session ......................................................................................................................................... 93 Generating a report .............................................................................................................................................. 93 PROCEDURE FOR CERVICAL SPINE ASSESSMENT .......................................................................................................94 Starting the Session ............................................................................................................................................. 94 Measuring ............................................................................................................................................................ 95 Reviewing the session ......................................................................................................................................... 96 Generating a report .............................................................................................................................................. 96 PROCEDURE FOR ANTERIOR KNEE ASSESSMENT ........................................................................................................97 Starting the Session ............................................................................................................................................. 97 Measuring ............................................................................................................................................................ 98 Reviewing the session ......................................................................................................................................... 99 Generating a report .............................................................................................................................................. 99 Range of Motion Training .............................................................................. 101 OVERVIEW ......................................................................................................................................................................... 101 CLINICAL GUIDE REFERENCE ......................................................................................................................................... 101 PROCEDURE ...................................................................................................................................................................... 101 ROMT01 – ROM Training with 1 inclinometer .................................................................................................... 102 ROMT02 – ROM Training with 2 inclinometers .................................................................................................. 103 Manual Muscle Testing.................................................................................. 105 OVERVIEW ......................................................................................................................................................................... 105 CLINICAL GUIDE REFERENCE ......................................................................................................................................... 105 PROCEDURE ...................................................................................................................................................................... 105 Starting the Session ........................................................................................................................................... 105 Muscle Testing Training (MMT01 & MMT02) ..................................................................................................... 106 Unilateral/Bilateral Muscle Testing (MMT03 & MMT04) ..................................................................................... 107 Measuring .......................................................................................................................................................... 107 Unilateral/Bilateral Muscle Testing with EMG (MMT05 & MMT06) ..................................................................... 109 Generating a report ............................................................................................................................................ 109 Algometry................................................................................................... 112 OVERVIEW ......................................................................................................................................................................... 112 CLINICAL GUIDE REFERENCE ......................................................................................................................................... 112 PROCEDURE ...................................................................................................................................................................... 112 Starting the Session ........................................................................................................................................... 112 Measuring .......................................................................................................................................................... 114 Generating a report ............................................................................................................................................ 115 ProComp & FlexComp Infiniti Rehab Suite vi Hardware Specifications ................................................................................ 117 Returning Equipment for Repair ...................................................................... 120 Repair Return Form ...................................................................................... 120 ProComp & FlexComp Infiniti Rehab Suite vii ProComp & FlexComp Infiniti Rehab Suite Introduction Welcome to the user manual for Rehab Suite. This manual provides information intended to help you get the most out of your system. The manual is organized into chapters as follows: Installation and System Requirements lists the computer requirements recommended for running the software. First Time Run explains how to start the software and verify its settings prior to using it for the first time. Hardware Set-up provides general information about the encoder, sensors and accessories included in the system. It also shows how to connect the hardware elements. Software Overview introduces the main functions of the BioGraph Infiniti software: recording, replaying, and reviewing sessions. It discusses the analytical processes of artifact rejection, statistics calculation, and report generation. In addition this section explains how to use a web camera with the software, how to calibrate and zero sensors, and how to run an impedance check. The next chapters explain the protocols run by the system. These are: General SEMG Assessment Static SEMG Assessment Dynamic SEMG Assessment Muscle Fatigue Monitoring SEMG Biofeedback Respiration Training Heart Rate Monitoring and HRV Skin Conductance & Temperature Biofeedback Static Range of Motion Assessment Dynamic Range of Motion Assessment Range of Motion Training Manual Muscle Testing Algometry Each protocol chapter presents the general principles of one specific protocol. It lists relevant references in the clinical guide. It provides step-by-step instructions for running the protocol. Finally, it describes how to generate a report. The remaining sections of the manual provide a list of Hardware Specifications, and information about the Warranty, obtaining Technical Support, and Returning Equipment for repair if necessary. Note: Important safety information about operating the equipment is provided in the front matter of the manual starting on page i. ProComp & FlexComp Infiniti Rehab Suite 1 Installation and System Requirements If BioGraph Infiniti is not already set up on your computer, please follow the Installation Instructions provided to install the program. Make sure that your computer meets the following requirements before you install the BioGraph Infiniti software: Desktop or laptop with two monitor capacity. CPU: 1.8GHz dual core processor or faster Operating systems: Microsoft® Windows® 7 Home Premium, Business, Ultimate, or Enterprise Microsoft® Windows Vista® Home Basic, Home Premium, Business, Ultimate, or Enterprise with Service Pack 2 Microsoft® Windows® XP Professional or Home Edition with Service Pack 3 DirectX 9c or later (if this is missing, it will be installed with BioGraph Infiniti) 50 – 60 gigabytes hard disk space for video recording and processing. (The software needs 2.5 gigabytes to install and run) Minimum RAM: 1 GB (Windows® XP) or 2 GB (Windows Vista® or Windows® 7) CD ROM or DVD drive Video Card (minimum XGA, 1,024 x 768 monitor resolution) 32 bit compatible sound card & speakers 1 USB port Mouse or compatible pointing device Microsoft® Office with Word® and Excel® (for report generation and printing) Webcam 30 frames per second (for video purposes only) Internet access (for updating software and receiving technical support) PLEASE NOTE: When using Windows® 7 Home Basic or Business or Windows Vista® Home Basic or Business, additional codecs must be installed to view camera and DVD. Low speed CPUs (1.8 GB or less) may be sluggish when running screens with multiple instruments. ProComp & FlexComp Infiniti Rehab Suite 2 First Time Run Once the software is installed, you have to configure your system. This takes only a few minutes. STARTING THE PROGRAM To start the program, simply double-click on the BioGraph Infiniti icon, on the Desktop: The program always starts by showing the Main Menu screen: VERIFYING SETTINGS Enable the Notch Filter Settings: Select Options at the top left of the main screen. Select Notch Filter from the drop-down menu. Select EEG, EMG and EKG, and set Frequency to 50Hz or 60Hz, depending on the transmission frequency used in your country (60Hz for North America, for instance). Then click OK. Note: These settings remain in effect unless you change them. Notch Filter Options ProComp & FlexComp Infiniti Rehab Suite 3 Select Temperature Units: Select Options at the top left of the main screen. Select Temperature Units from the drop-down menu. Select Fahrenheit or Celsius, as appropriate. Note: This setting stays in effect unless you change it. Select Temperature Units: Select Options at the top left of the main screen. Select Force Units from the drop-down menu. Select Kilograms or Pounds, as appropriate. Note: This setting stays in effect unless you change it. Optionally, enable the Confidential setting. This helps protect the privacy of your clients by masking their names in the client database. Click Database to open the Main Database window. From the Settings menu, select Confidential. The check mark indicates that the setting is enabled. If you need to disable the Confidential setting, repeat these steps to remove the check mark. With the Confidential setting disabled With the Confidential setting enabled ENTERING KEY CODES The first time you start to record a session with BioGraph Infiniti, the software will check for the key codes and ask you to enter them. You will also be asked to enter key codes if you have uninstalled and reinstalled the software, or if this is the first time you are using your encoder with your existing installation. There are three ways to start recording a session. They are described fully in the chapter Software Overview beginning on page 13. Quick Start: Click this option to record a Favorite session (page 13). This is the preferred method for recording sessions. Start Open Display Session: Click this option to record an unscripted session using your own selection of feedback screens (page 16). Start Script Session: Click this option to record a script session (page 14). 1. Click Quick Start, select a name from the Clients list and a protocol from the Favorites list, and then click OK. 2. The Encoder Key Codes dialog box opens. ProComp & FlexComp Infiniti Rehab Suite 4 3. Click to highlight your unit’s serial number in the left table (in this example, DA1002; this is the same number as on the back of the unit). The serial number is found on the back of the encoder. 4. Enter the Encoder Key Code (found inside the encoder battery compartment) in the Key Code text box. 5. Click to move the serial number from the left table to the right table. The serial number should now appear in the Configuration Table. 6. When done, click OK. 7. Now the Application Key Code dialog box opens. 8. Enter the Application Key Code. This number is found in the battery compartment with the encoder key code. 9. When done, click OK. Note: Even if you are using more than one encoder, you need to enter only one Application Key Code. If the key codes have been entered properly and there is no problem with your encoder setup or your sensor connections, the recording screen will open. ProComp & FlexComp Infiniti Rehab Suite 5 Hardware Set-up Before you can start recording a session, you have to set up your hardware. The following section describes how to connect a FlexComp Infiniti encoder but the process is similar when using ProComp Infiniti and ProComp5 Infiniti. For more information on using your particular encoder, please refer to the device’s hardware manual. The Encoder Connecting TT-USB and the encoder Insert one end of the fiber optic cable carefully into the fiber optic port on the encoder. Tighten the nut gently so that the cable won't slip out. Do the same with the other end of the fiber optic cable and the fiber optic port of the TT-USB interface unit. Insert the small connector of the USB cable into the USB port on the TT-USB interface device. Insert the large connector of the USB cable into the USB port of your PC. USB ports on a PC are generally located at the back of the base unit. You may also find a USB port at the front of your base unit; you can connect the other end of the USB cable to it. On a laptop, USB ports are usually located at the side or the back of the laptop. It is recommended to always use the same USB port for connecting the TT-USB to your computer. Battery Placement Opening the Compartment Looking at the underside of the encoder, you will see a long door in the plastic enclosure. Holding the encoder with the connectors facing you and with the door up, push lightly down and back with your thumbs on the door to slide it open. Attention: The internal workings of the encoder are not intended to be opened for repair except by qualified service personnel. The tamper-evident seal under the batteries in the battery compartment should not be removed or broken. Thought Technology may refuse to honour the unit’s warranty if the seal is broken. ProComp & FlexComp Infiniti Rehab Suite 6 Polarity When the compartment cover has been slid out, place four AA batteries in the slots, observing the correct battery polarity as embossed on the inside surface of the compartment. Closing the Compartment Slide the door back into the encoder case, gently pushing it in until you feel the click of the locking mechanism. Keeping an Eye on the Battery Level Since each sensor draws a small amount of power from the batteries when connected to the encoder, it is better to connect only the sensors that are going to be used for a session before you start recording; this will ensure maximal battery life. Most Thought Technology software applications will display a battery power indicator; we recommend that you replace the batteries as soon as this indicator falls below about 50% of the battery power. Caring For the Fiber Optic Cable A fiber optic (FO) cable is used for transmitting the sensor data to the computer. Although this technology provides maximal electrical isolation, signal fidelity and freedom of movement, some care has to be taken when handling the fiber optic cable, as it is much less flexible than a regular electric wire. Be careful not to bend it sharply or wind it in a loop smaller than 4 inches in diameter. Electromagnetic Electrical Interference When performing a biofeedback session, it is best to avoid placing the encoder near the computer, display monitor or any other electrical device, where it can be exposed to electromagnetic fields. Sensors and Accessories The instrumentation system includes a group of sensors used for the various protocols. Before a session can be recorded, the correct sensors must be connected to the encoder. Electromagnetic interferences The SEMG and EKG sensors are capable of detecting very tiny electrical signals (millionths of a Volt) generated by muscle activity. Therefore they are very sensitive to electromagnetic fields generated by other devices in the exam room, such as radio transmitting devices, computer monitors, medical devices (for example x-ray machines), and fluorescent, halogen or neon lights. These devices should be turned off, if they are not needed for the examination. If the situation arises, keep the instrumentation 10 feet away from radio transmitting devices and 3 feet away from electronic devices (including monitors) and fluorescent, halogen or neon lights. Disconnect all the unused sensors from the encoder. If not connected to the examinee, they may act as antennas and capture unwanted signals that would corrupt the signal. Electrostatic discharges To prevent static discharge from damaging the sensor and/or encoder, use anti-static mats or sprays in your working area. A humidifier may also be used to help prevent static environments by conditioning hot, dry air. ProComp & FlexComp Infiniti Rehab Suite 7 Connecting the sensors When connecting a sensor to the encoder, make sure to properly line up the guiding dot on the top of the plug with the notch in the device's input socket. Guiding dot Notch Forcing the plug into the jack in any other position may damage your equipment. Correct orientation of sensors For some sensors, such as the temperature and skin conductance sensors, either the connection cable or the electrode cable forms a permanent part of the item. Other sensors, for example the push button switch, have removable cables but only a single input entrance. This makes it impossible to connect these sensors in the wrong orientation to the encoder. Connect to electrodes Certain sensors, however, have removable cables and two input entrances. It is important to orient these sensors to the encoder correctly so that the physiological signal is properly received. These sensors include the EKG, EEG, and EMG sensors, all of which are shaped like the illustration at the right. Such a sensor is correctly oriented to the encoder when the cable joining them is connected to the bottom entrance of the sensor. If an extender cable with electrodes needs to be attached to such a sensor, it should be connected to the top entrance of the sensor. Connect to encoder The following is an overview of the sensors, electrodes, and accessories used with the system. ProComp & FlexComp Infiniti Rehab Suite 8 MyoScan/ MyoScan-Z EMG Sensor(P/N: SA9503M/SA9503Z) The MyoScan is a pre-amplified surface electromyography sensor, sensing raw SEMG. MyoScan-Z also allows impedance check. Input Range 0 -2000 µV Bandwidth 20 Hz – 500Hz. Used for: SEMG Assessment Muscle Fatigue Monitoring SEMG Biofeedback Dynamic Range of Motion Respiration Training Manual Muscle Testing MyoScan-Pro EMG (P/N: SA9401M-60 or SA9401M-50) The MyoScan-Pro is a pre-amplified surface electromyography sensor for use on low sampling rate inputs of the ProComp5 and ProComp Infiniti, and designed to measure RMS SEMG. Used for: SEMG Assessment SEMG Biofeedback InclinoTrac/Dual-InclinoTrac (P/N: T7650/T7655) The Dual-InclinoTrac is a dual inclinometer that measures relative angle (between back and head, for instance). Used for: Static Range of Motion Assessment Dynamic Range of Motion Assessment Range of Motion Training ForceTrac (P/N: T7640) The ForceTrac can be used as an algometer when used with its rod attachment. ForceTrac can be used as a manual muscle tester when used with its rubbercoated probes (a flat one, and a curved one). Used for: Manual Muscle Testing Algometry ProComp & FlexComp Infiniti Rehab Suite 9 Accessories to the ForceTrac are (from left to right): Rod attachment Curved muscle testing probe Flat muscle testing probe HR/BVP Sensor (P/N: SA9308M) The HR/BVP sensor is a blood volume pulse (BVP) detection sensor (also known as a photoplethysmography – PPG – sensor) housed in a small finger worn package, to measure heart rate (HR) and provide BVP amplitude, BVP waveform, HR and heart rate variability (HRV) feedback. Used for: Heart Rate Monitoring and HRV EKG-Z Sensor (P/N: SA9306M) The EKG sensor is a pre-amplified electrocardiograph sensor, for directly measuring the heart’s electrical activity. Connects via extender cables for a single channel hook up. Used for: Heart Rate Monitoring and HRV Respiration Sensor (P/N: SA9311M) The Respiration Sensor includes a sensitive and reliable girth sensor using an easy fitting high durability latex rubber band fixed with self-adhering belt for monitoring respiration rate, waveform and amplitude. Can be worn either thoracically or abdominally, over clothing. Used for: Respiration Training Relaxation Heart Rate Monitoring and HRV Skin Temperature Sensor (P/N: SA9310M) The Temperature sensor measures skin surface temperature between 10°C – 45°C (50°F - 115°F). It is supplied with a self adhering band for easy finger placement. Used for: Stress Assessment Relaxation ProComp & FlexComp Infiniti Rehab Suite 10 Skin Conductance Sensor (P/N: SA9309M) The Skin Conductance sensor measures the conductance across the skin, and is normally connected to the fingers or toes. Supplied with two finger bands. Used for: Stress Assessment Relaxation EKG Wrist Straps (P/N: SA9325) EKG Wrist Straps come in a kit containing reusable medical-grade, non-latex straps and replaceable silver/silver-chloride electrodes. They provide fast, convenient placement of electrodes for measuring EKG from the wrists. Disposable EKG/EMG electrodes (A) T3402M – Triode™ electrode, with standard 2cm spacing of silversilver chloride electrodes, backed with nickel plated brass snaps to prevent corrosion. (B) T3425 – UniGel electrodes, for use with the EKG sensor or EMG, in case of sensitive placements on dry skin. (C) T3404 – Single strip electrodes, versatile electrodes can be used as strip or separated for wider placements. Static EMG electrodes (P/N: SA9327) Standard silver-silver chloride re-usable electrodes, backed with nickel plated brass snaps to prevent corrosion when connected to pre-amplifiers for extended periods. Foot Pedal (P/N: SA7551) The Foot Pedal connects to the encoder and allows the user to remotely drive the software (initiate the recording). Used for: SEMG para-spinal scanning Thermal scanning SEMG para-spinal scanning with thermographic scanning Range of Motion assessment Manual Muscle Testing Algometry ProComp & FlexComp Infiniti Rehab Suite 11 Tele-Infiniti CF™ (P/N: SA9600) - Optional The Tele-Infiniti CF turns the encoder into a long range monitoring device. The unit disappears into the Compact Flash slot, leaving only the antenna visible to transmit data up to 300 feet (100 m). This accessory is optional. ProComp & FlexComp Infiniti Rehab Suite 12 Software Overview This chapter provides you with a rapid overview of the main functions of the BioGraph Infiniti software. Refer to the on-line help manual for a more detailed description of all the functions and features of the program. To open the on-line help, press the F1 function key, on your keyboard, from any dialog box in the program. Because the on-line help manual is designed to provide contextual information, it will automatically open at the section that discusses the dialog box from which the help was called. The information in this chapter is of a general nature. Each protocol chapter explains how to record, review and report upon data using that particular protocol. RECORDING SESSIONS With the BioGraph Infiniti software, two types of sessions can be recorded: Open Display and Script sessions. Both types of session can be recorded with BioGraph Infiniti. Scripts are predefined protocols that group together varied types of activities with specific display screens. They are used for evaluation and assessments because they produce statistics that can be used to determine the type of exercise and/or practice that is needed by the patient. These statistics can be trended across sessions to reflect patient progress. Open Display sessions are used for biofeedback training, when flexibility is important and you need to be able to rapidly change the session parameters, depending on the client's reactions. The kinds of feedback include various types of audio, such as music, tones, sounds and voice prompts. There are also visual media, such as animations, and different graphs that change color when the signals pass their threshold markers. Start the Program After making the necessary connections described in the previous chapter, turn on your encoder and start the BioGraph Infiniti software. Starting a session from a Favorite A Favorite is a predefined session configuration that contains all the settings you need for recording, replaying, and reviewing a session. Depending on the session type (script or open display), these settings include scripts, channel sets and screens, statistics for session reports, auto-rejection settings for review mode, and Excel report options. Favorites simplify and standardize the process of recording and reviewing sessions. Rehab Suite includes a Favorite for every protocol. You find them listed in the Favorites table when you click the Quick Start button on the main BioGraph screen. To start a session from a Favorite: 1. Click the Quick Start button on the main screen. 2. Optionally, click Add New Client, in the Client Data screen enter at least the person's first and last name, and click OK. 3. Select a name from the list of Clients. 4. Choose a Category from the drop-down list. Only the favorites belonging to the category will display. 5. Select a Favorite from the list. 6. Click OK. If there is no problem with your encoder or sensor connection, the recording screen will open. ProComp & FlexComp Infiniti Rehab Suite 13 Note: 7. If this is the first time you are recording a session, at this point the system will prompt you to enter key codes. See page 4 for more details. Start recording by clicking on the Start button in the toolbar. Starting a Script Session Select Start Script Session from the Main Menu screen. This opens the Start Session screen where you go through the process of selecting a client file and script, setting up session parameters, and launching recording mode. Start Session To see thumbnail images of the screens used in the chosen script, select Picture View. To record with a new script: 1. Select an existing Client. 2. Optionally, select a previously recorded script session from the Sessions list. 3. Click one of the following New Script options: Define New Session to select a new script. Keep Virtual Channel Settings. Select New Script to keep the client's channel set and settings but select a different script. The Script Database window opens. ProComp & FlexComp Infiniti Rehab Suite 14 Script Database 4. Select FlexComp Infiniti or ProComp Infiniti as the encoder communication protocol from the drop-down list at the top. 5. Optionally, choose a Script Category from the drop-down list. Only the scripts belonging to the category will display. 6. Select a script from the list, and click OK. Note: 7. If this is the first time you are recording a session, at this point the system will prompt you to enter key codes. See page 4 for more details. When the recording screen opens, start the script by clicking on the Start button instructions. , and follow the on-screen To record with a previously recorded script: 1. Select an existing Client. 2. Select a previously recorded script session from the Sessions list. 3. Click one of the following Start options: Start to rapidly start a new session with the same display screens and script settings as the selected session. These include any changes you made to the client settings. Start: Default Settings to start a new session with the default channel set settings instead of any changes you made to the client settings for the selected session. Note: 4. If this is the first time you are recording a session, at this point the system will prompt you to enter key codes. See page 4 for more details. When the recording screen opens, start the script by clicking on the Start button instructions. , and follow the on-screen To record with a new client: 1. Click Add New Client, in the Client Data screen enter at least the person's first and last name, and click OK. 2. Select the new Client from the list. 3. Click Define New Session and when the Script Database opens, follow the remaining steps to record with a new script. ProComp & FlexComp Infiniti Rehab Suite 15 Starting an Open Display Session Select Start Open Display Session from the Main Menu screen. This opens the Start Session screen where you go through the process of selecting a client file and channel set, setting up session parameters, and launching recording mode. Start Session To record a new session: 1. Create a new client as described above, or select an existing client from the list. 2. Select Define New Session to open the window. The Select up to 5 Screens for Open Display Mode window opens. Select up to 5 Screens for Open Display Mode To see thumbnail images of the screens available for the chosen channel set, select Picture View. 3. Select FlexComp Infiniti or ProComp Infiniti as the encoder communication protocol from the drop-down list at the top. 4. Highlight a Channel Set on the left. 5. Optionally, choose a Screen Category from the drop-down list. Only the screens belonging to the category will display. 6. Choose one to five Screens from the list, and click OK. To select more than one screen, press down the CTRL key while clicking with the left mouse button. ProComp & FlexComp Infiniti Rehab Suite 16 Note: 7. If this is the first time you are recording a session, at this point the system will prompt you to enter key codes. See page 4 for more details. When the recording screen opens, start recording by clicking on the Start button . Sensor Connections If there are problems with your sensor connections, the program will report them prior to accessing the recording screen. If, for example, you have sensors that are connected but are not required for this channel set, you will get a warning message. You can remove the sensor if you want, or continue recording by clicking Yes. Keep in mind that no data is recorded for sensors that are not defined in the channel set. Note: If there are sensor connection problems in addition to extra sensors, this information won't appear as a separate message. It will display in the Sensor Connections window. If you have connected wrong sensor types, you will see the Sensor Connections window. All the sensors that are expected will be listed in the Expected Sensor column. The Wrong Sensor Type column shows which sensor type was actually detected. You can remove the wrong sensor or replace it with the right one. Click Repeat to check the sensor connections again until the system no longer detects a wrong sensor type. The program will not allow you to record a session with the wrong sensors. Note: If the Wrong Sensor Type column is empty, the correct sensor has been connected. If you do not connect all the sensors that are required for the selected channel set, the message "Sensor is not detected" appears in the Wrong Sensor Type column. When a sensor is not connected, the program replaces its signal value by a constant value of 1. You can record a session when some sensors are missing, but the corresponding signal will be a flat line. Any calculations based on that signal will not reflect real physiological changes. STOPPING A SESSION No duration is set for an Open Display session. It must be stopped manually by clicking the Stop button . The duration of a Script session is set at the time the script is defined. When the script reaches its end, recording will automatically stop. When the session ends, the following series of message prompts will appear and guide you through the process of saving data, adding notes to the session file, and, optionally reviewing the data or recording another session. 1. Save session data: You can save the session in compressed format but, unless your hard drive has very little space available or you do not need to review the saved sessions, we recommend that you always Save, which uses noncompressed format. Compressed files can’t be replayed, reviewed or trended until they have been decompressed. ProComp & FlexComp Infiniti Rehab Suite 17 2. Enter Session Notes: Here you can enter, if you want, a treatment code, a session description and some notes. Click OK to continue. 3. Review or replay the session: You have the option to analyze the session data at this point. You can switch to review mode or replay mode. After you review the data and close the viewing screen, the program displays the next message prompt. 4. 5. Record another session with the same settings: If you selected No at the previous message, the program asks if you want to record another session with the same settings. If you select Yes at this point, the recording screen will reopen. Turn off your encoder: If you selected No at the previous message, the program prompts you to turn your encoder off. Click OK to return to the Main Menu screen. You can also manually stop recording a script session by clicking the Stop button . In this case, you are prompted to confirm the command. If you select No, the script continues recording normally. If you select Yes, no data is saved for the session, and you are prompted to record another session with the same settings (message 4, above). REPLAYING SESSIONS Replaying a session allows you to play back a recorded session like a movie. This is useful if you have recorded video data. You can replay the session from any point in time and skip to event markers or script activities and steps. 1. Select Database from the Main Menu screen. 2. In the Main Database window select the client whose session you want to replay. 3. Select the session from the right-hand table. 4. Click on Replay Session at the bottom. ProComp & FlexComp Infiniti Rehab Suite 18 Main Database 5. The next step depends on whether you selected a Script session or an Open Display session to replay. If you selected a Script session, the window Edit Channel Set Setting for Current Client opens. Click Close to enter replaying mode. If you selected an Open Display session, the window Review/Replay Session Confirmation opens. To replay the session using different screens from those used to record it, click Select Screens to open the Select Screens window. Select up to 5 screens and click OK to return to Review/Replay Session Confirmation. Click OK to enter replay mode. Review/Replay Session Confirmation 6. Click on the Start button to replay the session. REVIEWING SESSIONS After recording a session you can analyze the data by going into review mode. This mode allows you to scroll through the graphs, look at statistics, and print out a report displaying the data in graphical and/or statistical form. Review 1. Select Database from the Main Menu screen. 2. In the Main Database window select the client whose session you want to review. 3. Select the session from the right-hand table. 4. Click on Review/Report at the bottom. The Review/Replay Session Confirmation window opens. ProComp & FlexComp Infiniti Rehab Suite 19 For a Script session For an Open Display session If you are reviewing a session that was recorded using a Favorite, then review screens will already be selected by default, and you can click OK to enter review mode. 5. Otherwise, to select review screens, do the following. Click on Select Screens. From the Screen Category drop-down list, select Report-Review. Only screens from the selected category will be listed. Select up to 5 screens and click OK to return to Review/Replay Session Confirmation. Click OK again to enter review mode. Rejecting Artifacts The purpose of rejecting artifacts is to have reliable statistics, with the least amount of noise affecting the recording. Rejecting artifacts can be performed while reviewing sessions. It can be done manually by the person reviewing the data. First review the session to determine where the recording is most affected by noise. Then place artifact rejection segments at these locations, by following these steps. 1. Select the line graph containing the segment to be rejected. The selected graph will display a magenta border. 2. Press and hold the [Control] Key. 3. Place the cursor over one end of the rejected segment. 4. Click and hold the left mouse button. (You can release the [Control] key at this point.) 5. Drag the cursor across the segment to be rejected. The selected segment is highlighted in gray. 6. At the end of the segment, release the mouse button. Note: You can place artifact rejection segments only on single-line graph instruments. If you get an error message, you have to select a different screen for reviewing. Calculating Statistics To calculate statistics for a session, click the Calculate Statistics button in the tool bar. A message confirms that the program is processing session data and then the Statistics window opens. Click Close to close the window. ProComp & FlexComp Infiniti Rehab Suite 20 Note: This is the Statistics window for a script session. The Statistics window for an open display session is similar, but does not display a list of rejection durations for individual activities. Generating Session Reports In review mode BioGraph Infiniti 5.1 can generate two types of session report. Excel reports have been predefined and customized especially for the Rehab Suite protocols. An Excel report transfers session statistics from the session data file into a Microsoft Excel workbook and subjects them to further analysis. Excel reports can be saved or printed using the Excel functions. Excel reports have not been defined for open display sessions. The protocol chapters contain detailed information about their respective Excel reports. Text reports include general information about the session as well as optional information (session notes, statistics, markers) that you select. A text report can be generated from any screen which includes line graphs or trend graphs. Text reports are generated from Microsoft Word templates, and can be saved or printed using the Word functions. Text reports are preferred for open display sessions, but they can also be generated for script sessions. To generate a session report, enter review mode either immediately after recording a session (see Stopping a Session on page 17), or from the Database window by selecting the session from the database and clicking on Review/Report (see Reviewing a Session on page 19). Select review screens, and then follow these steps: 1. If this is an open display session, from the Options menu select Set Open Display Statistics and choose the channels for which statistics should be calculated. 2. If necessary, perform artifact rejection on the recorded data. 3. Click the Calculate Statistics icon 4. If you have loaded more than one screen, open the screen from which you want to generate the report. Different screens can generate different reports. 5. Click the Session Report icon in the tool bar to recalculate the statistics. in the tool bar and select the type of report that you want to generate. If you select Generate Excel Report, Microsoft Excel opens and displays your report as a workbook. You can print or save the report using Excel's Print and Save functions. ProComp & FlexComp Infiniti Rehab Suite 21 If you select Generate Text Report, the Session Report window opens, and you must continue to the next step. 6. Select report components by placing a check mark in the desired boxes. 7. Click Generate Report to generate the report. Word opens and displays your report as a document. You can print or save the report using Word's Print and Save functions. Note: Microsoft Word and Microsoft Excel must be installed on your system for these functions to work. Excel-generated session report Word-generated session report TOOL BAR OPTIONS While recording, replaying or reviewing an open display session there are certain options that are available on a tool bar found near the top of the display screen. To learn more about the tool bar, refer to the online help by pressing F1. Toggling Between Screens If you have chosen more than one screen you can view each one by clicking on the numerical buttons on the toolbar at the top. Up to five screens can be viewed (in the example below, there are four, where the third screen is currently on display). Adjusting Scales and Threshold By clicking on a graph instrument you can enable any of the scale and threshold options on the toolbar shown below. Vertical scale: The minimum and maximum scale values can be changed by clicking on the up and down arrows to the right of the text boxes labeled with Max and Min. ProComp & FlexComp Infiniti Rehab Suite 22 The numbers increase or decrease by 0.1, but when you click on the button , the numbers change by 1. (You can also type the desired value into the text box and then click anywhere on the screen to save the change.) Multi line-graph Y1 and Y2 axes toggle: The multiple line graph has a left and a right vertical scale that can be adjusted independently of each other by clicking on the toggle button. Left vertical scale enabled. Right vertical scale enabled. Threshold: The threshold line on a bar graph, line graph and animation scale can be adjusted in the same way as the vertical scale. The text box labeled Thr1 is for single threshold graphs, while Thr2 is for double threshold graphs like the multi-line graph that can have up to two guidelines. Time scale: The default time for all the screens is 30 seconds. You can select a new time scale by clicking on the drop-down menu. USING A WEB CAMERA When you see this logo on a screen in the manual, it means you can use a webcam with this screen. You only need to connect your webcam to a USB port of your computer and turn it on before you start the session. Note: Your computer system must be connected to a video capture device, such as a webcam, and the proper software installed, in order to use this function. The software searches for a connected video capture device and activates it automatically. A preliminary testing window will pop up, in order to adjust the camera. The video will be recorded with the session and can be reviewed or replayed. If you have more than one video capture device connected to your system, and want to use a specific one, place the cursor on the video image and click the right mouse button, then select the device from the list: USING A DVD When you see this logo on a screen in the manual, it means a DVD can be used with this screen. You only need to insert the DVD in the DVD player of your computer. When the option Start DVD but Pause session is selected, you can launch a DVD, access the DVD menu and start a movie while the program waits in Pause. When you are ready to start recording data, click the Pause button. Recording will begin. Note: Your computer system must include a functioning DVD drive in order to use this function. SENSOR CALIBRATION AND ZEROING The ForceTrac and Dual-InclinoTrac sensors may require calibration or zeroing. You do this in the Recording Screen before starting to run the protocol. From the Options menu of the Recording Screen, select Sensor Calibration. This opens the Sensor Calibration & Zeroing window. Here you can run a Wizard to zero or calibrate your sensor. ProComp & FlexComp Infiniti Rehab Suite 23 Encoder, Channels, and Sensors The left pane of the window identifies the specific encoder by its serial number (in this case, DA1029), lists the channels for the encoder, and indicates the calibration and zeroing status of the sensor attached to each channel. If a sensor has previously been zeroed or calibrated, the value entered in Sensor S/N displays beside its channel identifier. Click Show Legend to open a window explaining the symbols used to indicate sensor status. In the screen shot above, for example: For the sensor connected to Channel A, calibration and zeroing schemes exist and calibration and zeroing have both been performed. For the sensor connected to Channel B, no calibration scheme exists. A zeroing scheme exists, and zeroing has been performed. For the sensor connected to Channel C, no calibration scheme exists. A zeroing scheme exists, but zeroing has not yet been performed. Sensors have not been connected to the other channels. Command Buttons The command buttons are in a row at the bottom of the window. Depending on whether you are calibrating or zeroing the sensor, some button labels will change. Calibrate now: Click this button to open the Calibration Wizard, which provides step-by-step instructions leading you through the calibration procedure. The wizard opens the right pane of the window. When the Zeroing Wizard is active, this button is disabled. Zero now: Click this button to open the Zeroing Wizard, which provides step-by-step instructions leading you through the zeroing procedure. The wizard opens the right pane of the window. When the Calibration Wizard is active, this button is disabled. Note: If a sensor requires both calibration and zeroing, calibrate the sensor before you zero it. ProComp & FlexComp Infiniti Rehab Suite 24 Apply: Click this button to save changes to the settings. Abort calibration: In the Calibration Wizard, click this button to exit the wizard without saving changes. Abort zeroing: In the Zeroing Wizard, click this button to exit the wizard without saving changes. Next: After completing each step, click this button to proceed to the next step. Close: At any step, click this button to discard any changes to the settings and close the wizard. You will be prompted to confirm that you want to discard the changes. Sensor Status Details The list in the middle panes of the window shows specific values for the sensor on the selected channel. For a description of these values, press F1 to consult the on-line help. IMPEDANCE CHECK It may be necessary to check impedance values for MyoScan-Z sensors. These values indicate the quality of contact between the electrodes and the skin. You do this in the Recording Screen before starting to run the protocol. From the Options menu of the Recording Screen, select Impedance Check. This opens the Impedance Check window. Then, trigger impedance checking from your encoder. To do this: Ensure that the encoder's power light is on. Press and hold down the power button for about 3 seconds, or until the power light starts blinking. When the power light begins to blink, impedance checking mode is active. ProComp & FlexComp Infiniti Rehab Suite 25 The graphic display shows the impedance values of the selected sensor in green, orange or red. Green indicates a low value. Orange indicates a medium value. Red indicates a high value. Ideally, all three measurements should display in green. For more information about impedance checking, press F1 to consult the online help. To exit impedance checking mode, press the power button down for about 3 seconds, or until the power light stops blinking. ProComp & FlexComp Infiniti Rehab Suite 26 General SEMG Assessment OVERVIEW The following protocols are very common SEMG assessment techniques. They can be performed at the beginning of each visit. They allow you to quickly assess the examinee’s muscle condition and determine the training parameters of the day (since an examinee’s condition can change over time). This logo on a screen in a protocol indicates that you can use an optional webcam with the screen to record video of the session. You need only connect your webcam to a USB port of your computer and turn it on before you start the session. Note: Your computer system must be connected to a video capture device, such as a webcam, and the proper software installed, in order to use this function. CLINICAL GUIDE REFERENCE The clinical guide gives general guidelines and recommendations for the accurate use of the instrumentation. It also explains how to prepare the examinee and the procedure to follow. Chapter: SEMG ASSESSMENT; section: SEMG SIGNAL ANALYSIS: GENERAL CONCEPTS Also recommended: INTRODUCTION TO SURFACE ELECTROMYOGRAPHY SKELETAL MUSCLE PROPERTIES GENERAL PROCEDURE Starting the Session If you are going use a webcam to make a video recording of this session, connect your webcam to a USB port of your computer and turn it on. Connect the sensors to the encoder as follows: o o MyoScan/MyoScan-Z sensor to channel A. Optional MyoScan/MyoScan-Z sensors to channel B, and channels C to J for FlexComp Infiniti. A B C D E F G H I J Myo Myo Myo Myo Myo Myo Myo Myo Myo Myo (optional) (optional for FlexComp) (optional for FlexComp) (optional for FlexComp) (optional for FlexComp) (optional for FlexComp) (optional for FlexComp) (optional for FlexComp) (optional for FlexComp) Turn the encoder on. 1. Click Quick Start. 2. From Categories, select Pro/Flex Rehab Suite - General SEMG Assessment. ProComp & FlexComp Infiniti Rehab Suite 27 3. From Clients, select a name. 4. From Favorites, select the desired Assessment Protocol. 5. Click OK. Measuring Click the Start button . Reviewing the session When the session ends, a series of message prompts guides you through the process of saving data, adding notes to the session file, and switching to reviewing mode so that you can generate a session report. In review mode, a screen similar to this will appear: If you used a webcam to make a video recording of the session, during review the video playback is synchronized to the EMG signal as you move the Time Mark back and forth along the EMG signal line graph. Generating a report After the review screen opens, you can generate a Dynamic SEMG Assessment report. This is a Text report. 1. Click the Session Report icon in the tool bar. 2. Select Generate Text Report, select report components in the Session Report window, and click Generate Report. Microsoft WORD opens and displays your report. You can print or save the report using WORD's Print and Save functions. G.SEMG01 – BASELINE ASSESSMENT This protocol measures the resting level of the muscle. The patient must be asked to totally relax the muscle. The protocol script is divided into 3 steps: 1. Read instructions: Gives you an overview of what to expect; no data is recorded; press any key when you are done. ProComp & FlexComp Infiniti Rehab Suite 28 2. Verify signal: Take the time to make sure the sensor and cables are connected properly. No data is recorded. Pressing any key on your keyboard allows you to advance to the next activity. 3. Baseline: Relax muscles to determine new resting levels; duration is 15 seconds. 1. Instructions 2. Verify signal 3. Baseline G.SEMG02 – MAXIMAL FORCE ASSESSMENT This protocol measures the maximal force of the muscle. The maximal force is the highest level of voluntary contraction that a person can achieve without inducing unacceptable pain. The protocol is divided into 3 steps: 1. Read instructions: Gives you an overview of what to expect; no data is recorded; press any key when you are done. 2. Verify signal: Take the time to make sure the sensor and cables are connected properly. No data is recorded. Pressing any key on your keyboard allows you to advance to the next activity. 3. Rest-work cycle: The patient relaxes and contracts muscles for 5 seconds, three times. 1. Instructions 2. Verify signal 3. Rest-Work G.SEMG03 – ENDURANCE ASSESSMENT This protocol assesses a sustained contraction. The patient contracts as strongly as they can during an extended period (about 20 seconds). This monitors the recruitment of the slow twitch fibers (muscle endurance). The contraction should be performed against static resistance (isometric contraction). The protocol is divided into 5 steps: 1. Read instructions: Gives you an overview of what to expect; no data is recorded; press any key when you are done. 2. Verify signal: Take the time to make sure the sensor and cables are connected properly. No data is recorded. Pressing any key on your keyboard allows you to advance to the next activity. 3. Pre-Baseline: The patient must relax. 4. Contract and Hold: The patient contracts as strongly as they can during an extended period (about 20 seconds). 5. Post-Baseline: Comparison of resting levels (pre/post) assesses the ability to recover. ProComp & FlexComp Infiniti Rehab Suite 29 1. Instructions 2. Verify signal 4. Contract and Hold 3. Pre baseline 5. Post baseline G.SEMG04 – FAST FLICK ASSESSMENT This protocol measures the maximal force of the muscle. The maximal force is the highest level of voluntary contraction that a person can achieve without inducing unacceptable pain. The protocol is divided into 5 steps: 1. Read instructions: Gives you an overview of what to expect; no data is recorded; press any key when you are done. 2. Verify signal: Take the time to make sure the sensor and cables are connected properly. No data is recorded. Pressing any key on your keyboard allows you to advance to the next activity. 3. Pre-Baseline: The patient must relax. 4. Rapid Contractions: the patient repetitively contracts as quickly and strongly as they can. 5. Post-Baseline: Comparison of resting levels (pre/post) assesses the ability to recover. 1. Instructions 2. Verify signal 4. Rapid Contractions ProComp & FlexComp Infiniti Rehab Suite 3. Pre baseline 5. Post baseline 30 G.SEMG05 – GLOBAL SEMG ASSESSMENT 1 MUSCLE This is a complete assessment of the muscle with 5 activities: pre baseline, fast flicks (rapid contractions), work/rest (maximal force), endurance and post baseline. 1. Instructions 2. Signal Verification 3. Pre-baseline 4. Fast flicks 5. Work/Rest 6. Endurance 7. Post baseline SEMG ASSESSMENT – GENERAL PURPOSE (G.SEMG06 and up) This section regroups generic display screens designed for SEMG Assessment. As opposed to the protocols above, here there is no sequence of actions and limitation of time. G.SEMG06 - SEMG Assessment with 2 EMG General Purpose – 1Ch A General Purpose One channel display of signal. The line graph is to display the RMS EMG. It displays the power spectrum and median frequency, as well as statistics. ProComp & FlexComp Infiniti Rehab Suite 31 General Purpose – 1Ch B General Purpose One channel display of signal. The line graph is to display the RMS EMG. It displays the power spectrum and median frequency, as well as statistics. General Purpose – 2Ch A&B General Purpose The two line graphs on the top display the raw EMG of A and B. The power spectrum displays A on the left and B on the right. The graph at the bottom displays the median frequency of both channels. General Purpose – 2Ch Line-Bar Graphs The two RMS EMG signals are displayed on line graphs and bar graphs. Statistics are also displayed. G.SEMG07 - SEMG Assessment with 4 EMG (FlexComp Infiniti only) General Purpose – 4 EMG RMS with video 4 RMS EMG signals are displayed on 4 line graphs and bar graphs. General Purpose – 4 raw EMG with video 4 raw EMG signals are displayed on 4 line graphs. The bar graphs and digital displays show RMS EMG. These screens are also used for review. ProComp & FlexComp Infiniti Rehab Suite 32 G.SEMG08 - SEMG Assessment with 6 EMG (FlexComp Infiniti only) General Purpose – 6 EMG RMS with video 6 RMS EMG signals are displayed on 6 line graphs and bar graphs. General Purpose –6 raw EMG with video 6 raw EMG signals are displayed on 6 line graphs. The bar graphs and digital displays show RMS EMG. These screens are also used for review. G.SEMG09 - SEMG Assessment with 10 EMG (FlexComp Infiniti only) General Purpose – 10 EMG RMS with video 10 RMS EMG signals are displayed on 5 line graphs. General Purpose – 10 raw EMG with video 10 raw EMG signals are displayed on 10 line graphs. The digital displays show RMS EMG. These screens are also used for review. ProComp & FlexComp Infiniti Rehab Suite 33 Static SEMG Assessment OVERVIEW Static SEMG Scanning assesses the resting level of the muscles surrounding the spine in static position. The protocol scans 12 sites x 2 (left/right) from C2 to L5. CLINICAL GUIDE REFERENCE The clinical guide gives general guidelines and recommendations for the accurate use of the instrumentation. It also explains how to prepare the examinee and the procedure to follow. Chapter: SEMG ASSESSMENT; section: STATIC SEMG ASSESSMENT Also recommended: INTRODUCTION TO SURFACE ELECTROMYOGRAPHY PROCEDURE Starting the Session Connect the sensors to the encoder as follows: o o MyoScan or MyoScan-Z sensors to channels A and B (left in A, right in B); Foot pedal to channel C. A B C Myo (left) Myo (right) Pedal D E F G H I J Turn the encoder on. 1. Click Quick Start. 2. From Categories, select Pro/Flex Rehab Suite - Static SEMG Assessment. 3. From Clients, select a name. 4. From Favorites, select S.EMG01 – ParaSpinal Scanning. 5. Click OK. Click the Start button and read the instructions on the screen. Do not press the foot pedal yet. ProComp & FlexComp Infiniti Rehab Suite 34 Put conductive electrode paste or cream on the EMG electrodes (grey area only). Position yourself next to the examinee, the encoder attached to your belt, with the pedal near your foot. Press the foot pedal to go to the next screen. Measuring 1. Place the active electrodes (positive and negative) in alignment with the spine (except for trapezius), at a distance of 3 cm out from the vertebral ridge, and at the site shown on the screen. 2. Position your hands so that the electrodes remain stable and do not move, as shown in the picture below. Apply gentle pressure on the sensor so that the 3 electrodes make good contact with the skin. 3. Ask the examinee to relax their muscles. ProComp & FlexComp Infiniti Rehab Suite 35 Wait for the signal to settle; allow at least 5 seconds before recording the data. But do not wait more than 30 seconds; the signal will not settle more and you risk creating movement artifacts by holding the electrodes too long. 4. Press the foot pedal to record. 5. Then move to the next site. Repeat steps 1 to 6 for sites from C2 to L5. When the session ends, a series of message prompts guides you through the process of saving data, adding notes to the session file, and switching to reviewing mode so that you can generate a session report. Generating a report After the review screen opens, you can generate a SEMG Assessment report. This is an Excel report. 1. Click the Session Report icon 2. Select Generate Excel Report. in the tool bar. Microsoft Excel opens and displays your report as a workbook. You can print or save the report using Excel's Print and Save functions. ProComp & FlexComp Infiniti Rehab Suite 36 Normative Data are shown with a “T” on the graph: The report shows the difference between left and right (in %) for each site. The formula is (Max(left,right)Min(left, right))/Max(left,right). The report rates the level of activation of each site: Ranges Level of activation Color code Between Mean – 1 StD. and Mean + 1 StD. Normal (green) Between Mean + 1 StD. and Mean + 2 StD. Mid Activation (yellow) Between Mean + 2 StD. and Mean + 3 StD. Moderate Activation (orange) Greater than Mean + 3 StD. Severe Activation (red) Less than Mean – 1 StD. Mid Inhibition (yellow) Less than 1μV or greater than 25μV Invalid Data (red) Summary and Follow-up notes You can enter notes in the summary/follow-up notes boxes: In Excel 2000 and Excel 2003, place your cursor in the text box and start typing. In Excel 2007, place your cursor in the text box. 1. 2. Right-click the mouse button. Select Edit text. 3. Start typing. ProComp & FlexComp Infiniti Rehab Suite 37 Dynamic SEMG Assessment OVERVIEW Dynamic SEMG assesses muscle tension through various movements, such as flexion/extension, lateral flexion or rotation. In addition to general protocols, the system provides three assessment protocols for the cervical spine (CP, SCM or Traps) and for the lumbar spine: Flexion/Extension Left/Right Lateral Flexion Left/Right Rotation It also provides one assessment protocol for the anterior knee (VMO and VL). This logo on a screen in a protocol indicates that you can use an optional webcam with the screen to record video of the session. You need only connect your webcam to a USB port of your computer and turn it on before you start the session. Note: Your computer system must be connected to a video capture device, such as a webcam, and the proper software installed, in order to use this function. CLINICAL GUIDE REFERENCE The clinical guide gives general guidelines and recommendations for the accurate use of the instrumentation. It also explains how to prepare the examinee and the procedure to follow. Chapter: SEMG ASSESSMENT; section: DYNAMIC SEMG ASSESSMENT Also recommended: INTRODUCTION TO SURFACE ELECTROMYOGRAPHY SKELETAL MUSCLE PROPERTIES GENERAL PROCEDURE Starting the Session If you are going use a webcam to make a video recording of this session, connect your webcam to a USB port of your computer and turn it on. Connect the sensors to the encoder as follows: o o MyoScan/MyoScan-Z sensors to channels A and B (left in A, right in B). Optional MyoScan/MyoScan-Z sensors to channels C and D (left in C, right in D). A B Myo Myo C D Myo Myo (optional) (optional) E F G H I J Turn the encoder on. ProComp & FlexComp Infiniti Rehab Suite 38 1. Click Quick Start. 2. From Categories, select Pro/Flex Rehab Suite - Dynamic SEMG Assessment. 3. From Clients, select a name. 4. From Favorites, select the desired General Dynamic Assessment Protocol. 5. Click OK. Measuring Click the Start button . D.EMG – General Dynamic Assessment with 2 EMG D.EMG – General Dynamic Assessment with 4 EMG The Multi-line graph will display the EMG signal of 2 channels A and B. The Bar graph indicates the % Difference between the two signals. There are statistics available as well. The two Multi-line graph will display the EMG signal of 2 channels simultaneously, respectively A and B, C and D. The Bar graphs indicates the % Difference between the signals (A and B), (C and D). There are statistics available as well. Mark the different stages of the movement with event makers (events can be marked by hitting the space bar or a key of the keyboard that you would have preliminarily labeled with the name of the event). Reviewing the session When the session ends, a series of message prompts guides you through the process of saving data, adding notes to the session file, and switching to reviewing mode so that you can generate a session report. ProComp & FlexComp Infiniti Rehab Suite 39 In review mode, a screen similar to this will appear: D.EMG – General Dynamic Assessment with 2 EMG D.EMG – General Dynamic Assessment with 4 EMG The Multi-line graph will display the EMG signal of 2 channels A and B. The Bar graph indicates the % Difference between the two signals. There are statistics available as well. The two Multi-line graph will display the EMG signal of 2 channels simultaneously, respectively A and B, C and D. The Bar graphs indicates the % Difference between the signals (A and B), (C and D). There are statistics available as well. Select the desired display time window on the screen by using the dropdown list. It is recommended to select first Size to session for a global view of the session and then Size to activity to view the different phases of the motion. Scroll through the session by using the scroll bar. You can read the value of a given point on the signal by moving the red Time Mark. The Time Mark is usually placed at the right end of the graph (see picture). To move the Time Mark: 1. Place the cursor over the Time Mark. 2. Click and hold down the mouse button. 3. Drag the Time Mark to the desired position. Time Mark Move the mouse cursor over a marker (vertical dashed line) to display its label (such as flexion, re-extension etc.) ProComp & FlexComp Infiniti Rehab Suite 40 If you used a webcam to make a video recording of the session, during review the video playback is synchronized to the EMG signal as you move the Time Mark back and forth along the EMG signal line graph. This allows you to see lateral deviations in the movement and to observe any antalgic position. The review allows you to verify that the motion has been properly performed by the examinee at the right time, when prompted. You can also check the consistency from trial to trial. Generating a report After the review screen opens, you can generate a Dynamic SEMG Assessment report. This is a Text report. 1. Click the Session Report icon in the tool bar. 2. Select Generate Text Report, select report components in the Session Report window, and click Generate Report. Microsoft WORD opens and displays your report. You can print or save the report using WORD's Print and Save functions. PROCEDURE FOR LUMBAR SPINE ASSESSMENT Starting the Session If you are going use a webcam to make a video recording of this session, connect your webcam to a USB port of your computer and turn it on. Connect the MyoScan/MyoScan-Z EMG sensors to the encoder in channels A and B (left in A, right in B). A B Myo (left) Myo (right) C D E F G H I J Turn the encoder on. 1. Click Quick Start. 2. From Categories, select Pro/Flex Rehab Suite - Dynamic SEMG Assessment. 3. From Clients, select a name. 4. From Favorites, select the desired Dynamic SEMG Protocol for Lumbar Spine. 5. Click OK. Click the Start button and read the instructions on the screen. ProComp & FlexComp Infiniti Rehab Suite 41 First you will see an overview screen (Flexion/Re-extension, shown here): Press a key to go to the next screen. In the next screen, verify that the signal is free of artifacts and the sensors properly placed. Before going to the next screen and starting to record, instruct the examinee to perform the motion slowly, until they feel restriction, tightness or discomfort. Measuring 1. Before performing the motion, the examinee stays in neutral position and relaxes their muscles during 10 seconds. 2. Then the voice prompt asks the examinee to perform the motion three times. ProComp & FlexComp Infiniti Rehab Suite 42 3. At the end of the exercise, the examinee is asked to stay in neutral position and relax their muscles during 10 seconds. Reviewing the session When the session ends, a series of message prompts guides you through the process of saving data, adding notes to the session file, and switching to reviewing mode so that you can generate a session report. In review mode, a screen similar to this will appear: The review allows you to verify that the motion has been properly performed by the examinee at the right time, when prompted. You can also check the consistency from trial to trial. ProComp & FlexComp Infiniti Rehab Suite 43 Generating a report After the review screen opens, you can generate a Dynamic SEMG Assessment report. This is an Excel report. 1. Click the Session Report icon 2. Select Generate Excel Report. in the tool bar. Microsoft Excel opens and displays your report as a workbook. You can print or save the report using Excel's Print and Save functions. Section 1: Graphs The session is graphed as a simplified chart. For relaxation phases, such as baselines, neutral position and completed range of motion (full flexion, full rotation etc.), the EMG (RMS) mean is plotted. For motion phases, such as flexion, re-extension or rotation, the EMG (RMS) peak is plotted. Section 2: Data The data are grouped in order to facilitate the analysis. The report computes the difference between left and right either in μV or in %. The formula for μV difference is (right - left). The formula for percentage difference is (Max(left,right)- Min(left, right))/Max(left,right). ProComp & FlexComp Infiniti Rehab Suite 44 Section 3: Summary and Follow-up notes You can enter notes in the summary/follow-up notes boxes: In Excel 2000 and Excel 2003, place your cursor in the text box and start typing. In Excel 2007, place your cursor in the text box. 1. 2. Right-click the mouse button. Select Edit text. 3. Start typing. PROCEDURE FOR CERVICAL SPINE ASSESSMENT Starting the Session If you are going use a webcam to make a video recording of this session, connect your webcam to a USB port of your computer and turn it on. Connect the sensors to the encoder as follows: o o MyoScan/MyoScan-Z sensors positioned on the CPs to channels A and B (left in A, right in B). MyoScan/MyoScan-Z sensors positioned on the SCMs or Traps to channels C and D (left in C, right in D). A B C D Myo Myo Myo Myo (left CP) (right CP) (left SCM or Traps) (right SCM or Traps) Turn the encoder on. 1. Click Quick Start. 2. From Categories, select Pro/Flex Rehab Suite - Dynamic SEMG Assessment. 3. From Clients, select a name. 4. From Favorites, select the desired Dynamic SEMG Protocol for Cervical Spine. 5. Click OK. Click the Start button E F G H I J and read the instructions on the screen. ProComp & FlexComp Infiniti Rehab Suite 45 First you will see an overview screen (Flexion/Re-extension, shown here): Press a key to go to the next screen. In the next screen, verify that the signal is free of artifacts and the sensors properly placed. Before going to the next screen and start recording, instruct the examinee to perform the motion slowly, until they feel restriction, tightness or discomfort. Measuring 1. Before performing the motion, the examinee stays in neutral position and relaxes their muscles during 10 seconds. 2. Then the voice prompt ask the examinee to perform the motion three times. ProComp & FlexComp Infiniti Rehab Suite 46 3. At the end of the exercise, the examinee is asked to stay in neutral position and relax their muscles during 10 seconds. Reviewing the session When the session ends, a series of message prompts guides you through the process of saving data, adding notes to the session file, and switching to reviewing mode so that you can generate a session report. In review mode, a screen similar to this will appear: The review allows you to verify that the motion has been properly performed by the examinee at the right time, when prompted. You can also check the consistency from trial to trial. Generating a report After the review screen opens, you can generate a Dynamic SEMG Assessment report. This is an Excel report. ProComp & FlexComp Infiniti Rehab Suite 47 1. Click the Session Report icon 2. Select Generate Excel Report. in the tool bar. Microsoft Excel opens and displays your report as a workbook. You can print or save the report using Excel's Print and Save functions. Section 1: Graphs The session is graphed as simplified charts. For relaxation phases, such as baselines, neutral position and completed range of motion (full flexion, full rotation etc.), the EMG (RMS) mean is plotted. For motion phases, such as flexion, re-extension or rotation, the EMG (RMS) peak is plotted. The first graph shows CP. The second graph shows the second pair of monitored sites. They can be either SCM or traps. In order to select the sites, you have to click on “<select>”. The legend on the next pages will be automatically updated. ProComp & FlexComp Infiniti Rehab Suite 48 Section 2: Data The data are grouped in order to facilitate the analysis. The report computes the difference between left and right either in μV or in %. The formula for μV difference is (right - left). The formula for percentage difference is (Max(left,right)- Min(left, right))/Max(left,right). Section 3: Summary and Follow-up notes You can enter notes in the summary/follow-up notes boxes: In Excel 2000 and Excel 2003, place your cursor in the text box and start typing. In Excel 2007, place your cursor in the text box. 1. 2. Right-click the mouse button. Select Edit text. 3. Start typing. PROCEDURE FOR ANTERIOR KNEE ASSESSMENT Starting the Session If you are going use a webcam to make a video recording of this session, connect your webcam to a USB port of your computer and turn it on. Connect the MyoScan/MyoScan-Z EMG sensors to the encoder in channels A and B (A for VMO, B for VL). A B Myo (left) Myo (right) C D E F G H I J Turn the encoder on. ProComp & FlexComp Infiniti Rehab Suite 49 1. Click Quick Start. 2. From Categories, select Pro/Flex Rehab Suite - Dynamic SEMG Assessment. 3. From Clients, select a name. 4. From Favorites, select the desired Dynamic SEMG Protocol for Knee Assessment. 5. Click OK. Click the Start button and read the instructions on the screen. First you will see an overview screen: Press a key to go to the next screen. In the next screen, verify that the signal is free of artifacts and the sensors properly placed. ProComp & FlexComp Infiniti Rehab Suite 50 Before going to the next screen and starting to record, instruct the examinee to perform the motion slowly, until they feel restriction, tightness or discomfort. Measuring 1. Before performing the motion, the examinee stays in neutral position and relaxes their muscles during 10 seconds. 2. Then the voice prompt asks the examinee to perform the motion three times. 3. At the end of the exercise, the examinee is asked to stay in neutral position and relax their muscles during 10 seconds. When the session ends, a series of message prompts guides you through the process of saving data, adding notes to the session file, and switching to reviewing mode so that you can generate a session report. ProComp & FlexComp Infiniti Rehab Suite 51 Reviewing the session In review mode, a screen similar to this will appear: The review allows you to verify that the motion has been properly performed by the examinee at the right time, when prompted. You can also check the consistency from trial to trial. Generating a report After the review screen opens, you can generate a Dynamic SEMG Assessment report. This is an Excel report. 1. Click the Session Report icon 2. Select Generate Excel Report. in the tool bar. Microsoft Excel opens and displays your report as a workbook. You can print or save the report using Excel's Print and Save functions. Section 1: Graphs The session is graphed as a simplified chart. For relaxation phases, such as baselines and neutral position (leg up and leg down), the EMG (RMS) mean is plotted. For motion phases, (step up and step down), the EMG (RMS) peak is plotted. In order to select the involved side, you have to click on “Involved”. ProComp & FlexComp Infiniti Rehab Suite 52 Section 2: Data The data are grouped in order to facilitate the analysis. The report computes the difference between pre and post baselines and the ratio VMO/VL EMG peaks during the motion phases. Section 3: Summary and Follow-up notes You can enter notes in the summary/follow-up notes boxes: In Excel 2000 and Excel 2003, place your cursor in the text box and start typing. In Excel 2007, place your cursor in the text box. 1. 2. Right-click the mouse button. Select Edit text. 3. Start typing. ProComp & FlexComp Infiniti Rehab Suite 53 Muscle Fatigue Monitoring OVERVIEW SEMG can be used as an indicator of muscle fatigue. The following screens were designed for this purpose. This logo on a screen in a protocol indicates that you can use an optional webcam with the screen to record video of the session. You need only connect your webcam to a USB port of your computer and turn it on before you start the session. Note: Your computer system must be connected to a video capture device, such as a webcam, and the proper software installed, in order to use this function. CLINICAL GUIDE REFERENCE The clinical guide gives general guidelines and recommendations for the accurate use of the instrumentation. It also explains how to prepare the examinee and the procedure to follow. Chapter: SEMG ASSESSMENT; section: MUSCLE FATIGUE MONITORING Also recommended: INTRODUCTION TO SURFACE ELECTROMYOGRAPHY SKELETAL MUSCLE PROPERTIES GENERAL PROCEDURE Starting the Session If you are going use a webcam to make a video recording of this session, connect your webcam to a USB port of your computer and turn it on. Connect the sensors to the encoder as follows: o o A Myo MyoScan/MyoScan-Z sensor to channels A. Optional MyoScan/MyoScan-Z sensor to channel B. B C D E F G H I J Myo (optional) Turn the encoder on. 1. Click Quick Start. 2. From Categories, select Pro/Flex Rehab Suite – Muscle Fatigue. 3. From Clients, select a name. ProComp & FlexComp Infiniti Rehab Suite 54 4. From Favorites, select Muscle Fatigue Monitoring. 5. Click OK. Measuring Click the Start button . You can view each screen by clicking on the numerical buttons on the toolbar at the top. To stop the session, click the Stop button: Muscle Fatigue Monitoring on A & B For each signal, RMS EMG and median frequency are plotted on the same line graph. Video can also be recorded. Muscle Fatigue Monitoring on A This screen is similar to the one above, but only displays channel A. Report - Review – 2Ch 2 Line Graphs The two RMS EMG signals are displayed on line graphs. Statistics are also available. Review screen The same screens are used for review. All these screens are accessible from Start Open Display Session in the channel set “SEMG Assessment with 2 EMG”. ProComp & FlexComp Infiniti Rehab Suite 55 SEMG Biofeedback OVERVIEW This section suggests several training screens that will enhance and speed up rehabilitation thanks to SEMG biofeedback. This logo on a screen in a protocol indicates that you can use an optional webcam with the screen to record video of the session. You need only connect your webcam to a USB port of your computer and turn it on before you start the session. Note: Your computer system must be connected to a video capture device, such as a webcam, and the proper software installed, in order to use this function. CLINICAL GUIDE REFERENCE The clinical guide gives general guidelines and recommendations for the accurate use of the instrumentation. It also explains several biofeedback training techniques. Chapter: SEMG BIOFEEDBACK TRAINING Also recommended: INTRODUCTION TO SURFACE ELECTROMYOGRAPHY SKELETAL MUSCLE PROPERTIES GENERAL PROCEDURE Starting the Session If you are going use a webcam to make a video recording of this session, connect your webcam to a USB port of your computer and turn it on. Connect the sensors to the encoder as follows: o o MyoScan/MyoScan-Z sensor to channel A. Optional MyoScan/MyoScan-Z sensors to channel B to D, and channels E to J for FlexComp Infiniti. A B C D E F G H I J Myo Myo Myo Myo Myo Myo Myo Myo Myo Myo (optional) (optional) (optional) (optional for FlexComp) (optional for FlexComp) (optional for FlexComp) (optional for FlexComp) (optional for FlexComp) (optional for FlexComp) Turn the encoder on. 1. Click Quick Start. 2. From Categories, select one of the categories starting with “Pro/Flex Rehab Suite – SEMG Biofeedback –“. ProComp & FlexComp Infiniti Rehab Suite 56 3. From Clients, select a name. 4. From Favorites, select the desired SEMG Biofeedback Protocol. 5. Click OK. Click the Start button . You can view each screen by clicking on the numerical buttons on the toolbar at the top. If the feedback is scale dependent, you can adjust the sensitivity of the animation or graph as follow: Select the animation by clicking on it. A thin red frame will appear around it. Type the desired EMG scale in Min and Max. Then click anywhere on the screen. If the feedback is threshold-dependent: The threshold line on a bar graph, line graph and animation can be adjusted in the same way as the vertical scale. The text box labeled Thr1 is for single threshold graphs, while Thr2 is for double threshold graphs like the multi-line graph that can have up to two guidelines. You can also directly move the threshold by placing the mouse cursor on the threshold line, pressing and holding the mouse left button and moving the cursor up and down. To stop the session, click the Stop button: CATEGORY: PRO/FLEX SUITE – SEMG BIOFEEDBACK – RELAXATION These screens are designed for muscle deactivation training and, ultimately, total relaxation. RELAX01 - Relaxation with 1 EMG Relaxation - 1Ch Line Graph Scale-dependent Threshold-dependent Other Music is played when the channel A signal stays below the threshold. ProComp & FlexComp Infiniti Rehab Suite 57 Relaxation - 1Ch Relaxation Bar Graph Scale-dependent Threshold-dependent Other Music is played when the channel A signal stays below the threshold. Relaxation - 1Ch Smiley Scale-dependent Threshold-dependent Other The face will smile when the channel A signal is below the threshold. Relaxation - 1Ch Knee Flexion Scale-dependent Threshold-dependent Other When the signal is below the threshold, the leg relaxes; when above, it straightens. Relaxation - 1Ch Wrist Flexion Scale-dependent Threshold-dependent Other When the signal is below the threshold, the wrist relaxes; when above, it straightens. RELAX02 - Relaxation with 1 EMG Relaxation - 1Ch Filled Line-Bar Graphs Scale-dependent Threshold-dependent Other Music is played when the channel A signal stays below the line graph threshold. The signal is displayed in two different views: filled line graph and bar graph. ProComp & FlexComp Infiniti Rehab Suite 58 Relaxation - 1 Ch Parrot Puzzle Scale-dependent Threshold-dependent Other If the EMG reading is below the threshold for 10 seconds then the puzzle starts to fill in. If the signal goes above, pieces will disappear. Relaxation - 1Ch Growing Fractal Scale-dependent Threshold-dependent Other This display assists a patient to differentiate between contracting and relaxing their muscles. Set the animation scale to a maximum value that is appropriate for a low sub-maximal contraction. Set the animation threshold in the middle of this scale. As the patient sustains a sub-maximal contraction and the EMG activity goes above the threshold, the fractal will fill in. As the patient releases the contraction and the EMG activity falls below its threshold the fractal will slowly open and a relaxing song is heard. The complete animation cycle takes approximately 20 seconds, 10 on each side of the threshold. Relaxation - 1Ch Space Hoops Scale-dependent Threshold-dependent Other The animation moves when the channel A signal is below the threshold. Relaxation - 1Ch DVD Scale-dependent Threshold-dependent Other The channel A signal must stay below the bar graph’s threshold to keep the DVD screen size constant. ProComp & FlexComp Infiniti Rehab Suite 59 RELAX03 - Relaxation with 2 EMG Relaxation - 2Ch Shrinking Heads Scale-dependent Threshold-dependent Other Music is played when both channels A and B (bar graphs on the right) are below the threshold. The two heads must have the same size, which means both signals must be at the same level. Channel B could be connected to the healthy site, in order to use it as a model for the unhealthy site. Relaxation - 2Ch Relaxation with DVD Scale-dependent Threshold-dependent Other The DVD will resume playing when both channels A and B are below the threshold. CATEGORY: PRO/FLEX SUITE – SEMG BIOFEEDBACK – STRENGTHENING These screens are designed for muscle activation training and ultimately strengthening. The scale should be adjusted according to the maximal force and the threshold to the training goal. STRN01 - Strengthening with 1 EMG The three screens show a classic view of the signal with bar graphs and line graphs. Strengthening - 1Ch Bar Graph Scale-dependent Threshold-dependent Other This screen graphs the channel A signal on a bar graph and also displays statistics. A sound plays when the signal goes above the threshold. Strengthening - 1Ch Filled Line Graph Scale-dependent Threshold-dependent Other The signal changes color, and bolero music plays, when channel A goes above the threshold. ProComp & FlexComp Infiniti Rehab Suite 60 Strengthening - 1Ch Filled Line-Bar Graphs Scale-dependent Threshold-dependent Other The signal changes color, and music plays, when channel A goes above the line graph threshold. The bar graph also displays the EMG levels in real time. STRN02 – Contract and Hold (with 1 EMG) The four next screens provide the patient with more interesting feedback. Each screen requires the patient to hold the contraction for a longer period of time. Strengthening - 1Ch Smiley Scale-dependent Threshold-dependent Other The face will continue smiling as long as the contraction on channel A is being held above threshold. Strengthening - 1Ch Rooster Puzzle Scale-dependent Threshold-dependent Other The puzzle will fill when the contraction on channel A has been held above the threshold for more than 3 seconds. If the contraction dips below the threshold, then the timer will reset. The threshold is also indicated by the Tarantella tune and can be set on the bar graph instrument. Strengthening - 1Ch Flower Puzzle Scale-dependent Threshold-dependent Other The puzzle will fill when the contraction on channel A has been held above the threshold for more than 5 seconds. If the contraction dips below the threshold, then the timer will reset. The threshold is also indicated by a jazz tune and set on the bar graph. ProComp & FlexComp Infiniti Rehab Suite 61 Strengthening - 1Ch Dolphin Puzzle Scale-dependent Threshold-dependent Other The puzzle will fill when the contraction on channel A has been held above the threshold for more than 10 seconds. If the contraction dips below the threshold, then the timer will reset. The threshold is also indicated by a harpsichord sound and can be set on the bar graph instrument. STRN03 – Uptrain A / Downtrain B (with 2 EMG) The four next screens are more challenging, involving two muscles. Channel A is used for the muscle that must be activated, while channel B is used for the muscle that must not be activated. Strengthening - 2Ch Tomato Puzzle Scale-dependent Threshold-dependent Other The signal displayed on channel A must exceed the threshold and channel B must be below the threshold for 5 seconds in order for the puzzle to be revealed. Basic statistics are also displayed to give a more detailed picture. Strengthening - 2Ch Hero Morph-Slow Scale-dependent Threshold-dependent Other The animation is controlled by both channels A and B, and is threshold dependent. The signal A goes above its threshold, and the signal B stays below its threshold, the boy slowly morphs into a superman. The complete animation cycle is about 14 seconds. An audio tone is heard when the signal A is above the threshold. If one of the conditions is not satisfied, the animation resets to the beginning. The animation can also be reset manually. Strengthening - 2Ch Car Race Scale-dependent Threshold-dependent Other The aim is to make the blue car (channel A) pass the finish line (the white bar on the far right of each track) before the yellow car (channel B). To meet this goal, A must stay above its threshold while B stays below. The points for A increment when both channels are in condition, and the points for B increment when B is above threshold. ProComp & FlexComp Infiniti Rehab Suite 62 Strengthening - 2Ch Conditional DVD Scale-dependent Threshold-dependent Other The DVD stays on when the channel A signal is above its threshold and channel B signal stays below. If either condition is not met the DVD stops playing. STRN04 – Uptrain A / Downtrain B Specific (with 2 EMG) The two next screens are specific to a given joint. Strengthening - 2Ch Knee Flexion Scale-dependent Threshold-dependent Other Control over both channels during the movement is required to move the animation. The threshold can be set on the bar graphs to make it progressively easier or harder to trigger the animation. Strengthening - 2Ch Wrist Flexion Scale-dependent Threshold-dependent Other Control over both channels during the movement is required to move the animation. The threshold can be set on the bar graphs to make it progressively easier or harder to trigger the animation. CATEGORY: PRO/FLEX SUITE – SEMG BIOFEEDBACK – CONTROL These screens are designed for muscle control training. The scale should be adjusted according to the maximal force. Channel B is used to train the patient not to activate a second muscle while activating the first one. The threshold of channel B should be set at a small value above the resting baseline. CTRL01 - Control with 1 EMG Control - 1Ch Tubes Scale-dependent Threshold-dependent Other The animation represents channel A and is dependent on the scale on the left. The ball climbs the tubes when the signal goes up. Instruct your patient to move the ball to a given tube color. ProComp & FlexComp Infiniti Rehab Suite 63 Control - 1Ch Tension Discrimination Training Level 1 Control - 1Ch Tension Discrimination Training Level 2 Control - 1Ch Tension Discrimination Training Level 3 Scale-dependent Threshold-dependent Other Each screen contains a template to follow. Three levels of difficulty are available. You can also adjust the level of difficulty by adjusting the graph scale. These screens are designed for tension discrimination training and for muscle contraction control. CTRL02 - Control with 2 EMG Control - 2Ch Hero Morph-Fast Scale-dependent Threshold-dependent Other The animation represents channel A and is dependent on the scale on the left. The boy morphs into a superman when the channel A signal is toward the upper range of the scale. As the signal comes down the scale, the superman returns to a boy. Control - 2Ch Animal Game Scale-dependent Threshold-dependent Other An exercise to control muscle contraction by lining up the cartoon man with the animal in the blue square while the line-up of animals constantly changes. Channel A is connected to the animation. The stronger the contraction, the further the man moves to the right. To keep the man moving, the signal from channel B should remain below its threshold. ProComp & FlexComp Infiniti Rehab Suite 64 CATEGORY: PRO/FLEX SUITE – SEMG BIOFEEDBACK – EQUILIBRATION These screens are designed for equilibration training. Equilibration refers to bringing muscles into equilibrium. EQUL01 - Equilibration with 2 EMG Equilibration - 2Ch Balance Ratio Scale-dependent Threshold-dependent Other This two-channel ratio screen easily communicates the interplay of two muscles. When the muscles are in equilibrium, the weight is in the middle of the balance. When the weight is off to one end or the other, the muscles are progressively more out of balance. The bar graphs are connected to channels A, B. Equilibration - 2Ch Gorilla Ratio Scale-dependent Threshold-dependent Other This two-channel ratio screen easily communicates the interplay of two muscles. When the muscles are in equilibrium, the ball is balanced on the gorilla's shoulders. When the ball is off to one end or the other, the muscles are progressively more out of balance. The bar graphs are connected to channels A, B. Equilibration - 2Ch Bi-Lateral Bar-Video Scale-dependent Threshold-dependent Other The light turns red when the difference is greater than 35%. Both signals are also displayed in the same line graph and mirrored bars for comparison. Equilibration - 2Ch Bi-Lateral Bar-Video 2 Scale-dependent Threshold-dependent Other The light turns red when the difference is greater than 35%. Both signals are also displayed in the same line graph and bars for comparison. ProComp & FlexComp Infiniti Rehab Suite 65 EQUL02 - Equilibration with 4 EMG Equilibration - 4Ch Balance Ratio Scale-dependent Threshold-dependent Other This four-channel ratio screen easily communicates the interplay of four muscles. When the muscles are in equilibrium, the weight is in the middle of the balance. When the weight is off to one end or the other, the muscles are progressively more out of balance. The bar graphs will be connected to channels A, B, C, D. Equilibration - 4Ch Gorilla Ratio Scale-dependent Threshold-dependent Other This four-channel ratio screen easily communicates the interplay of four muscles. When the muscles are in equilibrium, the ball is balanced on the gorilla's shoulders. When the ball is off to one end or the other, the muscles are progressively more out of balance. The bar graphs will be connected to channels A, B, C, D. Equilibration - 4Ch Bi-Lateral Bar-Video Scale-dependent Threshold-dependent Other The light turns red when the difference is greater than 35%. Both signals are also displayed in the same line graph and mirrored bars for comparison. Equilibration - 4Ch Bi-Lateral Bar-Video 2 Scale-dependent Threshold-dependent Other The light turns red when the difference is greater than 35%. Both signals are also displayed in the same line graph and bars for comparison. ProComp & FlexComp Infiniti Rehab Suite 66 EQUL03 – Postural Training with 4 EMG The next three screens are specified for postural training. They will reinforce good posture with visual assistance. Equilibration – 4Ch Postural Training – Cervical & Thoracic Spine Scale-dependent Threshold-dependent Other The light will turn red when the difference between the two muscles at the site is greater than 35%. The mirrored bar graphs assist the comparison at the site. Equilibration – 4Ch Postural Training – Cervical & Lumbar Spine Scale-dependent Threshold-dependent Other The light will turn red when the difference between the two muscles at the site is greater than 35%. The mirrored bar graphs assist the comparison at the site. Equilibration – 4Ch Postural Training – Thoracic & Lumbar Spine Scale-dependent Threshold-dependent Other The light turns red when the difference is greater than 35%. Both signals are also displayed in the same line graph and bars for comparison. EQUL04 – Postural Training with 6 EMG (FlexComp Infiniti only) Equilibration – 6Ch Bi-Lateral – Video Scale-dependent Threshold-dependent Other Comparing 6 muscle sites, the difference between each two-muscle site should be less than 35%. The red light will be on to indicate the difference is greater than 35%. ProComp & FlexComp Infiniti Rehab Suite 67 Equilibration – 6Ch Postural Training – Cervical & Thoracic & Lumbar Spine Scale-dependent Threshold-dependent Other The 6 muscle sites are as indicated (Cervical, thoracic, and lumbar). The difference between each pair of muscles at the site should be less than 35%. The red light will be on to indicate that the difference is greater than 35%. EQUL05 – Postural Training with 10 EMG (FlexComp Infiniti only) Equilibration – 10Ch Bi-Lateral - Video Scale-dependent Threshold-dependent Other Comparing 10 muscle sites, the difference between each two-muscle site should be less than 35%. The red light will be on to indicate the difference is greater than 35%. Equilibration – 10Ch Postural Training – Cervical & Thoracic & Lumbar Spine Scale-dependent Threshold-dependent Other The 10 muscle sites are as indicated (Cerivcal, thoracic, and lumbar). The difference between each pair of muscles at the site should be less than 35%. The red light will be on to indicate that the difference is greater than 35%. Equilibration – 10Ch Postural Training – Cervical & Thoracic & Lumbar Spine 2 Scale-dependent Threshold-dependent Other The 10 muscle sites are as indicated (Cerivcal, thoracic, and lumbar). The difference between each pair of muscles at the site should be less than 35%. The red light will be on to indicate that the difference is greater than 35%. ProComp & FlexComp Infiniti Rehab Suite 68 Equilibration – 10Ch Postural Training –Thoracic & Lumbar Spine Scale-dependent Threshold-dependent Other The 10 muscle sites are as indicated (Thoracic, and lumbar). The difference between each pair of muscles at the site should be less than 35%. The red light will be on to indicate that the difference is greater than 35%. CATEGORY: PRO/FLEX SUITE – SEMG BIOFEEDBACK – TRAINING These screens are for general training, involving more complex or various exercises. TRNG01 - Training with 2 EMG Training - 2Ch Line Graph – Grow Box Scale-dependent Threshold-dependent Other A proportional sound is played when the square expands past the limit (red line). The left square is for channel A and the right square for channel B. The signals are also displayed on a line graph. Training - 2Ch Bar Graphs Scale-dependent Threshold-dependent Other A simple and easy-to-understand display for two channels of EMG. A song is played in two parts. If both channels are below the threshold then the music stops. If one or both channels are above the threshold then progressively more layers of music are added. Training - 2Ch Filled Line Graphs Scale-dependent Threshold-dependent Other Two filled line graphs display the two channels, with a color change at the threshold. Each channel controls a different part of the same song. ProComp & FlexComp Infiniti Rehab Suite 69 Training - 2Ch Line-Bar Graphs Scale-dependent Threshold-dependent Other Both channels are displayed on a line graph and a bar graph. Training – 1Ch Motor Copy Training Scale-dependent Threshold-dependent Other This screen is used for the motor copy training technique. It can also be used to train the patient to consistently repeat the same contraction without a template. Do the first repetition, and then wait for the new signal to appear in the top graph below before doing the next repetition. The movement detection threshold is set to 20μV. If you want to modify this value, from the Edit menu select Edit VC Settings, select V210 and edit the Input 2 Constant Value. TRNG02 - Training with 4 EMG Training - 4Ch Bar Graphs Scale-dependent Threshold-dependent Other Four bar-graphs representing 4 EMG channels, with a color change above threshold. Training - 4Ch Filled Line Graphs Scale-dependent Threshold-dependent Other Four filled line graphs display the four channels, with a color change at the threshold. ProComp & FlexComp Infiniti Rehab Suite 70 Training - 4Ch Line-Bar Graphs Scale-dependent Threshold-dependent Other The four channels are displayed on a line graph and a bar graph. UNSTABLE SHOULDER If you are going use a webcam to make a video recording of this session, connect your webcam to a USB port of your computer and turn it on. Connect the sensors to the encoder as follows: o MyoScan/MyoScan-Z sensor to channel A (Infraspinatus) and B (Lower Trapezius). A B Myo Myo C D E F G H I J Turn the encoder on. 1. Click Quick Start. 2. From Categories, select one of the categories starting with “Pro/Flex Rehab Suite – SEMG Biofeedback - Unstable Shoulder“. 3. From Clients, select a name. 4. From Favorites, select the Unstable Shoulder Protocol. 5. Click OK. Click the Start button and read the instructions on the screen. You can view each screen by clicking on the numerical buttons on the toolbar at the top. ProComp & FlexComp Infiniti Rehab Suite 71 Unstable Shoulder – 2Ch Unstable Shoulder – Overview Screen Scale-dependent Threshold-dependent Other This screen will demonstrate videos of required ranges of motion that the patient is required to perform. Unstable Shoulder – 2Ch Unstable Shoulder – Training Screen Scale-dependent Threshold-dependent Two filled line graphs represent Infraspinatus muscle (Ch A) and Lower Trapezius (Ch B). Both channels have to be above threshold. Two different alarms will play when the signals (A&B) are above or below threshold. MOTOR FUNCTION RESTORATION Connect the sensors to the encoder as follows: o o MyoScan/MyoScan-Z sensor to channels A to D. Optional MyoScan/MyoScan-Z sensors to channels E to J for FlexComp Infiniti. A B C D E F G H I J Myo Myo Myo Myo Myo Myo Myo Myo Myo Myo (optional for FlexComp) (optional for FlexComp) (optional for FlexComp) (optional for FlexComp) (optional for FlexComp) (optional for FlexComp) Turn the encoder on. 1. Click Quick Start. 2. From Categories, select one of the categories starting with “Pro/Flex Rehab Suite – Motor Function Restoration“. 3. From Clients, select a name. 4. From Favorites, select the desired Motor Function Restoration Protocol. 5. Click OK. Click the Start button . You can view each screen by clicking on the numerical buttons on the toolbar at the top. ProComp & FlexComp Infiniti Rehab Suite 72 All the screens under this category are based on the same principle. Only the number of channels and their assignment to a group (uptrain/downtrain) vary. The feedback is given on the ensemble of the signals. The patient gets a reward only if all the muscles simultaneously follow their correct activation pattern. The muscles and their corresponding signals are sorted into two groups: the up-trained and the down-trained. The up-trained muscles are the ones that will be encouraged to fire. The down-trained muscles are the ones that will be discouraged to fire. When the EMG of the up-trained muscles goes above a threshold and the EMG of the down-trained muscles goes below a threshold, the DVD resumes. All the uptrain signals are on the left, while all the downtrain signals are on the right. When a signal is not in the right state (above threshold for uptrain, below for downtrain), the corresponding bar is red (and green otherwise). When they are all green, the DVD resumes. ProComp & FlexComp Infiniti Rehab Suite 73 Respiration Training OVERVIEW Respiration training should be considered as part of the rehabilitation program: Proper breathing during effort enhances the efficiency of the contraction and therefore the efficiency of the training. Proper breathing is necessary for overall health and speeds up healing. Respiration training may also help the examinee to relax before therapy (reduces anxiety). The following biofeedback training screens were designed for this purpose. This logo on a screen in a protocol indicates that you can use an optional webcam with the screen to record video of the session. You need only connect your webcam to a USB port of your computer and turn it on before you start the session. Note: Your computer system must be connected to a video capture device, such as a webcam, and the proper software installed, in order to use this function. CLINICAL GUIDE REFERENCE The clinical guide gives general guidelines and recommendations. Chapter: RESPIRATION TRAINING WITH BIOFEEDBACK PROCEDURE Connect the sensors to the encoder as follows: o o Respiration sensor to channel D. MyoScan/MyoScan-Z to channel A and B (optional). A B Myo (optional) Myo (optional) C D E F G H I J Resp Turn the encoder on. 1. Click Quick Start. 2. From Categories, select Pro/Flex Rehab Suite – Respiration Training ProComp & FlexComp Infiniti Rehab Suite 74 3. From Clients, select a name. 4. From Favorites, select the training protocol. 5. Click OK. Click the Start button . You can view each screen by clicking on the numerical buttons on the toolbar at the top. To stop the session, click the Stop button: Training - Abdominal Respiration Training This screen was designed to train abdominal breathing. The line graph at the bottom displays the respiration amplitude. The two line graphs on the right display the EMG of the associated muscles. If the EMG of one channel is above its threshold, music will be heard. Training - Abdominal Respiration Training Windmill This screen was designed to train abdominal breathing. The greater is the abdominal respiration amplitude, the faster the windmill turns. The line graph at the bottom displays the respiration amplitude. The two line graphs on the right display the EMG of the associated muscles. If the EMG of one channel is above its threshold, the windmill will stop turning and music will be heard. Training - Relaxation Training This screen was designed for relaxation. The line graph displays the respiration amplitude. The examinee must follow the pink dot. This will lead them to a slow breathing rate (around 6 breath/min). ProComp & FlexComp Infiniti Rehab Suite 75 Training – Respiration During Exercise The screen was designed to help the examinee to breath properly during an exercise. It has a line graph displaying the respiration amplitude and a video camera. A tone proportional to the respiration amplitude can be heard. Review screen: Report Review – Respiration and EMG Review Screen The screen was designed for the review of the session. It shows the respiration amplitude and the EMG activity along with the video. All these screens are accessible from Start Open Display Session in the channel set “Respiration Training”. ProComp & FlexComp Infiniti Rehab Suite 76 Heart Rate Monitoring and HRV OVERVIEW The system allows the therapist to monitor rapid changes in the heart rate. It gives the choice of gathering the heart rate from EKG (electrocardiogram) or BVP (Blood Volume Pulse). The following screens allow the monitoring of heart rate (from BVP or EKG), respiration and EMG (2 sites). This logo on a screen in a protocol indicates that you can use an optional webcam with the screen to record video of the session. You need only connect your webcam to a USB port of your computer and turn it on before you start the session. Note: Your computer system must be connected to a video capture device, such as a webcam, and the proper software installed, in order to use this function. CLINICAL GUIDE REFERENCE The clinical guide gives general guidelines and recommendations. Chapter: HEART RATE MONITORING & HRV Also recommended: INTRODUCTION TO SURFACE ELECTROMYOGRAPHY RESPIRATION TRAINING WITH BIOFEEDBACK PROCEDURE Connect the sensors to the encoder as follows: o o o BVP or EKG sensor to channel C. Respiration sensor to channel D. MyoScan/MyoScan-Z to channel A and B (optional). A B C D Myo (optional) Myo (optional) EKG or BVP Resp E F G H I J Turn the encoder on. 1. Click Quick Start. 2. From Categories, select Pro/Flex Rehab Suite – Heart Rate Monitoring 3. From Clients, select a name. ProComp & FlexComp Infiniti Rehab Suite 77 4. From Favorites, select the training protocol (with EKG or BVP). 5. Click OK. Click the Start button . You can view each screen by clicking on the numerical buttons on the toolbar at the top. To stop the session, click the Stop button: Heart Rate & EMG Monitoring with webcam This screen displays the respiration amplitude and the heart rate on the same line graph. It plots the 2 channels of EMG. The HRV measure HR Max - HR Min is also displayed. Video can be recorded. Heart Rate & EMG Monitoring This screen is similar to the one above, but without webcam. Heart Rate & Monitoring This screen is similar to the ones above, but shows only the heart rate and respiration. Verification Screen This is a signal verification screen. It shows raw BVP (or EKG) with heart rate, as well as raw EMG. ProComp & FlexComp Infiniti Rehab Suite 78 Review screen The screen was designed for the review of the session. It shows the respiration amplitude and rate, the raw BVP (or EKG), heart rate, and Heart Rate Variability (HRV), and the EMG activity along with the video. All these screens are accessible from Start Open Display Session in the channel set “Heart Rate Monitoring with BVP and EMG” or “Heart Rate Monitoring with EKG and EMG”. ProComp & FlexComp Infiniti Rehab Suite 79 Skin Conductance and Temperature Biofeedback OVERVIEW Skin conductance and peripheral temperature biofeedback is useful when training of overall physiology is desired, as it incorporates two modalities with simple correlations to relaxation: skin conductance (lower) and temperature (raise). When these physiological measures meet the biofeedback conditions, the subject is in a general state of relaxation. These physiological measures can also be used to assess the level of stress of the examinee during the examination. The following biofeedback screens were designed for that purpose. This logo on a screen in a protocol indicates that you can use an optional webcam with the screen to record video of the session. You need only connect your webcam to a USB port of your computer and turn it on before you start the session. Note: Your computer system must be connected to a video capture device, such as a webcam, and the proper software installed, in order to use this function. CLINICAL GUIDE REFERENCE The clinical guide gives general guidelines and recommendations. Chapter: SKIN CONDUCTANCE AND PERIPHERAL TEMPERATURE BIOFEEDBACK Also recommended: RESPIRATION TRAINING WITH BIOFEEDBACK HEART RATE MONITORING & HRV PROCEDURE Connect the sensors to the encoder as follows: o o A Temperature sensor to channel C. Skin Conductance sensor to channel E. B C Temp D E F G H I J SC Turn the encoder on. 1. Click Quick Start. 2. From Categories, select Pro/Flex Rehab Suite – Skin Conductance and Temperature 3. From Clients, select a name. ProComp & FlexComp Infiniti Rehab Suite 80 4. From Favorites, select Biofeedback with Skin Conductance and Temperature. 5. Click OK. Click the Start button . You can view each screen by clicking on the numerical buttons on the toolbar at the top. To stop the session, click the Stop button: Training - Biofeedback on Skin Conductance The screen shows a bar graph of the skin conductance and plays a song and an animation when the SC value dips below the threshold. The threshold is set to automatically follow the signal to allow for instantaneous feedback of any change of direction. Training - Biofeedback on Temperature The screen shows a bar graph of the temperature signal and plays a song and an animation when the signal value moves over the threshold. The threshold is set to automatically follow the signal to allow for instantaneous feedback of any change of direction. Assessment & Review – Skin Conductance & Temperature The screen was designed for assessment. The screen shows a line graph of the raw signals of SC and Temp and a trend graph of epoch means. It also has a video/audio instrument, so you can record the examination. Events can be marked by hitting the space bar or a key of the keyboard that you would have preliminarily labeled with the name of the event). ProComp & FlexComp Infiniti Rehab Suite 81 Review/replay screen The screen was designed for the review of the session. The screen shows a line graph of the raw signals of SC and Temp and a trend graph of epoch means. Drag the time marker (vertical red line) over the raw signal and see the value for any data point as a number in the center of the screen. To see the whole session mean, drag the time marker completely to the end of the session. All these screens are accessible from Start Open Display Session in the channel set “Biofeedback with Skin Conductance and Temperature”. ProComp & FlexComp Infiniti Rehab Suite 82 Static Range of Motion Assessment OVERVIEW Range of Motion (ROM) assessment evaluates the ability of the examinee to achieve the full range of movement for a given part of the body. A dual inclinometer is used for measuring the angle between the neutral position and the maximum range of motion position that the examinee can achieve until they feel restriction, tightness or discomfort. th The protocols are based on AMA guides (6 edition, 2007). Protocols use the world standard Neutral Zero Reference method. This method defines the 0° angle as referring to the neutral position of the joint. The measurement is repeated 6 times as a validity check. The measures are compared to AMA normative data. CLINICAL GUIDE REFERENCE The clinical guide gives general guidelines and recommendations for the accurate use of the instrumentation. It also explains how to prepare the examinee and the procedure to follow. Chapter: RANGE OF MOTION ASSESSMENT; section: STATIC RANGE OF MOTION ASSESSMENT GENERAL PROCEDURE Preparing the instrumentation Connect the sensors to the encoder as follows: o o A Dual/single inclinometer to channel E; Foot pedal to channel C. B C Pedal D E F G H I J INC Turn the encoder on. 1. Click Quick Start. 2. From Categories, select Pro/Flex Static ROM Assessment. 3. From Clients, select a name. ProComp & FlexComp Infiniti Rehab Suite 83 4. From Favorites, select the desired Static ROM Protocol. 5. Click OK. Click the Start button Position yourself next to the examinee, with the encoder attached to your belt and the pedal near your foot. Press the foot pedal to go to the next screen. Position and stabilize the examinee in neutral position. If the patient cannot reach the neutral position, right-click on the purple box on the screen, enter the neutral zero reference (angle displayed when zero button is pressed) and click Apply: Position the dual inclinometer on the examinee and press the Zero button (on the primary or secondary, whichever is more convenient for you). and read the instructions on the screen. Do not press the foot pedal yet. ProComp & FlexComp Infiniti Rehab Suite 84 Measuring 1. Instruct the examinee to perform the motion slowly, until they feel restriction, tightness or discomfort. Make sure the inclinometer does not move against the body part during the motion. 2. When the position is stabilized, press the pedal to record the measure. 3. Instruct the examinee to go back to neutral position. Do not press the Zero button again. Repeat the exercise 6 times. Then repeat it another 6 times for the antagonistic movement. When the session ends, a series of message prompts guides you through the process of saving data, adding notes to the session file, and switching to reviewing mode so that you can generate a session report. ProComp & FlexComp Infiniti Rehab Suite 85 Generating a report After the review screen opens, you can generate a ROM Assessment report. This is an Excel report. 1. Click the Session Report icon 2. Select Generate Excel Report. in the tool bar. Microsoft Excel opens and displays your report as a workbook. You can print or save the report using Excel's Print and Save functions. Validity Check of the Trials The report shows the 6 measures and which ones are selected. Measures are considered as valid if they are within +/-5° or +/10% of the average of the three. It takes the three last consecutive valid measures. Final Result It then compares these to AMA Norms and shows the % of norm and the deviation from the norm. If the result is less than the norm, you see the result in green and the deviation from the norm in red. If the result is greater than the norm, you see the norm in green and the deviation from the norm in yellow (so the result is green+yellow). ProComp & FlexComp Infiniti Rehab Suite 86 User’s fields Position You can select the examinee’s position (there is a different list for each protocol): Or you can enter a different one: Involved Side (for the extremities only): You can select the involved side: Movement Type: You can select the movement type: Summary and Follow-up notes You can enter notes in the summary/follow-up notes boxes: In Excel 2000 and Excel 2003, place your cursor in the text box and start typing. In Excel 2007, place your cursor in the text box. 1. 2. Right-click the mouse button. Select Edit text. 3. Start typing. Comparing to uninvolved side Some reports allow you to compare the results with the uninvolved side: Select the sheet “Within Patient Analysis Report”. Type the results of the uninvolved side in the corresponding column: ProComp & FlexComp Infiniti Rehab Suite 87 Dynamic Range of Motion Assessment OVERVIEW Similarly to Dynamic SEMG, Dynamic ROM assesses muscle tension through various movements, by combining EMG with inclinometry. In addition to general protocols, the system provides three assessment protocols for the cervical spine (CP, SCM or Traps) and two for the lumbar spine. It also provides one assessment protocol for the anterior knee (VMO and VL). This logo on a screen in a protocol indicates that you can use an optional webcam with the screen to record video of the session. You need only connect your webcam to a USB port of your computer and turn it on before you start the session. Note: Your computer system must be connected to a video capture device, such as a webcam, and the proper software installed, in order to use this function. CLINICAL GUIDE REFERENCE The clinical guide gives general guidelines and recommendations for the accurate use of the instrumentation. It also explains how to prepare the examinee and the procedure to follow. Chapter: RANGE OF MOTION ASSESSMENT; section: DYNAMIC RANGE OF MOTION ASSESSMENT Also recommended: INTRODUCTION TO SURFACE ELECTROMYOGRAPHY SKELETAL MUSCLE PROPERTIES SEMG ASSESSMENT; section: DYNAMIC SEMG ASSESSMENT GENERAL PROCEDURE Starting the Session If you are going use a webcam to make a video recording of this session, connect your webcam to a USB port of your computer and turn it on. Connect the sensors to the encoder as follows: o o o MyoScan/MyoScan-Z sensors to channels A and B (left in A, right in B). Optional MyoScan/MyoScan-Z sensors to channels C and D (left in C, right in D). Dual/single inclinometer to channel E. A B Myo Myo C D E Myo Myo INC (optional) (optional) F G H I J Turn the encoder on. 1. Click Quick Start. ProComp & FlexComp Infiniti Rehab Suite 88 2. From Categories, select Pro/Flex Rehab Suite - Dynamic ROM Assessment. 3. From Clients, select a name. 4. From Favorites, select the desired General Dynamic ROM Assessment Protocol. 5. Click OK. Measuring Click the Start button . D.ROM – General Dynamic ROM Assessment with 2 EMG D.ROM – General Dynamic ROM Assessment with 4 EMG The Multi-line graph will display the EMG signal of 2 channels A and B along with the angle (in red). There are statistics available as well. The two Multi-line graph will display the EMG signal of 2 channels simultaneously, respectively A and B, C and D, along with the angle (in red). There are statistics available as well. Press the zero button of the inclinometer once, to mark the neutral position. Mark the different stages of the movement with event makers (events can be marked by hitting the space bar or a keyboard key that was previously assigned the name of the event). Reviewing the session When the session ends, a series of message prompts guides you through the process of saving data, adding notes to the session file, and switching to reviewing mode so that you can generate a session report. ProComp & FlexComp Infiniti Rehab Suite 89 In review mode, a screen similar to this will appear: D.ROM – General Dynamic ROM Assessment with 2 EMG D.ROM – General Dynamic ROM Assessment with 4 EMG The Multi-line graph will display the EMG signal of 2 channels A and B along with the angle (in red). There are statistics available as well. The two Multi-line graph will display the EMG signal of 2 channels simultaneously, respectively A and B, C and D, along with the angle (in red). There are statistics available as well. Select the desired display time window on the screen by using the dropdown list. It is recommended to select first Size to session for a global view of the session and then Size to activity to view the different phases of the motion. Scroll through the session by using the scroll bar. You can read the value of a given point on the signal by moving the red Time Mark. The Time Mark is usually placed at the right end of the graph (see picture). To move the Time Mark: 1. Place the cursor over the Time Mark. 2. Click and hold down the mouse button. 3. Drag the Time Mark to the desired position. Time Mark Move the mouse cursor over a marker (vertical dashed line) to display its label (such as flexion, re-extension etc.) ProComp & FlexComp Infiniti Rehab Suite 90 If you used a webcam to make a video recording of the session, during review the video playback is synchronized to the EMG signal as you move the Time Mark back and forth along the EMG signal line graph. This allows you to see lateral deviations in the movement and to observe any antalgic position. The review allows you to verify that the motion has been properly performed by the examinee at the right time, when prompted. You can also check the consistency from trial to trial. Generating a report After the review screen opens, you can generate a Dynamic SEMG Assessment report. This is a Text report. 1. Click the Session Report icon in the tool bar. 2. Select Generate Text Report, select report components in the Session Report window, and click Generate Report. Microsoft WORD opens and displays your report. You can print or save the report using WORD's Print and Save functions. PROCEDURE FOR LUMBAR SPINE ASSESSMENT Starting the Session If you are going use a webcam to make a video recording of this session, connect your webcam to a USB port of your computer and turn it on. Connect the MyoScan/MyoScan-Z EMG sensors to the encoder in channels A and B (left in A, right in B). Dual inclinometer to channel E. A B Myo (left) Myo (right) C D E F G H I J INC Turn the encoder on. 1. Click Quick Start. 2. From Categories, select Pro/Flex Rehab Suite - Dynamic ROM Assessment. 3. From Clients, select a name. 4. From Favorites, select the desired Dynamic ROM Protocol for Lumbar Spine. 5. Click OK. Click the Start button and read the instructions on the screen. ProComp & FlexComp Infiniti Rehab Suite 91 First you will see an overview screen (Flexion/Re-extension, shown here): Press a key to go to the next screen. In the next screen, verify that the signal is free of artifacts and the sensors properly placed. Press the zero button of the inclinometer once, to mark the neutral position. Before going to the next screen and starting to record, instruct the examinee to perform the motion slowly, until they feel restriction, tightness or discomfort. Measuring 1. Before performing the motion, the examinee stays in neutral position and relaxes their muscles during 10 seconds. 2. Then the voice prompt asks the examinee to perform the motion three times. ProComp & FlexComp Infiniti Rehab Suite 92 3. At the end of the exercise, the examinee is asked to stay in neutral position and relax their muscles during 10 seconds. Reviewing the session When the session ends, a series of message prompts guides you through the process of saving data, adding notes to the session file, and switching to reviewing mode so that you can generate a session report. In review mode, a screen similar to this will appear: The review allows you to verify that the motion has been properly performed by the examinee at the right time, when prompted. You can also check the consistency from trial to trial. Generating a report After the review screen opens, you can generate a Dynamic ROM Assessment report. This is a Text report. 1. Click the Session Report icon in the tool bar. 2. Select Generate Text Report, select report components in the Session Report window, and click Generate Report. ProComp & FlexComp Infiniti Rehab Suite 93 Microsoft WORD opens and displays your report. You can print or save the report using WORD's Print and Save functions. PROCEDURE FOR CERVICAL SPINE ASSESSMENT Starting the Session If you are going use a webcam to make a video recording of this session, connect your webcam to a USB port of your computer and turn it on. Connect the sensors to the encoder as follows: o o o MyoScan/MyoScan-Z sensors positioned on the CPs to channels A and B (left in A, right in B). MyoScan/MyoScan-Z sensors positioned on the SCMs or Traps to channels C and D (left in C, right in D). Dual inclinometer to channel E. A B C D E INC Myo Myo Myo Myo (left CP) (right CP) (left SCM or Traps) (right SCM or Traps) Turn the encoder on. 1. Click Quick Start. 2. From Categories, select Pro/Flex Rehab Suite - Dynamic ROM Assessment. 3. From Clients, select a name. 4. From Favorites, select the desired Dynamic ROM Protocol for Cervical Spine. 5. Click OK. Click the Start button F G H I J and read the instructions on the screen. ProComp & FlexComp Infiniti Rehab Suite 94 First you will see an overview screen (Flexion/Re-extension, shown here): Press a key to go to the next screen. In the next screen, verify that the signal is free of artifacts and the sensors properly placed. Press the zero button of the inclinometer once, to mark the neutral position. Before going to the next screen and start recording, instruct the examinee to perform the motion slowly, until they feel restriction, tightness or discomfort. Measuring 1. Before performing the motion, the examinee stays in neutral position and relaxes their muscles during 10 seconds. 2. Then the voice prompt ask the examinee to perform the motion three times. ProComp & FlexComp Infiniti Rehab Suite 95 3. At the end of the exercise, the examinee is asked to stay in neutral position and relax their muscles during 10 seconds. Reviewing the session When the session ends, a series of message prompts guides you through the process of saving data, adding notes to the session file, and switching to reviewing mode so that you can generate a session report. In review mode, a screen similar to this will appear: The review allows you to verify that the motion has been properly performed by the examinee at the right time, when prompted. You can also check the consistency from trial to trial. Generating a report After the review screen opens, you can generate a Dynamic ROM Assessment report. This is a Text report. ProComp & FlexComp Infiniti Rehab Suite 96 1. Click the Session Report icon in the tool bar. 2. Select Generate Text Report, select report components in the Session Report window, and click Generate Report. Microsoft WORD opens and displays your report. You can print or save the report using WORD's Print and Save functions. PROCEDURE FOR ANTERIOR KNEE ASSESSMENT Starting the Session If you are going use a webcam to make a video recording of this session, connect your webcam to a USB port of your computer and turn it on. Connect the MyoScan/MyoScan-Z EMG sensors to the encoder in channels A and B (A for VMO, B for VL). Dual inclinometer to channel E. A B Myo (left) Myo (right) C D E F G H I J INC Turn the encoder on. 1. Click Quick Start. 2. From Categories, select Pro/Flex Rehab Suite - Dynamic ROM Assessment. 3. From Clients, select a name. 4. From Favorites, select the Dynamic ROM Protocol for Knee Assessment. 5. Click OK. Click the Start button and read the instructions on the screen. ProComp & FlexComp Infiniti Rehab Suite 97 First you will see an overview screen: Press a key to go to the next screen. In the next screen, verify that the signal is free of artifacts and the sensors properly placed. Press the zero button of the inclinometer once, to mark the neutral position. Before going to the next screen and starting to record, instruct the examinee to perform the motion slowly, until they feel restriction, tightness or discomfort. Measuring 1. Before performing the motion, the examinee stays in neutral position and relaxes their muscles during 10 seconds. 2. Then the voice prompt asks the examinee to perform the motion three times. ProComp & FlexComp Infiniti Rehab Suite 98 3. At the end of the exercise, the examinee is asked to stay in neutral position and relax their muscles during 10 seconds. When the session ends, a series of message prompts guides you through the process of saving data, adding notes to the session file, and switching to reviewing mode so that you can generate a session report. Reviewing the session In review mode, a screen similar to this will appear: The review allows you to verify that the motion has been properly performed by the examinee at the right time, when prompted. You can also check the consistency from trial to trial. Generating a report After the review screen opens, you can generate a Dynamic ROM Assessment report. This is a Text report. ProComp & FlexComp Infiniti Rehab Suite 99 1. Click the Session Report icon in the tool bar. 2. Select Generate Text Report, select report components in the Session Report window, and click Generate Report. Microsoft WORD opens and displays your report. You can print or save the report using WORD's Print and Save functions. ProComp & FlexComp Infiniti Rehab Suite 100 Range of Motion Training OVERVIEW Range-of-motion therapy usually consists of simple exercises to increase the range of motion, flexibility, strength, endurance and control over the movement. The following biofeedback training screens were designed for this purpose. This logo on a screen in a protocol indicates that you can use an optional webcam with the screen to record video of the session. You need only connect your webcam to a USB port of your computer and turn it on before you start the session. Note: Your computer system must be connected to a video capture device, such as a webcam, and the proper software installed, in order to use this function. CLINICAL GUIDE REFERENCE The clinical guide gives general guidelines and recommendations for the use of biofeedback for ROM therapy. It also explains how to prepare the examinee and the procedure to follow. Chapter: ROM THERAPY WITH BIOFEEDBACK PROCEDURE Connect the sensors to the encoder as follows: o o A A single inclinometer unit (InclinoTrac) to channel C. Optionally, the second InclinoTrac unit can be used as a single inclinometer and connected to channel E. B C INC D E F G H I J INC optional Turn the encoder on. 1. Click Quick Start. 2. From Categories, select Pro/Flex Rehab Suite – ROM Training 3. From Clients, select a name. ProComp & FlexComp Infiniti Rehab Suite 101 4. From Favorites, select the desired training protocol. 5. Click OK. Click the Start button . You can view each screen by clicking on the numerical buttons on the toolbar at the top. To stop the session, click the Stop button: ROMT01 – ROM Training with 1 inclinometer Neutral Position Training – Gorilla Animation In this screen, the examinee is being trained to keep his joint in neutral position, by keeping the ball centered behind the monkey’s neck. When he is successful, the green light turns on. Threshold-based Training – Bowling Animation This is a threshold-based exercise. The examinee must perform the motion until a threshold is crossed. When this happens, the animation starts, and the bowl is thrown. The examinee must hold the position during 5 seconds to do a strike and get a point. They must then go back to neutral position to restart. Neutral Position and ROM Training – Dial Animation This is a stretching exercise. The examinee is told to reach a given color on the rainbow. When they return to neutral position, the light turns on. ProComp & FlexComp Infiniti Rehab Suite 102 ROM Training – Tube Game This screen is similar to the Dial Animation. This time, the examinee has to move the ball up and down. ROM Training – Animal Game Here, the examinee has to align the character with the animal appearing in the left box, by moving his limb. Review screen: ROM Training - Review The screen was designed for reviewing the session. It shows the ROM amplitude along with the video. All these screens are accessible from Start Open Display Session in the channel set “ROM Training with 1 inclinometer”. ROMT02 – ROM Training with 2 inclinometers The second unit of the dual-InclinoTrac can also be used as a single unit. You can use both units together, either for working on the three dimensions or bilateral training. ROM Training – Balance Animation For this screen, the inclinometers are positioned at the back and the left of the head or the trunk. The examinee can train to keep his head/trunk straight (line in the center of the lissajous graph, the balls in the middle of the balance and the green lights turned on). He can also roll his head around his neck and see where his ROM is limited. ProComp & FlexComp Infiniti Rehab Suite 103 ROM Training – Motor Copy Here the inclinometers are attached to the arms or legs. The examinee has to elevate both limbs in the same time to keep the ball centered on the balance. The line on the rainbow gives the averaged angle between the two sides. ROM Training - Review The screen was designed for reviewing the session but can be used to monitor the motion. It shows the ROM amplitudes along with the video. Review Screen: ROM Training - Review The screen was designed for reviewing the session. It shows the ROM amplitudes along with the video. All these screens are accessible from Start Open Display Session in the channel set “ROM Training with 2 inclinometers”. ProComp & FlexComp Infiniti Rehab Suite 104 Manual Muscle Testing OVERVIEW Manual muscle testing is the assessment of muscles and tendons and their ability to generate force. Computerized manual muscle testing improves and enriches a method that has existed and evolved for almost a century, by replacing subjective factors with objective data. SEMG allows the monitoring of potential muscle substitution. Note that muscle testing with ForceTrac is allowed only for grades 4 and 5. The examinee should be monitored closely and tests should be terminated immediately if there is any evidence of pain. The system is intended only to capture an objective record of force applied during testing, rather than to reduce the risk of injury. Therefore the ultimate responsibility for risk of injury rests with the examiner. CLINICAL GUIDE REFERENCE The clinical guide gives general guidelines and recommendations for the accurate use of computerized instruments along with traditional muscle testing. It also explains how to prepare the examinee and the procedure to follow. Chapter: MANUAL MUSCLE TESTING Also recommended: INTRODUCTION TO SURFACE ELECTROMYOGRAPHY PROCEDURE Starting the Session Connect the sensors to the encoder as follows: o o o ForceTrac to channel D; Foot pedal to channel C. MyoScan/MyoScan-Z to channel A and B (optional). A B C D Myo Myo Pedal FTrac (optional) (Optional) E F G H I J Turn the encoder on. 1. Click Quick Start. 2. From Categories, select Pro/Flex Rehab Suite - Manual Muscle Testing. ProComp & FlexComp Infiniti Rehab Suite 105 3. From Clients, select a name. 4. From Favorites, select the desired Muscle Testing Protocol. 5. Click OK. Muscle Testing Training (MMT01 & MMT02) These screens were designed for training purposes and for becoming familiar with the procedure and the instrumentation. They allow the recording of video, so the session can be replayed. If you use EMG sensors (MMT02), position them on the muscles of interest. Note: Make sure your ForceTrac is properly calibrated before starting. Click the Start button Ask the examinee to complete the range of motion and stabilize their position. Position the ForceTrac on the examinee. When ready, press the pedal and perform the test at full load. Resistance should always be applied gradually (not suddenly) and in the direction of the motion (“line of pull” of the muscle). The break usually happens within 2 or 3 seconds. A shorter break time may lead to re-injury. A longer break time may lead to fatigue. The trace of the applied force should appear after few seconds. You can repeat the exercise. . Training Screen without SEMG ProComp & FlexComp Infiniti Rehab Suite Training Screen with SEMG 106 Unilateral/Bilateral Muscle Testing (MMT03 & MMT04) Note: Make sure your ForceTrac is properly calibrated before starting. Click the Start button Position yourself next to the examinee, with the encoder attached to your belt, the pedal near your foot and the ForceTrac in the palm of your hand. Press the foot pedal to go to the next screen. Position and stabilize the examinee in neutral position. Ask the examinee to complete the range of motion and stabilize their position. Position the ForceTrac on the examinee and perform a trial at 50% load (do not press the pedal). Press the foot pedal to go to the next screen. and read the instructions on the screen. Do not press the foot pedal yet. The examinee should be monitored closely and tests should be terminated immediately if there is any evidence of pain. Measuring 1. Ask the examinee to complete the range of motion and stabilize their position. ProComp & FlexComp Infiniti Rehab Suite 107 2. When ready, press the pedal and perform the test at full load. Resistance should always be applied gradually (not suddenly) and in the direction of the motion (“line of pull” of the muscle). The break usually happens within 2 or 3 seconds. A shorter break time may lead to re-injury. A longer break time may lead to fatigue. Repeat the exercise 4 times. Then repeat it 4 times for the opposite side, if you are performing bilateral testing. When the session ends, a series of message prompts guides you through the process of saving data, adding notes to the session file, and switching to reviewing mode so that you can generate a session report. ProComp & FlexComp Infiniti Rehab Suite 108 Unilateral/Bilateral Muscle Testing with EMG (MMT05 & MMT06) The procedure is very similar to the one described above. The only difference is that the EMG sensors must be positioned on the muscles of interest and that EMG activity will be recorded. SEMG activity Potential substitute muscles being monitored with SEMG during the test. A tone can be heard when the SEMG goes above a threshold. Generating a report After the review screen opens, you can generate an MMT report. This is an Excel report. 1. Click the Session Report icon 2. Select Generate Excel Report. in the tool bar. Microsoft Excel opens and displays your report as a workbook. You can print or save the report using Excel's Print and Save functions. Unilateral Testing ProComp & FlexComp Infiniti Rehab Suite Bilateral Testing 109 Validity Check of the Trials The important data is the peak load before the break (maximum force). Trials are selected when if there is less than 15% between two consecutive trials and if the overall variation (coefficient of variation) between the selected trials is also less than 15%. The test requires at least 3 selected trials to be valid. Only the selected trials are plotted on the graph. Unilateral testing with all trials selected. Bilateral testing with only 3 trials selected for the involved side. Trial 1 is discarded. Final Result The final result computes the mean and standard deviation of the selected trials. For the bilateral test, the percentage of deficit is also computed. This is the difference in percent between the final result of the uninvolved side (reference) and the involved side. For the protocols with SEMG, the EMG peak intensity as well as the EMG-to-Force ratios are computed. User’s fields Muscle Test You can select the muscle test type (different list for unilateral/bilateral test): Or you can enter your own test: ProComp & FlexComp Infiniti Rehab Suite 110 Involved (bilateral testing only): You can select the involved side (right/left): Grade You can select the grade: Summary and Follow-up notes You can enter notes in the summary/follow-up notes boxes: In Excel 2000 and Excel 2003, place your cursor in the text box and start typing. In Excel 2007, place your cursor in the text box. 1. 2. Right-click the mouse button. Select Edit text. 3. Start typing. ProComp & FlexComp Infiniti Rehab Suite 111 Algometry OVERVIEW Algometry measures Pressure Threshold (PTM). It quantifies the sensitivity of para-spinal tissues and their tenderness. CLINICAL GUIDE REFERENCE The clinical guide gives general guidelines and recommendations for the accurate use of the instrument. It also explains how to prepare the examinee and the procedure to follow. Chapter: ALGOMETRY PROCEDURE Starting the Session Connect the sensors to the encoder as follows: o o ForceTrac with rod attachment to channel D; Foot pedal to channel C. A B C D Pedal FTrac E F G H I J Turn the encoder on. 1. Click Quick Start. 2. From Categories, select Pro/Flex Rehab Suite - Algometry. 3. From Clients, select a name. 4. From Favorites, select the Algometry Protocol. 5. Click OK. Note: The force unit (kgs/cm² or lbs/in²) depends on whether you have selected Pounds or Kilogram units in the menu Options->Force Units. ProComp & FlexComp Infiniti Rehab Suite 112 Note: Make sure your ForceTrac is properly calibrated before starting. Click the Start button Press the foot pedal to go to the next screen. Hold the ForceTrac in your hand. and read the instructions on the screen. Do not press the foot pedal yet. Force Unit Verification screen Before you can proceed, you must verify the Force units. If you use imperial units, press the ForceTrac algometer against a hard surface until it reaches at least 100 2 Lbs/inch (PSI). If you are unable to reach this value, it means the Force unit is not properly set. 2 Note: 1 Lbs/inch = 1 PSI. 2 If you can't reach Lbs/inch (PSI), change the force unit to Pounds. 1. 3. To do this, first end the session and return to the Main Menu screen of BioGraph Infiniti. Open the Options menu and select Force Units. The active force unit is the one with the check mark beside it. To change to Pounds, select it. 4. Then start a new session. 2. If you use metric units, press the ForceTrac algometer against a hard surface. If you are able to reach at least 14 2 Kg/cm , it means the Force unit is not properly set, and the red light will turn on. If the red light turns on, change the force unit to Kilograms. 1. 3. To do this, first end the session and return to the Main Menu screen of BioGraph Infiniti. Open the Options menu and select Force Units. The active force unit is the one with the check mark beside it. To change to Kilograms, select it. 4. Then start a new session. 2. If the red light does NOT turn on, press the pedal to continue. Note: pressing the pedal allows you to go to the next screen only if the maximum applied pressure is greater 2 2 than 3 Kg/cm and less than 14 Kg/cm . ProComp & FlexComp Infiniti Rehab Suite 113 Position yourself next to the examinee, with the encoder attached to your belt, the pedal near your foot and the ForceTrac in the palm of your hand. Measuring 1. Repeat the following sequence three times, once for each pressure threshold measure: 2. Measure of reference 1: Apply the tip of the algometer over the marked area and perpendicular to the surface of the skin. When ready to measure, press the foot pedal. 3. Increase the pressure gradually at a rate of exactly 2 2 14Lbs/inch or 10Kg/cm or follow the yellow line. Remove the algometer at the moment the patient says “now”. 4. Measure of reference 2: Apply the tip of the algometer over the marked area and perpendicular to the surface of the skin. When ready to measure, press the foot pedal. 5. Increase the pressure gradually at a rate of exactly 2 2 14Lbs/inch or 10Kg/cm or follow the yellow line. Remove the algometer at the moment the patient says “now”. 6. Measure of pressure threshold: Apply the tip of the algometer over the marked area and perpendicular to the surface of the skin. When ready to measure, press the foot pedal. 7. Increase the pressure gradually at a rate of exactly 2 2 14Lbs/inch or 10Kg/cm or follow the yellow line. Remove the algometer at the moment the patient says “now”. ProComp & FlexComp Infiniti Rehab Suite 114 When the session ends, a series of message prompts guides you through the process of saving data, adding notes to the session file, and switching to reviewing mode so that you can generate a session report. Generating a report After the review screen opens, you can generate an Algometry report. This is an Excel report. 1. Click the Session Report icon 2. Select Generate Excel Report. in the tool bar. Microsoft Excel opens and displays your report as a workbook. You can print or save the report using Excel's Print and Save functions. Page 1 Page 2 Selecting the sites For each measure, first select the area (cervical, thoracic, lumbar or sacral). If the measure is not used, select Not used. Then select the PTM site... ... and the side. ProComp & FlexComp Infiniti Rehab Suite 115 Then select the reference sites (opposite side or surrounding muscle). You can also add a description of the location of the site. Data table The data table shows the three measures, the average of the references and the difference between the references and the pressure threshold. According to the literature, the following conditions are considered a positive finding: The difference between the PTM and the opposite side or surrounding muscle, in the same patient, exceeds 2 2 2 kg/cm (28.5 Lbs/inch ). The PTM is less than 3 kg/cm (42.7 Lbs/inch ). 2 2 Summary and Follow-up notes You can enter notes in the summary/follow-up notes boxes: In Excel 2000 and Excel 2003, place your cursor in the text box and start typing. In Excel 2007, place your cursor in the text box. 1. 2. Right-click the mouse button. Select Edit text. 3. Start typing. ProComp & FlexComp Infiniti Rehab Suite 116 Hardware Specifications MyoScan/MyoScan-Z EMG Sensors (SA9503M/SA9503Z) Size (approx.) Weight Input impedance Input range Sensitivity CMRR Channel bandwidth Signal output range Input / output gain Supply voltage Current consumption Accuracy 37mm x 37mm x 12mm (1.45” x 1.45” x 0.45”) 15g (0.5 oz) ≥10GΩ in parallel with 10pF 0 – 2000VRMS <0.1VRMS >130dB 10Hz – 1kHz 0 – 1.0VRMS 500 7.26V (± 0.02V) 0.7mA (± 0.25mA) 0.3VRMS 4% of reading @25C to 30C MyoScan-Pro EMG Sensor (SA9401M-60 or SA9401M-50) Size (Approx.) Weight Input Impedance Input Range Sensitivity Bandwidth Accuracy 37mm x 37mm x 15mm (1.45” x 1.45” x 0.60”) 25g (1 oz) 10GΩ in parallel with 10pF 0 – 400VRMS, 0 – 1600VRMS <0.1VRMS 20Hz – 500Hz 5%, 0.3VRMS EKG Sensor (SA9306M) Length (approx.) Weight Temperature range Accuracy 152cm (60”) 10g (0.33oz) 10C - 45C (50F – 115F) 1.0C (1.8F) 20C – 40C (68F – 104F) HR/BVP Flex/Pro Sensor (SA9308M) Length (approx.) Weight Input range Accuracy 20mm x 34mm x 10mm (0.72” x 1.33” x 0.41”) 20g (0.66 oz) Unit less quantity displayed as 0% – 100% 5% Respiration Sensor (SA9311M) Size (approx.) Weight Range ProComp & FlexComp Infiniti Rehab Suite 132cm (52” long) 30g (1.0 oz) 30% – 65% 117 Skin Conductance Flex/Pro Sensor (SA9309M) Size without electrode leads (approx.) Size with electrode leads (approx.) Cable length (approx.) Weight (approx.) Signal input range Accuracy 3.5 cm (1.4”) 15 cm (6.0”) 127 cm (50”) 25 g (1 oz) 0 – 30.0 S 5% and 0.2 S Skin Temperature Sensor (SA9310M) Length (approx.) Weight Temperature range Accuracy 152cm (60”) 10g (0.33oz) 10C - 45C (50F – 115F) 1.0C (1.8F) 20C – 40C (68F – 104F) InclinoTrac/Dual-InclinoTrac (SA7650/ SA7655) Dimensions Weight Range Accuracy (operated in vertically-oriented plane) ≤ 2.0° (dual mode, angle difference) Output gain Output voltage span Power supply Current consumption, maximum Link cable 32mm x 18mm x 71mm 26g ± 180° ≤ 1.0° (standalone mode) 4.44mV / degree inclination 2.200 ± 0.8V 7.26V 9.5 mA (standalone mode) 19.0 mA (dual mode) RJ-11, 2 pairs, reversed (this is not a standard telephone cable) ForceTrac (SA7600) Dimensions Weight Input range (force) Safe overload Accuracy Zero-level output Full scale output swing Power supply Algometer Attachment: Dimensions Weight Material Flat Tester Attachment: Dimensions Weight Material Curved Tester Attachment: Dimensions Weight Material ProComp & FlexComp Infiniti Rehab Suite 93mm x 63mm x 25mm 94g 0–100 lbf 250 lbf ± (0.1lbf + 5% of reading) 2.048V 1V at 100 lbs load 7.26V 69mm x 11mm (diameter) 14g Aluminum 9mm x 42mm (diameter) 39g Neoprene 19mm x 42mm (diameter) 52g Neoprene 118 Placing Orders Outside USA Tel: 1-514-489-8251 Fax: 1-514-489-8255 In USA Toll-Free Tel:1-800-361-3651 E-Mail: [email protected] Or contact your local authorized distributor. Technical Support Outside USA Tel: 1-514-489-8251 Fax: 1-514-489-8255 In USA Toll-Free Tel: 1-800-361-3651 E-Mail: [email protected] Or contact your local authorized distributor. Warranty The hardware (encoder and sensors) is guaranteed to be free from defects in material and workmanship for 1 year from the date of purchase. In the unlikely event that repair is necessary, contact Thought Technology Ltd. to receive a Return Authorization number. Then send the unit back by a traceable method. Thought Technology will not be responsible for items not received. We will repair or replace your unit(s) that are still under warranty free of charge. This warranty does not apply to damage incurred through accident, alteration, or abuse. This warranty does not cover damage to the Infiniti encoder or the sensors caused by obvious mechanical mistreatment of the system. ProComp & FlexComp Infiniti Rehab Suite 119 Returning Equipment for Repair Before returning the equipment, please contact first our service department and get an authorization number (RA number). Canada and International +1 514 489-8251 USA 1-800-361- 3651 [email protected] Then fill-in the return form (the form can be found at the end of the manual). You must provide a detailed description of the problem you are experiencing, and your telephone/fax number and e-mail. The unit(s) must be sent postage prepaid and insured, with proof of purchase to one of the addresses below. All customs and duties charges will be billed to the customer if incurred by sending the unit to the wrong address. In the USA, ship insured to: Thought Technology Ltd. Cimetra LLC 8396 State Route 9 West Chazy, New York 12992 USA In Canada, ship insured to: Thought Technology Ltd. 8205 Montreal/ Toronto Blvd. Suite 223 Montreal West, Quebec Canada H4X 1N1 For international: Package must be marked “Broker: Livingston International – 133461” Ship insured to: Thought Technology Ltd. 8205 Montreal/ Toronto Blvd. Suite 223 Montreal West, Quebec Canada H4X 1N1 ProComp & FlexComp Infiniti Rehab Suite 120 Repair Return Form Be sure to call for authorization before returning any equipment! Copy and complete this form and include it with the unit(s). Include a copy of original invoice and return to the address in the Returning Equipment section. Name Company Address Phone No. Fax No. Date Purchased From Whom Model Name Serial No. Problem ProComp & FlexComp Infiniti Rehab Suite 121 ProComp & FlexComp Infiniti Rehab Suite