1
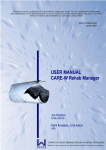
USER MANUAL
HIV PREVENTION, CARE & SUPPORT SYSTEM
(HIVPCSS)
VERSION V1.0
Designed & Developed by:
Biplob Chakma
Network and Database Management System Specialist
[email protected]
Page 1 of 91
Table of Contents
Para Topics
No
Page
No
Chapter 1: Introduction
1.
2.
a.
b.
c.
d.
e.
f.
g.
h.
Overview
Basic Features
User Information
Tabs, Menus, and Data Display Section
Page and Current Menu
Label, Button, Text Box, Check Box, Date Picker, and Drop Down
List
Grid View, Filter Section, Link Button, and Paging
Data Loading Image
Page Loading Sign
Message for Must Entry Fields
6
6
6
7
8
9
10
12
13
15
Chapter 2 – Login, Logout, and Change Password
1.
2.
3.
Login to HIVPCSS
Change Password
Logout from HIVPCSS
16
18
19
Chapter 3 – Basic Information Tab
1.
2.
3.
4.
5.
6.
7.
8.
9.
10.
Overview
District Menu
Sub District Menu
Suco Menu
Program Round Menu
Program Phase Menu
Program Quarter Menu
Beneficiary Category
Position Category
Organization
20
20
22
24
26
27
28
29
31
32
Page 2 of 91
Chapter 4 – Program Basic Information Tab
1.
2.
3.
4.
5.
6.
7.
Overview
Organization Office Menu
Drop in Center (DIC) Menu
Dispensers Menu
Outreach Session Topic Menu
Program Events Menu
Events Topic Menu
34
35
36
39
41
42
44
Chapter 5 – Personnel Information Tab
1.
2.
3.
Overview
Staff Information Menu
Beneficiary Information Menu
48
48
51
Chapter 6 – Program Activity Records Tab
1.
2.
3.
4.
5.
6.
7.
8.
9.
10.
11.
12.
13.
14.
15.
16.
Overview
Outreach Activity Records Menu
Counseling Records Menu
DIC Visit Record (Summary) Menu
Dispenser Stock Records Menu
Social Marketing Sales Menu
VCCT Card Utilization Menu
SIT Card Utilization Menu
Event Detail Menu
C&S Assessment Menu
C&S Outreach Activity Record Menu
RH/C&S Center Activity Record Menu
C&S Travel Menu
Faith Based Activity Menu
Client Travel Reimbursement Menu
Rest Home Use Menu
54
55
57
60
61
64
65
66
67
70
76
78
79
81
83
84
Chapter 7 – Administration Tab
1.
2.
3.
Overview
Users Menu
Assign Privilege Menu
85
85
87
Chapter 8 – Report Tab
1.
Overview
89
Page 3 of 91
2.
3.
Fixed Format Reports (Prevention) Menu
Fixed Format Reports (Care & Support) Menu
Page 4 of 91
89
91
How to Read this Manual
This operator manual is arranged according to functionality grouping. All the similar category
functionalities are arranged in different tabs. So the manual also covers each tab in each
chapter.
However, in order to have a HEAD START, the manual explains some of basic terminologies,
basic features of the system. These are explained in Chapter 1 and Chapter 2.
From Chapter 3 onwards, the manual explains all the features of the system starting with
‘Basic Information’.
In the last two chapters, the manual also explains about how to generate reporting and how
to administer the system.
Important!
This system is primarily aimed for Sub Recipients. So, multiple
organizations will be using this system. However, in this system, data
security is managed in such a way that one organization will not be
able to see other organizations data!
Page 5 of 91
Chapter 1 - Introduction
1.
Overview
Welcome to HIV Prevention, Care and Support System (HIVPCSS). If you are reading this
manual, that means you have decided to know about the system; how to enter data, how to
generate report Prevention and many others.
HIVPCSS is a tool to capture data regarding HIV Prevention, Care and Support activities. The
system can also generate various types of reports; such as, list of beneficiary (MSM, FSW,
CoSW, IDU etc.) and various programmatic reports; such as, quarterly report, yearly report
etc.
So, before you begin, let’s take some time to explore the HIV Prevention, Care and Support
System (HIVPCSS) tool (software/application) and learn about the basic features of
navigation and transaction entry. This chapter provides an overview of the system and
describes the elementary features of HIVPCSS.
2.
Basic Features
a.
User Information
Once you log into the system with correct credentials (Email ID and Password), you would be
able to see the logged in user information at the top right corner of the system as shown
below:
Page 6 of 91
b.
Tabs, Menus, and Data Display Section
Once you log into the system with correct credentials (Email ID and Password), you would be
able to see the tabs, menus, and data display section. Tabs are the collection of menus of
related functionalities; whereas a Menu indicates a specific functionality under a tab. Such as,
all types of reports are available under tab ‘Report’ and this report tab will have all the report
menus.
Data Display Section (DDS) is the area where system will display the data; either for viewing
or for adding a new record.
All these features are shown in below image:
Page 7 of 91
c.
Page and Current Menu
Once you log into the system and click on a menu, then something appears on the right side
of menu. This is called Page. Every menu will show a different page once it is clicked.
However, in some places in the system a page may be loaded once a button is clicked. So, a
Page is something where you’d view data or attempt to enter data. This is sometimes also
referred to UI (User Interface).
Now, when you’d click on a menu it will load the related page. Notice a black arrow tip
marked beside the menu. This indicates that the current menu is the one you’ve just clicked.
All these features are shown in below image:
Page 8 of 91
d.
Label, Button, Text Box, Check Box, Date Picker, and
Drop Down List
Below image shows labels, buttons, text boxes, check box, and drop down lists:
Page 9 of 91
Buttons: Once clicked, it will do some action(s); such as, saving, editing etc.
Text Box: User can type text here.
Check Box: User can tick the box when appropriate.
Drop Down List: User can choose one value from the given list.
Date Picker: User can enter a date in this box. If you click in this box, a date calendar will
appear and then you’d be able to choose a date you want. Please note that, the format of
date is US (United States) style i.e. it will show 4 March 2012 as ‘3/4/2012’, NOT as
‘4/3/2012’ i.e. in the format of ‘month/day/year’!
Read-Only Text Box: User cannot type anything but just can view the information shown
by the system.
Page 10 of 91
e.
Grid View, Filter Section, Link Button, and Paging
Below image shows grid view, filter section, link buttons, and paging section:
Grid View (GV): A list where data are displayed
Link Button: Similar to normal button i.e. when clicked, an action is done such as save, edit
etc.
Add a Sub District: Once clicked, it will load a page where you’d need to enter/type
data and then do a save operation
Edit: Once clicked, it will open existing record and then allow you to correct any
existing data of that record
Delete: Once clicked, it will delete/remove the record from system. Care should be
taken while performing this action!
Paging: When there are many data and cannot be displayed on one page in GV, then those
data are listed in multiple pages i.e. page no 2, 3, and so on
Filter Section: Normally the GV shows all the data that is available in the system. But when
you’d need to see some particular data then you’d need to use this filter section. Such as, to
show/see only sub districts of Dili district, you’d need to select ‘Dili District’ from the DDL of
the filter section and then click on ‘Apply Filter’ button. This will load all the sub districts of
Dili only. Below image shows all the sub districts of Dili district:
Page 11 of 91
This is how the filter section works! There will certainly be more than one filter in the filter
section in other pages. You’d just need to choose your desired filter and then do an ‘Apply
Filter’ to show the data from system.
The ‘Reset’ button in the filter section will set all the filter values to ‘none’ or ‘default’.
f.
Data Loading Image
Whenever you try to load data from system, it will show an image indicating that it is now
populating (downloading) data from online database and preparing to present in the GV. The
image will look like as shown below:
Page 12 of 91
You’d see this loading image when:
(1)
You are doing an ‘Apply Filter; or
(2)
You select an item from district DDL. This is because, it will load sub district
DDL according to selected district; or
(3)
You select a report option and its associated filters get activated; or
(4)
During any other situation whenever the system remains busy in getting data
from online you’ve requested it to do
YOU SHOULD WAIT TILL THE IMAGE DISAPPEARS; BECAUSE IT IS NOT YET READY FOR
YOU TO DO NEXT ACTION!
g.
Page Loading Sign
The system also remains busy from the time a page is requested and till it gets loaded fully.
However, this will not show any image; but instead, it will show a small rotating circle in the
browser tab heading. This is shown below:
Page 13 of 91
Page 14 of 91
h.
Message for Must Entry Fields
While you’d try to save a new record, there will be some field(s) that must be provided to get
the record saved into the system. If you don’t provide those must entry information, the
system will give you notification message. The message will be looking like shown below:
Page 15 of 91
Chapter 2 – Login, Logout, and
Change Password
1.
Login to HIVPCSS
Please do followings to login to HIVPCSS:
(1)
(2)
Open Mozilla Firefox browser (use version 19 or later)
Then go to this link:
http://www.hivpcs.tlhealthinformationsystem.com/
(3)
This will load the login page as shown below:
(4)
Type:
User ID (Email): login user email ID (Please note, this is NOT your personal email
ID! This is the ID that is used to log into the HIVPCSS)
Password: login password
Type Code: Type the digits that you can see on the screen (this is to protect your
account/system from spamming)
Page 16 of 91
(5)
You may or may not check the ‘Remember Password’; but if you are not using your
own laptop or desktop, it is suggested NOT TO CHECK this check box!
(6)
Click ‘Login’ button to login to HIVPCSS and wait till you are logged in
(7)
After a successful login, you’d see below page:
(8)
If you’ve provided wrong information during login, then you’d see below message:
In this case you try again with correct credentials to enter into the system.
Page 17 of 91
2.
Change Password
Please do followings to change your password:
(1)
After login, click on the ‘Change Password’ link button at the top right corner of the
HIVPCSS
(2)
This will load the change password page as shown below:
(3)
Type existing password, and then your new password two times and then click on
‘Change Password’ button to change your new password finally
PLEASE SAVE YOUR NEW PASSWORD IN SAFE PLACE SO THAT YOU DON’T FORGET IT OR
IT IS NOT DISCLOSED TO ANYONE!
3.
Logout from HIVPCSS
Please do followings to logout from HIVPCSS:
(1)
(2)
After login, click on the ‘Logout’ link button at the top right corner of the HIVPCSS
This will take you out off HIVPCSS and load login page again (for next login)
Page 18 of 91
Chapter 3 – Basic Information Tab
1.
Overview
This tab contains the functionalities for entering basic information that are required for the
system. Such as, district, sub district, staff position category etc. All these functionalities are
realized by some menus. These menus are:
(1)
(2)
(3)
(4)
(5)
District
Sub District
Suco
Position Category
Organization
If you click on ‘Basic Info’ tab, you’d be able to see above menus at the left and also data
landing space i.e. data display section (DDS) at the right side. Please note that, you haven’t
yet clicked on any menu and thus no menu is marked as current menu i.e. no red arrow tip
at the left of selected menu.
Note that, information under this tab are usually kind of one-time setting which you’d need to
enter at the beginning of starting the system. Such as, you’d probably very rarely use district
menu to add a new district because in not every year you’d have a new district in your
country!
Important!
Only super user of the system can view this tab and no other user can view this tab.
2.
District Menu
This menu is to set up district information. Click on ‘District’ menu to go to district page.
You’d see all the available districts in the GV list. You may see paging depending on amount
of record i.e. you may need to go to multiple pages to view all the districts. The district GV
will look like:
Page 19 of 91
In order to add a new district, do followings:
(1) Click on ‘Add a District’ link button
(2) You’d see below page:
(3) Type ‘Full Name’, district ‘Code’ and then check ‘Is Capital’ if it is the capital of the
country
(4) Once all information are given, click on ‘Save’ or ‘Save & Close’ button to finally save the
new district information
Note that, if you’ve chosen Save, you would still remain on the same page and if
you’ve chosen Save & Close button then you’d come back to district list GV.
Page 20 of 91
3.
Sub District Menu
This menu is to enter sub district information. Click on ‘Sub District’ menu to go to sub district
page. You’d see all the available sub districts in the GV list. You may see paging depending
on amount of record i.e. you may need to go to multiple pages to view all the sub districts.
The sub district GV will look like:
Note in the above GV list that, it is showing all the sub districts. At this point you may do an
‘Apply Filter’ to view sub district of a specific district. To do this, do followings:
(1) Select a district (say, Dili) from DDL in the filter section
(2) Then click on ‘Apply Filter’
(3) Notice that, the GV is now filled with all sub districts of district Dili
Page 21 of 91
In order to add a new sub district, do followings:
(1) Click on ‘Add a Sub District’ link button
(2) You’d see below page:
(3) Select one district under which you’d like to add this new sub district, then type ‘Full
Name’, sub district ‘Code’ and then check ‘Is Capital’ if it is the capital of the selected district
(4) Once all information are given, click on ‘Save’ or ‘Save & Close’ button to finally save the
new sub district information
Note that, if you’ve chosen Save, you would still remain on the same page and if
you’ve chosen Save & Close button then you’d come back to sub district list GV.
Page 22 of 91
4.
Suco Menu
This menu is to enter suco information. Click on ‘Suco’ menu to go to suco page. You’d see
all the available sucos in the GV list. You may see paging depending on amount of record i.e.
you may need to go to multiple pages to view all the sucos. The suco GV will look like shown
below:
Note in the above GV list that, it is showing all the sucos. At this point you may do an ‘Apply
Filter’ to view of a specific suco under a specific district and sub district. To do this, do
followings:
(1) Select a district (say, Dili) and a sub district (say Dom Alexio) from DDLs in the filter
section
(2) Then click on ‘Apply Filter’
(3) Notice that, the GV is now filled with all sub districts of district Dili
Page 23 of 91
In order to add a new suco, do followings:
(1) Click on ‘Add a Suco’ link button
(2) You’d see below page:
(3) Select one district under which you’d like to add this new sub district, then type ‘Full
Name’, sub district ‘Code’ and then check ‘Is Capital’ if it is the capital of the selected district
(4) Once all information are given, click on ‘Save’ or ‘Save & Close’ button to finally save the
new suco information
Note that, if you’ve chosen Save, you would still remain on the same page and if
you’ve chosen Save & Close button then you’d come back to suco GV.
Page 24 of 91
5.
Program Round Menu
This menu is to set up program round information. Click on ‘Program Round’ menu to go to
program round page. You’d see all the available rounds in the GV list. You may see paging
depending on amount of record i.e. you may need to go to multiple pages to view all the
rounds. The program round GV will look like:
In order to add a new program, do followings:
(1) Click on ‘Add a Round’ link button
(2) You’d see below page:
(3) Type ‘Round Name’, ‘Round Short Name’, ‘Start Date’, and ‘End Date’
(4) Once all information are given, click on ‘Save’ or ‘Save & Close’ button to finally save the
new round information
Note that, if you’ve chosen Save, you would still remain on the same page and if
you’ve chosen Save & Close button then you’d come back to program round GV.
Page 25 of 91
6.
Program Phase Menu
This menu is to set up program phase information. Click on ‘Program Phase’ menu to go to
program phase page. You’d see all the available phases in the GV list. You may see paging
depending on amount of record i.e. you may need to go to multiple pages to view all the
phases. The program phase GV will look like:
In order to add a new program, do followings:
(1) Click on ‘Add a Phase’ link button
(2) You’d see below page:
(3) Select a ‘Round’, ‘Phase’, ‘Phase Short Name’, ‘Start Date’, and ‘End Date’
(4) Once all information are given, click on ‘Save’ or ‘Save & Close’ button to finally save the
new phase information
Page 26 of 91
Note that, if you’ve chosen Save, you would still remain on the same page and if
you’ve chosen Save & Close button then you’d come back to program phase GV.
7.
Program Quarter Menu
This menu is to set up program quarter information. Click on ‘Program Quarter’ menu to go
to program quarter page. You’d see all the available quarters in the GV list. You may see
paging depending on amount of record i.e. you may need to go to multiple pages to view all
the quraters. The program quarter GV will look like:
In order to add a new program, do followings:
(1) Click on ‘Add a Quarter’ link button
(2) You’d see below page:
Page 27 of 91
(3) Select a ‘Round’, ‘Phase’, and then type ‘Quarter’ name, ‘Start Date’, and ‘End Date’
(4) Once all information are given, click on ‘Save’ or ‘Save & Close’ button to finally save the
new quarter information
Note that, if you’ve chosen Save, you would still remain on the same page and if
you’ve chosen Save & Close button then you’d come back to program quarter GV.
8.
Beneficiary Category
This menu is to set up beneficiary category information. Click on ‘Beneficiary Category’ menu
to go to beneficiary category page. You’d see all the available categories in the GV list. You
may see paging depending on amount of record i.e. you may need to go to multiple pages to
view all the beneficiary categories. The beneficiary category GV will look like:
Page 28 of 91
In order to add a new position category, do followings:
(1) Click on ‘Add a Beneficiary Category’ link button
(2) You’d see below page:
(3) Type ‘Category Name’, ‘Short Name’, ‘PID Prefix’, ‘Sex Type’, and ‘Will Have PID?’
(4) Once all information are given, click on ‘Save’ or ‘Save & Close’ button to finally save the
new beneficiary category information
Page 29 of 91
Note that, if you’ve chosen Save, you would still remain on the same page and if
you’ve chosen Save & Close button then you’d come back to sub district list GV.
9.
Position Category
This menu is to set up staffs’ position category information. Click on ‘Position Category’ menu
to go to staffs’ position category page. You’d see all the available staffs’ positions in the GV
list. You may see paging depending on amount of record i.e. you may need to go to multiple
pages to view all the staffs’ positions. The staffs’ position category GV will look like:
In order to add a new position category, do followings:
(5) Click on ‘Add a Position Category’ link button
(6) You’d see below page:
Page 30 of 91
(7) Type ‘Category Name’, ‘Short Name’, and ‘Category Level’
(8) Once all information are given, click on ‘Save’ or ‘Save & Close’ button to finally save the
new district information
Note that, if you’ve chosen Save, you would still remain on the same page and if
you’ve chosen Save & Close button then you’d come back to position category GV.
10. Organization
This menu is to enter organization’s information. Click on ‘Organization’ to go to organization
page. You’d see all the available organizations in the GV list. You may see paging depending
on amount of record i.e. you may need to go to multiple pages to view all the organizations.
The staffs’ position category GV will look like:
At this point you may do an ‘Apply Filter’ to view organizations as per district, sub district,
and service type. To do this, do followings:
Page 31 of 91
(1) Select a district (say, Dili) and a sub district (say, Dom Alexio) from DDLs in the filter
section
(2) Then click on ‘Apply Filter’
(3) Notice that, the GV is now filled with all organizations under district Dili and sub district
Dom Alexio
In order to add a new organization, do followings:
(1) Click on ‘Add an Organization’ link button
(2) You’d see below page:
(3)
Type or select below information:
Organization Name*: Name of the organization.
Short Name: Short name of the organization.
Page 32 of 91
Code: Code of the organization.
District*: The district where you want to add this organization.
Sub District*: The sub district where you want to add this organization.
Address*: Detail address of the organization.
Domain Name: Domain name of the organization.
Important!
Field with * marking is a mandatory field that must be provided to save an
organization. If you don’t provide that information, system will not save the
organization and will show error message in red text.
(4) Once all information are given, click on ‘Save’ or ‘Save & Close’ button to finally save the
new organization information
Note that, if you’ve chosen Save, you would still remain on the same page and if
you’ve chosen Save & Close button then you’d come back to organization GV.
Page 33 of 91
Chapter 4 – Program Basic
Information Tab
1.
Overview
This tab contains the functionalities for entering organization specific program basic
information; such as, organization’s offices, drop in centers, rest homes, dispensers etc. All
these functionalities are realized by some menus. These menus are:
(1)
(2)
(3)
(4)
(5)
(6)
(7)
Organization Office
Drop in Centers
Dispensers
Outreach Session Topics
Basic Package Details
Program Events
Even Topic
If you click on ‘Program Basic Information’ tab, you’d be able to see above menus at the left
and also the data landing space i.e. data display section (DDS) at the right side. Please note
that, you haven’t yet clicked on any menu and thus no menu is marked as current menu i.e.
no red arrow tip at the left of selected menu.
2.
Organization Office Menu
This menu is to enter office details of an organization. Click on ‘Organization Office’ menu to
go to organization office page. To see the list a particular office do followings:
(1)
(2)
(3)
Select a district (say, Dili) and then click on ‘Apply Filter’ button.
This will list all the offices from district Dili.
The page will look like as shown below:
Page 34 of 91
In order to add a new office, do followings:
(1) Click on ‘Add an Organization Office’ link button
(2) You’d see below page:
(3) Notice that, you cannot click on first text box i.e. Organization Name. This is because
this box is used by system.
(4)
Type or select below information:
Office Type*: Type of office.
Office Name*: Name of office.
Short Name: Short name of office.
Code: Code of the office.
District*: District where office is located.
Page 35 of 91
Sub District*: Sub district where office is located.
Address: Detail address of the office.
Important!
Field with * marking is a mandatory field that must be provided to save a TB
patient. If you don’t provide that information, system will not save the patient
and will show error messages in red text.
(5) Once all information are given, click on ‘Save’ or ‘Save & Close’ button to finally save the
new district information
Note that, if you’ve chosen Save, you would still remain on the same page and if
you’ve chosen Save & Close button then you’d come back to GV page.
3.
Drop in Center (DIC) Menu
This menu is to enter drop in center details of an organization. Click on ‘Drop In Center’
menu to go to drop in center page. The GV will look like below:
To see the list of particular drop in centers do followings:
(1)
(2)
(3)
Select a district (say, Dili) and then click on ‘Apply Filter’ button.
This will list all the drop in centers from district Dili.
The page will look like as shown below:
Page 36 of 91
In order to add a new office, do followings:
(1) Click on ‘Add a DIC’ link button
(2) You’d see below page:
(3)
Type or select below information:
DIC Type*: Type of drop in center.
DIC Name*: Name of drop in center.
Short Name: Short name of drop in center.
Page 37 of 91
Establishment Date: Date when drop in center was established.
Equipped Date: Date when drop in center was equipped.
Operation Start Date: Date when operation of drop in center was started.
District*: District where DIC is located.
Sub District*: Sub district where DIC is located.
Suco: Suco where DIC is located.
Is Rehabilitated: Check if the DIS was rehabilitated.
Is Running: Check if the DIC is running.
Remarks: Write any other information that is not mentioned above.
Important!
Field with * marking is a mandatory field that must be provided to save a TB
patient. If you don’t provide that information, system will not save the patient
and will show error messages in red text.
(4) Once all information are given, click on ‘Save’ or ‘Save & Close’ button to finally save the
new DIC information
Note that, if you’ve chosen Save, you would still remain on the same page and if
you’ve chosen Save & Close button then you’d come back to GV page.
4.
Dispensers Menu
This menu is to enter dispenser details of an organization. Click on ‘Dispensers’ menu to go
to dispenser list page. The GV will look like below:
Page 38 of 91
In order to add a new dispenser, do followings:
(1) Click on ‘Add a Dispenser’ link button
(2) You’d see below page:
(3)
Type or select below information:
Beneficiary Category: Beneficiary category for which dispenser is applicable.
Dispenser Name*: Name of dispenser.
Page 39 of 91
Dispenser Code: Code of dispenser.
District*: District where dispenser is located.
Sub District*: Sub district where dispenser is located.
Location: Location where dispenser is located.
Operation Start Date: Start date of operation.
Important!
Field with * marking is a mandatory field that must be provided to save a TB
patient. If you don’t provide that information, system will not save the patient
and will show error messages in red text.
(4) Once all information are given, click on ‘Save’ or ‘Save & Close’ button to finally save the
new dispenser information
Note that, if you’ve chosen Save, you would still remain on the same page and if
you’ve chosen Save & Close button then you’d come back to GV page.
5.
Outreach Session Topic Menu
This menu is to enter outreach session topic details of an organization. Click on ‘Outreach
Session Topic’ menu to go to outreach topics list page. The GV will look like below:
Page 40 of 91
In order to add a new dispenser, do followings:
(1) Click on ‘Add an Outreach Session Topic’ link button
(2) You’d see below page:
(3)
Type or select below information:
Outreach Session Topic Name: Topic name.
Short Name: Topic’s short name.
Page 41 of 91
Important!
Field with * marking is a mandatory field that must be provided to save a TB
patient. If you don’t provide that information, system will not save the patient
and will show error messages in red text.
(4) Once all information are given, click on ‘Save’ or ‘Save & Close’ button to finally save the
new topic information
Note that, if you’ve chosen Save, you would still remain on the same page and if
you’ve chosen Save & Close button then you’d come back to GV page.
6.
Program Events Menu
This menu is to enter event details of an organization. Click on ‘Program Events’ menu to go
to events list page. The GV will look like below:
In order to add a new event, do followings:
(1) Click on ‘Add an Event’ link button
Page 42 of 91
(2)
You’d see below page:
(3)
Type or select below information:
Event Type: Type of event.
Event Name: Nave of event.
Short Name: Short name of event.
Is National Event: Check if the event is a national event (such as Worlds AIDS Day).
Important!
Field with * marking is a mandatory field that must be provided to save a TB
patient. If you don’t provide that information, system will not save the patient
and will show error messages in red text.
(4) Once all information are given, click on ‘Save’ or ‘Save & Close’ button to finally save the
new event information
Note that, if you’ve chosen Save, you would still remain on the same page and if
you’ve chosen Save & Close button then you’d come back to GV page.
7.
Events Topic Menu
This menu is to enter event topic details of an organization. Click on ‘Event Topic’ menu to go
to event topic list page. The GV will look like below:
Page 43 of 91
In order to add a new event topic, do followings:
(1) Click on ‘Add an Event Topic’ link button
(2) You’d see below page:
(3)
Type or select below information:
Event Type*: Type of event.
Event Name*: Nave of event.
Event Topic Name*: Name of the event topic.
Event Topic Short Name: Short name of the event topic.
Audience Level*: Target audience level of the event.
Page 44 of 91
Important!
Field with * marking is a mandatory field that must be provided to save a TB
patient. If you don’t provide that information, system will not save the patient
and will show error messages in red text.
(4) Once all information are given, click on ‘Save’ or ‘Save & Close’ button to finally save the
new event topic information
Note that, if you’ve chosen Save, you would still remain on the same page and if
you’ve chosen Save & Close button then you’d come back to GV page.
Search Client (Patient) Functionality
During VCCT registration, it is also possible to populate a client from other systems; such as
a TB patient coming for VCCT. The TB patient is already in the system and we can just tag
that patient in the VCCT register. This is also possible for a person from beneficiary category
MSM, FSW, CoSW, or even IDU provided that person already registered in the system before
and he/she is coming for VCCT with a referral card. This functionality is to ensure a better
tracking of a person and also does not allow making duplicate entries of the same person.
To tag an existing client/patient in the VCCT register, do followings:
(1) Make sure you are on the ‘VCCT Client Registration’ details page
(2) You’d see one button ‘Search Patient’ at the top of the page and at the left of button
‘Save & Close’ as shown below:
(3)
(4)
Click on ‘Search Patient’ button
You’d see below page:
Page 45 of 91
(5) In the above GV, you’d see a list of all individual persons who have been registered
previously. They could be in TB system, Prevention, Care & Support System
(6) Like other GV pages, you can also filter to search for your desired person who has come
for VCCT registration
(7) Say, for example, a TB patient (TB No: 30, Reg. Year: 2013, Reg. Unit: CHC Bairo Pite)
has come for VCCT for the first time and you are now registering that TB patient in VCCT
register. All what you will be doing is to tag that patient to VCCT register; that’s it!
(8) So, now you check the TB check box (2nd line) and then enter all the information.
(9) Once done, click on ‘Apply Filter’ button and you will see that system has brought that
TB patient in the list.
(10) Now you click on ‘Select’ link button and this will take you back to the ‘VCCT Registrtion’
details page i.e. from where you’ve come in this GV page!
Page 46 of 91
(11) In the ‘VCCT Registration’ page you notice that system has automatically populated the
basic information like Name, Father Name, Mother Name, Age etc. So, you will not required
to type these information again here during VCCT registration.
(12) Please remember, saying again, all what you are doing is tagging an existing
patient/client in order to stop duplication.
Page 47 of 91
Chapter 5 – Personnel Information
Tab
1.
Overview
This tab contains the functionalities for entering staff information and beneficiary information.
The tab has following menus:
(1) Staff Information
(2) Beneficiary Information
If you click on ‘Personnel Information’ tab, you’d be able to see above menus at the left and
also the data landing space i.e. data display section (DDS) at the right side. Please note that,
you haven’t yet clicked on any menu and thus no menu is marked as current menu i.e. no
red arrow tip at the left of selected menu.
2.
Staff Information Menu
This menu is to save all the staff information. Click on ‘Staff Information’ menu to go to the
staff list page. You will not see any data in the list when the page is loaded. To view the data
click on ‘Apply Filter’ button and it will then show all the staffs in the list. The GV page will
look like shown below:
Page 48 of 91
In order to add new staff, do followings:
(1) Click on ‘Add a Staff’ link button
(2) You’d see below page:
(3)
Type or select below information:
Staff Personnel ID: System generated I of the staff.
Staff Code Name: Staff code name
Staff First Name: First name.
Staff Middle Name: Middle name.
Staff Last Name: Last name.
Staff Sex: Sex.
Organization Office: Office where the staff is working.
Position: Position of the staff.
Category: Category of the staff.
Date of Birth: Date of Birth of staff.
National ID: National ID of staff.
Page 49 of 91
Passport No: Passport number of staff.
Date of Join: Date when staff joined organization.
Date of Retired: Date when staff has left office.
District: Permanent district of the staff.
Sub District: Permanent sub district of the staff.
Suco: Permanent suco of the staff.
Address: Permanent address of the staff.
Is Beneficiary: Check if the staff is also beneficiary.
Is Group Leader: Check if the staff is a group leader.
(4)
Click on ‘Generate ID’ button to generate the ID for the staff. System will do this.
Important!
Field with * marking is a mandatory field that must be provided to save a TB
patient. If you don’t provide that information, system will not save the patient
and will show error messages in red text.
(5) Once all information are given, click on ‘Save’ or ‘Save & Close’ button to finally save the
new staff information
Note that, if you’ve chosen Save, you would still remain on the same page and if
you’ve chosen Save & Close button then you’d come back to GV page.
3.
Beneficiary Information Menu
This menu is to save all the beneficiary information. Click on ‘Beneficiary Information’ menu
to go to the beneficiary list page. You will not see any data in the list when the page is
loaded. To view the data click on ‘Apply Filter’ button and it will then show all the beneficiary
in the list. The GV page will look like shown below:
Page 50 of 91
In order to add new beneficiary, do followings:
(1) Click on ‘Add a Beneficiary Info’ link button
(2) You’d see below page:
Page 51 of 91
(3)
Type or select below information:
Code Name*: Beneficiary Code Name.
Father’s Name (3 letter)*: Father’s name (3 letters).
Mother’s Name (3 letter)*: Mother’s name (3 letter).
Marital Status: Marital status.
Profession: Profession.
Is Date of Birth Exact?: Check if you want to enter beneficiary’s date of birth.
Age*: Age in year and month in two respective text boxes.
District*: District of beneficiary.
Sub District*: Sub district of beneficiary.
Suco: Suco of beneficiary.
Address: Address of beneficiary.
Contact Status*: Contact status of beneficiary.
Page 52 of 91
Nationality: Nationality of beneficiary.
Category*: Category of beneficiary.
Beneficiary Sex*: Sex of beneficiary.
Important!
Field with * marking is a mandatory field that must be provided to save a TB
patient. If you don’t provide that information, system will not save the patient
and will show error messages in red text.
(4) Once all information are given, click on ‘Save’ or ‘Save & Close’ button to finally save the
new beneficiary information
Note that, if you’ve chosen Save, you would still remain on the same page and if
you’ve chosen Save & Close button then you’d come back to GV page.
Page 53 of 91
Chapter 6 – Program Activity
Records Tab
1.
Overview
This tab contains the functionalities for entering programmatic information relating to HIV
prevention, care and support. The tab has following menus:
(1) Outreach Activity Records
(2) Counseling Records
(3) DIC Visit Record (Summary)
(4) Dispenser Stock Records
(5) Social Marketing Sale
(6) VCT Cards Utilization
(7) STI Cards Utilization
(8) Event Details
If you click on ‘Program Activity Records’ tab, you’d be able to see above menus at the left
and also the data landing space i.e. data display section (DDS) at the right side. Please note
that, you haven’t yet clicked on any menu and thus no menu is marked as current menu i.e.
no red arrow tip at the left of selected menu.
STI data from periodic reports such as, STI monthly reports, training reports etc.
2.
Outreach Activity Records Menu
This menu is to save HIV prevention activity related records. Click on ‘Outreach Activity
Records’ menu to go to the outreach activity list page. There will not be any record in the list
while page loading. Click on ‘Apply Filter’ button to load the records in the list. The GV page
will look like shown below:
Page 54 of 91
In order to add an outreach activity record, do followings:
(1) Click on ‘Add an Outreach Activity Detail’ link button
(2) You’d see below page:
Page 55 of 91
(3)
Type or select below information:
Outreach Person*: Outreach staff.
Page 56 of 91
Outreach Area/Zone*: Outreach area.
Beneficiary’s Location*: Location of beneficiary.
Select a Beneficiary*: Beneficiary.
Outreach Date*: Outreach date.
Meeting Place*: Meeting place.
Is Individual or Group: Type of outreach contact; individual or as group.
Referral Cards: VCCT and STI referral card number given during outreach.
Condom/Lubricants: Amount of Condom and Lubricant given during outreach.
BCC Materials: Amount of BCC material given during outreach.
Including Partner: Check if the BCC material given to partner also.
STI Flipchart Demonstrated?: Check if it was demonstrated.
IDU Materials: Amount of IDU material given during outreach.
Referred to Rehabilitation Center: Check if the IDU person was referred to
rehabilitation center.
Referred for Vaccination, Diagnosis and Treatment of Viral Hepatitis: Check if
appropriate. Also check if it was including partner.
Referred for Prevention, Diagnosis and Treatment of Viral Tuberculosis: Check
if appropriate. Also check if it was including partner.
Attended Educational Session: Check the appropriate topics from list.
Important!
Field with * marking is a mandatory field that must be provided to save a TB
patient. If you don’t provide that information, system will not save the patient
and will show error messages in red text.
(4) Once all information are given, click on ‘Save’ or ‘Save & Close’ button to finally save the
new outreach information
Note that, if you’ve chosen Save, you would still remain on the same page and if
you’ve chosen Save & Close button then you’d come back to GV page.
3.
Counseling Records Menu
This menu is to save HIV prevention counseling activity related records. Click on ‘Counseling
Records’ menu to go to the counseling records list page. There will not be any record in the
list while page loading. Click on ‘Apply Filter’ button to load the records in the list. The GV
page will look like shown below:
Page 57 of 91
In order to add an outreach activity record, do followings:
(1) Click on ‘Add a Counseling Record’ link button
(2) You’d see below page:
Page 58 of 91
(3)
Type or select below information:
Counseled by*: Person who did counseling i.e. counselor or any other staffs did
counseling.
Is Having a PID?: Is the person counseled having PID?
Beneficiary’s Location: Location of beneficiary.
Select a Beneficiary: Beneficiary.
Counseling Method: Counseling method.
Counseling Date*: Date of counseling.
Counseling Time*: Time of counseling.
Counseling Subject: Topics discussed during counseling.
Topic Details: Details of topic.
Important!
Field with * marking is a mandatory field that must be provided to save a TB
patient. If you don’t provide that information, system will not save the patient
and will show error messages in red text.
(4) Once all information are given, click on ‘Save’ or ‘Save & Close’ button to finally save the
new counseling information
Page 59 of 91
Note that, if you’ve chosen Save, you would still remain on the same page and if
you’ve chosen Save & Close button then you’d come back to GV page.
4.
DIC Visit Record (Summary) Menu
This menu is to save HIV prevention activity related DIV visit records. Click on ‘DIC Visit
Record (Summary)’ menu to go to the counseling records list page. There will not be any
record in the list while page loading. Click on ‘Apply Filter’ button to load the records in the
list. The GV page will look like shown below:
In order to add an outreach activity record, do followings:
(1) Click on ‘Add a DIC Visit Record’ link button
(2) You’d see below page:
Page 60 of 91
(3)
Type or select below information:
DIC Name*: Name of DIC.
DIC In-charge’s Position: Position category.
DIC In-charge*: Name of DIC in-charge staff.
Visit Date*: DIC visit date.
Total no of Beneficiary (Visit): Total number of beneficiary visited DIC.
Visit Purpose: Purpose of DIC visit.
Important!
Field with * marking is a mandatory field that must be provided to save a TB
patient. If you don’t provide that information, system will not save the patient
and will show error messages in red text.
(4) Once all information are given, click on ‘Save’ or ‘Save & Close’ button to finally save the
new DIC visit information
Note that, if you’ve chosen Save, you would still remain on the same page and if
you’ve chosen Save & Close button then you’d come back to GV page.
Page 61 of 91
5.
Dispenser Stock Records Menu
This menu is to save HIV prevention activity related dispenser provisioning records. Click on
‘Dispenser Stock Record’ menu to go to the dispenser records list page. There will not be any
record in the list while page loading. Click on ‘Apply Filter’ button to load the records in the
list. The GV page will look like shown below:
In order to add an outreach activity record, do followings:
(1) Click on ‘Add a Dispenser Stock Record’ link button
(2) You’d see below page:
Page 62 of 91
(3)
Type or select below information:
Dispenser Filled by*: Name of person filled dispenser.
Dispenser Name: Name of dispenser.
Dispenser Fill Date*: Date when dispenser was filled in.
Condom Filled in: Number of condom put inside dispenser.
Lubricant Filled in: Number of lubricant put inside dispenser.
Brochure Filled in: Number of brochure put inside dispenser.
Leaflet Filled in: Number of leaflet put inside dispenser.
Flipchart Filled in: Number of flipchart put inside dispenser.
Condom Found: Number of condom found inside dispenser.
Lubricant Found: Number of lubricant found inside dispenser.
Brochure Found: Number of brochure found inside dispenser.
Leaflet Found: Number of leaflet found inside dispenser.
Page 63 of 91
Flipchart Found: Number of flipchart found inside dispenser.
Important!
Field with * marking is a mandatory field that must be provided to save a TB
patient. If you don’t provide that information, system will not save the patient
and will show error messages in red text.
(4) Once all information are given, click on ‘Save’ or ‘Save & Close’ button to finally save the
new dispenser provisioning information
Note that, if you’ve chosen Save, you would still remain on the same page and if
you’ve chosen Save & Close button then you’d come back to GV page.
6.
Social Marketing Sales Menu
This menu is to save HIV prevention activity related social marketing records. Click on ‘Social
Marketing Sales’ menu to go to the social marketing sales records list page. There will not be
any record in the list while page loading. Click on ‘Apply Filter’ button to load the records in
the list. The GV page will look like shown below:
In order to add an outreach activity record, do followings:
(1) Click on ‘Add a Dispenser Stock Record’ link button
(2) You’d see below page:
Page 64 of 91
(3)
Type or select below information:
Sold From Office*: Name of office sold items.
Sales Date*: Sold date.
Sold To: Individual or Group.
Condoms/Lubricant: Number of condom and lubricant sold.
BCC Materials: Number of leaflet and brochure sold.
Important!
Field with * marking is a mandatory field that must be provided to save a TB
patient. If you don’t provide that information, system will not save the patient
and will show error messages in red text.
(4) Once all information are given, click on ‘Save’ or ‘Save & Close’ button to finally save the
new social marketing sales information
Note that, if you’ve chosen Save, you would still remain on the same page and if
you’ve chosen Save & Close button then you’d come back to GV page.
7.
VCCT Card Utilization Menu
This menu is to save utilized VCCT cards that were given to beneficiary. Click on ‘VCCT Card
Utilization’ menu to go to the VCCT card utilization record list page. There will not be any
record in the list while page loading. Click on ‘Apply Filter’ button to load the records in the
list. The GV page will look like shown below:
Page 65 of 91
In order to mark a VCCT card as utilized, do followings:
(1) Click on ‘Apply Filter’ button
(2) It will load all the distributed VCCT cards
(3) Now find the card number that is utilized and then do followings:
- Check the check box
- Card Status to ‘Attended both counseling & testing’
(4) Now select all other cards one by one and also set the status like above
(5) Once all are selected, put the utilized date (this is usually last date of the utilized
month) and then click on ‘Save’ button
Important!
Utilized card cannot be selected for re-utilizatinon.
8.
SIT Card Utilization Menu
This menu is to save utilized STI cards that were given to beneficiary. Click on ‘STI Card
Utilization’ menu to go to the STI card utilization record list page. There will not be any
record in the list while page loading. Click on ‘Apply Filter’ button to load the records in the
list. The GV page will look like shown below:
Page 66 of 91
In order to mark a STI card as utilized, do followings:
(1) Click on ‘Apply Filter’ button
(2) It will load all the distributed STI cards
(3) Now find the card number that is utilized and then do followings:
- Check the check box
- Card Status to ‘Attended both counseling & testing’
(4) Now select all other cards one by one and also set the status like above
(5) Once all are selected, put the utilized date (this is usually last date of the utilized
month) and then click on ‘Save’ button
9.
Event Detail Menu
This menu is to save event details records. Click on ‘Event Details’ menu to go to the event
details records list page. There will not be any record in the list while page loading. Click on
‘Apply Filter’ button to load the records in the list. The GV page will look like shown below:
Page 67 of 91
In order to add details of an event, do followings:
(1) Click on ‘Add an Event Detail’ link button
(2) You’d see below page:
Page 68 of 91
(3)
Type or select below information:
Event Type: Event type.
Event*: Event.
Event Topic*: Event topic.
Target Participant(s): Type of participants.
Venue Type: Type of venue.
Page 69 of 91
District: District where even was held.
Sub District: Sub district where even was held.
Venue Address: Address where even was held.
Conducted by: Person conducted event.
Participant(s) Type: Category of participants.
Beneficiary Category: Category of participants.
Is Individual Wise: Check if the event was given individual wise.
Event Start Date: Event start date.
Event End Date: Event end date.
Total Participants: Total participants.
Important!
Field with * marking is a mandatory field that must be provided to save a TB
patient. If you don’t provide that information, system will not save the patient
and will show error messages in red text.
(4) Once all information are given, click on ‘Save’ or ‘Save & Close’ button to finally save the
new event details information
Note that, if you’ve chosen Save, you would still remain on the same page and if
you’ve chosen Save & Close button then you’d come back to GV page.
10. C&S Assessment Menu
This menu is to save HIV care and support assessment related records. Click on ‘C&S
Assessment’ menu to go to the care & support assessment records list page. There will not
be any record in the list while page loading. Click on ‘Apply Filter’ button to load the records
in the list. The GV page will look like shown below:
In order to add a Care & Support assessment details, do followings:
(1) Click on ‘Add a Care & Support Patient Assessment’ link button
(2) You’d see below page:
Page 70 of 91
In the above page, notice that there are many link buttons as explained below:
(1) Find PID: use this link button to tag ART patient for whom you are going to enter
assessment details. Please note that, you will see only those ART patients who agreed to be
connected with HIV Care & Support Network during ART registration. You must first select a
patient before you proceed further. Do followings:
(1) Click on ‘Find PID’ link button and you will see below pop-up:
Page 71 of 91
(2) Now type ART code and select ART Registration Unit from DDL and then click on
‘Apply Filter’ button
(3) System will find the patient and will show in the list
(4) If you’ve found the patient correctly, then click on link button ‘Select’ at the very
left of the patient record in the list
(5) At this stage you should be back to the previous page
(2) View Personal Details: use this link button to verify the personal details of the ART
patient before you proceed. If all information are OK, then click on ‘Correct’; else ‘Not
Correct’. You may also leave this un-verified and system will still allow you to save
assessment details.
(3) Medical Details: use this link to enter medical details of the assessment record. When
you click on this link button, you will see below page:
You can verify patient’s medical details like you’ve done while verifying personal
details. You can also leave this information un-verified as well.
Check the check box if appropriate.
(4) Prevention: use this link button to enter prevention details of the assessment record.
When you click on this link button, you will see below page:
Page 72 of 91
Selection the options as appropriate and then proceed to next link button section.
(5) Psychological Care / Legal and Human Rights: use this link button to enter
Psychological Care / Legal and Human Rights details of the assessment record. When you
click on this link button, you will see below page:
Page 73 of 91
Selection the options as appropriate and then proceed to next link button section.
Notice that, when you click on check box ‘Is Referred for Psychological Support’, you
some more information will get visible below this check box; which is like shown below:
Now, type and select information as appropriate.
Also, notice that, when you click on check box ‘Is Referred for Human Rights Support’,
you some more information will get visible below this check box; which is like shown
below:
Page 74 of 91
Now, type and select information as appropriate.
(6) Social / Welfare: use this link button to enter social/welfare details of the assessment
record. When you click on this link button, you will see below page:
Selection the options as appropriate and then proceed to next link button section.
Notice that, when you click on check box ‘Is Referred for Psychological Support’, you
some more information will get visible below this check box; which is like shown below:
Selection the options as appropriate and then proceed to next link button section.
Page 75 of 91
(7)
Now, for other remaining information, type or select below information:
Assessment Date*: Date of assessment.
Referred From Date: Referred from date.
Referred From Organization: Referred from organization.
Referred From Person: Referred from person.
Important!
Field with * marking is a mandatory field that must be provided to save a TB
patient. If you don’t provide that information, system will not save the patient
and will show error messages in red text.
(8) Once all information are given, click on ‘Save’ or ‘Save & Close’ button to finally save the
new Care & Support assessment details information
Note that, if you’ve chosen Save, you would still remain on the same page and if
you’ve chosen Save & Close button then you’d come back to GV page.
11. C&S Outreach Activity Record Menu
This menu is to save HIV care and support outreach activity related records. Click on ‘C&S
Activity Record’ menu to go to the care & support activity records list page. There will not be
any record in the list while page loading. Click on ‘Apply Filter’ button to load the records in
the list. The GV page will look like shown below:
In order to add a Care & Support activity record details, do followings:
(1) Click on ‘Add a Care & Support Activity Record’ link button
(2) You’d see below page:
Page 76 of 91
(3) Type or select necessary information in the above page and then click on ‘Save’ or ‘Save
& Close’ button
Important!
Find the patient like it is explained under menu ‘C&S Patient Assessment’
Page 77 of 91
Note that, if you’ve chosen Save, you would still remain on the same page and if
you’ve chosen Save & Close button then you’d come back to GV page.
12. RH/C&S Center Activity Record Menu
This menu is to save Rest Home and Care & Support Centers activity related records. Click on
‘RH/C&S Center Activity Record’ menu to go to the rest home and care & support center
activity records list page. There will not be any record in the list while page loading. Click on
‘Apply Filter’ button to load the records in the list. The GV page will look like shown below:
In order to add a Rest Home and Care & Support Center activity record details, do followings:
(1) Click on ‘Add a RH/C&S Center Activity Records’ link button
(2) You’d see below page:
Page 78 of 91
(3) Type or select necessary information in the above page and then click on ‘Save’ or ‘Save
& Close’ button
Important!
Find the patient like it is explained under menu ‘C&S Patient Assessment’
Note that, if you’ve chosen Save, you would still remain on the same page and if
you’ve chosen Save & Close button then you’d come back to GV page.
13. C&S Travel Menu
This menu is to save Care & Support related travel details. Click on ‘C&S Travel’ menu to go
to the care & support related travel details. There will not be any record in the list while page
loading. Click on ‘Apply Filter’ button to load the records in the list. The GV page will look like
shown below:
Page 79 of 91
In order to add Care & Support related travel details, do followings:
(1) Click on ‘Add a C&S Travel’ link button
(2) You’d see below page:
Page 80 of 91
(3) Type or select necessary information in the above page and then click on ‘Save’ or ‘Save
& Close’ button
Note that, if you’ve chosen Save, you would still remain on the same page and if
you’ve chosen Save & Close button then you’d come back to GV page.
14. Faith Based Activity Menu
This menu is to save faith based activity related details. Click on ‘Faith Based Activity’ menu
to go to the faith based activity details. There will not be any record in the list while page
loading. Click on ‘Apply Filter’ button to load the records in the list. The GV page will look like
shown below:
Page 81 of 91
In order to add a faith based activity details, do followings:
(1) Click on ‘Add a Faith Based Activity’ link button
(2) You’d see below page:
(3) Type or select necessary information in the above page and then click on ‘Save’ or ‘Save
& Close’ button
Note that, if you’ve chosen Save, you would still remain on the same page and if
you’ve chosen Save & Close button then you’d come back to GV page.
15. Client Travel Reimbursement Menu
This menu is to save clients’ travel reimbursement related details. Click on ‘Client Travel
Reimbursement’ menu to go to the client travel reimbursement list page. There will not be
Page 82 of 91
any record in the list while page loading. Click on ‘Apply Filter’ button to load the records in
the list. The GV page will look like shown below:
In order to add a client travel reimbursement record, do followings:
(1) Click on ‘Add a Client Travel Reimbursement’ link button
(2) You’d see below page:
(3) Type or select necessary information in the above page and then click on ‘Save’ or ‘Save
& Close’ button
Important!
Find the patient like it is explained under menu ‘C&S Patient Assessment’
Note that, if you’ve chosen Save, you would still remain on the same page and if
you’ve chosen Save & Close button then you’d come back to GV page.
Page 83 of 91
16. Rest Home Use Menu
This menu is to save Rest Home utilization records. Click on ‘Rest Home Use’ menu to go to
the rest home utilization records list page. There will not be any record in the list while page
loading. Click on Apply Filter’ button to load the records in the list. The GV page will look like
shown below:
In order to add a Rest Home Utilization details, do followings:
(1) Click on ‘Add a Rest Home Use’ link button
(2) You’d see below page:
(3) Type or select necessary information in the above page and then click on ‘Save’ or ‘Save
& Close’ button
Important!
Find the patient like it is explained under menu ‘C&S Patient Assessment’
Note that, if you’ve chosen Save, you would still remain on the same page and if
you’ve chosen Save & Close button then you’d come back to GV page.
Page 84 of 91
Chapter 7 – Administration Tab
1.
Overview
This tab contains the functionalities for assigning privilege to users. An user (may be normal
user or super user) can assign privileges to other users if he/she has the permission to do
that task. The tab contains following two menus:
(1)
(2)
2.
Users
Assign Privilege
Users Menu
This menu is to enter system user information. Click on ‘Users’ menu to go to users list page.
You’d see all the available user your organization in the GV list with their detail information.
The GV will look like shown below:
In order to add new user information, do followings:
(1) Click on ‘Add an User’ link button
(2) You’d see below page:
Page 85 of 91
(3)
Type or select below information:
User ID (Email)*: This is the email ID with which user will login to system.
User Password*: Password of the user.
User Category*: Category of user; either normal user or system admin.
Staff Position: Position of staff. If user category is system admin type, then you don’t’
need to select a staff; else a normal user must have to be a staff.
Select Staff Name: Staff name.
Organization Office: Organization office.
Is Active: Check if active.
Enable Email Validation: Don’t check this unless you want the activation to happen
automatically through email validation.
Important!
Field with * marking is a mandatory field that must be provided to save a
person/staff. If you don’t provide that information, system will not save the
person/staff and will show error message in red text.
(4) Once all information are given, click on ‘Save’ or ‘Save & Close’ button to finally save the
new user information
Note that, if you’ve chosen Save, you would still remain on the same page and if
you’ve chosen Save & Close button then you’d come back to personnel list GV.
Page 86 of 91
3.
Assign Privilege Menu
When a person logs into the system, he/she will see a menu called ‘Assign Privilege’. The
page will look like below:
Please note that, if a user cannot see this menu/page, then he/she is not given permission to
do this task!
In this image, the list shows all the menu names that are available in the system. Super user
or the person giving privilege will only need to choose the appropriate menu from list. Also
notice that, for each menu there are columns for assigning rights/permissions to user; such
as:
Can View – user will be able to see the data only; cannot do anything else!
Can Add – user will be able to view and as well as add new record
Can Edit – user will be able to edit an existing record
Can Delete – user will be able to delete an existing record
Is Active – user will be able to see the menu after logging into the system
To assign privilege to a user, do followings:
(1) Select a person (user) from DDL for whom you’d like to assign privilege.
(2) Now choose the appropriate rights/permissions for the pages you have planned to
assign to that user.
Page 87 of 91
(3) After you complete assigning rights/privileges to a user, click on Save button to save the
changes.
(4) If you don’t want to save and quit from assigning privileges, click on Cancel button.
Page 88 of 91
Chapter 8 – Report Tab
1.
Overview
This tab contains the menus to generate various types of reports. Data that were entered in
other tabs can be taken as output from this tab. There are total 4 menus in this tab as shown
below:
(1)
(2)
2.
Fixed Format Reports
Fixed Format Reports (Care & Support)
Fixed Format Reports (Prevention) Menu
This menu is to generate various programmatic reports of all prevention activities; such as,
quarterly report of a particular beneficiary group (say, MSM) etc.
Click on ‘Fixed Format Reports’ menu to go to the reports page. The page will look like shown
below:
On the left section of this page, there are total 6 report options, which are:
Page 89 of 91
(1)
(2)
(3)
(4)
(5)
(6)
(7)
(8)
(9)
(10)
(11)
(12)
(13)
(14)
(15)
(16)
(17)
1. Quarterly Report (Non-Cumulative)
2. Complete Database of Beneficiary Group
3. Monthly Summary Report (district wise)
4. Monthly Summary Report of all Districts
5. Complete Event Details
6. DIC Visit Details
7. Dispenser Details
8. List of Beneficiary who didn't Receive Basic Package
9. List of Beneficiary who Received Basic Package
10. No of Beneficiary Reached
11. List of Beneficiaries First Identified
12. No of PID Generated
13. List of PID Generated
14. List of VCT Duplicate Cards
15. List of STI Duplicate Cards
16. Outreach Verification Report (outreach staff wise)
17. Outreach Verification Report (without outreach staff wise)
In the other sections of this page, there are filters to generate more specific data.
Each of these report options will generate various data in different formats.
3.
Fixed Format Reports (Care & Support) Menu
This menu is to generate various reports from ART register; such as, list of HIV+ve patients,
details of a particular patient etc.
Click on ‘ART Reports’ menu to go to the reports page. The page will look like shown below:
On the left section of this page, you’d see below report options:
(1) Care & Support Indicator Report (Yearly)
(2) Care & Support Indicator Report (Multiple Yearly)
Page 90 of 91
(3)
(4)
(5)
(6)
(7)
List of All Clients have done Assessment
Care & Support Activity Details
Care & Support Center and Rest Home Activity Details
Rest Home Usage Details
In the other sections of this page, there are filters to generate more specific data.
Each of these report options will generate various data in different formats.
END OF THE USER MANUAL
Page 91 of 91