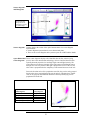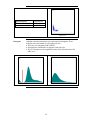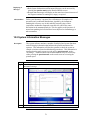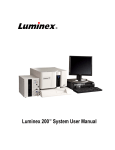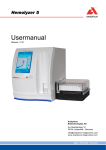
1
CONTENTS PREFACE .................................................................................................................................................. 3 Introduction ................................................................................................................................... 3 SECTION 1: SAFETY INSTRUCTIONS ...................................................................................................... 5 Section Overview ........................................................................................................................... 5 1.1 Intended Use ............................................................................................................................ 5 1.2 Safety Instruction .................................................................................................................... 6 1.3 Biohazards................................................................................................................................ 6 1.4 Emergency Procedure ............................................................................................................. 7 1.5 Warning Signs in Manual ....................................................................................................... 7 1.6 Instrument Signage ................................................................................................................. 8 SECTION 2: INSTALLATION .................................................................................................................. 10 Section Overview ......................................................................................................................... 10 2.1 Unpacking / Operating Placement & Environment ........................................................... 10 2.2 Installation Checklist............................................................................................................ 12 2.3 Removing Safety Card from Shear Valve .......................................................................... 12 2.4 Reagent Installation and Instrument Initialization ........................................................... 13 2.5 Connecting the Autoloader (optional) ................................................................................ 16 2.6 Initial Setup........................................................................................................................... 17 2.7 Analyzer Cable, Interface, and Printer Connections ........................................................ 19 2.8 Power Supply ........................................................................................................................ 20 SECTION 3: GENERAL OVERVIEW ....................................................................................................... 21 Section Overview ......................................................................................................................... 21 3.1 General Instrument Overview.............................................................................................. 21 3.2 Menu Structure...................................................................................................................... 22 3.3 Sample Volume, Throughput, and Parameters .................................................................. 24 SECTION 4: INSTRUMENT SETUP ......................................................................................................... 25 Section Overview ......................................................................................................................... 25 4.1 Main Menu and Touch Screen ............................................................................................. 25 4.2 Advanced Setup ..................................................................................................................... 27 4.3 Printer Settings ...................................................................................................................... 27 4.4 Send Settings .......................................................................................................................... 28 4.5 Language, Time, Date Settings............................................................................................. 29 4.6 Miscellaneous Settings........................................................................................................... 30 4.7 Result Column Settings ......................................................................................................... 31 4.8 Xb Range Settings ................................................................................................................. 32 4.9 Standby Settings ................................................................................................................... 32 4.10 Profile Limits Settings........................................................................................................ 33 SECTION 5: REAGENT SETUP ............................................................................................................... 34 Section Overview ......................................................................................................................... 34 5.1 Reagent Description .............................................................................................................. 34 5.2 Reagent Consumption ........................................................................................................... 35 5.3 Reagent Setup ........................................................................................................................ 37 5.4 Changing Reagents................................................................................................................ 39 SECTION 6: SAMPLE ANALYSIS ............................................................................................................ 40 Section Overview ......................................................................................................................... 40 6.1 Preparations before Analysis................................................................................................ 40 6.2 Daily Startup Sequence......................................................................................................... 41 6.3 Background Count ................................................................................................................ 42 6.4 Sample Identification ............................................................................................................ 43 6.5 Analyzing the Sample (Open Tube) ..................................................................................... 44 6.6 Analyzing the Sample (Cap Piercing) .................................................................................. 45 6.7 Analyzing the Sample (Autoloader) ..................................................................................... 45 6.8 Results..................................................................................................................................... 51 6.9 Searching and Sending Results ........................................................................................... 55 1 SECTION 7: QUALITY CONTROL (QC) AND BLOOD CONTROL MEMORY ........................................ 59 Section Overview ......................................................................................................................... 59 7.1 Quality Control (QC) ............................................................................................................ 59 7.2 Levey-Jennings Plots............................................................................................................. 62 7.3 Initialization and Use of Xb Function.................................................................................. 63 SECTION 8: CALIBRATION .................................................................................................................... 65 Section Overview ......................................................................................................................... 65 8.1 Preparations before calibration ........................................................................................... 65 8.2 Calibration ............................................................................................................................. 66 SECTION 9: CLEANING, MAINTENANCE & TRANSPORT .................................................................... 70 Section Overview ......................................................................................................................... 70 9.1 Daily Cleaning........................................................................................................................ 70 9.2 Shear Valve Cleaning ............................................................................................................ 71 9.3 Cleaning, As Needed.............................................................................................................. 73 9.4 Instrument Maintenance....................................................................................................... 75 9.5 Re-location of instrument (within the laboratory) ............................................................. 75 9.6 Short Term Transport (<12h) .............................................................................................. 75 9.7 Re-packaging and Long Term Transport (>12h) ............................................................... 76 9.8 Permanent Shut-Down and Storage .................................................................................... 77 9.9 Disposal Information............................................................................................................. 77 SECTION 10: PARAMETER AND SYSTEM INFORMATION MESSAGES ................................................. 78 Section Overview ......................................................................................................................... 78 10.1 Out-of-Range and Information Message Indicators ........................................................ 78 10.2 System Information Messages ............................................................................................ 79 10.3 Parameter Messages............................................................................................................ 81 10.4 Parameter Limitations of Automated Blood Cell Counters ............................................ 82 SECTION 11: TECHNOLOGY ................................................................................................................. 85 Section Overview ......................................................................................................................... 85 11.1 Measuring Principles.......................................................................................................... 85 11.2 Impedance Method............................................................................................................. 85 11.3 Principle of HGB Measurement ......................................................................................... 86 11.4 Principles of Optical Measurement ................................................................................... 87 11.5 Parameter Definitions ......................................................................................................... 88 SECTION 12: SPECIFICATIONS ............................................................................................................. 90 Section Overview ......................................................................................................................... 90 12.1 General ................................................................................................................................. 90 12.2 Short List of Specifications ................................................................................................. 91 12.3 Performance Specifications ................................................................................................ 92 SECTION 13: TROUBLESHOOTING ....................................................................................................... 93 Section Overview ......................................................................................................................... 93 13.1 Shifted (compressed) scattergram to the lower left corner.............................................. 93 13.2 Shifted scattergram into the upper right corner .............................................................. 94 13.3 Scattergram shifted/bent left-right or up-down ............................................................... 94 13.4 Split populations on scattergram ....................................................................................... 95 13.5 Scattergram smeared to the right or upper side; Extremely over-gained scatter ......... 95 13.6 Triangular populations at lower left corner...................................................................... 96 13.7 High angle noise................................................................................................................... 96 13.8 Dotted or continuous lines on X or Y axis end .................................................................. 97 13.9 Long, smeared population and commet-like background ............................................... 97 13.10 Over-lysed populations ..................................................................................................... 98 13.11 Concentrated (RBC ghost) scattergram .......................................................................... 98 13.12 Spreaded scattergram (high background) ...................................................................... 99 13.13 No or very few cells on scattergram................................................................................. 99 INDEX................................................................................................................................................. 101 APPENDIX A......................................................................................................................................... 102 2 Preface Introduction Instrument description Quintus 5-part hematology analyzer produced by Boule Medical for human application. Serial number Serial number is located on the rear of the instrument and in the Information screen. Serial number Figure 1.1 Software version The software version is found in the Diagnostic > Information screen. Serial number Software version Figure 1.2 3 Additional Documentation Additional documentation is available from your authorized distributor. Current additional documentation is listed below: · Service Manual · Basic Hematology · Product data sheets Operator requirements The following operator requirements must be fulfilled before operating the Quintus hematology system. · Basic skills in a laboratory environment. · Basic skills in hematology. · Awareness of IVD (EU)/FDA (US) requirements regarding laboratory equipment. · The operator must read and understand this manual. Optional accessories and consumables Manufacturer’s details Accessories and consumable lists are available from your local distributor. Boule Medical AB P.O. Box 42056 SE-126 13 Stockholm Sweden Telephone number: +46 8 744 77 00 Fax number: +46 8 744 77 20 Email: [email protected] Distributor details Distributors are listed on http://www.boule.se International standards and regulations EN591:2001 IVD 98/79/EG SSEN 61010-2-101 (Low Voltage Directive 2006/95/EC) EN 61326 (2006) (EMC 2004/108/EC) Standards harmonized with FDA Date of Issue October 2010 Software Versions Descriptions contained herein are relevant to Quintus, software versions: · · · · · Article no: 1504308 Main (upper-part) software: 1.0.432; OPN (DimmPC) software: 1.0.432; Firmware: 2.63 (1122) PIC software: 1.7 Laser software: 3.5 4 Section 1: Safety Instructions Section Overview Introduction This section describes the safety features and warnings associated with the Quintus system. Contents This section contains the following topics: Topic Intended Use Safety Instructions Biohazards Emergency Procedures Warning Signs in Manual Instrument Signage See Page 5 6 6 7 7 8 1.1 Intended Use Description The Quintus is a fully automatic hematology analyzer intended for in vitro diagnostic testing of blood specimens under laboratory conditions. Operator Requirements Operator must have basic laboratory skills and be aware of good laboratory practice. Warranty limitations · Service must be performed by Boule Medical AB (hereafter referred to as Boule), or by service personnel authorized by Boule. · Use only original spare parts and Boule authorized reagents, blood controls, calibrators and cleaners. (If these products are substituted it may void your warranty) · Operators and laboratory supervisors are responsible that Boule products are operated and maintained according to the procedures described in manuals, control inserts and technical bulletins. Warranty limitations in depth · Each Boule system is tested using recommended reagents, blood controls, calibrators and cleaners. All performance claims are generated as part of this complete system. · Boule products do NOT make diagnoses on patients. Boule intends its diagnostic products (systems, software and hardware) to be used to collect data reflecting the patient’s hematological status. This data, in conjunction with other diagnostic information and the evaluation of the patient’s condition, can be used by a trained clinician to establish a patient’s diagnosis and to define clinical treatment. 5 1.2 Safety Instruction Description Boule incorporates safety features within the instrument in order to protect the operator from injury, the instrument from damage and the test results from inaccuracies. Restrictions In order to insure the safety of the operator and instrument follow the instruction below: · Do not use the instrument outdoors. · Do no modify the instrument. · Do not remove the outer covers. (Authorized personnel only) · Do not use the instrument for other purposes than described in this manual. · Do not spill blood or other fluids on the instrument in such a way that it can leak through the instrument casing. (This might result in electrical malfunction or personal injury) Important Handling of reagents · Unauthorized modification of the instrument might result in erroneous results or risk for electrical shock. · Spilling fluids into the instrument might cause electrical malfunction and/or personal injury. · If a reagent comes in contact with eyes, rinse with running water for several minutes. If symptoms occur seek medical attention. · If the reagent comes into contact with skin, wash affected area with water. · If swallowed, rinse out mouth. If persistent symptoms occur seek medical attention. · Refer to MSDS at www.boule.se for further details. 1.3 Biohazards Description As there are no assurances of the absence of HIV, Hepatitis B or C viruses or other infectious agents in blood samples, blood controls, calibrators and waste these products should be handled as potentially biohazardous. Support documentation · Protection of Laboratory Workers From Infectious Disease Transmitted by occupationally acquired infections – 2nd Edition, Approved Guidelines (2001) Document M29-T2 promulgated by the Clinical and Laboratory Standards Institute, CLSI (NCCLS). · Follow local regulatory documentation. Handling of biohazardous material · Always wear protective gloves and goggles. Follow local regulations. · Handle samples with great care. Report incident according to local regulations. · Do not touch the waste liquid when discarding waste. 6 · If blood comes in contact with eyes or open cut, wash affected area with plenty of water. · If the waste liquid is inadvertently touched, wash affected area with Mandatory Action disinfectant solution first and follow with soap. 1.4 Emergency Procedure If there are any obvious signs of malfunction such as smoke or liquid leaking out of the instrument proceed as follows: In case of emergency Step 1 2 Action Disconnect the main power supply immediately by pulling out the cord from the main supply. Contact your authorized distributor. 1.5 Warning Signs in Manual Warning Signs The following warning signs in the manual are used to identify possible hazards and to call on the operator’s attention to this condition. Sign Function Indicates operation procedures that could result in personal injury or loss of life if not correctly followed. Warning Indicates operation procedures that could result in damage or destruction of equipment if not strictly observed. Caution Emphasizes operating procedures that must be followed to avoid erroneous results. Important Indicates that protective clothing, gloves or goggles must be used when performing described procedures. Mandatory Action 7 1.6 Instrument Signage Description Signs placed on the instrument define areas that need special attention or areas that contain danger. See IVD Symbol Table on page 9. Signs on equipment Figure 1.3 Figure 1.4 Figure 1.5 Figure 1.6 8 GB DE ES IT FR DK GR SE PO PL NO EST CZ CN Caution,consult instruction for use Achtung, Gebrauchsanweisung beachten Atención,ver instrucciones de uso Attenzione, vedere le istruzioni per l'uso Attention voir notice d'instructions Forsigtig se brugsanvisning Προειδοποίηση, συμβουλευτείτε τα συνοδά έντυπα Varsamhet, se bruksanvisning Atenção, ler as instruções de utilização Ostrzeżenie – skonsultować z instrukcją obsługi Forsiktig! Sjekk instruks nøye før bruk Hoiatus, vt. infot kasutusjuhendist Upozornění, přečtěte si návod k pouití Biological risk Biologissche Risiken Riesgo biológico Rischio biologico Risques biologiques Biologisk fare Βιολογικοί κίνδυνοι Biologisk risk Risco biológico Ryzyko wystąpienia skażenia biologcznego Biologisk risiko Bioloogiline risk Biologické riziko Consult Instructions for UseGebrauchsanweisung beachten Consulte las instrucciones de uso Consultare le istruzioni per l'uso Consulter les instructions d'utilisation Se brugsanvisning Συμβουλευτείτε τις οδηγίες χρήσης Se bruksanvisning Consultar as instruções de utilização Skonsultować z instrukcją obsługi Sjekk instruks før bruk Tutvu kasutusjuhendiga Přečtěte si návod k pouití Use by Verwendbar bis Fecha de caducidad Utilizzare entro Utiliser jusque Holdbar til Ημερομηνία λήξης Använd före Data de validade Uzyc przed Holdbarhet Kasutada enne Datum expirace 注意,须参阅使用说明 生物危害 请参阅使用说明 有效期 10º° EC REP LOT 2° GB DE ES IT FR DK GR SE PO PL NO EST CZ CN Authorized representative in the EC Bevollmächtigter in der Europäischen Gemeinschaft Representante autorizado en la Comunidad Europea Mandatario nella Comunità Europea Mandataire dans la Communauté européenne Repræsentant i det Europæiske Fællesskab Еξουσιοδοτημένος αντιπρόσωπος στην Ευρωπαϊκή Κοινότητα Auktoriserad representant inom Europeiska Gemenskapen Representante autorizado na Comunidade Europeia Autoryzowany Przedstawiciel w Unii Europejskiej Autorisert representant i EC Autoriseeritud esindaja EU-s Autorizovaný zástupce výrobce pro EU Temperature limitation Zulässiger Temperaturbereich Limite de temperatura Limiti di temperatura Limites de température Temperaturbegrænsning Περιορισμοί θερμοκρασίας Temperaturbegränsning Limites de temperatura Zakres temeratury przechowywania Temperaturbegrensning Temperatuuri piirang Limitující teploty Manufacturer Hersteller Fabricante Fabbricante Fabricant Producent Κατασκευαστής Tillverkare Fabricante Producent Produsent Tootja Výrobce Lot number Chargenbezeichnung Código de lote Codice del lotto Code du lot Lotnummer Αριθμός Παρτίδας Lotnummer Número de lote Numer serii Lot nummer Lot number Číslo are EC授权代表 温度限制 制造商 批号 IVD GB DE ES IT FR DK GR SE PO PL NO EST CZ CN CONTROL H 20 CONT CONTROL In Vitro Diagnostic Medical Device In Vitro Diagnostikum Producto sanitario para diagnóstico in vitro Dispositivo medico-diagnostico in vitro Dispositif médical de diagnostic in vitro Medicinsk udstyr til in vitro-diagnostik In Vitro Διαγνωστικό Ιατροτεχνολογικό προϊόν In vitro diagnostik Dispositivo médico para diagnóstico in vitro Produkt medyczny do diagnostistyki in vitro In vitro bruk In Vitro Diagnostika Meditsiini seade Diagnostické činidlo In Vitro High control, 20 parameters Hoch Kontrolle, 20 Parameter Control alto, 20 parámetros Controllo alto. 20 parametri Contrôle haut, 20 paramètres Høj Kontrol, 20 parametrer Πρότυπο ελέγχου Υψηλό, 20 Παράμετρος Hög kontroll, 20 parametrar Controlo alto, 20 parâmetros Poziomie wysokim kontrolny, 20-parametrowy Kontroll; 20 parametere, høy Kõrge kontroll, 20 parameetrit Vysoká kontrola, 20 parametrů Content Inhalt Contenido Contenudo Contenu Indhold Περιεχόμενο Innehåll Conteúdo Zawartość opalpwania Innehold Sisu Obsah Control Kontrolle Control Controllo Contrôle Kontrol Πρότυπο ελέγχου Kontroll Controlo Materiał kontrolny Kontroll Kontroll Kontrola 体外诊断产品 高值质控物,20参数 容量 质控物 CONTROL N 20 CONTROL L 20 CAL REF GB DE ES IT FR DK GR SE PO PL NO EST CZ CN Normal control, 20 parameters Normal Kontrolle, 20 Parameter Control normal, 20 parámetros Controllo normale, 20 parametri Contrôle normale, 20 paramètres Normal Kontrol, 20 parametrer Πρότυπο ελέγχου Κανονικό, 20 Παράμετρος Normal kontroll, 20 parametrar Controlo normal, 20 parâmetros Poziomie normalnym kontrolny, 20-parametrowy Kontroll; 20 parametere, normal Normaalne kontroll, 20 parameetrit Normální kontrola, 20 parametrů Low control, 20 parameters Nierig Kontrolle, 20 Parameter Control bajo, 20 parámetros Controllo basso, 20 parametri Contrôle bas, 20 paramètres Lav Kontrol, 20 parametrer Πρότυπο ελέγχου Χαμηλό, 20 Παράμετρος Låg kontroll, 20 parametrar Controlo baixo, 20 parâmetros Poziomie niskim kontrolny, 20-parametrowy Kontroll; 20 parametere, lav Madal kontroll, 20 parameetrit Nízká kontrola, 20 parametrů Catalogue number Bestellnummer Número de catálogo Numero di catalogo Référence du catalogue Katalognummer Αριθμός καταλόγου Katalognummer Referência de catálogo Numer Katalogowy Katalog-/referansenr. Kataloogi number Katalogové číslo Calibrator Kalibrator Calibrador Calibratore Calibrateur Kalibrator Διάλυμα Βαθμονόμησης Kalibrator Calibrador Kalibrator Kalibrator Kalibraator Kalibrátor 中值质控物,20参数 低值质控物,20参数 目录号 校准物 GB DE ES IT FR DK GR SE PO PL NO EST CZ CN The sampling needle may cause injury Die Probenahme Nadel kann zu Verletzungen führen La aguja de muestreo puede causar lesiones L'ago di campionamento può causare lesioni L'aiguille de prélèvement peut entraîner des blessures Prøveudtagningen nålen kan forårsage skade Η δειγματοληψία βελόνα μπορεί να προκαλέσει τραυματισμό Den provtagning nål kan orsaka skada A agulha de amostragem pode causar lesões Igły do pobierania próbek może spowodować szkody Det prøvetaking nålen kan forårsake skade Proovivõtu nõela võib põhjustada vigastusi Odběr vzorků jehlou můe způsobit zranění 抽樣針可能造成傷害 Radiation of laser apparatus Strahlung der Laser-Geräte La radiación del láser aparatos Radiazione di apparecchi laser Rayonnement de laser appareils Stråling af laser apparater Ακτινοβολία του λέιζερ συσκευών Strålning av laser apparater Radiação laser de aparelhos Promieniowania laserowego urządzenia Stråling av laser apparater Kiirgus laseriga seadmed Záření laserového přístroje 輻射激光儀器 Figure 1.7 IVD Symbol Table 9 Section 2: Installation Section Overview Introduction This section describes how to unpack and install the Quintus instrument. Contents This section contains the following topics: Topic Unpacking / Operating Placement and Environment Installation Checklist Removing Safety Card from Shear Valve Reagent Installation and Instrument Initialization Connecting the Autoloader (optional) Initial Setup Analyzer Cable, Interface, and Printer Connections Power Supply See Page 10 12 12 13 16 17 19 20 2.1 Unpacking / Operating Placement & Environment Description The instrument is packed in a specifically designed protective box. Visual Checking Check the box for physical damage. If damaged notify your carrier immediately. Included Material · Instrument · User’s Manual · Quick Reference Guide · Sample adapter · Reagent tube kit (in a plastic bag, with special caps) · Power cord · Barcode reader · Waste container · Maintenance kit (Shipment tubing; empty vial for Cleaner) · Installation form · Declaration of Conformity Optional Material · Printer · Autoloader (Autoloader unit, sample tray, and 10 sample racks) · External Keyboard Important The following procedures must be followed exactly. Boule has no responsibility in case of faulty or erroneous installation. 10 Installation/ Operating Placement The instrument should be placed in a laboratory environment according to the guidelines below: · Place the instrument on a clean horizontal surface. · The analyzer weighs 35 kg (77 lbs); two persons are needed to lift analyzer. · Avoid lifting the analyzer by the front cover. · Avoid exposure to sunlight. · Make sure the instrument has access to proper ventilation. The instrument should have at least 20 cm (8 inches) of space on both sides and above it. · Place the rear of the instrument so it has at least 15 cm (6 inches) of free space behind it. · Clearance in front of the Quintus to be able to open the front panel and comfortably reach the analyzer. 15 cm 20 cm Figure 2.1 Installation/ Operating Environment Important · Indoor Use · Temperature +15 to +30 ºC (+59 to +86 ºF) · Optimal operating temperature +25 ºC (+77 ºF) · Humidity < 80% Relative · Grounded main supply · Operating the instrument in an environment over +32 °C (+ 90°F) increases service needs, as well as degradation of sample specimen. · Operation at an altitude over 3000 meters (9000 ft) is not recommended · The analyzer should not be placed near potentially interfering devices capable of emitting radio frequencies (e.g. radio or television receiver, radars, centrifuge, X-ray devices, fans, etc.) · Allow 15 minutes from power on for the analyzer and its internal components to reach optimal operating temperature range 11 2.2 Installation Checklist Description Follow the quick Installation Checklist and Installation Menu step by step for best installation results. For more detail on each step refer to Sections 2.3 – 2.8. Installation Checklist Complete Unpacking / Operating Placement and Environment instructions in Section 2.1. Remove the safety card from shear valve and tighten shear valve. Connect the waste tubes to the analyzer and plumb to waste container or drain. Connect the reagent tubing to corresponding, color-coded reagent ports. Connect the other end of reagent tubing to cap and place in correct reagent container. Connect the power to the back of the analyzer, but do not plug it into an electrical socket. Connect the barcode reader to the back of the analyzer. If using Autoloader, push autoloader into the Quintus until the clamp is locked. Plug the power cord into the electrical socket and turn on analyzer at main power switch. Toggle on Standby switch to initialize the system. Scan in reagent barcodes. Press NEW SAMPLE button to perform self-test and to perform Fill process. Setup up date/time and language. To connect the analyzer to peripherals, such as the printer or a computer, see Section 2.7. 2.3 Removing Safety Card from Shear Valve Description Step 1 2 3 In order to prevent damage of the shear valve during transportation, a protective plastic card is placed between the ceramic disks of the shear valve. Before using the analyzer, this card must be removed. Action Open the cover of the analyzer and locate the white plastic card in shear valve. Pull out the card, in one quick motion. Check and tighten the locking screw of the shear valve. Figure 2.2 Note For more information on cleaning and assembling the shear valve see Section 9. 12 2.4 Reagent Installation and Instrument Initialization Description First start-up is special, because the Quintus arrives to your laboratory drained, without reagents. Prior to analyzing samples, it is necessary to enter in the reagent barcodes and fill the analyzer with reagents. Supported Reagents · The reagents for the instrument are delivered in cube formed boxes with plastic caps. · Hemolyzing reagent, Isotonic diluent, and Stop solution, hereafter referred to as Lyse, Diluent, and Stopper. (Specifically designed by Boule for the Quintus system.) Placement of reagent containers · It is recommended that all reagents are placed at the instrument level or below. · The analyzer has the capability to aspirate reagents from 1.2 meters (4 feet) below the analyzer. · Placing the reagent containers above the instrument level could cause system flow issue and is not recommended. Note Connecting Reagent Containers Step 1 2 3 This section describes how to connect the reagent containers for use. Action Connect the Diluent tubing (green) to the diluent input port. Connect the Stopper tubing (orange) to the stopper input port. Connect the Lyse tubing (yellow) to the lyse input port. 1 2 3 Figure 2.3 4 5 Connect the Diluent tubing to the cap with the longer tubing, and the Lyse and Stopper tubing to the two caps with shorter tubing. Insert reagent tubing into corresponding reagent container and tighten cap. 13 Connect the waste tubes to the analyzer. Place the other end of the waste tube directly into the drainage system or into a waste container, following local regulations. See Section 9.9 for Disposal information. Waste The end of the waste tubing must be at a lower level than the instrument itself. Not following this may lead to improper instrument functions and/or waste liquid flowing backwards into the instrument. Caution Always use protective gloves when working with the waste container and the waste tubing. Mandatory Action Initialize System To power on and initialize the system, perform the following: Step 1 2 Note Action Plug in analyzer and turn the main power switch to ON. (This is the small switch near the power cord.) Facing the analyzer, flip the Standby switch in the rear, upper-right corner of the unit by the serial number label. · The computer inside the analyzer needs a few minutes to start up and initialize the operating software. · The Quintus software starts automatically and puts you in the main menu. This menu allows access to analyzer setup, and you can also start operation. Figure 2.4 14 Reagent Barcode Entry To enter reagent barcode, perform the following steps: Step Action 1 Select ADVANCED menu. 2 Press [REAGENTS] and then press [ENTER NEW REAGENTS]. 3 Press the text box under the reagent you will scan in (it will highlight in yellow when activated) and then scan in the barcode from the corresponding reagent container. Repeat for all reagents. 4 Press [ENTER NEW REAGENT] to save. Figure 2.5 Figure 2.6 Figure 2.7 15 Fill system To fill the system for the first time, press [NEW SAMPLE] quick link at the top of the screen. During this first initialization, the analyzer performs a number of functions: · Starts up and performs a self-test on the hardware, electronics, and the software in the system · Fills up the analyzer with reagents · Performs an automatic background count Background count Even though maximum precaution and quality measures are taken in the factory, transportation and extended storage can cause higher background counts for the first few backgrounds analyses. Therefore it may be necessary to run 5-10 initial background measurements to rinse the tubing. Note · The user must [ACCEPT] the background measurement before real samples can be analyzed. 2.5 Connecting the Autoloader (optional) Description Step 1 If the optional Autoloader has been purchased with the system, then connect it to the analyzer prior to powering on either of the units. Action To connect the Autoloader to the analyzer, simply slide in the unit into opening on right-hand side of the analyzer until the clamp locks into place. Figure 2.8 Note If the analyzer and autoloader were purchased separately, the user may need to remove the secondary cover plate and attach the frame to the side panel. See assembly instructions included in the Autoloader packaging for further instruction. 16 2.6 Initial Setup Initial Setup Step 1 Initial setup of the instrument, except date and time, has been factory set to default values for the average Boule users. However, other user definable formats may be preferred, details are provided below and in Section 4. Action To set the date and time select [ADVANCED] then [SETUP] and then [LANGUAGE, DATE, TIME]. Figure 2.9 2 Figure 2.10 Select [SET TIME AND DATE] button Figure 2.11 3 4 Adjust the time and date, if necessary, select [OK] to exit screen and [SAVE] to accept new entry. To adjust the language, scroll to the language of choice, highlight and [SAVE] to accept the change. 17 Print All Settings Step 1 After initial setup, it is recommended to print all analyzer settings and keep them for personal records. Action The first step is to run a Self Test. Select [ADVANCED] from Main menu, then [DIAGNOSTICS], and then [SELF TEST]. Figure 2.12 Figure 2.13 Note Prior to running the Self Test, it is recommended to let the analyzer warm-up for 15 minutes and background count must have been accepted. 2 Select [START] button. This function will take about a minute. Figure 2.14 3 Once Self Test is complete, select [PRINT/SEND] tab. Save this printout for personal records. Factory Calibration All sample analysis modes (open tube, cap piercing, and autoloader) are factory calibrated. However, calibration should always be checked upon installation. See Section 8 for more details. 18 2.7 Analyzer Cable, Interface, and Printer Connections Description All connections are located on the rear panel of the instrument. The connections available are as stated below: Figure 2.15 Port Function PS2 Mouse port PS2 Keyboard port Serial COM port VGA port Connects optional mouse to analyzer Connects optional external keyboard to analyzer. Connects hospital data collection system (3.1 protocol) to analyzer. Connects VGA monitor to analyzer – for service purposes only. Connects hospital data collection system (10/100Mb Ethernet for HL7 protocol) to analyzer. Connects USB devices, such as printer and barcode reader to analyzer. (4 ports) Line-out, Line-in and MIC-in (Horizontal, Smart 5.1 supported) - not used. RJ-45 LAN ports USB 2.0 ports Audio jacks Peripheral Device Setup The Quintus Windows® XP® * Embedded recognizes most of the peripherals such as keyboards, mouse, and memory sticks without any additional installation process. *Registered trade mark Step 1 2 3 4 Note Action Shut down the analyzer. Connect the desired peripheral device. Power up the Quintus. After initialization of the system, the peripheral device should be installed automatically. If your device requires any additional installation steps, then service level action is required. Printer Installation The printer required additional installation steps. Please allow an authorized distributor or service technician to perform the installation. · Any Windows® XP® Embedded compatible printer can be installed. · The printer is connected to the rear of the instrument with USB printer cable. (Printer is not manufactured by Boule.) Computer and LIS Setup For setting up a computer link, please see Section 4. 19 2.8 Power Supply Main supply environment Warning The main power supply is located internally and designed to be operated indoors. The power supply is safe for transient voltage as defined in IEC 801-4. Electrical shock hazard. · The instrument must only be connected to a grounded mains supply. Violating this might result in injuries and/or loss of life and/or erroneous parameter results. Handling high If high voltage transients are expected on the main supply, please follow the transient voltage recommendations below. Warning Electrical shock hazard. · Installation of external electrical equipment such as CVT must only be carried out by authorized service engineers. Violating this might result in injuries and/or loss of life and/or erroneous parameter results. In case of Symptom Solution High transient -High background counts A CVT (magnetic stabilizer) should be implemented to keep the voltage above on RBC, PLT or WBC. instrument from being damaged. -Defective instrument. 15% (In general, avoid the use of an UPS.) Guidelines Guidelines are given in the Service Manual, “Installation auxiliary devices” section. Contact your authorized distributor in such a case. Power interruptions In case of an abrupt power loss there will be no damage done to the instrument. Calibration constants and other parameters necessary for operation are protected against main supply loss. Before connecting In order to run the instrument, the frequency and main voltage needs to correspond to user’s power outlet. · Locate the serial number plate on the rear of analyzer and check that the main voltage and frequency corresponds to local main outlet. · If voltage and/or frequency does not correspond, then contact your authorized distributor Connecting Power Cable Insert power cable into the instrument’s main power inlet and connect it to the main power supply. · Only the power cord supplied with the analyzer should be used. Avoid using extension cords. 20 Section 3: General Overview Section Overview Introduction This section contains general information about the instrument and optional accessories. Contents This section contains the following topics: Topic General Instrument Overview System Menu Sample Volume, Throughput, and Parameters See Page 21 22 24 3.1 General Instrument Overview Instrument Overview 3 1 Figure 3.1 6 5 2 4 Figure 3.1 Part Function This is the main user interface of the Quintus. User interactions and data input happen 1. Display using this screen. This is the cover for the main fluidic element like the shear valve, sampling needle, 2. Front Panel syringes, etc. It can be easily opened if any maintenance is necessary. To start the manual measurement you can push the START button in the front panel. The color of the START button identifies the status of the Quintus. The green color 3. Start Button means Quintus is ready to measure. The red color means Quintus is engaged in measurement. The orange color means Quintus is in the stand by state. The needle takes a manual sample from the tube inserted in the sample holder. The 4. Sample Rotor sample rotor turns into the Quintus covering the sample needle from unintended touch. 5. Autoloader Enables consecutive samples to be analyzed automatically. Barcode reader enables user to quickly enter patient, control, and reagent pack 6. Barcode Reader identifications, and utilize the QC program. 21 3.2 Menu Structure Flowchart 3.1 Main Menu Structure New Sample Select Analysis Modes Sample ID ____________ Operator ID ____________ Date ____________ Mode (↑ ↓ ) Keyboard (A,B,C,1,2,3) Clear (Clears all) Shift (Uppercase) Symbols (@,#,Ö,ö,Å,å) Back (Clears last) Back (Main Menu) Start < > Starts Sample Analysis Displays last sample analysis Accept (Background) Next Sample ID Rerun Back Autoloader Main Menu New Sample Autoloader (optional) Advanced Calibration/QC Results Print/Send Main Status Bar > > > > > ¤ ¤ ¤ Full scan Free list Selected samples > > > Info Back > < Advanced Setup Reagents Maintenance Diagnostic Service Back 8 possibilities of Analysis profiles Background Control Human Male Female Toddler Child Baby > > > > > < > > < Autoloader Sample tray chart Measure Mode Sample ID Add Remove Position Sample status Tray status Measure type Analyzing Back Start View list Details (↑ ↓) > ¤ ¤ < > > > Status Bar (Bottom of all pages) Warning bar Reagent status Sample analysis status Time Exit Calibration/QC ¤ ¤ ¤ ¤ > QC Xb Statistics Calibration Back > > > < Results Quality Control Start QC sample > View QC Data > View QC L-J Diagram > View QC Reference > Enter QC Reference > Lot Number list (↑ ↓) Back < Analysis List Scroll function Multi-Select Select all Delete Search Statistics Back Details Select Search Criteria > > > < > Select Day Date/Change Select interval Date/Change Select all Select Sample ID ____________ Select Mode (↑ ↓) Select Sequence interval Change Cancel Run select 22 < > Flowchart 3.2 Advanced Menu Structure 23 3.3 Sample Volume, Throughput, and Parameters Description The Quintus is a fully automated cell counter reporting up to 24 parameters. Sample volume ~100 µl Throughput ≥ 60 samples per hour 24 Parameters See list of parameters below: WBC LYM% LYM# MONO% MONO# GRAN% GRAN# EOS% EOS# BASO% BASO# Leukocyte parameters Total White Blood Cell Count Lymphocytes percentage Lymphocytes (absolute) Monocytes percentage Monocytes (absolute) Granulocytes percentage Granulocytes (absolute) Eosinophil percentage Eosinophil (absolute) Basophil percentage Basophil (absolute) RBC HGB HCT MCV MCH MCHC RDW% RDWa Erythrocyte parameters Total Red Blood Cell Count Hemoglobin Concentration Hematocrit Mean Cell Volume of RBCs Mean Cell Hemoglobin Mean Cell Hemoglobin Concentration Red Blood Cells distribution width percentage Red Blood Cells distribution width (absolute) PLT MPV PDW PCT LPCR Thrombocyte parameters Total Platelet Count Mean Platelet Volume Platelet Distribution Width Platelet Crit Large Platelet Concentration Ratio 24 Section 4: Instrument Setup Section Overview Introduction This section covers the initial configuration needed to customize the instrument settings. Contents This section contains the following topics: Topic Main Menu and Touch Screen Advanced Setup Printer Settings Send Settings Language, Time, Date Settings Miscellaneous Settings Result Column Settings Xb Range Settings Standby Settings Profile Limits Settings See Page 25 27 27 28 29 30 31 32 32 33 4.1 Main Menu and Touch Screen Main Menu The Main menu will be displayed upon initialization. · From this main screen all other menus can be accessed. · The Main menu is divided up into three main sections: 1. Quick links to main functions (upper part) 2. Interactive display area (middle section) 3. Status display (bottom section) 1 2 3 Figure 4.1 25 Quick links This upper section of the display is visible during all operations providing a onetouch entry for the following: · Start a manual or autoloader measurement · Open the measurement database (RESULTS) or Main menu · Initiate printing and/or sending of results Interactive display The middle section is used to display function or menu specific information, results, and all the dialogs that contain relevant information to the active operation mode. · Icons are arranged in a pentagon design and the following sub-menus can be opened (See Section 3.2 for detailed menu structure) : o New Sample o Results o Calibration/QC o Advanced o Autoloader Status display The status display shows the following: · Estimated fullness of the reagent and waste container · Warning messages · The status and progress of the active operation of the analyzer · The actual time · Printer status · Exit Simply press anywhere on the status bar to minimize or maximize it. Using the Touch Screen Important Using an external mouse · The touch screen display used in the Quintus analyzer is selected for reliability, endurance and compatibility with medical, laboratory environment. · The touchable items on the display are designed to be big enough to tap with finger. However in some cases you may find the usage of a tapping tool useful. o the blunt end of a pen or pencil o a plastic ‘stylus’ used with PDA devices · Do not use sharp or heavy objects to operate the touch screen. · Though the surface material is moderately resistive to liquids, avoid touching the screen with wet fingers or allowing liquids to come into contact with the screen. An external (PS2/ USB) mouse can also be used, giving the same functionality as the touch screen. By moving the mouse, navigate the mouse pointer over the desired item. Instead of tapping the touch screen press the LEFT mouse button to activate the function. See Section 2.7 Peripheral Device Setup for further instruction on installation. 26 An external (PS2/ USB) keyboard can also be used giving the same functionality as the virtual keypads on the display. This is especially useful for quick data entry of the Sample ID if barcodes are not being used. See Section 2.7 Peripheral Device Setup for further instruction on installation. Using an external keyboard 4.2 Advanced Setup Description Initial advanced setup of the analyzer, has been factory set to default values. However, other user definable formats may be preferred, details on how to setup these preferences and more detail on how to install and configure external components such as barcode readers, printers, data communication, etc. are provided below. Setup Menu In the SETUP menu you can change following settings: · · · · · · · · PRINTER SETTINGS SEND SETTINGS LANGUAGE, TIME, DATE MISCELLANEOUS COLUMNS (RESULT) XB RANGE SETUP STANDBY SETUP PROFILE LIMITS Figure 4.2 · All changes to settings are made effective by using the [SAVE] function. · To discard the changes and return to the Setup menu select the [BACK] button. Important 4.3 Printer Settings Printer Settings To select options for printing results. Step Action 1 2 3 4 Start by pressing [ADVANCED] from the MENU tab. Press [SETUP] and then [PRINTER SETTINGS] to enter the Printer setup. Printer: Select the printer to use from the printer list using the scroll buttons. Printout format: Select between different layouts for the printout. Copies: Use the scroll buttons to select the number of copies printed when user presses [PRINT/SEND] tab. Color printing: Enable/ disable color printing. (The checkbox is available if the printer driver supports the feature.) Double sided printing: Enable/ disable double sided printing. (The checkbox is available if the printer driver supports the feature.) 5 6 7 27 Step Action Figure 4.3 8 9 10 11 12 Note Automatic print: When selected allows automatic printing with every sample analyzed. (This is independent of Export type setting.) Logo visible: When selected allows logo to be printed on every printout. Items in queue: User can view the number of pending printer jobs Cancel all jobs: Press to cancel the remaining printouts pending in the queue. Print test: Press button to test printer functionality and connectivity To install printer see Section 2.7. 4.4 Send Settings Serial Setup To select options for sending results and data follow instruction below: Step Action 1 2 Start by pressing [ADVANCED] from the MENU tab. Press [SETUP] and then [SEND SETTINGS] to enter the Send setup. 3 Export type: This function allows the user to set the default Export type. This export type will function when the [PRINT/SEND] button is pressed. · Printer · Send to LIS – Enables/ disables the IP based LIS/ HL7 protocol · To text file · To binary file · To raw data Figure 4.4 28 Step 4 5 6 7 8 Action Communication port: Select either COM or Ethernet if using this function. Note: For Communication port activation to function correctly user must have a PC application that can receive and process reports. IP: If applicable, enter the IP address of the LIS/HL7 host. (Available only if the LIS checkbox is selected.) Port: If applicable, enter the port number of the listening port on the LIS/HL7 host. (Available only if the LIS checkbox is selected.) Sending port baud rate: Select either 9600 or 115200 baud to determine the speed of the serial communication to/from the host system if using this function. Note: If the cable is longer than 5 m (15 feet) then select 9600 baud. Receiving LIS command: Select to allow Remote worklist communication to be received from the host system into the New Sample or Autoloader Freelist mode. See Doc. 14154 on website for more information. 4.5 Language, Time, Date Settings Language, Time, Date Setup Step 1 2 3 To select options for setting the date, time and language follow instructions below: Action Start by pressing [ADVANCED] from the MENU tab. Press [SETUP] and then [LANGUAGE, TIME, DATE] to enter setup menu. Select [SET TIME AND DATE] button Figure 4.5 3 4 Adjust the time and date, if necessary, select [OK] to exit screen and [SAVE] to accept new entry. To adjust the language, scroll to the language of choice, highlight and [SAVE] to accept the change. 29 4.6 Miscellaneous Settings Miscellaneous Setup To select options for setting units, de-activation of on screen keyboard, activation of Sarstedt tube for analysis, volume, o follow instructions below: Step 1 Action Start by pressing [ADVANCED] from the MENU tab. Press [SETUP] and then [MISCELLANEOUS] to enter the Miscellaneous setup. Use scroll buttons to scroll to second and third pages of this setup menu. 2 Figure 4.6 Figure 4.7 To change units use scroll bars to select preference: 3 Parameter MCV unit HGB unit Count unit HCT/PCT unit Units fL µm3 g/L cells/ µL g/dL cells/L Absolute % mmol/L 4 Sound volume: Use scroll buttons to change the volume of the audio feedback. · Use the “0%” setting to turn off the audio feedbacks 5 Result record limit: Use the scroll buttons to choose either ALL or LAST MONTH · All – All the previous measurements are visible under RESULTS · Last month - Only results from the last 30 days are visible under RESULTS 6 7 Caution 8 On screen keyboard active: Select this function to enable or disable the touch screen and use an external keyboard for Sample ID entry. Note: Do not disable if there is no external keyboard connected Use only Sarstedt tube: Select this function if using Sarstedt® Monovette® tubes for manual measurements. Note: This is not applicable for the Autoloader, it is able to identify sample tube type prior to analysis. If switching between Sarstedt tubes and other types of sample tubes user must enable/disable this function or damage could occur to the sampling needle. Diagnostic Messages: Select this function to enable or disable the messages associated with Out-of-Range Indicators, see Section 10.1. Note: It is recommended that this function is enabled. 30 Step Action Figure 4.8 Laboratory header: Use this function to enter a laboratory header on the top of the printout. · 7 lines are available for entry, each line can hold up to 42 characters. 4.7 Result Column Settings Setting Result Columns This section allows the user to select which parameter shall be displayed and in which order under the Results tab. Step 1 2 Action Start by pressing [ADVANCED] from the MENU tab. Press [SETUP] and then [COLUMNS (RESULT)] to enter setup menu. Figure 4.9 3 4 Note 5 To add a parameter to the Results list, select the parameter from the right-hand column box and select the [ADD] button. To remove a parameter to the Results list, select the parameter from the left-hand column box and select the [REMOVE] button. To add or remove multiple parameters at once to/from the Results list press the Multi-Select buttons above corresponding column box. · To disable the Multi-Select button simply press the button again. To change the order of parameter in the Results list, select the parameter in the left-hand column box and use the UP and DOWN arrows, below the box, to move the parameter to the desired position in the list. 31 4.8 Xb Range Settings Xb Range Setup Step 1 2 This section allows the user to set the low and high Xb ranges, target value, and action limits. Action Start by pressing [ADVANCED] from the MENU tab. Press [SETUP] and then [XB RANGE SETUP] to enter setup menu. Figure 4.10 3 4 5 To change the Xb low or high limits, select the range box and type in new range. To change the Xb target value, select the target value box and type in new target value. To change the Xb Action limit, select the limit box and type in new limit. 4.9 Standby Settings Standby Setup Step 1 2 This section allows the user to set the standby time, screensaver timeout, and offline cleaning frequency. Action Start by pressing [ADVANCED] from the MENU tab. Press [SETUP] and then [STANDBY SETUP] to enter setup menu. Figure 4.11 3 Standby time: Use scroll buttons to change the how long the analyzer should wait before leaving the ready state and preparing for inactive operation. · Choose between 3, 5, 10, and 15 minutes · Recommended setup time is 15 minutes 32 Step Action Note The Standby time is activated after a background, control, or sample analysis. Screensaver time: Use scroll buttons to change the how long the analyzer should wait before the screensaver function is activated. · Choose between 3, 5, 10, 15, 30, and 60 minutes · Recommended setup time is 15 minutes To activate the display simply touch the screen. Overnight Clean: Use scroll buttons to change how long the analyzer should wait before running the overnight cleaning. · When this function is activated, the software will perform a minor fluidic operation to make sure that there are fresh reagents in measurement critical sections of the tubing system. · Choose between 0, 4, 8, 12, and 24 hours · Recommended setup time is 8 hours 0 hour selection means no cleaning cycle will be performed 4 Note 5 Note 4.10 Profile Limits Settings Profile Limits Setup Indicative normal ranges (profile limits) are provided in this instrument. It is recommended to establish local reference ranges (normal ranges) for your laboratory. (See CLSI standard C28-A2 for guidance on how to establish these ranges and examples of normal ranges in the reference documents listed at the end of this section.) Step 1 2 Action Start by pressing [ADVANCED] from the MENU tab. Press [SETUP] and then [PROFILE LIMITS] to enter setup menu. Figure 4.12 To change the low or high profile limits, select the limits box and type in new limit. Normal Range References 1. Cheng C, Chan J, Cembrowski G, van Assendelft O. Complete Blood Count Reference Interval Diagrams Derived from NHANES III: Stratification by Age, Sex, and Race Laboratory Hematology 10:42-53 2. Nordin G, et al. A multicentre study of reference intervals for haemoglobin, basic blood cell counts and erythrocyte indices in the adult population of the Nordic countries Scand J Clin Lab Invest 2004; 64: 385-398 3. How to Define and Determine Reference Intervals in the Clinical Laboratory; Approved Guideline – Second Edition. CLSI C28-A2 33 Section 5: Reagent Setup Section Overview Introduction This section covers the reagent setup, changing reagents, description of reagents, and reagent consumption. Contents This section contains the following topics: Topic Reagent Description Reagent Consumption Reagent Setup Changing Reagents See Page 34 35 37 39 5.1 Reagent Description Description Important Always use reagents recommended and approved by the manufacturer. The analyzer and the reagents form a system. Each component of this system is carefully selected and designed to meet certain criteria, which can very sensitively indicate and validate system operation. · All reagents are manufactured and provided by Boule Medical AB. · Using non-approved components of this system can cause false indications or incorrect, inaccurate measurements. · In order to operate correctly and accurately the following reagents must be used. Quintus 5-part Diluent Application Appearance Shelf-life Open bottle stability Storage Boule reagent code Color code Quintus 5-part Lyse Application Appearance Shelf-life Open bottle stability Storage Boule reagent code Color code Multiple ultra-filtered, particle free buffered isotonic solution, containing stabilizers, special additives and preservatives. Quantitative and qualitative determination of RBC, WBC, PLT and HGB concentration. Colorless, odorless solution. 24 months 90 days Between +15 °C and +35 °C. (~59-95 °F) 1504291 Green Multiple ultra-filtered, particle free reagent solution, containing lysing detergents, stabilizers, leucoprotective components, special additives and preservatives. Quantitative and qualitative determination of WBC and HGB concentration. Colorless solution, foaming by shaking. 24 months 90 days Between +15 °C and +35 °C. (~59-95 °F) 1504292 Yellow 34 Quintus 5-part Stopper Application Appearance Shelf-life Open bottle stability Storage Boule reagent code Color code Multiple ultra-filtered, particle free reagent solution, containing stabilizers, leucoprotective components, special additives and preservatives. Quantitative determination of WBC, leukocyte four-part differentiation (LYM, MONO, NEU, EOS) and hemoglobin (HGB) concentration. Colorless, odorless solution. 24 months 90 days Between +15 °C and +35 °C. (~59-95 °F) 1504293 Orange Boule Hypochlorite (2%) Cleaner Containing alkaline hypochlorite, special additives and preservatives. Application Capillaries, tubing and chambers, removing blood component precipitates. Slightly yellow liquid with chlorine odor. 24 months 90 days Between +15 °C and +30 °C (~59-86 °F) 1504113 Appearance Shelf-life Open bottle stability Storage Boule reagent code Note The “Hypochlorite Cleaner” is not an online-reagent (not connected to the Quintus with permanent tubing.) This reagent is aspirated from a sample tube or inserted into the Quintus directly for cleaning and maintenance functions. 5.2 Reagent Consumption Description This section describes the reagent consumption for the Quintus depending on a sample per day calculation. Diluent Consumption Approximately 52 ml per analysis cycle. Lyse Consumption Approximately 7 ml per analysis cycle. Stopper Consumption Approximately 1 ml per analysis cycle. Consumption Calculation · The consumption can be approximately calculated depending on the number of samples per day as shown on the graphs below. · The figures, presented in the graphs, assume one background count, one control analysis, and one exit standby are performed per day. · The consumption relation between the Diluent and Lyse is 8:1, based on 25 samples per day. · The consumption relation between the Diluent and Stopper is 34:1, based on 25 samples per day. 35 Diluent Consumption Diluent Consumption 140 120 mL/sample 100 80 60 40 20 0 5 10 15 20 25 50 75 100 125 150 175 200 Sam ple s /Day Figure 5.1 Lyse Consumption Lyse Consumption 18 16 14 mL/sample 12 10 8 6 4 2 0 5 10 15 20 25 50 75 100 125 150 175 200 Sam ple s /Day Figure 5.2 36 5.3 Reagent Setup Description This section describes the functions of the reagent setup menu and how to access reagent statistics. Reagent Input (Enter New Reagents) The Quintus System is interlocked with specified Boule reagents for optimal performance. The reagent containers must be identified by the instrument before analysis of samples can begin. To identify reagents scan in or manually enter the barcodes on the reagent containers. See Section 2.4. View Reagents The analyzer has built-in reagent consumption calculators. The calculated level of each reagent is indicated on the screen. The height of the bar shows the level in the container. These levels are also indicated on the screen in the status area. Step 1 2 Action Start by pressing [ADVANCED] from the Main menu tab and then [REAGENTS] to enter Reagent menu. In this menu you can view the amount of reagent left in each container and the calculated amount of remaining reagents in percent. 3 Figure 5.3 Note The reagent bars in the Reagent menu and the Status bar have both been color-coded to match the reagent inlet label on the rear of the analyzer and the reagent container label, for ease of use. Figure 5.4 37 4 5 The third method of viewing reagent statistics is by pressing [VIEW REAGENTS] from the Reagent Setup Menu. In this screen you can view the following, for the active Lyse, Stopper, and Diluent containers: · Reagent Volume · Lot number · The expiration date of the specific reagent container. · The Open Date, when the reagent container was first used on the system. · The Last Date, when the last time that reagent container was used to run a cycle. It is possible for the operator to inactivate the current reagent box by selecting the reagent and then pressing the [INACTIVATE ] button and then [YES]. Once deactivated the operator must scan in or manually enter another reagent container before analysis of samples can begin. (If reagent level is adequate, an inactive reagent can be re-activated by simply scanning the barcode on the reagent container again.) The interlocked reagent system displays indicator and warning messages to alert the operator when reagents are running low and need to be changed. Reagent Indicators Setting up the The nominal container volume of the waste can be set using the following Waste Container instructions: Step 1 2 3 Action Start by pressing [ADVANCED] from the MENU tab. Press [REAGENTS] and then [CONTAINER SIZES] to enter setup menu. Using the scroll buttons adjust the volumes according to your container size. · If the waste tubing is plumbed directly into a drain set the value to “0”. Figure 5.5 4 Note The waste container can be reset to “0” by selecting [RESET WASTE] button in main Reagent menu. If the waste container is almost full, according to set volume, then the Quintus warns the user to prepare for emptying the waste container. 38 5.4 Changing Reagents Description The interlocked reagent system displays indicator and warning messages to alert the operator when reagents are running low and need to be changed. When this occurs perform the following: Step Action 1 2 Start by pressing [ADVANCED] from the MENU tab. Press [REAGENTS] and then press [ENTER NEW REAGENTS]. Press the text box under the reagent you will scan in (it will highlight in yellow when activated) and then scan in the barcode from the corresponding reagent container. Repeat for all applicable reagents. 3 Figure 5.6 4 5 6 Note 7 Important Press [ENTER NEW REAGENT] to save. Remove the cap and seal on the new reagent container. Transfer the reagent tubing from the used container to the new reagent container. It is important when transferring the reagent tubing that it is kept clean and inserted into the correct reagent container. The analyzer is now ready to resume operation or analyze samples. No priming or fill cycle is necessary when putting on a new reagent container, if indicator and warning messages are followed. A reagent alarm will display when at least one of the reagent containers is running low, empty, or expired. Once alarm is displayed it will continue to display after each sample run until the indicated container is changed. 39 Section 6: Sample Analysis Section Overview Introduction This section covers the sample analysis routine, including how to analyze a sample in the three different modes offered in the Quintus. Contents This section contains the following topics: Topic Preparations before Analysis Startup Sequence Background Count Sample Identification Analyzing the Sample (Open Tube) Analyzing the Sample (Cap Piercing) Analyzing the Sample (Autoloader) Results Sample Memory Search Function See Page 40 41 42 43 44 45 45 51 55 6.1 Preparations before Analysis Sample collection · Human venous blood samples should be collected in an EDTA K3 or EDTA K2 tube in sufficient quantity and be gently mixed immediately after sampling in order to obtain accurate results. Please follow the recommendation of the EDTA tube supplier. Limitations Samples drawn in an open tube or vacuum tube should be analyzed between 15 minutes and 6 hours for most accurate results. Anticoagulant EDTA K3 (Ethylene Diamine Tetracetic Acid, Tri-potassium) liquid and recommendation EDTA K2 (Ethylene Diamine Tetracetic Acid, Di-potassium) spray-dried solution. Recommended by ICSH and CLSI (NCCLS). Sample tube type and size The following 13 x 75mm sample tubes/vials can be used with the Quintus: · Sarstedt Monovette®* · Becton, Dickinson (BD) Vacutainer ®* · Terumo Venosafe®* *Registered trade mark Important · Please note that if using Sarstedt Monovette® sample tubes the bottom of the sample tubes are different because of the syringe. · The sampling depth on the Quintus must be changed if a Sarstedt Monovette® sample tube is in use. See Section 4.6. 40 Sampling volume The Quintus is equipped with a “piercing” needle in order to be able to aspirate samples from closed sample tubes. The aspirating hole is on the side of the needle to prevent debris and dried blood particles to pass into the sampling path. It also means that the Quintus needs at least 1 mL of sample to perform analysis accurately and with precision. Handling of venous blood samples · The blood should be allowed to adapt to the EDTA for 15-20 minutes after sampling. · The sample should be thoroughly and gently mixed before analysis. It is recommended to use a mixer. · The sample should be mixed for 10-15 minutes. A sample not correctly handled may give erroneous results. Important Warning The sample should be kept at room temperature. Excessive cold or heat could cause erroneous results. · As there are no assurances of the absence of HIV, Hepatitis B or C viruses or other infectious agents in blood samples, blood controls, calibrators and waste these products should be handled as potentially biohazardous. · Always wear protective gloves and goggles. Follow local regulations. 6.2 Daily Startup Sequence The following sequence walks the operator through the beginning of the day startup routine for the analyzer. There are 2 simple steps to follow which takes the user through a background and control analysis sequence. This startup sequence is optional and can be bypassed if a different startup routine is desired. Startup Sequence Step 1 2 3 Action Touch display or press Standby switch on the analyzer. Press [NEW SAMPLE] quick link to Startup the analyzer. When complete the background count results are displayed. If the results are acceptable press [ACCEPT]. See Section 6.3. Figure 6.1 41 Step Note 4 5 Action If the background count results have a H (high) indicator press [RERUN] and the background count will be analyzed again. Press the [BACK] button to return to the New Sample menu. Change Mode to [CON/CAL], scan in the barcode on control vial, press [START QC SAMPLE], and then [START]. Figure 6.2 6 Note Figure 6.3 When complete the control results are displayed. If control results are acceptable, then the startup sequence is complete. Press [NEW SAMPLE] to go to the main analysis screen, and follow instructions in the following sections to analyze samples. If control results have a H (high) or L (low) indicator press [START] to analyze same lot of control sample again. 6.3 Background Count Background Check Step 1 2 3 Note The following sequence is performed to check that the background count is low enough to run a sample. It is recommended to run a background check at the beginning of each shift. No sample is required to analyze the background count. Action From the main screen press [NEW SAMPLE]. Under Mode scroll to [BACKGROUND] and press [START]. When complete the background count results are displayed. If the results are acceptable press [ACCEPT]. Background count must be accepted before a control or sample analysis can be performed. Accepted Background values The background count should not be higher than the figures shown below, assuming that at least 3 “backgrounds” are run after a sample. Parameters RBC WBC HGB PLT Values accepted ≤ 0.01 (1012/ L) ≤ 0.1 (109/ L) ≤ 0.2 (g/ dL) ≤ 10 (109/ L) 42 6.4 Sample Identification Description This section describes the different methods of Sample ID input (Identification). ID Input Methods The ID can be entered with the following methods: · Manually (touch screen or external keyboard) · Barcode Character Input · 50 Characters Limitations Step 1 2 3 4 Menu Action From the main screen press [NEW SAMPLE] quick link to open NEW SAMPLE menu. Press numerical keys to enter sample ID or scan in the ID barcode from the sample tube. Use scroll buttons to choose desired mode or profile. · The Quintus has six modes pre-programmed in: Human (general), male, female, toddler, child, baby Press [START] to begin sample aspiration. Figure 6.4 5 Note Operator ID Aspirate sample following selected procedures in sections 6.5 – 6.7. Sample ID entry and profile selection can be performed after sample aspiration has begun, in Open Tube and Cap Piercing modes. The Operator ID is an optional feature which can be entered prior to analyzing a sample or when exiting Standby Mode. To enter an Operator ID press the specified button and enter in numerical or alphabetic ID. The Operator ID will stay the same until Operator ID button is pressed again and changed, or when the analyzer goes into Shutdown Mode. 43 6.5 Analyzing the Sample (Open Tube) Description This section describes how to aspirate and analyze a sample with the “Open Tube” procedure. Starting procedure Refer to Section 6.1 for blood sample preparation and then follow the procedure below: Step Important Action Choose [NEW SAMPLE] quick link to begin sample analysis. 1 Analyzer must be in this menu to aspirate. 2 Enter Sample ID and select Mode. See Section 6.4 for more detail. 3 Remove cap from tube and place well mixed sample in sample rotor. Start the measurement by selecting the START button on the screen 4 or pressing the [START] button on the front panel of the Quintus. After starting the measurement the sample door will be rotated 180° Note (except in Background mode), the sample tube will be inside the Quintus where the aspiration of the sample will occur. · The Quintus will process the sample automatically without any human intervention. Do not hinder the sample rotor or try and remove the sample tube while it is rotating inside the system. · If using a Sarstedt Monovette® tube, see Section 4.6. Sample Aspiration Figure 6.5 Warning The results will be displayed within 60 seconds, on NEW SAMPLE 5 and RESULTS menu. For more information of results refer to Section 6.8. When START button returns to green, operator can begin analysis of 6 next sample. (Chime will also sound when complete.) · As there are no assurances of the absence of HIV, Hepatitis B or C viruses or other infectious agents in blood samples, controls, and calibrators these products should be handled as potentially biohazardous. · Always wear protective gloves and goggles. Follow local regulations. 44 Figure 6.6 Note 7 To re-analyze the same sample again with the same Sample ID press [RERUN] and the same sample will be analyzed again. To analyze a new sample press [RUN NEXT] or [BACK]. 6.6 Analyzing the Sample (Cap Piercing) Description Sample tube description This section describes how to analyze whole blood samples without removing the cap on the sample tube. See Section 6.1 for details. The sampling needle can be damaged if incorrect type of tube is used. Caution Cap Piercing analysis The Quintus uses the same sample needle for Cap Piercing. Simply follow the instruction in Section 6.5, except do not remove the cap from the sample tube. 6.7 Analyzing the Sample (Autoloader) Description This section describes how to analyze whole blood samples using the Autoloader (Automatic sampling device). Sample tube description Only closed sample tubes can be analyzed using the Autoloader. · The QC samples and open tube analyses must be processed in Open Tube mode. See Section 6.1 and 6.5 for details. 45 Cap detection The Autoloader has a built-in cap and tube type detector. · This detector provides an extra check that no open tube vial is accidentally placed in the Autoloader racks. · It is also able to determine the difference between Sarstedt and other vacutainer tubes. · If the wrong type of tube or a tube without a cap is detected, the Autoloader will automatically stop, place the racks back in home position, and give a warning message to the user. Built-in mixing device and barcode reader The Autoloader has a built-in mixing and barcode reading device · This mixer rotates and inverts the sample tube, similar to hand mixing · It also is able to read the barcode on the tube automatically, no manual entry is needed. Autoloader Modes There are three different modes that can be used for Autoloader measurements: · FULL SCAN mode: o The Autoloader will scan the whole sample tray o The same sample mode (Human (general), Male, Female, Baby, Toddler, Child) will be used for all the samples o The Sample ID is generated from the barcode (if available) · FREE LIST mode: o The samples are defined on a list o The following parameters can be defined per sample: § Sample ID § Sample mode o The samples should be placed in the same order onto the sample tray as the samples defined on the list. The gaps (empty sample positions) will be skipped on the sample tray · SELECTED SAMPLES mode: o For each position on the sample tray a sample can be connected o The defined samples will be processed only: § The additional samples will be skipped (not analyzed) § The missing samples will be marked o The following parameters can be defined per sample: § Sample ID § Sample mode Figure 6.7 46 Autoloader Rack The samples are scanned/ processed in the following order: Order · Order of the racks: ‘A’ → J o Rack ‘A’ is the rack at the front of the Quintus o Rack ‘J’ is the rack at the back side of the Quintus · Order of samples inside the rack from sample ‘1’ to sample ‘10’ o Sample ‘1’ is the sample closest to the Quintus o Sample ‘10’ is the sample at the rounded edge of the cover · A1 → A2 → → A9 → A10 → B1 → → B10 → C1 → …→ J10 Starting procedure Step 1 2 3 Refer to Section 6.1 for blood sample preparation and then follow the procedure below: Action Follow Daily Startup Sequence before using the Autoloader. See Section 6.2. Select [AUTOLOADER] from Main menu. Select [INFO] and then [RESET]. This function will reset the Autoloader to its home position. Select [OK] to exit back to Autoloader menu Figure 6.8 4 To analyze samples select which Autoloader mode works best for your laboratory. See details for each mode in the following sections. Full Scan Mode Step 1 This mode is recommended for barcoded samples using only one measurement mode and large batches. Action Open the cover to the Autoloader, place the samples in the racks or place loaded racks into tray. Figure 6.9 47 Step 2 Action Close the cover and select [FULL SCAN] button and then select Measure mode by using the scroll buttons. This mode will be used for all samples. Figure 6.10 3 Note 4 Press [START] button. It is recommended to place barcode labels on sample tubes. Samples without labels can be analyzed, however the Autoloader will assign a Sample ID to the sample based on it’s position in the sample tray and then will prompt user to enter ID after sample is analyzed. After starting the automated measurement in FULL SCAN mode: · The Autoloader will scan all the sample positions on the tray. If there is no rack then the whole row will be skipped. · If the sample can be processed (tube type identified, cap detected) then the Autoloader mixes the sample and reads the barcode. · The Quintus aspirates the sample and performs the measurement. · The progress can be followed/ monitored in [VIEW TRAY] menu. The sample currently being analyzed in highlighted around the edges in green. o By pressing on the specific sample positions, the user can see that status of that sample displayed on the left hand-side of the screen · When a sample is complete the color bar will change from yellow to green and then sample results can be viewed. (Chime will also sound after each sample is complete.) Figure 6.11 48 Step Action Figure 6.12 Warning To view sample details go to either: · [VIEW LIST] and select sample and then [DETAILS] or; 5 · [VIEW TRAY] and select specific sample position and then [DETAILS] · [RESULTS] quick link, select specific sample and then [DETAILS] Note · If color bar above the rack number is red, then a sampling error occurred. If the barcode below the rack number is red, then the barcode was not able to be detected and Sample ID needs to be entered once analysis is finished: · Select missing sample 6 · Enter new sample ID in Sample ID text box and press [ADD] · After all missing sample IDs are added press [SAVE ID] to save the assigned ID. DO NOT open the Autoloader cover after the [START] button has been pressed. All sampling will stop immediately and the Autoloader will need to be reset. To add more samples to an already initiated FULL SCAN mode measurement perform the following: · Select the [STOP] button · Wait until the current sample being measured is complete · Insert the new samples: o Open the cover of the Autoloader 7 o Place the new samples behind the last measured sample o Close the Autoloader cover · Select the [START] button The Quintus keeps track of the last analyzed sample on the sample tray of the Autoloader. After pressing [START] the Quintus instructs the Autoloader to go to the last processed position and continue the scanning from there. Free List Mode This mode is recommended for smaller batches, with or without barcoding, and where specific Measurement modes need to be assigned. Step 1 2 3 4 5 Note Action Select [FREE LIST] button. Select Measure mode by using the scroll buttons. Select Sample ID box and enter or scan in Sample ID. Press [ADD] to add the sample to the list. Repeat steps 2-4 until list is complete To remove a sample from the list, highlight sample, and press [REMOVE]. 49 Step Action Figure 6.13 6 7 Note 8 Open the cover to the Autoloader, place the samples in the racks or place loaded racks into tray, close the cover. Press the [START] button. · The free list does not determine the exact position of the sample, just the position compared to the other samples. · It is not possible to add more samples to the batch in free list mode after starting the automated measurement. · If the pre-defined barcode and the detected barcode do not match, then the barcode part of the sample icon changes to red on the TRAY VIEW. See Steps 4-5 in Full Scan menu for details on analysis and viewing results Selected Samples This mode is most often used for re-running specific samples in an already Mode measured tray. The Quintus will only look for the defined samples in this mode. Step 1 2 3 4 5 Action Select [SELECTED SAMPLES] button. Select tray position in where this sample is located. Select Measure mode by using the scroll buttons. Select Sample ID box and enter or scan in Sample ID. Save defined measure mode and sample ID by pressing [ADD]. Figure 6.14 50 Step 6 Note 7 8 Note 9 Emergency Sample Analysis Step 1 2 3 4 5 Note Action Repeat steps 2-5 until list is complete To remove a sample from the list, highlight sample, and press [REMOVE]. Open the cover to the Autoloader, place the samples in the racks or place loaded racks into tray, close the cover. Press the [START] button. · If a sample is defined, but no found on the tray, then the sample position will marked as problematic. · It is not possible to add more samples to the batch in free list mode after starting the automated measurement. See Steps 4-5 in Full Scan menu for details on analysis and viewing results Emergency (STAT) samples can be analyzed after the Autoloader has been started. Action Select the [STOP] button and wait until the current sample being measured is complete. Place the urgent sample into the sample rotor, the same as you would for an normal Open or Closed tube measurement (See Section 6.5) As soon as the current Autoloader measurement is finished, select the [NEW SAMPLE] quick link, enter in Sample ID, and press [START]. When urgent sample analysis is complete, return to the Autoloader menu by selecting [AUTOLOADER] quick link. Restart the measurement selecting the [START] button again. The Quintus will continue the automated measurement where from it was interrupted 6.8 Results Description This section describes the information that can be obtained from the sample analysis results. Detailed result screen The result screen of the Quintus is divided into four areas: 1. Sample information 2. Parameters 3. Histograms and scatter diagrams 4. Information and Warning messages To view the detailed results for a sample, select the sample under the RESULTS menu and then press the [DETAILS] button. The [NEW SAMPLE] quick link can be used to quickly see the last sample analyzed. 51 1 2 3 4 Figure 6.15 Step 1 2 3 Note 4 Action Sample Information - This section of the detailed results screen displays the following information: · Sample ID · Date and Time of when the sample was analyzed · Operator ID · Measurement Mode Parameters - This section of the screen displays: · Result values from current analysis · Units · Normal (Profile) ranges along with colored range bar o Red bar - Results Out-of-Range o Green bar- Results within range · Out-of-range or Error warning - See Section 10 for further details Histograms and scatter diagrams - This section of the screen displays: · 4-part differential scatter diagram · Basophil scatter diagram · RBC and PLT histogram · Magnified PLT historgram The histograms and the scatter diagrams are active areas – you can click on them and get magnified images of the actual drawings. Information and Warning messages - See Section 10 for further details · Press on the question mark, to see more detailed information about the message 52 Scatter diagrams and Histograms Scattergrams and histograms can be enlarged by pressing on smaller image. Figure 6.16 Scatter diagrams Quintus displays the results of the optical measurements in a scatter diagram representation. · Scatter diagrams represent data in a two-dimensional plane. · There are two scatter diagrams in the patient report: the 4-DIFF and the BASO. 4-part Differential These scatter diagrams displays cells identified after the first selective lysing scatter diagrams process. Due to the measurement technology, cells are classified based on their optically detected properties: low and high angle scattered light intensity. The optical detector can measure intensity of the light scattered of diffracted from or through each cell. One portion of this light is proportional to size of the cell, the other value is proportional to the complexity of the internal structures in the cell. Due to the fact that each cell in a population acts alike, they can be easily grouped based on the values acquired during the optical analysis. Therefore these similar cells can be grouped, and identified. Different colors help identifying various populations of blood cells. Population (4-diff diagram) Color on scatter diagram Artifact Lymphocytes Monocytes Neutrophil granulocytes Eosinophil granulocytes BLACK BLUE GREEN MAGENTA ORANGE Figure 6.17 53 Population (Basophil diagram) Color on scatter diagram WBC without Basophil Basophil granulocytes BLUE MAGENTA Figure 6.18 Histograms Impedance based measurements are represented on histograms. These diagrams show the number of cells against cell size. · There are two histograms: RBC and PLT. · Discriminators (thresholds) are displayed with red color. · The PLT histogram is the magnified section of the left-hand side of the RBC curve. Figure 6.20 Figure 6.19 54 6.9 Searching and Sending Results The following procedures explain how to search for previous sample analyses and statistics, and print, send, and delete samples. Searching for Results Step 1 2 3 Action Choose [RESULTS] from Main menu. · Each row represents a sample measurement. · Each column represent a parameter To search through the parameters use the LEFT and RIGHT scroll buttons or the scroll bar. To search for a specific samples use the scroll buttons, the scroll bar, or the [SEARCH] function. · The UP and DOWN scroll buttons will allow user to search line by line · The scroll bar can be used to scroll through many pages of samples quickly · To select more than one sample at a time, then please turn on the multi-select mode by activating the MULTI SELECT checkbox. · To select all samples activate the SELECT ALL checkbox. Figure 6.21 4 5 6 7 To search for a group of samples press [SEARCH]. In this menu samples can be selected by: · Select day: select measurement which were made on a given day · Select interval: select measurement which were made between two given dates · Select all: selects all sample analyzed in the database · Select Sample ID: selects a specific Sample ID number · Select Mode: selects all samples in a specific mode · Select Sequence number: selects measurements within a defined sequence number range Select checkbox to activate search criteria. Enter or change search criteria. Select the [RUN SELECT] button to start the selection process. Only those samples selected will be seen in the results screen. 55 Step Action Figure 6.21 Note 3 · To return to previous selection criteria either press [SEARCH], then [SELECT ALL], and then [RUN SELECT] or analyze a new sample. · Press [CANCEL] to exit Search function. To view sample statistics (CV%), select sample or group of samples to view, and press [STATISTICS]. Figure 6.22 4 5 To print selected sample or sample statistics press the [PRINT/SEND] quick link · The results can be printed individually or in a table format To delete selected sample or group of samples press [DELETE]. The instrument will display a prompt to enter an authorization code to verify deletions, press [555] and then [OK]. Figure 6.23 56 Sending results This section contains instructions on how to export data to: · Text files · LIS Export Text files Step 1 2 3 Action Start by pressing [ADVANCED] from the MENU tab. Press [SETUP] and then [SEND SETTINGS] to enter the Send setup. Change the Export Type to [TO TEXT FILE] and press [SAVE]. See Section 4.4. Figure 6.24 4 5 6 7 Connect the USB storage device (e.g. memory stick) to the Quintus. Select [RESULTS] quick link and choose samples using the search methods described in section above “Searching for Results”. To send selected sample or sample statistics press the [PRINT/SEND] quick link. Select the desired target folder and press [OK] to send. Figure 6.25 Note The file format is described in the Appendix of this manual. 57 Export to LIS Step 1 2 3 There are two main possibilities to upload the measurement data to a host system for further processing: · Use the “3.1 protocol” over a serial port · Use the LIS / HL7 (v2.5) over the IP stack. Action Start by pressing [ADVANCED] from the MENU tab. Press [SETUP] and then [SEND SETTINGS] to enter the Send setup. Change the Export Type to [SEND TO LIS] and press [SAVE]. See Section 4.4. Figure 6.26 4 Note 5 For the 3.1 Protocol based connection: · Install a “3.1 protocol” compatible software on your hosts computer · Build up a serial link (null modem, modem eliminator) between the Quintus and the host system. On the Quintus use the COM1 port on the back side of the Quintus. · Configure the serial connection: o Set Communication port to [COM 1] o Set Sending Baud rate to either [9600] or [115200]. (If connection cable is longer than 5m (15 inches) choose 9600. o On the host computer start up the desired software and: § Select the same speed § Select the serial port where the cable is connected · Send the selected records from Quintus to the host computer o Select [RESULTS] quick link and choose samples using the search methods described in section above “Searching for Results”. o To send selected sample or sample statistics press the [PRINT/SEND] quick link. To use an application other than 3.1 Protocol, contact your sales or service representative. For the LIS/HL7 based connection: · Configure the IP stack on the Quintus: o Contact the local IT administrator and collect information about the local network and the desired IP settings of the Quintus: § DHCP § Fixed IP (IP, Net-mask and Default router (if necessary)) o Ask sales or service representative to configure the local IP stack on the Quintus. · Configure the LIS properties in SEND menu: o Activate Receiving LIS Command by selecting the checkbox o Enter the IP address of the host computer o Enter the listener port of the host computer · Send the selected records from Quintus to the host computer using same procedure as that for the 3.1 Protocol. 58 Section 7: Quality Control (QC) and Blood Control Memory Section Overview Introduction The Quintus is equipped with an advanced QC program which allows the user to scan in QC Assay Values and control material, along with a QC memory capable of displaying and printing Xb and Levey Jennings plots. Contents This section contains the following topics: Topic Quality Control (QC) Levey-Jennings Plots Initialization and Use of Xb Function See Page 59 62 63 7.1 Quality Control (QC) Introduction This section describes the procedures to be performed for running control samples. QC Menu and Assay Value Input Follow the instruction below to access the QC menu and to enter Control/Calibrator Assay Values from the Assay sheet. Step 1 2 Action Start by pressing [ADVANCED] from the MENU tab. Press [CALIBRATION/QC] and then [QC] to enter QC setup. Figure 7.1 59 Step 3 Action Press [ENTER QC REFERENCE] and highlight the text box under Barcode 1. Figure 7.2 4 5 6 Note Refer to the Assay sheet for instructions on how to enter Assay Values. (These pages are delivered with authorized Boule controls). Select [OK] to save values. Select [BACK] and new lot number can now be seen on the main QC menu Assay values only need to be scanned in once per lot, they are stored in the Quintus memory once entered. Control Analysis It is recommended that the performance of the Quintus system is checked daily with certified blood controls authorized by Boule. Important Warning Step 1 2 3 4 Note · Handle and prepare controls in accordance to control package insert. · Never use an open vial longer than recommended by the manufacturer or subject any vial to excessive heat or agitation. · As there are no assurances of the absence of HIV, Hepatitis B or C viruses or other infectious agents in blood samples, controls, and calibrators these products should be handled as potentially biohazardous. · Always wear protective gloves and goggles. Follow local regulations. Action Choose [NEW SAMPLE] quick link to begin control analysis. Change Mode to [CON/CAL]. Using installed external barcode reader, scan the Control ID from the blood control vial label. Select [START QC SAMPLE], insert the well mixed blood control vial into sample rotor, and then press [START]. The Control lot can also be selected from the main QC menu in the right-hand column if barcode is damaged. 60 Step Action Figure 7.3 6 Note 7 Figure 7.4 When complete the control results are displayed. The Quintus identifies the QC lot and match the results with the previously defined control assay values. If control sample results have a H (high) or L (low) indicator press [START] to analyze same lot of control sample again. The Result screens, search, print, and send functions for QC samples are similar to patient samples. Search Function Each blood control type can be found by control lot number, date or sequence number. Step 1 2 3 4 Action The quickest way to for searching for a particular control or calibrator lot number is to select the desired lot number from the main QC menu in the right-hand column and then press [VIEW QC DATA]. For a more advanced search select [VIEW QC DATA] and then [SEARCH]. Select one of the following search criteria: Day, Date interval, All, Lot ID, and Sequence numbers. Select checkbox to activate search criteria and enter or change the search criteria Select the [RUN SELECT] button to start the selection process. Only those samples selected will be seen in the results screen. Figure 7.5 Note 5 · To return to previous selection criteria either press [SEARCH], then [SELECT ALL], and then [RUN SELECT] or analyze a new sample. · Press [CANCEL] to exit Search function. To print selected sample press the [PRINT/SEND] quick link · The results can be printed individually or in a table format 61 A monthly QC report can be printed out in a table format per lot of control. To print a Monthly QC summary report : Monthly QC Report Step 1 2 3 4 5 6 Action Under main QC menu select the desired Control lot number. Select [VIEW QC DATA] and then [SEARCH]. Activate SELECT INTERVAL and change the dates to the corresponding month. Press [RUN SELECT] to save the entry. Activate the SELECT ALL checkbox. Select [PRINT/SEND] quick link, choose [TABLE FORMAT] and then [OK]. Figure 7.6 7.2 Levey-Jennings Plots Procedure instruction This section describes selecting, viewing, and printing Levey-Jennings Plots. L-J Plots Levey-Jennings (L-J) plots are used to monitor the long term stability of the instrument using Boule blood controls. Blood controls To be able to use L-J plots, the Control/Calibrator Assay Values for the blood controls must be scanned with the installed barcode reader or manually entered in. Follow direction on Assay Sheet to scan in assay values. Displaying and To display and print the L-J plots, follow the instructions below: printing L-J Plots Step 1 2 3 Action Enter the QC menu and select the desired lot number from the main QC menu in the right-hand column. Select [VIEW QC L-J DIAGRAMS] to display the Levey - Jennings plots. Use the scroll buttons to view the different parameters, there are 4 pages. 62 Step Action Figure 7.7 Note 4 · The mean, standard deviation (SD) and coefficients of variation (CV) are calculated based on the QC analyses. · The dotted lines delineate acceptable ranges on Levey-Jennings plots. · Image 7.6, above, is constructed from several samples and will not be shown as above until a sufficient amount of samples have been analyzed. Print all diagrams by choosing [PRINT/SEND]. In case a control shows a system information indicator, the parameter values of such control will not be included in the L-J plots. Note 7.3 Initialization and Use of Xb Function The Xb function in the Quintus follows strictly the Bull algorithm for the parameters MCV, MCH and MCHC. These parameters should not drift as a function of time within a large patient population. The recommended range setting is ± 3% from the expected mean value of these parameters. Description Step 1 2 3 4 5 6 Action Start by pressing [ADVANCED] from the MENU tab. Press [CALIBRATION/QC] and then [Xb STATISTICS] to view plots. Print all diagrams by choosing [PRINT/SEND]. Choose [VIEW DATA] to view data selection. By default all sample data is selected. To exclude samples from the Xb data plots highlight sample to be removed and select [EXCLUDE]. To view excluded items select [VIEW EXCLUDED]. In this menu the user can also include the sample back into the plots by selecting [UNDO EXCLUDE]. 63 Step Action The image below is constructed from several samples and will not be shown as below until a sufficient amount of samples have been analyzed. Figure 7.8 7 Reference Figure 7.9 To change ranges on Xb Diagrams see Section 4.8 Bull BS, Hay KL. The blood count, its quality control and related methods: X-bar calibration and control of the multichannel hematology analysers. In: Clangoring I. editor. Laboratory Hematology: An account of Laboratory Techniques. Edinburgh. 64 Section 8: Calibration Section Overview Introduction This section describes the step-by-step procedure for calibration of the Quintus. The instrument has been calibrated by Boule prior to shipment. Good laboratory practice, however, requires regular checks and calibration of the measured parameters. It is recommended to calibrate the instrument when needed. Contents This section contains the following topics: Topic Preparations before calibration Calibration See Page 65 66 8.1 Preparations before calibration Before Calibration Important Warning · It is recommended that the performance of the Quintus system is checked daily with certified blood controls authorized by Boule. · Analyze control blood once in the open tube mode and compare results with the assigned values prior to calibration. · Verify that nothing is erratic with the control blood, the reagents, or the instrument before calibrating instrument. · Verify that instrument maintenance/cleaning is current. (See Sections 9.1 – 9.3) · Prior to calibration print Calibration Log. Select [CALIBRATION/QC] from Main menu, then [CALIBRATION], then [VIEW CALIBRATIONS], select latest calibration, and then [PRINT/SEND]. · The user should be thoroughly familiar with the analyzer system and the calibration procedure before performing calibration. · Refer to the Calibrator Product Insert for complete instructions for handling and use of blood calibration materials. · Never use an open vial longer than recommended by the manufacturer or subject any vial to excessive heat or agitation. · As there are no assurances of the absence of HIV, Hepatitis B or C viruses or other infectious agents in blood samples, controls, and calibrators these products should be handled as potentially biohazardous. · Always wear protective gloves and goggles. Follow local regulations. 65 8.2 Calibration Input Calibrator Follow the instruction in Section 7.1 Quality Control to access the QC menu Assay Values and to enter Control/Calibrator Assay Values from the Assay sheet. Whole Blood Calibration The following instructions calibrate Open Tube, Cap Piercing, and Autoloader modes. Follow the instructions below to calibrate: Step 1 2 3 Action Follow directions on Assay Sheet to scan in calibrator assay values. Select [CALIBRATION/QC] from Main menu and then [CALIBRATION]. Authorized operators can update or change calibration factors only by entering the Authorization Code [1234]. Figure 8.1 4 5 Note Select Calibration Mode: Five measures, Three measures, or Manual. Select Calibration Type: Calibrator or Human · It is recommended that five calibration analyses be performed in consecutive order through the open tube mode. (e.g. calibration process will be aborted if in the middle of calibration a patient sample analysis is performed) · The Quintus uses a different method to process QC samples than processing human samples, it is recommended to use Calibrator. Figure 8.2 6 Select [NEXT] to continue. 66 Step Action 7 Choose which Calibrator to use for calibration by using scroll buttons and then [NEXT] to continue. · The range of the target values for the Calibrator are linked to the pre-entered Assay sheet values. · If [HUMAN] was selected it will skip this screen and go the next one. Figure 8.3 8 9 Select [START] to begin calibration. After each measurement you have to accept the results by selecting [ACCEPT] or rerun that measurement by selecting [RESAMPLE]. (For a 5 sample calibration you need 5 accepted measurements.) Figure 8.4 Only press [ABORT] to exit calibration. This function will cancel all runs and take Note you back to the Main menu. After 5 measurements have been accepted the Quintus will display the following: · Target value · Mean – If outside of the calibrator normal range, this box will be highlighted red. · CV% - If outside of acceptable CV% value, these values will be highlighted yellow. Parameter CV% RBC £ 2.2 10 MCV £ 1.8 PLT £ 5.8 HGB £ 1.8 WBC £ 4.2 MPV £ 4.0 RDW% £ 4.0 67 Action Step 11 If the Mean or CV% are outside of the limits operator will be unable to perform calibration. To view the sample analyses select [VIEW SAMPLES]. Figure 8.5 12 13 To delete samples select which sample you would like to delete and select [DELETE] button. · When a sample is deleted it will ask you if you would like to run another sample or abort the calibration. o [RERUN] will rerun the sample o [ABORT] will cancel the entire calibration o [BACK] will return you to the previous menu When Mean and CV% is acceptable, select which parameters to calibrate by selecting the Use to Calibrate checkbox, and then select [NEXT]. Figure 8.6 14 · If the required number of measurements are completed and accepted, then the Quintus calculates and displays the new factors. · The currently valid factors and the CV of the measurements are also displayed. · You can review the new factors and make them effective by selecting [ACCEPT] or discard the changes by selecting [DISCARD]. Note It is recommended to run controls after calibration to verify that all parameters have been calibrated correctly. See Section 7.1 to perform QC. 68 Action Step Figure 8.7 Manual Calibration When you selected MANUAL for calibration mode, blood type and target value entry are disabled. The [NEXT] button takes you to the manual factor entry screen. · Values displayed in parentheses are actual calibration factors. To modify a value, tap the box of the value. · Calibration factors for each parameter can range from 0.80 to 1.20. · Values outside this range result in an error message. · To save factors, select [ACCEPT]. 69 Section 9: Cleaning, Maintenance & Transport Section Overview Introduction This section contains information that is crucial for maintaining, transporting and storing the Quintus. Contents This section contains the following topics. Topic Daily Cleaning Shear Valve Cleaning Cleaning, As Needed Instrument Maintenance Re-location of instrument (within the laboratory) Short Term Transport (<12h) Re-packaging and Long Term Transport Permanent Shut-Down and Storage Disposal Information See Page 70 71 74 76 76 76 77 78 78 9.1 Daily Cleaning The majority of the instruments cleaning procedures are automated to keep the user maintenance to an absolute minimum. Description Always use gloves when in contact with potentially biohazardous materials or parts of the instrument that might be contaminated with blood. Warning Daily Cleaning Procedure Step 1 Note 2 Note 3 The Daily Cleaning takes about five minutes and should be performed at the end of the day, the instructions are as follows: Action Select [EXIT] from Main menu and then [SHUTDOWN] or [OVERNIGHT CLEAN]. Instructions will be given to place Cleaner solution into sample rotor. It is recommended to use Overnight Clean for this cleaning function. See Section 4.9 for setup. Remove cap from vial with Boule Hypochlorite Cleaner, place in the sample rotor and then press [OK]. Even though the Quintus can pierce the cap of a sampling tube, the rubber caps are not designed for multiple punctures. Therefore, it is recommended to remove the cap of the vial with the cleaning solution, to prevent the rubber from hardening and eliminate any small rubber particles which could clog the aspiration needle. Cleaning process takes a few minutes, once complete remove Cleaner vial, recap and store until next use. 70 9.2 Shear Valve Cleaning Any salt build-up on the inner surface of the shear-valve may cause malfunction during operation. To avoid this problem, it is recommended to clean the shear valve after every 1500 samples or every month. Description Always use gloves when in contact with potentially biohazardous materials or parts of the instrument that might be contaminated with blood. Warning This procedure takes approximately 5-10 minutes, and the following materials are needed: · Distilled water · Gloves · Gauze pads or other soft, lint-free cloth Cleaning procedure Step 1 Action Select [ADVANCED] from Main menu and then [MAINTENANCE]. Figure 9.1 Select [SHEAR VALVE CLEAN] checkbox. The Quintus asks for confirmation 2 3 to start the procedure. Confirm by pressing [OK] and the procedure empties the shear valve and the connecting tubes. As the preparations completed the Quintus displays the instructions on how to proceed. · Do not press the [OK] until the shear valve is assembled again. 4 Open the front cover, and secure it with the latch. · Make sure that nothing is placed on the top, or in front of the analyzer. Grab the lower sides of the front panel, gently pushing the sides. Pull the lower part towards you, and lift it up. · Upon opening, a lever becomes visible. Make sure to tilt the front panel upwards so that you can push the lever into the secure position. 71 Step Action Figure 9.2 5 Unscrew the Axis screw, by turning it counter-clockwise, and remove by gently but firmly pulling it upward from shear valve. Clean Axis screw with water and wipe it dry. 6 Remove the upper disk from the shear valve by gently pulling it forward and slightly upward. The two disks will have some surface tension from the remaining liquid in the shear valve. Avoid hitting optical sensors located on the right side of the shear valve holding plate. Figure 9.3 Figure 9.4 Figure 9.5 7 Figure 9.6 Wipe any possible salt crystals off the upper and lower discs with a wet, lint-free cloth. Clean the housing/ mounting of the shear valve paying special attention to cleaning the aligning surfaces. 72 Step Note Action Do not use any sharp/ metal / hard objects to clean the shear valve, as they can scratch the surface of the shear valve. Figure 9.7 8 9 10 11 12 Figure 9.8 After cleaning the shear valve, the housing and surrounding area, put the disks together. Put the axis screw through the upper and lower disk. Gently press and rotate the screw until the lip of the screw is flush with the top of the upper disk and tighten clockwise until the axis screw is hand-tight. Gently lower the front panel. When it reaches its lowest position, gently push on the front side to click the lock levers into place. Select [OK] and the Quintus will check the movement and end positions of the shear valve. Go to [NEW SAMPLE] and run a few backgrounds to clear any remaining salt crystals. If the results are acceptable press [ACCEPT] and analyzer is ready to analyze a sample. 9.3 Cleaning, As Needed Description This section describes the cleaning procedure to be used to secure the correct function of the instrument over time. The cleaning time internal is dependent on the instrument usage and handling. · Less than 50 samples/day = every three months · More than 50 samples/day = every month Touch Screen Cleaning When necessary, gently clean the display with a soft cloth, slightly moistened with water and a mild soap. Dry carefully. Wash Head Cleaning The washing head cleans the outer surface of the aspirating tip with diluent. Any salt build-up on the lower surface may cause malfunction during operation. The wash head must be removed from the needle assembly for correct cleaning. This procedure takes approximately 5-10 minutes, and the following materials are needed: · Distilled water · Gloves · Gauze pads, soft, lint-free cloth or cotton swab 73 Step 1 2 3 Action Open the front cover, and secure it with the latch. The right-hand side panel of the analyzer must be removed to access the wash head. Loosen the 2+2 screws on the front and rear of the side panel. The panel can be gently pulled up and off the analyzer. The wash head should be “twisted off” from the needle, and pulled off downwards. Use a soft cloth or cotton swab dampened with water to clean the bottom of the wash head. The sampling needle is sharp, and can cause injury. Be careful when removing and replacing the wash head. Figure 9.14 4 5 6 Figure 9.15 Replace the wash head back by pushing the wash head onto the needle and lock it back into place by twisting it onto the holding rods. Replace the side cover and close the front panel. Go to [NEW SAMPLE] and run a few backgrounds to clear any remaining salt crystals. If the results are acceptable press [ACCEPT] and analyzer is ready to analyze a sample. High Background If the background measurement result is too high during a background Cleaning analysis, despite regular cleaning, use the built-in cleaning process to clean the system. This process can take up to 30 minutes. Step 1 2 Action Select [ADVANCED] from Main menu and then [MAINTENANCE]. Follow instruction for Daily Cleaning procedure in Section 9.1. 3 Go to [NEW SAMPLE] and run a few backgrounds to verify background is acceptable. If acceptable choose [ACCEPT] and analyzer is ready to analyze a sample. 4 If the background is still too high, return to [MAINTENANCE] and select [INTERNAL DILUENT RESERVOIR]. 5 6 7 Instructions will be given to place a full vial of Cleaner solution into sample rotor. Remove cap from vial with Boule Hypochlorite Cleaner, place in the sample rotor and then press [OK]. Once complete, return to Step 3 and re-analyze background. 5-6 backgrounds may need to be analyzed to complete clear out hypochlorite from the system. 74 9.4 Instrument Maintenance Description This section describes the maintenance that is required to maintain and increase the life of the instrument. Refer to local distributor for warranty requirements. Maintenance The maintenance should be performed at the following intervals by local distributor or authorized service technician: · 6 months or 20,000 samples 9.5 Re-location of instrument (within the laboratory) Description This section describes the procedure performed to move the instrument over very short distances. (From table to table). Before the relocation Place the instrument in Shutdown mode using [EXIT] button and then turn the main power switch to OFF. (This is the small switch near the power cord.) Step 1 2 3 Re-location Action Do not detach the reagent or waste tubing. Remove the tubing with caps from the reagent containers and place the tubing on top of the instrument when moving. Remove the waste tubes from waste container or drain, but do not detach tubes from analyzer. Disconnect all electrical connections. See Section 2.1 for lifting and placing the analyzer in the new location. After re-location Step 1 2 3 Action Place the waste tubes in waste container or drain. Reconnect the electrical connections. Insert the reagent tubing with caps back into the reagent containers. 9.6 Short Term Transport (<12h) Description This section describes the procedure performed before transporting the instrument over short distances. This procedure only describes the preparations performed before transporting the instrument for less than 12 hours. Short Term Transport · Follow direction in Section 9.5 except disconnect the reagent and waste tubing from the analyzer. · Package all components carefully for transport. · The instrument should be transported in temperature conditions between 5 to 30 ºC (41 to 86 ºF) · Humidity should be less than 80%. 75 9.7 Re-packaging and Long Term Transport (>12h) Description This section describes the procedure when transporting or shutting down the instrument for a longer period of time (>12 hours). Required tools: · · Important Prepare for shipment tube set Distilled water (or RO–water) It is very important to follow the below instructions for preparing the analyzer for long term transport or re-packaging, to avoid erroneous results upon reinstallation. Long term Shut-Down Step 1 2 3 4 5 6 7 8 9 Guidelines for transport Action Press [EXIT] button from MENU tab and then [SHIPMENT]. The analyzer will guide you through the Prepare for shipment process step by step. This process takes about 30 minutes. (Each step will take about 10 minutes.) · The first instructions will be to disconnect the reagent tubing from the back, but not the waste tubing. Then the system will drain the liquid system. · The second instructions will be to connect distilled water to the reagent inlets. Use the special reagent tubing with three connectors for this process. · The system will perform priming and full rinsing of the tubing system. Do not turn the analyzer off during this process. · The third instructions will be to disconnect the reagents from the back, except the waste. The system will drain all liquids from the analyzer. When shipment procedure is complete, the system will ask the operator to switch off the analyzer. Press [OK] and wait for the analyzer to exit and perform the shutdown procedure. Switch off power and then unplug analyzer. Disconnect the main supply cable and other connections such as reagent and waste tubing, barcode reader, printer, etc. Tight up the shear valve and put back the safety card, see section 2.3. Pack the instrument using the original shipping container. Mark the container with DELICATE INSTRUMENT, FRAGILE and THIS SIDE UP. Follow Guidelines for transport below. The instrument in its export package should fulfill the following transport/storage conditions: · Does not exceed –40°C (–40°F) for ≥24 hours. · Does not exceed a Dry heat of 70°C (+158°F) for ≥24 hours. · Dramatic change of temperature between -40°C (–40°F) and 30°C (+86°F). · Does not exceed a Damp heat steady state of 90% RH and 40°C (+104°F) during 48 hours. · Does not exceed a Damp heat cyclic of 90-100% RH and +25°/+40°C (+77°/+104°F) 12+12 hours. 76 9.8 Permanent Shut-Down and Storage Permanent ShutSee Section 9.7 Long Term Transportation. Down and Storing 9.9 Disposal Information Description Customers are advised to be knowledgeable of applicable local, state and federal requirements, and the content of effluent streams, before disposing of waste in public sewer systems or recycling decontaminated equipment. Disposal Materials · · · · Manufacturer Guidelines for waste products Used reagents Reagents mixed with potentially biohazardous material Instrument and instrument components Controls and calibration material · Place the instrument close to a waste container or drain suitable for disposal of used reagents. · Check that the drainage is suitable for disposal of chemical and biological waste. · Check that the waste tubing is securely fastened in the drain. Always use protective gloves when working with the waste container, waste tubing and when in contact with potentially biohazardous materials. Mandatory Action Instrument decontamination and disposal Important The European Directive 2002/96/EC on Waste Electric and Electronic Equipment (WEEE) aims to minimize the impact on the environment by prevention of waste. It is recommended to follow this procedure to allow waste collection and recycling of the equipment at the end of it’s life cycle. · The instructions for decontamination can be found on the Boule home page www.boule.se under User Support. · If there are any question on how to follow this procedure, contact your local distributor for more information. The analyzer should be considered as infected and the end user must follow a decontamination procedure before it is safe to hand over to a recycler. Warning 77 Section 10: Parameter and System Information Messages Section Overview Introduction The Quintus has several parameter and system information messages related to the measured parameters and the instrument. These messages alert the operator of possible pathologic samples and parameter value and instrument errors. Contents This section contains the following topics: Topic Out-of-Range and Information Message Indicators System Information Messages Parameter Messages Parameter Limitations of Blood Cell Counters See Page 78 79 81 82 10.1 Out-of-Range and Information Message Indicators Description The instrument has several out-of-range, parameter, system information messages related to the measured parameters and the instrument. The messages are shown on the display and printouts. Out-of-Range Indicators · · · A parameter that is outside the “Normal Range”, refer to Section 4.10 for Profile range setup, is either marked on the printout and display to indicate if the value is higher or lower than the pre-set “Normal Range” values. o ‘+’ the value of the parameter is higher than the upper limit o ‘++’ the value of the parameter is higher than the double of upper limit o ‘-‘ the value of the parameter is lower than the lower limit o ‘--‘ the value of the parameter is lower than the half of the lower limit o Parameter messages have also been assigned to the out-of-range indicators, see Section 10.3 Another way to view out-of-range results quickly is to look at the colored range bar: o Red bar - Results Out-of-Range o Green bar- Results within range ‘*’ the result for the affected parameter is not interpretable: o Out of sensor linearity o Measurement error o No Differential values will be shown if total WBC < 0.5 * 103 cells/µL o No MCV values will be shown if total RBC <0.60 o No RDW values will be shown if total RBC <0.60 or MCV = 0 o No MPV or PDW values will be shown if total PLT < 30 78 Displaying of Messages Abnormalities · Both System Information and Parameter Messages can be accessed by pressing the question mark on the Detailed Results screen. · Reagent alarm messages will display on the status bar when at least one of the reagent containers is running low, empty, or expired. Follow your laboratory’s protocol for verification on all samples with anomalies and /or abnormal distributions signaled by the instrument. Pathological cells may vary in their stability towards lysing of their cytoplasmic membranes compared to normal cells, which may cause aberrations in the automated analysis. This also applies to the presence of normal non-pathological cells that have been subjected to chemotherapy or other treatments. 10.2 System Information Messages Description Step 1 The system software monitors a number of analytical and system functions and will display information that indicates the possible attention of the operator. This information will alert the operator to check the system or sample or institute selected troubleshooting procedures. This information is presented on the touch screen as a code next to question mark, under “Warnings”. Additional detail and recommendations may be accessed by either pressing the question mark on the touch screen or reviewing the printed report. Action Press the question mark symbol on the touch screen to view more details on the System Information message. Figure 10.1 2 Press the [X] to close the message box. 79 System Information Messages Background messages Indicator b B F Message RBC background high WBC background high Differential background high Baso background high F H p HGB background high PLT background high Description Last accepted background result: RBC ≥ 0.01 x 10¹² cells/L Last accepted background result: WBC ≥ 0.1 x 10⁹ cells/L More than 100 cells detected during the 4-Diff background procedure. More than 100 cells detected during the Baso background procedure. Last accepted background result: HGB ≥ 0.2 g/dL Last accepted background result: PLT ≥ 10 x 109 cells/L Action · Perform background measurement · Check cleanliness of the reagents and the Quintus system · If background, is not acceptable perform [CLEAN] · Repeat background measurement · If issue persists see Section 9.3: High background cleaning Treat result as “reduced reliability” Distribution Indicators (RBC,WBC) Indicator Message S WBC Measurement Statistics Warning s RBC Measurement Statistics Warning Description The distribution of the WBC detection changes in time. It points to clogging, nonhomogeneous sample, cold sample, partial coagulation of the sample. The distribution of the RBC detection changes in time. It points to clogging, nonhomogeneous sample, cold sample, partial coagulation of the sample. Action · Re-analyze sample · Check the homogeneity, the temperature and the coagulation of the sample · Verify system has been correctly maintained, see Section 9.1 - 9.4 Clogging/Leakage Indicator (WBC, RBC) Indicator Message C WBC clogging c RBC clogging V WBC Vacuum Warning V RBC Vacuum Warning Indicator Message Description Drift in the probe voltage of the WBC capillary. The main reason for this drift is the clogging of the capillary. Drift in the probe voltage of the RBC capillary. The main reason for this drift is the clogging of the capillary. There is a (partial) clogging or leakage in the WBC part of measurement system. A faulty/ worn-out pump can create vacuum errors as well. There is a (partial) clogging or leakage in the RBC part of measurement system. A faulty/ worn-out pump can create vacuum errors as well. Action · Re-analyze sample · Verify system has been correctly maintained, see Section 9.1 - 9.4 · Re-analyze sample · Perform a self-test · Verify system has been correctly maintained, see Section 9.1 - 9.4 · If vacuum problems persist then contact service. Linearity Indicator (RBC) M Out of RBC linearity range m Inconsistency in RBC cell concentration Description Inconsistency in RBC cell concentration. 80 Action · Check the sample homogeneity. · Re-analyze sample · Repeat the sample with manual pre-dilution. · Check the sample homogeneity. · Re-analyze sample WBC Differential Indicators (LYM, MONO, GRAN, EOS, BASO) Indicator y Message 4-DIFF populations are not clearly distinguishable MON and NEU populations are not clearly distinguishable EOS and NEU populations are not clearly distinguishable MON and LYM populations are not clearly distinguishable 4-DIFF: Not enough cells detected during counting. BASO: Not enough cells detected during counting. Differential percentage error Baso percentage error Indicator Message A D E Q X x Y Description Action The 4-DIFF populations are not clearly distinguishable on the scattergram. The MON and NEU populations are not clearly distinguishable on the scattergram. The EOS and NEU populations are not clearly distinguishable on the scattergram. The MON and LYM populations are not clearly distinguishable on the scattergram. Not enough cells detected during the 4DIFF WBC differentiating. Not enough cells detected during the Baso WBC differentiating. Inconsistency in differential data. · Re-analyze sample · Blood sample too old or pathological sample. Follow laboratory’s protocol for verification of results. · Verify system has been correctly maintained, see Section 9.1 - 9.4 · Please report to service representative PLT Interference (PLT) l Description The PLT-RBC gap is not clearly detectable on the PLT-RBC histogram: small MCV, fractured RBC-s, aggregated PLT-s (cold blood), sideeffect of blood-transfusion. PLT-RBC gap is not clearly detectable on the PLT-RBC histogram Action · Check the sample homogeneity. · Re-analyze sample · If the problem persists follow laboratory’s protocol for verification of results. Aspiration/Sampling Indicator Indicator W Message Description When air is detected by the blood detector in main sampling column during aspiration. Sampling Error Action · Check that sample volume in tube is adequate · Re-analyze sample 10.3 Parameter Messages Description Parameter messages have also been assigned to the out-of-range indicators based on normal range values. More details on parameter limitation of the messages see Section 10.1 and 10.4. Message Indicator Message Indicator Leukopenia? Leukocytosis? Neutropenia? Neutrocytosis? Lymphopenia? Lymphocytosis? Monocytosis? Eosinophilia? Basophilia? Anemia? -- WBC ++ WBC -- NEUT ++NEUT -- LYM ++ LYM ++ MONO ++ EOS ++ BASO -, -- RBC Polycythemia? Microcytic RBC? Macrocytic RBC? Hypochromic? Hyperchromic? Anisocytosis? Thrombocytopenia? Thrombocytosis? Macrocytic PLT? +, ++ RBC -, -- MCV +, ++ MCV -, -- MCHC +, ++ MCHC +, ++ RDW -- PLT +, ++ PLT +, ++ MPV 81 10.4 Parameter Limitations of Automated Blood Cell Counters Description This section describes the different factors that may interfere with HCT, HGB, MCV, MPV, PLT, RBC, RDW, WBC and WBC differential determination. HGB Limitations Turbidity, in the blood sample, due to any number of physiological and/or therapeutic factors may produce falsely elevated HGB results. The instrument however, is compensated for this effect up to WBC concentrations of approximately 99.9 x 10⁹/L. Limitation Description Unlysed Red Increased turbidity may be seen in cases where the red blood cells are resistant to Blood Cells lysing. This condition will cause a falsely elevated HGB result but can be detected by monitoring the MCHC. Leukocytosis Extremely elevated WBC may produce falsely elevated HGB results due to turbidity. In case of extreme WBC counts, the following is recommended: The diluted sample should be centrifuged and the supernatant fluid checked on a spectrophotometer for turbidity. Lipemia, Elevated lipids in the blood sample will give the plasma a “milky” appearance hyperproteinemia which may disturb the spectrophotometric measurement of HGB. Similar and problems may occur with hyperproteinemia (high protein concentration) and hyperbilirubinemia hyperbilirubinemia (high bilirubin concentration). Accurate HGB determination can be achieved by using reference methods and a plasma blank. Fetal blood The mixing of fetal and maternal bloods may produce a falsely elevated HGB value. MCV / HCT Limitations As HCT is the product of MCV x RBC, any erroneous result in MCV and/or RBC will produce an equal error in the HCT parameter. Limitation Description Red Blood Cell Agglutination of RBC may produce an erroneous MCV value and therefore a Agglutination false HCT. WBC An excessive number of WBCs might cause interference within the RBC population and therefore a false MCV value. Thrombocytosis Excessive numbers of PLT, in most cases, do not interfere with the MCV param(elevated PLT) eter due to the use of the floating discriminator technology in the instrument. PLT Limitations Measurement of low PLT levels may be influenced by circulating RBCs, which may cause falsely high results. Measurement of high PLT levels is influenced by coincidence factors (e.g. counting of two cells as one) which may produce falsely low results. The instrument is compensated for these effects by separate algorithms to produce linearity ranges according to the specifications Limitation Description Microcytosis Very small RBCs might falsely elevate a PLT count and affect the MPV. This (small RBC, low effect is minimized in the instrument due to the use of a floating threshold MCV) (discriminator). By observing the PLT and RBC histograms, this effect is seen as an overlapping PLT/RBC area. Agglutinated Agglutinated RBCs might trap platelets and may give an erroneous low PLT RBCs count and affect the MPV. The presence of agglutinated RBCs is detected by monitoring the MCHC parameter and by careful examination of the stained blood film. Giant platelets in This may cause a low PLT count since they might fall within the RBC threshold excessive numbers range. Chemotherapy Cytotoxic and immunosuppressive drugs may increase the fragility of these cells, which may cause low PLT counts. Reference (manual) methods may be necessary to obtain an accurate platelet count. 82 Hemolysis A.C.D. blood RBC inclusions Platelet agglutination Hemolyzed specimens contain red cell stroma, which may elevate platelet counts. Blood anti coagulated with Acid Citrate Dextrose may contain platelet aggregates, which could depress the platelet count. Erythrocyte inclusions may also produce a spuriously increased platelet count. (e.g. Howell-Jolly bodies, siderotic and basophilic granules) Clumped platelets due to poor collection techniques or platelet satellitosis caused by EDTA activation of immunoglobulins may cause a decreased platelet count and/or an elevated WBC count. The specimen should be recollected in sodium citrate anticoagulant and re analyzed for only the platelet count. The final PLT result must be corrected for the sodium citrate dilution effect. MPV Limitations Limitation Giant platelets Small erythrocytes Agglutinated erythrocytes Chemotherapy EDTA Description Large platelets counted as RBCs will fall outside the PLT range and therefore lower the MPV. Very small RBCs might fall into the PLT region and might be counted as PLTs and therefore influence the MPV parameter. This may trap platelets and therefore affect the MPV parameter. Note that agglutinated erythrocytes may be detected by carefully examining the MCHC parameter and/or the stained blood film. May also effect the size of the PLTs. Note that all samples collected in EDTA will not maintain a stable MPV. The PLTs will swell as a function of time and temperature. RBC Limitations The red blood cell dilution contains all the cellular elements of the blood: RBC, WBC, and PLT. Platelets are not counted since the size falls below the discriminator threshold. Leukocytes are included in the RBC count, but since the ratio of RBCs to WBCs is approximately 1000:1, the introduced WBC count is almost negligible. Exceptions are noted below. Measurement of high RBC levels is influenced by coincidence factors (e.g. counting of two cells as one) which may produce falsely low results. The instrument is compensated for this effect by an algorithm to produce a linearity range according to the specifications Limitation Description Leukocytosis with In samples where the WBC is very high and at the same time the RBC is low, concurrent anemia the WBC may cause a false increase in the RBC count. The WBC is always included in the RBC count, but the contribution is not significant under normal circumstances. The RBC count may be corrected by simply subtracting the WBC from RBC. Agglutinated Red This might cause a falsely decreased RBC count. Blood samples containing Blood Cells the agglutinated red blood cells may be identified by observing abnormal MCH and MCHC values, as well as by examination of the stained blood film. Cold Agglutinins IgM immunoglobulins which are elevated in cold agglutinin disease may lower RBC and PLT counts and increase the MCV. RDW Limitations The red cell distribution width is a function of the RBC count and derived from the RBC histogram. In most cases, any error introduced in the MCV may also cause the RDW to be erroneous. Limitation Description Blood transfusions Blood transfusions may raise the RDW significantly due to the presence of bi-modal populations. WBC Limitations Measurement of high WBC levels is influenced by coincidence factors (e.g. counting of two cells as one) which may produce falsely low results. The instrument is compensated for this effect by an algorithm to produce a linearity range according to the specifications. Limitation Description Leukocytosis WBC in concentrations that exceeds the linearity limits of the system will require dilution of the blood sample with diluent. Re-assaying the diluted sample will help to obtain the correct assay value. 83 Nucleated Red Blood Cells, NRBC Unlysed Red Blood Cells Hemolysis Leukemias Chemotherapy Cryoglobulins Multiple myeloma Large lymphocytes, atypical lymphocytes, blasts, and basophils in excessive numbers Metamyelocytes, myelocytes, promyelocytes, blasts and plasma cells in excessive numbers Lymphocyte count interference Immature, nucleated red blood cells are large and not lysed like mature RBCs, thus they will be classified as a WBC and may cause falsely elevated WBC and lymphocyte results. If the number of the NRBC is sufficient to activate the distribution alarm, such interference will be detected. An overview of a stained blood film can reveal the presence of NRBCs. In particularly rare instances, the RBC in the blood sample may not completely lyse like expected. These non-lysed cells may be detected on the WBC histogram with a distribution alarm, or as an elevated baseline on the side of the lymphocyte population. Non-lysed RBCs will cause a falsely elevated WBC and lymphocyte count. (See also NRBC above) Hemolyzed specimen contains red cell debris, which may falsely elevate the WBC and/or PLT count. Hemolysis can be detected by looking at the color of the plasma in an EDTA-sample that has been allowed to sediment. This disease state may result in a spurious low WBC count, if the leukocytes are more fragile than normal and becomes destroyed in the sample. The cell fragments will also interfere with the WBC differential parameters (LYM, GRAN and MONO). A falsely low WBC count may also be seen in patients with lymphocytic leukemias due to the presence of abnormally small lymphocytes, which may not be counted by the instrument. Cytotoxic and immunosuppressive drugs may increase the fragility of the leukocytes, which may cause falsely low WBC counts. Increased levels of cryoglobin may cause elevated levels of WBC, RBC or PLT counts as well as HGB. Cryoglobulins may be associated with myeloma, carcinoma, leukemias, macroglobulinemia, lymphoproliferative disorders, metastatic tumors, autoimmune disorders, infections, idiopathic disease, aneurism, pregnancy, thromboembolic phenomena, diabetes, etc. The specimen can be warmed up to 37°C and re-analyzed immediately or a manual WBC, RBC or PLT count can be performed. The precipitation of proteins in multiple myeloma patients may give falsely elevated WBC counts. The presence of large or atypical lymphocytes, blasts, or an excessive number of basophils may interfere with the MONO cell area which otherwise consists mainly of monocytes. The presence of excessive numbers of metamyelocytes, myelocytes, promyelocytes, blasts and plasma cells may interfere with an accurate granulocyte count. The lymphocyte count is derived from the WBC count. The presence of nucleated red cells (NRBC), certain parasites and erythrocytes that are resistant to lysis may interfere with lymphocyte count. 84 Section 11: Technology Section Overview Introduction This section describes the different methods and principles of measurement and calculations. Contents This section contains the following topics: Topic Measuring Principles Impedance Method Principle of HGB Measurement Principle of Optical Measurement Parameter Definitions See Page 85 85 86 87 88 11.1 Measuring Principles Description This section describes the measuring principles of the Quintus. General Measuring Principles · Volumetric impedance method is used to determine cell counts regarding WBC, RBC and PLT parameters. · Photometric measurement of light absorbance is used to determine hemoglobin (HGB) concentration. · Optical measurement of light scattering and diffraction is used to determine 5-part WBC parameters. Whole Blood Dilution · WBC/BASO · RBC/PLT · 4-part DIFF 1: 170 1: 21250 1: 50 11.2 Impedance Method Description The volumetric impedance method counts and sizes cells by detecting and measuring changes in electrical impedance, when a particle within a conductive liquid passes through a small aperture. 85 · Each cell passing through the aperture – where a constant DC current flows between the external and internal electrodes – causes some change in the impedance of the conductive blood cell suspension. · These changes are recorded as increases in the voltage between the electrodes. · The number of pulses is proportional to the number of particles. The intensity of each pulse is proportional to the volume of that particle. The volume distribution diagrams of the particles are WBC, RBC, and PLT histograms. Pulses are counted only in channels (in terms of femtoliter, fL), which are between the lower and upper discriminators. Internal electrode + Aperture Blood cell suspension External electrode - Figure 11.1 11.3 Principle of HGB Measurement Description The lysed sample dilution can be analyzed for HGB based on stable chromogen content. The reagent lyses the red blood cells, which release hemoglobin. Subsequently, the HGB concentration is measured in a photometrical way across the WBC chamber. The actual sample HGB is calculated as a difference of a blank and a blood measure with and without illumination to reduce the effect of liquid refraction and disturbing light. Figure 11.2 86 11.4 Principles of Optical Measurement Description Optical measurement of light scattering and diffraction is used to determine 5 part WBC parameters. The optical measuring head contains focused laser source to illuminate the stream of WBC blood cells. The intensity changes of the scattered laser light, coming from the cells, determined by the cell volume and structure. The changes recorded as an increase in the voltage of the detector system outputs. The number of pulses is proportional to the number of particles. The intensity of each pulse is proportional to the volume and granularity of the blood cells. The WBC 5 population separation is based on the two dimension volume and granularity distribution diagram. Figure 11.3 The intensity of scattered light is detected by an optical signal processing system. Light beamed onto a cell will diffract (scatter) depending on the cell’s internal and external structures. Figure 11.4 External structure (and the size of the cell) causes low angle scatter. Internal complexity causes high angle diffraction. The different angled lights are captured by optical sensors. Thus the system gets two independent parameters about one cell passing the light beam. Figure 11.5 87 The data are plotted in a 2 dimensional coordinate system. Similar cells have similar scatter characteristics, and the analytical software can separate differentiate and identify them to provide 4DIFF and BASO scatter diagrams. Figure 11.6 11.5 Parameter Definitions Description This section describes the parameter definitions that have not been defined yet in other sections. MCV ( Mean Cell Volume RBCs) · Derived from the RBC distribution curve. · RBC counts that are lower than 0.60 (displayed value) do not give a MCV value due to low statistical significance. RDW (Red Cell Distribution Width) · The distribution width of the erythrocyte or platelet population derived from the histogram at 20% of peak (RDW example seen below). PDW (Platelet Distribution Width) Figure 11.7 · xDW-SD = RDWcal x (P2 - P1) (fl), xDW-CV = RDWcal x 0.56 x (P2 P1) / (P2 + P1) by the factor of 0.56 CV is corrected to the 60% cut · The RDW parameter is only valid if the MCV value is not zero. · The PDW parameter is only valid if total PLT < 30. 88 HCT (Hematocrit) · · · · MPV (Mean Platelet Volume) · The mean cell volume of the platelets is determined from the PLT size distribution curve. · MPV is not displayed in case of extremely low PLT counts (<30 ) due to high statistical inaccuracy of such a population. Calculated from the RBC and MCV values. HCT percentage = RBC x MCV x 100 HCT absolute = RBC x MCV If no MCV is derived from a sample due to too low a number of RBC cells, no HCT is calculated. HGB (Hemoglobin · Measured photometrically at 540 nm; each cycle blank measurement is Concentration) performed on diluent · HGB = HGBcal x (HGBmeasured – HGBblank) · The HGB readings are slightly corrected for turbidity in case of extreme WBC counts. MCH (Mean Cell Hemoglobin) · Average hemoglobin content of erythrocytes, calculated from RBC and HGB values. · MCH = HGB / RBC MCHC (Mean Cell Hemoglobin Concentration) · Calculated from the HGB and HCT values. · MCHC = HGB / HCTabsolute · Unit of measurement is displayed according to the one chosen for HGB result (g/dL, g/L or mmol/L) PDW (Platelet Distribution Width) · The PDW parameter is calculated from the PLT distribution curve. The SD is calculated of the PLT size-distribution curve up to the actual setting of the (upper) PLT discriminator. · The PLT parameter is only valid if the MPV value is not zero. LPCR (Large Platelets) · The LPCR (Large Platelets Concentration Ratio) parameter is calculated from the PLT distribution curve. · Platelets that are larger than 12fl up to the discriminator are expressed in % of the total PLT count. · The LPCR parameter is only valid if the MPV value is not zero. PCT (Packed Platelet Volume) · Calculated from the PLT and MPV values · PCTpercentage = PLT x MPV x 100 · PCTabsolute = PLT x MPV 89 Section 12: Specifications Section Overview Introduction This section describes the specifications for the Quintus and its parameters. Contents This section contains the following topics: Topic General Short List of Specifications Performance Specifications See Page 90 91 92 12.1 General Description This section describes the Quintus and its parts in general. User Environment The operator works with a menu from which the desired program is chosen, e.g. discriminator settings. Reagents Three external reagent reservoirs are used: · Quintus 5-part Diluent (20 liter) · Quintus 5-part Lyse (5 liter) · Quintus 5-part Stopper (5 liter) Control and Calibrator Four different products are available: · Boule Con-5Diff (low, normal, high) · Boule Cal-5Diff Technology The Quintus is a fully automatic hematology analyzer designed to measure up to 24 parameters using whole blood from an open and closed tube mode. 5-Part WBC The instrument performs a 5-part WBC differential by means of a cyanide free hemolyzing reagent. Protected A sample memory is available and protected against main power failures. The Sample Memory sample memory also contains a search function with selective printing and QC Options. 90 12.2 Short List of Specifications Specifications (Short) Measuring principle, RBC, WBC, PLT Measuring principle HGB Measuring principle 5-part Differential Optical measurement Impedance Light source: green LED with 540 nm wavelength Detector: light to frequency converter Light scattering measurement: Light source: semiconductor laser diode with 650 nm wavelength and 7mW (Class IIIB laser module if the protective housing is closed) Quartz flow cell with hydro-dynamic focusing Detector: fiber optic coupled PIN Si photodiodes Internal safety interlock Auto-alignment system Aperture length and diameter Sampling system Aspirated blood volume Number of Samples per hour Sample type Parameters reported Size distributions printed for QC capabilities Carry-over Warning flags on parameter abnormalities Setable normal ranges (profile limits) Reagent and Instrument alerts Built-in test / adjustment programs Calibration Language available Software upgrade Memory capacity Data processing Data store Display External printing Keyboard Barcode reader Peripheral ports Barcode reader input Serial output Main Voltage Power consumption (maximum) Frequency Main fuse Operating Temperature Humidity (non-condensing) Optional. Horizontal and vertical calibration of laser beam position Fine calibration: with calibration material (Polystyrene micro-particle or Polystyrene microsphere, 5 µm) WBC: 80 µm, RBC/PLT: 70 µm Ceramic shear valve with 3 separated primary loops ~ 100 µl > 60 samples Human whole blood (EDTA anticoagulant) WBC, LYM, MONO, NEU, EOS, BASO, LYM%, MONO%, NEU%, EOS%, BASO%, RBC, HCT, MCV, RDWsd, RDW cv, HGB, MCH, MCHC, PLT, PCT, MPV, PDWsd, PDWcv RBC, PLT and WBC differential Mean, SD, CV, Levey-Jennings plots and Xb plots < 0.5% Yes Yes Yes Yes Manual and SW supported automatic mode English menu and support for other languages Via USB 100,000 records including flags, scatter- and histograms VIA C7 1.8 GHz processor Windows® XP® Embedded 800 x 600 color graphic LCD, landscape layout Via USB port, any Windows® XP® Embedded compatible printer Virtual incorporated keyboard (External keyboard option via PS/2 or USB) External via USB port Built-in barcode reader in Autoloader unit 4 USB (2.0), Ethernet, PS/2 Yes Yes (Conformed to standard EN 60950) 100 – 240 V AC Max 400VA 50 / 60 HZ F 10A H 250V 15-30° C (59-86 °F) Up to 80% 91 Instrument Dimensions Autoloader Dimensions Instrument weight Autoloader weight Diluent Consumption Lyse Consumption Stopper Consumption HxWxD = 515 x 410 x 465 mm (20 x 16 x 18 inches) HxWxD = 190 x 380 x 320 mm (8 x 15 x 13 inches) 35 kg (≤ 77 lbs) 12 kg (≤ 26.4 lbs) Approximately 52 mL per analysis cycle. Approximately 7 mL per analysis cycle. Approximately 1 mL per analysis cycle. 12.3 Performance Specifications Linearity-Regression and Linear Range Linearity measured according to Boule I-1040 Section 8, based on Standard EP6-A. Parameter WBC RBC PLT HGB Linearity Range 0.5 – 99.9 x 10⁹/L 0.30 – 7.00 x 10¹²/L 20 – 1800 x 109/L 2.0 – 24.0 g/dL Parameter WBC RBC MCV PLT HGB Displayed range 0.0 - 119.9 x10⁹/L 0.00 – 14.00 x10¹²/L 15.0 – 250.0 fL 0 - 1999 x109/L 0.0 – 35.0 g/dL Maximum Non-Linearity ± 0.4*109/L or 3% ± 0.05*1012/L or 2% ± 10*109/L or 3% ± 0.2 g/dL or 2% Displayed Range Accuracy Linear correlation versus 5-part reference analyzer Parameter WBC RBC HGB HCT PLT Correlation Coefficients (R) ≥ 0.98 ≥ 0.98 ≥ 0.98 ≥ 0.97 ≥ 0.97 Parameter WBC RBC MCV PLT HGB CV (%) £ 3.0 £ 1.5 £ 1.0 £5 £ 1.5 Precision 92 Range (precision achieved within) 4.7 x 10³ / µL ≤ WBC ≤ 38 x 103 / µL RBC ≥ 2.5 x 10⁶ / µL 60 – 140 fL PLT ≥ 100 x 103 / µL HGB ≥ 6.0 g/dL Section 13: Troubleshooting Section Overview Introduction This section contains information needed to troubleshoot measurement related issues with the Quintus system Contents This Section contains the following topics: Topic Shifted (compressed) scattergram to the lower left corner Shifted scattergram into the upper right corner Scattergram shifted/bent left-right or up-down Split populations on scattergram Scattergram smeared to the right or upper side; Extremely over-gained scatter Triangular populations at lower left corner High angle noise Dotted or continuous lines on X or Y axis end Long, smeared population and commet-like background Over-lysed populations Concentrated (RBC ghost) scattergram Spreaded scattergram (high background) No or very few celss on scattergram See Page 93 94 94 95 95 96 96 97 97 98 98 99 99 13.1 Shifted (compressed) scattergram to the lower left corner Description This phenomenon is usually caused by a partial clog in the system or bad calibration of the scatter. The partial clog usually appears at the point where the flow-cell base narrows and the counting channel begins, it can cause a misaligned sample stream. Possible reasons: · Partially clogged flowcell in the optical head · Bending or clogging at sheath injection port · Laser power setting were changed and are wrong · False or missing calibration of scattergram · Misaligned optical head Corrective actions: · Check sheath tubing for bent or pinched portions · Run flow cell backwash(Maintenance/ Cleaning/Flow cell) · Check laser power settings* · Perform manual cleaning of flow cell* · Perform scatter calibration* *To be performed by qualified service technician only Figure 13.1 93 13.2 Shifted scattergram into the upper right corner Description This phenomenon is usually caused by bad scatter calibration or if scatter calibration was performed with partially clogged flow-cell and the clog has been removed. Also happens if the calibrator was expired or damaged. Possible reasons: · False or missing calibration of scattergram · Laser power settings were changed · Misaligned optical head Corrective actions: · Check laser power settings* · Perform scatter calibration* *To be performed by qualified service technician only Figure 13.2 13.3 Scattergram shifted/bent left-right or up-down Description · The normally curved histogram is bent left or right. It is related with low angle gain problems. · The normally curved histogram is bent down or up. It is related with high angle gain problems. · Cell populations otherwise look OK, only the color identification is cutting them in half. Possible reasons: · Optical amplifier LOW and/or HIGH angle gain was changed · Bad optical amplifier · The optical head has been replaced, but scatter calibration wasn’t performed Corrective actions: · Check optical amplifier gain factors* · Perform scatter calibration* *To be performed by qualified service technician only Figure 13.3 94 13.4 Split populations on scattergram Description This phenomenon is usually caused by a partial clog in the system or misaligned laser head. The partial clog usually appears in the entrance point of the flow-cell, which can cause a misaligned or side moving sample stream. Possible reasons: · Partially clogged flowcell · Bent or clogged sheath injection port · Misaligned optical head Corrective actions: · Check sheath tubing for bent or pinched portions · Run flow cell backwash(Maintenance/ Cleaning/Flow cell) · Check laser power settings* · Perform manual cleaning of flow cell* · Perform scatter calibration* *To be performed by qualified service technician only Figure 13.4 13.5 Scattergram smeared to the right or upper side; Extremely over-gained scatter Description All cells generate extremely “intensive” signals in the optical amplifier. The system cannot compensate for the extreme high signals since the expected intensity range is exceeded. Possible reasons: · Scatter calibration values are too high · Optical amplifier LOW and HIGH angle gain was changed · Bad optical amplifier · Optical head malfunction Corrective actions: · Check optical amplifier gain factors* · Perform scatter calibration* *To be performed by qualified service technician only Figure 13.5 95 13.6 Triangular populations at lower left corner Description The population on the background result can appear on control and human results as well. In that case it will be colored black or blue, as the system tries to identify it as some kind of irregular cell population. Possible reasons: · Noise in the laser light source. o (Noise is caused by an incorrect control of the laser diode’s power. The laser can be changing modes because of the improper power control, and the optical analytical algorithms cannot compensate for these changes. o Mode hopping (fluctuations in laser light power) can also cause false pulses or intensity changes on the optical detector, and will be interpreted as small particles going through the flow cell) · Misaligned optical head Corrective actions: · Check laser power settings* · Change Laser Head* Figure 13.6 *To be performed by qualified service technician only 13.7 High angle noise Description The pictures below show similar human measurements. · On the first picture there is good result. · The second picture shows a result where high angle noise was present during the measurement. o The populations are spread upwards. The analytical algorithm could not follow up and the lower populations are cross coloured. The results are false and most of the times flagged with N flag. Possible reasons: · Noise in the laser light source (see point 13.6) · Misaligned optical head Corrective actions: · Check laser power settings* · Change Laser Head* *To be performed by qualified service technician only Figure 13.7 96 Figure 13.8 13.8 Dotted or continuous lines on X or Y axis end Description The two lines can appear together, or independently. They indicate high intensity particles, which could not be identified as cells thus cannot be represented in the “normal” analytical range Possible reasons: · Bubbles passing through the flow cell · Improper tube connection in the sheath and/or optical sample path · If it only appears in the 4diff scattergram: o Possible a TCU problem o Incorrect temperature o Incorrect mixing o Partial clog in the TCU tubing · If it appears only in the BASO scatter: o Contaminated(dirty)WBC chamber o Malfunction of the WBC preheater module · If the problem is present in BOTH scattergrams, then most probably air bubbles are formed somewhere inside of the optical head or in the related tubing Figure 13.9 Corrective actions: · Check all related tubing for presence of air bubbles · Run self test, check TCU and WBC preheater temperature · Perform Cleaning and Hard Cleaning 13.9 Long, smeared population and commet-like background Description · Baso scatter shows cells spread out upwards and obliquely. · 4diff scatter is missing due to the high number of cells or showing small number of spread cells or sometimes just similar to the Baso scatter but with more cells. · Background measurements contain one smaller-bigger, comet-like image in both scattergrams. · This happens due to the high number of un-lysed cells which contaminate the optical head. The same happens if pure blood gets into the optical head due to pneumatical malfunction. Possible reasons: · Lyse and Stopper reagents are interchanged · Stopper reagent is connected to both inputs · Pneumatic error occurred during a previous human or control measurement and the optical head got contaminated Corrective actions: · Check if reagents are connected to corresponding inputs · Run Cleaning Human Figure 13.10 97 Background Figure 13.11 13.10 Over-lysed populations Description The 4diff scatter shows an overlysed condition (for different patient’s fresh blood). The populations are not concentrated and has spread out cells from them pointing to the lower left corner. Populations are smearing together along the path of the displayed curved arrow. Possible reasons: · Lyse reagent is connected to Stopper input as well · TCU temperature is too high, · Human blood is too old and too sensitive against the lyse reagent Corrective actions: · Check if reagents are connected to corresponding inputs · Run Self Test and check TCU temperature · Run control measurement from a freshly opened control tube Figure 13.12 13.11 Concentrated (RBC ghost) scattergram Description This image shows a concentrated group of cells. Cells seems to be unaffected by the chemical reactions that should separate them to different populations. · This scattergram can be seen on human results as well. Possible reasons: · Clogged TCU - RBC ghost population appears · Partially clogged TCU, the previous sample interferes with next one · Mechanical error or jam occurred during previous measurement, or sampling and the SW stopped. During restart, whole blood, or insufficiently diluted blood got into the flow cell, or to the injector area Corrective actions: · Run Cleaning · Perform manual cleaning of TCU* *To be performed by qualified service technician only Figure 13.13 98 13.12 Spreaded scattergram (high background) Description · If the sheath puffer or the diluent container is contaminated, similar scatters can be seen on both optical channels. · Optical background can be vertical or horizontal spreading of black dots like shown on the pictures. · Running backgrounds or draining and refilling the sheath puffer decreases the background. Possible reasons: · Sheath puffer or optical head contamination · Contaminated Diluent. In this case PLT background is also high Corrective actions: · Run Cleaning · Run Internal Diluent Reservoir cleaning · Open a new Diluent container Figure 13.14 Figure 13.15 13.13 No or very few cells on scattergram Description · Whatever is displayed on the scattergram (and also on histograms) was actually measured by the optical system. · Just a few cells have passed through the laser head · When both scattegrams are lack of cells it can indicate a possible optical head problem. Possible reasons, if only 4-Diff scatter is affected: · No cells and result is flagged with DA or DQ: the analysis cannot be performed, because the scattergram is probably having real cells, yet the system does not display it, because the populations are overlapped · No cells and result is flagged with X or low number of cells · Sampling error – insufficient amount of blood in the primary sampling loops · Partially clogged TCU, or limited sample flow through the TCU · TCU related tube has come off. · TCU related valve is not working properly Figure 13.16 99 Possible reasons, if only BASO scatter is affected: · Sampling error – insufficient amount of blood in the primary sampling loops · WBC chamber related tube path clogged or tube come off Possible reasons, if both scatters are affected: · Blood sample is low on WBC parameter · Partial or total clogging of flowcell · Sampling error – insufficient amount of blood in the tube, or something blocked the sample path into the shear valve · Sheath tube coil (below the shear valve) is pinched, full of bubbles, or blocked · Tube is loosen or has come off from the dilutor, optical head, or from sample path · No laser light · A totally misaligned optical system (typically an incorrect value was sent to the auto alignment motor, and it was saved). The laser light is off from the counting channel Corrective actions: · Run Cleaning · Run Self Test, check laser parameters · Check sampling · Check tubing for loosen connections, leaking, presence of air bubbles · Perform manual cleaning of TCU* *To be performed by qualified service technician only 100 INDEX A N Advanced menu . 17, 18, 19, 20, 31, 32, 33, 34, 35, 36, 37, 41, 43, 44, 63, 64, 66, 70, 72, 73, 79, 82, 84 Aspiration needle.................................................... 24, 35, 45, 50, 78, 81, 82 Assay Values ...................................................................... 66, 67, 68, 69, 73 Authorization code ...............................................................................63, 73 Autoloader... 12, 14, 19, 21, 24, 30, 33, 35, 50, 51, 52, 53, 54, 55, 56, 57, 73, 100, 101 NEW SAMPLE .................................................14, 47, 48, 49, 57, 67, 81, 82 Normal ranges .................................................................. 37, 38, 58, 86, 100 O Open Tube .................................................21, 45, 48, 49, 50, 51, 72, 73, 100 Operator ID...........................................................................................48, 58 Out-of-Range Indicators .................................................................58, 86, 90 B P Background count............................ 18, 21, 23, 37, 40, 46, 47, 81, 82, 83, 88 Barcode .............................................................18, 48, 51, 53, 54, 55, 56, 67 Barcode reader..................................... 12, 14, 22, 24, 31, 51, 67, 69, 84, 100 Baso........................................................................................................... 88 BASO........................................................28, 58, 59, 60, 89, 90, 94, 96, 100 Parameter Limitations................................................................................ 90 PCT ........................................................................................ 28, 34, 98, 100 PDW.........................................................................................28, 86, 97, 98 PLT .... 23, 28, 39, 47, 58, 60, 75, 86, 88, 89, 90, 91, 92, 94, 97, 98, 100, 101 Power supply ............................................................................................. 23 preheater.................................................................................................. 106 Printer................................................................... 12, 14, 22, 31, 32, 84, 100 C Calibration.................................................21, 23, 30, 72, 73, 75, 76, 77, 100 Calibrators .................................................6, 7, 46, 49, 67, 68, 72, 73, 75, 85 Cap Piercing .............................................................................21, 48, 50, 73 Cleaner ................................................................................. 6, 12, 39, 78, 83 Cleaning ............................................................15, 37, 39, 72, 78, 81, 82, 88 Control barcodes...................................................................................47, 67 Controls...... 6, 7, 10, 24, 37, 40, 46, 47, 49, 66, 67, 68, 69, 70, 71, 72, 76, 85 CV 63, 70, 75, 76, 100, 101 Q QC 24, 30, 47, 50, 66, 67, 68, 69, 70, 73, 76, 99, 100 R RBC.... 23, 28, 39, 47, 58, 60, 75, 86, 88, 89, 90, 91, 92, 94, 97, 98, 100, 101 RDW .................................................................... 28, 75, 86, 90, 92, 97, 100 Reagent barcodes.......................................................... 14, 15, 17, 41, 42, 43 Reagent consumption.............................................................. 38, 40, 41, 101 Reagent container ............................ 14, 15, 16, 18, 24, 41, 42, 43, 44, 83, 87 Reagent Safety............................................................................................. 7 Reagent setup ..................................................................... 17, 38, 41, 42, 43 Reagent tubing.................................................................... 14, 16, 44, 83, 84 Results ...............................................................32, 45, 49, 54, 56, 57, 59, 63 Results menu ......................................... 30, 34, 35, 49, 55, 57, 61, 64, 65, 87 D Date/time function ....................................................................14, 19, 20, 34 Diagnostic menu........................................................................................ 20 Diluent.......................................................15, 16, 39, 40, 42, 81, 98, 99, 101 dilutor...................................................................................................... 109 Disposal................................................................................................16, 85 Distributor ........................................................................ 5, 8, 22, 23, 83, 85 S E Keyboard .................................................................... 12, 22, 31, 34, 48, 100 Safety features ................................. 6, 7, 8, 16, 46, 49, 67, 72, 78, 79, 81, 85 Sample analysis .................................................21, 37, 44, 47, 49, 52, 57, 73 Sample collection .......................................................................8, 45, 49, 52 Sample ID............................ 31, 34, 48, 49, 50, 51, 52, 53, 55, 56, 57, 58, 62 Sample memory....................................................................................61, 99 Sample statistics ................................................................. 61, 63, 64, 65, 68 scattergram .......................................................................................106, 109 Send function............................................................................31, 32, 63, 64 Sequence number..................................................................................62, 68 Serial number ........................................................................................ 4, 23 Service.................................................................................... 5, 6, 22, 23, 89 Service technician.......................................................................6, 23, 65, 83 Setup menu................................ 19, 31, 32, 33, 34, 35, 36, 37, 38, 63, 64, 70 shear valve............................................................................................... 109 Shear valve ......................................................14, 15, 24, 79, 80, 81, 84, 100 Shear-valve................................................................................................ 79 Shutdown..................................................................................48, 78, 83, 84 Software version ...................................................................................... 4, 5 Specifications .............................................................................99, 100, 101 Standby......................................................................... 14, 16, 37, 40, 46, 48 Startup ............................................................................................46, 47, 52 Stopper ................................................................. 15, 16, 39, 40, 42, 99, 101 Storage............................................................................................18, 39, 84 System Information Messages ....... 30, 42, 43, 44, 57, 59, 70, 86, 87, 88, 100 L T Language .................................................................................. 14, 20, 33, 34 Levey-Jennings Plots .............................................................. 66, 69, 70, 100 LPCR....................................................................................................28, 98 LYM..................................................................... 28, 39, 60, 89, 90, 92, 100 Lyse.................................................................15, 16, 39, 40, 41, 42, 99, 101 TCU..........................................................................................106, 108, 109 Transport ........................................................................................14, 18, 84 Troubleshooting....................................................................................... 102 M USB.................................................................................. 22, 30, 31, 64, 100 Main menu................................. 20, 25, 29, 30, 52, 61, 72, 73, 75, 78, 79, 82 Maintenance ................................................................. 12, 24, 39, 72, 78, 83 MCH ................................................................................ 28, 70, 92, 98, 100 MCHC.................................................................. 28, 70, 90, 91, 92, 98, 100 MCV ..................................... 28, 34, 70, 75, 86, 89, 90, 91, 92, 97, 100, 101 Measuring principles ................................................................................. 94 Menu Structure .....................................................................................25, 26 Mixer....................................................................................................46, 51 MONO ....................................................................... 28, 39, 60, 89, 90, 100 Monthly QC............................................................................................... 69 MPV ..................................................................... 28, 75, 86, 90, 91, 98, 100 W EDTA ............................................................................... 45, 46, 91, 92, 100 Emergency Procedure.................................................................................. 8 EOS ............................................................................ 28, 39, 60, 89, 90, 100 Erroneous results .................................................................... 7, 8, 23, 46, 84 F Fill 14, 15, 18, 44 G GRAN ...................................................................................... 28, 60, 89, 92 H HCT...................................................................... 28, 34, 90, 91, 97, 98, 100 Hemolysis.............................................................................................91, 92 HGB .................................28, 34, 39, 47, 75, 88, 90, 92, 94, 95, 98, 100, 101 I Installation.................................................................... 12, 13, 14, 21, 23, 84 K U Warning signs...................................... 8, 9, 16, 23, 46, 50, 67, 72, 78, 79, 86 Warranty................................................................................................ 6, 83 Waste...................................................................................... 7, 8, 16, 46, 85 Waste container ...................................................... 12, 14, 16, 30, 43, 83, 85 Waste tubing................................................................. 14, 16, 43, 83, 84, 85 WBC...... 23, 28, 39, 47, 60, 75, 86, 88, 89, 90, 91, 92, 93, 94, 95, 96, 98, 99, 100, 101 X Xb function....................................................................... 36, 66, 70, 71, 100 101 Appendix A 102