1
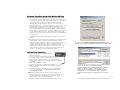
The last thing to do is creating the necessary folder/file objects required
for the CitiDISK HDV to work on.
1) Create a folder named as “Movie” at the root of CitiDISK HDV
volume.
2) Create another folder named “Media” and place it inside the “Movie”
folder.
3) Create a plain text file named “Project.txt” and place it inside the
“Movie” folder as well. Above three items are the signature objects
required by the CitiDISK unit to operate, must not be removed.
Technical Support
1). Web support
For answers to warranty, please consult this Quick Usage Guide page
20 and common questions, see
http://www.shining.com/support/faq/3.shtml.
2). Email support
Send questions to [email protected].
3). FAX support
To send technical support questions to Shining via fax have your FAX
machine dial +1-714-761-9624.
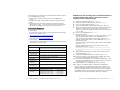
Technical Specifications
Interface
One IEEE1394A port
SBP-2 and Isochronous DV & HDV video streams
Cable
Sustained
Transfer Rate
Internal Battery
One 6pin-4pin IEEE1394A standard included
16 MBytes/second
External Power
Operating
Temperature
Relative
Humidity
Storage
Temperature
Dimension
Weight
HD Recording
Capacity
P18
Rechargeable, Lithium based battery good for up
to 90 minutes of non-stop recording
+6V to +18V DC in
0 to 55 Centigrade
95% Maximum
-22 to 65 Centigrade
Width: 77mm Length: 135mm Height: 24mm
10 ounces
FW1256H-80(DV or HDV)
> 360 minutes
FW1256H-100(DV or HDV)
> 450 minutes
FW1256H-120(DV or HDV)
> 540 minutes
FW1256H-160(DV or HDV)
> 630 minutes
Shining Technology CitiDISK HDV Quick Usage Guide v11.0
PLEASE follow the operating steps recommended below to
avoid incomplete video capture. Each step is further
explained in each referenced page.
1.
2.
3.
4.
Charging the unit’s internal battery – page 6
Choose the preferred native DV Video file format – page 10
Turn on the internal battery switch – page 6
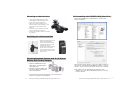
Setup the CitiDISK HDV & camera before capturing – page 4, 5
5.
Power on the camera first, set the “camera” mode for capturing live
video or set “VCR” mode for capturing tape video; select the
FireWire signal type (the signal can be DV or down converting HDV>DV, or HDV)
6. Power on the CitiDISK HDV unit – page 6
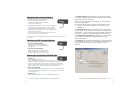
7. Capturing live video:
Start the recording by pressing the camera’s “REC” button once; or,
manually pressing “REC” button on the CitiDISK HDV once.
Stop the recording by pressing camera’s “REC” button once; or,
manually pressing “REC” button on the CitiDISK HDV once – page 7
Capturing tape video:
Play the tape first, manually pressing “REC” button on the CitiDISK
HDV once – page 7
Stop the recording manually by pressing “REC” button on the
CitiDISK HDV unit once – page 7
Note: Must turn off the CitiDISK HDV unit and start from step 5 if
changing FireWire signal type is preferred (e.g. from DV->HDV or
vice versa)
8. “QPlay” the last captured scene or play all scenes after you have
completed shooting – page 9
9. Power off the CitiDISK HDV first, the camera second – page 6
10. Connect to computer, copy all of the clips in “Media” folder to the
internal hard disk of PC/Mac before editing – page 8
11. Re-format the CitiDISK HDV or re-connect the CitiDISK HDV to the
camcorder and “QuickErase” all of the captured clips to re-claim the
free disk space for next usage – page 16, 17
12. Repeat STEPS 1 to 11 consistently for every video shoot
Note: Pages 12-15 describe steps for “Updating the CitiDISK HDV
firmware,” which is only necessary at certain times. Customers are
urged to download the latest firmware Uploader and verify the unit’s
firmware install date, whether or not it is earlier than the one posted
on SHINING’s website. If so, identify the firmware for your model and
read through the document first before updating the firmware.
Shining Technology CitiDISK HDV Quick Usage Guide v11.0
P3