1
Re-formatting the CitiDISK HDV( PC/XP )
Install the Shining Utility Suite first, find the
icon on the
desktop and double-click it to launch the utility.
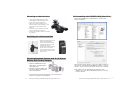
Mounting in Between Camera and Tripod
• Place the PCKT1256-TRPD kit( sold
separately ) underneath the camera;
tighten the screw to the camera’s tripod
screw hole.
• Insert the CitiDISK HDV to the PCKT1256TRPD’s compartment.
• Insert the external battery to the battery
compartment.
• Connect the battery power cable to the CitiDISK HDV’s external power
input socket.
• Plug in the 4-pin FireWire connector into the camcorder iLink port.
• Secure the quick-release plate underneath the PCKT1256-TRPD kit.
• Move around, shooting video with camera, PCKT1256-TRPD and the
CitiDISK HDV set as one piece of equipment.
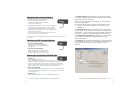
Select the “Hard Drive Setup” function at the center of the palette.
Select “YES” to create a “DV Disk.”
• Or, set the whole setup on the
tripod for stationary shooting.
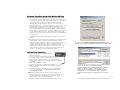
Select the target drive, e.g. “F” drives, next click on “Create DV Disk”
function to start the process. System will show “deleting current
partition” and “erasing data on drive” messages while actions will be
performed. Select “YES” to continue. Next, system will prompt
“Waiting for Windows to assign a drive letter” and “Partitioning and
formatting disk drive” messages. The whole process may take
several minutes. Next, you should see a message indicating the
partitioning and formatting processes are completed. Click on “OK”
to continue. The newly re-formatted “DV Disk” already have “Movie”
folder, “Media” folder & “Project” text file in the “Movie” folder is
ready to shoot the video; you can “Safely Remove” the CitiDISK HDV
now.
Note: NTFS is not supported for the purpose of cross-platform; user
must use Shining Utility Suite and select “DV Disk” in order to
capture video.
P16
P5
Shining Technology CitiDISK HDV Quick Usage Guide v11.0
Shining Technology CitiDISK HDV Quick Usage Guide v11.0