1
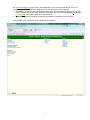
Blue Stakes of Utah Utility Notification Center, Inc. REMOTE ACCESS FOR MEMBERS (RAM) USERS MANUAL (Revised 06/16/2011) Welcome to Blue Stakes of Utah Utility Notification Center, Inc. (Blue Stakes) RAM User’s Manual. This document will serve as an instructional manual and reference guide. It will provide step-by-step instructions on how to access and use the RAM applications and web pages. RAM applications and web pages are designed to be user friendly and give Association members many useful functions pertinent to the membership with Blue Stakes. RAM provides the ability to review and update notification areas using grids or polygons; review contact information; view delivery and audit reports; run statistics reports; and search for and review tickets. Helpful features have been built into the applications to be easy to use and intuitive such as in-line instructions or tool tips which describe the function, use, and/or requirements for each field, button, and tab. I. RAM ACCOUNT REGISTRATION Individual users that require access to all of their membership information should register for an account in their name. Members that will have multiple employees using a single limited access account should register under their company name. All accounts are setup with read only permissions. Any user requiring additional assistance including the ability to edit notification area selections should contact Blue Stakes Member Services department at (801) 208-2103 or [email protected]. To register and establish a RAM account: Go to www.bluestakes.org; Click on the “Web Applications” link in the left hand column; Click “Sign Up (Create New Account)”; Select “Member” as the account type; Enter a strong password according to directions indicated; For individual accounts, enter your first name in the first box and your last name in the second box. For a limited access company account, please contact Member Services for assistance prior to registering. Enter the appropriate information in each field. Fields marked with an asterisk (*) are required; Check the box at the bottom to accept the online user agreement; Click Submit. Following registration submission you will receive an email with pertinent information regarding your account and required setup steps for proper access to the applications. Blue Stakes Member Services will notify you via email when your RAM account has been activated and is available to access. II. SYSTEM REQUIRMENTS Must have Internet access Must have a Microsoft Windows based computer (2000, XP, Vista, 7) with .NET Framework installed Must have Microsoft Internet Explorer 6.0 or later (free download from Microsoft) Must accept and abide by Blue Stakes Remote Access User Agreement Must have a basic understanding of the requirements for utilizing mapping applications. Training available upon request through the Member Service Department. For more information on running the Newtin applications please see Newtin Application Setup Note: Users that do not have permissions to install and/or configure their systems according to the specified requirements may need to consult with their Network Administrator or IT Department. III. RAM ACCOUNT LOGIN Go to www.bluestakes.org and click the “Web Applications” link on the left-hand column. Then click “Newtin User Login” link. Enter your assigned user name and password at the prompt. User Name – All member user names start with the letter “M”, followed by the first letter of your first name, and then your full last name. Example: John Doe’s user name would be MJDOE (M = Member, J = John, DOE = Doe). User Name is not case sensitive. Password – Enter the password created during registration. Password IS case sensitive. Once logged in, the page similar to the following will be displayed: 2 RAM MENU OPTIONS IV. TICKETS Section A. Ticket Resend Allows users to resend tickets to the member code By Ticket number, By Sequence number, or By Day, as well as resending the end of day Summary (or audit), and sending a Test ticket for testing purposes. A user can Remove a ticket that has been requested to be resent as long as the ticket hasn’t been delivered. Note: Ticket Resends are billable. B. Ticket Search An executable (.exe) database that allows the user the ability to search, view, print and copy ticket information received by the member receiver sites assigned to each user. Ticket search will only show tickets that the member was assigned or the user is authorized to view. Click on TICKET SEARCH to open the application, select “Search” and enter the criteria you want to search by. Select the “Search” button (upper right hand corner) to obtain results. Ticket Search Criteria Fields: Completed (drop down box) – Select the calendar date to begin searching from (date cannot be less than 350 days from current date). Current date will display if no date is selected. To (drop down box) – Select the calendar date to stop searching on (maximum range = 90 days). Current date will display if no date is selected. Reset Form (Button) – Select to clear all search criteria fields Work Date – Not Applicable Results (drop down box) – This field defaults to “Limit 500” or select the desired maximum number of tickets to be displayed. Ticket – Enter a valid ticket number to be searched (Example: A60450399/C70350411). Type (drop down box) – Select the type of ticket to search by: 2NDR – SECOND NOTICE REQUEST ACMT – TICKET WITH COMMENTS ADDED (BLUE STAKES USE ONLY) CNCL – CANCELLED TICKET NEW – NEW TICKET NSHW – NOT APPLICABLE RSND - RESEND RXMT – RETRANSMITTED TICKET UPDT – UPDATED TICKET VOID – VOIDED TICKET Priority (drop down box) – Select the priority type of ticket to search by: DAMG – DAMAGED (NOT APPLICABLE) EMER – EMERGENCY (NEW, CANCELLED) NORM – NORMAL (NEW) RUSH – RUSH (2NDR, RXMT) SHRT – SHORT (2NDR, RXMT) Category (drop down box) – LREQ (location request) is the only code available. Channel (drop down box) – Select code indicating source responsible for ticket(s) generation: 123 – Blue Stakes Customer Service Representative ITE – Internet Ticket Entry (submitted online by homeowners and other users) QT – Quick Ticket (submitted by remote user and mapped by Blue Stakes) WEB – Remote Ticket Entry (submitted and mapped by remote user) Operator (drop down box) – Enter account name of Customer Service Representative or remote user. Member (drop down box) – Select receiver site to search (Leave blank to default to first assigned receiver.) Grids – Enter latitude/longitude grid number to search by. County (drop down box) – Select county to search by. 3 Place – Enter an incorporated place name or unincorporated county (Example: Davis Co, Bountiful, Centerville, etc.) Subdivision – Enter the name of the business or subdivision if applicable. (Example: Wind River Estates or Blue Stakes of Utah) Address – Enter the house or building address number without directional (Example: 150, 9698 or leave blank if its an intersection) Lot – Enter the lot number or unit number (Example: A3, L5, 55) Street – Enter the numeric or alpha named street to search with directional (Example: E 13200 S (Numbered) / S Minute Man Dr (Alpha). Cross 1 – Enter the intersecting numeric or alpha named street to search. Cross 2 – Enter the second intersecting numeric or alpha named street to search. Done For – Enter the name of the company, home owner or business work is being done for. Location – Enter any description or special instructions to search. Company – Enter the name of the company, home owner or caller to search. Company Phone – Enter the primary telephone number for the caller. Meet – Defaults to include “Meet” requests. Remove check mark to exclude “meets.” Caller – Enter the name of the caller to search. Caller Phone – Enter the best contact phone number to reach caller. Caller Type (drop down box) – Enter “E” for excavators or “O” for all other callers. Work Type – Enter type of excavation performed (Example – bury phone drops, repair gas line, etc.) Header – Not Applicable Output Columns – Users have the ability to select specific column(s) that they would like to see displayed on the output screen when a ticket search is completed. Uncheck All – Select this button to display only the ticket and revision number. Check All – Select this button to select and display all columns. Output Columns: Select or deselect the desired columns to be displayed during current search session. Help: Displays ticket search suggestions to assist with lookups. C. Ticket Search (NAS) A web based application with basic ticket search capabilities. Functionality is limited, but similar to the Ticket Search (.exe – executable) application. D. Utility Contact Lookup Users have the ability to lookup Emergency After Hours, Planning & Design and Receiver Site contact information for Association members through this application. Move the mouse pointer over any field or button for a description of its use and functionality. Utility Contact Criteria Fields and Buttons: County – Select the name of the county from the drop down menu then left click on the “Select County” button. Place – Select the applicable place name or unincorporated county if place is not listed. Address – Enter the numerical address of the location (Example: 158, 13201, etc. / Leave blank for intersections). Street – Enter the prefix direction followed by the numeric or alpha named street of the location. All street types and direction names should be abbreviated (Examples: N Main St, E University Pkwy, W 10600 S, S 150 E, etc.). Cross – Enter the 2nd numeric or alpha named street of the location if needed. For an intersection, leave the address field blank but fill in the Street and Cross fields. st Find Street – Finds the information entered in address and street field. 1 text box under Load TKT will display the street(s) and ranges found. Map will display the first find or double click on the desired street and range in text box (Always verify that the street displayed is found in the City requested). st Find Cross – Finds the cross street entered. 1 text box will display street and ranges found. Double click to select. 4 Best Find – Finds the best or most accurate location related to the search criteria. Lat/Long – Enter latitude / longitude coordinates in decimal degrees to find location on map and click “POINT” button to locate. Note: the correct county must be listed first. Grid – Enter fifteen second latitude / longitude grid number to find on map and click “GOTO GRID” button to locate (Example: 4110B11139C). Ticket # – Enter the ticket number to load and click “LOAD TKT” button. To display map click “FIND STREET”. To lookup contact information for the notification are of the loaded ticket, click on the “AFTER HOURS", "DESIGN", or "RECEIVER” (Example: C80350011). Utility Lookup Buttons – Slide mouse pointer over each button for description of functionality. Map Functions – Map will navigate by clicking the map or using the purple border bar. Zoom levels are located at the bottom or south end of map screen. Lookups – Select the appropriate button to display type of information needed. AFTER HOURS – After hours contact information (between 5:00 p.m. and 7:00 a.m. on weekdays, weekends, and holidays) will be displayed for member utilities (See Web Site Calendar for list of Holidays the Notification Center is closed). DESIGN – Engineering contact information will be displayed for member utilities for use in addressing non excavation locate requests directly with the member utility. RECEIVER – Day time contact information will be displayed for member utility locators and/or contract locating companies. V.RAM User Downloads The following information applies to Microsoft Windows (2000/XP/Vista/Windows 7) based computers) How to run Newtin Applications on your computer: 1. Go to Blue Stakes Newtin website http://newtin.bluestakes.org and log in with the Account name and Password provided by Blue Stakes during your signup process. 2. Click on the appropriate link under the Downloads section for the application(s) that you would like to be able to run (ex. Ticket Search Application, Ticket Entry & Search Applications, or Search and Maintenance Applications).* 3. Accept any security warnings and choose to Run the selected download application. 4. Follow the steps through the Setup Wizard to install the program(s) and shortcut(s) that you would like to use. 5. Run the newly installed/downloaded Newtin application by double-clicking on the program file in the "C:\Bluestakes" folder (or the desktop shortcut) and entering your Blue Stakes Account and Password and clicking "OK". *Alternatively, you can manually download and configure any of the Newtin applications individually by replacing steps 2 through 4 above with those below. 1. Right click on the program link for the application you would like to access and select "Save Target As" and save to the folder "C:\Bluestakes" on the local hard disk. If the folder does not exist, create it first and then save the program there. Do NOT save it to the Desktop, Program Files, Windows folders or network storage. Also, make sure that the file name ends in ".exe". 2. With Windows Explorer locate the program that was just saved and double-click on it to run it. The very first time you run the program it will ask you for the path to the application server. Enter (without the quotes) "http://newtin.bluestakes.org/newtinweb" and click "OK". Then it will ask for the application server port. The use the default port of "80" and click "OK". If the program does not run, verify the following: 5 The saved program is located in "C:\Bluestakes". Due to security restrictions in Windows, running the program from other locations may not work. Also be sure that you have Read, Write, and Modify privileges for this folder. The saved file ends with ".exe". Again, for security reasons, Windows may strip the ".exe" from the name when doing "Save Target As" and you will need to add the ".exe" back in. The information you entered for the application server path and port are correct. These will be located in the folder where you saved the program in a file that ends with ".ini". This is a text file that you can view/edit by double-clicking on it. Or you can just delete this".ini" file, then start the program again and re-enter the information as per step 2 in the "Alternative" section above. The time zone and date/time are set correctly. If the time zone or date/time is incorrect you may not be able to run the software. Also, be sure that your date/time format is set to the Windows default of "MM/dd/yy" and "h:mm:ss tt". The connection to the internet is not blocked. Some users are located behind firewalls that limit connectivity to the internet. The firewall can do this by blocking connections to certain locations/ports or by filtering data content. In either case you may need to change firewall/security settings on the local computer or at the local network firewall to allow the program to communicate. The account and password are correct. Account names are not case sensitive but Passwords are case sensitive. Notes: Newtin software will run on Microsoft Windows machines that have version 1.1 or later of .Net Framework installed. If you have Windows 7 or Vista then you are all set. If you have Windows 2000/XP and have been doing Windows Updates then you should be all set. It is very rare today for a Windows computer to not have at least version 1.1 of .Net installed. If you do not have .Net installed please visit http://www.microsoft.com/net/ for more information on how to obtain it. Copyright (c) 2009, Norfield Data Products, Inc & Cosmic Computers, Inc. VI. DOCUMENTS A. Newtin Application Setup Provides instructions to download application(s) or how to setup .Net requirements and run Blue Stakes NEWTIN ticket entry operating system applications over the Internet. Remote Access User computers must be setup to recognize Blue Stakes website as a trusted WEB site. Click on the link to print or email a copy of the instructions. B. Members Users Manual Electronic copy of this manual for users to reference or print as needed. C. RA User Agreement Provides a copy of the Remote Access User Agreement agreed to upon registering for a user account. VII. MAINTENANCE A. Member Grids Displays selected notification area in fifteen-second latitude longitude grids. B. Member Polygons Displays selected notification area in polygons. C. Maintenance Of Grids/Polygons 6 RAM users have the ability to View selected notification area for their company. RAM users needing ability to Edit selected notification area will want to contact Blue Stakes Members Services at (801) 208-2103, for assistance. D. Accessing Member Grids/Member Polygons Select the Member Grids or Polygons link to open the Member Grid /Member Polygon maintenance application. o Accessing Grids/Polygons Criteria Fields: Select Member Code to Edit – Highlight or enter the member code to be viewed (Only primary receivers will have grid or polygon selections). Select County – Highlight the county to be displayed. Each county must be opened separately. To view a new county close the map screen by clicking on the red “X” in the upper right hand corner (Map will default to BEAVER County if a county is not selected). View – View will open grids or polygons in READ-ONLY mode. Active grids or polygons will be visible in red (Refer to the “LEGEND” button for color definitions). Edit – Edit will be grayed out on all READ-ONLY accounts. Users requiring access to add or remove grids or polygons will need to contact Blue Stakes Member Services. Map Tabs & Buttons – Slide the mouse pointer over each button for the definition of functionality. Map tab functionality may vary between the grid and polygon maintenance maps (Refer to brackets for clarification). o Search Function Criteria For Grid/Polygon Maintenance State – Defaults to UT. County – Defaults to the County selected on the previous page. Place – Type in the place name to lookup or select from the drop down menu arrow on the right. Address – Enter a single address or a range of address numbers. Leave blank if searching a single street or intersecting roads (Example: 7025 or 7025-7043). Street – Enter the name or numbered street to search (Example: W Arabian Way or W 2800 S). Cross – Enter the second name or numbered street (Example: S 7200 W). Swap Street/Cross – Click to swap the Street and Cross field information. Tab 1 - Street Search (Grid & Polygon Maintenance) – Select the Street or Cross button to search for the information entered in those fields. Search results will appear in the text box, below. Click and highlight the desired street and range of address numbers to move the map to the desired street or cross street. Tab 2 – Intersection (Grid & Polygon Maintenance) – Select the Find or Search button to look for intersecting roads from the Street and Cross fields. If there is an intersection at the given streets, it will appear in the text box and flash the intersection on the map. If there are no intersections found, a lookup box will appear with the message. Check the format of how the streets were entered or change the streets to search for a new intersection. Both a street and a cross street must be specified to search with this tab. Copy to Street/Cross button will copy information from the text box to these fields. Tab 3 – Lat/Long/Grid (Grid Maintenance) – In the Latitude and Longitude field box, enter a value and then select the Jump To button. The format must be entered in Decimal Degrees with both boxes holding information in order for a coordinate to be correctly found and displayed on the map. The Clear button will remove the marker from the map. The Remove button will remove the marker from the map display and the Latitude/Longitude boxes. o Latitude – This field requires a North/South reading of GPS coordinate (always North in Utah, between 37 and 42 degrees – Example: 41.123456). o Longitude – This field requires an East/West reading of GPS coordinates (always West in Utah, between 109 and 115 degrees, enter the value beginning with minus – Example: -109.123456. o In the Grid field box, enter a Grid name and then select the Jump To button. The map will display a red plus sign where the grid name exists. The Add button will highlight the grid in blue to be added to the saved grid selection. It will not be saved unless you post it before exiting. The Remove button will remove the selected grid. All tickets should have at least one grid name in the grid field of the ticket (Example Grid Name: 4022A11154B). 7 Tab 3 – Jump To (Polygon Maintenance) – The Jump To tab functions the same as the Lat/Long/Grid tab when searching for a latitude and longitude in polygon maintenance. You also have the same ability to Jump To a grid name entered in the field box. To Jump To a Polygon enter either the Name and/or PID number of the polygon you wish to view and then select the find button. (Polygons only have a name if they are named as selected. Check the Show Name & Extra boxes to see the name and PID numbers). Tab 4 – Reports (Grid Maintenance) – Displays five different options of being able to print, save or view reports. o Grid List Report – Grid list will print a text report of all grids that are selected by your company for notification. Select print and then chose from the drop down box what you want the report to display. You may sort the list by Grid Name, Effective Date or Expires Date. You may check the box to include the Grid Effective/Expire Dates. The option to include the time with the dates is only available if you include the grid dates. Leave unchecked if you do not to include this information. Check or uncheck the box to Include Expired Grids (Expired grids will display in gray color). o Grid Changes Report – Prints a text report of grid names and changes made during the current session. o Print – Prints an image of the current map view. o Save – Save the map image to a disk or your computer. o View – Select to view a list of grid changes. You may view the grids by selecting the New Grids or Modified Grids tab. Both reports will display the grid name, effective and expires date and current status. Tab 4 – Dates (Polygon Maintenance) – Polygon Maintenance Tab 4 and Grid Maintenance Tab 5 are the same. Tab 5 – Dates (Grid Maintenance) – The dates tab holds the values of when grids are effective and gives the option of an expiration date. Date values are used during new grid selection or when modifying existing grids. Changing the effective and expire date(s) prior to selecting new grids or modifying existing grids will default the grids to the date and times set. o Adding New or Modifying Existing Selections Effective – Effective Date Now box defaults to “effective now” when adding new grids or polygons. If you wish to change the effective date, uncheck the effective box and select the desired date from the drop down calendar (dates & times must be set for future). The activation time of each grid selection is crucial when setting a future date. Be sure to change the time prior to 7:00 a.m. or you will not be notified of location requests for the new selected grids or polygons until the listed time. The time will default to what time it was when you opened the Edit mode. o Expire – This box will default to never expire. If you do want to set an expiration date, uncheck the box and select the desired date from the drop down calendar. The Expire Time for all grids or polygons is crucial. You will want to be sure and change the time to be after 5:30 p.m. on the business day you want it to expire or before 7:00 a.m. on the next business day that you no longer want to receive notifications for the selected grids or polygons. Tab 5 – Utility (Polygon Maintenance) o Print – Print an image of the current view of the map. o Save – Saves the map image to a disk or your computer. Mode Buttons For Grid Maintenance Add – New grids appear Blue until they are posted. The number of grids selected displays on the bottom right hand side of the map screen. Delete – Select the button and then left click on the grid to be deleted. Clicking on a Blue grid (new) will remove it from the screen. Clicking on a Red grid (Existing) will deselect the grid Effective Now, which makes it inactive and gray. Undo – Select the button and then left click on the grid you want to remove or undo. Only works on Blue grids. Modify – Select the button and then left click on the grid you want to modify. The Effect and Expire dates are either defaulted to Now or go back to Dates Tab on the search screen and change the dates to what you want. Remark – Select to modify or update grid remarks only. 8 Copy – Select the button and then click on an existing grid that you want to copy the effective and expiration properties of to the next selected grid. o Mode Buttons For Polygon Maintenance Edit – Select the edit button and then click on the existing polygon. A polygon in edit mode will become a purple line with vertices. Click and drag the vertices to where you want them to expand or exclude the selected area (Polygons have a maximum area of 5 square miles). Save – Select and save after using edit mode or the changes made to the polygon will not be kept (Moving without saving the changes will revert the polygon back to the previous shape). Poly – Select and then point the mouse and double left click on the area of the map to add a circle polygon. P- Draw – Select then point and drag the mouse to create and select the desired freehand polygon shape. L - Draw – Select and then point and drag the mouse to create a buffered free hand line. Default buffer is 250 feet, change the desired buffer box (under Show Extra) up to 2500 feet. Delete – Select the button and then left click on the polygon to be deleted. Clicking on a Blue polygon (new) will remove it from the screen. Clicking on a Red polygon (Existing) will deselect the polygon making it Effective Now, which makes it inactive and grey. P - Line – Select and drag the line in any direction, click once to continue the line and twice to end the segment with a buffered line. Default buffer is 250 feet, you may change the desired buffer up to 2500 feet. Copy – Select the button and then click on an existing polygon that you want to copy the effective and expiration properties of to the next selected polygon. Remark – Select to modify or update the polygon remarks field. Modify – Select the button and then left click on the polygon you want to modify. The Effect and Expire dates are either defaulted to Now or go back to Dates Tab on the search screen and change the dates to what you want. Undo – Select the button and then left click on the polygon you want to remove or undo. Only works on Blue grids. o Mode Buttons For Grid & Polygon Maintenance Move – Select the navigation button to be able to center the map and zoom in and out. Click on an area in the current map view to have that point become the center of the map. Left click, hold and drag down to draw a box around an area in the map to zoom in (Lower Altitude). Right click, hold and drag down to draw a box around an area in the map to zoom out (Higher Altitude). Navigational Key: Top of Screen = North, Bottom = South, Right Side = East, Left Side = West. If you are in another mode and unable to navigate, select the move button and then click in the map to move. Bullseye – Select the button and then left click on an area in the map to draw a bullseye. Each ring equals 100 feet for a total of 1000 feet. Measure – Select the button and then point the mouse in the map to an area where you want to start measuring. Click and drag the mouse in any direction to determine the distance between locations on the map. Single click if you want to change direction and double click to exit the measurement tool. Measurements will be displayed in miles and feet in the bottom left hand corner of the map screen. When you do change directions it will display both the current segment as well as the total distance from the starting point. Near – Select the button and then click the mouse on any particular street. It will highlight that segment of the street in red and display the street and address ranges included in that segment in the bottom left hand corner of the map screen. Place – Select the button and then click in any area of the map. This tool will identify the place/city or town associated with the current map display. The display will outline the boundaries of that area in red with the dot pattern. Date View – Select the button and the Date View Mode box will pop up. This will allow you to view the grid and polygons selections for that specific date. You may change the date and time to any date to view this information. It is read-only and will not change the effective date of adding grids or polygons. o Zoom Buttons For Grid & Polygon Maintenance 9 o 1-5 Buttons – Select 1 thru 5 to zoom in and out from the map. Each level will jump the current view by 1000 feet. Zoom level 1 takes you closest to the map, level 5 takes you the furthest out with these buttons. County – Clicking on this button takes you to the county view. In and Out – Select the zoom in and out button to move the map in 250 feet increments. In takes you closer to the map, Out will take you further away. These buttons remain grayed out until you use another function or button in the map. TR – Selecting this button displays township and range in yellow. TRS – Selecting this button displays the sections in purple. Clear – Selecting this button will clear all mode buttons. Function Boxes Show Names (Grid & Polygon Maintenance) – Checking this box will display the name of each selected grid or polygon. Polygons will display none if they were not named when selected. Show Extra (Polygon Maintenance) – Checking this box will display the effective and expired dates and times with the PID number of each selected polygon. Not applicable to grids. County Grids (Grid & Polygon Maintenance) – Displays the name of all the county grids. Hide Polygons (Grid Maintenance) – Remove the check mark from this box to display polygons. Polygons will only be visible if a member has selected polygons in the polygon map (Polygons appear purple). Hide Grids (Polygon Maintenance) – Remove the check mark from this box to display grids. Grids will appear purple if there active and gray if they are expired. Hide Expired (Polygon Maintenance) – Check the box to hide all expired grids or polygons. E. Profile – Provides ability to update account information with the exception of the account name and main contact phone number. Open the profile page, change the information and select the update button. o Profile Criteria Fields: Type – Will be “M” for all member accounts. Company/Name – The name of your company. Address – The company mailing address, including the city, state and zip code. Ext – Your phone extension (If applicable). Caller – Your First and last name. Fax – Fax number including area code. E-mail – Your email address (Required with a Ram Account). Comments – You may enter a remark or comment that pertains to your contact information. (Information provided is used only by Blue Stakes of Utah). F. RA Signup Link to the Remote Access Sign-Up Page (Create Account). VIII. REPORTS A. Delivery Log Allows the user to view and print a combined daily audit of tickets delivered from both the A and C servers. B. Details Provides the user with detailed information pertaining to the member code, monthly transmission counts, delivery parameters, primary and alternate delivery destinations, contact information, hours of operation and the county and place names the member is registered in. C. Grid Changes Report Lets you query for the last date changes were made to a member code under the user account. D. Hot Spot Report Shows the total number of tickets transmitted per each grid (Search by individual date or date range). E. Member Stats 10 Statistics lets a user query for the total number of tickets delivered per member code. Report totals are available by day, week, month or year and are broken down by the type of ticket processed. The data in this report should match the total number of tickets on the monthly member invoice (Quarterly, Semi-Annual and Annual billing members will have multiple months on one invoice). F. Monthly Xmits Shows the total number of tickets sent to the member in a daily calendar format (Excludes the current business day). G. Notification The user is able to display a list of the counties, places, grids and rules for a member. a) Counties Shows a list of the county name(s) a member is registered in to receive notifications. b) Places Shows a list of the incorporated place name(s) a member is registered in to receive notifications. c) Grids Shows a list of the grid name(s) a member is registered in to receive notifications. No grids will be displayed if the member is registered to receive notification with polygon shape files. d) Rules Shows additional receiver sites attached to the member code to receiver secondary notifications. H. What’s Queued Lists tickets that are waiting to be delivered (Local server is the server user is currently on, Remote server will be the opposite). Header Display – Utah has two servers; the banner at the top of the page displays which NEWTIN server user is currently on – Utah A is Green, Utah C is Purple. 11