1
WS|Publishing
User Manual
By 1WorldSync GmbH ©
Contents
Introduction
7
Maintain and synchronize Trade Items ...................................................................................... 7
GDSN .......................................................................................................................... 8
Online Help Structure ................................................................................................................ 9
Systems requirements .............................................................................................................. 10
Basic Handling - User Interface
11
Login- Logout .......................................................................................................................... 11
Reset password .......................................................................................................... 12
Dash board ............................................................................................................................... 13
Menu Structure ........................................................................................................................ 14
Screen Structure of Module Area ............................................................................................ 15
General Control Elements and Widgets ................................................................................... 16
Set UI Language ...................................................................................................................... 17
Set Time Zone.......................................................................................................................... 17
Change Password ..................................................................................................................... 18
Supplier Item List MyItems
19
Customize the Hit List ............................................................................................... 19
Structure of the hit list ............................................................................................................. 20
Module Structure ..................................................................................................................... 21
Selection and Search Components ............................................................................ 21
Find Items in a specific Working Context ................................................................. 23
Find Items with the Quick Search function ............................................................... 24
Find items with the Advanced Search function ......................................................... 25
Define a search criteria for an advanced search
25
Add further search criteria and remove search criteria
28
Find Items with the Smart Search function ............................................................... 28
Find Items with Search Profiles................................................................................. 30
Create a search profile
30
Change a search profile
30
Delete a search profile
30
Apply an existing Search Profile
31
Overall State, Release State and Publication State .................................................................. 31
Prices available State ........................................... Fehler! Textmarke nicht definiert.
Area for Preview, Validation Report, and further Information ................................. 32
Item Preview
32
Validation Report
33
CIC State ................................................................................................................... 34
Hit List Function Bar ................................................................................................. 34
User Manual
Introduction 3
Maintain and create item data
35
Item editor................................................................................................................................ 35
Structure and function of the editor ........................................................................... 37
Menu bar ................................................................................................................... 37
Item information and hierarchy information ............................................................. 38
Navigating through the hierarchical context of the item ........................................... 40
Add a packaging item .............................................................................................................. 43
Create new item and add as packaging ...................................................................... 43
Add existing item as packaging ................................................................................. 43
Remove a packaging item ......................................................................................... 44
Add Components ..................................................................................................................... 44
Create a new component and adding it to an item ..................................................... 45
Add an item to an existing component ...................................................................... 45
Change amount of components ................................................................................. 46
Remove Component .................................................................................................. 46
Exceptions widget .................................................................................................................... 47
CIC Summary, Publication Info, Price Summary .................................................................... 47
CIC Summary ............................................................................................................ 47
Publication Info ......................................................................................................... 47
Price Summary .................................................... Fehler! Textmarke nicht definiert.
Input help in the editor ............................................................................................................. 48
Attribute validations .................................................................................................. 48
Attribute definitions................................................................................................... 49
Attribute groups / repeatable attributes...................................................................... 49
Date selection via calendar function .......................................................................... 50
GPC Browser ............................................................................................................. 51
Using code lists ......................................................................................................... 53
Trading Partner Dependent data ................................................................................ 54
Create Items
55
Create Items using an Empty Form ......................................................................................... 55
Create Items by copying an existing item ................................................................................ 56
Create an item using the template function .............................................................................. 57
Retailer specific validations ..................................................................................................... 58
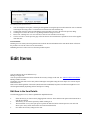
Edit Items
59
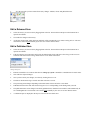
Edit Item in the Item Details...................................................................................... 59
Edit a Released Item .................................................................................................. 60
Edit a Published Item................................................................................................. 60
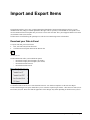
Import and Export Items
Excel Versions
Format
Rules for upload file
61
Download your Data in Excel ................................................................................... 61
Download History (Last Downloads) ........................................................................ 62
Download Excel Template ........................................................................................ 63
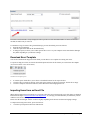
Importing Items from an Excel File .......................................................................... 63
Upload report ............................................................................................................. 64
Upload History (Last uploaded) ................................................................................ 65
Restrictions and Format Regulations ......................................................................... 65
65
66
66
Structure of an Excel File .......................................................................................... 67
Types of Attributes .................................................................................................... 68
Upload components ................................................................................................... 70
Publish items via Excel Upload ................................................................................. 71
Release Items
73
Working Version and Released Version ............................ Fehler! Textmarke nicht definiert.
Release Items from the Hit List ............................................................................................... 73
Release an Item from the Item Editor ...................................................................................... 74
Revoke the Release of an Item ................................................................................................ 74
Publish Items
75
Publish Items from Hit List ..................................................................................................... 76
Publish an Item from Item Editor ............................................................................................ 76
Select Publication Targets ....................................................................................................... 77
Allow Re-Publication of already published Targets ................................................................ 78
Publishing an Item as Part of a Hierarchy................................................................................ 78
Unpublish Items ....................................................................................................................... 80
Template List
81
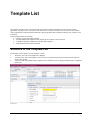
Structure of the Template List ................................................................................................. 81
Create Template ....................................................................................................................... 82
Copying a Template ................................................................................................................. 82
Edit Template........................................................................................................................... 83
Save an existing item as a Template ........................................................................................ 83
Template Preview and Validation Report ................................................................................ 84
Searching for and finding Templates ....................................................................................... 85
Create new Item from Template .............................................................................................. 85
Task List
86
Working on items with To Do status ....................................................................................... 87
Close a To Do from Task List ................................................................................................. 88
Price Information
Fehler! Textmarke nicht definiert.
Maintain prices
Fehler! Textmarke nicht definiert.
Price List Function Bar ...................................................... Fehler! Textmarke nicht definiert.
Create a new price ............................................................. Fehler! Textmarke nicht definiert.
Create price using the item list ............................ Fehler! Textmarke nicht definiert.
Create price using price type data form ............... Fehler! Textmarke nicht definiert.
Create price using a template............................... Fehler! Textmarke nicht definiert.
Create price using the upload functionality (Excel file)
Fehler! Textmarke nicht definiert.
Allowances/Charges ............................................ Fehler! Textmarke nicht definiert.
Brackets ............................................................... Fehler! Textmarke nicht definiert.
Edit/Change price .............................................................. Fehler! Textmarke nicht definiert.
Purge price ......................................................................... Fehler! Textmarke nicht definiert.
Download price data .......................................................... Fehler! Textmarke nicht definiert.
Validate price ..................................................................... Fehler! Textmarke nicht definiert.
Price Templates
Fehler! Textmarke nicht definiert.
Create a Template using Price Type .................................. Fehler! Textmarke nicht definiert.
Create a new template from Template List ........................ Fehler! Textmarke nicht definiert.
Edit a Template .................................................................. Fehler! Textmarke nicht definiert.
User Manual
Introduction 5
Delete a Template .............................................................. Fehler! Textmarke nicht definiert.
Search / Filter Templates ................................................... Fehler! Textmarke nicht definiert.
Synchronize Prices
Fehler! Textmarke nicht definiert.
Price data states.................................................................. Fehler! Textmarke nicht definiert.
Release Price ...................................................................... Fehler! Textmarke nicht definiert.
Send Price .......................................................................... Fehler! Textmarke nicht definiert.
Unrelease Price .................................................................. Fehler! Textmarke nicht definiert.
Correct Errors .................................................................... Fehler! Textmarke nicht definiert.
Delete price ........................................................................ Fehler! Textmarke nicht definiert.
Task List
Index
Fehler! Textmarke nicht definiert.
89
Introduction
This document aims to help you to familiarize yourself with and its functions.
is a convenient tool for capturing item master data in a user-friendly environment. Trade item master data plays a central
role in the entire supply chain between the manufacturer and retailer. With regard to efficient and smooth business
processes, it is crucial for data to meet high quality standards and to always be up to date.
All functionalities and the basics of working with the application are explained in the respective sections of this
document. As a supplier, the application allows you to easily create and maintain your complete product master data
descriptions and publish them in a GDSN-compliant data pool.
The chapter GDSN gives a brief overview of the GDSN standards and choreography. You can use the application
without any specific GDSN knowledge but it is highly recommended to familiarize yourself with the basics of the
GDSN.
Maintain and synchronize Trade Items
The application enables users to maintain item data through the entire workflow of a trade item
Trade item data records can be added to the system either manually or via data import (Excel interface)
Items saved in the system can be edited. Every time an item is saved an automatic validation check ensures the
validity of the item data.
Items that have been correctly validated can be released.
A released item is the precondition for publishing the item. A publication distributes the data to a selected group of
data recipients who can then view the item data provided they have subscribed to the respective item data.
Having received the item data, data recipients return a feedback sending confirmations with different status like
Accepted, Synchronized or Review. A response with status Review tells the supplier that the data needs further
adaption. The retailer can also specify when the data is incomplete.
These responses for the supplier, i.e. all trade items with a ‘To Do’ status, e.g. a received confirmation with status
Review, or perhaps a GDSN Exception, can specifically be accessed and managed in the task list module of
Webforms 2.0
User Manual
Introduction 7
GDSN
GDSN (Global Data Synchronization Network) is a standardized network of databases, referred to as data pools, for
trade item master data. GDSN is managed by GS1 and GDSN Inc.
GDSN allows trading partners to centralize, professionalize and, therefore optimize data exchange.
When using the GDSN, master data updates are performed in only one location (GDSN source data pool) and are
automatically published to all customers around the world who have subscribed to this data. Manufacturers and
customers who collaborate via GDSN can be sure they are viewing the same data.
Please note that this chapter gives only a very brief introduction to a complex subject. For more detailed information on
the GDSN standards and processes, please refer to the Knowledge Center on the GS1.org website
http://www.gs1.org/gsmp/kc
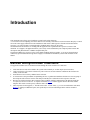
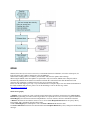
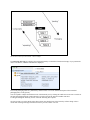
GDSN choreography
A Supplier creates a trade item ("item") with the required master data ("item data") and sends it to his GDSN Source
Data Pool (by publishing it to either an entire target market or to particular receivers). The item is registered within the
Global Registry from the Source Data Pool and published to receivers (retailers) who have subscribed to this data.
A Retailer subscribes the item data he wants to receive via his GDSN Recipient Data Pool. He can specify data by
target market, GPC, information provider and/or GTIN.
Via the Global Registry this subscription is sent to the Source Data Pool that hosts this data.
The Source Data Pool then delivers the subscribed data to the Recipient Data Pool by CIN (Catalog Item Notification)
messages.
The Retailer receives item data from there, and can now check and synchronize it or ask for a revision by the supplier.
Via the Recipient Data Pool he sends a CIC (Catalog Item Confirmation) message to the Source Data Pool that is
received by the Supplier, who then ensures the necessary steps are taken to correct and/or update the data.
GS1net Webforms as a GDSN Source Data Pool covers all functions within the dashed circle in the figure below.
Online Help Structure
The help documentation describes structure and functionality of the application.
User Manual
Introduction 9
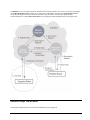
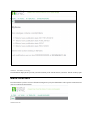
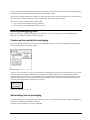
The Online Help can be accessed by clicking on the question mark icon on the right-hand side of the menu bar:
Help Button
Use the Index and Search areas to perform an exact search for individual chapters or subjects.
The Glossary is useful for looking up definitions and explanations of many hyperlinked words in the text.
The table of contents of the online help is reflected in the structure on the left. Topics can be accessed directly from this
structure by clicking on the icon in front of the topic:
After an introduction to the overall and basic handling of the user interface, the following functions are described:
How to:
•
search and find existing items using the search functions and search criteria.
•
create, maintain, edit and validate items.
•
import (upload) and export items via Excel interface.
•
prepare and maintain templates as a base for the creation of new items.
•
release and publishing item data.
Please note that the application is customized to meet individual customer requirements. This can result in a slightly
different appearance of the UI , e.g. colors, logos, tab names. The screenshots in this document may not always reflect
the UI 100%. The functionalities remain untouched.
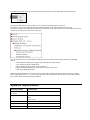
Systems requirements
Operating system
No restrictions
Broad band internet
connection
At least 1 MBit DSL
Browser
Internet Explorer 8 and 9
Firefox
Google Chrome
Javascript enabled
Required
Accept cookies
Required
Accept CSS
Required
Accept popups
Required
Allow images
Required
Screen resolution
Min 1024*768
We recommend using Mozilla Firefox ESR version 17 as a browser for all online applications and Microsoft Internet
Explorer 7, 8 or 9. For IE 9 the Google Chrome plugin is required.
Mozilla Firefox is available for download from the following website:
http://www.mozilla.org/en-US/firefox/organizations/all.html
Basic Handling - User Interface
This chapter explains the basic handling of the user interface.
This refers to the login procedure, to the dashboard homepage with its menu and module structure, and to the screen
structure of the item modules.
Also some general control elements and widgets of the user interface, and standard functions like language and time
zone setting, how to change the password, and the logout function are described here in detail.
Login- Logout
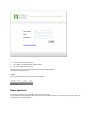
You access the application via your Web browser. A login window appears first, where you must enter your login data
set up in the system:
User Manual
Basic Handling - User Interface 11
Username: Enter your user name.
GLN: Enter your global location number (GLN).
Password: Enter your password.
The password is covered by asterisk characters and can be changed anytime.
Click Login to start the process..
Logout
To exit the application, choose Logout from the menu bar.
Logout function
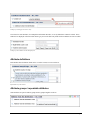
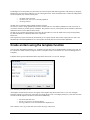
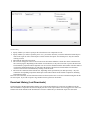
Reset password
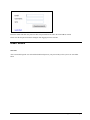
If you cannot remember your login data, the password can be reset.
Click the link Password forgotten in the login screen. You will then be taken to a new screen where you can enter your
email address, user name and GLN.
Fill in the details and click reset password. The new password will be sent to the email address entered.
Please note that the password must be changed when logging in for the first time.
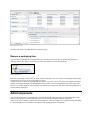
Dash board
Start Tab
After a successful login the start tab with the dash board opens as your point of entry to the system. See screenshot
below
User Manual
Basic Handling - User Interface 13
Dashboard – Item Summary on start page
The information displayed here provides you with a summary of the current status of your items. This tab is always open.
Menu Structure
From the menu bar you have access to all functions assigned to you by the administrator. The respective menu items will
open in a separate tab when clicked
Dashboard menu bar
The standard functions, i.e. language or time zone setting, password change and the logout function can be accessed from
here as well.
The following functions are available to you for maintaining item data in the application
MyItems : This is the main module of GS1net Webforms where new items are created or uploaded, and existing items
are searched for and maintained (e.g. edited, deleted, validated, released, published, or downloaded etc.). The item list
per default presents all items no matter which status they have.
MyTasks This list is restricted to published items for which a response with a ‘To Do’ status has been returned, e.g. a
GDSN exception or a recipient confirmation (CIC = Catalogue Item Conformation) with status Review. This usually
means a recipient retailer demands corrections or improvements to the received item data.
My Templates: This is the area where new item templates can be created and existing templates can be searched for and
maintained. Templates contain item data that are common for many items. They are saved under a template name and the
content defined as common in the template is then automatically populated when creating an item from a template. The
templates listed can also include templates assigned to the supplier by the Community Admin.
Change password: This is the place to change your log in password.
The right-hand section of the menu bar offers the standard functions. They include the language selection function,
which you can use to change the user interface language, and the Logout. The Info menu provides access to a number of
help topics as well as information on the product version. It explains elements and functions and describes typical work
processes of the application.
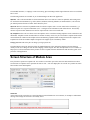
Screen Structure of Module Area
Every function is opened in a separate tab. You can have several tabs open at the same time and switch between them.
Several items or templates can be opened at the same as well - each one displayed in its own tab. It is possible to switch
between these items and templates.
Tabs in the module area
Status line
At the bottom of the screen there is a status line that provides information on recent actions, for example a confirmation
message after changes to an item are successfully saved.
User Manual
Basic Handling - User Interface 15
Status Line
Display of functions
All available options are always visible as buttons on the function bar. Whether an option is active or not depends on the
context (selection of items, status of items). Options that are not active are grayed out. See further information in section
‘Hit List Function Bar’.
Function bar above the Hit List
General Control Elements and Widgets
You can change the size of the various areas of this screen. To do so, move the mouse pointer to the dividing line
between the areas whose size you want to change. When the mouse pointer changes, click and hold the left mouse button
down. Then pull the dividing line in the required direction
Dividing line with mouse pointer icon
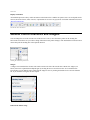
Widgets
A widget is an individual GUI element. The search section to the left of the item hit lists contains five widgets (see
below), that can be expanded and collapsed again by clicking the arrow icon in the title bar. See screenshot below.
If not needed, you can hide the entire search with all widgets at once by clicking the double arrow icon in the function
bar. If you click this icon again, the area reopens.
Arrow icon for expanding/collapsing widgets
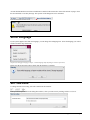
Edit an Item without saving
An item that has not been saved after a modification is marked with an asterisk in front of the tab title. Trying to close
this item tab leads to a security message. The rejection of the changes has to be confirmed.
Unsaved item tab with asterisk in tab title
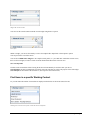
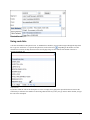
Set UI Language
If your system supports more than one language, you can change the UI language here. Select the language you wish to
switch to from the drop down menu.
Drop down for changing the language (example – available languages differ depending on customer requirements)
Please note that all open tabs will be closed when the language is switched.
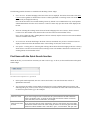
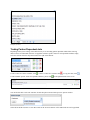
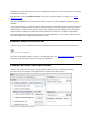
Set Time Zone
To change the time zone setting, select the control from the menu bar.
Then open the drop down list in the dialog shown below, select your time zone by clicking, and Save or Cancel.
User Manual
Basic Handling - User Interface 17
Flagging Show all time zones will extend the listing to all available time zones.
Once the time zone is changed all date and time information in the user interface will automatically be adjusted.
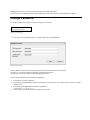
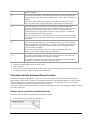
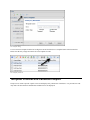
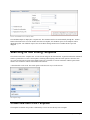
Change Password
To change your password, simply access the Change Password menu.
Change Password option
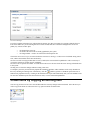
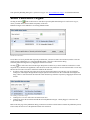
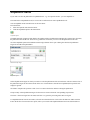
The Change Password dialog opens as a separate dialog box on the dashboard.
Change Password dialog
In the respective fields enter your current password, then enter and confirm the new password.
Click Save to save the new password. It will be valid from the next log in.
Clicking Cancel closes the dialog without changing the password.
The new password must meet the following requirements:
It must have at least five characters.
It can contain any alphanumeric characters. Passwords are case sensitive. You can use letters A to Z/a to z and the
numbers 0 to 9.
The following non-alphanumeric characters are allowed:
~!@#$%^&*_-+=`|\(){}[]:;"'<>,.?/
The new password must be different to the previous password.
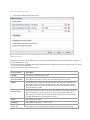
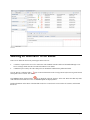
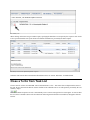
MyItems
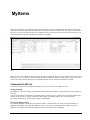
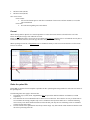
The hit list is main part of the application. Most of the functions necessary to maintain trade item data can be accessed
directly from this menu. Please see screenshot below for a general overview of the item list. The search is located on the
left of the screen area, the actual item list is the middle. The area at the bottom of the screen provides an item preview as
well as information on possible validation errors and a CIC summary.
Hit list
When you access the application for the first time, all items are displayed. The latest versions of the items will be shown
sorted by the ‘Last User Change’ option by default. In order to reduce the number of displayed hits, you can carry out a
search or use other selection options. Proceed as described in the section ‘Search and find Items’ to do this.
Customize the Hit List
The layout of the hit list can be modified according to the user’s preferences in a number of ways.
Sorting the Results
By default, the results are sorted by processing date which means the items that were changed last are always displayed
at the top.
You can sort the hit list in ascending or descending order by column. To do so, click the arrow icon in the header of the
column you want to use for sorting. A drop down menu opens, providing the options Sort Ascending and Sort
Descending. Alternatively, you can simply click the column header.
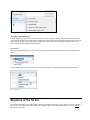
Showing and hiding Columns
The columns displayed in the hit list can be shown or hidden. Click the arrow icon in one of the column headers. A
dropdown menu appears, providing the submenu Columns. You can now define which of the columns you want to
display by activating or deactivating the checkboxes next to the column names accordingly.
User Manual
MyItems 19
Column options
Arranging columns differently
You can change the position of the columns in the hit list. To do so, click the header of the column whose position you
want to change, hold down the mouse button, and pull the column to the desired position in the table. Release the mouse
button once the column is in the position you require. Please note that the order the columns are displayed in is also
reflected in the columns submenu described above.
Save Layout
Once you have customized the list, you can save the layout by activating the Save layout button on the top right of the
screen.
You will then be able to select the view that you want to be applied to the current hit list from the drop down menu.
Selection of item view
Structure of the hit list
The item data belonging to the Supplier GLN is displayed by default providing you with a quick view of key and status
information of the selected item. This information is displayed below the hit list at the bottom of the screen without
having to open the item.
A number of functions such as editing or publishing items can be performed directly by selecting the icons from the
function bar. Editing an item opens a separate tab. Multiple items can be opened at once.
This section describes how to work with the hit list. It deals with the structure of the module, its basic functions, and the
control elements used in the various use cases.
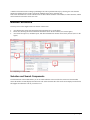
Module Structure
The entry screen of the Supplier Item List consists of three areas:
Area showing the various selection and search components (area 1 in the figure)
Hit list area, showing the items found and a function bar above the list of items (area 2 in the figure)
Area for the item preview, validation report, and other information on actions carried out by the user (area 3 in the
figure)
Structure of the Supplier Item List module
Selection and Search Components
The left-hand area of the module allows you to use search and filter criteria to affect the selection of items and thus
restrict the number of items displayed in the hit list. The selected criteria take effect on the items displayed in the hit list
and supplier item details as soon as you click Search.
User Manual
MyItems 21
Selection and search components area
This area gives you various different options for finding items:
You can restrict the item search to items with a specific release status.
You can use the Quick Search function.
You can also carry out a structured search in attributes (Advanced Search function)
You can restrict the item search using status filters in the Smart Search area.
You can use an existing search profile.
You can find an item starting from the task list.
Execute a search
Once you have defined all required restrictions and search criteria, click Search in the title bar or footer of the search and
selection conditions area or press Enter.
The search is carried out with the selection conditions defined. This means that the results only show items that meet the
defined criteria as well as the visibility conditions defined for the application and user.
A blue icon in the title bar indicates whether a search restriction has been defined in a widget. This allows you to see
where you have defined search criteria. If no selection conditions have been defined in a widget, the icon is grayed out.
Widget with search restriction
You can reset the search restrictions made in each widget using the Reset option.
Reset option
Within a widget, you can use the TAB key to move from input field to input field or from option to option.
You can press Enter to start the search.
You can also combine these widgets to one complex search profile, i.e. you could enter search/filter criteria in two,
three or all four widgets, in order to search for items that match all these filter criteria at once.
Save search profiles
The last search executed here before leaving the hit list will automatically be used next time you enter it.
Search profiles can also be permanently saved and reused any time later on. This is the purpose of the fifth widget
Search Profiles at the bottom of the search area. (See respective sub section below.)
Find Items in a specific Working Context
In you can reduce the number of items that are displayed in the hit list via the release status of items.
Working Context area in the area for the search and selection components
User Manual
MyItems 23
The following possible selections are available in the Working Context widget:
Latest Versions: All items belonging to the GLN of the user are displayed. The hit list shows items of the most
recent revision regardless of whether this revision is released, published or a working version. The items edited
most recently are displayed at the top.
Note: The hit list will be sorted in this Working Context by default. It is recommended to carry out all updates
and data maintenance from the ‘Latest Versions’ Context to ensure only up-to-date items will be displayed for
the user.
Released: Selecting this working context shows all items belonging to the user’s GLN(s), where a released
revision exists. The attribute values shown in the list are the released revision attribute values.
Note: As far as this item with a ‘pending Release’ has been released, only the released version with its attribute
values are available in this context.
Never Released: All items that belong to the GLN of the user and that do not yet have a released revision are
displayed. The hit list shows the attribute values of the working version (most recent version).
Item Update – Pending Release: Selecting this working context shows all items belonging to the user’s GLN(s),
which do have a released version and a (latest) working revision. The attribute values shown in the list are the
working (latest) revision attribute values.
Find Items with the Quick Search function
Within the hit list, you can search for items that you want to edit or copy. To do so, use the search function in the Quick
Search widget.
Search and selection components area - Quick Search
In the Quick Search input field, enter one or more search terms. Your search terms must consist of
alphanumeric characters.
You can restrict the number of items displayed in the hit list by using wildcards and logical operators. The
following table gives you an overview of ways in which you can restrict the search. The entered search terms
are shown in square brackets ([]) in the examples.
Search for a word
If you enter a single word as a search term, the system finds all items that contain this
word as an attribute value. A search for [shelf] finds all items that contain "wall shelf",
"pine wall shelf", and "red wall shelf", for example.
Search for more than
one word
If you enter more than one word (separated by spaces) as search terms, the system finds
all items that contain at least one of the words you entered. A search for [pine wall shelf]
finds items with the attribute value "wall shelf", "pine", "red wall shelf", and "pine wall
shelf", for example.
[*]
You can use the wildcard [*] when entering search terms. The asterisk represents any
string of characters. The search term [b*k] finds "book", "back", "bark", and "buck", for
example.
You can use a placeholder at the beginning, in the middle and at the end of a search
term. [b*k] and [book*] are allowed and [*ook] return results in the search query.
[+]
The search connector [+] connects search terms using an AND relationship, thus
specifying that all entered terms must occur in an attribute value in order for the item in
question to be included in the search results. You can use wildcards and search
connectors together. The search queries [wall shelf +pine] and [wal* +pine] find all
items with the attribute value [pine wall shelf].
Note that you cannot use a [+] sign at the start of a search term. The search ignores this
type of search term. Search terms restricted using [+] must always relate to a preceding
search term.
[-]
You can use the search connector [-] to exclude search terms. The system finds items
that do not contain the term preceded by [-]. A search for [wall shelf -pine] finds items
with the attribute value "wall shelf", "larch wall shelf", and "red wall shelf" but not
"pine wall shelf", for example.
Search terms restricted using [-] must always relate to a preceding search term.
Again, you can combine wildcards and search connectors.
["..."]
If you place quotation marks around the search term you enter, the search only finds
items that contain an attribute value with this exact phrase.
For example, a search for ["heavy duty work gloves"] finds all items whose attributes
contain the exact character string "heavy duty work gloves".
If necessary, define further restrictions for the search.
Then click Search.
The search is carried out using the defined search criteria. This means that the results only show items that meet the
search criteria and the visibility conditions defined for the user.
Find items with the Advanced Search function
In addition to the Quick Search function, allows you to carry out a structured search with advanced search criteria.
When using the Advanced Search function, you can define which values certain attributes must have in order for items
with those attributes to be included in the hit list. This allows you to form a set of search criteria. You can view the
restrictions defined using the Advanced Search functions if necessary.
You can carry out an ad-hoc structured search or save the selected search criteria as a search profile and make this profile
accessible to other users.
Define a search criteria for an advanced search
Proceed as follows to define the search criteria for an advanced search:
In the Advanced Search widget, click the Edit icon.
User Manual
MyItems 25
Edit option in Advanced Search widget
The form for defining search criteria opens.
Defining search criteria
Define the search criteria for the attributes. To do so, select the required attribute from the dropdown boxes and then, in
the input field, enter the value.
You can restrict the list of attributes shown in the dropdown box by entering the name of the attribute or part of its name
as a search term in the search field.
There are the following types of search criteria:
Search criterion
Description
Contains
The attribute contains the entered value.
Does Not Contain
The attribute can contain no value or any value other than the entered value.
Equals
The attribute value is exactly the entered value. Note that in the case of attributes of
the type Boolean, the value "true" should be entered here. The value "false" should
not be used for this search criterion, since in this case items for which the attribute is
not set would not be found.
Does not equal
The attribute can have no value or any value other than the entered value. Note that in
the case of attributes of the type Boolean, the value "true" should be entered here.
The value "false" should not be used for this search criterion, since in this case items
for which the attribute is not set would not be found.
Empty
The attribute has no value.
Not Empty
The attribute is not empty, i.e. it has a value.
From - To
The attribute value lies within the range defined by the two entered values. If the
search criterion "From"-"To" is chosen, two input fields are shown where you can
enter the values for the range. In the case of numerical attributes, the comparison is
carried out on a numerical basis; in all other cases, the comparison is alphanumeric.
Example for an attribute of the type Identifier: A search for "From" = "a" and
"To" = "h" (or "A"-"H") finds all values between those that start with "a" and
those that start with "h".
Example for an attribute of the type GTIN: The search finds all values that are
greater than or equal to the entered "From" value and smaller than or equal to
the entered "To" value: The search criterion "From" = "10000000" and "To" =
"20000000" would find all GTINs from 10000000 to 29999999; the search
criterion "From" = "401234500000" and "To" ="4012345999999" would find
all GTINs with the stem "4012345", e.g. "4012345000009".
Begins With
The attribute value begins with the entered value.
Does Not Begin
With
The attribute has no value or the attribute value does not begin with the entered
value.
Ends With
The attribute value ends with the entered value.
Does Not End
With
The attribute has no value or the attribute value does not end with the entered value.
You can define multiple search criteria for an attribute: To do so, choose the required attribute (e.g. "Product Variant
Description") in multiple dropdown boxes and give each one a value ("red", "green", and "blue"). The hit list then
displays all items that have one of these values ("red", "green", or "blue") for the attribute in question. Make sure that the
option Item must match at least one criterion (OR) is selected.
Make sure that you enter the attribute values in the correct format. This depends on the attribute type of the selected
attribute:
Attribute
Type
Search Criteria
Format
Number
Contains, Does Not Contain, Equals, Does Not
Equal, Empty, Not Empty, From-To, Begins
With, Does Not Begin With
Digits with a maximum of one
decimal point
Date
Equals, Does Not Equal, Empty, Not Empty,
From-To
YYYY-MM-DD
Date-Time
Equals, Does Not Equal, Empty, Not Empty,
From-To
YYYY-MM-DD hhmm
GTIN
Contains, Does Not Contain, Equals, Does Not
Equal, Empty, Not Empty, From-To, Begins
With, Does Not Begin With, Ends With, Does
Not End With
Digits
Text
Contains, Does Not Contain, Equals, Does Not
Equal, Empty, Not Empty, Begins With, Does
Not Begin With, Ends With, Does Not End With
Alphanumeric characters
Enumeration
Type
Equals, Does Not Equal, Empty, Not Empty
System name
User Manual
MyItems 27
Add further search criteria and remove search criteria
The number of search criteria in the Advanced Search area can be defined freely:
You can use the Add criterion option to add further search criteria. Each time you click this option, a new line
with selection and input fields is generated; you can use each new line to define search criteria for the attributes.
You can use the Remove option - provided for each line - to remove existing search criteria.
Combine search criteria
Define how you want the specified search criteria for the attributes to be evaluated. You can combine the search criteria
with AND or OR. The selection applies to all criteria defined in the Advanced Search area.
Activate one of the following radio buttons:
Item must match at least one criterion (OR)
Item must match all criteria (AND)
Exit the advanced search
You now have the following options for completing the operation.
Click Search if you want to use the search criteria to restrict the hit list straight away
and immediately obtain a search result.
Click Apply to return to the hit list without executing an immediate search and have the ability to add more search
criteria using the Quick or Smart search.
The search criteria you defined are now displayed in the Advanced Search widget on the left side (read-only mode).
Click Cancel to abort the advanced search and immediately get back to the hit list.
Delete all search criteria for the advanced search
To delete an advanced search along with all defined search criteria, proceed as follows:
In the Advanced Search widget, click the Reset icon.
The search criteria are deleted and the field with the search criteria is now empty.
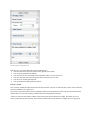
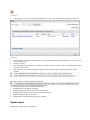
Find Items with the Smart Search function
You can restrict the hit list by means of a predefined search (Smart Search function).
To define the search criteria for a smart search, proceed as follows.
In the Smart Search widget, click the Edit icon.
Edit option in Smart Search widget
The form for defining search criteria opens.
Smart Search
There are the following types of search criteria:
You can display all items with a specific publication status (Published, Sent, Not Sent) by selecting the required
entry in the dropdown box.
You can display all published items for one or more retailers by activating the radio button next to the option
and then click the Edit
icon. A search dialog opens where you can search for the required retailers and
select them. You can use the Reset option to clear your selection.
You can display all items with a specific GPC (global product classification)
You can display all items with a specific CIC status (Accepted, Synchronized, Review, Rejected).
You can display all items with a price.
You can display all items without a price.
You can display all items that were edited within a certain time period. Type in the dates or use the calendar
function to select the start and end dates of the period. If you do not enter an end date, all items changed since
the entered start date are displayed.
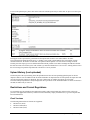
You now have the following options for completing the operation.
Use the Apply option to use the defined search criteria to restrict the hit list.
Click Cancel to return to the hit list without saving the changes.
The defined search restrictions are now displayed in the Smart Search widget (read-only mode).
User Manual
MyItems 29
Results of search restrictions for a smart search
To delete a smart search along with the defined search criteria, proceed as follows:
In the Smart Search widget, click the Reset icon.
The search criteria are deleted and the field with the search criteria is now empty.
Find Items with Search Profiles
You can use search profiles to save defined search settings in order to use them for future searches.
Search Profiles widget
Create a search profile
To create a new search profile, proceed as follows:
Define the required search settings in the selection and search components area.
Click Save in the Search Profiles widget.
In the dialog box that now opens, enter a name for the new search profile.
Complete the operation by clicking Save. Click Cancel if you want to return to the hit list without creating a new
search profile.
Change a search profile
To change an existing search profile, proceed as follows:
From the dropdown list, select the required search profile.
Change the search settings or create new search settings for the selected search profile.
Then either click the Save or the Save as option within the function bar of the Search Profiles widget. This option
is only active once you have changed the search settings for the search profile.
The changes are saved in the search profile you selected previously.
Delete a search profile
To delete a search profile, proceed as follows:
From the dropdown list, select the required search profile.
Click the Remove option.
Confirm the safety prompt that now appears. Click Cancel if you want to return to the hit list without deleting the
search profile.
The search profile is deleted from the list.
Apply an existing Search Profile
To apply an existing search profile, proceed as follows:
Select the required search profile from the dropdown box of existing search profiles.
The search settings for this search profile are now loaded.
Then execute the search by clicking the Search option in the title bar or footer of the search and selection
components area.
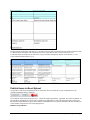
Overall State, Release State and Publication State
The Overall State gives information about the current status of the items. The table should give an overview about the
status as well as the matching icons displayed in the Release and Publication state.
Publicatio
n state
Release State
Overall State – Definition
Draft new Item
A newly created item which has been saved and perhaps edited several times Not
released yet.
Item update – pending release
New item which was already released, but not yet published. Has been edited again
afterwards, and the latest version is not yet released.
Released ready to publish
Newly created item – possibly edited several times– latest version is already released
and now ready to be published.
Sent item update – pending release
Item which itself was already released and published, but has been edited again. The
latest version is not yet released. As soon as this is done, the item is automatically
sent to the source pool again.
Item published
Item which was already released and published. No changes took place on this item
meanwhile.
After publishing the item cannot be unreleased anymore.
Sent item update –pending release
Item which was already released and sent as part of a published hierarchy, but
afterwards has been edited again.
The latest version is not yet released. As soon as this version is released, it is
automatically sent to the pool again.
Item sent
Item which was already released, and sent as part of a published hierarchy. No
changes took place on this item meanwhile.
User Manual
MyItems 31
Unpublished to all
Item which itself was unpublished from all recipients, but has not been edited and is
still released.
Unpublished to all –draft item
Item which itself was unpublished from all recipients and has been unreleased.
Unpublished to all – still sent
Item which itself was unpublished from all recipients but is still part of another
published hierarchy and has not been edited again.
Item unpublished to all – still sent Update – pending release and re-publish
Item which itself was unpublished from all recipients but is still part of another
published hierarchy and has been edited again.
Area for Preview, Validation Report, and further Information
A report area is provided beneath the hit list. You can change the size of this area or you can hide it altogether. This area
displays a preview of the item data or the validation report, for example. Various tabs provide further information on the
selected item.
Item Preview
If you select an item from the hit list by clicking it once, a preview of the item data for the item is displayed on a separate
tab beneath the list. The preview gives you a quick overview of the item and only displays a limited set of attributes. The
item preview is in a read-only mode. No modifications can be carried out here but validation errors will be displayed for
the user.
Item Preview
Validation Report
The Validation Report tab beneath the hit list provides the item data check in accordance with the validation rules
defined in the system. Highlight one or more items in the hit list and click on the
Validate button. The validation
report will not be loaded automatically, it has to be activated by the user. The report provides information on the nature
of the error. When highlighting more than one item, the validation report shows the reports for the items one after
another.
Validation Report
The top column shows icons indicating the result in terms of Adding, Saving or Releasing the item in question.
Icons in the report:
Action successful / no validation errors
Cannot be released due to validation errors
Icons for various error levels:
Error
The data cannot be saved or released.
Warning
The data can be saved but not released.
Info
The data can be saved and released.
Error
The data can be saved but not released.
CIC Summary
The CIC Summary tab displays the number of received CatalogueIetmConfrimations and an overview of the CICs. The
CIC Summary lists the most recent CIC for each retailer in a separate line along with its status.
The icon
is displayed if at least one current CIC with the status REVIEW has been sent by a retailer.
The icon
The icon
The icon
The icon
is displayed if at least one GDSN Exception has been received.
is displayed if the CIC of this retailer has the status ACCEPTED.
is displayed if the CIC of this retailer has the status SYNCHRONIZED.
is displayed if the CIC of this retailer has the status REJECTED.
An immediate feedback on items when major validation errors arise will be send by the source data pool. This will be
done by the GDSNException displayed as shown in the screenshot below:
User Manual
MyItems 33
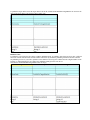
CIC State
The CIC State column displays the cumulated confirmation status of each item, so only the last status will be displayed
here. Beside a CIC, GDSN Exception will be displayed here as well.
The table gives an overview of the icons displayed along with the CIC State in the hit list.
Cumulated CIC
State
Comment
1) No CIC feedback received yet.
2) No feedback from recipients and no CIC Review as well as no GDSN Exception
3) Item is released again and there is no open CIC review and no GDSN Exception.
CICs from recipients have been received and have status ACCEPTED.
CICs from recipients have been received and have status SYNCHRONIZED.
“To do” state:
At least one latest CIC has state REVIEW and there is no open GDSN Exception.
CICs from all recipients have been received and have the state REJECTED.
“To do” state:
At least one GDSN Exception was received for that item and is still open.
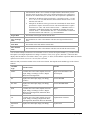
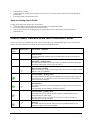
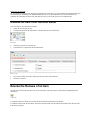
Hit List Function Bar
The function bar below the hit list contains actions that you can carry out on the selected items:
Function bar
Icon
Description and Definition
Create: Use this option if you want to add a new item
Copy: You can create a new item on the basis of an existing item.
Edit: You can use this option to make changes to an item.
Delete: Only saved draft items, which have not been released or published can be
deleted.
Validate: From the hit list, you can check items for completeness, formatting, and
consistency so that you can release them later on.
Release: If the current revision of an item has a quality state that is suitable for release,
you can use the Release option to release it. To do so, proceed as described in the section
‘Release Items’.
Undo Release: The release of an item can be revoked with this button.
Upload: You can create items by importing them into the system from an Excel file.
Download: To export the data of one or more items into an Excel or PDF file use this
option. You can also generate an empty Excel file to use as a template when creating
items for upload from here.
Maintain possible publication targets: Either choose and/or add the recipient(s) of the
item
Publish: Choose this option if you want to publish the selected item in the source data
pool.
Unpublish: The publication of an item can be revoked with the ‘Unpublish’ button.
Template: An item can be saved as template, to use it as a basis for other new items.
Select Rows: Use this button to select all rows or lines on all pages of the hit list at
once.
Maintain and create item data
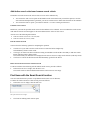
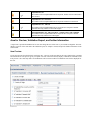
Item editor
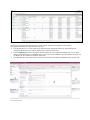
Open the hit list to access your items. All tasks relevant to item data maintenance can be performed from here. To access
an item, simply double click on it in the hit list
User Manual
Maintain and create item data 35
Supplier Item Details
Any item accessed in the editor will open in a new tab. The tab header always displays the item GTIN.
The supplier item detail area is split into three sub-areas:
The left-hand area (area 1 in the figure) shows the hierarchical assignment of the item. The packaging and
component hierarchies for the item are displayed here in their own sub-areas.
The actual Edit Form (area 2 in the figure) forms the main part of the supplier item details area. You can make
changes to the attributes here. In addition, there is a report area for the validation report beneath the edit form. You
can change the size of this area or hide the report area.
The right-hand area (area 3 in the figure) next to the edit form provides further information on the selected item.
Structure of item details
The status line in the supplier item details allows you to navigate through the item data in the hit list without having to go
to the hit list or individual supplier item details first. You can jump to the first or last item data record or move to the
previous or next record.
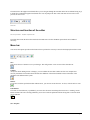
Status line
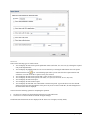
Structure and function of the editor
Structure of the editor - edit form with function bar
The editor has a menu bar below the actual edit form and an area for the validation report which can be hidden if
necessary.
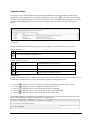
Menu bar
You can use the options provided in the function bar to perform the necessary actions for the displayed item data record
Function bar
Save
You can use the Save function to save your changes. This will generate a new revision of the selected item.
Validate
At any time while making entries or changes, you can validate the item data to make sure that it is complete and
correctly formatted. The item data check includes the validation of the entered attribute values on the basis of the
validation rules defined in the system.
Release
If you have saved the specified item data without errors, you can now release the item. To do so, click the Release icon.
Undo Release
If an item is released but not yet published, you can revoke the release and change the item state to a working version.
Please not that if the item is already published, you need to revoke the publication before being able to select the undo
release function.
Save Template
User Manual
Maintain and create item data 37
If an item is to be used as a basis for other items, it can be saved as a template. Saved templates can be selected from a
drop-down menu then in the ‘Create Item’ dialog. For detailed description of the template function, please refer to the
separate chapter in the documentation
Export PDF
The item currently opened in the editor can be exported to a PDF file. Simply select this option and choose PDF export.
A dialogue will open which allows you to either open or save the PDF.
Maintain possible publication targets:
Recipient(s) of the item can be added with this function.
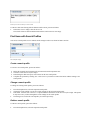
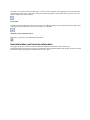
Item information and hierarchy information
The widgets in the area to the left of the item editor offer additional information on the selected item.
The left-hand area shows the Item Information containing the most important attributes that identify the trade item. This
information is displayed regardless of which tab or flex bar is open.
Left-hand widget
Item information
User Manual
Maintain and create item data 39
The Item Information widget displays the most important information that identifies the trade item, regardless of which
tab or flex bar is opened. The information displayed here can differ from system to system; it is defined by the customer.
However, the GTIN is always displayed here and is always at the top of the screen.
Item Information widget – example
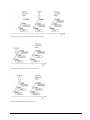
Navigating through the hierarchical context of the item
This widget allows you to navigate through the hierarchy of the selected item. The selected item is also the root node for
the hierarchies described below. The two hierarchies are displayed in two separate widgets.
Item Hierarchy Context
The selection of an item in the Packaging hierarchy widget causes the item to be selected in the Component hierarchy
widget, too (and vice versa).
The upper part shows all GTINs above the selected item while the lower part shows all GTINs below the selected item.
For example, opening an item marked as a pallet that contains a case and a base item will show the pallet in the upper
widget. The lower widget will show the pallet and all lower items.
User Manual
Maintain and create item data 41
Hierarchical context of a selected item - "Each" example
The Packaging hierarchy area displays the packaging hierarchy to which the selected item belongs. If you position the
mouse over an item, additional information is displayed.
The various packaging units are symbolized by different icons. For a more detailed description of the individual
packaging units, see the glossary.
You can expand or collapse the different levels of the hierarchy tree by clicking the small arrow icons next to each level.
Navigate through the hierarchy without having to go back to the hit list and select another item there.
To navigate through the hierarchy, choose one of the following three options:
Click on an item to view the details in the editor. Please note that the focus of the hierarchy will not change. This is
useful when working with large hierarchies because it provides a better overview.
Click on an item while holding the left SHIFT key: This not only opens the item details in the editor but also adjusts the
hierarchy view. The selected item now becomes the root knot in the widget.
Click on the item while holding the left CRTL key: This opens the item in a new tab. The hierarchy tree of the first item
opened will remain untouched while the hierarchy of the newly opened item will be adjusted.
You can carry out the following actions in this widget:
You can search for and add an existing component.
You can create a new component and add it to an item.
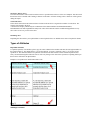
Add a packaging item
There are two ways of adding a packaging item to a hierarchy – either by creating a new item and adding it to the
hierarchy or by adding an existing item to the hierarchy.
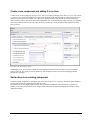
Create new item and add as packaging
Please note that this item cannot be a base item; only packaging items can be created from the hierarchy widget. Open
the item details and use the hierarchy widget.
Hierarchy widget
‘Create new item and add as packaging’ open the create item dialogue. Enter the GTIN of the trade item. If you want to
create the item from a template, select the correct template from the drop down menu. The GLN and target market
cannot be edited. The article type is set to packaging item by default. Once the necessary data is populated, click create
and the item editor will open. Now populate all necessary attributes and save the item. Once the newly created item is
saved, the option Add packaging becomes active in the UI.
Item editor for creating the packaging item
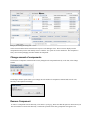
Add existing item as packaging
To add an existing item as a packaging, select Add existing item as a packaging in the hierarchy widget. A dialogue box
with a hit list containing the available item opens.
The items can be draft versions, released or published.
User Manual
Maintain and create item data 43
Hit list with items to add
Select the item that is to be added and click on Add Packaging.
Remove a packaging item
You can remove a packaging item from the hierarchy by clicking on the item in the tree and activating the Remove
packaging button. This option is deactivated if you have selected the root node of the hierarchy.
Remove packaging item
Removing a packaging is only possible for items with processing status New or Not Released. Packaging items with the
status Released, Corrected, or Changed cannot be removed.
Confirm the operation in the safety prompt that now appears. If you click Cancel, you return to the supplier item details
without removing the packaging. The packaging hierarchy is updated: The removed packing unit and any larger units
below it are no longer displayed. The packaging item retains its processing status. The item to which the packaging was
assigned remains unchanged.
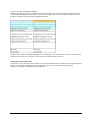
Add Components
You can add a component to a packaging item. Note that you can only add components for items with the processing
status New and Not Released. Items with status Released and Published cannot be added as components.
There are two ways of adding a component to a packaging item – either by creating a new component (item) and adding
it to the packaging item or by adding an existing item to the packaging item as a component.
Create a new component and adding it to an item
To add a newly created component (package or base item) to an existing packaging item, click Create new item and add
as component. The create item dialogue now opens. Enter the GTIN of the trade item and select the article type. If you
want to create the item from a template, select the correct template from the drop down menu. The GLN and target
market cannot be edited. Once the necessary data is populated, click Create and the item editor will open. Now populate
all necessary attributes and save the item. Once the newly created item is saved, the option Add component becomes
active in the UI.
Item Editor with Add component option
The dialogue closes. The new item is displayed in the component hierarchy in the item details for the item initially
selected. Click the Save option to save the initial item. The component is always saved in the packaging item that
contains the component.
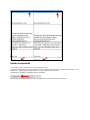
Add an item to an existing component
To add an existing component to a packaging item select Add existing item as component. The hit list opens and allows
you to search for and select packaging items and base items.
Note that the hit list only displays items with the same GLN and Target Market of the selected item, regardless of
whether you are able to add/create items for multiple GLNs. This prevents different packaging GLNs from occurring
within the hierarchy.
User Manual
Maintain and create item data 45
Dialogue for selecting an existing item – extract
Select an item from the hit list and click Add component. The dialogue closes. The new item is displayed in the
component hierarchy for the item initially selected. Click the Save option to save the initial item. The component is
always saved in the packaging item that contains the component.
Change amount of components
The amount of components contained can be easily changed in the component hierarchy. To do this, select Change
amount
The dialogue that now opens allows you to simply enter the number of components conatined and select ok. The
hierarchy is then updated accordingly.
Remove Component
To remove a component from the hierarchy, select Remove packaging. Please note that this option is deactivated if you
have selected the root node of the hierarchy. Confirm the operation in the safety prompt that now appears. The
component hierarchy is updated: The removed packing unit and any larger units below it are no longer displayed. Only
items with the processing status New or Not Released can be removed.
Exceptions widget
The Exceptions widget is located on the right hand side. The widget is minimized by default and can be opened by
clicking on the arrow symbol.
The information on the GDSN Exceptions received is displayed here. The Exceptions are listed with the exact date and
time they were received by the application as well as the type and error details. To acces the error details, click on the
status icon. This will open a pop-up window with more information about the error if available. Once the error is
corrected you can click on the icon Mark as done. This will remove the error status.
CIC Summary, Publication Info, Price Summary
CIC Summary
The CIC Summary widget displays the number of received CICs and gives an overview of these responses. The most
recent CIC for each retailer are displayed here.
The widget shows the CIC status icon, the to do state and the item recipient.
Clicking on the status item will open a pop-up window with more information about the CIC if available. Once you have
reviewed the CIC you can change the to do state to done by clicking the Mark as done icon.
Please note that only the most recent CIC from each retailer is displayed here. If you have received several CIC from the
same retailer and wish to view all CIC, you can open the entire list by clicking on the Show CIC history icon. This list
opens in a separate pop-up which displays the CIC state, the code, the GTIN of trade item, the description, the long
description, additional description, the corrective action, corrective information as well as the date/time of the receipt of
the message by the system.
For a list of the icons displayed please see chapter CIC state.
Publication Info
The Publication Info widget displays the number of publications. It indicates the publication target (retailer or target
market) as well as the publication date and delivery state.
User Manual
Maintain and create item data 47
Publication Info widget
You can carry out the following actions:
Publish the item. See chapter Publish items for details
‘Publish Items‘.
Unpublish the item. See chapter Unpublish items for details ‘Unpublish Items‘.
Input help in the editor
There a number of input helps integrated into the editor. The following functions are explained in this chapter:
Attribute validations
Attribute definitions
Attribute groups / repeatable attribute groups
Usage of code lists
Date selection via calendar function
Attribute validations
Some attributes will be highlighted in the UI during editing and saving. You will notice an information bubble next to
the input field for the attribute that indicates data is missing or incorrect.
Mandatory and conditionally mandatory fields are indicated with an exclamation mark which provides a mouse-over text
where the error or the missing data is described.
Example of a conditionally mandatory attribute field
Your data is checked while you are actually entering it. Once an incorrect value is entered a warning appears. If you
position the mouse over the icon, a message describing the error appears.
Example of a warning for an incorrect entry
The values for some attributes, for example the Information Provider, are set by default and cannot be edited. These
attributes are displayed in the item editor but are greyed out. The data entry fields for these attributes are not accessible.
Example of a non-editable selection and input field
Attribute definitions
Each attribute has a definition which can be viewed as a mouse-over text in the UI.
Information text for an attribute
Attribute groups / repeatable attributes
Some attributes are part of attribute groups and are grouped together in the UI.
User Manual
Maintain and create item data 49
Example of the display of a structured attribute
These groups can be repeated, to add a reputation use the icons in the top right hand corner. The
The
button copies the existing attribute, including all values entered. Use the
button adds a new reputation.
button to delete an attribute.
The entire
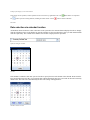
Date selection via calendar function
All attributes that are defined as a date or date-time in the system have the calendar function displayed in the UI. Simply
click the calendar icon next to the attribute to open the calendar. Use the arrow buttons to select year and month and then
click the required day. The calendar closes and the selected date is displayed in the input field.
Option for calling the calendar
Calendar
If the attribute is defined as date-time you are also able to specify the time at the bottom of the calendar. Please enter the
time first and then select the date. If you enter the date without entering the time, the system will set the time to 00:00 by
default. Note: The time zone is determined by the time zone setting of the application.
Calendar with time selection
Clicking Today will enter today’s date and the current time.
To jump to another month or year
use arrow to the left or right in the title bar to browse month by month,
Or click the arrow down to open the second dialogue, where you can directly click on the year and month,
confirming with OK (or Cancel).
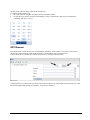
GPC Browser
The GPC Browser provides an easy way of navigating the mandatory Global Product Classification. The browser
displays the complex hierarchy of the Segment, Family, Class and Brick codes in a hierarchy tree.
You can either enter a code directly or access the browser by activating the browse button
GPC browser
Activating the browse button opens a list of all codes with the respective sub codes displayed in a hierarchy tree. Click
the relevant segment and open the tree beneath it, to specify your selection.
User Manual
Maintain and create item data 51
Selection of the code within the GPC
Click on Select. The system automatically populates all levels – Segment, Family, Class and Brick, of the GPC with the
correct codes.
Selected GPC codes
If you already know the correct code you can enter it directly in the search field and click on the Search button.
Depending on the level of the code all fields below will be populated automatically. As shown in the screenshot below, if
you enter the code at class level the brick code will still have to be specified. The GPC browser provides only the
relevant codes in a drop-down list.
Please note:
You can only search for codes. No free text search is allowed here.
The entry field on the top level only accepts complete codes. All other fields will automatically provide suggestions
if you start typing the code.
Code entered in the search field
Using code lists
Code lists are handled via drop down boxes. To maintain these attributes you can either navigate through the drop down
list or type in a search term. To open the drop down list, click on the arrow
. Depending on the number of codes
contained in a code list, the drop down list can be several pages long. Use the controls at the bottom of the list to
navigate through the list.
Drop down list
If you know either the code or the description it is easier to simply start typing in the input field. This will activate the
search and you will notice the number of codes being reduced with every letter you type. It does matter whether you type
the code or the description.
User Manual
Maintain and create item data 53
Example of search
Trading Partner Dependent data
Depending on the system settings, some attributes may be set to trading partner dependent which allows entering
different values for individual customers. To populate customer specific values for non-repeatable attributes simply
select the customer from the drop down menu to the right of the attribute.
To add a value for a further customer, click
, to delete a value for a customer click
To add customer specific values for repeatable attributes, please click
, to copy the value, click
on the right hand side of the screen.
You will be then able to select the customer from the drop down menu which opens in a separate window.
Select add to add the customer. A new data record for the selected customer will be added and can now be populated.
.
To add a value for a further customer, click
, to delete a value for a customer click
, to copy the value, click
.
Create Items
To create new items open the item hit list. The application offers you the following possibilities
Using an empty form
Copying an existing item
Using a template
Upload via Excel import
Create Items using an Empty Form
To create a new item, select the Create option from the hit list function bar
Create Option
The Create Item dialogue opens.
User Manual
Create Items 55
Create Item Dialogue
Leave the Template field empty here, and populate the primary key data. The primary key uniquely identifies the new
item. Please make sure you are entering the correct values for this data since it cannot be changed once saved. The
primary key consists of three parts:
o
o
o
the GTIN of the new item.
the GLN of the item owner is already populated by the system.
the Target market – needs to be selected from the drop down list
Choose the correct Article Type, in order to define the new item as a Package or a Base Item. The default setting is Base
Item, which is the smallest unit of an item hierarchy.
Click Next in order to assign possible data receivers (retailers) the new item shall be published to. This is necessary if
you wish to activate any retailer-specific validations.
Click on Create to open the item editor. You will then be able to save the item for the first time. Saving will add the item
to the system.
Clicking Cancel closes the dialogue without creating a new item.
To complete your item you must at least populate the mandatory attributes. These attributes can be easily identified in
the UI by checking for warning icons. Alternatively, click the
symbol to generate a validation report with a list of
attributes not populated correctly. Clicking on the attribute in the report will automatically take you to the attribute in the
UI. Once the validation report states the item has no errors, it can be released and published.
Create Items by copying an existing item
You can copy an item to create a new one and then make the necessary changes in the item details. Select the item you
wish to copy from the hit list. Then select the Copy option in the hit list function bar.
Copy option
The dialogue box for the primary key data of the new item now opens and must be populated. The primary key uniquely
identifies the new item. Please make sure you are entering the correct values for this data since it cannot be changed once
saved. The primary key consists of three parts:
o
o
o
the GTIN of the new item.
the GLN of the item owner is already populated
the Target Market
Clicking Cancel closes the dialog without creating a new item.
Click Next, in order to assign possible data receivers (retailers) the new item shall be published to. This is necessary if
you wish to activate any retailer-specific validations. The possible receivers of the copied item are listed here, and can be
modified for the new item (added or deactivated).
Clicking Create generates and opens the new item in the item editor on a new tab. Please note: Except for the primary
key data entered here it contains the data of the copied item.
Please note:
If the copied item is part of a hierarchy, the hierarchy is not copied. Only the item itself is copied. The new item is not
automatically released and published even if the copied item already has been released and/or published.
Create an item using the template function
You can create and maintain templates (see ‘Template List’) that can easily be populated when creating a new item. If a
lot of items have similar content, saving one of the as a template can save a lot of work (see ‘Save an existing item as a
Template’).
Templates can be opened and edited from the drop-down menu in the ‘Create Item’ dialogue.
Create Item Dialog with Template function
All templates created and saved by the user appear in the template drop-down menu of the ‘Create Item’ dialogue.
Select the template you want to use as the basis for creating the new item. The unique primary key of the new item does
not come from the template, and must be entered here additionally:
o
o
o
the GTIN of the new item.
the GLN of item owner is already entered.
the Target Market is to be selected from the dropdown list
Now select the Article Type of the new item to either Package or Base Item.
User Manual
Create Items 57
Clicking Cancel closes the dialogue without creating a new item.
Click Next in order to assign possible data receivers (retailers) the new item shall be published to. This is necessary if
you wish to activate any retailer-specific validations.
Finally clicking Create generates and opens the new item in the item editor on a new tab. Please note: Except for the
primary key data entered here it contains the data of the template. Please check to make sure the data is that of the item
you wish to save. Save the new data by clicking Save in the edit form function bar.
Retailer specific validations
Before clicking Create in the Create Item or Copy Item dialog, possible data receivers (retailers) can be assigned. This
activates retailer-specific validations right at the beginning of data maintenance. The items will be validated against the
rules of the selected retailers. The retailer-specific validations will be included in the validation report.
A list of possible receivers set up here will be offered in the publication dialogue when publishing the item. You will be
able to choose individual receivers from this list, or even add additional receivers not in the list yet.
In order to assign possible receivers here
Click the button Next in the above mentioned dialogues.
The dialogue Copy Item (or Create Item) – Select receivers appears. If retailer-specific validations are defined, the
entry appears in bold writing.
Select receivers dialogue
This list can be adjusted to the requirements of the new item by activating, deactivating or even adding additional
receivers.
Either flag a receiver from the list or add a new receiver in the entry field on top and afterwards click the green Add
option. A new receiver does not already have to be known by the system.
Clicking the Search icon on top opens a long list of possible receivers known by the system, where you can choose
from:
Search Dialog of Select possible receivers
You can change the sorting here, and navigate through this list using the options in the bottom line. We recommend
restricting the list using a filter- or search criterion entered in the search field on top.
Clicking OK closes the search list and adds the selected possible receivers to the list in the previous dialog.
Clicking Cancel closes the Create or Copy Dialog without creating a new item.
Please note: Clicking Reset selection will remove all receivers from the list in one step.
Click Create here or on the previous page will create the new item with the list of possible receivers in the supplier
item data store.
Private Brands:
Defining receivers as Party Receiving Private Data on the tab Private Information in the item details editor will restrict
the possible receivers list to the receivers entered there.
Publishing the item to other receivers is then not possible anymore.
Edit Items
You can edit items in several different ways
Editing of a single item:
You can open the item from the hit list and make the necessary changes to the item. See ‘Edit Item in the Item Details’.
Editing a number of items:
The update of several items can be easily achieved through a mass update using the Excel import. See section ‘Import
Items from Excel’
Items can be edited regardless of their state (Draft, Released or Published) but please note that items might have to be
released again manually depending on their status prior to editing.
Edit Item in the Item Details
The following applies to new, released, published or unpublished items:
Select the item(s) you want to edit by flagging them in the list. Then click the Edit option in the function bar to
open the item details.
Alternatively, an item can be opened by double-clicking on it.
The item details of every item open up in a separate tab while the hit list remains open in its own tab. This
allows you to easily switch between the various items and the hit list
Now make the necessary changes to the item.
User Manual
Edit Items 59
Save the item after you have made all necessary changes. Validate, release and publish the item.
Edit option
Edit a Released Item
Select the item(s) you want to edit by flagging them in the list. Then click the Edit option in the function bar to
open the item details
Now make the changes to the item(s).
An already released item, which has been modified, will be automatically set to status Pending Release. The item
must then be released again manually by the user. See section ‘Release Items’.
Edit a Published Item
Select the item(s) you want to edit by flagging them in the list. Then click the Edit option in the function bar to
open the item details
If the item has the processing status Published, the default mode for the edit form is the Change mode. You can
switch the edit form between Change mode and Correction mode in the editor.
Change mode option
Correct is intended to fix erroneous data whereas Change by refresh is intended as a modification of actual values.
Now make the required changes.
Once you have made your changes, save them by clicking the Save icon.
The data is checked and a log is created. Item data with errors is saved.
The processing status changes depending on the initial status of the item before it was edited.
Published items have the trade item status Changed or Corrected depending on the editing mode you used.
The publication status is not changed. An already published item, which has been modified, will automatically be
set to Pending Release. The item has to be released again manually by the user. See section ‘Release Items’.
A validation report is displayed in the Report section of the item details area.
Import and Export Items
The application allows you to carry out mass uploads and downloads of trade item data using Excel files. You can
download item data, change it and then upload the data again. This is especially recommended for mass-updates. You
can also download an Excel template that you can use to create new item data. The system supports both Excel 97/2003
(xls) and Excel 2007 (xlsx) formats.
The data can be released during the upload process. The file can contain single items or hierarchies.
Download your Data in Excel
To export item data, proceed as follows:
First, select the item(s) from the hit list.
Click the Download option in the hit list function bar.
Download function
The download menu offers you four different options.
- Download an empty Excel template (xls format)
- Download an empty Excel template (xlsx format)
- Download item data in Excel
- Download item data as Pdf
Download options
To download items in Excel select “Item download in Excel”. For details on templates see the relevant chapter.
The download dialogue now opens which allows you to select the required export format – either Excel 97/2003 (xls) or
Excel 2007 (xlsx) file. Please note that the appearance of the dialogue may differ depending on which browser you use.
User Manual
Import and Export Items 61
Download dialog
Specify whether you wish to export just the selected item or its components as well.
Specify whether you wish to export the prices. If so, you can also decide if you wish to include the historical price
items in the export as well as released prices. Please note that the option “not released prices” may also include
working versions.
Then click the option Start download.
The excel file will appear in the Last download area at the bottom. When the Column State shows ‘Initialized’ the
file is still in progress. Depending on the number of selected items, it may take some time to process the Excel file.
The download is prepared in the background. You can close the download window and continue with other tasks. If
you open the download menu later you will notice that the Excel file has been created and has now the status
“success” and can now be downloaded by clicking on the file name.
The Excel file contains all selected items and - depending on the specifications you made previously - may also
contain the corresponding components and all price items linked with the items and their components, including
historical price items.
Due to the size restrictions (no more than 65536 lines are allowed) of Excel 97 we do not recommend using this format
for mass exports. If you wish to export a large number of items, please use Excel 2007.
Download History (Last Downloads)
The bottom part of the Download dialog displays a list of the last downloads to be carried out. In addition to the file
name and number of exported items, this area displays the time of the export and the user who triggered it as well as the
amount of the items included in the download file. The State column tells you whether the export was successful.
The most recent download is always displayed at the top of the list. If the maximum number of entries for the list is
reached, the oldest entry is removed.
To download a copy of an Excel file generated during a previous download, proceed as follows:
Open the Download dialog.
Click the required file name in the download history.
A dialog box opens; it allows you to either open the file or save it to your computer. Please note that this dialogue
may differ depending on your browser settings.
Download Excel Template
You can also download an empty Excel file which you can then use as a template for creating new items.
To export an empty Excel file, click on the download option and select the file format you wish to have the template
(xls- Excel 97/2003 or xlsx -Excel 2007).
Download Excel Template option
A window opens which allows you to choose a download location for the export file here.
The Excel file is created. Its structure is the same as the structure of an Excel export file, but this file is empty.
The Excel template contains all attributes, both at Base Item and Packaging Item level.
Importing Items from an Excel File
When entering data for the Excel upload, it is of crucial to have the correct format in the excel cells. Please see detailed
information in chapter ‘Restrictions and Format Regulations’. It is strongly recommended that you familiarise yourself
with these rules before working with the Excel Interface.
Please note that the dialogue window can differ slightly depending on the browser used and its language settings.
To import items using an Excel file, proceed as follows:
Click the Upload option in the hit list function bar.
User Manual
Import and Export Items 63
Upload option
A dialog opens; you can select the prepared Excel file. To do so, click Choose file. This will open the browser.
Upload dialog
Specify whether you want the uploaded items to be released automatically following the import. To do so, activate
the relevant checkbox.
Click Start upload.
Before importing the items into the system, the system carries out a preliminary check to make sure that the format
of the Excel file is correct.
Any errors in the file - such as wrong file format or incorrect format for data- will be listed under pre-check
messages.
If the file is correct, you will see the following message:
A number of pre-checks are performed upon upload that check:
whether the primary keys are included on each sheet
whether the item is included on each sheet
whether each attribute is defined only once in the document
whether attributes unknown to the system are included in the file
whether all required attributes are filled
whether there are major hierarchy consistency violations
Upload report
Following the import, a report is generated.
To access the upload report, please click on the link in the column report and you will be able to open or save the report
directly.
The top part of the report lists the general data for the upload such as when it was started and the file name.
The second part lists details about the item, i.e. whether it was stored, released and lists the exact number of items
contained in the file, the number of items that were updated with the upload or if errors and/or warnings occurred.
The last part of the report gives more detailed information about possible errors and/or warnings and indicates whether
the trade item was stored in the system. The column Type indicates whether there is an error or a warning. Please refer to
the error message for possible steps that need to be taken to correct your data.
Upload History (Last uploaded)
The bottom part of the Upload dialog shows the uploaded Excel files and corresponding upload reports for the last
imports as links in a list. In addition to the file name and number of imported items for each upload, the import time and
user who triggered the import are displayed. The State column tells you whether the import was successful.
The most recently imported file is always displayed at the top of the list. If the maximum number of entries for the list is
reached, the oldest entry is removed.
Restrictions and Format Regulations
It is crucial that any file uploaded to the application complies with certain format rules; otherwise they will not be
processed. The application will always create Excel files which fully comply with these rules (e.g. Excel template and
Excel download file).
Excel Versions
The following Microsoft Excel formats are supported:
MS Excel 97 (XLS)
MS Excel 2000 (XLS)
MS Excel 2003 (XLS)
User Manual
Import and Export Items 65
MS Excel 2007 (XLSX)
MS Excel 2010 (XLSX)
Rows and Columns
Excel 97/2003
All excel file formats prior to 2007 have a maximum of 65536 rows and 256 columns (A to IV) that
can be transmitted.
Excel 2007
No restrictions regarding rows and columns.
Format
When entering data for upload it is of crucial importance to ensure the correct format is selected for the excel cells.
Please do not split or merge cells within the excel file.
Please use the format which is given in the excel template in the first row (only the first row is formatted correctly due to
technical restrictions in Excel). You can copy the row to keep the correct formatting.
When exporting an excel file, all populated rows are formatted correctly as well. You can use this file as well to ensure
an error free format.
First or populated rows formatted correctly
Rules for upload file
Please only use the Excel master template to upload item data. Uploading data using another file will result in a failure of
the upload process.
The following basic rules apply to all Excel files.
The primary keys (GTIN, GLN, TargetMarket) must be repeated on EACH worksheet in columns B, C and D
respectively.
The values that are to be transmitted must be entered in row 9 and lower. There must be one row per GTIN. Due to
size constraints in an empty template only row 9 is formatted correctly! Please make sure to format all following
cells correctly. In an Excel download of data stored in the data pool only the rows containing values are formatted
correctly for the same reason.
The first column of the uploaded file must always remain empty. Any data entered in this column will interfere with
the correct processing of the file.
The uploaded values always overwrite the content already stored in the data pool. Transmitting an attribute with no
value will result in the stored values being deleted from the data pool. A deletion of an attribute which was
populated before means that the values in the new version in the data pool will be deleted
Each extension is on a separate worksheet and named accordingly
Columns and/or worksheets that are not needed and do not contain mandatory or system and/or process relevant data can
be deleted from the file. This also applies to the worksheets Components and – if applicable – Publishing. However, it is
absolutely mandatory that the structure of the data remains intact. E.g. a value and corresponding unit of measure must
both be transmitted together. Any change to the structure of the file will result in an error.
Structure of an Excel File
A worksheet carrying trade item data has 8 fixed rows containing attribute information.
Do not make any changes to the data in the first eight rows.
The first three lines are color coded according to the cardinality of the respective attributes:
Mandatory attributes or attribute groups = blue
Optional attributes or attribute groups = green
Dependent attributes or attribute groups = yellow
The Excel template and the Excel download files contain different kinds of sheets.
User Manual
Import and Export Items 67
Worksheet ‘Release Notes’
The Non-Content-Sheet will be used for Release-Notes or specifications on the use of the excel template. This sheet with
the Release Notes is marked with a leading # character in the name. All sheets starting with a # character will be ignored
during the import.
Trade Item Sheets
These sheets contain the actual trade item data. The data in the Excel file is organized in number of work sheets. The
structure corresponds to the GUI.
A trade item is uniquely identified by the combination of the GDSN attributes GlobalTradeItemNumber,
InformationProvider and TargetMarketCountryCode. These three attributes must be included and populated on every
sheet. There is one row per item in the sheet.
.
Publishing sheet
Populating this sheet allows you to publish data via Excel upload. Please see Publish items via Excel Upload for details.
Types of Attributes
Repeatable attributes
To upload repetitions of an attribute, please copy the entire column for the attribute and enter the next highest number in
the square brackets []. The default value is "[0]" for the attribute. To create a repetition, enter [1], [2] for the second
repetition etc. The maximum number of repetitions is defined in the data structure. Please note that repetitions must
always be transmitted together and in the correct order. Any change to the order of the repetitions or splitting them up in
the Excel file will lead to an upload failure.
Example: Two repetitions of Trade Item Feature Code
Multilingual attributes
There are two kinds of multilingual attributes.
Attributes with language code not transmitted separately: The language code must be transmitted in square brackets []
after the name of the attribute. There must be one column per language. The code must be entered in upper case letters.
Example: Language specific brand name in English and French
Attributes with a separately transmitted language code: The language code is transmitted in a separate column and must
be entered as the value in row 9 and lower. The code must be entered in lower case letters.
Trading partner dependent values
It is necessary to copy the column of the attribute in question and add the GLN of the trading partner to the header. There
must be one column per trading partner. The neutral value is entered in the column with no GLN specified.
Example: a neutral Start Availability Date and a TPD value
User Manual
Import and Export Items 69
Upload components
It is possible to add components via Excel Upload in one step.
To upload components please ensure the components are included in the Excel file as individual trade items, i.e. the
primary key – GTIN, GLN and Target Market – are populated on each worksheet.
In addition, the worksheet Components must be populated.
The columns headed RelatedItem[0] need to be populated to indicate the hierarchy connection.
For gtin enter the GTIN of the related item, i.e. the next lower level item. For amount enter the amount of times this item
is contained in the next higher item of the hierarchy. Please ensure that the data is entered in the corect row.
To add more than one relation for the same item, copy the columns and adjust the number in the brackets, i.e. for a
second related item Related Item [1] etc.
Once the data is uploaded, the system is updated with the new trade items and components.
Publish items via Excel Upload
It is possible to add, release and publish newly created items via Excel Upload in one step. To publish items, the
worksheet Publishing must be populated.
The worksheet needs to have the primary keys – GTIN, GLN and Target Market – populated. They must be identical on
all worksheets. In addition, the Action Code is mandatory for publication as well as the publication target. Please note
that both the column Publish to Target market and the column Publish to GLN must be included in the file. Deleting one
of the columns will lead to an error in the upload process.
Publish to Target Market
User Manual
Import and Export Items 71
To publish to target market, enter the target market code in the column headed PublishToTargetMarket. Do not enter the
name of the target market, only the three digit country code.
Publish to GLN
To publish to a GLN enter the GLN in the column(s) PublishToGLN. To publish to more than one GLN, enter a different
GLN each column with the header and the number in brackets. By default the publishing worksheet has three columns
for publishing to GLN. If you wish to publish to more than three GLN copy the column and enter a higher number in the
brackets, i.e. PublishToGLN[3] for a futher GLN, PublishToGLN[4] for the next one etc.
Note that the column PublishToTargetMarket must be empty.
Release Items
General information
An item must have the Released state (Released ready to Publish) in order to be able to be finally published to the data
pool and to the business partner(s) (see ‘Publish items’).
The release state indicates that the item data has been validated successfully and has reached a good quality state, i.e.
mandatory data is complete, all data contents have the right format, and content interdependencies are observed and
consistent throughout all hierarchies the item belongs to.
Before this minimum data quality has been achieved you are editing the working version of the item which is still more
or less incomplete. This also applies to hierarchy inconsistencies. If an item is part of a component hierarchy it can only
be released if all the contained (smaller) components are released already. All its relations to other items in this hierarchy
are validated, as well, i.e. all items of every hierarchy the item is a part of are validated together.
Please note: Every hierarchy must contain at least one orderable unit. Often a base item is not an orderable unit. A
packaging item needs to be added before releasing the hierarchy. A hierarchy without an orderable unit will not be sent
out by the system.
Releasing can be done either from the hit list or the item editor.
The release state can be revoked from the hit list, which may have to be necessary for physical deletion of an item (see
‘Revoke the Release of an Item').
Release Items from the Hit List
You can release one or more items from the hit list.
First, select the item(s) from the hit list. Note, that selected non-related items may be released separately. If an error
occurs that prevents releasing one of the items, the other items may still be released, if free of errors.
Click the Release option in the hit list function bar.
Release option
If the item(s) belong to a hierarchy (or hierarchies) the user can determine whether only the item or the entire
hierarchy is to be released.
Selecting ‘Release Hierarchy’ will release all items in the related hierarchies; the related items do not need to be
selected separately. If an error occurs in any of the items the entire hierarchy will not be released.
Selecting ‘Release Single Item’ will release only the items you have selected. Please note that the items of all
relating hierarchies are validated together. An error in any of those items will also prevent releasing the single item.
Additionally, the selected item will not be able to be released if there is a validation rule that prevents the release of
individual items in a hierarchy.
The data is validated to make sure that it is complete, correctly formatted, and consistent. Errors will be displayed
in the validation report.
If everything is correct, the most recent version of every selected item is released.
The items are given the processing status Released – Ready to publish.
If an item was already published and later changed, releasing it will change the status from Item update-pending
release back to item published.
User Manual
Release Items 73
Please note the following:
We recommend saving base items first and releasing them in a later stage e.g. when the whole item hierarchy has been
created and saved. According to the GDSN standard, at least one of the components or the item itself must be an
orderable unit. Releasing solely the base item leads to an error as far as this item is not an orderable unit.
Release an Item from the Item Editor
You can release an item from the item editor.
Select the item from the hit list
Click the Edit option in the function bar or double click the item in the hit list
Edit option
The item now opens in a separate tab.
Click the Release option in the hit list function bar.
Release option
Now select whether you wish to select only the item or the entire hierarchy.
The item is released.
Revoke the Release of an Item
An item can be unreleased from the hit list or the item editor. Only items that are released but not published can be
unreleased.
Undo option
To undo the release via the hit list, select the item(s) and click on the undo release button.
To undo the release from the item editor, choose the item and either click the edit button or double click the item. The
item editor now opens.
You will be asked whether you really want to proceed. If an item was released but not published, it will receive the status
“Draft new item” after the unrelease. If you wish to unrelease an item that is already published, you have to revoke the
publication first (please see relevant chapter). Once the publication is revoked, it can be unreleased. The item will now
receive the status Unpublished to all- Draft item.
Publish Items
General information
Item data must be published in order to be sent out to the Source Data Pool. Only from there it is available to the
retailers, who have subscribed to this data.
To ensure quality, item data can only be published with status Released. But for publication, data is validated again to
make sure that it is consistent throughout the hierarchy, and that a publication is not done to non-permitted recipients.
Errors are shown in the Validation Report underneath of the hit list or item details, and must be corrected before
publishing can finally take place.
An item successfully published receives the overall item state Item Published. (Also see: ‘Overall State, Release State
and Publication State’). It is marked with the green world icon:
In general, an item should be published only once. For changes or corrections to be sent later on, the new working
version needs just to be released, but not published again.
Publishing hierarchies
If an item is part of a hierarchy, the publication must be done on the highest packaging or hierarchy level that is relevant
to the respective retailer. Publication will then include all lower item levels contained. If the highest hierarchy level
deviates for different retailers, the publication must be done on all these levels, i.e. more than once (see ‘Publishing an
Item as Part of a Hierarchy’).
Unpublish
A published item can be unpublished to stop data delivery to the data pool and the respective recipients (see ‘Unpublish
Items’).
If unpublished to all, the item receives the overall item state Item Unpublished to all, and is marked with the yellow
world icon:
If the unpublished item is still part of another published hierarchy, it receives the overall item state Item unpublished to
all – still sent, and is it is marked with the yellow/grey world icon:
Select recipients
User Manual
Publish Items 75
Publication can be done either from the hit list (see ‘Publish Items from Hit List’), or from the item editor (see ‘Publish
an item from Item Details’).
Both approaches use the same publication dialog to either choose or add the retailer(s) or recipient(s) (see ‘Select
Publication Targets’).
Item data can be published here to a list of chosen retailers. Of course, it can still be published to additional retailers
afterwards.
A list of business partners (= possible recipients or publication targets) is defined for the supplier by administration and
is then offered in the publication dialogue. This list could also have been accessed during item creation (see ‘Possible
Item Recipients’), in order to activate possibly retailer-specific validations right at the beginning of data maintenance.
Possible recipients could have been added or deactivated, and this selection can now even further be adjusted here.
Items can be published either directly from the hit list or the editor. Additionally, it is also possible to publish items via
Excel upload. Please refer to Import and Export Items for details.
Publish Items from Hit List
Select the items you want to publish in the item hit list and click the green Publish option in the hit list function bar.
Publish Option in the hit list function bar
This opens the publishing dialogue to choose or add publication target. See ‘Select Publication Targets’ for detailed
instructions. Please note: Only items that are already can be published.
Publish an Item from Item Editor
Select the item from the hit list and open it by either double clicking on the entry or clicking the edit button.
Go to the Publication Info widget on the right hand side, and click the green Publish option.
Item Details Editor with Publish Option to the right
This opens the publishing dialog Select publication targets. See ‘Select Publication Targets’ for detailed instructions.
Select Publication Targets
Clicking on Publish
either in the hit list or item editor opens the publication dialog Select Publication Targets,
where you either choose and/or add the recipient(s) of the item.
Publication targets can be added here for already published items:
Selection list with retailers
In case there is a list of possible data recipients pre-defined for your user account at item creation (in order to activate
retailer-specific validations) (see ‘Assign possible Recipients’), this list is offered in the dialog:
Select the publication targets here by flagging the check boxes in front.
Clicking
here will remove the selected targets. Recipients not in the list yet can be added or searched for. To add
recipients not yet known to the application, enter the GLN’s in the entry field New receiver and click Add. You can only
add one GLN at a time. The GLN’s will then be added to the list below.
In order to select recipients from a long list of GLN use the Search button to open this list. You can change the
sorting here, and navigate through this list using the options in the bottom line. We recommend restricting the list
using a filter- or search criterion entered in the search field on top. Select the recipients by flagging the check boxes
in front.
Search dialog for publication targets
Clicking Reset selection will remove all selections at once.
Clicking OK closes the search list and adds the selected publication targets - already flagged - to the list in the
previous dialog.
Back on the first page of the publication dialog you must now click the Publish button to initiate the publication process.
If successful, the item receives the publication status Item Published.
User Manual
Publish Items 77
Allow Re-Publication of already published Targets
Sometimes it is necessary to re-publish an item to the same recipient (publication target) once more regardless of
whether the previous publication was successful or not. Publishing an item to another target is always possible, and has
nothing to do with the respective option explained here.
In order to enable re-publication to the same recipient, flag the checkbox Allow re-publication of already published
targets in the dialog Select publication targets.
This flag will force the re-sending of item data to the Source Data Pool.
Publication Dialog
Publishing an Item as Part of a Hierarchy
When a released item is part of a packaging hierarchy, it must not necessarily be published separately in order to be sent
to the source data pool and from there to the retailers.
In most cases it is not published itself, but sent out as a part of the hierarchy. The examples below clarify the status
changes applied to items which are part of a hierarchy in which an item is published or unpublished.
Editing and publishing of a simple hierarchy
Enhancement of subsequent publishing of the simple hierarchy
Revocation of publication of a part of the hierarchy
Revocation of publication of the entire hierarchy
User Manual
Publish Items 79
Unpublish Items
If you want to revoke the publication of a published item - e.g. for a specific retailer - you can ‘unpublish’ it.
If an item has been unpublished to all, it receives the overall item state ‘Item Unpublished to all’.
You can unpublish items from the hit list or the item editor.
From the hit list:
Select the required items from the hit list.
Click the Unpublish option in the function bar.
Unpublish option
The Publication Info widget will then display the number and list of publications indicating the recipient GLN, the name,
the publication date and the CIC status of every publication. From here you can revoke the publication of the item.
Click the Unpublish option in the Publication Info widget function bar to open a dialog box that lists all publication
targets the item has been published to.
Publication Info widget
Unpublish option
Select all publication targets for which you wish to revoke the publication of the selected items. The list contains a list of
the publication targets for all selected items. In the case of items that are selected but not published, this operation will
simply be ignored.
Click OK to complete the operation. Click Cancel to return to the hit list without revoking the publication.
The previously selected publication targets for the items are removed from the corresponding recipient lists.
The items - which no longer have the status Published - are given the processing status Released again.
To unpublished items from the item editor, select the item from the hit list. Click on the edit button or double click the
item in the hit list. The item editor now opens, where you can select the unpublish button. Proceed as described above.
Template List
The Template List allows you to perform all functions related to template maintenance in one central area of the
application. Templates can be very useful if your items have a lot of data in common. New items can be easily added
using a template that contains predefined data that is already populated. The Template List has the same structure as the
item hit list.
The following functions are available:
Creating, copying and editing templates.
A hit list displaying all templates with a template preview similar to the item hit list
A validation report that validates the data filled in the template
A Quick Search and an Advanced Search
Structure of the Template List
The structure of the Template List is divided into 3 Areas:
The hit list, where all saved templates are displayed
A search section, where the templates can be retrieved via a Quick and an Advanced search with the option of
saving search profiles
A preview of the data populated in the template, where validation errors are displayed and beside this a validation
report field
Template List
User Manual
Template List 81
Templates which are assigned to you by the community owner are marked with a lock symbol. Those templates
can be used for new items, however the template itself cannot be altered.
Create Template
To add a new template, click the Create button
Create Template Dialog
Indicate the template name
The Article Type allows you to specify the nature of the item that the template will be used for. Similar to the
creation of an item, indicate whether this is a template for packaging or for base items
By clicking on Create the editor will open. When the template is saved for the first time, the data entered will be
validated. Any further validation must be initiated manually.
The template name must be populated in order to be able to save the template. All other missing data does not
prevent the template from being saved. Stored templates are available for selection from the drop down menu; the
user can correct the item data at a later stage.
Copying a Template
To copy a template, select a template in the hit list and click the Copy option in the function bar. Please note, that when
highlighting more than one template, the Copy button is inactive.
Copy Template Dialog
The filled data in the copied template can now be modified in the Editor before saving the template.
Edit Template
Click the Edit option in the function bar to edit one or more templates.
Edit Template
Clicking the button directly leads to the Editor with the template.
Edit the template and click save. The template will be validated automatically and an error report will be generated.
Save an existing item as a Template
There are two ways of saving an existing item as a Template.
If the item is already opened in the editor, simply click the Save as template button. The template creation dialogues now
opens, enter a template name and chose the article type.
User Manual
Template List 83
Save Template Dialog
To save an item as template from the hit list flag the item and click the Save as template button in the function bar.
Please note that only a single item can be saved as template at a time.
Save Template from hit list
Template Preview and Validation Report
The preview is meant to provide a quick overview and displays only a limited set of attributes. It is provided in a readonly mode. The data cannot be modified but validation errors are displayed.
Preview with validation error in read-only mode
The Validation Report is displayed in a separate tab. The validation must be activated manually through the ‘Validate’
button in the function bar. You can validate more than one template; the validation reports for all templates will be
displayed together. The validation report is not saved. When clicking another item or another tab the report will
disappear
Searching for and finding Templates
The search section of the ‘Template List’ is located in the widget on the left-hand side. A Quick Search and an Advanced
Search is provided here to retrieve the templates. Searching and navigating with both search options is done the same
way as the search works for items in the Supplier Item List. For details see section ‘Find Items with the Quick Search
function’ and ‘Find Items with the Advanced Search Function’.
A Search Profile can be saved. The Search profile works the same way as in the item list.
Search option widget
Create new Item from Template
The template list function bar provides a functionality to create an item directly from a template.
User Manual
Template List 85
Click the ‘Create item from template’ button and the ‘Create Item’ dialog will open with the corresponding
template selected.
Create item from template
For further information on creating of an item from a template, please refer to ‘Create Items using the Template
Function’.
You can also create items from templates if you click on the Create button in the item list. Choose the template from the
drop-down list. Templates assigned by the community owner are bold.
Task List
The Task List provides a separate area for managing incoming tasks via Catalogue Item Confirmations. Items with a To
Do state as a result of CICs with state REVIEW or GDSNExceptions are listed here.
The handling of the Task List as well as the available functions is consistent with the Supplier Item List. The search
section on the left-hand side and the function bar are identical. Please refer to the respective sections for further
information.
Task List
Working on items with To Do status
There are two different reasons why items appear in the Task List:
A retailer’s request for the review of a certain item. The feedback from the retailer will be handled through a CIC
Review message which references an item and contains review details.
A GDSNException sent by the source data pool is an immediate feedback if the publication failed.
The CIC Review is indicated with a
sign. For more information on the CatalogueItemConfirmation in general and its
status please refer to section ‘CIC State’.
The GDSNException, displayed with a
sign, is displayed in the CIC Summary tab as well. Please note that only items
with either the To Do state CIC review or GDSNEXception are displayed here.
Further information on the nature of the data that needs to be reviesed can be viewed in the CIC Summary tab beneath
the hit list.
User Manual
Task List 87
CIC Summary Tab
When clicking on the Review sign a window opens, specifying the data that is not accepted by the recipient. Click on the
icon to open the detailed error report. Please note that this information is provided by the data recipient.
CIC History with corrective information from the recipient
Select the item from the hit list and edit the affected data. Please see section ‘Edit Items’ for further details.
Close a To Do from Task List
The user can tick off the ‘CIC REVIEW’ entries and mark them as ‘done’. This action does not depend on the status of
the item, the user can mark the Review as done whether he has edited the item or not. This option is provided by the CIC
Summary widget.
The status ‘GDSN exception received’ is automatically reset as soon as messages have been sent again. As soon as either
the CIC-status is marked as done or the item has been released again after the data was modified, it disappears from the
task list.
Index
GDSN ........................................................................... 2
Hit List Contents ......................................................... 32
Online Help Structure ................................................... 4
Performance .................................................................. 5
Search profiles ............................................................ 23
Set UI Language ......................................................... 16
Systems requirements ................................................... 5
Working with the Hit List ........................................... 18
User Manual
Index 89