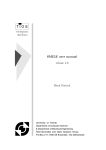
1
LogLock2000 v2.60
Attendance and Access Control System
Operator’s Manual, May 21, 2009
Copyright © 2002-09 by ASPiSYS Ltd.
Distributed by:
ASPiSYS Ltd.
P.O. Box 14386, Athens 11510, GREECE (EU)
http://www.aspisys.com
LogLock2000 Operator’s Manual, May 21, 2009, Copyright 2002-09 ASPiSYS Ltd.
1
Thank you for purchasing the LogLock2000 by ASPiSYS Ltd. LogLock2000 is a
sophisticated access control and/or time-attendance system for use in almost any size
business, from very small to quite large. It can be used to control access to homes,
stores, garages, or businesses.
Please also have a look at our newer LogLock Mini product
(http://www.aspisys.com/loglock_mini.pdf)
About the keys
LogLock2000 uses factory-guaranteed non-duplicable world-unique electronic keys
from stainless steel (known as iButtons ®1) to identify each user. Each user need only
be given a single key regardless of the number of access points (LogLock2000 or
UNiLOCK units – our other system – installed) at your premises. Unlike credit cards,
these keys will withstand heavy abuse including extreme levels of heat, cold, moisture.
You can step on them or even take them into water. They are virtually indestructible.
All types of iButtons can be used with LogLock2000 without affecting third-party
systems these iButtons may be used with.
General Characteristics / Capacity
The two major characteristics of LogLock are reliability and ease of use. Just touch the
special battery-free electronic key to the corresponding key reader, and (if you meet all
access control requirements) you’re in, all in less than one second.
LogLock uses a highly optimized real-time multitasking Operating System (our own
OS11) which makes it possible to have the system operate continuously, even when
making changes or retrieving the log through the terminal. Compare this to many
competitive systems where the main functions must be suspended during log retrieval or
system configuration.
LogLock is completely stand-alone, meaning that once programmed with its various
parameters, user database, and access control rights, no further connection to a PC is
required for operation. A PC is only required to make configuration changes or retrieve
the log.
The wrapping log keeps as many of the most recent actions as can fit in the device. This
means, one may leave the device unattended and only connect to it to retrieve the log
when there is need (e.g., for payroll use, a once-a-month connection may be enough in
many situations).
The system has a built-in calendar clock backed by a user-replaceable battery
(CR2032/CR2025). The clock auto-switches from/to DST based on EU rules.
1
iButton is a registered trademark of Maxim/Dallas
LogLock2000 Operator’s Manual, May 21, 2009, Copyright 2002-09 ASPiSYS Ltd.
2
One significant feature of LogLock that sets it apart from most, if not all, competition is
that the complete operating software is built-in, and it uses plain language commands.
No special PC software is required; any telnet terminal emulator will do. This means,
the system is not tied to a specific computer platform. It can be connected to from any
operating system, as long as it has a telnet application (practically all do). One can even
connect from a smart [cell] phone with a telnet application2. Strong 20-char userdefined passwords with 5-sec delays on each failed attempt protect from unauthorized
terminal access.
Because of the standard Ethernet connectivity, the device can participate in a larger
network and, therefore, connected to from any part of the world3. As an example, one
can have hundreds or thousands of units deployed all over the world, all fully managed
from a single location.
One important feature of the system is the use of ‘passive’ key readers (i.e., they contain
no electronic circuit) that are simple and nearly cost-free, while the actual system is
always securely installed inside the protected area. One may also connect in parallel
two (or more) readers so that if the main (obvious) reader is ever vandalized, one can
still use another reader (placed somewhere less obvious and less easy to reach) to gain
access. With most competitor systems (especially those not based on the iButton
technology), the reader is active (contains electronic circuit) and, if it breaks, the system
becomes non-functional until the reader is repaired or replaced.
Another important feature of LogLock is the ability of a single device to control up to
two doors, one for both entry and exit, or one for entry and a different one for exit. This
is mostly useful for garage or one-way turnstile installations.
Only one device is needed to control both sides of the door. Compare that to many
competitor systems which require a unit on each side of the door, increasing both cost
and installation complexity. With LogLock only a single pair of wires need to cross the
wall to the outside. The wires themselves can act as a reader if the actual reader is
vandalized.
Each LogLock2000 device can hold up to 800 unique users (keys), each with their own
name, optional 4-digit PIN code, and optional zone access restrictions. (The PIN
function is only available in keyboard-enabled models.) Each time a verified user enters
or exits the controlled area, LogLock2000 records the date, time, direction, and unique
user ID while striking the door open. This allows the manager to use the system to
know how much time people spent inside, or simply when they showed up to work.
You can optionally have the device record both successful and unsuccessful attempts
from registered users. This feature lets you see if anyone attempted to enter outside of
their approved ‘shift’.
2
A data plan and service availability is required. Charges may apply and depend on one’s
service plan.
3
Internet connectivity is required in this case.
LogLock2000 Operator’s Manual, May 21, 2009, Copyright 2002-09 ASPiSYS Ltd.
3
By combining the iButton with a PIN, it is practically impossible for anyone to gain
unauthorized access. The iButton alone is good enough for most situations, except
when unnoticed loss or theft of keys is involved. The optional PIN helps protect against
such cases because the finder of a key can’t possibly know the PIN (assuming an
expected reasonable defensive behavior by users – i.e., not giving their PIN to others or
writing it on their key). When a key is either lost or stolen, the user can be deactivated
from the system. This renders the key totally useless to whoever has it, and the original
user can replace it with a new one.
LogLock2000 Operator’s Manual, May 21, 2009, Copyright 2002-09 ASPiSYS Ltd.
4
In short, these are the features of the LogLock2000 system.
Maximum unique keys (people):
Maximum day or time zones:
Special zones:
Maximum fixed holidays:
Maximum entry/exit recordings:
Languages supported:
Door-open delay setting:
Door-strike mode:
Sounds/Beeps:
PIN mode:
Password protection:
Date and time setting:
File directory information:
Who is currently logged in:
Log listing and backup:
User listing and backup:
Zone listing and backup:
Holiday listing and backup:
User search by name:
Log search by user name:
Log restricted by date range:
Monitor mode:
Single entry & exit contol
Separate entry & exit control
Open entry and/or exit control
Optionally, restrict on ‘boss’
800
1000 (in up to 254 groups)
‘Always Allowed’ (0) & ‘Never Allowed’ (255)
30
15120 (with most recent 12600 always available)
English (anywhere) or Greek (LCD and user
names in listings only). We may be able to replace
Greek with another language, on request.
0 (.05 sec - instantaneous) to 25 seconds.
AC-like (noisy strike) or DC (quiet strike, or for
driving external relays)
Enabled (normal for better feedback)
Disabled (for minimum noise tolerance)
Enabled (for maximum security)
Disabled (for quicker access and/or internal or
custom installation)
Protects system from unauthorized alterations.
Battery-backed Real Time Clock (RTC)
Shows total, used, and free sizes for each file
Yes, even partial name (English or Greek).
Yes (Backup via terminal screen capture)
Yes (Backup via terminal screen capture)
Yes, complete list or individually by zone code
(Backup via terminal screen capture)
Yes (Backup via terminal screen capture)
Yes, even partial name (English or Greek)
Yes, even partial name (English or Greek)
Yes, None, FROM / TO, FROM only, TO only.
See who’s attempting access, even non-users.
Yes
Yes (e.g., useful for dual lane [entry/exit] garages.)
Yes (useful for rush hours, manual or automatic.)
Yes, it won’t let anyone enter if the boss is out.
LogLock2000 Operator’s Manual, May 21, 2009, Copyright 2002-09 ASPiSYS Ltd.
5
Getting Help
To get a list of the available commands, simply press ?[ENTER] on a blank terminal
line. You can press [ESC] to cancel the listing or clear the command line, press [CTRLS] (i.e., while holding down [CTRL] press [S]) to temporarily pause the listing, and
[CTRL-Q] to continue a paused listing.
Commands that have no parameters (like CLS) work immediately, as described in the
general help screen.
Commands that display user information or log activity (i.e., U, L, and WHO) may be
followed by a partial or full name to match only those records that have a match in all or
part of the name.
Commands that require parameters (except for those of the previous paragraph needing
a name), if typed without any, will print a short help message particular to that
command.
This is the main help screen:
Commands
========
AC ..................
AH ..................
AU ..................
AZ ..................
BACKUP ..............
C ...................
CLEARALLFILES .......
CLEARLOG ............
CLS .................
D ...................
DC ..................
DH ..................
DIR .................
DT ..................
DU ..................
DZ ..................
EN ..................
ENTRY ...............
EXIT ................
GR ..................
GRW .................
H ...................
IN ..................
INFO ................
L ...................
LL ..................
LOGALL ..............
M ...................
Pulsed strike mode
Add holiday
Add user
Add zone
Backup config
Set clock
Clear ALL files/settings
Clear log
Clear screen
Set log date range
DC strike mode
Delete holiday
Show settings
Door-strike time
Delete user
Delete zone
English
Open Entry [zone]
Open Exit [zone]
Greek DOS
Greek Win
Show holidays
Unit placed inside
OEM info
Show [named] user log
Show quick user log
Log all attempts
Monitor
LogLock2000 Operator’s Manual, May 21, 2009, Copyright 2002-09 ASPiSYS Ltd.
6
MASTER-RESET ........
NOENTRY .............
NOEXIT ..............
NOLOGALL ............
NOPASS ..............
NOZZR ...............
NP ..................
NS ..................
OUT .................
PACK ................
PASS ................
PIN .................
RESET ...............
REM .................
REX .................
S ...................
S1 ..................
S2 ..................
U ...................
WHO .................
ZZR .................
Z ...................
Reset password
Closed Entry
Closed Exit
Log successful attempts
Exit config mode
Normal zone check
NO-PIN mode
No sound
Unit placed outside
Pack files & save settings
Enter config mode / change password
PIN mode
Restart unit
Remark [string]
Request Exit
Sound
Single door
Split door
Show [named] users
Show [named] IN users
ZeroZone requirement [level]
Show [n] zones
About Zones
What is a zone? A zone is used to define days-of-week and hours within those days
when access is allowed. (Note: Since v2.47, zones can also be used in conjunction with
the ENTRY and EXIT commands, see appropriate section for details.) For example,
employees following a typical Monday thru Friday, 9am to 5pm schedule would be
assigned to a zone where Monday, Tuesday, Wednesday, Thursday, and Friday
excluding holidays are allowed, but only from the hours between 9am and 5pm. During
all other hours, or during any hours on Saturdays, Sundays, or holidays, they are not
allowed access.
The AZ (Add Zone) command is used to create a new zone entry. A single zone may
have more than one entry. This accommodates situations where a single entry isn’t
capable of defining the complete schedule for a zone. All entries of the same zone act
as a single zone so that a user assigned to a zone will be affected by all its entries.
Here’s the help screen of the AZ command:
Use: AZ n SMTWTFSH hhmm hhmm
n=1-254
For SMTWTFSH (Sun-Sat, H=holidays) a dash (-) turns the
corresponding bit off. Anything else turns it on.
Times in hhmm format, e.g., 0900 1700 for 9am-5pm
A zone number must be from 1 to 254. 0 and 255 are reserved and always defined by
the system. Zone 0 is to be assigned to those with no access restrictions whatsoever,
while zone 255 is to be assigned to anyone whose attempts to enter we want to monitor
but whom we never want to allow entrance.
LogLock2000 Operator’s Manual, May 21, 2009, Copyright 2002-09 ASPiSYS Ltd.
7
Days can be defined as a series of flags of either dashes (-) or any other characters
(except space, dash, or control characters) in their natural sequence, Sun-Mon-TueWed-Thu-Fri-Sat followed by the Holiday indicator. A dash means the day (or holiday)
isn’t accessible for that zone; anything else will make the corresponding day accessible.
The holiday bit of the flags indicates whether or not the zone allows access on fixed
holidays. The holiday bit cannot be set by itself, it requires at least one day of the week
to be also set. Fixed holidays are defined separately (see the AH command). There is
currently no provision for defining moving holidays, but a workaround is possible
(mentioned later on in this document).
To add the zone mentioned in the example earlier, one would give the command:
az 1 -MTWTF-- 0900 1700
(or the equivalent simpler and quicker to type az 1 -11111-- 0900 1700)
You can verify your entry by giving the command Z to display all zones. If you have
many zones defined and want to view only a specific zone number, follow Z by the
desired zone number (in this example, z 1).
The zone number in the example above is 1, so any user who must obey this zone’s
restrictions must be assigned to zone 1. A zone may have more than one entry, if
necessary. However, when deleting a zone with the DZ (Delete Zone) command, all
entries for that zone will be deleted, i.e., the whole zone will be deleted. You cannot
delete only a single entry of a zone.
Zones are independent of one another. If a zone covers certain day and time
combinations, it does not restrict another zone from covering the same days and times.
It is not required that you add all zone entries for the same zone together. You can add
one entry for zone 1, then add an entry for zone 2, then go back (days or months later) to
adding one more entry for zone 1, and so on, as the circumstances dictate.
Let’s take the example of a typical Greek retail store with morning and evening hours,
as well as Saturday mornings. The following defines a schedule for Monday thru Friday
from 9:00am to 2:00pm, Tuesdays, Thursdays, and Fridays from 5:30pm to 8:00pm in
addition to morning hours, and Saturdays from 10:00am to 3:00pm, all boundaries
inclusive.
az 2 -MTWTF-- 0900 1400
az 2 --T-TF-- 1730 2000
az 2 ------S- 1000 1500
A person with access in zone 2 (above) will be able to enter in any of these days and
within those hours. He or she can exit anytime (see note in box below).
LogLock2000 Operator’s Manual, May 21, 2009, Copyright 2002-09 ASPiSYS Ltd.
8
If multiple entries in a zone give opposing or overlapping rights, the effective
combination of these zone entries is applied during the authentication check. So, for
example:
az 3 -MTWTF-- 0800 1400
az 3 -MTWTF-- 1000 2000
will allow entry on weekdays from 8:00am to 8:00pm (inclusive) which is the effective
schedule of the two zone entries combined.
IMPORTANT: A zone has effect only for the entry of a person, not the exit. In other
words, if a person enters on time (based on their assigned zone), they will be able to exit
any time or date afterwards (preventing a potential ‘locked in’ situation). This means
that the actual zone can be limited to the expected entry times only, rather than the
whole day schedule. So, for a 9am to 5pm scenario instead of defining 0900 1700 (as
indicated in the earlier example), you could define 0850 1100 to allow people arriving a
little early to enter rather than wait outside, but not allow anyone over two hours late to
enter (provided this is the assumed company policy). This will work well only if
employees are expected to stay in throughout their work hours. If they may go out for
lunch (for example) you’ll have to allow for those times also.
To assign a zone that spans midnight, you MUST break it up into two pieces, one until
23:59 and one from 00:00 to the end time, or it will not work as you might think, e.g.,
az 4 –M-W-F-- 2100 2359
az 4 –-T-T-S- 0000 0100
will let those in zone 4 enter on Monday-Wednesday-Fridays from 9:00pm to 1:00am
(which is always on the following day, as you can see in the definition.) This, however,
will not work: az 4 –M-W-F-- 2100 0100
Now, what zone do you assign to yourself (i.e., the boss or security manager)? Most
likely, you and a select few others with equal authority within the company,
organization, or even your home will want unlimited access. Although you could define
a zone with all days (including holidays) and hours enabled, and then assign yourself to
that zone, there is a better way. Assign yourself to the pseudo-zone 0 (which can never
be redefined or accidentally deleted). A zero zone will allow you to enter without any
zone restrictions, whatsoever, even if no zones are defined at all. Zero-zone users are
the only people guaranteed to enter even if the clock is unadjusted due, perhaps, to a
past power failure and dead clock backup battery combination, or if the ZZR mode is
active. You also save a regular zone number (1-254) for other uses.
Now, what good is the other special pseudo-zone 255? Well, that’s for users you want
to keep registered in the system, but never give access to. “Why would anyone want to
do that?” Because one might want to be able to only track those people’s attempts to
enter but never really let them in. The system can track (log) unsuccessful attempts
(with the command setting of LOGALL) for registered users only, not any random iButton
ID someone may use. So, if you have a person with authorization for only one section
LogLock2000 Operator’s Manual, May 21, 2009, Copyright 2002-09 ASPiSYS Ltd.
9
of the building but not another, and you suspect foul play, you can check if that person
ever attempts to gain access to his non-authorized area.
Beginning with firmware v2.48, there are two new commands, ZZR (which stands for
Zero Zone Required) and its complement, NOZZR (OEM default).
With the ZZR command, one tells the system to allow people already restricted by zones
1 to 254 to enter based on their defined day-and-time schedules as usual, but considering
the additional restriction that at least one zero-zone person is already in. This restriction
also applies to the zoned ENTRY and EXIT commands. With this feature, the system
administrator has the flexibility to let people in, or engage the automatic ‘entry’ and/or
‘exit’, only when at least one of the trusted zero-zone people is already in. Since zerozone people are normally the owner, the security managers, or other fully trusted
people, when none of these people are inside the controlled area, all others will have to
remain outside, even if their zones would otherwise let them in. For example, a
storeowner may not want his employees entering the store if he himself hasn’t arrived
yet. The employees can still attempt access simply for recording show-up time for
payroll purposes (must be in LOGALL mode to record the attempt). The same
reasoning applies to auto ENTRY and EXIT in ZZR mode, i.e., only if at least one of
the zero-zone ‘managers’ is already logged-in, the ‘garage barriers’ will be
automatically activated based on their defined schedule(s).
But what if one wants to keep everyone out when zero zone people aren’t in yet, except
for a select few non-zero-zone people? The cleaning lady, for example, one may want
to allow entrance even when the boss is out; they usually do their job better prior to
anyone coming in to work, or after everyone has left. But, we still do not want to make
her zero zone because:
1. We want to assign her a day-of-week/time schedule and zero zones don’t have
any, and most importantly because…
2. If we were to make her zero-zone when in ZZR mode, her entry would
automatically enable all others to enter, too as if the boss just walked in. We
only want to exempt her from the ZZR requirement, without any undesired side
effects.
Fortunately, there is a way to do this. The ZZR Check Above level defines the zone level
above which ZZR checks are performed. The OEM default value is 0, which means
anyone assigned to a non-zero zone is subject to ZZR checking. If we set the ZZR
Check Above level to, say, 1 (with the command ZZR 1) then only people assigned to
zones above 1 (exclusive) will be subject to ZZR checking. Now, assigning the
cleaning lady to zone 1 will make her zone restricted but not ZZR restricted.
WARNING: When the ZZR mode is enabled, non-zero zone checks above the ZZR
Level may take significantly longer to complete; the actual time depends on the total
number of zero-zone users, and the current size of the log file. The delay ranges from
being unnoticeable to a minute or so for an almost full-system with hundreds of zerozone people.
LogLock2000 Operator’s Manual, May 21, 2009, Copyright 2002-09 ASPiSYS Ltd.
10
Therefore, to help minimize these possible delays when using the ZZR feature, try to
restrict the number of zero-zone people to the absolute minimum needed, even if you
don’t intend on using the ZZR mode all the time. For those who are free from specific
schedules but still may be subject to a possible future ZZR mode, create a zone where
all days and times are enabled (e.g., AZ 1 SMTWTFSH 0000 2359) just like with zerozone, and assign them to that zone instead of zone zero, so their status is not checked
during ZZR mode authentication, making things faster and safer.
WARNING: When in ZZR mode, it’s crucial that ALL zero-zone people always exit
properly using their key, even if non-zero-zone people unfortunately sometimes don’t
follow the rules (e.g., they may exit by manually opening the door, or along with a
friend’s legitimate exit bypassing the system, despite your warnings against it). Having
said that, be careful whom you assign to zone zero, or they could jeopardize your whole
security scheme when in ZZR mode.
Current versions include a speed optimization related to the ZZR mode, where this extra
check occurs only under some conditions, specifically, following a reset, a zero-zone
person’s exit, or a ZZR command. As such, one should hardly ever notice any delays in
entry authorization.
LogLock2000 Operator’s Manual, May 21, 2009, Copyright 2002-09 ASPiSYS Ltd.
11
About Holidays
‘Holidays’ is simply a list of all dates in DDMM format (year is irrelevant because
normal holidays repeat each year) of fixed (non-moving) holidays. For example, in
most Western countries, January 1st and December 25th of every year are holidays. Each
country, or territory may have additional holidays, such as national independence days,
etc. Fixed holiday examples include USA’s July 4th and Greece’s March 25th and
October 28th, etc.
Moving holidays, such as Easter day, can be added to the list each year, e.g., around the
beginning of the year, for the year ahead while removing the same holidays for the past
year. A holiday is added with the command:
AH DDMM
where DD is the date, and MM is the month. For example, AH 2512 will define
Christmas day (December 25th) as a holiday.
Any user assigned to a zone where the holiday bit is not set will not be allowed access
on dates that are defined as holidays, regardless if the specific day happens to be in the
allowed day list.
You can delete a holiday with the DH (Delete Holiday) command followed by the date in
DDMM format as you entered it when adding the holiday.
You can store up to 30 holidays. This should accommodate practically everyone in any
country. Because you can delete holidays (e.g. when redefining moving holidays) you
may start running out of space. If you’re running out of space for holidays because you
have deleted some, use the PACK command to remove any deleted holidays in order to
make room for new ones.
About the password
LogLock2000 can operate either in user or in supervisor mode. User mode allows
limited functionality, e.g., viewing the log and user database (except that private user
information – i.e., PIN – is not shown).
To add or delete users, zones, or holidays, you must be in supervisor mode. This is
indicated by a # (pound sign) prompt. A user mode, on the other hand, is indicated by a
> (greater than sign) prompt. For security reasons, a simple user cannot add or delete
from the database lest they change their own user rights. A simple user cannot change
the clock, again for security reasons. A simple user cannot even look at other users’ PIN
codes. Only a supervisor (# prompt) can perform any of these actions.
As it ships, LogLock has no passwords installed, so it starts up in privileged mode (#
prompt) to allow initial programming. If the LogLock unit’s terminal is accessible by
anyone other than yourself, or whoever the supervisor is, locally or even over the
LogLock2000 Operator’s Manual, May 21, 2009, Copyright 2002-09 ASPiSYS Ltd.
12
Internet, it is strongly recommended that you protect it by assigning the privileged mode
a password. Remember, privileged mode has commands that let one open the door
directly (e.g., REN and REX) without even being on location or having a valid key. For
this reason, besides assigning a password to privileged mode, one should always leave
the system in normal (> prompt), when done making changes. For similar security
reasons, it is also strongly advised to assign a password to the Ethernet Module via the
DS Manager.
Be sure to remember the password you define at all times, but never write it down or
disclose it to anyone else to prevent ‘leakage’. If you believe the password has been
compromised, you must make sure to change it as soon as possible. The command to
assign the fist time password, or change it thereafter, is:
PASS <password>
The <password> is up to 20 characters, case sensitive, meaning that ‘Secret’ and ‘secret’
are two different passwords, and can include any printable ASCII character (letters,
numbers, punctuation marks, etc.).
If you don’t want people around you to see your password as you type it or if you want
to enter characters not possible to type on the command line, don’t type the password on
the command line. Instead, type PASS and press [ENTER]. This will display:
Enter password (it will not display):
Then, you can enter the password secretly. Each typed character will be shown as an
asterisk (*) instead of the actual character you type.
To remove a password completely without doing a complete erasure of the unit’s
settings and database, you must use the second method (secret entry) and just press
[ENTER] when asked for a password. This will undefine the current password.
IMPORTANT: The password you define (or undefine) will be saved during the next
PACK command, not immediately. If you have changed your mind and don’t want to
save the changes, issue the RESET command. This will reload the system ignoring any
configuration changes made since the last PACK command issued. (The PACK command
does not affect user, zone, or holiday changes, which are always active immediately.)
Commands that are only accessible when a valid password is entered (i.e., in supervisor
mode) are shown in the help screen (displayed when ?[ENTER] is given at the
command prompt) only from within the # mode. To exit the supervisor mode and return
to user mode, give the NOPASS command.
IMPORTANT: Make sure you do NOT forget the password. If you do, the only way to
reset the unit’s password is by calling ASPiSYS Ltd. for instructions, and a special onetime code to unlock the password. Removing power from the system or the built-in
clock backup battery for any length of time will not cause it to forget the password.
LogLock2000 Operator’s Manual, May 21, 2009, Copyright 2002-09 ASPiSYS Ltd.
13
Before contacting ASPiSYS Ltd. for a password reset procedure, you must be connected
to your LogLock2000 via a terminal. You may also be required to verify your identity
before we give you the one-time unlock code. You can issue the INFO command for
contact information.
LogLock2000 Operator’s Manual, May 21, 2009, Copyright 2002-09 ASPiSYS Ltd.
14
The DIR command
To check the current device status (file sizes, settings, etc.), use the DIR command. The
following is a sample display of the command. Your actual display will be different
based on your own settings.
Filename Total Used+ Free
-------- ----- ----- ----Users...
800
23
777
Log..... 15120
2 15118
Zones... 1000
6
994
Holidays
30
11
19
Clock (DOW YYYY/MM/DD hh:mm): Thu 2009/05/21 14:24 DST
Lang. Code Page :
Door-Open delay :
Door Strike mode:
Unit Location
:
Separate Strikes:
Entry/Exit zones:
ZZR Mode / Above:
Sound
:
PIN Mode
:
Log Mode
:
Battery Status :
Win Greek
1.5 sec
AC
Inside
Yes
255/255
Off/0
ON
OFF
ALL
13.10V
From Date YYMMDD: Sat 2000/01/01 00:00
To Date
YYMMDD: Thu 2099/12/31 23:59
Adding / deleting users
Before gaining access, a user must be entered into the LogLock2000’s database. This is
done via the AU (Add User) command, whose format is shown below (as when you issue
the command without any parameters):
Use: AU ID{16} PIN{4} ZONE{3} [FROMDATE{6} [TODATE{6}]] "username{16}"
Dates in YYMMDD format, e.g. 090117 = Jan 17, 2009
Username: Lowercase = Greek, Uppercase = English
ZONE 1 to 254, (0=Always, 255=Never)
PIN="NONE" will not ask for PIN
The numbers in curly brackets indicate the expected, or maximum length for that
element of the command. Square brackets embrace optional portions of the command.
DOS Greek (GR), Windows Greek (GRW) character codes or lower case English
characters in the user name field are interpreted as Greek (when in Greek modes), while
uppercase are always interpreted as English (Latin alphabet). When in English mode,
you may use both upper- or lower-case names, but searching for them (U, L, and WHO
commands) is case-sensitive, so you must remember to type them the same way you
enter them.
The iButton ID is the unique number of the user’s iButton. It can be found engraved on
the iButton key itself (but you don’t need to memorize it, or write it down). You can
use the Monitor mode to have the iButton number display on the terminal each time you
touch it on the reader, regardless if it is already registered in the device. Alternatively,
you may hold it firmly on the primary key reader of the unit for about 2 seconds until the
number displays on the bottom LCD line. The number will keep displaying until you
LogLock2000 Operator’s Manual, May 21, 2009, Copyright 2002-09 ASPiSYS Ltd.
15
remove the iButton from the reader. This number is always exactly 16 characters long,
comprised of hexadecimal digits (numbers from 0 thru 9, and letters from A thru F,
case-insensitive).
A PIN is made of exactly four decimal digits (0 thru 9). The special PIN codeword
NONE (case-insensitive) is special in that the user will not be required to enter a PIN
regardless of the status of the PIN mode. Numeric PINs, on the other hand, will be
required verification when the system is set in PIN mode (do a DIR command to see
current settings and modes).
A zone number is a decimal number of up to three digits. The number must be in the
range 0 thru 255, or else an error message is displayed. Remember that zones 0 and 255
are special and do not correspond to any user-defined zones. In short, zone 0 allows
access at all times while zone 255 disallows all entry accesses (while permitting exits)
but keeps track of any such attempts in the log file (if in the LOGALL mode).
An optional StartDate and EndDate may be entered in YYMMDD format. To enter an
EndDate you must also first enter a StartDate, although a StartDate does not necessarily
require an EndDate to follow it. A StartDate will enable the specified user’s access
rights on that date. An EndDate, if defined, will disable the specified user’s access
rights at the end of that day. No access will be allowed at all outside the provided date
range. This feature is useful for temporary users with a starting and/or expiration date.
To define only an expiration date, you must also give a starting date, so just use any past
date or today for starting date to be allowed to enter an expiration date.
Beginning with v2.60 the StartDate and/or EndDate may contain ‘wildcards’. This feature is
100% backwards compatible. Wildcards are entered as two dots (..) in place of the YY, MM, or
DD element of the StartDate or EndDate for the AU command. Wildcards effectively skip the
check for that part of the date against the actual clock. Therefore, a wider selection of date
ranges becomes possible. Examples using the wildcard dates are shown below:
AU FF00123456789A01 NONE 200 ....01 ....07 “Paper Recycler”
AZ 200 -M------ 0900 1300 AUTO
st
th
The above user is restricted to enter on dates between 1 and 7 of every month of every year.
Because the user is further restricted by zone 200, which allows entry only on Mondays from
9:00am to 1:00pm, the user is able to enter only between those hours on the first Monday of
st
every month of every year. Instead of 01 to 07 which is for the 1 week, use a DD 08 to 14 for
nd
rd
th
2 week, 15 to 21 for 3 week, 22 to 28 for 4 week, and possibly 25 to 31 for last week.
Another example: A seasonal worker in a hotel is needed for the months of May to September
every year.
AU FF00123456789B01 NONE 201 ..05.. ..09.. “Pool cleaner”
AZ 201 –M-W-FSH 0700 1100 AUTO
A final example: A person is allowed only around Christmas day every year.
AU FF00123456789C01 NONE 202 ..1222 ..1228 “Santa Claus”
AZ 202 SMTWTFSH 2200 2359
AZ 202 SMTWTFSH 0000 0400 AUTO
LogLock2000 Operator’s Manual, May 21, 2009, Copyright 2002-09 ASPiSYS Ltd.
16
With the current implementation, YY wildcard date ranges that span year changes (e.g.,
from December to January), or MM wildcard date ranges that span month changes (e.g.,
from 25th to 5th of next month) are not possible.
Finally, the user name is entered within double quotes (“user name”). Only the first 16
characters are significant. NOTE: A null (empty) name – two double quotes with
nothing in between – will add and delete the user immediately, so it is practically
useless, except for testing purposes, e.g., to see the effects of a PACK command.
You cannot add another user with the same iButton ID because each iButton is supposed
to be given to exactly ONE user. No sharing of iButton IDs is allowed. The iButton ID
can be considered the unique index of the ‘user table’ of the database.
Different users may share the same PIN, or user name, however. The unique part of a
user is the iButton ID, and only that. Nevertheless, it is recommended that users with
the exact same name, be given slightly different names (an extra dot, or first-last and
last-first versions of the same name, for example) to make it easier to differentiate the
two in user or log listings without having to look at, or remember their iButton IDs. So,
for example, if two people are named ‘John Doe’, one could be entered as ‘John Doe’
and the other as ‘Doe, John’.
Since there is no ‘change user’ command, to change a user’s database record, you must
first delete it (if you plan on using the same iButton ID), and then add it again using the
new or modified information. To delete a user, use the DU (Delete User) command
followed by the unique iButton ID for the user you want to delete. Hint: Use the U
command to locate the user, double-click on the ID to mark it, then copy it (using
CTRL-C in most terminal programs.) Next, give the DU command followed by a space
and the pasted back ID.
About the Log
The log keeps track of all user entries to and exits from the protected area. The log
keeps the exact date and time of each successful entry or exit. By default, unsuccessful
attempts (e.g., attempting to enter outside the user’s zone limits) will not be recorded to
save log space for successful attempts. If you need to record both successful and
unsuccessful attempts from registered users (e.g., those attempting to enter outside their
zone restrictions), use the LOGALL command to set the system in ‘log all attempts’ mode.
If you want to revert to keeping a log only for successful attempts, use the NOLOGALL
command.
If you need to record unsuccessful attempts from non-registered iButton IDs, use a
terminal program with a screen capture capability, and leave the LogLock2000 into
Monitor mode (M command) during times you want to collect this information. This
will record all attempts to enter or exit, even for iButton IDs that aren’t part of the
system. The ID along with the words ENTER, EXIT, or ----- is displayed, depending on
whether the attempt was an entry, exit, or unsuccessful, respectively.
LogLock2000 Operator’s Manual, May 21, 2009, Copyright 2002-09 ASPiSYS Ltd.
17
The log for a specific user can be displayed using the L command followed by a
[partial] user name (but without the quotes used when creating a user). This is useful
for viewing a specific user’s ‘in’ times for a given period (say, a month). Alternatively,
you can download the complete (or within a date range) log to your computer (using a
terminal’s screen capture feature) for automatic time calculations on the PC. You will
need additional software for this task. We may be able to supply you with such software
for PC based computers on an as-needed basis at extra cost. If there is a programmer
in-house, they can easily write a small program to extract this information from the
captured log file, and calculate total times as required by your organization. For
Ethernet based units, we can provide pre-written scripts to setup a database (such as
MySQL), and keep it updated by manually running a couple of scripts, or so. Then, you
can get summarized information for each and every user, one at a time or all together.
Although the log space is rather large (15120 records), eventually it will become full. It
is expected, that if you’re interested in keeping accurate log history for periods longer
than can fit inside the device’s internal memory, you will download the log well before
it becomes full (e.g., at the end of a month, end of the week, etc. depending on usage –
number of users and number of entries/exits per user per day), and then optionally clear
the log completely (using the CLEARLOG command).
Hint: To avoid the possibility of losing any actions during the short interval between
the completion of the log transfer and the issuing of the CLEARLOG command, you can
opt to not ever clear the log manually (rather, let it auto-truncate the oldest 2520
actions when full), and use the Date Range (D command, see below) to retrieve only
newer log entries. If you retrieve the new log from a specific date and time combination
you will get only a minimum amount of overlaps with existing log entries from the
previous log retrieval (in case you’re pulling the log more than once per given period),
or no overlaps if retrieving between fixed past periods (e.g., every day for the previous
day up to 23:59 – last minute of day).
Note: A database (such as MySQL) can be indexed such that it will not allow duplicate
entries in its tables. (An index based on the iButton ID, date, time, and direction will be
sufficiently unique.)
When the log fills, the device will automatically erase a log page (i.e., 2520 records) of
the oldest log information to make room for newer information. So, at any given time
(unless you specifically clear the log with the CLEARLOG command), the log will hold at
least the 12600 most recent user entries and/or exits.
To define a date range for the L (Log) command, use the D (Date range set) command.
Pressing D [ENTER] will show this:
No Date Range, use: D YYMMDD[hhmm] [YYMMDD[hhmm]]
and cancel any previous date range setting. To set the date range from Aug. 13 to Aug.
29, 2004 (Athens 2004 Olympic Games), use this command:
LogLock2000 Operator’s Manual, May 21, 2009, Copyright 2002-09 ASPiSYS Ltd.
18
D 040813 040829
When you press [ENTER] the system responds with:
From Date YYMMDD: Fri 2004/08/13 00:00
To Date
YYMMDD: Sun 2004/08/29 23:59
Dates are entered in YYMMDD format and must be exactly 6 digits long, or (starting
with v2.46) entered in YYMMDDhhmm format and be exactly 10 digits long. If
choosing the YYMMDD format, then the time is automatically set to the beginning of
the day for the FROM date and to the end of the day for the TO date. The first date is
the FROM date while the second date is the TO date. Then, the log displayed with the L
command will be limited to accesses during this period (inclusive). You can also use
the command with only a FROM or only a TO date.
To set only a FROM date (to see log entries FROM that date onward), give only the first
parameter to the command. For example,
D 040813
will limit log viewing from Aug. 13, 2004 and later (to any date). After you press
[ENTER] the system responds with:
From Date YYMMDD: Fri 2004/08/13 00:00
To Date
YYMMDD: Thu 2099/12/31 23:59
(Notice how the TO date is automatically set to the latest date and time possible, i.e.,
Dec. 31, 2099 11:59pm)
To set only the TO date (to see log entries from any date TO a specific date), give any
invalid date for the FROM date followed by a valid TO date. For example,
D x 0408291700
will limit log viewing from any date to Aug. 29, 2004 at 5pm (inclusive). The ‘x’ acts
as a ‘don’t care’ indicator. Any date that isn’t made up of valid numbers and/or doesn’t
contain exactly 6 or 10 digits is invalid and, therefore, considered a ‘don’t care’ date.
After you press [ENTER] the system responds with:
From Date YYMMDD: Sat 2000/01/01 00:00
To Date
YYMMDD: Sun 2004/08/29 17:00
(Notice how the FROM date in this case is automatically set to the earliest date and time
possible, i.e., Jan. 1, 2000 12:00am)
NOTE: The system only understands dates for the years 2000 to 2099. Since the first
date is already past while the second one is beyond the expected life of this device, it is
LogLock2000 Operator’s Manual, May 21, 2009, Copyright 2002-09 ASPiSYS Ltd.
19
a non-issue for actual use. Anywhere you are expected to enter a year, you must omit
the leading 20 because the system expects all dates to be in the above range.
You can see the currently effective date range by issuing the DIR command. The date
range will remain in effect until you change it or the system is reset.
Any log viewing commands will always be restricted to within the effective date range.
Even if you search for a user name in the log (with the command ‘L username’), only
those accesses that fall within the effective date range will be shown.
Since the date range will auto-calculate and display the day-of-week for the given
date(s), you could use this function to check what day will be on a specific date.
IMPORTANT: Don’t forget to reset the date range before you take a complete log
backup or set the date range for an incremental log backup (e.g., to use with a PC
application). Press D [ENTER] to reset the date range to the default values of
2000/01/01 00:00 to 2099/12/31 23:59. Then, press L [ENTER] to get the complete
log.
Finding out who’s ‘in’
LogLock2000 gives you the ability to know who’s supposedly ‘in’ by checking the log
for those who have registered an entry without a following exit. For accurate results, it
is assumed that users have entered within the same log period (i.e., within the last 12600
transactions after the last CLEARLOG command). Otherwise, there is a possibility the log
gets truncated to make room for newer entries, losing the information for older entries.
This is highly unlikely to occur as even with a totally full user database (800 people),
each and every user will have to go in or out about 19 times on the same day for the log
to become full and risk losing older entries before getting a chance to retrieve it at the
end of the day.
The who command examines each user’s log activity. Any user who has entered but not
yet exited is considered to be ‘in’. Obviously, this will not be correct if people are
allowed to exit bypassing the LogLock2000 (e.g., by manually opening a door, or
exiting along with another person’s legal exit, without using their own key).
Just like the U and L commands, the WHO command may be followed by a partial user
name to limit the search to only those users whose name includes the one given.
Setting the clock
To set the real-time clock of the device you must use the C (Clock) command. The C
command expects the date and time in the YYMMDDhhmmss format (note that seconds
must be given also – if you don’t care for such accuracy give 00 for seconds). For
security reasons, only the supervisor (# prompt) can change the date and time.
LogLock2000 Operator’s Manual, May 21, 2009, Copyright 2002-09 ASPiSYS Ltd.
20
As an example, to set the date and time to ‘5:30:45pm August 15, 2004’, give the
command:
C 040815173045 [ENTER]
You will not be allowed to enter incorrect date/time codes. The day of week does NOT
need to be entered, as the unit is capable of automatically calculating it from the date.
Daylight saving time (DST) is automatically detected based on EU’s rules for changes
of time twice a year (last Sunday in October from DST to Normal, and last Sunday in
March from Normal to DST, at 3:00am). When setting the time the unit will
automatically go into DST or normal mode depending on the date entered (on a switch
date itself, the new mode will be set, regardless of time). Thereafter, the clock will keep
track of the correct time even during time changes from Normal to DST or back. This
makes it very convenient for the day(s) after a time change when people show up to
enter based on the changed time.
The clock is protected from power failures via a small long-life lithium battery that will
keep the clock running for several weeks of continuous power loss. If, however, the
unit is left unpowered for longer periods of time, the clock battery will eventually run
out and the unit will then require service to replace the battery. The device is not
serviceable by the casual user. Please note that even with a totally drained clock
battery, the unit is still usable but unless its power-supply is protected by a UPS
(Uninterruptible Power Supply) system, it will lose its date and time information every
time there is a blackout (or even a brownout on occasion), and it will have to be
manually reset. When losing the date/time due to a clock battery failure, the unit will
revert to the date ‘August 8, 2002’, certainly a past date.
Changing the LCD and username-in-listings language
LogLock2000 is partly bilingual. For units equipped with an LCD, it shows messages
on the LCD in either English or Greek. Other languages may be added (instead of
Greek) in the future, if sufficient demand warrants it.
The device’s terminal interface is always in the English language. This is because
Greek or other languages don’t use a standard character-display coding scheme among
different computers (e.g., PCs, Macs, UNIX, etc.) or different countries, and the Greek
or other language fonts aren’t default in most systems that support these languages.
This would make it very difficult to use the device if the terminal was in Greek and the
connected terminal didn’t show it correctly.
The LCD display the user sees can be switched from English to Greek, or back. To
switch to English, give the EN command. To switch to Greek for DOS, give the GR
command. To switch to Greek for Windows, give the GRW command. GR and GRW are
only different at the terminal display, not the LCD.
LogLock2000 Operator’s Manual, May 21, 2009, Copyright 2002-09 ASPiSYS Ltd.
21
The current language setting can be seen from the DIR command display, and it controls
all messages on the LCD, including the date and time, except for the user names.
Names on the LCD are always displayed in uppercase. On the terminal, however, if the
language is English, user names are displayed in lowercase for Greek and uppercase for
English. This allows an English system to handle Greek names or a Greek system to
handle English names. If the language is Greek for DOS, user names are displayed in
Greek for DOS code page for Greek and uppercase English for English names. Greek
for Windows works like Greek for DOS except the terminal code page is different for
Greek names.
Packing or ‘Garbage Collection’ (Technical Note – not needed for operation)
The non-volatile memory used by LogLock2000 for keeping settings, zone, holiday,
user, and log information is writable in a special way that does not allow erasing small
amounts of information at a time. Erasures must be done in big chunks. Also, this
memory is guaranteed by its manufacturer to at least 100.000 write-erase cycles which is
truly a lot but not infinite. In practice, this translates to well over 1.5 billion accesses,
which even with the heaviest possible usage imaginable, it is over a decade! It is
theoretically possible, however, that the memory will eventually go bad for writing data
to it, and it will need replacement. Special programming techniques have been utilized
to extend this writing period for as long as possible, so that you can enjoy many years of
service-free operation (for most installations, this limitation is a non-issue).
When deleting users, zones, or holidays, the unit doesn’t actually delete these; it simply
marks them for deletion (yet, this is an action that cannot be revoked). This means that
the space taken by the deleted items isn’t freed immediately. To truly remove any
deleted items from memory, you must use the PACK command. This command will skip
over all items that have been marked as deleted while copying the rest. This procedure
is called ‘garbage collection’. If you’re running out of memory space (as reported by the
DIR command’s FREE column), you can use the PACK command to restore any blocked
unused memory. However, try not to use the PACK command casually (for example,
each time you delete a single user, zone, or holiday).
When changing password or options (such as the open-door strike time), the device
keeps these changes in a temporary memory rather than save them immediately. This
allows making these changes more than once for testing a behavior before committing
them to memory. To make these changes ‘permanent’ you must again use the PACK
command.
Because of the write-erase cycle life of the memory, it’s recommended you use the PACK
command only when truly necessary. In other words, it’s not required to type the
command each time you delete a single user or zone. Give the command only when you
must change any of the DIR settings or password, or when there is no space remaining
in any of the files, and you need to add data to them, or if you have a significant number
of deleted records. This will help prolong your unit’s life to the maximum, before
LogLock2000 Operator’s Manual, May 21, 2009, Copyright 2002-09 ASPiSYS Ltd.
22
requiring service. (The FROM and TO search date range are never written to this
special memory, so a PACK command is never needed for accepting changes.)
Using LogLock2000 for entry or exit
The system comes with a built-in iButton ID reader (the round object marked with the
word KEY-> next to it), and (optionally) a secondary reader to be placed on the other
side of the protected area. The unit may be placed on the outside with the extra reader
placed inside. This allows entries to have the added benefit of PIN checks. Quite often,
however, it may be deemed suitable for protection from vandalism (i.e., zero hands-on
access to the system from outsiders) to reverse the installation. This means placing the
system on the inside, and the extra reader on the outside. In this ‘often preferred’
configuration, the PIN capability is automatically removed, as it makes no sense to have
people enter without PIN, yet ask them for a PIN to exit. The commands IN and OUT are
the ones that tell the system whether it’s located inside or outside. The device firmware
then knows how to behave correctly for each case.
Note for custom-made units: The unit may include detached readers. This is especially
true if your version doesn’t come in the regular keyboard equipped grey box.
Note for single reader attendance-only units: A version of this system comes with only
the single built-in reader (but not a secondary detached reader), and a special version
of the firmware. The intended purpose is to keep attendance logs, rather than provide
access control.
The firmware is different from all other versions in the following manner. Each time
the user touches their iButton ID on the reader, the unit will first check the last logged
action of the user and then assume the opposite action. So, entries and exits will
interleave for each separate user. It is up to the user to make sure the correct action is
logged. If the message on the LCD shows the wrong action (most likely because the
user forgot to register their previous action), the user must retry their iButton ID to
force the correct action to display, and sync the true direction with the logged one.
If asked for a PIN, enter your 4-digit PIN using the numbers 0 thru 9, then press the red
[ENTER] key. If you don’t type anything for about 10 seconds, the PIN entry mode will
be canceled and you will have to touch your iButton key again to start over.
The [ESC] key can be used to cancel the procedure.
The [DEL] key can be used to delete the last PIN digit entered to allow for corrections.
The [SHIFT] key will erase the whole PIN and start over waiting for keys from a blank
PIN.
The remaining keys are not operational at present. They are reserved for future use or
special (custom) versions of the firmware. Pressing an incorrect key while entering your
PIN will display a related error message and ignore the incorrect key. The keyboard is
LogLock2000 Operator’s Manual, May 21, 2009, Copyright 2002-09 ASPiSYS Ltd.
23
only operational during PIN entry. You cannot use the keyboard any other time, so
pressing keys when not in PIN entry mode will neither beep (when Sound is ON) nor
display any error messages.
If a Request-To-Exit push-button is connected, pressing the button momentarily will
open the exit door using the defined Door Time setting. No action will be logged,
unless in LOGALL mode. This push-button is normally used by secretaries or other
human operators letting visitors (in or) out. Visitors normally do not have their own
keys and depend on someone else to open the door for them. In a more secured
installation where all ‘visitors’ must be pre-validated, the Request-To-Exit button may
have to be left unconnected to prevent the possibility of any user exiting without the use
of their iButton ID (especially if the REX button is placed too close to the access point).
Dual strike mode
LogLock2000 can be set to use different strikes for entry and exit. This is useful for
situations where a different path is taken for each action (e.g., garages with separate
lanes for entry and exit).
The primary strike (LOCK1 in the connection diagram) is used for both entry and exit,
if the device is set for single strike mode (with the command S1).
When set in split (dual) strike mode (with the command S2), entries will always activate
the LOCK1 strike, while exits will always activate the LOCK2 strike, regardless if the
unit is set to be inside (IN command) or outside (OUT command).
The command ENTRY can be used to open the entry door (or barrier) connected at
LOCK1 while the command EXIT can be used to open the exit door (or barrier)
connected at LOCK2, and keep it open continuously (e.g., during rush hours you may
want to raise the garage barriers for efficiency). The iButton keys can still be used to
register the requested access (for time attendance purposes), but the strikes will not
close after the defined timeout (DT command). To cancel either command, use the
NOENTRY and NOEXIT commands, respectively.
Please note that the ENTRY and EXIT commands always operate in DC strike mode,
regardless of the actual strike mode setting.
Beginning with firmware version 2.47, the commands ENTRY and EXIT may be
followed by a zone number. If the zone number given is 255 (the OEM default), the
commands will be practically disabled (e.g., typing ENTRY will open the entry strike but
close it immediately). If the zone number is 0 then the original behavior of indefinite
engagement is enabled. Please note that when supplying a zone number to either of
these commands, the zone will be set but the command may not appear to be activated
immediately (depending on the situation, if zones are to be respected). If you give a
zone from 1 to 254, and that zone is defined, the strike will be activated on the days and
times dictated by the zone, and de-activated during days and times the zone won’t allow.
This is very flexible in that you may have the strike automatically engage during, say,
LogLock2000 Operator’s Manual, May 21, 2009, Copyright 2002-09 ASPiSYS Ltd.
24
business days and specific ‘rush hours’. Since a different zone may be used for entry
and exit, you can allow for different ‘rush hours’ for entry and exit.
Note: To make your system completely compatible with pre-2.47 firmware, please
assign both ENTRY and EXIT to zone zero (i.e., do NOT leave at the default 255/255
setting because it will behave differently than you’d expect).
Relevant note: When using in S1 mode, EXIT should be set at zone zero.
REX command
The REX command behaves exactly as if someone presses the REX button connected to
the corresponding connector on the diagram. When used with split strike mode, REX
always applies to the exit strike.
Battery-Low warning
If connected appropriately, LogLock2000 can warn you when the external supply battery
(e.g., UPS battery) is running low and needs replacement or other maintenance (e.g.,
charging). The warning appears on the top LCD line in the selected language along with
the date and time displays.
Mass-erase actions
Some commands are meant to completely erase various files or the whole system,
including the configuration. All delete commands (e.g., DU for delete user) can
optionally be followed by the word ALL to delete all records in that file with a single
command. A verification of the action will be required to prevent mistakes. If you are
certain you want to proceed with the action, enter Y and press [ENTER]. The command
for erasing all log entries is CLEARLOG while the command for erasing all files (including
the log and system configuration) returning the system into its OEM state in a single
step is CLEARALLFILES. All these actions can only be performed in password mode.
Contact information
The command INFO displays our company’s contact information (address, phone
numbers, etc.). Use it whenever you need to contact us. This information should be up
to date according to the purchase date (or latest firmware upgrade, if applicable) of your
unit. Should you require a firmware upgrade (e.g., to take advantage of added features
in later versions), please contact us. Firmware upgrades consist of a PLCC-52 socketed
chip replacement to be carried out only by a specialist in electronics handling, and
unless the update is performed to fix a possible remaining bug in the system, it is not
free.
LogLock2000 Operator’s Manual, May 21, 2009, Copyright 2002-09 ASPiSYS Ltd.
25
Installation Instructions
IMPORTANT: The installation of LogLock2000 must be performed ONLY by a qualified
person (someone experienced in electronic equipment handling). Do not attempt
installation yourself unless you know what you are doing, or else there is increased
probability of damage to the device due to wrong connections.
First, select the location on the wall you want to install the unit. Custom units may have
different installation requirements. It must be somewhere near the door, and at a height
such that all users can access the keyboard and view the LCD without having to either
stand on their toe tips or bend down so they can reach.
Note: If you’re worried that having the unit installed on the outside is subjecting it to
probable vandalism attacks, you can choose to place the unit on the inside of your
premises. Although this will provide the ultimate protection against vandalism, it will
make it impossible for users to physically access the unit’s keyboard from the outside
and, thus, to enter their PIN. For this reason, when setting the unit inside (by selecting
the IN mode), the PIN requirement is disabled automatically (even if set otherwise).
Next, (if you place the unit on the outside) you must prepare a passage for the wires to
come from the outside to the inside. Now, you’re ready to install the unit.
Step 1: Unscrew the front panel and keep the screws in a safe place for later.
Step 2: Remove the front panel slowly so as to not break or disconnect the keyboard
from the PCB (Printed Circuit Board).
Step 3: Unscrew the PCB from inside its plastic case and keep the screws in a safe place
for later.
Step 4: Connect the wires for each function (e.g., power-supply, request-to-exit, doorstrike, secondary iButton reader, RS232). See the diagram later for information on
where to connect each wire.
Step 5: Screw the case in place infront of the wall passage you allowed for the wires so
that the back opening of the case sits on top of the wall passage.
Step 6: Re-screw the PCB on to the inside of the plastic case, connecting the
communications cable on its back.
Step 7: Re-screw the front panel on to the plastic case.
Step 8: Connect the supplied RS232 cable to a PC for configuring it. Start a terminal
program (such as HyperTerm, with Courier New size 14 as the recommended font to
use) on your PC. Set it for 9600 bps 8-N-1, software flow control. Power up the device.
(If possible, use a 100ms delay after each line, and a 10ms delay after each character
for better responsiveness when loading a previously backed up device configuration.)
LogLock2000 Operator’s Manual, May 21, 2009, Copyright 2002-09 ASPiSYS Ltd.
26
If an Ethernet adapter is installed instead, connect it to a hub/switch or PC using
standard Ethernet UTP cable. From the TDST_3-9-82.ZIP file on the accompanying
CD (or Internet download, if a CD was not provided), install only the “DS Manager”
application and run it. Your settings should be similar to the following pictures (but
certain parameters, such as IP, may be different depending on your specific network
setup):
Double-click on the specific device (multiple devices may be showing) you want to
change.
LogLock2000 Operator’s Manual, May 21, 2009, Copyright 2002-09 ASPiSYS Ltd.
27
Owner name and device name are optional and can be set to your liking.
MAC address is changeable but should be unique. (Do not change unless you really
know why.)
DHCP can be enabled or disabled depending on whether you want your device to obtain
an IP address dynamically from the network’s DHCP server, or manually.
Port should be any valid port number, and there is no reason to change it from the
default (1001).
Gateway is your network’s router IP address (or PC address, if connected directly
through a cross cable.)
Subnet mask is again network specific. If you’re unsure what to use for gateway and
mask, issue the IPCONFIG command from the command console, and use the same
numbers as your PC’s.
LogLock2000 Operator’s Manual, May 21, 2009, Copyright 2002-09 ASPiSYS Ltd.
28
In the connection Tab, it’s important to set the Transport protocol to TCP. Connection
timeout is up to you, depending on your application (a zero will disable timeout).
Routing Mode should be “0-Server (Slave)”. Unless you want to accept connections
from only a single IP address, leave the ‘Accept connection from’ box to ‘Any IPaddress’.
LogLock2000 Operator’s Manual, May 21, 2009, Copyright 2002-09 ASPiSYS Ltd.
29
In the Serial port Tab, it’s important that you make the following settings the same as
shown above:
Serial interface, RTS/CTS flow control, DTR mode, Baud rate, Parity, and Data bits.
LogLock2000 Operator’s Manual, May 21, 2009, Copyright 2002-09 ASPiSYS Ltd.
30
In the Outbound Packets Tab, use the above preferred settings. ‘Start on any char’
should always be set to Yes. Various settings may work, but the ones shown will work
best.
LogLock2000 Operator’s Manual, May 21, 2009, Copyright 2002-09 ASPiSYS Ltd.
31
Press Save if you want to make a backup file of this configuration on your PC (to load
perhaps into another device). Finally, press OK to send the configuration to the device.
Changes sent to the device will be remembered across power cyclings.
IMPORTANT: DS Manager cannot auto-detect devices across a router. Your devices
must be in the same network segment.
Step 9: Restarting the unit, you should see the LCD light up, and the terminal screen
welcome you with a copyright message and the firmware version of your unit. You’re
done! With the Ethernet model, it’s possible that you won’t see the startup message
from a power up, only from a reset command. This is because the Ethernet module
itself needs some time to startup and connect to the network. Because the Ethernet
module itself is reset, your connection will be lost and it will have to be re-established..
Step 10: Press ?[ENTER] on the terminal to see the unit’s command help screen. If
nothing appears check your connections and settings.
For any questions or first-time programming of the unit please write or call us.
LogLock2000 Operator’s Manual, May 21, 2009, Copyright 2002-09 ASPiSYS Ltd.
32
Firmware revision notes – possible compatibility issues with previous versions
1. The ENTRY and EXIT commands in this version are more powerful, and they may be
followed by a zone number. The OEM default (or every time after a CLEARALLFILES
command, the) zone assigned to them is 255 which practically disables the commands.
To make the system behave the same as with previous firmware, you must first assign
zone 0 (zero) to both ENTRY and EXIT, and save the changes using the PACK
command (if they must survive a RESET).
2. Lines in previous firmware ended with CR,LF pairs but used single LF characters to
advance additional lines (e.g., the sequence CR,LF,LF was possible). Current firmware
uses a CR,LF pair for each new line (e.g., CR,LF,CR,LF). This should not cause a
problem unless your software specifically expects a sequence of consecutive LF
characters based on previous observations of the actual data stream.
3. Inputs were accepted on lines ending with either CR or LF. Now, only CR can be
used, LF is ignored. This change offers better telnet behavior with applications other
than HyperTerm. If the command you sent from your application ended with just an LF,
you must change it to a CR character (which will work both with current and previous
versions).
4. The WHO command is now updated immediately, not just once a minute as was the
case before.
5. The DIR and HELP output screens have changed slightly to accommodate the new
commands or options. If your software expected a specific output from the DIR screen
in particular, you'll have to allow for the changes by examining the new output.
LogLock2000 Operator’s Manual, May 21, 2009, Copyright 2002-09 ASPiSYS Ltd.
33
Version history – A brief description of features added in the various versions.
Below is a brief description of the various changes, additions, or bug fixes in the history
of the LogLock 2000 device. Not all version changes are visible to the end-user, as
many are internal and affect mostly performance optimizations. Also, some versions
add capabilities that are only available in special order versions of the system, and do
not make any difference for the standard or other versions. In general, the first number
in the version indicates significant hardware revisions, so a level 3.xx version is not
compatible with level 2.xx devices.
1.0
2.0
2.04
2.05
2.06
2.07
2.08
2.09
2.10
2.11
2.12
2.13
2.14
2.15
2.16
2.17
2.18
2.19
2.20
2.21
2.22
2.23
2.24
2.25
2.26
2.27
2.28
2.29
2.30
2.31
2.32
2.33
2.34
2.35
2.36
Original.
Major update. Added Greek language capability. Added PACK, PASS,
NOPASS, MASTER-RESET, and AC/DC commands. RESET command
possible only in # mode.
DIR shows the clock.
Rack cabinet version.
Single-sided version.
Variable 1/10th-second door-open delay.
Added iButton display on LCD when held pressed.
Timing adjustment for second iButton to behave like the primary one.
Minor internal optimizations.
Improved response for REX push-button.
Eliminated possible reset when setting new date/time.
Minor internal optimizations.
Added automatic DST.
Minor internal optimizations.
Updated help message.
Minor internal optimizations.
Bug fix with possible freezing of the command terminal.
Added partial user name search in WHO command.
Added ALL parameter to delete commands.
Added day-of-week display in log.
Minor internal optimizations.
Minor internal optimizations.
Minor internal optimizations.
Added date range checking for log.
Added REX logging.
Added battery status display in DIR command.
Minor internal optimizations.
Added stronger validation for MASTER-RESET command.
Special garage version.
Minor internal optimizations.
Minor internal optimizations.
Optimized log command.
Added terminal pausing with CTRL-S/CTRL-Q
Added BACKUP command. PACK command now only works in # mode.
WHO command made significantly faster.
LogLock2000 Operator’s Manual, May 21, 2009, Copyright 2002-09 ASPiSYS Ltd.
34
2.37
2.38
2.39
2.40
2.41
2.42
2.43
2.44
2.45
2.46
2.47
2.48
2.49
2.50
2.51
2.52
2.53
2.54
2.55
2.56
2.57
2.58
2.59
2.60
Minor internal optimizations.
Minor internal optimizations.
Display of door-time as decimal.
Added display of ENTRY or EXIT in monitor mode.
Fixed bug with 2.40 addition.
Minor internal optimizations.
Added string *** RQX *** to request-to-exit log display.
Added REX command.
Changed various messages. EXIT and NOEXIT work in S2 mode, too.
Added search time to D command.
Added optional zone to ENTRY and EXIT commands.
Bug fix for 2.47 addition. Ignore LFs for better telnet behavior. Added ZZR
mode.
Optimized ZZR check added in 2.48 for speed.
Force ZZR check when enabling it.
Reset Ethernet module at every reset rather than only at powerups.
Minor internal optimizations.
Cosmetic changes here and there.
Added LL command and multi-word search capability. Added full Greek
character set conversion.
Minimized redisplay of "Searching" message
Monitor mode has 1 min timeout by default and it's privileged
Manual ENTRY/EXIT/NOENTRY/NOEXIT ignored if not set at zero zone.
Added REM command for script comments
Plain ENTER does nothing
Changed password size from 8 to 20 characters.
Holiday only zone is now possible.
Added wildcard Start/End dates in AU command.
Added 5-second delay on failed password attempt.
LogLock2000 Operator’s Manual, May 21, 2009, Copyright 2002-09 ASPiSYS Ltd.
35
The following is the pinout for the RS-232C cable connected to the back of the unit in
the RJ45 jack. CAUTION: DO NOT CONNECT AN ETHERNET NETWORK TO
THIS JACK.
RJ45 PIN #
Pin Description
RS232 D9 PIN #
Connect together 1,
4, 6, 8
1
2
3
4
5
6
7
8
Not Connected
Not Connected
GND
RX
TX
GND
Not Connected
Not Connected
5
3
2
5
The following is the pinout for the PCB connector as shown in the diagram below.
PIN Name
Reader 1
Reader 2
Bat
V
GND
Lock 1
Lock 2
REX
Pin Description
iButton Reader #1 (primary)
iButton Reader #2 (secondary)
Optional UPS battery connection
Power Supply 10-13.8VDC positive (depending on strike)
Common Ground
Primary door strike
Secondary door strike (available only on special request)
Optional Request-to-Exit push-button (same as REX command)
LogLock2000 Operator’s Manual, May 21, 2009, Copyright 2002-09 ASPiSYS Ltd.
36
LogLock2000 Operator’s Manual, May 21, 2009, Copyright 2002-09 ASPiSYS Ltd.
37