Download Blackboard 9 Overview - Technology Support Services
Transcript
Blackboard 9 Overview
By Terence Peak
Title
Table of Contents
Login .................................................................................................. 3
The Blackboard Homepage .................................................................... 3
Quick Reference Menus .............................................................................................. 3
Tabs............................................................................................................................. 4
Notifications Dashboard ............................................................................................... 4
Tools ............................................................................................................................ 4
The Course Entry Page .......................................................................... 4
Edit Mode .................................................................................................................... 5
Control Panel ............................................................................................................... 5
Make Course Available ....................................................................................................... 6
Blackboard File Manager ............................................................................................. 6
Upload Files .......................................................................................................................... 7
Announcements ........................................................................................................... 8
The Course Menu ........................................................................................................ 9
Edit the Course Menu ........................................................................................................ 10
Edit Menu Links .................................................................................................................. 12
Blackboard Software Requirements ....................................................... 13
Browser and Operating System Requirements .......................................................... 13
Required Software (Click link to download) ............................................................... 13
Tips and Tricks .......................................................................................................... 13
2
UIW Department of Instructional Technology
Login
1. Click the Blackboard link
(http://blackboard.uiwtx.edu/) on the UIW
Homepage.
2. The Blackboard Login page opens.
3. Type your Username. Your username is the
name that precedes “@uiwtx.edu” in your
email address. The username is case
sensitive
4. Type your Password in the space provided.
The first time you login to Blackboard, your
password is your PIDM number.
5. Click Login.
6. If you make a mistake, repeat steps 3 and 4.
If you cannot log in, contact the System
Administrator, Kenneth Rogers at 832-2197.
3
4
5
The Blackboard Homepage
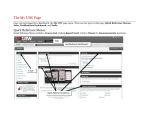
Once you have logged in to Blackboard, the Blackboard Homepage opens. There are four parts
to the homepage: Quick Reference Menus. Tabs, Notifications Dashboard, and Tools.
Quick Reference Menus
Quick Reference Menus include a Course List, student Report Card, a link to iTunes U,
Announcements, and more.
Tabs
Notifications Dashboard
Tools
Quick Reference Menus
3
UIW Department of Instructional Technology
Tabs
Across the top of the window is a string of tabs that access different areas of Blackboard. Click
on each tab as you read the explanation.
My UIW
Link to the Blackboard homepage.
Courses
Links to Blackboard courses.
Organizations
UIW Web-
Link to all Blackboard organizations.
The UIW Homepage opens within Blackboard.
Notifications Dashboard
The Notifications Dashboard displays links to course items or course information that have
been created, revised, or have impending due dates.
To-Do list
Needs Attention
What's New
Content items created as an assignment content type can be assigned a
due date. The item will appear on the To Do list with information as to
when it is due (i.e. today, tomorrow, this week, in the future, or past due).
Items that have been submitted by users and require review or grading.
Items added, updated, submitted, or changed by a user.
Tools
The box labeled Tools contains useful links to some helpful Blackboard assets.
Announcements
Calendar:
Tasks
View Grades
UIW Email
User Directory
Address Book
Personal Information
User Manual
Rave Alert
Blackboard Sync
Messages regarding courses and organizations, as well and bulletins from
the Blackboard Administrator.
The Blackboard calendar is separate from your Cardinal Mail calendar.
This is a “To Do list” set up in conjunction with the calendar.
Student access to their grades in all courses.
Link to Cardinal Mail.
Directory of registered Blackboard users.
The address book is set up by the user.
Access point to update personal information.
Systematic guide for Blackboard users.
Register for approved UIW emergency communications, course
announcements and other important course information via text message
and email Messaging charges apply depending upon your wireless carrier
plan.
Synchronizes Blackboard with your iPhone.
The Course Entry Page
The Course Entry Page is the welcome mat for the course, by warehousing course content.
From the Course Entry Page, the instructor can use the Edit Mode to toggle between the Edit
View and Student View, access and edit the Course Menu, Control Panel, Course Modules
and Banner, as well as navigate the course using the Breadcrumb Links. Students may also
4
UIW Department of Instructional Technology
access course content using the same tools. Students do not have a Control Panel or an Edit
option.
Edit Mode Toggle
Banner
Course Menu
Course Modules
Control Panel
Edit Mode
The Edit Mode allows the instructor to change their view of the content on screen.
ON shows the Edit View.
Instructors may edit the
course.
OFF shows the Student
View of the course.
Control Panel
Course Management is administered through the Control Panel, located below the menu bar:
Files
Course Tools
Course Links
Evaluation
Users and
Groups
5
Blackboard File Storage. This feature allows
instructors to upload, download store and
manage folders or documents into one central
location in their course.
Announcements, Email, and Discussion Boards
that can be added to a course.
Links to course tools and content within a
course.
Tools for creating tests, recording grades, and
tracking performance.
Options to create and administer (enroll, edit or
remove) course users and groups.
UIW Department of Instructional Technology
Customization
Packages and
Utilities
Help
Change the properties of the course such as,
availability, Guest/Observer status, tool
availability, and appearance.
Options to import, export, copy, and archive the
course.
Support and online documentation
Make Course Available
Once the course is made available, the course will appear on the student’s course list
1
1. Open your course. On the Control Panel,
locate Customization.
2
2. Click Customization
Customization menu.
3
3. Click Properties.
to expand the
4. The Properties page opens. Locate Option 2, Set
Availability, and click Yes
4
.
5. Click Submit.
Blackboard File Manager
The Blackboard File Manager feature allows instructors to upload, download store and manage
folders or documents into one central location within their Blackboard course. Documents (i.e.
PowerPoint sideshows, Word documents, or Multimedia files) can be uploaded to a Blackboard
course with a single upload, instead of uploading documents one document at a time.
The instructor will choose the Browse from Course option in the Content Area, to upload
content. All files added to the course can be copied to another course using the course copy
feature in Blackboard. These files may also be archived for use in future courses.
Open the Course Homepage and locate the Control Panel. Click the Action Button to open the
Files Page. The Files page opens with a series of buttons.
Upload: Allows the instructor to upload a single document, a folder
containing multiple files, or upload a pre-packaged set of documents
prepared for Blackboard by a textbook company.
6
UIW Department of Instructional Technology
Create an HTML Object: Allows the instructor to create a Reusable
document with text and multimedia content in HTML format that is
then stored in the File Manager. This document may be uploaded to
any Content Area. The student can open and read the information in
the same manner as course content. This option works best for any
items that are not time or date sensitive, but are reused frequently.
Create Folder: The instructor can create a folder to house a single
document, a folder or HTML Objects, or a pre-packaged set of
documents.
Upload Files
The instructor can upload a single document, a folder containing multiple files, or upload
a pre-packaged set of documents prepared for Blackboard by a textbook company.
1
1. Open the course homepage and locate the
Control Panel, and click the Action Button
to open Files.
2. Click Upload
and choose Upload
Files.
3. On your computer, open the file or folder that
contains the items that will be uploaded.
3
4
5
7
4. The Upload Multiple Files and Folders page
opens.
5. Click and Drag the files into the area marked
“To begin uploading. drag and Drop files
and folders here”
UIW Department of Instructional Technology
7
8
6. When all of the folders have loaded, click
Submit.
7. To remove files click Remove All.
8. Alternatively, Click Browse
to locate
and download files or folders.
6
9. It will take a few minutes upload large files.
10. Click Submit
again, and you will be
returned to the Files: page.
Announcements
Post an Announcement
1. In the upper right corner, turn the Edit
2
Mode ON.
2. On the Welcome Page, click More
Announcements to open the
Announcements Page.
3. Click Create Announcement.
3
4
5
4. The Create Announcement page opens. Type a Subject. Note the Asterisk (*) You are
required to fill out this field.
5. Type the message in the Message window.
6
7
8
UIW Department of Instructional Technology
6. Options Choose an announcement type by clicking the button
for
Permanent – Announcement will always be displayed.
Date restricted – Announcements can be given Display After and Display Until dates
to determine when the announcement will be available to Students. Click the checkbox,
and click the clock
and calendar
icons to set date and time.
7. Users are automatically notified by email when an announcement is submitted. Check the
Override box
if you DO NOT want the announcement emailed.
Syllabus
8
8. The Course Link will allow you to link the announcement to a specific content area of the
course, such as an assessment or the syllabus.
Click Browse.
Select the Course Link, and the link will appear in the Location window.
9. Click Submit
to complete the announcement.
The Course Menu
Turning the Edit Mode ON or OFF changes the instructor’s view of the Course Menu. In the
OFF position, the instructor sees the Student View, in the ON position, the instructor sees the
Edit View. The Edit View allows the instructor to change menu content. Notice that the Edit
View contains more content links that the Student View. This is because the links are pointed at
empty folders, which are not visible in the Student View.
Student View
Click the List View Icon
list.
to see the menu a
Edit View
The Course Menu is edited through the use of
the he Edit Mode.
Course Menu Links
9
UIW Department of Instructional Technology
Assignments, quizzes, tests, syllabi, and course documents are called course content. These
content items are accessed in by clicking the Content Links on the Course Menu. These links
allow for course navigation. Instructors may add, delete, rename or reorder links. By default, the
course menu will contain the following links:
Homepage
Syllabus
Course
Information
Faculty
Information
AKA called the Course Entry Page.
It is possible to post the syllabus in a downloadable format such as Microsoft
Word.
Information about the course such as a course outline.
Student access to contact information of instructors. This information is generated
through Personal Information in the Tools section of the Blackboard homepage.
Documents such as PowerPoint presentations that the student is expected to
Course Documents
download and review.
Any gradable or non-gradable course content that is used to assess a student’s
Assignments
knowledge.
The Discussion Boards are a tool for collaborative learning. Users participate in
Discussion Board
class discussions asynchronously.
External links are links to websites outside of Blackboard that you would like your
External Links
students to visit.
Link to an individual student’s course grades – aka the Report Card.
My Grades
Email
Email to anyone enrolled in the .course via Cardinal Mail.
Tools
Links to Blackboard assets including Email, Rave, and iTunes U.
Edit the Course Menu
Create a Content Area
Use Content Areas to organize course materials. There are several Content Area Links
including Assignments, Course Documents, and Syllabus already o the menu. However,
instructors can add specific links to suit their needs, such as Tests.
1
2
1. With the Edit Mode ON,
Button
on the Course Menu.
2. Click Create Content Area.
10
UIW Department of Instructional Technology
click the Create
3. The Add Content Area Window opens. Name the Content
Area.
4. Click the Available to Users checkbox.
The content
will appear on the content menu. This box can be left
unchecked until the Content Area is ready for activation. For
example, an instructor can create a Content Area for Tests,
and make it available on the day the test is administered.
3
4
5
5. Click Submit.
Create a Tool Link
Tool Links allow communication, interaction, and collaboration between users. Tools include
Announcements, Discussion Boards, Chat, Calendars, and Tasks. Any tool can be accessed
from the Course Menu, once a link to the course tool is created in the Course Menu.
1
1. With the Edit Mode ON,
2
Button
click the Create
on the Course Menu.
2. Click Create Tool Link.
3
3. The Add Tool Link Window opens. Name the Tool Link.
4
4. Click the dropdown menu
and choose a Tool Link.
5. Click the Available to Users checkbox.
5
.
6. Click Submit.
Create an External Link
External Links access internet links directly from the course menu. The link can open within the
Blackboard page, or in a new window.
11
UIW Department of Instructional Technology
1
1. With the Edit Mode ON,
Button
click the Create
on the Course Menu.
2. Click Create External Link.
2
3
3. The Add External Link Window opens. Name the
External Link.
4. Type the URL. You MUST include http:// in the URL.
4
5. Click the Available to Users checkbox.
6. Click Submit.
5
6
Edit Menu Links
Rename Course Menu Links
1. Turn the Edit Mode ON.
2. Choose a link, and click the Action Button
the Edit Menu.
to show
2
3. Choose Rename Link.
3
4. The link name is highlighted in blue. Overtype to change
the link name.
Type <B> before the link name for Bold text
Type <I> before the link name for Italic text
5. Click the green checkmark
6. Click the red X
to cancel.
4
5 6
12
UIW Department of Instructional Technology
to save.
Delete Course Menu Links
1. Turn the Edit Mode ON.
2. Choose a link, and click the Action Button
the Edit Menu.
to show
3. Choose Delete.
4. The link will be deleted. Delete only if you want to
permanently remove the link.
2
3
Reorder the Course Menu
1. Turn the Edit Mode ON.
2. Choose a Course Menu item by clicking the Drag and
Drop icon.
3. Drag the item to the desired location, and release.
2
Blackboard Software Requirements
Browser and Operating System Requirements
Operating System
Browser
Microsoft Internet Explorer
Mozilla Firefox
Apple Safari
Windows
XP
7.0 and 8.0
3.x
N/A
Windows
Vista
7.0 and 8.0
3.x
N/A
Windows 7
7.0 and 8.0
3.x
N/A
OS X 10.5,
10.6
N/A
3.x
3.x and above
Required Software (Click link to download)
Latest version of Java
Adobe Flash Player
Adobe Shockwave Player
Adobe Media Player
Adobe Acrobat Reader
Windows Media Player 11
Apple Quicktime Media Player
Apple iTunes Media Player
Real Player
Tips and Tricks
Turn off ALL Popup Blockers, including those in toolbars, before using
Blackboard.
Periodically Delete Browser Cache
Enable Cookies
Enable Java Script
13
UIW Department of Instructional Technology
Periodically Delete Browser Cache
Internet Explorer 7 & 8:
Safari
1.
2.
3.
1.
Click Tools.
Click Delete Browsing History.
Click Delete all.
From the Safari menu, select Empty Cache.
1.
2.
3.
4.
5.
6.
7.
1.
2.
3.
4.
5.
Open Netscape.
Click Edit.
Click Preferences.
From Category, click Privacy & Security.
Click Cookies.
Click Enable all cookies.
Click OK.
Click on the Safari-menu in Safar.
Click on the Preferences.
Click on the Security icon near the top of the window.
Under Accept Cookies select Always or Only from sites.
Save changes by clicking OK.
1.
2.
3.
4.
5.
6.
7.
8.
1.
2.
3.
4.
Open Internet Explorer.
Click Tools.
Select Internet options.
Select Security tab.
Click Custom level button.
Scroll down and enable all 3 Scripting options.
Click OK.
Close down Internet Explorer to save changes.
Click Edit.
Select Preferences.
Select Web Content under Web Browser section.
Click next to Enable Scripting and click OK.
Enable Cookies
Internet Explorer 7 & 8:
Safari
Enable Java Script
Internet Explorer
Safari
14
UIW Department of Instructional Technology


