1
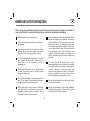
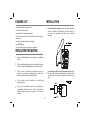
1. Mount two screws in the wall spaced according to
the template on the margin of this page. Leave a
clearance about 1/4 inch between each screw head
and the wall surface. Select screws of adequate
length and size for good fit into the keyholes of the
unit and secured mounting in the wall.
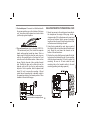
2. Using the long modular line cord, plug one end of
the cord into the unit and the other end into the wall
jack. Route the cord down the channel on the
bottom of the unit as shown.
3. Position the unit so that the screw heads fit into the
keyholes on the bottom of the unit. Once in position,
slide the phone down about 1/4 inch to secure the
mounting. Be sure to lift and rotate the wall
mounting tab on the handset cradle to the wall
mounting position (protruding upwards).
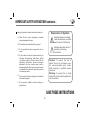
4. For wall-mount use (over standard USOC RJ11W modular wall jack): First, install the separate
plastic wall mounting bracket as shown. This is a
simple snap fit. Using the short line cord, plug one
end into the modular jack on the base unit, and
route the cord to the bottom centre of base unit as
shown. Plug the free end of line cord into the wall
jack. Position the base unit so that studs on the
modular wall jack fit into the two wall mounting
keyholes. Once in position, slide the phone down
about 1/4 inch to secure the mounting. Lift and
rotate the wall mounting tab in handset cradle to
the upward protruding wall-mount position. Place
handset in the cradle to hang up.
CAUTION: Make sure mounting is
secured before releasing the phone.
8
100 mm
WALL MOUNTING WITHOUT STANDARD WALL PLATE
3. For desktop use: Press and lock the Bracket with
the arrows pointing up on the bottom of the base
unit. Your phone can be placed on a desk or table
just like any regular telephone.