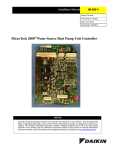
1
Installation and Maintenance Data Bulletin No. IM 498 June 1995 Part No. 571560Y-01 MicroTech® Remote Monitoring and Sequencing Panel for Reciprocating and Screw Chillers [Photos of panel and chillers] For Use With McQuay Models ALR, WHR, ALS & PFS Contents Introduction ..................................................................... 4 Applying the RMS Panel.............................................. 4 General Description ...................................................... 7 Component Data ............................................................. 7 Microprocessor Control Board ..................................... 8 Keypad/Display Board................................................. 9 LED Status Board ....................................................... 9 Sensor Input Board ................................................... 10 Temperature Sensors ................................................ 10 Software ID ................................................................... 10 Software Compatibility .............................................. 10 MicroTech Monitoring and Networking Options .............. 11 PC Monitoring ........................................................... 11 Network Master Panel ............................................... 11 Network Commissioning ................................................ Addressing the Controllers ........................................ Chiller Controller Setup ............................................. RMS Controller Setup................................................ Connecting the Communications Trunk ..................... 19 19 20 20 21 Service Information ..................................................... 23 Wiring Diagram ............................................................. 23 Test Procedures............................................................. Status LED Diagnostics............................................. Troubleshooting Power Problems .............................. Troubleshooting Communications Problems.............. Troubleshooting Analog Input Problems .................... Troubleshooting the LED Status Board ...................... Troubleshooting the Keypad/Display Board................ 24 24 24 24 25 25 26 MCB Replacement......................................................... 27 Installation................................................................... 12 Parts List....................................................................... 27 Panel Location and Mounting ........................................ 12 Field Wiring................................................................... Power ....................................................................... Network Communications ......................................... External Chilled Water Reset Signal .......................... External Demand Limiting Signal............................... Temperature Sensors ................................................ Remote Stop Switch or External Time Clock.............. PC Connection.......................................................... 13 13 13 16 16 17 17 18 McQuay, MicroTech, and SeasonPak are registered trademarks of McQuay International. Monitor is a trademark of McQuay International. Microsoft and MS-DOS are registered trademarks of Microsoft Corporation. Windows is a trademark of Microsoft Corporation. IBM is a registered trademark of International Business Machines Corporation. ©1995 McQuay International. All rights reserved throughout the world. Page 2 / IM 498 Illustrations Figures: 1. Primary Pump Distribution: Individual Chiller Pumps ........................................5 2. Primary Pump Distribution: Common Chiller Pump With Isolation Valves .........5 3. Primary-Secondary Pump Distribution .......................5 4. Primary Pump Distribution: Common Chiller Pump Without Isolation Valves ....6 5. Control Panel Layout .................................................7 6. Microprocessor Control Board (MCB).........................8 7. Hex Switches.............................................................9 8. Keypad/Display Board (KDB) .....................................9 9. LED Status Board (LSB) ............................................9 10. Sensor Input Board (SIB).........................................10 11. Software ID Tag.......................................................10 12. RMS Panel Dimensions ...........................................12 13. Field Wiring Schematic: Reciprocating Chillers ........14 14. Field Wiring Schematic: Screw Chillers....................15 15. RS-232 Cable Pinouts for 9-Pin Serial Ports ............19 16. RS-232 Cable Pinouts for 25-Pin Serial Ports ..........19 17. AMP Connector Terminal Configuration ...................22 18. RMS Panel Schematic Legend.................................23 19. RMS Panel Schematic .............................................23 20. MCB Power Supply Terminals..................................24 Tables: 1. MicroTech Unit Controller Installation Literature..........4 2. Model-Specific Chiller Installation Literature ...............4 3. Green and Red Status LED Indication ........................8 4. Amber Status LED Indication .....................................8 5. Program Code RMS-U13B Software Compatibility ...10 6. PC Specification ...................................................... 11 7. RMS Panel Environmental Specifications .................12 8. Features Requiring Temperature Inputs....................17 9. Network Communications Field Wiring Terminals.....21 10. Port B Voltages (AMP Type).....................................22 11. Thermistor Chart......................................................25 IM 498 / Page 3 Introduction This manual provides information about the MicroTech Remote Monitoring and Sequencing (RMS) Panel for McQuay SeasonPak reciprocating and screw chillers. It describes the components, field wiring options and requirements, network commissioning procedures, and service procedures. For a description of operation and information on using and programming the MicroTech RMS Panel, refer to Bulletin No. OM 118, MicroTech Remote Monitoring and Sequencing Panel. For specific information about the MicroTech chiller controllers, refer to the appropriate MicroTech unit controller installation manual (see Table 1). For installation and commissioning instructions and general information on a particular chiller, refer to its modelspecific installation manual (see Table 2). ! Table 1. MicroTech Unit Controller Installation Literature Chiller Type Reciprocating Screw Installation & Maintenance Data Bulletin Number IM 493 IM 549 Table 2. Model-Specific Chiller Installation Literature Chiller Model ALR (40–195 Tons) WHR (40–240 Tons) ALS PFS Installation & Maintenance Data Bulletin Number IM 499 IM 508 IM 548 IM 609 WARNING Electric shock hazard. Can cause personal injury or equipment damage. This equipment must be properly grounded. Connections and service to the MicroTech control panel must be performed only by personnel that are knowledgeable in the operation of the equipment being controlled. ! CAUTION Static sensitive components. A static discharge while handling electronic circuit boards can cause damage to the components. Discharge any static electrical charge by touching the bare metal inside the control panel before performing any service work. Never unplug any cables, circuit board terminal blocks, or power plugs while power is applied to the panel. NOTICE This equipment generates, uses and can radiate radio frequency energy and, if not installed and used in accordance with this instruction manual, may cause interference to radio communications. It has been tested and found to comply with the limits for a Class A digital device, pursuant to part 15 of the FCC rules. These limits are designed to provide reasonable protection against harmful interference when the equipment is operated in a commercial environment. Operation of this equipment in a residential area is likely to cause harmful interference in which case the user will be required to correct the interference at his or her own expense. McQuay International disclaims any liability resulting from any interference or for the correction thereof. Applying the RMS Panel The RMS Panel has been designed to control the four most common chiller plant configurations, which are as follows: 1. Primary Pump Distribution: Individual Chiller Pumps 2. Primary Pump Distribution: Common Chiller Pump With Isolation Valves 3. Primary-Secondary Pump Distribution 4. Primary Pump Distribution: Common Chiller Pump Without Isolation Valves Typical, schematic representations of these configurations are shown in Figures 1 through 4. Although the RMS Panel can be used with any of these configurations, you should be aware that with configurations 3 and 4 the temperature of the chilled water being supplied to the load may vary at part load conditions. However, you can minimize any adverse effects by setting the RMS Panel’s sequencing parameters as appropriate for the application. For more information, see the “Sequencing Control” section in Bulletin No. OM 118. Following are descriptions of these typical chiller plant configurations and guidelines for applying the RMS Panel in them. Note that the McQuay chillers in these configurations can be all reciprocating, all screw, or a mixture of reciprocating and screw. Page 4 / IM 498 The RMS Panel may be suitable for applications other than the four listed above. If your application does not match one of these four, contact your McQuay sales representative for assistance. Note: If two or three chillers are in an RMS Panel network, the RMS Panel will always sequence those chillers. The RMS Panel cannot be set up for remote monitoring only. Primary Pump Distribution: Individual Chiller Pumps Chiller plant configuration 1, “Primary Pump Distribution: Individual Chiller Pumps,” is shown in Figure 1. The distinguishing characteristics of this configuration are as follows: (1) two or three chillers are piped in parallel, (2) each chiller has its own primary chilled water pump, (3) the primary pumps are also used to distribute water to the cooling loads, and (4) the system may or may not have a bypass line and a valve that is controlled by a differential pressure controller (if there is no bypass line, three-way valves are typically used at the loads). Figure 1. Primary Pump Distribution: Individual Chiller Pumps Primary-Secondary Pump Distribution Chiller plant configuration 3, “Primary-Secondary Pump Distribution,” is shown in Figure 3. The distinguishing characteristics of this configuration are as follows: (1) two or three chillers are piped in parallel, (2) each chiller has its own primary chilled water pump, (3) one or more secondary pumps are used to distribute water to the cooling loads, and (4) the secondary circuit is hydraulically isolated from the primary circuit by a decoupler line. Figure 3. Primary-Secondary Pump Distribution In this system, the temperature of the water entering the loads will always be very close to each chiller’s leaving evaporator water temperature setpoint. Primary Pump Distribution: Common Chiller Pump With Isolation Valves Chiller plant configuration 2, “Primary Pump Distribution: Common Chiller Pump With Isolation Valves,” is shown in Figure 2. The distinguishing characteristics of this configuration are as follows: (1) two or three chillers are piped in parallel, (2) a common primary chilled water pump serves all chillers, (3) the primary pump is also used to distribute water to the cooling loads, and (4) each chiller has its own two-position isolation valve that is closed when the chiller is off. Figure 2. Primary Pump Distribution: Common Chiller Pump With Isolation Valves In this system, the temperature of the water entering the loads will always be very close to each chiller’s leaving evaporator water temperature setpoint. Caution: Significant changes in the chilled water flow rate through the evaporators can result when the chillers in this configuration are turned on and off. Large flow rate changes can cause erratic chiller control. In this system, the temperature of the water entering the loads depends upon the direction of flow in the decoupler line. If the flow rate in the primary circuit is higher than the flow rate in the secondary circuit (decoupler arrow to the left in Figure 3), the temperature will be very close to each chiller’s leaving evaporator water temperature setpoint. If the flow rate in the secondary circuit is higher than the flow rate in the primary circuit (decoupler arrow to the right in Figure 3), the temperature will be higher than each chiller’s leaving evaporator water temperature setpoint because the supply and return water mix. Typically, the flow rate in the secondary circuit is higher than the flow rate in the primary circuit at part load conditions; for example, when one chiller is on. Typically, the flow rate in the primary circuit is higher than the flow rate in the secondary circuit at full load conditions; for example, when all chillers are on. The primary and secondary flow rates can be equalized if a variable-speed secondary pump is used or if multiple sequenced secondary pumps are used, but note that the RMS Panel cannot perform these types of secondary pump control. Primary Pump Distribution: Common Chiller Pump Without Isolation Valves Chiller plant configuration 4, “Primary Pump Distribution: Common Chiller Pump Without Isolation Valves,” is shown in Figure 4. The distinguishing characteristics of this configuration are as follows: (1) two or three chillers are piped in parallel, (2) a common primary chilled water pump serves all chillers, (3) the primary pump is also used to distribute water to the cooling loads, and (4) water always flows through each chiller regardless of whether it is on or off. IM 498 / Page 5 Figure 4. Primary Pump Distribution: Common Chiller Pump Without Isolation Valves Page 6 / IM 498 In this system, the temperature of the water entering the loads depends upon the number of operational chillers. If all chillers are on, the temperature will be very close to each chiller’s leaving evaporator water temperature setpoint. If some chillers are on and some are off, the temperature will be higher than each chiller’s leaving evaporator water temperature setpoint because the cooler water leaving the active chiller(s) mixes with the warmer water leaving the inactive chiller(s). ________________________________ General Description _______________________________ The MicroTech Remote Monitoring and Sequencing (RMS) Panel is a microprocessor-based controller designed to provide sophisticated control of up to three MicroTech equipped SeasonPak reciprocating or screw chillers. In addition to providing remote chiller monitoring via network communications, the RMS controller is capable of sequencing two or three chillers as the cooling load varies. An automatic lead-lag selection ensures that chiller runtime is equalized. A 12-key keypad and a 2-line by 16-character display give you access to the RMS controller’s status information, setpoints, control parameters, alarm messages, and schedules. With a special keystroke combination, the RMS Panel’s keypad/display can emulate any chiller’s keypad/ display. The controller includes password protection to pro- tect against unauthorized or accidental setpoint or parameter changes. The RMS Panel is capable of performing all network communications required for complete, stand-alone chiller plant control (see note below). If desired, it can be incorporated into a MicroTech network that includes a Network Master Panel (NMP) and other MicroTech controllers. In either case, an IBM® compatible computer containing MicroTech Monitor™ software can be connected to give you full-screen monitoring and control capability. The computer can be connected directly or remotely via telephone lines with an optional modem. Note: As used throughout this manual, the term “chiller plant” denotes the RMS Panel and its associated chillers; it would not include, for example, a cooling tower system controlled by a MicroTech Application Specific Controller. Component Data The control panel layout for the RMS Panel is shown in Figure 5. The main components of the system are the Microprocessor Control Board (MCB), the Keypad/Display Board (KDB), and the LED Status Board (LSB). The Sensor Input Board (SIB) is an optional accessory that is included with the MicroTech RMS Sensor Kit. It is required to connect zone and outdoor air temperature sensors to the controller. All of these major components are mounted inside a standard NEMA 1 enclosure. They are interconnected by ribbon cables, shielded multi-conductor cables, or discrete wiring. Power for the system is provided by transformers T1 and T2. Following are descriptions of these MicroTech components and their input and output devices. Figure 5. Control Panel Layout IM 498 / Page 7 Microprocessor Control Board The Microprocessor Control Board (MCB) is shown in Figure 6. It contains a microprocessor that is preprogrammed with the software required to monitor and control up to three chillers. The MCB coordinates all communications between the RMS controller and the chiller controllers. When appropriate, it enables and disables chillers as required by its schedule, the current lead-lag configuration, and the cooling load. The various MCB connections and components are described below. Figure 6. Microprocessor Control Board (MCB) Microprocessor Status LEDs The green, red, and amber LEDs on the MCB provide information about the operating status of the microprocessor. The amber LED also indicates the existence of alarm conditions in the chiller network. (The Alarm LED on the LSB board also does this.) Following is the normal start-up sequence that the three status LEDs should follow when power is applied to the MCB: 1. The red (“Reset”) LED turns on and remains on for approximately 5 seconds. During this period the MCB performs a self-test. 2. The red LED turns off and the green (“Running”) LED turns on. This indicates that the microprocessor has passed the self-test and is functioning properly. 3. The amber (“Active”) LED remains off continually if no alarm conditions exist in the chiller network. If alarm conditions exist, the amber LED will flash as shown in Table 4. If the above sequence does not occur after power is applied to the controller, there is a problem with the MCB or its power supply. For more information, refer to the “Test Procedures” section of this manual, which is under “Service Information.” Tables 3 and 4 summarize the green, red, and amber status LED indications. Table 3. Green and Red Status LED Indication Green LED State Off Off On Red LED State Off On* Off Indication No power to MCB Self-test failure or power supply problem MCB operating normally * For longer than 5 seconds. Table 4. Amber Status LED Indication Analog Inputs Connection The MCB receives conditioned analog inputs from the Sensor Input Board through the Analog Inputs port via a plug-in ribbon cable. These inputs are 0–5 VDC analog signals. Digital Outputs Connection After processing all input conditions and network data, the MCB sends the appropriate output signals to the LED Status Board through the Digital Outputs port via a plug-in ribbon cable. Aux/Out Terminal Strip The Aux/Out terminal strip provides 12 VDC power to the LED Status Board and 5 VDC power to the back light on the Keypad/Display Board. Refer to the panel’s wiring diagram or Figure 19 for more information. Power In Terminal Strip The MCB receives 18 VAC, center-tapped power from transformer T2 through the Power In terminal strip. This power drives all logic and communications circuitry, the Aux/Out terminal strip, the LED Status Board, and the Keypad/Display Board. Refer to the panel’s wiring diagram or Figure 19 for more information. Power Fuses Two identical 2-amp fuses are located to the right of the Power In terminal strip. These fuses are in the MCB power supply circuit. Page 8 / IM 498 Amber LED State Off On 1/2 second; Off 1/2 second Indication Normal operation Alarm condition Keypad/LCD Display Connection The MCB receives input commands and operating parameters from the keypad and sends requested information to the display through the Keypad/LCD Display port via a plug-in ribbon cable. Hex Switches The MCB includes two hex (hexadecimal) switches that are used to set the RMS controller’s network address. The HI and LO hex switches are shown in Figure 7. A “hex switch setting” is defined as the HI switch digit followed by the LO switch digit. For example, a hex switch setting of 2F would have the HI switch set to “2” and the LO switch set to “F.” Typically, the RMS controller’s hex switch setting should be 00. Refer to “Addressing the Controllers” in the “Network Commissioning” section of this manual for more information. Note: You can change the setting of a hex switch with a slotted-blade screwdriver that has a 3/32 -inch tip. If a hex switch setting is changed, power to the MCB must be cycled in order to enter the new setting into memory. This can be done by opening and then closing the push button circuit breaker (CB1) in the panel. the display. If the password has been entered, any adjustable parameter or schedule can be modified with the keypad. Because the display is backlit, the liquid-crystal characters are highly visible regardless of the ambient light level. You can adjust the display contrast with a small pot located on the back of the board (see Figure 5). For information on using the keypad/display, refer to the “Getting Started” portion of Bulletin No. OM 118, MicroTech Remote Monitoring and Sequencing Panel. Figure 7. Hex Switches LED Status Board The LED Status Board (LSB), which includes two sets of LEDs and an alarm horn, allows you to quickly determine overall chiller plant status. It is shown in Figure 9. Communication Ports The MCB has two communication ports: port A and port B. Each port has six terminals and is set up for both the RS232C and RS-485 data transmission interface standards. The male and female connectors for these ports are manufactured by AMP. Therefore, they are referred to as “AMP plugs” or “AMP connectors” throughout this manual. Socketed fuses located next to the ports protect the communications drivers from voltage in excess of ±12 V. Following are brief descriptions of each port’s function. Port A: Port A is for communications with an IBM compatible PC using the RS-232C interface standard. The PC can be directly connected, over a limited distance, with a twisted, shielded pair cable, or it can be remotely connected via phone lines with a modem. (Port A can also be used to connect a licensed building automation system to the MicroTech network via Open Protocol.) The default communications rate is 9600 baud. For more information, see “PC Connection” in the “Field Wiring” section of this manual. Port B: Port B is for MicroTech network communications using the RS-485 interface standard. A twisted, shielded pair cable should be connected to port B via terminals B+, B–, and GND on terminal block TB2. The communications rate is 9600 baud. For more information, see “Network Communications” in the “Field Wiring” section of this manual. Keypad/Display Board The Keypad/Display Board (KDB) gives you a local interface with the RMS controller and a remote interface with the chiller controllers. All operating conditions, system alarms, control parameters, and schedules can be monitored from Figure 8. Keypad/Display Board (KDB) 1.RMS Status Chiller1 Enabled CATEGORY STATUS ALARMS CONTROL SWITCH MENU ITEM ACTION PREV. PREV. INCR. NEXT NEXT DECR. CLEAR ENTER Figure 9. LED Status Board (LSB) Unit Selection Indicators Four Unit Selection LEDs clearly indicate which controller in the network the RMS Panel’s keypad/display is interfaced with. For example, if the “Chiller #1” Unit Selection LED is lit, the RMS Panel’s keypad/display will act exactly as if it were the keypad/display at Chiller #1. A special combination of keystrokes allow you to change controllers. System Status Indicators Five System Status LEDs show the overall status of the chiller plant. Communications LED: The “Comm O.K.” LED will be on continually when communications to all connected chillers is normal. If the RMS controller detects a communication problem with any chiller in the network, the LED will flash. Depending on whether the communications failure is partial or total, the flash will occur either occasionally or continually. For example, if communications are lost with one chiller in a three chiller network, the “Comm O.K.” LED will flash one-third of the time. Chiller On LEDs: The “Chiller #1 On,” “Chiller #2 On,” and “Chiller #3 On” LEDs indicate at a glance which chillers are currently in a cooling mode of operation. If an LED is lit, that chiller is operating at stage 1 or higher. Alarm LED: The red “Alarm” LED will blink whenever there is an alarm in the RMS Panel or any of the chillers. This will occur regardless of the current unit selection. Alarm Horn If it is enabled, the piezo alarm annunciator (alarm horn) will sound whenever an alarm occurs in the RMS Panel or any of the chillers. This will occur regardless of the current unit selection. To silence the alarm horn, press the ALARMS key while the RMS Panel is the selected controller. You can adjust the alarm horn’s volume with a small pot located on the LSB board. You can also set up the horn so that it sounds only when certain types of alarms occur (comm IM 498 / Page 9 loss, faults, or problems). For more information, refer to the “Alarm Monitoring” section of Bulletin No. OM 118, MicroTech Remote Monitoring and Sequencing Panel. Note: Silencing the alarm horn does not clear an alarm. To clear an alarm from the RMS Panel you must first select the chiller with the alarm and then clear it. For more information, refer to the “Alarm Monitoring” section of Bulletin No. OM 118. Figure 10. Sensor Input Board (SIB) Sensor Input Board The Sensor Input Board (SIB) is included in the optional RMS Sensor Kit (part no. 0057186701). It collects the zone and outdoor air temperature sensor signals, converts them into 0–5 VDC signals, and sends them to the MCB via a plug-in ribbon cable. Temperature Sensors The RMS controller uses negative temperature coefficient thermistors for temperature sensing. A thermistor chart, which provides voltage-to-temperature and resistance-totemperature conversion data (Table 11), is included in the “Test Procedures” section of this manual. Software ID MicroTech RMS controller software is factory installed and tested in each panel prior to shipment. The software is identified by a program code (also referred to as the “Ident”), which is printed on a small label affixed to the MCB. An example of this label is shown in Figure 11. The program code is also encoded in the controller’s memory and is available for display on menu 21 of the keypad/ display or a PC equipped with Monitor software. Using menu 21 or Monitor software is the most reliable way of determining the controller’s program code. RMS controller program codification is as follows: Software Compatibility Note that RMS-U13B is not compatible with some earlier versions of standard MicroTech reciprocating and twocompressor screw chiller controller software, and it is not compatible with any version of standard three-compressor screw chiller controller software. The current software compatibility is summarized in Table 5. The wildcard character ([) can be any character. Table 5. Program Code RMS-U13B Software Compatibility Chiller Type Reciprocating Screw At the time of this writing, the program code for standard RMS Panel software is RMS-U13B. If your RMS Panel software has a later revision code (for example, RMS-U13C), some of the information in this manual may be inaccurate. However, since only very minor software changes are considered revisions, any inaccuracies should be insignificant. Figure 11. Software ID Tag Page 10 / IM 498 Compatible Programs RCP [ [ 01A AWR- [ 12E SC2 [ [ 17D through 17I SC2 [ [ 180 through 18C none Incompatible Programs none AWR- [ 12D and earlier SC2 [ [ 17C and earlier SC3 [ [ [ [ [ If you want to use an RMS Panel with older chillers that have incompatible standard software, the chiller software must be upgraded. If you have a version of chiller software that is later than the compatible programs shown in Table 5, it is likely that program RMS-U13B is compatible with it; however, it may not be. To find out for sure, contact McQuayService. MicroTech Monitoring and Networking Options PC Monitoring Network Master Panel A PC (personal computer) equipped with the appropriate Monitor software can be used to provide a high-level interface with a MicroTech network (see PC specification below). Monitor software features a high resolution graphic display, multilevel password access, and advanced trendlogging. The PC can be connected to the RMS controller either directly, via a single twisted, shielded pair cable, or remotely, via phone lines with an optional modem. For more information on connecting the PC to the controller, refer to “PC Connection” in the “Field Wiring” section of this manual. For the most convenience and best operation, the PC should be considered dedicated to the MicroTech system. However, you can exit the Monitor program to perform other tasks without affecting equipment control. Refer to the user’s manual supplied with the Monitor software for additional information. The MicroTech Network Master Panel (NMP) allows the RMS controller and its associated chillers to be incorporated into a building-wide network with other MicroTech unit and auxiliary controllers. In conjunction with a PC and Monitor software, it gives the building operator the capability to perform advanced equipment control and monitoring from a central or remote location. The following features are provided by the optional NMP: • • • • • • Remote unit monitoring Advanced scheduling features Advanced alarm management Global operator override by unit type Demand metering Historical electrical data logging For further information, contact your McQuay sales representative. PC Specification A direct or remote connected computer can be used for monitoring RMS Panel and chiller operation, changing setpoints, scheduling, trend logging, downloading software, and diagnostics. The PC must be an IBM or 100% true compatible. Table 6 shows the preferred and minimum PC specifications. Table 6. PC Specification Preferred Configuration 486DX processor, 66MHz or better 8 MB of RAM 120 MB hard disk drive or better 3½” floppy disk drive Serial port (9 pin male; Com1 or Com2) Parallel port Internal time clock, battery backed Super VGA graphics capability Super VGA monitor Printer Bus mouse or trackball 101 enhanced keyboard 9600 baud modem, compatible with the AT command set (optional) MS-DOS® 6.2 or higher Microsoft® Windows™ 3.1 or higher MicroTech® Monitor™ software Minimum Configuration 386SX processor, 16 MHz 4 MB of RAM 60 MB hard disk drive 3½” floppy disk drive Serial port (9 or 25 pin male; Com1 or Com2) – Internal time clock, battery backed VGA graphics capability VGA monitor – Serial mouse or trackball* 101 enhanced keyboard 1200 baud modem, compatible with the AT command set (optional) MS-DOS® 5.0 Microsoft® Windows™ 3.1 MicroTech® Monitor™ software * If a serial pointing device is used, there must be another serial port (Com1 or Com2) available for connecting the PC to the MicroTech controller. IM 498 / Page 11 _______________________________________ Installation _______________________________________ Panel Location and Mounting The RMS Panel is suitable for indoor use only. Table 7 lists the allowable temperature and humidity ranges. Locate the panel at a convenient height for operation of the keypad/ display, and allow adequate clearance for the door swing. Mount the panel to the wall with screws or bolts. It weighs 40 pounds. Four 1/4 -inch openings are provided at the corners of the panel. Panel dimensions are shown in Figure 12. The RMS Panel is equipped with special door hinges that have a friction adjustment screw. By adjusting this screw you can prevent the panel door from swinging open or closed unexpectedly. Table 7. RMS Panel Environmental Specifications Panel State Operating In storage Temperature 32 – 100°F –40 – 140°F Figure 12. RMS Panel Dimensions 7/8" Dia. knockouts (3 on left and right sides) Hinge friction adjustment screw 1/4" Dia. mounting slots (2) 14-1/2" 16-1/2" 14-3/4" 8-1/4" 1/4" Dia. (2) 1-3/4" 1-3/4" 1" 12" 1" 4" 14" Left Side View Front View 7/8" Dia. knockouts (3 on top and bottom) 2" 1-7/8" 7" 12-1/8" Bottom View Page 12 / IM 498 Relative Humidity 0 – 95% 0 – 95% Field Wiring Following are descriptions of the various field wiring requirements and options. Some RMS controller features require field wiring to implement; refer to the job plans and specifications. All possible field wiring connections are shown in Figures 13 and 14. Wiring must comply with the National Electrical Code and all local codes and ordinances. The warranty is void if wiring is not in accordance with these instructions. Note that the panel is divided into high and low voltage sections by a sheet metal barrier. The power wiring should enter the high voltage section. The temperature sensor wiring (if any) and the communications wiring should enter the low voltage section. Wiring penetrations must be made only through the 7/8 -inch knockouts provided. As shown in Figures 13 and 14, a typical chiller plant has the same type of chillers in it; however, this is not required. The RMS Panel can control a mixture of McQuay reciprocating and screw chillers. Power ! WARNING Electric shock hazard. Can cause personal injury or death. This equipment must be properly grounded. All protective deadfront panels must be reinstalled and secured when power wiring is complete. The RMS Panel requires a 115 VAC power supply, which should be connected to terminals L1 and L2 in the high voltage section of the panel. The panel must be properly grounded by connecting the ground lug (GRD) to earth ground. Refer to Figure 13 or 14. Power wiring must be sized to carry at least 5 amps. To gain access to the high voltage section, remove the deadfront barrier. It is attached to the panel with two 5/16 inch hex screws. Replace this deadfront when the wiring is complete. The panel is internally protected with a 0.5-amp circuit breaker (CB1), which is located inside the panel on the underside of the high voltage section (see Figure 5). This push-button circuit breaker can also be used as an on-off switch for the panel. When the push button is in, the panel should be energized. When the push button is out, the panel should be de-energized. Note that a white ring on the switch shaft is visible when the push button is out. Network Communications For network communications to occur, a twisted, shielded pair cable must be connected between the RMS Panel, its associated chillers, and any other MicroTech unit or auxiliary controllers. This interconnecting, “daisy-chain” wiring is shown in Figures 13 and 14. Network communications is accomplished using the RS-485 interface standard at 9600 baud. The typical network configuration, which is shown in Figures 13 and 14, consists of the RMS Panel and one, two, or three chillers. Unusual applications may include other MicroTech controllers; for example, a Network Master Panel, Application Specific Controllers, or Unit Ventilator Controllers. About MicroTech Network Architecture All controllers in a MicroTech network are assigned a “level”: level 1, level 2, or level 3. All networks must have one level-1 controller to coordinate communications. Multiple level-2 controllers can be connected to the level-1 controller with a communications “trunk,” an isolated section of the daisy-chained network wiring. (The network wiring between all controllers shown in Figure 13 is a trunk.) Multiple level-3 controllers can be connected to a level-2 controller with a separate trunk. The maximum allowable length of a communications trunk is 5000 feet. For the typical network in which there is one RMS Panel and no Network Master Panel, the RMS Panel is the level-1 controller and the chillers are level-2 controllers (this is the default factory setup). If a Network Master Panel is included in the network, it is the level-1 controller and the RMS Panel and the chillers are level-2 controllers. Unless there are many water source heat pumps or unit ventilators in the network, there usually will not be any level-3 controllers. Cable Specification The network communications cable must meet the following minimum requirements: twisted, shielded pair with drain wire, 300 V, 60°C, 20 AWG, polyethylene insulated, with a PVC outer jacket (Belden 8762 or equivalent). Note that some local codes or applications may require the use of plenum rated cable. Do not install the cable in the same conduit with power wiring. Note: Ideally, one continuous piece of cable should connect any two controllers. This will reduce the risk of communications errors. If the cable must be spliced, use crimp-type butt connectors (better) or solder (best). Do not use wire nuts. Wiring Instructions Regardless of whether the RMS controller is level 1 or level 2, the network connection to the RMS and chiller controllers is at port B on their MCB boards. As shown in Figures 13 and 14, field wiring to port B on these controllers can be accomplished by connecting the network cable to terminals B–, B+, and GND in the RMS Panel; terminals 137, 138, and 139 in each reciprocating chiller panel; and terminals 53, 54, and 55 in each screw chiller panel. Note that the chiller designations shown in Figures 13 and 14 (“Chiller #1,” “Chiller #2,” “Chiller #3”), are established by the network address, not the physical position of the chiller in the daisy chain. The networked controllers can be wired in any order. For example, the RMS controller could be connected between Chiller #1 and Chiller #2. It is highly recommended that the installing contractor keep track of the physical order of the controllers on the daisychained trunk. This will facilitate troubleshooting any network communications problems that may occur. For more on the network address, see “Addressing the Controllers” in the “Network Commissioning” section of this manual. Use the following procedure to perform the network wiring: 1. Before beginning, verify that the port B plug is disconnected from every controller on the communications trunk being wired. These plugs will be connected during the commissioning procedure. This is a precaution to prevent stray high voltage from damaging the controllers. Any voltage in excess of 12 V can damage the board’s communications drivers. IM 498 / Page 13 Figure 13. Field Wiring Schematic: Reciprocating Chillers Page 14 / IM 498 Figure 14. Field Wiring Schematic: Screw Chillers IM 498 / Page 15 2. Connect the network cable in a daisy-chain manner as shown in Figures 13 and 14. Use caution to assure that the correct polarity is maintained at each controller. Be sure to connect each cable’s shield to the controllers as shown in the figures. Like the positive (+) and negative (–) conductors, the shield (ground) conductor must be continuous over the trunk. 3. If a Network Master Panel is included in the network, connect its B port to the trunk in a similar fashion. External Chilled Water Reset Signal ! CAUTION Ground loop current hazard. Can cause equipment damage. The external reset signal must be isolated from any ground other than the MicroTech controller chassis ground. If it is not, ground loop currents could occur which could damage the MicroTech controller. If the device or system providing the external reset signal is connected to a ground other than the MicroTech controller chassis, be sure that it is providing an isolated output, or condition the output with a signal isolator. For chillers included in an RMS network, there are two optional chilled water temperature reset methods available: outside air temperature and external 4–20 mA signal. (The “return” and “ice” reset methods, which are available with stand-alone chillers, cannot be used with chillers in an RMS network.) Either of these methods or no reset can be selected at the RMS controller keypad or PC. The external reset option requires field wiring to implement. If selected, the external reset option linearly resets each chiller’s leaving evaporator water temperature setpoint as the input signal varies between 4 and 20 mA. At 4 mA and below, there will be no reset. At 20 mA, the leaving evaporator water temperature setpoint will be increased by the maximum amount possible (this amount is keypad or PC adjustable). For more on reset, refer to “Chilled Water Reset” in the “Chiller Plant Control Features” section of Bulletin No. OM 118, MicroTech Remote Monitoring and Sequencing Panel. Cable Specification The cable for the external chilled water reset signal must meet the following minimum requirements: twisted, shielded with drain wire, 300 V, 60°C, 20 AWG, polyethylene insulated, with a PVC outer jacket. Depending on the application, either two conductors (Belden 8762 or equivalent) or three conductors (Belden 8772 or equivalent) are required. Note that some local codes or applications may require the use of plenum rated cable. Do not install the cable in the same conduit with power wiring. Wiring Instructions As shown in Figures 13 and 14, the external reset signal must be field wired to Chiller #1. (The “Chiller #1” designation is established by the network address, not the physical position of the chiller in the daisy chain. See “Addressing the Controllers” in the “Network Commissioning” section of this manual for more information.) The RMS controller is programmed to continuously read the reset signal from Chiller #1 and pass it to the other chillers via network communications. Because there are many different devices that can provide an external signal, no attempt will be made here to cover every possible application. Instead, enough information about the MicroTech controller will be presented so that a compatible output device can be selected and wired Page 16 / IM 498 properly. McQuay International is not responsible for MicroTech controller damage that occurs as a result of misapplication of a field supplied device. The MCB board in the chiller controller is designed to accept 0–5 VDC analog input signals. The chiller’s Analog/ Digital Input (ADI) board conditions all inputs before they enter the MCB. The external reset signal, which enters the ADI board at input A6, is conditioned with a 250 ohm resistor. This on-board resistor is connected between the “S” (signal) terminal and “G” (ground) terminal of input A6. Note that the “G” terminal is earth ground (see caution above). This input arrangement will convert a 4–20 mA signal to a 1–5 VDC signal. The maximum allowable voltage at the “S” terminal is ±30 V. If desired, an unregulated 12 VDC power supply on the chiller’s MCB board can be used to power the reset signal output device. If this power supply is used, the total external load cannot exceed 100 mA. Reciprocating Chiller: Refer to Figure 13. Wire the reset signal to the terminals appropriate for the application. In all cases, connect the shield to terminal 133 (ground) and the varying signal to terminal 135 (ADI terminal “S”). Connections to terminal 146 (12 VDC power supply) and terminal 134 (ADI terminal “G”) may or may not be required. For additional information, see the unit wiring diagram and Bulletin No. IM 493, MicroTech Reciprocating Chiller Controller. Screw Chiller: Refer to Figure 14. Wire the reset signal to the terminals appropriate for the application. In all cases, connect the shield to terminal 47 (ground) and the varying signal to terminal 45 (ADI terminal “S”). Connections to terminal 41 (12 VDC power supply) and terminal 46 (ADI terminal “G”) may or may not be required. For additional information, see the unit wiring diagram and Bulletin No. IM 549, MicroTech Screw Chiller Controller. External Demand Limiting Signal ! CAUTION Ground loop current hazard. Can cause equipment damage. The external demand limiting signal must be isolated from any ground other than the MicroTech controller chassis ground. If it is not, ground loop currents could occur which could damage the MicroTech controller. If the device or system providing the external demand limiting signal is connected to a ground other than the MicroTech controller chassis, be sure that it is providing an isolated output, or condition the output with a signal isolator. If desired, an external 4–20 mA signal can be used to provide demand limiting for all chillers included in an RMS network. The external demand limiting option requires field wiring to implement. As the demand limiting signal varies between 4 and 20 mA, the maximum number of stages available in each chiller varies. At 4 mA and below, all chiller stages will be available. At 20 mA, only one stage will be available. Between 4 and 20 mA, the number of available stages varies according to a step function. The step function used depends on the total number of stages the chiller is equipped with. For more information, refer to “Demand Limiting” in the “Chiller Plant Control Features” section of Bulletin No. OM 118, MicroTech Remote Monitoring and Sequencing Panel. Cable Specification The cable for the external demand limiting signal must meet the following minimum requirements: twisted, shielded with drain wire, 300 V, 60°C, 20 AWG, polyethylene insulated, with a PVC outer jacket. Depending on the application, either two conductors (Belden 8762 or equivalent) or three conductors (Belden 8772 or equivalent) are required. Note that some local codes or applications may require the use of plenum rated cable. Do not install the cable in the same conduit with power wiring. Wiring Instructions As shown in Figures 13 and 14, the external demand limiting signal must be field wired to Chiller #1. (The “Chiller #1” designation is established by the network address, not the physical position of the chiller in the daisy chain. See “Addressing the Controllers” in the “Network Commissioning” section of this manual for more information.) The RMS controller is programmed to continuously read the demand limiting signal from Chiller #1 and pass it to the other chillers via network communications. Because there are many different devices that can provide an external signal, no attempt will be made here to cover every possible application. Instead, enough information about the MicroTech controller will be presented so that a compatible output device can be selected and wired properly. McQuay International is not responsible for MicroTech controller damage that occurs as a result of misapplication of a field supplied device. The MCB board in the chiller controller is designed to accept 0–5 VDC analog input signals. The chiller’s Analog/ Digital Input (ADI) board conditions all inputs before they enter the MCB. The external demand limiting signal, which enters the ADI board at input A7, is conditioned with a 250 ohm resistor. This on-board resistor is connected between the “S” (signal) terminal and “G” (ground) terminal of input A7. Note that the “G” terminal is earth ground (see caution above). This input arrangement will convert a 4–20 mA signal to a 1–5 VDC signal. The maximum allowable voltage at the “S” terminal is ±30 V. If desired, an unregulated 12 VDC power supply on the chiller’s MCB board can be used to power the demand limiting signal output device. If this power supply is used, the total external load cannot exceed 100 mA. Reciprocating Chiller: Refer to Figure 13. Wire the demand limiting signal to the terminals appropriate for the application. In all cases, connect the shield to terminal 133 (ground) and the varying signal to terminal 132 (ADI terminal “S”). Connections to terminal 146 (12 VDC power supply) and terminal 131 (ADI terminal “G”) may or may not be required. For additional information, see the unit wiring diagram and Bulletin No. IM 493, MicroTech Reciprocating Chiller Controller. Screw Chiller: Refer to Figure 14. Wire the reset signal to the terminals appropriate for the application. In all cases, connect the shield to terminal 47 (ground) and the varying signal to terminal 48 (ADI terminal “S”). Connections to terminal 41 (12 VDC power supply) and terminal 49 (ADI terminal “G”) may or may not be required. For additional information, see the unit wiring diagram and Bulletin No. IM 549, MicroTech Screw Chiller Controller. Temperature Sensors The RMS controller has several standard features that require the outdoor air temperature, zone temperature, or both to implement. Table 8 summarizes these features. For more information on them, see Bulletin No. OM 118, MicroTech Remote Monitoring and Sequencing Panel. Table 8. Features Requiring Temperature Inputs RMS Panel Feature Optimal Start Outdoor Air Reset Zone Temperature • Outdoor Air Temperature • • Low Ambient Lockout Cooling Degree-Day Totalization • • With the optional MicroTech RMS Sensor Kit, zone and outdoor air temperature sensors can be connected to the RMS Panel. Note that the RMS controller can read the outdoor air temperature from any associated chiller that has an outdoor air sensor connected to it. In this case, the RMS Sensor Kit is required only to connect a zone sensor for optimal start control. If none of the chillers associated with the RMS controller have outdoor air sensors, the RMS Sensor Kit must be installed to take advantage of any of the above features. The outdoor air temperature source is defined at the RMS Panel’s keypad or a PC during the commissioning process. The RMS Sensor Kit’s part number is 0057186701. Cable Specification Temperature sensor cable must meet the following minimum requirements: twisted, shielded pair with drain wire, 300 V, 60°C, 20 AWG, polyethylene insulated, with a PVC outer jacket (Belden 8762 or equivalent). Note that some local codes or applications may require the use of plenum rated cable. Do not install the cable in the same conduit with power wiring. Wiring Instructions Installation and wiring instructions for the MicroTech RMS Sensor Kit are included in Bulletin No. IM 501. This bulletin is included with the kit. The sensor wiring terminations are shown on the panel wiring diagram and Figures 13 and 14. Remote Stop Switch or External Time Clock If desired, a remote stop switch, an external time clock, or both can be wired to a digital input (D13) at each chiller. These two applications have different purposes, but the effect is the same when the digital input circuit is open: RMS Panel control is overridden and the chiller is disabled. Twisted, shielded cable is not required for remote stop switch or external time clock wiring, but it can be used. The switch or contacts used must be rated for low voltage (24 VAC) and low current (11 mA). Remote Stop Switch A remote stop switch (or dry contacts) can be used to shut down an individual chiller from a remote location. A separate switch must be connected to each chiller for which remote stop capability is required. When a chiller’s remote switch is opened, that chiller will be disabled. As a result, the RMS controller will not be able to start it if additional cooling capacity is required. When a chiller’s remote switch is closed, that chiller will be enabled. As a result, the RMS controller will be able to start it as required to meet the cooling load (if it is not disabled for some other reason). External Time Clock There are several methods of switching the chiller plant between occupied and unoccupied operation. It can be done by the RMS Panel’s internal schedule, an NMP schedule assigned to the RMS Panel, an operator override at the RMS Panel, or an external time clock. If an external time clock is used, it must be wired so that a separate set of dry contacts is connected to the remote stop input of each chiller. (If there are not enough poles on the time clock, use a relay.) The chiller plant will be in the occupied mode when the time clock’s contacts close. The chiller plant will be in the unoccupied mode when the time clock’s contacts open. For the external time clock to have absolute control over chiller plant scheduling, all internal daily schedules in the RMS and chiller controllers must be set IM 498 / Page 17 for continuous occupied operation (this is the default setting). For more information, see the “Scheduling” section of Bulletin No. OM 118, MicroTech Remote Monitoring and Sequencing Panel. Note: The optimal start feature is not available if an external time clock is used for scheduling. Wiring Instructions As shown in Figures 13 and 14, the remote stop switch or external time clock contacts must be field wired to each chiller (as required). After removing the factory-installed jumper, connect the switch to input D13 at terminals 140 and 141 on reciprocating chillers and terminals 60 and 61 on screw chillers. When the switch is closed, 24 VAC is applied to input D13, enabling the chiller. When the switch is open, input D13 is de-energized, disabling the chiller. If you want both a remote stop switch and an external time clock to control a chiller, wire these two devices in series. Caution: If you are using twisted, shielded cable, tape back the shield and drain wire on both ends of the cable. This will reduce the possibility of shorts. PC Connection Regardless of whether the PC is connected directly or remotely via phone lines, the connection to any MicroTech controller is at port A on the MCB. It is best to connect a PC to the level-1 controller because faster data transmission will result; however, a PC can be connected to any level-2 controller that does not have level-3 controllers associated with it. Either way, the PC will have access to the entire network (see note below). In the typical application, the RMS controller is level 1, the chiller controllers are level 2, and there are no level-3 controllers. See “Network Communications” above for more on network architecture. It is possible to connect two or more PCs to the network, but only one PC can be connected to any one controller. The PC that is used most often should be connected to the level-1 controller for better performance. For example, you may have one PC that you use at the building during the week and another PC that you use at home on weekends. In this situation, you may want to connect the on-site PC to the level-1 controller and the modem for the off-site PC to a level-2 controller. The RMS controller’s default port A communications rate is 9600 baud; however, it can be changed. For more information, see the “RMS and Chiller Controller Setup” section in Bulletin No. OM 118, MicroTech Remote Monitoring and Sequencing Panel. Note: If a PC is connected to a level-2 controller, a level-1 RMS Panel must be set up to poll that level-2 controller so that the PC will have access to the entire network. You can do this at the RMS controller’s keypad/display by adjusting the Total Slaves parameter, which is located under menu 21, “Misc Setup.” See the “RMS and Chiller Controller Setup” section in Bulletin No. OM 118 for more information. Page 18 / IM 498 Direct Connection An RS-232 communications cable kit that allows a PC to be directly connected to any MicroTech controller is available from McQuay International. The part number is 0057186802. The cable has a female DB-9 connector for connection to the PC’s 9-pin serial port. (If the PC has a 25-pin serial port, obtain an adapter.) The cable length is 12 feet. If more length is required, a twisted, shielded pair cable can be spliced into the kit cable (see “Cable Specification for Direct PC Connection” below). If this is done, splice the conductors with crimp-type butt connectors (better) or solder (best). Do not use wire nuts. The maximum allowable cable length for direct connection between the PC and a controller is 50 feet. If the desired length is over 50 feet, the MicroTech RS-232 Cable Extension Kit is required. This kit can extend the maximum allowable distance between the PC and the controller to 4000 feet. The part number is 0065487001. Remote Connection A voice quality, direct-dial telephone line is required for remote or off-site PC access to the network. The phone line should be terminated with a standard RJ-11 modular phone plug. A modem enables a remote or off-site PC to communicate with the networked controllers via phone lines. A modem is a standard chiller option, but it is not an RMS Panel option. However, a modem that can be field installed in the RMS Panel (or any chiller) is available from McQuay International. The part number is 0072140601. The kit comes complete with a 14,400 baud modem (set up for 9600 baud) and a wiring harness. If a remote PC connection is required, it is recommended that the modem at the MicroTech controller be supplied by McQuay International. Installation and wiring instructions for the MicroTech Modem Kit are included in Bulletin No. IM 564. This bulletin is included with the kit. Cable Specification for Direct PC Connection A properly terminated, twisted, shielded pair cable is required to directly connect a PC to a MicroTech controller. The cable must meet the following minimum requirements: twisted, shielded pair with drain wire, 300 V, 60°C, 20 AWG, polyethylene insulated, with a PVC outer jacket (Belden 8762 or equivalent). It must also be properly terminated to an AMP plug on one end and a female DB-9 or DB-25 connector on the other. See Figures 15 and 16 for cable pinouts. The AMP part numbers for the AMP connector shown in these figures are as follows: 1-4802700 (plug) and 60617-1 (female pin terminals). This AMP plug can be connected to an RMS controller, a chiller controller, or any other MicroTech controller that has the same type of AMP socket. The DB-9 or DB-25 connector is for connection to a 9-pin or 25-pin serial port on the PC. Note that some local codes or applications may require the use of plenum rated cable. Do not install the cable in the same conduit with power wiring. Note: A factory-assembled cable that meets this specification is provided with the PC Communications Cable Kit, which is available from McQuay International. This cable has a DB-9 connector. The part number of the kit is 0057186802. Figure 15. RS-232 Cable Pinouts for 9-Pin Serial Ports Figure 16. RS-232 Cable Pinouts for 25-Pin Serial Ports Network Commissioning The purpose of network commissioning is to establish and verify communications between the RMS Panel and its associated chillers. (It is not to establish and verify chiller plant operation.) Network commissioning can be done independently of the chiller commissioning procedures; however, if it is done before the chillers are commissioned, care should be taken to assure that the chillers do not start. The following instructions describe how to do this. To commission the network, you must be familiar with the operation of the keypad/display. For information, see the “Getting Started” portion of Bulletin No. OM 118, MicroTech Remote Monitoring and Sequencing Panel. Before the chiller plant is allowed to operate, the chillers must be commissioned in accordance with the instructions in the MicroTech unit controller installation literature and the model-specific chiller installation literature (see Tables 1 and 2). In addition, the RMS Panel and its associated chiller controllers must be set up so that they work properly together. This setup, which can be done before or after the network is commissioned, is described in Bulletin No. OM 118. A PC is not required to commission networks that include only RMS Panel(s) and chiller(s) because communications can be verified by observing the RMS Panel’s keypad/display and LED Status Board. However, if you want to use a PC to verify network communications, you can. The PC must be equipped with MicroTech Monitor software. Note: During the network commissioning process, all chillers must be temporarily shut down. Plan accordingly. Addressing the Controllers For network communications to occur, each controller in the network must have a unique network address. A controller’s hex switch setting defines its network address. A chiller controller’s hex switch setting also defines its chiller designation, which is used by the RMS controller for leadlag and sequencing control; for example, “Chiller #1.” For more on hex switch settings, see “Microprocessor Control Board” in the “Component Data” section of this manual. After changing a hex switch setting, power to the MCB must be cycled to set the new address into memory. In the RMS Panel, you can do this by opening and then closing circuit breaker CB1. In the chiller controllers, you can do this by opening and then closing the circuit breaker that supplies power to the MicroTech controller (located near the MCB). The hex switches are set differently depending on whether or not there is a Network Master Panel (NMP) or more than one RMS Panel in the network. Following are instructions on how to set them. Note: If a chiller is running, you should shut it down before removing power from the chiller controller. Do this by placing the Circuit No. 1 and Circuit No. 2 switches in the “Pumpdown and Stop” position. The Typical Network The typical RMS network includes one RMS Panel and one, two, or three chillers. It may also include other level-2 unit or auxiliary controllers that could be accessed with a PC via network communications. In this case, the RMS controller is the level-1 controller and the chiller controllers are level-2 controllers. Since the RMS Panel is level 1, its hex switch setting must be 00. The hex switch settings of the level-2 controllers must start at 01 and continue consecutively to a maximum of 3F (decimal 63). There must be no gaps in the sequence and no duplicate settings. As long as these rules are followed, a level-2 controller's hex switches can be set to any value. To keep the system simple, you should consider addressing the reciprocating and screw chillers according to their designations. For example, assume that a MicroTech network includes an RMS Panel, two reciprocating chillers, and one applied rooftop air handling unit. One possible addressing scheme is as follows: Hex Switch Setting Controller 00 RMS Panel 01 Chiller #1 02 Chiller #2 03 Rooftop air handling unit (PC accessible only) Note: If a PC or modem is connected to a level-2 controller, that controller should have as low an address as possible. This will improve the performance of network communications because it will reduce the required value of the RMS controller’s Total Slaves parameter and thus the amount of polling. For example, if a modem is connected to Chiller #3, you should consider setting Chiller #3’s hex switches to “01.” See the “RMS and Chiller Controller Setup” section in Bulletin No. OM 118 for more information. IM 498 / Page 19 Networks With an NMP If an RMS Panel is included in a network that has an NMP, the NMP must be the level-1 controller. In this case, an RMS Panel is a level-2 controller and the chiller controllers are also level-2 controllers. Since the NMP is level 1, its hex switch setting must be 00. The hex switch settings of the level-2 controllers must start at 01 and continue consecutively to a maximum of 3F (decimal 63). There must be no gaps in the sequence and no duplicate settings. As long as these rules are followed, a level-2 controller's hex switches can be set to any value. Two or more RMS Panels and multiple chillers are possible in this type of network. For example, assume that a MicroTech network includes an NMP, an RMS Panel, two screw chillers, and one applied rooftop air handling unit. One possible addressing scheme is as follows: Hex Switch Setting Controller 00 NMP 01 RMS Panel 02 Rooftop air handling unit (PC accessible only) 03 Chiller #1 04 Chiller #2 Networks With Two or More RMS Panels and No NMP If two or more RMS Panels are included in a network that does not include an NMP, one of the RMS Panels must be the level-1 controller. In this case, the other RMS Panels are level-2 controllers and the chiller controllers are also level-2 controllers. The level-1 RMS Panel’s hex switch setting must be 00. The hex switch settings of the level-2 controllers must start at 01 and continue consecutively to a maximum of 3F (decimal 63). There must be no gaps in the sequence and no duplicate settings. As long as these rules are followed, a level-2 controller's hex switches can be set to any value. For example, assume that a MicroTech network includes two RMS Panels, and four screw chillers. Each RMS Panel will control and monitor two chillers. One possible addressing scheme is as follows: Hex Switch Setting Controller 00 RMS Panel “A” 01 RMS Panel “B” 02 Chiller #1 for RMS Panel “A” 03 Chiller #2 for RMS Panel “A” 04 Chiller #1 for RMS Panel “B” 05 Chiller #2 for RMS Panel “B” Note: The only advantage to creating a network like this is to allow a PC access to all networked controllers. If there is no PC, each RMS Panel should be set up as a level-1 controller in a separate network as described above in “The Typical Network.” Note: If a PC or modem is connected to a level-2 controller, that controller should have as low an address as possible. A level-2 RMS Panel should also have as low an address as possible. This will improve the performance of network communications because it will reduce the required value of the level-1 RMS controller’s Total Slaves parameter and thus the amount of polling. For example, if a modem is connected to Chiller #2 for RMS Panel “B” in the above example, you should consider setting the hex switches for RMS Panel “B” to “01” and the hex switches for its Chiller #2 to “02.” See the “RMS and Chiller Controller Setup” section in Bulletin No. OM 118 for more information. Page 20 / IM 498 Chiller Controller Setup The chiller controller setup that will result by following these instructions is the minimum required for commissioning the network. Further setup will likely be necessary to adapt the chiller controllers to your particular application’s requirements. For complete information on how to do this, see the “RMS and Chiller Controller Setup” section in Bulletin No. OM 118. Control Mode During this commissioning process, it is recommended that the chillers be shut down by setting their control modes to “Manual Unit Off.” At the chiller controller’s keypad/display, the control mode is the first item under menu 13, “Control Mode.” You can get to it quickly by pressing the CONTROL key. After communications have been established between the RMS and chiller controllers, the chiller control modes can be set as desired (see note below). Note: Until their controllers are set up properly, the chillers should be manually shut down so that the RMS Panel cannot enable them. RMS Controller Setup The RMS controller setup that will result by following these instructions is the minimum required for commissioning the network. Further setup will likely be necessary to adapt the RMS controller to your particular application’s requirements. For complete information on how to do this, see the “RMS and Chiller Controller Setup” section in Bulletin No. OM 118. Control Mode Set the RMS Panel’s control mode to “All Chillers Off.” This will prevent chillers from being enabled as they are connected to the network. At the RMS controller’s keypad/ display, the control mode is the first item under menu 12, “Control Mode.” You can get to it quickly by pressing the CONTROL key. After communications have been established between the RMS and chiller controllers, the RMS Panel’s control mode can be set as desired. Number of Chillers The RMS controller needs to know how many chillers will be connected to it. You can set this value at the keypad/ display with the “# Chillers=” item under menu 21, “Misc Setup” (default is 2). Chiller #1 Address The RMS controller needs to know the network address of Chiller #1. You can set this value at the keypad/display with the “Chil #1 Addr=” item under menu 21, “Misc Setup” (default is 01). The value of this parameter must match the hex switch setting at Chiller #1. Chiller #2 Address The RMS controller needs to know the network address of Chiller #2 (if any). You can set this value at the keypad/ display with the “Chil #2 Addr=” item under menu 21, “Misc Setup” (default is 02). The value of this parameter must match the hex switch setting at Chiller #2. If there is only one chiller in the chiller plant, set this parameter to “NA.” Chiller #3 Address The RMS controller needs to know the network address of Chiller #3 (if any). You can set this value at the keypad/ display with the “Chil #3 Addr=” item under menu 21, “Misc Setup” (default is N/A). The value of this parameter must match the hex switch setting at Chiller #3. If there are one or two chillers in the chiller plant, set this parameter to “NA.” Controller Level The RMS controller needs to know whether it is a level-1 or level-2 controller. You can set the controller level at the keypad/display with the “Level=” item under menu 21, “Misc Setup” (default is level 1). To change the controller level 1. Set the hex switches as required. A level-2 controller’s hex switch setting cannot be 00. A level-1 controller’s hex switch setting must be 00. 2. At the keypad/display, set the “Level=” item to “1” or “2” as required. When the ENTER key is pressed, the RMS controller will automatically correct its checksums and reset itself. It will also change the Total Slaves parameter to “0” (see below). Total Slaves A level-1 RMS controller needs to know how many level-2 controllers (slaves) it needs to poll. (When a level-1 controller polls one of its level-2 slaves, it actively “asks” the slave if it has any requests for information from other controllers.) The Total Slaves parameter defines this number. You can set the Total Slaves parameter at the keypad/ display with the “Total Slaves=” item under menu 21, “Misc Setup” (default is 0). A level-2 RMS Panel’s Total Slaves parameter should always be set to “0.” In most cases, the Total Slaves parameter must be changed only if there is (1) a level-2 RMS Panel or (2) a PC connected to a level-2 controller. In the typical chiller plant network, which includes one RMS Panel (level 1) and no PC, the Total Slaves parameter should be set to “0” (default). If a level-2 controller needs to be polled, set the Total Slaves parameter just high enough to include that controller. For example, assume there are nine level-2 controllers connected to a level-1 RMS Panel; the controller at address 02 is another RMS Panel; and the controller at address 06 has a modem connected to it. In this case, the Total Slaves parameter should be set to “6.” Connecting the Communications Trunk Use the following two procedures to connect the RMS controller and chiller controllers to the network. You must complete the first procedure before beginning the second. Note that if the RMS and chiller controllers were set up as described above, the chillers will be disabled when the RMS controller starts communicating with them. Communications Cable and Port B Check The network communications cable should have been installed in accordance with the instructions in the “Field Wiring” section of this manual. This procedure will verify (1) that there are no shorts or stray voltages anywhere in the communications trunk and (2) that port B in each controller is intact. It must be performed once at every controller on the trunk before going on to the following “Verifying Communications” procedure. You can start at any controller and proceed in any order. Before beginning, verify that the port B connectors are disconnected from every controller on the trunk. On the RMS and chiller controllers, the port B connector is an AMP plug. 1. Verify that there is no voltage between any conductor and ground. Use a voltmeter to test for voltage at the network communications field wiring terminal block. With one lead on the control panel chassis (ground), check for voltage at the “+,” “–,” and “ground” terminals. Table 9 summarizes the terminal labels for the various controllers. There should be no AC or DC voltage. If you get a 2 or 3 VDC reading, it indicates that one or more powered controllers are connected to the trunk. These controllers should be located and disconnected. Note: The first check should test for voltage throughout the entire trunk; however, it is important that it be done at every controller. Cables look similar and can easily become crossed. 2. Verify that there are no shorts between any two conductors. Use an ohmmeter to test for shorts at the network communications field wiring terminal block. For the three combinations of conductor pairs, there should be infinite resistance between the conductors (see Table 9). If you find a resistance that is high but less than infinite, it indicates that one or more nonpowered controllers are connected to the trunk. These controllers should be located and disconnected. Note: The first check should test for shorts throughout the entire trunk; however, it is important that it be done at every controller. Breaks in the trunk may exist. 3. Plug the network communications connector into the B port. 4. Verify that there is power to the MCB and then check for proper port B voltage levels. Use a DC voltmeter to test for proper voltages at the network communications field wiring terminal block. With one lead on the control panel chassis (ground), check the voltage at the “+,” “–,” and “ground” terminals (see Table 9). The proper voltages are shown in Table 10. Note that the port B terminal labels in Table 10 are for the AMP-type connectors used on the RMS and chiller controllers. Figure 17 shows the terminal configuration for this AMP connector’s socket, which is mounted on the MCB board. (The terminals are labeled on both the socket and the plug, but they’re hard to see.) For communications to occur, each networked controller must have proper voltages at its port B terminals. When there is only one controller connected to the trunk (as in this check), the measured voltages are for port B on that controller. If no voltage or improper voltages are found, check the wiring between the port terminals and the field terminals. Using Table 10 and Figure 17, verify that the three conductors are properly terminated in the AMP plug. Remove and check the two fuses above the B port. If there is still a problem, it is likely that the communications driver in the MCB is defective. 5. Unplug the network communications connector from the B port. 6. Go to the next controller and repeat steps 1 through 5. 7. After finishing the last controller, do the following “Verifying Communications” procedure. Table 9. Network Communications Field Wiring Terminals Controller RMS Panel Reciprocating Chiller Screw Chiller Network Comm. Field Terminal + – Ground TB2-B+ TB2-B– TB2-GND TB7-138 TB7-137 TB7-139 TB4-54 TB4-53 TB4-55 Table 10. Port B Voltages (AMP Type) Port B (RS-485) Signal Terminal + 4 – 3 Ground 5 Acceptable Voltage Reading 3.0 ± 0.3 VDC 2.0 ± 0.3 VDC 0.0 ± 0.2 VDC IM 498 / Page 21 Figure 17. AMP Connector Terminal Configuration 4. With the controller’s B port disconnected, check for proper communications trunk voltage levels. Use a DC voltmeter to test for proper voltages at the network communications field wiring terminal block. With one lead on the control panel chassis (ground), check the voltage at the “+,” “–,” and “ground” terminals (see Table 9). The proper voltages are shown in Table 10. If no voltage or improper voltage levels are found, verify that the level-1 RMS Panel or NMP is energized and that the communications trunk wiring is intact. 5. Verify that there is power to the MCB and then plug the network communications connector into the B port. 6. Verify that network communications have begun. Verifying Communications This procedure will verify that proper communications have begun for each controller as it is connected to the network. The procedure begins with the level-1 controller because it coordinates network communications. After connecting it, you should connect any level-2 RMS Panels and then the level-2 chiller controllers. You can connect the chiller controllers in any order; however, it is better to follow the daisy-chain as you proceed. This will make troubleshooting easier if communications problems occur. For the typical network in which there is no Network Master Panel, the RMS Panel is the level-1 controller and the chillers are level-2 controllers. As a result of the previous procedure, the network communications connector should be disconnected from the B port at every controller on the trunk. Be sure that this is true before beginning this procedure. 1. Verify that the level-1 controller has a hex switch setting of 00. See “Addressing the Controllers” above for more information. 2. Plug the level-1 controller’s network communications AMP connector into the B port. Verify that there is power to the level-1 controller and then go to the first level-2 controller. 3. Verify that the controller has the correct level-2 network address. See “Addressing the Controllers” above for more information. Page 22 / IM 498 Go to the RMS Panel’s keypad/display and select the chiller just connected. (If the controller you just connected is a level-2 RMS Panel, go to step 7.) To do this, press the SWITCH key and then quickly press the NEXT key in the Menu key group. Repeat this keystroke combination as necessary to get the desired chiller. The Unit Selection LED for the selected chiller will illuminate. The keypad/display should show the chiller controller’s data. If communications do not exist, the message “Communications lost w/ chiller” will appear in the display. In this case, check the terminations between the B port and the field terminal block at the chiller and, if no other chillers are communicating, its RMS Panel. If the chiller controller just connected is associated with a level-2 RMS Panel, make sure that this RMS Panel’s level was changed from 1 to 2. Note: If the level-2 controller is not an RMS or chiller controller, you need a PC to verify communications. Refer to the user’s manual provided with the Monitor software for more information. 7. Go to the next controller and repeat steps 3 through 6. 8. After finishing the last level-2 controller, each RMS Panel’s Comm O.K. LED should be lit and not blinking, proving that network communications exist throughout the chiller plant. If the chillers have been commissioned, set up the RMS and chiller controllers as desired for normal operation. ________________________________ Service Information ________________________________ Wiring Diagram The following wiring diagram is identical to the one in the RMS Panel. It is reproduced here for your convenience. The legend is shown in Figure 18. Figure 18. RMS Panel Schematic Legend Component Designation Description CB1......................... KDB ........................ LSB......................... MCB........................ SIB .......................... T1 ........................... T2 ........................... TB1 ......................... TB2 ......................... Circuit Breaker Keypad/Display Board LED Status Board Microprocessor Control Board Sensor Input Board Transformer: 115/24 VAC Transformer: 24 VAC/18 VAC-CT Terminal Block: High Voltage Section Terminal Block: Low Voltage Section Factory Wire Number Field Wiring Terminal Field Wiring Printed Circuit Board Terminal Twisted, Shielded Pair Cable Figure 19. RMS Panel Schematic IM 498 / Page 23 Test Procedures A listing of MicroTech related part numbers is included in the “Parts List” section of this manual. If the MCB must be replaced, refer to the “MCB Replacement” section of this manual. If either fuse blows, the MCB is defective. 5. Reconnect the keypad/display ribbon cable. Cycle power to the controller and check the power fuses. If both fuses are intact, go to step 6. If either fuse blows, check the keypad/display and the connecting ribbon cable for shorts. Either one may be defective. Status LED Diagnostics The MCB status LED indications can aid in controller diagnostics. If the status LEDs do not operate normally as described in the “Component Data” section of this manual (see Table 3), there is a problem with the MCB. Following are troubleshooting procedures for the various symptoms. 6. Reconnect the analog input ribbon cable (if any). Cycle power to the controller and check the power fuses. If both fuses are intact, go to step 7. If either fuse blows, check the SIB board, the connecting ribbon cable, the thermistors, and the field wiring for shorts. Any of these may be defective. Red LED Remains On If the red LED remains on after the 5-second self-test period, it is likely that the MCB is defective. However, this can also occur in some instances if there is a power supply problem. Refer to “Troubleshooting Power Problems” below. 7. Reconnect the Aux/Out connector plug to the MCB. Disconnect the 12 VDC power plug from the LSB. Cycle power to the controller and check the power fuses. If both fuses are intact, go to step 8. If either fuse blows, it is likely that the keypad/ display is defective. Red and Green LEDs Off If the red and green LEDs do not turn on after power is applied to the controller, there is likely a defective component or a problem in the controller’s power distribution circuits. Refer to “Troubleshooting Power Problems” below. 8. Reconnect the digital output ribbon cable to the MCB. Reconnect the 12 VDC power plug to the LSB. Cycle power to the controller and check the power fuses. If both fuses are intact, the problem is indeterminate. Obtain factory service. If either fuse blows, check the LSB board and the connecting ribbon cable for shorts. Either one may be defective. Troubleshooting Power Problems The MCB receives 18 VAC, center-tapped power from transformer T2. It then distributes both 5 VDC and 12 VDC power to the various MicroTech components. A problem that exists in any of these components can affect the MCB and thus the entire control system. Power problems can be caused by a external short, which can blow a fuse, or a defective component, which can either blow a fuse or create an excessive load on the power supply. An excessive load can lower the power supply voltages to unacceptable levels. Use the following procedure to isolate the problem. Note that this procedure may require two or three spare MCB fuses (see parts list). Refer to the panel wiring diagram or Figure 19 as you proceed. Figure 20. MCB Power Supply Terminals 1. Verify that circuit breaker CB1 is closed. 2. Remove the MCB Power In terminal strip connector and check for 9 VAC between the terminals on the plug corresponding to terminals 2 and 3 on the board (see Figures 6 and 20). Then check for 9 VAC between the terminals on the plug corresponding to terminals 1 and 3 on the board. (Readings of 9–12 VAC are acceptable.) If 9 VAC is present between both sets of terminals, go to step 3. If 9 VAC is not present between both sets of terminals, check transformers T2 and T1 and all wiring between the 115 VAC source and the Power In plug. 3. Remove power from the controller by opening circuit breaker CB1. Check the MCB power supply input fuses (F1 and F2) with an ohmmeter. See Figure 20. A good fuse will have negligible resistance through it (less than 2 ohms). If either or both fuses are blown, replace them. Go to step 4. If the fuses are intact, the MCB is defective. 4. Reconnect the Power In plug and disconnect all other connectors on the MCB. Cycle power to the controller (close and then open CB1) and check the power fuses. If both fuses are intact, go to step 5. Page 24 / IM 498 Troubleshooting Communications Problems If the Comm O.K. LED on the LSB board is flashing, it indicates that a network communications problem exists. An alarm message on the keypad/display will indicate which chiller(s) the RMS Panel has lost communications with. Troubleshooting this type of problem is limited to the following: • • • • Checking the port B voltages Checking the port B fuses Checking the network wiring integrity Checking the network addressing The best way to accomplish these checks is to perform the start-up procedures in the “Network Commissioning” section of this manual. If these procedures have been performed and the problem persists, obtain factory service. Troubleshooting Analog Input Problems The controller receives its analog inputs from the optional Signal Input Board. Following are procedures that can be used to isolate analog input problems. Refer to the panel wiring diagram or Figure 19 as you proceed. Table 11. Thermistor Chart °F 15 16 17 18 19 20 21 22 23 24 25 26 27 28 29 30 31 32 33 34 35 36 37 38 39 40 41 42 43 44 45 46 47 48 49 50 51 52 53 54 55 56 57 58 59 60 61 62 63 64 65 66 67 68 69 70 71 72 73 74 75 76 Ohms 16,104 15,627 15,166 14,720 14,288 13,871 13,467 13,076 12,698 12,333 11,979 11,636 11,304 10,983 10,672 10,371 10,079 9797 9523 9258 9002 8753 8512 8278 8052 7832 7619 7413 7213 7019 6831 6648 6471 6299 6133 5971 5814 5662 5514 5371 5231 5096 4965 4838 4714 4594 4477 4363 4253 4146 4042 3941 3842 3748 3655 3565 3477 3392 3309 3228 3150 3074 Volts 4.145 4.124 4.102 4.080 4.057 4.034 4.011 3.988 3.964 3.940 3.915 3.890 3.865 3.839 3.814 3.788 3.761 3.734 3.707 3.608 3.653 3.625 3.597 3.569 3.540 3.511 3.482 3.453 3.424 3.394 3.365 3.335 3.305 3.274 3.244 3.213 3.183 3.152 3.121 3.078 3.059 3.028 2.996 2.965 2.934 2.902 2.871 2.839 2.808 2.777 2.745 2.714 2.682 2.651 2.620 2.589 2.558 2.527 2.496 2.465 2.434 2.404 °F 77 78 79 80 81 82 83 84 85 86 87 88 89 90 91 92 93 94 95 96 97 98 99 100 101 102 103 104 105 106 107 108 109 110 111 112 113 114 115 116 117 118 119 120 121 122 123 124 125 126 127 128 129 130 131 132 133 134 135 136 137 138 Ohms 3000 2927 2857 2789 2723 2658 2595 2534 2474 2416 2360 2305 2251 2199 2149 2099 2051 2004 1959 1914 1871 1829 1788 1747 1708 1670 1633 1597 1562 1528 1494 1461 1430 1398 1368 1339 1310 1282 1254 1228 1201 1176 1151 1127 1103 1080 1058 1036 1014 993 973 953 933 914 895 877 859 842 825 809 792 777 Volts 2.373 2.343 2.313 2.283 2.253 2.223 2.194 2.164 2.135 2.106 2.077 2.049 2.020 1.992 1.965 1.937 1.909 1.882 1.855 1.828 1.802 1.775 1.750 1.724 1.698 1.673 1.648 1.624 1.600 1.576 1.552 1.528 1.505 1.482 1.459 1.437 1.415 1.393 1.371 1.350 1.328 1.308 1.287 1.267 1.247 1.227 1.208 1.189 1.170 1.151 1.133 1.115 1.097 1.079 1.062 1.045 1.028 1.012 0.995 0.980 0.963 0.948 °F 139 140 141 142 143 144 145 146 147 148 149 150 151 152 153 154 155 156 157 158 159 160 161 162 163 164 165 166 167 168 169 170 171 172 173 174 175 176 177 178 179 180 181 182 183 184 185 186 187 188 189 190 191 192 193 194 195 196 197 198 199 200 Ohms 761 746 731 717 703 689 676 662 649 637 625 613 601 589 578 567 556 546 535 525 516 506 496 487 478 469 461 452 444 436 428 420 413 405 398 391 384 377 370 364 357 351 345 339 333 327 321 316 310 305 299 294 289 284 280 275 270 266 261 257 252 248 Volts 0.932 0.917 0.902 0.888 0.874 0.859 0.846 0.831 0.818 0.805 0.792 0.779 0.766 0.753 0.741 0.729 0.717 0.706 0.694 0.683 0.673 0.661 0.650 0.640 0.629 0.619 0.610 0.599 0.590 0.580 0.571 0.561 0.553 0.544 0.535 0.527 0.518 0.510 0.501 0.494 0.485 0.478 0.471 0.463 0.456 0.448 0.441 0.435 0.427 0.421 0.413 0.407 0.400 0.394 0.389 0.382 0.376 0.371 0.364 0.359 0.353 0.348 Open or Shorted Temperature Sensor Circuits The controller can assist in the diagnosis of temperature sensor problems by displaying either “open” or “short” instead of a temperature value on menu 7 of the keypad/ display. If menu 7 indicates a problem, check the sensor circuit wiring for shorts or disconnections. If the sensor circuit wiring and connections are intact, the sensor is probably defective. Verify this by performing the following “Erroneous Temperature Readings” procedure. Erroneous Temperature Readings If it is suspected that the controller is operating using erroneous temperature data, the following procedure can be used to check for problems: 1. Remove power from the controller by opening circuit breaker CB1. Verify that the MCB-to-SIB and MCB-toKDB ribbon cable connections are proper. Look for bent pins. After reconnecting the ribbon cables, restore power to the controller. 2. Measure the temperature at the suspect sensor using an accurate thermometer. 3. Determine the sensor’s associated SIB terminals. Refer to the panel wiring diagram. 4. Remove power from the controller. Disconnect the suspect sensor’s cable from the SIB field wiring terminal block and measure the resistance across the conductors. Using the thermistor chart (Table 11), compare this value with the measured temperature. If the measured resistance and temperature match, go to step 5. If the measured resistance and temperature do not match, either there is a wiring problem or the sensor is defective. Check the sensor circuit wiring and connections for defects. 5. Reconnect the sensor cable to the SIB. Restore power to the controller and measure the DC voltage across the sensor terminals on the SIB. Using the thermistor chart, compare this value with the measured temperature. If the measured voltage and temperature do not match, go to step 6. If the measured voltage and temperature match, the MCB is probably defective. 6. Measure the DC voltage between terminal 2 on the SIB and chassis ground. It should be 5 VDC. If the voltage is 5 VDC, the SIB board is probably defective. If the voltage is not 5 VDC, the MCB or the MCB-toSIB ribbon cable is probably defective. Troubleshooting the LED Status Board The LED Status Board is connected to the MCB via a 26conductor ribbon cable and discrete wiring for the 12 VDC power. The MCB provides operating voltages and control signal outputs for the LEDs. Board Component Defective If one of the LEDs, the alarm horn, or the alarm volume trim pot is bad, the LSB board must be replaced. All LEDs Out If there is power to the panel, two LEDs should always be lit: the Comm O.K. LED and one of the Unit Selection LEDs. If the green status LED on the MCB is lit, but no LEDs on the LSB are lit, perform the following procedure: 1. Check the ribbon cable and connections between the LSB and the MCB. Look for bent pins. 2. Check for 12 VDC at terminal 1 on the H1 plug on the LSB. Refer to the panel wiring diagram or Figure 19. To take the voltage reading, pull the plug back about IM 498 / Page 25 one-eighth of an inch and place the test lead against the exposed pin. Place the other lead on chassis ground. If there is no voltage, go to step 3. If there is 12 VDC, the LSB is probably defective. 3. Check the wiring and connections between the Aux/ Out terminal strip and the LSB. If the wiring is intact, the MCB is probably defective. Troubleshooting the Keypad/Display Board The Keypad/Display Board is connected to the MCB via a 26-conductor ribbon cable and discrete wiring for the back light. The MCB provides operating voltages, control signal outputs for the display, and input conditioning for the keypad inputs. Display is Hard to Read The clarity of the LCD display can be affected by ambient temperature. Typically, less contrast will result with cooler temperatures. If the display is difficult to read, adjust the contrast trim pot, which is located on the back of the keypad/display assembly (see Figure 5). Back Light Not Lit The Keypad/Display Board supplied with the RMS Panel is equipped with a back light. If the light does not come on, check for 5 VDC at terminal 1 on the J4 plug on the KDB. Refer to the panel wiring diagram or Figure 19. Note that this terminal is the one closest to the ribbon cable connector. To take the voltage reading, pull the plug back about one-eighth of an inch and place the test leads against the exposed pins. If there is no voltage, check the wiring and Page 26 / IM 498 connections between the Aux/Out terminal strip and the KDB. If the wiring is intact, the MCB is probably defective. Display is Blank or Garbled If the MCB appears to be functioning properly and the display is completely blank or garbled, perform the following procedure: 1. Try cycling power to the controller by opening and then closing circuit breaker CB1 (see note below). 2. Try adjusting the contrast trim pot, which is located on the back of the keypad/display assembly (see Figure 5). If the contrast trim pot has no effect, it is likely that either the keypad/display or its ribbon cable is defective. 3. After removing power from the controller, check the ribbon cable and connections between the keypad/ display and the MCB. Look for bent pins. Restore power after reconnecting the ribbon cable. 4. Try swapping a known good ribbon cable and keypad/ display. (These may come, for example, from a chiller controller. The keypad/display does not need a back light.) Swap these components separately to isolate the problem. Remove power from the controller before disconnecting the suspect component, and restore power after connecting the replacement component. If the problem persists, it is likely that the MCB is defective. Note: The keypad/display and MCB must be powered up together; otherwise, the display will be blank. Therefore, if the keypad/display is ever disconnected from the MCB and then reconnected, power to the controller must be cycled to restore the display. You can cycle power to the controller by opening and then closing circuit breaker CB1. MCB Replacement If an MCB board is defective and must be replaced, the proper controller software must be loaded into the replacement MCB. This can be done either at the factory or at the building site—if a PC equipped with appropriate Monitor software is available. The factory will download the proper controller software into a replacement MCB board before it is shipped if you include the RMS controller’s program code with the replacement MCB part order. If the program code is not provided, the MCB board will be shipped without software. Job-specific Monitor software includes each unit and auxiliary controller’s program. Therefore, it is possible to download the proper controller software to a replacement MCB at the building site if a PC equipped with that job’s Monitor software is available. In addition, if the controller’s configuration data was stored on the PC hard drive prior to the MCB failure, the exact configuration data (including all keypad programmable setpoints and parameters) can be restored. Refer to the user’s manual supplied with the Monitor software for more information. Parts List Component Designation MCB KDB LSB SIB T1 T2 CB1 – – – – – – – – ¬- Description Microprocessor Control Board Keypad/Display Board LED Status Board Sensor Input Board Transformer: 115/24 VAC Transformer: 24/18 VAC, Center Tapped Circuit Breaker Ribbon Cable Assembly: 26-Conductor, MCB to LSB Ribbon Cable Assembly: 26-Conductor, MCB to KDB Fuse: MCB Input Power, 2 Amp (Bussman No. GDC-2A) Fuse: MCB Communication Ports, 0.25 Amp RMS Sensor Kit PC Communications Cable Kit RS-232 Cable Extension Kit Modem Kit Part No. 654873B-06 654972B-02 664011A-01 571870A-01 606308B-01 467381B-14 350A733H01? 664012B-01 654997B-05 658220A-01 658219A-01 0057186701 0057186802 0065487001 0072140601 Notes: 1. If desired, the factory can download the correct software into the replacement MCB prior to shipment. See the “MCB Replacement” section above for more information. 2. MCB part number 654873B-06 includes a high memory chip. In addition to itself, this part replaces MCB boards with part numbers 654873B-01 and 654873B03. IM 498 / Page 27 13600 Industrial Park Boulevard, P.O. Box 1551, Minneapolis, MN 55440 USA (612) 553-5330 Printed on recycled paper containing at least 10% post-consumer recycled material.