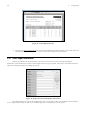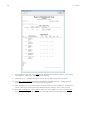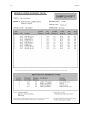
1
Quality Control – Field Density v.4
Database Management Module for
GEOSYSTEM® for Windows
User’s Guide
Copyright 2010
Von Gunten Engineering Software, Inc.
363 W. Drake Road, Ste. 10
Fort Collins, CO 80526
www.GEOSYSTEMSoftware.com
Information in this document is subject to change without notice and does not represent a commitment on the part of
Von Gunten Engineering Software, Inc. The software described in this document is furnished under a license
agreement, and the software may be used or copied only in accordance with the terms of that agreement. The licensee
may make copies of the software for backup purposes only. No part of this manual may be reproduced in any form for
purposes other than the licensee’s personal use without the written consent of Von Gunten Engineering Software, Inc.
Copyright Von Gunten Engineering Software, Inc. 2010. All rights reserved.
Published in the United States of America
GEOSYSTEM® is a registered trademark of VES, Inc.
Windows® is a registered trademark of Microsoft Corporation
Revised April 22, 2010
Contents
1.
INTRODUCTION ................................................................................ 1
1.1
PROGRAM FEATURES ................................................................................................1
1.1.1 New features in version 4 ....................................................................................1
1.2
INSTALLATION............................................................................................................1
1.3
STARTING QC-DENSITY.............................................................................................2
1.4
DATA REQUIREMENTS ...............................................................................................2
2.
CONFIGURATION.............................................................................. 3
2.1
MISCELLANEOUS SETTINGS .......................................................................................3
2.1.1 Number of Decimals to Report for Percent Compaction .....................................3
2.1.2 Compaction Percent Sign....................................................................................3
2.1.3 Field to be Key for Specification Fetching ...........................................................4
2.1.4 Units.....................................................................................................................4
2.1.5 California Test 216 Options: ................................................................................4
2.1.6 Grid Fonts: ...........................................................................................................4
2.1.7 Miscellaneous ......................................................................................................4
2.1.8 Standard Report Formats (User Configurable) ...................................................5
2.1.9 Crystal Reports Formats (Factory Configured)....................................................6
2.2
TEST SELECTION CRITERIA ........................................................................................6
2.3
PROGRAM OPTIONS ..................................................................................................7
2.3.1 Number of decimals to be reported for calculated percent compaction ..............8
2.3.2 Key field to be used for fetching specifications....................................................8
2.3.3 California Test 216 Options .................................................................................8
2.3.4 Font size and style for screen viewing.................................................................8
2.3.5 Special value for custom form .............................................................................8
2.3.6 Add percent sign to compaction reports ..............................................................8
2.3.7 Preferred density units to be used on reports......................................................8
2.3.8 Miscellaneous Options.........................................................................................8
3.
ENTERING TEST DATA................................................................... 10
3.1
ENTERING DENSITY TESTS ......................................................................................10
3.1.1 Specific notes about density table data fields:...................................................10
3.1.2 Field Sizes .........................................................................................................14
3.2
ENTERING PROCTOR TESTS ....................................................................................15
3.3
GENERAL DATA ENTRY INFORMATION ......................................................................16
3.3.1 Navigating the Grid and Editing Cell Data .........................................................16
3.3.2 Shortcut Keys for Editing Cell Data ...................................................................18
3.3.3 Resizing, Moving, and Switching Windows .......................................................18
3.4
DENSITY TEST TABLE CALCULATIONS ......................................................................18
3.4.1 Applying Field Rock Correction to Lab Rock Corrected Reference Proctor......19
3.5
MENU OPTIONS .......................................................................................................19
3.5.1 Menu Options That are the Same for Both Tables ............................................19
3.5.2 Density Test Table Menu Options .....................................................................20
3.5.3 Proctor Test Table Menu Options......................................................................21
3.6
VIEWING ONE TEST AT A TIME .................................................................................23
4.
PRINTING REPORTS ...................................................................... 25
4.1
SELECTING REPORT FORMATS.................................................................................25
4.2
SELECTING TESTS TO BE REPORTED........................................................................25
4.2.1 Selecting one test ..............................................................................................25
4.2.2 Selecting Multiple Tests.....................................................................................25
4.2.3 Selecting a Range of Tests ...............................................................................26
4.2.4 Checking Selection Outcome ............................................................................26
4.3
PRINTING / PREVIEWING TEST REPORTS ..................................................................27
3.2.1 Other Report Information...................................................................................28
4.3.1 Standard Report Preview Options .....................................................................29
4.3.2 Crystal Report Preview Options.........................................................................29
4.3.3 Printing Proctor Test Summaries ......................................................................29
5.
EDITING STANDARD REPORTS .................................................... 31
5.1
THE REPORT TABLE ................................................................................................31
5.2
THE STANDARD REPORT EDITING DIALOG ................................................................32
5.2.1 Choosing or Changing a Column’s Data Field ..................................................33
5.2.2 Properties Displayed When a Column is Selected ............................................33
5.2.3 The Details Columns Area (Column 1)..............................................................34
5.2.4 Miscellaneous Settings ......................................................................................34
5.3
RECOMMENDED APPROACH TO DESIGNING STANDARD REPORTS ..............................34
6.
6.1
6.2
6.3
6.4
6.5
6.6
MODIFYING DATABASE TABLE STRUCTURES ........................... 37
REASONS FOR DATABASE TABLE CHANGES .............................................................37
REQUIRED VALUES ..................................................................................................38
COLUMN SPECIFICATION PARAMETERS ....................................................................38
ADDING AND DELETING DATABASE TABLE COLUMNS ................................................39
THE DEFAULT DATABASE STRUCTURE .......................................................................39
ADDITIONAL MENU OPTIONS ....................................................................................40
7.
MERGING DATABASES.................................................................. 41
8.
TUTORIAL........................................................................................ 43
9.
HELP! ............................................................................................... 51
9.1
9.2
9.3
9.4
9.5
9.6
9.7
FREQUENTLY ASKED QUESTIONS .............................................................................51
ERROR MESSAGES ..................................................................................................52
INSTALLATION:.........................................................................................................67
STARTING NEW PROJECTS: .....................................................................................67
PRINTING REPORTS:................................................................................................67
PROJECT DATA .......................................................................................................69
PAVEMENT REPORT ................................................................................................69
1
QC - Density Version 4 User’s Guide
1. Introduction
1.1 Program Features
The GEOSYSTEM Quality Control - Field Density Test module version 4 (QC-Density) is a powerful database
program for reporting field density test results. It is a software module integrated with the GEOSYSTEM Data Manager
program (GDM). The user should be familiar with the material in the GDM reference manual prior to starting with this
manual.
•
It utilizes the Microsoft Jet database system for storing and retrieving data.
•
Two relational database tables are maintained by the program, one for density tests and one for Proctor tests,
for ease in entering, sorting, locating, and reporting results.
•
Calculate and report the percent compaction and whether the test passed or failed
•
When needed the ASTM D 4718 and AASHTO T224 rock correction calculations are performed to adjust the
Proctor test results to field conditions.
•
A variety of report formats are available, from the user configurable standard form to custom reports designed
using Seagate Crystal Reports.
1.1.1 New features in version 4
Version 4 is written using a newer Visual Basic compiler, bringing is up to the same standard as the rest of our
software. A summary of what is new in this version is:
•
The program is now Vista 64 and Windows 7 compatible.
•
Its underlying database engine is newer and faster
•
It uses a faster version of Crystal Reports
•
A new “read-only” method of operation is triggered when GDM is in read-only mode.
•
The user interface now has more of the usual look of GEOSYSTEM modules.
•
Rock correction is more clearly incorporated while retaining backwards compatibility with previous versions.
•
Newly updated help screens and user’s guide.
1.2 Installation
The program requires Windows XP, NT, Vista or 7, (32 or 64 bit). Installation should begin automatically when you
insert the program CD. If it does not, manually run the program SETUP.EXE that is on the CD.
2
1.
Introduction
1.3 Starting QC-Density
To start QC-Density, run GDM by clicking on its desktop icon, finding it on the Start Menu, or navigating to
GDM.EXE. On the opening GDM screen, QC-Density should be listed as one of the installed modules. If it is not listed
there was an error during installation.
Open an existing project or create a new project, then (if necessary) click on the QC-Density link displayed on the
left side of the GDM Source and Sample screen. QC-Density will load and display the test and Proctor data, if any have been
entered. More information about running GDM is described in the GEOSYSTEM for Windows, GEOSYSTEM Data
Manager reference guide.
1.4 Data Requirements
QC-Density requires field data from field density tests. This includes the in-situ density and moisture and the
percent of oversize material if applicable. Also required are the results data from the corresponding moisture-density
relationship (Proctor) test. Proctor test results for tests that have been entered into the GEOSYSTEM for Windows
Moisture-Density Test module are automatically transferred to the QC-Density database. Other data such as locations,
material descriptions, test methods, etc. can also be entered and reported.
3
QC - Density Version 4 User’s Guide
2. Configuration
QC-Density includes a number of options. The user should begin by setting up the program with the options that
are most likely to be commonly used. The following sections detail the various program options.
2.1 Miscellaneous Settings
To change these settings, select the Tools->Options menu. The following screen will be displayed:
Figure 1 - Options
2.1.1 Number of Decimals to Report for Percent Compaction
You can set the number of digits you wish to appear after the decimal for the program’s degree of compaction
calculation.
•
“0 decimal places”
•
“1 decimal place”
2.1.2 Compaction Percent Sign
Check the “Add percent sign” checkbox to automatically format the compaction result with a “%”.
4
2.
Configuration
2.1.3 Field to be Key for Specification Fetching
Specification entry can be automated. Specifications entered for other tests can be repeated to the current test based
on some common value. It can be identical Locations, or Soil Use, or Proctor Reference, or any other of several database
fields. Select a database field from the list to be used as the source of Required Compaction and Moisture Specification. All
subsequent tests with the same data in this key field will have their specification fields automatically filled in with the same
specifications.
2.1.4 Units
You can choose which density units are being used, and to be printed on the report. The choices are: “pcf,”
“kN/m3,” or “kg/m3.”
2.1.5 California Test 216 Options:
California Test Standard 216 for Maximum Density is unusual in that it uses the wet density as the standard measure
for compaction. Some situations, however, require the Cal Test 216 dry density results instead of wet density results to be
utilized as the maximum.
If you are using CalTest 216 and it requires using the Wet Density in the compaction percentage calculation instead
of the Dry Density you should check "Use Wet Density for Percent Compaction Calculation".
You will also need to establish whether or not the Maximum Densities listed in the Proctor Test Table are the
Maximum Dry Density or the Maximum Wet Density.
2.1.6 Grid Fonts:
Set the font used for displaying density test and Proctor test information. Click on Change to change.
2.1.7 Miscellaneous
Allow Resizing of Grid Row Height:
The height of rows in the Density Test Table and Proctor Test Table can be changed by the user. It has
been reported that it can also be easily inadvertently changed when pointing and clicking around quickly.
To allow row height changes, check the box by the option. If it is annoying, disable it.
Allow duplicate test numbers on different dates:
The program normally prevents using the same test number more than once. For labs whose procedures
require the numbering of tests be restarted each day, check this option.
Also check moisture specification for Pass/Fail determination:
The program always checks percent compaction against percent required. It will also check test moisture
against the moisture specification. To have this done, check this option.
Automatically generate test numbers:
If you would like the program to add 1 to the previous test number and automatically insert it when a new
test is added, then check this option.
QC - Density Version 4 User’s Guide
5
Automatically generate material numbers:
This option relates to certain custom forms which needed a unique and automatically incremented value for
their reports. It can be ignored by all other users.
Proctor reports have Area instead of Location:
Proctor reports printed in landscape orientation include the Proctor location field by default. It can be the
Proctor Area field instead by selecting this option.
Proctor reports have Extra Space:
Proctor reports printed in landscape orientation can be triple spaced if desired by selecting this option. The
report will contain fewer reports per page, but there will be ample room for notes.
Report result as 1,2,3 or 2,3 instead of Pass/Fail:
An alternate way to report pass/fail is numerically. Using this method, the result 1 means the test passed,
the result “2” means the test failed based on density, the result “3” means the test failed based on moisture.
If the test failed on both density and moisture the program will report “2,3”.
Use oversize data like older versions:
This determines which Oversize Specific Gravity and the Oversize Moisture Content are used. The current
method is to use the values entered for the Proctor test. Check this if you prefer the old method of using
the values entered for the specific Field Test.
Special Value for Custom Forms:
Some users with highly customized forms can use this option to enter a special value to be routinely printed
on their reports.
QC-Density can produce a variety of report formats. Supplied with the program are several formats from which to
choose. All of the formats supplied can be customized to variations of the existing, or to completely new report formats. The
user can do some customization; the GEOSYSTEM team must do the more complex customizations.
Report formats are designed in two ways. The program includes a standard format that may be modified by the user.
The program also includes several formats developed using Crystal Reports, which cannot be modified by the end user
without the Crystal Reports software product. Each of these is discussed in further detail in the following sections.
2.1.8 Standard Report Formats (User Configurable)
Standard reports have a simple format, as the examples in the Appendix show. To select a standard report to use, or
to design and edit standard reports, select File > Report Settings to display the Report Printing Options form. The bottom
panel, left side, (see below) displays the name and description of the currently selected standard report format. To select a
standard report format to use for printing, select the option button for Standard Reports, then from the list box, select the
report format to use.
6
2.
Configuration
Figure 2 - Standard Reports - Report Format Selection
The following standard report operations are available to the user:
New:
Create a new standard report which can either be based on an existing report or designed starting with a
blank form.
Edit:
Modify an existing standard report format.
Rename:
Change the name of the current report.
Remove:
Delete the current report (there is no undo on this - be sure!)
Selecting either New or Edit opens the standard report design window, described in greater detail in Chapter 5,
Editing Standard Reports.
2.1.9 Crystal Reports Formats (Factory Configured)
Crystal Reports (Seagate Software) is a database report-generating program. Report formats designed using Crystal
may have more features than QC-Density standard reports, as the examples in the Appendix show. To select a Crystal
Report format select File > Report Settings to display the Report Settings window. The bottom panel, right side, (see below)
displays the name and description of the currently selected custom report format. To select a custom report format as the one
to be used for printing, select the option button for Crystal Reports, then from the list box, select the report format to use.
Figure 3 - Crystal Reports - Report Format Selection
The Crystal Report program is used to design these report formats. It is not supplied with QC-Density. If you have
a copy of it and would like to design custom forms you must include a record selection formula of the form: NP<NT where
NP is the maximum number of Proctors that will fit on a page, and NT the maximum number of tests that will fit on a page.
Make sure the “>” points in the right direction to make the expression true. Please note that GEOSYSTEM Software is not
responsible for technical support on forms other than those provided with the QC-Density program.
2.2 Test Selection Criteria
Tests to be included on a report can be selected several different ways:
•
A collection of individually selected tests
7
QC - Density Version 4 User’s Guide
•
A range of test numbers (between a starting and ending test number)
•
A range of dates (between a starting and ending date)
•
All unprinted tests, or tests modified since being printed
Set the selection method to use by selecting File > Report Settings then choosing your preference from the middle
panel, left side: Report Selection Methods (see example below). Also be sure the “Clear Modified Flag After Printing” box is
checked; checked is its default setting. When that option is not checked the same set of modified tests can be printed
repeatedly, if the need ever arises to do so. To reset the modified flag for all tests you should first choose the modified
selection criteria, then click on the “Clear Modified” button.
Figure 4 - Report Selection Methods
2.3 Program Options
You can change some aspects of how the program works by selecting the menu option Tools > Options. The
Options dialog is shown in Error! Reference source not found..
Figure 5 - Program Options
8
2.
Configuration
2.3.1 Number of decimals to be reported for calculated percent compaction
The program calculates the percent compaction. It can be rounded to nearest whole number or to 1 decimal place.
2.3.2 Key field to be used for fetching specifications
The program can automatically repeat the Compaction Requirement and the Moisture Requirement from another
test. One key field, such as Proctor Reference or Soil Use, is used for fetching previously entered specifications.
2.3.3 California Test 216 Options
California Test Standard 216 for Maximum Density is unusual in that it uses the wet density as the standard measure
for compaction. Some situations, however, require the Cal Test 216 dry density results to be utilized as the maximum. To
accommodate these two cases you can select to use the Wet Density in the compaction percentage calculation instead of the
Dry Density. To do so, check "Use Wet Density for Percent Compaction Calculation". You will also need to establish whether
or not the Maximum Density listed in the Proctor Test Table for Cal Test 216 tests is the Maximum Dry Density or the
Maximum Wet Density.
2.3.4 Font size and style for screen viewing
Click on "Change" to select a different font for the Density Test and Proctor Test data tables.
2.3.5 Special value for custom form
Some users with highly customized forms can use this option to enter a special value to be routinely printed on their
reports.
2.3.6 Add percent sign to compaction reports
You may have the program add a percent sign (%) to the calculated percent compaction, and to the fetched required
percent compaction. To activate this option, check this box.
2.3.7 Preferred density units to be used on reports
Standard PCF or two Metric units, kN/m3 and kg/m3 can be set as the units to report for density. This selection
also sets the constant used to convert specific gravity to density in the AASHTO T 224 correction calculation.
2.3.8 Miscellaneous Options
Allow resizing of row height:
Row heights cannot be changed unless this is checked. If the row height is set too small the cursor
disappears and other side effects may be noted. After settling on a comfortable row height, uncheck this
option to prevent it from being changed.
QC - Density Version 4 User’s Guide
9
Allow duplicate test numbers on different dates:
The program normally prevents using the same test number more than once. For labs whose procedures
require the numbering of tests be restarted each day, check this option.
Also check moisture specification for Pass/Fail determination:
The program always checks percent compaction against percent required. It will also check test moisture
against the moisture specification. To have this done, check this option.
Automatically generate test numbers:
If you would like the program to add 1 to the previous test number and automatically insert it when a new
test is added, then check this option.
Automatically generate material numbers:
This option relates to certain custom forms which needed a unique incrementer for a value on their reports.
It can be ignored by all other users.
Proctor reports have Area instead of Location (landscape only):
Proctor reports printed in landscape orientation include the Proctor location field by default. It can be the
Proctor Area field instead by selecting this option.
Proctor reports have extra space (landscape only):
Proctor reports printed in landscape orientation can be triple spaced. The report will contain fewer reports
per page, but there will be ample room for notes if desired by selecting this option.
Report result as 1, 2, 3, or 2,3 instead of Pass/Fail:
Select the preferred method of reporting the result. These choices are explained in the Density Test Table
Pass/Fail Column explanation.
Use oversize data like older version:
This determines which Oversize Specific Gravity and the Oversize Moisture Content are used. The current
method is to use the values entered for the Proctor test. Check this if you prefer the old method of using
the values entered for the specific Field Test. See Rock Correction for more explanation.
10
3.
Entering Test Data
3. Entering Test Data
Start QC-Density by first opening an existing project, or by creating a new Project with GDM; for details, see
Chapter 2 of the GDM manual. When the sample window is displayed, double-click on the "Density Test" icon on the right
side of the screen. QC-Density starts with the display of the two database tables:
Figure 6 - QC-Density Opening Screen
The top table is the Density Test table; each row is one test. The lower table is the Proctor Test table.
3.1 Entering Density Tests
To begin a new test, move the cursor to the last row, which is marked by an asterisk, and begin typing the data. Edit
existing tests by first moving to the test field that needs to be changed, then making the changes. Shortcut keys and other tips
for entering and editing data are in Section 3.3.2 Shortcut Keys for Editing Cell Data.
3.1.1 Specific notes about density table data fields:
Test number:
The test number is alphanumeric and must be unique. If it is not, the program will not allow the test to be
added to the database. If you are entering numbers and need the program to sort numerically, be sure to
select the Sort Settings option to treat test numbers as numeric only. See Section 3.5.2 Density Test Table
Menu Options for more information. There is an option to allow non-unique test numbers to be entered if
the test date is different, see Section 2.3.8 Miscellaneous Options for more information.
11
QC - Density Version 4 User’s Guide
Test Date:
The data entered as the date must be convertible to a valid date. It will be converted to the format
MM/DD/YY from any valid date representation entered. If the year is left off, the current year will be
assumed. Two digit years, smaller than 91, are assumed to be in the next century. To enter 1990 or earlier
years, you must enter the entire 4 digits. After it is entered, the date will be converted to the format
selected in Windows Regional Settings, found in your Windows Control Panel.
Proctor Reference:
This number identifies which Proctor test’s results should be used with this test. If a Proctor test with this
number has not yet been entered, the program will prompt the user to enter the new Proctor test. Double
click (or press F3) the Proctor Reference cell to pop-up a list of Proctor References:
Figure 7 - Proctor Pop-up
Wet Density:
Enter the test’s wet density, or leave it blank and it will be calculated based on the dry density and moisture.
Dry Density:
Enter the test’s dry density, or leave it blank and it will be calculated based on the wet density and moisture.
After the dry density is entered, if there is a Proctor reference, the percent compaction will be calculated.
Moisture:
Enter the test’s moisture, or leave it blank and it will be calculated based on the wet density and the dry
density.
Compaction:
This is calculated by the program.
Required Compaction and Moisture Requirement:
The program compares the calculated compaction to the required compaction to set the “Pass/Fail” test
result. Both the “Required Compaction” and the “Moisture Requirement” automatically repeat for
subsequent tests with the same specification key as previous tests. The specification key can be set to be
almost any of the density database fields. See Section 3.5.1 Menu Options That are the Same for Both
Tables for more information.
For example, if the Proctor reference is being used as the key field, and the required compaction for the
first test using Proctor number 1 is 90%, then all new tests entered that use Proctor reference 1 will have
90% automatically copied as the required compaction. The key field is selected on the options screen. Note
that you can select "NONE" to disable this feature.
12
3.
Entering Test Data
Pass or Fail:
The value for the pass/fail column is automatically determined by the program by comparing the test
results with the compaction specification. If it is less, "Fail" is reported but if it is equal to or greater than
the specification "Pass" is reported.
Optionally, the moisture requirement can also be used to determine if the test passed or not. Select the
option to include the moisture requirement on the options screen (see Section 2.3.8 Miscellaneous Options
for more information). When the moisture requirement is used the test passes if, in addition to meeting the
compaction requirement, the moisture is greater than the minimum required, less than the maximum
required, or between the minimum and maximum if both are specified.
An alternate way to report pass/fail is numerically. Using this method, the result 1 means the test passed,
the result "2" means the test failed based on density, the result "3" means the test failed based on moisture.
If the test failed on both density and moisture the program will report "2,3".
See also: Section 2.3.8 Miscellaneous Options for information on selecting whether to report "Pass" and
"Fail" or use "1", "2", and "3".
Area:
This field gives the user an alternate place to enter information about where the test was performed.
Elevation Reference:
This can contain any information pertinent to the vertical control on the project.
Location Tested:
This is for the specifics of the test’s location.
Moisture Requirement:
Moisture requirements are entered in one of the following formats:
-N, +N
-N
-N, N
+N
-N to +N
N
-N to N
±N
where N is a real number. Examples are "-2 to +1" or "±3". The character "±" is character 177. The
moisture requirement can also used to determine the value for the pass/fail column. To employ it this way,
select the option on the options screen.
%+4 and %+3/4”:
These values may be entered to report the percent oversize on either of these specific sieves. They are not
used in the calculation of a rock corrected maximum dry density. To enter the percent of oversize material
for the test you must use the Oversize Percent column. For more information see Section 3.4.1 Applying
Field Rock Correction to Lab Rock Corrected Reference Proctor.
Percent Oversize:
This value is used in the calculation of the maximum dry density and optimum moisture for tests using rock
correction. Even if a value was entered for the +#4 or +3/4” fields it must be entered again here for the
oversize correction to be applied.
Oversize GS and Oversize Moisture:
These 2 fields are only displayed if the option to use oversize data like older versions is selected. See Section
2.3.8 Miscellaneous Options for more information. They are then also used in the rock correction
calculations. If that option is not selected then the columns are not displayed and the oversize specific
gravity and oversize moisture content are retrieved from the Proctor test. Details on these and other
calculations are found in Section 3.4.1 Applying Field Rock Correction to Lab Rock Corrected Reference
Proctor.
QC - Density Version 4 User’s Guide
13
Rock Corrected Maximum Dry Density and Rock Corrected Optimal Moisture:
The program calculates this value if the ASTM or AASHTO oversize correction data is entered and the test
method of the referenced Proctor Test is either ASTM or AASHTO. Required data must also be available:
1) A percent of oversize material (either +#4 or +¾” or other)
2) The oversize bulk specific gravity
3) The oversize moisture content.
If these values are present, and the referenced Proctor for the test has uncorrected values which are
different than the test results, then a rock corrected maximum dry density and optimum moisture will be
calculated and displayed in the Rock Corrected Max Dry Density and Rock Corrected Opt. Moisture
columns. Details on these and other calculations are found in Section 3.4.1 Applying Field Rock Correction
to Lab Rock Corrected Reference Proctor.
Station Number:
This is a commonly used method to refer to locations in construction.
Material Number, Section of Project and Lift Number
All of these are optional fields.
Density Test Method and Moisture Test Method:
This is for reporting test standards. Double click (or press F3) in either of these columns and a selection
box will pop up containing a list of commonly referenced test methods.
Figure 8 - Density and Moisture Test Method Pop-ups
Test methods may be added or changed by editing the QC-Density configuration file (CQC-FD.INI) using
Notepad. Edit the section [DenMethods] for density test methods and the section [MoistMethods] for
moisture test methods.
Material Description, Gauge and Technician:
These columns are both optional data. If you use these columns, you can take advantage of a shortcut to a
list of all previously entered Gauge Numbers and Technician names. Double click (or press F3) in either of
these columns and a selection box will pop up containing the list of previously entered data.
14
3.
Entering Test Data
Figure 9 - Material Description, Gauges, and Technicians Pop-ups
Soil Use:
This column is optional, but if used you can take advantage of a shortcut to a list of all commonly use
phrases describing Soil Use. Double click (or press F3) in either of these columns and a selection box will
pop up containing the list of commonly used Soil Use descriptions.
Figure 10 - Soil Use Pop-up
Soil Uses may be added or changed by editing the QC-Density configuration file (CQC-FD.INI) using
Notepad. Edit the section [SoilUses] and change existing TM entries or add new ones, using consecutively
larger numbers.
3.1.2 Field Sizes
The following table lists the sizes of the density test table fields:
Field
Test Number
Test Date
Size
15
8
Proctor Reference
15
Wet Density
Dry Density
8
8
Field
Location Tested
Location Tested (line
2)
Moisture
Requirement
% + 3/4" Sieve
% + #4 Sieve
Size
75
75
Field
Station Number
Soil Description
Size
25
75
10
Material Number
25
8
8
Section of Project
Lift Number
75
10
15
QC - Density Version 4 User’s Guide
Moisture
Compaction,%
8
7
Oversize Percent
Oversize GS
8
8
50
50
8
Density Test Method
Moisture Test
Method
Gauge Number
Required
Compaction
Pass or Fail
5
Oversize Moisture
5
Area
75
Rock Corr Max Dry
Density
Rock Corr Opt
Moisture
8
Technician
50
8
Soil Use
75
Elev. Reference
25
25
Periodically, program updates will change the size of fields. For the current field sizes refer to Section 6 Modifying
Database Table Structures.
3.2 Entering Proctor Tests
There should be a Proctor test in the Proctor test table for each unique “Proctor Reference” in the field density test
table. The value for the maximum dry density is used in the calculation of percent of compaction.
For users with the GEOSYSTEM for Windows Moisture-Density Test module, Proctor test results from that
module are displayed in the QC-Density Proctor Table.
Specific notes about Proctor table data fields:
Proctor Reference:
This number uniquely identifies the Proctor test so its results can be referenced by field tests. It can be
numbers, letters or any combination.
Max Dry Density and Opt Moisture:
These values are automatically imported from the Proctor tests that have been entered into the project.
They may also be entered manually for tests that have not been calculated by the GEOSYSTEM Moisture
Density Test module.
Uncorrected Max Dry Density and Uncorrected Opt Moisture:
These values are automatically imported from the Proctor tests that have been entered into the project. If a
rock correction procedure was performed during the Proctor test these values will differ from the formal
Proctor test results. They may also be entered manually for tests that have not been calculated by the
GEOSYSTEM Moisture Density Test module. These are the values actually used for recalculation of the
Max Dry Density and Opt Moisture when rock correction values are entered for a field test.
Test Method:
Enter the test method here. You may choose from a list of standard test methods by double clicking on the
field or pressing F3 to pop up the list. Then double click on the desired test method. Additional test
methods may be added by editing the QC-Density configuration file (CQC-FD.INI) using Notepad. Edit
the section [TestMethods] and change existing TM entries or add new ones, using consecutively larger
numbers.
16
3.
Entering Test Data
Figure 11 - Pop Up List of Test Methods
Location of Material, Material Description and Area of Material:
These are optional fields.
%+3/4”, %+#4:
These values are imported with GEOSYSTEM Moisture-Density module results. For manually entered
tests the values are optional.
Oversize GS, Oversize Moisture and Oversize Percent:
These values are imported with GEOSYSTEM Moisture-Density module results. For manually entered
tests the values are optional. If they are entered and no “uncorrected” results are entered, a calculation will
be performed to find the “uncorrected” results. Either the ASTM D 4718 or AASHTO T 224 oversize
correction will be applied, depending on the test methods of the test.
3.3 General Data Entry Information
Generally, editing data and moving between fields and between tables is similar to most Windows applications. The
procedures are described in this section.
3.3.1 Navigating the Grid and Editing Cell Data
Positioning the cursor in a field:
Click at the point in the field where the cursor is to be positioned. If the field becomes selected (typically
white on blue), click one more time. Use the left and right arrow keys. Alternatively select the field and
press F2 to activate edit mode.
Selecting text in a field:
Position the cursor at the start or end of the text to be selected. Initially when a field is selected all the text
in that field is selected. Drag the cursor over the text to be selected. It will change to white text on a blue
background. To select the entire field double click on the field. Another way to select text is to press the
right or left arrow keys while holding down the shift key. Press Shift-End to select all text from the cursor
to the end, press Shift-Home to select all text from the cursor to the beginning. To easily select the entire
field, press Home then Shift End.
17
QC - Density Version 4 User’s Guide
Replacing text in a field:
Select the text to be replaced, then type the replacement.
Deleting text in a field:
Select the text to be deleted, then press delete. Press Ctrl-Z to undelete.
Inserting text in a field:
Position the cursor at the insertion point and type the text to be inserted.
Limit to length of data:
When the number of characters being entered reaches the maximum length for that field, characters are no
longer displayed as they are typed. Sometimes, the allowable length exceeds the width of the column and
text is scrolled left and right as needed.
Widening columns:
Move the cursor to the line between the column headings. When the cursor becomes a
mouse button down and drag the column to the desired width.
, hold the left
Growing rows:
Move the cursor to the line between the row selectors. When the cursor becomes a
mouse button down and drag the row to the desired height.
, hold the left
Undoing/Canceling/Aborting changes made to a field:
To revert to the contents of the field prior to editing, press Esc (Escape). If the cursor has already been
moved to another field, the changes cannot be undone, to undo typing press Ctrl-Z. Right click to display
the local edit menu, then click Undo to revert to the state just prior to the most recent edit.
Start of field/End of field:
When editing a field, press Home to move to the first character, press End to move to the last character.
Selecting a field:
Click on the field or use the arrow keys to move to the field. Pressing Enter will also move to the next
field. Some fields validate data and you will not be able to leave the field until an acceptable value is
entered. An example is the Test Date field. A valid date must be entered before another field can be
selected.
Move to first test in database:
Press Ctrl-PgUp
Move to last test in database:
Press Ctrl-PgDn
Move to first field in record:
Press Home (when a field is selected)
Move to last field in record:
Press End (when a field is selected)
Delete a record:
at the start of each row) and then press Delete. A
Click on the record selector (the gray box
confirmation will be requested before the delete is performed. Deleting a test this way is permanent, unlike
deleting a test in the single record view of the test, for which there is an “undo” command.
18
3.
Entering Test Data
3.3.2 Shortcut Keys for Editing Cell Data
Ctrl-C Copies selected text to the clipboard. Applies to text selected within a cell only. Ctrl-C cannot be used for
copying entire rows.
Ctrl-V Pastes contents of the clipboard to a cell. Position the cursor at the insertion point before selecting. Text
can only be pasted to a cell, not to an entire row or column.
Ctrl-X Cuts selected text to the clipboard. Applies to text selected within a cell only. Ctrl-X can not be used for
cutting entire rows.
Ctrl-Z Undoes the most recent Cut, Paste, or Typing.
Mouse Right mouse click while over a cell to bring up a local menu of these same edit commands
3.3.3 Resizing, Moving, and Switching Windows
The height, width, and position of the tables can be changed. To switch between the density test and the Proctor test
windows, point and click or press Ctrl-Tab.
3.4 Density Test Table Calculations
QC-Density calculates the degree of compaction and the ASTM D 4718 or AASHTO T224 oversize correction as
follows:
Comp% = Υd field / Υd max x 100%
where:
Comp% = Percent Compaction (degree of compaction)
Υd field = field test dry density
Υd max = Proctor maximum dry density
ASTM D 4718-87 and AASHTO T224-01 correction:
( 100 Υd field Gbulk Υwater )
Υd corr = —————————
( Υd Pcoarse + Gbulk Υwater Pfine )
where:
Wcorr
Υd corr = ASTM or AASHTO corrected maximum dry unit weight
Υd= Proctor test maximum dry density (uncorrected)
Gbulk = bulk specific gravity of the oversize material
Pcoarse = percent coarse material in the field test
Pfine = percent fine material in the field test
Υwater = Unit weight of water (62.4 pcf or 1000 kg/m3)
= ( wopt Pfine + wcoarse Pcoarse)
where:
= ASTM or AASHTO corrected optimum water content
wopt = opt. water content of the Proctor, as decimal
wcoarse = water content of the oversize material, as decimal
Wcorr
QC - Density Version 4 User’s Guide
19
3.4.1 Applying Field Rock Correction to Lab Rock Corrected Reference Proctor
Typically, Proctor tests are run on the -#4 or -¾” portion of a sample, i.e. with the oversize fraction is removed.
When QC work is being performed in the field, of course, the oversize fraction cannot be removed, so an adjustment can be
made to compensate.
ASTM D 4718 and AASHTO T224 provide the method to compensate for oversize material in the fill being tested.
The amount of oversize material where the density test was performed must be estimated or measured. This estimate is then
used along with the Proctor Test results to determine a new, higher, value for the Maximum Dry Density. This is done using
the formula in section 3.4.
The QC-Density program has columns in the Proctor test results table for results with and without an oversize
correction. If the oversize corrected Proctor test result is the only result known the uncorrected value must also be
determined. To do this the percent of oversize material that was encountered in the sample used for the Proctor test must be
entered in the oversize percent column in the Proctor Test table. Then QC-Density can calculate the required value for
uncorrected maximum dry density. Similarly, if the optimum moisture content is also desired, the Proctor Test Oversize
Moisture content should be entered.
You will notice that both +#4 and +¾" can be entered. Enter only the relevant one, QC-Density uses whatever is
entered for the +#4 if present, and if not, whatever is entered for the +¾". If neither is the correct material size, just enter
the oversize percent in the Proctor Test table oversize percent column.
The specific gravity and moisture of the oversize material will be the same for field tests as for the corresponding
Proctor test. Because of this it isn’t necessary to enter the oversize specific gravity and moisture for each field density test.
These values are taken from the corresponding Proctor test. It should be noted that this is not how QC-Density version 1
handled the oversize specific gravity and moisture. An option is available to use the same method as version one if that is
preferred.
3.5 Menu Options
Accessing most program functions is done from the main menu of options displayed at the top of the screen. There
are some differences between the options available for the Density Test Table and the Proctor Test Table.
3.5.1 Menu Options That are the Same for Both Tables
File > Print Report:
Prints currently selected tests or a previous set of tests that was given a report name or
number. (See Chapter 4 “Printing Reports” for more information.)
File > Print Preview:
Displays a preview of the report. It is Identical to the Print Report option except that it
displays the report on the screen. The user can then proceed to print. There are 2 types of
previews, standard and Crystal Reports. Which one is displayed depends on the report
settings.
File > Report Settings:
Displays the dialog for the user to choose the filtering criteria for which test will be included
on a given report. Test reports can be:
- All tests between 2 dates
- All tests between 2 test numbers
- A set of individually picked tests
as well as other methods. For more information refer to Sections 2.2 and 4.2.4
20
3.
Entering Test Data
File > Printer Settings:
This opens the Windows printer setup dialog box.
File > Print Proctor Summary:
This prints a summary of the Proctor test database, with portrait or landscape options for
printer layout. For more information see Section 4.3.3
File > Exit:
This closes down QC-Density. Note that there is no Save button - changes to the database
are made as soon as they are made.
View > View a Density Test:
This displays one density test at a time on a larger form, allowing you to view more of the
test’s information. See Section 3.6 for more information.
View > View a Proctor Test:
This displays one test at a time on a larger form, allowing you to view more of the test’s
information. See Section 3.6 for more information.
View > Reset Table Sizes:
This resets the Density Test and Proctor Test Tables to their default sizes.
Tools > Options:
This sets user preferences for many features. See Section 2.3 for more information.
Tools > Administrator Options:
Displays the current database location and allows the user to modify the database structure.
Modifying the database structure in unnecessary under most circumstances. Please see
Chapter 6 for more information.
Tools > Merge QC-Density:
This provides a way to combine two projects into one. See Chapter 7 for more information.
3.5.2 Density Test Table Menu Options
Edit > Undo Row Height:
This returns the Density Table row height to the previous selected size.
Edit > Add Identical Test:
After selecting a test, this option produces an identical test with test settings (number, date,
Proctor reference, required compaction, area, elevation reference, location, moisture
requirement, soil description, test method, technician, and soil use) reproduced.
Sort > Test:
Keeps the density table sorted by Test Number
Sort > Date:
Keeps the density table sorted by Date
Sort > Area:
Keeps the density table sorted by Area
Sort > Soil Use:
Keeps the density table sorted by Soil Use
Sort > No Sort:
Keeps the density table unsorted - tests appear in the order entered.
21
QC - Density Version 4 User’s Guide
Sort > Sort Settings
(Density Test Table) This permits the user to choose ascending or descending sort order for
each sort key field. If the option to “Treat test numbers as numeric only” is selected, the
program will sort numerically. Any tests without numeric digits in their Test Number will be
placed at the beginning of the table.
Figure 12 - Density Test Sort Settings
Find > Test:
This permits the user to find a specific Test. For example, to find a test with a specific “Test
Number” click on Find > Test Number and enter the number you are looking for.
Find > Date:
This permits the user to find a specific Test Date.
Find > Anything Else:
This menu item varies depending on which column currently has the focus. This permits the
user to find an item in any other column. For example, to find a test with a specific
“Location Tested” first go to a cell in the “Location Tested” column, then click on Find >
Location Tested
Find > Find a Failing Test:
Permits the user to find the first instance of a failing test, as indicated by the data in the Pass
or Fail column.
3.5.3 Proctor Test Table Menu Options
File Menu:
These are the same as they are for the Density Test Table.
Edit Menu:
These are the same as they are for the Density Test Table, but there is not an option to add
an identical test.
Sort > Proctor Reference:
Keeps the Proctor table sorted by Proctor Reference
Sort > Location:
Keeps the Proctor table sorted by Location
Sort > Area:
Keeps the Proctor table sorted by Area
22
3.
Entering Test Data
Sort > Description:
Keeps the Proctor table sorted by Description
Sort > No Sort:
Keeps the density table unsorted - tests appear in the order entered.
Sort > Sort Settings:
This permits the user to choose ascending or descending sort order for each sort key field.
If the option to “Treat Proctor references as numeric only” is selected, the program will sort
them numerically. Any Proctor tests without numeric digits in their Proctor Reference will
be placed at the beginning of the table.
Figure 13 - Proctor Test Sort Settings
Find > Proctor Reference:
Permits the user to find a specific Proctor Reference in the Proctor table
Find > Location:
Permits the user to find a specific Location of Material in the Proctor table
Find > Anything Else:
This menu item varies depending on which column currently has the focus. This permits the
user to find an item in any other column. For example, to find a test with a specific “Area of
Material” first go to a cell in the “Area of Material” column, then click on Find > Area of
Material
Help > Current Table:
Jumps directly to the help topics for either the Density Table or the Proctor Table,
whichever one currently has the focus.
Help > QC-Density:
General help for the program
Help > Opening Screen:
Jumps directly to the help topics for the main data entry screen
Help > Contact GEOSYSTEM:
Opens the Tech Support page on the GEOSYSTEM website
Help > About This Program:
Displays the version number and license information
23
QC - Density Version 4 User’s Guide
3.6 Viewing One Test at a Time
As an alternative to the standard view of both tables at once, a single test at a time can be viewed. The data entry
screen then looks like the example in Figure 14. To do so, select the test to be displayed, the select View > View a Density
Test or View > View a Proctor Test. When viewing one test at time the user can change to the next or previous test by
clicking on the appropriate button. Other options include jumping to the first or last test and deleting records. An example
showing a single density test is given in the following figure:
Figure 14 - View Single Test
When in the single test view, the menu options are:
Close
Exits the single test view
Edit > Add a Test:
To add a new density or Proctor test
Edit > Delete a Test:
To delete the currently displayed test
Edit > Undelete:
To undelete the most recently deleted test
View > Next Test:
Displays the next test
View > Previous Test:
Displays the previous test
View > First Test:
Displays the first test
View > Last Test:
Displays the last test
24
3.
View > Auto Arrange:
Arranges the fields to best fit the screen
View > Single Column:
Arranges the fields into a single column
View > Two Column:
Arranges the fields into two columns
Shortcut keys while in the single record view are:
Alt-PgUp:
Alt-PgDn:
Ctl-PgUp:
Ctl-PgDn:
Same as View > Previous Test
Same as View > Next Test
Same as View > First Test
Same as View > Last Test
Entering Test Data
25
QC - Density Version 4 User’s Guide
4. Printing Reports
Quality Control - Field Density reports can be configured to a variety of formats by the user, and can be completely
customized by VES, Inc. to other formats that may be preferred. To print reports, individual tests can be selected, or simply
select the first and last in a range of test numbers or dates to print all reports in between.
4.1 Selecting Report Formats
Standard reports have a simple format, as the examples in the Appendix show. Custom reports, designed using the
Crystal Reports database report design program, can be more complicated. To choose which report to use, or to design or
edit a standard report, select File / Report Settings to display the Report Settings window. An example of this can be seen in
Figure 16 - Checking Selection Outcome.
To choose standard reports, select the option button for Standard Reports on the bottom panel, left side. The name
and description of the currently selected standard report format are displayed there. To select a different standard report
format, drop down the list box using the
then select the one desired.
To select a Crystal report format to use, select the option button for Crystal Reports in the bottom panel, right side.
The name and description of the currently selected custom report format are displayed there. To use a different custom
report format, drop down the list box using the
then select the report format to use.
4.2 Selecting Tests to be Reported
Individual tests can be selected, or bracket a range of test numbers or dates to print all reports in between.
4.2.1 Selecting one test
Click anywhere on the row of the test to be printed. The row selector
will appear at the beginning of that row.
4.2.2 Selecting Multiple Tests
Click on the row selector, shown in Figure 15 below, to select the row of a test to be printed. Then, holding down
the Ctrl key, click on the row selector for each subsequent test to be printed. Scroll through the table using PgUp and PgDn
or using the scrollbar. For each selected test you will see the row highlighted. Do not use the up and down arrow keys; doing
so cancels the selections.
Clicking on only one row selector will print only that test, however, if the Test Number is a mix of numbers and
letters, and the option to “Treat Test Numbers as Numeric Only” is selected, the program may print other tests that have the
same numeric portion. For example, selecting the row with a Test Number of “100a” will also print the test with a Test
Number “100b” or selecting “ABC” will also print “DEF”, as numerically they are both 0. To print only one test, simply click
anywhere on the row of the test to be printed.
26
4.
Printing Reports
4.2.3 Selecting a Range of Tests
Click on the row selector, shown in the figure below, to select the row of the first test to be printed. Then, holding
down the Ctrl key, click on the row selector for the last test to be printed. Whether the program will print all test numbers or
all dates between those selected, depends on the current report selection criteria, explained in Section 4.2.4 Checking Selection
Outcome.
Figure 15 - Selecting Tests to Print
4.2.4 Checking Selection Outcome
Choose File > Report Settings to check what tests will be printed based on the selection method and the tests
selected. The Report Printing Options form will be displayed, showing the number of tests selected, the number of tests
meeting the selection criteria, and the test number and date of the first and last tests selected. The following figure illustrates
this form.
Figure 16 - Checking Selection Outcome
27
QC - Density Version 4 User’s Guide
4.3 Printing / Previewing Test Reports
QC-Density reports are printed by selecting File > Print Report. Preview reports by selecting File > Print Preview.
Example report previews are shown in Figure 17 - Standard Report Preview and Figure 18 - Crystal Reports Preview.
Figure 17 - Standard Report Preview
28
4.
Printing Reports
Figure 18 - Crystal Reports Preview
⇒ After selecting Print > Print Preview the report can be immediately printed by clicking on the “Print” button for
standard reports, and the small printer icon at the center of the toolbar for custom reports.
3.2.1 Other Report Information
Reports may include some information that is the same for all of the tests in the report call Other Report
Information. This information is entered or selected right before the report is printed. This is done on the Report Selection
input form is displayed just prior to printing each report:
Figure 19 - Report Selection/Other Report Information
The table number is not used on the standard report, only custom reports, where it is usually placed in the header or
footer. Reported By and Title are both on the standard report, but not necessarily on custom reports.
29
QC - Density Version 4 User’s Guide
4.3.1 Standard Report Preview Options
Options available during the standard report preview are limited to hardcopy printing and closing the preview form.
Close the form by pressing “Esc” or clicking on the “Close” button.
4.3.2 Crystal Report Preview Options
Several options are available during the Crystal report preview. Refer to Figure 18 - Crystal Reports Preview for an
illustration.
Zoom: Click on the Zoom icon,
, to reduce or enlarge the image.
Print:
, to print the report
Click on the Print icon,
, to save the report as a text file or rich text file.
Export: Click on the Export icon,
Close: Click on the Close icon or press Alt-F4 to close the preview.
4.3.3 Printing Proctor Test Summaries
Reference sheets summarizing all the Proctor tests in the project can be conveniently printed. Select File > Print
Proctor Summary to print the summary. An example is in the Appendix.
30
4.
Printing Reports
31
QC - Density Version 4 User’s Guide
5. Editing Standard Reports
The standard report is a simple, user configurable report. The user can create as many forms as needed and save
each one with its own name. For more complicated reports, contact GEOSYSTEM Software to design the report. The
information presented at the top (heading area) of every standard report is the same. Below the heading a user configurable
table is printed. It contains a row for each test selected, and columns containing database fields selected by the user.
Configurable items on the standard report include:
•
Which test items should be included in the report table
•
Text of column titles
•
Number and width of columns
•
Number of lines of details for each test
•
Report Title
•
Number of lines in the distribution list
•
Left margin
To create a new report or to edit an existing report select File > Report Settings. In the standard reports section of
the form select the report to edit and click on the “Edit” button. An example of the Edit Standard Reports dialog is given in
Figure 21- Edit Standard Report Dialog.
5.1 The Report Table
There are 3 areas in the standard report table;
1) 2 fixed columns
2) Details containing 5 lines of 3 columns each
3) Normal user-definable columns.
Refer to Figure 20 - Areas of the Standard Report Table for an illustration of a standard report showing these areas.
Figure 20 - Areas of the Standard Report Table
32
5.
Editing Standard Reports
Fixed Columns Area:
There are 2 columns, Test Number and Test Date, which will always be printed first on reports. The user
cannot change these.
Details Columns Area:
This column can be configured to be up to 5 lines with information from 3 database fields on each one.
When they are printed, the program inserts commas and spaces to separate the fields. There is one
common title for this area, which can be up to 3 lines long. This area must have at least one line, and one
database field.
Normal Fields Area
These 7 fields follow the detail fields area, and print for every test in the report.
5.2 The Standard Report Editing Dialog
The standard form contains a heading, which cannot be modified, a user configurable table, and a footing which is
partially configurable. The process of creating or editing a standard report form involves the selection of which database fields
are going to be printed where in the table, and how the footing should look. Examples of the 5 standard reports included with
the program are in the Appendix. The “Edit Standard Reports” dialog is shown in Figure 21- Edit Standard Report Dialog.
Figure 21- Edit Standard Report Dialog
QC - Density Version 4 User’s Guide
33
5.2.1 Choosing or Changing a Column’s Data Field
To select the data to be printed for a given column, click on the box in column1 or beside column number 2-8. It
will turn from blue to white and information about the field, if one has been selected, will be displayed in the properties box.
To choose or change the database field for that column, double click on the desired field in one of the Data Fields lists. To
make a column blank, double click on "none", the last item listed in either of the lists. See Section 5.2.3 for additional
information.
When a column is selected the program can display a message if the current width is not the optimal width as
determined by the program.
Select “Yes” to change it or “No” to leave the width setting as is.
5.2.2 Properties Displayed When a Column is Selected
Below the column selection area is the column properties box. It contains the following information:
Top, Middle, and Bottom Titles:
Each column has 3 lines of title. Enter the desired title in these textboxes. Titles are normally left justified.
To center the title over the column, add a "!" as the first character of the title.
Column Number:
The currently selected column number
Width - The width of the currently selected column:
To optimize the appearance of the report, the column may be made wider or narrower. Clicking on the
spinner to its right will change the column width. The width of columns 2-8 defaults to 2 greater than
either the widest line in the title or the width of the data field. Since column 1 can include up to 3 data
fields, the sum of their widths is used.
Data Field:
The data field (if any) selected for a column.
Data Field Size:
The maximum number of characters allowed in the data field is displayed.
Left Shift:
The left shift is the number of characters by which the column is off center to the left. To optimize the
appearance of the report, the column may be shifted to the left. Clicking on the spinner to the right of
“Left Shift” changes the setting.
34
5.
Editing Standard Reports
5.2.3 The Details Columns Area (Column 1)
Up to 15 data fields can be reported in this area. Three data fields per line can be selected on 5 lines. If there is
more than one field on a line, it is separated by a comma and space from the next data field when the report is printed. The
width displayed for this versatile column is 2 greater than the longest title line or data field line. When data field line lengths
are determined, 2 characters are added for each comma and space that will separate data fields on the line.
⇒ Do not skip any lines - that will cause a blank line to print on the report in between the data selected for the line
above it and the data selected for the line below it.
5.2.4 Miscellaneous Settings
There are several miscellaneous settings related to reports. The panel at the bottom of the Edit Standard Reports
screen allows these to be set. They are:
Report Title:
The report prints at the top of reports.
Report Description:
At the top of the Edit Standard Reports screen is a text input box for the report description. This is the
description that is shown on the report settings form to describe the currently selected standard report.
Entries in Distribution List:
Use the spin button to increase or decrease the number of entries to be included in the distribution list at
the bottom of the report. Up to 10 entries can be printed.
Left Margin:
This sets the left margin for the page. This is handy if the reports are being bound and room is needed for
the binding.
Suggest field widths:
Whenever a field is selected and the width is not optimal a message is displayed. Un-check this box if you
want to suppress this message.
5.3 Recommended Approach to Designing Standard Reports
Designing or changing reports can be easily accomplished by following these steps:
1.
Decide which data fields will be reported in which columns.
2.
Select File > Report Settings and select an existing standard report that closely approximates the new
design.
3.
Select New and click “Yes” to use the selected report as the basis for the new report design. Enter a
name to identify the new report design.
4.
Make the changes needed to the design.
5.
Select Close. The program may warn that the report is wider than allowed (approx. 8” is the allowed
width). If so, rearranging the details area may help, otherwise it may be necessary to delete a column.
6.
Preview a report using the new design, note the needed changes, and select File > Report Settings then
click on the “Edit” button. Go back to step 4.
7.
Repeat steps 4, 5 and 6 as needed.
QC - Density Version 4 User’s Guide
8.
When the report looks good when previewed, begin printing hardcopy reports in step 6, and repeat
until you are satisfied.
35
36
5.
Editing Standard Reports
37
QC - Density Version 4 User’s Guide
6. Modifying Database Table Structures
QC-Density is a database application. A database is a structured storage scheme for tables containing rows and
columns of data. There are 2 primary tables in the QC-Density database, one for density tests and the other for Proctor tests.
The “Structure” of a database table is a set of specifications for each of the columns in the table. The most important
specifications are the name, size, data type, and prompt for each column. These can, with some exceptions, be changed by the
user. Under ordinary circumstances this will not be necessary.
To view and modify the structure select Tools > Administrator Options. The program will display a form showing
the location of the current database and command buttons to select either the Density or Proctor Tables.
When either is selected a table showing the Position, Name, Data Type, Size, and Description for each column in the
currently open Density or Proctor test table.
Figure 22 - Modifying the Database Table Structure
6.1 Reasons for Database Table Changes
The factory default database tables are designed to incorporate the majority of the typical needs when reporting field
density test results. Common reasons for changing the database structure include:
1.
The order of the columns is inefficient. i.e. A column that is rarely or never used is ahead of one that
is used a lot.
2.
Other titles on the columns would be preferred.
3.
Other columns are needed.
38
6.
4.
More room is needed.
5.
There are columns that are never used.
Modifying Database Table Structures
Changes such as these could cause confusion and problems if they are done incorrectly or by an unauthorized
person. To regulate access to these routines the program requires the user to select Options > Enable Administrator Level
Capabilities. The password OK (uppercase) must be entered, after which the program allows modifications.
6.2 Required Values
Some column specifications may not be changed. They are listed in Table 1.
TABLE OF RESTRICTED COLUMNS
(N indicates the parameter is restricted to the factory default setting)
Column
(Data Field)
TestNum
Position
Name
Type
Length
Description
Y
N
N
N
Y
TestDate
Y
N
N
N
Y
ProcRef
Y
N
N
N
Y
DryDen
Y
N
N
N
Y
Moist
Y
N
N
N
Y
PassFail
Y
N
N
Y
Y
Area
Y
N
N
Y
Y
Modified
Y
N
N
N
Y
Table 1 - Restricted Columns
6.3 Column Specification Parameters
Position:
The ordering of the columns is set by their position parameter.
Name:
Each column should have a unique name by which it can be referred. It should be kept short yet
descriptive. Alpha and numeric characters only are allowed.
Type:
There are optimal ways to handle text, dates, and different types of numbers. The following table describes
the different data types. Text is the most universal data type, as both alpha and numeric characters may be
entered.
39
QC - Density Version 4 User’s Guide
Table of Database Structure Data Types
Data Type
Numeric
Comments
Value
Integer
3
Will accept only integers in the range of 32,768 to +32,767
Long
4
Will accept only integers in the range of -2
billion to +2 billion
Double
7
Will accept only numbers
Date
8
Will accept only valid dates
Text
10
Will accept anything
Table 2 - Database Structure Data Types
Length:
Length is only applicable to text; it is ignored for other data types. During data entry, the maximum
number of characters that can be entered is specified by length.
Description:
The title printed at the top of each column of a data table, or the prompt given beside the input area when
viewing a single record. This is the most likely thing you will want to change.
6.4 Adding and Deleting Database Table Columns
To add a new database table column, move to the position column of the new record row (the last row with the
Enter the new column’s position, the column name, data type, length (for type 10 text fields), and a description.
).
To delete a column, click on the row selector for the row to be deleted, then confirm the delete. Yes, to delete a
column you delete a row. Seem confusing? Remember that each row in the Database Design table defines one of the
columns in the database table. Deletions are not committed to the database structure until the Save Changes button is
pressed. To undelete a row (database field), select Abandon Changes, then start over.
6.5 The default database structure
After making changes to a database structure the new structure can be saved as the default database. To do so, select
the option Options > Save as Default Structure. This saves the entire structure - both Density Test Table and Proctor Test
Table, regardless of which structure is currently displayed. This is useful because each time a new project is started a new
database is created which uses the default database structure.
Reverting back to the default database structure after making changes is easy. Select the option Options > Impose
Default Structure. The specifications for the current database structure will be replaced with the specifications of the default
database structure.
At any time, the structure of the current database can be returned to the factory default structure. To do so, select
the option Options > Restore Factory Default Structure.
40
6.
Modifying Database Table Structures
Remember that to perform any of these changes, administrator level capabilities must be instituted (see Section 6.1
Reasons for Database Table Changes). Exercise extreme care - they are not reversible; therefore there are redundant
verification prompts. Proceed with caution.
6.6 Additional Menu Options
Done > Save Changes:
Exits the structure modification routine and saves the new structure.
Done > Abandon Changes:
Exits the structure modification routine but discards any changes made.
Edit > Insert Row:
Doesn’t really insert a row - it just displays instructions about how to do it.
Edit > Delete Row:
Doesn’t really delete a row - it just displays instructions about how to do it.
41
QC - Density Version 4 User’s Guide
7. Merging Databases
QC-Density can merge two databases (i.e. merge two projects). Open the project that will be receiving the merged
data. Then select Tools > Merge QC-Density Database. On the merge form click "Browse for Database" and select the
database which contains the tests you would like to combine with your current project. Note that QC-Density databases have
the same or similar names to the project and can be found in the GEOSYSTEM project folder (projectname.GEO).
After you click "Start Merge" all density tests in the database being imported are added to the existing project. If
there are duplicates you will see the "Skip This Test" and "Merge This Test" buttons turn red and the program will pause until
you select one of those 2 options. Some of the existing data for the test is listed in the frame at the bottom of the form called
"Existing test in QC-Density database (if any)". The new test with the duplicate test number is displayed in the middle frame
called "Test found in merge database". Based on what you see you can decide whether to merge it in or skip it. If it is merged
in you will have 2 tests with the same test number, which you can resolve later.
Also, all the Proctor tests in the merging database will be added. Again, if there are duplicate Proctor references you
will see "Skip This Test" and "Merge This Test" buttons turn red and the program will pause until you select one of those 2
options. Some of the existing data for the Proctor is listed in the frame at the bottom of the form called "Existing Proctor in
QC-Density database (if any)". The new Proctor test with the duplicate Proctor Number is displayed in the middle frame
called "Proctor found in merge database". Based on what you see you can decide whether to merge it in or skip it. If it is
merged in you will have two Proctors with the same test number, which you can resolve later.
42
7.
Merging Databases
43
QC - Density Version 4 User’s Guide
8. Tutorial
Preparing for the tutorial
1.
Start GEOSYSTEM (either the Data Manager or LD5 - Boring Logs) using your usual procedure used
to start the program.
2.
Open the project DEMO.GEO; it should be found in the same directory as the GEOSYSTEM for
Windows software.
3.
Now, the GDM Source/Samples list will be displayed.
4.
Find on the left the icon for QC-Density and the title Field Density Reports. Click on the icon or title
to run the QC-Density module.
5.
QC-Density will start and display all the field tests and Proctor tests entered for the project “Demo”.
Its appearance will be similar to the following example:
44
8.
Tutorial
Navigation Tips:
1.
Click on one of the cells of the density test table then use the arrow keys to move around. This is one
simple way to navigate around the table.
2.
Click on the one of the cells of the Proctor test table, this is one simple way to switch to the other
table.
Adding new density tests and Proctor tests:
⇒ Record selectors are the grey boxes at the start of each row, . To indicate the current row the record selector
has the pointer in it, . To indicate the row used for entering new test, the record selector has an asterisk in it
.
⇒ Some of these steps assume certain values for certain test parameters. If someone has previously changed the
Demo project some values may be different. So feel free to make changes to the data in any way appropriate to
learn about the steps being discussed.
1.
The first step is configuration. Click on Tools > Options and select the following two settings:
Number of Decimals to Report for Percent Compaction: 1 decimal place
Key Field for Specification Fetching: Proctor Reference
2.
Click in the Test Number field on the new test row
3.
The cursor should now be in the Date field. Enter a date.
4.
In the same way enter Proctor Reference = C-7 and note that the Required Compaction and Moisture
Requirement are filled in using the same value as the other tests using that Proctor. Also the Pass or Fail
column should now indicate a passing test.
5.
Skip Wet Density, enter Dry Density = 123.4. After entering the Dry Density, the Percent Compaction will be
calculated.
6.
Enter the Moisture = 12.3. After entering the moisture, the Wet Density will be calculated.
7.
Skip the Percent Compaction and the Required Compaction, the program now should have inserted “Pass” in
the Pass or Fail column.
8.
Enter anything you would like for the Area, Elev. Reference and Location Tested.
9.
Then skip ahead a few columns to the Oversize Percent. Enter 40; you will notice that the Rock Corrected
Maximum Dry Density and Optimum Moisture are both filled in. Also notice that since there is a rock
correction applied the Percent Compaction is now based on that corrected value, and it is now less
than 95% and is a Failing test.
. Type 10 then press Enter.
10. Skip ahead to the Material Description column. You can pick from previously entered data. Doubleclick and a list of all previously entered Material Descriptions will be displayed. Pick a description and
click OK. You can edit the description just chosen. Click in the Material Description cell just filled in
and change it.
Enter a Proctor Test:
1.
Click in the Proctor Reference field on the new test row
. Type C-20 then press Enter.
2.
Enter 99.9 as the Maximum Dry Density and 9.9 as the Optimum Moisture.
3.
You can pick from a list of Test Methods. Double-click in the Test Method column. Then pick any
test method and click OK.
QC - Density Version 4 User’s Guide
4.
If the Proctor test had a rock correction performed on it you can enter the Specific Gravity and
Moisture of the oversize material. This will allow field tests to adjust the results for the percent of
oversize encountered in a field test.
Changing test results:
1.
Click on the Proctor Reference for test number 8. Change it to 2 and press Enter. When a change is made
to the Proctor Reference, the Percent Compaction is updated, as is the Pass or Fail value.
2.
As another example, make a change to a Proctor test result. Click on the Maximum Dry Density for
Proctor test number 2. Change its value to 150 pcf. The program updates the Percent Compaction and
Pass or Fail for all field tests that have 2 as the Proctor Reference. For example, it will have changed test
number 8, which you just changed to use Proctor number 2.
Sorting, Finding, and Deleting:
1.
SORTING: Select the Density Test Table. Then click on Sort > Date. The table will be sorted by test
date
2.
SORTING: Change the Sort method back to Test Number, the change test number 1 to 20. When
you press Enter the table will move that test to a new position at the end of the table. That is how the
program sorts tables. Change it back to 1. You may want to try different sort settings such as date and
area, increasing and decreasing, to see how they work. All settings are changed via the Sort menu.
3.
FINDING: Click on Find, then Test, and enter “5”. Test 5 will become the current test in the table.
4.
FINDING: Click in the “Density Test Method” column, Now the third “Find” option will be
“Density Test Method”. Click on Find, then Density Test Method, and enter “Sand Cone”. The first
test with Parking as the Area will be located. That is how the program finds information in any
column. You may want to try finding different values to see how the Finding function works.
5.
DELETING: Click on the Record Selector for test number 11, (if there is not a test 11, add one before
doing this). Then press Del. Press “Y” to confirm (or “N” to cancel). Tests deleted this way cannot
be undeleted. See step 4 in the following section for a safer method of deleting.
Viewing one test at a time:
1.
Click on View > View a Density Test to display all of the data for a single density test on the screen. If
the font size selected is small enough, it will be shown in its entirety. The appearance will be similar to
the following example:
2.
Use the up and down arrow keys, or click on a field to select different fields. Use PageUp and
PageDown if all the fields are not viewable at once.
3.
Use Alt-PageUp, Alt-PageDown, Ctl-PageUp, Ctl-PageDown to move to prior and subsequent tests, as
noted in the status bar at the bottom of the screen.
45
46
8.
4.
Select Edit > Delete Record to delete the current record. Then confirm it with “Yes”. Undelete it by
selecting Edit > Undelete.
5.
Leave the single test view by selecting Close.
Other miscellaneous capabilities:
1.
DATABASE STRUCTURE: Select Tools / Administrator Options, then click on Density Table. This
displays the density table database structure. Ordinarily the structure will not need to be changed, and
to prevent inadvertent changes this table is protected against changes. Refer to Chapter 6 for detailed
instructions about the database structure. Click on the Done > Abandon Changes and confirm to exit.
2.
HELP: Select Help > QC-Density. This is a standard Windows help system. Context sensitive help is
available throughout the program. Select Help > Contact GEOSYSTEM to go to the support page on
our website and enter a question. The support page is
http://www.geosystemsoftware.com/support.htm.
3.
FREQUENTLY ASKED QUESTIONS: From the displayed help screen, select Tips and Hints.
There are answers here to the most common questions about the program.
4.
FONT SIZE SELECTION: Select Tools > Options > Grid Fonts Change, and make any font
adjustments that are preferred. Note: After increasing the font size the user should increase the line
height until the cursor reappears.
Printing reports:
1.
Select File > Report Settings. Information about the currently selected report formats is displayed.
This should be similar to the example below:
2.
The bottom portion of the dialog tells which report format is currently selected. Click on the
“Standard Reports” button, if it’s not already selected, then click on Close.
3.
Next a range of tests will be selected for printing. Click on the record selector, , for test number 1.
The row color will switch to a blue background. Then, hold down Ctrl, and click on the record
selector for test number 4. The rows for both test number 1 and test number 4 should be highlighted.
This is the procedure for selecting the first and last tests of a range of tests to be printed on a report.
Tutorial
QC - Density Version 4 User’s Guide
4.
Select File > Report Settings again. This time the upper portion of the dialog will be of interest. There
are 5 methods shown under the heading “Report Selection Methods”. Make sure that the first one,
“All test numbers between” is selected.
5.
Check the value shown for the “Number of tests meeting selection criteria. It should be 4. If it is not,
click on Close and go back to step number 3.
6.
Click on close and select File > Print Preview. A dialog for “Report Selection” is displayed. An
example of this input dialog follows:
7.
Click on Update, then Continue and a preview of the report will be displayed. It should be similar to
the following example:
47
48
8.
8.
If the report looks OK, click on the Print button. The program will print the report to your currently
selected printer. Click on the “Close” button after printing.
9.
Select tests 1, 3, 5, 7, and 9 by clicking on each row selector while holding down the Ctrl key.
10. Select File > Report Settings then click on the button for “Just Selected Tests” - the Reports to be
Printed panel should indicate 5 tests selected and meeting criteria.
11. Next, try printing one of the custom reports. Punch the button for “Crystal Reports”. If “Sample1” is
not the current report format shown in the dropdown list box, change to it now. Click on Close.
12. Select File > Print Preview. Click Update to replace the current report’s set of tests. Click Continue
and a preview of the report will be displayed. It should be similar to the following example:
Tutorial
49
QC - Density Version 4 User’s Guide
13. Crystal Reports’ preview screen always opens with a zoomed view of the report. Use the scrollbars to
look around the entire report, or zoom out using the zoom button,
14. Print the report now by clicking on the print button,
.
.
15. After printing, close the Crystal Reports preview screen by clicking on the close button,
.
16. Standard report formats:
17. Select File > Report Settings to take a look at the process of creating and editing standard reports.
Click the dot by “Standard Reports”, then set the current report to “Report1”. Click on the “New”
button, then “Yes” to use Report 1 as the template for the new report.
18. Name the new format “Tutorial” and click OK. If you get a “Change width?” dialog click “No”. The
design dialog will be displayed - the purpose of this design dialog is to allow modifying many of the
features of a standard report. The next few steps will illustrate some of the modifications that can be
made. The dialog should appear somewhat like the following example:
19. Locate the box containing the field name “LiftNum” (at the bottom, center of the 15 boxes under the
heading
“--- Column 1 ---”, and click on it. It will turn white. If you get a “Change width?” dialog click “No”,
then remove the checkmark for “Suggest field widths if the chosen width is not optimal” so the width
suggestion will not appear again.
20. Locate the field name “ProcRef” in the “Data Fields” panel, under the heading “Test Database”.
Double click on it. Where the test’s lift number (“LiftNum”) data field had been shown, the Proctor
50
8.
reference (“ProcRef”) will now be shown. Now you have 2 very similar reports; “Tutorial” which
prints the Proctor reference and “Report1” which prints the lift number.
21. The title for the column still says “Lift Number” so click on the text for “Bottom Title”. Then change
“Lift Number” to “Proctor Ref”.
22. Make one last change to the report. Click on the text for the “Report Description” and change it to
read “Tutorial changes”.
23. Click on Save Changes and Close, then on Close again, then on File > Print Preview and Continue to
admire your work. Click Close then File > Exit to exit QC-Density. Then click on Project and Exit
to exit the GEOSYSTEM Data Manager program.
This concludes the QC-Density tutorial.
Tutorial
51
QC - Density Version 4 User’s Guide
9. Help!
QC-Density includes on-line, context-sensitive assistance for users with questions. To active it, simply click on the
Help menu item. If you don’t find an answer to your question in the program’s help, be sure to check the frequently asked
questions section in this chapter. If you’re still stuck, please feel free to contact GEOSYSTEM Software directly. We do not
charge for e-mail technical support, and offer a maintenance contract for those who would like Telephone support. Also,
please let us know the operating system and version of QC-Density (Help > About).
For installation questions call 970-223-8788
For all other questions select Help > Contact GEOSYSTEM to go to the support page on our website and enter a
question. The support page is
http://www.geosystemsoftware.com/support.htm.
You can also fax questions to: 970-223-0668
or email them to: [email protected]
9.1 Frequently Asked Questions
General
Q.
QC-Density does not appear in the list on installed modules after installation.
A.
Run GDM, select Help > About this program. Click on “System Info” to display information which will
include the path to the program folder or directory. Write it down, then reinstall QC-Density and be sure
that path is the destination selected during installation.
Q.
QC-Density produced an error message and terminated. What should I do?
A.
Under normal circumstances, the program should never shut itself down. If, for some unusual reason QCDensity cannot continue, the program will produce a message indicating what went wrong, and then
terminate itself. If this happens, make a note of the message and contact GEOSYSTEM Software via our
website (http://www.geosystemsoftware.com/support.htm) or e-mail
([email protected]).
Q.
How do I copy QC-Density data files from one machine to another?
A.
All GEOSYSTEM projects are kept in a single folder; you may either move the entire project by duplicating
the folder or move just the QC-Density data file by transferring the file with the “MDB” extension.
Data Entry
Q.
My required compaction specification is the same for all tests with the same soil use, is there a way to make
it automatic?
A.
Yes, select Tools > Options and select Soil Use as the Key Field for Specification Fetching. Both the
required compaction and the moisture specification will automatically be inserted. Another common way
to automate is to use the Proctor Reference.
Q.
Is there an automatic way to select an ASTM or AASHTO Proctor test method?
52
9.
Help!
A.
Double click, or press F2, while on the test method field and a list of test methods will appear.
Q.
Why is the vertical scroll bar not displayed on a table where it is needed to view all the rows?
A.
This is a quirk of Visual Basic, just scroll horizontally and it will re-appear.
Q.
There are extra, blank rows displayed, that is very annoying, why are they there?
A.
This is a quirk of Visual Basic, just select View > Reset Table Height and they will disappear.
Q.
Why is the cursor not visible and data entry not working correctly?
A.
The row height is too small. Increase the row height, then you may want to lock it in by deselecting Tools
> Options > Allow Resizing of Grid Row Height.
Q.
Some values for percent compaction and required percent compaction have percent signs and some do not.
A.
Values for percent compaction and required percent compaction include a percent sign if that program
option is set. See Section 2.3.6 for more information.
Hardcopy Printouts
Q.
There was room to print a standard report on one page, why did it print on two?
A.
The number of reports that will fit on a page is determined by the way the user designs the report. The
greater the number of lines in column 1 that have data fields, the fewer tests allowed per page. Since the
program does nothing when a line to be printed has no data, it will appear that there was room on a report
for additional tests.
Q.
Will the software generate reports on A-4 paper?
A.
Yes. Make sure that you have selected A-4 paper for the currently defined default printer. QC-Density
will automatically reformat the report from letter-size to A-4 size.
Q.
Can I include my company logo on QC-Density reports?
A.
No - reports with logos must be developed by GEOSYSTEM Software.
Q.
The report formats included with QC-Density do not suit my needs. Can a custom report format be
designed?
A.
GEOSYSTEM Software can custom-design a QC-Density report format to fit the specific requirements of
your organization. There is a fee for this service, so submit a sample of the desired report format and we
will prepare a bid on it.
9.2 Error Messages
No records selected for printing
May occur if a new test in being added when Print is selected. Move the cursor to a different
row, then back to the new row, and try printing again.
Crystal Report REPORTNAME was not found, access Report Settings and select another
If the report name is one of the standard reports, reinstall the program. If is a custom report
that was sent on another disk, copy it to the program directory.
There are no modified tests
The range selection criterion is set for printing all modified tests. Refer to Section 4.2 for
help on choosing a range selection method.
QC - Density Version 4 User’s Guide
Database Not Responding - Repeat Action
Try the operation that preceded the error again.
PostEvent Error: error message field Data Field Name was not found in rstStructDef
This error message indicates a major error in the database structure modification process.
Select the option to “Abandon Changes” and try the database modifications again. If the
problem persists, contact VES, Inc.
A database field required by this report is missing. Continue anyway?
The standard report being printed included in its design a data field which no longer exists.
It is OK to continue, but the design should be changed to use only database fields that are in
the database structure. Refer to Section 5 for help with editing standard reports.
Bad Date Entered
The date entered as the date to be found was not valid. Enter a valid date.
It may be necessary to manually delete the temporary database files found in your Windows Temp directory whose
names start with ~RM?
Delete all files in the WINDOWS\TEMP folder that start with ~RM and end with the
extension .TMP.
Some required data missing in Field Name ... Filling in value as 999 or MISSINGDATA
Some database fields require data, such as the Test Number or Proctor Reference. If the
program finds them empty it will supply values. If this message occurs frequently, contact
GEOSYSTEM Software.
For all other error messages, including any of the following:
JetErr: error message
Couldn't load GDMINFO
Standard report error: error message
DBGrid2 Error: error message
Crystal Report Error: error message
Error in Sort after trying requery: error message
Error error.message copying FDTRMDB.MDB to foldername
Error copying FDTRMDB.MDB to pathname
Error in file name: name of file
Error: error.message
Data error event hit err: error message
select Help > Contact GEOSYSTEM to go to the support page on our website and enter a question. The support page is
http://www.geosystemsoftware.com/support.htm.
You can also fax questions to: 970-223-0668
or email them to: [email protected]
53
54
9.
Help!
55
QC - Density Version 4 User’s Guide
Appendix
Example Reports
56
Appendix
QC - Density Version 4 User’s Guide
57
58
Appendix
QC - Density Version 4 User’s Guide
59
60
Appendix
QC - Density Version 4 User’s Guide
61
62
Appendix
QC - Density Version 4 User’s Guide
63
64
Appendix
QC - Density Version 4 User’s Guide
65
66
Appendix
QC - Density Version 4 User’s Guide
67
Addendum to QC-Density Reference Manual
for use with
Asphalt Pavement Quality Control Projects
The GEOSYSTEM Construction Quality Control - Field Density module can be used for pavement
construction quality control projects as well as soils. Special considerations are as follows:
9.3 Installation:
The extra disk labeled “Custom Files - Asphalt” contains an installation program which adds the asphalt
capability to the standard program. Run "Custom" to perform the addition of these files.
There are some data entry fields added to the GEOSYSTEM Data Manager's Project Data section. They are
added at the end of the data entry screen, which may not be where you want them. To relocate them, make a backup
copy of the file GDM.INI which is in your GDM program folder. Then edit GDM.INI and locate the section:
[ProjectData]
Toward its end there are the project data items:
Spare1=Field Engineer: ,CQC-FD
Spare2=Moisture Standard: ,CQC-FD
Spare3=Density Standard: ,CQC-FD
which should be relocated near the top, for convenience in data entry. Any other rearrangements you may wish to do
are fine as well.
9.4 Starting New Projects:
1.
Follow the standard GEOSYSTEM Data Manager methods for starting a new project.
2.
When the CQC-FD program has started and the new, empty databases are displayed, select Tools/Density Database
Structure.
3.
Select Options/Enable Administrator Level Capabilities, and enter OK as the password.
4.
Select Options/Impose Other Structure, then navigate to the GEOSYSTEM for Windows directory. There, select
PAVEMDB.MDB for asphalt density projects.
9.5 Printing Reports:
1.
For pavement projects the pavement report must be selected. Select File/Report Settings to view the report
configuration.
2.
The lower right hand corner of the form should have the button next to “Crystal Reports” selected, if it is not, click
on the button to select it.
3.
In the list box below that button the name of the report form to be used for printing is shown. Select PAVE, or
other file name if yours is a custom pavement report, for asphalt testing jobs.
68
Asphalt
4.
Follow standard report printing methods. Just prior to previewing or printing, the following screen appears. It may
be slightly different if you have a custom pavement form. The letters in circles are a key to where the information is
printed on the report (see the sample report in Figure 25).
Figure 23 - Report Selection Form for Asphalt Reports
5. Enter the report number and other pertinent information before printing the report.
69
QC - Density Version 4 User’s Guide
9.6 Project Data
General information about the project is entered as Project Data. The type of data entered there are shown in
the following figure, the GEOSYSTEM Data Manager Project Data Entry screen.
Figure 24 - Project Data Entry Screen
9.7 Pavement Report
The pavement form reports data entered on the GEOSYSTEM Data Manager Project form, the Quality
Control for Density Report Selection form as well as data entered into the 2 tables, for density tests and Marshall tests.
It can sometimes be confusing to tell where the data is entered, so the sample report shown here includes reference
characters which tie the data back to the data entry screens in Figure 23 and Figure 24.
70
Asphalt
Figure 25 - Sample Report with Data Entry References
Index
+#4, 16
+3/4, 12, 16
+4, 12
AASHTO T 224 Oversize Correction, 19
AASHTO T224 Oversize Correction, 16, 18
ASTM D 4718 Oversize Correction, 18, 19
Calculations, 18
California Test 216, 4
Checking Selection Outcome, 26
Crystal Report Preview Options, 29
Crystal Reports, 6
Data Entry Questions, 51
Database
Modifying Structure, 37
database structure, 37
Date, 11
Deleting Tests, 17, 23
Density Tests, 10
density units, 4, 8
Detail Columns, 32
Distribution List, 34
duplicate test numbers, 9
Editing Cell Data, 16
Enabling Administrator Level Capabilities, 38
Error Messages, 52
Field Sizes, 14
File > Print Preview, 19
File > Print Proctor Summary, 20
File > Print Report, 19
File > Printer Settings, 20
File > Report Settings, 7, 19
Font Size, 4
Frequently Asked Questions, 51
General Questions, 51
Hardcopy Printout Questions, 52
Installation, 1
Left Shift, 33
merge two databases, 41
merge two projects, 41
Modified Flag, 7
Moisture Requirement, 12
moisture specification, 4, 9
New features in version 4, 1
Other Report Information, 28
Oversize GS, 12, 16
Oversize Moisture, 12, 16
Oversize Percent, 16
Pass or Fail, 12
Pass/Fail, 5, 9
Percent Oversize, 12
Previewing Test Reports, 27
Printing
test reports, 27
Printing Reports, 25
Proctor Curves, 15
Proctor Reference, 11, 15
Proctor reports, 9
Proctor Test Module, 15
Report
Changing the Fields Printed, 33
Report Formats, 55
(See Appendix), 55
Reports
Centering Columns, 33
Details Columns, 34
Resizing of Grid Row Height, 4
resizing of row height, 8
Resizing Windows, 18
Rock Corrected Max Dry Density, 13
Rock Corrected Opt. Moisture, 13
Rounding, 3
Selecting a Range of Tests, 26
Selecting Multiple Tests, 25
Selecting one test, 25
Selecting Report Formats, 25
Selecting Tests for Reports, 6, 25
Shortcut Keys for Editing Cell Data, 18
Sort > Sort Settings (Proctor Test), 22
Sorting Tests, 21
Special Value, 5
Specification, 4
Specification Key, 11
Standard Reports, 5, 31
Starting QC-Density, 2
Test Method, 15
Test Number, 10
Tools > Administrator Options, 20
Tools > Merge QC-Density, 20
Tools > Options, 20
Tools->Options, 3
Treat Test Numbers as Numeric Only, 25
Uncorrected Max Dry Density, 15
Uncorrected Opt Moisture, 15
Units, 4
View > Reset Table Sizes, 20
View > View a Density Test, 20
View > View a Proctor Test, 20
Viewing One Test at a Time, 23
Widening columns, 17