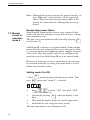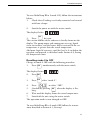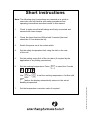
1
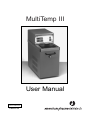
MultiTemp III
User Manual
18-1106-33
Edition AE
Important user information
Reading this entire manual
is necessary for full understanding and safe use of
this product.
Should you have any comments on
this manual, we will be pleased to
receive them at:
Amersham Pharmacia Biotech AB
SE-75184 Uppsala
Sweden
Amersham Pharmacia Biotech reserves
the right to make changes in the specifications without prior notice.
© Amersham Pharmacia Biotech AB
1998 – All rights reserved
Trademarks
MultiTemp and Multiphor are trademarks of Amersham Pharmacia
Biotech Limited or its subsidiaries.
KLEA 134a is a trademark of ICI.
Amersham is a trademark of Nycomed
Amersham plc.
Pharmacia and Drop Design are trademarks of Pharmacia & Upjohn Inc.
Terms and Conditions of
Sale
All goods and services are sold subject
to the terms and conditions of sale of
the company within the Amersham
Pharmacia Biotech group which supplies them. A copy of these terms and
conditions is available on request.
Office Addresses
Amersham Pharmacia Biotech AB
SE-751 84 Uppsala
Sweden
Amersham Pharmacia Biotech UK
Limited
Amersham Place
Little Chalfont
Buckinghamshire
England HP7 9NA
Amersham Pharmacia Biotech Inc.
800 Centennial Avenue
P.O. Box 1327
Piscataway N.J. 08855-1327
USA
Contents
1. Introduction..................................................................... 3
2. Safety information ........................................................... 3
2.1 Safety precautions................................................. 3
2.2 Safety standards.................................................... 4
2.3 Safety features ...................................................... 5
3. Installation....................................................................... 6
3.1 Unpacking and installation ................................... 6
3.2 Tubing connections............................................... 7
3.3 Recommended bath liquids................................... 7
3.4 Filling and draining the bath ................................ 8
3.5 Mains connection ................................................. 8
4. Operation ........................................................................ 9
4.1 Start-up.................................................................. 9
4.2 Setting the temperature limit .............................. 10
4.3 Temperature setting limit.................................... 10
4.4 Temperature setting ............................................ 11
4.5 Temperature correction value ............................. 11
5. Trouble shooting ..............................................................13
5.1 Error messages......................................................13
6. Maintenance ....................................................................14
6.1 General .................................................................14
6.2 Fuses .....................................................................14
7. Detailed Description ........................................................16
7.1 General operating principle...................................16
7.2 Front and rear panels............................................16
7.3 Control panel........................................................16
7.4 Description of safety features................................18
7.5 Manual restart in operation mode 8 .....................20
8. Technical specification .....................................................22
9. Ordering information.......................................................23
Short instructions (Back page)
2
1. Introduction and 2. Safety information
1. Introduction
MultiTemp™ III circulates constant temperature liquid to
external electrophoresis equipment. The liquid temperature
range is -10 to +90 °C. The unit contains KLEA 134a™, an
ozone friendly HFC-type coolant.
MultiTemp III both supplies coolant for high voltage techniques and provides temperature control at higher temperature
(e.g. 60 °C) when performing DNA sequencing. When used
with equipment such as the Amersham Pharmacia Biotech
Multiphor™ II electrophoresis unit, two units can be connected to MultiTemp III at the same time.
MultiTemp III can also be used as a stand-alone constant
temperature water bath.
2. Safety information
2.1 Safety
precautions
Read this entire manual before using MultiTemp III.
1. This instrument is designed for indoor use only.
2. The unit must be connected to a grounded mains socket.
3. Ensure that the vents at the sides of the instrument are not
covered.
4. Do not use in a dusty atmosphere or close to spraying
water.
5. Set the temperature limit cut-off correctly.
6. Use only water or water with ethylene glycol in the bath.
7. Do not use the circulator beyond its specifications or for
other than its intended use.
3
1. Introduction and 2. Safety information
8. Do not touch the stainless steel bath cover and tubings
when the unit is used at a high working temperature. Under
these conditions, the surface temperature can rise up to
approximately 70 °C.
2.2 Safety
standards
MultiTemp III is designed in accordance with:
• Protection class 1 according to IEC 536: all conductive
parts that might become accessible are connected to earth.
• Protection IP 32 according to IEC 529/EN 60529: protection against accidentally touching accessible live parts by
penetration of particles with a thickness or a diameter of
more than 2.5 mm and protection against dropping water
onto the unit, inclined at max. 15 degree angle.
This product meets the following EG directives:
• 72/23/EEC through the harmonised standard;
EN 61010-1, 1993+A1, 1992. Safety requirements for
electrical equipment for measurement, control and laboratory use.
- Part 1: General requirements.
- Part 2: Requirements for laboratory Equipment for heating of material.
Note: The operator has to apply the safety precautions
listed in section 2.1 above.
• 89/336/EEC through the standards;
- EN 50081/Part 1:03.93 Electromagnetic Compatibility
emission standard
- EN 50082/Part 1:03.93 Electromagnetic Compatibility,
Generic immunity standard.
The CE symbol, and corresponding declaration of confirmity, is valid for the instrument when it is
- used as a “stand alone” unit or
- connected to other CE marked Amersham Pharmacia
Biotech instruments or
- connected to other products recommended or described in this manual and
- is used in the same state as it was delivered from
Amersham Pharmacia Biotech except for alterations
described in this manual.
4
1. Introduction and 2. Safety information
2.3 Safety
features
General cut-off
The heater, the compressor and the circulation pump can be
switched off by a relay built into the unit. This general cutoff will be activated if a malfunction is detected by the safety
sensors.
See 7.4, Description of Safety Features.
Protection against over-heating
A built-in temperature limit switch protects against uncontrolled heating of the bath liquid by activating the general
cut-off if this limit is exceeded.
The built-in temperature limit switch also senses low levels of
coolant.
See 7.4, Description of Safety Features.
Pump motor protection
When the temperature in the winding of the pump motor
reaches a certain level, the general cut-off will be activated,
preventing the motor from overheating.
See 7.4, Description of Safety Features.
Sensor check
The temperature sensor is permanently monitored. The general cut-off is activated if sensor breakage or current leakage is
detected.
See 7.4, Description of Safety Features.
Restart after power failure
MultiTemp III automatically restarts after a power failure.
See 7.4, Description of Safety Features.
5
3. Installation
3. Installation
3.1 Unpacking
and
installation
1. Check the contents against the packing list supplied. Inspect
for any damage that may have occurred during transit. Report
any damage immediately to your local Pharmacia Biotech
representative and to the transport company concerned.
2. Place MultiTemp III in its working location, ensuring adequate space for ventilation of air through the grids on the
sides (air outlet) and rear (air inlet) of the unit.
3. Allow MultiTemp III to stand in an upright position for
24 hours before use. Compressor lubricant may have run
into the liquifier and evaporator if the unit has not been
transported in an upright position.
6.
2.
1.
3.
5.
4.
9.
8.
8.
7.
10.
Fig. 1. Front and rear view of MultiTemp III.
1.
2.
3.
4.
5.
6
Control Panel
Temperature limit dial
Outlet nozzle
Inlet nozzle
Mains cable
6. Circuit breaker
220 V, two thermal fuses
115 V, one thermal fuses
7. Bath Drain
8. Handles (front and rear)
9. Cover lid
10. Air ventilation
3. Installation
3.2. Tubing
connections
Silicone tubing (inner diameter 8 mm) can be used over the
entire working temperature range of the unit. PVC tubing
can only be used in the temperature range of 10 to 60 °C.
1. Connect the inlet and outlet tubing to the nozzles on the
rear of the circulator (Fig. 1).
2. Connect the other ends to the electrophoresis unit. The
nozzles have an outer diameter of 9.5 mm. To ensure safe
tubing connections, secure all tubing with hose clamps.
When MultiTemp III is used as a water bath, the nozzles
should be connected to each other.
Condensation of water on cold tubing can be avoided by
covering it with insulating tubing. (See Insulation for cooling
tubing in the Ordering Information section.)
Condensation on the cooling plate of Multiphor II during
sample application can be avoided by shutting off the circulation to the cooling plate with a three way valve. (See 3-way
Valve Set in the Ordering Information section.)
Note: Do not touch or remove tubing when the unit is in
operation. Stay alert to the dangers of hot water. The
surface temperature of the tubing can reach 70 °C at
high working temperatures.
3.3 Recommended
bath
liquids
Use distilled water in the temperature range of 5 to 90 °C. A
mixture of distilled water and ethylene glycol in a concentration up to 20% is suitable for lower ranges (-10 to +40 °C).
Warning! Ethylene glycol is poisonous. Handle with
care and follow recommended safety procedures.
Warning! Methanol and ethanol are not recommended
because of their low flash points. Both liquids are unsafe to use.
3.4 Filling and
draining
the bath
Remove the plastic lid and fill the bath with liquid. The distance between the surface of the liquid and the stainless steel
top plate should be about 2 cm. If it is more than 4 cm, a
sensor will activate the temperature limit switch and cause
cut-off.
7
3. Installation
To drain the bath, switch off the mains power and remove
the outlet tubing from the external equipment and let the
liquid pour into a large vessel using hydrostatic pressure. The
bath contains 3 litres of liquid, plus the volume in tubing and
connected equipment. The last millilitres can be removed by
opening the screw on the front of the unit, (see Fig. 1).
Warning! Do not drain hot water. Use protective gloves
and clothing when draining the bath liquid.
Compare the local mains voltage and frequency with the spe3.5 Mains
connection cifications written on the label on the rear of the unit before
connecting the unit to a grounded mains socket. Deviations
of voltage and frequency must not be more than those specified in this manual (95 to 132 V/60 Hz, 95 to 125 V/ 50 Hz,
198 to 253 V/50 Hz). Connect the unit to a grounded mains
socket only. The socket must be rated as suitable for the total
power consumption of the unit (1,200 W).
8
4. Operation
4. Operation
4.1 Start-up
9
8
10
1
3
2
7
4
6
5
Fig. 2. Front panel of MultiTemp III.
1.
2.
3.
4.
5.
Mode selector
Set value down
Set value up
Enter
Reset
6. Mains switch
7. Control lamp cooling on/off
8. Display
9. Heater control sign
10. Display
Before switching on, confirm that the outlet and inlet nozzles
are either firmly connected to external equipment or to each
other and that the tubing is secured with hose clamps.
Switch the power on at the mains switch.
The version number of the software is briefly
shown on the display.
After starting the unit, the pump will circulate the liquid to
9
4. Operation
the external system and the level in the bath will fall. Add
more liquid until the level is once again 2 cm below the top
plate.
If the safety circuit is triggered, please top up with more liquid and restart the unit using
. Repeat this action if
necessary.
Note: Check the liquid level after the unit has been in use
for a while.
When MultiTemp III is switched on, the compressor starts
and the heater will be activated if the set temperature is greater then the actual temperature. A constantly lit dot in the
left digit position (9 in Fig. 2) indicates that the heater is
working to reach the set temperature. A flashing dot indicates that the bath has reached the set temperature.
4.2 Setting the Note: Setting a temperature limit is important for the safe
operation of the unit. It does not set the working
temperature
temperature.
limit
Set the temperature limit using the dial on the
rear of the unit. The scale shows approximate
temperatures. Set the dial to a value 5-10 °C
above the desired working temperature.
If a more accurate temperature limit is required, the procedure described in Section 7.4 should be followed.
The range of temperatures that can be set can be limited if
4.3 Temperature setting required by the application or for other reasons.
limit
Caution: This is a setting limitation, not a primary safety
measure. The temperature limit protection must
be set separately (see Section 4.2).
1. Press
10
to select the H mode
4. Operation
2. Use
or
to set the maximum allowed set temperature. The factory pre-set value is 90.0 °C.
3. Confirm with
before the display returns to the actual temperature value.
Note: The new value is not saved until
sed.
1. Press
4.4 Temperature setting
2. Use
has been pres-
to select the S mode.
or
to set the working temperature.
3. Confirm with
before the display automatically
returns to the actual temperature value.
Note: The new set value is not saved until
pressed.
4.5 Temperature
correction
value
has been
The display continuously indicates the actual temperature in
the bath at the position of the sensor. This temperature does
not correspond directly to the temperature in the externally
connected equipment. Under most circumstances this temperature difference is very small. To adjust the display value to
reflect the temperature in the external system, proceed as follows:
1. Measure the temperature in the external system.
2. Calculate the temperature difference between this value
and the value displayed.
Tdiff = Tdisp -Tmeas
has to be entered.
3. Press
Tdiff is the correction value “c” that
to select the C mode
4. Use
or
to set the correction value with its + or
- sign. The range is -25.0 to +2.50 °C. The factory pre-set
value is 0.0.
11
4. Operation
5. Confirm with
temperature value.
before the display returns to the actual
Note: The new value is not saved until
sed.
12
has been pres-
5. Trouble shooting
5. Trouble shooting
5.1 Error
messages
Message on display
Cause
Remedy
The bath temperature has exceeded
Pour in more liquid.
the safety temperature limit.
Too low water level.
Pour in more liquid.
The winding of the pump motor is too hot.
Check pump and wait a few minutes until the
motor temperature has dropped.
If this fault occurs often, return the unit for
service.
The temperature sensor is broken.
The sensor must be exchanged by service
personnel.
The bath liquid has cooled down below
Check the water level in the bath and
the temperature limit.
adjust if necessary. Restart the unit by
pressing reset.
The winding of the pump has cooled down Check pump and wait a few minutes until the
below the alarm level.
motor temperature has dropped.
If this fault occurs often, return the unit for
service. Restart the unit by pressing reset.
Locked display
The temperature sensor is
Restart the unit by pressing reset.
functioning again.
This error may require service personnel.
An undefined fault has occurred.
However, before contacting service personnel,
top up the bath with some water. This can
solve the problem.
Undefined cause.
Press both arrow keys and the main switch
simultaneously to get
in the display.
Switch off the unit and restart.
Note: The unit is now changed to the
factory set parameters.
13
6. Maintenance
6. Maintenance
6.1 General
Warning! Always disconnect MultiTemp III from the
mains (Pull out the mains plug) before maintenance
and/or service. Service should be carried out by authorised personnel only.
To maintain efficient operation of the compressor cooling
unit, have the air grid and liquifier (heat exchanger) checked
and cleaned by service personnel two to four times a year,
depending on the amount of dust in the air.
Always ensure the liquid bath has sufficient circulating liquid.
The cooling coil in the bath and the bath vessel itself should
be periodically checked and any deposits removed. Metal
particles and acidic or alkaline substances should be removed
quickly as they could harm the stainless steel material and
cause corrosion.
After some time, the stainless steel surface and the housing
may show spots and become tarnished. Clean them with
stainless steel liquid cleaners normally used in the kitchen.
Do not use scouring pads or powder!
Disposal
MultiTemp III will provide many years of efficient operation.
When its working life is over, however, please remember that
the unit contains coolant R 134a, which despite its environmental friendliness may only be discarded by authorised personnel.
14
6. Maintenance
6.2 Fuses
The circuit breaker (thermal fuses) for MultiTemp III are located on the rear of the unit.
Note: If the circuit breaker has been triggered, there may be
some delay before it can be released. Please push the
circuit breaker button only; do not pull.
PUSH
Ratings for the circuit breaker:
for 198 to 253 V version two circuit breakers 2 x 8 Amps
for 95 to 132 V version
one circuit breaker 1 x 13 Amps
Fuses for the electronics located inside the unit must be replaced by authorised personnel only:
for 198 to 253 V version
fuse
1 x 40 mAmps/T
for 95 to 132 V version
fuse
1 x 63 mAmps/T
15
7. Detailed Description
7. Detailed Description
7.1 General
operating
principle
MultiTemp III regulates temperature by balancing the effects
of constant cooling and controlled pulses of heating.
Constant cooling is provided by a built-in unit that includes a
compressor, an air cooled liquifier and an evaporator (a cooling coil as heat exchanger) located in the chamber. This cooling unit operates at temperatures up to 68.0 °C. Beyond this
temperature, the compressor automatically switches off.
Heating is provided by pulses of power at a frequency established by the set working temperature.
This type of control achieves an optimal balance between
cooling and heating and maintains the liquid temperature
constant at any pre-set level.
See Figure 1 for a description of the front and rear panels
7.2 Front and
rear panels with connection points for cooling liquid and power.
7.3 Control
panel
The five digit numeric display shows either the actual operating temperature, error messages or the set temperature. After
selecting mode or setting temperature, the display automatically switches back to the actual temperature after approximately 10 seconds.
In the “actual temperature” mode, a constantly lit dot in the
left digit position indicates that the heater is working to
reach the set temperature. A flashing dot indicates that the
liquid in the bath has reached this working temperature.
The control light is lit only when the compressor is in
operation.
16
7. Detailed Description
Mains Switch. Starts the cooling compressor and the pump
motor that circulates the temperature controlled liquid.
Activates the heater if the temperature set is greater than the
actual temperature.
Change the temperature value. Values are changed in an
accelerating manner when either key is held down.
Changes between showing the actual temperature and
the various program modes.
Actual temperature mode; shows the actual temperature in
the bath.
S mode; sets the working temperature.
c mode; sets temperature correction value.
H mode; sets the maximum allowed set temperature.
8 mode; in 8 mode on, MultiTemp III must be manually restarted using reset after power failure (See Section 7.5
Manual restart in mode 8).
Enters a set value if pressed before the display returns
to actual temperature value. The display changes from flashing to constant to confirm the enter operation.
After the safety circuit has shut down MultiTemp III
and the error has been eliminated, press
to re-start
the unit.
Warning! After a power interruption, the circulator
restarts automatically. Ensure that this cannot cause a
dangerous situation.
Note: If you need to start MultiTemp III manually after
power failure by pressing reset, proceed directly to
Section 7.5 Operation mode 8.
17
7. Detailed Description
7.4 Description General cut-off
The heater, the compressor and the circulation pump can be
of safety
switched off by a relay built into the unit. This general cutfeatures
off will be activated if a malfunction is detected by the safety
sensors.
When the general cut-off switch is activated, the circulator
can only be restarted after the cause of the indicated fault has
been eliminated. The display will show when this has occurred. The circulator can then be re-started by pressing the
Reset key.
Protection against over-heating
A built-in temperature limit switch protects against uncontrolled heating of the bath liquid by activating the general
cut-off if this limit is exceeded. (This safety device is independent of the control temperature sensor that regulates the set
working temperature.)
The temperature cut-off limit is set on the dial at the rear of
the circulator. This has a range of 20 to 95 °C. You should
select a cut-off limit that is 5 to 10 °C above the set working
temperature. If the temperature rises above this limit, the
general cut off is activated and the following error message is
displayed
. After the bath liquid has cooled
down to below the cut-off limit, the following code is
displayed
.
The built-in temperature limit switch also senses low levels of
coolant. If the liquid level falls and exposes the heating element, the temperature will rise above the temperature limit
cut-off level and the general cut-off will be activated. Top up
with coolant to remedy this situation.
The same two error messages shown above will be displayed.
Restart the unit by pressing
.
(Regular topping up with the liquid coolant is recommended,
See Section 4.1, Start-up.)
18
7. Detailed Description
Accurate Setting of Temperature Limit
If a more accurate temperature limit is required, for example
50 °C, follow the procedure below.
1.
2.
Set the temperature limit switch to its highest value.
Set the working temperature to 50 °C according to
Section 4.4.
3. Run the unit and wait until it reaches exactly 50 °C.
4. Turn the temperature limit dial very slowly anticlockwise (temperature down) until the safety circuit is triggered and the display indicates a malfunction.
5. Change the working temperature setting to any value
lower than 50 °C.
6. Wait until the bath liquid has cooled down to below
50 °C.
7. Press the reset key.
The circulator can now be used for temperatures up to
50 °C. As soon as 50 °C is reached, the unit switches off.
Protecting the pump motor
When the temperature in the winding of the pump motor
reaches a certain level, the general cut-off will be activated.
This protection prevents the motor from overheating. The
following error message will be displayed.
. After the winding of the pump has cooled
down, the following code
is displayed.
Check the pump and wait a few minutes until the motor temperature has dropped further before restarting the unit.
If this fault happens frequently, contact service personnel.
Sensor check
The temperature sensor is permanently monitored. The general cut-off is activated if sensor breakage or current leakage is
detected. This fault is
indicated by
.
19
7. Detailed Description
Note: Although this feature activates the general cut-off, it is
not a dedicated ”safety-function” of the type listed
above. When the error message shown above is displayed, the sensor must be exchanged by service personnel.
Restart after power failure
7.5 Manual
restart in
operation
mode 8
MultiTemp III automatically restarts after a power failure.
Make sure that this automatic restart will not cause a dangerous situation to arise.
The unit can be restarted manually instead by pressing
(see Section 7.5).
MultiTemp III is factory set to normal mode. Normal mode
means that the unit automatically re-starts after power failure. As most modern electrophoresis power supplies automatically restart after short power failures, we strongly recommend that you leave MultiTemp III set in its normal mode.
However, if automatic re-start is inconvenient, the unit can
be restarted manually by setting Operation mode 8 to ON,
follow the procedure below:
Setting mode 8 to ON
1. Press
press
2.
simultaneously with the mains switch. Then
again until ”mode 8” is selected.
Press
to select ”ON” instead of ”OFF”.
(”OFF” is factory set)
3.
Confirm by pressing
when the display is flashing.
4.
Wait until the display shows the actual temperature.
5.
Switch off the unit using the mains switch.
The operation mode is now changed to ON.
20
7. Detailed Description
To start MultiTemp III in 8 mode ON, follow the instructions
below:
1.
Check that all tubings are firmly connected and secured
with hose clamps.
2.
Switch the power on with the mains switch.
The display flashes
.
3.
Press
for start.
The version number of the software is briefly shown on the
display. The pump motor and compressor start up, liquid
starts to circulate, and the heater will be activated if the set
temperature is greater than the actual temperature.
Add more liquid if necessary, until the level is 2 cm below the
top plate and proceed as described under Section 4.2, Setting
the temperature limit.
Resetting mode 8 to OFF
Change to mode 8 OFF with the following procedure.
1.
Press
simultaneously with the main switch.
The display flashes
2.
Press
.
3.
Press
.
select “mode 8”.
4.
5.
Press
to select “OFF”.
Confirm by pressing
when the display is flashing.
6.
Wait until the display shows the actual temperature.
7.
Switch off the unit using the mains switch.
The operation mode is now changed to OFF.
To start MultiTemp III in 8 mode OFF, follow the instructions described in Section 4.1, Start-up.
21
8. Technical specifiations
8. Technical
specifications
Technical specifications (ambient temperature 20 °C)
Working temperature range
-10 to 90 °C
Temperature control constancy at 20 °C
< ± 0.1 °C
Range of temperature limit switch
20 to 95 °C
Heater capacity,
230V
800 W
115V
800 W
Cooling capacity,
Cooling capacity,
115 V
230 V
at 20 °C
240 W
at 5 °C
200 W
at 20 °C
265 W
at 5 °C
215 W
Compressor coolant
R 134 a
Bath volume
3 litres
Bath opening/depth
130x100/100 mm
Pump capacity, pressure, max.
0.32 bar
Pump capacity, flow rate, max.
12 l/min
Noise level at 1 m in front of the unit
<63 dB(A)
Mains requirements
95 to 132 V/ 60 Hz
95 to 125 V/ 50 Hz
198 to 253 V/ 50 Hz
22
Power consumption
1,200 W
Ambient operating humidity
80% at 31 °C; maximum 50%
Relative humidity maximum
at 40 °C
Ambient operating temperature
4 to 40 °C
Ambient operating pressure
Maximum altitude of 2,000 m
Dimensions (H x W x D)
480 x 220 x 420 mm
Weight
28 kg
9. Ordering information
9. Ordering information
Designation
Code No.
MultiTemp III 100-120 V
18-1102-77
MultiTemp III 220-240 V
18-1102-78
Accessories
Item
Quantity
Code No.
Cooling Tubing, 8/12 mm, silicone
4m
80-1106-56
Tubing Connector Set female and male
4
18-1104-26
Hose clamps
10
18-1104-27
Insulation for cooling tubing 14/27 mm
8m
80-1116-11
3-way Valve Set
1
18-1106-39
23
Short instructions
Note: The following short instructions are intended as a guide to
users who are fully familiar with safety procedures and
operating instructions described earlier in this manual.
1.
Check to make sure that all tubings are firmly connected and
secured with hose clamps.
2.
Check the liquid level and fill the bath if needed (the level
should be 2-4 cm below the lid).
3.
Switch the power on at the mains switch.
4.
Set the safety temperature limit using the dial on the rear
of the unit.
5.
Set the setting range limit of the circulator (if required by the
application or any safety precautions).
6.
Set the working temperature. Press
to select the S mode
.
Use
or
to set the working temperature. Confirm with
7.
Set the temperature correction value if required.
Printed in Sweden by TK i Uppsala, Sept 1998
before the display automatically returns to the actual
working temperature.