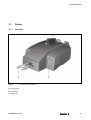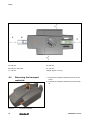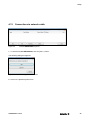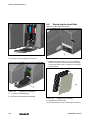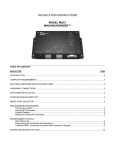
1
PrintJet ADVANCED User Manual Foreword Foreword Revisions Version Date Change 1.0 01/13 First edition 1.1 03/13 First revised edition Contact address Weidmüller Interface GmbH & Co. KG Postfach 3030 D - 32720 Detmold Klingenbergstraße 16 D - 32758 Detmold Phone +49 (0) 5231 14-0 Fax +49 (0) 5231 14-2083 E-Mail [email protected] Internet www.weidmueller.com 2 1449820000/1.1/03.13 Contents Contents 1 Introduction ...........................................................................................................7 1.1 Notational conventions.....................................................................................................................8 1.2 Warranty and liability ........................................................................................................................9 1.3 Copyright ...........................................................................................................................................9 1.4 Guarantee terms................................................................................................................................9 2 Safety information...............................................................................................11 2.1 General safety information.............................................................................................................12 2.2 General operating information.......................................................................................................13 2.3 Safety measures for environment protection ..............................................................................14 2.4 Symbols and information used on the device .............................................................................14 2.5 Intended use ....................................................................................................................................15 2.6 Residual risks when using the device ..........................................................................................15 2.6.1 Hazards due to electricity ..................................................................................................16 2.6.2 Hazards due to hot surfaces..............................................................................................17 2.6.3 Hazards due to incorrect spare parts.................................................................................17 2.7 Safety devices and guards.............................................................................................................17 2.8 Obligations of the plant operator ..................................................................................................17 2.9 Personnel requirements .................................................................................................................18 2.9.1 Qualifications required by personnel .................................................................................18 2.9.2 Obligations of personnel ....................................................................................................18 2.9.3 Responsibilities ..................................................................................................................18 3 Printer description ..............................................................................................19 3.1 Printer ...............................................................................................................................................21 3.1.1 Overview ............................................................................................................................21 3.1.2 Connectors.........................................................................................................................23 3.1.3 Rating plate........................................................................................................................23 3.2 MultiCards and MetalliCards..........................................................................................................24 4 Setup ....................................................................................................................27 4.1 Unpacking ........................................................................................................................................28 4.2 Scope of supply...............................................................................................................................28 4.3 Installing the printer........................................................................................................................28 4.4 Removing the transport restraints ................................................................................................30 4.5 Fitting the output rail ......................................................................................................................31 1449820000/1.1/03.13 3 Contents 4.6 Positioning the touch panel ...........................................................................................................31 4.7 Connecting the power plug............................................................................................................32 4.8 Methods of connecting the printer ................................................................................................34 4.8.1 Connection via the network interface.................................................................................34 4.8.2 Connection via USB...........................................................................................................34 4.9 Turning on the printer.....................................................................................................................35 4.10 Choosing the language for the touch panel .................................................................................36 4.11 Installing the standard version of the M-Print® PRO software ..................................................39 4.12 Connection via network cable .......................................................................................................45 4.13 Connection via USB cable..............................................................................................................50 4.14 Installing the network version of the M-Print® PRO software....................................................54 4.14.1 Description .........................................................................................................................54 4.14.2 Tasks to be done on the central computer/server .............................................................55 4.14.3 Tasks to be done on the clients .........................................................................................69 4.15 Activating M-Print® PRO ................................................................................................................71 4.16 Setting up and adjusting a MultiCard for the printer...................................................................73 4.17 Running a print test ........................................................................................................................74 5 Operation .............................................................................................................77 5.1 General operation............................................................................................................................78 5.2 5.3 4 5.1.1 Important information .........................................................................................................78 5.1.2 Inserting MultiCards/MetalliCards......................................................................................79 5.1.3 Processing a single MultiCard/MetalliCard ........................................................................80 5.1.4 Processing a stack of MultiCards ......................................................................................80 Software settings ............................................................................................................................81 5.2.1 Starting M-Print® PRO ......................................................................................................81 5.2.2 Mapping and calibrating the printer ...................................................................................82 5.2.3 Setting the printer correction..............................................................................................87 5.2.4 Setting material-dependent slip .........................................................................................89 5.2.5 Adjusting MultiCards ..........................................................................................................91 5.2.6 Printing MultiCards/MetalliCards .......................................................................................95 5.2.7 Curing settings / Heating level ...........................................................................................95 5.2.8 Selecting the print quality...................................................................................................95 Touch panel .....................................................................................................................................96 5.3.1 Menu structure of the touch panel .....................................................................................97 5.3.2 Main menu .........................................................................................................................98 1449820000/1.1/03.13 Contents 5.3.3 Submenus ..........................................................................................................................99 5.3.4 System Info ........................................................................................................................99 5.3.5 Changing the printer name ..............................................................................................100 5.3.6 Changing the IP address and subnet mask and activating DHCP ..................................102 5.3.7 Selecting the language ....................................................................................................105 5.3.8 Changing the USB port ....................................................................................................106 5.3.9 Ink level ............................................................................................................................107 5.3.10 Protocol ............................................................................................................................108 5.3.11 Information .......................................................................................................................109 5.3.12 Tools ................................................................................................................................110 5.3.13 Print jobs ..........................................................................................................................111 5.3.14 Templates ........................................................................................................................112 5.3.15 Printing the templates from the USB stick .......................................................................113 6 Cleaning and maintenance...............................................................................115 6.1 Tools menu ....................................................................................................................................116 6.1.1 Printhead cleaning ...........................................................................................................117 6.1.2 Printhead flushing ............................................................................................................118 6.1.3 Executing a sensor check ................................................................................................120 6.1.4 Executing a nozzle check ................................................................................................122 6.2 Replacing ink cartridges ..............................................................................................................124 6.3 Replacing the wastepad ...............................................................................................................130 6.4 Replacing the dust filter ...............................................................................................................132 6.5 Cleaning the printer enclosure ....................................................................................................133 6.6 Cleaning the touch panel .............................................................................................................133 6.7 Updating the printer software ......................................................................................................134 7 Troubleshooting................................................................................................135 7.1 General information ......................................................................................................................136 7.2 General troubleshooting ..............................................................................................................136 7.3 List of events .................................................................................................................................138 8 Transporting the printer ...................................................................................145 8.1 Decommissioning the printer ......................................................................................................146 8.2 Packing the printer........................................................................................................................146 8.3 Disposing of the printer................................................................................................................147 1449820000/1.1/03.13 5 Contents 9 Annex .................................................................................................................149 9.1 Technical data ...............................................................................................................................150 9.2 Ordering data.................................................................................................................................151 9.3 Declaration of conformity.............................................................................................................152 9.4 List of figures.................................................................................................................................153 9.5 List of tables ..................................................................................................................................156 6 1449820000/1.1/03.13 Introduction 1 Introduction 1.1 Notational conventions.....................................................................................................................8 1.2 Warranty and liability ........................................................................................................................9 1.3 Copyright ...........................................................................................................................................9 1.4 Guarantee terms................................................................................................................................9 1449820000/1.1/03.13 7 Introduction This user manual provides all the information you need for trouble-free operation of the PrintJet ADVANCED (hereafter called printer or device). CAUTION This warning sign indicates a low risk situation which, if not avoided, could result in minor or moderate injury. This user manual must be read, understood, and followed by members of staff before commencing work, maintenance tasks, cleaning, and troubleshooting at the printer. This applies, in particular, to any safety information. NOTE After reading the user manual you will be able to This warning indicates a hazard which, unless avoided, could involve a low risk of material damage. operate the printer safely, clean the printer correctly, take appropriate action in the event of a fault. Important information In addition to this user manual, it is necessary to comply with the general laws and other regulations concerning accident prevention and environmental protection in the country of use. This symbol indicates information about a printer function or setting, or that due care and attention are required. It also indicates information which must be followed at all times. This user manual is an integral part of the printer. It must be kept with the printer throughout its service life. 1.1 The following notational conventions are also used: Text following this mark represents an item in a list. - Text following this mark represents subordinated lists. 1 Several activities which must be executed in the specified sequence are marked by consecutive numbering. [ ] Buttons which must be actuated in the software are shown in square brackets. Notational conventions Passages of this operating manual that require special attention or are a direct hazard warning are shown as follows: DANGER Electrical hazard warning This warning sign indicates an electrical hazard. Only qualified and authorized electrical specialists are allowed to work on electrical equipment. This symbol or text in " " refers to other chapters and sections in this user manual or to other documents. WARNING This warning indicates a potential hazard which, unless avoided, could involve a medium risk of death or (serious) injury. 8 1449820000/1.1/03.13 Introduction Symbols used in the manual Deployment of untrained personnel In this user manual, particular hazards are identified by the following symbols: Structural alterations to the printer (modifications or other alterations to the printer are prohibited.) Non-compliance will result in the printer's EC Declaration of Conformity no longer being valid) Hot surface warning This symbol warns of a burn hazard due to hot surfaces. Crush hazard This symbol warns of a crush hazard, for instance to your hands. Technical modifications Opening the printer enclosure, Use of out-of-date ink cartridges, Use of unapproved spare parts or spare parts that do not satisfy technical requirements Automatic start-up warning This symbol warns of automatic printer startup. Disasters, effects of extraneous elements and force majeure Electromagnetic interference warning! We reserve the right to make technical alterations in the course of further development and improvement of features. This symbol warns of electromagnetic interference fields, which may negatively influence operation of the device. 1.3 1.2 Warranty and liability The obligations specified in the supply contract, the general and delivery terms and conditions of Weidmüller Interface GmbH & Co. KG, and the legal regulations in force at the time the contract was signed apply. Copyright This operating manual is protected by copyright and intended for internal use only. This user manual or parts thereof must not be passed or disclosed to any third party or be reproduced or exploited in any form without the prior written consent of Weidmüller Interface GmbH & Co. KG except for internal use. Contravention results in liability for damages. Further claims remain reserved. All the information and instructions in this user manual have been compiled in line with applicable standards and regulations, state-of-the-art technology, and our extensive knowledge and experience. Warranty and liability claims for personal injury and material damage are excluded if they are attributable to one or more of the following causes: 1.4 Guarantee terms The guarantee terms and conditions are contained in the general terms and conditions of Weidmüller Interface GmbH & Co. KG. Unintended or inappropriate use of the printer (also see section "2.5 Intended use"), Inappropriate installation, commissioning, operation, maintenance or cleaning of the printer Operation of the printer with defective or incorrectly fitted printer enclosure, Failure to heed information in the user manual regarding installation, commissioning, operation, maintenance and cleaning of the printer 1449820000/1.1/03.13 9 Safety information 2 Safety information 2.1 General safety information.............................................................................................................12 2.2 General operating information.......................................................................................................13 2.3 Safety measures for environment protection ..............................................................................14 2.4 Symbols and information used on the device .............................................................................14 2.5 Intended use ....................................................................................................................................15 2.6 Residual risks when using the device ..........................................................................................15 2.6.1 Hazards due to electricity ..................................................................................................16 2.6.2 Hazards due to hot surfaces..............................................................................................17 2.6.3 Hazards due to incorrect spare parts.................................................................................17 2.7 Safety devices and guards.............................................................................................................17 2.8 Obligations of the plant operator ..................................................................................................17 2.9 Personnel requirements .................................................................................................................18 2.9.1 Qualifications required by personnel .................................................................................18 2.9.2 Obligations of personnel ....................................................................................................18 2.9.3 Responsibilities ..................................................................................................................18 1449820000/1.1/03.13 11 Safety information WARNING Failure to observe the safety information below may have serious consequences: Damage to the device! The printer enclosure should not be removed. Risk to persons due to electrical and chemical hazards Opening the enclosure will result in the loss of any warranty rights! Failure of functions. Read the safety and hazard information in this section thoroughly before putting the printer into operation. In addition to the information specified in this user manual, the plant operator/machine operator must comply with national occupational health and safety regulations. It is also important to follow in-house rules and regulations. 2.1 NOTE General safety information In the following cases, you must disconnect the printer from all sources of power and contact a qualified service technician: Only qualified service technicians should replace components inside the device. Always read and understand the user manual before commencing operation and maintenance tasks at the printer. Only use the printer for its intended purpose (see section "2.5 Intended use"). Keep all safety and warning signs on the printer clean and renew them, if necessary. Only trained personnel are allowed to use the printer. Always keep the user manual with the product for future reference. It must be ensured that everyone involved with the device is able to view the user manual at any time. The power cable or plug are worn or damaged. Liquid has penetrated the PrintJet ADVANCED. The PrintJet ADVANCED has fallen down or the enclosure has been damaged. The performance of the PrintJet ADVANCED is not up to the required standard, e.g. poor print quality or insufficient resistance to smearing and scratching. CAUTION Never remove the printer enclosure! There is a potential risk of injury! Only qualified service technicians should replace components inside the device. 12 1449820000/1.1/03.13 Safety information 2.2 General operating information When selecting the installation site for the printer, ensure the ambient conditions are suitable (also see chapter "9.1 Technical data"). The openings in the enclosure of the printer must not be blocked or covered over. Do not switch off the printer! The printer automatically goes into standby mode. The operating parameters are only retained while the printer is turned on. These parameters ensure, for example, that the printhead is cleaned optimally. Switching off the printer may result in the ink cartridge nozzles becoming blocked. Do not open the ink tank lid during operation. Print some MultiCards/MetalliCards every week. This is the only way to preserve print quality. Only use products that have been produced or approved by Weidmüller (M-Print® PRO software, MultiCards/ MetalliCards and ink cartridges). Otherwise no liability can be assumed for the quality and durability of printing. NOTE The Weidmüller warranty does not cover faults or damage to the printer resulting from the use of unapproved or unsuitable accessories or consumable materials. Do not shake ink cartridges, as this may cause ink to leak. Do not disassemble or try to refill ink cartridges. Store unopened ink cartridges in a cool and dry place, preferably in a refrigerator at about 4 °C. Before using an ink cartridge that has been stored in a colder place, allow the cartridge to stand at room temperature for at least three hours. Only remove ink cartridges from the printer when they are empty or their use-by date has expired. Removing an ink cartridge can cause leaks in the connection between the ink cartridge and the ink line. This can lead to a faulty ink feed system. Never use out-of-date ink cartridges. When the use-by date of the ink approaches (printed on the packaging), a message is displayed at the touch panel. Replace the specified ink cartridge (see section "6.2 Replacing ink cartridges"). For the best printing results, the ink in the cartridge should be used within nine months of installation. NOTE Using expired ink reduces the print quality and can cause damage to the printer. Handling ink cartridges Keep ink cartridges out of reach of children. Never allow children to play with ink cartridges. Printer ink is not suitable for human consumption. No not allow ink to come into contact with the mucous membranes. If you accidentally swallow any ink, rinse out your mouth and drink plenty of water. Do not induce vomiting. Always handle used ink cartridges with care as a small amount of ink could remain in the ink supply outlet. If you get ink on your skin, wash thoroughly with soap and water. Never touch the ink supply outlet of the ink cartridge or the area around it. 1449820000/1.1/03.13 13 Safety information Install ink cartridges in the printer immediately after removing them from the packaging. The print quality can be impaired if an ink cartridge is left unpacked for any length of time before use. Ink is used when a new ink cartridge is inserted or when the ink tank lid is opened, as the printer always carries out a reliability check. Always handle ink cartridges with care, otherwise ink could spill and cause soiling. 2.4 Symbols and information used on the device The following information and symbols are attached to the printer: Hot surface warning This symbol warns of a burn hazard due to hot surfaces. Crush hazard 2.3 Safety measures for environment protection This symbol warns of a crush hazard, for instance to your hands. Automatic start-up warning Recycling in accordance with WEEE B-to-B disposal Purchasing our product gives you the opportunity to return the device to Weidmüller at the end of its service life. The EU Directive 2002/96 EC (WEEE) regulates the return and recycling of waste electrical and electronics equipment. In the business-to-business sector (B-to-B), manufacturers of electrical equipment have been obligated since August 13, 2005 to take back and recycle free of charge all electrical equipment sold after that date. After that date, electrical equipment must not be disposed through the 'normal waste disposal channels'. Electrical equipment must then be disposed of and recycled separately. All devices that fall under the directive must feature this symbol: This symbol warns of automatic printer startup. Insertion instructions This symbol displays the correct insertion direction of the MultiCards. Warning label on the device Important information Keep all safety and hazard signs on the device clean and renew them, if necessary. 14 1449820000/1.1/03.13 Safety information 2.5 Intended use This printer is only intended for use in applications as described in the user manual. Any other form of usage is not permitted and can lead to accidents or destruction of the device. Using the printer in unapproved applications will lead immediately to the expiration of all guarantee and warranty claims on the part of the operator against the manufacturer. Using the printer for purposes other than those specified or failure to observe the operating instructions and warning notes can lead to serious malfunctioning that may result in personal injury or damage to property. Only use the software M-Print® PRO, MultiCards/MetalliCards and inks which have been approved for this marking system by Weidmüller. Weidmüller can make no guarantee for the print quality and resistance when a different software and other MultiCards/MetalliCards and ink are used. Claims of any kind for personal injury or material damage arising from unintended use are ruled out. The plant operator alone is liable for any injury or damage attributable to unintended use. Intended use also includes: Heeding all information from the operating manual Complying with the operating and maintenance conditions. Structural modifications to the device Construction and acceptance are based on the German Product Safety Act (ProdSG). Never modify the printer. Non-compliance will invalidate the printer's EC Declaration of Conformity. Such a breach absolves the manufacturer of the printer from warranty. Replace any defective components of the printer immediately. Only use original spare parts (ink cartridges, MultiCards/MetalliCards, wastepad). Only they satisfy the technical requirements. 2.6 Residual risks when using the device The device has a state-of-the-art design and complies with recognized safety rules and regulations. However, the printer can still be impaired when used. Only use the device "as intended". When using the device, observe the warning signs at the device and the safety information in this user manual. Any faults that could impair safety must be rectified immediately. NOTE Damage due to unintended use! Any kind of unintended use of the printer may result in damage. 1449820000/1.1/03.13 15 Safety information 2.6.1 Hazards due to electricity DANGER Electrical hazard warning Touching live parts is a direct risk to life. Damage to the insulation or individual components may result in fatal injury. Only electrical specialists are allowed to work on the printer's electrical components. Keep moisture away from live parts as it can cause short-circuits. Pay particular attention to this when cleaning the printer. Have extension and device cables with plugs and sockets tested by an electrical specialist, or by a trained person using suitable inspection facilities, at least every 6 months. Modifications carried out after testing must comply with DIN EN 60204-1. Only connect the device to a properly grounded and fused socket. Do not use a socket already being used by devices that are turned on and off at regular intervals, such as photocopiers or fans. Do not connect the printer to either a switch-operated or a timer-controlled power outlet. Never use damaged or worn-out power cables. If you connect the PrintJet ADVANCED to the power supply via an extension cable, ensure that the total nominal current of all of the devices connected to the extension cable does not exceed the ampere rating for that extension cable. Also ensure that the total nominal current of all the devices plugged into the wall-mounted socket outlet does not exceed the ampere rating for that power outlet. Regularly inspect the printer's electrical components for defects, such as loose connections or damage to the insulation. If there is damage, immediately switch off the printer's power supply and have the damage repaired. Never bypass fuses or take them out of operation. When replacing fuses, pay attention to the correct amperage. 16 1449820000/1.1/03.13 Safety information 2.6.2 Hazards due to hot surfaces CAUTION Burn hazard due to hot surfaces Contact with hot components can cause burns. Make sure all components have cooled down to the ambient temperature prior to carrying out any work. 2.6.3 Hazards due to incorrect spare parts NOTE Incorrect or faulty spare parts may cause damage, malfunctions, or total failure, and may also give rise to safety hazards. Use original spare parts only. Purchase spare parts from Weidmüller. The necessary details about spare parts are given in section "9.2 Ordering data“. 2.7 2.8 Obligations of the plant operator The device is used in an industrial plant. The device operator is therefore subject to the legal requirements concerning occupational health and safety. In addition to the safety information in this user manual, it is necessary to comply with the safety, accident prevention, and environmental protection regulations in force in the country of use. The following applies in particular: The operator must clearly define and arrange the responsibilities for installation, commissioning, operation, maintenance, and cleaning. The operator must ensure that all personnel working on or with the printer have read and understood this user manual. The operator must provide sufficient lighting at the control points of the printer in accordance with local occupational health and safety regulations. Furthermore, the operator is responsible for keeping the printer in a perfect working order. The following therefore also applies: The operator must ensure that all messages on maintenance indicated at the touch panel and described in this user manual are adhered to. Safety devices and guards Only operate the printer with the printer enclosure in place and the ink tank lid closed. Do not remove the printer enclosure. Opening the enclosure will cause a loss of all warranty rights. 1449820000/1.1/03.13 17 Safety information 2.9 2.9.1 Personnel requirements Qualifications required by personnel 2.9.3 Responsibilities The responsibilities of personnel for installation, commissioning, operating, maintenance, and cleaning must be clearly defined. Personnel require the following qualifications for the various activities: WARNING Injury hazard due to inadequate qualifications Inappropriate handling of the printer can lead to injuries. All activities must therefore be carried out by qualified personnel only. NOTE Damage to the device due to inadequate qualifications Inappropriate handling can lead to material damage. All activities must therefore be carried out by qualified personnel only. 2.9.2 Skilled personnel Skilled personnel are able to do their work and recognize/avoid potential hazards on their own as a result of their training, knowledge and experience and their familiarity with regulations. Electrical specialists Electrical specialists are able to work independently on electrical equipment and recognize/avoid potential hazards as a result of their training, knowledge, and experience, as well as their familiarity with standards and regulations. Electrical specialists have been trained for their specific task and know the relevant standards and regulations. Obligations of personnel Before working on or with the device, all persons undertake the following: To comply with basic regulations concerning health, safety and accident prevention To read the safety information and warnings in this user manual and to confirm with their signature that they have understood the issues 18 1449820000/1.1/03.13 Printer description 3 3.1 3.2 Printer description Printer ...............................................................................................................................................21 3.1.1 Overview ............................................................................................................................21 3.1.2 Connectors.........................................................................................................................23 3.1.3 Rating plate........................................................................................................................23 MultiCards and MetalliCards..........................................................................................................24 1449820000/1.1/03.13 19 Printer description Combined with the marking software M-Print® PRO, the ink-jet printer PrintJet ADVANCED is a marking system for MultiCards and MetalliCards. This system can be used for the individual marking of equipment quickly and conveniently. The PrintJet ADVANCED uses a brilliant permanentlyreadable printing process to print MultiCardformatted markers for switching devices, machines, terminal blocks, cables, wires, and valves. A secure and permanent label is ensured through high-level resistance to smearing and scratching, UV-stability, and the high printing resolution for all markers. The PrintJet ADVANCED allows you to print very small fonts. Even the smallest characters are easy to read, permitting you to increase the markers' information density. The MultiCards can be fed individually or inserted as stack (of up to 30 MultiCards) into the loader. MetalliCards should only be inserted individually. Stack processing is not intended for MetalliCards. The MetalliCard is inserted into an inlay for processing. 20 The MultiCard fed into the printing unit is printed with a thermally-hardened ink and then transferred to a fixation unit. In the fixation unit, the ink is then hardened with a special heat radiator. The duration of this process is varies for MultiCards and MetalliCards. Finally, the MultiCard/MetalliCard is fed out of the PrintJet ADVANCED onto the output rail and can be removed. The MultiCard/MetalliCard can be used immediately. Please note that the MultiCards and MetalliCards become hot due to the fixation process. If necessary, let them cool down before removing them from the output rail. The PrintJet ADVANCED should not be switched off. If the PrintJet ADVANCED is not used, it automatically goes into standby/energy-saving mode. This optimizes the cleaning cycles and thus increases the availability of the printer. 1449820000/1.1/03.13 Printer description 3.1 Printer 3.1.1 Overview Figure 1 Front view of the printer A Touch panel B Ink tank lid C Output rail 1449820000/1.1/03.13 21 Printer description Figure 2 Rear view of the printer A Filter cover B Connectors C MultiCard/MetalliCard input D Stack input (loader) E Interface USB master for connecting a USB stick 22 1449820000/1.1/03.13 Printer description 3.1.3 Figure 5 Figure 3 Open ink tank lid A Ink cartridges Rating plate Rating plate The rating plate contains information on the mains voltage, article number, serial number, and MAC address (address of the network card). B Wastepad C Ink tank lid (open) 3.1.2 Figure 4 Connectors Connectors A Left-hand fuse (2.5 ampere) B Right-hand fuse (10 ampere) C Mains power supply connection D Network interface (RJ45 connector) E USB slave for connecting the PC 1449820000/1.1/03.13 23 Printer description 3.2 MultiCards and MetalliCards MultiCards made from plastic and MetalliCards made from aluminum or stainless steel can be printed with the PrintJet ADVANCED printer. The marking system, consisting of the PrintJet ADVANCED printer and the M-Print® PRO software, has been designed by Weidmüller for MultiCards or MetalliCards. Figure 6 MultiCards/MetalliCard A Example: MultiCard B Example: Half MultiCard C Example: MetalliCard D Example: Inlay for MetalliCards The MultiCards can be inserted individually or in stacks. MetalliCards should only be inserted individually. 24 1449820000/1.1/03.13 Printer description MultiCards can be halved. To receive a half MultiCard, bend the complete MultiCard in the middle and break in half. Complete and half MultiCards should not be mixed in a stack. It is, however, possible to process different MultiCard types in a stack, e.g. DEK 5/5 and SM 27/27. Description of the MultiCard Figure 7 Description of the MultiCard A First project marker surface B Marker area C Side strip 1449820000/1.1/03.13 25 Setup 4 Setup 4.1 Unpacking ........................................................................................................................................28 4.2 Scope of supply...............................................................................................................................28 4.3 Installing the printer........................................................................................................................28 4.4 Removing the transport restraints ................................................................................................30 4.5 Fitting the output rail ......................................................................................................................31 4.6 Positioning the touch panel ...........................................................................................................31 4.7 Connecting the power plug............................................................................................................32 4.8 Methods of connecting the printer ................................................................................................34 4.8.1 Connection via the network interface.................................................................................34 4.8.2 Connection via USB...........................................................................................................34 4.9 Turning on the printer.....................................................................................................................35 4.10 Choosing the language for the touch panel .................................................................................36 4.11 Installing the standard version of the M-Print® PRO software ..................................................39 4.12 Connection via network cable .......................................................................................................45 4.13 Connection via USB cable..............................................................................................................50 4.14 Installing the network version of the M-Print® PRO software....................................................54 4.14.1 Description .........................................................................................................................54 4.14.2 Tasks to be done on the central computer/server .............................................................55 4.14.3 Tasks to be done on the clients .........................................................................................69 4.15 Activating M-Print® PRO ................................................................................................................71 4.16 Setting up and adjusting a MultiCard for the printer...................................................................73 4.17 Running a print test ........................................................................................................................74 1449820000/1.1/03.13 27 Setup 4.1 Unpacking CAUTION Crush hazard during transport Because of its weight the printer must always be carried by two people. Always hold the printer at the front and rear when carrying it. 4.2 Scope of supply When you have taken the PrintJet ADVANCED and all accessories out of the packaging, make sure you have all the following items: Power cable USB cable 1 MultiCard DEK 5/5 10 MetalliCards CC-M 85/54 AL 10 primer cloths NOTE 1 Inlay CC 85/54 Because of its weight the printer must always be carried by two people. Always hold the printer at the front and rear when carrying it. Output rail DVD with the M-Print® PRO software Quick guide User Manual Always transport the printer in a horizontal position. If transported improperly, ink may escape and soil or damage the device. 4.3 Installing the printer NOTE 1 Open the packaging. 2 Take out all the accessories. 3 Two people must lift the printer with the polystyrene packaging material out of the box. Do not use the device near potential sources of electromagnetic interference, such as loudspeakers or the base stations of cordless telephones, as this can impair its function. 4 Remove the polystyrene packaging material. Important information Important information Keep the original packaging for any future transport. 28 When installing the printer, make sure you provide the necessary operating and maintenance spaces. 1449820000/1.1/03.13 Setup 1 Pay attention to the information given above. NOTE The printer must be placed on a flat, stable surface. The printer will not operate properly if it is tilted or at an angle. Avoid locations that are subject to strong fluctuations in temperature and humidity. Also see section “9.1 Technical data”. 2 Place the printer on a surface that extends beyond the base area of the printer on all sides. 3 Leave enough space in front of the output rail to allow the printer to output MultiCards/MetalliCards without hindrance. 4 Install the printer in such a way that it is sufficiently ventilated on all sides. 5 Install the printer near a power socket so that the plug can be readily removed in the event of a fault. Do not expose the printer to direct sunlight, strong light or excessive heat. Avoid locations that are subject to impact shocks or vibrations. Do not use a table joined to other tables in order to avoid the transmission of vibration. Avoid installation sites that are subject to a large amount of dust. 1449820000/1.1/03.13 29 Setup Figure 8 Operating and maintenance spaces A 250 mm D 250 mm B 200 mm output rail E 100 mm C 100 mm Weight: approx. 37.2 kg 4.4 1 Remove the transport restraints from the touch panel. Figure 9 30 Removing the transport restraints 2 Remove the transport restraint from the ink tank lid. Transport restraints 1449820000/1.1/03.13 Setup 4.5 Figure 10 Fitting the output rail Figure 11 Touch panel lowered Figure 12 Touch panel raised Fitting the output rail Fit the output rail, letting it snap into place. 4.6 Positioning the touch panel The touch panel can be raised up to three rest positions. A 'click' sound indicates that the touch panel is engaged in one of the rest positions. After a fourth 'click' sound, the touch panel is unlocked and can be gently lowered down. 1449820000/1.1/03.13 31 Setup 4.7 Connecting the power plug DANGER Electrical hazard warning The supply voltage must match the voltage given on the printer’s rating plate. Only connect the device to a properly grounded and fused socket. Do not use a socket already being used by devices that are turned on and off at regular intervals, such as photocopiers or fans. Figure 13 Rotating the touch panel 1 Raise the touch panel to the desired position (see "Figure 11 Touch panel lowered"). The touch panel can be rotated 270°. 2 Rotate the touch panel by its handle (A) to the required position (see "Figure 13 Rotating the touch panel”). Do not connect the printer to either a switch-operated or a timer-controlled power outlet. If you connect the PrintJet ADVANCED to the power supply via an extension cable, ensure that the total nominal current of all of the devices connected to the extension cable does not exceed the ampere rating for that extension cable. Make sure that the total nominal current of all devices connected to the wall socket does not exceed the ampere rating for that socket. When connecting the printer to the power supply, make sure that the building installation is protected by an appropriate backup fuse. 32 1449820000/1.1/03.13 Setup DANGER Warning of electrical hazard if the power cable is damaged A damaged power cable can cause a fatal electric shock and lead to a fire. Do not let the power cable get damaged and leave it in its original state. Do not place any objects on the power cable. Do not pull hard on the power cable and do not bend it any more than necessary. Failure to comply with these instructions can cause an electric shock or a fire. Insert the plug in a nearby socket and make sure that the socket is readily accessible. 1449820000/1.1/03.13 Figure 14 Connecting the power plug 1 Connect the power cable to the printer (A). 2 Connect the power cable to the socket (B). Important information Make sure that the plugs are inserted firmly. 33 Setup 4.8 Methods of connecting the printer The PrintJet ADVANCED can be connected to the PC via the USB cable or to the local network via the network cable. The installation methods are largely identical. Where they differ, the methods are described separately. 4.8.1 Connection via the network interface 4.8.2 Figure 16 Figure 15 Connection via USB USB cable Connection –network cable Important information A Network cable B Network interface (RJ45 connector) Do not connect the USB cable until you have installed the M-Print® PRO application software. 1 Connect the network cable (A) to the printer’s network interface (B). 2 Lay the cable so that there is no tripping hazard. 34 1449820000/1.1/03.13 Setup 4.9 Turning on the printer Turn on the printer by briefly holding down the on/off switch. NOTE Do not switch off the printer! The printer automatically goes into standby mode. The operating parameters are only retained while the printer is turned on. These parameters ensure, for example, that the printhead is cleaned optimally. Turning off the printer or not using it can cause blockage of the ink nozzles after a while. Figure 17 Turning on the printer A On/off switch 1449820000/1.1/03.13 35 Setup 4.10 Choosing the language for the touch panel When you start up the printer for the first time, a language choice is displayed on the touch panel. Figure 18 Touch panel – language choice 1 Choose the required language by touching the corresponding button. Touch this button to scroll forward to the next page and additional options. Touch this button to scroll back to the previous page. If the printer was turned off before you chose the language of if you want to change the language subsequently, you have to perform the following steps: 36 1449820000/1.1/03.13 Setup Figure 19 Touch panel – main menu 2 Choose the [System Info] button on the touch panel’s main menu. Figure 20 Touch panel – System Info 3 Select the [LANGUAGE] button in the System Info window. 1449820000/1.1/03.13 37 Setup Figure 21 Touch panel – language selection 4 Select the desired language and touch the [SAVE] button to confirm your choice. 38 1449820000/1.1/03.13 Setup 4.11 Installing the standard version of the M-Print® PRO software The marking system has been designed for the following operating systems: Microsoft Windows® 7 (32bit/64-bit versions), Windows® Vista and Windows® XP. Important information Installation should be carried out by a specialist. Administrator rights are required for this process. You can find information about the application software in the M-Print® PRO user manual. 1 Insert the supplied DVD in the PC’s DVD drive. The DVD starts automatically and the following screen appears: Figure 22 M-PRINT® PRO Installation - Language setting 2 Touch the desired language. 3 Touch the [START APPLICATION] button. 1449820000/1.1/03.13 39 Setup Figure 23 M-PRINT® PRO Installation - Start menu 4 Touch the [SOFTWARE] button. Figure 24 M-PRINT® PRO Installation - software 5 Touch M-PRINT® PRO. 40 1449820000/1.1/03.13 Setup Figure 25 M-PRINT® PRO Installation - Language selection 6 Touch the desired language. The installation process starts automatically and the setup wizard appears. Figure 26 M-Print® PRO – setup wizard 7 Click the [CONTINUE] button. 1449820000/1.1/03.13 41 Setup Figure 27 M-Print® PRO – accepting the license terms 8 Accept the terms in the license agreement and press the CONTINUE] button. 9 Choose the setup type in the next window: Figure 28 M-Print® PRO – choosing the setup type Typical The M-Print® PRO program is installed with the most common features. 42 1449820000/1.1/03.13 Setup Custom The M-Print® PRO program is installed; add-on modules can be selected/deselected. Complete The M-Print® PRO program and all add-on modules are installed automatically. Network The M-Print® PRO program is installed on a shared drive on the network and can be used by multiple users. 10 Press the [Typical] button. Important information If you want to install the network version, read section “4.14 Installing the network version of the M-Print® PRO software”. Pressing the [Typical] button opens the following window: Figure 29 M-Print® PRO – starting the installation process 11 Click the [Install] button to start installation. 1449820000/1.1/03.13 43 Setup Figure 30 M-Print® PRO – status of the installation process The installation status is shown by the progress bar. Figure 31 M-Print® PRO – finishing the installation process 12 When installation has been completed, press the [Finish] button. 44 1449820000/1.1/03.13 Setup 4.12 Figure 32 Connection via network cable PrintJet ADVANCED Explorer 1 To add the PrintJet ADVANCED, click the [Add…] button. The following dialog box appears: Figure 33 Choosing printer connection 2 Click on the [Network] button here. 1449820000/1.1/03.13 45 Setup The following dialog box appears: Figure 34 Adding the printer 3 When you click on the button [Browse network...], the search process is started. Figure 35 46 Browsing network 1449820000/1.1/03.13 Setup If a printer was found, the following dialog box appears: Figure 36 Search result - Browsing network 4 Use the [Add selected printers] button to add the printer. The following dialog box appears: Figure 37 PrintJet ADVANCED Explorer 5 If you want to change the printer name, click the [Properties...] button. This changed printer name is then displayed in M-Print® PRO. 1449820000/1.1/03.13 47 Setup Figure 38 Changing the printer name 6 Enter the printer name required for M-Print® PRO, for example PrintJet ADVANCED. 7 Confirm your inputs with [OK]. Figure 39 Changed printer name The changed name PrintJet ADVANCED is displayed in the Explorer. Figure 40 48 PrintJet ADVANCED Explorer 1449820000/1.1/03.13 Setup You can remove the highlighted printer from the list with the [Delete] button. You can add this printer again at any time. You exit the dialog box with the [Close] button. You can check whether the printer highlighted in the list is connected and accessible with the [Test] button. If so, the following dialog box appears: Figure 41 Dialog box – connection test successful You see the following message if the printer cannot be found because, for example, it is turned off: Figure 42 Dialog box – printer not found 8 Next you have to activate the M-Print® PRO software (see “4.15 Activating M-Print® PRO”). 1449820000/1.1/03.13 49 Setup 4.13 Connection via USB cable Important information When you have installed the M-Print® PRO application software, connect the USB cable to the printer. The printer control software is installed automatically. Figure 43 Connection –USB cable C USB cable D USB port Figure 44 PrintJet ADVANCED Explorer 1 To add the PrintJet ADVANCED, click the [Add…] button. 50 1449820000/1.1/03.13 Setup The following dialog box appears: Figure 45 Choosing printer connection 2 Click the [USB] button. The printer search starts. Figure 46 Printer search The search result is displayed in the following dialog box: Figure 47 Printer - search result If no printer was found, you may start a new search process via the button [Search again]. If a printer was found, click on the button [Add selection]. The following dialog box appears: 1449820000/1.1/03.13 51 Setup Figure 48 PrintJet ADVANCED Explorer 3 If you want to change the printer name, click the [Properties...] button. This changed printer name is then displayed in M-Print® PRO. Figure 49 Changing the printer name 4 Enter the printer name required for M-Print® PRO, for example PJA Workplace 1 (USB1). 5 Confirm your inputs with [OK]. The changed name PJA Workplace 1 (USB1) is displayed in the Explorer. Figure 50 Changed printer name You can remove the highlighted printer from the list with the [Delete] button. You can add this printer again at any time. You exit the dialog box with the [Close] button. You can check whether the printer highlighted in the list is connected and accessible with the [Test] button. 52 1449820000/1.1/03.13 Setup If so, the following dialog box appears: Figure 51 Dialog box – connection test successful You see the following message if the printer cannot be found because, for example, it is turned off: Figure 52 Dialog box – printer not found 6 Next you have to activate the M-Print® PRO software (see “4.15 Activating M-Print® PRO”). 1449820000/1.1/03.13 53 Setup 4.14 Installing the network version of the M-Print® PRO software Important information Installation should be carried out by a specialist. Administrator rights are required for this process. 4.14.1 Description The network version of M-Print® PRO is used when multiple users need to work with the software in a network. Instead of installing M-Print® PRO on each of their computers, here it is only necessary to install the software centrally (Setup.exe on a server or central PC). The client PCs (or users) access M-Print® PRO via shared network paths. Example scenario: Figure 53 54 Example scenario for network installation 1449820000/1.1/03.13 Setup Important information The network version can only be installed when the PrintJet ADVANCED is connected to the network via the network cable. It is not possible to install the network version via the USB port. 4.14.2 Tasks to be done on the central computer/server 1 Insert the DVD in the server/central computer. Figure 54 M-PRINT® PRO Installation - language setting 2 Touch the desired language. 3 Touch the [START APPLICATION] button. 1449820000/1.1/03.13 55 Setup Figure 55 M-PRINT® PRO Installation - Start menu 4 Touch the [SOFTWARE] button. Figure 56 M-PRINT® PRO Installation - software 5 Touch M-PRINT® PRO. 56 1449820000/1.1/03.13 Setup Figure 57 M-PRINT® PRO Installation - Language selection 6 Touch the desired language. The installation process starts automatically and the setup wizard appears. Figure 58 M-Print® PRO – setup wizard 7 Click the [CONTINUE] button. 1449820000/1.1/03.13 57 Setup Figure 59 M-Print® PRO – accepting the license terms 8 Accept the terms in the license agreement and press the CONTINUE] button. 9 Choose the setup type in the next window: Figure 60 M-Print® PRO – choosing the setup type 10 Press the [Network] button. 58 1449820000/1.1/03.13 Setup Figure 61 Network installation – choosing the target directory You can check how much storage space is free on the available drives with the [Disk Usage] button. 11 Click the [Browse…] button. 12 Select the target directory, for example C:\software\. Important information The users of the client computers must be able to access the target directory. 13 Click the [CONTINUE] button. 1449820000/1.1/03.13 59 Setup Figure 62 Network installation – choosing directories 14 For individual components such as the catalog you can use the […] button to choose other directories (for example the catalog in C:\data\catalog). Important information The target directories must be on a local drive of the server (network drives and UNC paths such as \\ServerName\ShareName\Path are not allowed). All folders listed above must be accessible to users of the client computers over the network. Write rights are essential for some of the folders (see section “Sharing folders”). 15 Click the [CONTINUE] button. 60 1449820000/1.1/03.13 Setup Figure 63 Starting network installation 16 Click the [Install] button. Microsoft Windows® User Account Control (UAC) might appear. 17 If so, confirm here that changes are allowed to be made to Windows. After your confirmation, the target directories are created and the files are copied to or created in them. 1449820000/1.1/03.13 61 Setup Figure 64 M-Print® PRO – status of the network installation The progress is indicated by a bar. Figure 65 Finishing network installation 18 When installation has been completed, press the [Finish] button. 62 1449820000/1.1/03.13 Setup The following dialog box appears: Figure 66 PrintJet ADVANCED Explorer 19 To add the PrintJet ADVANCED, click the [Add…] button. The following dialog box appears: Figure 67 Adding the printer When you click on the button [Browse network...], the search process is started. 1449820000/1.1/03.13 63 Setup Figure 68 Browsing network If a printer was found, the following dialog box appears: Figure 69 Search result - Browsing network Use the [Add selected printers] button to add the printer. You can also add the printer via its serial number or its network name or its IP address. Important information If you specified [Activate DHCP] under SYSTEM INFO on the touch panel, you must add the printer via its network name. Pressing the respective question mark shows where you can find the required information. You can see the serial number, for example, on the printer’s rating plate. 64 1449820000/1.1/03.13 Setup 20 Clicking the question mark for the serial number shows you the position of the rating plate on the printer. Figure 70 Serial number – rating plate 21 Enter the serial number or the network name or the IP address. If you click on the question mark, you will receive more information. 22 Click the respective [Add...] button. The entered printer is displayed in the PrintJet ADVANCED Explorer. Figure 71 Changing the printer name 23 If you want to change the printer name, click the [Properties...] button. This changed printer name is then displayed in M-Print® PRO. 1449820000/1.1/03.13 65 Setup Figure 72 Entering the printer name 24 Enter the printer name required for M-Print® PRO, for example PJA (production). 25 Confirm your inputs with [OK]. The changed name is displayed in the PrintJet ADVANCED Explorer. Figure 73 PrintJet ADVANCED Explorer You can remove the highlighted printer from the list with the [Delete] button. You can add this printer again at any time. You exit the dialog box with the [Close] button. You can check whether the printer highlighted in the list is connected and accessible with the [Test] button. If so, the following dialog box appears: Figure 74 66 Dialog box – connection test successful 1449820000/1.1/03.13 Setup You see the following message if the printer cannot be found because, for example, it is turned off or there is a network problem: Figure 75 Dialog box – printer not found 26 Next you have to activate the M-Print® PRO software (see “4.15 Activating M-Print® PRO”). Sharing folders M-Print® PRO uses the following folders; the folder structure depends on what was specified in the setup process: Figure 76 Network installation – folder structure 1449820000/1.1/03.13 67 Setup The meaning of the folders is as follows: Folder Contents bin This folder contains executable files. - data Standard directory in which users should store their MPrint® PRO files. X images This folder contains M-Print® PRO images. This folder is accessed when users choose images in M-Print® PRO via Insert > Image. install The printer control software is stored in this folder during installation. usblan Write rights required This folder contains the printer control software to support USB communication. This folder contains user profiles (for example user-specific settings defined via Tools > Options, printer mappings etc.). M-Print® PRO reads settings in this folder and writes them here. X This folder and its subfolders contain the M-Print® PRO program files. X configs This folder contains the product catalog. X filter This folder contains filter files that are needed for the import function (File > Import). X scripts This folder contains import scripts. X symbols This folder contains program symbols (for example for protective grounding) that can be inserted in M-Print® PRO. X templates Templates must be stored in this folder. X temp M-Print® PRO stores temporary files in this folder. X updates The update routine stores data in this folder. X Printer updates can be stored in this folder. X profiles shared pja Table 1 68 Folder structure and meaning 1449820000/1.1/03.13 Setup 4.14.3 Tasks to be done on the clients No further setup is required on the clients. By default users must launch the “start.exe” file from the ‛bin’ folder. The actual storage location of the “start.exe” file depends on what was specified during setup (directories). The dialog provides the necessary functions: Figure 77 Network installation – client No Windows administrator rights are needed for these functions. Open M-Print® PRO 6... Clicking this button starts the M-Print® PRO program. Create Desktop Link By clicking this button you can create a link to M-Print® PRO on the desktop. Create Start Menu Link By clicking this button you can add M-Print® PRO to the Start menu. Associate Files with M-Print® PRO 6 By clicking this button you can associate files with M-Print® PRO so that they are opened directly with MPrint® PRO when they are double-clicked. 1449820000/1.1/03.13 69 Setup Install EPLAN Electric P8 Addon This function is not required for the PrintJet ADVANCED. Close You close the start screen with the [Close] button. To set the correct print position for a MultiCard and to compensate for physical changes to it, you must make some settings via the M-Print® PRO software. These tasks are described in detail in chapter "5 Operation”, in section “5.2 Software settings”. If you make these settings at just one PC, for example client PC 1, then you must also make them available to client PC 2 to client PC N. With the following function you can share these settings with the other client PCs automatically. 1 Start the M-Print® PRO program. 2 In M-Print® PRO choose Tools and then Options. The following window appears: Figure 78 Clients – sharing print settings 3 Click the [Share Print Settings] button. The next time the users start up their PCs they are notified of the settings that have been made and can decide whether they want to adopt them or not. 4 Next you have to activate the M-Print® PRO software (see “4.15 Activating M-Print® PRO”). 70 1449820000/1.1/03.13 Setup 4.15 Activating M-Print® PRO The first time you start M-Print® PRO the software must be activated. 1 Start M-Print® PRO via the program icon on the desktop or via Start → Programs → Weidmüller → MPrint® PRO. Figure 79 M-Print® PRO program icon on the desktop The first time you start M-Print® PRO a window appears in which you can choose the demo version or the full version. Figure 80 M-Print® PRO – choosing the version 2 Choose the full version and click the [Next] button. 1449820000/1.1/03.13 71 Setup Figure 81 M-Print® PRO – key type 3 Choose the license key type and click the [Next] button. Figure 82 M-Print® PRO – registration 4 Enter the 11-digit license key shown on the case of the DVD that came with the printer. 72 1449820000/1.1/03.13 Setup If you also register the software via the internet, you will receive information about software updates and a description of new functions. 5 To do this, click the [Register] button and follow the instructions that are shown. 6 If you do not want registration, click the [Next] button. Figure 83 M-Print® PRO – finishing the installation process 7 To complete activation, press the [Finish] button. 4.16 Setting up and adjusting a MultiCard for the printer To set the correct print position for a MultiCard and to compensate for physical changes to it, you must make some settings via the M-Print® PRO software. These tasks are described in detail in chapter "5 Operation”, in section “5.2 Software settings”. 1449820000/1.1/03.13 73 Setup 4.17 Running a print test When you have turned on the printer, run a print test. Follow these steps: Figure 84 Touch panel – main menu 1 Touch the [TEMPLATES] button on the touch panel’s main menu. 2 Choose a template that corresponds to the supplied MultiCard. 74 1449820000/1.1/03.13 Setup Figure 85 Touch panel – templates 3 Insert the MultiCard. 4 Touch the [PRINT] button to run the print test. 1449820000/1.1/03.13 75 Operation 5 5.1 5.2 5.3 Operation General operation............................................................................................................................78 5.1.1 Important information .........................................................................................................78 5.1.2 Inserting MultiCards/MetalliCards......................................................................................79 5.1.3 Processing a single MultiCard/MetalliCard ........................................................................80 5.1.4 Processing a stack of MultiCards ......................................................................................80 Software settings ............................................................................................................................81 5.2.1 Starting M-Print® PRO ......................................................................................................81 5.2.2 Mapping and calibrating the printer ...................................................................................82 5.2.3 Setting the printer correction..............................................................................................87 5.2.4 Setting material-dependent slip .........................................................................................89 5.2.5 Adjusting MultiCards ..........................................................................................................91 5.2.6 Printing MultiCards/MetalliCards .......................................................................................95 5.2.7 Curing settings / Heating level ...........................................................................................95 5.2.8 Selecting the print quality...................................................................................................95 Touch panel .....................................................................................................................................96 5.3.1 Menu structure of the touch panel .....................................................................................97 5.3.2 Main menu .........................................................................................................................98 5.3.3 Submenus ..........................................................................................................................99 5.3.4 System Info ........................................................................................................................99 5.3.5 Changing the printer name ..............................................................................................100 5.3.6 Changing the IP address and subnet mask and activating DHCP ..................................102 5.3.7 Selecting the language ....................................................................................................105 5.3.8 Changing the USB port ....................................................................................................106 5.3.9 Ink level ............................................................................................................................107 5.3.10 Protocol ............................................................................................................................108 5.3.11 Information .......................................................................................................................109 5.3.12 Tools ................................................................................................................................110 5.3.13 Print jobs ..........................................................................................................................111 5.3.14 Templates ........................................................................................................................112 1449820000/1.1/03.13 77 Operation 5.1 General operation If the printer is turned off or is not used, this can lead to blockage of the ink nozzles after some time. 5.1.1 Important information Print some MultiCards/MetalliCards every week. This is the only way to preserve print quality. CAUTION Warning of crushing Do not operate the printer without its cover and do not reach through its openings while it is running. CAUTION Automatic start-up warning The printer can start up at any time without warning when a print job is sent over the network. Only remove ink cartridges when they are empty or have expired. Removing an ink cartridge can cause leaks in the connection between the ink cartridge and the ink line. This can lead to a faulty ink feed system. Do not use ink that has expired. When the ink expiration date is approaching, a message is displayed on the touch panel. Replace the specified ink cartridge (see section “Replacing ink cartridges”). NOTE Using expired ink reduces the print quality and can cause damage to the printer. CAUTION Warning of hot surface The curing process makes MultiCards and MetalliCards very hot. Let MultiCards/MetalliCards cool off before removing them from the output rail. Only use products that have been produced or approved by Weidmüller (M-Print® PRO software, MultiCards/ MetalliCards and ink cartridges). Otherwise no liability can be assumed for the quality and durability of printing. Important information The openings in the enclosure of the printer must not be blocked or covered over. Do not insert any unintended objects through these openings. Printer faults and damage caused by the use of unapproved and unsuitable accessories and consumables are excluded from the warranty. Make sure that no liquid gets into the printer. Do not switch off the printer! The printer automatically goes into standby mode. The operating parameters are only retained while the printer is turned on. These parameters ensure, for example, that the printhead is cleaned optimally. 78 1449820000/1.1/03.13 Operation 5.1.2 Inserting MultiCards/MetalliCards Direction of insertion for MultiCards Figure 87 Opening the inlay 1 Open the inlay’s lock (A) and raise the bar. Figure 86 Direction of insertion for MultiCards MultiCards can be inserted directly without any prior handling. The end with the solid margin must be fed into the printer. Inserting a MetalliCard in the inlay 1 Before inserting the MetalliCard in the inlay, remove the protective plastic film that is attached to the MetalliCard. 2 Clean the MetalliCard with a moist cloth (Primer CC-M – 1341200000). Figure 88 Inserting a MetalliCard in the inlay 2 Insert the MetalliCard (C) in the inlay (D). 3 Lower the bar (B) and close the lock. 3 Hold the MetalliCard at the side when inserting it in the inlay. Do not touch the area to be printed as that reduces the print quality. 1449820000/1.1/03.13 79 Operation Direction of insertion for MetalliCards 5.1.4 Processing a stack of MultiCards Important information Only MultiCards are allowed to be inserted in stacks (not MetalliCards). You can insert a stack of up to 30 MultiCards in the loader. The stack must not exceed 30 MultiCards. The stack must not contain a mix of full-size and half-size MultiCards. Insert the stack of MultiCards in the loader (A) in the direction of insertion shown previously. Figure 89 5.1.3 Direction of insertion for MetalliCards Processing a single MultiCard/MetalliCard Place the single MultiCard/MetalliCard on the green conveyor belt (A) in the direction of the arrow. Figure 91 Inserting a stack of MultiCards A Loader to hold the stack Figure 90 Inserting a single MetalliCard inlay A One at a time 80 1449820000/1.1/03.13 Operation 5.2 Software settings The following settings must be made via the M-Print® PRO software. To determine some settings, it is necessary to print a MultiCard. The printed MultiCard can be cleaned with cold water and used again. Important information The MultiCard is not cured in this process. The ink can be wiped off easily. Make sure that you do not get your clothes dirty. 5.2.1 Starting M-Print® PRO Start M-Print® PRO via the program icon on the desktop or via Start → Programs → Weidmüller → M-Print® PRO. Figure 92 M-Print® PRO program icon on the desktop 1449820000/1.1/03.13 81 Operation 5.2.2 Mapping and calibrating the printer A printer must be assigned for each MultiCard type, e.g. DEK 5/5. Calibration must be carried out once for the printer, as this is a printer-specific zero point. Assigning a printer Figure 93 Selecting a MultiCard 1 Choose e.g. MultiCard → Terminal Markers. 2 Select the DEK 5/5 MC-10 NEUTRAL WS MultiCard. 3 Press the [Select Product] button. 4 From the menu bar choose File → Print. 82 1449820000/1.1/03.13 Operation Figure 94 Selecting the printer 5 Select the PrintJet ADVANCED printer that has been added. 6 Press the [Map] button. Figure 95 Mapping the printer 7 In the dialog box that follows choose ‛As Printer’ and confirm this with the [OK] button. 1449820000/1.1/03.13 83 Operation Figure 96 Assigning variants to the printer 8 In this dialog box choose whether you want to assign all variants of the DEK 5/5 MultiCard to this printer. If you press the [Yes] button, all versions of the MultiCard type DEK 5/5 are assigned to the PrintJet ADVANCED and are always output on this printer unless this setting is changed. Printer calibration Figure 97 Calibration 9 Now click on the [Calibration…] button to determine the print position for the printer. 84 1449820000/1.1/03.13 Operation Figure 98 Coordinate plane 10 Insert, for example, a DEK 5/5 MC-10 NEUTRAL WS MultiCard in the printer (also see section “5.1.2 Inserting MultiCards/MetalliCards”). 11 Click the [Print Coordinate Plane] button. 12 Measure the X and Y values as shown below and enter them in the corresponding fields. Figure 99 Measuring and entering values The values that you enter automatically correct the side margins. 1449820000/1.1/03.13 85 Operation 13 Repeat the steps until the coordinate plane is in the following position on the printed MultiCard. Figure 100 Position of the coordinate plane 14 Check this by printing a coordinate plane with the corrected values. 15 Save the settings by clicking the [Save] button. 16 Next set the printer correction (see the following section). 86 1449820000/1.1/03.13 Operation 5.2.3 Setting the printer correction The printer correction must only be set once. It does not depend on the MultiCard type. 1 From the menu bar choose Tools → Printer Settings → Set Printer Correction... 2 Insert, for example, a DEK 5/5 MC-10 NEUTRAL WS MultiCard in the printer (also see section “5.1.2 Inserting MultiCards/MetalliCards”). Figure 101 Setting the printer correction 3 Print a rectangle of the specified size (228 x 46 mm) by pressing the [Print Rectangle] button. 4 Remove the printed MultiCard from the printer. 5 Measure the size of the printed rectangle. 1449820000/1.1/03.13 87 Operation Figure 102 Setting the printer correction 6 Enter the measured values in the ‛Actual Width (X)’ and ‛Actual height (Y)’ fields. In the example above the measured values are 227.5 x 46. The printer must output the rectangle 0.22% larger in order to reach the required output size. 7 To check the dimensions, insert a DEK 5/5 MC-10 NEUTRAL WS MultiCard in the printer again. 8 Press the [Print Adjusted Rectangle] button. 9 When the dimensions are correct, confirm your inputs with the [OK] button. The printer has now been adjusted for all MultiCards. 10 Next set the material-dependent slip (see the following section). 88 1449820000/1.1/03.13 Operation 5.2.4 Setting material-dependent slip The material-dependent slip correction must take place for every MultiCard version, as it must be set material dependently. 1 From the menu bar choose Tools → Printer Settings → Set Material-Dependent Slip... 2 Insert, for example, a DEK 5/5 MC-10 NEUTRAL WS MultiCard in the printer (also see section “5.1.2 Inserting MultiCards/MetalliCards”). Figure 103 Setting material-dependent slip 3 Print a rectangle of the specified size (228 x 46 mm) by pressing the [Print Rectangle] button. 4 Remove the printed MultiCard from the printer. 5 Measure the size of the printed rectangle. 1449820000/1.1/03.13 89 Operation Figure 104 Material-dependent slip – entering the measured values 6 If the measured values differ from the specified size, enter these measured values in the ‛Actual Width (X)’ and ‛Actual height (Y)’ fields. In the example above the measured values are 227 x 46. The printer must output the rectangle 0.44 % larger in order to reach the required output size. 7 To check the dimensions, insert a DEK 5/5 MC-10 NEUTRAL WS MultiCard in the printer again. 8 Click the [Print Adjusted Rectangle] button. 9 When the dimensions are correct, confirm your inputs with the [OK] button. 10 Next set the printer correction (see the following section). 90 1449820000/1.1/03.13 Operation 5.2.5 Adjusting MultiCards MultiCards may not be their normal size, for example as a result of the ambient temperature. It is generally the width that is affected by such a change. You can adjust MultiCards to compensate for these physical changes. The adjustment must be set for every MultiCard type. 1 From the menu bar choose File → Adjust Marker Type... Figure 105 Adjusting the marker type 2 Measure the width (X) from the beginning of the first project marker to the beginning of the last project marker (see figure above). 3 To determine the height (Y), measure from the lower edge of the bottom marker to the upper edge of the top marker (see figure above). 4 Enter the actual measured values in the ‛Width (X)’ and ‛Height (Y)’ fields. 1449820000/1.1/03.13 91 Operation Enter the required values in the ‛Offset (a)’ and ‛Offset (b)’ fields to adjust the offset. Figure 106 Adjusting the offset 5 Insert, for example, a DEK 5/5 MC-10 NEUTRAL WS MultiCard in the printer (also see section “5.1.2 Inserting MultiCards/MetalliCards”). 6 Click the printer icon: The printed MultiCard looks like this: Figure 107 MultiCard Three squares and one row of dots were printed on the MultiCard. 92 1449820000/1.1/03.13 Operation Example of an incorrect zero point in the X direction (offset a) Figure 108 Adjusting the zero point in the X direction In this example the three squares and the row of dots were printed 1 mm too far to the left. To adjust this, it is necessary to change the value for ‛Offset (a)’ in the 'Adjust Marker Type' window (see Figure 105 Adjusting the marker type). In this example the squares have to be shifted to the right. Consequently a positive value must be entered (1 mm in this example). Example of an incorrect zero point in the Y direction (offset b) Figure 109 Adjusting the zero point in the Y direction In this example the three squares and the row of dots were printed 1 mm too far up. To adjust this, it is necessary to change the value for ‛Offset (b)’ in the 'Adjust Marker Type' window (see Figure 105 Adjusting the marker type). In this example the squares have to be shifted down. Consequently a positive value must be entered (1 mm in this example). 1449820000/1.1/03.13 93 Operation Example of an incorrect width X (adjusting the centering for all markers) Figure 110 Adjusting the centering in the X direction From marker to marker, printing is increasingly shifting from the center to the right. To adjust this, it is necessary to subtract the measured value (1 mm in this example) from the actual value for ‛Width (X)’ in the 'Adjust Marker Type' window (see Figure 105 Adjusting the marker type). If printing is increasingly shifting, from marker to marker, from the center to the left, it is necessary to add the measured value to the current value for 'Width (X)' in the 'Adjust Marker Type' window (see Figure 105 Adjusting the marker type). Example of an incorrect height Y (adjusting the centering for all markers) Figure 111 Adjusting the centering in the Y direction From marker to marker, printing is increasingly shifting from the center upward. To adjust this, it is necessary to subtract the measured value (1 mm in this example) from the current value for ‛Height (Y)’ in the 'Adjust Marker Type' window (see Figure 105 Adjusting the marker type). 94 1449820000/1.1/03.13 Operation If printing is increasingly shifting, from marker to marker, from the center downward, it is necessary to add the measured value to the current value for 'Height (Y)' in the 'Adjust Marker Type' window (see Figure 105 Adjusting the marker type). Important information If MultiCards are adjusted at just one computer, these settings must be made available to the other computers. This is done by the administrator. For details of this, read section “4.14.3 Tasks to be done on the clients”). 5.2.6 Printing MultiCards/MetalliCards Procedure: 1 Start the M-Print® PRO software. 5.2.7 Curing settings / Heating level The settings for curing MultiCards and MetalliCards differ and are applies automatically. 3 Enter the text or insert an image or barcode that you want to print. It is possible to set a higher or lower intensity for curing. Details on fine adjustment of the heating level can be found in the M-Print® PRO user manual. 4 Insert the MultiCard/MetalliCard or the MultiCard stack. After cooling, check each MultiCard or MetalliCard for resistance to smudging and scratching. 2 Select the required MultiCard/MetalliCard. 5 Start printing via M-Print® PRO. It is also possible to store the print job on a USB stick and insert this stick directly in the printer's USB master port. The print job is then selected and printed at the touch panel via the [TEMPLATES] button, see section "5.3.15 Printing the templates from the USB stick". 1449820000/1.1/03.13 5.2.8 Selecting the print quality It is possible to determine the print quality. Details on this process can be found in the M-Print® PRO user manual. 95 Operation 5.3 Touch panel The touch panel enables you to look up information about the printer such as the current ink level in the cartridges, view and delete print jobs and carry out maintenance. You can also set the required language for the touch panel and print out sample templates. The touch panel displays prompts to change the ink cartridges and to maintain the printer. The touch panel can be raised and rotated to the position you require (see section “4.6 Positioning the touch panel”). 96 1449820000/1.1/03.13 Operation 5.3.1 Menu structure of the touch panel TEMPLATES PRINT JOBS Templates Overview Print USB TOOLS Printhead cleaning Printhead flushing Sensor check Nozzle check Edit Print SYSTEM INFO (Page 1) Printer name Change printer name IP address Change IP address Change subnet mask Activate/ Deactivate DHCP Language USB port Select language Select USB port SYSTEM INFO (Page 2) Ink fill level Protocol Information Select color Overview of events Information about PrintJet ADVANCED Information of ink Message and proposed solution Message information 1449820000/1.1/03.13 97 Operation 5.3.2 Main menu Figure 112 Touch panel – main menu The printer status is shown in the bottom line. In the example above the printer is ‛Ready’. Pressing one of the four buttons – [TEMPLATES], [PRINT JOBS], [TOOLS] and [SYSTEM INFO] – takes you to the corresponding submenu. The bottom part of the main menu shows the ink level of the individual cartridges. You can find exact details of the ink level under [SYSTEM INFO] in the second window (see section "5.3.4.2 System Info"). 98 1449820000/1.1/03.13 Operation 5.3.3 Submenus Other buttons are available in the submenus: Touching this arrow button displays the next page. Touching this arrow button displays the previous page. Touching this button takes you back to the main menu. The currently selected menu, for example System Info, is shown at the top of the touch panel. 5.3.4 System Info 1 Touch the [SYSTEM INFO] button on the touch panel’s main menu. Figure 113 Touch panel – System Info 1 1449820000/1.1/03.13 99 Operation Figure 114 Touch panel – System Info 2 The following sections provide more information about the individual menu items. 5.3.5 Changing the printer name The preset printer name is always the serial number. You can assign a self-explanatory name to the printer to be able to identify it better. Follow these steps: 1 In the first System Info window, select the [PRINTER NAME] button. The following window appears: Figure 115 100 Touch panel – System Info 1 – printer name 1449820000/1.1/03.13 Operation 2 Enter the desired printer name via the on-screen keys and touch the [SAVE] button to confirm it. You can delete the entire entry with the [X] key. You enter a space character with the [Space] key. You can switch to numeric keys with the [123] key. Figure 116 Touch panel – System Info 1 – printer name 3 In this window you can enter the required data via the numeric keys. You can delete the entire entry with the [X] key. 4 Save your inputs by touching the [SAVE] button. 5 It may be necessary to restart the printer (if so, a message is then displayed on the touch panel). 1449820000/1.1/03.13 101 Operation 5.3.6 Changing the IP address and subnet mask and activating DHCP Important information Installation should be carried out by a specialist. Administrator rights are required for this process. You can assign the IP address either statically by entering the IP address and subnet mask or dynamically by activating the Dynamic Host Configuration Protocol (DHCP). In the case of static IP address assignment the printer will always have the network data that you enter (IP address and subnet mask). In the case of dynamic IP address assignment via DHCP the printer might have a different IP address when it is restarted. If you choose [DHCP], the IP address and its subnet mask are automatically retrieved from the DHCP server on the network. This means that a DHCP server must be accessible on the network. Important information If you activate [DHCP], the printer must be added via the network name (not via the IP address as this might change when the printer is restarted). IP address 1 Touch the [SYSTEM INFO] button on the main menu. 2 In the first System Info window, touch the [IP ADDRESS] button. The following window appears: Figure 117 102 Touch panel – System Info 1 – IP address/subnet mask/DHCP 1449820000/1.1/03.13 Operation Subnet mask 3 Change the network parameters and touch the [SAVE] button to confirm the changes. You can delete the entire entry with the [X] key. The following window appears: Figure 118 Touch panel – System Info 1 – IP address/subnet mask/DHCP 1449820000/1.1/03.13 103 Operation Activating DHCP 1 Touch the [SYSTEM INFO] button on the main menu. 2 In the first System Info window, touch the [IP ADDRESS] button. The following window appears: Figure 119 Touch panel – System Info 1 – IP address/subnet mask/DHCP 3 Touch the checkbox [DHCP]. If this checkbox is checked, this function is active. 104 1449820000/1.1/03.13 Operation 5.3.7 Selecting the language 1 In the first System Info window, touch the [LANGUAGE] button. The following window appears: Figure 120 Touch panel – language 2 Choose the required language by touching the corresponding button. Touch this button to scroll forward to the next page and additional options. Touch this button to scroll back to the previous page. 3 Touch the [SAVE] button to save the selected language. 1449820000/1.1/03.13 105 Operation 5.3.8 Changing the USB port Whenever a printer is installed via a USB port, USB – 001 is assigned to it. If you connect a second printer to the PC, USB – 001 is automatically assigned to this printer, too. A different USB port must therefore be assigned manually to the second printer, e.g. USB – 002 or USB – 003. Proceed as follows to make this change: 1 In the first System Info window, touch the [USB PORT] button. The following window appears: Figure 121 Touch panel – System Info – USB port 2 Select the desired USB port and touch the [SAVE] button to confirm it. 106 1449820000/1.1/03.13 Operation 5.3.9 Ink level Use the [INK LEVEL] button to display information about the ink cartridge. 1 In the second System Info window, touch the [INK LEVEL] button. The following window appears: Figure 122 Touch panel – System Info – ink level 2 If you enter the respective color, a window opens with further information about the selected ink cartridge. Figure 123 Touch panel – System Info – information of ink 1449820000/1.1/03.13 107 Operation 5.3.10 Protocol Use the [PROTOCOL] button to display an overview of printer events. 1 In the second System Info window, touch the [PROTOCOL] button. The following window appears: Figure 124 Touch panel – System Info – protocol 2 If you touch the [DETAILS] button, detailed information about the message and, if necessary, a proposed solution are displayed. Figure 125 Touch panel – System Info – protocol details Use the [NOTES] button to display information. 108 1449820000/1.1/03.13 Operation 5.3.11 Information 1 In the second System Info window, touch the [INFORMATION] button. The following window appears: Figure 126 Touch panel – System Info – information Information about the PrintJet ADVANCED is displayed here, e.g. which firmware version is currently in use or how many MultiCards/MetalliCards have been printed. 1449820000/1.1/03.13 109 Operation 5.3.12 Tools If you touch the [TOOLS] button on the main menu, you can carry out the following maintenance tasks. Figure 127 Touch panel – Tools You will find a description of the individual maintenance tasks in chapter “6 Cleaning and maintenance”. 110 1449820000/1.1/03.13 Operation 5.3.13 Print jobs If you touch the [PRINT JOBS] button on the main menu, all print jobs that are still in the printer queue are displayed. Here you can also delete print jobs if, for example, the wrong file was sent to the printer. Figure 128 Touch panel – Print Jobs This window shows all pending print jobs. 1 Select the print job that you want to delete by touching it. 2 Touch the [EDIT] button to stop the printer. 3 Touch the [Delete] button. A print job that has already started cannot be deleted. The power cable must not be disconnected during printing. 1449820000/1.1/03.13 111 Operation 5.3.14 Templates 1 Touch the [TEMPLATES] button on the touch panel’s main menu. Figure 129 Touch panel – templates Under [TEMPLATES] you will find sample templates, e.g. for printing tests. 2 Touch the template that you want to print. 3 Insert the corresponding MultiCard in the printer. Touch the [PRINT] button to execute the print job. 112 1449820000/1.1/03.13 Operation 5.3.15 Printing the templates from the USB stick You can store print data on a USB stick and output it on the PrintJet ADVANCED. 1 Touch the [TEMPLATES] button on the touch panel’s main menu. Figure 130 Touch panel – templates Figure 131 Connection – USB stick 2 Insert the USB stick into the USB master port. 3 Touch the [USB] button (see "Figure 130 Touch panel – templates"). 1449820000/1.1/03.13 113 Operation Figure 132 Touch panel – templates The print files on the USB stick are displayed. You create print files in M-Print® PRO by choosing ‛PJA File Output’ as the printer (for details, see the MPrint® PRO user manual. 4 Touch the [PRINT] button to execute the print job. 114 1449820000/1.1/03.13 Cleaning and maintenance 6 6.1 Cleaning and maintenance Tools menu ....................................................................................................................................116 6.1.1 Printhead cleaning ...........................................................................................................117 6.1.2 Printhead flushing ............................................................................................................118 6.1.3 Executing a sensor check ................................................................................................120 6.1.4 Executing a nozzle check ................................................................................................122 6.2 Replacing ink cartridges ..............................................................................................................124 6.3 Replacing the wastepad ...............................................................................................................130 6.4 Replacing the dust filter ...............................................................................................................132 6.5 Cleaning the printer enclosure ....................................................................................................133 6.6 Cleaning the touch panel .............................................................................................................133 6.7 Updating the printer software ......................................................................................................134 1449820000/1.1/03.13 115 Cleaning and maintenance 6.1 Tools menu Figure 133 Touch panel – main menu 1 Touch the [TOOLS] button in the main menu. The following screen is then displayed: Figure 134 116 Touch panel – tools menu 1449820000/1.1/03.13 Cleaning and maintenance 6.1.1 Printhead cleaning Carry out printhead cleaning if the print quality deteriorates. Print quality correct Print quality insufficient 1 Touch the [TOOLS] button in the main menu. 2 Touch the [HEAD CLEANING] button in the Tools menu. The following window appears: Figure 135 Touch panel – printhead cleaning Touch the [NO] button if printhead cleaning should not be executed: 3 Touch the [YES] button if printhead cleaning should be executed: 1449820000/1.1/03.13 117 Cleaning and maintenance Printhead cleaning takes approx. 2 minutes. The following message is displayed on the touch panel during printhead cleaning: Figure 136 Touch panel – printhead cleaning duration 4 Print out a MultiCard. If the printing result is still not satisfactory, execute printhead flushing. 6.1.2 Printhead flushing If you have carried out printhead cleaning and the printing result is still not satisfactory, execute printhead flushing. With printhead flushing, considerably more ink is used than with printhead cleaning. 1 Touch the [TOOLS] button in the main menu. 2 Touch the [HEAD FLUSHING] button in the Tools menu. 118 1449820000/1.1/03.13 Cleaning and maintenance The following window appears: Figure 137 Touch panel – printhead flushing Touch the [NO] button if printhead flushing should not be executed: 3 Touch the [YES] button if printhead flushing should be executed: Printhead flushing takes approx. 5 minutes. The following message is displayed at the touch panel: Figure 138 Touch panel – printhead flushing duration 1449820000/1.1/03.13 119 Cleaning and maintenance 6.1.3 Executing a sensor check In a sensor check, all sensors in the printer are checked to make sure they are functioning. If a sensor is soiled, for example, it cannot detect when a MultiCard/MetalliCard passes through. 1 Insert a MultiCard in the printer. 2 Touch the [TOOLS] button in the main menu. 3 Touch the [SENSOR CHECK] button in the Tools menu. The following window appears: Figure 139 Touch panel – execute sensor check Touch the [NO] button if a sensor check should not be executed: 4 Touch the [YES] button if a sensor check should be executed: All sensors in the system are now checked. The following window is displayed during this time: 120 1449820000/1.1/03.13 Cleaning and maintenance Figure 140 Touch panel – sensor check in progress A status page is subsequently displayed which presents the sensors and shows whether they are correct or not. Contact a service technician in case of an error. 1449820000/1.1/03.13 121 Cleaning and maintenance 6.1.4 Executing a nozzle check If the print quality is not OK, there might be a blocked or dried out nozzle. To see if this is the case, execute a nozzle check. 1 Touch the [TOOLS] button in the main menu. 2 Touch the [NOZZLE CHECK] button in the Tools menu. The following window appears: Figure 141 Touch panel – selecting a MultiCard for a nozzle check 3 Select a MultiCard for the nozzle check by touching the respective MultiCard, e.g. [CC 30 / 60 MC WS]. 4 Touch the [NEXT] button. 122 1449820000/1.1/03.13 Cleaning and maintenance Figure 142 Touch panel – inserting a MultiCard for the nozzle check Touch the [CANCEL] button to cancel the process. 5 Insert the selected MultiCard into the loader. 6 Touch the [PRINT] button. The following screen is displayed during the nozzle check: Figure 143 Touch panel – nozzle check in progress 1449820000/1.1/03.13 123 Cleaning and maintenance 6.2 Replacing ink cartridges Replace the ink cartridges when they are empty or their expiration date has been reached. Handling ink cartridges Observe the following information when replacing ink cartridges: CAUTION The ink cartridges are sealed units. Under normal circumstances, ink will not leak out of an ink cartridge. Always handle used ink cartridges with care as ink can be in the ink supply outlet. If you get ink on your hands, wash them thoroughly with soap and water. If you get ink in your eyes, rinse immediately with plenty of water. If you accidentally swallow any ink, rinse out your mouth and drink plenty of water. Do not induce vomiting. Keep ink cartridges out of reach of children. Never allow children to play with ink cartridges. Printer ink is not suitable for human consumption. No not allow ink to come into contact with the mucous membranes. Only remove ink cartridges from the printer when they are empty or their use-by date has expired. Removing an ink cartridge can cause leaks in the connection between the ink cartridge and the ink line. This can lead to a faulty ink feed system. 124 Never use out-of-date ink cartridges. When the use-by date of the ink approaches (printed on the packaging), a message is displayed at the touch panel. Replace the specified ink cartridge. For the best printing results, the ink in the cartridge should be used within nine months of installation. NOTE Using expired ink reduces the print quality and can cause damage to the printer. Damages due to the use of outof-date ink cartridges are excluded from the warranty. Do not shake ink cartridges, as this may cause ink to leak. Do not disassemble or try to refill ink cartridges. Store unopened ink cartridges in a cool and dry place, preferably in a refrigerator at about 4 °C. Before using an ink cartridge that has been stored in a colder place, allow the cartridge to stand at room temperature for at least three hours. Install ink cartridges in the printer immediately after removing them from the packaging. The print quality can be impaired if an ink cartridge is left unpacked for any length of time before use. Ink is used when a new ink cartridge is inserted or when the ink tank lid is opened, as the printer always carries out a reliability check. Always handle ink cartridges with care, otherwise ink could spill and cause soiling. Never touch the ink supply outlet of the ink cartridge or the area around it. 1449820000/1.1/03.13 Cleaning and maintenance The ink filling level can be displayed at the touch panel; if necessary, replace the ink cartridges. 1 Select the [SYSTEM INFO] button in the main menu. 2 Change to the second page of the System info 3 Touch the [INK LEVEL] button. The following window appears: Figure 144 Touch panel – System Info – ink level 1449820000/1.1/03.13 125 Cleaning and maintenance If the expiration date of an ink cartridge has been reached, a message is automatically displayed on the touch panel. Figure 145 Touch panel – ink cartridge out-of-date Important components can become blocked and the printer may be damaged if you touch the [Yes] button and continue to print with the out-of-date ink cartridge. Damages due to the use of out-of-date ink cartridges are excluded from the warranty. Therefore, replace out-of-date ink cartridges immediately! (Also see information shown via the [PLEASE NOTE] button.) 4 Touch the [NO] button. 5 Replace the ink cartridge. 126 1449820000/1.1/03.13 Cleaning and maintenance The following information is displayed after touching the [INFORMATION] button: Figure 146 Touch Panel – ink cartridge empty Touch the arrow to return to the previous screen. 1449820000/1.1/03.13 127 Cleaning and maintenance Figure 147 Important information Information on inserting ink cartridges If you open the ink tank lid, the printer stops. The ink cartridges are electronically and mechanically coded, ensuring they can only be inserted correctly. Opening the ink tank lid 1 Open the ink tank lid by pressing the finger recess (A). Figure 149 Coding of the ink cartridges A Electronic coding B Mechanical coding Figure 148 Removing the ink cartridge 2 Remove the ink cartridge which must be replaced by extracting it horizontally. 128 1449820000/1.1/03.13 Cleaning and maintenance Figure 150 Positions of the ink cartridges A Black ink cartridge (K) B Cyan ink cartridge (C) C Magenta ink cartridge (M) Figure 151 Inserting an ink cartridge 4 Insert the ink cartridge into the printer. The ink cartridge is properly inserted when it snaps into place. D Yellow ink cartridge (Y) 3 Remove the ink cartridge from its packaging. 1449820000/1.1/03.13 129 Cleaning and maintenance 6.3 Replacing the wastepad Replace the wastepad if a touch panel message displays that it is full. Proceed as follows for more information: 1 Touch the [SYSTEM INFO] button on the main menu. 2 Change to the second page of the System Info. 3 Touch the [PROTOCOL] button. Figure 152 Touch panel – System Info – protocol 4 Touch the [DETAILS] button to display more information about the message and, if necessary, a proposed solution. 130 1449820000/1.1/03.13 Cleaning and maintenance Figure 153 Touch panel – System Info – protocol Use the [NOTES] button to display information. Important information Do not open the wastepad. The complete tray must be replaced. Dispose of the wastepad through an authorized dealer or at a suitable hazardous materials disposal center. Check local regulations before attempting to dispose of the wastepad yourself. Important information If you open the ink tank lid, the printer stops. Figure 154 Opening the ink tank lid 1 Open the ink tank lid by pressing the finger recess (A). 1449820000/1.1/03.13 131 Cleaning and maintenance 6.4 Replacing the dust filter Replace the dust filter if it is soiled. Figure 155 Unlock the wastepad 2 Press the interlock (B) downwards and ... Figure 157 Removing the filter cover 1 Remove the filter cover (A) by, e.g., inserting a slotted screwdriver into the recess and carefully removing the filter cover. The filter cover is fixed at three points. Figure 156 Extracting the wastepad 3 … extract the wastepad (C). 4 Insert the new wastepad horizontally. Figure 158 Replacing the dust filter 2 Replace the dust filter (B). 3 Re-insert the filter cover until it snaps into place. 132 1449820000/1.1/03.13 Cleaning and maintenance 6.5 Cleaning the printer enclosure NOTE Do not use volatile chemicals such as benzene, thinning fluid or insecticide on the printer. The use of such chemicals can result in damage to the printer including cracks or color changes. DANGER Electrical hazard warning When cleaning the printer, ensure that no moisture enters it. Only clean the printer enclosure. Only service technicians should clean the inside of the printer. Keep moisture away from live parts as it can cause short-circuits. Regularly clean the outside of the printer enclosure using a soft, dry or slightly moistened cloth. 1449820000/1.1/03.13 If the dirt does not come off, initially wipe the printer with a cloth moistened with a neutral cleaning agent, then with a moist cloth, and finally with a dry cloth. 6.6 Cleaning the touch panel Clean the touch panel with a cleaning agent suitable for touch screens and a soft, lint-free cloth. 133 Cleaning and maintenance 6.7 Updating the printer software Proceed as follows to update the printer software: 1 Start the M-Print® PRO program. 2 In M-Print® PRO, choose the menu item 'Extras' and then 'Options'. 3 In the 'Options' window, choose the entry 'PrintJet ADVANCED' and then 'Administration'. Figure 159 M-Print® PRO – updating the printer software 4 Select the update file, in the example above it is the 'update.zip' file. 5 Click on the [Start printer update] button and the following message is displayed. Figure 160 M-Print® PRO – updating the printer software 6 Confirm the message with [YES]. A successful software update is displayed on the touch panel of the printer. 7 Touch the [OK] button to confirm it at the touch panel of the printer. 134 1449820000/1.1/03.13 Troubleshooting 7 Troubleshooting 7.1 General information ......................................................................................................................136 7.2 General troubleshooting ..............................................................................................................136 7.3 List of events .................................................................................................................................138 1449820000/1.1/03.13 135 Troubleshooting 7.1 General information A message on the touch panel indicates a printer fault or when an ink cartridge needs to be replaced. Touch the [SYSTEMINFO] button in the main menu of the touch panel for more detailed information about this message and to see which measures should be taken. Change to the second page of the System Info and touch the [PROTOCOL] button. The event is displayed. Use the [DETAILS] button to display further information and an appropriate proposed solution. Is the printed image unclear or doubled? In this case, contact the Weidmüller Customer Service department. Is there a problem with the printer's location? 1 Make sure that the printer is located on a flat even surface. 2 Install the printer at a site that is free from vibration. A MultiCard/MetalliCard is stuck in the printer Switch off the printer and then switch it back on again. 7.2 General troubleshooting CAUTION Never remove the printer enclosure in case of a fault. Contact the Customer Service department if the fault cannot be rectified. The printing results are unsatisfactory. The printed image is too weak or is spotted. The card stuck in the printer will be fed out. The print is irregular, either too strong or too weak Check the following if there is a problem with the print quality, such as irregular print or inappropriate ink quantity: Are you using an out-of-date ink cartridge? NOTE Using expired ink reduces the print quality and can cause damage to the printer. Check the printer status. Has the printer not been used for a long time? The ink might have dried up or the printhead nozzles are blocked. 1 Execute a nozzle check (see section "6.1.4 Executing a nozzle check"). 2 If necessary, clean the printhead. (See section "6.1.1 Printhead cleaning".) 136 1449820000/1.1/03.13 Troubleshooting The printouts are dirty or spotted Check the following if the printed marker areas are dirty or spotted: Have you touched the unprinted marker areas of the MultiCard/MetalliCard? Do not touch the unprinted marker area. Are the MultiCards/Is the MetalliCard aligned correctly? Check the alignment of the inserted MultiCard/MetalliCard. Are you using an original Weidmüller ink cartridge? Opening the ink tank lid during the print process Printing is canceled if the ink tank lid is opened during the printing process. If you open the lid before the heating unit has switched on, the printing process will resume as soon as the lid is closed. If you open the lid while the heating unit is already activated, the heating unit will be switched off. The current MultiCard will be printed and fed out of the printer without fixation. A message is displayed on the touch panel. The filling level of the ink cartridges is set to 'empty'. The printer automatically starts re-initialization of the ink tank system (takes up to 2 minutes). Only use original Weidmüller ink cartridges. The printer may be damaged if you are not using an original Weidmüller ink cartridge or if you are using a refilled cartridge. 1449820000/1.1/03.13 137 Troubleshooting 7.3 List of events Code Event Measure Information 30019 Internal ink collector unit is nearly full. Please contact your Weidmüller representative to ensure the operating status. Unlike the ink collecting tray that can be replaced easily by the user, the internal ink collector unit is firmly fitted and can therefore only be replaced by a service technician. If the internal ink collector unit is full, the printer stops the operation in order to prevent print system malfunctions. Only qualified service technicians should replace components inside the device. 30021 Internal ink collector unit is nearly full. Please contact your Weidmüller representative to ensure the operating status. Unlike the ink collecting tray that can be replaced easily by the user, the internal ink collector unit is firmly fitted and can therefore only be replaced by a service technician. If the internal ink collector unit is full, the printer stops the operation in order to prevent print system malfunctions. 10032 Ink collecting tray is nearly full. Make sure that a new ink collecting tray is available. The order number is 1338710000. To avoid waiting due to a full ink collecting tray, you should make sure that you always have a new ink collecting tray available. 10072 The BLACK ink cartridge (K) is nearly empty. The ink cartridge is nearly used up. Make sure that a new ink cartridge is available. The order number is 1338690000. If the ink cartridge is empty, the printer stops the operation in order to prevent print system malfunctions. 10073 The CYAN ink cartridge (C) is nearly empty. The ink cartridge is nearly used up. Make sure that a new ink cartridge is available. The order number is 1338680000. If the ink cartridge is empty, the printer stops the operation in order to prevent print system malfunctions. 138 Only qualified service technicians should replace components inside the device. 1449820000/1.1/03.13 Troubleshooting Code Event Measure 10074 The MAGENTA ink cartridge (M) is nearly empty. The ink cartridge is nearly used up. Make sure that a new ink cartridge is available. The order number is 1338670000. If the ink cartridge is empty, the printer stops the operation in order to prevent print system malfunctions. 10075 The YELLOW ink cartridge (Y) is nearly empty. The ink cartridge is nearly used up. Make sure that a new ink cartridge is available. The order number is 1338650000. If the ink cartridge is empty, the printer stops the operation in order to prevent print system malfunctions. 30626 The cleaning procedure failed. Replace the ink cartridge if necessary. Restart the printer. There may be too little or no color in one of the ink cartridges. If the message is displayed again, please contact your Weidmüller representative. 1449820000/1.1/03.13 Information 139 Troubleshooting Code Event Measure 40012 The expiry date for BLACK (K) has passed. Replace the BLACK ink cartridge (K). The order number is 1338690000. Weidmüller urgently recommends that you do not continue to print with inks that have expired, as this can damage the printer. To continue printing, click on [Notes] and confirm that you wish to continue on the next screen. Replace the CYAN ink cartridge (C). The order number is 1338680000. Weidmüller urgently recommends that you do not continue to print with inks that have expired, as this can damage the printer. To continue printing, click on [Notes] and confirm that you wish to continue on the next screen. 40013 40014 40015 140 The expiry date for CYAN (C) has passed. The expiry for MAGENTA (M) has passed. The expiry date for YELLOW (Y) has passed. Replace the MAGENTA ink cartridge (M). The order number is 1338670000. Replace the YELLOW ink cartridge (Y). The order number is 1338650000. Information Weidmüller urgently recommends that you do not continue to print with inks that have expired, as this can damage the printer. To continue printing, click on [Notes] and confirm that you wish to continue on the next screen. Weidmüller urgently recommends that you do not continue to print with inks that have expired, as this can damage the printer. To continue printing, click on [Notes] and confirm that you wish to continue on the next screen. Each ink cartridge has an expiry date. This helps to protect the print system and to maintain consistent labeling quality. Once the expiry date has passed, the properties of the ink deteriorate. Important components can be clogged and cause permanent damage to the printer. To minimize the risk of damage to the device, the device automatically performs additional cleaning procedures once the expiry date has passed. This can also increase the consumption of inks that have not expired. Weidmüller recommends that you always replace expired ink cartridges immediately. Weidmüller shall not accept any responsibility for the quality or reliability of expired ink cartridges. Servicing or repairs to the device that are necessary as a result of expired ink cartridges are excluded from the warranty. 1449820000/1.1/03.13 Troubleshooting Code Event Measure 40002 Faulty BLACK ink cartridge (K). Restart the printer. Replace the BLACK ink cartridge (K). The order number is 1338690000. Only use original PrintJET ADVANCED ink cartridges. Please contact your Weidmüller representative if the error persists. Restart the printer. Replace the CYAN ink cartridge (C). The order number is 1338680000. Only use original PrintJET ADVANCED ink cartridges. Please contact your Weidmüller representative if the error persists. 40003 Faulty CYAN ink cartridge (C). Information 40004 Faulty MAGENTA ink cartridge (M). Restart the printer. Replace the MAGENTA ink cartridge (M). The order number is 1338670000. Only use original PrintJET ADVANCED ink cartridges. Please contact your Weidmüller representative if the error persists. 40005 Faulty YELLOW ink cartridge (Y). Restart the printer. Replace the YELLOW ink cartridge (Y). The order number is 1338650000. Only use original PrintJET ADVANCED ink cartridges. Please contact your Weidmüller representative if the error persists. 40205 The ink tank cover is open. Close the ink tank cover. Please contact your Weidmüller representative if the error persists. 40101 No ink cartridges have been detected. Insert the ink cartridges and make sure that they are fully engaged. The order number for a colour set is 1338720000. Please contact your Weidmüller representative if the error persists. 1449820000/1.1/03.13 Printer faults and damage caused by the use of unapproved and unsuitable accessories and consumables are excluded from the warranty. Furthermore, Weidmüller shall not accept any responsibility for the print quality and print resistance if third-party software, markers or inks have been used that have not been approved by Weidmüller for this system. 141 Troubleshooting Code Event Measure 40172 Faulty BLACK ink cartridge (K). Restart the printer. Replace the BLACK ink cartridge (K). The order number is 1338690000. Only use original PrintJET ADVANCED ink cartridges. Please contact your Weidmüller representative if the error persists. Restart the printer. Replace the CYAN ink cartridge (C). The order number is 1338680000. Only use original PrintJET ADVANCED ink cartridges. Please contact your Weidmüller representative if the error persists. 40173 Faulty CYAN ink cartridge (C). Information 40174 Faulty MAGENTA ink cartridge (M). Restart the printer. Replace the MAGENTA ink cartridge (M). The order number is 1338670000. Only use original PrintJET ADVANCED ink cartridges. Please contact your Weidmüller representative if the error persists. 40175 Faulty YELLOW ink cartridge (Y). Restart the printer. Replace the YELLOW ink cartridge (Y). The order number is 1338650000. Only use original PrintJET ADVANCED ink cartridges. Please contact your Weidmüller representative if the error persists. 40030 Faulty ink collecting tray. Restart the printer. Replace the ink collecting tray. The order number is 1338710000. Only use original PrintJET ADVANCED ink cartridges. Please contact your Weidmüller representative if the error persists. Printer faults and damage caused by the use of unapproved and unsuitable accessories and consumables are excluded from the warranty. Furthermore, Weidmüller shall not accept any responsibility for the print quality and print resistance if third-party software, markers or inks have been used that have not been approved by Weidmüller for this system. Do not open the wastepad. The complete tray must be replaced. Dispose of the wastepad through an authorized dealer or at a suitable hazardous materials disposal center. Check local regulations before attempting to dispose of the wastepad yourself. 142 1449820000/1.1/03.13 Troubleshooting Code Event Measure Information 40159 The ink collecting tray was not inserted correctly. Insert the ink collecting tray correctly and make sure that it is fully engaged. Restart the printer if necessary. If the message is displayed again, please contact your Weidmüller representative. 40904 The temperature is too high. Wait a while until the printer has acclimatized. Restart the printer. If the message is displayed again, please contact your Weidmüller representative. 40905 The temperature is too low. Wait a while until the printer has acclimatized. Restart the printer. If the message is displayed again, please contact your Weidmüller representative. 40011 The ink collector unit is full. Replace the ink collector unit. The order number is 1338710000. If the ink collector unit is full, you can no longer continue to print. Dispose of the wastepad through an authorized dealer or at a suitable hazardous materials disposal center. Check local regulations before attempting to dispose of the wastepad yourself. 10044 The temperature is too low. Wait a while until the printer has acclimatized. Restart the printer. If the message is displayed again, please contact your Weidmüller representative. 10045 The temperature is too high. Wait a while until the printer has acclimatized. Restart the printer. If the message is displayed again, please contact your Weidmüller representative. Internal error Restart the printer. If the message is displayed again, please contact your Weidmüller representative. 1449820000/1.1/03.13 Do not open the wastepad. The complete tray must be replaced. 143 Troubleshooting Code Event Measure Information 60005 Transport timeout Restart the printer. Carry out a sensor test. The marker was not transported within the defined time. If the message is displayed again, please contact your Weidmüller representative. 60006 Internal error Restart the printer. If the message is displayed again, please contact your Weidmüller representative. 60007 Faulty ink cartridge. Restart the printer. Check that the ink cartridge is installed correctly. Please contact your Weidmüller representative if the error persists. Only use original PrintJET ADVANCED ink cartridges. Furthermore, Weidmüller shall not accept any responsibility for the print quality and print resistance if third-party software, markers or inks have been used that have not been approved by Weidmüller for this system. 60008 Transport timeout Restart the printer. Carry out a sensor test. The marker was not transported within the defined time. If the message is displayed again, please contact your Weidmüller representative. 60009 Internal error Restart the printer. If the message is displayed again, please contact your Weidmüller representative. 144 Printer faults and damage caused by the use of unapproved and unsuitable accessories and consumables are excluded from the warranty. 1449820000/1.1/03.13 Transporting the printer 8 Transporting the printer 8.1 Decommissioning the printer ......................................................................................................146 8.2 Packing the printer........................................................................................................................146 8.3 Disposing of the printer................................................................................................................147 1449820000/1.1/03.13 145 Transporting the printer 8.1 Decommissioning the printer 8.2 Packing the printer Important information Only use the original packaging when transporting or dispatching the printer over long distances (e.g. relocating). Only then can the best protection be guaranteed for the printer during transport. If you no longer have the original packaging, you can order a packaging kit from Weidmüller under the order number 1408670000 PJ ADV VP SET. NOTE Figure 161 Switching off the printer A On/off switch Because of its weight the printer must always be carried by two people. Always hold the printer at the front and rear when carrying it. 1 Switch off the printer at the On/Off switch (A). 2 Disconnect all cables from the printer. a Power cable b Network cable or USB cable 3 Remove the remaining MultiCards from the loader. 4 Prior to transporting the printer, ensure that the ink cartridges have been inserted correctly. 5 Fold down the touch panel and secure it with adhesive tape. 6 Secure the ink tank lid with adhesive tape. 1 Place the printer in the polystyrene packaging material 2 The carefully place the printer into the cardboard box. 3 Put the printer accessories into the cardboard box. 4 Close the cardboard box. 7 Remove the output rail. 146 1449820000/1.1/03.13 Transporting the printer 8.3 Disposing of the printer Weidmüller will then professionally recycle and dispose of your printer in accordance with the current laws and regulations. Proceed as follows to dispose of the printer: 1 Decommission the printer (see section "8.1 Decommissioning the printer"). 2 Pack the printer in the original packaging (see section "8.2.Packing the printer"). Weidmüller will take care of all recycling and waste disposal measures. You will incur no costs or suffer any inconvenience. 3 Send the printer to your Weidmüller sales agent through a parcel service. 1449820000/1.1/03.13 147 Annex 9 Annex 9.1 Technical data ...............................................................................................................................150 9.2 Ordering data.................................................................................................................................151 9.3 Declaration of conformity.............................................................................................................152 9.4 List of figures.................................................................................................................................153 9.5 List of tables ..................................................................................................................................156 1449820000/1.1/03.13 149 Annex 9.1 Technical data Technical data Application Printing on Weidmüller MultiCards and MetalliCards Technology: Ink-jet process with heat fusing Print quality: 600 dpi, 1200 dpi Labeling and marking software: M-Print® PRO System requirements: Microsoft Windows® 7, VISTA and XP Feed: Automatic loader for max. 30 MultiCards (for MultiCards only) Single feed for MetalliCards and MultiCards Interfaces: USB 1.1 / 2.0 and network 10 Base-T / 100 Base-TX Voltage supply: AC 220 – 240 V / 4 A , 50/60 Hz or AC 100-120 V / 8 A , 50/60 Hz Fuses: Right-hand fuse: Left-hand fuse: Operating location: Office conditions Ambient temperature: 10 °C – 35 °C 50 °F – 95 °F Dimensions (L x W x H): Length including output rail: Length without output rail: Width: Height with folded down touch panel: Height with folded up touch panel: Weight: 57.8 kg (127.43 lb) with packaging 37.2 kg (82.01 lb) without packaging Ink system: Color system 1 x black 1 x cyan, 1 x magenta, 1 x yellow Scope of supply: PrintJet ADVANCED Power cable USB cable 1 MultiCard DEK 5/5 10 MetalliCards CC-M 85/54 AL 1 Inlay CC 85/54 Output rail DVD with the M-Print® PRO software Quick guide User Manual 10 primer cloths The printer is equipped with ink cartridges and the wastepad. Table 2 150 10 AHT 240/120 V 2.5 AHT 240/120 V approx. 1138 mm (44.80") approx. 945 mm (37.20") 554 mm (21.81") 328 mm (12.91") 422 mm (16.61") Technical data 1449820000/1.1/03.13 Annex 9.2 Ordering data Name Article number PrintJET ADVANCED 230 V 1324380000 PrintJET ADVANCED 110 V 1338700000 PJ ADV TNTK INK K Black ink cartridge 1338690000 PJ ADV TNTK INK C Cyan ink cartridge 1338680000 PJ ADV TNTK INK M Magenta ink cartridge 1338670000 PJ ADV TNTK INK Y Yellow ink cartridge 1338650000 PJ ADV TNTK INK SET Colour set 1338720000 TNAW PJ ADV Wastepad 1338710000 PJ ADV FIVL Filter membrane 1409080000 Primer CC-M 1341200000 Table 3 Ordering data 1449820000/1.1/03.13 151 Annex 9.3 152 Declaration of conformity 1449820000/1.1/03.13 Annex 9.4 List of figures Figure Figure 1 Figure 2 Figure 3 Figure 4 Figure 5 Figure 6 Figure 7 Figure 8 Figure 9 Figure 10 Figure 11 Figure 12 Figure 13 Figure 14 Figure 15 Figure 16 Figure 17 Figure 18 Figure 19 Figure 20 Figure 21 Figure 22 Figure 23 Figure 24 Figure 25 Figure 26 Figure 27 Figure 28 Figure 29 Figure 30 Figure 31 Figure 32 Figure 33 Figure 34 Figure 35 Figure 36 Figure 37 Figure 38 Figure 39 Figure 40 Figure 41 Front view of the printer Rear view of the printer Open ink tank lid Connectors Rating plate MultiCards/MetalliCard Description of the MultiCard Operating and maintenance spaces Transport restraints Fitting the output rail Touch panel lowered Touch panel raised Rotating the touch panel Connecting the power plug Connection –network cable USB cable Turning on the printer Touch panel – language choice Touch panel – main menu Touch panel – System Info Touch panel – language selection M-PRINT® PRO Installation - Language setting M-PRINT® PRO Installation - Start menu M-PRINT® PRO Installation - software M-PRINT® PRO Installation - Language selection M-Print® PRO – setup wizard M-Print® PRO – accepting the license terms M-Print® PRO – choosing the setup type M-Print® PRO – starting the installation process M-Print® PRO – status of the installation process M-Print® PRO – finishing the installation process PrintJet ADVANCED Explorer Choosing printer connection Adding the printer Browsing network Search result - Browsing network PrintJet ADVANCED Explorer Changing the printer name Changed printer name PrintJet ADVANCED Explorer Dialog box – connection test successful 1449820000/1.1/03.13 Page 21 22 23 23 23 24 25 30 30 31 31 31 32 33 34 34 35 36 37 37 38 39 40 40 41 41 42 42 43 44 44 45 45 46 46 47 47 48 48 48 49 153 Annex Figure Figure 42 Figure 43 Figure 44 Figure 45 Figure 46 Figure 47 Figure 48 Figure 49 Figure 50 Figure 51 Figure 52 Figure 53 Figure 54 Figure 55 Figure 56 Figure 57 Figure 58 Figure 59 Figure 60 Figure 61 Figure 62 Figure 63 Figure 64 Figure 65 Figure 66 Figure 67 Figure 68 Figure 69 Figure 70 Figure 71 Figure 72 Figure 73 Figure 74 Figure 75 Figure 76 Figure 77 Figure 78 Figure 79 Figure 80 Figure 81 Figure 82 Figure 83 Figure 84 Figure 85 154 Dialog box – printer not found Connection –USB cable PrintJet ADVANCED Explorer Choosing printer connection Printer search Printer - search result PrintJet ADVANCED Explorer Changing the printer name Changed printer name Dialog box – connection test successful Dialog box – printer not found Example scenario for network installation M-PRINT® PRO Installation - language setting M-PRINT® PRO Installation - Start menu M-PRINT® PRO Installation - software M-PRINT® PRO Installation - Language selection M-Print® PRO – setup wizard M-Print® PRO – accepting the license terms M-Print® PRO – choosing the setup type Network installation – choosing the target directory Network installation – choosing directories Starting network installation M-Print® PRO – status of the network installation Finishing network installation PrintJet ADVANCED Explorer Adding the printer Browsing network Search result - Browsing network Serial number – rating plate Changing the printer name Entering the printer name PrintJet ADVANCED Explorer Dialog box – connection test successful Dialog box – printer not found Network installation – folder structure Network installation – client Clients – sharing print settings M-Print® PRO program icon on the desktop M-Print® PRO – choosing the version M-Print® PRO – key type M-Print® PRO – registration M-Print® PRO – finishing the installation process Touch panel – main menu Touch panel – templates Page 49 50 50 51 51 51 52 52 52 53 53 54 55 56 56 57 57 58 58 59 60 61 62 62 63 63 64 64 65 65 66 66 66 67 67 69 70 71 71 72 72 73 74 75 1449820000/1.1/03.13 Annex Figure Figure 86 Figure 87 Figure 88 Figure 89 Figure 90 Figure 91 Figure 92 Figure 93 Figure 94 Figure 95 Figure 96 Figure 97 Figure 98 Figure 99 Figure 100 Figure 101 Figure 102 Figure 103 Figure 104 Figure 105 Figure 106 Figure 107 Figure 108 Figure 109 Figure 110 Figure 111 Figure 112 Figure 113 Figure 114 Figure 115 Figure 116 Figure 117 Figure 118 Figure 119 Figure 120 Figure 121 Figure 122 Figure 123 Figure 124 Figure 125 Figure 126 Figure 127 Figure 128 Figure 129 Direction of insertion for MultiCards Opening the inlay Inserting a MetalliCard in the inlay Direction of insertion for MetalliCards Inserting a single MetalliCard inlay Inserting a stack of MultiCards M-Print® PRO program icon on the desktop Selecting a MultiCard Selecting the printer Mapping the printer Assigning variants to the printer Calibration Coordinate plane Measuring and entering values Position of the coordinate plane Setting the printer correction Setting the printer correction Setting material-dependent slip Material-dependent slip – entering the measured values Adjusting the marker type Adjusting the offset MultiCard Adjusting the zero point in the X direction Adjusting the zero point in the Y direction Adjusting the centering in the X direction Adjusting the centering in the Y direction Touch panel – main menu Touch panel – System Info 1 Touch panel – System Info 2 Touch panel – System Info 1 – printer name Touch panel – System Info 1 – printer name Touch panel – System Info 1 – IP address/subnet mask/DHCP Touch panel – System Info 1 – IP address/subnet mask/DHCP Touch panel – System Info 1 – IP address/subnet mask/DHCP Touch panel – language Touch panel – System Info – USB port Touch panel – System Info – ink level Touch panel – System Info – information of ink Touch panel – System Info – protocol Touch panel – System Info – protocol details Touch panel – System Info – information Touch panel – Tools Touch panel – Print Jobs Touch panel – templates 1449820000/1.1/03.13 Page 79 79 79 80 80 80 81 82 83 83 84 84 85 85 86 87 88 89 90 91 92 92 93 93 94 94 98 99 100 100 101 102 103 104 105 106 107 107 108 108 109 110 111 112 155 Annex Figure Figure 130 Figure 131 Figure 132 Figure 133 Figure 134 Figure 135 Figure 136 Figure 137 Figure 138 Figure 139 Figure 140 Figure 141 Figure 142 Figure 143 Figure 144 Figure 145 Figure 146 Figure 147 Figure 148 Figure 149 Figure 150 Figure 151 Figure 152 Figure 153 Figure 154 Figure 155 Figure 156 Figure 157 Figure 158 Figure 159 Figure 160 Figure 161 9.5 Touch panel – templates Connection – USB stick Touch panel – templates Touch panel – main menu Touch panel – tools menu Touch panel – printhead cleaning Touch panel – printhead cleaning duration Touch panel – printhead flushing Touch panel – printhead flushing duration Touch panel – execute sensor check Touch panel – sensor check in progress Touch panel – selecting a MultiCard for a nozzle check Touch panel – inserting a MultiCard for the nozzle check Touch panel – nozzle check in progress Touch panel – System Info – ink level Touch panel – ink cartridge out-of-date Touch Panel – ink cartridge empty Opening the ink tank lid Removing the ink cartridge Coding of the ink cartridges Positions of the ink cartridges Inserting an ink cartridge Touch panel – System Info – protocol Touch panel – System Info – protocol Opening the ink tank lid Unlock the wastepad Extracting the wastepad Removing the filter cover Replacing the dust filter M-Print® PRO – updating the printer software M-Print® PRO – updating the printer software Switching off the printer List of tables Table Table 1 Table 2 Table 3 156 Page 113 113 114 116 116 117 118 119 119 120 121 122 123 123 125 126 127 128 128 128 129 129 130 131 131 132 132 132 132 134 134 146 Page Folder structure and meaning Technical data Ordering data 68 150 151 1449820000/1.1/03.13 www.weidmueller.com Egypt Argentina Azerbaijan Australia Bahrain Belgium Bosnia and Herzegovina Brazil Bulgaria Chile China Costa Rica Denmark Germany Estonia Finland France Greece United Kingdom Hong Kong India Indonesia Iran Ireland Iceland Israel Italy Japan Yemen Jordan Canada Kazakhstan Qatar Columbia Croatia Kuwait Latvia Lebanon Lithuania Luxembourg Malaysia Macedonia Mexico New Zealand Netherlands Norway Austria Oman Paraguay Peru Philippines Poland Portugal Romania Russia Saudi Arabia Sweden Switzerland Serbia and Montenegro Singapore Slovakia Slovenia Spain South Africa South Korea Syria Taiwan Thailand Czech Republic Turkey Ukraine Hungary Uruguay USA UAE Venezuela Vietnam Belarus Weidmüller is the leading manufacturer of components for electrical connectivity. The Weidmüller product range includes terminal blocks, PCB plug-in connectors, protected component assemblies, industrial Ethernet components as well as relay modules to power supply and surge protection modules of all connection types. Material for electrical installation and equipment marking, basic I/O components, and tools round off the product range. As an OEM provider, the company sets standards worldwide in electrical and device connectivity. Order number 1449820000/1.1/03.13