1
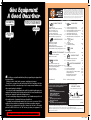
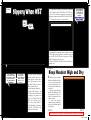
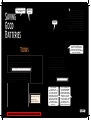
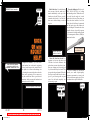
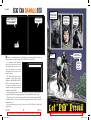
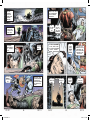
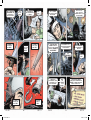
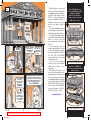
TB 43-PS-707, The Preventive Maintenance Monthly, is an official publication
of the Department of the Army, providing information for all Soldiers assigned
to combat and combat support units and all Soldiers with unit maintenance
and supply duties. All information published has been reviewed and approved
by the agency responsible for the equipment, publication or policy discussed.
Application of the information is optional with the user. Masculine pronouns may
refer to both genders. The use of product or company names does not constitute
endorsement of those products, services or companies by the U.S. Army.
ISSUE 707
OCTOBER 2011
COMBAT VEHICLES
2
Stryker Fuel Leaks
M2/M3-Series Bradley Shutdown Reminder
M1-Series Tank Brake Levers
M113-Series FOV Ramp Safety
CVC Helmet Headset Dryness
M109 Howitzer, M992A2 Air Box Cleaning
M109A6 Paladin Fuel Cap Gasket Check
2-3
3
4-5
6-7
7
8-9
9
WHEELED VEHICLES
MRAP/ROUTE CLEARANCE 18
AVIATION
Aircraft TMs and Troubleshooting
21
M260/M261 Rocket Launcher Maintenance Tips 22-23
OH-58D Ground Handling Wheels
24
UH-60A Tool Selection
25
AH-64A/D SSU Protection
26
Let PM Prevail
TOOLS
27-34
42-43
43
44
CBRN
44-45
CBRN Training Sources Online
46
SOLDIER SUPPORT
46-49
50-51
M978 HEMTT Fueling Safety, Part 1
Fire Extinguisher Information
LOGISTICS MANAGEMENT
AR 750-6 Revised
DA Form 2404 Modifications
Power Grid Training Course
Improvised Explosive Device Effects Simulator
Centrally Managed OCIE
PS Magazine Back Issue Retention
CALL Handbook CSDP Pointers
51
51
52-53
54-55
56-57
58-59
59
60
61
Connie’s Post Scripts
You are invited to send PS your ideas for improving maintenance
procedures, questions on maintenance and supply problems and
questions or comments on material published in PS.
Just write to:
MSG Half-Mast
PS, the Preventive Maintenance Monthly
USAMC LOGSA (AMXLS-GP)
5307 Sparkman Circle
Redstone Arsenal, AL 35898
Or email to:
[email protected] or
[email protected]
Internet address:
https://www.logsa.army.mil/psmag/pshome.cfm
35
36-37
37
37
38-39
39
40-41
42
Tool Engraving, Part 2
Tool Warranties for Marines
18-19
20
21
35
Small Arms Gaging Requirements
Small Arms Cleaning Tank Caution
M16A4 Rifle, M4/M4A1 Carbine BUIS Removal
M16-Series Rifle Buttstock Correction
M120/M120A1, M121 Mortar Tips
M249 Machine Gun Barrel Marking
M249, M240 Machine Gun Carbon Removal
10
HMMWV Turret Tarp NSNs
10
FMTV Air Springs Inflation
11
HEMTT -A4 Load Testing
12
M1074P/M1075P1 PLS STE-ICE Wiring Harness
13
Lead-Acid Batteries Testing, Charging, Disposal 14-17
Talon 3B Robot Track Adjustment
MRAP Rollover Avoidance
SMALL ARMS
By order of the Secretary of the Army:
RAYMOND T. ODIERNO
General, United States Army Chief of Staff
Official:
JOYCE E. MORROW
Administrative Assistant to the Secretary of the Army
1120308
PS, The Preventive Maintenance Monthly (ISSN 0475-2953) is published monthly by the Department of the Army, Redstone Arsenal,
AL 35898-5000. Periodical postage is paid at the Huntsville, AL post office and at additional mailing offices.
Postmaster: Send address changes to PS, The Preventive Maintenance Monthly, USAMC LOGSA (AMXLS-GP), 5307 Sparkman Circle,
Redstone Arsenal, AL 35898-5000.
Issue 707
TB 43-PS-707
Approved for
Public Release;
Distribution is
Unlimited
October
2011
if he survives…
he has much to
learn about
preventive
maintenance before
facing future
enemies!
Will he survive?
Will he learn?
Find out on page 27!
Give Equipment
A Good Once-Over
hey, you’re right
from reset and
you look great…
oh boy! not only does that Black
Hawk get to go through reset but
it also gets a thorough inspection.
if only I was
as fortunate.
…but I’m going
to check you out
anyway.
TB 43-PS-707, The Preventive Maintenance Monthly, is an official publication
of the Department of the Army, providing information for all Soldiers assigned
to combat and combat support units and all Soldiers with unit maintenance
and supply duties. All information published has been reviewed and approved
by the agency responsible for the equipment, publication or policy discussed.
Application of the information is optional with the user. Masculine pronouns may
refer to both genders. The use of product or company names does not constitute
endorsement of those products, services or companies by the U.S. Army.
ISSUE 707
OCTOBER 2011
COMBAT VEHICLES
2
Stryker Fuel Leaks
M2/M3-Series Bradley Shutdown Reminder
M1-Series Tank Brake Levers
M113-Series FOV Ramp Safety
CVC Helmet Headset Dryness
M109 Howitzer, M992A2 Air Box Cleaning
M109A6 Paladin Fuel Cap Gasket Check
2-3
3
4-5
6-7
7
8-9
9
WHEELED VEHICLES
MRAP/ROUTE CLEARANCE 18
AVIATION
Aircraft TMs and Troubleshooting
21
M260/M261 Rocket Launcher Maintenance Tips 22-23
OH-58D Ground Handling Wheels
24
UH-60A Tool Selection
25
AH-64A/D SSU Protection
26
M ost Soldiers are very familiar with the Army’s Reset program that puts equipment back
into mint condition.
Whether it’s radios, aircraft, tanks or weapons, everything gets torn apart.
During Reset, every part of an end item has hands laid on it. Everything is laid bare
down to the nuts, bolts, screws and wiring so that the components and hardware can be
either repaired, replaced or refurbished.
At some point—unlike Humpty Dumpty who couldn’t be put back together again—your
equipment is put back together in like-new condition. After it is cleaned, refurbished, and
repaired, your equipment is put back in the Army inventory.
Because so many things can happen during Reset, it’s a good maintenance practice to do
a thorough inspection of equipment that has gone through Reset.
For example, on aircraft you might want to look for loose rivets or connectors, FOD, or
anything else that could have been mistakenly left behind in areas with moving parts.
When you get equipment back from Reset, always take the time to thoroughly
perform the PMCS called for in the TM. That way you know your equipment is in
mint condition.
Let PM Prevail
TOOLS
27-34
42-43
43
44
CBRN
44-45
CBRN Training Sources Online
46
SOLDIER SUPPORT
46-49
50-51
M978 HEMTT Fueling Safety, Part 1
Fire Extinguisher Information
LOGISTICS MANAGEMENT
AR 750-6 Revised
DA Form 2404 Modifications
Power Grid Training Course
Improvised Explosive Device Effects Simulator
Centrally Managed OCIE
PS Magazine Back Issue Retention
CALL Handbook CSDP Pointers
51
51
52-53
54-55
56-57
58-59
59
60
61
Connie’s Post Scripts
You are invited to send PS your ideas for improving maintenance
procedures, questions on maintenance and supply problems and
questions or comments on material published in PS.
Just write to:
MSG Half-Mast
PS, the Preventive Maintenance Monthly
USAMC LOGSA (AMXLS-GP)
5307 Sparkman Circle
Redstone Arsenal, AL 35898
Or email to:
[email protected] or
[email protected]
Internet address:
https://www.logsa.army.mil/psmag/pshome.cfm
35
36-37
37
37
38-39
39
40-41
42
Tool Engraving, Part 2
Tool Warranties for Marines
18-19
20
21
35
Small Arms Gaging Requirements
Small Arms Cleaning Tank Caution
M16A4 Rifle, M4/M4A1 Carbine BUIS Removal
M16-Series Rifle Buttstock Correction
M120/M120A1, M121 Mortar Tips
M249 Machine Gun Barrel Marking
M249, M240 Machine Gun Carbon Removal
10
HMMWV Turret Tarp NSNs
10
FMTV Air Springs Inflation
11
HEMTT -A4 Load Testing
12
M1074P/M1075P1 PLS STE-ICE Wiring Harness
13
Lead-Acid Batteries Testing, Charging, Disposal 14-17
Talon 3B Robot Track Adjustment
MRAP Rollover Avoidance
SMALL ARMS
By order of the Secretary of the Army:
RAYMOND T. ODIERNO
General, United States Army Chief of Staff
Official:
JOYCE E. MORROW
Administrative Assistant to the Secretary of the Army
1120308
PS, The Preventive Maintenance Monthly (ISSN 0475-2953) is published monthly by the Department of the Army, Redstone Arsenal,
AL 35898-5000. Periodical postage is paid at the Huntsville, AL post office and at additional mailing offices.
Postmaster: Send address changes to PS, The Preventive Maintenance Monthly, USAMC LOGSA (AMXLS-GP), 5307 Sparkman Circle,
Redstone Arsenal, AL 35898-5000.
Click here for a copy of this article to save or email.
707 00-01.indd 1-2
9/8/11 4:29 PM
Stryker…
man, I’m
glad to
get outTa
there!
Stop
Fuel
Leak
at Its
Source
noticed a fuel
smell in the crew
compartment of
your stryker
lately?
your vehicle could
be one of several
with a leaking c7
fuel distribution
assembly (fda).
The majority of the leaks appear at the
input and output fittings on the FDA’s
check valve. But you also need to eyeball
the input and output fittings for the supply
and crossover valves. All three of these
valves are made of brass and are prone
to stress corrosion cracks that let fuel
leak out.
If enough fuel builds up under the floor
plates, you and other crewmembers can be
exposed to concentrated fuel vapors that can
make you sick.
Before you inspect, be sure to drain the hull
following the general cleaning instructions
in your vehicle’s -10 manual. If no leaks are
found, continue your mission. But make sure
you check the valves regularly as part of your
before-operation PMCS. If you find a leak,
tell your mechanic.
He’ll contact General Dynamics Land
System (GDLS) Contractor Logistics
Support (CLS). They’ll send a CLS team to
remove and replace the leaking C7 FDA with
a new, stainless steel version.
PS 707
2
don’t
wait
around.
check it
now!
Look for leaks around check
valve’s input and output fitting
yeah! that
fuel smell was
starting to
make me sick!
For help locating your GDLS CLS, contact Chris Spall or John Tippett:
[email protected] or [email protected]
Check out the complete scoop in TACOM GPA 11-011:
https://tulsa.tacom.army.mil/safety/gpm/tacom_wn/gpa11-011.html
You can also download a complete list of Stryker vehicles with C7 engines by their
vehicle identification numbers. Just email Half-Mast:
[email protected]
M2/M3-Series Bradleys…
hey,
what’s
happened
here?
my tea leaves
tell me you forgot
to turn off his
electronics and
now his batteries
are dead.
when you
shut down,
you must
remember
to…
Then check input and output
fittings on supply valve…
…Make it a COMPLETE Shutdown!
T
…and crossover valve
OCT 11
he mission is finally over and
you want to grab a quick shower
before heading to the chow hall.
But before you crawl out of your
Bradley, think a second.
Did you remember to turn off
the radios? How about the lights
and other electronic gear?
If you forget, those items can still pull power
from the batteries. And if your vehicle sits a while,
you might come back to dead batteries.
Even worse, you might not notice that the radios
were left on. And if you start the engine with the
radios on, a power spike could damage them.
So don’t forget: A complete shutdown includes
all electronics, too.
Click here for a copy of these articles to save or email.
707 02-03.indd 1-2
8/29/11 5:34 PM
M1-Series Tanks…
Go for the Gold
I just got a brand new
silver-colored remote
control lever for my
transmission service brake!
color matters when it comes
to the transmission service
brake remote control lever,
nsn 3040-01-090-4562, on
your m1-series tank.
Good
levers are
gold- or
bronzecolored…
PS 707
no, that
says your
service brake
might fail!
that says
I’m stylin’!
and no, it’s
not because
it makes
a fashion
statement.
During the vehicle
manufacturing process,
workers noticed that
some of the levers in
their parts bins were
silver or aluminum gray
rather than the normal
gold or bronze color.
After the odd-colored
levers were analyzed,
it was found that they
did not meet hardness
specifications.
…while bad
levers will
be silver or
aluminum
gray
4
with Brake Lever
OCT 11
better get
it replaced!
Most of the levers were
Look for remote control lever here
purged at the manufacturing
facility, but it’s possible
that a few may have been
installed. It’s unlikely the
softer levers will break, but a
failure would lead to the loss
of service brakes. So inspect
your tank now. Just open the
cooling fan access door on
the right side of your tank and
look for the lever between the
right cooling fan assembly
and the exhaust duct.
If the lever is gold or bronze, you’re good to go. If a silver or aluminum lever is
found, ask your mechanic to replace it.
Mechanics, order a replacement lever through normal supply channels using a
priority level of 02. To expedite receipt of the replacement lever, overnight shipping
is available by contacting the Defense Logistics Agency (DLA) Call Center at
1-877-DLA-CALL (1-877-352-2255) or DSN 661-7766. For OCONUS callers, the
DSN is 312-661-7766.
To get credit, submit a Product Quality Deficiency Report (PQDR) against
TACOM contract W56HZV-07-C-0224. You can start the PQDR process at:
http://www.nslcptsmh.csd.disa.mil/webpqdr/webpqdr.htm
For more information, check out TACOM GPA 11-014:
https://tulsa.tacom.army.mil/safety/gpm/tacom_wn/GPA11-014.html
Click here for a copy of this article to save or email.
707 04-05.indd 1-2
8/26/11 3:16 PM
M113-Series
FOV…
Slippery When w et
watch
that
first
step!
ramp on your M113-series vehicle is made to load and off-load troops
quickly and safely. But safety goes out the window if the ramp’s nonslip coating is
in bad shape.
if the ramp
surface on
your carrier is
down to bare
metal, fix it
like this…
1. Wash the surface thoroughly
with soap and hot water. Use a
general purpose scrub brush to
remove dirt, grease and loose
paint. Rinse with hot water to
further cut grease and oil.
2. Let the ramp dry completely.
3. Apply CARC primer to the
bare metal surface. Instructions
for applying the primer start
on Page 8 of TB 43-0242, WD
CARC Spot Painting. You’ll
find a list of primer NSNs in
App B. Depending on the primer
you choose, it will need to dry
anywhere from 2-6 hours.
you can access
tb 43-0242 and
tm 43-0139 at
the logsa etm
website:
https://www.logsa.
army.mil/etms/
Put nonslip walkway compound on ramp’s bare spots
it’s a
slippery
one!
T he
Footing gets a
little tricky when
the surface is worn.
in wet weather, it
can be downright
dangerous.
4. Use a paint brush to apply nonslip walkway compound
to all the primed areas. NSN 8010-01-527-4055 gets
a gallon of tan walkway compound. Instructions for
applying the compound start in WP 0010 00-6 of TM 430139, Painting Instructions for Army Materiel.
5. After the nonslip compound has dried, apply a topcoat
of WD CARC paint. Application instructions start on
Page 9 of TB 43-0242. Choose the type and color WD
CARC paint from the list in App B.
6. Allow the WD CARC to dry for at least 6 hours before
stepping on it.
CVC Helmets…
Keep Headset High and Dry
I
t stands to reason, crewmen:
Water and electronics don’t mix.
So how you treat the headset
in your CVC helmet has a lot to
do with how well it works when
you need it.
If you leave your helmet lying
around, it’ll probably get wet
the next time you clean your
vehicle. The earphones are very
sensitive to water.
So when the mission’s
complete, take your helmet with
you or store it in a place where it
won’t get wet.
PS 707
Stray wash water can seep inside headset earphones
7
OCT 11
Click here for a copy of these articles to save or email.
707 06-07.indd 1-2
8/29/11 5:34 PM
M109-Series SP Howitzer, M992A2 Ammo Carrier…
Air Box in Need of Cleaning
man, that was
a {cough!} long
mission!
my air box could
use {wheeze!}
a good cleaning!
2. Open the two plugs at the base of each air box and blow out all the dirt and
sand with low-pressure air—no more than 30 psi. You’ll have to remove the blower
motor hose bracket to get to the plugs on the Paladin’s left air box.
Remove plugs and blow out sand and dirt
they took care of
my air box as soon
as we got back!
Remove bracket from Paladin air box
it makes all
the difference!
If you don’t keep on top of them, dirt and dust have a funny way of building up fast.
A quick look inside the air cleaner boxes in your howitzer or ammo carrier provides
all the proof you need.
That’s because dust and grit collect all over the boxes even under the best
conditions. If you’re deployed, that dirt, sand and dust collect a whole lot faster.
When that happens, the air induction system exhaust fans just can’t remove all the
dust and grit.
So, next time you pull the air filters for cleaning, clean the air boxes, too.
after removing the
air filter, follow
these steps…
1. Clean out any dirt on the panel under the air filter.
3. If the dirt and sand have hardened—which is what happens if water gets mixed
in—you’ll probably have to break up the mess with a screwdriver or chisel before
blowing it out. Be careful not to damage the bottom of the air box, though.
Never clean the boxes by hosing them out with water. That leads to rust, which
causes even more clogging problems.
M109A6 Paladin…
Refueling? CheCk the Gasket!
C
rewmen, when it comes to the fuel cap on your M109A6 Paladin, it’s all about
the seal.
Taking the cap off and on, exposure to the elements, and just plain old age take
a toll on the rubber gasket on the underside of the fuel cap. When the gasket wears
out, it no longer creates a good seal between the fuel cap and the filler neck rim.
That can let water and
dirt seep into the fuel cells.
Check fuel
cap gasket
And here’s a news flash: The
for damage
engine won’t burn water or
dirt very well.
So take a good look at the
fuel cap gasket whenever you
refuel. If the gasket is torn,
cracked or just plain worn out,
replace the fuel cap. A new
cap comes with NSN 259000-798-4056.
PS 707
9
OCT 11
Click here for a copy of these articles to save or email.
707 08-09.indd 1-2
8/29/11 5:34 PM
HMMWVs…
Turret Tarp NSNs
FMTV…
Keep Air Springs
in PS 699, we gave
you NSNs to get
replacement tarps for
your HMMWV turrets,
but those NSNs lead
to terminal items, so…
drivers, you’re in for a rough
ride in your 2 1/2- or 5-ton fmtv
if you don’t keep the vehicular
air springs inflated.
if the cab gets down
to metal-to-metal
contact, you won’t be
a stranger to pain!
…we have
not just one
new NSN for
you…
A
…but two!
A 12 x 17 tarp
or a fitted
cover!
Dear Half-Mast,
On Page 11 of PS 699 (Feb 11), you recommended that we cover our
HMMWV turrets with a tarpaulin, NSN 4610-00-442-9736, to keep rain
and snow from flooding inside the vehicle. But FED LOG shows the NSN you
gave us is a terminal item. What’s a good replacement?
CW2 J.H.
Dear Chief J.H.,
Sorry about that. We’ve got two options for you.
NSN 2540-00-587-2532 brings a 12x17-ft tarpaulin.
Or you can order a fitted cover with NSN 2540-01-330-6177.
PS 707
10
OCT 11
Click here for a copy of this article to save or email.
707 10-11.indd 1-2
few well-intentioned operators believe they have to deflate both air springs before
tilting the truck’s cab. Problem is, they forget to re-inflate them when they finish the
work. That presents problems.
With no air, the cab isn’t level. Bumps and jars during operation can make the
springs pinch the bag. A damaged bag won’t hold air, causing your backside to suffer
big time on a bumpy road.
If the air springs on your truck
Keep cab
are flat, re-inflate ‘em. The panel’s
level with
a little misleading. Just press and
inflated air
turn the CAB knob on the hydraulic
springs
manifold control panel to the right.
There’s only one situation when
you need to deflate the air springs,
and that’s when you’re preparing
your FMTV for air transport. So
leave ‘em alone at all other times.
Press and
And if you have to replace the
turn CAB
air springs, order them using NSN
knob to right
2510-01-481-7663 and NSN 2510to inflate air
01-481-7651. Use your parts manual
springs
as a guide.
Both air springs on basic and –A1 model FMTVs (serial numbers under 100,000)
can be repaired by replacing the air bag. To order the air bag, use PN PP997900 with
CAGE 26952. An NSN will be assigned later. Cab air bags aren’t on –A1R model
FMTVs (serial numbers 100,001 and higher).
PS 707
11
OCT 11
Click here for a copy of this article to save or email.
8/26/11 3:16 PM
Deflate Suspension
Before Load Testing
HEMTT -A4s…
But sergeant!
you TOLD us to
load test a crane
on a HEMTT -A4.
You want your equipment to work, but that doesn’t always happen. And if you’ve tried
load testing a crane on your HEMTT -A4, you might have experienced this!
Troops have found that load testing a crane on a HEMTT -A4 leads to the suspension air
bags inflating and raising the load. This makes it impossible to measure the drift of the load
during the test.
Avoid this problem by following these
updated load test procedures that will be
added to your HEMTT -A4 IETM, EM 0288:
When you set up the crane, under the
“Prepare Crane For Operation” section of the
IETM, make sure you dump the suspension
air before setting up the outriggers. Go to
the “Operator” section of the IETM and find
the procedure to “Operate Air Suspension
Dump Valve.” Follow those instructions.
Once you’ve finished operating or load
testing the crane, inflate the suspension after
stowing the outriggers.
That means the SPNSN AIR LOW indicator
light, located to the right of the speedometer
and above the transmission oil temperature
gauge, should be OFF before you move the
HEMTT. This is important because if you
Follow IETM instructions for operating
operate the HEMTT without the suspension
air suspension dump valve
inflated, you could damage the truck.
PS 707
12
OCT 11
Click here for a copy of this article to save or email.
707 12-13.indd 1-2
M1074P1/M1075P1 PLS…
Snub the Rub
Hey… what
happened to
my STE-ICE? it
was working a
moment ago!
he STE-ICE wiring harness on new and rebuilt PLS engines is getting a raw deal.
TThat’s
because the harness can rub against the rotating back plate of the engine’s
200-amp generator.
Enough rubbing wears away the insulation and exposes the wiring. That causes an
electrical short in the vehicle’s diagnostic system. A short means no STE-ICE!
so
here’s
the
quick
fix…
Secure wiring
harness with
zip tie or clamp
to engine oil
dipstick tube
Use a high-temperature tie-wrap, NSN 5975-01-5776742, and secure the wiring harness onto the engine’s
oil dipstick tube. That way the wiring harness stays clear
of the generator’s back plate. And that’s all it takes to
snub out the rub.
13
OCT 11
Click here for a copy of this article to save or email.
8/26/11 3:13 PM
Lead-Acid Batteries…
wow! LOok at aLl
these unserviceable
batteries!
Saving
Good
Batteries
What do you do when your vehicle’s
I’m not
unserviceable!
lead-acid battery, NSN 6140-01-4851472, doesn’t work? Just turning it in as
unserviceable is one choice, but not the
right one! The right choice is to test it first
to make sure it really is unserviceable.
Save your unit the cost of new
batteries by testing them when you think
they could be bad. Turn them in only
when testing shows they are bad.
Yeah, me
neither!
the test equipment you
need is in the standard
automotive tool set
(sats). you can also order
individual testers.
Testers
A conductance tester, such as the Pulse Tech (PT)
490 conductance tester is very sensitive. It can find
defects or battery weaknesses long before any problem
or capacity loss appears.
And the mini battery tester (MBT-1)
is a micro-ohm load tester designed
as a diagnostic tool for the operator. A
fixed post positive connector and coil
cord moveable negative connector make
checking multiple batteries easy and fast.
PT 490 Conductance Tester, NSN 6130-01-510-9594
But the PT 490 can’t analyze the condition of
a battery pack if it is connected in parallel; you
need to isolate each battery. Use the MDX 700P
HD conductance tester.
MBT, NSN 6130-01-463-8499
Midtronic’s MDX 700P HD
replaces Micro 700 Series
conductive tester,
NSN 6625-01-477-4704
PS 707
14
OCT 11
Click here for a copy of this article to save or email.
707 14-15.indd 1-2
load testers
indicate the
battery’s ability to
hold its voltage
while under load.
make sure you read
the owner’s manual
for load testers
before using them.
otherwise, you
might get incorrect
results.
PS 707
fully charge the
batteries before
putting them into
service. recharge
the batteries after
removal if you’re
going to store
them. you don’t have
to recharge the
batteries if they
are headed to dla
disposition services.
15
OCT 11
8/26/11 3:13 PM
Chargers
here
are your
charging
options…
The Pro-4HD charger automatically
selects 12 or 24 volts. It senses the battery’s
condition and provides only the voltage the
battery can accept.
It comes with two charging cables: one
for the NATO slave connection and one
with alligator clamps.
The pallet charger is a 12-volt, 12-station
charging unit. This charger can connect to any type
or size of 12-volt vehicular battery.
Each charging station on the charger works
independently. That way, any combination of leadacid batteries can be charged at the same time.
Pallet charger, NSN 6130-01-532-7711
Pro-4HD charger, NSN 6130-01-500-3401
Pulse Charger World Version Plus,
NSN 6130-01-477-4703
Disposal
The Pulse Charger
World Version Plus is a 12-volt
only charger; on the back it
has a manual switch for battery
types. It comes with alligator
clamps, so it should only be
used on batteries that have been
removed from your vehicle.
batteries are
considered
hazardous
material…
The Associated PP-1660 Type F charger charges
both 12-volt and 24-volt batteries. It has two
charging cables: one for the NATO slave connection
and one with battery clamps. This charger was
issued with the early SATS.
Associated PP-1660 Type F charger,
NSN 6140-01-518-7866
so make sure you follow hazardous material
disposal procedures outlined by the tech manual
and state, federal and local host nation laws.
also, use da pam 200-1, environmental
protection and enhancement, as a resource.
you’ll find the hqda guidance in alaract
message number 100311741/amhs dtg 031826z may 10.
you can search for alaracts on ako. you can also
view it online using this link:
for more
assistance,
contact ltc
Penny Toniolli.
call her at
703-697-0556,
dsn 227-0556,
or e-mail:
penny.toniolli@
us.army.mil
https://www.us.army.mil/suite/page/550282
PS 707
707 16-17.indd 1-2
17
OCT 11
8/26/11 3:13 PM
Talon 3B Robot…
Avoid Loose Track
hey!
a loose track on your
my
track is
slipping!
talon 3b robot is bad news!
too much play
in the track
means it’s
going to slip.
slippage
causes mobility
problems
on different
surfaces and
graded slopes.
I’m
gonna
need an
adjustment!
• With your fingers, loosen the
thumb nut counter-clockwise.
here’s
how to
adjust
the
track…
PS 707
• Lift the chassis or turn it on its side so the track is freely suspended.
• Using a 5/16-in hex
wrench, set the track
tension by turning
the tensioner screw
counter-clockwise until
the bottom edge of
the small idler wheel
is halfway between
the track guide lugs.
Make sure you check
for any movement of
the large idler wheel.
There should be no
lateral (forward and
backward movement)
of the wheel.
• Using your fingers, tighten
the thumb nut by turning
it clockwise to lock it
into position. Do not
overtighten the track’s
tensioner screw or you’ll
shear its cotter pin.
Use the same procedure
for the other side. How
well the robot steers and
drives depends on the
relative tension between
the left and right track. So
be sure to adjust each track
to the same tension.
/
Correct track tension adjustment looks like this
if you don’t have a
5 16-in hex wrench handy
18
in your tool box…
…one is available
in a key set that
comes with nsn
5120-01-473-9592.
OCT 11
Click here for a copy of this article to save or email.
707 18-19.indd 1-2
8/26/11 3:13 PM
Avoid
MRAP
Vehicles…
All Aircraft…
Rollovers
loOk
everyone!
it’s the
troubleshOoter!
our
hero!
to help end
vehicle rollovers,
keep these lessons
learned in mind
before you start
the day’s mission…
he’s gonna
take our
troubles
away!
CoOl!
he’s here
to find our
problems!
and fix ‘em!
• Perform rollover drill rehearsals with the gunner and crew prior to all missions
• Keep all mission equipment properly stowed
• Maintain appropriate speed for road conditions
• Make sure your crewmembers wear seat belts or their Gunner’s Restraint Systems (GRS)
• Use a ground guide when tactical conditions permit
• Unlock combat door locks in a non-conflict situation. That way, rescuers can enter an
unlocked vehicle if needed
when planning mission routes using composite
risk management, remember that mrap
vehicles have larger profiles and weigh more
than the vehicles they replaced in theater.
also take into
account the mission’s
criticality, as well as
weather and terrain.
M
echanics, doing a thorough job of troubleshooting prevents the unnecessary
replacement of components and parts on your aircraft.
If you have problems with a component or aircraft system, troubleshoot it from
beginning to end like it says in the TM. This will help you identify exactly what the
problem is. It may also help you find faults you can fix without sending components to
the support shop.
Don’t ignore troubleshooting even when you think it’s a waste of time. Troubleshooting can identify the problem and reduce the hours support needs to spend looking
for and fixing a minor problem on a component you turned in as bad.
if you don’t troubleshoot thoroughly you’ll
end up unnecessarily
spending money and
replacing parts.
So end your
troubles by
troubleshooting
thoroughly like
your TMs say.
be a hero to your airCrafT…
be a TroubleshootEr!
PS 707
20
OCT 11
Click here for a copy of this article to save or email.
707 20-21.indd 1-2
PS 707
21
OCT 11
Click here for a copy of this article to save or email.
9/7/11 3:38 PM
M260/M261 Rocket Launcher…
I’m ready
to rock!
let’s
do some
serious
rocket
firing!
ROCK
ROCK
on
on With
With
RockET
RockET
Help!
Help!
your m260/m261 rocket
launcher will rock if you
remember these rocket tips…
Suspect the contacts. If you load rockets
in the launcher, but rockets aren’t registering
as being loaded, suspect the contacts. Before
you spend a lot of time troubleshooting, first
try cleaning the contacts in the tubes where the
rockets aren’t registering. If the contacts are
dirty, the rocket doesn’t have a good electrical
connection, which prevents the launcher from
knowing the rocket is loaded.
Rockets not registering? Clean contacts
Mark bad tubes. If troubleshooting
does turn up a bad tube, mark out its
number immediately on the top of the
launcher at each end. That way you will
remember which tube is bad and will
know not to bother loading a rocket in
it again.
Tube bad? Mark out its
number on launcher
Clean with clean bore brush. It is
important to clean out the tubes with
CLP and a bore brush. Otherwise, dirt
and carbon can cause the rockets to jam.
But your cleaning won’t do much good
if you clean with a dirty bore brush. That
just spreads the gunk around. When the
brush gets coated with dirt and carbon,
give it a good cleaning with soap and
water. Let the brush completely dry
before using it again.
hey, that bore
brush is dirtier
than me!
Use rocket loading tool. Use the tool,
NSN 1005-01-536-7961, for loading
and unloading rockets. Without the tool,
you could jam the rocket in its tube
against the rocket stop. Then, when you
move the rocket forward to lock it in
place, the end shield may be punctured
and the igniter wire and weather seal
may be damaged. That makes the rocket
unusable because of possible exposure
to electrostatic discharge and the hazard
of electromagnetic radiation (EMR) to
ammo and rockets.
Use rocket loading tool
to avoid damaging…
…end
shield
If you do damage an end shield,
contact your ammo logistics/quality
assurance representative or turn in the
rocket to the ammo supply point. You’re
not authorized to replace end shields.
now it’s
time to
rock it!
wash it out,
will ya?
PS 707
22
OCT 11
Click here for a copy of this article to save or email.
707 22-23.indd 1-2
9/7/11 5:44 PM
OH-58D…
Handling Your WHeEls
thanks,
buddy!
No problem-o!
now to take
care of your
buddy.
UH-60A…
Use the Right Tool
I hopE This wiLl
work on the FLOW
VALve and not oN
my knUCKleS!
just don’t
leave my gun
resting on
my pin!
that one will
work on your
nerves and
your knuckles
and not much
else!
uSE
THis
onE!
M echanics,
Mechanics, your
Kiowa Warrior’s
ground handling
wheels (GHW)
should not
interfere with
its weapons if
you install the
wheels right.
PS 707
Save yourself a headache and possible aircraft damage
by lifting the weapon and stowing it in the up position
before you install the GHW.
Some mechanics know that installing the wheels while
the rocket launcher and the M296 machine gun are installed
is troublesome. The launcher or other weapon systems get
in the way when the wheels are put on the aircraft skids.
A common practice is to remove the expandable bolt
pin from the universal weapons pylon, lift the weapon, reinsert the bolt pin and then allow the weapon to rest against
the bolt pin.
That solution has its own problems. The weapon could
slip from your hands and bang against the pin. Even
if you’re careful and manage to rest the rocket pod or
an M296 machine gun on the pin, the pod and gun will
eventually bend the pin. And if HELLFIRE missiles are
installed, their fins can be damaged by the wheels.
When installing the ground handling wheels, it’s best to
stow weapons in the up position like it says in Para 4-76
of TM 9-1090-214-23&P. That way you won’t be saying
“oops” later.
24
OCT 11
Click here for a copy of this article to save or email.
707 24-25.indd 1-2
using a hammer and an extension to turn off the main module
transmission oil flow is not the way to go.
The oil filter flow valve positioner tool and a breaker bar are the right tools to use
when changing the transmission oil filter on A Model Black Hawks. Make sure the
tool is cinched in properly because you’ll need your muscles to turn it.
Some mechanics improvise trying to use the old positioner tool with an extension.
They end up with busted knuckles, cuts and abrasions, gouges on the transmission
sump case and damage to the filter sleeve tang area.
Using a hammer and extension or the old tool leads to depot level repairs that may
include replacing the filter sleeve or even the transmission. The end result is costly
downtime and reduced operational readiness.
If you still have the old tool hanging around, don’t use it. It requires brute strength
and often slips off, causing damage. Make the tool listed in Fig 264 in WP 2014 00
of TM 1-1520-237-23-20.
When changing transmission oil filter…
PS 707
…use this tool…
25
…and not this one!
OCT 11
Click here for a copy of this article to save or email.
9/7/11 4:50 PM
AH-64A/D…
Seat Can Damage SSU
I hate it when you
have to take out my
seats. My SSU takes
a real beating!
I’ll go easy.
I won’t yank
them out!
L
ong ago in
medieval times,
a young squire
stands watch…
someday I
will become
a knight…
like the one
I serve.
a light…
off in the
distance!
it is the
enemy!
don’t
Worry!
Mechanics, one component in your AH-64 that can’t take a licking and keep on
ticking is the sensor surveying unit (SSU), NSN 1270-01-159-7994.
Pay attention when removing
the co-pilot seat because the sensor
Protect SSU when removing seat
SSU mounts and the seat are very
close. The mounts are not strong
and break easily if the heavy seat
bangs into them.
The SSU sends signals to the
integrated helmet and display
sighting system (IHADSS). If the
SSU is broken, your helmet will
no longer be connected to aircraft
weapons and the target acquisition
designation sight (TADS).
If the mounts are broken, it’s over for your bird. It will be red X’d and won’t be
flying until the SSU mount gets repaired by a depot maintenance contact team.
The pilot seat is less of a problem because there’s more clearance between the SSU
and the seat. But, if you’re not careful removing the pilot seat, the SSU can suffer
damage there, too.
Be careful removing your seats. If you aren’t, the SSU will take a licking and
stop ticking.
PS 707
26
OCT 11
Click here for a copy of this article to save or email.
707 26-27.indd 1-2
M
oments
later…
now is my
chance to earn
my knighthood.
I will
vanquish
the foe…
by
myself!
Let “PM” Prevail
Click here for a copy of this article to save or email.
8/26/11 3:12 PM
S
Back in the castle,
ighting
the enemy,
the young
squire spurs
his steed
forward…
the young squire
slowly regains
his senses…
so…
you are
alive,
eh?
…and discovers
he has bitten
off more than
he can chew.
The squire
…TOPples
him to the
ground.
fights bravely,
but… a sharp
blow…
707 28-29.indd 1-2
…I
came
back
bruised
and
battered.
I-I don’t know what
to say, sire. I went
off to battle seeking
victory… instead…
The last thing
He’s had
enough-that will
do!
PS 707
what
do you
have to
say for
yourself?
he sees (before
HE fades into
unconsciousness)
is a magnificent
knight!
28
OCT 11
th-there
were too
many—
PS 707
h-how
do you
know-?
there
was only
one!
29
you left the
garrison without
permission. we
could have been
over-run…and
you, killed.
tHe
fight was
observed.
OCT 11
8/26/11 3:12 PM
but, there was
good reason for
your loss in
battle squire.
what
do you
mean?
“the pommel on
your sword
was loose.”
your skirmish
was lost before
it began.
“the strap
on your
shield
broke.”
b-but…
how…?
“the point on
your lance
was split.”
now tell me…
what have you
learned from this,
young squire?
yes…it’s true!
all those things
did happen.
to be prepared
before going into
battle…and to make
sure my equipment is
mission ready!
and how do you
make your equipment
mission ready?
with
maintenance!
preventive
maintenance could
have saved you
much suffering.
“the strap on
your helmet
was torn.”
PS 707
707 30-31.indd 1-2
read
the
scrolls
in the
armory.
with preventive
maintenance to
be exact!
verily,
sire.
“the scrolls contain
directions for checks and
services to keep equipment
ready for battle.”
“the horse
threw a
shoe.”
30
OCT 11
PS 707
31
OCT 11
8/26/11 3:12 PM
someday, you
will become a
great knight.
but you have
much to learn.
this is but your
first stop on
your journey
to knighthood.
Time and again his
now…get
some rest.
shield protected him in
combat, while his sword
vanquished his enemies.
F
you are inducted
into the order
of knights.
inally, his victories
are recognized and
he is summoned to be
vested as a fullfledged knight.
Y
ears pass and the
squire has applied
himself to the proper
care and maintenance
of his equipment…
and has proven his
bravery in battle.
In the great hall
where the knights
have gathered…
do you have
anything to say
to your fellow
knights?
the most important
lesson that I have
learned is…
…the necessity
of preventive
maintenance!
what
lessons
have you
learned?
PS 707
707 32-33.indd 1-2
32
OCT 11
PS 707
33
OCT 11
8/29/11 5:34 PM
sir knight, you
have learned
well.
take my
baTtle
shield anD
carry it with
you always!
you are the one
with the shield
I saw that night
so long ago.
Small
Arms…
Where Is the Gaging Requirement?
I’m
NMC!!
hold
on!
I can’t be
fired becAuse
I haven’t been
gaged in more
than a year!
Dear Half-Mast,
We have weapons in our unit that haven’t been gaged in more than a year. I
believe that means they are NMC, but I can’t find where it states that in the
TMs. The Soldiers in my unit want to fire the weapons and I can’t prove to
them that they shouldn’t.
SSG S.G.
Dear SSG S.G.,
Since you are part of an Active Army unit, you are absolutely right: the weapons
shouldn’t be fired if they haven’t been gaged in more than a year. Every small arms
-23&P TM has this statement:
“All Army small arms are to undergo gaging by Direct Support (or equivalent for
Aviation units) one year from receipt in accordance with the applicable technical
manual. This is NOT a part of initial services to be performed upon receipt of
the weapon. Active Army small arms will, as a minimum, undergo subsequent
gaging on an annual (every year) basis. Guard and Reserve small arms will, as a
minimum, undergo subsequent gaging on a biannual (every two years) basis.
These prescribed gaging intervals are, as stated, the minimum required to
assure the safety, operability, and reliability of Army small arms. Any small arm
may be inspected/gaged on a more frequent basis. It is recommended that weapons
used in training be gaged after each training cycle has been completed.”
In the M16 rifle’s TM 9-1005-319-23&P, this statement appears
at the beginning of the manual after the General Warnings.
It’s usually in the same place in the other small arms TMs.
PS 707
707 34-35.indd 1-2
34
OCT 11
PS 707
35
OCT 11
Click here for a copy of this article to save or email.
9/7/11 3:38 PM
Small Arms…
Use
Cleaning
Tanks with
OK - I’m clean now
but I neEd to be
completeLy lubed
before You store me!
Caution!
no lube means
corRosiOn…
and corrosion
ruiNS me!
• Use only dry cleaning solvent Type II
(81349), MIL-PRF-680. This is the only
solvent authorized for small arms.
NSN 6850-01-474-2316 brings 55 gallons,
NSN 6850-01-474-2317 5 gallons,
NSN 6850-01-474-2319 1 gallon, and
NSN 6850-00-281-1985 4 1-gal containers.
Units would be
better off never using
cleaning tanks for
their weapons, mainly
because it’s too easy
to mix up bolts when
many weapons are
run through the tanks.
If a bolt is used with
a weapon it wasn’t
headspaced for, the
receiver can rupture
during firing.
But cleaning tanks
aren’t going away,
especially at posts that
are dealing with large
numbers of weapons
during training. Here
are a few precautions
to help your weapons
survive cleaning tanks:
• Use a metal basket in the tank to ensure no parts disappear during cleaning.
• When the weapons come out of the tank, they must be completely wiped clean
of solvent and allowed to completely dry. But here’s the important part: The
weapons must then be completely lubricated before storage. Solvent removes
every bit of lubrication from weapons. If weapons are stored without being relubed, count on them being ruined by corrosion.
• Protect yourself from solvent. It’s strong stuff. Wear goggles, rubber gloves, and
coveralls with the sleeves rolled down.
• Remember that some weapon parts should never be dunked in solvent. Examples
are the M2 and M48 machine gun back plates, the MK 19 bolt assembly and
anything plastic. Solvent will eat up these parts. Check the operator TMs for info
on what parts to keep away from solvent.
M16A4 Rifle, M4/M4A1 Carbine…
hands off
my buIS,
buddy!
you gotta
leave that
installed
on me all
the time in
case those
fancy optic
sights Stop
WORKinG.
• Don’t clean small arms in the
same cleaning tank you use for
things like vehicle parts. They
may have contaminants that
could damage weapons.
dude!
you just
cleaned
HmMwv
parts in
there…
I’m the
ONLY
solvent
you can use
on small
Arms!
PS 707
36
…you’re
not
putting
me in
there,
too!
W
hen Soldiers are installing optic sights on
their M16A4 rifles and M4/M4A1 carbines, they
are removing the backup iron sight (BUIS).
Bad move!
As its name states, BUIS is the backup sight
in case something goes wrong with whatever
other sight you’re using. It keeps you from
being sightless in the heat of battle.
Plus, removing the BUIS deadlines your
weapon.
So leave the BUIS alone and keep it installed
in the rear-most slot on the mounting rail.
Install the M68 or RCO-150 sights anywhere but
that last slot. That’s strictly for the BUIS.
The TMs for the M68 and M150 sights show
the sights mounted without the BUIS. That will
be corrected in the next update to the TMs.
M16 Buttstock Picture Wrong
The picture of hte new M16-series rifle hybrid buttstock PS showed on Page 24 in PS 703
(Jun 11) was wrong. When you order the new buttstock kit, NSN 1005-01-569-6938, it will
look like the picture on WP 0021-19 in TM 9-1005-319-23&P.
OCT 11
Click here for a copy of these articles to save or email.
707 36-37.indd 1-2
BUIS Is Backup...
Leave It Alone!
PS 707
37
OCT 11
8/26/11 3:09 PM
M120/M120Al,
M121 Mortars…
• If you have an M298 cannon with serial number 11729,
Mortar
Matters
that
Matter
Here are a
few rules
all mortar
men need to
remember
about their
M120/M120A1
and M121
mortars…
• All mortar cannons must have
you need to report it ASAP to the TACOM POC at the end of
this article. TACOM Safety of Use Messages 10-21 and 10-27
identified several M298s that may be unsafe and only the one
marked 11729 has not been accounted for.
current Weapons Record Data cards,
DA Form 2408-4, prior to firing.
Soldiers authorized to fill out the
card should make sure their Unit
Identification Codes (UICs) are current
and show only those UICs that they
support or are assigned to. For more
information on mortars and UICs, see
PS 700:
https://www.logsa.army.mil/psmag/
archives/PS2011/700/700-19-20.pdf
ah-ha!
you’re the
infamous
11729. I need
to report
you.
I’m not SURE I
UNDERSTAND ALL THis.
guess I’d better
calL Joe SChmiDT.
• The M298 cannon
breech cap and cannon
tube are a matched-forlife set and shouldn’t be
switched between cannons.
The breech cap’s firing pin
and the cannon’s white line
must align for the cannon
assembly to lock into the
baseplate securely. That’s
why they’re matched for
life. The serial numbers are
stamped on both the breech
cap and cannon tube to
help you keep track.
Breech cap and cannon tube
must stay together. Check serial
numbers to make sure you’ve
got the right ones
M249 Machine Gun…
• The 120-mm mortar systems with LINs M68405 and
M68326 and their M120-mm cannons, NSN 1015-01-5222630, now require Property Book Unit Supply Enhanced
(PBUSE) reporting/Unique Item Tracking (UIT). Check with
your property book officer for help.
707 38-39.indd 1-2
if you have
mortar
questions
like these
guys, contact
TACOM’s Joe
Schmidt at
DSN 786-1216,
(586) 282-1216,
or email:
always A
GOod idea
for MortaRs.
Shipment of Small Arms Equipment, the M298 tube can’t
exceed a bore diameter of 4.757 inches for unit deployment or
overseas shipment. You can find other info and requirements
on 60-, 81- and 120-mm mortars on Pages 48-49 of TB 9-1000247-34. The TB is on the ETM site:
https://www.logsa.army.mil/etms/welcom1.cfm
38
you
can’t
fire Me
until
you
update
my
2408-4!
joe.schmidt@
us.army.mil
• According to TB 9-1000-247-34, Standards for Overseas
PS 707
sorry!
OCT 11
Click here for a copy of these articles to save or email.
Should Both Barrels Be ID’ed?
Dear Half-Mast,
There is no
requirement in the
M249 machine
gun TMs for both
barrels to be ID’ed
for the receiver they
are headspaced for.
Shouldn’t this be an
official requirement
since it’s critical
that Soldiers
not use a barrel
that hasn’t been
headspaced for that
receiver?
CW4 J.F.
Dear Chief J.F.,
Yes, barrel marking should be an official requirement.
This will be added in the next change to TM 9-1005201-23&P. The best way to ID the barrels for both the
M240 and M249 machine guns is to safety-wire a dog
tag underneath the barrel’s heatshield. Make sure the
wire ends don’t stick out where they can poke someone.
You can also paint the number on the barrel.
What you don’t want to do is engrave
the number on the barrel. That ruinsv
the barrel’s finish, which leads
to corrosion and a
ruined barrel.
M249, M240 Machine Guns…
I think I have carbon
congestion! wHoo! I feel Awful!
Gas
Problems?
SCrape ‘em
Away!
what can I
do to hELP?
scRApe
it OFf!
• Clean inside the front of the gas cylinder with the FLAT SIDE
I f carbon is allowed to build and build inside the gas systems of the M249 and M240
• Clean the piston grooves by scissoring
the SCRAPER around the grooves
• Clean the front hole of the
piston with the FLAT SIDE
machine guns, they fire slower and slower and then not at all.
The key to gas relief for both machine guns is the scraper. Each scraper part is
designed to scrape away carbon from different parts of the gas system. And the
sooner you use the scraper, the easier the job is. The longer carbons sits, the harder it
gets. It eventually becomes like enamel.
I CAN’T BUDGE
THis carbon
in your gas
system!
no wonder! you
waited a week to
clean it out. you
shoulda cleaned
me right after
firing!
Here’s how
to use the
scraper on
both machine
guns…
• Clean two grooves on regulator
with PROTRUDING TIPS
• Clean center hole of regulator
with POINTED END, turning it
clockwise and pushing in until
scraper hits bottom
PS 707
40
OCT 11
For the chamber, use the chamber brush and CLP. If your M249 or M240 has
trouble extracting, a quick cleaning of the chamber usually fixes the problem.
CLP does a good job of cleaning off carbon, but it also does a good job of collecting
carbon. So never use CLP—or any of the other lubes—on the barrel’s gas regulator
hole, the gas regulator, the gas cylinder, or the op rod’s piston end. Clean carbon off
those parts with the scraper only—no CLP.
Leave M240 set
It’s OK to use CLP to clean the barrel, the chamber, the rest
at #1 except in
of the op rod, and the bolt face, but wipe them dry before firing.
emergencies
Another excellent way to fight carbon in the gas system is
to change the barrel on both the M249 and M240 when you’re
supposed to. For the M240, that means changing barrels every
10 minutes during sustained fire (100 rounds per minute) and
every two minutes during rapid fire (200 rounds per minute).
For the M249, during both sustained fire (40 rounds per
minute) and rapid fire (100 rounds per minute), change the
barrel every 200 rounds.
What you don’t want to do with the M240 is change the gas
regulator setting from #1. The #2 setting produces much more
carbon in the gas system. The #2 setting should be used only in
combat emergencies.
If your scraper and elbow grease just won’t clean out all the
carbon, ask your armorer for help.
Click here for a copy of this article to save or email.
707 40-41.indd 1-2
9/12/11 10:23 AM
Tools…
in PS 699 (Feb
11), we told you
not to engrave
ID numbers on
Army tools.
Tool
Tool Engraving
Engraving
Part 2
Why? Many Army tools have a lifetime warranty, which means they’re replaced
for free if they’re damaged or broken. In some cases, engraving or laser etching ID
numbers on tools voids that warranty. So that means if something goes wrong with
the tool, you could be stuck with the replacement cost.
Several readers wrote to PS that you should definitely engrave ID numbers on tools
to help keep track of them. One reader pointed out that TC 3-04-7, Army Aviation
Maintenance, says: “Paint, etch, tape, or mark all tools for easy identification during
inventories.”
But, unfortunately, that doesn’t change the fact engraving or etching tools may
void their lifetime warranty.
One possible solution is to pay the tool’s manufacturer to engrave the ID
numbers on the tools. That leaves the warranty in effect. And it turns out some tool
manufacturers say it’s OK to engrave or etch the tools without affecting the warranty.
So when you’re considering the best
hello,
way to ID your tools, first check with
acme toOls?
the manufacturer to see if engraving the
do your
wrenches
tools will affect the warranty. If it will,
have lifeTime
ask the manufacturer what they charge
WaRranties?
yes? OK, does
for doing the engraving. If that’s more
engraving
them affect
than you want to pay, you’re left with
the WArRanty?
the alternatives of painting or taping the
ID number on the tool. Some units are
also putting bar codes on tools.
Not sure which of your tool sets have lifetime warranties? PS 655 (June 07) listed
many of the sets, kits and outfits (SKO) that have lifetime warranties. You can view
the story at:
https://www.logsa.army.mil/psmag/archives/PS2007/655/655-28-29.pdf
For more current SKO info, go to: https://pmskot.army.mil/
PS 707
42
OCT 11
Replacing Tools Under Warranty
If you do break a tool that’s under warranty through normal use, you can usually
get it replaced within a couple of business days. Here’s how:
• Go to the PM SKOT link on the previous page.
• Click on CONTINUE and then on REPLACEMENT/WARRANTY. That brings you to the
link that has both tool warranty and replacement links. For a warranty claim, click on
the warranty link and enter the requested info.
If you need to replace a tool broken through abuse or one that’s been lost or
stolen, get it through the replacement process. That way PM SKOT can give you
worldwide Army support. Click on the replacement link and enter the tool and
credit card or MIPR info. If you don’t have a unit credit card, click on the PM
SKOT link for further instructions.
If you have tool questions of any kind, call toll free 1-877-4PM-SKOT (1-877476-7568) or email: [email protected]
Tool
Warranty
Often
Good for
Marines
no problem,
buddy! my lifetime
warranty applies
to the marine
corps, too!
Dear Half-Mast,
I have read in PS that many of the Army’s sets, kits and outfits (SKO) have
lifetime warranties that will provide replacement of tools that break during normal
use. I was wondering if the warranty also applies to tools the Marines purchase
through PM SKOT.
SFC M.B.
Dear Sergeant First Class M.B.,
Yes, the warranty is good for tools Marines purchase through PM SKOT. But
Marines cannot purchase all the SKOs available through PM SKOT. To see which
SKOs are authorized for Marines, check USMC Supply Instruction (SI) 10510-OR
(publication control number 16410510000), which is online:
https://pubs.logcom.usmc.mil/front.htm
To obtain tool warranty and replacement info, go to: https://pmskot.army.mil
Click on REPLACEMENT/WARRANTY to bring you to the page that has both
replacement and warranty links.
PS 655 (Jun 07) published a list of many of the SKOs that have lifetime
warranties. It’s online:
https://www.logsa.army.mil/psmag/
archives/PS2007/655/655-28-29.pdf
Click here for a copy of these articles to save or email.
707 42-43.indd 1-2
9/7/11 3:37 PM
CBRN Sources
I guess
you could
say that
I hear these
CBRN training
films are
kinda old.
Good grief!
there must be
more current
training on
deconning
than this!
Dear Half-Mast,
We help train Soldiers on CBRN equipment and we’ve run into a couple of
problems we hope you can help with:
• The only training film we have on deconning is very old. Are there any films
more recent?
• TC 3-8 used to cover how to conduct gas chamber exercises for
masks, but it was rescinded. Its information was supposed to be added to
AR 350-1, Army Training, but it wasn’t. Where can you go for guidance
on doing the gas chamber exercises?
Mr. G.H.,
You’re in
luck!
PS 707
G.H.
In 2009, a new training video came out on
using the M12 decon. You can order it online:
http://www.defenseimagery.mil
Go to Learning Resources and type in “M12
decon apparatus”.
But the Defense Imagery site has a wealth
of other training material on all kinds of
CBRN and other Army equipment, including
the M40 mask, M41 PATS, the ICAM, and
the M17 decon. CBRN specialists need to
check out the site for material they can use in
training their unit.
44
Online
OCT 11
CBRN Knowledge Network
Concerning your question about info on
gas chamber exercises, the US Army CBRN
THere’s a whole
I’m
libRARY here on
glad
School at Ft Leonard Wood, MO, has put
STUFf to help!
HalfMASt
out instructions for doing the exercises. Go
told
to their CBRN Knowledge Network site:
us
about
http://www.wood.army.mil/
it!
wood_cms/usacbrns.shtml
Then click on CBRN Knowledge Network
Website. You will need to use your CAC
card to log in. Under DOTMLPF, click
on Training and click again on CBRN
Collective Training. Then click on the file
Mask Confidence Training. This gives you a
training program developed and approved
by the US Army CBRN School.
But don’t stop there. The site also offers:
• CBRN Specialist (MOS-T) Course (Phase 1) online access instructions
• US Army CBRN School Training Support—This site contains training materials
used by the school to train CBRN Warfighters.
• CBRN Collective Training—This site contains CBRN materials for unit training.
• CBRN Soldier Training—This site offers tools, resources and information for
Soldier training that includes critical tasks.
• Standards in Training Commission—The site assists units
in developing weapons training strategies and requirements.
Click here for a copy of this article to save or email.
707 44-45.indd 1-2
9/8/11 4:30 PM
M978
HEMTT…
Get a Safe Handle
on Fueling,
We’ve put
together some
guidelines for
handling fuel
safely…
PART I
it’s risky
business,
handling
fuel…
…open flames, static
electricity or sparks
can set off fires and
explosions…
Dress the Part
Fuel
handlers,
make sure
you’re
dressed for
the part
by wearing
personal
protective
equipment
(PPE)…
…liquid fuel can
irritate your skin
and eyes…
• Industrial safety goggles with
a seal that holds them snugly
against your face.
• Fuel handler’s gloves.
Size
Small
Medium
Large
X-large
XX-large
NSN
8415-01-5292612
2618
2621
2624
2638
Fuel
handler’s
glove
• Cold weather petroleum
handler’s gloves
Size
…in cold
weather, supercooled fuel can
inflict frostbite
on bare skin.
X-small
Small
Medium
Large
X-large
all good reasons
to practice safety
when you’re working
around your m978
hemtt tanker.
PS 707
46
OCT 11
NSN
8415-01475-9987
466-3531
466-3586
466-3587
475-9981
Cold
weather
petroleum
handler’s
glove
• Hearing protection you’d normally
wear in your shop or motor pool.
• You might even think about ordering a fire-resistant
lightweight performance hood, NSN 8415-01-576-7524.
It protects your face, ears and neck.
Click here for a copy of this article to save or email.
707 46-47.indd 1-2
9/7/11 3:37 PM
PMCS in the TMs
Before handling fuel, do the
Before PMCS by the book. See
Chap 4 of these manuals…
You’ll find the TMs on the
USAMC Logistics Support
Activity ETMs Online website…
TM 9-2320-339-10 for the M978A4
TM 9-2320-348-10 for the M978A2
TM 9-2320-429-10 for the M978
https://www.logsa.army.mil/
etms/online.cfm
Static Electricity
You’ll
also
find
them
on EM
0038.
One of the greatest dangers around fuel trucks is static electricity. An electrical charge
can build up from the flow of fuel through hoses and pumps, and into and out of metal
tanks. If the charge becomes too great, it can spark. And that spark might set off a fire or
an explosion. That’s why you need to bond and ground your vehicle before handling fuel.
Bonding is when you electrically connect two objects to make the static charges on
them equal. For example, before you fuel or defuel a vehicle from a HEMTT tanker,
connect one of the HEMTT’s static cables to the vehicle being fueled.
Grounding is when you electrically connect a single vehicle or two bonded vehicles to
a ground rod. In this case, you’d connect one of the HEMTT’s static cables to the rod.
Use static cable…
Liquid and Vapor
Be alert
to liquid
fuel leaks
and fuel
vapors
around
your
tanker.
707 48-49.indd 1-2
Fuel leaks do more than waste resources
Look at fuel hose for
and foul the environment. They’re a fire
leaks, holes and tears
hazard. A hot engine can ignite leaking fuel.
Clothing wet with fuel can catch fire from the
static electricity on your body and clothes.
Metal scraping pavement causes sparks that
can also set fuel ablaze.
Inspect the fuel servicing hose for holes,
tears or dry rot—prime places where leaks
occur. Make sure the fuel service nozzle has a
gasket. Inspect it for tears, cracks or dryness.
Clean up any leaks you find around your
truck. Ask field-level maintenance to replace
or repair leaking equipment.
See to it your unit has an SOP for fuel leaks
and spills. It’s not enough to know the SOP.
You need to practice it. Always keep a spill
kit on your HEMTT. Make sure the kit has
absorbent pads, pillows, socks and dry sweep.
One more thing: When you use the fuel
service nozzle, put a drip pan under it to
catch overflow or drips.
Fuel leaks you can spot. Fuel vapors you can’t. You’ve got to sniff
them out. Liquid fuel evaporates, forms vapors and mixes with air. It’s
especially dangerous in areas that are poorly ventilated. Even an empty
fuel tank may still have some lingering vapors mixed with air. Add a
flame or spark to the mix and it could explode.
…to
ground
HEMTT
Fuel handlers should inspect the static cables and connections daily. Same goes for the
ground rod.
Static electricity can also build up on
Keep water handy to rinse fuel from clothes
you and your clothes, especially if they’re
nylon or wool. Taking off charged clothes
or tugging at them could unleash a spark.
If the clothes are wet with fuel, they could
burst into flames. (Nylon clothes have
another drawback: If they catch fire, they
melt.)
Keep a 5-gal water can on your truck.
You’ll need it if fuel splashes on you. Use
water to rinse fuel off your clothes before
you strip down. Also use it to flush your
eyes and skin as needed.
Next month, PS 708 will present the
second and final part in this series about
safe fuel handling. Part II will discuss night
fueling, placards, smoking, sources of
ignition, fire extinguishers and education.
PS 707
49
OCT 11
8/26/11 3:10 PM
Fire
Extinguishers…
Mission Capable,
Strictly Speaking?
there’s
no fire
extinguisher
in this guy -is he NMC or
not?
yes!
no!
you guys
need to
talk to
someone
about
this!
Half…
…mast!
The
answer’s
not as
simple
as you
might
think.
PS 707
• If the TM lists the fire extinguisher as a
basic issue item (BII), it’s required gear. It
must be operational and with the vehicle at
all times. Otherwise, the vehicle is NMC. It
must be deadlined until it gets an operating
fire extinguisher.
• If the TM includes the fire extinguisher on the
no.
yes.
if your vehicle doesn’t
have a portable, handheld fire extinguisher,
is the vehicle fully
mission capable?
According to TACOM, here are the guidelines:
PMCS tables in
some -10 TMs say
the vehicle is nonmission capable
(NMC) if its fire
extinguisher is
missing or not
working.
PMCS tables in
other -10 TMs
don’t even mention
a fire extinguisher.
So how do you
know if it’s OK to
roll?
additional authorization list (AAL), then
it’s not required gear. Your vehicle is fully
mission capable even if the fire extinguisher is missing or not working.
Of course, if your vehicle’s main job is to haul
Get a class
passengers or flammable materials, you should
B and C
always carry a fire extinguisher. Get a class B
extinguisher
and C multi-purpose extinguisher. It’s made
for your
to put out flammable liquid fires and electrical
vehicle
equipment fires.
Check out your TMs for recommended
portable, hand-held fire extinguishers. If the
TMs don’t list any, consider one of these:
• NSN 4210-01-149-1356
• NSN 4210-01-189-6452
• NSN 4210-01-481-3875
They’re class B
and C dry chemical
extinguishers that
use potassium
bicarbonate as an
For more information,
see TB 5-4200-200-10,
extinguishing
Hand Portable Fire
agent. Each
Extinguishers Approved
for Users.
one has a 5-lb
capacity.
AR 750-6 Revised
50
OCT 11
A revision to AR 750-6, U.S. Army Equipment Safety and Maintenance Notification
System, went into effect in Dec 2010. This rapid revision updates the current command
activity names of Army service component commands and direct reporting units. It also
assigns responsibility to the Army DCS G-4 to organize and convene an Army Safety
Action Team (ASAT) when material risk is determined to be high on any piece of Army
equipment, in accordance with AR 385-10, The Army Safety Program. It’s available on the
Army Publishing Directorate’s website:
http://www.apd.army.mil/pdffiles/r750_6.pdf
Click here for a copy of these articles to save or email.
707 50-51.indd 1-2
9/7/11 3:37 PM
No Field
Days with
DA Form
2404
Hey, check
out this cool
checklist I
Made foR
DA Form 2404!
Dear Half-Mast,
DA Pam 750-8, The Army Maintenance Management System
(TAMMS) Users Manual, shows examples of how to use DA Form 2404
for PMCS, quarterly inspections, annual services, battlefield damage
assessment and repair and estimated cost of damage. My concern is with
the proper use of section 10c, “Deficiencies and Shortcomings.”
I think only those examples listed should be included in 10c. But I have
seen some units turn column 10c into a checklist. For example: “Inspect
tank, pump and plumbing for leaks.” Is this permitted?
Mr. A.A.
Mr. A.A.,
We’ve received
similar inquiries
from otHer
readers, so
this seems to
be a common
concern.
OCT 11
Click here for a copy of this article to save or email.
707 52-53.indd 1-2
improper form modifications include things
like changing form FiELD titles. For example,
changing the ORGANiZATiON block to read
CORPORATiON or moving around the data
fields would invalidate the form.
it’s a good idea for
you to check with the
LCMC responsible for
the piece of equipment
you are servicing.
They may already
have an approved
version of DA Form
2404 you can use that
is equipment-specific.
CORPORATiON
HQDA G-4 tells
us a form is not
considered altered
or modified as long
as it’s being used
for its intended
purpose.
For example, if a
unit wants to fill in
inspection checks or
services information
on DA Form 2404
and print it locally,
that falls within
guidelines.
PS 707
uhhh… I’m not sure
we’re s’posed to tamper
with that form. better
ask half-Mast.
now we can
breEze right
thROUGH
PMCS on this
puPpy!
For detailed guidance on forms, see DA 25-31,
Forms Management, Analysis and Design.
Para 1-9 covers steps for getting new forms
or modifications approved:
http://www.apd.army.mil/pdffiles/p25_31.pdf
PS 707
in that case,
why reinvent
the wheel?
53
8/26/11 3:06 PM
Power
Grid
Training
Plugs
Safety
now there’s
a power
grid training
course that
teaches proper
installation
of the central
p0wer solution!
electrocutions
in theater are
happening!
these deaths are
sad and were
preventable.
707 54-55.indd 1-2
the first week
of training
covers…
the
second
week
includes
hands-on
training
with power
plants and
electrical
distribution
systems
and it
covers…
• Electrical safety, basic electrical theory,
• Grounding and bonding methods
• Preventive maintenance checks
BB ullets and bombs are not the only threats in a war zone.
Something as simple as taking a shower or washing a
vehicle can end in tragedy. Several Soldiers have died from
electrocution, and others have been injured in power-related
incidents.
These kinds of tragedies are caused by overloaded circuits,
inadequate extension cords or improperly emplaced grounds
in the power system. Following safety procedures could have
prevented such disasters.
Frayed wiring plus overloaded lines equals potential disaster
PS 707
It’s easy to assume that when outlets
Put
are available there is sufficient electricity,
safety
too. However, the central power solution
first by
(CPS) was developed to provide tactical
learning
power grids that supply power to new,
right
power-hungry technologies. Many
way to
servicemembers do not know how to
set up
emplace power grids properly. Proper
power
installation of power grids can prevent
structure
electrical fires and save lives.
The Communications-Electronics Command-Life Cycle Management Command
(CECOM-LCMC) Information Technology Field Service Branch (IT-FSB) Tactical
Power Integration Team (TPIT) now offers a 2-week power grid training course that
teaches Soldiers how to install the CPS properly. This is important because CPS
installation does not currently fall under any military occupational specialty.
54
OCT 11
units of measurement, electrical symbols,
Ohm’s Law, electrical math, AC (alternating
current) and DC (direct current) circuits,
single-phase and 3-phase power, computing
neutral current, load calculations and load
balancing
• Introduction to the National Electrical Code
• Sizing of conductors, current draw and
voltage drop, circuit breakers and fuses,
tools, and use of test equipment (such as
multimeters, ammeters and ground
resistance testers).
and services, safety, paralleling
procedures (how to parallel
generators to create backup power
and uninterrupted power transfer)
• Troubleshooting, power plant
emplacement, power distribution
illumination systems electrical
(PDISE) set up, designing and
connecting the power grid, and the
differences between generator
models.
This training will be given to some units during rotations to the Joint Readiness
Training Center (JRTC) at Ft Polk, LA, or the National Training Center (NTC) at
Ft Irwin, CA.
However, any unit can request power grid training from CECOM’s IT-FSB TPIT
by calling DSN 738-5505, (254) 288-5505, or emailing:
[email protected]
Click here for a copy of this article to save or email.
8/26/11 3:07 PM
Safety…
a
ncient
rome…
gratias, brutus
cautionus, but
I need not fear
the Iedes.
beware
the Iedes!
for verily,
I heed all
the safety
warnings in
here.
However, setting up, handling
or breaking down the device
without following procedures
in the operator’s manual or
using the included safety
gear is dangerous!
The improvised
Explosive
Device Effects
Simulator
(IEDES) is
a powerful
training tool.
IEDES was
All four “SAFE/ARM” wheels are
color-coded with GREEN side for “SAFE”
and RED side for “ARMED”.
When PSSD is in “SAFE” mode,
all 4 wheels should be turned with
GREEN indicators facing out
NOTE: Wheels are on both sides of PSSD
When PSSD is in “ARMED” mode,
all 4 wheels should have RED warning
indicators facing out
[email protected]
specially
designed to
train Soldiers
how to defeat
explosive
devices.
PS 707
IEDES kits contain lots of parts, and
all of them should be handled carefully.
Use extreme caution when handling the
Pyrotechnic Scalable Signature Device
(PSSD). This 32-shot magazine-based
launcher uses M30/M31 cartridges, so
handling it without safety gear could
result in serious injury to yourself or
others.
The PSSD should never be powered on
or armed during set up, break down, or
while loading or unloading cartridges.
If the PSSD is detonated while anyone
is closer than the required safety standoff
distance, it can cause injury from
noise, fragmentation and hazardous
material.
You should find the safety gear
needed for handling IEDES in the transit
case that was fielded with the device.
Both the A-Kit, NSN 6910-01-572-4917,
and B-Kit, NSN 6910-01-572-4925,
contain specialized face visors, gloves
and hearing protection.
If some or all of your safety gear
is missing, contact your installation’s
training safety coordinator to get
replacements.
When IEDES is first fielded to your
unit, a trainer will demonstrate proper
handling procedures. However, be sure to
read the list of warnings and follow the
set up/handling/break-down instructions
in the operator’s user manual, OUM-056920-703-10 (Mar 2010). If your
your original
OUM is missing, contact the IEDES,project
project director, Ron Inmon, at DSN 970-3364,
970-3364, (407 ) 208-3364, or email:
56
OCT 11
NOTE: Wheels are on both sides of PSSD
Click here for a copy of this article to save or email.
707 56-57.indd 1-2
9/7/11 3:37 PM
Logistics Management…
Clean Sweep:
Commanders
Can Move
Centrally
Managed
OCIE Off
Books
hey, let’s
head over to
the cIf today
and see
what’s up!
great idea!
that’s
really
where we
belong
anyway!
Reserves
Mr. Michael Nixon
[email protected]
The
Army reports that some centrally managed organizational clothing and
individual equipment (OCIE) is showing up in PBUSE.
Generally, units should not buy or stock centrally managed OCIE issued by
Central Issue Facilities (CIFs). Too often, OCIE accountability is lost during change
of commands and deployments. Loss of visibility can also mean money down the
drain if a unit reorders OCIE it already has.
Central Management Office
Mr. Amit Saigal
[email protected]
How Many Back Issues of PS ?
many good things
come in threes.
like chocolate,
vanilla and strawberry ice cream!
and one of the
best trios to
keep in your unit
is the past three
years of ps!
• body armor
• advanced combat helmets
• sleep systems
• extended cold weather
some
examples of
centrally
managed ocIe
that can be
transferred
off a unit’s
property
book
include…
clothing system
(ECWCS) articles.
The complete list of OCIE that can be transferred from PBUSE to the installation
support module (ISM)-CIF contains more than 300 items.
Unit commanders, here’s a chance to scrub your property books. You can move
centrally managed OCIE out of PBUSE, get it off your unit’s property book and help
the Army redistribute supplies.
Best of all, moving centrally managed OCIE to your supporting CIF can also
free up your unit supply personnel. They’ll no longer have to maintain, manage or
account for all these items!
PS 707
Note: Before transferring any centrally managed items to your CIF, give them
your lateral transfer documentation and set a date for the actual transfer to occur. A
lateral transfer is not considered complete until property accountability is transferred
to the supporting/gaining CIF, and accounted for in the ISM-CIF. The CIF will
transfer OCIE items to the Soldier’s ISM-CIF clothing records.
For OCIE items already issued or hand-receipted to a Soldier, transfer the items
to the ISM-CIF, then note the transfer in the Soldier’s ISM-CIF clothing record. The
Soldier must sign the updated clothing record to finish the transaction.
To see the complete list of centrally managed OCIE, with LINs and NSNs, login
to AKO: https://www.us.army.mil/suite/doc/25856454
For more information, email the following:
Active Army
National Guard
Lillie Vinson
CW4 Kenneth Gildner
[email protected]
[email protected]
58
S
ometimes units ask us how many years of PS Magazine they need to keep on hand.
We recommend keeping the last three years, unless your local command says otherwise.
if your unit needs
back issues of ps,
drop half-mast a
request at
[email protected]
be sure to
include your
full mailing
address when
you write!
OCT 11
Click here for a copy of these articles to save or email.
707 58-59.indd 1-2
9/7/11 3:37 PM
Publications…
THe CsDP
can identify
logistical
problems
and allOW
for TiMELY
corRective
actions…
CALL Handbook
Gives CSDP Pointers
…and help
standardize supPly
discipliNE and ensure
compliance with DA
supply policy.
Contact Correction for SAMS-E Help
On Page 53 in PS 704 (Jul 11), the contact information for the
Automated Logistics Assistance Team (ALAT) in Afghanistan
Bagram (North) should be: DSN (318) 431-4490/4493 and email:
[email protected]
Also, the ALAT-Iraq facility closed on September 1, 2011.
LOGSA Updates ETM CD-ROM/DVD Labels
The USAMC Logistics Support Activity (LOGSA) is updating CD-ROM/DVD labels on all electronic
technical manuals (ETMs). Starting September 1, 2011, the new labels will include the current
Army Chief of Staff’s name and the signature of the current Administrative Assistant to the
Secretary of the Army, which are required on all DA-authenticated technical manuals (paper or
electronic format.) The new labels mean it’s no longer necessary to keep the mailers that your
disks came in to prove you have official, DA-authenticated CD-ROMs/DVDs. Questions? Contact
ETM Customer Service at DSN 645-0809, (256) 955-0809, or email:
[email protected]
New Fuel Solenoid Diode
Assembly for HMMWVs
If your HMMWV’s fuel solenoid diode assembly, NSN 596101-180-5634, shorts out, do this. Replace it with the new
flyback diode assembly, NSN 5961-01-593-3791. This assembly
has a blue protective shrink sleeve; the old one has a black
one. You’ll see both assembly NSNs in a future TM change.
With the Army’s growing focus on property accountability, it’s more important
than ever for each unit to establish and enforce their Command Supply Discipline
Program (CSDP).
The Center for Army Lessons Learned (CALL) offers a helpful handbook to
assist leaders in setting up their unit’s CSDP and reducing fraud, waste and abuse.
The Small Unit Leader’s Guide to the Command Supply Discipline Program tells
unit leaders how to:
M1165A1 HMMWV
Windshield NSNs
The HMMWV parts manual doesn’t list windshield
information for M1165A1 up-armored HMMWVs yet. So use
NSN 2510-01-560-1159 to get the driver’s windshield. And
NSN 2510-01-561-2540 brings the passenger windshield.
Order both with CAGE code 34623.
Containerized
Kitchen’s Winch,
Drum Assembly
The NSN, part number and
description for the containerized
kitchen’s winch, drum assembly,
shown as Item 1 in Fig 2 of
TM 10-7360-226-13&P (Aug 01,
w/Ch 4, Mar 07), are wrong.
They’ve changed to:
NSN 3950-01-511-1191
Part number 50390-201
Decription PARTS KIT, WINCH
The CAGE remains the same.
Make a note until the TM is
updated.
• Implement the CSDP in the unit, step-by-step.
• Understand various property types and establish accountability for each type.
• Document the loss, damage, or destruction of government property through the
FLIPL (financial liability investigation of property loss) process.
• Understand maintenance and supply readiness and how it can affect the unit’s ability
to perform its assigned mission.
To view or download a pdf of the handbook, visit the CALL website:
http://usacac.army.mil/cac2/call/docs/10-19/10-19.pdf
PS 707
60
OCT 11
Click here for a copy of these articles to save or email.
Click here for a copy of this article to save or email.
707 60-61.indd 1-2
8/26/11 3:06 PM
Click here for a copy of this article to save or email.
DON’T FORGET YOUR
SAFETY GOGGLES!
…can
change
quickly!