1
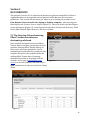
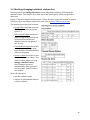
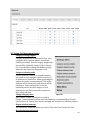
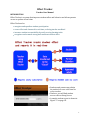
Section 3 SETUP Spend some time exploring the menu choices in Setup and Setup/Settings. Figure 23, Setup menu 3.1 Setup menu items Time Periods You set your Cirst Time period when you signed up for Effort Tracker. When you want to start scoring over (e.g. at the end of a quarter) go to Setup/Time periods and select the New Time period button. When you create a new Time period you will be able to select which previously-‐created classes/subjects you wish to bring along to the new Time period. Classes/Subjects From here you may create a new class/subject or edit an existing one. Students Add Students to one or more of your classes, or move a student from one class to another. Click the tab of the class you wish to make changes to, or work from the All classes tab (See Figure 24). Access Student Access codes are listed here. Each student and parent will need their student’s assigned access code in order to view Effort Tracker data that is updated in real-‐time. To provide the codes you may choose to: 1) cut and paste access codes into emails that you send to your students and their parents, or 2) print, cut out, and distribute, paper strips of paper that contain each student’s name, access code, and the Access web address. Titled events Edit previous Titled Events or create a new one. 23