1
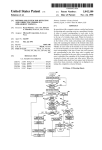
USER'S MANUAL for the “Technique Online” internet banking system from “Bank Technique” (For legal persons) CONTENTS: Introduction 1. Access to the “Technique Online” system: rst steps 1.1 Registration 1.2 Necessary tools 1.3 Full list of banking operations 1.4 First-time log-in 1.5 Further authorization 2. Performance of operations in the “Technique Online” system 2.1 Home page 2.2 General settings 2.2.1 Change password 2.2.2 Session summary 2.2.3 Site map 2.2.4 Logout Main menu 3. Transaction activities 3.1 Transaction authorization 3.2 Transaction password 3.3 View transaction status 4. Accounts 4.1 Deposits 4.1.1 Contract term deposit view 4.2 Savings and current accounts 4.2.1 Account activity 4.2.2 Account details 4.3 Overall view 4.3.1 Account summary 5. Loans 5.1 Loan activity 5.1 Loan details 5.3 Loan repayment inquiry 5.4 Loan schedule 6. Payments 6.1 Recurring transfer and payments 6.1.1 Standing instruction view 6.1.2 Standing instruction cancellation 6.2 Foreign transfer 6.2.1 Payment via SWIFT 6.3 Within country 6.3.1 ADV Payment 6.3.2 Payment in foreign currency to other local banks (to local banks via existing corresponding accounts) 6.3.3 Payment in AZN via XÖHKS 6.3.4 Tax payment 6.3.5 Payment in AZN via AZIPS (urgent) 6.4 Within Bank 6.4.1 Payment to another customer of Bank Technique 6.4.2 Payment through own accounts (same currencies) 6.4.3 Payment through own accounts (exchange) 6.5 Payment initiation 6.6 Adding beneciary 6.7 Existing template 6.8 View utilized limits 7. Tools 7.1 Exchange rate inquiry 7.2 ATM and branch locators 8. Customer services 8.1 Self services 8.1.1 Set account preferences 8.1.2 Alerts 8.1.3 Change users limits 8.1.4 Dashboard widget management 8.1.5 Lock transaction password 8.2 Mailbox 9. Cards 9.1 Card payments 9.1.1 Billing payments 9.2 Change card status 9.3 SMS-banking 9.4 Card statement 9.5 Card summary 9.6 Card details 10. Recommendations for password generation 11. Security recommendations USER'S MANUAL OF THE “BANK TECHNIQUE” INTERNET BANKING SYSTEM - “TECHNIQUE ONLINE” “Technique Online” is a modern system of branchless banking services, which enables conduct of transactions on bank accounts via Internet. “Technique Online” helps to save time, perform bank operations safely and easily at any time, from anywhere, on any computer connected to Internet. The system allows you to perform a wide range of banking operations, including getting information about your accounts, cards, loans and deposits; make transfers; authorize payments and etc. A complete list of operations is shown below. (See item 1.3) “Technique Online” is absolutely secure. Safety of a branchless banking system is ensured by modern means of information security: All information is encrypted through a secure TLS (Transport Layer Security) protocol. During work in the system, a closed padlock icon must be displayed in the internet browser (in different browsers the icon may vary). The mechanism of cryptographic authentication of communicating parties ensures reliability of the authentication procedure. Nobody except the Customer will be able to perform an operation. All information is stored on the Bank's secure server, which means that all your personal information is protected by the Bank. The “Technique Online” system is based on a universal solution for automating banking operations – Oracle FLEXCUBE Direct Banking, developed by the Oracle company, the largest developer of corporate software solutions. Oracle FLEXCUBE is present in more than 125 world countries and meets the most topical requirements and demands of corporate, retail and investment banking. We hope that this Manual will help you to quickly operate the “Technique Online” system which will enable management of your nances directly from home or office and make your life easier. 1. ACCESS TO THE “TECHNIQUE ONLINE” SYSTEM First steps All individuals and legal entities owning an account, including a card account, in “Bank Technique” OJSC are eligible to register in the system. 1.1 For registration in the system: Apply to the branch of the Bank, which serves your account. Complete the Application form for joining the “Technique Online” Internet Bank system, sign the service contract and closely read the user instructions. Within one business day you will be sent a User ID (to the indicated email) and passwords (to the indicated mobile phone), enabling your rst-time log-in into the system and maintenance of transactions. That means that you have been granted access to the “Technique Online” system. For any inquiries regarding connection to the system and its operation, please, call: 131, (+99412) 447-7744, (+99450) 447-77-44. 1.2 Necessary tools: The following tools are required for operating the system: PC (laptop) with Windows or MacOS, access to Internet and one of the up-to-date Internet browsers. A mobile phone for receiving SMS (text messages) delivering a temporary password or one-time passwords (OTP), with the mobile phone number specied in the contract with the Bank. For token (key generator) holders: key fobs, produced by Bank Technique for generation of one-time passwords (OTP). For display-card holders: display-cards, produced by Bank Technique, which offers all the facilities of a bank card and generates one-time passwords. Login to the system is performed at www.online.banktechnique.az. Always make sure that the URL in the browser window is correct and read the security recommendations. 1.3 Full list of banking operations in the “Technique Online” system: Viewing and maintenance of existing bank accounts Submission of detailed account statements Viewing information on loans Viewing loan history Payments and transfers abroad Payments and transfers within the country Payment of VAT and other tax payments Transfers between own accounts Conversion operation Transfers to accounts of other Bank customers Creating and viewing of periodic payments and transfers Transaction authorization The ability to save transaction templates for further using Viewing of information on existing card accounts Obtaining extracts from bank accounts Credit card payments Activation/deactivation of the SMS-banking service Blocking a card in case of loss or theft Temporary card blocking Regulation of the operations' limits Obtaining information about ATM, branches and units' location and their contact details Viewing exchange rates online Obtaining information about held operations through a mobile phone or an e-mail Condential communication with the Bank Viewing the status of operations 1.4 First time Log-in During the rst-time logging into the “Technique Online” system: Enter the URL www.online.banktechnique.az into the address bar of the browser window. A page requesting the User ID and Password for logging to the system will open. Enter the User ID and temporary Password: the User ID has been sent to the email address indicated in the Application form. The temporary password has been sent via SMS (text message) to the mobile phone number indicated in the Application form. After logging into the system, read and accept the Terms of Service to continue working in the system. Thereafter, on the page for password change you will have to: 1. Change the temporary password for initial login on your own, personal password. To change the password, you should ll in appropriate elds: «Enter Old Password» (current password), «New Password), «Conrm New Password» and press «Change». Important! Be extremely careful when entering your password. In accordance with security policy of the Bank, after entering 3 times in a row the wrong password your account will be locked. To unlock the account, you will have to contact the Bank's office. 2. Change the temporary password for making transactions («Transaction password») to your own, personal password. A temporary transaction password as well as a temporary password for initial login is sent via SMS to the mobile number indicated in the Application form. Legal persons may not conduct operations without entering the transaction password (For details See item 3.2). To change the password, you should ll in appropriate elds: «Enter Old Password» (current password), «New Password), «Conrm New Password» and press «Change». When creating a new password, strictly follow the Recommendations for password generation. (See item 10) In order to ensure security, the Bank recommends that virtual keyboard be used. Otherwise, to use a physical keyboard, clear the tick from the box next to the “Use virtual keyboard” option. Upon completion of the Change Password operation, a notication about successful password change will be sent to your email address and mobile phone number. Then, the system will prompt you to enter a nickname for the Account (optonal tem, clck «Skp» to contnue). See item 8.1.1 for details. Then, you can get acquanted wth lmts on the amount and number of transactons wthn the system and send a request for makng changes to them (optonal tem, clck «Skp» to contnue). See tem 8.1.3 for detals. The next page will display a notication about successfully saved settings. When you click the “Continue” button, the session will be automatically interrupted and a page requiring User ID and Password will open to log into the system. 1.5 Further authorization To enter the “Technique Online” system, the User ID and personal password must be entered. Then, the system will check the conformity of the Password to the User ID (authentication). To ensure your security, the system employs a two-tier authentication process. Therefore, in order to start working in the system and view information regarding your bank accounts, a one-time password (OTP) must be entered. The one-time password is generated by a token or a display-card (6-digits code): Once you got a password generated via a token or a display-card, enter OTP into the appropriate eld. If the password is correct, you will be automatically navigated to the home page of your prole in the system. 2. PERFORMANCE OF OPERATIONS IN THE “TECHNIQUE ONLINE” SYSTEM 2.1 Home page On the home page you can nd widgets for easy and timely access to information on the status of the client's accounts (for details about settings of widgets, see item 8.1.4). The widget on the up left side displays operations requiring approval by the authorized person (for details see item 3.1). On the right side you can see the tools for communication with the Bank (for details see item 8.2). The main menu items for legal entities are grouped in a square button at the low left corner of the screen (similar to the "Start" menu in the Windows operating system): Transaction activities Accounts Loans Payments Tools Customer Services Cards After choosing the desired menu item (sub item), you will be redirected to the system page for making operations within selected section. For easy navigation in the menu, you can use the «Back» button (to go back for one level) and «Home» button (to return to the main menu). 2.2 General settings (In the top right corner of the home page) 2.2.1 Change password In case you want to change the Login password or Transaction password, you should choose it from the drop-down menu and ll in the following elds: “Enter Old Password”, “New Password”, “Conrm New Password and click the “Change” button. When generating a password, strictly follow the “Recommendations for password generation”. (See item 10). To ensure security, the Bank recommends that virtual keyboard be used. Otherwise, to use a physical keyboard, clear the tick from the box next to the “Use virtual keyboard” option. The password must be known to the Customer only. Never tell your password to anybody! For security enhancement, it is recommended to change the password every 60 days. Upon expiration of the password's validity date, you will receive a notication about the necessity of changing the password. 2.2.2 Session summary Here, you can track your activity in the “Technique Online” system. The page displays the list of all log-in sessions to the system. For detailed information about each session, click on “View session info”. 2.2.3 Site map This page will help a Customer to see the full picture of the “Technique Online” system by presenting the full list of sections and pages of the interface. Additionally, this page enables quick access to a needed page. 2.2.4 Logout It is strongly recommended to use the “Logout” menu for exiting the system. For security purposes, sessions are interrupted after 15 minutes of idling after the latest action (such as transaction operations, choosing of menu items, etc.), and the Log-in page automatically opens for re-entering the system. In any case, work in the system is interrupted 30 minutes after log-in. MAIN MENU 3. TRANSACTION ACTIVITIES Brief Description: in this section you can view the status of executed transactions, authorize payments and transfers. Why use it: to obtain information about the status of executed payments and transfers, conrm, cancel or send back for revision those transactions that require authorization. 3.1 Transaction Authorization Depending on the organizational structure of enterprise, the «Technique Online» system offers functions that provide control capacity on the implementation of nancial operations by the company's officials. In this case, before transmitting of the transaction to the Bank's central system for subsequent execution, the system will require approval by the authorized person (usually the director). To browse transactions pending approval see the tab «Transactions to Authorize». To authorize a transaction: On the «Status» graph click on the link with the transaction status, then mark the checkbox on the left side and click «Authorize». You can choose multiple transactions simultaneously. To reject the transaction: you should choose it from the list (marking the checkbox on the left side) and click «Reject». To send the transaction to modify: the system's functions allow the authorized person to send the transaction to the initiator for completion. отправить транзакцию для доработки инициатору. You should choose it from the list (marking the checkbox on the left side) and click «Send to Modify». Thereafter, for the operation's security, enter a one-time password (OTP) which is generated by a token / a display-card (6-digits code). As soon as you enter a valid OTP on the next page you will have to enter your transaction password. Note that the transaction password is being sent to the client during the procedures of registration in the «Technique Online» system (for details see item 3.2). This is another step to ensure security of your nances. Regarding this, the system will require you to enter not the whole password but only some of its characters, position of which will correspond to numbers above the elds ( Example: If your password is Tech250 and numbers above the elds are 1,4 and 6, subsequently you will have to enter «T», «h» and «5»). Also, for security reasons, the Bank recommends you to use the virtual keyboard. Otherwise, to select a physical keyboard, uncheck to «Use virtual keyboard». After this a notication of successful completion of the transaction will be displayed on the screen. The change of the transaction status will be displayed at the initiator's prole as well. During the payment authorization you should differentiate proles of system users: the initiator (the one who initiates a transaction) and authorizer (the one who authorized to conrm this transaction). With such a mechanism, an Initiator can view the status of transactions initiated by him. At the same time, Authorizer views all the transactions waiting for his conrmation. Remember that transactions which were initiated, but not authorized don't get to the Bank's central system! When transaction was successfully initiated but was not authorized, the Initiator gets a notication of a successful operation, however, the system emphasizes that the transaction was initiated, but not authorized, what is indicated in the phrase «... .has been initiated». 3.2 Transaction Password As an additional step to ensure safety legal persons conducting transactions will be required to enter the Transaction Password as well. This combination of letters and numbers is sent to your mobile phone during your registration, and then you can easily change it in general settings. (See item 2.2.1) It is impossible to complete an operation without entering the transaction password in case it was required by the system. Be careful and do not tell anyone your transaction password. At the slightest suspicion, change it, or use the block function. (See item 8.1.5) Pay attention to the input form of the transaction password. The system will require you to enter not the whole password but only some of its characters, position of which will correspond to numbers above the elds ( Example: If your password is Tech250 and numbers above the elds are 1,4 and 6, subsequently you will have to enter «T», «h» and «5»). This unordinary input form is designed for better protection of your nances. 3.3 View transaction status At the top of the page, transactions can be sorted by choosing “View by: Transaction Status” or “View by: Transaction Currency”. The “Initiated Transactions” tab shows the list of all the previously performed transactions and their status. The “View Draft/Template” tab displays the list of saved drafts and templates and indicates the transaction status. To view the details of drafts and templates, click on the link of the transaction status in the “Status” section. The “Transactions to Authorize” tab displays the list of transactions pending for approval. To view the details of drafts and templates, click on the link of the transaction status in the “Status” section. 1. To authorize a transaction: On the «Status» graph click on the link with the transaction status, then mark the checkbox on the left side and click «Authorize». You can choose multiple transactions simultaneously. 2. To reject the transaction: you should choose it from the list (marking the checkbox on the left side) and click «Reject». 3. To send the transaction to modify: the system's functions allow the authorized person to send the transaction to the initiator for completion. отправить транзакцию для доработки инициатору. You should choose it from the list (marking the checkbox on the left side) and click «Send to Modify». The change of the transaction status will be displayed at the initiator's prole as well. The “View Transactions” tab displays the list of all transactions. The basic "transactions' statuses" are following: Under Process: The transaction is in the execution process. Initiated: The transaction initiated, but pending for approval Accepted: The transaction has passed the «Technique Online» system and is being processed by the Bank's central system. Completed: The transaction has passed the «Technique Online» system, has been completely processed by the Bank's central system and executed. All the processes and activities related to this transaction have been completed. Rejected: The transaction was rejected by the central system of the Bank. Move the cursor over the word "Rejected" – to view the cause of rejection. 4. ACCOUNTS Brief description: reects detailed information and statements from your accounts in Bank Technique, including information about deposits, assignment of nicknames to accounts, performing account balance in another currency equivalent. What to use for: to obtain information about deposits, to have the most comprehensive information about accounts, such as account number, number of the contract on the basis of which the account was opened, and the account balance. 4.1 Deposits 4.1.1 Contract Term Deposit View For viewing deposit related information, choose the appropriate deposit account from the list. A dialogue window will appear with details about the specied deposit. To return to the list of deposits, click the “Back” button. 4.2 Savings and Current Accounts 4.2.1 Account Activity This operation is envisaged for obtaining an account statement. For this: In the “Accounts activity” sub-menu, choose the required account from the drop-down menu and set the parameters for generation of a statement. The system offers sorting of the inquiry results by a certain time period, performed transactions and their types, or the transaction amount. Having chosen the search criteria, click “Submit” to see the requested information on the screen. The following information will be displayed on the screen: Account number; Account currency; Opening balance; Closing balance. The “Pages” section shows the number of pages in the report and enables transition from one page to another. There is information about transactions at the bottom of the “Account activity” window: Transaction date; Value date - date of transaction valuation; Transaction Reference No; Description - classication of the transaction; Debit - the amount of transaction involving debit; Credit - the amount of transaction involving credit. IMPORTANT: If an account transaction was performed on a non-business day, information about it will be displayed in the account statement for the soonest business day. Download account activity statement: This operation is envisaged for downloading an account statement to the customer's computer. By choosing the desired format (.pdf/.xls) from the drop-down menu at the bottom of the screen and clicking the “Download” button, you can save the loan activity history on your computer. By clicking the “Download” button you can save the detailed statement in the desired format. 4.2.2 Account Details This operation is envisaged for obtaining detailed information about the account. For this: Go to the “Account Details” sub-menu and in the drop-down menu, choose the required account. After you click the “Submit” button, a page displaying the details of the selected account will open. Displayed information: Name – name of the account owner; Opening date – the date, the account was opened; Account number; Account type (e.g., current); Account relationship – account owner's relation to the account (e.g., joint account); Account status; Branch number – the code of the branch (section) servicing the account; Product name; Account currency; Overdraft allowed – indicates presence (“Yes”) / absence (“No”) of a loan limit applied to the Customer's account. The Balances page displays the following information about the account balance: Current balance; Amount on hold; Overdraft limit; Balance available; Minimum balance required; Net Available Balance for Withdrawal; Uncleared Funds. 4.3 Overall View 4.3.1 Account Summary The page of the “Account Summary” sub-item displays general information about all of the Customer's accounts, the currency of each account and the available amounts. At the bottom of the page you can see the summarized balance of the accounts. To nd out the balance of each account, use the drop-down menu on the right to choose the currency and conrm the operation by clicking the “Go” button. Thus, your accounts balances will be displayed in the chosen currency. Also, here the Customer is given a chance to assign nicknames to the accounts. A specic nickname for an account makes management of accounts easy, particularly if you have multiple accounts. It is quite hard to recognize the designation of an account by the account number, whereas nicknames promote recognition. Below are the examples of nicknames for accounts which will make them easily recognizable: 1. Salary 2. Savings 3. Corporate 5. LOANS Brief description: to obtain of information about loans in Bank Technique. What to use for: to nd out the loan payment amount and the deadline for the payment, as well as other important information regarding loan products. 5.1 Loan Activity This operation is envisaged for viewing and downloading the loan activity history. Choose the appropriate loan agreement number from the drop-down menu and specify the criteria (parameters) for generating the history of loan activity. The System offers the option of ltering the results depending on the specied time period, performed transactions and their types. Having entered the search parameters, click the “Submit” button to obtain the requested information on the screen. The following information will be displayed: Transaction Date, Description. In this column, PRINCIPAL Liquidation implies repayment of the principal loan amount, MAIN_INT Liquidation – repayment of interest amounts, and OD_INT Liquidation – payment of overdue interest amounts. Credit – shows the repaid amount. Downloading the information displayed on the screen By choosing the desired format (.pdf/.xls) from the drop-down menu at the bottom of the screen and clicking the “Download” button, you can save the loan activity history on your computer. 5.2 Loan Details This operation is envisaged for obtaining detailed information about loans. Navigate this page to open the list of a loan agreement, the currency of a loan and the outstanding amount. To obtain detailed information about one of the loans, click the drop-down menu on the left of the loan details and choose the “Loan Details” option. A new page will open to display all the information about the specied loan: The page displaying the general information about the loan is divided into three segments. Account Details – this segment displays general information about the loan: Customer ID – the Customer's 7-digit ID number, Account Number – the number of the loan agreement, Currency – name of the currency, Loan Tenure – term of the loan, Product Name – type of the loan. Loan Details – this segment displays the following loan details: Opening Date – the loan issuance date; Maturity date – loan expiration date; Disbursed Loan Amount; Interest Rate; Principal Penalty Rate; Amount Paid Till Date; Interest Repayment Frequency; Principal Repayment Frequency. Outstanding Loan Details: Principal balance – remaining loan amount; Interest Amount Still to be paid; Overdue Interest Still to be paid; Final Settlement Amount; Next installment Date; Next installment Amount; Installment Arrears; Loan Outstanding – the outstanding amount of principal loan and calculated interest. To return to the list click the “Back” button or view Loan history by clicking the “Loan Activity” button (See item 5.1). 5.3 Loan Repayment Inquiry This operation is envisaged for a quick inquiry about loan repayment. The search criteria include repaid amounts, time periods of repayment and credit contract number. To perform this operation: Choose the appropriate number of the loan agreement from a drop-down menu and enter the repaid amount and the starting date for search. Click “Submit” to conrm and another page will open to display information about the date of repayment and the repaid amount. For detailed information about the designation of the payment, click on the loan agreement number. 5.4 Loan Schedule The operation is envisaged for viewing the loan (repayment) schedule. Перейдя на страницу, выберите из списка один из кредитных договоров для просмотра графика платежей. На новой странице откроется полный детализированный график погашения кредита (как осуществленные, так и будущие платежи). В колонке “Status” (Статус) отображается информация о платежах – «Paid» (Оплачено) и «Unpaid» (Неоплачено). You necessarily should make a payment before the payment deadline, indicated in the chart. For editing the schedule on the screen, downloading it to your computer in different formats or printing it out, use the icons at the top of the page. Note: Every page displays up to 10 records. To go back to the list of loans, click the “Back” button. 6. PAYMENTS Brief description: transferring of amounts to accounts both within the Bank, and in other banks, local or foreign. What to use for: to transfer funds to individuals and legal entities, both within the Bank and to other banks, pay taxes and VAT, make cashless conversion operations, make payments, as well as periodic payments, settle loans and replenish deposits in a cashless basis. 6.1 Recurring Transfer and Payments The section is designed for viewing and canceling of previously created standing instruction. The creation of a standing instruction occurs during the operation of a payment creation. 6.1.1 Standing Instruction View To view a previously created standing instruction or payment on the «Standing Instruction View» page from the drop-down menu select the needed account, type of payment and specify the parameters of the search (if the parameters are not set, the system will display all the standing instructions of the selected account). After setting the search parameters, click «Submit» to display the requested information. To see the detailed information choose the needed standing instruction by clicking on the appropriate number of the order of payment. 6.1.2 Standing Instruction Cancellation To cancel the previously created standing instruction, on the «Standing Instruction Cancellation» page from the drop-down menu select the needed account, type of payment and specify the parameters of the search (if the parameters are not set, the system will display all the periodic transfers of the selected account). After setting the search parameters, click «Submit» to display the requested information. To see the detailed information choose the needed standing instruction by clicking on the appropriate number of the order of payment. Press «Conrm» button for cancellation of the standing instruction, otherwise press «Change» to change the data. In case you press the “Conrm” button, ensure transaction security by entering the one-time password generated by a token/ display card (6-digits code). 6.2 Foreign Transfer 6.2.1 Payment via SWIFT This operation is designated for transferring amounts to accounts opened in banks abroad. When the “Make new payment” page opens, you will be able to enter and save in the system the information about the beneciary (it is also recommended to use this option if money transfers to this beneciary may repeatedly occur in the future). Thus, when requesting a payment transaction to this beneciary, there will be no need to enter repeatedly re-enter all of the information: choosing the beneciary from the offered list is sufficient. For this purpose, choose the “Add Beneciary by clicking here” option and ll in data for future use. Otherwise, if it is a one-time payment, just ll in the data about the beneciary into the “Beneciary Details” segment. (See item 6.6 for rules of lling in the beneciary blank). To repeat a transaction, in case you have a saved template/draft, choose the “Existing Template” item and follow the instructions. (See item 6.7) To perform the operation: Choose the account from which the amount will be transferred. The drop-down menu will display the accounts which can be used for the transaction. For entering the beneciary's details, use the Fill in the transfer amount and choose the currency in the drop-down menu. If you want the payment to be executed on a future date rather than immediately, use the “Pay Later” option instead of “Pay Now”, and specify the needed date in the drop-down calendar. Besides, you can set the parameters of a standing instruction. For this, select the «Setup Standing Instruction» option and then, in the opened below «SI Details» dialog box select the frequency of payment, the date of the rst transfer and the expiration date from the drop-down menu. Specify the designation of the payment in the following eld: Payment Details 1 - Payment Details 4 (a total of 4 elds, in the rst of which the payment designation is chosen from a drop-down menu, while the other three elds can be lled in manually). The operation Initiator may restrict viewing of created templates / drafts. In order to do this in the Template Access Type item choose «Private» from the drop down menu. For opening access to created templates / drafts for other authorized persons of your company (employees with access to the Technique Online» system) choose «Public» from the drop down menu. Choose one of the options to continue. (See item 6.5). button or ll in the data manually. 6.3 Within country This operation is envisaged for money transfers to accounts opened in local, Azerbaijan banks. 6.3.1 ADV Payment (VAT payment) 6.3.2 Payment in foreign currency to another local banks (only to the local banks with which corresponding accounts already exist) 6.3.3. Payment in AZN via XOHKS 6.3.4 Tax payment 6.3.5 Payment n AZN va AZIPS When the “Make new payment” page opens, you will be able to enter and save in the system the information about the beneciary (it is recommended to use this option if money transfers to this beneciary may repeatedly occur in the future). Thus, when requesting a payment transaction to the same beneciary, there will be no need to enter repeatedly re-enter all of the information: choosing the beneciary from the offered list is sufficient). For this purpose, choose the “Add Beneciary by clicking here” option and ll in data for future use. Otherwise, if it is a one-time payment, just ll in the data about the beneciary into the “Beneciary Details” segment. (See item 6.6 for rules of lling in the beneciary blank). To repeat a transaction, in case you have a saved template/draft, choose the “Existing Template” item and follow the instructions. (See item 6.7) To perform the operations: Choose the account from which the amount will be transferred. The drop-down menu will display the accounts which can be used for the transaction. If the list doesn't include the needed Bank, use the “Payment via SWIFT” option. For entering the beneciary's details, use the Fill in the transfer amount. If you want the payment to be executed on a future date rather than immediately, use the “Pay Later” option instead of “Pay Now”, and specify the needed date in the drop-down calendar. Besides, you can set the parameters of a standing instruction. Note: this option available for some transactions. For this, select the «Setup Standing Instruction» option and then, in the opened below «SI Details» dialog box select the frequency of payment, the date of the rst transfer and the expiration date from the drop-down menu. Specify the designation of the payment. The operation Initiator may restrict viewing of created templates / drafts. In order to do this in the Template Access Type item choose «Private» from the drop down menu. For opening access to created templates / drafts for other authorized persons of your company (employees with access to the Technique Online» system) choose «Public» from the drop down menu. Choose one of the options to continue. (See item 6.5). button or ll in the data manually. Note: If the beneciary's name is not indicated in the “Beneciary bank name” list, the transaction is performed as “Payment via SWIFT”. 6.4 Within Bank This operation is envisaged for money transfers between your accounts in Bank Technique and for money transfers to other customers' accounts in the Bank, as well as for performing foreign exchange transactions. 6.4.1 Payment to Another Customer of Bank Technique (Перевод на счета других клиентов Банка) A transaction from your accounts to the accounts of Bank Technique customers will enable money transfers in various currencies to other customers of the Bank. When the “Make new payment” page opens, you will be able to enter and save in the system the information about the beneciary (it is recommended to use this option if money transfers to the same beneciary may repeatedly occur in the future). Thus, when requesting a payment transaction to the same beneciary, there will be no need to enter repeatedly re-enter all of the information: choosing the beneciary from the offered list is sufficient). For this, choose the “Add Beneciary by clicking here” option and ll in data for future use. Otherwise, if it is a one-time payment, just ll in the data about the beneciary into the “Beneciary Details” segment. (See item 5.6 for rules of lling in the beneciary blank). To repeat a transaction, in case you have a saved template/draft, choose the “Existing Template” item and follow the instructions. (See item 6.7) To perform the operation: Choose the account from which the amount will be transferred. The drop-down menu will display the accounts which can be used for the transaction. For entering the beneciary's details, use the Enter the transfer amount. Besides, you can set the parameters of a standing instruction. For this, select the «Setup Standing Instruction» option and then, in the opened below «SI Details» dialog box select the frequency of payment, the date of the rst transfer and the expiration date from the drop-down menu. Specify the designation of the payment. button or ll in the data manually. The operation Initiator may restrict viewing of created templates / drafts. In order to do this in the Template Access Type item choose «Private» from the drop down menu. For opening access to created templates / drafts for other authorized persons of your company (employees with access to the Technique Online» system) choose «Public» from the drop down menu. Choose one of the options to continue. Payment through own accounts Money transfers between your accounts in the Bank enable quick and easy movement of amounts from one account to another, as well as performance of foreign exchange transactions. To repeat a transaction, in case you have a saved template/draft, choose the “Existing Template” item and follow the instructions. (See item 6.7). 6.4.2 Payment through own accounts (same currencies) Choose the account from which the amount should be transferred. The drop-down menu will display the accounts which can be used for the transaction. Choose the destination account to which the money should be transferred. The drop-down menu will display the accounts which are suitable for receipt transactions. Fill in the amount of transfer. Besides, you can set the parameters of a standing instruction. For this, select the «Setup Standing Instruction» option and then, in the opened below «SI Details» dialog box select the frequency of payment, the date of the rst transfer and the expiration date from the drop-down menu. Specify the designation of the payment. The operation Initiator may restrict viewing of created templates / drafts. In order to do this in the Template Access Type item choose «Private» from the drop down menu. For opening access to created templates / drafts for other authorized persons of your company (employees with access to the Technique Online» system) choose «Public» from the drop down menu. Choose one of the options to continue. (See item 6.5). 6.4.3 Payment through own accounts (exchange) Choose the account from which the amount will be transferred. The drop-down menu will display the accounts which can be used for the transaction. Choose the account to which the money should be transferred. The drop-down menu will display the accounts which are suitable for receipt transactions. Enter the transferred amount. When transactions are made between accounts of different currencies, the screed will show two elds for entering the amount. Depending on the purpose of the transfer, enter the amount into one of the elds: if the amount is entered into the upper eld (Source Account Amount), the specied amount will be withdrawn from your disbursement account (indicated in the "Source Account” eld). If you need to receive a certain amount to your receiving account (indicated in the "Destination Account” eld), enter the intended amount into the lower window (Destination Account Amount). (Example: If you need to buy USD for 100 AZN, the AZN account should be chosen in the Source Account eld, while your USD account should be chosen in the “Destination Account” eld, and the “Source Account Amount” must enter 100 AZN. Meanwhile, the “Destination Account Amount” eld must remain blank. If you need to buy 100 USD for manats, choose the AZN account in the “Source Account” eld and enter the 100 USD amount into the “Destination Account Amount” eld. Meanwhile, the “Source Account Amount” eld should remain blank.) Specify the designation of the payment. The operation Initiator may restrict viewing of created templates / drafts. In order to do this in the Template Access Type item choose «Private» from the drop down menu. For opening access to created templates / drafts for other authorized persons of your company (employees with access to the Technique Online» system) choose «Public» from the drop down menu. Choose one of the options to continue. (See item 6.5). 6.5 Payment initiation Click the “Initiate” button to initiate the process. A window displaying the entered data opens for user's conrmation. If the data is correct, click “Conrm”, otherwise, click “Change” to correct the data. Once you have conrmed all the entered data by clicking “Conrm”, ensure transaction security by entering the one-time password (OTP) generated by a token/ display card (6-digits code). As soon as you enter a valid OTP on the next page you will have to enter your Transaction password. Note that the transaction password is being sent to the client during the procedures of registration in the «Technique Online» system (for details see item 3.2). This is another step to ensure security of your nances. Regarding this, the system will require you to enter not the whole password but only some of its characters, position of which will correspond to numbers above the elds ( Example: If your password is Tech250 and numbers above the elds are 1,4 and 6, subsequently you will have to enter «T», «h» and «5»). Also, for security reasons, the Bank recommends you to use the virtual keyboard. Otherwise, to select a physical keyboard, uncheck to «Use virtual keyboard». After this a notication of successful completion of the transaction will be displayed on the screen. Remember that transactions which were initiated, but not authorized don't get to the Bank's central system! When transaction was successfully initiated but was not authorized, the Initiator gets a notication of a successful operation, however, the system emphasizes that the transaction was initiated, but not authorized, what is indicated in the phrase «... .has been initiated». Click on the “Save as Template” button to save the money transfer transaction process as a template for future transactions of similar nature. Click on the “Save as Draft” button to save the transaction process as a draft. The Bank has set a limit for maximal amount of payments and transfers in the system per day. Click the “View Limits” button to check the daily limit for the money transfer transaction. The daily limit applies within 24 hours since the moment of transaction performance. When performing transactions in foreign currency, the amount is converted into manats (AZN) on the basis of the current exchange rate of Bank Technique. You can also click the “Change Limits” button to navigate to the page designed for sending to the Bank an application for changing the existing limits. (See item 6.8). 6.6 Beneciary Maintenance In this section, a user can create, modify, or delete the data of the beneciary (customer information of the recipient). To create the data of the beneciary: From the drop-down menu select the type of transaction and click «Create Benefeciary Template» button. If you select «Add Beneciary by clicking here» option, then during processing of a new payment your actions will begin from the following step. On the next page, enter the requested data: Beneciary ID - in this eld a short name of the recipient (nickname) is indicated. Beneciary name – the name of the beneciary. Beneciary Tax ID – INNP of the beneciary. Beneciary account – the account number of the beneciary (IBAN). In the “MFO Code” by using a Click the «Add» button to input a data. To return to the previous page use the «Back» button. In case of reliability of the data displayed in the opened window press «Conrm», otherwise press «Change» to change the data. you can select from the list the beneciary's bank. After conrming the operation, a user will see the system notication of a successful data saving. For searching, modifying, or deleting of the beneciary's data created previously: From the drop-down menu select the type of transaction and then click the «Search» button. You will see the list with the beneciaries' data on the specied type of transactions. To view detailed information, select the needed beneciary by clicking on the appropriate identication number of the beneciary. To change the data of the beneciary, check the control box on the left, and then click «Modify». Enter your changes on the new page and press again the «Modify» button. (To return to the list press «Back»). In case of reliability of the data displayed in the opened window press «Conrm», otherwise press «Change» to change the data. To delete the beneciary's data, mark the checkbox on the left and then click «Delete». On the new page conrm the action by the «Conrm» button, otherwise press «Back» to return to the list. After conrming the operation, a user will see the system notication of successful data saving. 6.7 Existing template When repeating the payment, one can save time by using “Existing template”. When using this feature, click the tool icon to navigate to the page where the previously saved payment transactions (templates) are displayed. Choose the right template for editing, viewing or copying the transaction by clicking the “Use template” button. A page will open with already entered payment parameters which can be edited if necessary. Then, for copying a given payment on the basis of the chosen template, click the “Initiate” button and follow the steps described in the sections regarding conguring of transactions. 6.8 View Utilized Limits For security purposes, certain limits are imposed on the amounts and number of transactions per user. On this page you can view the existing limits. For this purpose, use the drop-down menu to choose the type of transaction, and, if necessary, set the time period. Click “Continue” to open a page with detailed information about the limits. Here, you can also click the “Change Limits” button to navigate to the page designed for sending to the Bank an application for changing the existing limits. After that, set your own limits for transactions and conrm by clicking the “Change” button. In case of decrease of established limits the operation will be carried out automatically. In case of increase of established limits, you also need to write a mail using the “Mailbox” menu with described reasons of limit changing. The Bank will make a decision after review of your application and notify you hereof by e-mail. You may go back to established limits by checking the «Reset to bank dened limits» (Back to the limits set by the Bank) button at the top of the page. Important! When changes are made, the new limits become effective on the next business day. 7. TOOLS For Customers' convenience, the Bank has added into this menu a number of tools assisting the customer in getting bank services. Brief description: to obtain detailed information about the location of ATMs and branches of the Bank, their contact details, and daily updated table of exchange rates. What to use for: to locate an ATM, a branch of the Bank, to contact the service points, to view the exchange rates. 7.1 Exchange Rate Inquiry For customer's information and convenience, the system offers an online electronic table of current exchange rates. 7.2 ATM and Branch Locators Find the nearest ATMs/branches by entering the address and clicking the “Search” button. 8. CUSTOMER SERVICES Brief description: This section is designed for additional services for customers in the framework of the “Technique Online” system. What to use for: to receive notications, change the parameters of the home page, enable correspondence between a customer and the Bank, change limits for transactions within the system, lock transaction password. 8.1Self Servces 8.1.1 Set Account Preferences This page is designed for assigning nicknames to accounts (the “Account Nickname” section), as well as for marking an account as your favourite (the “Set as Favourite” section). A specic nickname for an account makes management of accounts easy, particularly if you have multiple accounts. It is quite hard to recognize the designation of an account by the account number, whereas nicknames promote recognition. Below are the examples of nicknames for accounts which will make them easily recognizable: 1. Salary. 2. Savings. 3. Corporate Click “Save” to save the entered data. 8.1.2 Alerts “Technique Online” offers a notication system which allows to set up the process of obtaining information about some transactions performed in the online banking system by email or SMS. To set up alerts: On the Alerts page, choose the group of alerts and click “Get Alerts”. Mark the type of alert you wish to get. You may manually set the desired parameters of notication choosing the rst item - Limit Threshold Alert, designed for warning about funds on the bank account reduced up to a certain level. You can separately assign the email address and the mobile phone number to which the alerts will be sent. Having made your choice, click the “Register/De-Register” button to continue. In the new window conrm the chosen parameters by clicking on the “Conrm” button, or go back to change the settings by clicking “Back”. Upon your conrmation, a notication about successful updating of the alerts system will appear on the screen. 8.1.3 Change Users Limits For security purposes, certain limits are imposed on the amounts and number of transactions. You can send the Bank an application for changing the existing limits. To do so, use this page to set your own limits for transactions and conrm by clicking the “Change” button. In case of decrease of established limits the operation will be carried out automatically. In case of increase of established limits, you also need to write a mail using the “Mailbox” menu with described reasons of limit changing. The Bank will make a decision after review of your application and notify you hereof by e-mail. You may go back to established limits by checking the «Reset to bank dened limits» (Back to the limits set by the Bank) button at the top of the page. Important! When changes are made, the new limits become effective on the next business day. 8.1.4 Dashboard Widget Management This section is envisaged for activating/deactivating the dashboard widgets of the Technique Online system (e.g., mini-statement, the user's latest activity, the list of transactions pending authorization, and other information). To change the settings: Choose the communication channel on the page (in this case “Internet”) and click “Submit” to continue. Mark the widgets you wish to install/uninstall on the home page. By default, the system has all available widgets activated. Click “Conrm Selection” to conrm the selected settings. A notication will appear on the screen about the successful completion of the operation. 8.1.5 Lock Transaction Password The operation is designed for blocking the password necessary for making transactions. (More on transaction password, see item 2.3). You should immediately use this option and block your Transaction Password in case you suspect your password is known to third parties. In order to do it: Mark the checkbox on the left side of the very account, Transaction Password of which you are going to block and then click «Lock» to proceed. Approve your choice on the next page by clicking «Conrm» or click «Back» to return to the previous page. After this a notication of successful completion of the operation will be displayed on the screen. Subsequently, the password becomes invalid. In order to get a new Transaction Password you should apply to the Bank Technique. In this case, a new automatically generated password will be sent to your e-mail which will have to be changed during your next access to the system. 8.2 Malbox Each user in his prole has a mailbox created for communication with the Bank. During operations held in the “Technique Online” system the Bank guarantees high condentiality level of client's nancial information. Choose the “Mailbox” icon to view incoming messages from the Bank. In the “Alerts” tab the system notications are reected. In the “Bulletins” tab user can view newsletters sent for the Bank's customers. The number of new messages is indicated next to each folder. To send a new message to the Bank, choose the “Compose Message” item in the “Mailbox”, ll in the “Subject” line (the subject of the message is chosen from a drop-down menu, but your own Subject can be typed in as well) and “Message” box, and click on the “Send” button. If necessary, a le can be attached to the message by means of the “Attachment” button. The size of the le must not exceed 1 Mb. To view the messages sent to the Bank, choose the “Sent messages” item in the “Mailbox”. 9. CARDS Brief description: view detailed information regarding cards issued by Bank Technique and billing payments. What to use for: to view card related information: card number, type of the card, term of validity, change the card status, execute payments for utility services, sign for the SMS-banking service, view and save a statement on card transactions. Notice, that depending on the organizational structure of enterprise, before the transmission of a transaction for further execution to the Bank's central system, the system may require an approval of this transaction by authorized person (For details see item 3.1) 9.1 Cards Payments 9.1.1 Bllng Payments This operation is envisaged for paying the bills for the services provided by mobile communication operators, Internet providers, television, telephony, utility services, etc. To perform the operation: In the “Billing Payments” section, choose the biller category and the biller's name from the drop-down menus. Then, use the next drop-down menu to choose the number of the card to be charged for payment, and enter the subscriber's identication number (phone number, number of contract signed with Internetprovider, etc.) and the amount owed. Click the “Submit” button to continue. A window displaying the entered data opens for user's conrmation. If the data is correct, click “Conrm”, otherwise, click “Back” to make corrections. Once you have conrmed all the entered data by clicking “Conrm”, ensure transaction security by entering the one-time password generated by a token/ display card (6-digits code). A notication about successful completion of transaction will appear on the screen. 9.2 Change Card Status This operation is envisaged for changing of a card status, thus, blocking any transactions involving your card. The card must be blocked in case it has been lost or stolen. To perform the operation: Use the drop-down menus to choose the card number and the reason for blocking. The system recognizes three statuses: Lost Stolen Temporary blocked Click “Submit” to continue. A window displaying the entered data opens for user's conrmation. If the data is correct, click “Conrm”, otherwise, click “Back” to make corrections. Once you have conrmed all the entered data by clicking “Conrm”, ensure transaction security by entering the one-time password generated by a token/ display card (6-digits code). A notication about successful completion of transaction will appear on the screen. Important! Unblocking of the card is done only in the branches of the Bank. 9.3 SMS-Banking This operation enables the Bank Technique card holders to obtain information about card transactions via SMS. This service can be activated or deactivated on this page. Besides, you can modify the phone number for already activated service by indicating a new number and further re-activation. To perform the operation: From the drop-down menu choose the number of the card, for which the SMS-notication service should be activated /deactivated. Choose the operation: Activation/Deactivation Enter the mobile phone number, paying attention to the prex denoting the mobile operator. Do not enter “0”. For example, 509999999 Click “Submit” to continue. A window displaying the entered data opens for user's conrmation. If the data is correct, click “Conrm”, otherwise, click “Back” to make corrections. Once you have conrmed all the entered data by clicking “Conrm”, ensure transaction security by entering the one-time password generated by a token/ display card (6-digits code). A notication about successful completion of transaction will appear on the screen. 9.4 Card Statement This operation is envisaged to obtain a card statement. The statement can cover 7 days, 14 days or a month. To perform the operation, from the drop-down menu choose the card number, the statement period and click “Submit” A card statement provides the following information: Card number Available balance Transacon date Transacon number Descripon Transacon amount Billing amount By clicking the “Download” bu on you can save the detailed statement on your computer hard drive. 9.5 Card Summary This page displays general information about all your cards, currency of cards and the available amount on the card. Displayed information also includes the card number name on a card the amount of credit limit the currently available balance credit currency and the date of opening a - date open. To view detailed information about your card, click on the card number and choose “Card Details”. You can also choose “Change Card Status” from the drop-down menu. 9.6 Card Details This page displays detailed information about your card. To view this information, choose in the drop-down menu the number of a card and click “View”. From here you can navigate to the “Card Statement” section. 10. RECOMMENDATIONS FOR PASSWORD GENERATION A password must consist of at least 6 characters. It must contain capital and small Latin letters and numbers. Remember! The password is case sensitive. Use at least one capitalized letter for a password. The password must be known to the customer only. Never tell your password to anyone! Bank employees will not ask you for the password at any time. It is undesirable to set the following passwords: Containing data associated with you (e.g.: part of the card number or birth date, etc.); Containing 4 or more repeated gures in a row; Consisting of a sequence of gures 0123456789, 9876543210, 1234567890, 0987654321; Consisting of a sequence of letters: qwertyui; Where the last 4 symbols repeat the rst 4 symbols; Where the last 4 symbols mirror the last 4 symbols. For security enhancement, it is recommended to change the password every 60 days. Upon expiration of the password's validity date, you will receive a notication about the necessity to change the password. 1 11. SECURITY RECOMMENDATIONS For secure use of the “Technique Online” Internet bank system, follow the recommendations below: Never tell you Login ID or password to third parties, including the Bank employees. Nobody is authorized to demand disclosure of this information. (In case such an inquiry is made to you, immediately inform the Bank of it); Check and make sure that the connection is in a protected TLS mode – there must be a closed padlock icon in your web-browser window; Check the web-address of the “Technique Online” Internet banking system. The URL in the address line of the web-browser must be as https://online.banktechnique.az. (if you see a different address, immediately report it to the Bank); Upon completion of your work session in the internet-bank system, make sure to close the system window by clicking “Logout” in the menu; Do not enter the system from public computers; Install and update anti-virus software on your computer; Use only licensed software; In case of any suspicion for fraud, immediately report it to the Bank's customer service by calling 131, (+99412) 447-77-44, (+99450) 447-77-44. Additionally, read the recommendations for password generation.