1
RIGHT. FROM THE START.
RIGHT. FROM THE START.
RIGHT. FROM THE START.
RIGHT. FROM THE START.
RIGHT. FROM THE START.
RIGHT. FROM THE START.
RIGHT. FROM THE START.
RIGHT. FROM THE START.
Task Manager
Installation and
User’s Guide
RIGHT. FROM THE START.
RIGHT. FROM THE START.
RIGHT. FROM THE START.
RIGHT. FROM THE START.
RIGHT. FROM THE START.
DSS 10010-00 B00
© 1995 Alpha Microsystems
REVISIONS INCORPORATED
REVISION
DATE
A00
July 1995
A01
March 1983
A02
June 1985
B00
October 1988
Task Manager User’s Guide
To re-order this document, request part number DSS-10010-00
The information contained in this manual is believed to be accurate and reliable. However, no responsibility
for the accuracy, completeness or use of this information is assumed by Alpha Microsystems.
This document applies to AMOS/L Versions 1.3D and later
and AMOS/32 Versions 1.0D and later.
This document may contain references to products covered under U.S. Patent Number 4,530,048.
The following are registered trademarks of Alpha Microsystems, Santa Ana, CA 92799:
AMIGOS
AlphaBASIC
AlphaFORTRAN 77
AlphaMATE
AlphaWRITE
VIDEOTRAX
AMOS
AlphaCALC
AlphaLAN
AlphaNET
CASELODE
Alpha Micro
AlphaCOBOL
AlphaLEDGER
AlphaPASCAL
OmniBASIC
AlphaACCOUNTING
AlphaDDE
AlphaMAIL
AlphaRJE
VER-A-TEL
The following are trademarks of Alpha Microsystems, Santa Ana, CA 92799:
AlphaBASIC PLUS
DART
inFront/am
AlphaVUE
ESP
AM-PC
MULTI
All other copyrights and trademarks are the property of their respective holders.
ALPHA MICROSYSTEMS
2722 S. Fairview St.
P.O. Box 25059
Santa Ana, CA 92799
AMTEC
inSight/am
Task Manager User’s Guide
Page i
TABLE OF CONTENTS
CHAPTER 1 - INTRODUCTION
1.1
HOW THE TASK MANAGER WORKS . . . . . . . . . . . . . . . . . . . . . . . .
1.2
WHAT THE TASK MANAGER CAN DO FOR YOU . . . . . . . . . . . . . .
1.3
SYMBOLS AND ABBREVIATIONS . . . . . . . . . . . . . . . . . . . . . . . . . . .
1-1
1-3
1-4
CHAPTER 2 - CONTROL FILES
2.1
SPECIAL INPUT FORMATS . . . . . . . . . . . . . . . . . . . . . . . . . . . . . . . .
2.2
USING CONTROL FILES . . . . . . . . . . . . . . . . . . . . . . . . . . . . . . . . . .
2.2.1 Setting up a Permanent, Repeating Task . . . . . . . . . . . . . . . .
2.3
THE LOG FILE . . . . . . . . . . . . . . . . . . . . . . . . . . . . . . . . . . . . . . . . . .
2.4
VIEWING THE QUEUE FILE . . . . . . . . . . . . . . . . . . . . . . . . . . . . . . . .
2.5
EXAMPLES . . . . . . . . . . . . . . . . . . . . . . . . . . . . . . . . . . . . . . . . . . . . .
2-1
2-3
2-5
2-6
2-7
2-8
CHAPTER 3 - SUBMITTING TASKS TO THE TASK MANAGER
3.1
THE SUBMIT SWITCHES . . . . . . . . . . . . . . . . . . . . . . . . . . . . . . . . . .
3.2
EXAMPLES . . . . . . . . . . . . . . . . . . . . . . . . . . . . . . . . . . . . . . . . . . . . .
3-2
3-4
CHAPTER 4 - TROUBLESHOOTING
4.1
TROUBLESHOOTING CONTROL FILES . . . . . . . . . . . . . . . . . . . . . .
4.1.1 WARNINGS: . . . . . . . . . . . . . . . . . . . . . . . . . . . . . . . . . . . . . .
4.1.2 Checking the Progress of a Task . . . . . . . . . . . . . . . . . . . . . . .
4-1
4-1
4-2
APPENDIX A - INSTALLING THE TASK MANAGER
A.1
CREATING QUEUE FILES . . . . . . . . . . . . . . . . . . . . . . . . . . . . . . . . .
A.1.1 Creating BATQUE.SYS . . . . . . . . . . . . . . . . . . . . . . . . . . . . . .
A.1.2 Creating Other Queue Files . . . . . . . . . . . . . . . . . . . . . . . . . . .
A.1.3 Changing Existing Queue Files . . . . . . . . . . . . . . . . . . . . . . . .
A.2
CREATING JOB INITIALIZATION FILES . . . . . . . . . . . . . . . . . . . . . .
A.2.1 Deciding How Many Jobs to Have . . . . . . . . . . . . . . . . . . . . . .
A.2.2 Contents of the Job .INI File . . . . . . . . . . . . . . . . . . . . . . . . . .
A-1
A-2
A-3
A-3
A-4
A-4
A-4
DSS-10010-00, Rev. B00
Page ii
Task Manager User’s Guide
A.3
A.4
MODIFYING YOUR SYSTEM INITIALIZATION FILE . . . . . . . . . . . . .
A.3.1 Setting Up the Worker Jobs . . . . . . . . . . . . . . . . . . . . . . . . . . .
A.3.2 Setting Up the Task Manager Job . . . . . . . . . . . . . . . . . . . . . .
A.3.3 MONTSTing . . . . . . . . . . . . . . . . . . . . . . . . . . . . . . . . . . . . . . .
TROUBLESHOOTING TASK MANAGER INSTALLATION . . . . . . . .
A-6
A-9
A-9
A-11
A-12
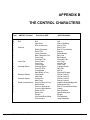
APPENDIX B - THE CONTROL CHARACTERS
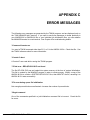
APPENDIX C - ERROR MESSAGES
DOCUMENT HISTORY
INDEX
DSS-10010-00, Rev. B00
CHAPTER 1
INTRODUCTION
The Task Manager is a software system that enables you to schedule and run programs on
your computer without tying up your terminal. No matter how fast your computer is, or how
much memory or disk storage is available, programs that process large amounts of data or
perform complex routines can normally tie up your terminal for quite a while.
For example, it might take ten minutes or more to sort a large employee file. And the procedure
for generating the weekly payroll might involve many programs and routines—and might take
hours. Waiting for such a task to finish so you can use your terminal again could be tedious
and frustrating.
The Task Manager is designed to allow you to run specific tasks without tying up your terminal.
Performing repetitive tasks can be made automatic, and your time can be spent on more
challenging work.
You may already be familiar with the Task Manager Print Spooler. If this spooler is in use on
your computer system, whenever you send a file to the printer, you are actually submitting a
request to the Task Manager. Each print request is stored in a queue file until the Task
Manager finds a printer available. When the printer is free, the Task Manager takes each
request in turn from the printer queue file and prints the requested file.
This manual will show you how to construct control files, submit them to the Task Manager for
processing; and if the Task Manager is not already defined on your computer system, this
manual will give you detailed instructions for modifying your system initialization command file
and creating the queue files and control files to make the Task Manager work for you.
1.1HOW THE TASK MANAGER WORKS
If you are familiar with the use of command files, you know how they can simplify things by
performing a series of AMOS commands when you type just the name of the command
file. The Task Manager is a similar but much more powerful extension of this concept, as it
enables you to perform commands and run programs at scheduled times by submitting
control files to perform the specified tasks. You can schedule the control files to run at
whatever interval or frequency you choose. When you want to process a control file, you
submit a request to the Task Manager who in turn stores your requests in queue files, and
uses dedicated jobs to process the control files "behind the scenes" so your terminal is free
for you to use while the other tasks are running.
DSS-10010-00, Rev. B00
Page 1-2
Chapter One
Before we go on, let’s define some special terms we use to discuss the Task Manager.
A task is what we call one or more commands that form a logical series of
events to accomplish something. When you use TXTFMT on a file, and
then print it, you have accomplished a task. When you log into an account,
erase all .BAK files, and run the commands necessary for backing up your
files onto a disk, floppy disk, or tape, that also is a task.
A control file is a special file with a .CTL extension. It contains all the
instructions and commands that you would normally type on your terminal to
perform a particular task. It’s quite similar to a command file, but it lets you
do a lot more.
A queue file is another special file which the Task Manager uses to store
your requests to run the control files. When you submit a task to the Task
Manager, you also have the opportunity to specify the task’s priority as well
as other characteristics which we’ll discuss later.
A log file is the third type of special file associated with the Task Manager.
It has the same file name as the control file plus a .LOG extension, and it’s
used by the Task Manager to store the task’s output which would normally
be displayed on your terminal screen. When a task is finished, you can view
this file to make sure everything worked as expected.
Batch processing means that the input to a particular program (or series of
programs) is submitted all at once in a "batch." Batch processing differs
from interactive processing in that the batch processes take their input all at
once (in this case, from the control file), whereas interactive or "Real Time"
applications require you to enter menu selections and type commands on
your terminal at the same time they are running. Because it processes the
instructions in each control file as a batch, the Task Manager is classified as
a batch processor.
To process the instructions in your control files, the Task Manager assigns each control file
to one of its "worker" jobs. These special jobs do not have terminals assigned to them;
instead, each worker job is assigned a "pseudo-terminal" which makes the instructions in
the control file appear as though they were actually coming from a real terminal. A
pseudo-terminal is a piece of the operating system software which is defined as if it were a
physical terminal. Likewise, when the worker job thinks it’s sending some output to a real
terminal, the output really goes to a log file.
A control file must contain all of the commands and input that you would normally enter on
the terminal to complete a task. Control files have a slightly different format than command
files, but do not have many of the command file’s limitations. Inside a control file, you can
do almost everything that you can do directly on your terminal.
When you submit the control file to the Task Manager, it’s placed in a queue file which the
Task Manager uses to organize and schedule the task requests. If there are more tasks
submitted than the Task Manager has worker jobs, the queue file saves the task requests
DSS-10010-00, Rev. B00
Introduction
Page 1-3
(in the same way the printer queue holds print requests) until the next available worker job
is ready. The Task Manager arranges the tasks in the queue file in order of their
submission times and their priority levels. When a worker job finishes one task, the Task
Manager selects the next appropriate task in the queue file for it to process.
Once the control file is in the queue, no more human control is needed until the task is
finished. All output that would normally be displayed on a terminal is written to the log file.
After the task is finished, this file can be viewed to make sure everything worked correctly.
The log file may also contain necessary output or data from the task.
The Task Manager also gives you the ability to keep specific tasks in the queue
permanently, set to run whenever you wish—daily, weekly, monthly, etc. This saves you
the trouble of setting up and submitting the tasks each time. Tasks may be scheduled to
run anytime you choose at any interval you choose.
The Task Manager queue file can be set up so that the permanent entries in the queue will
remain there after the task is completed. Tasks can also be set to restart if the system
goes down while they are executing.
In this manual, we’ll show you how to create control files and how to submit jobs to the
Task Manager. And if the Task Manager isn’t already active on your computer system,
Appendix A of this manual explains how to install the Task Manager and set up the worker
jobs. To see if the Task Manager is active on your computer, type:
SYSTAT RETURN
If the job TASK is attached to MANAGR and is running the program TSKIDL is SL state,
the Task Manager is already up and running.
1.2WHAT THE TASK MANAGER CAN DO FOR YOU
The Task Manager can do just about anything you want it to. Any program you can run
from your terminal, the Task Manager can run for you while you do other, more creative
things. Every computer installation is unique and has its own requirements, so it’s difficult
for us to anticipate the specific uses you might put the Task Manager to.
You can use the Task Manager to schedule all the programs you run on a regular basis. If
you have weekly file sort and print program, you can have the Task Manager do it for you
automatically. And the Task Manager will remember to do it on schedule every week
without your having to resubmit the request.
The Task Manager can run your monthly billing. You can have the Task Manager
automatically run the programs to calculate the amounts due, print the statements, create a
file of overdue payments, and do whatever else you need to do to keep your books in order.
If you do periodic mailings, the Task Manager can schedule the printing of your mailing
labels.
DSS-10010-00, Rev. B00
Page 1-4
Chapter One
As long as you know in advance what data each application program is going to need as
input, you can create a control file with that data to run the program and print any report.
We encourage you to experiment and use your imagination to adapt your applications to
run under the Task Manager.
1.3SYMBOLS AND ABBREVIATIONS
Like all the other manuals in the Alpha Micro Documentation Library, this manual contains
a number of standardized symbols and abbreviations that we hope will make the examples
easier for you to read and understand.
SYMBOL
MEANING
devn:
Device-Name. The "dev" is the three letter physical device code, and the
"n" is the logical unit number. Examples of device names are DSK0:,
DSK5:, WIN1:, and MTU0:. Usually, device names indicate disk drives,
but they can also refer to magnetic tape drives and video cassette
recorders.
filespec
File Specification. A file specification identifies a specific file within an
account. A complete filespec is made up of the devn:, the filename, the
file extension, and the project-programmer number. For example:
devn:filename.ext[p,pn]
-orDSK0:SYSTEM.INI[1,4]
{}
Braces are used in some examples to indicate optional elements of a command line. In the example:
DIR{/switch}
the braces tell you that "/switch" is not a required portion of the DIR command line.
/
The slash symbol precedes a command line switch or "option request."
For example:
DIR/WIDE:3 RETURN
This command requests a directory display of the disk account you are
currently logged into. The switch (/WIDE:3) indicates that you want the
display to be three columns wide.
DSS-10010-00, Rev. B00
Introduction
Page 1-5
SYMBOL
MEANING
TEXT
Bold text in an example of user/computer communication represents the
characters you type.
text
Text like this in an example of user/computer communication represents
the characters the computer displays on your terminal screen.
KEY
In our examples, the keycap symbol appears whenever you need to
press a certain key on your terminal keyboard. The name of the key you
need to press appears inside the keycap symbol, like this: RETURN . If you
need to press the TAB key, you would see TAB , or the ESCAPE key,
ESCAPE . (Sometimes the ESCAPE key is labeled ESC or ALT MODE.)
^
This symbol in front of a capital letter means the letter is a "control
character." That is, you held down the CTRL key on your terminal keyboard while you typed the letter. For example, when you press
CTRL /
C , it appears on your screen as ^C. (^C is the control character
used like the CANCEL key to cancel most programs and return you to AMOS
command level.) You’ll find out more about control characters in Chapter
2.
This symbol means "halt!" It indicates an important note you should read
carefully before going further in the documentation. Usually, text next to
this symbol contains instructions for something you MUST or MUST NOT
do, so read it carefully.
This symbol means "hint." It indicates a helpful bit of information.
This symbol means "remember." It indicates something you should keep
in mind while you are following a set of instructions.
DSS-10010-00, Rev. B00
CHAPTER 2
CONTROL FILES
A control file contains the commands and data that you want to have processed by the Task
Manager. The control file needs to contain all input and commands that the task requires, just
as if you were typing them on your terminal.
Here is a simple control file that writes a system status message to the log file. Use AlphaVUE
to create a file called SAMPLE.CTL in any disk account you wish. Type in the following three
commands.
LOG SYSTEM SERVICE
DIR/W
SYSTAT
The first command should always be a LOG command, and you should specify a user name if
your computer supports them. Otherwise, you should specify a valid disk account, such as
DSK0:[1,4], or an Ersatz device specification, such as SYS:. You may optionally place a
LOGOFF command at the end of the file. The Task Manager automatically logs off when it
finishes.
As you can see, control files can be very simple. They can also be very complex in size and in
the number of things they do. No matter how complex the task, however, the commands inside
the control file are usually simple, and most are exactly as you would enter them on a terminal.
2.1SPECIAL INPUT FORMATS
Certain commands have to be modified slightly for batch processing; and for this purpose,
the Task Manager interpretes lines which begin with a dollar sign ($) as special input. The
following special control file statements are supported:
DSS-10010-00, Rev. B00
Page 2-2
Chapter Two
$^n
Forces the control character "n" to the task, where "n"
is any ASCII character. For example: a $^C forces the
ASCII value 3 (Control-C) to the task. More than one
letter may be specified at a time (for example, $^CQB
first forces the character Control-C, then Control-Q and
finally Control-B to the task).
The legal control
characters are @ (ASCII 0) through the underline
symbol {_} (ASCII 31). Appendix B of this manual lists
the valid control characters and their functions.
$;comment
Comment. The rest of the line after the semi-colon is
ignored. This feature is useful for adding descriptive
comments to the control file. Nothing is forced to the
task.
$ROUTE{filespec}
Reroutes the task output to a new log file. If no filespec
is specified, the current file is closed and reopened for
append.
$CHAINfilespec
Reroutes the task input to a new control file. This is
NOT a subroutine call mechanism—control of the job
does not return to the control file after the new control
file finishes, so the $CHAIN should be the last
command in a control file. The filespec defaults to
.CTL and the account and device that the former
control file was submitted from. The log file remains
the same.
$OPR{>jobname}text
Sends a message to the Operator Job (the default
setting), or to the jobname specified (The Operator Job
is the job defined in the OPERATOR= command in the
initialization file for each job). This is more powerful
than a SEND command, and guarantees the message
will get through.
$PAUSE{>jobname}text
Causes a message to be sent to the Operator Job
specified in the job initialization file (the default setting),
or the specified jobname.
When this message
appears, the task is suspended until the receiver enters
a carriage return. This is useful in a case where an
external task (such as mounting a disk drive) needs to
be performed before proceeding with the rest of the
task.
DSS-10010-00, Rev. B00
Control Files
Page 2-3
$JOB/revision
This command allows the .CTL file to control itself. The
$JOB statement expands at run time into: SUBMIT
queue-filespec=/SEQUENCE:#. This means that the
.CTL file will resubmit itself with different specifications.
The /revision can be any switch or switches (except
/PRIORITY) that can be used with SUBMIT. This
command is used to change the way the task was
originally submitted. See the next chapter for the
SUBMIT command and its switches.
The $JOB
command allows you to set up permanent, repeating
tasks. See Section 2.2.1 for more information on $JOB.
$SLEEPnnn
Suspends control of the task for a specified number of
seconds. This is useful for time critical control. The
Task Manager job will still be active, but the worker job
will be inactive, so that no data will be forced or
retrieved until the sleep period is over.
$+text
Forces the rest of the line to the task without forcing a
carriage return.
This is a special application for
sending data that is to be terminated unconventionally
(for example, for some software applications, the ASCII
character Control-D might be used instead of a
carriage return to end the line).
2.2USING CONTROL FILES
The usual format for a control file name is a filename with a .CTL extension. The SUBMIT
command defaults to that extension, but that extension is not necessary. The control file
can have any extension—it is just easier to have a .CTL extension for submitting and
identification purposes.
The job is not logged in at the start of the control file, so you must log the task into a legal
account. But you do not need to LOGOFF the task at the end of the control file.
If you do not log in the job at the start of your control file, each command is answered by
the system with:
?Login please
At the end of the task, the Task Manager automatically logs the job off.
DSS-10010-00, Rev. B00
Page 2-4
Chapter Two
When composing a control file, try to visualize each step that you would execute on your
terminal, and enter it into the file in the same way. You may want to do the task once
manually and write down each step of the procedure, since it is easy to forget steps,
especially if they are familiar ones that you do without thinking about them.
You do not have to force a carriage return (^M) after each line of input—the Task Manager
assumes a carriage return unless you specify otherwise with the $+TEXT command.
You can input data at any point the terminal would normally ask for input. This allows you
to run programs and functions such as AlphaVUE, AlphaBASIC, etc. Be careful, however,
to put the data in the sequence that it would be input on the terminal, or the task may not
execute properly.
The FORCE command can be used inside a .CTL file to force commands to other jobs.
You can also send messages to other jobs. For instance, if the task submitted has a long
running time, you can either use a SEND command or an $OPR>jobname command at the
end of the control file, to inform you when the task is finished. The $OPR command is
preferrable to SEND, since SEND can get the response "?Busy" in some cases. $OPR
guarantees your message gets through.
You can send output to a printer as you normally would with the PRINT or PRNT
commands, and you may also use the SUBMIT command in a control file. The job
submitted will be placed in the proper queue and begin executing. If there are other tasks
in the queue, however, that task will wait until its turn comes.
The $CHAIN command can be used to execute another control file immediately. Note that
chaining between tasks rather than using one control file to SUBMIT another control file
allows the task to run without interruption, and the output stays in a single log file.
Be especially careful when using control characters inside a control file. Certain control
characters have different functions in different situations. A common example is that of
Control-S, which suspends the terminal if used in monitor command mode, but causes the
text to be centered if used inside AlphaVUE. If you use the wrong character in the wrong
area, you could have problems.
For instance, using the Control-S inside a control file while the task is at monitor command
level causes the job to be suspended. The Task Manager will be waiting for a return signal
from the job, and the job will be waiting for a Control-Q from the Task Manager to release
the job, and neither will do anything. In this case, you would have to kill your task using the
SUBMIT/KILL switch, correct the control file, and resubmit it.
So, be sure you are thoroughly familiar with the control characters and what they do before
you use them inside a control file. See Appendix B for a list of the control characters and
their functions.
The Task Manager system does not work with any program that displays
the statement:
DSS-10010-00, Rev. B00
Control Files
Page 2-5
All other users will be suspended while <program> is running.
Enter RETURN to continue or CTRLC to abort.
For example, some of the Video Cassette programs (VCRSAV, VCRRES,
VCRDIR) and the 1/4" Streamer programs (STRSAV, STRRES, STRDIR)
display this message. Since the Task Manager is another "user," it will be
suspended also, so that it cannot continue running the task. DSKCPY is
another command that the Task Manager cannot run.
Also, do not use the STAT command inside of a control file. Because the
STAT command needs a Control-C to terminate it, it will wait for that input
from the Task Manager. The Task Manager will be waiting for an end signal
from STAT and, again, nothing will happen. You will have to kill the task,
take the STAT command out of the control file, and resubmit the task.
2.2.1Setting up a Permanent, Repeating Task
The control file for this type of task is the same as any other. You merely add a $JOB
statement to it. Place the $JOB statement at the end of the .CTL file ahead of the
LOGOFF command, if there is one. Make sure the job is at monitor level when the
$JOB statement is executed.
Here is an example of the $JOB statement that you might add to your .CTL file. (Be
sure to leave a space between $JOB and the option switches.)
$JOB /NEXT:0-1-0/PERMANENT/RESTART
This command will reset the SUBMIT specifications for the task. This causes the task to
be run again exactly one day after the time the task last ran. (The /NEXT switch is
explained more fully in the next chapter.) For example, say that you submitted the task
to run at 2:00 PM. After the task is completed, the $JOB command will change the
entry in the queue so that it will be scheduled to run at 2:00 PM the next day. Do not
use /AFTER here, since the job would be reset to run again one day after the task
finished (which could be a few seconds to a few hours after the task started).
The reason this command comes at the end of the .CTL file is that, if the system should
crash while this task is running, the queue entry will not have yet changed (to the next
day). This way, you know that the task is finished running before it is re-scheduled for
the next running.
The /PERMANENT and /RESTART switches are included here as a precaution, in case
the original submission did not specify them. Once a control file with this $JOB
statement is submitted, the task will be performed daily until you stop it.
DSS-10010-00, Rev. B00
Page 2-6
Chapter Two
The /RESTART switch guarantees the running of the task even in the case of a system
crash or a reboot. Without /RESTART, a crash or reboot would cause the task to be
lost until the next time it was scheduled to run.
When you first SUBMIT the control file, therefore, you should specify /PERMANENT
and /RESTART. The usual format is to also specify the date and time you would like
the task to begin executing using the AFTER switch. If this is not specified, the $JOB
will use the current date and time. That is, if the job is first submitted at 3:15 PM, it will
then run daily at 3:15 PM.
Of course, the $JOB command can be set for any period you like—daily, weekly,
monthly, every three days, every 12 hours, etc.
The one switch you should not use in the $JOB command is the /PRIORITY:n switch.
Changing priority from within a task is not permitted. You must submit the original task
at the priority you want it to always have.
2.3THE LOG FILE
Since the Task Manager jobs don’t have real terminals to send their output to, they use
disk files (with .LOG extensions) instead. This means that everything the task does will
appear in the log file just as it would on a terminal screen.
For instance, if you enter AlphaVUE inside your task, the file will show the entire screen
that you would normally see in AlphaVUE.
Be careful not to leave valuable data in the log file if the task is to be submitted again,
because the Task Manager will write over an existing log file if one of the same name
exists.
The log file may contain some strange symbols (such as terminal screen handling control
characters), and some displays that may be useless, such as the field of asterisks that
AlphaVUE uses to fill a blank file screen.
Normally, when you kill a task that’s in the middle of executing, the log file will remain,
containing everything the task completed before it was canceled. This can be useful, since
occasionally a task will run longer than it should, or get into an endless loop inside a
program.
Viewing the log file could show you just where the task went wrong. This can be a great
help in debugging a control file. However, when you use the SUBMIT filespec/KILL option,
the Task Manager will do everything it can to kill a task, and sometimes it needs to erase
the log file to terminate some tasks. In such a rare case, you would not have a log file to
view.
DSS-10010-00, Rev. B00
Control Files
Page 2-7
2.4VIEWING THE QUEUE FILE
To see what is in the queue file, enter:
SUBMIT RETURN
The display of the current Queue file looks something like this:
Queue DSK0:BATQUE.SYS[1,4]:
Control file
Seq # Mem
Status Priority
Log file
====================================================================
DSK2:TEST.TXT
56
32k
DSK2:MANUAL.CTL
57
44k
Run date: 22-Apr-82 16:50:29
*
P
256
200
DSK2:T3.LOG
DSK2:T4.LOG
Total of 2 tasks in queue.
The sequence number is the number that identifies the order of submission for the tasks,
and is used as a reference for the /SEQUENCE switch when updating the file in the queue.
The Run date shown in the queue listing is the date and time when the task will run. This
defaults to the current date and time when the task was submitted if no run date/time is
specified.
The task that is currently running will not have this displayed, rather it will have a status of
*, which indicates that it is currently running. All jobs waiting to run will show their run date
and time.
Notice that the file MANUAL.CTL is permanent in the queue file, as indicated by a status of
"P". The symbols you may see are:
* (RUNNING)
P (PERMANENT)
R (RESTART)
S (SUSPEND)
K (KILL)
- The task is currently executing.
- The task is a permanent entry in the queue.
- The task will restart after an interrupted run.
- The task is in suspended state.
- The task is waiting to be killed.
The SUBMIT command will show you the BATQUE.SYS queue file. If you wish to see a
different queue listing, such as MYQUE, you can view it by typing:
SUBMIT MYQUE= RETURN
DSS-10010-00, Rev. B00
Page 2-8
Chapter Two
This will show you the queue listing for MYQUE. Notice that the equal sign is included. If it
weren’t, the Task Manager would interpret it as an attempt to submit MYQUE.CTL to the
queue file. If there are no tasks in the queue, you will see:
Queue DSK0:MYQUE.SYS[1,4]:
%The queue is empty
2.5EXAMPLES
A typical control file to take a system status of the computer and log the date and time
might look like the following:
$; Log on with a legal user name:
LOG SYSTEM SERVICE
$; Get the date and time of the task run:
TIME
DATE
$; Get system status:
SYSTAT
$; End of task, log off:
LOGOFF
Here is an example of a program to send a file to the printer:
$; Log on with a legal user name:
LOG SYSTEM SERVICE
$; Text format the file:
TXTFMT HEADER,TEST
$; Rename the file:
RENAME/D TEST.LST=HEADER.LST
$; Send the .LST file to the printer:
PRNT TEST
DSS-10010-00, Rev. B00
Control Files
Page 2-9
$; Get the date and time of the task run:
TIME
DATE
$; Logoff the account:
LOGOFF
Next, suppose that you have an AlphaBASIC program to handle your employee files, and
that one of the options for that program is to search for the records of employees who are
up for job performance reviews and to send the information to a file named REVUE.DAT.
A control file could be set up to run the program:
$; Log on with a legal user name:
LOG SYSTEM SERVICE
$; Compil the AlphaBASIC program:
COMPIL TEST.BAS
$; Get the date and time of the task run:
TIME
DATE
$; Run the AlphaBASIC program:
RUN TEST
$; Input data for the option:
3
$; Send a message to your terminal:
$OPR >USER1 EMPLOYEE LIST IS COMPLETE.
$; Logoff the account:
LOGOFF
Just in case the program TEST.BAS has an error, you should SUBMIT the task with
/ERROR:FATAL specified, so if the RUN command is unable to find TEST.RUN, the task
will terminate. See the next chapter for an explanation of the ERROR switch.
This control file compiles and runs the program, using the 3 as the input to select the
option. It then writes the time and date into the log file. Once the task is finished, you can
view or print the file REVUE.DAT.
DSS-10010-00, Rev. B00
Page 2-10
Chapter Two
One handy use of the Task Manager is for performing routine backups of data. Before you
submit a backup control file, it’s a good idea to run DSKANA on the disks you will be
backing up. A typical backup file might look like this:
$; Log on with a legal user name:
LOG SYSTEM SERVICE
$; Log into operator’s account:
LOG DSK2:[1,2]
$; Send a message to the user:
$PAUSE >USER1 MOUNT BACKUP TAPE. PRESS RETURN WHEN READY:
$; Mount the tape drive:
MOUNT MTU0:
$; Erase backup files:
ERASE *.BAK[]
$; Send message to user:
$OPR >USER1 MAKE SURE YOU AND ALL OTHERS ARE OFF THE DISK!
$PAUSE >USER1 TYPE RETURN WHEN READY:
$; Sequence the files on the disk:
DIRSEQ []
$; Copy from Disk to Magnetic Tape:
MTUSAV MTU0:=DSK2:[]
$; Send a message indicating task is done:
$OPR >USER1 Backup is complete.
$; Logoff the account:
LOGOFF
The $PAUSE statement sends the message to the user and then waits for a carriage
return before the Task Manager will resume execution of the task. This give you the
opportunity to ready your back-up tape and check for disk errors before trying to copy your
files. The LOGOFF command in all these examples is optional.
DSS-10010-00, Rev. B00
CHAPTER 3
SUBMITTING TASKS TO THE TASK
MANAGER
Whenever you want to enter, change, or delete control files from the Task Manager queue files,
you can use the SUBMIT command. This is a versatile command with many optional switches
that allows you to specify exactly how you want the control file you submit to be executed by
the Task Manager.
The SUBMIT command format is:
SUBMIT {queue-filespec=}{ctl-filespec}{/switch1...{/switchN}}
Where:
queue-filespec=
Optional queue file specification. The default queue file
is DSK0:BATQUE.SYS[1,4]. Any switches after it will
affect only the specified queue file.
ctl-filespec
Optional control file specification. This is the name of
the control file you want to submit to the Task Manager.
/switch
Optional switch(es). The switches (described in detail
below) determine how the Task Manager processes
the control file.
The default command specification is "DSK0:BATQUE.SYS[1,4]=/LIST." In other words, if you
simply enter SUBMIT with no other specifications, the screen will display the current contents of
the BATQUE file.
All the optional switches for the SUBMIT command can be abbreviated to any unique name.
For example, /KILL can be abbreviated to /K, since no other switch starts with K. /REVIVE,
however, cannot be abbreviated to /RE, but must be at least /REV —otherwise, it will be
confused with /RESTART.
The default switches are: /LIST, /NORESTART,
/ERROR:NONE, /MEMORY:32K, and /PRIORITY:256
DSS-10010-00, Rev. B00
/NOPERMANENT,
/NOLOGTIME,
Page 3-2
Chapter Three
3.1THE SUBMIT SWITCHES
The switches are:
/SEQUENCE:n/Revision
switches
Where n specifies an existing queue file entry of
sequence number n. Specifying a sequence number
signals to SUBMIT that you wish to edit an existing
queue entry.
The Revision part of this option
represents a switch or switches that revise the queue
instruction. For example, you may want to change a
permanent
file
to
non-permanent
by
using
/SEQUENCE:n/NOPERMANENT.
/KILL
Removes the specified queue entry from the queue. If
the task is running, the Task Manager will cancel the
task immediately.
/LIST
Lists the contents of the queue file. This is the default if
no control file is specified. If a specific queue entry is
specified, it will list only that entry.
/SUSPEND
Suspends the specified task if it is running. The Task
Manager will cease forcing control file data while the
task is suspended.
/REVIVE
Revives the specified task if it is suspended. Negates
the /SUSPEND switch.
/RESTART
Indicates the specified task is restartable if the system
should crash or be rebooted while it is running. When
the system boots again, the task will restart from the
beginning as though it were resubmitted.
/NORESTART
Indicates the specified task is not restartable. Used to
negate the /RESTART switch. This is the default
setting.
/PERMANENT
Indicates the specified task is a permanent queue
entry. After the task is completed, it will not be
removed from the queue file. The control file should
use the $JOB statement to re-schedule the next run
time.
/NOPERMANENT
Negates the /PERMANENT switch. Default switch.
/LOGTIME
Outputs the current time to the log file at the beginning
of each line of output.
/NOLOGTIME
Negates the /LOGTIME command. Default switch.
DSS-10010-00, Rev. B00
Submitting Tasks to the Task Manager
Page 3-3
/ERROR:{NONE}
{WARNING}
{FATAL}
{ALL}
If you specify FATAL or WARNING, the task will be
aborted on a system generated error message. If a ?
occurs in the first column, FATAL will kill the task. If a
% occurs in the first column, WARNING will kill the
task. For instance, if you specified a non-existent file
for a program inside of your task, an error message
"?File not found." will be written to the .LOG file. If
ERROR:FATAL is specified, it would detect the "?" and
terminate the whole task. NONE is the default value.
ALL specifies that the task will abort on either a
WARNING or FATAL message.
/MEMORY:n
Indicates the specified task needs a minimum of nK to
execute. The Task Manager will examine the available
jobs, and try to select one that has at least the
specified memory available. The default value is 32K.
/PRIORITY:n
Indicates the specified task has a queue priority of n.
The default value is 256. The higher the number, the
higher the position in the queue. This value is also
used by the Task Manager scheduler for scheduling
tasks only to jobs that will run a specified priority. The
minimum value is 0, and the maximum is 511. Once as
task has begun executing, it is not possible to change
its priority (for example, you cannot lower its priority to
stop it and let another task go ahead of it).
/OUTPUT:filespec
Used to specify a different output file for the task. The
default output file is the input filename with a .LOG
extension.
/NOOUTPUT
Causes the output to be displayed on the terminal that
the job is running on, rather than being sent to a log
file. Useful for demonstrations, or if you want to see
the output as it happens. This cannot be used on a
pseudo-terminal—make sure the job that is running the
task is connected to a real terminal.
DSS-10010-00, Rev. B00
Page 3-4
Chapter Three
/AFTER:{+}mm-dd-yy
{,hh:mm AM/PM}
Indicates the specified task will only be run after the
specified date/time. (mm-dd-yy represents month, day,
and year—each two digits long, while hh:mm
represents two digit hours and minutes.) The date and
time can be specified either as absolute (such as
04-13-89,3:17 PM) or as relative (such as +0-1-0,0:03).
If ’+’ is specified, the specified date and time will be
added to the current date and time to get the deferred
run date and time. The numbers in this case must be
relative. This does not guarantee that the job will start
exactly at the specified time (another task might be
running), but does guarantee that it will not run before
the specified time.
/NEXT:mm-dd-yy{,hh:mm}
Indicates the specified task will be run again after the
specified amount of time.
(mm-dd-yy represents
month, day, and year—each two digits long, while
hh:mm represents two digit hours and minutes.) This is
similar to the AFTER switch, except that it counts from
the beginning run time (when the task was submitted)
rather than the current time. The specified time can
only be relative. Used in permanent, repeating tasks.
/DEADLINE:{+}mm-dd-yy
{,hh:mm AM/PM}
Indicates the specified task must run before the
specified date and time, otherwise the task will be
removed from the queue. Can be either absolute or
relative.
(mm-dd-yy represents month, day, and
year—each two digits long, while hh:mm represents
two digit hours and minutes.)
3.2EXAMPLES
The following command submits the file TEST.CTL to the regular Task Manager queue
(BATQUE.SYS) and runs it as soon as the tasks ahead of it (if any) are through executing.
The default settings are /NORESTART, /NOPERMANENT, /NOLOGTIME, and
/ERROR:NONE. The memory allocated to the job is 32K, the priority is 256, and the
output goes to the file TEST.LOG:
SUBMIT TEST RETURN
In the next example, the file TEST.CTL is submitted to queue MYQUE.SYS instead of
BATQUE.SYS. It is placed permanently in the queue, and runs each day after the current
time. (The .CTL file must contain a $JOB/NEXT command, also.) For example, if it is 3:23
PM when you submit the task, the task will run now, and at 3:23 PM tommorow, and each
day after that at 3:23 PM. If the system crashed or was rebooted in the middle of this task,
it will restart:
DSS-10010-00, Rev. B00
Submitting Tasks to the Task Manager
Page 3-5
SUBMIT MYQUE.SYS=TEST/RESTART/PERMANENT/AFTER:+0-1-0 RETURN
This next command instructs the Task Manager to change the memory requirement of
whatever task is sequence #14 in the queue to 40K:
SUBMIT/SEQUENCE:14/MEMORY:40K RETURN
You do not have to specify a task name, since the sequence number is unique. (The
sequence number appears next to the name of each control file in the queue. The
previous chapter explained how to display the contents of the queue using the SUBMIT
command with no arguments.) The Task Manager allows you to specify the memory size
as either "40" or "40K."
The next example shows how to submit the file TEST.TXT to the queue as the control file:
SUBMIT TEST.TXT RETURN
If you did not specify .TXT, the Task Manager would have searched for the file TEST.CTL.
Here, CENTRY.CTL is submitted to the Task Manager with a deadline. The task must be
executed before the date and time specified:
SUBMIT CENTRY/DEADLINE:12-31-99,11:30 PM RETURN
If you’re editing your .CTL file in AlphaVUE, and you wish to save it and
submit it immediately, you can save a step by entering "G" (meaning "GO")
after the > prompt in AlphaVUE command mode. (See the AlphaVUE
User’s Manual for information on the GO function.)
DSS-10010-00, Rev. B00
CHAPTER 4
TROUBLESHOOTING
4.1TROUBLESHOOTING CONTROL FILES
If you have submitted a task, and it does not run (or runs improperly), check the following:
If your task runs, but does not work properly, check the .LOG file to determine
exactly what did happen, then revise your .CTL file appropriately.
If your task does not run, type SUBMIT, and see what the execution status of the
task is. Perhaps the task is waiting for a job to become free, or perhaps the
requirements specified for the task cannot be met by any of the jobs connected to
the Task Manager.
If that doesn’t help, use SYSTAT or STAT to see if the Task Manager job (TASK
MANAGR) is running. If it is not (indicated by a ^C symbol in the Status area)
follow the instructions in "Troubleshooting" in Chapter 2.
There are, of course, files that the Task Manager cannot process. Ordinary text files
containing text could be submitted to the Task Manager, but nothing much would happen.
A control file (whatever the extension) must have commands inside to be the input for a
task. Otherwise, you will just be filling a .LOG file with the same text you submitted.
4.1.1WARNINGS:
Do not use the program DSKANA inside a control file unless you can be absolutely
sure that no other user will be accessing the specified disk when the control file runs.
You could seriously damage the file records and bitmap of the disk if this occurs. This
includes the Task Manager itself, the queue file, and the log file—make sure that they
are not accessing the disk being analyzed.
If the system goes down, or if you reboot while a Task Manager job is running, that task
will be terminated and removed from the queue (unless it had RESTART specified),
because the memory space that the Task Manager was using to run the job was shut
down in the middle of the task.
DSS-10010-00, Rev. B00
Page 4-2
Chapter Four
Since the Task Manager accesses the queue file on the disk, and a worker job may also
access the disk while performing a task, you should not unmount or spin down the drive
if you have a job running in the Task Manager queue.
It doesn’t hurt to unmount or spin down the drive if there are jobs in the queue which are
not running, since the Task Manager will then wait until the drive is spun up again
before starting a task.
SPECIAL WARNING: You should never use AlphaVUE to look at or edit
a control file while the Task Manager is running it. Two users (yourself
and the Task Manager) trying to access the same file at the same time
can cause portions of the bitmap to be destroyed. (Computers using
AMOS File Locking are automatically prevented from doing this.)
If you discover a problem in your control file that needs to be fixed, kill
the task before editing the control file. For example,
SUBMIT SAMPLE.CTL/KILL RETURN
When the .CTL file is fixed, you can then resubmit it.
If you should submit a task which has an error in it that causes the task to be stuck in
AlphaVUE, you will have to reboot in order to reset the Task Manager. The Task
Manager cannot kill a task that is executing inside AlphaVUE, due to the fact that the
Task Manager is between one command and the next, awaiting an end signal from
AlphaVUE.
If you cannot kill the task for some reason, rebooting the computer always works as a
last resort. If you have specified /RESTART, kill the task before you reboot—when the
system comes up again, the Task Manager will then remove the task from the queue
(unless it is a permanent or restartable task.)
4.1.2Checking the Progress of a Task
If you want to check on the progress of a task, you can put a $ROUTE filespec
command inside the control file at certain points. When the process reaches that point,
the output of the Task Manager will be routed to a new .LOG file. At this point, you can
enter AlphaVUE and examine the previous .LOG file to see if the job has been
executing properly up to that point. This filespec will default to a .LOG extension.
You can also check on the progress of a task by using the SYSTAT and STAT
commands. These displays will show you what is occurring in the Task Manager and
the various jobs on the system. The SYSTAT display is just a printout of this data. The
STAT display contains basically the same information, but it constantly updates the data
each second, and runs until you press ESC and Q to return to monitor level.
DSS-10010-00, Rev. B00
Troubleshooting
Page 4-3
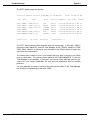
The STAT display might look like this:
Status of AMOS/L Version X.XX(XX) on 26-SEP-88
Job
Term
JOB1
JOB2
JOB3
JOB4
JOB5
TASK
TERM1
TERM2
TERM3
TERM4
PSEUDO
MANAGR
PPN
Prog
DSK0:[45,2]
DSK1:[101,3]
DSK3:[314,15]
DSK2:[200,0]
DSK0:[1,2]
Qfree: 109
Up time:
VUE
PRINT
DIRSEQ
LOGOFF
VUE
TSKIDL
50:20:22
Bytes @ address
Time: 05:00:32 PM
68122
68608
49152
68608
68608
8192
1572746
1044746
646746
430746
1252746
222746
CPU Time
00:08:34.4
00:00:01.8
00:00:22.7
00:00:00.0
00:03:36.0
00:02:59.9
Status
RN
RN
RN
^C
RN
RN
Ti
Ti
To
Ti
Io
Sl
Disk queue: 0
The STAT printout shows which program each job is executing. In this case, JOB5 is
executing inside AlphaVUE, and the Task Manager is idle (TSKIDL stands for TASK
IDLE), which means it is waiting for one command to be finished before it begins the
next line of the command file.
The Status area is where to look if you suspect that your task is running in an infinite
loop or is shut down. If the printout under status for the TASK MANAGR is ^C, then the
Task Manager is not operating. In this case, you need to kill the task and examine your
control file, your system initialization file, and your job initialization files for possible
problems.
You can generally see what is occurring by looking at the status of the Task Manager
and of the job it is executing (in this case, JOB5).
DSS-10010-00, Rev. B00
APPENDIX A
INSTALLING THE TASK MANAGER
This appendix tells you how to set up the Task Manager and gives you step-by-step installation
instructions. The AMOS operating system already contains all the software necessary for
setting up the Task Manager on your computer. The programs involved are named:
QFLOCK.SYS, MAKQUE.LIT, SUBMIT.LIT, TSKINI.LIT, TSKINI.OVR, and TSKMAN.OVR.
For the Task Manager to work, you must create the queue files it will use to store your
requests. Then you must define the characteristics of each worker job in individual job
initialization files. And finally, you must modify your system initialization command file to
recognize the Task Manager job and the worker jobs.
A.1CREATING QUEUE FILES
The first thing to do is to create the queue files the Task Manager uses for storing your
requests. MAKQUE is the command that creates queue files for use with the Task
Manager. The format is simply:
MAKQUE
Your first use of this command will be to create a queue file called BATQUE.SYS. This is
the name of the queue file that the Task Manager is programmed to default to.
If you do not create BATQUE, you will get an error if you do not specify a queue file when
you submit tasks. Generally, one queue file is all you will need for your system, and it is
much easier to use the default setting than to specify a queue file name every time you
submit a job.
The MAKQUE program creates batch queue files in the account you are logged into.
Therefore, when you create the BATQUE file, make sure that you are logged into account
DSK0:[1,4]. This is the place that the Task Manager will look for it—it uses the default
queue specification DSK0:BATQUE.SYS[1,4].
DSS-10010-00, Rev. B00
Page A-2
Appendix A
A.1.1Creating BATQUE.SYS
Log into DSK0:[1,4] and enter MAKQUE after the AMOS prompt and press the
RETURN key. The program then asks you for some information to determine the
characteristics of the queue file:
Enter type of queue file - Batch (B) or Spooler (S): B RETURN
Enter the letter for the type of queue file you would like to create. In this case, we are
creating a Batch queue-- if you select S, MAKQUE will create the file
DSK0:SPLQUE.SYS[1,4].
Enter name of queue file to create: BATQUE RETURN
Enter the name you wish to give your queue file. The program assumes an extension of
.SYS. You must specify a name for the queue file, or you will get an error and
MAKQUE will terminate. The first time you use MAKQUE with the (B) option, you
should specify BATQUE.
Enter number of queue records to be allocated: 100 RETURN
Your response defines the size of the queue and how many tasks it can handle. In this
case, the file will be 100 records long, and be able to schedule approximately 100 tasks.
This number also controls the sequence number rotation.
The sequence numbers in this case will increment to 100 before starting again at 1. If
you do not enter a record allocation number, MAKQUE simply prompts you again.
Generally, 100 records is the recommended number to allocate to the queue file. This
is usually enough space in which to schedule tasks, and it does not take up much of the
disk area. If you think you need to schedule more than that number of tasks, allocate
more records.
NOTE: It is inefficient to allocate too many records. If you need more
than 100, try to estimate how many more you need, and not go too much
over that number in allocating records.
The program then displays:
Now initializing queue file, please wait...
Initialization complete.
and returns you to AMOS command level. When a queue file is made, you need to
reboot in order to get the Task Manager to recognize it. Once you have rebooted, your
queue file (in this case, BATQUE.SYS) is ready.
DSS-10010-00, Rev. B00
Installing the Task Manager
Page A-3
A.1.2Creating Other Queue Files
In considering the creation of other queue files, you will need to let your circumstances
and needs guide you. There are some cases where other queue files would be
desirable. These usually involve tasks which are unusual in some way—ones that
require an excess of memory space, ones that have unusual run time specifications,
etc. You may also want to create a special queue file just for permanent jobs, since you
don’t have to worry about submitting them. This will make the BATQUE.SYS display
easier to read, if you have a lot of tasks. The majority of users will only need
BATQUE.SYS for their operations.
Remember that MAKQUE creates batch queue files in the account you are logged into.
For example, if you are logged into account [200,0], that is where the queue file will be.
If you wanted to submit a task to that queue from, say, account [202,4], you would have
to specify:
SUBMIT queue-filespec[200,0] control-filespec
in order to submit the task.
This is a drawback of using other queues—it simply takes extra time and effort to submit
tasks to them. Using command or DO files to submit the tasks can make this easier.
A.1.3Changing Existing Queue Files
If you find that a queue file that you have created has too few (or too many) records to
accomplish your tasks, you can re-create the queue file by running MAKQUE again, and
specifying the same name (check that the Task Manager is not performing any tasks,
and be sure that you are in the correct account). When you re-create the queue file,
specify more (or fewer) records. Remember that you will have to reboot your system in
order for the new queue to be connected to the Task Manager.
This procedure involves a little more work if your computer uses LOKSER or the AMOS
File Locking System integral to AMOS 2.0 or later. Since both LOKSER and the AMOS
File Locking System locks all of the Task Manager’s queue files (to prevent other
programs and processes from harming the queue entries), you (or the MAKQUE
program) will not be able to erase the version of the queue file that is on the disk. You
will first have to use the LOKUTL program to remove the queue file, then use MAKQUE,
and finally reboot your system (which will connect the queue file to the Task Manager
and restore the File Locking System protection).
DSS-10010-00, Rev. B00
Page A-4
Appendix A
A.2CREATING JOB INITIALIZATION FILES
First you should decide how many jobs you want the Task Manager to control, and create
a separate job initialization file for each one. Then you can go ahead and set up both the
Task Manager and those jobs in your system initialization command file.
A.2.1Deciding How Many Jobs to Have
The number of jobs assigned to the Task Manager determines the number of tasks that
can be performed at the same time. Two or three jobs are usually enough.
For example, if you give it three jobs, the Task Manager can run three tasks at the same
time. There are no set limitations to the number of jobs you can specify. Your decision
depends on how much memory is available on your computer system, and how much
memory you give to your Task Manager and to each individual job. You will have to
balance your needs to your memory space and requirements.
The Task Manager controls which task it assigns to which job on the basis of several
criteria. It tries to match the option switches you specify when you SUBMIT the task
with the characteristics you define for the jobs in the initialization files. As you will see,
you can set up the jobs to accept only tasks of a certain memory or priority requirements.
For instance, you might want to set up one job specifically for small tasks. If you give
the job 10K of memory in the system .INI file, a task would only run on that job if you
specified a memory requirement of 10K or less when you SUBMIT the task.
The default memory for a task is 32K, so the Task Manager would bypass that 10K job
when normal tasks are submitted. In order to get a task to run on that job, you would
have to specify /MEMORY:10K (or less) when you SUBMIT a task. This small job
would be useful if you don’t want small tasks taking up queue space and delaying larger
tasks.
You may also wish to give one or more jobs extra memory, say, 128K. These jobs can
be specifically used for long and involved tasks that need more memory. If you have a
variety of jobs with different specifications, you can tailor the tasks to the jobs, and use
memory more efficiently.
A.2.2Contents of the Job .INI File
For each worker job you want the Task Manager to use, you must create a file with its
jobname and an .INI extension located in the System Library account, DSK0:[1,4]. If
you decide to call one of the worker jobs ROBOT1, here is an example of what the file
for ROBOT1.INI might contain:
DSS-10010-00, Rev. B00
Installing the Task Manager
JOB
QUEUE
OPERATOR
PRIORITY
IDLE
Page A-5
=
=
=
=
=
ROBOT1
DSK0:BATQUE.SYS[1,4]
USER1
100
60
The first line defines the actual job that is to be controlled. The second line specifies
what queue file the job will accept tasks from. This is exclusive, which means that the
job will only execute tasks submitted to that queue file.
Next, the operator is defined (this must be a jobname that is defined on your system).
This is the default jobname to which messages generated by your control file, or error
messages generated by the Task Manager or AMOS, will be sent if no other jobname is
specified.
Then, the priority number is specified. The priority number allows you to give certain
tasks precedence over other tasks. Any tasks with a priority less than or equal to this
number can be run on this job. For instance, ROBOT1 will run a priority 90 task or a
priority 45 task, but will not run a priority 120 task. The minimum priority is 0, the
maximum is 511. You should set up at least one worker job to process tasks of the
highest (511) priority.
The Idle specification is the number of seconds that each job connected to the Task
Manager will wait between attempts to search the queue for a new task. In this case,
each job that is idle will check the queue file every minute to see if there are any tasks
which are ready to be run.
The Task Manager uses this information when it’s looking for a job to run a task on. For
instance, you might have three worker jobs—ROBOT1, ROBOT2, and MIKE. When a
task is submitted to the Task Manager, it might look at ROBOT1, and find that ROBOT1
is already running a task. It then looks at ROBOT2. ROBOT2 is not running a task
currently, so the Task Manager compares the task submitted with the characteristics of
ROBOT2, as defined by ROBOT2.INI.
If the requirements (memory space and priority level) can be met by ROBOT2, then the
Task Manager runs the task on that job. If it does not because, say, the task needs
more memory than ROBOT2 has allocated to it, the Task Manager looks to job MIKE.
If that job does not meet the requirements, the Task Manager leaves the task in the
queue until ROBOT1 has finished its task, and then matches the task against ROBOT1.
And if that does not meet the requirements, the Task Manager leaves the task in the
queue and creates a display like this:
DSS-10010-00, Rev. B00
Page A-6
Appendix A
Queue DSK0:BATQUE.SYS[1,4]:
Control file
Seq # Mem
Status Priority
Log file
====================================================================
DSK2:TEST.CTL
47
32K
256
DSK2:TEST.LOG
Run date: 11-Jan-83 03:24 PM
Execution status: Control file not found
DSK2:TEST2.CTL
45
300K
256
DSK2:TEST2.LOG
Run date: 12-Jan-83 02:22 PM
Execution status: Task waiting for memory requirements
DSK2:TEST3.CTL
46
32K
10
DSK2:TEST3.LOG
Run date: 12-Jan-83 02:22 PM
Execution status: Task waiting for priority requirements
Total of 3 tasks in queue.
NOTE: The first task, TEST.CTL, displays "Control file not found". This
can occur if a task is submitted to be run at a future time, and then the
.CTL file is erased before the task executes.
If your task has a problem like the ones shown above, you have to either kill the task
using SUBMIT and the /KILL switch, or change the memory requirements for the task,
using the SUBMIT command with the /SEQUENCE:n and the /PRIORITY:nnn switch or
the /MEMORY:nnn switch. If your task has requirements that no job connected to your
Task Manager can satisfy, you have to create a new job (or modify an old one) to meet
those specifications. This means modifying your system initialization command file and
rebooting.
A.3MODIFYING YOUR SYSTEM INITIALIZATION FILE
Now that you’ve created the queue files and the job initialization files, you’re ready to
activate the Task Manager by updating your system initialization command file. You
should be logged into the System Library account, DSK0:[1,4].
1.Since it’s not a good idea to modify the .INI file directly (a mistake could mean the
system would not be able to boot up again), you should make a copy of it and
modify the copy. For the purposes of this installation, name the copy TEST.INI.
For example, if your computer runs under control of the AMOS/32 operating
system, you would type:
LOG SYS: RETURN
COPY TEST.INI=AMO32.INI RETURN
(Of course, if your computer runs under the AMOS/L operating system, you would
specify AMOSL.INI instead.)
DSS-10010-00, Rev. B00
Installing the Task Manager
Page A-7
2.Use the AlphaVUE text editor to view the TEST.INI file, and change the JOBS
command. Increase the number of jobs allocated on the system by the number of
extra jobs you want to connect to the Task Manager; also add one extra job for
the Task Manager itself.
3.Provide names for these jobs by using the JOBALC command. The Task
Manager job MUST be named TASK, and must be attached to a pseudo-terminal
named MANAGR. The Task Manager will not operate on any other job. This
name is necessary because there are other programs that communicate with the
Task Manager, and these programs have to have a standard name to reference.
The worker jobs can have any name you wish. Your new JOBALC statement
might look like this:
JOBALC TASK,ROBOT1,ROBOT2,MIKE
Be sure to place this JOBALC statement after other JOBALC statements in your
initialization file. The first job defined in the first JOBALC statement automatically
becomes the Operator Job, and it is not possible for the Task Manager to be the
Operator Job—your computer will not boot correctly.
4.Define the terminals and the jobs used by the Task Manager. Add the following
TRMDEF statement for the Task Manager terminal:
TRMDEF MANAGR,PSEUDO,NULL,25,25,25
Now, add a TRMDEF for each job that will be connected to the Task Manager.
Although you can attach a real hardware terminal to a job being used by the Task
Manager, you will usually want to define a pseudo-terminal for each job, so you
don’t tie up an actual terminal.
In general, the procedure for setting up a pseudo-terminal looks like this:
a.Copy an existing TRMDEF statement for a real hardware terminal on the
system. For example:
TRMDEF TERM1,AM355=1:9600,ALPHA,100,100,100
b.Change the terminal name to a unique name of six characters or less; such
as PTERM1:
TRMDEF PTERM1,AM355=1:9600,ALPHA,100,100,100
c.Then change the interface driver to PSEUDO:
TRMDEF PTERM1,PSEUDO,ALPHA,100,100,100
Note that the unit "AM355=1:9600" is a single interface driver name along
with that driver’s optional baud rate.
DSS-10010-00, Rev. B00
Page A-8
Appendix A
d.Changer the last buffer size to 50. This makes it possible to kill a command
which has very fast output, such as TYPE or DUMP.
TRMDEF PTERM1,PSEUDO,ALPHA,100,100,50
e.If you are also setting up the Task Manager Printer Spooler, define your
printer(s) to the Task Manager:
TRMDEF PRINTR,AM350=1:9600,ALPHA,25,25,25
f.Now create as many TRMDEF statements like the one above as you need,
each with a unique terminal/printer name.
One final hint: Use any terminal driver you wish except NULL. We used
ALPHA above because that driver is already in use for other terminals on
our system. Using a driver that is already being used by another terminal
saves room in your monitor.
The procedure for connecting a real terminal to the Task Manager is:
a.Use one of the real terminals defined in a TRMDEF statement, or (if you are
adding a new terminal for the purpose) copy one of the TRMDEF
statements for a real terminal, and modify it to access the proper I/O port.
b.When you get to the stage of attaching jobs to terminals (see Section A.3
below), attach the terminal you have defined to TASK, as you would a
pseudo-terminal.
5.Add the QFLOCK.SYS program system memory by adding this SYSTEM
statement:
SYSTEM QFLOCK.SYS
before the final SYSTEM command. QFLOCK.SYS is the program that allows the
Task Manager to communicate with all of the system functions and with the Task
Manager queue file(s). The Task Manager will not operate if QFLOCK.SYS is not
loaded into system memory by your system .INI file.
6.Make sure the TEST.INI file contains a MSGINI statement. If one already exists,
you don’t need to change it. If one does not exist, add the following statement to
your file:
MSGINI 8K
The MSGINI program allows the Task Manager to communicate with the
disk-based spooler queue. 8K is the recommended size if you are adding the
MSGINI statement at this time. For more information on MSGINI, see your
System Operator’s Guide, or the System Operator’s Guide to the System
Initialization Command File for AMOS 2.0 and later.
DSS-10010-00, Rev. B00
Installing the Task Manager
Page A-9
For more information about setting up printers to run under the Task Manager print
spooler, see the section "Setting Up the Task Manager Print Spooler" in your AMOS
System Operator’s Guide.
Now you need to set up the Task Manager job and the jobs that will be connected to it.
A.3.1Setting Up the Worker Jobs
The next thing you must enter into your TEST.INI file is the commands to initialize the
jobs. For example:
ATTACH MANAGR,ROBOT1
KILL ROBOT1
FORCE ROBOT1 MEMORY 32K
WAIT ROBOT1
ATTACH PTERM1,ROBOT1
This procedure will first ATTACH the job (ROBOT1) to the Task Manager terminal
temporarily, and FORCE 32K of memory to it. Then it will ATTACH the job to its
pseudo-terminal (WRKER1). The reason you FORCE the memory while attached to
MANAGR is because the driver used by the terminal WRKER1 is not a NULL driver,
whereas MANAGR does use a NULL driver. The NULL driver allows you to FORCE in
this manner, whereas a non-NULL driver will hang you up. Therefore, use the above
format to initialize the jobs.
The system initialization command file goes through this procedure each time the
system is brought up. You must have a set of commands like this for each job you
define to be used by the Task Manager. If the job you are attaching is a real terminal,
use the procedure above, except that you probably have the terminal defined already in
your TEST.INI file, so you won’t have to add a new TRMDEF statement. If you are
using a real terminal, you do not need to attach the job to MANAGR before forcing
memory to it.
A.3.2Setting Up the Task Manager Job
The next thing you have to add to the system initialization command file is the Task
Manager job setup. As part of this setup, the initialization file will force TASK to run the
TSKINI.LIT program. When TASK runs this program, TSKINI connects the jobs you
have just initialized with the Task Manager. TSKINI.LIT must be run AFTER the other
jobs are initialized.
Therefore, the statements that set up the Task Manager job must come after the
statements that set up the jobs it will be connected to. We recommend that you place
the Task Manager job setup statements at the end of the TEST.INI file, just before the
MEMORY 0 command.
DSS-10010-00, Rev. B00
Page A-10
Appendix A
TSKINI.LIT, TSKINI.OVR, and TSKMAN.OVR are the actual programs that make up the
Task Manager. TSKINI.LIT is the main program of the Task Manager. It communicates
with the queues and activates the programs TSKINI.OVR and TSKMAN.OVR when they
are needed.
The .OVR programs are overlays, which means that they are only called into memory
when they are needed, which saves memory space. TSKINI.OVR is the module that
handles the initialization files of the jobs that the Task Manager controls, and
TSKMAN.OVR is the actual Task Manager processor. The .OVR programs do not
require any set-up procedure.
Here is an example of what you might enter in your TEST.INI file to set up the Task
Manager job:
ATTACH MANAGR,TASK
KILL TASK
FORCE TASK
MEMORY 38K
LOG SYS:
TSKINI
B ROBOT1.INI
; Set up ROBOT1
B ROBOT2.INI
; Set up ROBOT2
B MIKE.INI
; Set up job MIKE
S PRNTR1.INI
; Set up printer PRNTR1
S DIABLO
; Set up printer DIABLO
G
; Next line blank to end FORCE sequence:
WAIT TASK
AMOS executes the entire list of commands each time the computer reboots. It
attaches the terminal MANAGR to the job TASK, and forces 38K of memory to it. Be
sure to leave one blank line after the "G" to end the FORCE sequence.
Then, using the job initialization files, it connects the jobs listed above (ROBOT1,
ROBOT2 and MIKE), to the Task Manager as batch jobs (the "B" stands for "BATCH").
The Task Manager can only run tasks on jobs that are set up as batch jobs. It will also
connect the two printer initialization files to the print spooler (the "S" stands for
"SPOOL"). The default file extension is .INI for both BATCH and SPOOL files.
You can specify any job on your system to be used by the Task Manager (but each job
has to have an initialization file). If you wish to use a job that’s attached to an actual
hardware terminal, specify it here in the same way you would specify a job using a
pseudo-terminal (including the "B").
DSS-10010-00, Rev. B00
Installing the Task Manager
Page A-11
You may wish to do this if you are using most or all of your memory already for the jobs
you have defined. In such a case, you can use your terminals normally during the day,
and have the Task Manager use them for running tasks at night, or whenever they are
free.
If you do use real terminals with the Task Manager, be sure no one is using the
Terminal at the time a task is submitted to run, because the Task Manager will take over
the terminal in order to run the task.
You can specify as many jobs as you like (within your memory limits), and end the
specification with the end indicator "G".
The minimum of memory necessary for the Task Manager to run is 23K. This sets up
the Task Manager to run itself. For each additional job that you want the Task Manager
to run, you must specify an extra 3K of memory.
Thus, in the above example, the system initialization command file FORCEs 38K—23K
for the Task Manager and 3K each for ROBOT1, ROBOT2, MIKE, PRNTR1, and
DIABLO. If you want four jobs given to the Task Manager, specify 35K, and so on. If
you do not specify enough memory, you will get an error message when you try to run
the Task Manager.
NOTE: If the command line processor program, CMDLIN.SYS, is loaded
into system memory, you need less memory for the Task Manager—only
16K minimum for the Task Manager itself, plus 3K for each job/printer.
TSKINI.LIT is the Initialization program for the Task Manager; it connects the jobs to the
Task Manager, and reads the specifications for each job. The Task Manager uses this
information to select a job when it needs to run a task.
For information on setting up printer initialization files, see the document "Setting Up the
Task Manager Print Spooler" in your System Operator’s Guide.
Check over the changes you made to your TEST.INI, and when you are satisfied that
everything looks all right, press ESCAPE to move to AlphaVUE command level and finish
out of this file. After you’ve created the individual job initialization files as described in
the next section, you can MONTST the file to bring the Task Manager to life.
A.3.3MONTSTing
Now that you’ve made all of the adjustments to your TEST.INI file, you’re ready to use
the MONTST command to test your new system initialization command file before
renaming it to AMOS32.INI or AMOSL.INI. (See the MONTST command reference
sheet in the System Command Reference Manual.
DSS-10010-00, Rev. B00
Page A-12
Appendix A
Use the STAT or SYSTAT command to find out if the Task Manager is defined correctly.
When you are sure the TEST.INI file is up and running properly, copy it to its standard
name, AMOS32.INI or AMOSL.INI. The Task Manager is installed.
A.4TROUBLESHOOTING TASK MANAGER INSTALLATION
If you have just finished installing the Task Manager, and you can’t get it to work properly,
check the following:
1.Use SYSTAT or STAT to see if the Task Manager job (TASK MANAGR) is
running. If it is not (indicated by a ^C symbol in the Status area), check your
system initialization command file for the following items:
a.Did you add a SYSTEM QFLOCK.SYS statement?
b.Have you enough JOBS defined?
c.Are the Task Manager jobs defined in the JOBALC statement(s)?
d.Are the pseudo-terminals for the Task Manager jobs specified in proper
TRMDEF statements?
e.Is there a MSGINI nK statement?
f.Is each Task Manager worker job set up properly? (Is each job initialization
file correct?)
g.Is the Task Manager job set up correctly? Are all the jobs and printers
defined in the TSKINI statement?
2.If the problem does not seem to be in the AMOS32.INI or AMOSL.INI file, check
the individual job initialization files for errors. Make certain that the job.INI files
have the correct names (the name of the job as defined in the JOBALC statement,
not the name of its terminal).
3.If you find an error, fix it and reboot your system. If that does not correct the
problem, go through this list again, and check for other errors.
4.Finally, if you still cannot locate the problem, try connecting the MANAGR terminal
to a real terminal in the TRMDEF statement (instead of to a PSEUDO NULL
terminal) and running a task on it. This will allow you to see the error messages
generated by TSKINI (which are shown in Appendix C).
DSS-10010-00, Rev. B00
APPENDIX B
THE CONTROL CHARACTERS
Char.
@
A
B
C
D
E
F
G
H
I
J
K
L
M
N
O
P
Q
R
S
T
U
V
W
X
Y
Z
[
/
^
AMOS/L Function
Null
Function in VUE
Null
Last Word
EOL to Next Line
Interrupt
Line Feed
Carriage Return
Resume Display
Interrupt display
Erase command line
DSS-10010-00, Rev. B00
Delete Character
End of File
Insert Character
Next Character=Text
Cursor Left
Horizontal Tab
Cursor Down
Cursor Up
Cursor Right
Carriage Return
Cursor to EOL
Concatenate
Mark Block of Text
Insert Mode
Last Page
Center Line
Next Page
Cursor to Start of Line
Delete Word
Cursor to Next Word
Cursor to Next Marker
Erase to EOL
Delete Line
Escape
Line Insert/Entry Mode
Cursor Home
ASCII Definition
Null
Start of Heading
Start of Text
End of Text
End of Transmission
Enquiry
Acknowledge
Bell Code
Back Space
Horizontal Tab
Line Feed
Vertical Tab
Form Feed
Carriage Return
Shift Out
Shift In
Data Link Escape
Device Control 1
Device Control 2
Device Control 3
Device Control 4
Negative Acknowledgement
Synchronous Idle
End of Transmission blocks
Cancel
End of Medium
Special Sequence
Escape
File Separator
Group Separator
APPENDIX C
ERROR MESSAGES
The following error messages are generated by the TSKINI program, and are displayed only on
the TASK MANAGR job’s terminal. If you want to see these messages to locate problems in
your AMOS32.INI or AMOSL.INI file or your individual job initialization files, you can redefine
the MANAGR terminal to a real terminal. See Chapter 4 for troubleshooting details.
?Command format error
You used a TSKINI command other than B, S, or G in the AMOSL.INI file. Check that file. See
the TSKINI reference sheet for more information.
?Control-C abort
A Control-C was used while running the TSKINI program.
??Fatal error - RES:QFLOCK.SYS not found
The file QFLOCK.SYS was not loaded into system memory at the time of system initialization.
This file is needed by the MAKQUE program in order to create queues. Modify a copy of the
AMOSL.INI file to contain a SYSTEM QFLOCK.SYS line, then MONTST the file, renaming it to
AMOSL.INI if it tests successfully.
?File error during queue file initialization
Not enough queue blocks were allocated—increase the number of queue blocks.
?Illegal command
One of the commands specified in a job initialization command file is incorrect. Check the file
for errors.
DSS-10010-00, Rev. B00
Page C-2
Appendix C
?No jobs defined
No jobs were legally connected to the Task Manager in your system initialization command file.
Check the area of AMOSL.INI in which you set up TASK MANAGR, and make sure the TSKINI
is properly connecting jobs to it.
?No task job defined
You did not define the jobname in the job initialization command file. Edit the file to include a
JOB=jobname command.
?Queue file not batch format
?Queue file error in <filespec.INI>, initialization aborted
The queue file you specified in a job initialization command file or is in an improper format.
Check your spelling, and make sure you are using a proper Task Manager queue file.
?Print spooler is not installed
The Task Manager communicates with the spooler through the Inter-Task Communication
system. This error indicates that some part of the process is not "hooked up." This could be
because the Task Manager is not properly installed, or because the Inter-Task Communication
system is not set up. See your System Operator.
?Specified job not found in <filespec.INI>, initialization aborted
The job you specified with the JOB=<jobname> command in your job initialization command file
does not exist on your system. Check the file for spelling errors, or use SYSTAT to see which
jobs are defined on your system.
?Specified operator not found in <filespec.INI>, initialization aborted
The operator jobname you specified in your job initialization command file does not exist on
your system. Check the file for spelling errors, or use SYSTAT to see which terminal names
are defined on your system.
?Task Manager may only be executed from TASK MANAGR 23K job.
You did not specify enough memory for the TASK MANAGR job in the system initialization
command file, or you did not connect the Task Manager software to TASK MANAGR. The
Task Manager job requires 23K of memory, plus 3K for each job or printer attached. Only 16K
(+3K each) is needed if CMDLIN.SYS is loaded into system memory. Increase the memory
allocated to the job, or make sure the TASK MANAGR job is properly set up.
DSS-10010-00, Rev. B00
October 1988
Revision B00
AMOS/L TASK MANAGER USER’S GUIDE
DOCUMENT HISTORY
Revision A00 - AMOS/L Release 1.0 - (Printed 6/82) - New Document
Revision A01 - AMOS/L Release 1.1 - (Printed 3/83)
Corrected minor errors throughout the manual. Added the /NOOUTPUT switch
for SUBMIT. Included troubleshooting hints in Chapter 3.
Revision A02 - AMOS/L Release 1.3 - (Printed 6/85)
Added new information about the Task Manager controlled print spooler.
Updated troubleshooting sections and error message appendix.
Revision B00 - AMOS/L Release 1.3D and AMOS/32 Release 1.0D - (Printed 10/88)
Revised and reformatted entire manual for Laser printing. Removed reference
to /LIMIT switch which is no longer supported. Added explanation that change of
task priority by $JOB statement from within control file is not possible while task
is executing.
DSS-10010-00, Rev. B00
Task Manager User’s Guide
Page Index-1
INDEX
$+text statement . . . . . . . . . 2-3
$;comment statement . . . . . 2-2
$CHAIN statement . . . . . . . 2-2
$JOB statement . . . . . . . . . 2-3
$OPR statement . . . . . . . . . 2-2
$PAUSE statement . . . . . . . 2-2
$ROUTE statement . . . . . . . 2-2
$SLEEP statement . . . . . . . 2-3
$^n statement . . . . . . . . . . . 2-2
/AFTER . . . . . . . . . . . . . . . .
/DEADLINE . . . . . . . . . . . . .
/ERROR . . . . . . . . . . . . . . .
/KILL . . . . . . . . . . . . . . . . . .
/LIST . . . . . . . . . . . . . . . . . .
/LOGTIME . . . . . . . . . . . . . .
/MEMORY . . . . . . . . . . . . . .
/NEXT . . . . . . . . . . . . . . . . .
/NOLOGTIME . . . . . . . . . . .
/NOOUTPUT . . . . . . . . . . . .
/NOPERMANENT . . . . . . . .
/NORESTART . . . . . . . . . . .
/OUTPUT . . . . . . . . . . . . . .
/PERMANENT . . . . . . . . . . .
/PRIORITY . . . . . . . . . . . . .
/RESTART . . . . . . . . . . . . .
/REVIVE . . . . . . . . . . . . . . .
/SEQUENCE . . . . . . . . . . . .
/SUSPEND . . . . . . . . . . . . .
3-4
3-4
3-3
3-2
3-2
3-2
3-3
3-4
3-2
3-3
3-2
3-2
3-3
3-2
3-3
3-2
3-2
3-2
3-2
Abbreviations . . . . . . . . . . .
AlphaVUE . . . . . . . . . . . . . .
AMOS file locking . . . . . . . .
ATTACH command . . . . . . .
1-4 to 1-5
2-4
A-3
A-9
BATCH processor . . . . . . . . 1-2
BATQUE.SYS file . . . . . . . . 3-1, A-1 to A-2
Braces {} . . . . . . . . . . . . . . . 1-4
DSS-10010-00, Rev. B00
Task Manager User’s Guide
Page Index-2
Caret ^ . . . . . . . . . . . . . . . . . 1-5
Changing existing queue filesA-3
Checking task progress . . . . 4-2
Circumflex ^ . . . . . . . . . . . . . 1-5
CMDLIN.SYS file . . . . . . . . . A-11
Control characters . . . . . . . . B-1
CTRL /
C
. . . . . . . . . . . . 1-5
Control file . . . . . . . . . . . . . . 1-2, 2-1
$+text statement . . . . . . . 2-3
$;comment statement . . 2-2
$CHAIN statement . . . . . 2-2
$JOB statement . . . . . . . 2-3
$OPR statement . . . . . . . 2-2
$PAUSE statement . . . . 2-2
$ROUTE statement . . . . 2-2
$SLEEP statement . . . . . 2-3
$^n statement . . . . . . . . . 2-2
Examples . . . . . . . . . . . . 2-8 to 2-10
Format . . . . . . . . . . . . . . 2-1
Status codes . . . . . . . . . 2-7
Creating
BATQUE.SYS . . . . . . . . A-2
Other queue files . . . . . . A-3
Queue files . . . . . . . . . . . A-1
Definitions . . . . . . . . . . . . . .
Batch processor . . . . . . .
Control file . . . . . . . . . . .
Log file . . . . . . . . . . . . . .
Queue file . . . . . . . . . . . .
Task . . . . . . . . . . . . . . . .
Device-name . . . . . . . . . . . .
Devn: . . . . . . . . . . . . . . . . . .
1-1
1-2
1-2
1-2
1-2
1-2
1-4
1-4
Error messages . . . . . . . . . . C-1 to C-2
Examples of control files . . . 2-8 to 2-10
File locking . . . . . . . . . . . . .
File specification . . . . . . . . .
Filespec . . . . . . . . . . . . . . . .
FORCE command . . . . . . . .
A-3
1-4
1-4
2-4, A-9
GO . . . . . . . . . . . . . . . . . . . . 3-5
Halt symbol . . . . . . . . . . . . . 1-5
Hint symbol . . . . . . . . . . . . . 1-5
Installation . . . . . . . . . . . . . . A-6
Job initialization file . . . . . . . A-4
DSS-10010-00, Rev. B00
Task Manager User’s Guide
Page Index-3
Job initialization file—ExampleA-5
Keycap symbol . . . . . . . . . . 1-5
Killing a task . . . . . . . . . . . . 4-2
LOG command . . . . . . . . . .
Log file . . . . . . . . . . . . . . . . .
LOGOFF command . . . . . . .
LOKSER file locking . . . . . .
2-1
1-2 to 1-3, 2-6
2-1, 2-10
A-3
MAKQUE command . . . . . .
Format . . . . . . . . . . . . . .
MONTST command . . . . . .
MSGINI statement . . . . . . . .
A-1 to A-3
A-1
A-11
A-8
Permanent task set up . . . .
PRINT command . . . . . . . . .
Print spooler . . . . . . . . . . . .
PRNT command . . . . . . . . .
Pseudo-terminal . . . . . . . . .
2-5
2-4
1-1
2-4
1-2
QFLOCK.SYS file . . . . . . . .
Queue file . . . . . . . . . . . . . .
Display . . . . . . . . . . . . . .
queue records . . . . . . . . . . .
A-8
1-2 to 1-3, 2-7
2-7
A-2
Remember symbol . . . . . . . 1-5
Repeating task set up . . . . . 2-5
Slash / . . . . . . . . . . . . . . . . . 1-4
Spooler . . . . . . . . . . . . . . . . 1-1
STAT display . . . . . . . . . . . . 4-3
SUBMIT command . . . . . . . 2-3, 3-1
Examples . . . . . . . . . . . . 3-4 to 3-5
Format . . . . . . . . . . . . . . 3-1
Option switches . . . . . . . 3-2 to 3-4
Symbols . . . . . . . . . . . . . . . 1-4 to 1-5
System initialization commandA-6
file
Example . . . . . . . . . . . . . A-10
Task . . . . . . . . . . . . . . . . . .
Task Manager
Introduction . . . . . . . . . .
Status display . . . . . . . . .
Theory of operation . . . .
Uses . . . . . . . . . . . . . . . .
Task Manager job . . . . . . . .
TEST.INI file . . . . . . . . . . . .
TRMDEF statement . . . . . .
Example . . . . . . . . . . . . .
DSS-10010-00, Rev. B00
1-1 to 1-2
1-1
A-5
1-1
1-3
A-9
A-6
A-7
A-7
Task Manager User’s Guide
Troubleshooting . . . . . . . . .
Control files . . . . . . . . . .
Installation . . . . . . . . . . .
Warnings . . . . . . . . . . . .
TSKINI.LIT . . . . . . . . . . . . .
TSKINI.OVR . . . . . . . . . . . .
TSKMAN.OVR . . . . . . . . . .
Page Index-4
4-1 to 4-3, A-12
4-1
A-12
4-1
A-9
A-10
A-10
Worker jobs . . . . . . . . . . . . . 1-2, A-4, A-9
DSS-10010-00, Rev. B00