Download CF1 Getting Started Guide - Persistor Instruments Inc
Transcript
®
PERSISTOR CF1
Getting Started Guide
Rev 8
© 1998-2000 Persistor Instruments Inc.- All rights reserved.
Standard Terms and Conditions of Use
Life Support and Safety Equipment:ÊPersistor Instruments Inc. (Pii) hardware, software, and
firmware products are not warranted to operate without failure or designed with components or testing
suitable for reliable use as critical components where failure to perform can reasonably be expected to
cause loss of life or significant harm to humans. Designers of diagnosis, treatment, life support, or safety
equipment systems for humans using Pii products must take prudent steps to protect against system
failures with the appropriate backup, redundant, or fault tolerant mechanisms.
Specifications:ÊProduct features and specifications are subject to change without notice and Pii
reserves the right to make any product improvements at any time. Pii is not responsible for errors or
omissions in published documents.
Limited Warranty:ÊPii warrants that its hardware products against any defects in materials and
workmanship under normal and proper use that would prevent them from meeting published performance
specifications at the time of purchase for one (1) year from the date of purchase. This warranty does not
cover depreciation or damage caused by normal wear, accident, improper use or maintenance. Persistor
Instruments Inc.warrants that its firmware and software products will perform substantially as described
in published materials accompanying its hardware products for a period of ninety (90) days from the date
of purchase.
If found defective by Pii within the terms of this warranty, the full extent of Pii's liability and your
exclusive remedy will be, solely at Pii's option, to either repair, replace, or refund the purchase price of
the product that does not meet Pii's limited warranty provided that (a) the defective product is promptly
returned to Pii for failure analysis, (b) a complete description of the failure accompanies the product, and
(c) no evidence is found of damage from accident, neglect, misuse, or improper alterations of the product.
TO THE MAXIMUM EXTENT ALLOWED BY LAW THIS EXPRESS WARRANTY IS IN LIEU OF,
AND BUYER EXPRESSLY WAIVES ALL OTHER LIABILITIES, OBLIGATIONS, GUARANTEES,
AND WARRANTIES OF ANY KIND, EXPRESS OR IMPLIED, INCLUDING WITHOUT
LIMITATION, ANY IMPLIED WARRANTY OF MERCHANTABILITY, FITNESS FOR A
PARTICULAR PURPOSE, AND ANY IMPLIED WARRANTY OF TITLE OR NONINFRINGEMENT. THIS WARRANTY GIVES YOU SPECIFIC LEGAL RIGHTS, AND YOU MAY
ALSO HAVE OTHER RIGHTS WHICH VARY FROM STATE TO STATE.
Limitation of Liability:ÊTO THE MAXIMUM EXTENT ALLOWED BY LAW, IN NO EVENT
SHALL PII OR ITS SUPPLIERS BE LIABLE FOR ANY DIRECT, INDIRECT, INCIDENTAL OR
CONSEQUENTIAL DAMAGES, INCLUDING WITHOUT LIMITATION INJURY OR DEATH,
LOST OR INADEQUATE DATA OR INFORMATION, LOST REVENUES OR PROFITS, LOST USE
OR BUSINESS INTERRUPTION, REPLACEMENT OR RENTAL COSTS ARRISING FROM THE
FAILURE OF, OR INABILITY TO USE PII PRODUCTS. IN NO EVENT SHALL PII'S LIABILITY
FOR ANY DAMAGES EXCEED THE PURCHASE PRICE OF THE PRODUCT.
ÊPersistor CF1 Getting Started Guide
2
Table of Contents
Preface
Standard Terms and Conditions of Use ................................................................................................ 2
Table Of Contents................................................................................................................................ 3
General Information
Introduction ......................................................................................................................................... 4
What’s in the Kit?................................................................................................................................ 4
Equipment Required ............................................................................................................................ 4
Warnings and Precautions.................................................................................................................... 4
Installing CodeWarrior ........................................................................................................................ 6
Installing MotoCross ........................................................................................................................... 10
Location, Location, Location ............................................................................................................... 11
Hookup and First Run.......................................................................................................................... 12
CF1 C Programming Tutorial
Your First Project ................................................................................................................................ 13
A Note About Targets.......................................................................................................................... 15
Run Your First Program ...................................................................................................................... 15
What Happened? ................................................................................................................................. 16
CF1 Hardware Subsystems .................................................................................................................. 17
Appendices
Specifications ...................................................................................................................................... 20
Block Diagram and Signal Connections............................................................................................... 21
Pin Descriptions .................................................................................................................................. 22
Power Connections .............................................................................................................................. 24
UART Connections ............................................................................................................................. 25
QSPI Connections ............................................................................................................................... 26
Counter/Timer ..................................................................................................................................... 27
PRCPDAQ Board Layout .................................................................................................................... 28
PRCPDAQ Parts Location Drawing..................................................................................................... 28
PRCPDAQ Schematic ......................................................................................................................... 29
CF1 Dimensions and PCB Pad Placement............................................................................................ 30
ÊPersistor CF1 Getting Started Guide
3
General Information
Introduction
This getting started guide describes how to setup and install the various components that make up your
Persistor CF1 Starter Kit. This printed manual stops at the point where you’ve installed the online HTML
and PDF documentation, though we’ve included some diagrams and tables that you may find handy in
working with the Persistor.
The combination of a Persistor and RecipeCard let you quickly start working on your experiment goals
without putting a lot of front-end effort into wiring up the hardware. In many cases, this will be all you
need for the initial prototype, proof-of-concept, or feasibility studies. The RecipeCards come with
complete schematics, parts lists, and design notes for when and if you decide to move portions to your
custom board.
What’s in the Kit?
Your CF1 Starter Kit should contain the following items:
1
1
1
1
1
1
3
3
1
PERCF1C
PCF8MBC
PCFADAP
PRCPDAQ
CBL10H10DB9
CBL30CG4TL
SHNTJMPS
CGPINS
MXWCF1
Persistor CF1
8MB CompactFlash Card
PCMCIA Adapter Card
PicoDAQ Analog RecipeCard
10” DB-9 Serial Adapter Cable
30” Power Cable to Tinned Leads
Shunt Jumpers
Space C-Grid Connector Pins
MotoCross for CF1 (CD-ROM)
Equipment Required
4-20VDC, 100mA power supply
PC running Win95/98/NT or Macintosh with System 7 or above with free serial port
Metrowerks CodeWarrior and MotoCross for CF1
Warnings and Precautions
We really don't want to dampen the excitement of exploring your new board, but there's some stuff you
really ought to know. Even the old-timers may find something new to worry about with this new 3.3 volt
system and its lowest power suspend mode. Just take a minute to skim this short section and save the
possible embarrassment and expense of having to admit you leaped before looking.
ÊPersistor CF1 Getting Started Guide
4
3.3V I/O: The CF1 is a 3.3 volt only system, and cannot tolerate any voltages above 3.6 volts on any of
its I/O or BUS lines, except for the RS-232 signals (RSTXD, RSRXD, RSCTS, RSRTS). Even
momentary connection to 5 volt signals will likely result in permanent damage to the board’s components.
Do not attempt to get around this by running the board at 5 volts as the RAM, and especially the flash
will suffer stress damage!
Suspend Mode: When the CF1 goes into suspend mode, all of the I/O and BUS pins (except for the
RS232, /WAKE, and /SHDN) look like very low impedance current sinks with about a 1.3-1.8 volt
forward drop. CF1 I/O or BUS lines being driven from off-board peripherals will try very hard (and
succeed) at pulling these levels low, which is probably not what you want. Any I/O lines being pulled
high to an external V+ source will be pulled down to this forward voltage drop. Both of these situations
will consume lots of current which defeats the purpose of suspend mode.
Static Sensitive CMOS: Every component on the CF1 is CMOS and susceptible to immediate damage,
or worse, premature field failures if you don't take precautions to guard against damage from static
electricity.
Develop with a current limited power supply! You can save yourself a lot of grief by running the board
from a bench supply current limited to about 100mA. Jumpers, test probes, and programming bugs make
it very easy to send the CF1 into some horrible current sucking latchup and current limiting can keep a
spurious slip from destroying your board.
Develop at low voltage! The CF1 onboard voltage regulator can handle +/-20 volt inputs, but nothing
else on the board can. Just like current limiting, developing at around 4 volts is a good way to keep a
simple slip from destroying your board.
Floating Inputs: Most of the I/O lines on the CF1 do not have onboard pull-up resistors, and most of
these are left in their default input state at reset. CMOS floating inputs draw current in somewhat
unpredictable fashion - nowhere near enough to do any damage, but enough to defeat the gains of some of
the power saving modes. You should either pull unused I/O lines to VREG or GND, or force them to be
outputs.
Don't Stick Probes in the Header Sockets: The header strips used in the RecipeCards are meant to
accept 0.025" square posts. Anything else is likely to permanently deform the connectors and cause your
system to fail or behave erratically. We did this here with a scope probe tip (0.037" diameter), and a
customer did it with a miniature DMM probe (0.044" diameter). We both spent many frustrating hours
searching for the source of bizarre problems. The deformation damage is quite visible, but only with the
help of a microscope - and no, this would not be covered under the warranty.
Backup battery is required: The CF1 depends on a separate PIC microcontroller to manage startup,
power-off watchdogs, suspend mode, and CF card changes. Even if you're not using the last three
features, you probably want the CF1 to start up when you apply power - and that's not guaranteed unless
there is voltage at the VBBK pin during power-up. If you really don't want to provide a backup cell, you
can connect separate 3 volt regulator between your main supply and VBBK.
ÊPersistor CF1 Getting Started Guide
5
Installing CodeWarrior
Your first step toward developing with the CF1 is installing Metrowerks® CodeWarrior®. This section
explains how to install CodeWarrior Release 6 for use with MotoCross® libraries and support tools for the
CF1. Follow the instructions on these four pages (mostly pictures), then perform the simpler MotoCross
installation. If you follow these installation instructions to the letter, you should be running your first
MotoCross program in less than an hour.
To use the MotoCross package, you will need:
1) Metrowerks CodeWarrior Pro - Release 6 (or later)
2) 32MB RAM, 120MB Free Disk Space, CD-ROM
3) Pentium-class processor (recommended), 80386, or 80486
4) Windows NT 4, Windows 95, or Windows 98
MotoCross requires that you install CodeWarrior using the Metrowerks CD installer with any of their
options to build MacOS-68K projects. If you have an existing installed CWPro and can compile MacOS
68K applications, you can skip this section and resume with the CF1 Getting Started Guide. If you're
using CodeWarrior solely for CF1 development, you need only select the options checked in the screen
captures below, which will require about 160MB of disk space. Keep an eye on the Space Required and
if it varies a lot from the screen snapshots, carefully review your selections. If you have trouble, it’s
perfectly safe to reinstall CodeWarrior in part or whole, and that generally will get you going.
CD Installation
Start by inserting the CodeWarrior CD. On most
PCs, you will automatically be presented with the
installation dialog. On some others, you will have
to double click on the CD icon to get things
started. Pay attention to the following note from
the Metrowerks documentation:
"The installation software on CodeWarrior
Professional can't successfully install a new
version of CodeWarrior if an older version of
CodeWarrior already exists on your computer.
To remove the old version of CodeWarrior,
launch the Uninstall CodeWarrior program.
This program is available from the Start
menu."
That done, click the Launch CodeWarrior Setup button. Then work your way through the next several
information dialogs...
ÊPersistor CF1 Getting Started Guide
6
ÊPersistor CF1 Getting Started Guide
7
Destination
You're best off just accepting the
default directory offered by the
installer. You can actually put
CodeWarrior anywhere, though all of
the other CF1 documentation and
installers will reference locations to
the standard default. The actual
location of the CodeWarrior program
files does not matter a great deal, as
you will not actually be working in
this directory. In fact, the Metrowerks
directory is a particularly bad place to
keep your own projects as they can get
inadvertently deleted when you
upgrade to the next release of
CodeWarrior. This is covered in more
detail in the getting started
documentation.
Select Components
Using the screen snapshots as a guide…
1) Setup Type
a) Click-select “4. Custom Installation”
b) Click Next>
2) Select Components
a) Check “CodeWarrior IDE”
b) Check “PPC-68K Development”
c) Click Next>
3) Select Program Folder
a) Click Next>
4) Select File Associations Option
a) Choose “Typical: Selected…”
b) Click Next>
5) Start Copying Files
a) Click Next>
b) Wait for the copy to complete
6) Register CodeWarrior
a) Fill out the registration information
b) Click Next >
7) InstallShield Wizard Complete
a) Click Finish>
ÊPersistor CF1 Getting Started Guide
8
ÊPersistor CF1 Getting Started Guide
9
Installing MotoCross
After you've installed CodeWarrior, insert the Persistor CF1 Tools CD and double-click the Setup.exe
icon to run the MotoCross Installer. If you followed the destination suggested by CodeWarrior, our
installer will just require a few clicks on the "Next" button to complete installation. Here's what it should
look like:
ÊPersistor CF1 Getting Started Guide
10
Location, Location, Location
After installing CodeWarrior and MotoCross,
you should have something that looks like
what's adjacent. CodeWarrior is very fussy
about the relative locations of its various
components, and the preconfigured MotoCross
stationery makes similar location-relative
assumptions. If things get moved around, expect
your compilations to start failing.
Fortunately, you won't be doing much inside the
CodeWarrior directory. All of your work should
be done in completely separate directories with
whatever convention you find best. For our
projects, we typically use:
C:\piisoft\CF1\
You can even have projects scattered over many
directories or drives. The main point is:
Don't put your projects in the Metrowerks
directory!
They will be lost when you install updated
versions of CodeWarrior, and this is likely to
happen a couple of times a year. Even though
MotoCross installs and lets you run example
programs in the Metrowerks directory, it knows
you can recover them by simply reinstalling
MotoCross. This is not the case for your
projects and the source files you create.
The only things that should go into the
Metrowerks directories are installations from
Metrowerks and Persistor Instruments. You
should also always assume that files in the
Metrowerks directory will get deleted during
update installations.
ÊPersistor CF1 Getting Started Guide
11
Hookup and First Run
There are several jumper pins on the RecipeCard and these come pre-configured to select default options
that let you quickly try out your new system. You’ll need to insert the CF1 into the sockets on the
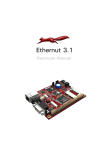
RecipeCard. This is very difficult to do incorrectly. If you have any doubts, look at the picture on the front
cover.
Insert the power and RS-232 cables into their respective headers. These are shrouded and polarized to
prevent incorrect insertion. Connect the red lead of the power cable to your supplies positive terminal and
connect the black lead to negative. The power cabling uses Molex C-Grid connectors and these are
available from DigiKey and Allied among others.
DB9F CABLE
The RS-232 cable adapts the RecipeCards 2x5 dip header to a
standard DB-9F that connects to standard PC comm port or
extension cable. The cable wires the 2x5 connector such that pin 1
of the DB9 connects to pin 1 of the 2x5, and all of the other 2x5
connections are setup such that they map correctly to a standard
DCE as shown.
RI
9
CTS 8
RTS 7
DSR 6
5
GND
9
4
DTR
7
8
3
TXD
5
6
2
RXD
3
4
DCD
1
2
1
Face Views
If you haven’t installed MotoCross yet, but already have a communications program on your PC you can
give the Persistor a quick try by setting your communications program for direct connection, 9600 baud,
no parity, 8 data bits, and 1 stop bit. Apply power to the Persistor, and you'll probably see something like
the following:
-------------------------------------------------------------Persistor CF1 - Persistor Instruments Inc. - www.persistor.com
SN 10945 - PicoDOS V2.26 - BIOS V2.26 - PBM V2.26
(C) 2000 Peripheral Issues - www.periph.com
-------------------------------------------------------------C:\>
The PicoDOS prompt is a standard DOS-like drive identifier when a flash card is installed. When there’s
no card, PicoDOS displays a warning that many functions are disable and reverts to the PicoDOS prompt.
From either prompt, you can type the VERsion command with the –Verbose option for system details as
shown:
C\>VER –V <ret>
CF1 SN 10945
PicoDOS 2.26
BIOS
2.26
PBM
2.26
PIC
1.44
Typing HELP will always give you a list of the available PicoDOS commands
ÊPersistor CF1 Getting Started Guide
12
CF1 C Programming Tutorial
So, you've gotten your Persistor out of the box hooked up and ready to go. Now it's time to find out what
the CF1 can really do. This tutorial assumes that you have followed the correct installation procedure for
both CodeWarrior and MotoCross. If CodeWarrior is not installed or MotoCross is installed improperly,
this tutorial will be of little utility.
Your First Project
To begin, launch CodeWarrior. Select File ->
New Project. A "New" window will appear
allowing you to select from a list of stationery.
You will see options for several types of
projects, but for now just choose Persistor CF1
Stationery. Type the desired name (we'll use
FirstCF1Project) in the Project Name box and
click "OK". The next "New Project" window
will ask to specify which type of CF1 project
you want, and you should expand the appropriate
CodeWarrior version (probably CWPro6) and
choose CF1.PicoDOS and click "OK".
Once the above steps are completed, you will be
presented with a CodeWarrior Project window. There
are several "groups" within the project window. These
are merely organizational tools and do not reflect any
"on disk" structure for the project. When first opened,
these groups are collapsed and you can click on their
expander controls (the boxes on the left) to view the
files in the groups. The two snapshots at right show the
same project with different expansion levels. We'll go
through the groups one by one ahead:
1) MotoCross Support - This group
contains several libraries crucial to
compiling projects for the CF1.
These files include a special version
of the C standard library and math
support library for the CF1 and a
special startup library that sets up
your C program to run in the CF1
environment. You will generally
never make changes to this group or
to the files in this group.
ÊPersistor CF1 Getting Started Guide
13
2) CF1 Support - This group contains a
pair of C files that control runtime
memory mapping and provide some
interface support between the CF1
firmware and the standard C libraries.
You will generally never make
changes to this group or to the files in
this group.
3) Docs - This group is the key to easy
development on the CF1. In this
folder are links to starting points for
all of the on-line documentation for
the CF1. Bear in mind that you will
need to have Adobe Acrobat as well
as a modern web browser like
Explorer or Netscape installed on
your machine for this to work. There
are two HTML files accessible to you
in the folder.
PersistorCF1UsersManual.htm is
the master link to the user’s manual.
You may just double click that file
directly in the window to launch your
web browser and begin viewing the
manuals. ctm.htm is a link to the
Configurable Timer Documentation.
In addition, in the Docs folder you
should see a pdf folder. This folder
contains links to most of the
hardware and part-level
documentation that we provide in
PDF format that can be read with
Adobe Acrobat.
4) Headers - This folder contains links
to the main header files used in
development for the CF1. If you need
to look up any function prototypes or
typedefs used with any of the
Persistor API functions or PicoDOS, you can find those files here. Once again, you can open the files
by simply double clicking on them.
5) Application - This is the folder where you can store all of your application source files. You will
notice that it already contains a file called cf1main.c. This is a starter file that we have provided to
help make it easier for you to begin development. It contains the all of the standard ANSI header file
includes as well as all of the device specific includes that you will need to work with the CF1.
ÊPersistor CF1 Getting Started Guide
14
Once you become familiar with CodeWarrior and CF1 development, you can begin to tailor the
organization of projects to meet the specific needs of your application. The format described above works
well for most projects, but just like the arrangement of files on your PC desktop, it's really just an
organizational convenience.
A Note About Targets
Metrowerks CodeWarrior has a special
feature that allows "multiple targets" in one
project file. This allows us, in our examples
to keep related, yet separate projects
together in one file for organizational
purposes.
To pick a particular target use the target
pull-down menu in the project window
located beneath the Files tab at the top of the
window. The left edge of the menu has a
bullseye with an arrow pointing at it.
Some multi-target projects send the
compilers object and binary data to either a
"bin" directory, or into a directory named
"<PROJECTNAME> Data". Point
MotoCross to one of these if you do not see
the binaries in the main project directory.
However, if you use our project stationery
this should not be an issue.
Your first program
The default C project stationery contains a
simple bit of code that prints out the serial
number of your CF1 as well as information
regarding the program build and the
versions of the BIOS and PicoDOS that are
burned into your Persistor's flash. You may
wish to look at the file cf1main.c before
compiling it. Once you are comfortable with
the code you see select Project -> Make. If
everything is installed correctly this should
build a binary executable that the MotoCross program can then load into your CF1.
During the build, the files and groups in your project window will update with information about the size
of the code and data required for each module as shown. These numbers reflect the worst case usage, and
the smart linker will generally reduce that by quite a bit. Map files created by CodeWarrior and
MotoCross give complete details on memory usage and mapping.
ÊPersistor CF1 Getting Started Guide
15
You can run MotoCross by double-clicking
the MotoCross.exe file at the top of your
project window's list of files. Select
MotoCross -> Post Link and Load… then
navigate to your project's bin directory and
select the file with the ".bin" extension. In a
few seconds, MotoCross will load the file
into the CF1 and leave you in its terminal
window where you'll see something like the
following.
This prompt indicates that the code was loaded into your CF1 and the G (which was automatically sent by
MotoCross) is an abbreviation for the GO command that will launch your program. At this point, if you
press Enter, your program will execute.
What Happened?
Congratulations, you have just compiled
and run your first program for your CF1.
When you chose the CF1.PicoDOS
stationery and gave it the name
FirstCF1Project, CodeWarrior created a
new folder and populated it with the project
file (FirstCF1Project.mcp), a starter C
source file (cf1main.c), a project data folder
(FirstCF1Project Data) and a bin folder to
hold compliled binary code. CodeWarrior
also automatically opened the project and
added it to the list of recent projects so you
can quickly open it again from the File
menu.
When you chose Project -> Make,
CodeWarrior checked all of the file
dependencies, compiled all of the C source
files, then linked the C code with the
libraries. If it had found any errors, it would
have displayed an error window with a list
of problems for you to fix by doubleclicking on the error message.
There were no errors, so it created the binary file (unnamed.bin) that thinks it is a Macintosh 68K
executable, along with a map file that specifies the locations of functions and global variables in a not-souseful relative offset format. Because CodeWarrior thinks in terms of creating Macintosh programs, it
also generated a few other items which you can safely ignore, including a zero length file (unnamed), and
a possibly invisible directory called Resource.frk.
ÊPersistor CF1 Getting Started Guide
16
When you ran MotoCross and post-linked unnamed.bin, MotoCross created six new files that are the real
targets for the CF1. The file with the extension RUN is a CPM68K binary file, and it's what loaded into
RAM and ran on the CF1. The APP is the same program, but targeted to load into flash memory when
you use the MotoCross ->Load CPM68K… command.
The RHX and AHX files are also applications, but in Motorola S Record (hex) format. The RMP and
AMP files contain text listing the functions and global variables, exactly as they are used on the CF1. You
can open and read these maps directly from CodeWarrior.
Beyond Standard C Libraries
As you may have read elsewhere, the CF1 supports the ANSI C Standard Library. This fact should put an
experienced C programmer well on their way to writing more meaningful and useful programs for the
CF1. However, it is unlikely that you bought the CF1 solely to write programs with the C Standard
Library. You probably want to take advantage of the CF1's I/O features, low-power operation and more of
its many specialty subsystems. The following is a blow-by-blow description of the major hardware
subsystems in the CF1.
CF1 Hardware Subsystems
The CF1 as an embedded controller is very diverse and agile. It can do almost anything. There are many
different sections of APIs for accessing each of the internal capabilities. The following is a list of the
major subsystems that you will find described in further detail in the online User's Manual.
ATA Device Drivers - The CF1 API has a suite of functions that allow you to manipulate ATA storage
devices (usually CompactFlash) from within your programs. Although most developers will never have a
need to use these in light of the standard file routine compatibility, they are nonetheless provided for your
programming convenience.
CompactFlash Low Level Drivers - The CompactFlash Low Level drivers cover programming needs
specific to CompactFlash card management and use. It is unlikely that you would ever use these but they
are provided as an additional abstraction layer between the hardware and the ATA device drivers.
Checksums and Cyclic Redundancy Check Functions - Because many CF1 applications involve the
transfer of data between the CF1 and a host computer as well as any other mating systems, there is often a
need for error checking and data integrity tests. These functions provide a built in mechanism for
performing checksum verification and cyclic redundancy checks.
Chip Select Drivers - One of the more interesting and distinguishing features of the CF1 is the ease with
which you can add memory-mapped peripherals. The functions in the API subsection provide relatively
high level mechanisms for mapping and configuring the two bus chip select lines that are available for
your use. Examples are also provided which make use of these functions for mapping in new I/O. See the
examples folder in the User's Manual for more information on this specific example.
ÊPersistor CF1 Getting Started Guide
17
Configurable Timer Module - The CF1 uses the Motorola MC68CK338 processor as its main brain. The
'338 contains several hardware submodules that are specifically tailored to the common tasks in
embedded computing. One of these submodules is the Configurable Timer Module. While it is one of the
more complex subsystems in the '338, we have attempted to provide high-level accessor function to all of
the features of the CTM6. The CTM contains both Single Action and Double Action modules that can
perform tasks such as period measurement and Pulse Width Modulation. For a more detailed description
of the CTM please see the included HTML documentation from Motorola which you will find in the same
directory as your user's manual.
Flash Memory Functions - The CF1 has 1MB of non-volatile flash memory built-in. This is used to hold
both the BIOS libraries and PicoDOS as well as other system internals. However, there is about 768K free
for non-volatile application storage or data storage if you find the need. Because flash memory has special
requirements and does not support random access unlike conventional RAM, we have developed a suite
of functions that perform the writing and erasing tasks on the flash as well as other maintenance chores
and diagnostic utilities. If you wish to develop programs that will make use of the Flash, you will need to
familiarize yourself with this section in the User's Manual.
Interrupt and Exception Vector Wrapper Functions - We recognize that many applications in
embedded computing are time sensitive or could be best serviced by a hardware or software interrupt
mechanism. These functions provide you with a simple, easy to understand method for creating your own
interrupt handlers written in C. We also provide functions that install your new interrupt handlers, written
either in C using our prototyping and definition tools or written directly in assembly language, in to the
Vector Table of the 68338.
LED Signal Functions - The CF1 has two dual color LEDs mounted near the sides of the Compact Flash
header. They can be used as simple indicators of program status, as a visual watchdog or whatever else
you can think of. This set of simple, almost self explanatory functions control the state and behavior of
these LEDs making it easy for your programs to provide the most minimal of visual feedback.
Pin I/O Drivers, Functions and Macros - These functions and macros allow you to control and
manipulate the behavior of the CF1's 33 general-purpose I/O lines. Some of the I/O pins on the CF1 have
alternate functions related to other subsystems. This section contains functions that allow you to
manipulate these alternate functions and correctly manage the use of the I/O pins on connector C on the
CF1. Furthermore, there is a set of macros that provide ultra high-speed access allowing you to perform
basic pin operations in under a microsecond with certain restrictions.
Periodic Interrupt Timer - Another hardware feature of the Motorola MC68CK338 is the Periodic
Interrupt Timer or PIT. The PIT allows the '338 to trigger an interrupt on a set period. The period can be
adjusted in increments of 100 microseconds from 100µs to 25.5ms and in increments of approximately
51ms from 51ms to around 13s. The CF1 API also proved a chore management system for the PIT
allowing you to perform more than one chore, written in standard C with no special considerations (other
than speed), on each interrupt and to shield the programmer from the necessity of writing low-level
interrupt handlers.
PicoDOS Library Functions - Providing that PicoDOS is resident in flash in your particular application,
which is normally the case, you can access most of the core functionality of PicoDOS from within your
applications. Also provided is a subsystem called CMD processor which provides a deep and valuable
framework for setting up a command line interface to your program. The CMD Processor allows your
ÊPersistor CF1 Getting Started Guide
18
program to accept commands from a user interactively over the serial port, parse their arguments and
dispatch the appropriate function. This can be a huge time saver if you want your program to be
interactive.
Power Management Drivers - One of the more crucial features of the CF1 is its low power consumption
with non-executing power-down modes as low as 5 µA, The CF1 really is a low-power panacea for the
embedded system designer. This driver section gives you access to all the different power modes and
power conservation functions the CF1 has to offer. There are many ways to reduce power in an embedded
system. In this API section we have attempted to provide an intuitive management scheme for these many
and diverse options.
Queued PicoBUS - Another Persistor Exclusive. The Motorola QSPI bus is a powerful way to add
peripherals such as A/D converters and various other sensors to an embedded system. Until now there
hasn’t been an intuitive, managed, yet performance oriented software layer to control and manage this
bus, but PicoBUS has solved this problem. The QPB API allows you to configure and manage your SPI
devices. Furthermore, our internal library of device configurations is growing all the time. We may
already have done some of the groundwork for the device you want to use.
Real Time Clock Drivers - The 68338 has an onboard Real Time Clock (RTC) that has its own precision
crystal and its own power lines to allow ultra-reliable operation and persistence through low power
shutdowns and hardware reset cycles. This suite of API functions gives you access to setting and reading
this clock. It also provides its own periodic interrupt much in the same way as the PIT but it is fixed at 1
second intervals. Furthermore, it is worth noting that all of the ANSI C time-related functions are linked
in at a low level to the RTC, so it is more than possible that you will never need to use these driver
functions.
Serial Controller Interface Driver - The serial controller interface (SCI) is the main line of
communication with the outside world during development. It consists of a low-level driver for the
onboard UART and line drivers. Once again all of the ANSI C stdio functions are built on top of this
driver but if power conservation is your game you may need to use some of these low-level calls to
configure the UART in a specific way to help meet your design needs. We have attempted to cover all of
the bases in this driver, from normal operation to the lowest power modes.
System Clock and Wait State Management - One of the easiest ways to conserve power in an
embedded controller is to turn down the speed. Power consumption in a processor varies almost linearly
with speed, and we provide functions for you to adjust the system clock anywhere from 160KHz to
16MHz and beyond. Right there you can reduce your power consumption by an order of magnitude.
Furthermore, these functions provide a great level of control regarding the wait states and access speeds
of the various bus peripherals. If you are interested in measuring and characterizing the performance of
your CF1, you may wish to see our example program called Hurry Up and Wait. This program provides
a great example of how to change the system clock and the number of wait states used with each
peripheral.
Utility Functions - Lastly, there are functions that don't seem to fit anywhere else. These functions
include a hexdump function that can be extremely useful during development and other useful, but
difficult to classify functions.
ÊPersistor CF1 Getting Started Guide
19
Specifications
Absolute Maximum Ratings
VBAT to GND............................................................................................ ±20V
VREG and VBAT to GND ......................................................................... ±20V
Digital Signals to GND ..................................................... -0.3V to VREG+0.3V
Operation Temperature............................................................. -25°C to +75°C
Storage Temperature................................................................ -40°C to +85°C
Humidity:........................................................................... 0 to 95% (non-cond)
Physical Specifications
PARAMETER
Weight
with CF Card
Length
Width
with CF Card
Thickness
SI
63.5
35.5
51.0
14.5
mm
mm
mm
mm
2.180"
US
.340
< 1oz
< 1.2 oz
2.5 in
1.4 in
2.0 in
0.57 in
.270"
.535"
.185"
.050"
2.500"
1.750"
.050"
.550"
.050"
.090"
1.250"
1.400"
Electrical Characteristics
PARAMETER
VBAT Operating Voltage
CONDITIONS
-25°
-25°
-25°
-25°
-25°
C to +75°
C to +30°
C to +75°
C to +30°
C to +75°
C at 40mA
C at 75mA
C at 75mA
C at 250mA
C at 250mA
VREG Operating Voltage
VREG Operating Current
VBBK Operating Voltage
VBBK Operating Current
System Clock
PLL Crystal
RTC Crystal
MIN
3.6
3.6
3.6
5.0
5.0
3.1
16MHz Constant CF Write
16MHz (CF Idle)
8 MHz (CF Idle)
4 MHz (CF Idle)
320kHz (CF Idle)
LPSTOP (CF Idle)
LPSTOP (no CF)
Suspend
2.7
Backup/Suspend
VREG > VBBK
±100ppm
±50ppm
ÊPersistor CF1 Getting Started Guide
0.160
39.996
32.766
TY P
3.3
100
55
32
20
4
300
240
6
3.0
2.8
0.1
40.000
32.768
MAX
UNITS
20
20
12.8
8.4
6.0
3.6
125
70
40
25
10
500
400
20
VREG
20
1
16
40.004
32.770
V
V
V
V
V
V
mA
mA
mA
mA
mA
µA
µA
µA
V
µA
µA
MHz
kHz
kHz
20
Block Diagram and Signal Connections
ÊPersistor CF1 Getting Started Guide
21
Pin Descriptions
Type
A
The CF1 interfaces to your circuitry using three standard
double-row 0.1" headers. Many CF1 based systems will only
need to access the signals on the 2x25 pin "C" connector,
which brings out pins on both sides of the board (OEM
versions may specify pins on only one side or the other).The
2x10 "A" and "B" connectors bring out the address and data
bus along with control signals for system expansion.
Description
Output only signals that are always driven.
Ao
Type A that can operate in open drain mode.
Aw
Type A output with weak pull-up during reset.
Three state output that includes circuitry to pull up output before
high impedance is established to ensure rapid rise time.
Type B that can operate in open drain mode.
B
Bo
...Pxx
Has onboard pull-up resistor of value xx.
...PxxG Has onboard pull-down resistor of value xx.
RS-232 (EIA) level input.
RS-232 (EIA) level output.
3
4
1
2
34 33
11 12
CLKOUT
ADDR17
ADDR15
ADDR13
ADDR11
ADDR9
ADDR7
ADDR5
ADDR3
ADDR1
19 20
17 18
15 16
13 14
11 12
9
10
7
8
5
6
3
4
1
2
12 11
6
13 14
B
O
T
T
O
M
14 13
5
17 18
22 21
8
19 20
15 16
26 25
10
7
36 35
ADDR18
ADDR16
ADDR14
ADDR12
ADDR10
ADDR8
ADDR6
ADDR4
ADDR2
ADDR19
6
4
2
7
5
3
1
9
8
10
16 15
18 17
20 19
24 23
28 27
30 29
32 31
40 39
42 41
44 43
46 45
48 47
50 49
/DS
GND
PASS
/RES
VREG
VLIN
VBAT
PCS2
PCS3
PCS1
PCS0
CTD9
CTD8
CTD5
CTD4
S18A
CTD29
CTD27
CTD26
/IRQ5
/IRQ2
RXD
/RXD
RTS
CTS
Pin type designations are taken from the MC68CK338 Technical
Summary, and where appropriate, suffixed with the value of
onboard pullup resistors or special notes.
9
CLKIN
/CS10
DATA14
DATA12
DATA10
DATA8
DATA6
DATA4
DATA2
DATA0
38 37
R/W
/CS8
DATA15
DATA13
DATA11
DATA9
DATA7
DATA5
DATA3
DATA1
BERR
/BKPT
FRZ
DSI
DSO
/SH
VBK
SCK
MOSI
MISO
D10
CTD7
CTD6
S14B
S14A
S18B
D28
CTM
/WK
/IRQ7
MDK
TXD
/TXD
/RTS
/CTS
The first ten pins of connector "C" form a standard BDM
(Background Debugger Mode) connector block at the top of the
CF1, and these are identified by a solid white silk-screen. In
addition, every fifth pin of connector "C" is marked with white to
help quickly identify the proper pin.
...RSI
...RSO
Static Sensitive CMOS! All of the CF1 pins connect to static sensitive CMOS circuitry. You must take
precautions to guard against damage to these parts from static electricity.
A
Signal
Desc.
Dir. Function
Type
A
Signal
Desc.
Dir. Function
1
ADDR1
Address Bus 1
Out
BUS
A
2
ADDR19
Address Bus 19
Out
BUS
A
3
ADDR3
Address Bus 3
Out
BUS
A
4
ADDR2
Address Bus 2
Out
BUS
A
5
ADDR5
Address Bus 5
Out
BUS
A
6
ADDR4
Address Bus 4
Out
BUS
A
7
ADDR7
Address Bus 7
Out
BUS
A
8
ADDR6
Address Bus 6
Out
BUS
A
8
ADDR9
Address Bus 9
Out
BUS
A
10
ADDR8
Address Bus 8
Out
BUS
A
11
ADDR11
Address Bus 11
Out
BUS
A
12
ADDR10
Address Bus 10
Out
BUS
A
13
ADDR13
Address Bus 13
Out
BUS
A
14
ADDR12
Address Bus 12
Out
BUS
A
15
ADDR15
Address Bus 15
Out
BUS
A
16
ADDR14
Address Bus 14
Out
BUS
A
17
ADDR17
Address Bus 17
Out
BUS
A
18
ADDR16
Address Bus 16
Out
BUS
A
19
CLKOUT
System CLock Output
Out
CLK
A
20
ADDR18
Address Bus 18
Out
BUS
A
B
Signal
Desc.
Dir. Function
Type
B
Signal
Desc.
Dir. Function
Type
1
DATA1
Data Bus 1
I/O
AwP1M
2
DATA0
Data Bus 0
I/O
BUS
AwP1M
AwP1M
BUS
Type
3
DATA3
Data Bus 3
I/O
BUS
AwP1M
4
DATA2
Data Bus 2
I/O
BUS
5
DATA5
Data Bus 5
I/ O
BUS
AwP1M
6
DATA4
Data Bus 4
I/O
BUS
Aw*1
7
DATA7
Data Bus 7
I/O
BUS
AwP1M
8
DATA6
Data Bus 6
I/O
BUS
AwP1M
8
DATA9
Data Bus 9
I/O
BUS
AwP1M
10
DATA8
Data Bus 8
I/O
BU S
AwP1M
11
DATA11
Data Bus 11
I/O
BUS
AwP1M
12
DATA10
Data Bus 10
I/O
BU S
AwP1M
13
DATA13
Data Bus 13
I/O
BUS
AwP1M
14
DATA12
Data Bus 12
I/O
BU S
AwP1M
15
DATA15
Data Bus 15
I/O
BUS
BP10K
16
DATA14
Data Bus 14
I/O
BU S
AwP1M
17
/CS8
Chip Select 8
Out
BUS
A
18
/CS10
Chip Select 10
Out
BUS
A
19
R/W
Read/Write
Out
BUS
AP10K
20
CLKIN
40kHz Clock Input
In
CLK
*2
ÊPersistor CF1 Getting Started Guide
22
C
Signal
1
/DS
Desc.
Dir. Function
Data Strobe
Out
BDM/BUS
Pwr
BDM/PWR
3
GND
Ground
5
PASS
Pass Through (not used)
7
/RESET
9
VREG
3.3V Power to Circuitry
11
VLIN
3.3V Regulator Ouput
Reset
Type
C
Signal
Desc.
Dir. Function
Type
B*8
2
BERR
Bus Error
Out
BDM/BUS
BP10K
P10K
-
4
/BKPT
Breakpoint
In
BD M
*10
6
FREEZE
Freeze
Out
BDM
A
BoP820
8
DSI
BDM Input
IN
BDM
A
BDM Output
Out
BDM
A
Shutdown
Out
PWR
*3
I/O
BDM/BUS
In
BDM/PWR
10
DSO
Out
PWR
12
/SHDN
13
VBAT
Main Battery Input
In
PWR
14
VBBK
Backup Battery Input
In
PW R
15
PCS2
SPI Chip Select 2
I/ O
QSPI/GPIO
Bo*9
16
SCK
SPI Clock
I/O
QSPI/GPIO
17
PCS3
SPI Chip Select 3
I/ O
QSPI/GPIO
Bo*9
18
MOSI
SPI Data Out
I/O
QSPI/GPIO
Bo*9
19
PCS1
SPI Chip Select 1
I/ O
QSPI/GPIO
Bo*9
20
MISO
SPI Data In
I/O
QSPI/GPIO
BoP1M
Bo*9
21
PCS0
SPI Chip Select 0
I/ O
QSPI/GPIO
Bo*9
22
CTD10
Double Action Timer
I/O
TMR/GPIO
Ao
23
CTD9
Double Action Timer
I/ O
TMR/GPIO
Ao
24
CTD7
Double Action Timer
I/O
TMR/GPIO
Ao
25
CTD8
Double Action Timer
I/ O
TMR/GPIO
Ao
26
CTD6
Double Action Timer
I/O
TMR/GPIO
Ao
27
CTD5
Double Action Timer
I/ O
TMR/GPIO
Ao
28
CTS14B
Single Action Timer
I/O
TMR/GPIO
A
29
CTD4
Double Action Timer
I/ O
TMR/GPIO
Ao
30
CTS14A
Single Action Timer
I/O
TMR/GPIO
A
31
CTS18A
Single Action Timer
I/ O
TMR/GPIO
A
32
CTS18B
Single Action Timer
I/O
TMR/GPIO
A
33
CTD29
Double Action Timer
I/ O
TMR/GPIO
Ao
34
CTD28
Double Action Timer
I/O
TMR/GPIO
Ao
35
CTD27
Double Action Timer
I/ O
TMR/GPIO
Ao
36
CTM31L
External Timer Load
In
TMR/GPIO
AP1M
37
CTD26
Double Action Timer
I/ O
TMR/GPIO
Ao
38
/WAKE
External Wakeup
In
PW R
*4
39
/IRQ5
Interrupt Request 5
I/ O
IRQ/GPIO
B10K*5
40
/IRQ7
Interrupt Request 7
I/O
IRQ/GPIO
B10K*5
41
/IRQ2
Interrupt Request 2
I/ O
IRQ/GPIO
B10K*5
42
MODCLK
Alternate Clock Source
I/O
CLK/GPIO
B10K*6
43
RSRXD
RS232 Receive (EIA)
In
UART
RSIP5KG
44
RSTXD
RS232 Transmit (EIA)
Out
UART
RSO
In
UART
*7
46
/TXD
RS232 Transmit (CMOS)
Out
UART
Bo
48
/RTS
RS232 RTS (CMOS)
Out
UART
AP1M
In
UART
B*7
45 IRQ4/RXD IRQ/RS232 Rx (CMOS)
47
RSRTS
RS232 RTS (EIA)
Out
UART
RSO
49
RSCTS
RS232 CTS (EIA)
In
UART
RSIP5KG
50 IRQ3/CTS IRQ/CTS (CMOS)
*1. DATA4 is pulled low with 10K during reset.
*2. CLKIN is connected to the 68338 EXTAL input for the 40kHz crystal. It is an extremely high impedance input and care
must be taken not to make unintentional connection to this pin, which would likely cause erratic behavior. Contact the factory
for information on using CLKIN with an external precision clock source.
*3. /SHDN is an output signal controlled by the power management circuitry. Your peripheral circuitry can monitor this signal,
but only with inputs having less than 100nA leakage and less than 100pF capacitance. When low, all of the CF1 circuitry is
powered off. Do not attempt to assert or load this line.
*4. /WAKE is input to the power management circuitry and is pull high with 1M to the internal VBAK volage. External
circuitry (coordinated with CF1 driver software) may use this line to pull the CF1 out of suspend mode.
*5. These lines must be left floating, or asserted high at reset.
*6. This line must be floating or asserted high at reset for normal operation. It may be pulled low during reset to disable the
onboard PLL clock oscillator and insert an external clock. Contact the factory for application notes.
*7. /RXD and /CTS are inputs to the 68338, but are normally driven by the RS232 driver chip. You can disable the RS232
driver under software control to allow the CF1 to run the UART at CMOS levels.
*8. DS comes out of reset as an active driving bus output, but is not used by the CF1 except when connected to a BDM
debugger. When your program gets control, you can define this line as a BUS signal (for decoding), an input signal (though
you must not drive into it until you redefine it), or an output signal. The convenient location and the fact that it is less useful as
a general purpose control line (since it flails at reset) makes this an ideal pin for diagnostics and timing or profiling your
functions with a scope using the fast I/O macros.
*9. All of the QSPI (PicoBUS) signals revert to inputs at reset which means they may assume any state, and that could be
trouble for attached SPI devices which could interpret reset flailing as commands, which in turn could have the SPI device do
something the CF1 would not like. You should add 10K to 100K pullups to the /CS lines of your SPI devices to prevent
trouble.
*10. The PASS pin does not connect to any circuitry on the CF1 and may be used to pass a signal from a top mounted
expansion board to another bottom mounted board.
ÊPersistor CF1 Getting Started Guide
23
Power Connections
The CF1 has very flexible power management support circuitry
to simplify integration with your electronics. The onboard 3.3
volt linear regulator with reverse battery protection and thermal
current limiting that "floats" on the CF1 board to allow you to
bypass, augment, or reassign it to other circuitry. Normally,
you simply wire your positive supply to the VBAT input, then
jumper VLIN (the regulator output) to VREG.
An onboard power supervisor ensures that the CF1 will receive
an orderly reset and that the memory and real-time clock will
be preserved in the event of a power disruption.
A separate power managing controller lets the CF1 drop into a
SUSPEND mode where the system draws less than 10
microamps. It can wake and resume after a programmed delay
or on detection of /WAKE signal or CompactFlash card change
event.
C
Signal Dir.
3
GND
In
13
VBAT
In
11
VLIN
Out
9
VREG
In
-
VCF
-
14
VBBK
In
-
VBAK
-
7
/RESET
I/O
12
/SHDN
Out
28
/WAKE
In
C11
C13
+
C12
+
C38
+
C14
+
VLIN
VBAT
1uF
LT1521
3.3V
10uF
/SHDN
/SHDN
.01uF
/WAKE
VBBK
Power
Manager
VBAK
3V
C9
C7
VREG
/RESET
VREG
/RESET
VCF
22uF 10Ω
C3
GND
22uF
GND
Description
This is the negative return for all of the CF1 power signals and digital ground for all of the CF1 logic.
This is the unregulated DC input voltage to the onboard LT1521 linear regulator. The LT1521 will allow the
CF1 to work with inputs from 3.6 to 20 volts and provides reverse power protection to -20 volts. This input
connects to a 1uF tantalum filter capacitor. Leave this input unconnected if you are not using the onboard
regulator.
This is the regulated 3.3 volts from the onboard LT1521 linear regulator. The LT1521 has a rated output of
300mA maximum, but the actual continuous current will vary with temperature and input voltage. Refer to
the specifications on page 2 for operating limits. The regulated output does not connect directly to any
onboard components and is normally wired to VREG with an offboard connection to power the CF1
electronics. This output connects to a 10uF tantalum filter capacitor.
This is the regulated 3.3 volts to the CF1 electronics. It is normally wired to VLIN, but may be driven by any
3.3 volt supply. VREG connects to an onboard 22uF tantalum filter capacitor. It also connects to the
MAX795 power supervisor which resets the CPU and switches over to VBBK when the input drops below 3
volts (2.85 to 3.00).
This onboard only power signal feeds the CompactFlash header through a 10 ohm current limiting resistor
to VREG. It has its own 22uF tantalum filter capacitor.
This is the 3 volt backup battery supply input. It feeds into the MAX795 power supervisor and runs the realtime clock and 256KB SRAM when the main voltage drops below 3 volts.
This onboard only power signal comes from the MAX795 power supervisor and feeds the RTC and SRAM
from VREG when main power is normal, and from VBBK when the main voltage drops below 3 volts.
This open-drain bidirectional signal resets the CF1 electronics. This is pulled to VREG with an 820 ohm
resistor. Both the MAX795 power supervisor and the PIC power manager can assert this signal.
This is an output signal controlled by the power management circuitry. Your peripheral circuitry can monitor
this signal, but only with inputs having less than 100nA leakage and less than 100pF capacitance. When
low, all of the CF1 circuitry is powered off. Do not attempt to assert or load this line.
This is the input to the power management circuitry and is pulled high with 330K to the internal VBAK
voltage. External circuitry (coordinated with CF1 driver software) may use this line to pull the CF1 out of
suspend mode.
ÊPersistor CF1 Getting Started Guide
24
UART Connections
The 68338 has a Serial Controller Interface
(SCI) that provides standard UART functions
at rates from 64 to 500 kbaud with advanced
error detection circuitry. The SCI supports
full or half duplex operation, double
buffering, optional parity generation and
detection, and wakeup on idle line or address
detection.
GND
C3
68CK338
MAX3222
/OFF
C44
RSTXD
CTIO4
1M
PQS7/TXD
PF4/IRQ4
C43
RSRXD
RXD
VREG
1M
Optional
5
2
3
8
Optional
7
The CF1 has an onboard MAX3222 dual EIA
DB
9F
driver to interface directly to any standard
to
PC
RS-232 terminal or device. Either or both the
receive and transmit drivers can be disabled
under software control to conserve power or
allow connection to alternate RS-485 or RS-422 drivers.
C47
C49
C46
C45
C48
C50
RSRTS
CTIO2
RSCTS
PF3/IRQ3
CTIO5
/EN
/TXD
CF1
/RXD
/RTS
/CTS
BIOS UART Support: The CF1 BIOS software handles port configuration, polled or buffered
receive and transmit, and flow control with several dozen high-level C functions. One of the example
projects that ships on the CF1 Developer's CD demonstrates how to stream incoming RS-232 data to a file
on the CompactFlash card at any standard BAUD rate while automatically dropping to less than 2mA
whenever the serial line idles. This particular example is 180 lines of C code, over 100 of which are just
comments and formatting.
RS-232 Wakeup Call: Both the RXD and CTS signals connect to interrupt
request pins on the 68338 to allow wakeup from deep sleep modes from any
UART activity. However, in the 10µA SUSPEND mode, power to the CPU is
completely off so we add the simple circuit at right to yank on the /WAKE line
when a UART character comes in. It may seem odd to tie the emitter of the NPN
transistor to VREG, but VREG actually looks like GROUND when the CF1 is in
SUSPEND, and this circuit keeps the WAKE line from flailing during normal operation.
100K
C43 RSRXD
C38 /WAKE
1M
*DIP14 pinout
14
MAX3100
6
/SHDN /IRQ
1.8432 MHz
DOUT
9
DIN
/CS
8
11
10
0.1uF
X1
X2
SCLK
/RTS
TX
/CTS
RX
GND
7
ÊPersistor CF1 Getting Started Guide
5
2
C20 MISO
1
C18 MOSI
4
C15 /PCS2
3
13
12
C9
VREG
C9
VREG
C41 /IRQ2
VCC
2nd UART borrowing spare drivers: All of the
CMOS level UART signals are brought out to allow driver
replacement, and the RTS and CTS signals can be used for
EIA level flow control or reassigned to work as RXD and
TXD signals for a second external UART such as a
MAX3100 SPI UART shown. In the next section, you'll
see that this same technique can be used to expand to up to
14 additional UARTs.
CF1
2N
3904
C16 SCK
4.7K
C48 /RTS
C50 /CTS
CF1
TX
RSRTS C47
RSCTS C49
RX
GND
C3
25
QSPI Connections
ÊPersistor CF1 Getting Started Guide
2
3
4
5
6
7
8
9
11
12
13
2
3
4
5
12
13
14
15
7
15
14
13
12
11
10
9
7
15
14
13
12
11
10
9
RF+
A0
Vcc
A1
/CS
A2
A3
A4
A5
A6
A7
A8
A9
A10
RF-
T
L
V
2
5
4
3
Va
Vb
Vc
Vd
Ve
Vf
Vg
EOC
OUT
IN
CLK
GND
/CLR
REF
Dout
Din
/CS
CLK
Vh
GND
D0
Vdd
D1
D2
D3
D4
D5
D6
D7
D0
D1
D2
D3
D4
D5
D6
D7
C
D
P
6
8
H
C
6
8
P
1
15
MAX3100
SPI UART
C
F
/PCS2 1
VREG
C17 /PCS3
C15
19
C19 /PCS1
C21 /PCS0
Vcc
L
T
C
1
6
6
0
20
ID0
ID1
/CE
MISO
MOSI
SCK
Vss
Vdd
C ID0
D
P ID1
6
8 /CE
H MISO
C
6 MOSI
8
P SCK
1 Vss
16
C20 MISO
17
C18 MOSI
18
C16 SCK
10
C3
16
16
11
11
6
10
6
10
9
9
7
7
8
8
1
1
16
16
1
1
2
2
6
6
3
3
4
4
5
5
8
8
16
16
1
1
2
2
6
6
3
3
4
4
5
5
8
8
GND
Va
Vcc
/CLR
REF
Dout
Din
/CS
CLK
L
T
C
1
6
6
0
Vb
Vc
Vd
Ve
Vf
Vg
GND
Vh
Vdd
D0
ID0
ID1
/CE
MISO
MOSI
SCK
Vss
C
D
P
6
8
H
C
6
8
P
1
D1
D2
D3
D4
D5
D6
D7
Vdd
D0
ID0
D1
C
D
ID1
P
/CE 6
8
MISO H
C
MOSI
6
8
SCK
P
Vss 1
D2
D3
D4
D5
D6
D7
2
3
4
5
12
13
14
15
7
15
14
13
12
11
10
9
7
15
14
13
12
11
10
9
µPower 10-bit Octal DAC
1
8-Bit Digital I/O Port
11 Channel, 12-Bit A/D
14
8-Bit Digital I/O Port
Allegro MicroSystems
American Microsystems
Analog Devices
Atmel
Burr-Brown
Catalyst
Dallas Semiconductor
Exar
Exel Microelectronics
Fujitsu Microelectronics
Harris Semiconductor
Linear Technology
Maxim
Micrel Semiconductor
Microchip Technology
Micro Linear
Motorola
National Semiconductor
Ramtron
Signal Processing Tech.
SGS-Thomson
Siemens
Sipex
Texas Instruments
Xicor
µPower 10-bit Octal DAC
Devices
8-Bit Digital I/O Port
SPI
A-D
A-D 8/10
b
A-D 12/14 it
1
D-A 6+ b bit
it
D-A 8/10
b
1
D-A 2/14 it
Ana 16+ b bit
it
l
EEP og MU
RO
X
M
Dri
ve
RTC r
PLL
MIS
C
The table below lists some of the manufacturers of SPI
compatible devices and their product offerings. This is by no
means complete, but it does give you an idea of the
expansion possibilities just working the serial bus.
C9
8-Bit Digital I/O Port
The 68338 has a powerful Queued Serial Peripheral
Interface that allows simple hardware expansion to over five
hundreds different SPI compatible devices. The circuit at
right demonstrates glueless expansion adding a second
UART (from the previous section) 11 A-D channels with 12bit resolution, 16 voltage output 10-bit D-A channels, and 32
individually programmable bidirectional digital I/O pins.
26
Counter/Timer
C36
The Counter Timer Module is actually a collection of separate
timer modules with specialized capabilities. Most of these are
independent single-action or double-action counter/timers that
connect to a bidirectional I/O pin on the CF1. The remaining
modules cooperate to provide the four timebases used by the
CTMs to perform their work.
C31
C32
C37
C35
A Single Clock Prescaler Submodule (CPSM) feeds one FreeRunning Counter Submodule (FCSM) and three Modulus
Counter Submodules (MCSM) with six individually selectable
clocks derived from the CPU system clock. The FCSM and
MCSM modules drive the four timebases from one of these
clocks or from an external clock. The FCSM has a fixed modulus
of 65536, while the MCSMs have loadable modulus registers
and load inputs for greater flexibility.
C34
C33
C28
Input Capture: Capture the timebase on either edge of the I/O
pin and optionally generate an interrupt.
Output Port: Set or clear the I/O pin.
CTS18A
CTS18B
CTD26
CTD27
CTD28
CTD29
C
F
1
C30
Single Action Submodules: The CTM has eight
SASMs, six connect to I/O pins from the CF1, while the other
two are used internally by the CF1 for simple I/O. Each SASM
can perform one of the following functions:
CTM31L
C29
C27
C26
C24
C25
C23
C22
CTS14A
CTS14B
CTD4
CTD5
CTD6
CTD7
CTD8
CTD9
CTD10
MC68CK338 - CTM
Single
Action
24A
Single
Action
24B
Single
Action
18A
Single
Action
18B
Double
Action
26
Double
Action
27
Double
Action
28
Double
Action
29
LOAD
Modulus
Counter
31
Modulus
Counter
30
LOAD
Time Base Bus 1 (A)
Time Base Bus 2 (B)
External Clock (1&2)
External Clock (3&4)
Single
Action
12A
Single
Action
12B
Single
Action
14B
Single
Action
14B
Double
Action
4
Double
Action
5
Double
Action
6
Double
Action
7
Double
Action
8
Double
Action
9
Double
Action
10
Modulus
Counter
LOAD
FreeRunning
Counter
2
3
Clock
Prescaler
Time Base Bus 4 (A)
Time Base Bus 3 (B)
Output Compare: Set or clear the I/O pin on a timebase match
and optionally generate an interrupt.
Output Compare and Toggle: Toggle the I/O pin on a timebase match and optionally interrupt.
Double Action Submodules: The CTM has eleven DASMs which all connect to I/O pins from
the CF1. In addition to the functions listed for the SASMs, each DASM can perform one of the following
functions:
Input Pulse Width Measurement: Measure the time between leading and falling edges of the I/O pin
and optionally generate an interrupt on completion.
Input Period Measurement: Measure the time between two successive leading or falling edges of the
I/O pin and optionally generate an interrupt on completion.
Output Pulse Width Modulation: Generate a pulse width modulated waveform with selectable
resolutions of 7, 9, 11, 12, 13, 14, 15, or 16 bits.
ÊPersistor CF1 Getting Started Guide
27
1
ÊVREG
to
CONN.ÊÊ
1
ÊVREG
to
VLINÊÊ
1
ÊCR2032Ê
1
1
ÊIRQ5Ê
ÊPBMÊÊ
ÊRESETÊ
ÊWAKEÊÊ
1
ÊPersistor CF1 Getting Started Guide
28
A
B
C
D
R S -232
P C F3 3 8
1
50
48
/CTS CTS
/RTS RTS
49
47
/TXD/RXD
45
RX
43
42
MCLKIRQ2
41
40
IRQ7 IRQ5
39
46
44
TX
RSCTS
RSCTS
RSTXD
RSTXD
RSRTS
RSRTS
RSRXD
RSRXD
38
WAKE D26
37
36
D27
35
34
D28
D29
33
P BM
/IRQ5
2
R1
1
32
31
RI
1
2
JP1
9
CTS 8
2
PB1
/WAKE
S18B S18A
3
4
5
RTS 7
1
DSR 6
L ED
D1
5
GND
9
4
DTR
7
8
3
TXD
5
6
2
RXD
3
4
1
DCD
1
2
7
8
9
10
HDR1
2
Face Views
A TT N
2
1
1
2
A - D C O N V E RT E R
PB2
3
/RESET
SSTRB
A NA LO G
CJ1
3
30
28
S14A D4
S14B D5
29
AGND
D6
D8
25
24
D7
D9
23
2
C3 4.7uF CJ2
2 1
2 1
CC
2 1
27
26
MISO
D10 PCS0
21
20
MISO PCS1
19
MOSI
MISO
4
/PCS3
SCK
MOSI
18
MOSI PCS3
17
2
C1
/PCS3
SCK
16
SCK PCS2
15
14
VBBK VBAT
13
VBAT
12
SHDNVLIN
11
VLIN
10
DSO VREG
2
C2
1
1uF
1
1
COM
11 VREF
12 RADJ
C4 0.047uF AGND 13
AGND
14 DGND
SSTRB
22
6
DTR/DSR
220Ω
M31L
2
1
DB9F CABLE
2
1
15 DOUT
16 STRB
17 DIN
18 /CS
/SHDN
M
A
X
1
4
6
19 SCLK
IC1
20 VDD
1
2
3
PAD1
VREF
10
COM
9
COM
CH7
8
AD7
CH6
7
AD6
CH5
6
AD5
CH4
5
AD4
CH3
4
AD3
CH2
3
AD2
CH1
2
AD1
CHO
1
VANA
3
4
5
6
7
8
9
10
AD0
11
12
VANA
13
14 AGND
4
0.1uF
HDR2
VBAT
R2
VLIN
VBBK
100Ω
2
BAT1
JP2
8
6
4
2
6
DSI /RES
FRZ PASS
9
7
3
BERR /DS
1
1
/RESET
100uF
2 1 VREG
5
GND
BKPT
VREG
L I T HUM
B A CK U P
H O LD E R
1
C5 1uF
1 2 GND
1
2 VREGX
2
1
JP3
C6
GND
VBAT
3
GND
4
HDR3
Persistor Instruments Inc. p e r s i s t o r . c o m
North Falmouth, MA USA
508-563-7192
HDR4
Project
Title
Page
Title
Drawn
j hg
By
File
¶EJ9805PRC-PLG.A5.Sch
P e rs i s to r R ec i p e C ar d P RC - PL G
PicoLog Prototype Card
A
5
P O WE R
2
+
5
B
ÊPersistor CF1 Getting Started Guide
C
Orig.
Date
Doc.
No.
98/05/28
Rev
A4
Page
1
of
6
1
Last.
M o d . 7/20/98
Size
D
29
CF1 Dimensions and PCB Pad Placement
2.180"
.340
.270"
.535"
2.500"
1.850"
.050"
0.650"
0.050"
50
2.500"
0.050"
1
TOP VIEW
.050"
.550"
1.750"
.050"
.090"
1.250"
1.400"
2
1
2.000"
1.400"
0.050"
0.400"
0.050"
.185"
0.407"
1.685"
1
3
5
7
9
11
13
15
17
19
21
23
25
27
29
31
33
35
37
39
41
43
45
47
49
20
20
0.407"
C
2
4
6
8
10
12
14
16
18
20
22
24
26
28
30
32
34
36
38
40
42
44
46
48
50
CompactFlash Card
1
3
5
7
9
11
13
15
17
19
0.570"
0.535"
0.225"
0.185"
NOTE:
All pins are 0.025" (0.64mm) gold-plated, phosphorbronze square posts, all centered on a 0.100" grid.
BOTTOM VIEW
BOTTOM
VIEW
20
18
16
14
12
10
8
6
4
2
C
1
3
5
7
9
11
13
15
17
19
21
23
25
27
29
31
33
35
37
39
41
43
45
47
49
ADDR18
ADDR16
ADDR14
ADDR12
ADDR10
ADDR8
ADDR6
ADDR4
ADDR2
ADDR19
A
19
17
15
13
11
9
7
5
3
1
2
4
6
8
10
12
14
16
18
20
22
24
26
28
30
32
34
36
38
40
42
44
46
48
50
CLKOUT
ADDR17
ADDR15
ADDR13
ADDR11
ADDR9
ADDR7
ADDR5
ADDR3
ADDR1
BERR
/BKPT
FRZ
DSI
DSO
/SH
VBK
SCK
MOSI
MISO
D10
CTD7
CTD6
S14B
S14A
S18B
D28
CTM
/WK
/IRQ7
MDK
TXD
/TXD
/RTS
/CTS
CLKIN
/CS10
DATA14
DATA12
DATA10
DATA8
DATA6
DATA4
DATA2
DATA0
20
18
16
14
12
10
8
6
4
2
2
4
6
8
10
12
14
16
18
20
ADDRESS BUS
B
19
17
15
13
11
9
7
5
3
1
1
3
5
7
9
11
13
15
17
19
TOP
VIEW
DATA BUS
CompactFlash Card
R/W
/CS8
DATA15
DATA13
DATA11
DATA9
DATA7
DATA5
DATA3
DATA1
2
4
6
8
10
12
14
16
18
20
RS-232
Counter/Timer/DIO
QSPI
POWER
/DS
GND
PASS
/RES
VREG
VLIN
VBAT
PCS2
PCS3
PCS1
PCS0
CTD9
CTD8
CTD5
CTD4
S18A
CTD29
CTD27
CTD26
/IRQ5
/IRQ2
RXD
/RXD
RTS
CTS
ÊPersistor CF1 Getting Started Guide
30


