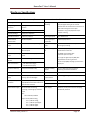
1
NeuroPort®
Bio-potential Signal Processing System
User’s Manual
(Revision 4.00)
391 Chipeta Way, Suite G
Salt Lake City, UT 84108
866-806-3692
www.blackrockmicro.com
[email protected]
Caution: Federal law (USA) restricts this device to sale, by or on the order of a licensed physician.
NeuroPort® User’s Manual
Table of Contents
TABLE OF CONTENTS.............................................................................................................................................. 1
TABLE OF FIGURES ................................................................................................................................................. 3
SYMBOLS OF CONTRAINDICATIONS, WARNINGS, CAUTIONS................................................................................. 5
CONTRAINDICATIONS ......................................................................................................................................................5
WARNINGS ...................................................................................................................................................................5
CAUTIONS.....................................................................................................................................................................5
SPECIFICATIONS ..................................................................................................................................................... 6
INTRODUCTION ..................................................................................................................................................... 9
SYSTEM DESCRIPTION .....................................................................................................................................................9
SYSTEM REQUIREMENTS ..................................................................................................................................................9
SYSTEM SCHEMATIC ........................................................................................................................................................ 9
PACKING CONTENTS ....................................................................................................................................................... 9
HARDWARE ......................................................................................................................................................... 10
FRONT-END AMPLIFIER (FEA) ........................................................................................................................................10
FRONT-END AMPLIFIER POWER SUPPLY (APS) ..................................................................................................................10
NEURAL SIGNAL PROCESSOR (NSP) .................................................................................................................................11
CONNECTORS, CABLES, ETC. ...........................................................................................................................................12
Headstage Requirements ....................................................................................................................................12
ICS Connectors ....................................................................................................................................................12
Front-End Amplifier Input ...................................................................................................................................13
Cables ..................................................................................................................................................................14
Neural Signal Simulator (NSS) .............................................................................................................................15
1 Gbps Ethernet Card ..........................................................................................................................................15
SETUP .................................................................................................................................................................. 16
HARDWARE SETUP ....................................................................................................................................................... 16
SOFTWARE SETUP ........................................................................................................................................................ 16
DATA ACQUISITION SOFTWARE ........................................................................................................................... 18
NEUROPORT® CENTRAL SUITE ........................................................................................................................................18
Installation ..........................................................................................................................................................18
Sorting Algorithms ..............................................................................................................................................18
Sampling Rates ...................................................................................................................................................18
CENTRAL ....................................................................................................................................................................19
HARDWARE CONFIGURATION .........................................................................................................................................21
Front-End Amplifier Inputs ..................................................................................................................................22
Analog Input........................................................................................................................................................22
Analog Output.....................................................................................................................................................23
Digital In ..............................................................................................................................................................23
Digital Out ...........................................................................................................................................................24
Serial I/O .............................................................................................................................................................25
Revision 4.00 / LB-0175
Page 1
NeuroPort® User’s Manual
Audio ...................................................................................................................................................................25
Global Settings ....................................................................................................................................................25
Filters ..................................................................................................................................................................26
Auto Thresholding ...............................................................................................................................................27
Spike Sorting .......................................................................................................................................................27
Adaptive Filtering ................................................................................................................................................29
N-TRODE GROUPS ....................................................................................................................................................... 29
SPIKE PANEL................................................................................................................................................................29
RASTER PLOT...............................................................................................................................................................30
SINGLE NEURAL CHANNEL..............................................................................................................................................31
ANALYSIS SOFTWARE .......................................................................................................................................... 34
ACTIVITY MAP .............................................................................................................................................................34
FILE STORAGE ..............................................................................................................................................................34
SIGNAL TO NOISE RATIO ................................................................................................................................................36
NEURAL MODULATION..................................................................................................................................................36
IMPEDANCE TESTER ......................................................................................................................................................36
CROSSTALK .................................................................................................................................................................37
N-TRODE....................................................................................................................................................................38
OTHER UTILITIES .................................................................................................................................................. 40
CENTRAL PLAY .............................................................................................................................................................40
CENTRAL SIM ..............................................................................................................................................................40
N-PLAY SERVER ............................................................................................................... ERROR! BOOKMARK NOT DEFINED.
HARDWARE SPECIFICATIONS ............................................................................................................................... 41
WARRANTY .......................................................................................................................................................... 42
RETURN MERCHANDISE AUTHORIZATION (RMA) ................................................................................................ 42
TROUBLESHOOTING............................................................................................................................................. 43
EXTRANEOUS NOISE .....................................................................................................................................................43
WINDOWS COMPATIBILITY ISSUES ...................................................................................................................................43
NO POWER TO NEUROPORT® SYSTEM .............................................................................................................................43
LOST PACKETS ERROR NOTIFICATION ...............................................................................................................................44
NO NEURAL ACTIVITY ON ALL CHANNELS ..........................................................................................................................44
Revision 4.00 / LB-0175
Page 2
NeuroPort® User’s Manual
Table of Figures
FIGURE 1 - SYSTEM OVERVIEW..............................................................................................................................................9
FIGURE 2 - FRONT-END AMPLIFIER ......................................................................................................................................10
FIGURE 3 - FRONT-END AMPLIFIER POWER SUPPLY ................................................................................................................10
FIGURE 4 - NSP FRONT .....................................................................................................................................................11
FIGURE 5 - NSP BACK ....................................................................................................................................................... 11
FIGURE 6 - DIGITAL IN PIN DIAGRAM ...................................................................................................................................11
FIGURE 7 - SERIAL I/O PIN DIAGRAM ...................................................................................................................................12
FIGURE 8 - HEADSTAGE ASSEMBLY AND CONNECTIONS ............................................................................................................13
FIGURE 9 - FRONT-END AMPLIFIER INPUT SCHEMATIC .............................................................................................................14
FIGURE 10 - FIBER-OPTIC CABLE ..........................................................................................................................................14
FIGURE 11 - CROSSOVER CABLE ..........................................................................................................................................14
FIGURE 12 - AMPLIFIER POWER SUPPLY CABLE ......................................................................................................................15
FIGURE 13 - NEURAL SIGNAL SIMULATOR .............................................................................................................................15
FIGURE 14 – 1-GBPS ETHERNET CARD .................................................................................................................................15
FIGURE 15 - NETWORK CONNECTIONS WINDOW ...................................................................................................................16
FIGURE 16 - LOCAL AREA CONNECTIONS PROPERTIES ..............................................................................................................17
FIGURE 17 - IPV4 PROPERTIES ............................................................................................................................................17
FIGURE 18 - CENTRAL MAIN APPLICATION ............................................................................................................................19
FIGURE 19 - THRESHOLDING WINDOW .................................................................................................................................20
FIGURE 20 - CENTRAL OPTIONS...........................................................................................................................................20
FIGURE 21 - HARDWARE CONFIGURATION ............................................................................................................................21
FIGURE 22 - FRONT-END INPUT PROPERTIES .........................................................................................................................22
FIGURE 23 - ANALOG INPUT PROPERTIES ..............................................................................................................................23
FIGURE 24 - ANALOG OUTPUT PROPERTIES ...........................................................................................................................23
FIGURE 25 - DIGITAL INPUT PROPERTIES ...............................................................................................................................24
FIGURE 26 - DIGITAL OUTPUT PROPERTIES ............................................................................................................................24
FIGURE 27 - SERIAL I/O PROPERTIES ....................................................................................................................................25
FIGURE 28 - AUDIO PROPERTIES..........................................................................................................................................25
FIGURE 29 - GLOBAL SETTINGS ...........................................................................................................................................26
FIGURE 30 - FILTER PROPERTIES ..........................................................................................................................................26
FIGURE 31 - AUTO THRESHOLDING PROPERTIES .....................................................................................................................27
FIGURE 32 – HISTOGRAM PEAK COUNT SPIKE SORTING PROPERTIES ..........................................................................................28
FIGURE 33 – MANUAL PCA SPIKE SORTING PROPERTIES .........................................................................................................28
FIGURE 34 - ADAPTIVE FILTERING ........................................................................................................................................29
FIGURE 35 - N-TRODE PROPERTIES ......................................................................................................................................29
FIGURE 36 - SPIKE PANEL...................................................................................................................................................30
FIGURE 37 - SPIKE PANEL...................................................................................................................................................31
FIGURE 38 - SINGLE NEURAL CHANNEL .................................................................................................................................32
FIGURE 39 - ACTIVITY MONITOR .........................................................................................................................................34
FIGURE 40 - FILE STORAGE .................................................................................................................................................35
FIGURE 41 - FILE STORAGE OPTIONS ....................................................................................................................................35
FIGURE 42 - SIGNAL TO NOISE RATIO ...................................................................................................................................36
FIGURE 43 - NEURAL MODULATION .....................................................................................................................................36
FIGURE 44 - AUTO IMPEDANCE ...........................................................................................................................................37
Revision 4.00 / LB-0175
Page 3
NeuroPort® User’s Manual
FIGURE 45 - CROSSTALK ....................................................................................................................................................38
FIGURE 46 - N-TRODE UTILITY ............................................................................................................................................38
Revision 4.00 / LB-0175
Page 4
NeuroPort® User’s Manual
Symbols of Contraindications, Warnings, Cautions
IEC60101-0102
Danger of
Electrostatic
Discharge (ESD)
IEC60417-5019
Protective earth
(ground)
IEC60417-5036
Dangerous
voltage
IEC60417-5021
Equipotentiality
Connector
IEC606417-5335
Type of CF
Applied Part
IEC60417-5007
ON (power)
IEC60417-5008
OFF (power)
IEC60417-5010
ON/OFF (push/push)
CSA 60950-1-03
UL 60950-1
Class 1 Laser
Product
EN-980
Serial Number
EN-980
Manufactured date
EN-980
EC Representative
EN-980
Manufacturer
EN-980
Combined
Manufacturer /
Manufacturing Date
EN-980
Warning
EN-980
Read the
documentation
EN-980
Batch
N
M
Y
g
|
|
f
P
M YEAR
i
Contraindications
The NeuroPort® System is a recording system and should not be used in applications involving stimulation.
Warnings
•
•
•
•
•
•
•
Only connect NeuroPort® System components to properly tested, grounded and dedicated AC outlets to
reduce the risk of electrical shock. Do not use an adapter for ungrounded wall outlets.
Do not connect the NeuroPort® System to an outlet controlled by a wall switch.
Do not use the NeuroPort® System in the presence of flammable anesthetic agents.
Avoid strong static discharges from sources like televisions or computer monitors because it can damage the
electrical components of the system.
Keep the NeuroPort® System away from liquids. Contact with water, shower spray, or wet surfaces can lead
to the patient receiving an electrical shock.
Connection of external instruments may compromise electrical safety compliance with IEC 60601-1.
The NeuroPort® System should be disconnected from any electrodes during cardiac defibrillation.
Cautions
•
•
•
Federal law (USA) restricts this device to sale, by or on the order of a physician.
Follow the restrictions of use for third party electrodes or arrays.
Third party recording systems connecting to the NeuroPort® System and components must be electrically
isolated for patient safety.
Revision 4.00 / LB-0175
Page 5
NeuroPort® User’s Manual
Specifications
Model Name
NeuroPort® Bio-potential Signal Processing System
Power Requirements
120/240 VAC 60 Hz, 8.0 Amps maximum load, UPS backup power available
for up to 5 minutes.
Serviceable Fuses
5 x 20mm, 250V, 1.6A, Slow Blow
Compliance Standards
IEC 60601-1, IEC 60601-1-2, IEC 60601-2-26, CSA listed
Type of Protection
Class I (Amplifier Power Supply)
Degree of Protection
Type CF Applied Part (Amplifier and Patient Cable Assembly)
Mode of Operation
Continuous
Water Ingress Protection
Ordinary Equipment, not fluid resistant, IP20
Operating Environment
10˚C to 40˚C, 5 to 95% R.H. (non-condensing)
Storage Environment
-20˚C to 50˚C, 5 to 100% R.H. (non-condensing)
Revision 4.00 / LB-0175
Page 6
NeuroPort® User’s Manual
Table 204 – Guidance and manufacturer’s declaration – electromagnetic immunity – for all EQUIPMENT and
SYSTEMS that are not LIFE-SUPPORTING (refer to 60601-1-2).
Guidance and manufacturer’s declaration electromagnetic immunity
—
The NeuroPort® System is intended for use in the electromagnetic environment specified below. The customer or the user of the
NeuroPort® system should assure that it is used in such an environment.
Immunity test
IEC 60601 test
level
Compliance
level
Electromagnetic environment — guidance
Portable and mobile RF communications equipment
should be used no closer to any part of the
NeuroPort® system, including cables, than the
recommended separation distance calculated from the
equation applicable to the frequency of the transmitter.
Recommended separation distance
Conducted RF
3 Vrms
IEC61000-4-6
150 kHz to 80 MHz
Radiated RF
3 V/m
IEC 61000-4-3
80 MHz to 2,5 GHz
3V
3 V/m
d = 1.2 P 150 kHz to 80 MHz
d = 1.2 P 80 MHz to 800 MHz
d = 2.3 P 800 MHz to 2.5 GHz
where P is the maximum output power rating of the
transmitter in watts (W) according to the transmitter
manufacturer and d is the recommended separation
distance in meters (m).
Field strengths from fixed RF transmitters, as detera
mined by an electromagnetic site survey should be
less than the compliance level in each frequency
b
range .
Interference may occur in the vicinity of equipment
marked with the following symbol:
NOTE 1 At 80 MHz and 800 MHz, the higher frequency range applies.
NOTE 2 These guidelines may not apply in all situations. Electromagnetic propagation is affected by absorption and
reflection from structures, objects and people.
a
b
Field strengths from fixed transmitters, such as base stations for radio (cellular/cordless) telephones and land
mobile radios, amateur radio, AM and FM radio broadcast and TV broadcast cannot be predicted theoretically with
accuracy. To assess the electromagnetic environment due to fixed RF transmitters, an electromagnetic site survey
should be considered. If the measured field strength in the location in which the NeuroPort® system is used
exceeds the applicable RF compliance level above, the NeuroPort® system should be observed to verify normal
operation. If abnormal performance is observed, additional measures may be necessary, such as reorienting or
relocating the NeuroPort® system.
Over the frequency range 150 kHz to 80 MHz, field strengths should be less than 3V/m.
Revision 4.00 / LB-0175
Page 7
NeuroPort® User’s Manual
Table 206 – Recommended separation distances between portable and mobile RF communications equipment
and the EQUIPMENT or SYSTEM - for EQUIPMENT or SYSTEMS that are not LIFE-SUPPORTING (refer to
60601-1-2).
Recommended separation distances between portable and mobile RF communications equipment and
the NeuroPort® system
The NeuroPort® system is intended for use in an electromagnetic environment in which radiated RF disturbances
are controlled. The customer or the user of the NeuroPort® system can help prevent electromagnetic interference
by maintaining a minimum distance between portable and mobile RF communications equipment (transmitters)
and the NeuroPort® system as recommended below, according to the maximum output power of the
communications equipment.
Separation distance according to frequency of transmitter m
Rated maximum
output power of
transmitter W
150 kHz to 80 MHz
0,01
0.12
0.12
0.23
0,1
0.38
0.38
0.73
1
1.2
1.2
2.3
10
3.8
3.8
7.3
100
12
12
23
d =[
3,5
] P
V1
80 MHz to 800 MHz
d =[
3,5
] P
E1
800 MHz to 2,5 GHz
d =[
7
] P
E1
For transmitters rated at a maximum output power not listed above, the recommended separation distance d in
metres (m) can be estimated using the equation applicable to the frequency of the transmitter, where P is the
maximum output power rating of the transmitter in watts (W) according to the transmitter manufacturer.
NOTE 1 At 80 MHz and 800 MHz, the separation distance for the higher frequency range applies.
NOTE 2 These guidelines may not apply in all situations. Electromagnetic propagation is affected by absorption
and reflection from structures, objects and people.
Revision 4.00 / LB-0175
Page 8
NeuroPort® User’s Manual
Introduction
The Blackrock NeuroPort® Bio-potential Signal Processing System supports recording, processing and displaying
bio-potential signals from supplied electrodes. Bio-potential signals may include Electrocorticography (ECoG),
electroencephalography (EEG), electromyography (EMG), electrocardiography (ECG), electrooculography (EOC)
and evoked potentials (EP).
System Description
The NeuroPort® System is designed to record and process neural signals from up to 256 surface or penetrating
electrodes (using two synchronized NSPs) in addition to analog and digital experimental events. The system is
capable of performing several online processing of neural signals, including noise cancellation, adjustable digital
filters, simultaneous extraction of spike and field potentials, and manual and automatic online spike sorting.
System Requirements
•
•
•
•
•
Microsoft Windows XP or Microsoft Windows 7 Professional Edition
AMD or Intel 2.0 GHz Dual-core CPU or faster
2 GB of RAM
1x free 64-bit PCI slot
Minimum of 500 GB 3 Gbit/s SATA II HDD
System schematic
Experiment Operation Area
Neural Electrodes with less
than 1Megohm Impedance
HighImpedance
Neural
Electrodes
Optional 1X
Follower
Headstages
Neural Signal Simulator
for System Testing
OR
Front End
Amplifier
Fiber Optic Isolation
Experiment Subject Area
Analog
and Digital
Experiment
Signals
System Operator
Neural
Signal
Processor
Cerebus Interface
Software running
on User's PC
Front End
Power Supply
Optional
Ethernet
Switch
Neural
Data
Files
Cerebus
Software on
Other PCs
Figure 1 - System Overview
Packing Contents
•
•
•
•
•
•
•
•
Neural Signal Processor (NSP) and Rubber Feet
Rack Mounting (2) Ears and Screws (4)
Front-End Amplifier (FEA) & Power Supply (APS)
Neural Signal Simulator (NSS)
Power Supply
Power Cables and Connectors
1-Gbps Network Interface Card & Crossover Ethernet Cable
NeuroPort® User’s Manual & Software Disk
Revision 4.00 / LB-0175
Page 9
NeuroPort® User’s Manual
Hardware
Front-End Amplifier (FEA)
The amplifier receives signals directly from the electrodes through a headstage or the patient cable. The sampled
signal (up to 30 kHz) is amplified, analog filtered (1st-order high-pass at 0.3 Hz and 3rd-order low-pass at 7,500 Hz)
and digitized (16-bits at 250 nV resolution) and then is transmitted to the NSP via a fiber optic link. The analog filter
allows for the low-frequency field potentials as well as the higher frequency spike signals to be recorded. A later
stage digital filtering will allow these two signals to be separated.
Figure 2 - Front-End Amplifier
The FEA ground is not connected to the ground pin of the AC connector. There are ESD shunt circuits that will
conduct differences of 1000 V or more. The amplifier is isolated and floating.
Front-End Amplifier Power Supply (APS)
The power supply consists of five analog and digital supply channels with monitoring, sequencing, and emergency
shutdown control. In the event of an error in voltage or power delivery, the power supply will shut down and a red
error LED will turn on. After checking all amplifier and patient cable connections for any inadvertent shorting turn
off the power supply and turn it back on to reset the error.
Figure 3 - Front-End Amplifier Power Supply
Revision 4.00 / LB-0175
Page 10
NeuroPort® User’s Manual
The On/Off switch is located on the back of the unit. Once it is switched on, the power supply will start a power-up
sequence of analog and digital supplies ending with the green ON LED illuminating. When the power switch is
turned off this sequence is reversed and the output of the amplifier will be tied to ground.
Neural Signal Processor (NSP)
The NSP performs final processing and on-line analysis of the neural signals and then transmits this data to the
connected host PC via an Ethernet link.
Figure 4 - NSP Front
Figure 5 - NSP Back
1)
2)
3)
4)
Power switch: It is used to turn the NSP on and off. The LED above the switch will illuminate when the unit is on.
LCD Display: It displays the current operating status of the unit. The statuses include, “Initializing”, “NSP Startup”,
“NSP Running”, and “Synchronized”.
Analog Inputs: Analog experiment information can be recorded through 16 analog input BNC ports. The analog source
may range from ±5.0 V and should come from a source impedance of less than 100 Ω. The coupling of each input
channel can be manually selected in the software. By default, channels 1 to 8 are AC-coupled and channels 9-16 are
DC-coupled.
Digital Input: Digital signals may be recorded using the 16-bit DB37 input port. The pin diagram is shown below. DS is
the digital strobe pin. D0-15 are data pins. EOP is reserved. SYNC is an output pin and can be used with external
equipment to indicate when the port is scanned.
Figure 6 - Digital In Pin Diagram
5)
Serial I/O: The port is an RS232 DB9 digital input/output port. The pin diagram is shown below. Currently, the
software only supports this port as an input. Pin 2 is “Receive Data”, pin 3 is “Transmit Data”, and pin 5 is “Ground”.
Revision 4.00 / LB-0175
Page 11
NeuroPort® User’s Manual
Figure 7 - Serial I/O Pin Diagram
6)
Analog Outputs: Four ±5.0 V analog output BNC connectors can be used to send monitoring signals or stimulus
waveforms to other connectors.
7) Audio Output: The system sends a ±1 V line-level audio signal of the selected data channel to two BNC ports and one
3.5mm female stereo audio connector.
8) Digital Outputs: Four single-bit digital BNC outputs can be programmed for monitoring or timing functions.
9) Sync Port: A synchronization pulse can be set as an optional line to inform equipment when the NSP neural signal
inputs and front panel ports are scanned. It is active on the rising edge of the signal.
10) Fiber-optic Link: This port connects to the FEA using a fiber-optic cable. An LED to the right of the connector turns
green when a link is established and turns red when the link is broken.
11) Synchronization Port: This DB9 port is located in the back of the NSP and it is used in the synchronization of two
NSPs. The synchronization occurs automatically at startup if the sync cable (Blackrock Part# 5584) is properly
connected between two NSPs. Some models may not have this port. To upgrade your system to add synchronization
capability, please contact Blackrock Microsystems support.
Connectors, Cables, etc.
Headstage Requirements
The high input impedance and low bias current of the front-end inputs make it possible to connect microelectrodes
with 1-MΩ or lower impedance values directly to the Front-End Amplifier inputs without the need for a headstage.
This configuration has the advantage of avoiding noise added to the signals by the headstage, but it makes the
application more susceptible to environmental and power line noise. To minimize environmental noise, it is
preferable to keep direct electrode connections shorter than 20 cm (8 inches). For longer connections, HSF-32
headstage units from Blackrock Microsystems are recommended. These units allow microelectrodes with
impedances up to 5-MΩ, and cables up to 1 meter (3.5 feet) in length.
ICS Connectors
The HSF-32 is built to work with Samtec (www.samtec.com) connectors and it is designed to mate with the ICS
family of array holders from Blackrock Microsystems. If you are using an ICS array holder without a headstage, you
will need to use a HBA-32 headstage bypass adaptor in place. To use the ICS-96, you will need a group of three
CHA-32 adapters that are mounted together with a shared reference. To select Ref 1 or Ref 2 on the ICS-96, you
will need to place a reference jumper on the CHA-32 board connected to Bank A or Bank C.
The connector board has up to four Samtec FTSH 36-pin connectors; pins 1-32 are the electrodes, pin 33 is the
reference, pins 34 and 35 is ground, and pin 36 is bus. It is connected to either 1X headstage followers (HSF-32) or
Headstage bypass adapter boards (HBA-32) and then connected to the inputs of the amplifier with Samtec ribbon
cables; J1 to A, J2 to B, etc.
Revision 4.00 / LB-0175
Page 12
NeuroPort® User’s Manual
Figure 8 - Headstage Assembly and Connections
Front-End Amplifier Input
The FEA has four 34-pin banks. Each bank consists of 32 channels, a reference electrode pin, and a ground pin. The
electrodes within each bank are differentially amplified with respect to the reference electrode input of the same
bank. If all electrode channels on all banks are to be electrically measured with respect to a common reference
electrode this reference electrode needs to be connected to the reference input on every bank.
Revision 4.00 / LB-0175
Page 13
NeuroPort® User’s Manual
Figure 9 - Front-End Amplifier Input Schematic
Additionally, four 6-pins power supply banks provide power (±5V) to the headstage and are capable of delivering 130
mA of combined current to the FEA. The ground pins on every connector are internally connected to the grounding
post on the back of the unit. For best results, the FEA should be the central grounding point for electrical ground
connections to the research subject.
Cables
Included with the system is a power cable for the NSP (not shown), a power cable for the APS (not shown), a fiberoptic link that connects the FEA to the NSP, a crossover Ethernet cable that connects the NSP to the host PC, and a
cable that connects the APS to the FEA.
Figure 10 - Fiber-optic Cable
Figure 11 - Crossover Cable
Revision 4.00 / LB-0175
Page 14
NeuroPort® User’s Manual
Figure 12 - Amplifier Power Supply Cable
Neural Signal Simulator (NSS)
The NSS supplies simulated field potentials and action potential activities. It can be used to test the system in lieu of
a connected patient. The NSS is powered by four AA batteries that can be accessed by removing the back screws
and the back plate. The black pin is NSS Ground.
Figure 13 - Neural Signal Simulator
1 Gbps Ethernet Card
The supplied Ethernet Card is to be installed in a 64-bit PCI slot of the Host PC. It will connect to the NSP via the
supplied Ethernet cable.
Figure 14 – 1-Gbps Ethernet Card
Revision 4.00 / LB-0175
Page 15
NeuroPort® User’s Manual
Setup
Hardware Setup
The supplied 1-Gbps PCI Ethernet card needs to be installed in a 64-bit PCI slot of the host PC and a crossover
Ethernet cable (included) is needed to directly connect the host PC to the NSP. The host PC and the NSP can also be
connected through a 1-Gbps Business Class Ethernet switch (not a router or a hub), in which case a regular Ethernet
cable is needed.
Software Setup
1)
2)
3)
4)
5)
6)
7)
8)
Once installed, the card needs to be configured to connect to the NSP.
(Windows XP) Go to Control Panel->Network Setup.
(Windows 7) Click on Start and search for “View Network Connections”.
Right click on the correct Ethernet Adaptor (usually, Local Area Connection) and click on Properties.
Uncheck all services except for Internet Protocol (TCP/IP) or Internet Protocol Version 4 (TCP/IPv4).
Click on Internet Protocol (TCP/IP) and click on Properties
For IP Address enter 192.168.137.1, for Subnet Mask enter 255.255.255.0 and leave the rest blank.
Click on OK to save changes.
Figure 15 - Network Connections Window
Revision 4.00 / LB-0175
Page 16
NeuroPort® User’s Manual
Figure 16 - Local Area Connections Properties
Figure 17 - IPv4 Properties
Note: Up to 16 PCs can be connected to the same NSP using a 1-Gbps network switch. For other PCs connected
using a network switch, IP addresses should increment, such as 192.168.137.2, 192.168.137.3, etc.
Note: For reference, the NSP’s IP address is 192.168.137.128.
Revision 4.00 / LB-0175
Page 17
NeuroPort® User’s Manual
Data Acquisition Software
NeuroPort® Central Suite
Installation
To install the software suite, run NeuroPort® Central Suite.msi from the supplied CD and follow the instructions.
The NeuroPort® Central Suite consists of several applications that perform various functions. To run these apps first
run the Central shortcut via the Start Menu.
Sorting Algorithms
The program can sort detected action potentials using three different methods.
o
o
o
o
Hoops: This is a manual method. A time-amplitude algorithm, which involves manually placing hoops, where the
detected spike waveform must go through.
Manual PCA: This is a manual method. The system calculates the first three principle components on a representative
sample group then projects each new waveform into the same 3D PCA space. The user draws an ellipsoid around each
cluster to sort the group.
Histogram Peak Count: This is an automatic method. An automatic sorting algorithm is described in Spike Sorting
on page 27.
Sampling Rates
The NSP is capable of sampling data at a rate of up to 30 kS/s. The recorded signal is band-pass analog filtered by
the amplifier at cut-off frequencies of 0.3 Hz and 7.5 kHz. Additionally, depending on the configuration, the signal
is digitally filtered as described below:
o
0.3 Hz—150 Hz @ 1kS/s
Samples data at a rate of 1,000 samples per second, and digitally low-pass filters it at a
cutoff frequency of 150 Hz. This option is typically used for recording of continuous low
frequency EEG/ECG/EOG/ERG/LFP waveforms.
o
0.3 Hz—250 Hz @ 1 kS/s
Samples data at a rate of 1,000 samples per second, and digitally low-pass filters it at a
cutoff frequency of 250 Hz.
o
10 Hz—250 Hz @ 1 kS/s
Samples data at a rate of 1,000 samples per second, and digitally band-pass filters it at
cutoff frequencies of 10 Hz and 150 Hz. This option is typically used for recording of
continuous EMG/EEG waveforms.
o
0.3 Hz—500 Hz @ 2 kS/s
Samples data at a rate of 2,000 samples per second, and digitally low-pass filters it at a
cutoff frequency of 500 Hz.
o
0.3 Hz—2.5 kHz @ 10 kS/s
Samples data at a rate of 1,000 samples per second, and digitally low-pass filters it at a
cutoff frequency of 2.5 kHz.
o
0.3 Hz—7.5 kHz @ 30 kS/s
Samples data at a rate of 30,000 samples per second. This configuration does not digitally
filter the signal. This option is typically used for recording wide-band raw data.
o
250 Hz—7.5 kHz @ 30 kS/s
Samples data at a rate of 30,000 samples per second, and digitally high-pass filters it at
cutoff frequencies of 250 Hz. This option is typically used for recording high-frequency
action potential data.
Revision 4.00 / LB-0175
Page 18
NeuroPort® User’s Manual
Central
This is the main control app. To run Central, click on Start, navigate to the Blackrock Microsystems folder, and click
on the Central shortcut. This app has shortcuts to all the other apps in the suite. Clicking on each icon will open the
corresponding app. Clicking Reset will reset the timestamps on the NSP and sets it back to zero.
Figure 18 - Central Main Application
The File menu contains functions to load & save various configuration files as well as the option to close
applications, and shut down the NSP hardware.
•
o
o
o
o
o
o
o
o
o
Load System Settings: Load previously saved channel settings.
Load Sorting Rules: Load previously saved system calculated sorting rules.
Load PCA Basis: Load previously saved system calculated PCA basis vectors.
Save System Settings: Saves the channel settings made in Hardware Configuration.
Save Sorting Rules: Saves spike sorting details.
Save PCA Basis: Saves PCA basis vectors.
Close Applications: Closes Central and all associated applications. It leaves the NSP running.
Hardware Standby and Close: It causes the system to stop gathering data. File storage can be stopped prior to NSP
going into “Standby” mode. The NSP must be in “Standby” mode to update the firmware.
Hardware Shutdown and Close: Closes Central and all its associated applications and stops the NSP. Manually turn off
the NSP power switch.
The Tools menu contains functions regarding thresholding, spike sorting and general application settings.
•
o
Thresholding: Set the manual threshold level for all channels by a RMS multiplier or by a fixed voltage value.
Revision 4.00 / LB-0175
Page 19
NeuroPort® User’s Manual
Figure 19 - Thresholding Window
o
o
o
Options: See below.
Lock Unit Statistics: The statistics used for the automatic spike sorting algorithm are adaptive over time. Selecting this
disables the adaptive part of the algorithm.
Rebuild Spike Sorting Model: This option restarts the automatic spike sorting function.
Options: Set to various general options for the Central app.
•
Figure 20 - Central Options
o
o
o
o
o
o
o
Allows multiple instances of various applications.
Do Not Log Sort Changes: Will not automatically log sort changes.
Log Sorting Changes on ‘Record’: Will automatically log the spike sorting model, the signal to noise ratio summary,
and the crosstalk summary if gets rebuilt during a recording session.
Log Sorting Changes “Always”: Will log the spike sorting model, the signal to noise ratio summary, and the crosstalk
summary any time it gets rebuilt.
Log PCA coordinates on “Record”: Will log the spike sorting model only when recording is started.
Enable Autoload: If this option is checked, upon opening Central a pre-determined CCF file will be opened and the
settings will be loaded. If the field is left blank, Central will allow the operator to select a CCF file.
Prompt before load: Will prompt the user before loading the CCF file.
The Windows menu: Will have information on the system and the software as well as shortcuts to the various
apps.
•
o
o
About: This option displays the version of the software and the firmware of the NSP. These version numbers may be
needed if you contact technical support.
System Summary: Will open the System Summary window.
Revision 4.00 / LB-0175
Page 20
NeuroPort® User’s Manual
Hardware Configuration
To access this app click on Hardware Configuration on the Central app. This app is for setting up channels and
various other parameters. It also allows the user to define the sampling frequency, filtering parameters, and many
other features for each individual channel. Further, the user can set other global and spike sorting variables too.
Figure 21 - Hardware Configuration
•
By default, only one instance of Hardware Configuration can be opened. To open multiple instances enable
this feature in Central under Tools Options.
•
All of the NSP inputs and outputs can be grouped by function or by their location on the NSP. Signal Types
are grouped by function. NSP Channels are grouped based on their physical location on the NSP.
•
The NSP Channels consist of Front-End Amplifier Inputs, Analog Inputs, Analog Outputs, Digital Inputs,
Digital Outputs, Serial I/O, and Audio outputs.
•
The Hardware Configuration window contains a toolbar with buttons in the upper left corner to change the
view of the window. The buttons (from left to right) are Icon View, List View, Detail View, and Full Row
Details. Each entry represents a probe, or channel, on the array and the neural signal being received.
•
To configure any of these channels, select the channel type on the left side of the window. Each individual
channel is displayed on the right side of the window for the channel type that was selected. You can configure
the channels individually, by groups of channels, or select all channels. To configure an individual channel,
double click the channel to display the channel properties. To configure a group of channels, hold down the
<Shift> or <Ctrl> and click on channels. Once the group of channels to configure has been selected, click the
Channel Properties icon located at the top right side of the toolbar.
Revision 4.00 / LB-0175
Page 21
NeuroPort® User’s Manual
Front-End Amplifier Inputs
This window will allow the user to set different properties of a specific channel or a group of selected front-end
amplifier channels.
Figure 22 - Front-End Input Properties
o
o
o
o
o
o
o
o
o
o
o
o
Label: A user-defined name for the specific channel. When configuring a group of channels you can label them on a
global basis by clicking the Edit button.
Digital and Analog Range: Fixed values for informational purposes.
External Gain: Set the gain to match the headstage gain value.
Amplitude Rejection*: Rejects any waveform that falls outside a user-defined amplitude.
Spike Extraction: When enabled (default), the system will display the spike-triggered events.
Sorting Algorithm: Sets the sorting algorithm for a channel as described in Sorting Algorithms
on page 18.
Continuous Acquisition: By enabling this option, the NSP records continuous waveforms by selecting a bandwidth.
The appropriate sampling rate for the continuous waveforms is automatically selected with the corresponding
bandwidth.
Continuous Acquisition Bandwidth – Sample Rate: Sets the sampling rate for a channel as described in Sampling Rates
on page 18.
Line Noise Cancellation: This enables the line noise cancellation (LNC) filter. With the LNC filter enabled, you can set
the time constant in the drop down menu to adapt to the 50 or 60 Hz line noise. A time constant of 10s is the default
and recommended setting. However, you may set the time constant from 1s to 60s, instantaneous or to hold.
Reference Electrode: In addition to the hardware reference, this selection allows you to specify a software reference
electrode. The software reference can be applied to either the raw data stream which affects both LFP and spike data, or
it can be applied to only the spike data stream.
* The artifact rejection algorithm works only when all channels are enabled. For instance, even if 80 channels are inactive
the algorithm will still use those channels in its calculations.
Analog Input
This window will allow the user to set different properties of a specific or a group of selected analog input channels.
All the options are the same as the ones of the front-end amplifier inputs except that the coupling can also be
determined for each analog input channel.
Revision 4.00 / LB-0175
Page 22
NeuroPort® User’s Manual
Figure 23 - Analog Input Properties
o
AC Coupling: The coupling for each analog input channel is user selectable between AC and DC coupled. By default,
channels 1-8 are AC coupled and channels 9-16 are DC coupled.
Analog Output
This window will allow the user to set the properties of the analog outputs being transmitted to other equipment
connected to the NSP.
Figure 24 - Analog Output Properties
o
o
o
o
o
Label: A user-defined name for the specific channel.
Input and Output Range: Fixed values for informational purposes.
Track Most Recently Selected: When this box is checked the channel source will change based on whichever channel is
selected from Spike Panel, Neural Channel, or Raster Plot.
Source Type: Choose whether to output LFP or Spike data through the analog output.
Source Channel: Select the channel to monitor through the analog output.
Digital In
This window will allow the user to set the properties of the digital inputs being received from other equipment
connected to the NSP.
Revision 4.00 / LB-0175
Page 23
NeuroPort® User’s Manual
Figure 25 - Digital Input Properties
o
o
o
Label: A user-defined name for the specific channel.
Function: The functions may include:
16-bit on word strobe: reads 16-bits on strobe.
16-bit on bit changes: reads 16-bits when any bits change, falling or rising.
16-bit on rising edge: read 16-bits when any bits get set high.
16-bit on falling edge: read 16-bits when any bits get set low.
8-bit strobe / 8 bit bit changes: reads 8-bits on strobe and the other 8-bits on any bit changes, rising or falling.
8-bit strobe / 8 bit bit rising edge: reads 8-bits on strobe and the other 8-bits when any bits get set high.
8-bit strobe / 8 bit falling edge: reads 8-bits on strobe and the other 8-bits when any bit gets set low.
NOTE: The strobbed input is read by the NSP on the rising edge of the strobe signal. The user should set the data bits
and then set the strobe bit high, so that the NSP can capture the data bits. Setting the strobe bit low will not trigger the
NSP to read the data bits.
Digital Out
This window will allow the user to set the properties of the digital outputs being transmitted to other equipment
connected to the NSP.
Figure 26 - Digital Output Properties
o
o
o
Label: A user-defined name for the specific channel.
Properties: The user has the option to Monitor Electrodes, which will send a TTL pulse from that specific Digital
Output every time a spike is detected or a specific sorting spike is detected. As a second option, the user can select
Timed to output a user specified frequency range with a specified duty cycle and offset. The low and high sampling
show the number of clock cycles the square wave is set to high or low. The offset unit is clock cycles and can offset the
trigger of one channel from the other output channels.
Track Most Recently Selected: When this box is checked the channel source will change based on whichever channel is
selected from Spike Panel, Neural Channel, or Raster Plot.
Revision 4.00 / LB-0175
Page 24
NeuroPort® User’s Manual
o
o
Source: Select a source channel to monitor.
Monitor Units: The user can select which units to monitor from the source channel through the digital output ports. The
user can monitor unclassified units and/or classified units defined online.
Serial I/O
This window will allow the user to set the properties of the outputs being received from other equipment connected
to the NSP via the serial ports.
Figure 27 - Serial I/O Properties
Audio
This window will allow the user to set the properties of the audio outputs being transmitted to other equipment
connected to the NSP.
Figure 28 - Audio Properties
o
o
o
o
Label: A user-defined name for the specific channel.
Track Most Recently Selected: When this box is checked the channel source will change based on whichever channel is
selected from Spike Panel, Neural Channel, or Raster Plot.
Function: Choose whether to output LFP or Spike data through the analog output.
Source: Select the channel to monitor through the analog output.
Global Settings
Revision 4.00 / LB-0175
Page 25
NeuroPort® User’s Manual
Figure 29 - Global Settings
o
o
o
o
o
Spike Properties: Define variables related to the size of a spike-triggered spike.
Spike Width: Allows a user definable number of samples to be collected in the spike-triggered processing window. The
default value is 48 samples. This would collect spike-triggered waveforms for 1.6-ms. The spike width can be set to a
range of 30 samples up to 128 samples. (1.0-ms to 4.3-ms spike triggered sample width.) The longer this value the
larger the size of a spike-triggered waveform.
Prethreshold Samples: The number of samples to capture before the threshold is crossed. The default value is 10,
meaning that 10 samples, before the point of crossing threshold, are captured.
Line Noise Frequency: The line frequency of the system, either 50 Hz or 60 Hz. This value changes in different
countries. For example, line noise frequency in the Unites States is 60 Hz, but it is 50 Hz in the Europe.
LNC Reference Channel: The reference channel used to extract the line noise. The extracted line noise for each channel
can be viewed in Single Neural Channel when the Raw/LNC button is checked.
Filters
This window provides specifications of the various filters set in the NeuroPort® system. The filters can be set for
each channel individually. For graphical details and specifications, click the digital filter dropdown box and select a
filter.
Figure 30 - Filter Properties
Revision 4.00 / LB-0175
Page 26
NeuroPort® User’s Manual
Auto Thresholding
This window allows the user to specify the auto thresholding properties for spike detection.
Figure 31 - Auto Thresholding Properties
o
o
o
o
o
o
Threshold Multiplier: The signal is filtered between 1-5 kHz (2nd order Butterworth) for spike detection and the noise in
that band is estimated. The signal value has to cross the average noise times the Threshold Multiplier. This value
should be between 2.0 and 3.0.
X,Y,Z dimensions of the noise ellipsoid: Radius of the Noise Ellipsoid in the feature space along each axis. This
parameter can also be set graphically by dragging the outside of the ellipsoid in the feature space view of the analog
properties window.
X,Y,Z center location of the noise ellipsoid: The center point of the Noise Ellipsoid along the X, Y, and Z axis. This
parameter can also be set graphically by dragging the center of the ellipsoid in the feature space view of the analog
properties window.
X,Y,Z axis rotation of the noise ellipsoid: The rotation angle of the Noise Ellipsoid along each axis. This parameter can
also be set graphically by dragging the rotation handles of the ellipsoid in the feature space view of the analog
properties window.
Reset to Default: Pressing this button will reset the X,Y,Z values above to default for all channels.
Apply to All: Pressing this button will apply the X,Y,Z values above to all channels.
Spike Sorting
This window allows the user to specify the rules and settings used with the automatic spike sorting. The default
settings are recommended, but can be changed to user preference.
Revision 4.00 / LB-0175
Page 27
NeuroPort® User’s Manual
Figure 32 – Histogram Peak Count Spike Sorting Properties
Figure 33 – Manual PCA Spike Sorting Properties
o
Method: Choose between the automatic Histogram Peak Count and Manual PCA methods.
o
Method Histogram Peak Count: Feature space sample points are projected onto an axis and a histogram is constructed.
Clusters are then estimated by determining peaks and valleys and are sorted into units.
Valley Percentage: The first peak from the origin is detected and marked. To find a valley the valley height needs to be
less than the first peak’s height x the valley percentage value (valley height < first peak height x valley percentage).
Close Peak Percentage: For a second peak to be found, the second peak height needs to be greater than the height of the
valley + the height of the 3 points around the peak * the close peak percentage (second peak height > valley height +
(3-point mean around valley * close peak percentage)).
Freeze Time (minutes): Time Specified in minutes that the spike sorting process of determining the number of units per
channels runs.
Update Rate (# spikes): Specifies the number of spikes that needs to be collected per unit before spike sorting statistics
are updated. Assume one unit per channel at the beginning.
Minimum Peak Percentage: Histogram peaks have to have a minimum height which is calculated by adding the valley
height (or zero) to the value of total # of samples used * minimum peak percentage.
o
o
o
o
o
o
o
o
Method Manual PCA: Uses Principle Component Analysis method to sort units recorded on an electrode.
Wave Basis Size: The number of waveforms to use to calculate the PCA basis vectors. Example, 250 waveforms are
needed to create the PCA basis vectors.
Update Basis Multiplier: The multiplier of the basis size. This number is used to recreate the basis after so many
waveforms. For example, if this number is 5 and the Wave Basis Size is 250 then after 1250 (250 x 5) waveforms the
PCA basis vectors are recalculated.
Revision 4.00 / LB-0175
Page 28
NeuroPort® User’s Manual
Artifact Rejection*: This feature is used to get minimize the amount of artifact in the signal.
Maximum Simultaneous Channels: If more than X channels fire at the same time, their events are rejected and the
waveforms will not get recorded.
o Refractory Period: Spike detection is turned off for X samples after an event has been detected.
* The artifact rejection algorithm works only when all channels are enabled. For instance, even if 80 channels are inactive
the algorithm will still use those channels in its calculations.
o
o
Adaptive Filtering
Recorded signals may contain some noise from any known sources of external noise, such as an eye coil box. These
external noise sources may be plugged into the NeuroPort® System and tested for extraneous noise levels. The
Adaptive Filtering utility provides a means to determine how much of the recorded signal is comprised of noise so
that parameters can be set to eliminate the noise from the signal.
Figure 34 - Adaptive Filtering
Plug the peripheral equipment into the NSP then click on Hardware Configuration Adaptive Filtering, right-click
the channel icon then select Properties. Use the drop down menu to activate the settings. The Reference Channels
can be set as 1 or 2 Channel filtering of spike and continuous data or just the spike stream data. Click Apply to
activate filtering. The noise level is automatically computed by the system.
N-Trode Groups
An N-Trode is set of electrode channels that can be chosen and assigned by the user. The user can have multiple NTrode sets. Each N-Trode set can contain up to 4 channels. When using a multi electrode arrays or an electrode
shank with multiple recording sites, this software allows the user to define the single channels associated to the
multiple recording points and perform sorting on the N-Trode as an entity. To define N-Trode groups open a group
and double click on available channels to assign them to a group. Press OK to save changes.
Figure 35 - N-Trode Properties
Spike Panel
This app displays the detected spikes on all of the front-end channels. Double click on any channel to display its
events in the Single Neural Channel window (explained later). Use the <Shift> or <Ctrl> keys to select several
channels to highlight. Channel selection and other display properties can be turned on or off through the right-click
context menu. A map file can be applied to the display to change the spatial arrangement of the channels on the
Revision 4.00 / LB-0175
Page 29
NeuroPort® User’s Manual
screen to match the electrode array in use. Figure below displays channels of a 10x10 electrode array. If spike
sorting rules are defined, the spikes belonging to different units will be displayed in different colors.
Figure 36 - Spike Panel
o
o
o
o
o
o
o
o
o
Load Map File: The default map file for the spike panel is the 16x8. A custom map file can be loaded to change the
layout to match the spatial arrangement of the channels on the screen to match the electrode array in use. Contact
Blackrock Customer Service to obtain the map file specific to your electrode array.
Load Default Map File: By selecting this button, the default 16x8 grid of 128 channels will be loaded.
Map File Information: Displays information about the map file currently loaded.
Time to screen refresh: The drop down tool allows the user to select the time until the spike panel display will refresh.
The refresh rate can be set to refresh every 2, 5, 10, or 20 seconds, or Never to stop the refresh.
Open Selected Channels: After selecting a channel, or group of channels, to display in the neural channel module, click
this button to open the selected channels or right click after selecting channels then click Open Selected Channels.
Refresh Screen: Select the refresh button to manually refresh the spike panel display.
Magnify Current Channel: Select this button to magnify the channels in the spike panel. Move the mouse over the
channel to magnify the channel. When magnify is turned on, the channels will only be magnified if the spike panel
display window has been sized down.
Broadcast Channel Selections: Select this button broadcast the selected channels to other computers that may also be
connected to the NeuroPort® system through an Ethernet connection.
Level of Criticality (LOC): The LOC button displays the load on the PC.
Raster Plot
The Raster Plot screen displays spikes as a pixelized image, each pixel representing a signal impulse sampled for the
length of time set by the user in the drop-down box. In this example, 30 ms/pix indicates that each pixel indicates a
neural signal occurring in a 30-millisecond time period. Continuous analog data can also be shown.
Revision 4.00 / LB-0175
Page 30
NeuroPort® User’s Manual
Figure 37 - Spike Panel
o
o
o
o
o
o
o
o
o
o
o
o
o
o
Play: When selected, Raster Plot displays wrap.
Scroll: When selected, Raster Plot displays scrolls.
Pause: When selected, the Raster Plot display will pause.
One Line per Channel: When selected, all spike events on a channel will be displayed on one line.
Split Channel: Splits single channels in the raster plot display. A channel can be displayed by online classification rules
and continuous waveforms.
Rate: Lets the user select the scrolling speed at which the raster plot displays the data. Set the range from 10 ms/pix to
250 ms/pix (milliseconds per pixel).
Decrease size, Increase size, Minimize, and Maximize Channels: Select a channel (or group of channels) in the raster
plot to increase or decrease the size of the selected channels.
Delete Channel: Click this button after selecting a channel or group of channels to delete them from the raster plot
display.
Move Down, Move Up: Use these buttons to move one or a group of channels up or down in order on the raster plot
display.
Scale Continuous Data: Use this button to display continuous waveform in the raster plot module and adjust the scale
for display.
Refresh: Refreshes the raster plot display.
Sort: This button sorts the channels in the raster plot display. Click the drop down arrow to display the sorting types
then select sort by Channel ID, Recording Mode, or Unit ID.
Choose Channels, Add All, Clear All: Click the Choose Channels button to select a group of channels to add or remove
from the raster plot display. To add all channels to the display, click the Add All button. The Clear All button will
remove all channels from the raster display.
Open Selected Channels: After selecting a channel or group of channels to display in Neural Channel, click this button
to open the selected channels.
Single Neural Channel
This app displays the activity of a single channel. It is also where units can be defined for the manual spike sorting
algorithms.
Revision 4.00 / LB-0175
Page 31
NeuroPort® User’s Manual
Figure 38 - Single Neural Channel
o
o
o
o
o
o
o
o
o
o
Channel ID: From the drop down box, change the channel displayed.
Auto: Toggles thresholding between adaptive threshold and a user defined fixed value.
Properties: Display and change the settings of the current channel.
Spike Display: The signal is displayed as time stamped events. Use the vertical slide button at the right of the screen to
set the voltage range. The default time scale of the spike display window is 1.6 ms / 48 samples spike width. The time
scale / spike width samples can be defined in the Global Settings section in the Hardware Configuration module in a
range from 1.0 ms to 4.3 ms (30 samples to 128 samples).
Clear: This button clears the spike display until new spikes are triggered. Specify in the drop down box how many
events will be displayed before clearing.
Spike Count Drop Menu: Specify how many spikes are displayed before the screen is refreshed.
Show Spikes Drop Menu: You may specify which waveform types are displayed in the spike Display.
Waves/Pattern: View spikes in waveform or 2D or 3D pattern view.
Cont. Signal: This allows the display of the continuous waveform signal and spike display in raster format.
Raw/LNC: Click this button to display the raw data and any applicable line noise.
Manual Override options: A user can override the automatic spike sorting on an individual channel by clicking on
the Pattern view. Click the Edit button next to the classified spike to override the auto spike sorting function for that
sorted unit and resort to a manual sorting option. Press <C> to see all available controls. Hold down the <Ctrl> key
and draw an ellipse in the Pattern view around the cluster that you would like to define as a spike. You may also
change the size of the ellipse to make the diameter larger or smaller. Once the ellipse is placed in the cluster that you
are defining, the word “Overridden” will appear next to the sorted unit. You can also change the threshold radius by
changing the diameter of the grey ellipse in the center of the Pattern Display. Any units that occur in the grey circle
will not be displayed as a spike.
3D PCA On-line Spike Classification: If manual PCA is selected, spike sorting is performed using online PCA
analysis within the PCA space. PCA Spike Sorting can classify up to five different signals per channel, each selected
signal receives a separate color. An ISI Histogram is also displayed for each classified spike.
Hoops Spike Sorting: If Hoops spike sorting is selected, you can click on Define (not shown above) next to each unit
window box. A color box will appear in the spike window. Drag the box to place a hoop anywhere on the screen so
that spikes go through that hoop. Any spike going through the hoop will be classified as that unit. Multiple hoops
can be placed and only spikes that go through both hoops will be classified.
A user can sort an individual channel by clicking on the Pattern. Click the Define button next to the classified spike
to sort that unit. Hold the Ctrl key and draw around the cluster. An ellipsoid will be created which is used to define a
unit. You may also change the size of the ellipsoid by pressing R then moving the handle.
Revision 4.00 / LB-0175
Page 32
NeuroPort® User’s Manual
Unit Mapping: Another override option can be performed by clicking the unit-mapping button. Rules can be
remapped, combined, or classified as noise.
Revision 4.00 / LB-0175
Page 33
NeuroPort® User’s Manual
Analysis Software
Activity Map
This app gives the user an overview of the firing rates of each electrode spatially organized over time. A map file
can be loaded to change the electrode arrangement. The spiking activity of each channel is binned and smoothed.
Binning is counting the number of spikes that occur over a fixed time window (20ms). Smoothing adds steps
between events and non-events both between channels and over time on a channel, smoothing out the event horizon
that would otherwise be too abrupt a change and could possibly cause signals to be missed by the observer.
Figure 39 - Activity Monitor
o
o
o
o
o
o
Pause: When checked, the display will pause. The activity map will resume when the box is clicked again to clear.
Reset Button: Press to restart the display of the firing rates.
Maximum Scale Range: Allows the user to set the maximum value of the Color Scale.
Scale Eccentricity: This setting allows the user to set how eccentric and sensitive the colors are to the firing rates.
Time Constant: A time specified in seconds is how long each electrode area color will retain prior to returning to blue.
Load Map File: A map file can be loaded to change the layout of the grid.
File Storage
Use the File Storage Interface screen to record data. The user can enter patient information and select a path for the
files that are created when the session is initiated. The NeuroPort® Software assigns a numeric name to the files.
The numeric file name indicated the data and time of recording. For example, 20110124-152145 indicated that the
data file was recorded on January 24, 2011 at 3:21:45 PM. File Storage will also save the settings, in the same folder
as the data file, at the beginning of a recording session.
Revision 4.00 / LB-0175
Page 34
NeuroPort® User’s Manual
Figure 40 - File Storage
o
o
o
o
o
File Splitting: The software can split recorded data files during a recording session to allow smaller file sizes for offline
analysis. The file size and time limit before the system will create a new file can be user defined by clicking the view
drop down menu Options. To disable file splitting, check the disable file-splitting box in the file storage module.
File Description: Use the dialog to add comments up to 256 characters long to the data files. Multiple lines can be
entered by pressing the <Enter> key, but the user should not enter more than eight lines in this field. Comments need to
be entered prior to recording a data file.
Record For: With the Record For box checked, specify an amount of time (in seconds) that the NeuroPort® system will
record data. Once the time has expired, the recording will stop automatically.
Start/Stop Recording: Press the Record button to start recording data. Press the Stop button to stop the data acquisition
cycle. This is an acceptable way to stop acquisition cycles as it simply closes the data file and preserves all file content
up to the point of acquisition termination.
Remote Recording Control: Check the remote recording box to Start, Stop, Pause, and Resume file recording from an
external source through the digital input port, or the serial I/O port. Click the Setup button below the remote recording
check box to set user-defined hex values for each remote recording function. For example, to start recording as soon as
HEX value 0001 is read on the digital port and ignoring bits 5-12 choose Digital Input, enter 000F for the first HEX
box (mask) and enter 0001 for the second HEX box (read value).
Figure 41 - File Storage Options
o
o
o
Enable Sync Pulse: Will send a sync Digital Output 1. The sync signal is a unique waveform pattern and repeats itself
for 14 seconds. Each 14 seconds the pattern changes. This can be used to synchronize recordings with an external
equipment.
Invert Sync Pulse: It will invert the sync pulse. The pulse will start high and will go low.
Remove Noise: Enabling this option will remove noise-classified waveforms (unit 255) from the recorded file.
Revision 4.00 / LB-0175
Page 35
NeuroPort® User’s Manual
o
o
o
Sync with NeuroMotive Recording: It will enable syncing with the NeuroMotive Video Recording and Tracking
System, if present.
Split File Interval: The recorded file will be split every so often indicated by this value.
Storage Needed at Current Configuration: It indicates the amount of storage needed for recording using current
settings.
Signal to Noise Ratio
Signal to Noise Ratio (SNR) displays the amplitude of the channel and noise in µV. It also displays the signal-tonoise ratio so that the quality of the signal can be monitored. Readings can be saved as a tab-delimited text file and
opened in Excel or another program for future analysis. The SNR for elec11 in the example below is 9.50 meaning
that the signal is 9.5 times bigger than the noise.
Figure 42 - Signal to Noise Ratio
Neural Modulation
Neural Modulation displays changes over time of the firing frequency. The Modulation Index covers a range of 0 to
12.0 but a range of 2-5 is considered normal.
Figure 43 - Neural Modulation
Impedance Tester
Impedance Tester analyses each channel to ensure proper impedance of every electrode. When selected, a dialog
box is displayed instructing the user to turn the impedance switch located on the patient cable to the impedance
position, marked with a + sign. Data cannot be recorded when the system is in impedance mode. The impedance
Revision 4.00 / LB-0175
Page 36
NeuroPort® User’s Manual
function can read impedances of about 50 kΩ or greater. If an impedance measurement is below 50 kΩ an
information box will pop up on the screen stating that the electrode impedance is below 50 kΩ but will not give a
number. Steps to measure impedances are states below:
Figure 44 - Auto Impedance
1)
Click on Impedance Tester on Central. The Auto Impedance app will open. If data is being recorded, the user will be
prompted to stop recording or cancel the impedance test. The user will also be given the chance to stop the recording
from the dialog.
2) A dialog box will be displayed notifying that Auto Impedance is checking the impedance switch to ensure it is in the
Impedance position. If not, the user will be prompted to turn the switch to Impedance mode.
3) Auto Impedance checks the array reference wires before beginning.
4) Impedance data is collected then the Auto Impedance screen is displayed. All channels are measured simultaneously.
The measurement takes about one minute. Impedance readings are displayed for every channel. Tolerance is defaulted
to 100-800 Ω. If any channels display numbers outside tolerance, the box will turn yellow (below) or red (over) to
indicate out of range values.
5) Open View Options to display the Impedance Calculation Settings.
6) Open the Edit menu or right-click one of the bad channels to display the properties menu.
7) Select Disable Bad Channels to mark out-of-tolerance channels with a display border.
8) When the other Central modules are opened, the disabled channels will be blank or contain an “X” through the box in
Spike Panel.
9) Click File/Save Values to save the settings to a data in a text file on the hard drive.
10) Click File/Exit to quit Impedance testing. Auto Impedance will check the switch.
11) A dialog will be displayed instructing you to turn the Impedance switch to the Normal position. When the switch has
been toggled to the Normal position, Auto Impedance restores original channel settings and will close. Do not leave the
impedance switch in the Impedance position when not in the Auto Impedance feature. If the switch is accidentally
switched to the Impedance position when not testing, significant noise will be present invalidating the recorded data.
Crosstalk
If you suspect that you may be looking at the same neural activity on more than one channel, the Crosstalk
Diagnostic module will compare each channel for cross correlation. The Crosstalk Diagnostic Module will display
each channel as green, yellow, or red.
Revision 4.00 / LB-0175
Page 37
NeuroPort® User’s Manual
Figure 45 - Crosstalk
o
o
o
o
Green indicates that no cross correlation to any other channel was found.
Yellow indicates that possible cross correlation is found with another marked yellow channel, but not exact cross
correlation. It is suggested that the user closely compares any channels that turn yellow to determine if it is possible
crosstalk.
Red indicates that a high level of cross correlation is found with other red marked channels.
You can flag any channels as “bad” and disable them from the Edit drop down menu.
N-Trode
The N-Trode utility is used when electrode types with multiple recording points are located on the same shank or in
the same discrete area of an electrode array.
Figure 46 - N-Trode Utility
o
Before being able to use this utility N-Trode groups need to be defined in Hardware Configuration as described in NTrode Groups
Revision 4.00 / LB-0175
Page 38
NeuroPort® User’s Manual
o
o
o
o
o
on page 29.
nTrode: Use the drop down menu to switch between the different N-Trode groups. You can also use the arrows to flip
through the various groups.
Hide Continuous: Checking this box will hide the continuous signal window on the bottom of the page to leave more
room for the N-Trode display boxes.
Magnification: It changes the magnification of the pattern window by zooming in and out.
Define/Delete/Units: Select a unit then click on Define. Hold down the <Ctrl> key and using the mouse to draw a shape
around a given cluster to define it as a unit. Repeat this process until all units are defined. To delete, select a unit and
click on Delete button.
Revision 4.00 / LB-0175
Page 39
NeuroPort® User’s Manual
Other Utilities
Central Play
CentralPlay is a tool for replaying pre-recorded digital data (NEV file type) back for review and re-sorting using
hoops. A recorded video may also be played back in sync with the recorded data. To run, click on Start and navigate
to the installation folder of NeuroPort® Central Suite and click on the CentralPlay shortcut. A clock with a sliding
bar allows the user to pause, rewind and replay the data file. The only editing capability of CentralPlay is the ability
to define new hoops sorting rules to the recorded spikes.
Central Sim
CentralSim is a tool for simulating data collection. It is mostly used for demoing the software package and/or its
features. To run, click on Start and navigate to the installation folder of NeuroPort® Central Suite and click on the
CentralSim shortcut.
Revision 4.00 / LB-0175
Page 40
NeuroPort® User’s Manual
Hardware Specifications
NEUROPORT® FRONT-END AMPLIFIER / DIGITIZER
Input Range
± 8.095 mV
Analog to Digital
Conversion
16-bit digital output, with 0.25 µV per bit
resolution
Input Impedance
> 10 ohms || 3pF
Input Bias/Leakage
+5pA typical, ±20pA max
Input Referred Noise
NEUROPORT® NEURAL SIGNAL PROCESSOR
th
Digital Signal
Processing
Adaptive Line Noise Cancellation filter, 4 -order
hi/lo pass digital filtering for all channels.
Separate filters for simultaneous continuous and
spike streams along with online spike
classification using time/amplitude and/or
template matching.
< 3.0µVrms (14µVp-p)
Neural Signal Inputs
Up to 128-Channels
Common Mode
Rejection Ratio
> 90 dB at 50/60 Hz
Neural Signal Input
Sample Rate
30,000 Samples/second
Common Mode Input
Range
up to ±3.0 V between inputs and ground
Experimental Analog
Inputs
Sixteen ±5 V, 16-bit inputs for experiment or
neural signal processing
Experimental Digital
I/O
One 16-bit input port (DB-37) with Word and
Packet Strobe control lines.
12
Differential Input Range up to ±3.0 V between electrode and
reference inputs
One RS232 I/O port (DB-9) with
115k baud input and output.
Maximum Input Voltage up to ±5.0 V between any input and
Range
ground
Four single-bit digital outputs (BNC) with
programmable monitoring functions.
Crosstalk between
channels
< 1 LSB for all configurations
Filter characteristics
1 order Butterworth (high),
rd
3 order Butterworth (low)
High Pass Cutoff Freq
0.3 Hz (full-bandwidth mode)
Experiment Analog
Outputs
Four ±5 V, 600 ohm, 16-bit outputs for
monitoring and stimulus waveforms
Low Pass Cutoff Freq
7.5 kHz
Audio Outputs
Two ± 1 V line-level outputs
Headstage Power
Supply
±5.0 V output, up to 150 mA for
powering optional headstages
Multi-NSP
Synchronization
From PC trigger to digital or serial input ports
Control/Data Output
Connection
MT-RJ fiber-optic port with 2-way 150
Mbps 8B/10B encoded data-stream and
32-bit CRC data validation
PC Hardware Interface 1 Gigabit Ethernet
External Power Supply
Five channel with monitoring,
sequencing, and emergency shutdown
control
One TTL output (BNC) sampling synchronization
output port.
st
PC Software Interface
Windows XP Pro
Power Supply
Standard 3-pin PC power connector accepting
110-240 VAC, 50-60 Hz
Input:
120 or 240 VAC, 50-60Hz
Outputs: +5.0V, 500mA analog,
–5.0 V, 500 mA analog,
+3.3 V, 300 mA quiet Digital :
+3.3 V, 500 mA digital,
+5.0 V, 300 mA digital
Revision 4.00 / LB-0175
Page 41
NeuroPort® User’s Manual
Warranty
Blackrock Microsystems (“Blackrock”) warrants its products are free from defects in materials and manufacturing
for a period of one year from the date of shipment. At its option, Blackrock will repair or replace any product that
does not comply with this warranty. This warranty is voided by: (1) any modification or attempted modification to
the product done by anyone other than an authorized Blackrock employee; (2) any abuse, negligent handling or
misapplication of the product; or (3) any sale or other transfer of the product by the original purchaser.
EXCEPT FOR THE WARRANTY SET FORTH IN THE PRECEDING PARAGRAPH, Blackrock PROVIDES
NO WARRANTIES OF ANY KIND, EITHER EXPRESS OR IMPLIED, BY FACT OR LAW, AND HEREBY
DISCLAIMS ALL OTHER WARRANTIES, INCLUDING WITHOUT LIMITATION THE IMPLIED
WARRANTIES OF MERCHANTABILITY, FITNESS FOR A PARTICULAR PURPOSE, AND NONINFRINGEMENT OF THIRD-PARTY PATENT OR OTHER INTELLECTUAL PROPERTY RIGHTS. Blackrock
SHALL NOT BE LIABLE FOR SPECIAL, INDIRECT, INCIDENTAL, PUNITIVE, EXEMPLARY OR
CONSEQUENTIAL DAMAGES (INCLUDING WITHOUT LIMITATION, DAMAGES RESULTING FROM
LOSS OF USE, LOSS OF PROFITS, INTERRUPTION OR LOSS OF BUSINESS OR OTHER ECONOMIC
LOSS) ARISING OUT OF NON-COMPLIANCE WITH ANY WARRANTY. Blackrock’s ENTIRE LIABILITY
SHALL BE LIMITED TO PROVIDING THE REMEDY SET FORTH IN THE PRECEDING PARAGRAPH.
Return Merchandise Authorization (RMA)
In the unlikely event that your NeuroPort® system needs to be returned to Blackrock for repair or maintenance, do
not send any equipment back without a Return Merchandise Authorization Number. An RMA number will be issued
to you by a Blackrock representative. If you need to obtain an RMA number, you may contact a product support
representative at (801) 582-5533 or toll free at (866) 806-3692.
Once an RMA number has been issued, it is important to safely pack the returned item for shipping back to
Blackrock. It is preferred that you save the original boxes and packing materials that your NeuroPort® system
arrived in for return shipment. Please address the package as follows:
Blackrock Microsystems
ATTN: RMA #
391 Chipeta Way, Suite G
Salt Lake City, UT 84108 USA
Tel: (801) 582-5533
Revision 4.00 / LB-0175
Page 42
NeuroPort® User’s Manual
Troubleshooting
Extraneous Noise
You will find that the NeuroPort® system is very sensitive to extraneous electromagnetic signals. It is designed to
detect microvolt level signals.
When the simulator is attached to the system, touching or just holding your hand near the ribbon cables will cause
noise on Spike Panel and Raster Plot. This is not a fault but an indication that the location and arrangement of the
connecting cables is critical to optimal performance.
Make sure that the cables connecting the amplifier to the NSP are kept away from the ribbon cables that input
signals to the amplifier to avoid feedback problems and cross-talk between channels. The simulator is an excellent
tool to detect subtle problems in the system setup.
Computer monitors can also be a major source of noise and should be kept away from the instrumentation field.
Windows Compatibility Issues
On certain PCs running the Windows operating system, some of the software modules or executable files rarely
experience graphical issues. If this happens, set the compatibility mode in the file properties of the software to
correct the issue.
Open the Release folder that NeuroPort® installed on your PC then right-click the module / executable file. Select
the “properties” option in the drop down menu.
From the file properties screen, click the Compatibility tab at the top of the window then click the box in the
Compatibility mode section to run the program in compatibility mode for Windows 2000.
No Power to NeuroPort® System
In the event that the NeuroPort® system does not power on, check the following:
12) Verify that the NeuroPort® system is plugged into a working outlet or power strip, and verify that all power cords are
plugged into the NeuroPort®.
Revision 4.00 / LB-0175
Page 43
NeuroPort® User’s Manual
13) Verify the position of the power switch and make sure it is in the ON position. If the power switch is in the ON
position, turn it to the off position then wait at least five seconds before turning the NeuroPort® back on. (It is
recommended that when restarting the NeuroPort®, always wait five seconds before turning the unit back on. This will
ensure a proper system reset.)
14) Contact Product Support at (866) 806-3691, or (801) 582-5533 for assistance.
Lost Packets Error Notification
If an error message is displayed that network packets were lost during analysis or recording, or that no packets are
being received when running Central, verify the following:
15) Check the Ethernet Cat5-e cable and verify that it is secure in the 1 Gigabit Ethernet card in the PC and the RJ-45 port
on the back of the NSP labeled “To PC.”
16) Look at the Central Control module and verify that the PC system load is not too high. If the PC system load is too
high, adjust the thresholds on all channels to lower the load on the PC or lower the sample rate for continuous
waveforms if they are enabled. Are any other programs running on the Host PC? If so, close any open programs that do
not need to be running while using the NeuroPort® system.
17) Does the Host PC meet the minimum specifications for the NeuroPort® system? Contact product support for the PC
specifications at (801) 582-5533 or (866) 806-3692.
18) Is a firewall enabled on the Host PC? Some issues with firewalls have been known to block data packets between the
NeuroPort® system and the PC. Disable the firewall then reboot the Host PC.
No Neural Activity on all Channels
If the NSP is turned on and running but there is no apparent activity on any of the channels from an implant or from
the simulator, verify the following:
19) Open Central.exe and verify that packets are being received from the NeuroPort® system. If the PC is not receiving
packets from the NeuroPort® system, see troubleshooting section 0 above.
20) Verify that the fiber optic data link between the amplifier and the NSP is plugged in and that the green light next to the
fiber optic data port on the NSP is illuminated. If the light is red, there is no fiber optic link present. Check the LED
next to the fiber optic port on the back of the amplifier to verify that it has power. If the LED is not illuminated, check
the power supply and verify that it is turned on and not in standby mode. Are the cables securely plugged in?
Revision 4.00 / LB-0175
Page 44