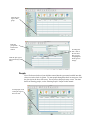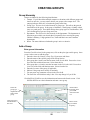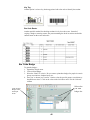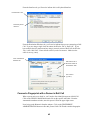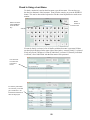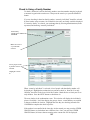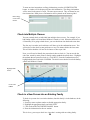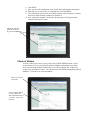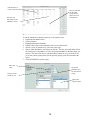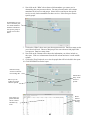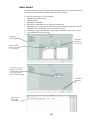
1
child check-in
user manual
version 11
Table of Contents
CHILD CHECK IN OVERVIEW
Check In / Out Process..................................................................................................................5
Check In Methods.........................................................................................................................5
Key Tags...................................................................................................................................5
Bar Code Badge........................................................................................................................6
Name, Phone, Family Number..................................................................................................6
Finger Print Scan.......................................................................................................................6
Name Tags and Security Tags.......................................................................................................7
Mobile Device...........................................................................................................................7
Check Out.....................................................................................................................................8
INSTALLING ROLL CALL for CHILD CHECK-IN
Hardware/Software Requirements................................................................................................9
Roll Call workstations..............................................................................................................9
Bar Code scanner......................................................................................................................9
Dymo LabelWriter....................................................................................................................9
Finger Print Scanner.................................................................................................................9
Finger Print Software................................................................................................................9
Roll Call Software Installation......................................................................................................9
Single user version....................................................................................................................9
Network Version.......................................................................................................................9
Check in Station Hardware Installation......................................................................................10
Bar Code Scanner...................................................................................................................10
Dymo Labelwriter...................................................................................................................10
CONFIGURING CHECK-IN
User Security and Check In Users..............................................................................................11
Activate Roll Call Security.....................................................................................................11
Create Check In Users............................................................................................................11
Check In User - Types............................................................................................................12
Check In User - Defaults........................................................................................................12
Check In User - Screen Appearance.......................................................................................14
Name Tags & Parent Tags...........................................................................................................15
Check In Preferences..................................................................................................................17
Groups.........................................................................................................................................17
People..........................................................................................................................................18
Key tags......................................................................................................................................19
CUSTOMIZING CHECK IN LABELSs
Check-In/Out Setup....................................................................................................................20
Customizing Parent Tags............................................................................................................21
Defining the Page Size................................................................................................................24
Markers.......................................................................................................................................25
Dragging Objects........................................................................................................................26
Adding Images............................................................................................................................26
Printing a test label......................................................................................................................26
Customizing Child/Adult/Youth labels.......................................................................................26
CREATING GROUPS
Group Hierarchy.........................................................................................................................28
Enter general information.......................................................................................................28
Add Members..........................................................................................................................29
Create sessions........................................................................................................................29
Preferences..............................................................................................................................30
Mass Enrollment.........................................................................................................................30
ADDING PEOPLE INFORMATION
Import People Information..........................................................................................................32
One Row per Family (standard)..............................................................................................32
One Row per Family (custom)................................................................................................33
One Row per Person (standard)..............................................................................................33
One Row per Person (custom)................................................................................................33
Import Process........................................................................................................................33
Enter a new Family.....................................................................................................................35
Contact Information................................................................................................................36
Address...................................................................................................................................36
Pictures....................................................................................................................................37
Phones.....................................................................................................................................38
USING BAR CODES
Bar Code Font.............................................................................................................................39
Windows.................................................................................................................................39
Mac.........................................................................................................................................39
Bar Code Options........................................................................................................................39
Bar Code Badge......................................................................................................................39
Key Tag...................................................................................................................................40
Bar Code Roster......................................................................................................................40
Bar Code Badge..........................................................................................................................40
Key tags......................................................................................................................................42
Order tags................................................................................................................................42
Assign key tag numbers..........................................................................................................42
Bar Code Roster..........................................................................................................................42
USING FINGERPRINTS
Fingerprint Technology Configuration........................................................................................44
Fingerprint Set Up with Roll Call...............................................................................................44
Connect a Fingerprint with a Person in Roll Call.......................................................................45
OPERATING THE CHECK IN STATIONS
Log into the Check In Station.....................................................................................................48
Check In Using a Last Name......................................................................................................50
Check In Using a Phone Number................................................................................................52
Check in Using a Bar Code.........................................................................................................55
Check In with Rapid Check In....................................................................................................57
Check In Using a Touch Screen..................................................................................................57
Check into Multiple Classes.......................................................................................................59
Check in a New Person into an Existing Family........................................................................59
Check in Visitors.........................................................................................................................61
Check into Services.....................................................................................................................62
Check Out...................................................................................................................................63
Compare tags..........................................................................................................................63
Using Roll Call.......................................................................................................................63
Check in Roster...........................................................................................................................64
USING MOBILE CHECKIN
Getting Started............................................................................................................................66
Mobile CheckIn Trial..............................................................................................................66
Enter License Number............................................................................................................66
Logging in with your Mobile Device..........................................................................................66
Roll Call Configuration...........................................................................................................66
Mobile Device on Same Network...........................................................................................66
Mobile Device on Different Network.....................................................................................67
Login Screen...........................................................................................................................67
Checking in Using Last Name....................................................................................................68
Checking in Using Phone Number.............................................................................................70
Check in Visitors.........................................................................................................................71
Printing Name Tags and Parent Tags..........................................................................................72
Using the Dashboard...................................................................................................................73
ATTENDANCE REPORTS
Attendance Summary..................................................................................................................74
Attendance by Person.................................................................................................................76
Attendance by Type....................................................................................................................80
Attendance by Session................................................................................................................81
Absent Present Report.................................................................................................................82
Visitor Report..............................................................................................................................84
CHILD CHECK IN OVERVIEW
Check In / Out Process
The child check in system in Roll Call allows you to check students into their classes,
record attendance and print nametags and security labels. This system can be used to
check people into any groups/classes or worship service that is defined in Roll Call.
Check In Methods
When the student arrives to check in, the first thing you need to do is identify that student
or family. You can identify them in a variety of ways. These methods are discussed
below.
Key Tags
Probably the most popular method for checking students in is to issue key tags to the
parents. These keytags can be customized to have your church or ministry logo on the
front and a bar code on the back. The bar code number is assigned to mom, dad or the
individual student. Key tags can be used to check students in an unmanned station or a
manned station.
5
Bar Code Badge
Another option for using a bar code scan to check students in, is to print a bar code badge
from Roll Call. These badges are printed on an 8 ½ x 11 sheet of paper or on Avery
business card stock. Once you have the badges printed, you can laminate them and issue
to the families. Badges can be used to check students in using an un-mannend station as
well as a manned station.
Name, Phone, Family Number
If you do not want to scan a bar code, you can use the keyboard or a touch screen monitor
to identify who is here to check in. You can type in the last name, last 4 digits of the
phone number or a family number. The person manning the check in area simply types the
last name or number, then selects the student from the list. Typically when checking in
using a name, phone number or family number a volunteer will be manning the check in
station.
Use your computer
keyboard or this virtual keyboard if you
have a touch screen
to enter the phone.
Finger Print Scan
Another option for identifying who is here to check in, is the finger print scan. This
option is only available on the Windows platform. This mode of check in can be used on
an un-manned station or a manned station.
6
Mobile Device
Starting with version 11.0.31 you can check in using an iPad, iPod, smartphone or other
tablet. This is an add-on component of Roll Call. You’d check in students by name or by
the last four digits of their phone number. The name tags are printed in a central location
where Roll Call is running as a print queue user.
Use an iPad or other
mobile device to check
students in by name of
phone number.
Name Tags and Security Tags
Once the student checking in has been identified and checked into their class, name tags
and parent tags can be printed.
The Roll Call system requires a Dymo Labelwriter 450 or 450 Turbo to print the labels.
We support two different size labels. The first is a smaller label (30334). Your church
can also opt to use the larger 30256 label. This option gives you more flexibility as to the
information included on the label. You logo can also be printed on this label.
A parent tag or security can also be printed. This tag will only include the security
number on it. There will be no information about the child on this tag. The parent brings
this tag to the classroom to pick up their child. The teacher will compare the numbers
on the child’s name tag with the number on the parent tag. If they match, the teacher can
release the child.
Place your logo here.
Security number.
Child’s name tag can includ name, class checked
into, parents names, allergies and notes.
7
Parent tag only has
security number
on it.
Check Out
To check a child out using the Roll Call system, you will need to once again identify that
child. The station operator will see that the child is checked in, they can click the button
to check them out of that class. If there are any custody comments for this child, they
will be displayed when the check out button is pressed. The station operator can take any
necessary action to ensure the child is leaving with the proper parent or guardian.
We’ve found that most churches do not check out using the system. They compare the
parent tag with the child’s tag to determine if the child can be released.
8
INSTALLING ROLL CALL for CHILD CHECK-IN
Hardware/Software Requirements
Roll Call workstations
If you will only be using one check-in station, you’ll want to install Roll Call Standalone.
If you will be using multiple check in station, each “kiosk” needs to have a computer with
Roll Call Client. That computer must have a network connection so that it can connect to
Roll Call Server.
Bar Code scanner
If you will be checking students in using bar code technology, each check-in station will
need a bar code scanner. The scanner needs to be a keyboard wedge device with the
ability to scan a single digit. We recommend the Voyager CG hand held scanner. These
scanners may be purchased through By the Book.
Dymo LabelWriter
This printer is required if you wish to print labels for the child and parent upon check in.
The program is expecting a Dymo LabelWriter 450 or 450 Turbo printer. You may choose
from 2 different label sizes, the 30256 shipping label or the 30334 multi-purpose labels.
Finger Print Scanner
If you will be checking students in using biometrics, you’ll need the M2Sys finger print
scanner connected to a Windows version of Roll Call.
Finger Print Software
If you’ll be checking students in using their fingerprint, you’ll need the M2Sys finger
print software installed on a Windows computer.
Roll Call Software Installation
Single user version
The single user version of Roll Call allows one user, on one computer to access Roll Call.
For the single user installation, use the following instructions.
To install Roll Call double click on the Roll Call installer file you downloaded. The install
program will prompt you through the process. Click on the NEXT button to continue
through each step of the process.
Once the installation is complete, you will have a Roll Call icon on your desktop. If you
are a Mac user, you will need to drag the application to your dock. To use Roll Call,
double click on that icon. The first time you start Roll Call it will ask if you wish to run
the Full or the Lite version. Choose Full.
Network Version
A network installation of Roll Call allows multiple people to access the data. If you have
a multi-user license, multiple users can access the data simultaneously. For example, if
you want to have 3 check in stations, you will need to use the network version of Roll
Call so all 3 stations are looking at the same information.
9
For the network installation, you will need to have your computers networked together.
You will need to install Roll Call Server software on the computer that will house the
database. You will need to install Roll Call Client software on all computers that need
access to the data.
To install Roll Call Server double click on the Roll Call Server installation file. The
install program will prompt you through the process. Click on the NEXT button to
continue through each step of the process.
Once the installation is complete, there will be a Roll Call Server icon on the desktop. To
start Roll Call Server, double click on the icon. For users to work in Roll Call the Server
must be running.
To install Roll Call Client double click on the Roll Call Client installation file. The install
program will prompt you through the process. Click on the NEXT button to continue
through each step of the process.
Once the installation is complete, there will be a Roll Call Client icon on the desktop. To
start Roll Call, double click on the icon. The Client will see Roll Call Server running on
the network and connect to it. The first time you connect in, it will ask if you wish to run
the Full or the Lite version. Choose Full.
Check in Station Hardware Installation
In a network environment, each check in kiosk should have Roll Call Client installed with
access to Roll Call Server. In a single kiosk environment, the station should have Roll
Call standalone installed.
Bar Code Scanner
If will be using bar code technology to check student’s in, plug the scanner into a USB
port on your check in station. You can confirm that the scanner is working properly by
scanning a bar code from a badge or keytag while you are in Text Edit (Mac) or Notepad
(Windows). If the bar code number pops into the page, the scanner is working properly.
Dymo Labelwriter
If you will be printing name tags and/or security labels, plug your Labelwriter into a USB
port. Make sure to install the printer drivers first then follow directions for plugging in
the printer..
If you are on a Windows machine, go to Printers and Faxes at the operating system level
and choose properties for the Dymo Labelwriter. Click on Printing Preferences. For
the 30334 labels, click Portrait. For the 30256 labels, select Landscape. Click on the
ADVANCED button, then select the appropriate labels size.
If you are a portable church, or are plugging the Labelwriters in each Sunday, please note,
on some Windows machines, a new printer definition is created each time you plug in the
printer. Make sure you only have ONE Labelwriter printer definition and that it is online.
10
CONFIGURING CHECK-IN
To begin configuring Roll Call to use the child check in features, expand the Check In/Out
menu. Click on the Setup menu item. Begin entering the information and click NEXT
through each page. As you complete a section, a green plus sign will be displayed on the
related icon at the top. When all icons have a green check, you know you are ready to
start using the check in system.
User Security and Check In Users.
To use Roll Call’s child check in/out system you must “sign into” the system as a check
in user. The type of user determines the screens you will see. So the first thing you will
need to do to activate the security system and set up the “check in” type users.
Activate Roll Call Security
To activate the security system within Roll Call you must give the Director user a
password. To do this:
1. Expand the Check In/Out menu.
2. Click on the Setup menu item.
3. Enter the password you’d like to give to Director. Then re-enter that password to
confirm.
4. Click SAVE. Make sure to save this password before you click NEXT to go to the
next step in the process.
Expeand Check In/
Out menu. Click
on Setup.
Click on
an area to
go directly
there.
Make sure to click
SAVE before leaving this page.
Click NEXT
through all the
steps.
Create Check In Users
After you’ve entered the Director password and clicked NEXT, you will be at the window
to add check in users. To add a check in user, click on the plus sign in the lower left of the
window. Enter the following information:
1.Username – enter the name for this specific check in user.
2.Password – enter a password for this specific user or leave it blank.
3. Confirm – re-enter the password if you entered one.
4. Check In User (Client) – choose this option for check in users
5. Check In User (Mobile) - choose this option for users that will be using mobile
devices.
6. Print Queue - choose this option for a user that will be for your printing station.
7. Click OK to save this user.
You are now taken to the window to select the properties for this specific check in user.
11
Click the plus
sign to add a
check in user.
Enter a username and
password for this user.
Make sure to
choose a check
in “type” user.
Check In User - Types
There are four parameters for the check in user type. You can select one or more of these
parameters for each check in user.
Self Check In – If the check in user has “self check in” marked, this user will not be able
to view any address information from the people list screens. This user will not be able to
print the check in roster or change any of the find by options. Also, this user will not be
able to use the Quick Enroll button to add people to the system. They can only check in
people who already exist in the database. Use this type of user for “unmanned” stations.
Touch screen – if the check in user has “touch screen” marked, a virtual keyboard will
be displayed on the screen. If you also have “self check in” marked, a virtual numeric
keypad will be displayed so folks can search by last 4 of the phone number.
Rapid Check In – if the check in user is marked as “rapid check in”, the confirmation
screen will not be displayed. The person selected will automatically be checked into the
class they are enrolled in. This assumes each student is only enrolled in one class at a
time. If two classes are available for a student to check into, the confirmation screen will
be displayed so the user can decide which class they will be attending.
Check-Out – if the check in user is marked as “check out”, the user will be able to see if
someone is already checked into a class. They will also be able to check that person out
of a class. If Check-Out is not marked, the option to check out will not be available on
the screen.
Check In User - Defaults
For each check in user you can set the following defaults:
12
Mark all the options
that apply to this
user.
Click SAVE to save the
changes to this user.
1. Do you want to search by name, phone or family number?
2. Do you want to return families or individuals?
3. Do you want to display the Quick Enroll button, so the user can enter visitor
information?
4. Which campus groups should be considered for this check in?
Search by – if you are not using a bar code scan or fingerprint scan to identify who is
there to check in, you will need to identify them based on their last name, last four digits
of the phone number or the family number. If this user is not a “self check in” user, you
can change the search by criteria from within the check in screen. Self Check In users can
only search by last four digits of the phone.
Return Families or Individuals – if you are doing a bar code scan or fingerprint scan
and have “return by family” checked, a list of all the family members will be returned
when you perform the scan. If you are searching by name, phone or family number, a
list of families will be returned that meet the entered criteria. Then the user will need to
highlight the appropriate family. Next a list of family members will be presented so you
can choose the ones that will be checking in.
If you are doing a bar code scan or fingerprint scan and have “return by individual”
checked, only the person assigned that bar code number (or fingerprint) will be returned.
Typically you would use this to check students into a youth group or adult class.
If you are searching by name, phone or family number and have “return by individual”
checked, a list of people that meet that criteria will be displayed. For example, if you
search by name and enter “Smith”, a list of everyone who has the last name “Smith” will
be returned. You can highlight one or more from the list to check them in.
Quick Enroll – if the “quick enroll” option is checked for this user, the Quick Enroll
button will be displayed. This will allow the user to enter visitor information and then
check them into a class. Self Check In users are not allowed to have Quick Enroll.
Default Campus - if system preferences are set to allow multiple campuses, each check
in user can have a default campus defined. This means that the user will only be able
to check into groups/classes/services that are from that campus. For example, if the
check in user has a default campus “Southside”, they will only see groups that also have
Southside as the campus.
13
Check In User - Screen Appearance
For each check in user, you can set preferences that affect the appearance of the screen.
You can set the heading, color and image that is displayed. For each check in user, enter
the following information:
1. Check In Header – Enter the heading you’d like displayed on the Check In Screen
2. Header Font – Select the font for the heading
3. Header Font Size – Select the size of the font for the heading
4. Header Color – Select the color of the heading
5. Check In Image – Click the plus sign to pull in the graphic logo you’d like displayed
on the check in screen.
6. Background Color – Select the color you’d like as the background on the check in
screen.
7. Alternate Color – Select the color you’d like to use for alternating data on the
selection boxes.
Once you have selected all the information necessary for your check in user, make sure to
press the SAVE button.
Enter the check in
station header you
want when this user
signs in.
Pull in the image you
want displayed for
this check in user.
Now, when you
sign in as that check
in user, the screen
includes the logo
and new heading.
14
Name Tags & Parent Tags
Use the “tags” section to set your preferences for printing name tags and parent tags.
Once you hit next from the check in user screen, you will be asked if you want to print
name tags upon check in. If you do, click Yes. Click NEXT
Next, you’ll be asked which size you’d like to use. We have 2 standard sizes. The 30256
is the larger shipping size label. The 30334 is a smaller multi-purpose label. If you’d
like to use a different size label, or customize the information that is printed on the label,
choose the customize option. This will take you to the form to create your label. For
detailed instructions on customizing the name tags, see the next chapter on Customizing
Name Tags and Parent Tags.
Choose the size
labels you’d like
to use for printing
name tags and parent tags.
Click NEXT.
The next window asks if you’d like to print a parent tag for children. The parent tag lists
only the security number that matches the child’s name tag. Parent tags are only printed
for people in the database whose family position is Child.
Also on the screen you may indicate the number you’d like to use as the security number
on the name tag and the parent tag. You may choose from the family number, a random
security number that uses numbers and characters or a random security number that is
strictly numbers. Click NEXT.
Indicate if you’d
like parent tags
printed for children.
Indicate the
security number
you’d like displayed.
Click NEXT.
15
From this window, select the information you’d like printed on the child’s name tag.
1.Logo –if you are using the 30256 size labels, you can print a ministry logo in the
upper left of the label. You don’t want this logo to be a super high resolution logo
or it will take a long time to print.
2.Barcode – some churches print the barcode on the label itself for easy check out.
3. Security number - choose the security number you’d like printed on the child’s
name tag. The badge number is not allowed if you will be printing parent tags.
The badge number uniquely identifies the child. The family number is a number
assigned to the family in roll call. The random security number is randomly
determined by the system. The random number will change from week to week.
The badge number and family number will not change from week to week.
4.Allergies – any allergies listed in the “Special Needs” comment section will be
displayed on the name tag if this is checked.
5. Last Name same size as First – By default the first name is in a larger font that the
last name. If you’d like them to be the same size, check this box.
6. Session Time or Check In Time - You can choose to include the the group start
time or the actual time that they checked in.
Mark the options
you’d like to include on the name
tag for children.
Click NEXT.
When you’ve checked the options you’d like for the name tag, click NEXT to choose a
logo for Youth and Adult name tags. The youth and adult name tags will only include
their name, the date of the event and the group they are checking into. There is no
security number, barcode or allergy information printed on an Adult tag.
To add a logo for the Youth/Adult tag, click the box for logo. Click the ADD IMAGE
button and navigate to that image file. Click NEXT to continue through the check in set
up process.
At this point you may want to install your Dymo printer and run a test label to make sure
everything looks okay. Once you have the printer installed, click on the PRINT TEST
button. If everything prints okay, click NEXT to continue through the set up process.
16
Check In Preferences
The check in preferences allow you to set the “check in timeframe”. You can set the
number of minutes before a class, event, worship service starts you’d like to begin the
check in process. You can also set the number of minutes before a class ends that you will
no longer allow anyone to check into that class.
To enter these preferences, click NEXT from the print test label window, or click on the
preferences setup graphic.
As an example, let’s say we have a Sunday school class that meets from 9:30 to 10:30,
if we set our beginning time to 30 minutes before, we can begin checking kids in at 9:00
a.m. In this same example if we set the ending minutes to 15, we could check students
into that class until 10:15. At 10:15 we would no longer see this class in our list of classes
to check into.
You also have the option to choose what you’d like as the default association in the Quick
Enroll portion of check in. The quick enroll is what you use to enter visitors into the
system so you can check them in. Go ahead and use the drop down to pick the association
your church uses to identify a visitor. This option is not available for Mobile CheckIn.
The welcome screen text is an area that you can define pieces of informaiton that
you’d like to view on the Confirmation screen. Maybe you’d like to see a birthday or
association come up for each person as you are checking them in. You’ll need a bit of
programming here, so call us at 800.554.9116 and we’ll help you get this set up.
You can click
on a check in
graphic to go
directly to that
section.
Enter the start
and end time
preferences.
Groups
To use the child check in functionality, there must be something to check into. You can
check people into Groups or Services. The Groups area in Roll Call is where you would
set up your Sunday school classes, VBS, membership classes etc. The Services area is
where you set up your worship services. Each group that you will be checking into must
have at least 1 session. A session is the day and time that it meets. For example, if you
had a first grade Sunday school class that meets at 9:30 and 11:00, those times would be
sessions.
To add a group through the check in setup area, click on the plus sign in the lower left
corner. You are now at the window to add a group. For more details on creating groups,
see the “Creating Groups” chapter in this manual.
17
Click the plus
sign to add a
group.
Enter the
group name
header information.
To change the
time, click in
the start time.
The row will
be highlighted.
Click again to
change.
Click the plus sign to
add sessions (day and
time).
People
You will also need to have ßyour children entered into the system and enrolled into their
classes to use the check in system. To enter people through the check in setup area, click
the plus sign in the lower left corner. You are now at the people entry screen. For more
details on entering people, see the “Entering People” chapter in this manual.
To add people, click
on the plus sign in
the lower left.
18
Enter the contact information for this person.
Click SAVE & CLOSE
to save and leave.
Key tags
If you will be ordering key tags for use with the Roll Call child check in system, click
NEXT from the People list in the set up process or click on the Key tags graphic. The
first window asks if you’ll be using Key tags. If so, answer yes. If not, answer no.
To assign a key tag to a person, highlight their name in the list. Click on their barcode
number (assigned by roll call) Once that number is highlighted, scan the key tag. This
will assign the new number to this person.
Place the cursor in
the bar code field.
Scan the keytag
you wish to assign
to this person.
19
Customizing Check-in Labels
Starting with version 11.0.24, you can now specify which size Dymo labels you want to use for
printing Check-in labels as well as what you would like to have on the labels. This document will
go over the involved.
There are 3 types of check-in labels that Roll Call prints: Child labels, Adult/Youth labels and
Parent tags. If you choose to use paper stock other than the default stock (30256 or 30334), you
must define the layout of all three types of labels manually.
This document will only address customizing the checkin-in labels and not specifically address
setting up checkin.
You can only customize the check-in labels from a machine that has the Dymo printer
installed.
Check-In/Out Setup
In order to customize your check-in labels you must go into the Check-In/Out setup wizard from
the Navigator screen. Click on the Tags image and make sure that the system has been set up to
print tags on checkin.
You will now want to select Dymo (Custom) and select the label size you wish to use. Be sure to
select the paper orientation based on the label size you choose. (Note, if you want to customize
the 30256 or 30334 labels you will need to select those paper sizes).
20
Customizing Parent Tags
To customize the parent tag be sure to first select the type of security number you want to display
on the tag. Click on the Customize Parent Tag button in order to customize the parent tag. When
you are finished, you can click on the Print test label to print a test parent tag to make sure that
you have defined it correctly.
21
When you click on the Customize button, a blank canvas window will be presented which will
allow you to define your parent tag from scratch.
A window entitled Object Library : CheckinLabel will also be visible. The purpose of the object
library is to allow you to drag and drop the objects you want on the label.
22
23
Selecting an object will print its properties on the label. A description of the objects is as follows:
Lbl_Allergy – Allergies stored in the person’s record
Lbl_BadgeNo – Badge Number
Lbl_Barcode – Barcode
Lbl_BirthDate – Birth Date
Lbl_Date – Current Date
Lbl_Custom1 – People Custom1
Lbl_Custom2 – People Custom2
Lbl_FamNum – Family Number
Lbl_FirstName – First Name
Lbl_Group – Group name. If person checked into more than one event the groups are separated
by a comma
Lbl_Group_and_day_and_time – Group name – Day and time
Lbl_LastName – Last Name
Lbl_Note – Notes for checkin
Lbl_OrgName – Organization Name
Lbl_ParentCell – Parents cell phone number
Lbl_ParentNam – Name of parents
Lbl_ParentNamCell – Name of parents and cell phone number
Lbl_Room – room number of group checked into
Lbl_SecCode – security code
Defining the Page Size
The first thing you should do is to define the label size in the canvas window. This will allow
you to see the limits you have to work with for your label. Click on the button that looks like the
image below:
Note: On windows machines make sure that you go into the print preferences for the Dymo
printer and set the label size you’ve selected prior to setting the page size in Roll Call.
Once you change the page setup, you’ll notice that the layout in the canvas changes to reflect the
paper size you’ve chosen. The box outline is the size of the label you have to work within.
24
Markers
You will now want to set the markers to the appropriate height. The markers are the lines that
go horizontally across the canvas. They have an arrow on the right size of the grid. If you don’t
see the markers, you can right mouse click on the canvas and select Display > Markers to display
them.
Markers set the height of the label to print. There are three markers: Detail, Break and Footer.
By default, these markers are set to the same location. In order to move these lines you must first
separate them. Click and hold the mouse on the arrow on the right side of the canvas and drag
the Footer down. Click on the same arrow and drag the Break down. You will now be able to
drag the detail marker where you need it to be. The Detail marker should be just above the line
outlining the bottom of the label. Once you’ve positioned the detail marker correctly you will
need to drag the break and footer markers to the same location as outlined below:
25
Dragging Objects
Now that you have the label size and marker limits set correctly it is time to begin designing
your parent tag. You can drag the objects from the library onto the canvas and position and size
them as you want. You can also set the font size, font characteristics and alignment by using the
property list for each object. To get to the property list you can double click on an object once it is
in the canvas and it will bring up the property list.
Adding Images
If you want to add an image onto the label just open up the image file in a previewer, copy it and
paste it into the canvas. You can then resize it and move it to where you want.
When you are finished with the changes you need to make sure you save the changes by clicking
on the save button as pictured below:
Printing a test label
When you are finished with the parent tag, you can print out a test to make sure that you have
defined it correctly. If you find that multiple labels are being printed, then you need to move the
markers up a little bit.
Customizing Child/Adult/Youth labels
You can customize the Child, Adult and Youth labels by following the same methods as described
for the parent tag. Each custom tag can be tested to ensure that it will print out properly on the
labelwriter.
26
Conclusion
As you can see, the form canvas allows you the ability to customize your check-in labels in any
fashion you desire. You even have the ability to add things to your labels that you can’t currently
have on the standard labels!
27
CREATING GROUPS
Group Hierarchy
Groups are defined by the following classifications:
1. Campus. If your church has multiple campuses or locations with different groups and
classes at each site, you may want to define your groups at the campus level. The
campus indicates which site or location the group stems from.
2. Group Type. The next level in the hierarchy is group type. This tells us the general
classification of the group. Is the group a committee, a small group, a Sunday school
class or a youth group? Your church defines these group types or classifications. Roll
Call’s default group types are Group and Class.
3. Department. The next level in the hierarchy is the department. The department is
the ministry area within your church that is responsible for overseeing the group.
Children’s Ministry, Congregational Care, Youth and Music are some common
departments.
4. Status. The status indicates whether the group is active or inactive.
Add a Group
Enter general information
From the Check In wizard, in the groups area, click on the plus sign to add a group. Once you are in the screen to add the group:
1. Enter the values for Campus, Group Type, Department and Status.
2. Enter the name of the specific group under Group Section.
3. If the group has a leader, enter the last name in the Leader field. Press tab to view a
list of the folks with that last name. Select from the list.
4. If the group has a co-leader, enter the last name in the Co-Leader field. Press tab to
view a list of the folks with that last name. Select from the list.
5. Enter the Location of the group, if applicable.
6. Indicate if the group meets weekly or randomly.
7. You may enter any comments or notes in the Notes field.
8. The Start Date will default to today’s date. You may change it if you’d like.
Click SAVE & CLOSE to save the information and return to the Search screen. Click
SAVE & NEW to save the information and enter a new group.
Enter leader’s
last name, then
press TAB.
Select from the
list
Select the
group type,
department and
name of this
group.
Click plus sign to
add members to
this class.
Choose weekly or random
frequency.
28
Add Members
To enroll people into the group, press the Members tab. From within the members tab:
1. Click the plus sign in the lower left of the window. A new window will be displayed
for you to enter the Last Name and First Name (or portion of the last name) of the
person you want to enroll.
2. Select the appropriate person to enroll in the group.
3. Tab across to enter any of the custom field data for this person. If you need to define
the membership custom field names, click CHANGE TITLES and enter the name of
the data you’d like to capture.
Enter last name or
portion of last name.
Further refine list by
entering first name.
Double click on the name
to select it. If the name is
highlighted, press enter to
select.
Create sessions
Next, you’ll want to indicate which days and at what times the group meets. The meeting
days and times are called sessions in Roll Call. A group that meets weekly can have an
unlimited number of sessions. A group that meets randomly does not have any sessions
defined.
To create a session:
1. Click on the session tab, if sessions are not currently displayed.
2. Click on the plus sign in the lower left. A row will be displayed, with a default of
Sunday and time of 12 a.m.
3. Use the Day of Week drop down box to select the appropriate day.
4. Enter the Start Time.
5. Enter the End Time.
6. Place your cursor under Room and double click to enter the room number of this
group meeting.
Select the day
that the group
meets.
Enter start and
end times.
Click on the plus
sign to add a new
session.
29
Preferences
Use the preferences tab in the group screen to:
1. Tell Roll Call how many labels you wanted printed upon check in into this group.
2. Tell Roll Call which fields to print on the Attendance Roster.
3. Set age ranges for graduation.
Enter roster preferences.
Enter the
number of
labels to
print on child
check in.
Enter age ranges
if you will be
graduating on
birthdays.
Mass Enrollment
To enroll multiple people into a group at once, choose Mass Enrollment from the Utilities
menu at the top.
Select Association
To limit the people in the list based on an association, click over each association you’d
like in the list.
Select Male or Female
To limit the list of possible enrollees to a certain Gender, check the box for Male or
Female. This can also be used in combination with Age range and association. For
example, if you wanted only male members, you could check the box for male and click
over the association Member.
Enter an age range
To limit the selection of possible enrollees based on age, enter an Age range. You can also
use this option in combination with Male/Female and Association. So if you wanted to
limit the list to boys ages 6 – 8, you could check male, and enter an age range of 6 – 8.
Press CONTINUE to get your list of potential enrollees. Mark the box to Select All if you
want everyone in the list to be enrolled in the group. Or, highlight each person you want
enrolled. To highlight multiple people, hold down the apple key on the Mac, or the shift
key on Windows.
Select using query editor
If there is different criteria you’d like to use to determine potential enrollees, you can use
the query editor to get that list. For this example let’s say we want a list of those people
that live in a certain city. From this window, click the QUERY EDITOR button. The
query editor will be displayed.
1. Change the Query In field to Address.
30
2.
3.
4.
5.
Select City from the Field Name drop down box.
Highlight “is equal to” in the Comparison box.
Enter the name of the city in the Value field.
Click on the QUERY button.
A list of people that live in that city will be displayed. Mark the box to Select All if you
want everyone in the list to be enrolled in the group. Or, highlight each person you want
enrolled. To highlight multiple people, hold down the apple key on the Mac, or the shift
key on Windows.
From within the
group you wish to
enroll people into,
select the Mass
Enroll option under
Utilities.
Use this window to build
the list of possible enrollee’s into this group. Choose
associations, gender or
age ranges that should be
included in the list.
Highlight all the
people you’d like to
enroll in the group.
Click ENROLL
SELECTED.
31
ADDING PEOPLE INFORMATION
Import People Information
When you begin using Roll Call, you may wish to import your existing contacts into the
database. Roll Call allows you to import people contact information and some custom
fields from a tab delimited text file. If you have the information in Excel, you can create
the tab delimited file, by saving as “tab delimited text file”.
There are four file variations that can be used for the import:
One Row per Family (standard)
This format assumes that all the information on a single line is for one family. The data
must be in the following order:
1. Family Last Name
2. Head’s First Name
3. Gender
4. Association
5. Cell Phone
6. Work Phone
7.Email
8. Spouse Last Name
9. Spouse First Name
10. Spouse Gender
11. Spouse Cell
12. Spouse Work Phone
13. Spouse Email
14. Home Phone 1
15. Home Phone 2
16. Address 1
17. Address 2
18. City
19. State
20. Postal Code
21. Child 1 First Name
22. Child 1 Gender
23. Child 1 Birth date
24. Child 2 First Name
25. Child 2 Gender
26. Child 2 Birth date
27. Child 3 First Name
28. Child 3 Gender
29. Child 3 Birth date
30. Child 4 First Name
31. Child 4 Gender
32. Child 4 Birth date
33. Child 5 First Name
34. Child 5 Gender
35. Child 5 Birth date
32
One Row per Family (custom)
This format allows you to import the same information, names, children, address, city
state, zip, gender and birthdates, but the order does not have to be exact. For example
if you don’t have a second home phone, you don’t need to leave a blank column for that
field. You will be able to tell Roll Call which data is in which column.
One Row per Person (standard)
In the one row per person format, each row in the spreadsheet represents an individual.
Roll Call will pull people together based on matches in the address field. The first person
it encounters with an address will be marked as the head of family.
This file type requires the data to be in this exact order. If you do not have data for a
column, leave that column blank.
1. Title (ex. Mr., Mrs., Rev etc.)
2. Last Name
3. First Name
4. Nick Name
5. Suffix (ex. Jr., Sr.)
6. Gender (Male or Female)
7. Family Position (Husband, Wife, Youth, Child, Adult or Other)
8. Marital Status
9. Association (ex. Member, Regular Attender, Visitor)
10. Email
11. Home Phone 1
12. Home Phone 2
13. Address 1
14. Address 2
15. City
16. State (2 character abbreviation)
17 Postal Code
18. Birth Date
19. Cell Phone
20. Work Phone
One Row per Person (custom)
In the one row per person format, each row in the spreadsheet represents an individual.
Roll Call will pull people together based on matches in the address field. The first person
it encounters with an address will be marked as the head of family.
In the custom format, the columns can be in any order you choose. This format also
allows you to import custom fields. As part of the import process you will be able to
define which data belongs to which fields.
Import Process
Once you have created the file that will be imported, do the following to bring the data
into Roll Call.
1. Expand the People menu on the left side.
2. Click on Import People (You can also select File>Import People from the top menu).
3. From the window that is displayed, select your file format type, click NEXT.
4. From this window, select your default Association and default Family Position.
These fields are required, so if you don’t have a value in the record, Roll Call will use
the default value to create the record in Roll Call.
33
5. Indicate which row the data starts. For example if you have titles in row 1, the data
would start on line 2.
6. Click LOAD FILE. Navigate to your text file and open it. Your data will be displayed
in a spreadsheet fashion in the lower section of the window.
Click on Import
menu item.
Choose file format
type, then click
NEXT.
Enter defaults for
Association and
Family Position.
Click LOAD
FILE, navigate
to your date,
then click
OPEN.
7. If you selected a custom file format, you will need to use the drop down box at the top
of each column to define the data represented in that column. If you do not want to
import the data in a column, leave the selection as SKIP.
Click on the column SKIP, to get
the drop down of
fields. Select the
field name that represents this column.
Click FINISH to import
the data once
you’ve mapped
all fields.
34
Enter a new Family
To enter people information into Roll Call using the Add Person screen you can do either
of the following:
1. From the Search Profiles (under People), click on the plus (+) sign in the lower left.
2. OR, Open up the People menu (left sidebar) and click Add a Family.
Click Add Family from menu.
Click plus sign
to add a person
or new family.
You are now in the Add Person screen. If you are entering a new family, enter the person
who will be marked as Head of Family first. When you first come into the form, you’ll be
in the Family Position field. Based on your selection here, the Title, Gender and Marital
Status can be filled in.
Once you enter family position, the title,
gender and marital
status will be filled in
for you.
Enter name and
contact information.
35
Contact Information
Once you’ve entered the Family Position, you can tab through each of the fields on this
main page. Enter the following information:
1. First Name - enter the person’s full first name.
2. Nickname - the nickname will default to the value entered for the first name. You can
change this to the nickname if it is different than the first name.
3. Middle Name – enter the middle name. This field is not required.
4. Last Name – enter the last name. This field is required. If you are entering a
business, enter the business name in the last name field.
5. Suffix - enter the suffix Jr., Sr., etc if applicable.
6. Spouse - if the person you are entering is married, you can enter the spouse’s name
here.
7. Association – enter how this person is involved in the church. Are they a Member,
Regular Attender, Visitor, etc.
8. Birth Date - enter the full birth date for the person.
9. Primary & Alt Phones - enter the phone numbers for the family here.
10. Unlisted - if the family doesn’t want their phone numbers listed in directory check
here.
11. Head of Family – this box will be checked for the head of family. Each family needs
one and only one head.
12. Personal Email – an email address for this person.
13. Envelope Number – you may enter an envelope numbers here, or use the assign
envelope number option under the Bulk Changes menu to assign numbers en masse.
14. Family Number – if you selected “automatic” from preferences, this number will be
assigned by Roll Call. Otherwise, you may assign a family number manually.
15. Badge No. - if the family position is child, a badge number will be assigned. You may
enter a different number if you’d like.
16. Barcode No. – the barcode number is used to identify individuals and families for
child check-in. This number is automatically assigned by Roll Call, unless you have
the preference set to manually assign the number.
Address
Next, we’ll move down to the address/pictures tab on the People screen. Notice there are
three tabs underneath Address. You can now click on the tab to enter Primary Address,
Alternate Address and Notes. The Primary address is the families main address. The
Alternate address is for folks who live in a different part of the country for part of the
year. The notes section can be used to enter driving directions.
Enter the following information on the Primary address tab:
1. Optional Mailing Name - The name entered here will be used as the mailing name
on all correspondence and labels. For example, if you have a husband and wife Jim
& Sue Smith, the default mailing label would be Jim & Sue Smith OR Mr. & Mrs.
Smith. However, if you entered “The Smith Family” as the optional mailing name,
the letters, labels and receipts would be addressed to “The Smith Family”.
2. Address, City, State and Zip.
3. Country – if you have the preference turned on for country there will be a country
field displayed here.
4. Shepherd Area – if your church assigns deacons, congregational care pastors or other
lay people to come along side families, you may indicate that here.
5. Family Email – an email address that can be used to send emails to the entire family.
6. Bad Address – if you’ve had mail returned, so you know it is an invalid mailing
address, you can mark the box for “bad address”.
36
7. Do not send mail – if someone has requested that you not send them mail, mark this
box.
8. Unlisted Address – if someone has requested that their address is not published, mark
this box.
Click on Alternate Address tab.
Enter alternate
address plus effective dates for the
address.
Note WEB
MAP and COPY
address buttons.
If you need to enter a secondary or alternate address, click on the ALT Address tab. Enter
the following information:
1.Address – the street address for the alternate address.
2. More Address – the address line 2.
3. City, State and Zip of the alternate address.
4.Country – if you have the preferences to display country, you can enter the country
here.
5.Phones – enter the home phone numbers for the alternate location.
6. Effective Month & Days – enter the start date when this address takes effective.
7. Ends Month & Day – enter the month and day that this address should no longer be
used.
To enter Notes regarding the address information, click on the Notes tab. Enter the free
format information here.
If you’d like directions to an address, click on the WEB MAP button on the bottom of the
page. If you’d like to copy the address onto the clip board to paste in another application,
click COPY ADDRESS.
Pictures
You can pull in family pictures and/or individual pictures into Roll Call. Click on the
Address/Pictures tab. Notice the two tabs on the right side for Picture and Family Picture.
The individual picture should be a portrait picture. To pull in the individual picture do the
following:
1. Make sure you are anchored on the Picture tab (click on the word Picture).
2. Click on the plus sign (+) in the lower left.
3. Navigate to your image file and click OPEN.
37
Click on the tab for the
type of picture you are
bringing in.
To navigate to the image file, click on the
plus sign.
The family picture should be in landscape. To pull in the family picture do the following:
1. Make sure you are anchored on the Family Picture tab (click on the word Family
Picture).
2. Click on the plus sign (+) in the lower left.
3. Navigate to your image file and click OPEN.
Phones
To enter an individual’s phone numbers, click on the Phones tab. Enter the following
information:
1. Work Phone & Extension – enter the person’s work number.
2. Cell Phone – enter the cell phone number for this person. If you wish to send texts,
you’ll also need to enter the carrier information.
3. Pager – enter a pager number for this person if they have one.
4. Fax – enter a fax number for this individual.
Click on Phones
tab.
Enter an individuals
phone numbers.
Click to add additional phone
numbers.
38
USING BAR CODES
Bar Code Font
To print the bar code font on badges or sign in rosters, you’ll need to move the font file
into your system font folder.
Windows
If you are using a windows standalone installation, you’ll want to copy the font file
(IDAutomation) from C:\BytheBook\RollCall\BarCode to your C:\Windows\Font folder.
If you are using Roll Call on Windows as part of a network installation, you’ll need to
copy the font file (IDAutomation) from C:\BytheBook\RollCall_Client\BarCode to C:\
Windows\Font folder
Mac
If you are using a OSX standalone installation, you’ll want to copy the font file
(IDAutomation) from Applications:RollCall:Barcode to your HD:Library:Fonts folder.
If you are using Roll Call on Mac as part of a network installation, you’ll need to copy the
font file (IDAutomation) from Applications:RollCall:Barcode to your HD:Library:Fonts
folder.
Bar Code Options
Bar Code Badge
One option for checking in students, is to create bar code badges. These badges are
produced using Roll Call. The badges are printed 8 or 10 per page using Avery business
card stock. They can be printed then laminated or placed in name tag holders. The
badges are printed with a bar code which identifies the student. They can also include
your church logo, the student’s picture, family number or badge number, allergy
information and the parent’s names.
39
Key Tag
Another option is to have key chain tags printed with a bar code to identify the student.
Bar Code Roster
Another possible method for checking students in is by bar code roster. Instead of
swiping a badge or entering a name, the person manning the check in station can find the
students name on the roster and scan it.
Bar Code Badge
To print the badges,:
1. Expand the People menu.
2. Click on Print Badges.
3. Select the “Run For” criteria. Do you want to print these badges for people in certain
groups, associations, shepherd areas, etc.
4. Once you’ve chosen your “run for” criteria, select the specific groups, associations or
shepherd area values. Click on the value on the left side to move it to the “Selected”
column.
Select who
you want
badges for.
Click on Print
Badges under
the People
menu.
40
5. Click GENERATE.
6. You are now in the Badge wizard. Select the option for 8 or 10 per page. Also
choose if you want an individual badge or a family badge. The individual badge will
include the individual picture, and allergy information. The family badge will include
the family members names and the family picture.
7. Click NEXT.
Choose family or
individual badge
Choose the
number of labels
printed per page.
8. From this window, choose the security number you’d like printed on the badge. Also
choose a logo to print on the badge. Finally choose the picture you’d like printed on
the badge.
9. Click NEXT to view all the people that a badge will be printed for.
Choose what you’d like
included on the badge.
10. Click FINISH to send the badges to the printer.
Example of
the family
badge.
41
Key tags
Order tags
You may order tags from us or from a different printer. If you order the tags from
us you’ll need to download the key tag template. We have several shapes and sizes
available. Open that template in your graphics program and place your logo on top of
the template. If you wish to have color all the way to the edge of the tag, make sure to
include a 1/8 inch bleed. Also, your logo graphic must be a high resolution graphic at
least 300 dpi. Export this to a pdf and email to us at [email protected].
If you decide to order from a different printer, here are the specifications for the bar code
number:
1. Must use a code 39 font.
2. The number must end with a Q.
3. There must be start and stop characters surrounding the number.
Assign key tag numbers
Next, you’ll need to assign the key tag number to a person in Roll Call. This can be done
under Check In/Out setup. Click on the Key tag graphic. Highlight the existing code for
the person you wish to assign a key tag. Scan the key tag to assign the new number.
Click on the bar
code graphic.
Click in the bar
code field, scan
the keytag bar
code to assign the
number.
Bar Code Roster
The bar code roster can be printed from the Group Reports screen.
1. Expand the Groups menu.
2. Click on Reports.
3. Click on “Sign in Roster” on the left side list of reports.
4. Click over all the groups that you’d like to run this for.
5. Click on the Criteria tab. Select the fields you’d like displayed on the roster. Make
sure to include bar code.
6. Click GENERATE to send the roster to the printer
42
From group
reports, select
Sign in Roster.
Select the
appropriate
groups.ß
Click on the
Criteria tab.
Choose the fields
you’d like included.
Click GENERATE.
43
USING FINGERPRINTS
Fingerprint Technology Configuration
To identify and check children in using finger prints, you will need to install the M2SYS
Server and Client software on Windows machines ( 2003 Server, Windows XP, Vista,
or Windows 7). The installation instructions for this software can be found on your
installation CD or at www.M2SYS.com.
The fingerprint scanner must be plugged into a USB port on the client machines.
Fingerprint Set Up with Roll Call
The first step is to set up the BioPlugin Adapter settings on each of the client machines.
Double click on the BioPlugin Adapter icon. From the finger print window, click on the
SETTINGS button.
Click on
SETTINGS
button to enter
administrative
information.
From the General tab, you’ll need to enter the IP address and port number of the
Biometric Server. This information can be found in the Control Panel under Biometric
Server.
Click on General
tab.
Enter IP address
and Port number
of the Biometric
Server.
44
From the Interface tab, you’ll need to indicate this is a Keyboard Interface.
Click Interface tab.
Select Keyboard
interface.
From the Destination Windows tab, you’ll need to indicate that you are connecting to Roll
Call. If you are using a single check in station, the Window Title is “Roll Call”. If you
have multiple check in stations and are using a network version of Roll Call, the Window
Title is also “Roll Call”. Enter rollcall as the Keystroke Destination. Make sure the
suffix is set to p {enter}
Click Destination
Window tab.
Enter Roll Call or
Roll Call Client as
the Window Title.
Set suffix to
p{enter}.
Connect a Fingerprint with a Person in Roll Call
When a person arrives to check in, you’ll need to first identify that person in Roll Call.
Click on the FIND BY NAME button and click on the specific individual. From the
Automated Attendance window, note this person’s ID in the upper right corner.
Next, bring up the Biometric SnapOn Adapter. Click on the FINGERPRINT
ADMINISTRATION button to enter this person’s Roll Call ID and scan their fingerprint.
45
Note the ID for this
person.
Click on FINGERPRINT ADMIN to
record Roll Call ID and
scan finger print.
From the Fingerprint Admin window, enter the person’s ID number, then click on the
REGISTER A NEW PRINT button.
Enter the ID
from the Roll
Call checkin
screen.
46
The next screen allows you to scan the individuals fingerprint. Make sure you set a
standard for which finger and on which hand will be scanned. Click on the right side to
capture the fingerprint. Have the student place their finger on the scanner. They will need
to scan their print three times. A message will come up indicating a successful scan.
Click to begin scanning fingerprint.
47
OPERATING THE CHECK IN STATIONS
Log into the Check In Station
To use the check in functionality of Roll Call, you need to log on with a user name that
is a check in user type user. To start Roll Call, double click on the Roll Call icon. The
Login window is displayed. If you do not get the Login screen, that means the security
system is not activated. You’ll need to give the Director user a password. See the chapter
on “Configuring Roll Call for Check In/Out”.
From this log in
screen, choose
the user and enter
password.
If you are already logged into Roll Call, but are in the back end of the program where you
look up people and groups, you can get into the Check In portion, by expanding the check
in menu, then selecting Launch. This will bring you to the Login window so you can
login as a check in user.
Click Launch under
the checkin/out menu
to get to the Login
screen. Sign in as
check in user.
Once you log in, you’ll be taken to the check in screen. This screen can look different
depending on the type of check in user you’ve signed in as. These options are discussed
more in the chapter on “Configuring Roll Call for Check In/Out”.
Here’s an example of a manned check in station. This station can be used to check in with
a scan or a search by name. It can also be used to check in visitors.
48
Can scan or
search by
name.
Can enter
visitors through
Quick Enroll.
Returns a list of
individuals.
Here’s an example of an unmanned touch screen station that allows check in by a scan or
by a search of phone number.
This screen can
accept a scan or
entry of the last
4 digits of the
phone.
Note the quick
enroll button is
gone.
This is an example of a manned touch screen user, searching by name and returning lists
of families. You can also do a scan from this station as well.
49
Check In Using a Last Name
To check a student in, based on their last name, type the last name. You can also type
the first few characters of the last name. Then press the enter key or press the SEARCH
button. This can be done with a keyboard or with the virtual keyboard on a touch screen
monitor.
Return
families is
selected.
Enter Last Name.
Click SEARCH
or hit the enter
key.
If return by family is selected, a list of families with that last name is presented. If there
are three people displayed in the upper right of the window, “return by family” is selected.
If only one person is displayed, “return by individual” is selected. If return by individual
is selected, a list of individuals with that last name will be presented.
Lists the families where the
last name is
Evans.
If “return by individual”
was selected, you would
get a list like this. All
individuals with that last
name are displayed.
50
Highlight the family that is present to check in. Press the Next button. A list of family
members is presented. Highlight the students that are there to check in. Note the “List
only Children” check box in the lower left of this window. Mark this box if you are only
checking in children. Press the NEXT button to check them in.
If “return by individual” is selected, a list of people with that last name will be displayed.
Highlight the students that are present to check in. Note the “List only Children” check
box in the lower left of this window. Mark this box if you are only checking in children.
Press the NEXT button to check them in.
Highlight the students that are present to check in.
Click NEXT.
The next window is the confirmation screen. This window will display the individual’s
picture if available. It will also display the groups, classes, events that they are enrolled
in, that are available for check in. Highlight the class they are checking into and click
CONFIRM to complete the check in process.
Highlight the class
she is checking into,
then click CONFIRM.
Click OTHER
GROUPS to
see all classes
meeting at
this time.
If the student is not enrolled in the class they wish to attend, you may press the OTHER
GROUPS button, to check them into a different class. Once you press the OTHER
GROUPS button, all classes that are meeting at the current time will be displayed.
Highlight the one they wish to attend, and press CONFIRM
51
To enter one time instructions or allergy information, press the ALLERGY/NOTES
button. A window will be displayed to enter this information. The allergy information
will be stored in the person’s record. The notes are not stored. They are meant for onetime instructions. Both pieces of information can be printed on the name tag label.
Window for entering allergies and
notes information.
Check In Using a Phone Number
To check a student in based on the last 4 digits of their phone number, enter that number
using the keyboard or numeric keypad on the touch screen monitor. Then press the enter
key or press the SEARCH button. The system will search for any families or individuals
that have a home, cell or work number that end in those 4 digits.
Enter last 4 of
phone number,
click SEARCH.
If “return by family” is selected, a list of families that meet that phone number criteria
will be presented. If there are three people shown in the upper right of the window, “return
by family” is selected.
Highlight the family that is present to check in. Press the NEXT button. A list of family
members is presented. Highlight the students that are present to check in. Note the “List
only Children” check box in the lower left of this window. Mark this box if you are only
checking in children. This will limit your list to only children. Press the NEXT button to
check them in.
If “return by individual” is selected, a list of people that meet that phone number criteria
will be displayed. Highlight the students that are present to check in. Press the NEXT
button to check them in.
52
List of individuals associated
with that phone
number.
The next window is the confirmation screen. This window will display the individual’s
picture if available. It will also display the groups, classes, events that they are enrolled
in that are available for check in. Highlight the class they are checking into and click
CONFIRM to complete the check in process.
Highlight the
class and click
CONFIRM.
Click OTHER
GROUPS to check
into a different class.
If the student is not enrolled in the class they wish to attend, you may press the OTHER
GROUPS button, to check them into a different class. Once you press the OTHER
GROUPS button, all classes that are meeting at the current time will be displayed.
Highlight the one they wish to attend, and press CONFIRM.
To enter one time instructions or allergy information, press the ALLERGY/NOTES
button. A window will be displayed to enter this information. The allergy information
will be stored in the person’s record. The notes are not stored. They are meant for onetime instructions. Both pieces of information will be printed on the name tag label.
Enter allergy
or note information.
53
Check In Using a Family Number
To check a student in, based on the family number, enter that number using the keyboard
or numeric keypad on the touch screen. Then press the enter key or press the SEARCH
button..
If you are checking in based on family number, “return by individual” should be selected.
It doesn’t make sense to return a list of families since only one family would be displayed.
If “return by family” is selected, you can change that by selecting Administration (on the
top menu) and choosing “return by individual”.
Enter family
number, then click
SEARCH.
Make sure to have
“by individual”
selected.
List of people in family number 100 are
returned.
Highlight to check
in.
When “return by individual” is selected, a list of people with that family number will
be displayed. Highlight the students that are present to check in. Note the “List only
Children” check box in the lower left of this window. Mark this box to limit your list to
only children. Press the NEXT button to check them in.
The next window is the confirmation screen. This window will display the individual’s
picture if available. It will also display the groups, classes, events that they are enrolled
in that are available for check in. Highlight the class they are checking into and click
CONFIRM to complete the check in process.
If the student is not enrolled in the class they wish to attend, you may press the OTHER
GROUPS button, to check them into a different class. Once you press the OTHER
GROUPS button, all classes that are meeting at the current time will be displayed.
54
Highlight class
and click CONFIRM to complete
the check in.
Click OTHER
GROUPS to check
student into different
class.
Highlight the one they wish to attend, and press CONFIRM.
To enter one time instructions or allergy information, press the ALLERGY/NOTES
button. A window will be displayed to enter this information. The allergy information
will be stored in the person’s record. The notes are not stored. They are meant for onetime instructions. Both pieces of information will be printed on the name tag label.
Check in Using a Bar Code
From the check in screen, scan the bar code from the badge, roster or key chain tag.
If “return by family” is selected a list of all the family members associated with this
bar code number will be displayed. You can easily tell if return by family is selected
by looking at the picture in the upper right of the window. If there are three people
displayed, “return by family” is selected.
While in this
screen, scan
the bar code.
Note “by family” is selected.
55
From the list of family members, highlight the students that are present to check in.
Press NEXT. The next window is the confirmation screen. This window will display the
individual’s picture if available. It will also display the groups, classes, events that they
are enrolled in that are available for check in. Highlight the class they are checking into
and click CONFIRM to complete the check in process for that student.
Highlight the
students that are
present to check
in.
If the “return by individual” is selected (only one person will be displayed in the upper
right), the bar code scan will take you immediately to the confirmation screen for the
individual associated with that bar code number. Highlight the class they are there to
attend, then click CONFIRM.
This window is
displayed after
scanning for an
individual.
Click OTHER
GROUPS to
check into a different group.
Highlight the
class, and click
CONFIRM.
If the student is not enrolled in the class they wish to attend, you may press the OTHER
GROUPS button to check them into a different class. Once you press the OTHER
GROUPS button, all classes that are meeting at the current time will be displayed.
Highlight the one they wish to attend, and press CONFIRM.
To enter one time instructions or allergy information, press the ALLERGY/NOTES
button. A window will be displayed to enter this information. The allergy information
will be stored in the person’s record. The notes are not stored. They are meant for onetime instructions. Both pieces of information will be printed on the name tag label.
56
Check In with Rapid Check In
To use the “rapid check in” feature, the check in user must have “rapid check in” marked
as an option. For more information on setting up users, see the “Configuring Roll Call for
Check In” chapter of this manual.
The rapid check in feature will automatically check a student into his class if he is only
enrolled in one class for the current check in period. Once you highlight his name, and
press NEXT, the attendance is recorded for that class and labels will automatically be
printed.
If there are two classes available for the student to check into, the confirmation screen
will be displayed. If the student is not enrolled in any classes meeting at the current time,
the confirmation screen will be displayed, even though the user is rapid check in.
By using the “rapid check in” feature, you do loose the ability to enter allergy or notes
information during the check in process.
Check In Using a Touch Screen
To check in using a touch screen monitor, you’ll need to sign in using a check in user
that has “touch screen” marked. For more information on setting up users, see the
“Configuring Roll Call for Check In” chapter of this manual.
When you sign in as a check in user with the touch screen option, a virtual keyboard will
be displayed on the screen. This allows the user to enter a name or number using just the
screen. Once they enter the criteria, they can press the SEARCH button on the screen
instead of using the mouse. Once the lists are displayed, the user simply highlights by
using their finger on the screen to highlight names.
Enter the name
or number using
the virtual keyboard.
If you are using a scan to identify who is there to check in, you can still use the touch
screen, to select the names from the list, highlight the class and click the CONFIRM
button.
In this first example, let’s sign in as a touch screen user and we are going to search by
name. Touch the letters “CRU”, then touch the SEARCH button.
From the list of people returned, touch Melissa Crumb’s name. From the confirmation
screen, touch the class, then click CONFIRM. The attendance is now recorded and the
labels are printed.
57
Check In Using a Finger Print
From the check in screen, scan the fingerprint. If “return by family” is selected a list of
all the family members associated with fingerprint will be displayed. You can easily tell if
return by family is selected by looking at the picture in the upper right of the window. If
there are three people displayed, “return by family” is selected.
From the list of family members, highlight the students that are present to check in.
Press NEXT. The next window is the confirmation screen. This window will display the
individual’s picture if available. It will also display the groups, classes, events that they
are enrolled in that are available for check in. Highlight the class they are checking into
and click CONFIRM to complete the check in process for that student.
Highlight the
students that are
present to check
in.
Click OTHER
GROUPS to
check into a different group.
Highlight the
class, and click
CONFIRM.
If the “return by individual” is selected (only one person will be displayed in the upper
right), the fingerprint scan will take you immediately to the confirmation screen for the
individual associated with that fingerprint. Highlight the class they are there to attend,
then click CONFIRM.
If the student is not enrolled in the class they wish to attend, you may press the OTHER
GROUPS button, to check them into a different class. Once you press the OTHER
GROUPS button, all classes that are meeting at the current time will be displayed.
Highlight the one they wish to attend, and press CONFIRM.
58
To enter one time instructions or allergy information, press the ALLERGY/NOTES
button. A window will be displayed to enter this information. The allergy information
will be stored in the person’s record. The notes are not stored. They are meant for onetime instructions. Both pieces of information will be printed on the name tag label.
Enter allergy
or note information.
Check into Multiple Classes
You can certainly check an individual into multiple classes at once. For example, if you
had Sunday school at 9:30 and then Children’s Church at 11:00. When the child arrives at
9:20 and they’ll be going to both classes, you can check them into both at the same time.
The first step is to make sure both classes will show up in the confirmation screen. You
will need to set the check in start preferences to say 120 minutes before the class starts.
This will allow both the 9:30 and 11:00 classes to show up at 9:00.
Next, you will need to identify the person that is there to check in. You can use the bar
code scan, search by name, phone or family number methods described above. Highlight
the students that are present to check in. Click NEXT. From the Confirmation screen,
highlight both classes and click CONFIRM. The child is now checked in to both Sunday
school and Children’s Church.
Highlight both
classes.
Click CONFIRM.
Check in a New Person into an Existing Family
To check in a person who is not in the database, but their family is in the database, do the
following:
1. Search by name or phone number to find the appropriate family.
2. Highlight the appropriate family and click NEXT.
3. Click on the ADD TO EXISTING FAMILY button.
4. Enter the information for the new student.
This is also a g reat way to check in a vistor that is coming with an existing family.
59
From the results of
your family search,
highlight the appropriate family.
Click NEXT.
Click ADD TO EXISTING to add a member
to this family. Or if
this family brought a
visitor, you can add the
visitor here.
Note the Smith family
information is displayed for us here.
Click OK to
proceed with
the check in.
We can add up to 4
new children to this
family.
60
Check in Visitors
To check visitors into a class or group, click on the QUICK ENROLL button. Select
an association of Visitor. Next enter the address and phone information if you’d like.
Next enter the Mom and Dad’s information if you’d like to capture that. In the lower
section enter the children’s names. You can enter up to four children through this QUICK
ENROLL. Click OK to save this information.
Click on QUICK ENROLL to add visitors.
Enter address information if you’d
like.
At a minimum,
enter all the
children’s
names.
Enter mom and
dads info, if you’d
like.
Highlight the
children present
to be checked
in.
Click NEXT.
61
Now you will be at the screen to highlight those that are present to check in.
At the confirmation screen you will need to click on OTHER GROUPS button. This
will display all classes that are available for check in. Highlight the class you’d like to
Click OTHER
GROUPS.
Highlight the appropriate class for this child,
then press CONFIRM
check this visitor into. Click on ALLERGY/NOTES to enter allergy or one time note
information for the name tag. Once you click CONFIRM the labels will be printed.
Check into Services
You can set Roll Call up so that you can check people into worship services. First you’ll
need to define the Service. To do this expand the Service menu and click Add Service.
Enter the following information:
1.Name -Give the service a name.
2. Day – Select the day of the week this service meets.
3. Start Time – Enter the start time of the service.
4. End Time – Enter the ending time of the service.
5. Check in – Mark this box to allow automated check in to this service.
6. Labels – Indicate if you want name tags printed when someone checks into this
service.
7. Associations – Enter the association of people that can check into this service.
8. Click SAVE & CLOSE to save this service.
Mark that you’d like to
use “check in” for this
service.
Enter Service name
and time.
62
Check into the
service, the same
manner you
would check into
a class.
Once you have the services set up for check in, you can check people into those services
using any of the methods listed above.
Check Out
Compare tags
One method of checking the students out is to compare the security number on the child’s
name tag with the security number on the parent tag. If the numbers match the teacher
can release the child.
Using this method, you will want to make sure to have policies in place to handle the
circumstance where a parent looses the parent tag.
Using Roll Call
You can also check students out through the Roll Call system. When they are logged out,
the out time is recorded and any custody comments are displayed on the screen.
To log a student out:
1. Log onto Roll Call as a check in user that has “check out” privileges.
2. Identify the student that is checking out by scan or by searching name, phone or
family number.
Click CHECK
OUT.
Highlight the
class she is
checking out of.
63
If there are custody
comments they will be
displayed upon check
out.
3. Highlight the appropriate name.
4. Highlight the class they are checking out of.
5. Click CHECK OUT.
Check in Roster
You can print a check in roster from the check in screen. The check in roster is a report
for each class. It lists all the students that are checked in, their parents name, allergy and
note information, security number and birthday.
Select check in
roster from the
Administration
menu.
Highlight the
rosters you’d like
to print.
Click PRINT.
64
Sample check in roster.
65
USING MOBILE CHECKIN
Roll Call Mobile CheckIn is an add-on component to the Roll Call software package. It
allows you to check students in using an iPad, iPod touch, tablet or a smartphone that has
access to the internet or wireless connection to your local area network. You can even
check adults into worship services if you’d like.
When you use a mobile device to check students in, the name tags and security tags are
printed from a central location that has a computer with Roll Call, logged in as a Print
Queue user.
Getting Started
Mobile CheckIn Trial
We offer a 30 day trial of Mobile CheckIn, if you would like to give it a trial run. You
will need to activate your trial by doing the following:
1. Login as Administrator or Director
2. Select File>Enter License from the top menu
3. Click on the Mobile CheckIn tab
4. Click on the TRY IT button
Enter License Number
If you’ve purchased a license for the Mobile CheckIn component, you’ll need to enter
your license number to begin using it. To do this:
1.
2.
3.
4.
5.
Login as Administrator or Director
Select File>Enter License from the top menu
Click on the Mobile CheckIn tab
Enter the License Number
Click OK
Logging in with your Mobile Device
Roll Call Configuration
You can run Mobile Check In with Roll Call standalone or the network version of Roll
Call. If you are using Roll Call stand alone, Roll Call will need to be started. You’ll need
to log in as the print queue user. If you are running the client/ server version Roll Call
Server will need to be running. If you will be printing labels, you’ll need to log in as the
print queue user.
Mobile Device on Same Network
If you are running your mobile devices off the same network as your Roll Call system,
you will need to determine the IP address of Roll Call Server. If you look on the Server
dashboard, the IP address is displayed for you. It would be best to configure this machine
to have a fixed IP address, so that address does not change from week to week. This is
discussed further in our white paper on internet port forwarding http://www.bythebook.
com/dmdocuments/PortForwarding.pdf
To get to the
Mobile CheckIn
login screen, open
your broswer and
type the IP Address
of your Roll Call
Server machine.
If you are running Roll Call standalone, you will need to determine the IP address of that
machine. On the Mac, go to the Apple and select System Preferences, then Network. This
window will show you the IP address. On Windows, go to the Start menu in the lower
left of your screen. In the Search box, type in CMD, select the CMD under Programs. In
the Window that pops up, type in “ipconfig” and press return. This will give you your IP
address.
Once you know the IP Address, you’ll use that as the web address in your browser. Open
your browser and enter http://enter-ip-here . If you do not have a fixed IP address this
number could change each week. If you do have a fixed IP address you can create a
domain name to log into.
Mobile Device on Different Network
If you are checking in from a remote location and are using a 3G network, you will need
to create a fixed IP address for your Roll Call. A good example of this would be a bus
ministry where you’d have the bus driver check the students in before they get to church.
Creating a fixed IP is discussed further in our white paper on internet port forwarding,
http://www.bythebook.com/dmdocuments/PortForwarding.pdf
To log in, open your browser and enter http://enter-ip-here. Since you have a fixed ip
address you can create a domain name that is easier to enter.
Login Screen
You are now at the log in screen for the Mobile Check In system. Select the appropriate
user name. Make sure that each device logs in with a different user name. Enter the
password. Click OK.
Login using your
Mobile checkin
username.
Checking in Using Last Name
Once you’ve logged in, you’ll see two tabs; dashboard and check in. Click on the Check
In tab. Next, make sure to select “by Name” from the drop down. To check someone in:
1. Touch the field to get the keypad.
2. Enter the last name of the family who is present to check in.
3. Touch SEARCH.
Click on check in
tab.
Enter last name or
portion of last name.
Click Search.
4. A list of families with that last name will be presented if you check in user was set
to return by family. If the check in user was set to return by individual, you will
get a list of individuals with that last name.
5. Touch on the hyperlink on the appropriate family.
6. A list of each individual in that family will be presented.
Click on hyperlink for
the correct family.
Next you’ll get
a list of all the
people in that
family.
Mark the box for
each child that is
checking in.
7. Mark each person that needs to check in.
8. Click NEXT.
9. Now you are at the confirmation screen for the first family member checking in.
10. Mark the class or classes they are checking into, click CONFIRM.
11. The confirmation screen for the next family member will be displayed. Continue
this process until all family members are checked in.
12. Once each family member is checked in, the name tags will be printed at the
centralized print queue station.
Choose the class this
child will be attending, click CONFIRM.
Checking in Using Phone Number
Once you’ve logged in, you’ll see two tabs; dashboard and check in. Click on the Check
In tab. Next, make sure to select “by Phone Number” from the drop down. To check
someone in:
1. Touch the field to get the keypad.
2. Enter the last four digits of the families phone number. This could be the primary
phone for the family or a cell phone number for any of the family members.
3. Touch SEARCH.
Click on hyperlink for
the correct family.
4. A list of families that have a phone number with those 4 digits will be displayed,
if your check in user was set to “by family”. If your check in user preferences
were set to “by individual”, you will get a list of all people that have a phone
number with those 4 digits.
5. Touch on the hyperlink on the appropriate family.
6. A list of each individual in that family will be presented.
7. Mark each person that needs to check in.
Next you’ll get
a list of all the
people in that
family.
Mark the box for
each child that is
checking in.
8. Click NEXT.
9. Now you are at the confirmation screen for the first family member checking in.
10. Mark the class or classes they are checking into, click CONFIRM.
11. The confirmation screen for the next family member will be displayed. Continue
this process until all family members are checked in.
12. Once each family member is checked in, the name tags will be printed at the
centralized print queue station.
Choose the class this
child will be attending, click CONFIRM.
Check in Visitors
To check visitors into a class or group, click on the QUICK ENROLL button. Select
an association of Visitor. Next enter the address and phone information if you’d like.
Next enter the Mom and Dad’s information if you’d like to capture that. In the lower
section enter the children’s names. You can enter up to four children through this QUICK
ENROLL. Click OK to save this information.
Choose your visitor
association.
You can capture address
as well as mom and
dad’s informaiton here if
you’d like... but it is not
required.
Now you will be at the screen to highlight those that are present to check in.
At the confirmation screen you will need to click on OTHER GROUPS button. This
will display all classes that are available for check in. Highlight the class you’d like to
check this visitor into. Click on ALLERGY/NOTES to enter allergy or one time note
information for the name tag. Once you click CONFIRM the labels will be printed.
Joe was just entered
through the quick
enroll. Notice there
are no groups for him
to check into yet.
Click OTHER
GROUPS to enroll him
in a class.
Printing Name Tags and Parent Tags
Once a family has checked into their classes, the name tags will be printed at the
computer where you have logged onto Roll Call as the print queue user. You can have as
many of these print queue stations logged in as you’d like.
When you log in as the print queue user, you will see the print queue status for today.
Each family will be listed and the status of the labels will be listed on the right.
If you should need to reprint, simply highlight the family name and click REPRINT. The
name tags and security tag will be re-printed.
This is the window you’ll see
when you log in
as the print queue
user.
You may also print Check In Rosters from this user. Select Admin>Check In Roster from
the top menu. Highlight the classes you’d like to have rosters for, click PRINT.
Using the Dashboard
When you click on the Dashboard tab, you will see a list of all the classes that someone
has checked into today. The head count and visitor counts for each class are listed on the
right.
Dashboard will
show headcounts for all
classes meeting
today.
Click on a class to
see everyone who
is checked in.
Click on the class name to view a list of the people that have checked into that class.Once
a family has checked into their classes, the name tags will be printed at the computer
where you have logged onto Roll Call as the print queue user. You can have as many of
these print queue stations logged in as you’d like.
ATTENDANCE REPORTS
Attendance Summary
The attendance summary report gives head count information for service and group
attendance information. The Attendance Summary by Day lists the group or service, the
meeting date, the number of people enrolled if the attendance is for a group, the number
of visitors (people with the association of visitor) that attended, the head count and the
number of people that attended. For a specific class/service and day the head count
and number of people will be the same. However, on the summary lines, the number
of people represents the number of “unique” people that attended those classes. So if
someone attended 2 classes and a worship service, they would only be counted once.
The Attendance Summary can also be run by week, month or year. When running for this
time frame, it will display the head count.
To run the attendance summary report by day:
1. Expand the Attendance menu.
2. Click on Reports.
3. Highlight Attendance Summary.
4. Enter the date range for the attendance data you are interested in.
5. Select “By Day” as the report type.
Enter date range
you are interested
in. Also enter
what type of attendance you are
interested in.
Highlight Attendance Summary
Report.
Click GENERATE to run the
report.
6. Choose which attendance you want to run this for. You may select All and it will list
all worship service attendance as well as all group attendance for the date range you
entered. You may select Service, and then choose which services you’d like to see
or you may choose groups, then pick the specific groups you’d like included in the
report.
7. Click GENERATE to run the report.
74
Note the daily totals for each class.
Since we selected
all, the small
group and worship services are
included also.
Note the combined totals for all
Children’s classes.
To run the Attendance Summary report by week, month or year:
1. Expand the Attendance menu.
2. Click on Reports.
3. Highlight Attendance Summary.
4. Enter the date range for the attendance data you are interested in.
5. Select by week, by month or by year as the report type.
6. Choose which attendance you want to run this for. You may select All and it will list
all worship service attendance as well as all group attendance for the date range you
entered. You may select Service, and then choose which services you’d like to see
or you may choose groups, then pick the specific groups you’d like included in the
report.
7. Click GENERATE to run the report.
Enter date
range.
Choose the
attendance you
are interested in
seeing.
Select by week,
month or year.
Choose the
specific values.
75
Note each of the
classes I chose is
listed. The head
count for the entire
week is listed.
Click EMAIL
to send this
report to
someone via
Email.
Click graph
to create a
graphical
representation
of this data.
Graph of above
attendance data.
Note weeks
along bottom.
Attendance by Person
The attendance by Person report outlines the different services or groups a person came
to, if you run this report “by day”. If you run this report by week, month or year it will
show you in a spreadsheet format how many times they attended each week, month or
year.
To run the attendance by person report by day:
1. Expand the Attendance menu.
2. Click on Reports.
3. Highlight Attendance by Person.
4. Enter the date range for the attendance data you are interested in.
5. Select “By Day” as the report type.
6. On the “Who” tab, select which people you want to run this for. You can choose
by association, groups, keywords, shepherd areas or search the database. Once you
choose your type, you can pick the specific values. For example, if you wanted to see
all your Members and Regular Attenders, choose Associations, then click on Member
and Regular Attender to select those values.
76
Highlight Attendance by
Person.
Click on the
Who tab.
And choose
which people
you want
included in
the report.
Enter date range
and select “by day”
to get the detail
attendance information.
In this example I
choose groups, and
picked several Sunday School classes.
Click to only
show active
groups in the
list. Mark if
you only want
to see active
members in the
report.
7. Next click on the “What” tab to choose which attendance you want to run this for.
You may select All and it will list all worship service attendance as well as all group
attendance for the date range you entered. You may select Service, and then choose
which services you’d like to see, or you may choose groups then pick the specific
groups you’d like included in the report.
Click on the “What”
tab to choose the type
of attendance data to
include in the report.
In this example
I’ve chosen
to include attendance for the
1st grade - 6th
grade classes.
77
8. Next click on the Columns tab to choose the information you wish to include on
the report. Click on a column name from the left column and move it to the middle
column.
9. Click on the View People tab, to review the people that will be included in the report.
10. Click GENERATE to run the report.
Click on the Columns tab to add
additional fields to
the report.
Double click on
a field in the left
column to move it
to the “Selected”
column.
Click on View Records tab to see all
the people that will
be included in the
report.
Shows a person’s
name, then lists
what they attended and the date
they attended.
78
To run the by person report by week, month or year:
1. Expand the Attendance menu.
2. Click on Reports.
3. Highlight Attendance by Person.
4. Enter the date range for the attendance data you are interested in.
5. Select by week, by month or by year as the report type.
6. On the “Who” tab, select which people you want to run this for. You can choose
by association, groups, keywords, shepherd areas or search the database. Once you
choose your type, you can pick the specific values. For example, if you wanted to see
all your Members and Regular Attenders, choose Associations, then click on Member
and Regular Attender to select those values.
Click on Attendance by
Person.
Click on Who
tab.
Choose who you wish
to see in the report. In
this example, I chose
by Association. Then
picked Member, Reg
Attender and Occasional Attender.
7. Next click on the “What” tab to choose which attendance you want to run this for.
You may select All and it will list all worship service attendance as well as all group
attendance for the date range you entered. You may select Service, and then choose
which services you’d like to see or you may choose groups, then pick the specific
groups you’d like included in the report.
Click on the What
tab. Then choose
the type of attendance data you wish
to consider for this
report.
In this example
I’ve chosen
Service attendance. And
chose these 3
services.
8. Next click on the Columns tab to choose the information you wish to include on
the report. Click on a column name from the left column and move it to the middle
column.
9. Click on the View People tab, to review the people that will be included in the report.
10. Click GENERATE to run the report.
79
Double click on
a field from the
left side column
to move it to the
Selected column.
The report lists how
many times a person
came each month.
The dash means there
was no attendance for
that month.
The number of
months attended
and # months
missing are also
included.
Note all the
actions that can
be performed.
Attendance by Type
The Attendance by Type report will list all the people who came to a group or service on
a specific day. This is a great report to run if you want to see who came to your Sunday
School classes last weekend and who was absent. Or you can see who attended last
Saturday nights service.
To create the Attendance by Type report, do the following:
1. Expand the Attendance menu.
2. Click on Reports.
3. Highlight Attendance Summary.
4. Enter the date range for the attendance data you are interested in.
5. Choose which attendance you want to run this for. You may select All and it will list
all worship service attendance as well as all group attendance for the date range you
entered. You may select Service, and then choose which services you’d like to see
or you may choose groups, then pick the specific groups you’d like included in the
report.
6. Click GENERATE to run the report.
80
Highlight Attendance by Type.
Select the specific
values based on
the type of attendance you chose.
Select which
type of attendance you are
interested in.
Select group,
service or all.
Click on the
Columns tab
to select additional data to be
included on the
report.
Click GENERATE to run
the report.
Double click
or drag a field
from left side
to “Selected”
column.
Lists the class
name.
Lists members
present for the
date.
Lists absent
members.
Attendance by Session
The Attendance by Session report will list all the people who came to a specific group
session or a specific service time on a specific day.
To create the Attendance by Session report, do the following:
1. Expand the Attendance menu.
2. Click on Reports.
3. Highlight Attendance by Person.
81
4. Enter the date range for the attendance data you are interested in.
5. Choose which attendance you want to run this for. You may select All and it will list
all worship service attendance as well as all group attendance for the date range you
entered. You may select Service, and then choose which services you’d like to see
or you may choose groups, then pick the specific groups you’d like included in the
report.
6. Click GENERATE to run the report.
The report lists the
name of the group
or service and the
specific time.
All who attended
at that time are
listed.
Absent Present Report
The absent/present report allows you to find folks who have been absent so many weeks
or who have attended so many times in a certain time frame.
To run the Absent/Present report:
1. Expand the Attendance menu.
2. Click on Reports.
3. Highlight Absent Present.
4. Enter the date range for the attendance data you wish to view.
5. On the “Who” tab, select the people to consider for the attendance report. You can
choose by association, groups, keywords, shepherd areas or search the database.
Once you choose your type, you can pick the specific values. For example, if you
wanted to evaluate attendance for all your Members and Regular Attenders, choose
Associations, then click on Member and Regular Attender.
Highlight
the Absent/Present
report.
From the
“who” tab,
choose which
people you’d
like to consider for the
report.
Enter date
range of attendance that will
be included on
report.
82
6. Next click on the “What” tab to choose which attendance you want to use in
determining who was present or absent. You may select All and it will evaluate
attendance for all services and groups. Select Services and choose the specific
services to only look at attendance for those services. Select Groups to choose
specific groups.
In determining if a person was absent or present, which attendance
should be considered...
All, specific groups or
specific service attendance.
7. Click on the “When” tab to enter your absent present criteria. Enter how many weeks
you wish to look back. Choose to find people who were absent or find people who
were present. Enter how many times.
8. Next click on the Columns tab to choose the information you wish to include on
the report. Click on a column name from the left column and move it to the middle
column.
9. Click on the View People tab, to review the people that will be included in the report.
10. Click GENERATE to run the report.
Enter how many
weeks to look back
from ending date.
Indicate how
many weeks
absent or
present.
Enter if you are
looking for people
absent or present.
Shows
number
of weeks
missing.
Lists all the people that met that
criteria. Shows
attendance by
week.
83
Visitor Report
The Visitor report will list all your first time, second time, third time visitors, based on the
association of visitor and the attendance data you wish to evaluate.
To create the Visitor report, do the following:
1. Expand the Attendance menu.
2. Click on Reports.
3. Highlight Visitor Report.
4. Enter week of attendance you are interested in looking at.
5. Choose the type of visitor you are looking for from the drop down under the Who tab.
Then choose the association(s) you use to indicate a visitor.
6. Click on the “what” tab and indicate which type of attendance you wish to evaluate.
7. Click GENERATE to run the report.
Highlight
Visitor report.
Choose the
number of
times visited.
Choose the association your church
uses for visitors.
Choose the type of attendance you wish to
consider when determining if it was their 1st,
2nd or 3rd time visiting.
Click GENERATE to
run.
Our list of 1st
time visitors
on the 15th.
84
Index
A
D
Allergy Info
entering at check in 53
Association 36
Attendance
record 5
Dymo Labelwriter
installation 10
B
Bar Code
badge 6, 39
printing 40
checking in with 55
font 39
key tag 40
roster 40
printing 42
Bar Code Scanner
installation 10
Birthday 36
C
Campus
default for check in 13
Check In 5
into worship service 62
multiple classes 59
preferences 17
rapid check in 57
screen 49
set up 11
user
defaults 12
sign in 48
types 12
users 11
using bar code 55
using family number 54
using fingerprint 58
using last name 50
using phone number 52
visitors 59, 61
with touchscreen 57
Check In Roster 64
Check In Screen
appearance 14
Check In Times 17
Check Out 8
compare tags 63
user 12
using system 63
Classes. See also Groups
E
Email
record address 36
Envelope number 36
F
Family number 36
Fingerprint Scanner
connect w roll call 45
setup 44
Finger Print
check in with 58
scan 6
G
Groups
creating new 17, 28
hierarchy 28
mass enroll 30
members 29
sessions 29
H
Hardware Requirements
bar code scanner 9
Dymo Labelwriter 9
finger print scanner 9
Roll Call station 9
I
Import
people info 32
pictures 37
Installation
network version 9
single user version 9
K
Key Tag 5
Key Tags 40
assign numbers 42
ordering 42
Key tags
assign numbers 19
L
Logging In 48
M
Mass Enrollment 30
Multiple Classes 59
N
Name tags 5, 7
setup 15
O
Optional mailing name 36
P
Parent Tag 8
setup 15
People
enter new records 18, 35
Phone
cell phone 38
home 36
primary 36
work 38
Phone numbers 36
Q
Quick Enroll 13
R
Rapid Check In 12, 57
Reports
absent present 82
attendance by person 76
attendance by session 81
attendance by type 80
attendance summary 74
visitor 84
Return by
family 13
individual 13
S
Search by
family number 54
name 6, 13, 50
phone number 52
Security
activate 11
roll call 11
Security Number 8
Security Tags 5, 7
Self Check In 12
Service
check into 62
Sessions 29
Shepherd area 36
Sunday School Classes. See also Groups
T
Touch Screen
check in 57
user 12
U
Unlisted phone 36
V
Visitor
report 84
Visitors
checking them in 13
enrolling 59, 61
W
Worship Service
checking in 62