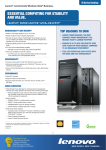
1
CODICO® E-1000 Series MPEG-2 Professional Encoders USER MANUAL SCOPUS DOCUMENTS (P/N 100474) (REV 1.0 / MARCH 2004) CODICO® E-1000 Series MPEG-2 Professional Encoders USER MANUAL SCOPUS DOCUMENTS (P/N 100474) (REV 1.0 / MARCH 2004) Scopus Network Technologies Inc. Scopus Network Technologies Ltd. U.S. Offices International Headquarters 100 Overlook Center Drive, 3rd Floor 10 Ha’amal St., Park Afek Princeton, NJ 08540. Rosh Ha’ayin, 48092 USA Israel Tel: (609)-987-8090 Tel: (972) –3-9007777 Fax: (609)-987-8095 Fax: (972) –3-9007888 Email: [email protected] Email: [email protected] Web: Web: www.scopususa.com www.scopus.net DOCUMENT HISTORY VERSION Rev. 0.0 DATE Feb. 2004 DETAILS First release for the E-1000 Series of MPEG-2 Professional Encoders. This series includes the CODICO® E-90, E-900, E-900A, E-1000 and the CODICO® E-1200 Advanced MPEG-2 Encoder. Official release for E1000 / 4.03 software version Rev. 1.0 March 2004 New format and head page © 2001 Scopus Network Technologies Ltd. All rights reserved. Scopus Network Technologies Ltd. Reserves the rights to alter the equipment specifications and descriptions in this publication without prior notice. No part of this publication shall be deemed to be part of any contract or warranty unless specifically incorporated by reference into such contract or warranty. The information contained herein is merely descriptive in nature, and does not constitute a binding offer for sale of the product described herein. Specifications and features sets are for technical information and are not legally biding. CODICO® is a Registered trademark of Scopus Network Technologies Ltd. In Israel, Germany, France, U.K. U.S.A. and Japan. All references to registered trademarks of other vendors are the property of their respective owners. File E 1000 Series User Rev 00.doc. Saved 22/03/2004 12:26 CODICO® E-1000 Series MPEG-2 Professional Encoders INTRODUCTION Scopus Network Technologies Ltd. takes great pride in delivery of its products, and makes every endeavor to ensure its clients full satisfactory. On behalf of all the Scopus team, we would like to extend our congratulations on your investment in the CODICO E-1000 Series of MPEG-2 Professional Encoders. E-1000 SERIES OF MPEG-2 PROFESSIONAL ENCODERS CODICO® PRODUCT LINE The E-1000 Series of Professional MPEG-2 Encoders is an integral member of the advanced CODICO product line. The CODICO transmission product sites and family offers reception comprehensive stations. In solutions addition, it is for both the most cost-effective solution for TV broadcasting applications. The following table lists the CODICO® product family and the illustration shows the integration of the members of the product line in a DVB environment. PRODUCT DESCRIPTION E-90 Entry Level MPEG-2 Encoders E-900A Audio Professional Encoders E-900/E-1000 MPEG-2 Professional Encoders E-1200 MPEG-2 Advanced Encoders E-1800 HDTV Encoder E-1510 DSNG Encoders and Up Converters E-1710/E-1720 DSNG Encoders and Modulators/Exciters MOD-6810 Line DSNG Modulator Scopus Documents (p/n 100474) Page i User Manual Front Matter PRODUCT IRD-2450 DESCRIPTION HDTV Integrated Receiver Decoder IRD-2600/IRD-2800 Advanced Professional Integrated Receiver Decoders Page ii CID-3100 Common Interface Decryptor RTM-3300 Compact DVB Re-Multiplexer and Stream Processor RTM-3800 Series DVB Multiplexers IVG-7000 Series Intelligent Video Gateways RSW-7x00 Series Redundancy Switches NMS-4000 Family Complete Network Management System CAS-5000 Series Conditional Access System SM-30x0 Series Statistical Multiplexing Systems SI-3050 Series PSI/SI Generator Applications (Rev 1.0 / March 2004) CODICO® E-1000 Series MPEG-2 Professional Encoders MANUAL SCOPE AND STRUCTURE The User Manual for the CODICO E-1000 Series of MPEG-2 Professional Encoders provides instructions for qualified technicians to facilitate optimum performance of the E-1000 Series in a Digital Video Broadcasting System. The manual is comprised of the following main sections: SECTION 1: OVERVIEW This section provides introduction and product description, including typical applications, describes the functional and physical structure of the unit and lists its main capabilities and specifications. SECTION 2: INSTALLATION This section provides data and procedures required to install and activate the unit. SECTION 3: FRONT PANEL OPERATION This section provides theoretical and detailed information regarding operating the control and monitoring functions provided from the E-1000 Front Panel. SECTION 4: ADVANCED OPERATION This section provides advanced information for operating high-level options, including software installation and updating, remote control via SNMP and configuration using VI tools. SECTION 5: MAINTENANCE This section provides instructions for performing operational tests on the encoder and for troubleshooting failures in the encoder operation. NOTES It is assumed throughout this document that personnel have general knowledge about the E-1000 Series of MPEG-2 Professional Encoders, their applications and capabilities. General knowledge of the CODICO® System and its applications is also assumed. For detailed information, refer to the CODICO® MPEG-2 DVB Family Product Description documents. Scopus Documents (p/n 100474) Page iii User Manual Front Matter TECHNICAL SUPPORT In case of technical problems with the CODICO system or one of its components, refer to the System Documentation. In most instances, this may save you time in resolving technical difficulties. Should you not be able to resolve the problem, call your local distributor for technical support. HOW TO RETURN FAULTY PARTS Before returning an item: 1. Request an RMA (Return Merchandise Authorization) Tracking Number from your local Distributor. 2. Scopus Network Technologies Support will assign an RMA Tracking Number; this must accompany the item returned and will be referred to in all correspondence. 3. Send the item to Scopus Network Technologies with the RMA Number included in the accompanying documentation (shipping and customs forms). CUSTOMER SUPPORT POINT OF CONTACT (POC) Scopus Network Technologies Inc. Scopus Network Technologies Ltd. U.S. Offices International Headquarters 100 Overlook Center Drive, 3rd Floor 10 Ha’amal St., Park Afek Princeton, NJ 08540. Rosh Ha’ayin, 48092 USA Israel Tel: (609)-987-8090 Tel: (972) -3-9007777 Fax: (609)-987-8095 Fax: (972) -3-9007888 Email: [email protected] Web: Page iv www.scopus.net (Rev 1.0 / March 2004) CODICO® E-1000 Series MPEG-2 Professional Encoders CE Certification The CODICO® E-1000 Series of Professional Encoders (CODICO® E-90, CODICO® E-900, CODICO® E-900A, CODICO® E-1000, CODICO® E-1200) meet all the CE Class B requirements. FCC Compliance Notice Trade Name Scopus Product Name Entry Level MPEG-2 Encoder Product Model Number CODICO® E-90 Product Name MPEG-2 Encoder Product Model Number CODICO® E-900 Product Name Audio Broadcast Encoder Product Model Number CODICO® E-900A Product Name Broadcast MPEG-2 Encoder Product Model Number CODICO® E-1000 Product Name Advanced MPEG-2 Encoder Product Model Number CODICO® E-1200 These devices comply with Part 15 of the FCC Rules. Operation is subject to the following two conditions: • This device may not cause harmful interference. • This device must accept any interference received, including interferences that may cause undesired operation. Responsible Party: Responsible Party's Name Carlo Basile Address 100 Overlook Center Drive, 3rd Floor Princeton, NJ 08540. USA Communication Tel: (609)-987-8090 Fax: (609)-987-8095 E-Mail: [email protected] Scopus Documents (p/n 100474) Page v User Manual Front Matter THE FCC WANTS YOU TO KNOW This equipment has been tested and found to comply with the limits for a Class B digital device, pursuant to Part 15 of the FCC rules. These limits are designed to Provide reasonable protection against harmful interference in a residential installation. This equipment generates, uses and can radiate radio frequency energy and, If not installed and used in accordance with the instructions, may cause harmful interference to radio communications. However, there is no guarantee that interference will not occur in a particular installation. If this equipment does cause harmful interference to radio or television reception, which can be determined by turning the equipment OFF and ON, the user is encouraged to try to correct the interference by one or more of the following measures: • Reorient or relocate the receiving antenna. • Increase the separation between the equipment and receiver. • Connect the equipment to an outlet on a circuit different from that to which the receiver is connected. • Consult the dealer or an experienced radio/TV technician. FCC WARNING MODIFICATIONS NOT EXPRESSLY APPROVED BY THE MANUFACTURER COULD VOID THE USER AUTHORITY TO OPERATE THE EQUIPMENT UNDER FCC RULES. Page vi (Rev 1.0 / March 2004) CODICO® E-1000 Series MPEG-2 Professional Encoders WARRANTY SCOPUS Network Technologies Ltd. warrants that the Product and any part thereof, including, but not limited to spare parts, will, when properly installed, conform to SCOPUS Network Technologies Ltd. published specifications and that the Product and any parts thereof, including, but not limited to, spare parts, will be free from defects deriving from wrong workmanship and faulty materials under normal use and service, for a period of twelve (12) months following the date of manufacture thereof. The supply of spare parts at reasonable cost shall be available for a period of three (3) years from the date of delivery. This warranty does not cover ordinary wear and tear of the Product or other defects due to circumstances beyond SCOPUS Network Technologies Ltd. control such as unsuitable operating means, chemical, Electro-mechanical or electrical influences and damages which may be caused by interference by the CUSTOMER or any unauthorized third party. Defective cards/assemblies will be sent to SCOPUS Network Technologies Ltd. for repair. The repaired cards/assemblies will be returned to the CUSTOMER within 30 days from their receipt by SCOPUS Network Technologies Ltd. Cards/assemblies repaired during the 12 months warranty period will carry a warranty of 6 months from date of repair or until end of original warranty period, whichever is the later date. SCOPUS Network Technologies Ltd. sole liability under this warranty shall be limited to the repair or replacement with equivalent units at SCOPUS Network Technologies Ltd. facilities, of any Product or parts thereof that do not conform to SCOPUS Network Technologies Ltd. published specifications or that are defective in material or workmanship, as specified above. The expense of installing repaired or replaced parts shall be borne by the CUSTOMER. SCOPUS Network Technologies Ltd. sole obligation under this Warranty is be the supplier of the Product to the CUSTOMER and to provide such services as set out in this Warranty on the SCOPUS Network Technologies Ltd. terms and conditions provided for herein. In no event will SCOPUS Network Technologies Ltd. be liable to the CUSTOMER for any business expenses, loss of profits, incidental, indirect or consequential damages, however caused, unless such expenses, loss or damages shall have derived from an infringement of patents of copyrights. THE WARRANTIES STATED HEREIN ARE EXCLUSIVE AND ARE EXPRESSLY IN LIEU OF ALL OTHER WARRANTIES, EXPRESSED OR IMPLIED, INCLUDING, BUT NOT LIMITED TO, THE IMPLIED WARRANTY OF MERCHANTABILITY OR FITNESS FOR A PARTICULAR PURPOSE. Beyond the warranty period, SCOPUS Network Technologies Ltd. shall repair or replace defective cards/assemblies according to its standard price list relevant at such time. Cards/assemblies thus repaired shall carry a warranty of 6 months. Scopus Documents (p/n 100474) Page vii User Manual Front Matter TABLE OF CONTENTS Section 1 Overview..................................................................................... 1-1 1.1. 1.1.1. 1.1.2. 1.1.3. 1.1.4. 1.2. 1.2.1. 1.2.2. 1.2.3. 1.2.4. 1.2.5. 1.2.6. 1.3. 1.3.1. 1.3.2. 1.4. 1.4.1. 1.4.2. 1.4.3. 1.4.4. 1.4.5. 1.4.6. 1.4.7. 1.4.8. 1.5. 1.5.1. 1.5.2. 1.5.3. 1.5.4. 1.5.5. 1.6. 1.6.1. 1.6.2. 1.6.3. General Information......................................................................................... 1-1 Local and Remote Control Features ................................................... 1-2 Statistical Multiplexing Capabilities .................................................... 1-3 Additional Highlights and Benefits ..................................................... 1-5 Applications.................................................................................... 1-7 Basic and Custom Configurations ................................................................. 1-11 E-90 Basic Configuration ................................................................ 1-11 E-900 Basic Configuration .............................................................. 1-11 E-900A Basic Configuration ............................................................ 1-12 E-1000 Basic Configuration ............................................................ 1-12 E-1200 Basic Configuration ............................................................ 1-13 E-1000 Series Custom Options ....................................................... 1-14 Architecture and Functional Description....................................................... 1-17 Scopus TripplePassTM Concept......................................................... 1-17 Block Diagram Description ............................................................. 1-18 Mechanical Structure...................................................................................... 1-20 Enclosure ..................................................................................... 1-20 Front Panel .................................................................................. 1-20 Rear Panel ................................................................................... 1-21 Encoder Video Input Interfaces ....................................................... 1-24 Encoder Audio Input Interfaces....................................................... 1-27 Encoder Data Input Interfaces ........................................................ 1-29 Encoder Output Interfaces ............................................................. 1-30 Encoder Control Interfaces ............................................................. 1-31 Encoder Management .................................................................................... 1-33 Front Panel Control ....................................................................... 1-33 TFTP Interface .............................................................................. 1-33 ASCII .......................................................................................... 1-34 SNMP Management ....................................................................... 1-34 NMS-4000 Management................................................................. 1-35 Capabilities and Specifications ...................................................................... 1-36 Capabilities .................................................................................. 1-36 Interface Connections Specifications................................................ 1-38 Physical Specifications ................................................................... 1-41 Section 2 Installation ................................................................................. 2-1 2.1. 2.2. Page viii General.............................................................................................................. 2-1 Installation Information ................................................................................... 2-1 (Rev 1.0 / March 2004) CODICO® E-1000 Series MPEG-2 Professional Encoders 2.2.1. 2.2.2. 2.3. 2.3.1. 2.3.2. 2.4. 2.4.1. 2.4.2. 2.4.3. 2.4.4. 2.5. 2.5.1. 2.5.2. 2.5.3. 2.5.4. 2.5.5. Safety Precautions .......................................................................... 2-1 Inventory Check ............................................................................. 2-2 Mechanical Installation.....................................................................................2-3 Site Preparation Guidelines .............................................................. 2-3 Rack Mounting................................................................................ 2-3 Electrical Installation ........................................................................................2-4 Compact Flash Installation ............................................................... 2-4 Power and Ground .......................................................................... 2-5 Cabling Connections ........................................................................ 2-5 Encoder Cascading Connections ........................................................ 2-6 Quick Start ........................................................................................................2-8 Power Up Sequence ........................................................................ 2-8 Initialization Sequence .................................................................... 2-8 External Remote Control ................................................................ 2-10 Initial Configuration ...................................................................... 2-10 Serviceability Checks..................................................................... 2-11 Section 3 Encoder Front Panel Operation ............................................... 3-1 3.1. Introduction ......................................................................................................3-1 Front Panel Theory of Operation ....................................................... 3-1 Front Panel Menu - Parameters Management Concept ......................... 3-3 Front Panel Menu ............................................................................ 3-5 3.2. Encoder Configuration Menu............................................................................3-7 3.2.1. Encoder Configuration Menu Overview............................................... 3-7 3.2.2. Video Configuration Menu .............................................................. 3-10 3.2.3. Audio Configuration Menu .............................................................. 3-18 3.2.4. Audio MUSICAM Configuration Sub-Menu ......................................... 3-19 3.2.5. Audio Dolby Configuration Sub-Menu .............................................. 3-21 3.2.6. Auxiliary Configuration Menu .......................................................... 3-28 3.2.7. BISS Items Configuration Sub-Menu ............................................... 3-34 3.2.8. Service Configuration Menu............................................................ 3-39 3.2.9. Advanced Services Configuration Sub-Menu ..................................... 3-40 3.2.10. A/D Services Configuration Sub-Menu............................................ 3-48 3.2.11. Other Service Configuratrion Sub-Menu ......................................... 3-52 3.3. Status Menu .................................................................................................... 3-56 3.3.1. System Status Menu ..................................................................... 3-57 3.3.2. General Status Menu ..................................................................... 3-58 3.4. Test Menu........................................................................................................ 3-60 3.4.1. Test menuÆAudio test................................................................... 3-61 3.4.2. Test menuÆVideo test................................................................... 3-61 3.1.1. 3.1.2. 3.1.3. Section 4 Advanced Operation.................................................................. 4-1 4.1. General ..............................................................................................................4-1 Scopus Documents (p/n 100474) Page ix User Manual Front Matter 4.2. 4.2.1. 4.2.2. 4.2.3. 4.2.4. 4.2.5. 4.2.6. 4.2.7. 4.2.8. 4.2.9. 4.3. 4.3.1. 4.3.2. 4.4. 4.4.1. 4.4.2. 4.4.3. 4.5. 4.5.1. 4.5.2. 4.5.3. 4.5.4. Management of Encoder Software .................................................................. 4-1 Terminal Set-Up ............................................................................. 4-2 View Encoder Configuration on Local PC............................................. 4-5 TFTP Connection and Set-Up ............................................................ 4-7 Formatting the Flash Disk .............................................................. 4-13 Update Encoder Software Files Using TFTP Tools ............................... 4-18 Update Encoder Shell Using TFTP Tools............................................ 4-22 Display Encoder Shell Data Using the Terminal ................................. 4-25 Update Encoder Options................................................................. 4-27 Update User Options ..................................................................... 4-31 Encoder Configuration.................................................................................... 4-32 Using VI Editor to Edit the Configuration File .................................... 4-33 Encoder Configuration File.............................................................. 4-36 DVB Scrambling.............................................................................................. 4-58 DVB Scrambling Format ................................................................. 4-58 DVB Scrambling Memory Structure ................................................. 4-59 DVB Scrambler Configuration Parameters ........................................ 4-60 SNMP Management ........................................................................................ 4-62 SNMP Configuration....................................................................... 4-62 SNMP Management Information Bases (MIBs) .................................. 4-63 SNMP Parameter Property Sheet ..................................................... 4-64 E-1000 SNMP Agent Traps ............................................................. 4-66 Section 5 Maintenance ............................................................................... 5-1 5.1. 5.2. 5.2.1. 5.2.2. 5.2.3. 5.2.4. 5.2.5. 5.3. 5.3.1. 5.3.2. 5.4. 5.4.1. 5.4.2. 5.5. Page x General.............................................................................................................. 5-1 Safety Instructions ........................................................................................... 5-1 Safety Precautions .......................................................................... 5-1 Caution and Warning Statements ...................................................... 5-2 Technical Support ........................................................................... 5-2 How To Return Faulty Parts .............................................................. 5-2 Customer Support Point Of Contact (POC).......................................... 5-3 Test Procedures ................................................................................................ 5-3 Power-Up Check. ............................................................................ 5-4 Serviceability Check ........................................................................ 5-5 Status and Diagnostic Messages..................................................................... 5-7 Front Panel Status Messages ............................................................ 5-7 Encoder Status Messages............................................................... 5-10 Rear Panel Connectors - Pin Assignment ..................................................... 5-11 (Rev 1.0 / March 2004) CODICO® E-1000 Series MPEG-2 Professional Encoders LIST OF FIGURES Figure Figure Figure Figure Figure Figure Figure Figure Figure Figure Figure Figure Figure Figure Figure Figure Figure Figure Figure Figure Figure Figure Figure Figure Figure Figure Figure Figure Figure Figure Figure Figure Figure Figure Figure Figure Figure Figure Figure 1-1: 1-2: 1-3: 1-4: 1-5: 1-6: 1-7: 1-8: 1-9: 1-10: 1-11: 1-12: 1-13: 1-14: 1-15: 1-16: 1-17: 2-1: 2-2: 2-3: 2-4: 3-1: 3-2: 3-3: 3-4: 3-5: 4-1: 4-2: 4-3: 4-4: 4-5: 4-6: 4-7: 4-8: 4-9: 4-10: 4-11: 4-12: 4-13: CODICO® E-1000 Series of MPEG-2 Professional Encoders .........................1-1 RTM-3800 Based Tipple Pass™ Stat Mux Application ..................................1-4 IVG-7300 Based Tipple Pass™ Stat Mux Application ...................................1-5 Audio and Video Distribution System Application........................................1-7 Video Distribution System Application........................................................1-8 Video Over ATM Application......................................................................1-9 Digital Terrestrial Distribution Application ................................................1-10 E-1000 Series of MPEG-2 Encoder - Layout and Option Location ...............1-16 E-1000 Series, Functional Block Diagram................................................1-18 E-1000 Series Encoder - Front View ........................................................1-20 E-1000 Series Encoder - Rear View .........................................................1-21 Composite/SDI Video Input Panel ...........................................................1-24 Composite/Component Video Input Panel................................................1-26 E-1000 Audio Input Options ...................................................................1-27 E-1000 Series Data Input Options ...........................................................1-29 E-1000 Series Output Options.................................................................1-30 E-1000 Series Control Interfaces Connections..........................................1-32 E-1000 Series Compact Flash Receptacle...................................................2-4 E-1000 Typical Rear Panels - Connectors Location .....................................2-5 RS-422 Cascading - Cable Connections......................................................2-7 ASI Cascading - Cable Connections ...........................................................2-7 Front View of the Encoder ........................................................................3-1 Encoder Front Panel Menu - Basic Tree Structure.......................................3-6 Encoder Configuration Menu Tree .............................................................3-8 Encoder Status Menus............................................................................3-56 Encoder Test Menus...............................................................................3-60 HyperTerminal Properties Window - Example ............................................4-3 HyperTerminal Set-Up Sequence - Example...............................................4-4 HyperTerminal Set-Up Sequence - Example...............................................4-4 RS-232 Connection Topology....................................................................4-5 HyperTerminal Capture Text Window - Example ........................................4-6 TFTP Connection Topology .......................................................................4-8 Encoder Control Transfer - Example ..........................................................4-9 TFTP TCP/IP Update Sequence - Example ...............................................4-10 “TFTP PumpKIN” Application - Main Window ...........................................4-11 “TFTP PumpKIN” Application - Options Window .......................................4-12 Flash Disk Set-Up for Formatting - Sequence Example .............................4-14 Copy to Shell RAM Disk - Using TFTP PumpKIN ......................................4-15 Flash Disk formatting Sequence - Example ..............................................4-16 Scopus Documents (p/n 100474) Page xi User Manual Front Matter Figure Figure Figure Figure Figure Figure Figure Figure Figure Figure Figure Figure Figure Figure Page xii 4-14: 4-15: 4-16: 4-17: 4-18: 4-19: 4-20: 4-21: 4-22: 4-23: 4-24: 4-25: 4-26: 5-1: Copy to Flash RAM Disk - Using TFTP PumpKIN .......................................4-17 Encoder Starter Files Extraction - Example...............................................4-17 TFTP PumpKIN transfer of “e1ksw.arj” File ..............................................4-19 TFTP PumpKIN Confirmation of “e1ksw.bat” File Transfer.........................4-20 TFTP Software Upgrading - Sequence Example ........................................4-21 TFTP PumpKIN Transfer of “shell.rom” File..............................................4-23 Shell Update - Sequence Example ...........................................................4-24 Encoder Shell Contents - Example ...........................................................4-25 Encoder Options Update Sequence - Example ..........................................4-30 User Options Update Sequence - Example ...............................................4-31 Memory Structure of Keys ......................................................................4-60 Encoder Parameter Property Sheet - Example 1 .......................................4-64 Encoder Parameter Property Sheet - Example 2 .......................................4-65 E-1000 Series Encoder - Panel Initialization Sequence ............................... 5-4 (Rev 1.0 / March 2004) CODICO® E-1000 Series MPEG-2 Professional Encoders LIST OF TABLES Table Table Table Table Table Table Table Table Table Table Table Table Table Table Table Table Table Table Table Table Table Table Table Table Table Table Table Table Table Table Table Table 1-1: 1-2: 1-3: 1-4: 1-5: 2-1 2-2: 3-1: 4-1: 4-2: 4-3: 4-4: 4-5: 4-6: 4-7: 4-8: 4-9: 4-10: 4-11: 4-12: 4-13: 4-14: 5-1 5-2 5-3: 5-4: 5-5: 5-6: 5-7: 5-8: 5-9: 5-10: E-1000 Series Configuration Options .......................................................1-14 Encoder Typical Connector Interfaces .....................................................1-21 Encoder Capabilities...............................................................................1-36 E-1000 Series Encoders Interfaces ..........................................................1-38 E-1000 Series Encoders Physical Specifications ........................................1-41 E-1000 Series of MPEG-2 Professional Encoders Inventory List ...................2-2 Encoder Status Messages .........................................................................2-9 Front Panel Controls and Indicators ..........................................................3-2 Encoder Shell Contents Description .........................................................4-26 Encoder Options Description...................................................................4-28 VI Editor Modes .....................................................................................4-34 VI Commands and Syntax ......................................................................4-35 Encoder Basic Configuration Parameters..................................................4-37 Encoder Specific features Configuration Parameters .................................4-49 E-1200 Look Ahead Specific Configuration Parameters .............................4-55 Old TCP Configuration Parameters ..........................................................4-56 Encoder-StatMux Configuration Parameters .............................................4-56 Encoder-ATM-Output Configuration Parameters .......................................4-57 CAS-5000 Configuration Parameters........................................................4-57 DVB Scrambler Configuration Parameters ................................................4-61 E-1000 Private MIB Table Description......................................................4-63 E-1000 SNMP Agent Traps......................................................................4-66 Fail To Comply Messages .........................................................................5-8 Encoder Warning Messages .....................................................................5-9 ANALOG 1/2 L/R Interface Pin-to-Signal Assignment ................................5-11 GPI Interface Pin-to-Signal Assignment ...................................................5-11 HSD Interface Pin-to-Signal Assignment ..................................................5-12 Monitor Interface Pin-to-Signal Assignment .............................................5-12 Data Control (RS-232) Interface Pin-to-Signal Assignment........................5-13 RS-422 Output 1 Connection Interfaces Pin-to-Signal Assignment.............5-13 RS-422 Output 2 Connection Interfaces Pin-to-Signal Assignme................5-14 Audio Channel 3,4 Connector (Option) ....................................................5-14 Scopus Documents (p/n 100474) Page xiii CODICO® E-1000 Series MPEG-2 Professional Encoders Section 1 OVERVIEW 1.1. GENERAL INFORMATION The CODICO E-1000 Series of MPEG-2 Professional Encoders is a family of advanced MPEG-2 DVB encoders of the Main/Professional Profile @ Main Level compression standard (4:2:0/4:2:2 compression). The E-1000 Encoders are designed to provide either stand-alone operation (as required in a DSNG application), multiple sources multiplexing, when up to four encoders can be cascaded together, or in a multi-encoders array for statistically multiplexed transport streams. The E-1000 MPEG-2 Encoders are fully DVB compliant, allowing for installation into hybrid networks that include third party DVB-compliant equipment (checked and approved by ISOG and EBU). Housed in a 1-rack unit slim-line chassis and featuring low power consumption, the E-1000 Series integrates mechanically with the CODICO product line. Figure 1-1 provides a general view of the E-1000 Series of MPEG-2 Encoder. Figure 1-1: CODICO® E-1000 Series of MPEG-2 Professional Encoders Scopus Documents (p/n 100474) Page 1-1 User Manual Overview The E-1000 Series of MPEG-2 Encoders consists of the following encoders: • The E-90 Entry Level MPEG-2 Encoder • The E-900 Industrial MPEG-2 Encoder • The E-900A Audio Professional Encoder • The E-1000 Professional MPEG-2 Encoder • The E-1200 Advanced MPEG-2 Encoder NOTE The CODICO® E-1000 Professional MPEG-2 Encoder is used as the encoding section of the CODICO® E-1510 DSNG Exciter. The CODICO® MOD-8610 DSNG Modulator and UpConverter provides the modulation and up-converting features of the E-1510 DSNG Exciter. 1.1.1. Local and Remote Control Features The E-1000 Series of MPEG-2 Encoders provides local management from the Encoder’s Front Panel or from a local terminal. It can also be remotely controlled over the Ethernet and using SNMP tools (using either a remote terminal or a network management system). In both cases, the E-1000 series provides the tools for full operation, configuration and redundancy control of stand-alone and multi-encoder systems. FULL REDUNDANCY MANAGEMENT The E-1000 Series supports full modulator or multiplexer redundancy via double ports of either 2 x 270 MHz ASI or 2 x RS-422 interface. This ensures a constant alternative path for the output signal. When the E-1000 Series of Encoders are connected in a multi-encoders/multiprogram system, the CODICO® NMS-4000 Network Management System monitors the system components. If a problem arises at any point in the system, the NMS-4000 switches between redundant encoders, multiplexers or modulators to ensure an alternative path for the output signal. Page 1-2 (Rev 1.0 / March 2004) CODICO® E-1000 Series MPEG-2 Professional Encoders USER FRIENDLY LOCAL MANAGEMENT Initial setup and local operation of the E-1000 Series Encoders is quick and easy, with intuitive menu-driven software, viewed on an LCD and controlled locally by front panel pushbuttons. 10 pre-programmed setups can be stored to save time in configuring the encoder. The compact flash card port in the E-1000 front panel is used for software and configuration updates. SNMP LOCAL AND REMOTE MANAGEMENT The E-1000 Series Encoders are provided with the capability for local or remote monitoring and management from a terminal connected to the encoder and using industry standard SNMP (Simple Network Management Protocol) tools. The SNMP tools are also used to provide remote monitoring and management functions between a management station and a multi-encoder based system for the CODICO® NMS-4000 Network Management System. The Ethernet port is also used for network connection to receive software and configuration updates. 1.1.2. Statistical Multiplexing Capabilities The E-1000 series support statistical multiplexing for a multi-encoder based system. The statistical multiplexing (stat-mux.) feature calculates and sets the allocation of dynamic and/or static access priority to incoming signals according to required picture quality/video rate. These calculations set the optimal picture encoding level to provide a constant multiplexed transport stream for best usage of the bandwidth while providing the optimal picture on each channel. Two levels of statistical multiplexing are supported by the CODICO® DVB line: • Basic statistical multiplexing, using the CODICO® SM-3000 Statistical Multiplexer. • Advanced statistical multiplexing, implemented by the Scopus developed TripplePass™ Statistical Multiplexing concept. CODICO® SM-3000 STAT-MUX BASED STATISTICAL MULTIPLEXING Using the CODICO® SM-3000 Statistical Multiplexer in an E-1000/E-900 based multi-encoder system provides allocation and access priority to the incoming signals for optimal picture encoding level to provide a constant multiplexed transport stream at the output of a multi-input/multi-output multiplexing unit, based on the CODICO® RTM-3800 DVB Multiplexers. Scopus Documents (p/n 100474) Page 1-3 User Manual Overview TRIPPLEPASS™ BASED STATISTICAL MULTIPLEXING Advanced statistical multiplexing is provided by the Scopus developed TripplePass™ Statistical Multiplexing concept. It is a 3 steps parallel approach, securing best encoding and multiplexing mechanism in multi-encoder environment. The Scopus TripplePass™ concept uses the Pre-Processing and Look Ahead (PLA™) dual encoder architecture featured in the CODICO® E-1200 Advanced MPEG-2 Encoder. This architecture provides advanced pre-processing capabilities, including picture smoothing, dynamic noise reduction and picture re-sizing for best bit per pixel compression. It also provides look-ahead capabilities consisting of compression complexity estimation and advanced statistical multiplexing using the CODICO® SM-3010 TripplePass™ Statistical Multiplexer for best picture encoding in a multi-program transport stream multiplexing unit. This multiplexing unit is implemented by either the CODICO® RTM-3800 Line of DVB Multiplexers or by the new CODICO® IVG-7300 Intelligent Video Re-Multiplexer. The TripplePass™ statistical multiplexing system is managed by the CODICO® NMS-4000 Network Management System. Figure 1-2: RTM-3800 Based Tipple Pass™ Stat Mux Application Encoder 1 V1 A1a A1b V2 A2a A2b Encoder 2 AV Matrix (8x8) Output TS #1 V5 A5a A5b Encoder 20 10/100 BaseT Stat Mux Page 1-4 NMS (Rev 1.0 / March 2004) CODICO® E-1000 Series MPEG-2 Professional Encoders Figure 1-3: IVG-7300 Based Tipple Pass™ Stat Mux Application Encoder 1 V1 A1a A1b V2 A2a A2b Encoder 2 AV Matrix (8x8) Output TS #1 Encoder 12-16 V5 A5a A5b 10/100 BaseT Stat Mux 1.1.3. NMS Additional Highlights and Benefits Video Interfaces The E-1000 Series of MPEG-2 Professional Encoders provides Analog to Digital interface and serial digital interface for mixed analog and digital inputs: • • • • Analog video input, using the Composite/Component Video Input Module. Mixed analog and digital inputs, using the Composite/SDI Option Card. Serial digital video input, by installing the SDI Option Card. Composite and S-VHS analog video input, by installing the Composite Options Card. MPEG-2 Encoding Profiles The MPEG-2 Professional Encoders support the following encoding profiles: • 4:2:2 Professional Profile @Main Level • 4:2:0 Main Profile @Main Level Scopus Documents (p/n 100474) Page 1-5 User Manual Overview Audio Interface The 1000 Series Encoders provides up to 4 stereo (8 mono) audio channels. Each channel provides left/right analog or AES/EBU-2 digital interfaces for audio information. Dolby Profiles The E-1000 Series provides the following Dolby Digital supported features for the audio channels: • AC-3 / 2.0 Dolby Digital encoding. • Dolby 5.1 pass-through profile. • Dolby-E pass-through profile. Teletext and VBI Processing The E-1000 Series features advanced Teletext and VBI processing capabilities. Frame Synchronization The E-100 Series offers frame synchronization, which ensures recovery of sync timing in cases of video signal dropouts. Digital Noise Reduction The E-1000 MPEG-2 Encoder Series optionally provides Digital Noise Reduction (DNR). The DNR further improves video quality in the E-1000 Series by filtering out flicker noise and random noise typically found in video material of low-level quality. The E-1200 features advanced DNR, using adaptive and temporal filters for active noise reduction, sync-cut detection for I-frame insertion, and buffer control to further improves full content picture smoothing. Low and Ultra Low Latency (Delay) Mode The Low Delay (or low latency) Mode provided by the E-1000 series, offers a quick end-to-end response time to enhance two-way transmissions for DSNG and Live Interviews and is available for both 4:2:0 and 4:2:2 DVB compression standards. The Ultra Low Delay Mode offers for the 4:2:2 compression standard an ultra low end-to-end response time of up to 150 mSec. DVB Scrambling Module The E-1000 Series provides an optional, factory installed, DVB Scrambling module to support BISS (DSNG-CA) Scrambling for BISS MODE 1 and BISS-E type DSNG applications. The module also provides build-in proprietary scrambling for connection to CAS-5000 based systems or for encoder-based encryption. Page 1-6 (Rev 1.0 / March 2004) CODICO® E-1000 Series MPEG-2 Professional Encoders 1.1.4. Applications The E-1000 Series Encoders can be implemented in a wide range of applications. Below are some of the typical uses for the E-1000 Series Encoders. • Standard digital TV distribution, 4:2:0 profile • Professional digital TV distribution, 4:2:2 profile • Digital Satellite News Gathering, 4:2:2 profile • Direct Satellite Broadcast • CATV digital head-ends • Distribution over telecom channels • Private networks • Video On Demand • Cascading • Encryption and Scrambling Figure 1-4 through Figure 1-7 illustrate several system applications for the CODICO® E-1000 Series Encoders. Figure 1-4: Audio and Video Distribution System Application Video E-1000 Audio Audio only Encoders up to 4 stereo each Audio E-900A Audio E-900A Audio E-900A Audio E-900 Scopus Documents (p/n 100474) Muliplexer Modulator / network adater RSW Switch Redundant Muliplexer Modulator / network adater Page 1-7 User Manual Overview Figure 1-5: Video Distribution System Application 6+2 INPUT Encoder Encoder MAIN Encoder 6 Video/Audio Input Matrix MPEG-2 Multiplexer Modulation/ Network Adaptor Encoder BACKUP Encoder MPEG-2 Multiplexer Encoder Satellite RSW Switch Modulation/ Network Adaptor Cable TV Telco Terrestrial Encoder Encoder REDUNDANCY CONTROL EPG, PSI/SI Generation & Table Editor NMS CAS STAT MUX Page 1-8 (Rev 1.0 / March 2004) CODICO® E-1000 Series MPEG-2 Professional Encoders Figure 1-6: Video Over ATM Application IRD 2800 ( Site B) IRD 2800 (Site A) ATM RSW Switch ATM IRD 2800 (Site C ) Encoder ATM Multiplexer Adaptor Encoder A/V Matrix ASI Matrix ATM Multiplexer Adaptor Encoder Encoder CONTROL NMS 4000 Scopus Documents (p/n 100474) Page 1-9 User Manual Overview Figure 1-7: Digital Terrestrial Distribution Application Modulator Amplifier (CDFDM) Satellite dish MPEG-TS Sync System Component Video SCPC Encoder Audio ASI 4 GPS 1pps RX Network Adapter 10MHz SDI Video SCPC Encoder SCPC Encoder ASI 4 SFN Adaptor MPEG-2 TX Network Adaptor 10MHz RTM-3800 MPEG-2 Multiplexer S-VHS Video Audio Distribution Network (G.703 Fiber ATM) ASI 2 1pps Audio GPS Composite Video RX Network Adapter SCPC Encoder 2 ASI MPEG-TS Audio Sync System GPS 1pps Modulator Amplifier (CDFDM) Satellite dish 10MHz Page 1-10 (Rev 1.0 / March 2004) CODICO® E-1000 Series MPEG-2 Professional Encoders 1.2. BASIC AND CUSTOM CONFIGURATIONS NOTE As with all other CODICO family products, the E-1000 Series Encoders feature customization for application-specific implementations. Contact Scopus Network Technologies Technical Support for your particular system requirements. 1.2.1. E-90 Basic Configuration The basic configuration of the E-90 features the following: 1.2.2. • DVB Video Compression: 4:2:0, up to 8 Mbps and up to full D1. • Analog VBI Processing: Teletext, CC, VPS, WSS, VITC • Analog Video Input: Composite, 10-bit A/D, Basic TBC • Audio Input: 2 * Channels, configurable analog / digital • Low Speed Data (LSD): Up to 115.2 Kbaud. • TS Output Interface and Rate: 2 * ASI and 2 * RS-422 transport stream • Alarm output: GPI, configurable • Local Control Front Panel Control, 10 Pre-programmed setups E-900 Basic Configuration The basic configuration of the E-900 features the following: • DVB Video Compression: 4:2:0, up to 8 Mbps and up to 2/3 D1. • Analog VBI processing: Teletext, CC, VPS, WSS, VITC • Analog Video Input: Composite, 10-bit A/D, basic TBC • Audio Input: 2 * Stereo audio channels, configurable analog / digital • Low Speed Data (LSD): Up to 115.2 Kbaud. • High Speed Data (HSD): Up to 2 Mbps • TS Output Interface and Rate: 2 * ASI and 2 * RS-422 transport stream up to 25 Mbps • Latency Mode: 4:2:0 Low latency delay mode • Alarm output GPI, configurable • Local Control Front Panel Control, 10 Pre-programmed setups Scopus Documents (p/n 100474) Page 1-11 User Manual Overview 1.2.3. E-900A Basic Configuration The basic configuration of the E-900A features the following: 1.2.4. • Audio Input: 4 * Stereo audio channels, configurable analog / digital • Low Speed Data (LSD): Up to 115.2 Kbaud. • High Speed Data (HSD): Up to 2 Mbps • TS Output Interface and Rate: 2 * ASI and 2 * RS-422 transport stream up to 25 Mbps • Latency Mode: 4:2:0 Low latency delay mode • Alarm output GPI, configurable • Local Control Front Panel Control, 10 Pre-programmed setups E-1000 Basic Configuration The basic configuration of the E-1000 features the following: Page 1-12 • DVB Video Compression: 4:2:0, up to 50 Mbps and up to full D1. • Analog VBI processing: Teletext, CC, VPS, WSS, VITC • Analog Video Input: Composite, 10-bit A/D, basic TBC • Audio Input: 2 * Stereo audio channels, configurable analog / digital • Low Speed Data (LSD): Up to 115.2 Kbaud. • High Speed Data (HSD): Up to 20 Mbps • TS Output Interface and Rate: 2 * ASI and 2 * RS-422 transport stream up to 25 Mbps • Latency Mode: 4:2:0 Low latency delay mode • Alarm output GPI, configurable • Local Control Front Panel Control, 10 Pre-programmed setups • External Control Remote NMS-4000 Support for external SNMP control (MIB available) (Rev 1.0 / March 2004) CODICO® E-1000 Series MPEG-2 Professional Encoders 1.2.5. E-1200 Basic Configuration The basic configuration of the E-1200 features the following: • TripplePass™ Support Supports statistical multiplexing based on Scopus TripplePass™ Technology • PLA™ Capability Dual encoding architecture provides preprocessing and look ahead (PLA™) capability for complexity estimation. • DVB Video Compression: 4:2:0 / 4:2:2, up to 50 Mbps and up to full D1. • Video Input: Analog (Composite), Digital (SDI) • VBI processing: Teletext, CC, VPS, WSS, VITC (Analog and Digital) • Audio Input: 2 * Stereo audio channels, configurable analog / digital Dolby AC-3 5.0 Pass through • High Speed Data (HSD): Up to 20 Mbps • TS Output Interface: 2 * ASI and 2 * RS-422 transport stream up to 25 Mbps • Alarm Indications Via NMS • External Control Remote NMS-4000 control Support for external SNMP control (MIB available) Scopus Documents (p/n 100474) Page 1-13 User Manual Overview 1.2.6. E-1000 Series Custom Options Table 1-1 lists the options available for customized configurations of the E-1000 Series of MPEG-2 Professional Encoders. Figure 1-8 illustrates the mechanical layout inside the E-1000 Series (all models) and clarify the combination of options that can be selected. Table 1-1: OPTION OPT 001 E-1000 Series Configuration Options OPTION DESCRIPTION SM-3000 or SM-3010 Statistical E-90 E-900 E-900A E-1000 E-1200 N/A N/A N/A Option Built-In N/A N/A N/A Option Built-In Multiplexing Support OPT 002 Upgrade 4:2:0 to 4:2:2 OPT 003.1 SDI Input instead of the Analog Inputs, TBC and Frame Sync Option Option N/A Option N/A OPT 003.2 SDI Input in addition to the Analog Inputs, TBC and Frame Option Option N/A Option Built-In Sync OPT 004.1 2 x G.703 Outputs (E1 or E2), No FEC, Unframed N/A Option Option Option N/A OPT 004.2 2 x G.703 Outputs (E1 or E2), With FEC, Unframed N/A Option Option Option N/A OPT 005 DVB Scrambling + BISS DSNGCA N/A Option Option Option N/A OPT 006 VBI over SDI N/A Option N/A Option Built-In OPT 007 Encoder Cascading (RS-422) N/A Option Option Option N/A OPT 008 -48 Volt Power Supply (instead Option Option Option Option Option N/A N/A N/A Option N/A N/A Option Built-In Option N/A of 110/220 Volt) OPT 009 Built-in Modulator Control (for OPT 012 3rd and 4th Stereo: Analog/ AES/EBU (SP-DIF) + Embedded Page 1-14 the CODICO® MOD-8610 Modulator) (Rev 1.0 / March 2004) CODICO® E-1000 Series MPEG-2 Professional Encoders Table 1-1: OPTION E-1000 Series Configuration Options OPTION DESCRIPTION E-90 E-900 E-900A E-1000 E-1200 OPT 013.1 DS-3 Leased-line connection (ATM AAL-1 protocol) Option N/A Option Option N/A OPT 013.2 E3 Framed, no FEC Option N/A Option Option N/A OPT 014 AC-3 Pass-through Option Option Option Option Built In OPT 015 3rd ASI Output N/A Option N/A Option N/A OPT 016 ASI Input N/A N/A Option Option N/A OPT 018 Low Delay Mode (4:2:2 Only) N/A N/A Option Option N/A OPT 019 Dolby AC-3 / 2.0 Encoding Option N/A Option Option Option OPT 020.1 Dolby-E Pass-Through Option Option Option Option Option OPT 020.2 Linear Audio Option Option Option Option Option OPT 021 DNR, FrameSync, TBC, Component Input (in addition to N/A N/A N/A Option N/A Composite Input) NOTES Only one option can be selected for each location: 1. OPT 004, 005, 008, 012, 013, are factory pre-set. 2. OPT 004 and OPT 005 are interchangeable 3. OPT 015 and OPT 016 are interchangeable 4. Only one ASI Output available with OPT 005 and OPT 013 5. OPT 004 (E1 or E2) is provided with 2 * G.703 unbalanced outputs. OPT 004 for E1 may be ordered with 1 balanced and 1 unbalanced output. 6. FEC in option OPT 004 and OPT 013 relates to FEC according to DVB-C standard (ETS-300-329). ATM protocol includes its own error correction. 7. OPT 006 requires OPT 003 and/or OPT 012, accordingly 8. OPT 015 eliminates OPT 004 and OPT 013 9. OPT 016 eliminates OPT 004 and OPT 013 10. OPT 016 instead of OPT 007 Scopus Documents (p/n 100474) Page 1-15 User Manual Overview Figure 1-8: E-1000 Series of MPEG-2 Encoder - Layout and Option Location DOLBY 3 & 4 INPUTS CV AND/OR SDI INPUTS PLA™ MODULE (E-1200 ONLY STEREO 3 & 4 INPUTS COMPONENT INPUTS DVB SCRAMLER (E-900/E-1000 ONLY) OR OR TELCO OUTPUTS (E-900/E-1000 ONLY) Page 1-16 OR AC POWER SUPPLY OR DC POWER SUPPLY (Rev 1.0 / March 2004) CODICO® E-1000 Series MPEG-2 Professional Encoders 1.3. ARCHITECTURE AND FUNCTIONAL DESCRIPTION The E-1200 Advanced MPEG-2 Encoder features advanced pre-processing and complexity estimation (“look ahead”) encoding capabilities to enhance multiencoding systems performance and to compress low-bit rates at single channel environment (in the near future). This pre-processing and look ahead (PLA™) capability is part of the TriplePass™ Encoding and Statistical Multiplexing concept introduced by Scopus. 1.3.1. Scopus TripplePassTM Concept The Scopus TripplePassTM Encoding and Statistical-Multiplexing Mechanism (patent pending) is the ultimate solution in advanced encoding mechanism and statistical multiplexing techniques, providing the best class picture quality at a very low average bit rate and offering as much as 18 channels per satellite transponder. The TripplePassTM mechanism is a three steps parallel approach, taken to ensure the best encoding and multiplexing mechanism in a multi-encoder environment. The first two encoding passes are performed in a single encoder environment, whilst the third pass is operated in a multi-encoder environment. PRE-PROCESSING- FIRST PASS With the first pass, the encoder performs full content picture smoothing, dynamic noise reduction using adaptive and temporal filters, sync-cut detection for I-frame insertion and buffer control. Moreover, depending on bit rate budget, picture re-sizing is considered to find the appropriate bit per pixel compression. This initial pass process enables the encoder to optimize the second pass encoding and thus improve the picture quality. COMPLEXITY ESTIMATION - SECOND PASS The Complexity Estimation determines the best encoding process for each picture. A Pre-processing and Look Ahead (PLA™) process is used to predict the relative complexity of each picture in order to enable the third pass to allocate the bit rate such that almost equal quality will be maintained within the various picture and the various programs. Scopus Documents (p/n 100474) Page 1-17 User Manual Overview STATISTICAL MULTIPLEXING - THIRD PASS The statistical multiplexing algorithm is executed in a multi-program environment. The process is provided in conjunction with the CODICO® SM-3010 Advanced Statistical Multiplexer. The SM-3010 manages and controls each encoder output buffer optimizing the encoder VBR operating mode and utilizing each of the program’s statistics. 1.3.2. Block Diagram Description The block diagram in Figure 1-9 illustrates the signal processing pathways in the E-1000 Series of MPEG-2 Encoders. Figure 1-9: E-1000 Series, Functional Block Diagram control PREDICTOR SDI Input Digital Video (itu - r656) Digital video control Pre-processor (option) Video (itu-r656) Delayline CV Input Analog video Videoinput interface Analog vbi(cv) Mpeg-2 encoder video Asi 1 out Frame synchronizer a/d Asi 2 out Digital vbi vbi Vbi processor asi Program multiplexer T ransportstream outputinterface Asi 3 out (option) hsd High speed data Audio1&2input interface G.703 (option) control Audio1&2 a/d audio Ds3 (option) Audioencoder Audio3&4input interface(option) Dolbyac-3/2.0 encoder(option) Audio3&4 a/d Flash memory Dvbscrambler (option) G.703 (option) G.703 (option) Ds-3 (option) Ds-3 (option) scr1 (option) scr2 (option) control CPU CRT Page 1-18 RS-232 (Rev 1.0 / March 2004) CODICO® E-1000 Series MPEG-2 Professional Encoders Analog and digital video information, together with VBI data, are received by the video input interface. This information is first pre-processed and than encoded for output. Pre-processing includes A/D conversion (for the analog data), filtering, and frame synchronization as well as optional Digital Noise Reduction (DNR) and Advanced Time Base Correction (TBC). An MPEG-2 Encoder encodes the pre-processed information. The E-1200 Advanced MPEG-2 Encoder features an optional Pre-Processing function which provides advanced Digital Noise Reduction (DNR) and picture/signal smoothing capabilities to enhance the encoding condition with minimum loss of information and picture quality. The MPEG-2 encoding in the E-1200 features a dual encoding architecture enabling advanced pre-processing and look-ahead (PLA™) complexity estimation. This architecture consists of a Predictor element (first encoding level) and an MPEG-2 Encoder (second level). • The Predictor monitors and gathers the statistics of the incoming frames and provides frames complexity estimation using reference parameters. It predicts the encoding level required based on analyzing the picture dynamic behavior (sport scenes versus static scenes). A Delay Line holds the incoming frames until the estimation process is completed to compensate for time-delays during the process. This Delay Line provides up to 2 Sec. delay for best encoding prediction. • The MPEG-2 Encoder receives from the Predictor the per-frame compression parameters. It calculates the optimal encoding parameters and sends back to the Predictor. During the estimation pass, the actual bit rate is measured and compared to the required bit rate. Analog (mono and stereo) and digital (AES/EBU) Audio input information is received from up to four stereo inputs and provided to the Audio MusiCam encoder. Optional two inputs (replacing Audio In-3 and In-4) provides AC-3/2.0 Dolby digital encoding as well as Dolby 5.1 and Dolby-E pass-through. The encoder is equipped with separate Synchronous RS-422 and Asynchronous RS-232 ports, for HSD and LSD, respectively. Both methods of data transfer are uni-directional and may be used concurrently. A Program Multiplexer receives the processed MPEG-2 video information, the Audio processed information together with VBI and data from the HSD line and generates the SDI output transport stream. Scopus Documents (p/n 100474) Page 1-19 User Manual Overview 1.4. MECHANICAL STRUCTURE 1.4.1. Enclosure The E-1000 Series Encoders are housed in a ruggedized industrial enclosure, 1 U by 19” (Rack Mount). Featuring heat dissipation capabilities, the E-1000 Series Encoders may be installed without the necessity for spacing between units. This allows increased flexibility for installing a large number of encoders in limited-space environments. 1.4.2. Front Panel The front panel of the E-1000 Series Encoders has a compact, slim-line design (See Figure 1-10). For manual control of the encoder, a four-way touch pad provides access to parameter menus displayed in the LCD window. An entry is completed with the Enter and/or Escape touch pads. A compact flash card port at the right end of the front panel is used for software upgrades and storing encoder configurations. Figure 1-10: E-1000 Series Encoder - Front View Page 1-20 (Rev 1.0 / March 2004) CODICO® E-1000 Series MPEG-2 Professional Encoders 1.4.3. Rear Panel The rear panel of the E-1000 Series Encoders includes all of the required professional input/output connectors (Audio, Video, Monitor, Ethernet, High Speed Data), eliminating the need for additional connector panels on the rack. The AC connector and power switch are also located on the rear panel. Figure 1-11 shows a standard E-1000 Series rear panel. Figure 1-11: E-1000 Series Encoder - Rear View FORMAT 525/ 625 COMPST/Y * VIDEO IN PB PR DETECTOR V-SYNC PUSH * PUSH PUSH ASI-3[] ASI-IN[] SCR[] PUSH A N L G A N L G A N L G A N L G 1 L 1 R 2 L 2 R AES/EBU 1 AES/EBU 2 DS3[] AUDIO CH 3 & 4 GPI HSD ETH The rear panel connectors and interfaces are grouped in the following functional categories: • Encoder Video Input Interfaces, refer to paragraph 1.4.4. • Encoder Audio Input Interfaces, refer to paragraph 1.4.5. • Encoder Data Input Interfaces, refer to paragraph 1.4.6. • Encoder Output Interfaces, refer to paragraph 1.4.7. • Encoder Control Interfaces, refer to paragraph 1.4.8. Table 1-2 describes the function of each connector on the panel (including options). Table 1-2: INTERFACE Encoder Typical Connector Interfaces DESCRIPTION CONNECTOR TYPE ANLG 1 L Analog Audio-1 left channel. XLR female ANLG 1 R AES/EBU1 Analog Audio-1 right channel or Digital AES/EBU-1. XLR female ANLG 2 L Analog Audio-2 left channel. XLR female ANLG 2 R AES/EBU2 Analog Audio-2 right channel or Digital AES/EBU-2. XLR female Scopus Documents (p/n 100474) Page 1-21 User Manual Overview Table 1-2: INTERFACE AUDIO CH 3 & 4 Encoder Typical Connector Interfaces DESCRIPTION Optional Analog Audio-3 and 4 Channels or Digital AES/EBU-3 and -4 Channels, deployed over a “D25 type to XLR” adapter cable into four XLR female connectors, or CONNECTOR TYPE 25 pin D-Type Optional Dolby AC-3 2.0 encoding and/or Optional Dolby E pass-through GPI General Purpose Interface for the alarm relay. GPI HSD High Speed Data interface (private data, RS-422 interface). RJ-45 ETH For connection to Ethernet networks 802.3. RJ-45 (Standard) MONITOR For connection to a computer or monitor (RS-232 interface). 9 PIN D-type DATA For low speed data interface (RS-232 interface). 9 PIN D-type ASI-1 DVB ASI Output interface. BNC female 75Ω OUT 1 Transport Stream Output 1 (RS-422 interface). RJ-45 NOTE: When the optional G.703/E1 module is installed, this connector can be used for G.703/E1 Balanced Output. OUT 2 Transport Stream Output 2 (RS-422 interface). RJ-45 Power For connection to 90-250 VAC, 50/60 Hz mains power supply. HP A mechanical harnessing device is provided to prevent accidental removal of the AC power cable. Page 1-22 (Rev 1.0 / March 2004) CODICO® E-1000 Series MPEG-2 Professional Encoders Table 1-2: INTERFACE ASI-2, ASI-3 Encoder Typical Connector Interfaces DESCRIPTION In the standard E-1000 configuration, ASI-2 is provided as a follow-up to ASI-1 while ASI-3 is not connected. CONNECTOR TYPE BNC female 75Ω In addition, the ASI-2 and ASI-3 connectors are used for a variety of optional interfaces: DVB ASI-Output Expansion Interface: ASI-2 and ASI-3 connectors are used to provide additional DVB ASI outputs (requires installation of an optional ASI OUT Expansion card). DVB ASI Input Expansion Interface: ASI-3 connector is used to provide a DVB ASI Input (requires the installation of an optional ASI IN Expansion card). G.703 Interface: ASI-2 and ASI-3 connectors are used to output G.703 level unbalanced signal (Requires installation of optional G.703 modules for each different output rate): • G.703 / E1: 2,048 Kbps • G.703 / E2: 8,448 Kbps • G.703 / E3: 34,3688 Kbps DVB Scrambler: ASI-2 and ASI-3 connectors are used for DVB Scrambled output (requires installation of an optional DVB Scrambling module). Scopus Documents (p/n 100474) Page 1-23 User Manual Overview 1.4.4. Encoder Video Input Interfaces The E-1000 Series of MPEG-2 Professional Encoders are provided with a wide range of optional video input panels: • Composite/SDI Video Input Panel. • Composite/Component Video Input Panel (E-1000 MPEG-2 Encoder only). In addition, video from the ASI Input transport stream can also be received from the ASI IN optional interface. 1.4.4.1. Composite/SDI Video Input Panel (Option) The Composite/SDI Video Input panel for the E-1000 Professional Encoders provides full range of video inputs, including analog super-video (S-VHS) interface, analog composite video (CV) interface and serial digital video interface (SDI). Analog Teletext (and other VBI elements) is provided over CV while digital VBI information is provided over SDI. Figure 1-12 displays the Composite/SDI Video Input Panel. Figure 1-12: Composite/SDI Video Input Panel Two derivates are also available as optional Video Input Interface panels: SDI Video Input Panel The SDI Video Input panel is a sub-set of the Composite/SDI Video Input panel, where the analog composite video interface is not provided and the CV connector is used for analog Teletext over CV input only. Composite Video Input Panel The Composite Video Input panel is a sub-set of the Composite/SDI Video Input panel, where the SDI interface is not provided. NOTE The E-1200 Advanced Encoder is provided with the Composite/SDI Video Input Panel built-in. Page 1-24 (Rev 1.0 / March 2004) CODICO® E-1000 Series MPEG-2 Professional Encoders The Composite/SDI Video Input Panel (and the two derives) provides the following controls and indicators: S-VIDEO Interface (Mini DIN Connector) Input connector for analog composite Super-Video (S-VHS) interface. NOTE The SDI Video Input Panel Option does NOT support the S-VHS interface. CV Interface (BNC female, 75Ω Connector) Input connector for the analog composite video (CV) interface, including analog Teletext over CV. NOTE The SDI Video Input Panel Option does NOT support the analog Composite Video (CV) interface. This input is used to receive analog Teletext over CV data only. SDI Interface (BNC female, 75Ω Connector) Input connector for the serial digital interface (SDI) transport stream (video and embedded audio). NOTE The SDI connector and interface are NOT installed on the Composite Video Input Panel Option. 525 / *625 Indicator (Red/Green LED) When illuminated, video input is received. Indicates video format detected: • Green Color:625 lines format • Red Color:525 lines format LOCK Indicator (Red/Green LED) When illuminated, video is received. Indicates video reception status: • Green Color:Video locked • Red Color:Video NOT locked DET Indicator (Red/Green LED) When illuminated, video is received. Indicates video synchronization: • Green Color:V-Sync detected • Red Color:V-Sync NOT detected Scopus Documents (p/n 100474) Page 1-25 User Manual Overview 1.4.4.2. Composite/Component Video Input Panel (Option) The Composite/Component Video Input Panel provides interface for analog composite video (CV), including Teletext and other VBI over CV information, as well as analog component video (Y, PB, PR). The module provides Digital Noise Reduction (DNR) circuitry for signal enhancement. Figure 1-13 displays the Composite/Component Video Input Panel. Figure 1-13: Composite/Component Video Input Panel FORMAT 525/ 625 COMPST/Y * VIDEO IN PB PR DETECTOR V-SYNC * The Composite/Component Video Input Panel provide the following controls and indicators: VIDEO IN COMPST/Y Interface (BNC female, 75Ω) Input connector for the analog Y element of the component video, or for the analog composite video. VIDEO IN PB Interface (BNC female, 75Ω) Input connector for the analog PB element of the component video. VIDEO IN PR Interface (BNC female, 75Ω) Input connector for the analog PR element of the component video. FORMAT 525/*625 Indicator (Red/Green LED) When illuminated, video is received. Indicates video format: • Green Color: 625 lines format • Red Color: 525 lines format DETECTOR *V-SYNC Indicator (Red/Green LED) When illuminated, video is received. Indicates video synchronization: • Green Color:V-Sync detected • Red Color:V-Sync NOT detected V-Sync detection Indicator: Page 1-26 (Rev 1.0 / March 2004) CODICO® E-1000 Series MPEG-2 Professional Encoders 1.4.4.3. ASI Input Option for Cascading The optional ASI Input interface enables input for an ASI level transport stream. The main function of the ASI IN interface is cascading the encoder to another slave encoder. ASI-3[] ASI-IN[] SCR[] DS3[] This feature enables cascading at up to 30 Mbps (comparing to the regular cascading over RS-422 interface, up to 20 Mbps effective bit rate). The ASI Input interface is using the ASI OUT-3 connector (BNC type connector). NOTE When the ASI Input interface is used, the RS-422 HSD input is disconnected. 1.4.5. Encoder Audio Input Interfaces The E-1000 Series Encoders features the following audio input options: • Stereo Analog Audio Channels, 2 or 4 channels • Stereo Digital AES/EBU Audio Channels, 2 or 4 channels • Dolby encoded Digital Audio Channels, 2 channels NOTE Stereo Embedded Audio over SDI is provided via the Serial Digital Interface on the Composite/SDI Video Input Panel or the SDI Video Input Panel (refer to paragraph 1.4.4.1). Figure 1-14 shows the location of the Audio Input connectors on the E-1000 rear panel. Figure 1-14: E-1000 Audio Input Options FORMAT 525/ 625 COMPST/Y * VIDEO IN PB PR DETECTOR V-SYNC * PUSH PUSH ASI-3[] ASI-IN[] SCR[] PUSH A N L G A N L G A N L G 1 L 1 R 2 L 2 R AES/EBU 1 AUDIO 1 Scopus Documents (p/n 100474) PUSH A N L G AES/EBU 2 AUDIO 2 DS3[] AUDIO CH 3 & 4 GPI HSD ETH AUDIO 3+4 Page 1-27 User Manual Overview 1.4.5.1. Standard Audio-1 and Audio-2 Interface The standard Audio-1 and Audio-2 Musicam Encoding Interface consist of four XLR connectors, which are used to receive the audio data for Channel 1 and Channel 2, respectively for the Musicam Encoding circuits. • Analog audio, which requires two connectors for the each analog stereo channel. • Digital AES/BEU audio, which uses the right XLR connector of the analog channel pair. 1.4.5.2. Optional Audio-3 and Audio-4 Interface The optional Audio-3 and Audio-4 Interface consist of an Musicam encoding expansion interface card installed inside the encoder and connected by a 25-pin D-type connector on the rear panel. A deployment cable adaptor, with a 25-pin D-type connector on one side and four XLR connectors on the other side, provides the connections for the Audio-3 and Audio-4 inputs. Each pair of XLR connectors provides analog stereo input or digital AES/BEU input, similar to the Audio-1 and Audio-2 connectors. 1.4.5.3. Optional Dolby-3 and Dolby-4 Interface The optional Dolby-3 and Dolby-4 Interface consist of a Dolby Digital expansion interface card installed inside the encoder and connected by a 25-pin D-type connector on the rear panel. A deployment cable adaptor, with a 25-pin D-type connector on one side and four XLR connectors on the other side, provides XLR connections for the Dolby-3 and Dolby-4 inputs. Page 1-28 (Rev 1.0 / March 2004) CODICO® E-1000 Series MPEG-2 Professional Encoders 1.4.6. Encoder Data Input Interfaces The data input for the encoder consists of low-speed and high-speed input data. It is provided on the following interfaces: • RS-422 High Speed Data (HSD) Input interface, • ASI IN Input interface, • RS-232 Low Speed Data (LSD) Input interface Figure 1-15 shows the location of the Data Input connectors on the E-1000 Series rear panel. Figure 1-15: E-1000 Series Data Input Options FORMAT 525/ 625 COMPST/Y * VIDEO IN PB PR DETECTOR V-SYNC * PUSH PUSH PUSH ASI-3[] ASI-IN[] SCR[] PUSH A N L G A N L G A N L G A N L G 1 L 1 R 2 L 2 R AES/EBU 1 AES/EBU 2 AUDIO CH 3 & 4 GPI HSD HSD Input 1.4.6.1. DS3[] ETH LSD Input High Speed Data (HSD) Input Interface The HSD Input interface enables the connection of an external high-speed stream to the encoder. The input is also used in cascading encoders. The HSD interface is provided over a RJ-45 type connector (refer to Figure 1-15). 1.4.6.2. Low Speed Data (LSD) Input Interface The LSD Input interface enables the connection of an external low-speed stream to the encoder. The LSD interface is provided over a D-Type, 9-pin connector (refer to Figure 1-15). Scopus Documents (p/n 100474) Page 1-29 User Manual Overview 1.4.7. Encoder Output Interfaces The E-1000 Series Encoders output is normally provided on RS-422 and ASI BNC connectors. With the addition of optional cards, the ASI BNC connectors may provide different outputs depending on the configuration required, including DS-3, G.703 or DVB Scrambled output. Figure 1-16 shows the encoder rear panel with different output interfaces. Figure 1-16: E-1000 Series Output Options ASI-3 (OPTION) DS-3 (OPTION) G.703 (OPTION) SCR (OPTION) ASI-IN (OPTION) ASI-2 DS-3 (OPTION) G.703 (OPTION) SCR (OPTION) FORMAT 525/ 625 COMPST/Y * VIDEO IN PB PR DETECTOR V-SYNC * PUSH PUSH PUSH ASI-3[] ASI-IN[] SCR[] PUSH A N L G A N L G A N L G A N L G 1 L 1 R 2 L 2 R AES/EBU 1 AES/EBU 2 DS3[] AUDIO CH 3 & 4 GPI HSD ETH RS-422 OUTPUT1 G.703 E1/ BALLANCED (OPTION) ASI-1 RS-422 OUTPUT2 1.4.7.1. ASI Output Interface Option The standard ASI-1 and ASI-2 output (BNC type) connectors are provided for ASI transport stream output. A third, ASI-3 output connector is optionally provided by additional hardware. Different hardware and software enables using ASI-3 connector as ASI Input for reception of ASI level input transport streams. 1.4.7.2. DS-3 Output Interface Option The DS-3 Output Interface is available as a factory installed option, which supports two DS-3 outputs streams at a physical bit rate of 44.736 Mbps. The interface uses the ASI-2 and ASI-3 connectors, both delivering identical output streams. NOTE When using the DS-3 interface option, the output rate can be set up to 37.5 Mbps. Upon changing the rate, the interface will get reset and recover automatically. The DS-3 option card is based on ATM cells according to the DVB standard ETS300813. The VPI\VCI addresses are factory pre-set for 1\32 and can be modified through the Front Panel Menu options. Page 1-30 (Rev 1.0 / March 2004) CODICO® E-1000 Series MPEG-2 Professional Encoders 1.4.7.3. G.703 Output Interface Option The addition of a G.703 interface board to the E-1000 Series enables the encoder to support an unframed G.703 interface with or without FEC. The encoder supports G.703 E1, E2 and E3 standards, using different boards. The interface uses the ASI-2 and ASI-3 connectors, both delivering identical output streams. Balanced G.703 E1 output is provided over the RS-422 OUTPUT1 connector. FEC is implemented in accordance with the DVB-C algorithm. In order to enable/disable FEC, each of these boards contains a jumper strapping (JP1). Removing the strapping disables FEC. 1.4.7.4. DVB Scrambling Output Interface Option The addition of a DVB scrambling board, the encoder is able to support Fixed-key DVB scrambling over the ASI BNC outputs. This option is available pre-installed at the factory or as hardware installation by one of the Scopus Network Technologies field-technicians (this installation is not available as an upgrade kit that can be installed by the user). The E-1000 Series continues to provide Scopus proprietary encoder based encryption, which is enabled on a software level via the terminal interface. 1.4.7.5. RS-422 Output Interface Two standard RS-422 output connectors (RJ-45 type, see Figure 1-16) provide identical High Speed Data (HSD) output for cascading the encoder to another SLAVE encoder. When the G.703 E1 interface is installed, the RS-422 OUTPUT1 (left RS-422) connector can be used to output G.703 E1 / Balanced level data. 1.4.8. Encoder Control Interfaces The E-1000 Series Encoders provides a wide range of interfaces for local/remote control and monitoring. It includes the following (see Figure 1-17): • Data Control over RS-232 Interface. • Ethernet Interface for NMS-4000 control. • Monitor Output, for connecting an external terminal. • GPI Interface for status reports. Scopus Documents (p/n 100474) Page 1-31 User Manual Overview Figure 1-17: E-1000 Series Control Interfaces Connections MONITOR FORMAT 525/ 625 COMPST/Y * VIDEO IN PB PR DETECTOR V-SYNC PUSH * PUSH PUSH ASI-3[] ASI-IN[] SCR[] PUSH A N L G A N L G A N L G A N L G 1 L 1 R 2 L 2 R AES/EBU 1 AES/EBU 2 GPI GPI 1.4.8.1. DS3[] AUDIO CH 3 & 4 HSD ETH ETHERNET RS-232 RS-232 / DATA Control The RS-232 / DATA Connector provides RS-232 standard interface (D-Type, 9 pin connector). This interface is used for serial control on the encoder. NOTES The communication protocol is available on request. When using the Data Interface for serial control, Low Speed Data (LSD ) is not available. 1.4.8.2. Ethernet Interface The ETH Ethernet Interface provides access for the CODICO® SM-3000 Statistical Multiplexer or the CODICO® NMS-4000 Network Management System to control and monitor the operation of the encoder. It is also used for the connection of an external MIB browser terminal to control and monitor the operation of the E-1000 Series. The interface is provided over a 10 BaseT / RJ-45 connector. 1.4.8.3. Monitor Output The MONITOR Output connector provides RS-232 standard interface (D-Type, 9 pin connector, and is used to connect an external Terminal or a Computer to control and monitor the E-1000 Series operation. 1.4.8.4. GPI Interface The General Purpose Interface (GPI) outputs status and warning messages on the operational condition of the encoder. The GPI information is provided over a GPI connector. Page 1-32 (Rev 1.0 / March 2004) CODICO® E-1000 Series MPEG-2 Professional Encoders 1.5. ENCODER MANAGEMENT 1.5.1. Front Panel Control An extended control menu tree provides the basic control on the E-1000 Series Encoder. This menu provides configuration, set-up and in-process monitoring functions, activated by the controls and displays on the encoder front panel. The front panel allows control via a four-way (UP, DOWN, LEFT, RIGHT) touch pad, an Enter key, and an Escape key. Operational commands and parameters are displayed on an Alphanumeric LCD. The four-way touch pad allows scrolling through the menus of the embedded software and parameter modification. 1.5.2. TFTP Interface The encoder provides a single session TFTP server interface, to enable downloading and uploading of files via port 69 of the TCP/IP protocol stack. The IP address of the encoder can be ascertained from the front panel menus. CAUTION THE TFTP SERVER DOES NOT INCLUDE AN AUTHENTICATION MECHANISM. ENABLING THE TFTP KEEPING TFTP SERVER RENDERS THE ENCODER VULNERABLE TO UNAUTHORIZED ACCESS. SESSIONS TO A MINIMUM IS ADVISED TO AVOID UNAUTHORIZED ACCESS. Client computers installed with Windows NT 4.0 have a TFTP command line installed, which can be found in %SYSTEM ROOT%SYSTEM32. Operating systems that do not have a TFTP client installed by default can use any TFTP client. Shareware/Freeware (“Pumpkin”) is available to TFTP clients at the following web sites: http://www.klever.net and http://walusoft.co.uk. The TFTP server is activated on request from an ANSI terminal using the command: ‘tftp’. Once enabled, only the rebooting of the encoder disables the TFTP interface. The TFTP interface is disabled by default. Scopus Documents (p/n 100474) Page 1-33 User Manual Overview 1.5.3. ASCII The E-1000 Series Encoders support terminal connection via the rear panel RS-232 interface. Any ANSI terminal program or application can be used. The terminal interface uses the command structure and syntax supported by the individual program. 1.5.4. SNMP Management The Simple Network Management Protocol (SNMP) is a standard interface protocol between a manager computer and several agents installed in the users on the network. It provides basic network monitoring and management functions between a management station and managed nodes through applications located on the nodes, called agents. These agents maintain a database of information (Management Information Base or MIB) about managed nodes and when queried by the manager, retrieve data from the database and send it back to the manager in a response. SNMP over TCP/IP uses UDP packets as its transport for these queries and responses. The management station can be the NMS-4000 or any other terminal, using standard MIB Browser. The main purpose of the SNMP Manager and Agents is: • The SNMP Manager monitors and controls information about the nodes on the network. • The SNMP Agent interfaces between the node and the SNMP Manager. The SNMP Manager requests the Agent to get/set data items identified by Object Identifiers (OIDs) and monitors for trap messages generated by the Agent when malfunctions are identified. The E-1000 SNMP uses two management information bases: • MIB2 System Table: contains general parameters that must to be supported on any SNMP protocol. • E1000 Private MIB: contains parameters unique to the E-1000 Series Encoder. Page 1-34 (Rev 1.0 / March 2004) CODICO® E-1000 Series MPEG-2 Professional Encoders 1.5.5. NMS-4000 Management When using the NMS-4000 for remote control and management of a system, the E-1000 Series can be configured to automatically announce its presence, by UDP broadcast, to the NMS. The NMS responds by registering the encoder and assuming control thereof and the Front Panel Menus is conditionally disabled. Prerequisite to remote management is the definition of a local host IP address for the TCP stack of the encoders Ethernet interface. When the NMS and encoder reside on separate subnets, a Gateway (Router) address must also be defined. TCP/IP properties are definable from the front panel menu, using the CONFIG | SERVICE | ADVANCED menu option. The NMS-4000 uses the SNMP management tools for remote control of the encoder operation. Scopus Documents (p/n 100474) Page 1-35 User Manual Overview 1.6. CAPABILITIES AND SPECIFICATIONS 1.6.1. Capabilities Table 1-3 details the capabilities of the E-1000 Series of MPEG-2 Professional Encoders. Table 1-3: REQUIREMENT Preprocessing Encoder Capabilities SPECIFICATION Analog Time Base Correction (TBC), Frame Synchronizer Automatic Frame Re-sizing Advanced Digital Noise Reduction (DNR) over the analog video input (option) Advanced four-level Digital Noise Reduction (E-1200) VBI Pre-Processing (Over analog or digital video inputs): • Teletext (WST 625) • Close Capture (CC), Wide Screen Signaling (WSS), Vertical Interval Time Code (VITC), Video Program System (VPS) Compression and Processing DVB MPEG-2 Encoding Profile: • E-90/E-900/900A Encoders 4:2:0 Main Profile @ Main Level • E-1000/E-1200 Encoders: 4:2:0 / 4:2:2, Switchable Low Delay Mode (at 4:2:0 and 4:2:2). Ultra Low Delay Mode (at 4:2:2 only) down to 150 mSec end-to-end. Variable GOP: I, P and B Frames processing Encoding Rate 4:2:0 Main Encoding Profile:up to 15 Mbps 4:2:2 Professional Encoding Profile: up to 52 Mbps Data Transfer Low Speed Data: RS-232 up to 115.2 Kbaud High Speed Data: RS-422 up to 20 Mbps E-1200 Look Ahead Encoding Evaluation Look Ahead capability, implemented by dual-encoding architecture: • First encoder functions as a program complexity predictor. • Second encoder functions as the main encoder. Enhanced complexity estimation, up to 70 frames. Page 1-36 (Rev 1.0 / March 2004) CODICO® E-1000 Series MPEG-2 Professional Encoders Table 1-3: Encoder Capabilities REQUIREMENT Video Input and Encoding SPECIFICATION Video Input Formats: • Digital Input: SDI • Analog Input: S-VHS, Composite (OCMSA) • Components (option) Analog Conversion: 10 bit A/D Aspect Ratio: 4:3, 16:9 (PAL/NTSC) Video Picture Resolution: • Horizontal Resolution: 720, 704, 640,544, 480 pixels/line • Vertical Resolution: 576 (PAL), 480 (NTSC) lines/frame Audio Input and Encoding 2 Stereo Channels (4 Mono), Option for 4 Stereo Channels (8 Mono) Audio Formats: Analog, AES/EBU (option), Embedded (option) Audio Mode: Stereo, Joint Stereo, Single Channel, Dual Channel Audio Encoding: • Encoding Format: MPEG I layer II, CD quality • Encoding Rate: 64 to 384 Kbps Dolby Encoding: • Dolby Digital Encoding (AC-3 / 2.0, option) • Dolby-E Pass-through (option) • Dolby AC-3 / 5.1 Pass-through Output Transfer Stream DVB Interface: 2 x ASI Output (ASI-3 option), up to 52 Mps Telecom G.703 Interface (Option): Unframed PDH at E1, E2 or E3 data rates with/without DVB-C FEC Support DVB-PDH Interface (Option): ATM AAL-1 Interface at E3 data rate DVB Scrambling (Option): BISS Mode-1, BISS-E scrambling High Speed Data transfer over RS-422, up to 20 Mbps Scopus Documents (p/n 100474) Page 1-37 User Manual Overview 1.6.2. Interface Connections Specifications Table 1-4 details the input, output and control connection interfaces for the E-1000 Series. Table 1-4: E-1000 Series Encoders Interfaces INTERFACE PROPERTY SPECIFICATION INPUT CONNECTION INTERFACES Number of inputs 1 Input data rate 270 Mbps Impedance 75 Ω Interface ITU-R 656 Number of inputs 1 Input Format PAL-B, -M, -N, -G, NTSC -M Impedance 75 Ω Interface ITU-R 624 Quantization 10 bit Component Video Number of inputs 1 (Y, PB, PR) Input Format Betacam Impedance 75 Ω Quantization 10 bit Type RS-232 serial interface Data rate 2400, 4800, 9600, 19200, 38400, and 115200 bps Type RS-422 Interface Synchronous Data rate Up to 20 Mbps SDI Serial Digital Input Composite Video AUX Low Speed Data Input AUX High Speed Data Input Page 1-38 (Rev 1.0 / March 2004) CODICO® E-1000 Series MPEG-2 Professional Encoders Table 1-4: E-1000 Series Encoders Interfaces INTERFACE AES/EBU Digital Audio Analog Audio External Clock Input Alarm Relay Interface PROPERTY SPECIFICATION Number of inputs 1 to 2 Stereo or 4 Mono channels. Option for 4 Stereo (or 8 Mono) channels. Data format Serial Interface AES/EBU Number of inputs 1 to 2 Stereo or 4 Mono channels. Option for 4 Stereo (or 8 Mono) channels. Impedance 600 Ω balanced Sampling frequency 32 kHz, 44.1 kHz, 48 kHz Quantization 18 bits (SP-DIF) Number of inputs 1 Interface RS-422 1 relay Normally Open (N.O.) Contact. Monitors Video Fault, Audio Fault, and Temperature Alarm Number of outputs 2 Internal out rate 1 to 20 Mbps* Effective output rate 1 to 20 Mbps* Data out Interface RS-422 Clock out Interface RS-422 Number of outputs 2 (3 Optional) Effective output data rate 1 to 52 Mbps (external clock) Physical line rate 270 Mbps Impedance 75 Ω Output Interface Hot-Link OUTPUT CONNECTION INTERFACES RS-422 Output DVB ASI Output Scopus Documents (p/n 100474) Page 1-39 User Manual Overview Table 1-4: E-1000 Series Encoders Interfaces INTERFACE Telecom G.703 Output (option) PROPERTY SPECIFICATION Number of outputs 2 Physical line rate 2 Mbps (E1), 8 Mbps (E2), 34 Mbps (E3) Impedance 75 Ω Output interface G.703 Unframed PDH Data rates: E1, E2 or E3 G.703 with FEC (optional): DVB-C FEC DS-3 Output (Option) Interface ATM, AAL-1 Number of outputs 2 Physical line rate 45 Mbps Impedance 75 Ω Output interface G.703 according to ETS 300813 (DVB) *Output Rate may be further affected depending on cable length. CONTROL CONNECTION INTERFACES Ethernet NMS Interface (option) Serial Comm. Channel Page 1-40 Interface Ethernet Impedance 50 Ω Protocol TCP/IP, proprietary Transmit / Receiver RS-232, D-type 9-pin Connector Data rate 9600 bps (8 bit, No Parity, 1 bit stop) (Rev 1.0 / March 2004) CODICO® E-1000 Series MPEG-2 Professional Encoders 1.6.3. Physical Specifications Table 1-5 details the physical specifications of the E-1000 Series Encoders. It includes the mechanical dimensions, electrical requirements and environmental conditions for operational and non-operational modes. Table 1-5: E-1000 Series Encoders Physical Specifications PARAMETER VALUE E-1000 MECHANICAL DIMENSIONS Height 44mm (1.75”, 1 U Rack Unit) Width 483mm (19” Standard Rack) Depth 530mm (21”) Weight 4.5Kg (9 Lb.) E-1000 ELECTRICAL REQUIREMENTS AC Supply Voltage 90V AC (Min.) to 260V AC (Max.) DC Supply Voltage -48V DC (option) Power consumption 100W (Max consumption) E-1000 ENVIRONMENTAL CONDITIONS Temperature Operation: 0°C to +50°C Non-operational: -40°C to +70°C Humidity Operational: 85% non-condensing at +30°C. Non-operational: 95% non-condensing at +45°C Vibration and Shock In accordance with MIL-STD-810D Altitude Operational: Up to 10,000 Ft. Non-operational: Up to 50,000 Ft. Air consumption 40 CFM. Input is from the right side. Output is to the left side. 100mm side clearance required for air movement. Scopus Documents (p/n 100474) Page 1-41 CODICO® E-1000 Series MPEG-2 Professional Encoders Section 2 INSTALLATION 2.1. GENERAL This Section describes the procedures required for installing the CODICO® E-1000 Series of MPEG-2 Professional Encoders. 2.2. INSTALLATION INFORMATION 2.2.1. Safety Precautions To avoid injury and equipment damage, observe the following safety precautions: • Do not move or ship equipment unless it is properly packed in its original wrapping and shipping containers. • Only Scopus Network Technologies trained personnel should perform equipment operation, service and maintenance. • To prevent damage by lightning, ground the unit according to local regulations. Scopus Documents (p/n 100474) Page 2-1 User Manual Installation 2.2.2. Inventory Check Before installing the unit, ensure that all the equipment to be installed has arrived (refer to Table 2-1). Check the parts received with the encoder unit for damage. CAUTION IF ANYTHING IS MISSING OR DAMAGED, DO NOT CONTINUE WITH THE INSTALLATION. Table 2-1 E-1000 Series of MPEG-2 Professional Encoders Inventory List DESCRIPTION QUANTITY CODICO® E-90, or E-900, or E-900A or E-1000 or E-1200 MPEG-2 Professional Encoder 1 AC Power Cable (for AC Powered encoders) 1 out of the following options: • European Code Cable (for Euro use) • American Code Cable (for U.S. use) • Power Cable (for other countries use) DC Power Cable (for DC Powered encoders) 1 E-1000 Series of MPEG-2 Professional Encoders User Manual 1 Page 2-2 (Rev 1.0 / March 2004) CODICO® E-1000 Series MPEG-2 Professional Encoders 2.3. MECHANICAL INSTALLATION 2.3.1. Site Preparation Guidelines The E-1000 Series of MPEG-2 Professional Encoders can be desk or rackmounted. GENERAL GUIDELINES Install the encoder within 1.5m (5 feet) from an easily accessible grounded AC outlet, capable of furnishing the required supply voltage. As with any other mission-critical electronic device, the use of a UPS (Uninterrupted Power Supply) and an AVR (Automated Voltage Regulation) is highly recommended to ensure proper operation of the encoder. DESK INSTALLATION GUIDELINES When placed on a flat surface, leave space at the sides for airflow. Air intake for cooling is from holes at the side of the unit and the fans at the back panel. RACK MOUNTING GUIDELINES Confirm that the rack is fully prepared for the installation and that it has been properly grounded. Leave sufficient space in front and behind the rack to facilitate easy access during installation and maintenance. 2.3.2. Rack Mounting When mounted in a standard 19-inch equipment rack, mounting brackets must be used to support the device. CAUTION TO PREVENT DAMAGE TO THE ENCODER CHASSY, USE FORE ATTACHING THE DEVICE WITH THE FRONT PANEL SCREWS WILL AND AFT MOUNTING BRACKETS. D Prepare the encoder for rack installation according to the following directions: 1. The rack adapter kit includes two mounting brackets. The brackets are fastened with screws on the sides of the encoder housing. Scopus Documents (p/n 100474) Page 2-3 User Manual Installation 2. Attach each bracket by inserting two screws, with flat washers, in the two front holes at the sides of the housing. Nuts are already in place on the inner side of the holes. 3. After attaching the brackets, the unit is ready for installation in the rack. 4. Fasten the brackets to the side rails of the rack by means of four screws (not included in the kit), two per side. 5. Ensure that proper grounding is provided for the rack assembly to prevent potential electrical problems in the devices mounted on the rack. 2.4. ELECTRICAL INSTALLATION WARNING DO NOT CONNECT AC POWER UNTIL YOU HAVE VERIFIED THAT THE LINE VOLTAGE IS CORRECT AND THE PROPER FUSES ARE INSTALLED. FAILURE TO DO SO COULD RESULT IN ELECTRICAL SHOCK. 2.4.1. Compact Flash Installation The E-1000 Series encoders are fitted with a Compact Flash Disk that contains the updated software version. The receptacle for the flash disk is located under the cover on the front right side of the encoder (see Figure 2-1). The Flash Disk should be firmly inserted in to the slot provided to ensure contact. CAUTION DO NOT ATTEMPT TO REMOVE OR INSERT THE FLASH DISK WHILE THE ENCODER IS POWERED ON OR INNITIALIZING. Figure 2-1: Page 2-4 E-1000 Series Compact Flash Receptacle (Rev 1.0 / March 2004) CODICO® E-1000 Series MPEG-2 Professional Encoders 2.4.2. Power and Ground The E-1000 Series Encoder can be supplied with AC or DC Power Supply. Power and Ground connection for each option is detailed in the following paragraphs. 2.4.2.1. AC Power Supply The AC Power Cable provides AC power and ground to the encoder. Power Switch ASI-3[] ASI-IN[] SCR[] • Connect one end of the cable the power DS3[] connector at the AC connector. • Connect the other end to the AC power source. 2.4.2.2. Power Connector DC Power Supply The -48 DC power and ground to the encoder is supplied by an external 48 Vdc Power Supplier. The external power supplier connects to the contacts on the power terminal board: • (+) 48V DC to the (+) contact. • (-) 48V DC to the (-) contact. • Grounding point wire to the (GND) contact. 2.4.3. Cabling Connections All cable connections to the encoder are made via the rear panel. Figure 2-2 shows the rear panel connector interfaces, for different input and output options. The left section of the panel is exchangeable to accommodate the encoder video option modules (refer to paragraph 1.4.4 for details on the options available). On the right side of the panel, the BNC connector functionality may provide different outputs depending on the configuration required, including DS-3, G.703 or DVB Scrambled outputs (refer to paragraph 1.4.7 for details). Figure 2-2: FORMAT 525/ 625 COMPST/Y * E-1000 Typical Rear Panels - Connectors Location VIDEO IN PB PR DETECTOR V-SYNC * PUSH PUSH ASI-3[] ASI-IN[] SCR[] PUSH A N L G A N L G A N L G 1 L 1 R 2 L 2 R AES/EBU 1 Scopus Documents (p/n 100474) PUSH A N L G AES/EBU 2 DS3[] AUDIO CH 3 & 4 GPI HSD ETH Page 2-5 User Manual Installation 2.4.4. Encoder Cascading Connections Cascading encoders provides expansion of the range of inputs. These inputs are encoded to the output of the encoding section in a Head-End DVB system. The terms MASTER and SLAVE are used in reference to the encoders as follows: • MASTER: the encoder that contains all the cascaded streams. • SLAVE: the encoder that is cascading to the SLAVE “above” it or to the MASTER. The slave encoders feed their output into the HSD input of the higher-level encoder. Internal algorithms automatically compensate the delay incurred due to the lower bit rate of the HSD interface. These algorithms perform PCR re-stamping on the signal received from the cascade. The E-1000 Series of MPEG-2 Professional Encoders enables two types of encoder cascading interfaces: • RS-422 Encoder Cascading This option uses one of the RS-422 Output connectors on the SLAVE encoder to connect the video data to the HSD RS-422 Input interface of the MASTER (or higher level SLAVE) encoder (see connecting diagram in Figure 2-3). • ASI Encoder Cascading This option uses one of the ASI OUT connectors on the SLAVE encoder to connect the transport stream data to the ASI IN Input interface of the MASTER (or higher level SLAVE) encoder (see connecting diagram in Figure 2-4). NOTES Page 2-6 • Using the ASI interface enables cascading for faster streams (up to 30 Mbps) than those enabled over RS-422 interface (up to 20 Mbps). • When the optional ASI IN input interface is connected, the standard HSD Input interface is disabled, as both interfaces uses the same stream input processing function of the encoder. • Due to the cascading configuration, changing parameters in one of the slaves can take longer periods of time than for a single encoder. • Both cascading options support up to three SLAVE encoders cascaded to the MASTER encoder. (Rev 1.0 / March 2004) CODICO® E-1000 Series MPEG-2 Professional Encoders CAUTION THE ORDER OF OPERATION OF THE CASCADING IS VERY IMPORTANT. REFER TO SECTION 3 FOR SET-UP AND OPERATIONAL INSTRUCTIONS. Figure 2-3: RS-422 Cascading - Cable Connections MASTER FORMAT 525/625 COMPST/Y * VIDEO IN P B P R DETECTOR V-SYNC PUSH PUSH * PUSH PUSH A N L G A N L G A N L G A N L G 1 L 1 R 2 L 2 R AES/EBU 1 AES/EBU 2 AUDIO CH 3 & 4 GPI HSD ET H SLAVE FORMAT 525/625 COMPST/Y * VIDEO IN P B P R DETECTOR V-SYNC PUSH PUSH * PUSH PUSH A N L G A N L G A N L G A N L G 1 L 1 R 2 L 2 R AES/EBU 1 AES/EBU 2 AUDIO CH 3 & 4 GPI HSD ET H SLAVE FORMAT 525/625 COMPST/Y * VIDEO IN P B P R DETECTOR V-SYNC PUSH PUSH PUSH A N L G * 1 L PUSH A N L G A N L G 1 R 2 L AES/EBU 1 Figure 2-4: A N L G AUDIO CH 3 & 4 2 R AES/EBU 2 GPI HSD ET H ASI Cascading - Cable Connections ASI 3 (ASI INPUT - MASTER) MASTER FORMAT 525/ 625 COMPST/Y * VIDEO IN PB PR DETECTOR V-SYNC PUSH * PUSH PUSH ASI-3[] ASI-IN[] SCR[] PUSH A N L G A N L G A N L G A N L G 1 L 1 R 2 L 2 R AES/EBU 1 AES/EBU 2 DS3[] AUDIO CH 3 & 4 GPI HSD ETH SLAVE FORMAT 525/ 625 COMPST/Y * VIDEO IN PB PR DETECTOR V-SYNC * PUSH PUSH A N L G 1 L AES/EBU 1 PUSH ASI-3[] ASI-IN[] SCR[] PUSH A N L G A N L G 1 R 2 L A N L G DS3[] AUDIO CH 3 & 4 2 R AES/EBU 2 GPI HSD ETH ASI 1 (ASI OUTPUT - SLAVE) Scopus Documents (p/n 100474) Page 2-7 User Manual Installation 2.5. QUICK START 2.5.1. Power Up Sequence The initialization sequence of the encoder is as follows: 1. Ensure that the Compact Flash is fully inserted into the receptacle located on the front panel. 2. Power the unit ON. The front panel illuminates and the LCD display shows the progress of initialization. 3. Once initialized, the display should show the STATUS OK message. 2.5.2. Initialization Sequence Accesses to system menus for the encoder are made via the System menu. Initializing Please Wait The E-1000 Series Flow Chart provides an overview of access routes to the menus and sub-menus accessible from the Front Panel of control. When the E-1000 Series is powered ON, an initialization sequence commences providing verbose status of the device as it retrieves parameters from flash memory. Successful initialization results in the STATUS OK message being displayed on the LCD, and the encoder is Under Local Control. The Initialization sequence proceeds down to the Status menu, from which all other menus are accessible. Unit Initializing Please Wait Reading System Config Please Wait... Status OK PAL SDI F720 8294kbps Status Menu ENCODER MODEM (OPTION) CONFIG Page 2-8 Encoder Menu STATUS TEST (Rev 1.0 / March 2004) CODICO® E-1000 Series MPEG-2 Professional Encoders If an error is detected in the encoder, messages are displayed on the LCD Display, as Status Messages and by lightning the Status LEDs (on the encoder front panel).Table 2-2 lists the LCD messages and the LED response to detection of failures and malfunctions in the encoder. Table 2-2: Encoder Status Messages LCD DISPLAY MESSAGES LED STATE Fail To Comply Messages Unit Not Responding RED LED BLINK Comm Checksum Error RED LED BLINK Unit Busy GREEN LED BLINK Illegal Setup RED LED BLINK Encoder Warning Messages Temp. High >49°C RED LED BLINK Ext. Clock Absent GREEN LED BLINK Video Input Absent GREEN LED BLINK Audio Input Absent GREEN LED BLINK Audio Fault RED LED BLINK Video Fault RED LED BLINK Video & Audio Fault RED LED BLINK Scopus Documents (p/n 100474) Page 2-9 User Manual Installation 2.5.3. External Remote Control If the encoder is set locally for remote control by the NMS-4000, the Status OK message will display STATUS OK - TCP (see .)שגיאה! מקור ההפניה לא נמצא. In this state, access to the front panel menus is conditionally disabled and control is the responsibility of the NMS-4000. To regain local control: 1. Press the [Enter] button. A prompt appears “Set Local Control?” 2. Select Yes and press the [Enter] button. The encoder will reboot with local control restored. NOTE Local Control also disables the UDP broadcast used by the encoder to announce its presence on the network. 2.5.4. Initial Configuration CAUTION DO NOT REMOVE THE COMPACT FLASH CARD DURING OPERATION!!! After the physical installation and initialization are complete, the following basic configuration should be performed. This procedure provides only the elementary parameters for simple operation. Use the interactions found in the Operation Section to define the following: • Setting of the video format • Setting of the video input • Setting of the audio input After configuration, provided the receiver parameters properly match those of the encoder, video monitors should display a picture. Page 2-10 (Rev 1.0 / March 2004) CODICO® E-1000 Series MPEG-2 Professional Encoders 2.5.5. Serviceability Checks This section describes a set of checks that can be performed in order to determine proper operation of the encoder. Once initial configuration has been performed, serviceability checks should be done, which consist of the following tests (refer to Section 5:): • Video Test, refer to paragraph 5.3.2.1. • Audio Test, refer to paragraph 5.3.2.2. Scopus Documents (p/n 100474) Page 2-11 CODICO® E-1000 Series MPEG-2 Professional Encoders Section 3 ENCODER FRONT PANEL OPERATION 3.1. INTRODUCTION This Section provides a detailed description of the CODICO® E-1000 Series of MPEG-2 Professional Encoders operation, using the front panel control menu. 3.1.1. Front Panel Theory of Operation The operation of the front panel menu is provided to the local operator, using the front panel of the encoder. Figure 3-1 shows the front panel and the control elements on the panel. Table 3-1 describes these elements. Figure 3-1: LCD Front View of the Encoder Four Way Touch Pad Enter Touch Pad Scopus Documents (p/n 100474) ESC Touch Pad LED Panel Cover Compact Flash Drive Page 3-1 User Manual Encoder Front Panel Operation Table 3-1: CONTROL ITEM LCD Front Panel Controls and Indicators DESCRIPTION The Liquid Crystal Display (LCD) is an alphanumeric display used to display the front panel control menu options, input control parameters and status information. It also displays system data and system status messages. Four Way Touch Pad The Four Way ( [Left] / [Right] / [Up] / [Down]) touch pad enables navigation in the menus by moving UP, DOWN, LEFT or RIGHT, respectively, in the information displayed on the LCD. Enter Touch Pad The [Enter] touch pad confirms/saves a selection or proceeds to next menu/item. ESC Touch Pad The [Esc] touch pad exits from the current position or returns to the Status Message at the top of the menus. Status Indicator LED The Status Indicator LED uses the following legend: • Constant Green: System Initializing and Normal Operation • Flashing Green: Service Warning • Constant Orange: Bit Stream Warning • Constant Red: Hardware Failure Indication is available once the encoder is initialized and corresponds with status messages viewed from the LCD. Flash Card Receptacle Page 3-2 Mechanical slot for the Compact Flash card (Rev 1.0 / March 2004) CODICO® E-1000 Series MPEG-2 Professional Encoders 3.1.2. Front Panel Menu - Parameters Management Concept All encoder parameters can be viewed though the front panel LCD and changed by the touch pads. Managing/Changing a parameter is performed in a three-step (choose, change, save) procedure. 3.1.2.1. CHOOSE Step: The first step consists of navigating in the menu tree and finding the parameter in the menu. The various encoder parameters are set on a menu tree by categories. The menu tree can be navigated from the touch pad as follows: • The [Left] / [Right] touch pads are used to move between the categories. The categories are aligned in a row and the selected category is highlighted. [Up] / [Down] touch pads are used to move between the • The parameters under the selected category. • A category / parameter is selected by pressing the [Enter] touch pad. • The [Esc] touch pad returns one level back. 3.1.2.2. CHANGE Step: The second step changes the current value of the parameter selected. There are two kinds of parameters, differed by the way they are changed: OPTION LIST PARAMETERS: The operator selects an option parameter out of a pre-defined list. • The [Up] / parameter. [Down] touch pads are used to select the required • [Enter] confirms the new parameter. NUMERICAL VALUE PARAMETERS: The operator sets a numeric value/parameter. [Left] / • The digits. • The [Up] / a digit. [Right] touch pads are used to move between the [Down] touch pads are used to change the value of • [Enter] confirms the new number/value. • [Esc] rejects it and returns to the original numeric value. Scopus Documents (p/n 100474) Page 3-3 User Manual Encoder Front Panel Operation 3.1.2.3. SAVE Step: The changes in the encoder take effect only after saving the parameters. Saving the parameters is done as follows: EXIT TO TOP-LEVEL MENU After all parameters have been modified, exit to the top-level menu by repeatedly pressing the [Esc] touch pad. CONFIRM THE CHANGES Before the top-level menu appears, the user is required to confirm the changes. The LCD screen displays the message Parameters were modified and the options: • Save: The changes take effect in the encoder. • Restore: Parameters were modified SAVE RESTORE Edit The changes are restored to their old values. • Edit: Keep modifying the parameters. Select an option with the [Left] / [Right] touch pads and confirm selection by pressing the [Enter] touch pad. IMPORTANT Some of the functions are updated and saved as soon as the configuration change is completed, without the need to perform the save procedure detailed above. It includes the following configuration set-up options (a specific note is also provided at the option description in the following text): - Audio Channel Level Option, refer to paragraph 3.2.4.3 for details. - A/D Factory Default Setup Option, refer to 3.2.10.1 for details. - A/D Luminance Gain Option, refer to 3.2.10.2 for details. - A/D Chrominance Gain Option, refer to 3.2.10.3 for details. - Recall Encoder Setup Option, refer to 3.2.11.1 for details. - Save Encoder Setup Option, refer to 3.2.11.2 for details. - Select Reset Type Option, refer to 3.2.11.5 for details. - Adjust Display Contrast Option, refer to 3.2.11.6 for details. Page 3-4 (Rev 1.0 / March 2004) CODICO® E-1000 Series MPEG-2 Professional Encoders 3.1.3. Front Panel Menu The setup, control and monitoring of the E-1000 of encoders operation is locally provided using the extended E-1000 Front Panel Menu. This menu is displayed on the Front Panel LCD and is operated by the Front panel Control Pads. All configurations share a common initialization phase and, when successfully completed, the Encoder System Menu is displayed, enabling access to the Front Panel Menu Tree of the encoder. The Encoder System Menu tree provides the following options (see Figure 3-2): ENCODER CONFIGURATION MENU This menu provides access for setting-up the encoder’s parameters. Refer to paragraph 3.2.1 for a detailed description. ENCODER STATUS MENU This menu displays the current status of the encoder’s parameters. Refer to paragraph 0 for a detailed description. ENCODER TEST OPTION This option activates a detailed functional test session for the encoder main functions. Refer to paragraph 3.4 for a detailed description. NOTE A dotted menu selection in the Menu Tree diagrams indicates that the availability of this option is dependent upon the system configuration. The Modem Menu option is displayed only when the encoder is connected to an RF Modulator / Exciter. Scopus Documents (p/n 100474) Page 3-5 User Manual Encoder Front Panel Operation Figure 3-2: Encoder Front Panel Menu - Basic Tree Structure SCOPUS Initializing Please Wait Status OK NTSC C/V F720 8000Kbs System Menu Encoder Modem Modem Menu (Option) Encoder Menu Config Encoder Configuration Menu Video Audio Aux Service Page 3-6 Status Test Encoder Status Menu System General (Rev 1.0 / March 2004) CODICO® E-1000 Series MPEG-2 Professional Encoders 3.2. ENCODER CONFIGURATION MENU 3.2.1. Encoder Configuration Menu Overview The Encoder Configuration Menu enables the E-1000 user to view and set the configuration parameters of the encoder. The menu is activated from the Encoder Main Menu, by selecting the “Config” option in the Encoder Menu. 3.2.1.1. Encoder Configuration Menu Structure The Encoder Configuration parameters are grouped into four categories (see Figure 3-3): THE VIDEO PARAMETERS: The Video category in the Encoder Configuration Menu provides access for setting up the encoder for the video data received (input) and generated (output). For details, see paragraph 3.2.2. THE AUDIO PARAMETERS: The Audio category in the Encoder Configuration Menu provides access for setting up the encoder for the audio data received (input) and generated (output) and for managing Dolby parameters. For details, see paragraph 3.2.3. THE AUXILIARY PARAMETERS: The Aux category in the Encoder Configuration Menu provides access for setting up a group of additional data processing functions, including Teletext and Conditional Access parameters. For details, see paragraph 3.2.6. THE SERVICE PARAMETERS: The Service sub-menu in the Encoder Configuration Menu provides access for setting up to a wide range of service parameters. For details, see paragraph 3.2.8. Scopus Documents (p/n 100474) Page 3-7 User Manual Encoder Front Panel Operation Figure 3-3: Encoder Configuration Menu Tree Config ENCODERCONFIGURATION MENU AUDIO AUX VIDEO Current Video Format Encoder Menu Status MUSICAM AUDIO CONFIG DLBY/CH1/CH2 Current LS Data Rate Test SERVICE ENCODERSERVICEMENU A/D OTHER Current Aspect Ratio Current DefaultSetup Current Recall Setup Current Framing Type Current Luminance Current Save Setup Current Chrominance Current Service Name Current Offset Level Current Control Type Current Y/C delay Current Reset Type Current Dig. Noise Red. PanelContrast ADVANCED Current Video Source Current Audio#1 Source Current Data Rate Current HS Data Rate Current Output Rate Current Audio#2 Source Current Coding Mode Current HS Clock Rate Current Video Rate Current Audio#3 Source Current Sampl. Freq Current VBI Fields Current Program Number Current Video Resolution Current Audio#4 Source Current Bitstrm Node Current TTX Source Current Cascading Current Video Profile Current Audio#1 Rate Current Dialog Level Current CA Mode Current A/V Sync Current Luma Temporal Current Audio#2 Rate Current Surround Mode Current Enc Based Grp Current DVB Tables Current Chroma Temporal Current Audio#3 Rate Current Mixing Level Biss Items Menu Current GOP Structures Current Luma Vertical Current Audio#4 Rate Current Room Type Current Clock Type Current GOP size Current Chroma Decimath Current Audio#1 Level Current Copyright Current HorizontalFltr Current Audio#2 Level Current Original Current Audio#3 Level Current Audio Source Current Audio#4 Level Current DYN RNG PRF Current Audio SampleRate Current RF OVERMDPRT Current Current Current Current Current Current Current Current Current Current INCREASE DECREASE VideoPID Audio#1 PID Audio#2 PID Audio#3 PID (option) Audio#4 PID (option) LS Data PID HS Data PID Teletext PID PCR PID PMT PID Current IP Number Current Default Gw Current LP Filter Current NMS UDP Port Current DC Notch Page 3-8 Current Subnet Mask (Rev 1.0 / March 2004) CODICO® E-1000 Series MPEG-2 Professional Encoders 3.2.1.2. Encoder Configuration Menu Operation The touch pad keys on the Encoder Front Panel control the operation of the Encoder Configuration Menu. MENU NAVIGATION Navigation in the menu consists of scrolling through the branch options, using the [Up] / [Down] touch pads. It displays the various parameters available to the operator. Current Video Format NTSC Each parameter is displayed with the “Current” label preceding the “Parameter” label on the top line of the LCD and the currently active option on the bottom line. PARAMETER CONFIGURATION Pressing the [Enter] touch pad selects the parameter for configuration and changes the “Current” label to “Select:” label. Select: Video Format NTSC * Two types of parameters are available for configuration (Options and Values). Each type requires a different set-up procedure: Selecting an Option: This type of parameters features a list of valid options. The user is enabled to select one of the options to replace the currently active [Up] / [Down] touch pads option. The enables the user to navigate through the list of valid options. An asterisk (*) identifies the currently active option. Setting-Up a Number/Value: This parameter is numerical, presented as a string of digits and representing a decimal or [Left] / [Right] hexadecimal value. The are used to select the digit to be changed. The [Up] / [Down] are used to increase / decrease the value of the digit. SAVING CHANGES Saving a configuration change requires confirmation (unless otherwise specified), as detailed in paragraph 3.1.2 above. Scopus Documents (p/n 100474) Page 3-9 User Manual Encoder Front Panel Operation 3.2.2. Video Configuration Menu The Video Configuration Menu enables the user to access and set the parameters of the video information received and provided by the encoder. The Video Configuration Menu is activated from the Encoder Configuration Menu by selecting the “Video” option: Power-Up the Encoder Scopus Initializing Please Wait Wait for Power Up to complete Status OK NTSC C/V F720 800Kbs Wait for Initialization to complete Status OK NTSC C/V F720 800Kbs Press [Down] touch pad to activate and enter the Encoder Menu Select “Config” option in the Encoder Menu to activate and enter the Encoder Configuration Menu Navigate by [Left] / selection by [Enter]. Encoder Menu Config Status Test Encoder Configuration Video Audio Aux Service [Right] and confirm Select “Video” option in the Encoder Configuration Menu to activate and enter the Video Configuration Menu Branch Current Video Format NTSC Navigate by [Left] / [Right] and confirm selection by [Enter]. NOTES Activating the “Video” option provides access to a group of video functions/items, enabled for monitoring and setting up. The following sub-paragraphs describe the parameters available for each of these functions (also refer also to Figure 3-3 for the structure of the Video Configuration Menu branch). Page 3-10 (Rev 1.0 / March 2004) CODICO® E-1000 Series MPEG-2 Professional Encoders 3.2.2.1. Video Format Configuration The Video Format item in the Encoder ConfigurationÆVideo Menu displays the current video format Display Current Video Format Pressing the [Enter] keypad enables setting up the format of the video signal received. [Up] / [Down] to select an Navigate by option and confirm selection by [Enter]. Configuring Video Format / Select Options Current Video Format NTSC Select: Video Format NTSC * PAL Valid Options: • PAL: European Color TV Standard • NTSC: USA Color TV Standard 3.2.2.2. Video Source Configuration The Video Source item in the Encoder ConfigurationÆVideo Menu displays the current video source to the encoder. Display Current Video Source Pressing the [Enter] keypad enables the selection of the type of video signal received. Configuring Video Source / Select Options Current Video Source SDI Select: Video Source [Up] / [Down] to select an Navigate by option and confirm selection by [Enter]. SDI * Valid Options: S-VHS • C/V: Analog composite standard video YUV C/V signal • SDI: Digital video signal • S-VHS: Analog composite super-VHS video signal • YUV: Analog Y-U-V component video signal NOTE The installed type of Video Input Panel determines the type of the video source options displayed for selection (refer to paragraph 1.4.4 for details). Scopus Documents (p/n 100474) Page 3-11 User Manual Encoder Front Panel Operation 3.2.2.3. Output Rate Configuration The Output Rate item in the Encoder ConfigurationÆVideo Menu displays the encoder’s current output rate value. Display Current Output Rate Pressing the [Enter] keypad enables setting up of the transport stream output rate. Configuring Output Rate / set value [Left] / Select the digit by set the digit value by [Up] / Confirm value by [Enter]. [Right] and [Down]. Valid Values: • Up to hardware version HW E5: Current Output Rate 25000000 Select: : Output Rate 25000000 * Up to HW Version E5: 10000000 to 25000000 HW Version E5 and up: 10000000 to 52000000 A decimal number from 1000000 to 25000000 (10-25 Mbps) • Hardware versions HW E5 and up: A decimal number from 1000000 to 52000000 (10-52 Mbps) Page 3-12 (Rev 1.0 / March 2004) CODICO® E-1000 Series MPEG-2 Professional Encoders 3.2.2.4. Video Rate Configuration IMPORTANT The Video Rate parameter is the maximum rate assigned to the video component in the stream and it depends on the output rate. If the Output Rate is lower than the Video Rate, the value set for the Output Rate is displayed and the this maximum output rate is assigned to the video. The Video Rate item in the Encoder ConfigurationÆVideo Menu displays the encoder’s current video rate value Display Current Video Rate Pressing the [Enter] keypad enables setting up of the transport stream output rate value. Configuring Video Rate / set value Select the digit by [Left] / [Up] / set the digit value by [Right] and [Down]. Current Video Rate 22000000 Select: Video Rate 25000000 * Up to HW Version E5: Confirm value by [Enter]. From 10000000 to 25000000 Valid Values: HW Version E5 and up: • Up to hardware version HW E5: From 10000000 to 52000000 A decimal number from 1000000 to 25000000 • Hardware versions HW E5 and up: A decimal number from 1000000 to 52000000 Scopus Documents (p/n 100474) Page 3-13 User Manual Encoder Front Panel Operation 3.2.2.5. Video Resolution Configuration NOTE Use of the full vertical / 368 horizontal (FUL VER / 368 Hor) resolution is not recommended. For a better picture, use full vertical / 352 horizontal (FUL VER / 352 Hor) resolution. The Video Resolution item in the Encoder ConfigurationÆVideo Menu displays the current resolution of the video. Display Current Video Resolution Pressing the [Enter] keypad enables the selection of the type and resolution of the video signal (full or half vertical and the selected horizontal resolution]. Configuring Video Resolution / Select Options Current Video Resolution FULL VER / 720 Hor Current Video Resolution FULL VER / 720 Hor * FUL VER / 704 Hor FUL VER / 640 Hor FUL VER / 544 Hor FUL VER / 480 Hor FUL VER / 368 Hor FUL VER / 352 Hor HLF VER / 352 Hor AUTO RESOLUTION Page 3-14 (Rev 1.0 / March 2004) CODICO® E-1000 Series MPEG-2 Professional Encoders 3.2.2.6. Video Profile Configuration The Video Profile item in the Encoder ConfigurationÆVideo Menu displays the current MPEG-2 profile used for the video compression. Display Current Video Profile Pressing the [Enter] keypad enables the selection of the video compression profile and the video delay/latency. Configuring Video Profile / Select Options [Up] / [Down] to select an Navigate by option and confirm selection by [Enter]. Current Video Profile 4:2:2 LOW DELAY Select: Video Profile 4:2:2 LOW DELAY * 4:2:0 Valid Options: 4:2:0 LOW DELAY • 4:2:0: 4:2:2 4:2:0 Main Profile @ Main Level compression 422 ULT LOW DLY • 4:2:0 Low Delay: 4:2:0 compression profile with low latency/delay • 4:2:2: 4:2:2 Professional Profile @ Main Level compression • 4:2:2 Low Delay: 4:2:2 compression profile with low latency delay • 422 ULT Low Dly: 4:2:2 compression profile with ultra low latency/delay 3.2.2.7. Luminance Temporal Configuration The Luma Temporal item in the Encoder ConfigurationÆVideo Menu displays the current state of the luminance vertical temporal filter for the picture vertical information. Display Current Luma Temporal (filter state) Pressing the [Enter] keypad enables toggling the filter operational state. Configuring Luma Temporal / Select Options [Up] / [Down] to select an Navigate by option and confirm selection by [Enter]. Valid States: Enabled / Disabled Scopus Documents (p/n 100474) Current Luma Temporal ENABLED Select: Luma Temporal ENABLED * DISABLED Page 3-15 User Manual Encoder Front Panel Operation 3.2.2.8. Chrominance Temporal Configuration The Chroma Temporal item in the Encoder ConfigurationÆVideo Menu displays the current state of the chrominance vertical decimation filter for the picture vertical information. Display Current Chroma Temporal (filter state) Pressing the [Enter] keypad enables toggling the filter operational state. Configuring Chroma Temporal / Select Options Navigate by [Up] / [Down] to select an option and confirm selection by [Enter]. Valid States: Enabled / Disabled 3.2.2.9. Current Chroma Temporal ENABLED Select: Chroma Temporal ENABLED * DISABLED Luminance Vertical Configuration The Luma Vertical item in the Encoder ConfigurationÆVideo Menu displays the current level of the luminance vertical filter. Display Current Luma Vertical (level) Pressing the [Enter] keypad enables setting up the filter operational level (8 levels). Configuring Luma Vertical / Select Options Navigate by [Up] / [Down] to select an option and confirm selection by [Enter]. Valid Options: • DISABLED • Level 1 (MIN), Level 2(LOW), Level 3, Level 4, Level 5, LEVEL 6 (HI), Level 7 (MAX) Current Luma Vertical LEVEL 6 (HI) Select: Luma Vertical LEVEL 6 (HI) * DISABLED LEVEL 1 (MIN) LEVEL 2 (LOW) LEVEL 3 LEVEL 4 LEVEL 5 LEVEL 7 (MAX) Page 3-16 (Rev 1.0 / March 2004) CODICO® E-1000 Series MPEG-2 Professional Encoders 3.2.2.10. Chrominance Decimation Configuration The Chroma Decimath item in the Encoder ConfigurationÆVideo Menu displays the current level of the chrominance decimation filter Display Current Chroma Decimath (set level) Current Chroma Decimath LEVEL 1 (MIN) Pressing the [Enter] keypad enables setting up the filter operational level (4 levels). This is an additional filtering on the Chrominance vertical decimation process (the decimation for obtaining the 4:2:0 picture). [Up] / [Down] to select an Navigate by option and confirm selection by [Enter]. Valid Options: Configuring Chroma Decimath / Select Options Select: Luma Vertical LEVEL 1 (MIN) * DISABLED LEVEL 2 LEVEL 3 (MAX) • DISABLED • Level 1 (MIN) Level 2, Level 3 (MAX) 3.2.2.11. Horizontal Filter Configuration The Horizontal Filter item in the Encoder ConfigurationÆVideo Menu displays the current level of the horizontal filter and enables setting up the filter operational level (8 levels). This filter blurs the picture horizontally. Display Current Horizontal Filter Pressing the [Enter] keypad enables the selection of the item. [Up] / [Down] to select an Navigate by option and confirm selection by [Enter]. Configuring Horizontal Filter / Select Options Valid Options: • DISABLED • Level 1 (MIN), Level 2 (LOW), Level 3, Level 4, Level 5, Level 6 (HI), Level 7 (MAX) Current Horizontal Filter Level 7 (MAX)* Select: Horizontal Filter Level 7 (MAX)* DISABLED Level 1 (MIN) Level 2 (LOW) Level 3 Level 4 Level 5 Level 6 (HI) Scopus Documents (p/n 100474) Page 3-17 User Manual Encoder Front Panel Operation 3.2.3. Audio Configuration Menu The Audio Configuration menu enables the user to access and set the parameters of the audio information received by the encoder. The Audio menu has the following sub-menus: • Audio MUSICAM Configuration menu manages audio related parameters such as: source, rate, level and sample rate. Refer to paragraph 3.2.4 • Audio Dolby Configuration menu manages Dolby related options. Refer to paragraph 3.2.5 The Audio Configuration Menu is activated from the Encoder Configuration Menu by selecting the “Audio” option: Power-Up the Encoder Scopus Initializing Please Wait Wait for Power Up to complete Status OK NTSC C/V F720 800Kbs Wait for Initialization to complete Status OK NTSC C/V F720 800Kbs [Down] touch pad to activate and Press enter the Encoder Menu Select “Config” option in the Encoder Menu to activate and enter the Encoder Configuration Menu Navigate by [Left] / selection by [Enter]. Encoder Menu Config Status Test Encoder Configuration Video Audio Aux Service [Right] and confirm Select “Audio” option in the Encoder Configuration Menu to activate and enter the Audio Configuration Menu Branch Audio Config MUSICAM DLBY/CH1 DLB/CH2 [Left] / [Right] and Navigate by confirm selection by [Enter]. Page 3-18 (Rev 1.0 / March 2004) CODICO® E-1000 Series MPEG-2 Professional Encoders 3.2.4. Audio MUSICAM Configuration Sub-Menu The Audio MUSICAM Configuration Menu is a sub-set in the Audio Configuration menu (See paragraph 3.2.3). It enables the user to configure MUSICAM audio related parameters such as: source, rate, level and sample rate. NOTE Audio #3 and #4 are provided only when the optional Audio Expansion card is installed. Audio #3 and #4 parameters are configured in the same manner as the Audio #1 and Audio #4 parameters. 3.2.4.1. Audio #1, #2 Source Configuration The Audio #1, #2 Source item in the Config ÆAudioÆMUSICAM Menu Displays the current audio source and enables the selection of the type of the input audio source. Display Current Audio #1, #2 Source Pressing the [Enter] keypad enables the selection of the item. [Up] / [Down] to select an Navigate by option and confirm selection by [Enter]. Configuring Audio #1, #2 Source / Select Options Valid Options: • AUTO: Audio type is automatically selected by the encoder • EMBEDDED: Digital audio, embedded in the Current Audio #1, #2 Source AUTO Select: Audio #1, #2 Source AUTO * EMBEDDED ANALOG AES-EBU DOLBY SDI signal • ANALOG: Composite or Component analog audio signal • AES-EBU: A/D converted audio data (stereo) • DOLBY: Dolby Digital (AC-3) audio data (available on Channel 1 only) Scopus Documents (p/n 100474) Page 3-19 User Manual Encoder Front Panel Operation 3.2.4.2. Audio #1, #2 Rate Configuration The Audio #1, #2 Rate item in the ConfigÆ AudioÆMUSICAM Menu Displays the current audio rate value and enables the selection of the encoding bit rate for the received audio signal. Display Current Audio #1, #2 Rate Pressing the [Enter] keypad enables the selection of the item. [Up] / [Down] to select an Navigate by option and confirm selection by [Enter]. Configuring Audio #1, #2 Rate / Select Options Current Audio #1, #2 Rate 64 Kbps Select: Audio #1, #2 Rate 64 Kbps * 96 Kbps Valid Options: • 64, 96, 128, 160 192, 224, 256, 320 or 384 Kbps 128 Kbps 160 Kbps 192 Kbps • OFF 224 Kbps 256 Kbps 320 Kbps 384 Kbps OFF 3.2.4.3. Audio #1, #2 Level Configuration IMPORTANT This is an immediate action option. Setting a new audio level for the channel is saved immediately, upon completion of configuration change. The Audio #1, #2 Level item in the ConfigÆ AudioÆMUSICAM Menu Displays the current audio level value and enables setting the audio level for the input audio signal. Display Current Audio #1, #2 Level Pressing the [Enter] keypad enables setting up the item value. Configuring Audio #1, #2 Level / Set Value [Left] / Select a digit by [Up] / the digit value by Confirm value by [Enter]. [Right] and set [Down]. Current Audio #1, #2 Level 3 Select: Audio #1, #2 Level 3* A decimal number between -12 dB and +12 dB Valid Options: A decimal number between -12 dB and +12 dB Page 3-20 (Rev 1.0 / March 2004) CODICO® E-1000 Series MPEG-2 Professional Encoders 3.2.4.4. Audio Sample Rate Configuration The Audio Sample Rate item in the ConfigÆ AudioÆMUSICAM Menu Displays the current value and enables the selection of the A/D converter sampling rate for input audio signal. Display Current Audio Sample Rate Pressing the [Enter] keypad enables the selection of the item. [Up] / [Down] to select an Navigate by option and confirm selection by [Enter]. Configuring Audio Sample Rate / Select Options Valid Options: • 32 KHz • 44.1 KHz • 48 KHz 3.2.5. Current Audio SampleRate 32 KHz Select: Audio SampleRate 32 KHz* 44.1 KHz 48 KHz Audio Dolby Configuration Sub-Menu The Audio Dolby Configuration Menu is a sub-set in the Audio Configuration menu (See paragraph 3.2.3). It enables the user to configure Dolby Audio related parameters. NOTE Dolby #3 and #4 are provided only when the optional Dolby Expansion card is installed. Scopus Documents (p/n 100474) Page 3-21 User Manual Encoder Front Panel Operation 3.2.5.1. Dolby Data Rate Configuration The Data Rate item in the ConfigÆ AudioÆDLBY/CH3/CH4 Menu Display Current Data Rate Current DATA RATE 192K Pressing the [Enter] keypad enables the selection of the item. Configuring Data Rate / Select Options Select: DATA RATE Navigate by [Up] / [Down] to select an option and confirm selection by [Enter]. 192K Valid Options: 128K 640K, 576K, 512K, 448K, 384K, 320K, 256K, 224K, 192K, 160K, 128K, 112K, 96K, 80K, 64K, 56K 112K 160K 96K 80K 64K 56K 640K 576K 512K 448K 384K 320K 256K 224K 3.2.5.2. Dolby Coding Mode Configuration The Coding Mode item in the ConfigÆ AudioÆDLBY/CH3/CH4 Menu sets the Dolby coding mode. Display Current Coding Mode Pressing the [Enter] keypad enables the selection of the item. [Up] / [Down] to select an Navigate by option and confirm selection by [Enter]. Configuring Coding Mode / Select Options Valid Options: Current CODING MODE STEREO Select: CODING MODE STEREO MONO DISABLED • STEREO • MONO • DISABLED Page 3-22 (Rev 1.0 / March 2004) CODICO® E-1000 Series MPEG-2 Professional Encoders 3.2.5.3. Dolby Sample Frequency Configuration The Sample Frequency item in the ConfigÆ AudioÆDLBY/CH3/CH4 Menu sets the sample frequency. Display Current Sampl Freq Pressing the [Enter] keypad enables the selection of the item. [Up] / [Down] to select an Navigate by option and confirm selection by [Enter]. Configuring Sampl Freq / Select Options Valid Options: Current SAMPL. FREQ 48K Select: SAMPL. FREQ 48K 32K 44.1K • 32 KHz • 44.1 KHz • 48 KHz 3.2.5.4. Dolby Bit Stream Mode Configuration The Bit Stream Mode item in the ConfigÆ AudioÆDLBY/CH3/CH4 Menu sets the Dolby mode. Display Current Bit Stream Mode Pressing the [Enter] keypad enables the selection of the item. Configuring Bit Stream Mode / Select Options [Up] / [Down] to select an Navigate by option and confirm selection by [Enter]. Valid Options: • • • • • • • Current BITSTRM MODE COMPLETE MAIN Select: BITSTRM MODE COMPLETE MAIN VOICEOVER EMERGENCY VOICEOVER COMMENTARY EMERGENCY DIALOGUE COMMENTARY HEARING IMPAIRED DIALOGUE VISUALY IMPAIRED HEARING IMPAIRED MUSIC n EFFECTS VISUALY IMPAIRED MUSIC n EFFECTS Scopus Documents (p/n 100474) Page 3-23 User Manual Encoder Front Panel Operation 3.2.5.5. Dolby Dialog Level Configuration The Dialog Level item in the ConfigÆ AudioÆDLBY/CH3/CH4 Menu sets the level of the dialog parameter. Display Current Dialog Level Pressing the [Enter] keypad enables setting up the item value. Configuring Dialog Level / Set Value Select a digit by the digit value by [Left] / [Up] / [Right] and set [Down]. Current DIALOG LEVEL 3 Select: DIALOG LEVEL 3* A decimal number between 1 and 31 Confirm value by [Enter]. Valid Options: A decimal number between 1 and 31 3.2.5.6. Dolby Surround Mode Configuration The Surround Mode item in the ConfigÆ AudioÆDLBY/CH3/CH4 Menu sets the surround stereo mode. Display Current Surround Mode Pressing the [Enter] keypad enables the selection of the item. [Up] / [Down] to select an Navigate by option and confirm selection by [Enter]. Configuring Surround Mode / Select Options Select: SURROUND MODE NOT INDICATED SURR. CODED Valid Options: NOT CODED • NOT INDICATED • SURR. CODED • NOT CODED 3.2.5.7. Current SURROUND MODE NOT INDICATED Dolby Mixing Level Configuration The Mixing Level item in the ConfigÆ AudioÆDLBY/CH3/CH4 Menu Display Current Mixing Level Current MIXING LEVEL 3 Pressing the [Enter] keypad enables setting up the item value. Select a digit by the digit value by [Left] / [Up] / [Right] and set [Down]. Confirm value by [Enter]. Configuring Mixing Level / Set Value Select: MIXING LEVEL 3* A decimal number between 0 and 31 Valid Options: A decimal number between 0 and 31 Page 3-24 (Rev 1.0 / March 2004) CODICO® E-1000 Series MPEG-2 Professional Encoders 3.2.5.8. Dolby Room Type Configuration The Room Type item in the ConfigÆ AudioÆDLBY/CH3/CH4 Menu sets the room size parameter. Display Current Room Type Pressing the [Enter] keypad enables the selection of the item. [Up] / [Down] to select an Navigate by option and confirm selection by [Enter]. Configuring Room Type / Select Options Valid Options: Current ROOM TYPE SMALL ROOM Select: ROOM TYPE SMALL ROOM LARGE ROOM NOT INDICATED • SMALL ROOM • LARGE ROOM • NOT INDICATED 3.2.5.9. Dolby Copy Right Configuration The Copy Right item in the ConfigÆ AudioÆDLBY/CH3/CH4 Menu Display Current Copy Right Current COPYRIGHT 1 Pressing the [Enter] keypad enables the selection of the item. [Up] / [Down] to select an Navigate by option and confirm selection by [Enter]. Configuring Copy Right / Select Options Select: COPYRIGHT 1 0 Valid Options: 1, 0 3.2.5.10. Dolby Original Configuration The Original item in the ConfigÆ AudioÆDLBY/CH3/CH4 Menu Display Current Dolby Original Current ORIGIAL 1 Pressing the [Enter] keypad enables the selection of the item. [Up] / [Down] to select an Navigate by option and confirm selection by [Enter]. Valid Options: 1, 0 Scopus Documents (p/n 100474) Configuring Dolby Original / Select Options Select: ORIGINAL 1 0 Page 3-25 User Manual Encoder Front Panel Operation 3.2.5.11. Dolby Audio Source Configuration The Audio Source item in the ConfigÆ AudioÆDLBY/CH3/CH4 Menu sets the type of source for the audio data. Display Current Audio Source Pressing the [Enter] keypad enables the selection of the item. [Up] / [Down] to select an Navigate by option and confirm selection by [Enter]. Configuring Audio Source / Select Options Current AUDIO SOURCE AES-EBU Select: AUDIO SOURCE AES-EBU ANALOG Valid Options: EMBEDDED • • • • TEST TONE AES-EBU ANALOG EMBEDDED TEST TONE 3.2.5.12. Dolby DYN RNG PRF Configuration The DYN RNG PRF item in the ConfigÆ AudioÆDLBY/CH3/CH4 Menu sets the required audio dynamic range. Display Current DYN RNG PRF Pressing the [Enter] keypad enables the selection of the item. [Up] / [Down] to select an Navigate by option and confirm selection by [Enter]. Configuring DYN RNG PRF / Select Options Valid Options: • • • • • Page 3-26 NONE SPEECH MUSIC LIGHT Current DYN RNG PRF FILM STNDRD Select: DYN RNG PRF FILM STNDRD NONE SPEECH MUSIC LIGHT MUSIC STNDRD FILM LIGHT MUSIC STNDRD FILM LIGHT (Rev 1.0 / March 2004) CODICO® E-1000 Series MPEG-2 Professional Encoders 3.2.5.13. Dolby RF OVERMD PRT Configuration The RF OVERMD PRT item in the ConfigÆ AudioÆDLBY/CH3/CH4 Menu Display Current RF RF OVERMD PRT Current RF OVERMD PRT 0 Pressing the [Enter] keypad enables the selection of the item. [Up] / [Down] to select an Navigate by option and confirm selection by [Enter]. Valid Options: 1, 0 Configuring RF OVERMD PRT / Select Options Select: RT OVERHD PRT 0 1 3.2.5.14. Dolby LP Filter Configuration The LP Filter item in the ConfigÆ AudioÆDLBY/CH3/CH4 Menu activates/deactivates the Low-Pass filter. Display Current LP Filter Pressing the [Enter] keypad enables the selection of the item. [Up] / [Down] to select an Navigate by option and confirm selection by [Enter]. Configuring LP Filter / Select Options Current LP FILTER 1 Select: LP FILTER 1 0 Valid Options: 1, 0 3.2.5.15. Dolby DC Notch Configuration The DC Notch item in the ConfigÆ AudioÆDLBY/CH3/CH4 Menu activates/deactivates the DC Notch filter. Display Current DC Notch Pressing the [Enter] keypad enables the selection of the item. [Up] / [Down] to select an Navigate by option and confirm selection by [Enter]. Configuring DC Notch / Select Options Current DC NOTCH 32 KHz Select: DC NOTCH 1 0 Valid Options: 1, 0 Scopus Documents (p/n 100474) Page 3-27 User Manual Encoder Front Panel Operation 3.2.6. Auxiliary Configuration Menu The Auxiliary Configuration menu enables the user to access and set the auxiliary parameters of the audio information received by the encoder. The paragraph below describes the parameters available for each of these functions (refer also to Figure 3-3 for the menu structure). The Auxiliary Configuration Menu is activated from the Encoder Configuration Menu by selecting the “AUX” option: Power-Up the Encoder Scopus Initializing Please Wait Wait for Power Up to complete Status OK NTSC C/V F720 800Kbs Wait for Initialization to complete Status OK NTSC C/V F720 800Kbs Press [Down] touch pad to activate and enter the Encoder Menu Select “Config” option in the Encoder Menu to activate and enter the Encoder Configuration Menu Navigate by [Left] / selection by [Enter]. Status Test Encoder Configuration Video Audio Aux Service [Right] and confirm Select “AUX” option in the Encoder Configuration Menu to activate and enter the Auxiliary Configuration Menu Branch Page 3-28 Encoder Menu Config Current CA mode Clear (Rev 1.0 / March 2004) CODICO® E-1000 Series MPEG-2 Professional Encoders 3.2.6.1. Low Speed Data Rate Configuration The LS Data Rate item in the ConfigÆ Auxiliary Menu Sets the data rate of the low speed data received by the encoder. Display Current LS Data Rate Pressing the [Enter] keypad enables the selection of the item. [Up] / [Down] to select an Navigate by option and confirm selection by [Enter]. Configuring LS Data Rate / Select Options Current LS Data Rate 2400 Select: LS Data Rate 2400 * 4800 Baud Valid Options: 9600 Baud • NONE • 2400, 4800, 9600, 19200, 38400, 19200 Baud 57600, 115200 Baud 38400 Baud 57600 Baud 115200 Baud NONE 3.2.6.2. High Speed Data Rate Configuration The HS Data Rate item in the ConfigÆ Auxiliary Menu Sets the high speed data (HSD) rate. Display Current HS Data Rate Pressing the [Enter] keypad enables setting up the item value. Configuring HS Data Rate / Set Value Select a digit by the digit value by [Left] / [Up] / [Right] and set [Down]. Current HS Data Rate 25000000 Select: HS Data Rate 25000000 * Number up to: 20000000 (Dec) Confirm value by [Enter]. Valid Options: Number up to: 20000000 (Dec) Scopus Documents (p/n 100474) Page 3-29 User Manual Encoder Front Panel Operation 3.2.6.3. High Speed Clock Rate Configuration The HS Clock Rate item in the ConfigÆ Auxiliary Menu Sets the HSD clock rate. Display Current HS Clock Rate Current HS Clock Rate 512 KHz Pressing the [Enter] keypad enables the selection of the item. [Up] / [Down] to select an Navigate by option and confirm selection by [Enter]. Valid Options: 64, 512, 1024, 2048, 3072, 4096, 6144, 8192 KHz Configuring HS Clock Rate / Select Options Select: HS Clock Rate 512 KHz * 64 KHz 1024 KHz 2048 KHz 3072 KHz 4096 KHz 6144 KHz 8192 KHz 3.2.6.4. VBI Fields Configuration The VBI Fields item in the ConfigÆ Auxiliary Menu Displays the current enabled VBI features and enables the selection of the VBI features to be provided. Display Current VBI Fields Pressing the [Enter] keypad enables the selection of the item. [Up] / [Down] to select an Navigate by option and confirm selection by [Enter]. Configuring VBI Fields / Select Options Select: VBI Fields OFF * ALL Valid Options: SMC+WSS+TTX • OFF: No VBI features are enabled. • ALL: All VBI features (SMC, WSS, TTX and SMC+WSS VPS) are enabled: - SMC: Stereo Mode Control - WSS: Wide Screen Signaling - TTX: Teletex - VPS: Video Program Source • SMC+WSS+TTX: Only SMC, WSS and TTX are enabled • SMC+WSS: Only SMC and WSS are enabled • SMC+TTX+VPS: Only SMC, TTX and VPS are enabled Page 3-30 Current VBI Fields OFF SMC+TTX+VPS SMC+TTX SMC WSS+TTX+VPS WSS+TTX WSS TTX+VPS TTX SMC + VPS WSS + VPS VPS (Rev 1.0 / March 2004) CODICO® E-1000 Series MPEG-2 Professional Encoders • SMC+TTX: Only SMC and TTX are enabled • SMC: Only SMC is enabled • WSS+TTX+VPS: Only WSS, TTX and VPS SMC + WSS + VPS are enabled • • • • • • • • 3.2.6.5. WSS+TTX: Only WSS and TTX are enabled WSS: Only WSS is enabled TTX+VPS: Only TTX and VPS are enabled TTX: Only TTX is enabled SMC+VPS: Only SMC and VPS are enabled WSS+VPS: Only WSS and VPS are enabled VPS: Only VPS is enabled SMC+WSS+VPS: Only SMC, WSS and VPS are enabled. Teletext Source Configuration The TTX Source item in the ConfigÆ Auxiliary Menu Displays the current input source of teletex and enables the selection of the source. Display Current TTX Source Pressing the [Enter] keypad enables the selection of the item. [Up] / [Down] to select an Navigate by option and confirm selection by [Enter]. Configuring TTX Source / Select Options Current TTX Source OVER-C/V Select: TTX Source OVER-C/V * Follows - Video Valid Options: • OVER-C/V: Analog Teletex is received over the C/V input. • FLLOWS-VIDEO: The digital teletex PID follows the Video PID. Scopus Documents (p/n 100474) Page 3-31 User Manual Encoder Front Panel Operation 3.2.6.6. Conditional Access Menu Configuration The CA Menu item in the ConfigÆ Auxiliary Menu Displays the current Conditional Access operation mode and enables the selection of the CA operation mode enabled on the encoder. Display Current CA Menu Pressing the [Enter] keypad enables the selection of the item. [Up] / [Down] to select an Navigate by option and confirm selection by [Enter]. Configuring CA Menu / Select Options Valid Options: Current CA Menu BISS modes Select: CA Menu BISS modes * Clear Encdr Basd Encr • Clear: No encryption (clear stream) • BISS modes: Basic Interoperable Scrambling System (BISS) Mode Encryption • Encdr Basd Encr: Encoder based encryption 3.2.6.7. Encoder Based Group Configuration The Enc Based Grp item in the ConfigÆ Auxiliary Menu sets the encryption group When the Encoder Based Encryption option is activated, (up to 16 options available, marked 00 to 15). Display Current Enc Based Grp Pressing the [Enter] keypad enables the selection of the item. [Up] / [Down] to select an Navigate by option and confirm selection by [Enter]. Configuring Enc Based Grp / Set Value Current Enc Based Grp 003 Select: Enc Based Grp 003 * 00 Valid Options: . 00 Grp # (up to 15 Grp): 16 Encoder based encryption groups. . 15 NOTE The encoder based encryption is available only for CODICO® IRD-25x0 Integrated Receiver Decoders. Page 3-32 (Rev 1.0 / March 2004) CODICO® E-1000 Series MPEG-2 Professional Encoders 3.2.6.8. Clock Type Configuration The Clock Type item in the ConfigÆ Auxiliary Menu Displays the current clock source and enables the selection of the source for the channel clock. Display Current Clock Type Pressing the [Enter] keypad enables the selection of the item. [Up] / [Down] to select an Navigate by option and confirm selection by [Enter]. Configuring Clock Type / Select Options Current Clock Type Internal Select: Clock Type Internal * External Valid Options: Internal, External NOTE: After selecting the Channel Clock type, the menu performs a jump to the Output Rate parameter, to select the rate of the output transport stream (in the Config-> Video menu, refer to paragraph 3.2.2). Scopus Documents (p/n 100474) Page 3-33 User Manual Encoder Front Panel Operation 3.2.7. BISS Items Configuration Sub-Menu The BISS Items Configuration Sub-Menu provides a group of configuration options for the various scrambling operating modes under the BISS Encryption standard. For a detailed description of the BISS scrambling and encryption functions, refer to paragraph 4.4. NOTE: The sub-menu is activated from the Encoder Auxiliary Configuration Menu by pressing the [Enter] keypad on the E-1000 Front Panel when the BISS Items Menu item is displayed. The paragraphs below describe these parameters (refer also to Figure 3-3 for the sub-menu structure). MENU OPERATION • Navigating (UP/DOWN touch pads) in the menu displays the various parameters available. Each parameter is displayed with the “Current” label preceding the “Parameter” label on the top line of the LCD and the current active option on the bottom line. • Selecting the parameter for configuration changes the “Current” label to “Selelct:” label and enables the user to navigate through the valid options available for each parameter. The current active option is marked by an asterisk (*). • Saving a configuration change requires confirmation (unless otherwise specified), as detailed in paragraph 3.1.2 above. The BISS Items Configuration Sub-Menu supports the following scrambling modes: • Clear Mode (No scrambling), provided in the ConfigÆAuxÆBISS Items Mode sub-menu (for details, refer to paragraph ). • Mode 1 Mode (BISS Mode-1 scrambling), provided in the ConfigÆAuxÆBISS Items Mode sub-menu (for details, refer to paragraph ). • Burr ID Mode (BISS-E Buried ID scrambling), ConfigÆAuxÆBISS Items Mode sub-menu (for paragraph ). • Inj ID (BISS-E ConfigÆAuxÆBISS paragraph ). Page 3-34 Injected ID Items Mode provided in the details, refer to scrambling), provided sub-menu (for details, in the refer to (Rev 1.0 / March 2004) CODICO® E-1000 Series MPEG-2 Professional Encoders Navigate in the Encoder Configuration Menu by [Up] / [Down] to select the BISS Items Menu and confirm selection by [Enter]. Display Current BISS Items Menu The Scrambling Method item in the ConfigÆAuxÆBISS Items Menu displays the current active scrambling mode and enables setting-up the scrambling mode parameters. Display Current Aspect Ratio Pressing the [Enter] keypad enables the selection of the item. Configuring BISS Items Menu / Select Options Valid Options: • (Current) CLEAR: No scrambling • (Current) MODE 1: BISS-1 Mode • (Current) Biss-E Bur-ID: BISS-E Mode BISS Items Menu ENTER Current Scrambl. Method CLEAR Select: BISS Items Menu CLEAR Mode-1 BISS-E BURR-ID BISS-E INJ ID with buried ID as active ID • (Current) Biss -E Inj-ID: BISS-E Mode with injected ID 3.2.7.1. Clear / No Scrambling Configuration Setting up the encoder for transport stream for Clear / No Scrambling requires the user to activate the Clear scrambling method. Press [Right] touch pad to activate and enter the Scrambling Method Select option. Current Scrambling Method CLEAR * [Up] / [Down] touch pads Navigate by to display the CLEAR select item and press [Enter] key to activate this scrambling mode. Scopus Documents (p/n 100474) Page 3-35 User Manual Encoder Front Panel Operation 3.2.7.2. BISS Mode-1 Scrambling Configuration Setting up the encoder for transport stream scrambling under BISS Mode-1 Scrambling mode requires the user to activate the BISS Mode-1 scrambling method and enter the Open Session Word (12 Hex characters / 48 bits word). [Right] touch pad to activate and Press enter the Scrambling Method Select option. Current Scrambling Method MODE 1 * Navigate by [Up] / [Down] touch pads to display the Mode 1 select item and press [Enter] key to activate this scrambling mode. Navigate by [Up] / [Down] touch pads in the BISS Items Sub-Menu to display the Clear-HI current value. Select: Clear-HI 888888 [Right] touch pad to activate and Press enter the Clear-HI option, the first 6, most significant, characters in the BISS Mode-1 Open Session Word. [Left] / [Right] touch pads to Use the select the character to be changed and the [Up] / [Down] touch pads to increase / decrease the value of the character. Press [Enter] key to accept the new value for the MS part of the BISS Mode-1 Clear Session Word. Repeat above to select and set-up the ClearLO option. This option sets-up the remaining 6 characters in the BISS Mode-1 Clear Session Word. Page 3-36 Select: Clear-LO 888888 (Rev 1.0 / March 2004) CODICO® E-1000 Series MPEG-2 Professional Encoders 3.2.7.3. BISS-E Buried ID Scrambling Configuration Setting up the encoder for transport stream scrambling under BISS-E Buried ID Scrambling mode requires the user to enter the Encrypted Session Word (16 Hex characters / 64 bits word). This word is calculated from the Open Session Word and the unique Encoder Buried Identification word (for details, refer to paragraph 4.4). Press [Right] touch pad to activate and enter the Scrambling Method Select option. Current Scrambling Method BISS-E Burr-IDI * [Up] / [Down] touch pads Navigate by to display the BISS-E Bur-ID select item and press [Enter] key to activate this scrambling mode. [Up] / [Down] touch pads Navigate by in the BISS Items Sub-Menu to display the Crypto Key-HI current value. Select: Crypto Key-Hi 88888888 [Right] touch pad to activate and Press enter the Crypto Key-HI option, the first 8, most significant, characters in the BISS-E Encrypted Session Word (16 Hex characters / 64 bits word). [Left] / [Right] touch pads to Use the select the character to be changed and the [Up] / [Down] touch pads to increase / decrease the value of the character. Press [Enter] key to accept the new value for the MS part of the BISS-E Encrypted Session Word. Repeat above to select and set-up the Crypto Key-LO option. This option sets-up the remaining 8 characters in the BISS-E Encrypted Session Word. Scopus Documents (p/n 100474) Select: Crypto Key-LO 88888888 Page 3-37 User Manual Encoder Front Panel Operation 3.2.7.4. BISS-E Injected ID Scrambling Configuration Setting up the encoder for transport stream scrambling under BISS-E Injected Key Scrambling mode requires the user to enter the Injected ID Word (14 Hex characters / 56 bits word) and the Encrypted Session Word (16 Hex characters / 64 bits word). The Injected ID word is user defined while the Encrypted Session word is calculated from the Open Session Word and the unique Encoder Injected word (for details, refer to paragraph 4.4). Press [Right] touch pad to activate and enter the Scrambling Method Select option. Current Scrambling Method BISS-E Burr-IDI * [Up] / [Down] touch pads Navigate by to display the BISS-E Inj-ID select item and press [Enter] key to activate this scrambling mode. Navigate by [Up] / [Down] touch pads in the BISS Items Sub-Menu to display the Crypto Key-HI current value. Select: Crypto Key-Hi 88888888 [Right] touch pad to activate and Press enter the Crypto Key-HI option, the first 8, most significant, characters in the BISS-E Encrypted Session Word (16 Hex characters / 64 bits word). [Left] / [Right] touch pads to Use the select the character to be changed and the [Up] / [Down] touch pads to increase / decrease the value of the character. Press [Enter] key to accept the new value for the MS part of the BISS-E Encrypted Session Word. Repeat above to select and set-up the Crypto Key-LO option. This option sets-up the remaining 8 characters in the BISS-E Encrypted Session Word. Repeat above to select and set-up the Injected ID HI option. This option sets-up the first 6 characters in the BISS-E Injected ID Word (14 Hex characters / 56 Bits). Repeat above to select and set-up the Injected ID-LO option. This option sets-up the remaining 8 characters in the BISS-E Encrypted Session Word. Page 3-38 Select: Injected ID-Hi 88888888 Select: Injected ID -LO 88888888 Select: Crypto Key-LO 88888888 (Rev 1.0 / March 2004) CODICO® E-1000 Series MPEG-2 Professional Encoders 3.2.8. Service Configuration Menu The Encoder Service Configuration Menu provides a group of monitoring and set-up functions for the Encoder. These parameters are grouped into three categories (Figure 3-3 above): • Advanced service parameters, provided in the ConfigÆServiceÆ Advanced sub-menu (for details, refer to paragraph 3.2.9). • A/D service parameters, provided in the ConfigÆServiceÆA/D sub-menu (for details, refer to paragraph 3.2.9.18). • Additional service parameters provided in the ConfigÆServiceÆOther sub-menu (for details, refer to paragraph 3.2.11). The Service Configuration Menu is activated Configuration Menu by selecting the “Service” option: Power-Up the Encoder from the Encoder Scopus Initializing Please Wait Wait for Power Up to complete Status OK NTSC C/V F720 800Kbs Wait for Initialization to complete Status OK NTSC C/V F720 800Kbs [Down] touch pad to activate and Press enter the Encoder Menu Select “Config” option in the Encoder Menu to activate and enter the Encoder Configuration Menu Navigate by [Left] / selection by [Enter]. Status Config Test Encoder Configuration Video Audio Aux Service [Right] and confirm Select “Service” option in the Encoder Configuration Menu to activate and enter the Service Configuration Menu Branch Scopus Documents (p/n 100474) Encoder Menu Service Menu Advanced A/D OTHER Page 3-39 User Manual Encoder Front Panel Operation 3.2.9. Advanced Services Configuration Sub-Menu The Advanced Services Configuration Sub-Menu provides access for set-up and configuration to advanced encoder service parameters. The paragraphs below describe these parameters (refer also to Figure 3-3 for the sub-menu structure). MENU OPERATION • Navigating (Up / Down touch pads) in the menu displays the various parameters available. Each parameter is displayed with the “Current” label preceding the “Parameter” label on the top line of the LCD and the current active option on the bottom line. • Selecting the parameter for configuration changes the “Current” label to “Selelct:” label and enables the user to navigate through the valid options available for each parameter. The current active option is marked by an asterisk (*). • Saving a configuration change requires confirmation (unless otherwise specified), as detailed in paragraph 3.1.2 above. 3.2.9.1. Aspect Ratio Configuration The Aspect Ratio item in the ConfigÆServiceÆAdvanced Menu Displays the current value and enables the selection of the aspect ratio mode of display. Display Current Aspect Ratio Pressing the [Enter] keypad enables the selection of the item. [Up] / [Down] to select an Navigate by option and confirm selection by [Enter]. Configuring Aspect Ratio / Select Options Current Aspect Ratio 4:3 Select: Aspect Ratio 4:3 * 16:9 Valid Options: 4:3 Auto • 4:3: Fixed aspect ratio, set to 4:3 • 16:9: Fixed aspect ratio, set to 16:9 • 4:3 Auto: Starts with aspect ratio of 4:3 16:9 Auto and changes when the aspect ratio data is modified (WSS information in line 23). • 16:9 Auto: Starts with aspect ratio of 16:9 and changes when the aspect ratio data is changed (WSS information in line 23). Page 3-40 (Rev 1.0 / March 2004) CODICO® E-1000 Series MPEG-2 Professional Encoders 3.2.9.2. Framing Type Configuration The Framing Type item in the ConfigÆServiceÆAdvanced Menu Displays the current value and enables the selection of the framing type. Display Current Framing Type Pressing the [Enter] keypad enables the selection of the item. [Up] / [Down] to select an Navigate by option and confirm selection by [Enter]. Configuring Framing Type / Select Options Valid Options: 188, 204 3.2.9.3. Current Framing Type 188 Select: Framing Type 188 * 204 Program Number Configuration The Program Number item in the ConfigÆServiceÆAdvanced Menu is combining two streams from two encoders into one stream by connecting the first encoder output to the second encoder input. Display Current Program Number Current Program Number 0001 (1-FFFF) When cascading, each encoder in the chain should have the previous encoder program number. Pressing the [Enter] keypad enables the selection of the item. [Up] / [Down] to select an Navigate by option and confirm selection by [Enter]. Configuring Program Number / Set Value Select: Program Number 0001 (1-FFFF) Valid Options: 4 digits, in Hex, which defines the program number of the incoming stream. Scopus Documents (p/n 100474) Page 3-41 User Manual Encoder Front Panel Operation 3.2.9.4. Cascading Configuration The Cascading item in the ConfigÆServiceÆAdvanced Menu Enables (ON) or disables (OFF) the cascading function. Display Current Cascading Current Cascading ON When cascading, each encoder in the chain should have the previous encoder program number. Pressing the [Enter] keypad enables the selection of the item. [Up] / [Down] to select an Navigate by option and confirm selection by [Enter]. Configuring Cascading / Select Options Select: Cascading ON * OFF Valid Options: ON, OFF 3.2.9.5. Audio to Video Sync Configuration The Audio to Video Sync item in the ConfigÆServiceÆAdvanced Menu Displays the current value and enables the selection of the “lips” (audio to video) synchronization delay. Display Current Audio to Video Sync Current A/V Sync 12 This value changes the audio offset in the stream: • A positive value forwards (advances) the audio position in regards to the video/picture position. • A negative value delays (withdraws) the audio position in regards to the video/picture position. Pressing the [Enter] keypad enables setting up the item value. Select a digit by [Left] / [Up] / the digit value by Confirm value by [Enter]. Page 3-42 [Right] and set [Down]. Configuring A/V Sync / Set Value Select: A/V Sync 12 * -199 . Valid Options: . ± 199 mSec +199 (Rev 1.0 / March 2004) CODICO® E-1000 Series MPEG-2 Professional Encoders 3.2.9.6. DVB Tables Configuration The DVB Tables item in the ConfigÆServiceÆAdvanced Menu Enables inclusion of DVB tables in the stream. Display Current DVB Tables Pressing the [Enter] keypad enables the selection of the item. [Up] / [Down] to select an Navigate by option and confirm selection by [Enter]. Configuring DVB Tables / Select Options Valid Options: Current DVB Tables NORMAL + PLAY FILE Select: DVB Tables NORMAL + PLAY FILE * NO DVB TABLES NORMAL STREAM • NO DVB TABLES: No DVB SI tables. Used for saving bandwidth. • NORMAL STREAM: Includes DVB SI tables in stream. • NORMAL + PLAY TABLES FILE: Includes DVB SI tables and “Play” tables in stream. “Play” tables are pre-prepared tables (set by Scopus), loaded from the Compact Flash card 3.2.9.7. GOP Structure Configuration The GOP Structure item in the ConfigÆServiceÆAdvanced Menu Displays the current value and enables the selection of the Group Of Pictures (GOP) stream structure. Display Current GOP Structure Pressing the [Enter] keypad enables the selection of the item. [Up] / [Down] to select an Navigate by option and confirm selection by [Enter]. Configuring GOP Structure / Select Options Valid Options: IP, IBP, IBBP Scopus Documents (p/n 100474) Current GOP Structr IP Select: GOP Structr IP * IBP IBBP Page 3-43 User Manual Encoder Front Panel Operation 3.2.9.8. GOP Size Configuration The GOP Size item in the ConfigÆServiceÆAdvanced Menu Displays the current value and enables the selection of the size of the GOP. Display Current GOP Size Pressing the [Enter] keypad enables the selection of the item. [Left] / [Right] and set Select a digit by [Up] / [Down]. the digit value by Confirm value by [Enter]. Configuring GOP Size / Set Value Current GOP Size 000 (M:NN HeexaDec) Select: GOP Size 000 (M:NN HexaDec) Valid Options: 204 (M:NN Decimal) Where: • M: type of GOP; 1=IP, 2=IBP, 3=IBBP • NN: GOP length; 01 to 99 NOTE NN divided by M must result in integer (i.e., for NN=22 and M=3, the GOP size is not valid) 3.2.9.9. Video PID Configuration The Video PID item in the ConfigÆServiceÆAdvanced Menu displays and manages the current Video PID Display Current Video PID Pressing the [Enter] keypad enables setting up the item value. Configuring Video PID / Set Value [Left] / Select a digit by the digit value by [Up] / Confirm value by [Enter]. [Right] and set [Down]. Current Video PID 1061 (20-1FFF) Select: Video PID 1061 (20-1FFF) Valid Options: Number between 20 and 1FFF Page 3-44 (Rev 1.0 / March 2004) CODICO® E-1000 Series MPEG-2 Professional Encoders 3.2.9.10. Audio#1 PID Configuration The Audio#1 PID item in the ConfigÆServiceÆAdvanced Menu displays and manages the current Audio#1 PID value. Display Current Audio#1 PID Pressing the [Enter] keypad enables setting up the item value. Configuring Audio#1 PID / Set Value [Left] / Select a digit by the digit value by [Up] / Confirm value by [Enter]. [Right] and set [Down]. Current Audio#1 PID 1063 (20-1FFF) Select: Audio#1 PID 1063 (20-1FFF) Valid Options: Number between 20 and 1FFF 3.2.9.11. Low Speed Data PID Configuration The LS Data PID item in the ConfigÆServiceÆAdvanced Menu displays and manages the current Low Speed Data PID. Display Current LS Data PID Pressing the [Enter] keypad enables setting up the item value. Configuring LS Data PID / Set Value Select a digit by [Left] / [Up] / the digit value by Confirm value by [Enter]. [Right] and set [Down]. Current LS Data PID 1064 (20-1FFF) Select: LS Data PID 1064 (20-1FFF) Valid Options: Number between 20 and 1FFF 3.2.9.12. High Speed Data PID Configuration The HS Data PID item in the ConfigÆServiceÆAdvanced Menu displays and manages the current High Speed Data PID value. Display Current HS Data PID Pressing the [Enter] keypad enables setting up the item value. Configuring HS Data PID / Set Value Select a digit by [Left] / [Up] / the digit value by Confirm value by [Enter]. [Right] and set [Down]. Current HS Data PID 1068 (20-1FFF) Select: HS Data PID 1068 (20-1FFF) Valid Options: Number between 20 and 1FFF Scopus Documents (p/n 100474) Page 3-45 User Manual Encoder Front Panel Operation 3.2.9.13. Teletext PID Configuration The Teletext PID item in the ConfigÆServiceÆAdvanced Menu displays and manages the current Teletext PID value. Display Current Teletext PID Pressing the [Enter] keypad enables setting up the item value. Configuring Teletext PID / Set Value [Left] / Select a digit by the digit value by [Up] / Confirm value by [Enter]. [Right] and set [Down]. Current Teletext PID 1069 (20-1FFF) Select: Teletext PID 1069 (20-1FFF) Valid Options: Number between 20 and 1FFF 3.2.9.14. PCR PID Configuration The PCR PID item in the ConfigÆServiceÆAdvanced Menu displays and manages the current PCR PID value. Display Current PCR PID Pressing the [Enter] keypad enables setting up the item value. Configuring PCR PID / Set Value [Left] / Select a digit by the digit value by [Up] / Confirm value by [Enter]. [Right] and set [Down]. Current PCR PID 1080 (0=VidPID) Select: PCR PID 1080 (0=VidPID) Valid Options: Number between 20 and 1FFF or 0 for Video PID 3.2.9.15. PMT PID Configuration The PMT PID item in the ConfigÆServiceÆAdvanced Menu displays and manages the current PMT PID value Display Current PMT PID Pressing the [Enter] keypad enables setting up the item value. Configuring PMT PID / Set Value Select a digit by [Left] / [Up] / the digit value by Confirm value by [Enter]. [Right] and set [Down]. Current PMT PID 1079 (20-1FFF) Select: PMT PID 1079 (20-1FFF) Valid Options: Number between 20 and 1FFF Page 3-46 (Rev 1.0 / March 2004) CODICO® E-1000 Series MPEG-2 Professional Encoders 3.2.9.16. IP Number Configuration The IP Number item in the ConfigÆServiceÆAdvanced Menu displays and manages the current IP Address value Display Current IP Number Pressing the [Enter] keypad enables setting up the item value. Configuring IP Number / Set Value [Left] / Select a digit by [Up] / the digit value by Confirm value by [Enter]. [Right] and set [Down]. Current IP Number 10.10.0.151 Select: IP Number 10.10.0.151 Valid Options: Any valid IP Address. 3.2.9.17. Default Gateway Configuration The Default GW item in the ConfigÆServiceÆAdvanced Menu displays and manages the current default gateway IP Address value Display Current Default GW Pressing the [Enter] keypad enables setting up the item value. Configuring Default GW / Set Value Select a digit by [Left] / [Up] / the digit value by Confirm value by [Enter]. [Right] and set [Down]. Current Default GW 10.10.0.129 Select: Default GW 10.10.0.129 Valid Options: Any valid IP Address. 3.2.9.18. Subnet Mask Configuration The Subnet Mask item in the ConfigÆServiceÆAdvanced Menu displays and manages the current Subnet Mask value Display Current Subnet Mask Pressing the [Enter] keypad enables setting up the item value. Configuring Subnet Mask / Set Value Select a digit by [Left] / [Up] / the digit value by Confirm value by [Enter]. [Right] and set [Down]. Current Subnet Mask FFFF.FF00 Select: Subnet Mask FFFF.FF00 Valid Options: 0000.0000 - FFFF.FFFF Scopus Documents (p/n 100474) Page 3-47 User Manual Encoder Front Panel Operation 3.2.10. A/D Services Configuration Sub-Menu The A/D Services Configuration Sub-Menu provides access for set-up and configuration to advanced encoder service parameters. The paragraphs below describe these parameters (refer also to Figure 3-3 for the sub-menu structure). Menu Operation • Navigating (UP / DOWN touch pads) in the menu displays the various parameters available. Each parameter is displayed with the “Current” label preceding the “Parameter” label on the top line of the LCD and the current active option on the bottom line. • Selecting the parameter for configuration changes the “Current” label to “Selelct:” label and enables the user to navigate through the valid options available for each parameter. The current active option is marked by an asterisk (*). • Saving a configuration change requires confirmation (unless otherwise specified), as detailed in paragraph 3.1.2 above. 3.2.10.1. Restore Default Setup IMPORTANT This is an immediate action option. The A/D reverts to the default values upon completion of configuration change. The Restore Default Setup item in the ConfigÆService MenuÆA/D Sub-Menu Restores the device to the factory default setup. Pressing the [Enter] keypad enables the selection of the item. Display Current Restore Default Setup Pressing the [Enter] keypad enables the selection of the item. [Up] / [Down] to select an Navigate by option and confirm selection by [Enter]. Configuring Restore Default Setup / Select Options Valid Options: Current Default Setup No-Operation Select: DVB Tables No - Operation * RESET IT NOW • No-Operation - do nothing • RESET IT NOW - resets the encoder to the default setup Page 3-48 (Rev 1.0 / March 2004) CODICO® E-1000 Series MPEG-2 Professional Encoders 3.2.10.2. Luminance Configuration IMPORTANT This is an immediate action option. Setting new luminance level is saved immediately, upon completion of configuration change Pressing the [Enter] keypad enables setting up the item value. [Left] / Select a digit by the digit value by [Up] / Confirm value by [Enter]. [Right] and set [Down]. Configuring Luminance / Set Value Select: Luminance 128* 00 . Valid Options: . 0 to 255 (default 128) 255 3.2.10.3. Chrominance Configuration IMPORTANT This is an immediate action option. Setting new luminance level is saved immediately, upon completion of configuration change The Chrominance item in the ConfigÆService MenuÆA/D Sub-Menu Displays the current value and enables the selection of the chrominance gain. Display Current Chrominance Pressing the [Enter] keypad enables setting up the item value. Configuring Chrominance / Set Value [Left] / Select a digit by the digit value by [Up] / Confirm value by [Enter]. [Right] and set [Down]. Current Chrominance 128 (0-255) Select: Chrominance 128 (0-255) Valid Options: 0 to 255 (default 128) Scopus Documents (p/n 100474) Page 3-49 User Manual Encoder Front Panel Operation 3.2.10.4. Offset Level Configuration The Offset Level item in the ConfigÆService MenuÆA/D Sub-Menu Displays the current value and enables the selection of the video offset level. Display Current Offset Level Pressing the [Enter] keypad enables setting up the item value. Configuring Offset Level / Set Value Select a digit by [Left] / [Up] / the digit value by Confirm value by [Enter]. [Right] and set [Down]. Current Offset Level 128 (0-255) Select: Offset Level 128 (0-255) Valid Options: 0 to 255 (default 128) 3.2.10.5. Y-C Delay Configuration The Y-C Delay item in the ConfigÆService MenuÆA/D Sub-Menu Displays the current value and enables the selection of the Y to C delay for the component video (active only when component input interface is provided). Display Current Y-C Delay Pressing the [Enter] keypad enables setting up the item value. Configuring Y-C Delay / Set Value [Left] / Select a digit by the digit value by [Up] / Confirm value by [Enter]. [Right] and set [Down]. Current Y-C Delay 06 (0-12) Select: Y-C Delay 06 (0-12) Valid Options: 0 to 12 (default 6) Page 3-50 (Rev 1.0 / March 2004) CODICO® E-1000 Series MPEG-2 Professional Encoders 3.2.10.6. Dig. Noise Red. Configuration The Dig. Noise Red. item in the ConfigÆService MenuÆA/D Sub-Menu Displays the current value and enables the selection of the digital noise reduction (DNR) filters activated (active in E-1000 Encoder with DNR function activated). Display Current Dig. Noise Red. Pressing the [Enter] keypad enables the selection of the item. [Up] / [Down] to select an Navigate by option and confirm selection by [Enter]. Configuring Dig. Noise Red./ Select Options Valid Options: • • • • OFF (default) LOW Current Dig. Noise Red OFF * Select: Dig. Noise Red OFF * HIGH MEDIUM LOW MEDIUM HIGH Scopus Documents (p/n 100474) Page 3-51 User Manual Encoder Front Panel Operation 3.2.11. Other Service Configuratrion Sub-Menu The Other Service Configuration Sub-Menu provides access for set-up and configuration of additional encoder service parameters. The paragraphs below describe these parameters (refer also to Figure 3-3 for the sub-menu structure). MENU OPERATION • Navigating (UP / DOWN touch pads) in the menu displays the various parameters available. Each parameter is displayed with the “Current” label preceding the “Parameter” label on the top line of the LCD and the current active option on the bottom line. • Selecting the parameter for configuration changes the “Current” label to “Select:” label and enables the user to navigate through the valid options available for each parameter. The current active option is marked by an asterisk (*). • Saving a configuration change requires confirmation (unless otherwise specified), as detailed in paragraph 3.1.2 above. 3.2.11.1. Recall Setup IMPORTANT This is an immediate action option. After recalling the setup, the encoder reboots it self immediately. The Recall Setup item in the ConfigÆService MenuÆ Other Sub-Menu Loads a user-defined set-up that was previously saved using the ‘Save Encoder Setup’. Display Current Recall Setup Current Recall Setup 0 Use the up and down touch pads to scroll between the saved setups. There are 10 saved setups numbered between zero and nine. Press the Enter touch pad to load the setup or Esc to cancel the operation. Pressing the [Enter] keypad enables the selection of the item. [Up] / [Down] to select an Navigate by option and confirm selection by [Enter]. Configuring Recall Setup / Set Value Select: Recall Setup Number between 0 and 9 Valid Options: Numbers between 0 and 9 Page 3-52 (Rev 1.0 / March 2004) CODICO® E-1000 Series MPEG-2 Professional Encoders 3.2.11.2. Save Setup IMPORTANT This is an immediate action option. The new values are saved immediately, upon completion of configuration change. Saving the parameters does not require the encoder to reboot. The Save Setup item in the ConfigÆService MenuÆ Other Sub-Menu Internally saves the Encoder parameters. Display Current Save Setup Current Save Setup 0 0 There can be 10 different saves of the parameters numbered between zero and nine. Pressing the [Enter] keypad enables the selection of the item. [Up] / [Down] to select an Navigate by option and confirm selection by [Enter]. Configuring Save Setup / Set Value Select: Save Setup Number between 0 and 9 Valid Options: Numbers between 0 and 9 3.2.11.3. Service Name Configuration The Service Name item in the ConfigÆService MenuÆ Other Sub-Menu Defines a name for the service. Display Current Service Name Pressing the [Enter] keypad enables setting up the item value. Configuring Service Name / Set Value [Left] / [Right] Select a character by and set the character value by [Up] / [Down]. Current Service Name ENC2 Select: Service Name ENC2 Confirm value by [Enter]. Valid Options: Up to 22 Characters. String must end with a ‘$’ character. Scopus Documents (p/n 100474) Page 3-53 User Manual Encoder Front Panel Operation 3.2.11.4. Control Type Configuration The Control Type item in the ConfigÆService MenuÆ Other Sub-Menu Defines a name for the service. Display Current Control Type Valid value: Configuring Control Type / Set Value Up to 22 Characters Current Video Format NTSC Select: Video Format NTSC * 3.2.11.5. Reset Type Configuration IMPORTANT This is an immediate action option. Selecting a reset type is saved immediately, upon completion of configuration change. The Reset Type item in the ConfigÆService MenuÆ Other Sub-Menu Displays the current value and enables the selection of the type of reset for the encoder. Display Current Reset Type Pressing the [Enter] keypad enables the selection of the item. [Up] / [Down] to select an Navigate by option and confirm selection by [Enter]. Configuring Reset Type / Select Options Valid Options: Current Reset Type No-Opwration Select: Reset Type No-Operation Boot Reload Encoder • BOOT: Fast (S/W) boot • RELOAD PARAMETERS: Reloads encoder parameters during the boot. Page 3-54 (Rev 1.0 / March 2004) CODICO® E-1000 Series MPEG-2 Professional Encoders 3.2.11.6. Panel Contrast Configuration IMPORTANT This is an immediate action option. Increasing the contrast is linear. Decreasing the contrast requires selecting the DECREASE option each time. The Panel Contrast item in the ConfigÆService MenuÆ Other Sub-Menu Displays the current value and enables the selection of the type of reset for the encoder. Display Current Panel Contrast Current Panel Contrast INCREASE DECREASE • INCREASE: Each press on the Enter touch pad increases the LED contrast by one step. • DECREASE: Each press on the Enter touch pad decreases the LED contrast by one step. Scopus Documents (p/n 100474) Page 3-55 User Manual Encoder Front Panel Operation 3.3. STATUS MENU The Encoder Status menu enables the user to monitor the current status of the encoder parameters. Figure 3-4 shows the Encoder Status Menu flowchart. The following sub-paragraphs describe the parameters available for each function. Figure 3-4:Encoder Status Menus Encoder Menu Status Config Test Encoder Status Menu SYSTEM Video Rate Encoder SW Ver :________ Panel Ver :________ First Audio Rate Encoder HW Ver.:________ Permission :________ Second Audio Rate Encoder Type Third Audio Rate Video Interface Type Fourth Audio Rate Audio Channels: Low Speed Data Rate Page 3-56 GENERAL ATM Interface Type: High Speed Data Rate DVB Scrambler Board Teletex Data Rate Temperature (Rev 1.0 / March 2004) CODICO® E-1000 Series MPEG-2 Professional Encoders 3.3.1. System Status Menu The StatusÆSystem Menu provides access for monitoring system parameters. The paragraphs below describe these parameters (refer also to Figure 3-4 for the sub-menu structure). 3.3.1.1. Video Rate Display The Video Rate item in the Encoder StatusÆ System displays the current video rate Display Current Video Rate Current Video Rate 00002001 BPS Navigate by [Up] / [Down] to display the items in the system status Menu. 3.3.1.2. Audio Rate Display The Audio Rate item in the Encoder StatusÆ System displays the current audio rate on each channel. Channels 3 and 4 are displayed when the Audio expansion card is installed. 3.3.1.3. Display Current LS Data Rate Current LS Data Rate 00002001 BPS HS Data Rate Display The HS Data Rate item in the Encoder StatusÆSystem displays the current High Speed Data rate 3.3.1.5. Current Audio#1 Rate 00001002 BPS LS Data Rate Display The LS Data Rate item in the Encoder Status ÆSystem displays the current Low Speed Data rate 3.3.1.4. Display Current Audio Rate on channel 1 Display Current HS Data Rate Current HS Data Rate 00004001 BPS TTX Data Rate Display The TTX Data Rate item in the Encoder StatusÆSystem displays the current Teletext Data rate Scopus Documents (p/n 100474) Display Current TTX Data Rate Current TTX Data Rate 00002001 BPS Page 3-57 User Manual Encoder Front Panel Operation 3.3.2. General Status Menu The StatusÆGeneral Menu provides enabling the access to monitor system parameters. Refer also to Figure 3-4 for the sub-menu structure. 3.3.2.1. Encoder Software Version Display The Encoder Software Version item in the Encoder StatusÆGeneral Displays the Software and Front Panel Version Numbers. 3.3.2.2. Enc. SW Ver 01.06.03 Panel Ver PAN_0037D Encoder Hardware Version Display The Encoder Hardware Version item in the Encoder StatusÆGeneral Displays the Hardware and Panel Permission Numbers. 3.3.2.3. Display Current Encoder Software Version Display Current Encoder Hardware Enc. HW Ver E6.1-7 Perm. Code FFFEFF50 Encoder Type Display The Encoder Type item in the Encoder StatusÆGeneral Displays the type of encoder provided: Display Current Encoder Type Encoder Type E1000 ENCODER E1000, E90, E100, E900A, E1510, E1710 Page 3-58 (Rev 1.0 / March 2004) CODICO® E-1000 Series MPEG-2 Professional Encoders 3.3.2.4. Video Interface Display The Video Interface item in the Encoder StatusÆGeneral Displays the type of input interface provided: Display Current Video Interface Video Interface 10 Bits Interface Valid options: • TEN BIT A/D With D.N.R: Supports the Composite/Component Video Input Panel. • TEN BIT A/D + DIGITAL: Supports the Composite/SDI Video Input Panel. • TEN BIT A/D: Supports the Composite Video Input Panel. • DIGITAL With VBI DECD: Supports the SDI Video Input Panel. • EIGHT BIT A/D (Old option): Supports the 8-bit A/D Video Interface Card. • DIGITAL INTERFACE (Old option): Supports the Digital Video Interface Card. 3.3.2.5. Audio Channels Display The Audio Channels item in the Encoder StatusÆGeneral Displays the number of audio channels available: Display Current Audio Channels Audio Channels 2 Audio Channels • Two Audio Channels • Four Audio Channels 3.3.2.6. DVB Scrambler Board Display The DVB Scrambler Board item in the Encoder StatusÆGeneral Displays if the DVB Scramble Board EXIST or No Board is installed. 3.3.2.7. Display Current DVB Scrambler Board DVB Scrambler Board No Scrambling Board Temperature Display The Temperature item in the Encoder Status ÆGeneral Displays the current operating temperature of the unit. Scopus Documents (p/n 100474) Display Current Temperature Temperature 27 oC Page 3-59 User Manual Encoder Front Panel Operation 3.4. TEST MENU The Encoder Test menu enables access to the System Configuration Test function. Figure 3-5 shows the Test Menu structure. The paragraphs below describe the parameters available for each function. Menu Operation • Navigating (UP / DOWN touch pads) in the menu displays the various parameters available. Each parameter is displayed with the “Current” label preceding the “Parameter” label on the top line of the LCD and the current active option on the bottom line. • Selecting the parameter for configuration changes the “Current” label to “Selelct:” label and enables the user to navigate through the valid options available for each parameter. The current active option is marked by an asterisk (*). • Enabling a test starts the test pattern insertion. To terminate the test, the test must be disabled. Enabling or disabling a test requires confirmation, as detailed in paragraph above. Figure 3-5: Encoder Test Menus Encoder Menu Config Status Test Current Audio Test Current Video Test Page 3-60 (Rev 1.0 / March 2004) CODICO® E-1000 Series MPEG-2 Professional Encoders 3.4.1. Test menuÆAudio test The Audio Test item in the Test Menu Activates (ENABLED) or deactivates (DISABLED) the audio pattern source selftest. Display Current Audio test Pressing the [Enter] keypad enables setting up the item value. Configuring Audio test / Select Options Navigate by [Up] / [Down] to select an option and confirm selection by [Enter]. Valid Options: Current Video Format NTSC Select: Audio test ENABLED DISABLED • DISABLED • ENABLED 3.4.2. Test menuÆVideo test The Video Test item in the Test Menu Activates (ENABLED) or deactivates (DISABLED) the video pattern source self-test. Display Current Video test Pressing the [Enter] keypad enables setting up the item value. Configuring Video test / Select Options Navigate by [Up] / [Down] to select an option and confirm selection by [Enter]. Valid Options: Current Video Format NTSC Select: Video test DISABLED ENABLED • DISABLED • ENABLED Scopus Documents (p/n 100474) Page 3-61 CODICO® E-1000 Series MPEG-2 Professional Encoders Section 4 ADVANCED OPERATION 4.1. GENERAL This Section provides information regarding advanced functions available for E-1000 Series Encoder users. 4.2. MANAGEMENT OF ENCODER SOFTWARE This section provides information and procedures required to perform management actions on the encoder software and software storage tools. The procedures for software loading and for software upgrade are identical. New software for the encoder is supplied in two files: • e1ksw.arj (approx. 1.1-1.2 MB) This file holds system software files, compressed with the ARJ compression algorithm. • e1ksw.bat (approx. 1300-1500 bytes) This batch file extracts the files stored in the e1ksw.arj archive into the directory of the Encoder. NOTE New software versions are provided in compressed format using the ARJ algorithm. ARJ decompressing of the files is not necessary during the software installation. CAUTION SOFTWARE UPDATING MUST BE PERFORMED WITH THE STATISTICAL MULTIPLEXER SHUT-OFF AND NMS DISCONNECTED. THE NMS AND STAT-MUX. CAN BE TURNED ON ONLY AFTER THE SYSTEM HAS BEEN SUCCESSFULLY UPDATED (I.E., THE PANEL VERSION NUMBER HAS BEEN CHANGED TO THE NEW VERSION). THE Scopus Documents (p/n 100474) Page 4-1 User Manual Advanced Operation CAUTION WHEN COPYING FILES, MAKE SURE THAT THE COPIED FILES ARE NOT LIMITED FOR READ-ONLY. READ-ONLY MARKED FILES MAY ABORT THE AUTOMATIC INSTALLATION OF THE NEW SOFTWARE VERSION. The installation procedure loads the system software to the encoder in a compressed format. Once loaded, the encoder must then be powered OFF and back ON to activate the updated software. During initialization, the compressed files are automatically extracted and the encoder is configured with the parameters used prior to the software upgrade. If the panel version was changed, the initialization process will upgrade the panel as well. NOTE If difficulties arise during installation/update, copy the e1ksw.log log file (generated at the same directory where the version is currently saved) and Send the e1ksw.log file to the technical support person and request assistance. 4.2.1. Terminal Set-Up The following procedure describes how to set-up the terminal communication to the encoder. a. Make sure the terminal is properly connected to the encoder using one of the following options • Direct connection, over RS-232 interface (see paragraph 4.2.2 below for details), used when it is required to view the contents of the encoder configuration files. • Ethernet connection, over TFTP interface (see paragraph 4.2.3 below for details), used when it is required to update or edit the contents of the encoder configuration files. b. Activate the Hyper Terminal from the PC. The HyperTerminal Main Window is displayed. c. Page 4-2 Select from the Menu Bar on the HyperTerminal Main Window the “File” Æ “Properties” option. The HyperTerminal Properties Window is displayed (see Figure 4-1): (Rev 1.0 / March 2004) CODICO® E-1000 Series MPEG-2 Professional Encoders d. Set-Up the terminal parameters (see Figure 4-1): 1. Enter the COM number designated for the encoder into the “connect using:” field to connect the terminal to the encoder. Figure 4-1: HyperTerminal Properties Window - Example 2. Press “Configure” to display the Terminal Configuration Window and set the following parameters for the terminal (see Figure 4-2): • Bits per second: 9600 • Data bits: 8 • Parity: None • Stop bits: 1 • Flow control: None Scopus Documents (p/n 100474) Page 4-3 User Manual Advanced Operation Figure 4-2: HyperTerminal Set-Up Sequence - Example 3. Press "f" to ensure that the terminal is connected (the encoder status is displayed (see Figure 4-3): Figure 4-3: HyperTerminal Set-Up Sequence - Example ===== Scopus Network Technologies, E1X00 Encoder===== ============ Boot Loader Version(0) 1.54============= E1000 MIB File Version 01.28============ ============ )I) (1)1:43:42 ==== Encoder is started==== )I) (1)1:43:55 ==== Initialization done==== Page 4-4 (Rev 1.0 / March 2004) CODICO® E-1000 Series MPEG-2 Professional Encoders 4.2.2. View Encoder Configuration on Local PC The following procedure provides a fast way to review the current configuration of the encoder (provided on the “encoder.cfg” configuration file, for details, see paragraph 4.3.2 ahead). This procedure describes how to view the contents of files in the encoder by using the Windows HyperTerminal data communication program. It requires connecting the Encoder to a local PC, via a standard RS-232 interface, using a standard Null Modem Cable. a. Use the null modem cable to connect any RS-232 COM Input on the PC to the MONITOR connector on the E-1000 Encoder rear panel (refer to Figure 4-4 for interconnection topology). Figure 4-4: RS-232 Connection Topology Com 1...2 RS-232 Null Modem Cable Monitor In ETH b. Activate and set-up the Hyper Terminal from the PC according to the procedure described in paragraph 4.2.1. c. In the HyperTerminal Main Window Menu, select transfer Æ capture text. The Capture Text Window is displayed (see Figure 4-5). Scopus Documents (p/n 100474) Page 4-5 User Manual Advanced Operation Figure 4-5: HyperTerminal Capture Text Window - Example d. Type the path and file name of the file to be copied (example; C\: encoderconfig.txt) and press: “start” key on the keyboard. e. Copy the file to the terminal according to the following steps: 1. Type: “Esc” 2. Type: “Y” 3. On Login request, Enter: “com” 4. On password request press: [Enter] Key 5. Type “cat encoder.cfg” and press [Enter] Key. f. The text of the encoder.cfg file is running on the screen. Once the file run is completed, press “transfer” Æ “capture text” Æ “stop”. g. Check that the encoder.cfg file has been successfully copied into the PC. NOTE To file-up or download software files to the Encoder, use the TFTP tools (refer to paragraph 4.2.3). Page 4-6 (Rev 1.0 / March 2004) CODICO® E-1000 Series MPEG-2 Professional Encoders 4.2.3. TFTP Connection and Set-Up TFTP stands for "Trivial File Transfer Protocol". This protocol provides the tools required to update or edit the contents of the encoder configuration files (the “encoder.cfg” file. For details, see paragraph 4.3.2 ahead). Use of the TFTP tools requires the encoder to be connected to local or remote PC, via an Ethernet connection. NOTE Any TFTP Application should provide the tools required to update or edit the encoder.cfg file. The following procedures use the TFTP PumpKIN Application. This freeware tool is available for download at ftp:\\www.klever.net. The following procedure describes how to connect and set-up the Encoder and the PC for using the TFTP interface. a. Set-up the PC connection to the Encoder and the Ethernet according to the following steps (refer to Figure 4-6 for TFTP interconnection topology): 1. Use a null modem cable to connect the MONITOR connector on the encoder rear panel and the COM connector on the PC. 2. Use an RJ-45 Ethernet cable to connect the PC to the network, via a Mini Hub. 3. Use an RJ-45 Ethernet cable to connect between the ETH connector on the encoder rear panel and the network, via a Mini Hub. Scopus Documents (p/n 100474) Page 4-7 User Manual Advanced Operation Figure 4-6: TFTP Connection Topology Ethernet RJ-45 Cable Mini Hub ANSI Terminal RJ-45 Ethernet Com 1...2 RS-232 Null Modem Cable Monitor In ETH E-1000 b. Activate the Encoder and configure the Encoder TCP/IP properties to be on the same network as the encoder by using the following functions in the Config > Service > Advance Front Panel Menu: 1. Set the Encoder IP Number; Use the Select IP Number: function. 2. Set the Encoder Gateway (GW) IP Number: Use the GW Number: function. NOTE The Gateway IP Number defines the sub-net area where the E-1000 is located. c. Page 4-8 Activate and set-up the Hyper Terminal from the PC according to the procedure described in paragraph 4.2.1. (Rev 1.0 / March 2004) CODICO® E-1000 Series MPEG-2 Professional Encoders d. Transfer control on the encoder to the terminal according to the following steps (see example in Figure 4-7): 1. Press "Esc" to EXIT. Acknowledge exit by pressing "Y" to the message "Are you sure?" 2. Type "com " in the "login" section and then press [Enter] Key. 3. In "Password" section, press [Enter] Key. Check that the shell prompt (com>) is displayed. Figure 4-7: Encoder Control Transfer - Example Are you sure ? Yes Use 'com' for Terminal login, 'lan' for Telnet login. Use '?' for commands list. Login: com Password : Copyright (c) Integrated Systems, Inc., 1992. Welcome to pSOSystem... com> e. Type “x mdd 20” and press [Enter] Key to check the Flash Disk. CAUTION CONTINUE ONLY IF THE “FLASH DISK CHECK - OK” f. MESSAGE IS RECEIVED. Configure the Terminal TCP/IP properties to be on the same network as the encoder: CAUTION THE ENCODER IP AND THE TERMINAL IP SHOULD BE ON THE SAME SUB-NET AREA. Scopus Documents (p/n 100474) Page 4-9 User Manual Advanced Operation 1. Set the Encoder IP Number. Type “x flash ip {IP Address]” and press [Enter] Key. Where: {IP Address] is the specific IP address of the encoder (example, 100.100.100.10) 2. Set the Encoder Gateway IP Number. Type “x flash gw {GW Address]” and press [Enter] Key. Where: {GW Address] is the specific Gateway IP address of the encoder (example, 100.100.100.2) 3. Set the Encoder IP NetMask Number. Type “x flash mask {NetMask Address]” and press [Enter] Key. Where: {NetMask Address] is the specific Hexadecimal NetMask IP address of the encoder (example, the Hex FFFFFF00 represents the 255.255.255.0 address) 4. Type “x flash save” and press [Enter] Key. Once the save procedure is successfully completed, the “Update Done OK” is displayed. 5. Type "boot " and press [Enter] Key to restart the encoder. Figure 4-8 shows an example of the TFTP TCP/IP Update sequence. Figure 4-8: com> com> com> com> TFTP TCP/IP Update Sequence - Example x x x x flash flash flash flash ip 100.100.100.11 gw 100.100.100.2 mask ffffff00 save Update Done OK com> sync com> boot Scopus Network Technologies, E1X00 Encoder===== Boot Loader Version(0) 1.52============= E1000 MIB File Version 01.25============ )I) (1)1:9:34 ==== Encoder is started==== )I) (1)1:9:40 ==== Initialization done==== ===== ============ ============ g. Type " tftp " and press [Enter] Key to activate the TFTP Server. Page 4-10 (Rev 1.0 / March 2004) CODICO® E-1000 Series MPEG-2 Professional Encoders CAUTION CONTINUE ONLY IF THE “TFTP SERVER IS ACTIVATED/STARTED/ALREADY ACTIVE” MESSAGE IS RECEIVED. h. Activate the “TFTP PumpKIN” application on the PC. The TFTP PumpKIN Main Window is displayed (See Figure 4-9). Figure 4-9: “TFTP PumpKIN” Application - Main Window i. Press "Options" in the main window. The TFTP PumpKIN Options Window is displayed (See Figure 4-10). Press "O.K." to confirm. NOTE During the initial activation, it is recommended to change the “TFTP file system root" to a known folder, previously opened, which contains the two file versions. Scopus Documents (p/n 100474) Page 4-11 User Manual Advanced Operation Figure 4-10: “TFTP PumpKIN” Application - Options Window Page 4-12 (Rev 1.0 / March 2004) CODICO® E-1000 Series MPEG-2 Professional Encoders 4.2.4. Formatting the Flash Disk Formatting the Encoder Flash Disk requires specialized tools, such as the formatting program “fdformat.elf”, supplied with the encoder software. The “fdformat.elf” program formats the disk in standard DOS notation while leaving space for special software information. Any DOS-operated software and tools recognize the format generated by this program. CAUTION DO NOT FORMAT THE FLASH DISK USING THE STANDARD PC OR LAPTOP FORMATTING TOOLS. FLASH DISK FORMATED BY THESE TOOLS WILL IMMEDIATELY CRASH WHEN ATTEMPTING TO UPDATE THE SOFTWARE. Format the Flash Disk according to the following steps: a. If required, prepare the system for Flash Disk formatting according to the following steps: 1. Make sure that the proper physical and electrical connection of the Encoder and the HyperTerminal is complete and both units are activated (see paragraph 4.2.3 above). 2. Press "f" to ensure that the terminal is connected (the encoder status is displayed). 3. Press [Esc] to EXIT. Acknowledge exit by pressing "Y" to the message "are you sure?" 4. Power off the encoder. b. Prepare the Flash Disk for formatting according to the following steps: 1. Remove the Flash Disk from the encoder and reboot the encoder. This action makes the RAM disk the default mass-storage memory while the encoder boots. 2. After the boot process has been completed, re-insert the Flash Disk into the Encoder. 3. Invoke the “openfd” shell command to initialize the O/S partition information (unique to each Flash Disk). 4. Invoke the “fdfrmt” shell command to format the Flash Disk as an O/S native-file system and load the file system. Scopus Documents (p/n 100474) Page 4-13 User Manual Advanced Operation 5. Once the Flash Disk formatting is successfully completed, the “Flash Disk Mounted as pHILE+ file system” message is displayed. Figure 4-10 shows an example of the Flash Disk set-up for formatting sequence. Figure 4-11: Flash Disk Set-Up for Formatting - Sequence Example Scopus Network Technologies, E1X00 Encoder===== ******************************** FlashDisk Mount Failed* * . FlashDisk might be missing* ? * * Working with RAMDISK* ! ******************************** ============ ============ Boot Loader Version(0) 1.54============= E1000 MIB File Version 01.28============ Use 'com' for Terminal login, 'lan' for Telnet login. Use '?' for commands list. Login: com Password : Copyright (c) Integrated Systems, Inc., 1992. Welcome to pSOSystem... com> openfd com> fdfrmt Flash Disk Mounted as pHILE+ file system c. Page 4-14 Copy the “fdformat.elf” and the “flash.elf” commands into the Shell RAM disk (volume 3.0.0), using the TFTP PumpKIN tools (see Figure 4-12): (Rev 1.0 / March 2004) CODICO® E-1000 Series MPEG-2 Professional Encoders Figure 4-12: Copy to Shell RAM Disk - Using TFTP PumpKIN d. Invoke the “fdformat.elf” application, to reformat the Flash Disk according to encoder requirements: 1. Type “x fdformat 8” and press [Enter] Key. 2. Type “Y” in response to the “Continue (Y/N)” request. 3. Once the “Flash Disk Format Completed” message is displayed, type “boot” and press [Enter] Key to re-boot the system. Figure 4-13 shows an example of the Flash Disk formatting sequence. Scopus Documents (p/n 100474) Page 4-15 User Manual Advanced Operation Figure 4-13: Flash Disk formatting Sequence - Example com> x fdformat 8 This program erases the content of the Flash Disk. Make sure you have an 8M Flash Disk unit. You can replace the Flash Disk unit now in order to format a faulty unit. Continue (Y/N) ? y Flash Disk Format Completed com> boot ===== ============ ============ Scopus Network Technologies, E1X00 Encoder===== Boot Loader Version(0) 1.54============= E1000 MIB File Version 01.28============ Use 'com' for Terminal login, 'lan' for Telnet login. Use '?' for commands list. Login: com Password : Copyright (c) Integrated Systems, Inc., 1992. Welcome to pSOSystem... e. Copy the “starter.arj” and “unarj.elf”, files into the Flash RAM Disk (volume 4.0.0) using the TFTP PumpKIN tools (see Figure 4-14): Page 4-16 (Rev 1.0 / March 2004) CODICO® E-1000 Series MPEG-2 Professional Encoders Figure 4-14: Copy to Flash RAM Disk - Using TFTP PumpKIN f. Activate the “x unarj x starter” shell command to extract the Starter files. Wait for the Starter files extraction to complete. Figure 4-15 shows an example of the Encoder Starter files extraction. Figure 4-15: Encoder Starter Files Extraction - Example Copyright (c) Integrated Systems, Inc., 1992. Welcome to pSOSystem... com> x unarj x starter Processing archive: starter.ARJ Archive date : 2002-12-17 07:15:48 Extracting RM.ELF (|)CRC OK Extracting FLASH.ELF (/)CRC OK Extracting MV.ELF (\)CRC OK Extracting UX.ELF (|)CRC OK Extracting FILEXFER.ELF (/)CRC OK Extracting RP_N_PNL.ELF (-)CRC OK file(s( 6 g. Type “x mdd 0” and press [Enter] Key to check the Flash Disk. The message “OK” is displayed if the Flash Disk is functional. CAUTION CONTINUE ONLY IF THE “FLASH DISK CHECK - OK” Scopus Documents (p/n 100474) MESSAGE IS RECEIVED. Page 4-17 User Manual Advanced Operation 4.2.5. Update Encoder Software Files Using TFTP Tools The following procedure describes how to copy files using the TFTP interface. a. If required, prepare the system for file copying according to the following steps: 1. Make sure that the proper physical and electrical connection of the Encoder and the HyperTerminal is complete and both units are activated (see paragraph 4.2.3 above). 2. Press "f" to ensure that the terminal is connected (the encoder status is displayed). 3. Press "Esc" to EXIT. Acknowledge exit by pressing "Y" to the message "are you sure?" 4. Type "com " in the "login" section and then press [Enter] Key. 5. In "Password" section, press [Enter] Key. Check that the shell prompt (>com) is displayed. 6. Type “x mdd 20” and press [Enter] Key to check the Flash Disk. CAUTION CONTINUE ONLY IF THE “FLASH DISK CHECK - OK” MESSAGE IS RECEIVED. 7. Type " tftp " and press [Enter] Key to check that the TFTP Server is activated. CAUTION CONTINUE ONLY IF THE “TFTP SERVER IS ACTIVATED/STARTED/ALREADY ACTIVE” MESSAGE IS RECEIVED. b. Operate the “TFTP PumpKIN” application on the PC. Check that the TFTP PumpKIN Main Window is displayed (See Figure 4-9 above). c. Select "Put File" in the TFTP PumpKIN Main Window. d. Type "e1ksw.arj" in the "Local file" section. The system automatically moves to the "Remote file" section. Page 4-18 (Rev 1.0 / March 2004) CODICO® E-1000 Series MPEG-2 Professional Encoders e. Type the IP number of the Encoder “{E-1000 IP No]” in "Remote host" section. Press "O.K." to send it. f. The “PumpKIN” application displays the “Sending e1ksw.arj to {E-1000 IP No]” message and confirms file transfer by displaying the “Transfer of e1ksw.arj has successfully completed” message. Figure 4-16 shows the TFTP PumpKIN Send File Window and the response to a successful file transfer. Figure 4-16: TFTP PumpKIN transfer of “e1ksw.arj” File g. Repeat steps ‘a’ to ‘f’ to transfer the "e1ksw.bat" file. The “PumpKIN” application displays the “Sending e1ksw.bat to {E-1000 IP No]” message and confirms file transfer by displaying the “Transfer of e1ksw.bat has successfully completed” message (see Figure 4-17). Scopus Documents (p/n 100474) Page 4-19 User Manual Advanced Operation Figure 4-17: TFTP PumpKIN Confirmation of “e1ksw.bat” File Transfer h. At the terminal, type "sync " and press [Enter] Key. i. Type "boot " and press [Enter] Key to restart the encoder. The encoder starts installing the upgrade. j. The “e1ksw.bat” application starts the extraction and installation of the files in the “e1ksw.arj” file and a list of opened files is displayed on the monitor. k. Once the installation is completed, the following message is displayed: e1ksw.arj deleted The SW Version Update Completed. l. On the encoder front panel, the encoder status display should indicate STATUS OK. Figure 4-18 shows an example of the Software Upgrading Procedure sequence. Page 4-20 (Rev 1.0 / March 2004) CODICO® E-1000 Series MPEG-2 Professional Encoders Figure 4-18: TFTP Software Upgrading - Sequence Example com> sync com> boot Scopus Network Technologies, E1X00 Encoder===== ===== Boot Loader Version(0) 1.54============= ============ E1000 MIB File Version 01.28============ ============ Processing archive: e1ksw.arj Archive date : 2003-06-15 09:31:28 Testing ARBITER.ELF (|)CRC OK Testing AUDIO.ELF (/)CRC OK Testing AUTOEXEC.BAT (\)CRC OK Testing COD_FIFO.ELF (|)CRC OK Testing CONVERTC.ELF (\)CRC OK Testing CP.ELF (|)CRC OK Extracting UCODES\SIFPAL.UX Extracting UCODES\PAL.UX file(s( 70 E1KSW.ARJ deleted SW Version update Completed (/)CRC OK (/)CRC OK Scopus Network Technologies, E1X00 Encoder===== ===== ============ Boot Loader Version(0) 1.54============= ============ E1000 MIB File Version 01.28============ )I) (1)1:43:42 ==== Encoder is started==== )I) (1)1:43:55 ==== Initialization done==== Scopus Documents (p/n 100474) Page 4-21 User Manual Advanced Operation 4.2.6. Update Encoder Shell Using TFTP Tools The following procedure describes how to update the Shell Flash ROM in the Encoder, using the TFTP interface. a. If required, prepare the system for file copying according to the following steps: 1. Make sure proper physical and electrical connection of the Encoder and HyperTerminal is complete and both units are activated (see paragraph 4.2.3 above). 2. Press "f" to ensure that the terminal is connected (the encoder status is displayed). 3. Press "Esc" to EXIT. Acknowledge exit by pressing "Y" to the message "are you sure?" 4. Type "com " in the "login" section and then press [Enter] Key. 5. In "Password" section, press [Enter] Key. Check that the shell prompt (>com) is displayed. 6. Type “x mdd 20” and press [Enter] Key to check the Flash Disk. CAUTION CONTINUE ONLY IF THE “FLASH DISK CHECK - OK” MESSAGE IS RECEIVED. 7. Type " tftp " and press [Enter] Key to check that the TFTP Server is activated. CAUTION CONTINUE ONLY IF THE “TFTP SERVER IS ACTIVATED/STARTED/ALREADY ACTIVE” MESSAGE IS RECEIVED. 8. Operate the “TFTP PumpKIN” application on the PC. Check that the TFTP PumpKIN Main Window is displayed (See Figure 4-9 above). b. Select "Put File" in Main Window. c. Type "shell.rom" in the "Local file" section. The system automatically moves to the "Remote file" section. d. Type the IP number of the Encoder “{E-1000 IP No]” in "Remote host" section. Press "O.K." to send it (see Figure 4-19). Page 4-22 (Rev 1.0 / March 2004) CODICO® E-1000 Series MPEG-2 Professional Encoders Figure 4-19: TFTP PumpKIN Transfer of “shell.rom” File e. The “PumpKIN” application displays the “Sending shell.rom to {E-1000 IP No]” message and confirms file transfer by the “Transfer of shell.rom has successfully completed” message. CAUTION DO NOT POWER OFF THE ENCODER DURING SHELL UPDATING. THIS MAY CAUSE THE LOSS OF ALL DATA. f. At the terminal, type “x flash prog shell.rom” and press [Enter] Key to update the Shell Flash ROM information. g. Type " x flash ver shell.rom” and press [Enter] Key to verify the correct update of the Shell Flash ROM information. h. Once the Shell Update Verification sequence is completed, reboot the encoder. Figure 4-20 displays an example of the the shell update sequence. Scopus Documents (p/n 100474) Page 4-23 User Manual Advanced Operation Figure 4-20: Shell Update - Sequence Example com> x flash prog shell.rom .................................................................... File read : OK. Starts : 0x100, Ends : 0xBFC10 Erasing FLASH (0x00000-0xBFFFF) Programming FLASH (0x00000-0xBFC10) com < com> x flash ver shell.rom .................................................................... File read : OK. Starts : 0x100, Ends : 0xBFC10 Verify flash programming (0x00000000-0x000BFC10) Verify Ended : OK com > boot i. Page 4-24 Update the encoder files, using the procedure described in paragraph 4.2.5 above. (Rev 1.0 / March 2004) CODICO® E-1000 Series MPEG-2 Professional Encoders 4.2.7. Display Encoder Shell Data Using the Terminal The following procedure describes how to display the information stored in the encoder shell using the Terminal. a. If required, activate the terminal according to the following steps: 1. Make sure proper physical and electrical connection of the Encoder and Terminal is complete and both units are activated (see paragraph 4.2.3 above). 2. Press "f" to ensure that the terminal is connected (the encoder status is displayed). 3. Press "Esc" to EXIT. Acknowledge exit by pressing "Y" to the message "Are you sure?" 4. Type "com " in the "login" section and then press [Enter] Key. 5. In "Password" section, press [Enter] Key. Check that the shell prompt (>com) is displayed. b. Type “x flash show” and than press [Enter] Key to display the Encoder Shell contents (see Figure 4-21). Table 4-1 describes the information displayed. Figure 4-21: Encoder Shell Contents - Example com> x flash show Magic Number .. : IP ............ : GW ............ : MAC ........... : HW_version .... : Encoder Options : Encoder Options : Encoder Options : Encoder Options : User Options .. : User Options .. : User Options .. : User Options .. : Checksum ...... : Magic Number .. : NetMask ....... : Checksum ...... : Scopus Documents (p/n 100474) 'E1K0' 100.100.100.10 100.100.100.1 00-50-C2-01-C8-FD 8 (Board:E9) (450908) FFFFFF70 FFFFFFFF FFFFFFFF FFFFFFFF FFFFFFFF FFFFFFFF FFFFFFFF FFFFFFFF FFFFFFFF FFFFFFFF FFFFFFFF FFFFFFFF FFFFFFE7 FFFFFFFF FFFFFFFF FFFFFFFF FFFFFFFF FFFFFFFF FFFFFFFF FFFFFFFF FFFFFFFF FFFFFFFF FFFFFFFF FFFFFFFF 28722284 'E1K0' 255.255.255.0 (FFFFFF00) BACEB5E0 FFFFFFFF FFFFFFFF FFFFFFFF FFFFFFFF FFFFFFFF FFFFFFFF FFFFFFFF FFFFFFFF Page 4-25 User Manual Advanced Operation Table 4-1: Encoder Shell Contents Description SHELL ITEM Magic Number ITEM DESCRIPTION Encoder Magic number. Example: E1K0 IP Address The IP Address of the Encoder, displayed in binary code (address) format. Example: 100.100.100.10 GW The Gateway (GW) Address of the Encoder, displayed in binary code (address) format. Example: 100.100.100.1 MAC Encoder unique Ethernet address. Used as an ID for the encoder. Displayed in hexadecimal format. Example: 00-50-C2-01-C8-FD HW_version Displays the current version of the encoder hardware. Example: HW_version: 8 (Board: E9) (450908) Where: 8 = Hardware version number. Board: E9Main board version number (450908)Scopus version code Encoder Options 16 Encoder Option Words (Encoder_Word00 thru Encoder_Word15). Used to define the encoder activated options. Refer to Table 4-2 for option descriptions. User Options 16 User Option Words (User _Word00 thru User _Word15). Used to define the user activated options: Example: FFFFFFE7 Where: E = SNMP Enabled 7 =TFTP Enabled Checksum User Options checksum Magic Number Encoder Magic number NetMask Encoder NetMask, displayed in binary and hexadecimal format. Checksum NetMask checksum Page 4-26 (Rev 1.0 / March 2004) CODICO® E-1000 Series MPEG-2 Professional Encoders 4.2.8. Update Encoder Options The following procedure describes how to update the Encoder Options in the Encoder. NOTE Changing the Encoder Options requires Scopus permission. This permission is provided by a unique Encoder Option Code, associated with the encoder unique MAC Address. To receive the Encoder Option Code, Scopus needs to know the Encoder MAC Address (this address is displayed in the Shell Flash Content screen (see Figure 4-21). a. If required, prepare the system for file copying according to the following steps: 1. Make sure proper physical and electrical connection of the Encoder and HyperTerminal is complete and both units are activated (see paragraph 4.2.3 above). 2. Press "F" to ensure that the terminal is connected (the encoder status is displayed). 3. Press "Esc" to EXIT. Acknowledge exit by pressing "Y" to the message "are you sure?" 4. Type "com " in the "login" section and then press [Enter] Key. 5. In "Password" section, press [Enter] Key. Check that the shell prompt (>com) is displayed. 6. Type “x mdd 20” and press [Enter] Key to check the Flash Disk. CAUTION CONTINUE ONLY IF THE “FLASH DISK CHECK - OK” Scopus Documents (p/n 100474) MESSAGE IS RECEIVED. Page 4-27 User Manual Advanced Operation b. At the terminal, type “x flash enc {encoder_wordn].{option-code] {pass_word]” and press [Enter] Key to update the new encoder options in the encoder shell. Where {encoder_wordn].is the encoder word number (00 - 15) to be updated. {option-code] is the new word containing the activation code for the encoder option. {pass_word] is the unique pass-word provided by Scopus to activate the new option authorization. c. Type “x flash save” and press [Enter] Key to save the new encoder options in the encoder shell. Once the save is completed, the following message is displayed:”Update Done OK” Table 4-2 lists the options available for the encoder and the respective encoder words. Figure 4-22 shows an example of the Encoder Options Update sequence. Table 4-2: Encoder Options Description 4:2:2 Profile TTX StatMux Cascading Basic Encr. Audio Only 52M VBI over SDI QPSK AC3 ENCODER OPTIONS - - - - - - + - - - + - - - - - - - - - - + - - - - - - - - FFFFFFFC + + - - - - - - - - FFFFFFFB - - + - - - - - - - FFFFFFFA + - + - - - - - - - OPTION WORD Page 4-28 FFFFFFFF FFFFFFFE FFFFFFFD FFFFFFF9 - + + - - - - - - - FFFFFFF8 + + + - - - - - - - FFFFFFF7 - - - + - - - - - - FFFFFFF6 + - - + - - - - - - FFFFFFF5 - + - + - - - - - - (Rev 1.0 / March 2004) CODICO® E-1000 Series MPEG-2 Professional Encoders Table 4-2: Encoder Options Description 4:2:2 Profile TTX StatMux Cascading Basic Encr. Audio Only 52M VBI over SDI QPSK AC3 ENCODER OPTIONS + + - + - - - - - - FFFFFFF3 - - + + - - - - - - FFFFFFF2 + - + + - - - - - - OPTION WORD FFFFFFF4 FFFFFFF1 - + + + - - - - - - FFFFFFF0 + + + + - - - - - - FFFFFFEF - - - - + - + - - - FFFFFFDF - - - - - + + - - - FFFFFFCF - - - - + + + - - - FFFFFFBF - - - - - - - - - - FFFFFFAF - - - - + - - - - - FFFFFF9F - - - - - + - - - - FFFFFF8F - - - - + + - - - - FFFFFF7F - - - - - - + + - - FFFFFF6F - - - - + - + + - - FFFFFF5F - - - - - + + + - - FFFFFF4F - - - - + + + + - - FFFFFF3F - - - - - - - + - - FFFFFF2F - - - - + - - + - - FFFFFF1F - - - - - + - + - - FFFFFF0F - - - - + + - + - - FFFFFEFF - - - - - - - - + - FFFFFDFF - - - - - - - - - + FFFFFCFF - - - - - - - - + + Scopus Documents (p/n 100474) Page 4-29 User Manual Advanced Operation Figure 4-22: Encoder Options Update Sequence - Example Copyright (c) Integrated Systems, Inc., 1992. Welcome to pSOSystem... com> x flash show Magic Number .. IP ............ GW ............ MAC ........... HW_version .... Encoder Options Encoder Options Encoder Options Encoder Options User Options .. User Options .. User Options .. User Options .. Checksum ...... Magic Number .. NetMask ....... Checksum ...... : : : : : : : : : : : : : : : : : 'E1K0' 100.100.100.10 100.100.100.1 00-50-C2-01-C8-FD 8 (Board:E9) (450908) FFFFFF70 FFFFFFFF FFFFFFFF FFFFFFFF FFFFFFFF FFFFFFFF FFFFFFFF FFFFFFFF FFFFFFFF FFFFFFFF FFFFFFFF FFFFFFFF FFFFFFE7 FFFFFFFF FFFFFFFF FFFFFFFF FFFFFFFF FFFFFFFF FFFFFFFF FFFFFFFF FFFFFFFF FFFFFFFF FFFFFFFF FFFFFFFF 28722284 'E1K0' 255.255.255.0 (FFFFFF00) BACEB5E0 FFFFFFFF FFFFFFFF FFFFFFFF FFFFFFFF FFFFFFFF FFFFFFFF FFFFFFFF FFFFFFFF com> x flash enc 0 fffffffb 3316427 com> x flash save Update Done OK com> Page 4-30 (Rev 1.0 / March 2004) CODICO® E-1000 Series MPEG-2 Professional Encoders 4.2.9. Update User Options The following procedure describes how to update the User Options in the Encoder. NOTE Changing the User Options DO NOT requires Scopus permission. a. If required, prepare the system for file copying according to the following steps: 1. Make sure proper physical and electrical connection of the Encoder and HyperTerminal is complete and both units are activated (see paragraph 4.2.3 above). 2. Press "f" to ensure that the terminal is connected (the encoder status is displayed). 3. Press "Esc" to EXIT. Acknowledge exit by pressing "Y" to the message "are you sure?" 4. Type "com " in the "login" section and then press [Enter] Key. 5. In "Password" section, press [Enter] Key. Check that the shell prompt (>com) is displayed. b. At the terminal, type “x flash user {user_wordn].{option-code]” and press [Enter] Key to update the new encoder options in the encoder shell. NOTE {user_wordn].is the user word number (00 - 15) to be updated. {option-code] is the new word containing the activation code for the user option. c. Type “x flash save” and press [Enter] Key to save the new encoder options in the encoder shell. Once the save is completed, the following message is displayed: ”Update Done OK” (see Figure 4-23) Figure 4-23: User Options Update Sequence - Example com> flash user 0 ffffffe7 com> flash save update done OK com> Scopus Documents (p/n 100474) Page 4-31 User Manual Advanced Operation 4.3. ENCODER CONFIGURATION In order to determine the parameter settings during the initialization, the Encoder uses the records specified in a configuration file. This file includes documentation regarding the valid records under each setting. Also this file lists and describes the valid records and their function. The configuration file can be modified in the following ways: • Using the supplied VI text editor • Copying the configuration file to a host computer, where the text is edited and then copying back the modified file to the Encoder. NOTES Copying the file can be done by using RS-232 connection or the TFTP connection. The file can be edited using any kind of Word editor, once it is transferred to the editor. It is important to ensure that the file returned to the Encoder is in text format. CAUTION IT IS RECOMMENDED THAT AUTHORIZED PERSONNEL ONLY BE REQUESTED TO PERFORM MAINTENANCE PROCEDURES OR MODIFICATIONS TO THE CONFIG FILE. UNAUTHORIZED CHANGES MADE TO THIS FILE MAY CAUSE UNPREDICTABLE RESULTS OR SYSTEM FAILURE IP numbers follow the “dotted decimal” notations (r.s.t.u) representing four groups of numbers e.g. [10.0.0.20]. Page 4-32 (Rev 1.0 / March 2004) CODICO® E-1000 Series MPEG-2 Professional Encoders 4.3.1. Using VI Editor to Edit the Configuration File VI Editor is a simple UNIX text editor that is installed on the Encoder to enable modification of the Encoders configuration file (encoder.cfg) under ANSI compliant terminal emulation. Any ANSI compliant terminal may be used providing the requirement of 24 logical lines and 80 logical columns. Suitable terminal applications include (tested): • Hilgraeve HyperTerminal (installed on most WIN NT/9X OS) • Teranishi TeraTermPro Ver 2.3 The following procedure assumes that your ANSI compliant terminal is installed and configured for connection to the Encoder. The VI Editor provides online help. To access the help file, type :h<Enter>. To quit, type :q<enter>. The ‘Backspace’ key does not work while in VI mode. The editor converts TABS to spaces when reading an input file. During Insert and Replace modes, TABS are not allowed or accepted. During Insert and Replace modes, Backspace does not erase the last typed character and the user must exit the mode and correct the error in the editing mode, by the x or X keys. The VI Editor provides four basic editor modes, short keys, and functions (described in Table 4-3). Replacing the last character with ‘_’ saves the original input file. Scopus Documents (p/n 100474) Page 4-33 User Manual Advanced Operation Table 4-3: MODE Insert VI Editor Modes PARAMETERS Identification String: -Insert ModeActivated by: ‘i’, ‘a’, ‘o’, ‘O’ DESCRIPTION Used to insert text into file. Means that the command can be duplicated by an integer prefix. Terminated by: <ESC> Replace Identification String: Replace Mode Activated by: String at bottom Status line Replaces / Overstrikes text in file. Means that the command can be duplicated by an integer prefix. Terminated by: --Command Identification String: No special mark on screen Activated by: --- To move cursor, delete, cut, copy, and paste text. This is the default mode after exiting from other modes. Terminated by: --Meta-Command Identification String: Echo displayed on the bottom status line Special commands, e.g. write file, quit, get help, etc. Activated by: ‘:’ followed by command character(s) :q! Ignores any changes and Quits editor/help Terminated by: --- :w Writes buffer to file :q Exit editor/help :w! Same as ':w' :wq Writes buffer to file and exit :x Writes buffer to file (ONLY if changed) and exit :h Enters help buffer Page 4-34 (Rev 1.0 / March 2004) CODICO® E-1000 Series MPEG-2 Professional Encoders Table 4-4: SYNTAX VI Commands and Syntax DESCRIPTION /text<CR> Search text forward in the buffer (limited to 32 characters) /<CR> Repeat last search (forward) in the buffer. Cursor Movement Commands [N]j Down. (Also by '+', <ENTER>) [N]k Up (Also by '-') [N]h Left (Also by <BackSPACE>) [N]l Right (Also by <SPACE>) Editing Commands [N]x Deletes character(s) under the cursor [N]X Deletes character(s) left to the cursor [N]dd Deletes N lines starting from the current line (puts them in the paste buffer) I Inserts text at the cursor position. A Appends text after the cursor position J Join next line to current one. O Opens a new line below cursor and inserts text. O Opens a new line above the current line. [N]Y Yanks N lines into a paste buffer (starting at current line). P Puts the paste buffer after the cursor position. P Puts the paste buffer before the cursor position. R Replaces text. CAUTION THE PASTE BUFFER IS LIMITED TO 32 Scopus Documents (p/n 100474) LINES AND T Page 4-35 User Manual Advanced Operation TO OPEN THE ENCODER.CFG WITH VI EDITOR: From the command prompt enter the command: x vi encoder.cfg. The VI editor is executed and the encoder.cfg is displayed. NOTE If you have doubts about an item (if it is legal in any former version), follow the next procedure (in an encoder with the old version): - Create a small file with the questionable item, followed by a line 'EndOfData'. The file can have any name, e.g : z1.z2. - Copy the file into the E1000 and execute the command: x convertc -c z1.z2 (This command should end without error messages). 4.3.2. Encoder Configuration File The E-1000 series settings are defined in the “encoder.cfg” configuration file. Table 4-5 lists and describes each parameter and the valid options available for the parameter. Table 4-6 lists additional E-1000 conbfiguration parameters that added for specific applications. Additional optional configuration parameters are provided in the “encoder.cfg” configuration file when the respective option is provided. These options consists of the following: • Configuration parameters for the ATM Output interface. For details, refer to • Configuration parameters for the ATM Output interface. For details, refer to Table 4-10. • Configuration parameters for the SM-3000 and SM-3010 Statistical Multiplexers. For details, refer to Table 4-9. • Configuration parameters for the CAS-5000 Conditional Access System. For details, refer to Table 4-11. CAUTION ONLY AUTHORIZED PERSONNEL MAY DEFINE THE PARAMETERS CONTAINED IN THE CONFIGURATION FILE. ANY CHANGES MADE TO THIS FILE MAY CAUSE UNPREDICTIBLE RESULTS OR SYSTEM FAILURE. Page 4-36 (Rev 1.0 / March 2004) CODICO® E-1000 Series MPEG-2 Professional Encoders Table 4-5: PARAMETER VideoResolution Encoder Basic Configuration Parameters DESCRIPTION AND VALID OPTIONS Valid Options: • • • • • • F720: Full Vert. Res. 720 Pix/Line Horiz. Res. F704: Full Vert. Res. 704 Pix/Line Horiz. Res. F640: Full Vert. Res. 640 Pix/Line Horiz. Res. F544: Full Vert. Res. 544 Pix/Line Horiz. Res. F480: Full Vert. Res. 480 Pix/Line Horiz. Res. F368: Full Vert. Res. 368 Pix/Line Horiz. Res. NOTE: Use of F368 resolution is not recommended. For a better picture, use resolution F352. • F352: Full Vert. Res. 352 Pix/Line Horiz. Res. • H352: Half Vert. Res. 352 Pix/Line Horiz. Res. • AUTO: Auto Resolution OutputRate Output rate of the transport stream. Valid Options: integer in the range of 500000 - 52000000 (0.5 to 52 Mbps) VideoFormat Determines the type of Video Format. Valid Options: NTSC or PAL VideoSource Determines the type of Video Interface. Valid Options: COMPOSITE, SVHS, COMPONENT or D1_SDI VideoTest Determines Video Test Pattern Source. Valid Options: • 1 = internal video test pattern • 0 = external video is used AudioTest Determines Audio Test Pattern Source. Valid Options: • 1 = internal audio test pattern • 0 = external audio is used Scopus Documents (p/n 100474) Page 4-37 User Manual Advanced Operation Table 4-5: Encoder Basic Configuration Parameters PARAMETER DESCRIPTION AND VALID OPTIONS VideoPID Video PID number AudioPID_1 1’st Audio PID number AudioPID_2 AuxDataPID HSD_PID 2’nd Audio PID number Low Speed Data PID number (RS-232) High Speed Data PID number (RS-422) Teletext PID number Teletext_PID PCR parameter for Transport stream type PcrPID PMR parameter for Transport stream type PmrPID 3’rd Audio PID number AudioPID_3 4’th Audio PID number AudioPID_4 NOTES: Number Range: in HEX; 0x20 - 0x1FFF PCR set to 0 means that it “follows” the value of the VideoPID. ChannelClockType Determines software control of output clock channel source. Valid Options: • Internal: obtained internally. • External: external source AudioSource_1 Determines the type of Audio Interface. AudioSource_2 Valid Options: AudioSource_3 AudioSource_4 AES-EBU, ANALOG, EMBEDDED, AUTO, DOLBY, LINEAR NOTES: When in AUTO Mode, it automatically detects the Audio Interface and sets the interface to follow the video interface, as follows: For VideoIntreface = Analog (YC, YUV, CV), audio source is ANALOG For VideoIntreface==Digital (SDI), audio source is AES-EBU DOLBY Mode can be specified only for AudioSource_1. Page 4-38 (Rev 1.0 / March 2004) CODICO® E-1000 Series MPEG-2 Professional Encoders Table 4-5: Encoder Basic Configuration Parameters PARAMETER AudioRate_1 AudioRate_2 AudioRate_3 AudioRate_4 DESCRIPTION AND VALID OPTIONS Fixes the coded audio bit rate. Valid Options: 0, 64000, 96000, 128000, 160000, 192000, 224000, 256000, 320000, or 384000. NOTE: When N = 0 then this channel is not active. AudioSampleRate Determines the audio sample rate. Valid Options: 48 for 48K, 32 for 32K, or 44 for 44.1K HSDataRate The estimated rate of the High Speed Data channel. Valid Options: Maximum value is 20 MBps. LS_DataRate Fixes the low speed port data rate. Valid Options: 0, 2400, 4800, 9600, 19200, 38400, 57600, 115200 16:9_AspectRatio Determines the Aspect Ratio of the encoded video. Valid Options: 1 = Sets the aspects ratio to 4:3 2 = Sets the aspects ratio to 16:9 3 = Sets the aspects ratio to 4:3 at start-up and changes with the WSS. 4 = Sets the aspects ratio to 16:9 at start-up and changes with the WSS. NOTE: For options 3 (4:3) and 4(16:9), the value follows the WSS data; if WSS changes, the value in this item follows the WSS value. HSClockRate Displays the current value and enables the selection of the internal clock source that can be used by the customer to control the High Speed data input. Valid Options: 64K, 512K, 1024K, 2048K, 3072K, 4096K, 6144K, or 8192K ForcedVidRate A long number that forces video rates to the specified rate when the computed value is higher than this value. Valid Options: range of 1000000 to 50000000 Scopus Documents (p/n 100474) Page 4-39 User Manual Advanced Operation Table 4-5: PARAMETER Encoder Basic Configuration Parameters DESCRIPTION AND VALID OPTIONS AudioMode_1 Fixes the coding mode of the audio channels. AudioMode_2 Valid Options: AudioMode_3 Stereo (default), JointStereo, DualChannel, or SingleChannel AudioMode_4 RecoverErrors Controls automatic recovery when PTS FIFO, output FIFO or measured video bit rate is out of expected range. Valid Options: 0 = Disabled, 1 = Enabled Verbosity Causes the Encoder to report many events to the monitor port. These events include all faults detected during encoding and more. Valid Options: 0 = Disabled, 1 = Enabled StatInterval Encoder status is written to monitor each N second. Valid Options: 0 = Disabled, N = Value in seconds NOTE: If Verbosity = 0, any value for N except 0 is meaningless. StandardA2D Determine the type of Standard Analog-to-Digital. Valid Options: 0 = 10B 1=H 2=I CAUTION: DO NOT CHANGE THIS VALUE. VideoProfile Determines the Video Profile. Valid Options: 0 for 4:2:0 Video Profile 1 for 4:2:0 Video Profile with Low Delay 2 for 4:2:2 Video Profile 3 for 4:2:2 Video Profile with Low Delay 4 for 4:2:2 Video Profile with Ultra-Low Delay Page 4-40 (Rev 1.0 / March 2004) CODICO® E-1000 Series MPEG-2 Professional Encoders Table 4-5: Encoder Basic Configuration Parameters PARAMETER NMS_Control DESCRIPTION AND VALID OPTIONS Defines the NMS control. Valid Options: 1 = NMS control is enabled. If connection with an NMS is established, the Front Panel displays only the encoder status and the “change_THIS_state” message. 2 = NMS control is disabled and the Front Panel has full control over the system. 3 = Serial NMS control is enabled. The Front Panel displays the “change_THIS_state” message UDP_sm_X_Port UDP_sm_R_Port The port numbers used for the communication with the STAT-MUX controller (Transmit port (X_Port) and Recieve port (R_Port), respectively) Valid Range: 1024 to 6400 StatMuxMode Defines the Statistical Multiplexer operational status. Valid Options: 0 = OFF, 1 = ON VideoTestType Displays the current value and enables the selection of type of the Video test bar injected Valid Options: 0 = bar test, 1 = flicker bar test. ServiceName Defines the Service Provider name. Example: "SCOPUS". Any string of maximum 22 characters (A-Z capitals, digits, space and ‘-‘ only). Spaces in the string should be enclosed it in quotation marks, i.e. "AN EXAMPLE". LuminanceLevel Defines the Luminance level. Valid Options: any number between 0 - 255 [neutral value = 128] ChrominanceLevel Defines the Chrominance level. Valid Options: any number between 0 - 255 [neutral value = 128] VideoOffsetLevel Defines the Video Offset level. Valid Options: any number between 0 - 255 [neutral value = 128] Y_C_Delay Defines the Y_C delay. Valid Options: Any number between 0 - 12 [neutral value = 6] DigitNoiseReduct Determines the Noise reduction level. Valid Options: Off, Low, Medium, High Scopus Documents (p/n 100474) Page 4-41 User Manual Advanced Operation Table 4-5: Encoder Basic Configuration Parameters PARAMETER VideoPhase DESCRIPTION AND VALID OPTIONS Defines the Video phase. Valid Options: any number between 0 - 20 [Neutral value = 10] ChromaPhase Defines the Chroma phase. Valid Options: Any number between 0 - 255 [Neutral value = 128] DVB_Tabl_Present Defines how to use the DVB tables. Valid Options: 0 = liminates the DVB tables (for improved video quality at very low rates) 1 = Normal 2 = Plays the content of the (binary) file DVB.TBL PacketSize Defines the size of the packet for the G.703 Output format. Valid Options: 0 = 188 or 1 = 204 (for G703) CAS_method Defines the CAS system used. Valid Options: 0 = Clear 1 = Encoder based encryption 2 = Not Applicable 3 = CAS-5000 based encryption (DVB Scrambling) 4 = EBU BISS Scrambling CAS_group_no Group number for the Encoder based encryption method. Valid Options: Group Number (0-15). LocalIdleTime The idle time of the FRONT PANEL, after which the encoder returns to NMS enable mode. Expresses in seconds. When set to 0, this feature is disabled. KeepAliveTimer This is a timeout (in seconds) in which the TCP connections are reset to the initial state (wait for NMS connection) if no messages are received from the NMS station. When set to 0, this feature is disabled. CBROutputRate CBRVideoRate Page 4-42 The last values that were used during Constant Bit Rate mode are kept here for restoring them upon exit from the Stat-Mux Mode. (Rev 1.0 / March 2004) CODICO® E-1000 Series MPEG-2 Professional Encoders Table 4-5: Encoder Basic Configuration Parameters PARAMETER ProgramNumber DESCRIPTION AND VALID OPTIONS Program number in PMT or the Service ID in SDT of the current encoder. Valid Options: Hexadecimal numbers between 1 and FFFF CAUTION: Encoder based encryption works only if the ProgramNumber = 1 ! Alarms_Relay The argument is a string that must be composed from the character set "AVUTMN". The meaning of each character/operator is: V = Turn on relay if Video fault exists. U = Turn on relay if aUdio fault exists. T = Turn on relay if Temperature fault exists. M = Turn on relay if Mux module reports any fault D = Turn on relay if moDulator reports any fault (Applicable for E1500 only) The above characters can be concatenated to form an OR function (Boolean) for all conditions specified. A = Turns ON all individual conditions. N = Turn sOFF all individual conditions. NOTE: The results are unpredictable if conflicting conditions are specified. Correct Example: ‘Alarms_Relay TV’ Turns on relay if temperature or video faults exist. Incorrect Example: ‘Alarms_Relay TVN’ May not turn on relay if temperature or video faults exist because of the N operator. EncodersCascading Defines the type of encoder connection Valid Options: 0 = regular encoder 1 = encoder which receives another encoder transport stream through the HighSpeedData FIFO Scopus Documents (p/n 100474) Page 4-43 User Manual Advanced Operation Table 4-5: PARAMETER DVB_options Encoder Basic Configuration Parameters DESCRIPTION AND VALID OPTIONS 32 bit HEX number that controls the output DVB stream. Default: 2 CAUTION: To be changed only by Scopus Networks Technologies qualified staff. GOP_Structure Controls the GOP structure and attributes. Valid Options: • IP keyword: Generates IPPP.. PPP.. GOPs. Results in low delay, low efficiency (bit rate wise) encoder. • IBP keyword: Generates IBPBP..IBPBP.. GOPs. Results in medium delay, medium efficiency encoder. • IBBP keyword: Generates IBBP..IBBP.. GOPs. Results in high delay, high efficiency (bit rate wise) encoder. GOPMN Left BYTE is M value, right BYTE is N value (values are in Hexadecimal notation). NOTES: Overrides the GOP_Structure item if specified. N must be dividable by M. Example: M=2,N=12 specified as : 20C TrnspStrmID Transport Stream ID and Original Network ID, respectively. OrgnlNtwrkID Number Range: HEX number 0x20 - 0x1FF (as for all PIDs) AV_Sync Defines the amount of audio shift (for A/V fine tuning). Given in positive or negative units of mSec (Positive = delay the audio) Dolby_Sync Defines the amount of audio shift (for A/V fine tuning) when DOLBYpass-though is selected for audio ch#0. Given in positive or negative units of mSec (Positive = delay the audio) Page 4-44 (Rev 1.0 / March 2004) CODICO® E-1000 Series MPEG-2 Professional Encoders Table 4-5: PARAMETER Dolby_Rate Encoder Basic Configuration Parameters DESCRIPTION AND VALID OPTIONS This item applies when DOLBY pass though is selected for audio ch#0. This is the estimated rate of the DOLBY source. The range is between 32000-640000 bps. • If the user puts a value bigger than the real value, a waste of bandwidth occurs. • If he puts a value smaller than the real value, the audio output will be incorrect. The normal CH#0 rate has no meaning in this state. NTSC_Setup Enables the NTSC Setup Level. Meaningful for the Harris and for the 10Bits A/Ds. Valid Options: 0 disables the NTSC setup level 1 enables the NTSC setup level (default). AudioVolume_1 Sets the volume of each Audio Channel (expressed in dB). AudioVolume_2 If not specified, it has the default value of 0. AudioVolume_3 AudioVolume_4 Valid Options: Can be any integer in the range -12 to +12 Language_1 Specifies the language code for each audio channel. Language_2 Valid Options: Language_3 Language_4 IntgrtdADmode 0 = if no specification is available, or 3 characters = language code, according to ISO 639-2 standard. Determines the mode of the new Integrated Video Valid Options: "tv", "vcr", "dvd" Interfaces VBI_over_CV Enables VBI information input from the digital input of the SDI Video Interface option. Valid Options: 0 = Default 1 = Uses VBI information received on the Composite Video (CV) input. Scopus Documents (p/n 100474) Page 4-45 User Manual Advanced Operation Table 4-5: Encoder Basic Configuration Parameters PARAMETER VBI-Fields DESCRIPTION AND VALID OPTIONS The argument is a string that must be composed from the character set "ANTWSV". The meaning of each character is as follows: A = ALL VBI components are enabled. N = ALL VBI components are disbled. T = Telelext is enabled. W = WSS is enabled (Aspect Ratio Selection) S = SMC is enabled (Sound Mode) V = VPS is enabled. The above characters can be concatenated to form an OR of all conditions specified. The results are unpredictable if conflicting conditions are specified (such as 'NVT'). CAUTION: VPS is disabled unless TTX is enabled too. LumaFilter ChromaFilter Temporal filters for the vertical luminance blurring and for the chrominance vertical decimation features of the picture vertical information. Valid Options: 0 = filter not activated (default), 1 = filter activated. LumaVertFilter Sets the Luminance Vertical Filter strength. This filter blurs the picture vertically, each level removing about 10% of the information. Therefore, the strongest filter (7) removes about 70% of the information. Valid Options: 0 = Bypass, 1, 2, 3, 4, 5, 6 and 7 = Strongest ChromaDecFilter Sets the Chrominance Decimation Filter strength. This is an additional filtering on the Chrominance vertical decimation process (the decimation for obtaining the 4:2:0 picture). Valid Options: 0 = Bypass, 1, 2 and 3 = Strongest HorizontalFilter Page 4-46 Sets the Horizontal Filter strength. This filter blurs the picture horizontally, each level removing about 5% of the information. Therefore, the strongest filter (7) removes about 35% of the information. Valid Options: 0 = Bypass, 1, 2, 3, 4, 5, 6 and 7 = Strongest (Rev 1.0 / March 2004) CODICO® E-1000 Series MPEG-2 Professional Encoders Table 4-5: Encoder Basic Configuration Parameters PARAMETER IntraRefreshRate DESCRIPTION AND VALID OPTIONS Defines the Intra DCT refresh rate when in Low Delay mode. Valid Options: 0 = Disable refresh 1 = Slow refresh rate 2 = Moderate refresh rate 3 = Fast refresh rate 4 = Total refresh rate DLBEnData_Rate0 Defines the data rate for the Dolby Digital audio encoder. DLBEnData_Rate1 Valid Options: a number between 3 and 18, representing: 3=56K, 4=64K, 6=96K, 7=112K, 8=128K, 9=160K, 10=192K, 11=224K, 12=256K, 13=320K, 14=384K, 14=448K, 16=512K, 17=576K, 18=640K DLBEnCodinMode0 Defines the operating mode of the Dolby Digital audio encoder. DLBEnCodinMode1 Valid Options: a number between 0 and 2, representing: 0= Disabled, 1= Mono, 2= Stereo DLBEnSampleRate0 Defines the sampling frequency of the Dolby Digital audio encoder. DLBEnSampleRate1 Valid Options: a number between 0 and 2, representing: 0= 48K, 1= 44.1K, 2= 32K DLBEnStreamMode0 DLBEnStreamMode1 Defines the Bitstream operating mode of the Dolby Digital audio encoder. Valid Options: a number between 0 and 7, representing: 0 = Complete_Main 1 = Musin_n_Effects 2 = Visually_Inpaired 3 = Hearing_impaired 4 = Dialogue 5 = Commentary 6 = Emergency 7 = Voiceover DLBEnDialogue0 DLBEnDialogue1 Defines the normalization value for Dialogue Mode of the Dolby Digital audio encoder. Valid Options: a number between 1 and 31. Scopus Documents (p/n 100474) Page 4-47 User Manual Advanced Operation Table 4-5: Encoder Basic Configuration Parameters PARAMETER DESCRIPTION AND VALID OPTIONS DLBEnSrnd_Mode0 Defines the surround mode of the Dolby Digital audio encoder. DLBEnSrnd_Mode1 Valid Options: a number between 0 and 2, representing: 0= Not_Indicated, 1= Not_Surround_Coded, 2= Surround_Coded DLBEnMix_Level0 Defines the mixing level for the Dolby Digital audio encoder. DLBEnMix_Level1 Valid Options: a number between 0 and 31. DLBEnRoom_Type0 Defines the room type for the Dolby Digital audio encoder. DLBEnRoom_Type1 Valid Options: a number between 0 and and 2, representing: 0= Not_Indicated, 1= Large_Room, 2= Small_Room DLBEnCopyright0 Enables/disables the Dolby Digital audio encoder copyright bit. DLBEnCopyright1 Valid Options: 0 or 1. DLBEnOriginal0 Enables/disables the Dolby Digital original bitstream. DLBEnOriginal1 Valid Options: 0 or 1. DLBEnDrcProfile0 Defines the dynamic range of the compression profile for the Dolby Digital audio encoder. DLBEnDrcProfile1 Valid Options: a number between 0 and and 5, representing: 0= None, 1= Film standard, 2= Film light, 3= music standard, 4 = Music light, 5 = Speech DLBEnRF_Om_Prtc0 DLBEnRF_Om_Prtc1 DLBEnLP_Filter0 DLBEnLP_Filter1 DLBEnDC_Filter0 DLBEnDC_Filter1 Page 4-48 Enables/disables the RF overmodulation protection for the Dolby Digital audio encoder. Valid Options: 0 or 1. Enables/disables the LP bandwidth filter for the Dolby Digital audio encoder. Valid Options: 0 or 1. Enables/disables the DC notch filter for the Dolby Digital audio encoder. Valid Options: 0 or 1. (Rev 1.0 / March 2004) CODICO® E-1000 Series MPEG-2 Professional Encoders Table 4-6: Encoder Specific features Configuration Parameters PARAMETER DESCRIPTION AND VALID OPTIONS VBV_Delay Overrides default value if other than 0 Pnl_DeviceName Self determined Device Name. This string will be displayed instead of the "E1X00 DVB Encoder" normally displayed message. Any string of maximum 22 characters (A-Z capitals, space and ‘-‘ only). Spaces in the string should be enclosed it in quotation marks, i.e. "AN EXAMPLE". Pnl_CompanyName Self determined Company Name. This string will be displayed instead of the "SCOPUS" normally displayed message. Any string of maximum 22 characters (A-Z capitals, space and ‘-‘ only). Spaces in the string should be enclosed it in quotation marks, i.e. "AN EXAMPLE". ProviderName The Provider Name. Any string of maximum 22 characters (A-Z capitals, space and ‘-‘ only). Spaces in the string should be enclosed it in quotation marks, i.e. "AN EXAMPLE". NetworkID Network identification number, represented in Hexadecimal NetworkName The Network name. A string of a maximum 19 characters. (A-Z capitals, space and ‘-‘ only). Spaces in the string should be enclosed it in quotation marks, i.e. "AN EXAMPLE". VideoAbsentFilter Sets the VIDEO_ABSENT condition response time when sending this condition to the NMS. Options are: 0 = fastest response 1 = fast response 2 = medium response 3 = slow response (default) Scopus Documents (p/n 100474) Page 4-49 User Manual Advanced Operation Table 4-6: Encoder Specific features Configuration Parameters PARAMETER SelectiveScrambl DESCRIPTION AND VALID OPTIONS The argument is a string that must be composed from the character set "ANV1234". The meaning of each character is: A = Scrambling all components N = Scrambling no components V = Scrambling video component D = Scrambling data component 1,2,3,4 = Scrambling Audio1, Audio2, Audio3 or Audio4 component The above characters can be concatenated to form an OR of all conditions specified. The results are unpredictable if conflicting conditions are specified (such as 'NV2'). Service2Name Service3Name Service4Name NOTE: This option is available in AUDIO ONLY mode. These are 3 strings of audio service names of channels 2,3,4. Each string is limited to 11 characters. If values are not specified, the default values are: "RADIO2", "RADIO3", "RADIO4". Audio_PMT_PIDS NOTE: This option is available in AUDIO ONLY mode. This is a string of 3 audio PMT PID's. It should be 3 HEX numbers separated by colons only. If values are not specified, the default values are: 10A9, 10D9, 1109. Aud_Program_nmbr NOTE: This option is available in AUDIO ONLY mode. This is a string of 3 audio program numbers. It should be 3 HEX numbers separated by colons only. If values are not specified, the default values are: 2, 3, 4. Page 4-50 (Rev 1.0 / March 2004) CODICO® E-1000 Series MPEG-2 Professional Encoders Table 4-6: Encoder Specific features Configuration Parameters PARAMETER AudioVolume_1R DESCRIPTION AND VALID OPTIONS AudioVolume_2R Sets the volume of the Audio Channel (expressed in DB) for the upper 4 channels, when working with 8 mono channels. AudioVolume_3R Valid Values: an integer in the range -12 to +12 (default value = 0). AudioVolume_4R AudioPID_1R AudioPID_2R Defines the PID for the upper 4 channels when working with 8 mono channels. AudioPID_3R AudioPID_4R AudioRate_1R AudioRate_2R Sets the coded audio bit rate for the upper 4 channels, when working with 8 mono channels. AudioRate_3R Valid Options: 0, 64000, 96000, 128000, 160000, 192000 AudioRate_4R 0 means that this channel is not active. Language_1R Language_2R Specifies the language code for the upper 4 channels, when working with 8 mono channels. Language_3R Valid Options: Language_4R 0 = if no specification is available, or 3 characters = language code, according to ISO 639-2 standard. PCR_pid_eq_APID When in Radio mode, enables the PCR PID to equal the Audio PID. Valid values: 0 = disabled (default), 1 = enabled SDI_ANLG-swch Enables the automatic switching between COMPOSITE and SDI video inputs for the Composite/SDI Video Input Panel. Detection of the presence of video at the inputs controls this automatic switch. Valid Options: 0 = enables automatic switching (default). N (>0) Sets switching delay to N seconds. CAUTION: The SDI_ANLG-swch parameter is disabled when the bit 11 of the DVB_options parameter is set. Scopus Documents (p/n 100474) Page 4-51 User Manual Advanced Operation Table 4-6: Encoder Specific features Configuration Parameters PARAMETER CC_method DESCRIPTION AND VALID OPTIONS Sets the operating mode of the Close-Caption (CC) feature. Valid Options [format: decimal representation of a 3 digit binaric word, each bit represents a method]: 1 [001] = Least significant Bit (D0), enables the CC through user-data (default). 2 [010] = Next Bit (D1), enables the CC through DVB packets. 4 [100] = Third Bit (D2), enables the CC through ATSC packets. NOTES: User-data and ATSC methods must be exclusive. If both of them are specified, ATSC overrides user-data. Some combinations are possible (a single bit in the specified decimal number enables each method): 3 [011] = enables sending CC using both user data and DVB 6 [110] = enables sending CC using ATSC and DVB Example: To send CC as DVB and as ATSC, specify "CC_method 6" ExtendedVid.Lines NOTE: This parameter is applicable for 4:2:2 profile only. Enables coding of the extended video lines (invisible lines). Valid Options: 1 = enables, 0 = disables coding AP_duration_4_RA This parameter sets the time delay between re-connection of video signal and the reset of the audio encoder. This feature is required when the “DVB-options” parameter is set to 8. i.e., any “video present” after a “video absent” causes an audio reset by the MUX. Valid Values: in seconds, up to 18 seconds DV-SUB-rate DVB subtitling rate. Valid Range: Between 0 to 2000000 Page 4-52 (Rev 1.0 / March 2004) CODICO® E-1000 Series MPEG-2 Professional Encoders Table 4-6: Encoder Specific features Configuration Parameters PARAMETER DV-SUB-lang DV-SUB-lang1 DESCRIPTION AND VALID OPTIONS Sets the subtitling language for the Main and Secondary DVB subtitling language, respectively. Valid Options: 0 = if no specification is available, or 3 characters = language code, according to ISO 639-2 standard. DV-SUB-pages DV-SUB-pages1 TSBT-LNG-init Sets the identification code for the Main and Secondary language pages, respectively. Expressed as hexadecimal number: • Left half (word): Composition Page ID • Right half (word): Ancillary Page ID TSBT-NMR-init Seven pairs of language/page-number parameters. The language is the language code for each TTX page. TSBT-LNG-0 Valid options: TSBT-NMR-0 0: No specification is available. TSBT-LNG-1 nnn: A three characters language code, according to ISO 639-2 standard. The number is any number between 100 and 900. TSBT-NMR-1 TSBT-LNG-2 TSBT-NMR-2 NOTE: TSBT-LNG-3 Pairs which end with -init are attributes of the init page (normally 100). TSBT-NMR-3 Pairs which end with add_info are attributes of the additional information page of the teletext. TSBT-LNG-add_info TSBT-NMR-add_info Pairs which end with -prog_scd are attributes of the program schedule page of TSBT-LNG-prog_scd TSBT-NMRprog_scd LSD-TimeOut the teletext. Any item will be active given that the language description has a nonzero value. Activates the TIME-OUT mode of the Low Speed Data port. Valid Options 0 = This mode is non-active. Any other number = This is the timeout value in 0.01 Sec steps. The timeout range is 3-32000 (0.03-320 Seconds) This mode flushes out any pending data if there is a timeout in the input characters stream that is longer then the value specified here. Scopus Documents (p/n 100474) Page 4-53 User Manual Advanced Operation Table 4-6: PARAMETER LSD-TimeOut (Cont’d) Encoder Specific features Configuration Parameters DESCRIPTION AND VALID OPTIONS Important: 1. This mode requires that the IRD will be set to: DATA2-LSD PID filtering=TRANSPORT PAYLOAD 2. The Encoder sets an additional bandwidth to the LS data allocated bandwidth. (reducing the BW allocated for video). This additional BW is calculated as [150/TimeOut( )TimeOut expressed at 0.01 Sec units, Additional BW expressed at Kbits/second]. CAUTION: Be careful when setting this item to a low value (the additional BW is 50Kbit/sec at LSD-TimeOut=3). LSD-EOF-Char Activates the EOF mode of the LS data port. If the value is higher than 255, this mode is disabled. Any value lowers than 255 enables this mode. The value is the decimal ASCII value of the EOF character. Valid Options: 0 thru 255 Example: to specify Control-D, use the value 4 This mode flushes out any pending data if the EOF character is detected at the input stream. Important: 1. This mode requires that the IRD will be set to: DATA2-LSD PID filtering=TRANSPORT PAYLOAD 2. The Encoder sets an additional bandwidth to the data with a default value of 100 mSec (reducing the BW allocated for video). This additional BW is calculated as [150/TimeOut( )TimeOut expressed at 0.01 Sec units, additional BW expressed at Kbits/second]. 3. If the LSD-Timeout is not 0, it is taken as the timeout for extra BW calculations. PPCR_interval Determines the PCR interval in mSec. Valid Range: 2 - 100 Page 4-54 (Rev 1.0 / March 2004) CODICO® E-1000 Series MPEG-2 Professional Encoders Table 4-6: Encoder Specific features Configuration Parameters PARAMETER DESCRIPTION AND VALID OPTIONS StreamType Defines the type of transport stream. Available Options: Transport:MPEG-2 Transport Program:MPEG-2 Program System:MPEG-1 System AudioOrder Predictor-Rate A string of 4 digits separated by '-' sign, which indicates how the audio channels are ordered within the PMT. In case of 8 Mono, the order is of mono pairs. NOTE: This parameter is provided for the E-1200 encoder only Sets the predictor to work at SBVR. If all values are zero, the predictor operates in PWCBR mode. Valid Options: Initial Rate, QI, QP, QB CH0-as-DTMF Activates/deactivates audio channel #0 as a DTMF detector instead of regular audio channel. Valid Options 0 = Channel #0 is audio. 1 = Channel #0 is DTMF detector Table 4-7: PARAMETER E-1200 Look Ahead Specific Configuration Parameters DESCRIPTION AND VALID OPTIONS LA_time_msec Look Ahead delay, expressed in mSec. Vid_PTS_Add Time addition for video presentation, expressed in 90 KHz units. Scopus Documents (p/n 100474) Page 4-55 User Manual Advanced Operation Table 4-8: Old TCP Configuration Parameters PARAMETER DESCRIPTION AND VALID OPTIONS UDP_PortNumber NMS Broadcast port, expressed as a decimal number. NOTE: This number must match the value specified in the NMS ReTransmitTime Table 4-9: Retransmission time between boot messages, expressed in sec. Encoder-StatMux Configuration Parameters PARAMETER UDP_sm_Mcast_IP DESCRIPTION AND VALID OPTIONS Multicast IP address for the StatMux messages. Default: 224.0.0.5 Valid Range: 224.0.0.1 - 239.255.255.254 QuantStepI Quantization step for I, P, B pictures, respectively. QuantStepP Valid Options: QuantStepB 0 = Step disabled (default) 1 through 32 = overwrites the encoder working mode and sets it in a Storage VBR Mode. Initial-SM-rate The encoder expects to receive from the StatMux Controller the maximum value for the video rate. The value set in this parameter is used as default rate until a new value is received from the StatMux Controller Page 4-56 (Rev 1.0 / March 2004) CODICO® E-1000 Series MPEG-2 Professional Encoders Table 4-10: Encoder-ATM-Output Configuration Parameters PARAMETER DESCRIPTION AND VALID OPTIONS ATM_VCI_Adr ATM_VPI_Adr Sets the ATM VCI and VPI addresses. Valid Values: VCI Address range: 0001 to 0xFF, Hexadecimal VPI Address range: 0x20 to 0xFFFF, Hexadecimal ATM_FEC Table 4-11: Activates (1 options) or Deactivates (0 option) the FEC for the ATM Output. CAS-5000 Configuration Parameters PARAMETER DESCRIPTION AND VALID OPTIONS CAS_port TCP port number for the CODICO® CAS-5000 connection. CAS_IP_number IP number pf the CAS server. Scopus Documents (p/n 100474) Page 4-57 User Manual Advanced Operation 4.4. DVB SCRAMBLING Through the addition of a DVB scrambling board, the E-1000 Series Encoders are able to support Fixed-key DVB scrambling over the ASI 3 and two BNC Outputs. The ability to support DVB scrambling ensures interoperability with DVB-CI compatible IRDs (including the CODICO® IRD-2600/2800) and set-top boxes from third party vendors. This option is available pre-installed at the factory or as hardware installed by one of the Scopus Network Technologies field technicians. DVB scrambling is enabled or disabled on the software level and will only function when the presence of a DVB scrambling board is detected. When performing a field installation, parameters relating to DVB scrambling must be added to the Encoder Configuration File. IMPORTANT WHEN ADDING THESE PARAMETERS, SET THE DVBBOARDEXISTS PARAMETER TO 1. 4.4.1. DVB Scrambling Format The E-1000 Series of MPEG-2 Professional Encoders support the following DVB Scrambling based schemes for stand-alone receivers. Management of receivers in groups requires the addition of a conditional access system (such as the CAS-5000). 4.4.1.1. Fixed-Key DVB Scrambling While utilization of DVB scrambling enables greater flexibility to change keys on both transmitting and receiving ends, management functionality is limited to either being ON or OFF. Page 4-58 (Rev 1.0 / March 2004) CODICO® E-1000 Series MPEG-2 Professional Encoders 4.4.1.2. BISS Scrambling System The European Broadcasting Union (EBU) has defined a simple, standardized scrambling system suitable for Digital Satellite News Gathering (DSNG) that can work with all brands and types of equipment used to transmit and receive television pictures by satellite. The Basic Interoperable Scrambling System (BISS) is based on the DVB common scrambling algorithm and enables secure (scrambled) transmissions between DSNG equipment from any supplier. 4.4.1.3. BISS-E Scrambling System The BISS-E specification enables the use of keys or “Session Words” which are also encrypted. This adds another layer of security to the transmissions while fully retaining the benefits of inter-operability. The advance is achieved solely by means of software and all existing BISS equipment remains compatible with the new BISS-E specification. The keys for unscrambling the transmission are distributed in a secure form using the established DES encryption method. Descrambling requires the corresponding DES process and a secret identifier buried in the equipment by the Network Manager. 4.4.2. DVB Scrambling Memory Structure The DVB Scrambling Session Word is a 64 bits word, arranged in two halves of 32 bits each (four bytes). The lower (least significant) byte of each half, accessible to user programming, must not be used as they are overwritten with the computed checksum during operation (see Figure 4-24). Once saved, the computed results are visible from the DVB scrambling key options. The two halves of each key are separated by hyphens (-), but this occurs only for user readability and it is not part of the keys. When DVB scrambling is enabled (single key or double key), reception on an IRD is only possible providing that: • The IRD is fitted for DVB Descrambling. • The IRD is configured with the proper keys. Scopus Documents (p/n 100474) Page 4-59 User Manual Advanced Operation Figure 4-24: Memory Structure of Keys 64 bits 1 2 3 4 5 6 7 8 9 10 11 12 13 14 15 16 17 18 19 20 21 22 23 24 25 26 27 28 29 30 31 32 57 58 59 60 61 62 63 64 Overwritten with computed checksum during operation 4.4.3. DVB Scrambler Configuration Parameters The E-1000 Series Encoders configuration files provide access to parameters, which control the DVB scrambler. describes the parameters of the DVB Scrambling function in the Encoder configuration file. CAUTION ONLY AUTHORIZED PERSONNEL MAY DEFINE THE PARAMETERS CONTAINED IN THE CONFIG ANY CHANGES MADE TO THIS FILE MAY CAUSE UNPREDICTABLE RESULTS OR SYSTEM FAILURE Page 4-60 FILE. (Rev 1.0 / March 2004) CODICO® E-1000 Series MPEG-2 Professional Encoders Table 4-12: DVB Scrambler Configuration Parameters Parameter Description DVBboardExists Example: 1 DVBscrambleMode Example: 0 Options: 0 = Clear 1 = BISS-mode-1, (Clear SW panel entry) 2 = BISS-E with Injected ID as active ID 3 = BISS-E with Buried ID as active ID This is the injected ID of this unit. DVBInjcIDHi 0 DVBInjcIDLo 0 This is the CLEAR key. DVBclrKeyHi Example: CDEF1200 DVBclrKeyLo Example: 56789000 This is the Crypted Key. DVBcrpKeyHi Example: 0 DVBcrpKeyLo Example: 0 DVBslave1PIDs 1162;1163;1165;1169 DVBslave2PIDs 1262;1263;1265;1269 A list of PIDs that comes from the slave(s) and must be scrambled. Each list is limited to 10 items! The list must be semi-colon (;) separated and at HEXA notation (without 0x prefix). DO not insert spaces into the list! Scopus Documents (p/n 100474) Page 4-61 User Manual Advanced Operation 4.5. SNMP MANAGEMENT SNMP (Simple Network Management Protocol) provides basic network monitoring and management functions between a control station and managed nodes. It uses applications located on the nodes, called agents. These agents maintain a database of information (Management Information Base or MIB) about the managed nodes and when queried by the manager, retrieve data from the database and send it back to the manager in a response. In addition, the agent generates a wide range of event reports, called TRAPS. The SNMP uses UDP packets as its transport over TCP/IP for these queries and responses. NOTE Operation of the SNMP is performed using any SNMP browser. The following explanations and examples refer to the MG-Soft MIB Browser, Professional Edition 7.0.03730. 4.5.1. SNMP Configuration To configure the SNMP browser, the following two parameters should be set: • IP: The IP address of the E-1000. • Community Name: The SNMP Protocol defines a Community Name protocol that should be identical on the E-1000 and on the browser computer. NOTE The E-1000 community name is “E1000-xxx“. Where: xxx is the IP address of the E-1000. Page 4-62 (Rev 1.0 / March 2004) CODICO® E-1000 Series MPEG-2 Professional Encoders 4.5.2. SNMP Management Information Bases (MIBs) The E-1000 SNMP supports two management information bases: • MIB2 System Table: contains general parameters that must be supported on any SNMP protocol. • E-1000 Private MIB: contains parameters unique to the E-1000 Encoder. Table 4-13 describes some of the parameters defined in the E-1000 private MIB. Table 4-13: E-1000 Private MIB Table Description PARAMETER NAME DESCRIPTION scopusE1000 Main directory of Encoder parameters. Æabout Contains common information about functioning SNMP Agent. ÆÆUserControlAction This parameter applies the changes made to the encoder parameters. After changing the encoder parameters, this parameter should be set to 4 (apply all settings). IMPORTANT: Changes in the encoder do not take affect until the UserControlAction is set to 4. Æe1000 Contains encoder parameters Æftp Contains data that is necessary to ftp actions Æauxiliary Auxiliary data. All data under this node is used ONLY for creating traps. NOTE: The user should not use GetRequest and WalkRequest for these items. Scopus Documents (p/n 100474) Page 4-63 User Manual Advanced Operation 4.5.3. SNMP Parameter Property Sheet Each SNMP parameter has a property sheet, which describes the parameter structure. Figure 4-25 and Figure 4-26 show the property sheet of two parameters. The structure of the property sheet includes the following sections: a. Parameter ID: includes information on the parameter name, path, OID, type and module. b. Parameter Place: shows the parameter parent, siblings and children. c. Parameter Value: shows the following information: 1. Value type: there are three primary types: • Integers - for numerical values • Strings - for text values • Sequence - this parameter is used as an array for another parameter. Arrays are used when there can be a variety of numbers. 2. Max Access: describes whether the parameter can be read, written or both. Some parameters can only be read. d. Parameter Description: A text, which describes the parameter purpose. Figure 4-25: Encoder Parameter Property Sheet - Example 1 Parameter ID Parameter Menu Location Parameter Value Parameter Description Page 4-64 (Rev 1.0 / March 2004) CODICO® E-1000 Series MPEG-2 Professional Encoders Figure 4-26: Encoder Parameter Property Sheet - Example 2 Parameter ID Parameter Menu Location Parameter Value Parameter Description Scopus Documents (p/n 100474) Page 4-65 User Manual Advanced Operation 4.5.4. E-1000 SNMP Agent Traps The traps provided by the E-1000 SNMP Agent are listed in Table 4-14. Table 4-14: TRAP # Page 4-66 E-1000 SNMP Agent Traps TRAP DESCRIPTION 1 TRAP_encoder_initial_connection_trap 2 TRAP_encoder_is_alive_trap 3 TRAP_encoder_is_terminated_trap 4 TRAP_encoder_is_shutdown_trap 5 TRAP_encoder_is_ready_trap 6 TRAP_encoder_is_recovered_trap 7 TRAP_encoder_is_normalized_trap 8 TRAP_encoder_initial_acquaintance_trap 11 TRAP_video_fault_trap 12 TRAP_audio_fault_trap 13 TRAP_mux_fault_trap 14 TRAP_temperature_fault_trap 21 TRAP_video_absent_trap 22 TRAP_audio_absent_trap 31 TRAP_setup_file_missing_trap 41 TRAP_ftp_success_trap 42 TRAP_ftp_failure_trap (Rev 1.0 / March 2004) CODICO® E-1000 Series MPEG-2 Professional Encoders Section 5 MAINTENANCE 5.1. GENERAL This Section provides maintenance instructions for the CODICO® E-1000 Series Encoders. These instructions include test procedures and fault isolation directives. 5.2. SAFETY INSTRUCTIONS WARNING WHENEVER IT IS SUSPECTED THAT SAFETY PROTECTION IS IMPAIRED, THE EQUIPMENT MUST BE MADE INOPERATIVE AND SECURED AGAINST UNINTENDED OPERATION AND THE APPROPRIATE SERVICING AUTHORITY MUST BE INFORMED. SAFETY IS LIKELY TO BE IMPAIRED IF, FOR EXAMPLE, THE EQUIPMENT FAILS TO PERFORM THE INTENDED FUNCTIONS OR SHOWS VISIBLE DAMAGE. SERVICING AND MAINTENANCE INSTRUCTIONS ARE FOR QUALIFIED PERSONNEL ONLY. TO REDUCE THE RISK OF SHOCK AND DAMAGE TO EQUIPMENT, DO NOT PERFORM ANY SERVICING AND MAINTENANCE UNLESS YOU ARE QUALIFIED TO DO SO. 5.2.1. Safety Precautions The equipment described in this manual contains parts that are connected to the electrical power supply. This is a potentially lethal voltage. For correct and safe use of the equipment, it is essential that operating and servicing personnel follow generally accepted safety procedures in addition to the safety precautions specified in this manual. Specific warning and caution statements, where applicable, appear throughout this manual. Warning and Caution symbols are marked on the hardware where necessary. Scopus Documents (p/n 100474) Page 5-1 User Manual Maintenance 5.2.2. Caution and Warning Statements Throughout this manual, the following caution and warning symbols are used: CAUTION SYMBOL THE CAUTION SYMBOL IS USED TO INDICATE CORRECT OPERATION OR MAINTENANCE IN ORDER TO PREVENT DAMAGE TO OR DESTRUCTION OF EQUIPMENT OR OTHER PROPERTY. WARNING SYMBOL THE WARNING SYMBOL IS USED TO INDICATE A POTENTIAL HAZARD THAT REQUIRES CORRECT PROCEDURES OR PRACTICES IN ORDER TO PREVENT PERSONAL INJURY. 5.2.3. Technical Support In case of technical problems with the CODICO system or one of its components, refer to the System Documentation. In most instances, this may save you time in resolving technical difficulties. Should you not be able to resolve the problem, call your local distributor for technical support. 5.2.4. How To Return Faulty Parts Before returning an item: 1. Request a RMA (Return Merchandise Authorisation) Tracking Number from your local Distributor. 2. Scopus Network Technologies support will assign a RMA Tracking Number; this must accompany the item being returned and will be referred to in all correspondence. 3. The item is sent to Scopus Network Technologies with the RMA Number included in the accompanying documentation (shipping and customs forms). Page 5-2 (Rev 1.0 / March 2004) CODICO® E-1000 Series MPEG-2 Professional Encoders 5.2.5. Customer Support Point Of Contact (POC) Scopus Network Technologies Inc. Scopus Network Technologies Ltd. U.S. Offices International Headquarters 100 Overlook Center Drive, 3rd Floor 10 Ha’amal St., Park Afek Princeton, NJ 08540. Rosh Ha’ayin, 48092 USA Israel Tel: (609)-987-8090 Tel: (972) -3-9007777 Fax: (609)-987-8095 Fax: (972) -3-9007888 Email: [email protected] Web: 5.3. www.scopus.net TEST PROCEDURES The diagnostic and troubleshooting tests available for the E-1000 Series of MPEG-2 Professional Encoders consists of the following groups of tests: 1. Operational Checks: Checks the operational status of the E-1000. • Power-Up Check (see paragraph 5.3.1): Checks the system initialization at power up. • Serviceability Check (see paragraph 5.3.2) Checks the system audio and video processing operation. 2. Troubleshooting and Fault Isolation: The E-1000 generates status reports and warning messages during operation. These messages are grouped into two categories: • Front Panel Status Messages (see paragraph 5.4.1): Messages generated by the front panel unit and are displayed on the front panel LCD. • Encoder Status Messages (see paragraph 5.4.2): Messages generated by the encoder itself and displayed on the optional monitor, connected to the encoder. Scopus Documents (p/n 100474) Page 5-3 User Manual Maintenance 5.3.1. Power-Up Check. The initialization sequence of the encoder is as follows: 1. Ensure that the Compact Flash is fully inserted into the receptacle located on the front panel. 2. Power Up the E-1000 Series unit and check: • The internal fan start. • That the front panel illuminates and the LCD lights-up and displays the status messages of the initialization sequence. 3. The initialization sequence flow diagram is displayed in Figure 5-1 (refer to paragraph 2.5.2 for a detailed description of the sequence). 4. Once the initialization is completed, the display should show the STATUS OK message. Figure 5-1: E-1000 Series Encoder - Panel Initialization Sequence Initializing Please Wait Unit Initializing Please Wait Reading System Config Please Wait... Status OK PAL SDI F720 8294kbps Status Menu ENCODER MODEM (OPTION) CONFIG Page 5-4 Encoder Menu STATUS TEST (Rev 1.0 / March 2004) CODICO® E-1000 Series MPEG-2 Professional Encoders 5.3.2. Serviceability Check After performing any installation, initialization, or configuration to the E-1000 Series Encoders, maintenance checks should be performed to ensure that the unit is serviceable. It consists of the following tests: • Video Test, refer to paragraph 0. • Audio Test, refer to paragraph 5.3.2.2. An IRD-2600 Integrated Receiver Decoder (or similar), a video monitor and a loudspeaker must be connected to E-1000 Series encoders in order to perform the maintenance checks. NOTES The monitor connection is optional and needed only to view the Test Bar. The speaker connection is optional and needed only to hear the test sounds generated during the test procedure. 5.3.2.1. Video Test. Test Setup: 1. Connect the E-1000 Series Encoders to the IRD. 2. Connect the IRD to the monitor. Test Procedure: 1. Enter the main menu of the E-1000 Series Encoder. 2. Select the TEST option and press [Enter]. 3. Select the VIDEO TEST option and press [Enter]. 4. Press the ESC button twice. 5. Select the SAVE option from the menu. 6. Press [Enter] to start the VIDEO TEST. Test Results: The monitor, if connected, will show the Test Bar. Scopus Documents (p/n 100474) Page 5-5 User Manual Maintenance Removing the Test: 1. Enter the main menu of the E-1000 Series Encoders. 2. Select the TEST option and press [Enter]. 3. Select the VIDEO TEST option and press [Enter]. 4. Press the ESC button twice. 5. Select the SAVE option from the menu. 6. Press [Enter] to stop the VIDEO TEST. 5.3.2.2. Audio Test Test Setup: 1. Connect the E-1000 Series Encoders to the IRD. 2. Connect the IRD to the speaker. Test Procedure: 1. Enter the main menu of the E-1000 Series Encoder. 2. Select the TEST option and press [Enter]. 3. Select the AUDIO TEST option and press [Enter]. 4. Press the ESC button twice. 5. Select the SAVE option from the menu. 6. Press [Enter] to start the AUDIO TEST. Test Results: The speaker, if connected, will make a continuous beep sound. Removing the Test: 1. Enter the main menu of the E-1000 Series Encoders. 2. Select the TEST option and press [Enter]. 3. Select the AUDIO TEST option and press [Enter]. 4. Press the ESC button twice. 5. Select the SAVE option from the menu. 6. Press [Enter] to stop the AUDIO TEST. Page 5-6 (Rev 1.0 / March 2004) CODICO® E-1000 Series MPEG-2 Professional Encoders 5.4. STATUS AND DIAGNOSTIC MESSAGES The E-1000 Series of MPEG-2 Professional Encoders generates two types of status messages: • Front Panel Status messages, which are generated by the encoder front panel and are displayed on the front panel LCD. Refer to paragraph 5.4.1 for a detailed description. • Encoder Diagnostic messages, which are generated by the encoder operating system and displayed on an external VGA monitor connected to the encoder. Refer to paragraph 5.4.2 for a detailed description. 5.4.1. Front Panel Status Messages After the E-1000 initialization is completed, the E-1000 LCD displays the Status Message of the encoder. These messages are divided into two groups: • Fail To Comply Messages, which are the response of the encoder to requests from the operator (see paragraph 5.4.1.1). • Encoder Warning Messages, which are operational warning messages generated by the encoder (see paragraph 5.4.1.2). NOTE The E-1000 front panel includes one Status LED. The LED operation is correlated with the status message displayed. When the E-1000 operates correctly, the Status LED lights steady in green, and the “status ok” message is displayed on the LCD. Scopus Documents (p/n 100474) Page 5-7 User Manual Maintenance 5.4.1.1. Fail To Comply Messages The Fail To Comply Messages are displayed when the encoder fails to comply with the operator requests/commands. Table 5-1 lists and describes the messages available and the response of the Status LED when the message is displayed. It also describes the message and suggests the most common correction actions required. Table 5-1 Fail To Comply Messages MESSAGE Unit Not Responding LED RESPONSE RED LED BLINK DESCRIPTION The encoder does not respond to commands from the E-1000 Front Panel. Check the Encoder Diagnostic report (Refer to paragraph 5.4.2). Comm Checksum Error RED LED BLINK Communication errors are detected between the encoder and the front panel. Check the Encoder Diagnostic report (Refer to paragraph 5.4.2). Unit Busy GREEN LED BLINK The encoder is busy with previous tasks and cannot respond to commands from the E-1000 Front Panel. Wait for task completion. If the task fails to complete within a predefined time period, the encoder will display a “Unit Not Responding” fail to comply message. Illegal Setup RED LED BLINK The encoder cannot comply with the requests from the E-1000 Front Panel. Check the parameters for illegal inputs. Page 5-8 (Rev 1.0 / March 2004) CODICO® E-1000 Series MPEG-2 Professional Encoders 5.4.1.2. Encoder Warning Messages The Encoder Warning Messages are displayed when the encoder detects a failure in the normal operation of the encoder. Table 5-2 lists and describes the messages available and the response of the Status LED when the message is displayed. Table 5-2 Encoder Warning Messages MESSAGE Temp. High >49°C LED RESPONSE GREEN LED BLINK DESCRIPTION Encoder internal temperature is higher than 490C. Check room temperature in the encoder area. If higher than normal room temperature, lower by air-conditioning or external ventilation. Check encoder ventilation and airflow. Remove all airflow interfering objects. Ext. Clock Absent GREEN LED BLINK External reference clock input to the encoder is missing. Check proper operation of the external clock source. Video Input Absent GREEN LED BLINK External video input to the encoder is missing. Check proper video input signal. Audio Input Absent GREEN LED BLINK External audio input to the encoder is missing. Check proper audio input signal. Video Fault RED LED BLINK External video input and/or failure in the video processing by the encoder. Check proper and consistent video input data and format. Check correct video processing set-up for the input video format. Scopus Documents (p/n 100474) Page 5-9 User Manual Maintenance Table 5-2 Encoder Warning Messages LED RESPONSE MESSAGE RED LED BLINK Audio Fault DESCRIPTION External audio input and/or failure in the audio processing by the encoder. Check proper and consistent audio input data. Check correct audio sampling rate for the input audio information. Video & Audio Fault RED LED BLINK Failure in the video and audio processing by the encoder. Check proper and consistent audio and video input data and format. Check correct processing set-up. 5.4.2. Encoder Status Messages Any fault that prevents the encoder from normal boot-up, causes the message "Unit not responding" to be displayed on the Front Panel. In this case, the user must attach the terminal to the encoder and check the error message (always sent to monitor port). All error messages are textual messages and in most cases they are self-explanatory. In most cases, the user can correct the errors by receiving help from Scopus support stuff. The following are several encoder status messages and the suggested troubleshooting steps: • Flash Disk Mount Failed. Disk might be missing? Check the presence of the flash disk. Exchange disks between encoder units to verify correct structure of the "suspicious" flash disk. • File "filename" is missing. Some vital file is missing from the Flash Disk. Perform full SW upgrade procedure. Page 5-10 (Rev 1.0 / March 2004) CODICO® E-1000 Series MPEG-2 Professional Encoders 5.5. REAR PANEL CONNECTORS - PIN ASSIGNMENT The pin assignment for the connectors on the E-1000 is detailed in Table 5-3 through Table 5-9 .Table 5-10 describes and lists the pin assignment for the optional Audio Channel 3.4 connector. Table 5-3: ANALOG 1/2 L/R Interface Pin-to-Signal Assignment PIN # SIGNAL 1 Ground 2 Positive 3 Negative Table 5-4: PIN # GPI Interface Pin-to-Signal Assignment SIGNAL 1 Normally Closed 2 Common 3 Normally Open Scopus Documents (p/n 100474) Page 5-11 User Manual Maintenance Table 5-5: PIN # HSD Interface Pin-to-Signal Assignment SIGNAL 1 CLOCK IN + 2 CLOCK IN - 3 Reserved for future applications 4 CLOCK OUT + 5 CLOCK OUT - 6 Reserved for future applications 7 DATA IN + 8 DATA IN - Table 5-6: PIN # Page 5-12 Monitor Interface Pin-to-Signal Assignment SIGNAL 1 -- 2 Rx 3 Tx 4 -- 5 GND 6 -- 7 -- 8 -- 9 -- (Rev 1.0 / March 2004) CODICO® E-1000 Series MPEG-2 Professional Encoders Table 5-7: Data Control (RS-232) Interface Pin-to-Signal Assignment PIN # SIGNAL 1 -- 2 Rx 3 Tx 4 -- 5 GND 6 -- 7 -- 8 -- 9 --- Table 5-8: RS-422 Output 1 Connection Interfaces Pin-to-Signal Assignment PIN # SIGNAL 1 CLK + 2 CLK - 3 GND 4 G.703-BALANCED E1 on Out1 only 5 G.703-BALANCED E1 on Out1 only 6 GND 7 DATA + 8 DATA - Scopus Documents (p/n 100474) Page 5-13 User Manual Maintenance Table 5-9: RS-422 Output 2 Connection Interfaces Pin-to-Signal Assignme PIN # SIGNAL 1 CLK + 2 CLK - 3 GND 4 CLKIN + (OUT 2 ONLY) 5 CLKIN - (OUT 2 ONLY) 6 GND 7 DATA + 8 DATA - NOTE Pins 4 and 5, required for external clocking, are enabled only on the OUT 2 connector. DO NOT USE THE OUT 1 CONNECTOR FOR EXTERNAL CLOCKING. Table 5-10: PIN NO Page 5-14 Audio Channel 3,4 Connector (Option) DESCRIPTION NAME 1 N.C. 2 N.C. 3 N.C. 4 N.C. 5 Gnda 6 N.C. 7 ANA_AES_DRIN- Analog Audio CH4 Right (-) or Digital AES/EBU(-) (Rev 1.0 / March 2004) CODICO® E-1000 Series MPEG-2 Professional Encoders Table 5-10: PIN NO Audio Channel 3,4 Connector (Option) DESCRIPTION NAME 8 ANA_AES_DRIN+ Analog Audio CH4 Right (+) or Digital AES/EBU(-) 9 N.C. 10 Gnda 11 N.C. 12 CLIN- Analog Audio CH3 Left (-) 13 CLIN+ Analog Audio CH3 Left (+) 14 N.C. 15 N.C. 16 N.C. 17 DLIN- Analog Audio CH4 Left (-) 18 DLIN+ Analog Audio CH4 Left (+) 19 N.C. 20 Gnda 21 N.C. 22 ANA_AES_CRIN- Analog Audio CH3 Right (-) or Digital AES/EBU(-) 23 ANA_AES_CRIN+ Analog Audio CH3 Right (+) or Digital AES/EBU(+) 24 N.C. 25 Gnda NOTE Use a “D25 type to XLR” adapter cable, Cat no. 23499315800. Scopus Documents (p/n 100474) Page 5-15