1
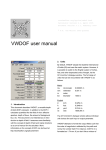
RAWHide Alpha Release Documentation
Send Bugs Reports and Likes and Dislikes to the RAWHide Support Forum
RAWHide is © 2004-2008 Franklin A. Holub – All Rights Reserved
Some components are derived from David Coffin’s DCRaw.
RAWHide Features:
• In NO case are any RAW files changed or modified.
• RAWHide only outputs the best quality 16 bit per channel Tiff files with full EXIF data.
• Multi Monitor support with new Thumbnailer.
• ALL available and recoverable highlight data is extracted and saved in the output tiff image.
• RAWHide uses the 7D/5D rotation tag to correctly rotate the output tiff image.
• Dark frame subtraction available at the raw image level. (Raw data is subtracted from raw data).
• Flat Frame correction available at the raw image level.
• ACC Demosaicing routine faithfully extracts and recovers all of the resolution and detail possible.
• Five other Demosaicing routines available to best suit your image.
• Simple “Control – Double Click” to select White Balance.
• Simple “Alt – Double Click” to select Background Subtraction.
• Uses the Alpha Mount Lens ID to report the lens description for the lens used to take the photo from an editable lens
database.
• Reads KM/Sony (alpha) Zone Matching tag and adjusts the image per the intent of ZM.
• “Sidecar” database files remember your conversion settings for each raw file.
• Batch Processing.
• Drag-N-Drop support.
• Clipboard Support.
• Unique “f/Stop” histogram.
• Main process and Batch process run on separate threads and in that sense support multiple processors.
• Windows compatible “Ratings” tag for output tiff files.
RAWHide Concepts:
• RAWHide is intended to be a fast convenient RAW image file converter that produces the highest
quality output possible.
• Sessions:
• Sessions are nothing more then a list of files to be processed.
• Sessions can be ignored. Their use is not required to process RAW images.
• Sessions can be used as a simple means to “manage” your photo collections. (However…)
• RAWHide is not really intended to “manage” your RAW file collections. It was developed with the
photographer in mind who prefers to manage his or her own RAW files using “Normal” methods.
• RAWHide assumes that your workflow starts with your Camera’s settings. So settings for Saturation,
Contrast, White Balance, Exposure Compensation, Sharpness, etc are read from your RAW Image files
and applied to the conversion – unless you override them.
• RAWHide can continuously process the Photo’s in your Session List in the background as you work on
your current image (or selection of images).
• RAWHide never writes to, modifies, deletes, moves, or in anyway changes your RAW files. (The
Thumbnail Viewer does have a “Delete to Recycle Bin” function)
• Settings for each file are stored as “sidecar” files in RAWHide’s database directory.
RAWHide Quick Start Guide:
1. Start RAWHide
2. Open the Edit->Edit Copyright menu option.
3. Add your personal info. The Photographer’s Name and Copyright Message.
4. Adjust any other settings (Saturation, Sharpness, etc) to suit your personal preferences.
5. Select the File->Save Preferences menu selection.
Quick Conversion Guide (Single File):
1. Open RAWHide by double clicking a single file or by using the RAWHide program icon.
2. Using File->Open Photos, find the raw image file you wish to convert and open it.
3. After the file initially loads, Add a description and/or an EXIF comment.
4. If needed, adjust White Balance (Use custom settings or select a gray or white area in the image with a
“Control-double-click”).
5. Click on the “Color and Levels” tab to make any adjustments required.
6. Select “Batch Queue->Start” or “Current Photo->Send to Editor” to begin conversion process(es).
Quick Conversion Guide (Batch Method):
1. Open RAWHide by double clicking a single file or by using the RAWHide icon.
2. More files may be added to a session by selecting them with the “Add Photos” menu item, Dragging
and Dropping them into RAWHide, Opening an existing “Session List”, or by double-clicking single files
in Windows Explorer. – OR – Better yet select “View -> Open Thumbnail Viewer” and use it to select
your Photos.
3. Adjust the image or an EXIF comments as needed.
4. Adjust color and exposure as needed.
5. Use arrow keys or click the “Row Header” of the file to preview and adjust another image in session.
6. To make the same change to more then one image. Select multiple images in the list by selecting the
file name and/or the EXIF comment cells, then adjust the control you wish to change in all selected
files. NOTE: Only the change applied to the selected images will be the particular setting changed –
The settings indicated by other sliders are not applied to the selected images. (To be sure what settings
are used for an individual image, select the image’s “Row Header”.)
7. Select “Batch Queue->Start” or “Current Photo->Send to Editor” to begin conversion process(es).
RAWHide and the Mouse:
1. Zooming your image in the main view can be done by scrolling the Mouse Wheel or by picking the
zoom % desired from the list box.
2. Scroll/Pan your image by pressing and holding the Left Mouse Button – or use the Scroll Bars.
3. White Balance: Use “Control – Double Click” to select White Balance reference patch.
4. Background Subtraction: Use “Altl – Double Click” to select Background reference patch.
Session List
(fig. 2)
Row Header
Thumbnail Image
Filename
Image Comments
Thumbnail Image
•Click “Row Header” to select new Photo
•Bold – Red text row is the currently shown Photo
•Row with Pink background indicates the Photo(s) currently being
processed by the Batch Queue.
•Output files (Tiffs) are shown in bold when completed.
•Edit EXIF comments by changing the “Image Comment” cell(s).
Controls and Stuff…
Current Session Operations:
Menus:
File
Open Session
Loads a Session (list of files) into the RAWHide – The current list is cleared!
Open Photos
Click here to open a standard windows Open File dialog to add your RAW file(s) to the current session
list.
Add…
Adds a Session or selected photos (list of files) to the current Session.
Save Session
Saves the current Session using the existing Session filename
Save Session As
Saves the current Session using a new Session filename
Associations…
(See “Associations” later in document)
Jpeg File Preferences
Settings for saving Jpeg files of your photos.
Save Default Preferences
Saves the current Program Settings, These settings will become the defaults for future images
Exit
Closes the Program
Edit
Remove Selected
Removes the currently selected images from the Session
Remove Current
Removes the current image from the Session
Remove All
Removes all images in the current Session.
Edit Copyright
Pops up a panel where the “Artist” and “Copyright” messages for any photos can be edited
View
Open Thumbnail Viewer
Opens the thumbnail viewer
Reset Monitors
Resets the Monitor usage of RAWHide and the Thumbnailer
Switch Monitor
Moves RAWHide to the “next” monitor
Swap Monitors
Swaps the Monitor usage of RAWHide and the Thumbnailer
Processing Info
Displays certain processing details to the user.
Batch Queue
Start
Starts the batch queue.
Running / Stop
Stops the batch queue if running
Current Photo
Current to Editor
Opens the current image’s tiff file in the system’s default Image editor/viewer for tiff files.
Help
User Manual
Opens the PDF user manual.
RAWHide Web Site
Uses your internet browser to take you to the the RAWHide Web site.
RAWHide Support Forum
Uses your internet browser to take you to the the RAWHide Support Forum (this is the place to ask
questions and get answers about RAWHide.
Edit Lens Database
Opens the Alpha Mount Lens Database (csv file) in the system’s default editor (Usually Excel).
About RAWHide
Displays RAWHide’s build and version information.
Other Things:
Session List (See fig. #2)
The Session List displays a simplified list of Raw Files in the current Session.
• If more then one Raw file in the list is highlighted, then any changes made to the image settings will be
applied to all of the highlighted images! If you highlight multiple comments, then you may notice that the
“Current Image Comment” above the Histogram becomes editable. Example: You have 50 photos from
your 2007 summer vacation, so you load the images into the Current Session and highlight them all, then
you can key in the words “2007 Summer Vacation” in the “Current Image Comment” text box and all of
the selected files will have their comments updated. Also, you may wish to adjust the Saturation as well, all
selected images will then inherit the new Saturation setting, other settings will remain unchanged.
Row Header
Clicking on the “List Header” of a given raw file causes that file to be processed in the main viewport.
Raw File Name
Clicking on the Raw file name of the list displays the Thumbnail Image. Also the “EXIF” data for the raw file is
displayed if the “Thumb EXIF” tab is selected. Clicking the Raw File Name does not effect or change the
currently displayed image in the main viewport.
Image Comment
This field may be edited. This comment will then placed in the TIFF Comment and the EXIF Description file
tags.
Date/Time
Displays the Date and Time the image was taken.
Output File
The Path and Filename of the photo once it is converted.
White Balance Controls:
As Shot: This uses the WB multipliers contained in the RAW File o to
adjust the image.
Automatic: RAWHide will attempt to determine White Balance.
Selected Point: Double Click Image while holding down the control key
to select area to be considered as white or neutral grey. Then click the
List Header on the current image in the Session List to reload & reprocess. A 15x15 pixel sampling region centered at
the point of selection is used to calculate the WB data. Do NOT select areas which have “clipped colors” or in areas
containing blown highlights.
Color Temperature( Kelvin) and Hue: Adjusts WB by setting a value that matches the light source’s color approximate
color temperature. Examples: tungsten light ≈ 2500°K, daylight ≈ 5500°K, cloudy day ≈ 4500°K…
RGB Multipliers: Adjusts WB by allowing the user to key in multipliers directly. Note that these values adjust (change)
and display the current actual multipliers. (Also see Copy and Paste)
Copy and Paste buttons: Use the Copy and Paste buttons in the White
Balance tool bar to Copy and Paste the Multipliers from one image to
another (or several). An Example on how to use this feature would be to
put a gray card in the first shot and set the WB using it and then apply
those WB settings to the other shots, but without the gray card.
Exposure & Levels Controls:
Use Camera EV Comp for Highlights: Readjusts (rescales) the
brightness of an image taken with a Negative EV exposure
compensation setting for better highlights. (Kind of a manual “Zone
Matching”). More specifically, this brightens the mid tones and shadows
to a level that would equal the brightness if the image had been taken
without exposure compensation. Highlight data requires more
compression but no highlight data is clipped.
Exposure Compensation (EV): This is the digital equivalent of Push
(positive numbers) or Pull (negative numbers) Processing. It can also be
said that this settings mimics the exposure compensation of the camera.
Highlight Compression: This is a little hard to explain. Basically this
setting tells the program how “hard” to compress the highlights. The lowest setting gives a more natural “film-like”
response and the highest setting gives a harder more “linear” response. An explanation is a bit complicated, but here
goes. In a gamma adjusted 8 bit image 0EV should be at a value of 127 and highlight clipping happens at 255 or +2.2EV.
As you know (the Histogram in RAWHide shows this) there is often an extra stop or more of highlight data above that
+2.2EV level. RAWHide always passes ALL of that data on to the output image which has to be "compressed" into that
( speaking in 8 bit terms even though RAWHide outputs 16 bits) 127 to 255 range (The highlight values could go as high
as 1000 if not compressed). The value shown by the slide indicates where the elbow of the curve required to compress
the data starts. 0.05 starts near 127 and 0.99 is near 255. In other words, 0.05 compresses the data from 130 to 1000 into
the 130 to 255 range and 0.99 compresses the data from 250 to 1000 into the 250 to 255 range (values are approximate).
As you can see the 0.99 value compress the highlight data "more" but over a smaller range.
Shadow Compression: The lowest setting leaves the results as is. A higher setting gives an effect of lightening the
shadows.
Contrast: Increasing contrast uses an “S” curve function that does not clip highlights or shadows. Clicking the button
resets the Contrast to the value originally assigned by the camera.
Saturation: Adjusts Saturation in HSV color space. Note: Saturation clipping is possible using this setting. Clicking the
button resets the Saturation to the value originally assigned by the camera.
Demosaicing (Advanced) Panel
No Demosaicing routine is totally fool proof. While one routine may
work well with most images, one may find another routine works better
for a certain image. To this end, RAWHide offers several routines to
choose from. These radio buttons can be used to select one of the three
demosaicing routines that were developed for RAWHide or a couple
“standard” routines that others have developed.
ACC: Advanced Color Corrective method. This routine is the
most advanced of those offered and was developed from the
ground up just for RAWHide. It will usually produce the
highest resolution with the least amount of moiré and or color
artifacts in high contrast areas. In most cases it eliminates the
“zipper” and “maze” effects and does the best job of
reproducing the full resolution of the camera. See “ACC
Controls” below.
ECW: Expanded color weighting. This routine produces a fine “grain” and in some areas can be the most
pleasing (esp in high ISO low light images). Also tends to produce the best results with images that have fine
point-like or “grain” detail. The histograms of images processed with this routine are very smooth.
SNS: Smooth – N – Slow! This routine reconstructs each RGB channel separately. The result is smooth but
with a loss of resolution and higher color artifacts in high contrast areas. It uses quadratic math and is the
slowest of the three methods. It is very good for portraits and cases where smooth skin tones may be desired.
AHD: Currently considered the newest "state-of-the-art" routine and is the basis for many of the top tier
converters. It is added here so you can compare its results with others.
VNG: An older routine that was added mostly because the code was already in RAWHide. This option may be
removed at some time.
FAST: This is a well respected routine with good results and it is the fastest routine of the choices available.
ACC Controls (Only works with ACC Demosaicing)
Enable Multipass Conversion & Number of passes. Sometimes there
are image areas that show a zipper effect when only a single ACC
pass is used. Check the box and select 2 or more passes and these
artifacts will often all but disappear!
Red/Blue Bias
This one is really cool! It is basically a moiré pattern fighter! In areas
of high detail that approach or exceed the Nyquist Limit the output
can take on a blue or red cast in a kind of “maze” pattern. This is
because the Bayer pattern data has two valid solutions for the data in
the area. Adjusting this setting can force the program to correct these
areas (see the blue patch in the image to the right). If you see a patch
of blue, then adjust the value to the Red a bit (and vice-a-versa).
Usually values around +/-15 work the best. Caution! Fixing one area
may cause problems in another area of the image.
D/S Weighting: ACC looks at both Luminance (Detail) values and
Color (Saturation) values to determine how best to determine a given pixel. ACC normally looks at both,
however, at times a given image may look better if the ACC routine looks harder at one of these values then the
other.
Darkframes & Background Controls:
Use Dark Frame: The basic idea is to take a long exposure image and
then a "dark frame" image of the same duration with the lens cap(s)
on the camera (the in-camera process just leaves the shutter closed).
The dark frame image, which in theory only contains noise, is
subtracted from the real image which, in theory, contains the image +
noise. In this way most of the noise is subtracted out of the resulting
image. See the “Dark Frame Subtraction” page on the RAWHide
Website for details.
Use Flat Frame: Also known Vignetteing and/or Dust correction.
Many wide angle lenses vignette at low (large) aperture settings,
similarly dust on the camera’s sensor becomes visible at high (or
small) aperture settings. Basically, after you take a photo, take another
photo with the exact same aperture and focal length settings of a flat
field of view (Totally empty sky blue is perfect!). Shutter speed is not
important. Use that picture as the “Flat Frame” and your vignetteing
and/or dust spots will disappear.
Dark Pit Filter: Effectively eliminates “Dark Pit” single pixel noise from High ISO images.
Hot Pixel Filter: Primarily intended for use on long exposure images with a darkframe. Tends to produce a “watercolor”
effect when used on normal images without darkframes.
Background Subtraction: Primarily intended for use on subjects such as astrophotos. Use “Alt – Double Click” to select
the Background Subtraction area sample. The area sample is averaged and then those RGB values are subtracted from
the Bayer Pattern data prior to demosaicing. Use the slider to determine the “strength” of the subtraction.
Color Management
Output Profile: The two best output profiles are AdobeRGB1998 and sRGB Color Space Profile. The ProPhoto RGB
and Wide RGB profiles are also included for those who require a wider color gamut. Currently RAWHide ignores the
camera setting for profile. The Adobe profile is popular for proofing and high quality work, sRGB is best for general
propose use and web pages (It can look better on the screen too). If
the software you use to view and review the output tiff files is not
color management compatible, then use the sRGB output profile! You
may notice that the images displayed in RAWHide may only change
slighty (if at all) when profiles are changed from one to another, this
is because RAWHide’s display uses CMS and corrects the displayed image to the system’s color space. Two options,
NONE (Gamma Only) and None (Linear) do not embed profiles in the output file.
Sharpness Panel:
USM Strength: Rawhide uses a real un-sharp mask to sharpen images. The USM Strength ranges from -4 (Blur) to +4
(Sharpen). Zero (0.0) is just that… Zero! If you set the USM Strength
to Zero, RAWHide actually turns the sharpening routines OFF! (With
this you can see actually just how much sharpening other converters
actually apply to images when they are set to “zero”. )
USM Radius: This determines how far away surrounding pixels
influence the target pixel. The radius should be just big enough before
halos become apparent.
USM Threshold: If the difference in contrast within the radius is
below the threshold. Then no sharpening is performed.
Noise Reduction Panel:
BTW - By default NR is turned off in RAWHide. RAWHide uses a
simple but effective wavelet based Noise Reduction routine that effectively removes "iso-noise" while preserving most
real image detail. This code was written by scratch and is not based on any existing code or “PhD authored math papers”.
Rather, it is based on a "natural" understanding of wavelets. The idea is not to achieve miracles, but rather to get
improved results. For miracles suggest one of the fancy aftermarket Noise Reduction Photoshop add-ons is suggested
Noise Reduction Strength: Controls the strength of the NR effect.
Noise Reduction Radius: Is the “radius” of the noise frequency to
reduce, Most image noise has a kind of “grain” that is of a certain
size. Match the radius to that grain size and there will be a dramatic
reduction in perceived noise.
Noise Reduction Threshold: Is and a “threshold” of contrast in which
not to apply the effect.
Crop without NR
Crop with NR
Note the reduction in noise without any “real” reduction in true detail. RAWHide’s noise reduction routine is simple and
effective.
Edit Copyright:
These are settings that you are less likely to change often. They could be moved elsewhere but we have them here to get them out
of the way.
Owner (EXIF Artist): This sets the EXIF Artist tag. Your Name goes here!
Copyright Message: This fills in the copyright tiff tag. Add Your Name and maybe the words “All Rights Reserved”.
The program will add the © symbol and the year based on the year from the Metadata in the RAW file.
Associations:
This Control lets you create or remove file associations for RAWHide. When you create an association between files of a
given type and RAWHide, you can open the files from within Windows Explorer or My Computer simply by doubleclicking on them. Also, files associated with RAWHide are displayed with the RAWHide icon.
Since you may have a number of different RAW image conversion programs installed on your computer, this command
lets you specify which file types you want to open with RAWHide. RAWHide creates associations only at your request –
by default no associations are created when RAWHide is installed on your computer.
File associations are based on the file’s extension. For each file type listed in the dialog box, the corresponding file
extension(s) will be associated with RAWHide. (i.e. ARW for .arw)
To create one or more associations, check the boxes next to the file types for which you want to create associations and
then click the Save button.
To remove one or more associations, un-check the boxes next to the file types whose associations you want to remove
and click the Save button. While RAWHide attempts to restore previous associations, There can be no guarantee that
those previous associations will be or can be restored by RAWHide. If the restoration of the previous association fails,
you must reinstall the application or, if it has a command similar to File Associations, you can re-establish the
associations manually.
Jpeg File Preferences:
These settings allow you to automatically make Jpeg Copies of the output tiff files. These files are save at the Jpeg
Quality rating you select and can be resized based on the largest dimension (i.e. A setting of 900 will take a 2000x3000
pixel image and make a 600x900 image). This setting is a general RAWHide setting and is not applied separately from
image to image. Leaving the “Resize” checkbox unchecked will result in a image being the same size as original rawfile.
Currently, JPEG files will be stored in the same location with the same name as their respective tiff files (with a .jpg
extension of course).
Other Controls:
Zoom Box
FIT: Fits the current image in the preview pane.
50%: Displays the image at half size…
100% : Displays content of image buffer at 1 to 1 scale (Pixel to Pixel)
200% : Magnifies the image 2x.
…
Up to 1600%
MouseWheel: Is used to zoom in and out.
The HISTOGRAM
The histogram used in RAWHide is a little different then
most. Instead of being based on pixel values, it is based on
FStops (EV) assuming linear output from the raw data in
which the values are doubled for each F-stop (which does
seem to be the case). It is based on the actual RAW data
after highlight recovery. The range is approximately -10 to
+5
stops with 0EV being the lighter line about 2/3’s of the way
across the chart. The grey vertical lines are 1 stop
increments. The dashed vertical lines represent the clipping
levels of the color channels (Red, Green, & Blue). The
rightmost dark line represents the limit of data (Nothing brighter was recorded in the raw data). The dashed vertical black
line is the highest level an output file can record without compressing the highlights. Data right of this line would be
clipped in software with no highlight handling capability. Also, this is the point at which RAWHide starts to apply its
highlight recovery algorithms.
As you move the cursor over the main image, a line will move across the histogram indicating the maximum value of the
RGB components. A shorter line will also move across the histogram which represents the final output in stops after
Highlight Recovery, Highlight Compression, Contrast, and Shadow Compression have been applied. The numeric values
(in stops) are reported below the histogram. They are from right to left… Red, Green, Blue, Input Max (long line), and
Output Max (short line). Adjusting the EV settings adjusts the histogram data and values are reported in that context.
Moving your cursor over the histogram itself displays the EV value represented by that point of the histogram.
The Batch Queue
The Batch Process is controlled by a second (or third…) RAWHide thread. The background thread processes the image
in exactly the same way as the thread that is used to display the main image. The batch thread runs at a lower priority so
its impact from running is minimized on the rest of the system. RAWHide utilizes multiple processors (cores) if
available.
Queue Status: Reports the current status of the batch queue: How many files are in the queue the number of files in the
queue and the number of files yet to be processed.
Other Notes:
• This is Alpha level software – This means it is likely to have plenty of bugs! Use at your our risk!
• I need honest and open feedback – If you HATE something let me know but PLEASE do not be cruel or unkind!
Alpha Release Notes:
•
See the “History” page on the RAWHide Website: http://www.my-spot.com/RHC/
Known Bugs/Issues:
•
See the “History” page on the RAWHide Website: http://www.my-spot.com/RHC/


![2013 [MANUAL TÉCNICO DE BARRERAS ACÚSTICAS]](http://vs1.manualzilla.com/store/data/006215445_1-fe5972e016b697b84001549c27199097-150x150.png)