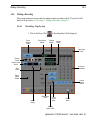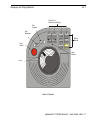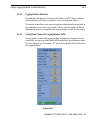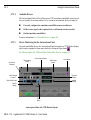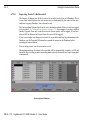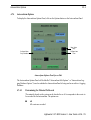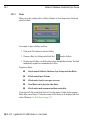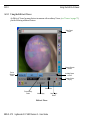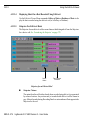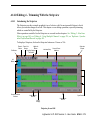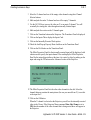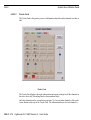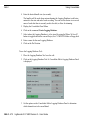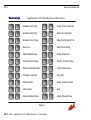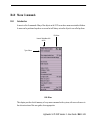
1
Lightworks
V.I.P 4500
Version 3
USER GUIDE
070-9920-03
Acknowledgements
All trademarks are the property of their respective companies and are used in this user guide solely for identifying a particular product for reference purposes only.
Writer: Lawrence Windley
Editor: Malcolm Wills
Disclaimer
Tektronix U.K. Development Centre Limited accepts no liability for any consequential, incidental or indirect
damages (including damages for loss of business profits, business interruption, loss of business information and
the like) arising from any action or inaction based on information contained in this document. Tektronix U.K.
Development Centre Limited reserves the right to vary the specifications of its products and/or to revise the documentation at any time without notice.
Copyright
Tektronix U.K. Development Centre Limited and its associated companies retain all ownership rights to its
products’ hardware, computer programs and documentation. Use of a Lightworks product is governed by the
licence agreement supplied with the sale contract.
Document Revision Status
Lightworks V.I.P 4500 Version 3 - User Guide
Tektronix Part Number: 070-9920-03
Rev. A - 11th February 1999
Lightworks V.I.P 4500 Version 3 - User Guide iii
iv
Lightworks V.I.P 4500 Version 3 - User Guide
About This User Guide
You may want to read the entire user guide from cover-to-cover before you start working. Or you may
want to start using the system straight away and only refer to the user guide if you get stuck. Either way,
it helps to know where to look for things.
The user guide is structured as follows:
Contents
The Contents section includes a summary of chapter headings and a full table of contents.
Part A - Operation
Part A contains step-by-step instructions to all aspects of operating the system. Topics are presented in the order in which they would usually be encountered during post-production.
Part B - Reference
Part B provides reference information on using the Keyboard, Mouse and Console, plus a summary of the function of every menu command on the system.
Part C - Technical
Part C provides some technical information on configuration and maintenance of the V.I.P system.
Glossary
The Glossary contains definitions of common terms, as used in Lightworks products and documentation.
Index
For the latest information about a specific software release, please refer to the release notes supplied with
the release and to any subsequent Product Support Bulletins.
For information about system hardware, connections and configuration, please see the Lightworks V.I.P
4500 - Installation Manual (Rev. 1.04 or later) and the Lightworks V.I.P 4500 Fibre Channel Upgrade
Installation Manual.
Lightworks V.I.P 4500 Version 3 - User Guide v
The following style conventions are used to enhance the usability of this user guide:
Cross References
Cross references are provided to link related sections of the user guide. Cross references look like
this:
See ‘Starting a Project’ on page 67.
Hypertext Links
For users of the electronic (PDF) version of the user guide, green text indicates a clickable hypertext link to the relevant section. Typically these are contents entries, cross references and index
page entries.
Header and Footer Information
At the top of each page is a header which shows the paragraph number, for example A2.1. At the
bottom of each page is a footer which shows the chapter number and page number, for example
A2.0 - 63.
Text For Menu Commands
The text of the V.I.P system menu commands is capitalised and bold, for example Set Default
Tool Position.
Text For Buttons
The names of on screen buttons, Console buttons and Keyboard keys are capitalised and plain. For
example; the Record button, the Play button, the Enter key.
Button Combinations
Certain Console and Keyboard operations use combinations of more than one key. This is represented in the text by a “+” character; for example “ALT+1” means hold down the ALT key and
press the 1 key.
User Input Text
Text input by the user, using the keyboard, is represented in Courier font, for example “RUN
INSTALL.EXE”.
vi
Lightworks V.I.P 4500 Version 3 - User Guide
Support
Telephone Support
Telephone support is available from Tektronix Video and Networking Division, as shown below.
Europe, Africa and Middle East (EAME)
Telephone support:
Austria
02236 8092 400
Belgium
02 715 89 92
Denmark
44 85 07 06
Finland
0947 834205
France
01 69 86 83 47
Germany
0221 9477 444
Italy
02 25086600
Netherlands
0513 656395
Norway
22 07 07 15
Spain
091 3726050
Sweden
08 629 6597
Switzerland
041 72 93 625
UK
01628 405 810
Rest of EAME
+44 1628 405 817
Lightworks V.I.P 4500 Version 3 - User Guide vii
Fax and E-Mail support:
General Enquiries or Service Administration:
Fax (UK): + 44 1628 404 848
Fax (France): +33 1 69 86 83 46
Fax (Germany): +49 221 9477 445
Fax (Italy): +39 2 25086601
E-mail: [email protected]
Lightworks Technical Enquiries:
Fax: +44 171 462 6312
E-mail: [email protected]
United States
VND Hotline:
(+1) 800 - 547 - 8949
Other Regions
Please contact the appropriate Tektronix office or your local distributor or supplier.
Lightworks E-Mail Usergroup
The Lightworks E-Mail Usergroup has been set up to facilitate communication between users of Lightworks products. Subscribers can share hints, exchange information on problems and solutions, and raise
general issues - the aim being to help everyone get the most out of their Lightworks equipment.
Requests to subscribe should be mailed to [email protected]. Please note that this
group exists primarily for users to talk to each other and so any specific requests for support or information should be directed to the appropriate Tektronix office or local distributor.
Tektronix Website
A number of other useful technical and operational documents are available on the Tektronix Website at
http://www.tek.com/VND/documentation.html.
viii
Lightworks V.I.P 4500 Version 3 - User Guide
Contents - Chapter Summary
About This User Guide
v
Support
vii
Contents - Chapter Summary
ix
Contents
13
Part A: Operation
A1.0 Introduction
55
A2.0 Getting Started
59
A3.0 Projects and Rooms
81
A4.0 Recording 1 - Recording Configurations
97
A5.0 Recording 2 - Recording Timecode and Labels
121
A6.0 Recording 3 - Making a Recording
147
A7.0 Autoconforming and Redigitising
169
A8.0 Preparing Shots For Editing
185
A9.0 Organising Shots and Edits
207
A10.0 Finding Shots and Edits
223
Lightworks V.I.P 4500 Version 3 - User Guide Contents - ix
Contents
A11.0 Editing 1 - Basic Editing
233
A12.0 Editing 2 - Editing When Playing Multiple Sources
251
A13.0 Editing 3 - Editing From Tape To Disk
269
A14.0 Editing 4 - Trimming With the Stripview
279
A15.0 Editing 5 - Real-time Effects
303
A16.0 Editing 6 - Using Multiple Channels
329
A17.0 Editing 7 - Audio Editing
357
A18.0 Audio Control
373
A19.0 Rendered Effects 1 - Mirror, Flip, Crop, Resize, Page Turn
391
A20.0 Rendered Effects 2 - Titles
403
A21.0 Playing Out Your Work
435
A22.0 EDLs 1 - Import
443
A23.0 EDLs 2 - Export
449
A24.0 Project Management 1 - Consolidating
467
A25.0 Project Management 2 - Import and Export Of Logs and Material
475
A26.0 Project Management 3 - Deleting
497
A27.0 Project Management 4 - Databases
505
Contents - x
Lightworks V.I.P 4500 Version 3 - User Guide
Contents
Part B: Reference
B1.0 The Console
523
B2.0 The Keyboard
531
B3.0 The Mouse
541
B4.0 Menu Commands
545
Part C: Technical
C1.0 The CONFIG.DAT File
585
C2.0 Lightworks Logging Database Format
607
C3.0 Device Templates
619
C4.0 Features For Use With Omnibus Automation Systems
623
C5.0 Troubleshooting
631
C6.0 Basic Care and Maintenance
637
Glossary
639
Index
649
Lightworks V.I.P 4500 Version 3 - User Guide Contents - xi
Contents
Contents - xii
Lightworks V.I.P 4500 Version 3 - User Guide
Contents
About This User Guide
v
Support
vii
Telephone Support
vii
Europe, Africa and Middle East (EAME)
United States
Other Regions
vii
viii
viii
Lightworks E-Mail Usergroup
viii
Tektronix Website
viii
Contents - Chapter Summary
ix
Contents
13
Part A: Operation
A1.0 Introduction
55
A1.1 Lightworks V.I.P 4500 Online Editing System
55
A1.2 Definitions
55
A1.2.1 Shot
A1.2.2 Edit
A1.2.3 Ghost
A1.2.4 Reel
55
55
56
56
A2.0 Getting Started
59
A2.1 Introduction
59
A2.2 Starting the System
59
A2.2.1 Starting the System - Step-by-step
A2.3 User Interface Basics
A2.3.1 Menu Button
60
62
62
Lightworks V.I.P 4500 Version 3 - User Guide Contents - 13
Contents
A2.3.2 Open/Close Button
A2.3.3 Vanish Button
A2.3.4 Entering Text
A2.3.5 Removing Objects From the Screen Using the Shark
A2.3.6 Yellow Arrow
A2.3.7 Using Visidirs To Select Folders and Files
A2.4 Starting a Project
A2.4.1 Starting a Project - Step-by-step
62
62
62
63
63
64
67
67
A2.5 The Toolbox
68
A2.6 Making a Recording
69
A2.6.1 Recording - Step-by-step
A2.7 Displaying and Playing Material
A2.7.1 Tiles
A2.7.2 Viewers
A2.7.3 Tile and Viewer Status Displays
A2.7.4 Playing Material In a Viewer or Tile
A2.7.5 Other Methods Of Playing Through Shots and Edits
A2.8 Shutting Down the System
A2.8.1 Shutting Down the System - Step-by-step
A3.0 Projects and Rooms
A3.1 An Introduction To Projects and Rooms
A3.1.1 Projects
A3.1.2 Rooms
A3.1.3 Relationship Between Projects and Rooms
69
71
71
72
75
76
78
80
80
81
81
81
81
81
A3.2 Lobby Screen
82
A3.3 Using Rooms
83
A3.3.1 Creating a New Room For an Existing Project
A3.3.2 Naming a Room
A3.3.3 Using an Existing Room
A3.3.4 Creating a New Room and a New Project
A3.4 Setting Up a Project
A3.4.1 Creating a New Project
A3.4.2 Displaying the Project Card
Contents - 14
Lightworks V.I.P 4500 Version 3 - User Guide
83
86
86
87
88
88
89
Contents
A3.4.3 TV Standard
A3.4.4 Default TV Standard For New Projects
A3.4.5 Audio Parameters
A3.4.6 Aspect Ratio
A3.4.7 Letterboxing For Viewers and Tiles
A3.4.8 Naming a Project
A3.4.9 Project Creation Date
A3.4.10 Notes Field
A3.5 Saving and Loading Room Styles
A3.5.1 Room Styles For New Rooms
A3.5.2 Saving Room Styles
A3.5.3 Loading a Room Style
A3.5.4 Deleting a Room Style
A3.6 Using Passwords
89
89
90
90
91
91
91
91
92
92
92
92
93
93
A3.6.1 Project Passwords
A3.6.2 Skeleton Passwords
A3.7 Transferring Shots, Edits, Ghosts and Reels Between Projects
A3.7.1 Moving Shots To Another Project
A3.7.2 Moving Reels To Another Project
A3.7.3 Moving an Edit or Ghost To Another Project
A3.7.4 Copying Shots and Edits To Another Project
A3.8 Deleting Rooms and Projects
93
93
94
94
94
95
96
96
A3.8.1 Deleting a Room - Step-by-step
A3.8.2 Deleting a Project
96
96
A4.0 Recording 1 - Recording Configurations
97
A4.1 An Introduction To Recording
97
A4.2 System Resources
97
A4.2.1 Resources Available For Recording
A4.2.2 Editing Whilst Recording - ‘Background Recording’
A4.3 How the V.I.P System Uses Reels
A4.3.1 Reels Panel
A4.3.2 Creating Reels
A4.3.3 Tape Types
A4.3.4 Setting a Default Reel Type
98
98
99
99
100
101
101
Lightworks V.I.P 4500 Version 3 - User Guide Contents - 15
Contents
A4.3.5 Unknown Reels
A4.3.6 Reels Created For Imported Data
A4.3.7 Setting Up Reel ID Prompting
A4.3.8 Quickly Defining Parameters For New or Imported Reels
A4.3.9 Changing the Reel ID
A4.4 External Devices
A4.4.1 Definition Of an External Device
A4.4.2 Types Of External Device
A4.4.3 Adding New Devices
A4.4.4 Renaming Devices
A4.4.5 Deleting Devices
A4.4.6 Device Templates
A4.4.7 Live Feed Reels
A4.4.8 Using the Device Definition Panel
A4.4.9 Security Of Device Definitions
A4.4.10 Default Label Mapping For Devices
A4.4.11 Slave Operations Using Master Control Devices
A4.5 Setup Options For VTRs
A4.5.1 Sony Protocol Adjustment
A4.6 Monitor Panels For VTRs and Other Controllable Devices
A4.6.1 VTR Monitor Panel Controls and Displays
A4.7 Audio Synchronisation During Recording
A4.7.1 Recording Digital Audio Locked To Audio Inputs
101
102
102
102
103
104
104
105
106
107
107
107
108
108
113
114
114
115
116
116
116
118
119
A4.8 Adjustment Of Digital Audio Operating Levels
119
A5.0 Recording 2 - Recording Timecode and Labels
121
A5.1 Introduction
A5.1.1 Some Definitions
A5.1.2 Sources Of Labels
121
121
121
A5.2 Primary Timecode
122
A5.3 Standard Label Mapping Sets
123
A5.4 Allocation Of Label Mapping Sets For Recordings
126
A5.4.1 Using the Label Mapping Visidir
A5.5 Using the Label Mapping Panel
Contents - 16
Lightworks V.I.P 4500 Version 3 - User Guide
126
127
Contents
A5.5.1 Displaying the Label Mapping Panel
A5.5.2 Active Labels
A5.5.3 Optional and Compulsory Labels
A5.5.4 Record Control Label
A5.5.5 Displaying Details Of Labels
A5.5.6 Label Types
A5.5.7 Label Mask
A5.5.8 Saving a Label Mapping Set
A5.5.9 Label Mapping Set User Description
A5.5.10 Reel ID From Labels
A5.5.11 Record Control
A5.6 Coping With Missing Labels
127
129
129
129
130
131
131
132
133
133
133
134
A5.6.1 Recording From Tapes With Breaks In Timecode
A5.6.2 Recording From Tapes With Gaps In Timecode
A5.6.3 Recording From a Source With No Timecode
A5.7 Entering Labels Manually
134
136
136
137
A5.7.1 Adding New Labels To a Shot
A5.7.2 Logging Original Audio Timecode Information
137
138
A5.8 Labels Required For Syncing Picture and Sound
139
A5.8.1 Camera Date and Camera ID Labels
139
A5.9 Recording VITC
139
A5.9.1 Recording VITC Using a Standard Label Mapping Set
A5.9.2 Selecting the VITC Line Number
A5.9.3 Identifying VITC Using NTGRAPHT
A5.10 Film Labels
139
140
140
141
A5.10.1 3-perf 35mm Film
A5.10.2 Recording Labels Encoded In 3-line VITC
A5.10.3 Film Keycodes Not Encoded In 3-line VITC
A5.10.4 Setting the Pulldown Sequence When Recording Labels
A6.0 Recording 3 - Making a Recording
141
142
144
144
147
A6.1 Introduction
147
A6.2 Using a Logging Database To Assist Recording
147
A6.2.1 Creating a Logging Database On the V.I.P System
A6.2.2 Creating a Logging Database On Another Computer
148
149
Lightworks V.I.P 4500 Version 3 - User Guide Contents - 17
Contents
A6.2.3 Generating a Logging Database From Shots or Edits On the V.I.P System
A6.2.4 Loading an Existing Logging Database
A6.2.5 Loading a Logging Database From Another Computer
A6.2.6 Adding and Modifying Logging Database Entries
A6.2.7 Deleting Entries From a Logging Database
A6.2.8 Logging Database Durations
A6.2.9 Setting Default Values For Logging Database Fields
A6.2.10 Logging Databases Containing NTSC Drop and NTSC Non-Drop Timecode
A6.2.11 Checking the Logging Database
A6.2.12 Saving a Logging Database
A6.2.13 Deleting a Logging Database
A6.2.14 Merging Logging Databases
A6.2.15 Printing a Logging Database
A6.2.16 Recording From a Logging Database
A6.3 Recording Options
A6.3.1 Recording Options On the Project Card
A6.3.2 Recording Options On the Recording Panel
A6.4 Basic Recording Using a Recording Panel
A6.4.1 Displaying a Recording Panel
A6.4.2 Basic Recording - Step-by-step
A6.4.3 Logging Basic Details Of a Shot
A6.4.4 Playing Back the Recording
A6.4.5 Default Shot Names For Recordings
149
152
153
153
154
155
155
156
157
157
158
158
159
159
160
160
161
163
163
165
166
167
167
A6.5 Recording Panel Timecode Displays
167
A6.5.1 Cueing To a Timecode
168
A7.0 Autoconforming and Redigitising
169
A7.1 An Introduction To Autoconform
169
A7.2 Allocation and Use Of Resources
170
A7.2.1 Allocation Of Record Resources
A7.2.2 Tape Types and Allocation Of Devices
A7.2.3 VTR Type and Reel ID When Autoconforming
A7.2.4 Audio Channels Required
A7.2.5 Label Hierarchy When Autoconforming From Logging Databases
A7.3 Using the Autoconform Panel
A7.3.1 Displaying the Autoconform Panel
Contents - 18
Lightworks V.I.P 4500 Version 3 - User Guide
170
170
170
170
171
171
171
Contents
A7.3.2 Available Devices
A7.3.3 Device Monitoring On the Autoconform Panel
A7.3.4 Label Mapping
A7.3.5 Reels Referenced By Autoconform
A7.3.6 Saving, Loading and Deleting Autoconform Sessions
A7.3.7 Viewing the Progress Of Autoconform Recordings
A7.3.8 Inspecting Events To Be Recorded
A7.4 Autoconform Options
172
172
173
173
173
173
174
175
A7.4.1 Determining the Material To Record
A7.4.2 Setting the Picture Quality
A7.4.3 Determining the Optimisation To Apply
A7.4.4 Conform Video Only
A7.4.5 Options When Autoconforming From a Logging Database or Edit
A7.5 Starting the Autoconform
175
176
176
178
178
178
A7.5.1 Monitoring Levels During Autoconform
A7.6 Stopping an Autoconform
179
180
A7.6.1 Suspending Recordings
A7.7 Completing the Autoconform Of an Edit
A7.7.1 SKIP and FAILURE Logging Databases
A7.8 Changing the Material Used In an Edit
A7.8.1 Conditions For Filling an Edit
A7.8.2 Recording New Material For an Edit
A7.8.3 Filling an Edit (or Ghost)
A7.8.4 Filling Ghosts
A8.0 Preparing Shots For Editing
180
180
180
181
181
182
182
184
185
A8.1 Introduction
185
A8.2 Logging Shots and Edits
185
A8.2.1 Displaying a Filecard For a Shot or Edit
A8.2.2 Devising a Logging Scheme
A8.2.3 Filling In a Filecard
A8.2.4 Logging Whilst Recording
A8.2.5 Logging Original Audio Reel IDs and Timecodes
A8.2.6 Using the Database Search and Replace Button
A8.3 Putting Cues In a Shot
185
186
187
187
189
189
189
Lightworks V.I.P 4500 Version 3 - User Guide Contents - 19
Contents
A8.4 Breaking Down Shots Into Ghosts
A8.4.1 Edits Containing Ghosts
A8.4.2 Breaking Down a Shot
A8.4.3 Ghost Timecode and Reel ID
A8.4.4 EDLs For Edits That Contain Ghosts
190
190
191
191
192
A8.5 Editing Shots Together To Create an Assembly
192
A8.6 Syncing-up
193
A8.6.1 Sync-up To Current Frames
A8.6.2 Sync-up By Timecode
A8.6.3 Syncing Multiple Shots By Timecode
A8.7 Kemrolls
A8.7.1 Making a Kemroll
A8.7.2 Multi-Cam Editing Using Kemrolls
A8.7.3 Using Kemrolls When Syncing-up
A8.8 Breaking Down Recordings Using Autochop
A8.8.1 Autochop - Step-by-step
A8.9 Updating Filecards For Shots After Recording Using Retrofit
A8.9.1 Retrofit - Step-by-step
A9.0 Organising Shots and Edits
A9.1 Galleries, Databases, Racks and Sync Groups
A9.1.1 Galleries
A9.1.2 Databases
A9.1.3 Racks
A9.1.4 Sync Groups
A9.1.5 Gallery, Database, Rack and Sync Group Permanence
A9.1.6 Naming Galleries, Databases, Racks and Sync Groups
A9.1.7 Arranging Galleries, Databases, Racks and Sync Groups On Screen
A9.2 Displaying Timecode and Other Labels
A9.2.1 Label Display On Viewers and Stripviews
A9.2.2 Label Display For an Edit
A9.2.3 Viewer Labels Panel
A9.2.4 Viewer Labels Panel Options
A9.3 Timecode Calculations
Contents - 20
Lightworks V.I.P 4500 Version 3 - User Guide
193
195
197
197
197
198
198
199
199
200
200
207
207
207
209
210
211
212
212
213
214
214
216
217
218
220
Contents
A9.3.1 Entering Timecodes
A9.3.2 Tear-off Timecodes
A9.3.3 Timecode Strip
A10.0 Finding Shots and Edits
221
222
222
223
A10.1 Introduction
223
A10.2 Performing a Search
224
A10.2.1 Searching For Everything In the Projects
A10.2.2 Searching For Specific Shots or Edits
A10.2.3 Searching For Specific Galleries, Databases, Racks or Sync Groups
A10.2.4 Stopping a Search
A10.3 Search Options 1 - Shots, Ghosts, Edits, Galleries, Databases or Racks
A10.3.1 Shots Checkbox
A10.3.2 Edits Checkbox
A10.3.3 Ghosts Checkbox
A10.3.4 Galleries Checkbox
A10.3.5 Databases Checkbox
A10.3.6 Racks Checkbox
A10.3.7 Sync Groups Checkbox
224
224
225
225
226
226
226
226
226
227
227
227
A10.4 Search Options 2 - Searching For Shots With or Without Material
228
A10.5 Search Options 3 - Display Method For Search Results
229
A10.6 Search Options 4 - Whole Words
229
A10.7 Searching By Date
229
A10.7.1 Searching By Date - Step-by-step
A10.8 Searching For Material By Disk
A11.0 Editing 1 - Basic Editing
230
231
233
A11.1 Introduction
233
A11.2 Using the Console
233
A11.3 Selecting Record and Source Viewers
234
A11.3.1 Starting a New Edit
A11.3.2 Selecting an Existing Edit
A11.3.3 Selecting a Source
235
236
236
Lightworks V.I.P 4500 Version 3 - User Guide Contents - 21
Contents
A11.4 Selecting Part Of a Shot or Edit
A11.4.1 Marking and Parking
A11.4.2 Using a Series 2 Console To Select an Entire Shot
A11.4.3 Swapping Ends Of a Selected Part
A11.4.4 Deselecting Part Of a Shot or Edit
A11.4.5 Marking While Playing
A11.4.6 Making a Selection On Both Source and Record
A11.4.7 Editing From Tiles
A11.5 Selecting Channels To Edit
A11.5.1 Channel Assignment During Editing
A11.6 Editing Using the Replace Button
A11.6.1 Performing an ‘Open-Ended’ Replace
A11.6.2 Replace Edit - Using a Selected Section Of the Source
A11.6.3 Replace - Using a Selected Section Of the Record
A11.6.4 Replace - Replacing Entire Shots
A11.6.5 Replace Edit - Picture Only or Sound Only
A11.7 Backtiming (Replacing Backwards)
A11.7.1 Backtiming - Selected Section Of the Edit
A11.7.2 Backtiming - Selected Section Of the Source
A11.8 Editing Using the Insert Button
A11.8.1 Inserting Into an Edit
A11.8.2 Some Special Cases When Inserting
A11.9 Editing Using the Delete Button
A11.9.1 Deleting a Section Of an Edit
A11.10 Editing Using the Move Button
A11.10.1 Moving (Lifting) a Section Of an Edit
236
236
237
237
237
238
238
238
238
238
240
240
240
241
242
242
242
242
243
244
244
245
246
246
247
247
A11.11 Undo and Redo
247
A11.12 Editing By Cutting and Pasting
248
A11.12.1 Using the Clipboard To Cut and Paste
A11.12.2 Clipboard Undo Button
A11.12.3 Clipboard Redo Button
248
248
248
A11.13 Making an Empty Cut Within a Shot
249
A11.14 Copying and Clipping Up an Edit
249
Contents - 22
Lightworks V.I.P 4500 Version 3 - User Guide
Contents
A11.14.1 Making a Copy Of an Entire Edit
A11.14.2 Making a Copy Of Part Of an Edit
A11.15 Start Time For an Edit
249
249
250
A11.15.1 Changing the Edit Start Time
A12.0 Editing 2 - Editing When Playing Multiple Sources
250
251
A12.1 Introduction
251
A12.2 Playing the Record Viewer and a Single Source Together
251
A12.2.1 Using ALT+2 For ‘Twin Playing’
A12.3 Sync Groups
251
252
A12.3.1 Generating a New Sync Group
A12.3.2 Organising Sync Groups On Screen
A12.3.3 Adding Sources To a Sync Group
A12.3.4 Removing a Source From a Sync Group
A12.3.5 Choosing the Sync Method
A12.3.6 Lock Indicator
A12.3.7 Displaying the Lock-frame
A12.3.8 Changing the Lock-frame
A12.3.9 Displaying Synced Tiles As Viewers
A12.3.10 Playing Sync Group Tiles and Viewers
A12.3.11 Match-framing For Sync Groups
252
253
253
254
254
256
257
257
258
258
259
A12.4 Align Kemrolls
259
A12.5 Live Editing
260
A12.5.1 Strategies For Live Editing
A12.5.2 Getting Ready For Live Editing
A12.5.3 Console Cut Buttons
A12.5.4 Starting Live Editing
A12.5.5 Monitoring Live Edits As They Are Made
A12.5.6 Stopping Live Editing
A12.5.7 Viewing an Edit Created By Live Editing
A12.5.8 Changing an Edit During Live Editing
A12.5.9 Resuming Live Editing
A12.5.10 Adding Edits To Sync Groups
A12.5.11 Live Editing Picture Only
A12.5.12 Live Editing To an Audio Track
A12.5.13 Undo and Redo When Live Editing
260
261
261
262
263
263
263
263
264
265
266
267
268
Lightworks V.I.P 4500 Version 3 - User Guide Contents - 23
Contents
A13.0 Editing 3 - Editing From Tape To Disk
269
A13.1 Introduction
269
A13.2 Displaying Edit-to-it Reels
269
A13.3 Using the Edit-to-it Viewer
270
A13.3.1 Assigning a Device To an Edit-to-it Viewer
A13.3.2 Edit-to-it Viewers With VTRs (Source/Record Device Types)
A13.3.3 Edit-to-it Viewers For Manual Control Device Types
A13.3.4 Displaying Shots On a Reel Recorded Using Edit-to-it
A13.3.5 Stripview For Edit-to-it Reels
A13.4 Using Edit-to-it For Editing Operations
A13.4.1 Using Edit-to-it With a New Reel
A13.4.2 Using Edit-to-it With an Existing Reel
A13.4.3 Available Audio Channels For Edit-to-it Viewers
A13.4.4 Channel Selection and Channel Mapping
A13.4.5 Monitoring Audio During Edit-to-it Recordings
A13.4.6 Redigitising Edit-to-it Recordings
A13.4.7 Seeing Cuts As They Are Made
A13.4.8 Using Edit-to-it For Quick Recording
A13.4.9 Using Edit-to-it Whilst ‘Background Recording’
A13.4.10 Cancelling an Edit-to-it Recording
A13.4.11 Removing Recorded Material From Edit-to-it Reels
A13.4.12 Adding Cues To Edit-to-it Reels
A14.0 Editing 4 - Trimming With the Stripview
A14.1 Introducing the Stripview
A14.1.1 Stripview Displays
A14.1.2 Navigating the Stripview
A14.1.3 Customising the Stripview
A14.1.4 Selecting Channels
A14.1.5 Grouping Channels
A14.1.6 Other Stripview Controls
A14.2 Trimming Using the Stripview
A14.2.1 Unjoining and Joining Cuts
A14.2.2 Moving Shots When Cuts Are Unjoined
A14.2.3 Changing Shot Lengths
Contents - 24
Lightworks V.I.P 4500 Version 3 - User Guide
272
273
273
274
274
275
275
276
276
277
277
277
277
277
278
278
278
278
279
279
280
281
282
283
284
286
287
287
288
289
Contents
A14.2.4 Moving a Cut
A14.2.5 Adding Black or Audio Spacing At a Cut
A14.2.6 Trimming By Numbers
A14.2.7 Finishing a Trim
A14.2.8 Previewing Trims
A14.3 Trimming - Some Practical Examples
A14.3.1 Adjusting the Outgoing Shot
A14.3.2 Making Split Edits With the Stripview
A14.4 Monitoring When Trimming
290
290
291
291
292
292
292
293
294
A14.4.1 Monitoring Audio When Trimming
A14.4.2 Monitoring Video When Trimming
A14.4.3 Pictures Displayed With Trimview Enabled
A14.4.4 Trimview Default
A14.5 Changing Sync Using the Stripview
A14.5.1 Syncing By Playing
A14.5.2 Syncing By Marking and Aligning (Action Match)
A14.6 Fixing Sync Using the Stripview
A14.6.1 Fixing Sync Using the Stripview Menu Commands
A14.6.2 Fixing Sync Using the Stripview Sync Buttons
294
294
294
296
296
297
297
298
299
300
A14.7 Undo and Redo
301
A14.8 Handling the PAL Colour Framing Sequence
301
A14.8.1 Show Colour Framing Errors
A15.0 Editing 5 - Real-time Effects
301
303
A15.1 Introduction
303
A15.2 Creating Dissolves and Wipes
303
A15.2.1 Using the Transitions Panel
A15.2.2 Representation Of Effects On the Stripview
A15.3 Effect Inputs
307
A15.3.1 Wipe Inputs
A15.3.2 Dissolve Inputs
A15.3.3 Adding Effect Inputs
A15.4 Nesting or Combining Effects
304
307
307
308
308
308
Lightworks V.I.P 4500 Version 3 - User Guide Contents - 25
Contents
A15.4.1 Using Internally Rerouted Tracks With Effects
A15.5 Adjusting Effects Parameters
A15.5.1 Displaying the Effect Properties Panel
A15.5.2 Using the Effect Properties Panel
A15.5.3 Progress Control
A15.5.4 Interaction Between Wipe Position and Size
A15.6 Working With Keyframes
A15.6.1 Editing Keyframes
A15.6.2 Buttons Used For Keyframe Editing
A15.6.3 Keyframeable Effect Parameters For Wipes and Dissolves
A15.6.4 Parameters That Are Not Keyframeable
A15.6.5 Advanced Keyframe Parameters
A15.7 Creating Luminance Keys
A15.7.1 Creating a Luminance Key With a Dissolve On and Off
A15.8 Storing and Repeating Effects
A15.8.1 To Store an Effect
A15.8.2 To Add a Stored Effect To an Edit
A15.8.3 Copying Effects That Use Specified Channels
A15.9 Trimming Effects
A15.9.1 To Change the Length Of an Effect
A15.9.2 To Move an Effect
A15.9.3 Turning an Effect Into a Cut
A15.9.4 Trimming a Multiple Channel Effect
A15.10 Varispeed
A15.10.1 Varispeed - Step-by-step
A15.10.2 Effect Of Varispeed Values
A15.10.3 Indication Of Varispeed For Shots
A15.10.4 Undoing Varispeed
A15.11 Fit-to-fill
A15.11.1 Fit-to-fill - Step-by-step
A16.0 Editing 6 - Using Multiple Channels
309
309
309
311
311
311
312
312
312
313
315
316
317
318
322
322
322
322
323
323
323
324
324
325
325
325
326
327
327
327
329
A16.1 Introduction
329
A16.2 Adding Channels To an Edit
330
Contents - 26
Lightworks V.I.P 4500 Version 3 - User Guide
Contents
A16.2.1 Adding a Channel
A16.2.2 Deleting a Channel
A16.3 Assigning and Monitoring Video Channels
A16.3.1 Monitoring Edits With Multiple Video Channels
A16.3.2 Switching Video Channels To Inputs
A16.3.3 Internally Rerouting Video Channels
A16.3.4 Playing Multiple Video Channel Edits
A16.3.5 Video Output Routing
A16.3.6 Multiple Video Outputs For Video Channels
A16.4 User Names For Video Inputs and Outputs
A16.4.1 Setting Video Input and Output Names
A16.5 Using Multiple Video Channels In an Edit
A16.5.1 Edit Inputs
A16.5.2 Switching an Edit Video Channel To an Input
A16.6 Adjusting Output and Input Timing
A16.6.1 Compensating For Delays Introduced By External Devices
A16.6.2 Using the Properties Panel For an Input
A16.6.3 Non-synchronous Inputs
A16.6.4 Display Of Pictures From a VTR In an Edit-to-it Viewer
A16.7 Using the V.I.P System With External Effects Devices
A16.7.1 Summary of Procedure
A16.8 Control Of External Effects Devices
A16.8.1 Configuring External Control Event Types
A16.8.2 Deleting an External Control Event Type
A16.8.3 Stripview External Control Channels
A16.8.4 Trigger Names
A16.8.5 Adding and Removing Triggers
A16.8.6 Disabling an External Control Channel
A16.8.7 Serial Control With E-MEM Recall
A16.8.8 Serial Control Configuration
A16.9 Replicate - Synchronous Playback and Record
A16.9.1 Performing a Replicate
A16.9.2 Replicate Options
A16.9.3 Replicating Audio
A16.9.4 Replace Section With New Shot
330
331
332
332
332
332
332
333
334
334
335
336
337
338
339
339
340
341
342
342
342
343
343
345
345
346
346
347
347
348
349
350
352
353
354
Lightworks V.I.P 4500 Version 3 - User Guide Contents - 27
Contents
A16.9.5 Monitoring Audio and Video During Replicate
A16.9.6 Undoing a Replicate
A16.9.7 Replicate History
354
355
355
A17.0 Editing 7 - Audio Editing
357
A17.1 Introduction
357
A17.2 Adding and Removing Audio Channels
357
A17.2.1 Adding Audio Channels To an Edit
A17.2.2 Removing Audio Channels From an Edit
A17.2.3 Audio Channel Assignment During Editing
A17.3 Replacing Sound With ‘Atmosphere’
A17.3.1 Replacing
A17.3.2 Finding ‘Atmosphere’ By Resyncing
A17.4 Moving Sections Of Audio Within an Edit
357
357
358
358
358
358
359
A17.4.1 Using the Clipboard
A17.4.2 Using ALT+M
A17.4.3 Using ALT+S
A17.4.4 Using ALT+K
359
359
359
359
A17.5 Shot-by-shot Audio Level Control
360
A17.5.1 Enabling Audio Level Control
A17.5.2 Making Shot-by-shot Audio Level Adjustments
A17.5.3 Ramping the Audio
A17.5.4 Resetting Sliders To Default Value
A17.5.5 Shot Sound Sliders For Grouped Audio Channels
A17.6 Audio Crossfades
A17.6.1 Creating a Crossfade
A17.6.2 Creating Crossfades For an Entire Channel
A17.6.3 Removing Crossfades
A17.6.4 Monitoring Crossfades
A17.7 Chequerboarding Audio
A17.7.1 Chequerboarding Procedure
A17.8 Adding Live Audio To an Edit Using the Voice Over Feature
A17.8.1 Voice Over Panel
A17.8.2 Adding a Device To Use With Voice Over
Contents - 28
Lightworks V.I.P 4500 Version 3 - User Guide
360
360
362
362
362
362
362
364
364
364
366
366
368
368
370
Contents
A17.8.3 Performing a Voice Over Edit
A17.8.4 Performing a Voice Over Edit Whilst ‘Background Recording’
A17.8.5 Names For Voice Over Shots
A17.8.6 Timecode and Reel ID Of Voice Over Recordings
A18.0 Audio Control
370
371
371
371
373
A18.1 Introduction
373
A18.1.1 Audio Processing Chain
A18.2 System Sound Monitor Panel
373
375
A18.2.1 Selecting the Screen Object To Monitor
A18.2.2 Tracks Card
A18.2.3 Setup Card
A18.2.4 Outputs Card
A18.2.5 Mixes Card
A18.3 Using the Audio Output Routing Panel
A18.3.1 Determining Assignments To Audio Outputs
A18.3.2 Loading and Saving Audio Output Routing Panel Settings
A18.4 Monitoring Audio Levels With the Level Meters Panel
A18.4.1 Level Meters Peak Hold Button
A18.5 Using External Audio Mixers With the V.I.P System
A18.5.1 Defining Audio Mixer Device Types
A18.5.2 Chasing Timecode Output From an Edit
A18.5.3 Audio Mixer Automation With Yamaha Audio Consoles
A18.5.4 Configuring Control Of Yamaha 03D and 02R Audio Consoles
A18.5.5 Scene and Automation Data
A18.5.6 External Mixer Control Panel
A19.0 Rendered Effects 1 - Mirror, Flip, Crop, Resize, Page Turn
375
376
378
379
380
381
382
383
384
385
385
385
386
386
387
388
389
391
A19.1 Introduction
391
A19.2 Procedure For Creating Rendered Effects
391
A19.3 Properties Of New Shot Created By Rendering an Effect
393
A19.4 Magnifier Tool
394
A19.5 Setting Up the Effects
395
Lightworks V.I.P 4500 Version 3 - User Guide Contents - 29
Contents
A19.5.1 Mirror Effect
A19.5.2 Flip Effect
A19.5.3 Crop Effect
A19.5.4 Resize Effect
A19.5.5 Page Turn Effect
A19.5.6 Black and White Effect
A19.6 Using TARGA Files
A19.6.1 Importing a TARGA Image
A19.6.2 Importing a TARGA Sequence
A19.6.3 Exporting a TARGA Image
A19.7 Rendered Effects In EDLs
395
395
396
398
399
400
400
400
401
401
402
A20.0 Rendered Effects 2 - Titles
403
A20.1 Introduction
403
A20.1.1 Title Types
A20.2 Procedure For Creating Rendered Titles
A20.2.1 Displaying the Title Tool
A20.2.2 Summary Of Titling Procedure
404
405
405
406
A20.3 Properties Of New Shot Created By Rendering a Title
407
A20.4 Title Layers
407
A20.4.1 Adding and Removing Layers
A20.4.2 Editing and Viewing Layers
A20.5 Title Window Scroll Bars
A20.5.1 Duration Display
A20.6 Saving and Loading Titles
A20.6.1 Saving an Individual Layer
A20.6.2 Loading an Individual Layer
A20.6.3 Saving a Title Session
A20.6.4 Loading a Previously Saved Session
A20.7 Positioning and Aligning Objects
A20.7.1 Ruler
A20.7.2 Guidelines
A20.7.3 Aligning Objects
A20.8 Text Entry Mode
Contents - 30
Lightworks V.I.P 4500 Version 3 - User Guide
407
408
409
410
411
411
411
412
412
413
413
413
414
415
Contents
A20.8.1 Entering Text Using the Keyboard
A20.8.2 Changing Insertion Point
A20.8.3 Selecting Multiple Characters
A20.8.4 Accessing Characters Not On the Keyboard
A20.8.5 Title Clipboard Buttons In Text Entry Mode
A20.8.6 Importing Text
A20.9 Selection Mode
415
416
416
416
417
417
418
A20.9.1 Selecting an Individual Object
A20.9.2 Selecting Multiple Objects
A20.9.3 Moving Objects
A20.9.4 Changing the Order Of Selected Objects
A20.9.5 Title Clipboard Buttons In Selection Mode
A20.10 Image Import Mode
418
418
419
420
420
421
A20.10.1 Importing a Bitmap
A20.10.2 Setting the Position Of Imported Bitmaps
A20.10.3 Aspect Ratio Correction Of Imported Bitmaps In NTSC Projects
A20.10.4 Title Clipboard Buttons In Image Import Mode
A20.11 Box Mode
421
421
421
422
422
A20.11.1 Creating a Box
A20.11.2 Title Clipboard Buttons In Box Mode
A20.12 Selecting Fonts Using the Font Selector Panel
A20.12.1 Resizing Areas Of the Font Selector Panel
A20.12.2 Font Selector Panel Sample Window
A20.12.3 Font Selector Panel Buttons
422
422
423
424
424
424
A20.13 Setting Text Attributes Using the Layout Panel
424
A20.14 Setting Object Attributes Using the Effects Panel
425
A20.14.1 Shadow
A20.14.2 Shadow Drop
A20.14.3 Shadow Colour
A20.14.4 Shadow Density
A20.14.5 Outline
A20.14.6 Outline Width
A20.14.7 Outline Colour
A20.14.8 Outline Density
A20.14.9 Fill
A20.14.10 Opacity
426
426
426
426
426
427
427
427
427
428
Lightworks V.I.P 4500 Version 3 - User Guide Contents - 31
Contents
A20.15 Timing Of Titles
A20.15.1 Timing For Static Layers
A20.15.2 Holding Static Layers For the Duration Of a Title
A20.15.3 Timing For Roll and Crawl Layers
A20.15.4 Set FX Viewer Duration
A20.15.5 Using Invisible Objects For Timings
A20.15.6 Setting the End Point Of Titles
A20.15.7 Using the Duration Display
A20.16 Other Options
A20.16.1 Using Colour Selector Panels
A20.16.2 Gamma Correction
A20.16.3 Importing Bitmaps With Alpha Channels
A20.16.4 Using Control Codes To Layout Imported Text
A20.16.5 Separating Text Objects
A21.0 Playing Out Your Work
A21.1 Introduction
A21.1.1 Playout Options
A21.1.2 Playing Whilst Recording
A21.1.3 Record Destinations
A21.1.4 Playout Viewer
A21.2 Controlled Playout
A21.2.1 Prestriped Playout
A21.2.2 Timecode Generation Playouts
A21.2.3 Summary Of Procedure
A21.2.4 Preroll and Postroll Times
A21.2.5 Start Timecode For a Playout
A21.2.6 Controlling the Record Device
A21.2.7 Stopping the Playout
A21.2.8 VTRs or Audio Recorders With Four Audio Channels
428
428
429
429
430
430
430
430
431
431
432
432
432
433
435
435
435
436
436
437
437
438
438
438
439
440
440
440
440
A21.3 Slaved Playouts Controlled By Master Controller Devices
441
A21.4 Audio Level Control During Playout
441
A21.4.1 Switching Off Shot-by-shot Level Control
Contents - 32
Lightworks V.I.P 4500 Version 3 - User Guide
441
Contents
A22.0 EDLs 1 - Import
443
A22.1 Introduction
443
A22.2 Requirements For EDL Import
443
A22.2.1 EDL Conditions
A22.2.2 Project Conditions
A22.3 Procedure For EDL Import
443
443
444
A22.3.1 Displaying the EDL Import Panel
A22.3.2 Inspecting an EDL
A22.3.3 Reels For Imported Data
A22.3.4 Importing an EDL
A22.3.5 Changing Handles After EDL Import
444
444
445
445
446
A22.4 Recording Missing Shots After Importing an EDL
447
A22.5 Some Specific Formats For EDL Import
447
A22.5.1 Lightworks Generic EDLs
A22.5.2 Importing Edits Created On EditStar Systems
A23.0 EDLs 2 - Export
447
448
449
A23.1 Introduction
449
A23.2 Requirements For EDL Export
449
A23.2.1 EDLs For NTSC Projects
A23.3 Procedure For EDL Export
449
450
A23.3.1 Summary Of Procedure
A23.3.2 Displaying the EDL Export Panel
A23.4 Options On the EDL Export Panel
A23.4.1 EDL Format
A23.4.2 Channel Mask Button
A23.4.3 Set Output Path Button
A23.4.4 EDL Filename
A23.4.5 Dump Filename
A23.4.6 Inspect EDL
A23.4.7 Write EDL
A23.5 Options On the Basic EDL Options Panel
A23.5.1 Make Dump Reel
450
450
451
451
451
452
453
453
453
453
454
454
Lightworks V.I.P 4500 Version 3 - User Guide Contents - 33
Contents
A23.5.2 Merge Channels
A23.5.3 Keep Audio Crossfades
A23.5.4 Sort Mode
A23.5.5 Audio Timecode Type
A23.5.6 Skip Black Events
A23.5.7 Start Time
A23.5.8 Remove All Comments
A23.5.9 Force Clean List
454
455
455
456
456
456
456
456
A23.6 Advanced EDL Options Panel
457
A23.7 Default Options
457
A23.7.1 Lift CMX3600 Channels
A23.7.2 Default Reel ID
A23.7.3 Pad Reel ID With Zeroes
A23.7.4 Default Filename
A23.7.5 Start Reel For Alpha->Num
A23.7.6 Override Alpha->Num Mapping
A23.8 Dump Reel Options
A23.8.1 Make Dump Reel
A23.8.2 Dump Reelid
A23.8.3 Dump Reel Filename
A23.8.4 Dump Reel Handle
A23.9 Comment Options
A23.9.1 Remove All Comments
A23.9.2 Use Effects Descriptions
A23.9.3 Use Shot Name List
A23.9.4 List All Reels Used
A23.9.5 Comments For Dissolves
A23.9.6 Comments For Audio Source
A23.9.7 Audio Source Comment Text
A23.9.8 Comments For Varispeed
A23.9.9 Text For Varispeed Comment
A23.10 Audio Options
A23.10.1 Keep Audio Crossfades
A23.10.2 Timecode Type
A23.10.3 Comments For Audio Source
A23.10.4 Audio Source Comment Text
A23.10.5 Edit To EDL Channel Mapping
Contents - 34
Lightworks V.I.P 4500 Version 3 - User Guide
458
458
458
458
458
459
459
459
459
460
460
460
460
461
461
461
461
461
461
461
461
462
462
462
462
462
462
Contents
A23.11 Optimizations Panel
463
A23.11.1 Merge Channels
A23.11.2 Use Split Edits
A23.11.3 Combine Dissolves
A23.11.4 Split Cut/Dissolve Pairs
A23.11.5 Generate Excalibur-Style EDLs
A23.11.6 Skip Black Events
A23.11.7 Use Preread
A23.11.8 Reorder Reel ID
A23.11.9 Force Clean List
463
463
463
464
464
464
464
464
464
A23.12 Wipe Codes Options
465
A23.13 Inspecting the EDL Before Export
465
A23.14 Writing the EDL To Disk
466
A23.14.1 Checking That the EDL Has Been Written
A23.14.2 Using Floppy Disks
A24.0 Project Management 1 - Consolidating
466
466
467
A24.1 Introduction
467
A24.2 Using Consolidate
468
A24.2.1 Consolidating an Edit To Free Hard Disk Space
A24.2.2 Consolidating an Edit - Step-by-step
A24.2.3 Consolidating a Ghost To Free Hard Disk Space
A24.2.4 Using Consolidate To Copy an Edit To Another Drive
A24.2.5 Using Consolidate To Generate a Logging Database
A24.3 Consolidate Options
468
469
470
470
471
473
A24.3.1 Determining Which Channels To Consolidate
A24.3.2 Force/Saving Button
A25.0 Project Management 2 - Import and Export Of Logs and Material
473
474
475
A25.1 Introduction
475
A25.2 Making a Backup Copy Of a Project
476
A25.2.1 Making a Project Backup - Step-by-step
A25.2.2 Restoring a Project Backup - Step-by-step
A25.3 Importing and Exporting
476
477
479
Lightworks V.I.P 4500 Version 3 - User Guide Contents - 35
Contents
A25.3.1 Importing - Step-by-step
A25.3.2 Exporting - Step-by-step
A25.4 Supported Formats
A25.4.1 Lightworks V.I.P Format
A25.4.2 OMF1 and OMF2
A25.4.3 WAV
A25.4.4 Audio Workstation
A25.4.5 Supported Profile Formats
A25.5 Fibre Channel Support
A25.5.1 Media Manager Application
A25.5.2 Exporting Shots and Edits Via Fibre Channel
A25.5.3 Importing Shots and Edits Via Fibre Channel
A25.5.4 Deleting Exported Material
A25.5.5 Transfer Speeds and Resources
A25.5.6 Automatic Creation Of Profile Movies
479
481
482
482
483
485
486
486
488
488
489
490
490
490
490
A25.6 Using Optical Disks
491
A25.7 Using the PLS20 Tape Archiving System
491
A25.8 Deleting Archive Files
491
A25.9 Disk Manager
492
A25.9.1 Naming Material Disks
A25.9.2 Grouping Disks
A25.9.3 Displaying Information About Grouped Disks
A25.9.4 Ungrouping Disks
A25.9.5 Moving Material Between Disks
A25.9.6 Copying Material Between Disks
A26.0 Project Management 3 - Deleting
A26.1 Introduction
A26.1.1 Deleting Ghosts
A26.1.2 Deleting Reels
A26.2 Finding the Shots, Ghosts and Edits To Delete
A26.2.1 An Individual Shot, Ghost or Edit
A26.2.2 A Group Of Shots, Ghosts and/or Edits
A26.2.3 All the Shots Used In an Edit
A26.2.4 All the Shots Not Used In an Edit
Contents - 36
Lightworks V.I.P 4500 Version 3 - User Guide
492
493
493
494
494
494
497
497
498
498
498
498
499
499
499
Contents
A26.2.5 All the Shots Recorded From a Reel
499
A26.3 Deciding Whether To Delete Material Only
499
A26.4 Deleting Using the Gallery Menu Commands
500
A26.4.1 Destroy Reels and Their Associated Material
A26.4.2 Delete Material (Picture and Sound) From Shots
A26.4.3 Delete Only Picture Material From Shots
A26.4.4 Delete Only Sound Material From Shots
A26.4.5 Destroy Shots, Material, Edits and Ghosts
A26.4.6 Deleting an Archive
500
500
500
501
501
501
A26.5 Deleting Using the Database Menu Commands
502
A26.6 Performing the Deletion
502
A26.6.1 Deleting - Step-by-step
A26.7 Deleting a Whole Project
502
503
A26.7.1 Deleting a Whole Project - Step-by-step
A26.8 Finding and Deleting Material With No Logs
A26.8.1 Using the Find Orphaned Material For Deletion Command
A26.9 Destroying Reels
503
504
504
504
A27.0 Project Management 4 - Databases
505
A27.1 Introduction
505
A27.2 Creating Databases
506
A27.2.1 Database Of Shots and Edits Found By a Search
A27.2.2 Database Of Shots Used In an Edit
A27.2.3 Database Of Shots Not Used In an Edit
A27.2.4 Database Of the Shots and Edits In a Gallery
A27.2.5 Database Of Shots Recorded Using Edit-to-it
A27.2.6 Database Of Shot References
A27.2.7 Displaying a Gallery Of Shots and Edits In a Database
A27.3 Choosing the Fields To Display
A27.3.1 Changing the Contents Of a View
A27.3.2 Saving Views
506
506
506
507
507
508
508
508
508
510
A27.4 Moving Around a Database
510
A27.5 Operations On Database Fields
511
Lightworks V.I.P 4500 Version 3 - User Guide Contents - 37
Contents
A27.5.1 Database Duration Field
A27.5.2 Cut and Paste Keyboard Commands
A27.5.3 Cut and Paste Of Text From Windows Clipboard
A27.5.4 Resizing Database Fields
A27.5.5 Sorting Database Entries By Field
A27.6 Tagging Entries
A27.6.1 Show Tagged/Show All Button
A27.6.2 Remove Tagged Button
A27.7 Other Features Of Databases
A27.7.1 Gallery Button
A27.7.2 Popping Out Tiles From a Database
A27.7.3 Dropping a Tile Into a Database
A27.7.4 Database Names
A27.7.5 Database Permanence
A27.7.6 Databases In the Rack
A27.7.7 Saving Databases
A27.7.8 Merging Databases
A27.8 Database Searches
A27.8.1 Matching Whole Words
A27.8.2 Search and Replace
A27.8.3 Search and Replace Timecodes For Logging Databases
511
511
513
513
513
514
514
514
514
514
514
515
515
515
515
516
516
517
517
518
518
A27.9 Database Menu Commands
519
A27.10 Printing Databases and Logging Databases
519
A27.10.1 Saving a Database For Export
519
Part B: Reference
B1.0 The Console
523
B1.1 Introduction
523
B1.2 Console Transport Controls
525
B1.2.1 Play/Stop Buttons
B1.2.2 Lever
B1.2.3 Jump Buttons
B1.2.4 Jog Wheel (Series 2 Console Only)
B1.3 Console Editing Buttons
Contents - 38
Lightworks V.I.P 4500 Version 3 - User Guide
525
525
525
526
526
Contents
B1.3.1 Mark
B1.3.2 Unmark
B1.3.3 Swap
B1.3.4 Cue
B1.3.5 Replace
B1.3.6 Move (Series 1 Console)/Remove (Series 2 Console)
B1.3.7 Insert
B1.3.8 Delete
B1.3.9 Trim Buttons (Series 2 Console Only)
B1.4 ‘Shifted’ Console Button Functions
B1.4.1 Stop+Play Forward
B1.4.2 Stop+Play Backward
B1.4.3 Stop+Jump Back
B1.4.4 Stop+Jump Forward
B1.4.5 Stop+Replace
B1.4.6 Stop+Insert
B1.4.7 Stop+Unmark
B1.4.8 Stop+Cue
B1.4.9 Stop+Swap
B1.4.10 Stop+Undo and Stop+Redo Buttons (Series 2 Console Only)
B1.4.11 Stop+Fill Button (Series 2 Console Only)
B1.4.12 Stop+Mark All (Series 2 Console Only)
526
526
527
527
527
527
527
527
527
527
527
527
528
528
528
528
528
528
528
528
528
528
B1.5 Console Cut Buttons
529
B1.6 User Keys (Series 2 Console Only)
529
B1.6.1 Assigning User Key Functions
B2.0 The Keyboard
529
531
B2.1 Introduction
531
B2.1.1 END - Find Last Field
B2.1.2 Enter
B2.1.3 ESC - Stop Current Operation
B2.1.4 HOME - Find First Field
B2.1.5 Spacebar - Stop Search
B2.1.6 TAB - Next Field
B2.2 ALT Key Commands
531
532
532
532
532
532
533
B2.2.1 ALT+1 - Disable Twin Play
533
Lightworks V.I.P 4500 Version 3 - User Guide Contents - 39
Contents
B2.2.2 ALT+2 - Enable Twin Play
B2.2.3 ALT+3 - Enable Concurrent Play
B2.2.4 ALT+4 - Zoom In
B2.2.5 ALT+B - Paste Blank Row
B2.2.6 ALT+C - Cancel Recording
B2.2.7 ALT+D - Paste Duplicate Row
B2.2.8 ALT+E - Enable Live Editing
B2.2.9 ALT+F - Paste Field
B2.2.10 ALT+H - Store Row
B2.2.11 ALT+I - Paste Default Row
B2.2.12 ALT+K - Copy From Channel
B2.2.13 ALT+M - Move To Channel
B2.2.14 ALT+O - Pop-Out Original Tile
B2.2.15 ALT+R - Start Recording
B2.2.16 ALT+S - Swap Channel
B2.2.17 ALT+T - Delete Current Row
B2.2.18 ALT+U - Undo Paste Row
B2.2.19 ALT+V - Fit-to-fill
B2.2.20 ALT+W - Store Current Field
B2.2.21 ALT+X - Exit
B2.2.22 ALT+Y - Paste Stored Row
533
533
533
533
533
533
533
533
534
534
534
534
534
534
534
534
534
535
535
535
535
B2.3 Arrow Keys
535
B2.4 CTRL Key Commands
536
B2.4.1 CTRL+C - Copy Text
B2.4.2 CTRL+D - Swap NTSC Timecode
B2.4.3 CTRL+E - Stop Playout
B2.4.4 CTRL+M - Match-frame Display
B2.4.5 CTRL+P - Stripview Trimming Preview Feature
B2.4.6 CTRL+Q - Cue Device
B2.4.7 CTRL+V - Paste Text
B2.4.8 CTRL+X - Cut Text
B2.5 SHIFT Key Commands
B2.5.1 SHIFT+DEL - Copy Timecode
B2.5.2 SHIFT+INS - Paste Timecode
B2.5.3 SHIFT+Click - Secondary Sort
B2.6 Keyboard Reference
Contents - 40
Lightworks V.I.P 4500 Version 3 - User Guide
536
536
536
536
537
537
537
537
537
537
537
537
537
Contents
B3.0 The Mouse
541
B3.1 Introduction
541
B3.2 Mouse Clicks In Windows NT
541
B3.2.1 Single Click (Left Mouse Button)
B3.2.2 Double Click (Left Mouse Button)
B3.2.3 Drag
B3.3 Mouse Clicks On the V.I.P System
B3.3.1 Click (Left Mouse Button)
B3.3.2 Right-Click and Drag
B3.3.3 Right+Left-Click
B3.3.4 Left+Right-Click
541
541
541
542
542
542
543
543
B4.0 Menu Commands
545
B4.1 Introduction
545
B4.1.1 Displaying the Menu For an Object
B4.1.2 Menu Commands
B4.1.3 Pin Button
B4.2 Database Menu
547
B4.2.1 Change Database Format
B4.2.2 Tag Duplicates
B4.2.3 Make Reel Rack
B4.2.4 Save Database For Export
B4.2.5 Show Keystrokes
B4.2.6 Database Permanence: TRANSIENT [permanent]
B4.2.7 Move Contents To Another Project
B4.2.8 Copy Contents To Another Project
B4.2.9 Merge Databases
B4.2.10 Shots Not Used
B4.2.11 Create Logging Database
B4.2.12 Destroy Reels and Their Associated Material
B4.2.13 Delete Material (Picture and Sound) From Shots
B4.2.14 Delete Only Picture Material From Shots
B4.2.15 Delete Only Sound Material From Shots
B4.2.16 Destroy Shots, Material, Edits and Ghosts
B4.3 Device Menu
546
546
546
547
547
547
548
548
548
548
548
548
548
548
549
549
549
549
549
549
Lightworks V.I.P 4500 Version 3 - User Guide Contents - 41
Contents
B4.3.1 Rename Current Device
B4.3.2 Enable Device Configuration In All Rooms YES [no]
B4.4 Disk Manager Menu
B4.4.1 Free Space Based On
B4.4.2 Show Grouped Drive Information
B4.5 Edit Menu
B4.5.1 Show Original Material Cues NO [Yes]
B4.5.2 Unlock/Lock Current Channel Into Label Display
B4.5.3 Add Channels
B4.5.4 Delete Channels
B4.5.5 Gallery Of Shots
B4.5.6 Database Of Shots
B4.5.7 Consolidate
B4.5.8 Find Material To Fill Edit
B4.5.9 Use Ghost Code NO [yes]
B4.5.10 Make Sync-Ghost
B4.5.11 Make Print-Ghost
B4.5.12 Trace (Ghosts To Shots)
B4.5.13 Simplify
B4.5.14 Trimview Enabled [no] YES
B4.5.15 Viewer Size NORMAL [big] (High-Res Projects Only)
B4.5.16 Destroy This Shot/Edit?
B4.5.17 Output Chase Timecode
B4.5.18 Publish To Omnibus
B4.6 Edit-to-it Menu
B4.6.1 Gallery Of Shots
B4.6.2 Database Of Shots
B4.6.3 Roll Record Viewer
B4.6.4 Redigitise Existing Material
B4.6.5 Connected To Device
B4.6.6 Change Device Connections/Inspect Device Connections
549
550
550
550
550
551
552
552
552
552
552
553
553
553
553
553
553
554
554
554
554
554
554
554
555
555
555
555
555
555
556
B4.7 EDL Formats Menu
556
B4.8 Effects Menu
557
B4.8.1 Keep Original Timecodes YES [no]
B4.8.2 Import TARGA Image
B4.8.3 Import TARGA Sequence
B4.8.4 Export TARGA Image
Contents - 42
Lightworks V.I.P 4500 Version 3 - User Guide
557
557
558
558
Contents
B4.8.5 Create Video Black (5 min)
B4.8.6 Create Video Black (10 min)
B4.8.7 Show Layer Commands
B4.8.8 Viewer Size NORMAL [big]
B4.8.9 Choose Destination
B4.8.10 Keep Full Video Aspect Ratio [yes] NO
B4.8.11 Picture In Picture? [yes] NO
B4.8.12 Background Colour
B4.9 Gallery Menu
558
558
558
558
558
558
559
559
559
B4.9.1 Tidy Gallery (and Sort)
B4.9.2 Tidy Gallery (Without Sort)
B4.9.3 Change Tile Size
B4.9.4 Constant Dimension [Height] WIDTH
B4.9.5 Gallery Permanence TRANSIENT [Permanent]
B4.9.6 Move Contents To Another Project
B4.9.7 Copy Contents To Another Project
B4.9.8 Find Material To Fill Ghosts
B4.9.9 Remove Duplicate Shots
B4.9.10 Merge Gallery
B4.9.11 Create Logging Database
B4.9.12 Make Kemroll
B4.9.13 Show Gallery As Database
B4.9.14 Autosynchronise Gallery
B4.9.15 Make Edit From Gallery
B4.9.16 Destroy Reels and Their Associated Material
B4.9.17 Delete Material (Picture and Sound) From Shots
B4.9.18 Delete Only Picture Material From Shots
B4.9.19 Delete Only Sound Material From Shots
B4.9.20 Destroy Shots, Material, Edits and Ghosts
B4.9.21 Publish Contents To Omnibus
B4.10 General Menu
560
560
560
560
560
560
560
561
561
561
561
561
561
562
562
562
562
562
562
562
562
563
B4.10.1 System Sound Monitor Panel
B4.10.2 VTR Monitor Panel
B4.10.3 Level Meters Panel
B4.10.4 Current Project Details
B4.10.5 Show Cookie
B4.10.6 Project Password
B4.10.7 Delete Undo Edits
563
563
563
564
564
564
564
Lightworks V.I.P 4500 Version 3 - User Guide Contents - 43
Contents
B4.10.8 Make Synchroniser
B4.10.9 Magnifier Tool
B4.10.10 Set Default Tool Position
B4.10.11 Tidy Tools
B4.11 Import/Export Menu
B4.11.1 Delete Lightworks V.I.P Archive
B4.11.2 Calculate Space Required
B4.12 Level Meters Panel Menu
B4.12.1 Inputs Display: [user selection] ACTIVE SOURCE ONLY
B4.12.2 Select Inputs To Display
B4.12.3 Outputs Display: USER SELECTION [none]
B4.12.4 Select Outputs To Display
B4.12.5 Set Decay Rate
B4.12.6 Set Red Level
B4.12.7 Set Peak Hold Time
B4.13 Logging Database Menu
B4.13.1 Change Database Format
B4.13.2 Save Database For Export
B4.13.3 Show Keystrokes
B4.13.4 Autochop (TM)
B4.13.5 Retrofit
B4.14 Logging Database Panel Menu
B4.14.1 Overlapping Timecodes: [flag as errors] IGNORE
B4.15 Audio Output Routing Panel Menu
B4.15.1 Save Routing
B4.15.2 Load Routing
B4.15.3 Delete Routing
B4.16 Playout Menu
B4.16.1 Playout Type: PRESTRIPED [t/c generation]
B4.16.2 Change Device Connections/Inspect Device Connections
B4.16.3 Sync Prestripe To: [ltc] 9-PIN
B4.16.4 Set Preroll Time In Seconds
B4.16.5 Set Postroll Time In Seconds
B4.17 Rack Menu
B4.17.1 Rack Permanence [transient] PERMANENT
Contents - 44
Lightworks V.I.P 4500 Version 3 - User Guide
564
564
564
564
565
565
565
565
565
566
566
566
566
566
566
567
567
567
567
567
567
568
568
568
568
568
568
569
569
569
569
569
569
570
570
Contents
B4.17.2 Make Database Of All
B4.18 Recording Panel Menu
570
570
B4.18.1 Stop Record If Label Break [no] YES
B4.18.2 Stop Record If Label Missing NO [yes]
B4.18.3 Monitor Video During Record NO [yes]
B4.18.4 Change Device Definitions/Inspect Device Definitions
B4.18.5 Film -> Video Transfer
B4.19 Reel Menu
570
571
571
571
571
571
B4.19.1 Set Tagged To Current Reel Settings
B4.19.2 Tag Unknown Reels
B4.19.3 Change Reel ID
B4.19.4 Set Project Default Reel Type
B4.19.5 Delete Current Reel and Associated Shots
B4.20 Searchcard Menu
571
572
572
572
572
572
B4.20.1 Delete Undo Edits
B4.21 Stripview Menu
572
573
B4.21.1 Show/Hide Strips
B4.21.2 Group Channels
B4.21.3 Ungroup Channels
B4.21.4 Align Marks
B4.21.5 Show Sync Losses NO [Yes]
B4.21.6 Fix Sync
B4.21.7 Show Frame Reuse NO [Yes]
B4.21.8 Drag In Black DISABLED [Enabled]
B4.21.9 Show Shot Names NO [yes]
B4.21.10 Show Colour Framing Errors
B4.21.11 Fix Colour Framing
B4.22 Sync Group Menu
573
574
574
574
574
574
574
574
575
575
575
575
B4.22.1 Concurrent Players [yes] NO
B4.22.2 Sync To: LOCK-FRAME [timecode]
B4.22.3 When Timecode, Sync To: V [a1] [a2]
B4.22.4 Allow Lock Adjustments [yes] NO
B4.22.5 Sync Group Permanence TRANSIENT [permanent]
B4.22.6 Display Viewers
B4.22.7 Fill From Gallery
B4.22.8 Tidy Sync Group
575
575
576
576
576
576
576
577
Lightworks V.I.P 4500 Version 3 - User Guide Contents - 45
Contents
B4.22.9 Align Kemrolls
B4.23 System Menu
B4.23.1 Default Standard For New Projects
B4.23.2 System Configuration
B4.23.3 Skeleton Password
B4.23.4 Add New Input Device
B4.23.5 Delete Device
B4.23.6 Change Device Connections
B4.23.7 External Control Configuration
B4.23.8 Delete Projects
B4.23.9 Find Orphaned Material For Deletion
B4.23.10 Reel User Field Names
B4.23.11 Use Undo Edits
B4.24 Titling Menu
B4.24.1 Add New Layer
B4.24.2 Insert New Layer
B4.24.3 Delete Current Layer
B4.24.4 Import Text Into Layer
B4.24.5 Load Layer
B4.24.6 Save Layer
B4.24.7 Load Session
B4.24.8 Save Session
B4.24.9 No Ruler, Fine Ruler, Medium Ruler and Coarse Ruler
B4.24.10 Set FX Viewer Duration
B4.24.11 Set Layer Timing
B4.24.12 Add ‘Invisible’ Object Centred On Screen
B4.24.13 Add ‘Invisible’ Object On Page After Last Object
B4.24.14 Gamma Correction [on] OFF
B4.24.15 Bitmaps Have Prescaled Alpha Channels YES [no]
B4.24.16 Select All
B4.24.17 Deselect All
B4.24.18 Invert Selection
B4.24.19 Send To Back Selected
B4.24.20 Bring To Front Selected
Contents - 46
Lightworks V.I.P 4500 Version 3 - User Guide
577
577
577
577
578
578
578
578
578
578
578
578
578
579
579
580
580
580
580
580
580
580
580
581
581
581
581
581
581
581
581
582
582
582
Contents
Part C: Technical
C1.0 The CONFIG.DAT File
585
C1.1 Introduction
585
C1.1.1 Format Of Parameters
C1.1.2 Modifying CONFIG.DAT Entries
C1.1.3 Editing the CONFIG.DAT File
C1.2 User Adjustable CONFIG.DAT Parameters
C1.2.1 Alladin Serial Control Configuration Parameters
C1.2.2 Alladin Pro Serial Control Configuration Parameters
C1.2.3 allow_MAR
C1.2.4 allow_omf_aifc_export
C1.2.5 allow_system_timing_change
C1.2.6 audio_drift_tolerance
C1.2.7 audio_xfade_rule
C1.2.8 audio_xfade_samples
C1.2.9 autochop_active
C1.2.10 auto_reel_enquiry
C1.2.11 auto_simplify
C1.2.12 backup_depth
C1.2.13 break_on_timecode_break
C1.2.14 check_quantise
C1.2.15 database_auto_permanence
C1.2.16 default_border_width
C1.2.17 default_gal_shape
C1.2.18 default_reel_type
C1.2.19 default_stripv_height
C1.2.20 default_stripv_width
C1.2.21 disk_menu_space
C1.2.22 DVExtreme Serial Control Configuration Parameters
C1.2.23 edl_audio_source
C1.2.24 edl_audio_mapping_comment
C1.2.25 edl_combine_dissolves
C1.2.26 edl_default_reelid
C1.2.27 edl_dissolve_comment
C1.2.28 edl_dump_reelid
C1.2.29 edl_dump_reel_filename
C1.2.30 edl_dump_reel_handle
586
586
586
587
587
587
588
588
588
588
588
589
589
589
589
589
590
590
590
590
590
590
590
590
591
591
591
591
591
592
592
592
592
592
Lightworks V.I.P 4500 Version 3 - User Guide Contents - 47
Contents
C1.2.31 edl_file_name
C1.2.32 edl_import_audio_mapping
C1.2.33 edl_import_channel_length
C1.2.34 edl_import_channel_start
C1.2.35 edl_inhibit_black
C1.2.36 edl_keep_xfades
C1.2.37 edl_list_reelids
C1.2.38 edl_make_dump_reel
C1.2.39 edl_merge_chans
C1.2.40 edl_no_comments
C1.2.41 edl_pad_reelid
C1.2.42 edl_use_audio
C1.2.43 edl_use_shot_name_list
C1.2.44 edl_use_split_edits
C1.2.45 edl_varispeed_comment_out
C1.2.46 edl_varispeed_comment_text
C1.2.47 EDL Wipe Parameters
C1.2.48 flag_overlapping_timecodes
C1.2.49 gallery_auto_permanence
C1.2.50 gallery_name
C1.2.51 gallery_sort_tiles
C1.2.52 Grass Valley DPM700 Serial Control Configuration Parameters
C1.2.53 Grass Valley 1200 Serial Control Configuration Parameters
C1.2.54 Grass Valley 2200 Serial Control Configuration Parameters
C1.2.55 keep_original_timecodes
C1.2.56 Krystal Serial Control Configuration Parameters
C1.2.57 lock_digital_recordings_advisory_message
C1.2.58 lock_digital_recordings_to_digital_inputs1&2
C1.2.59 log_panel_closed_galleries
C1.2.60 machine_type
C1.2.61 Magic DaVE Serial Control Configuration Parameters
C1.2.62 max_sync_error_seconds
C1.2.63 menu_font_size
C1.2.64 mirror_as_movies
C1.2.65 omnibus_default_dub_destination
C1.2.66 omnibus_dub_service
C1.2.67 omnibus_dongle
C1.2.68 omnibus_handle
C1.2.69 omnibus_machine_name
C1.2.70 playout_lock_to_AES
Contents - 48
Lightworks V.I.P 4500 Version 3 - User Guide
592
592
592
592
593
593
593
593
593
594
594
594
594
594
595
595
595
596
596
596
596
596
597
597
597
598
598
598
598
598
598
599
599
599
599
600
600
600
600
600
Contents
C1.2.71 pal_pairing_amount
C1.2.72 pal_pairing_flag
C1.2.73 playout_preroll_secs
C1.2.74 ppm_decay_rate
C1.2.75 ppm_loud_level
C1.2.76 ppm_peak_hold_time
C1.2.77 preview_preroll_secs
C1.2.78 record_miss_gaps_mode
C1.2.79 record_miss_gaps_timeout
C1.2.80 report_replace_lost_events
C1.2.81 retrofit_active
C1.2.82 reuse_seconds
C1.2.83 rr_from_db
C1.2.84 Sony Generic Serial Control Configuration Parameters
C1.2.85 stop_if_timecode_absent
C1.2.86 stripv_celstrip_font_size [number]
C1.2.87 stripview_from_tile
C1.2.88 stripv_time_ctr_on
C1.2.89 stripv_zoom_mins
C1.2.90 system_0dBFs_level
C1.2.91 tape_unthread
C1.2.92 timecode_chase_output
C1.2.93 toolbox_no_copies
C1.2.94 trash_seeking
C1.2.95 trash_dwell_default
C1.2.96 trash_speed
C1.2.97 trimview_enabled
C1.2.98 trimview_default
C1.2.99 use_prefs
C1.2.100 viewer_menu_delete
C1.2.101 vob_total_duration_by_selection
C1.2.102 vtr0.no_timer1
C1.2.103 vtr_idle_unthread_time
C1.2.104 vtr_record_need_servo_lock
C1.2.105 vtr_record_preroll
C1.2.106 vtr_record_start_advance
C1.2.107 vtrslave_port
C1.2.108 vtr_timeout
C1.2.109 vtr_type_no_timer1_mode
C1.2.110 yamaha_automation_offset
600
601
601
601
601
601
601
601
602
602
602
602
602
602
603
603
603
603
603
603
604
604
604
604
604
605
605
605
605
605
605
605
606
606
606
606
606
606
606
606
Lightworks V.I.P 4500 Version 3 - User Guide Contents - 49
Contents
C1.2.111 yamaha_enable
C2.0 Lightworks Logging Database Format
606
607
C2.1 Introduction
607
C2.2 Parameters
607
C2.3 Format Of the Main Log
608
C2.4 Header For Entries
608
C2.4.1 Preferred Form
C2.4.2 Alternative Form
608
609
C2.5 Entries
610
C2.6 Logging Databases For Import
610
C2.7 Sample Parameters
611
C2.8 Fields Required
611
C2.9 Simple Example
612
C2.10 More Complex Examples Of the Lightworks Database
612
C2.10.1 Film Database Header
C2.10.2 Field Headers
C2.10.3 Field Names and Widths
C2.10.4 Example Of a Record
C2.10.5 Audio-Only Entries
C2.10.6 Permitted Label Standards
C2.10.7 Label (Code) Formats
C2.10.8 Pulldown Sequence
C2.10.9 35mm 3-perf
612
614
614
615
616
616
617
618
618
C3.0 Device Templates
619
C3.1 Introduction
619
C4.0 Features For Use With Omnibus Automation Systems
C4.1 Introduction
C4.1.1 About Omnibus Automation Systems
C4.2 Configuring the V.I.P System For Use With Omnibus
Contents - 50
Lightworks V.I.P 4500 Version 3 - User Guide
623
623
623
623
Contents
C4.2.1 Enabling Omnibus Features
C4.2.2 Enabling the V.I.P System To Initiate Omnibus Dubbing
C4.2.3 Naming the V.I.P System On the Omnibus Network
C4.2.4 Synchronisation
C4.2.5 EditStar Synchronisation
C4.3 Workflow For EditStar Newsroom Systems
C4.3.1 Transferring an Edit From the EditStar System To the V.I.P System
624
624
624
625
625
625
625
C4.4 Setting Up the Omnibus Master Controller Device
626
C4.5 Recording or Playout Under Omnibus Control
626
C4.5.1 Recording or Playing Out - Step-by-step
C4.5.2 Taking Back Local Control From the Omnibus System
C4.6 Controlling a V.I.P System From Omnibus
C4.6.1 Playout Viewer Dub Buttons
626
627
627
627
C4.7 Omnibus and EditStar EDL Interchange
628
C4.8 Publishing Edits
628
C4.8.1 Publishing Individual Edits
C4.8.2 Publishing Entire Galleries
C4.8.3 Renaming Published Edits
C4.8.4 Naming Of Edits
C5.0 Troubleshooting
628
628
629
629
631
C5.1 Introduction
631
C5.2 General Procedure
631
C5.3 Cookies
631
C5.3.1 Displaying the Cookie For a Project Folder
C5.3.2 Displaying the Cookie For a Shot, Ghost, Edit or Reel
C5.4 Bootup Problems
632
C5.4.1 Nothing Happens When the System Is Switched On
C5.4.2 System Hangs With “Non-System Disk or Disk Error” Message
C5.5 Runup Problems
C5.6.1 Cueing Problems
632
632
632
C5.5.1 Correct Lobby Screen Not Displayed
C5.6 Recording Problems
632
632
633
633
633
Lightworks V.I.P 4500 Version 3 - User Guide Contents - 51
Contents
C5.7 Crashes and Hangs
C5.7.1 Recovering Corrupted Edits
C5.8 Graphics Monitor Checklist
C5.8.1 No Power To Monitor
C5.8.2 The Power Light Is Illuminated But There Is No Picture
C5.8.3 There Is a Picture On the Graphics Monitor, But It Is Not the Correct Picture
C6.0 Basic Care and Maintenance
C6.1 Suggestions For Care and Maintenance
634
634
635
635
636
636
637
637
Glossary
639
Index
649
Contents - 52
Lightworks V.I.P 4500 Version 3 - User Guide
Part A: Operation
Lightworks V.I.P 4500 Version 3 - User Guide 53
54 Lightworks V.I.P 4500 Version 3 - User Guide
A1.0 Introduction
A1.1
Lightworks V.I.P 4500 Online Editing System
The Lightworks V.I.P system is an online non-linear editing system that combines the Lightworks user
interface with advanced disk recorder technology, to provide significant improvements in productivity
and efficiency.
The Lightworks interface incorporates a dedicated editing Console, unique graphical user interface and
powerful database capabilities. These tools allow the editor to work quickly and efficiently without
impeding the creativity of the editing process.
The V.I.P system’s adaptation of Profile disk recorder technology to the editing environment brings
multi-channel capabilities, to overcome the bottleneck when digitising material, and Profile picture
quality, which is well established world-wide as truly broadcastable.
A1.2
Definitions
Before starting to use the V.I.P system, it is useful to understand what is represented by the terms ‘shot’,
‘edit’, ghost’ and ‘reel’. This section contains important definitions of these terms. (The Glossary, at the
end of this user guide, contains definitions of other terms used.)
A1.2.1
Shot
A ‘shot’ is created by a single continuous recording of pictures and sound into the system.
A shot is stored on the system as two things - a log file and a material file. The log file for
a shot contains logging information such as the shot name, reel ID and timecode. The material file contains pictures or sound for the shot.
A1.2.2
Edit
An ‘edit’ on the system means any edited sequence of shots and/or ghosts.
The edit that you see on the graphics screen does not ‘exist’ in the same way as a videotape
master. The edit is simply a list of edit points in Lightworks’ own format - without pictures
and sound and without timecode. An edit is stored on the system as a log file.
In order to work correctly, the edit needs to refer to the logs of the shots or ghosts used in
it. When you view the edit, it plays the pictures and sound from the material files of the original shots.
Lightworks V.I.P 4500 Version 3 - User Guide A1.0 - 55
A1.2
Definitions
A1.2.3
Ghost
Shots recorded into the V.I.P system sometimes need further preparation - for example
syncing picture and sound or breaking down long recordings. The products of these processes are called ‘ghosts’ and do not have their own material files - they refer to the material
files of their original shots.
A ghost is stored on the system as a log file. When you play a ghost it plays the pictures and
sound from the material file of its original shot.
When working with ghosts you should not delete the original shots, as each ghost refers to
the log and material of its original shot.
A number of operations on the V.I.P system result in the creation of a ghost. All ghosts share
certain common characteristics.
A ghost behaves like a shot for editing purposes and like an edit for project management
purposes.
A1.2.4
Reel
Source material exists on various types of physical media - for example video tapes, audio
tapes, film camera rolls, compilation rolls. When one of these is used as a source for recordings by the V.I.P system, details relating to the repeatability of the recording become important - for example the type of device that can play the tape, the channel mapping and how
timecode and other labelling information should be read.
This data is saved in the form of a ‘reel’ which is stored on the system as a log file.
A1.0 - 56
Lightworks V.I.P 4500 Version 3 - User Guide
Definitions
A1.2
GRAPHICS SCREEN
EDIT
SYSTEM DRIVE
MATERIAL DRIVE
LOG
Edit plays material
from shot
SHOT
LOG
MATERIAL
Ghost plays material
from shot
GHOST
LOG
Relationship between a Shot, a Ghost and an Edit.
Lightworks V.I.P 4500 Version 3 - User Guide A1.0 - 57
A1.2
A1.0 - 58
Definitions
Lightworks V.I.P 4500 Version 3 - User Guide
A2.0 Getting Started
A2.1
Introduction
This chapter provides a brief guide to starting the V.I.P system, setting up a Project, making simple
recordings and then playing back the material recorded.
If you are new to the system, this chapter can be followed ‘tutorial style’ - provided that the system you
are working on is already correctly connected and configured for recording and playing back. See the
Lightworks V.I.P 4500 Installation Manual and see ‘Recording 1 - Recording Configurations’ on page
97 for more information.
A2.2
Starting the System
To start the system you need to have a valid Windows NT user name and password for the machine you
will be working on. Do not use the Windows NT administrator account for normal editing sessions.
Please contact your system or network administrator for assistance, if necessary.
This section assumes that you are familiar with using a keyboard and mouse on a PC running Windows.
If not then see ‘The Keyboard’ on page 531 and see ‘The Mouse’ on page 541.
The chapter on the Mouse covers some special clicks used when operating the V.I.P system. The most
important of these are:
Clicking the Right Mouse Button
Clicking the right Mouse button is used to move an object. The user guide text refers to this as a
“right-click”.
Clicking the Left Mouse Button
Clicking the left Mouse button is used to activate an object, button or command. The user guide
text refers to this as a “click”.
Lightworks V.I.P 4500 Version 3 - User Guide A2.0 - 59
A2.2
Starting the System
A2.2.1
Starting the System - Step-by-step
1 Switch on the power to all units and wait for the Windows NT 4.0 Log On Screen.
If a Disk Expansion Unit is fitted, sufficient time should be allowed for the material
disks to spin up and be recognised.
Windows NT 4.0 Log On Screen
2 Press CTRL+ALT+DEL. Wait for a message asking for a user name and password.
3 Make sure the user name is correct and then type in your Windows NT password and
press the Enter key.
Windows NT will log you on as a user. When the log on is complete, you will be able
to see the shark icon
on the Windows NT desktop.
4 Click on the shark icon.
The Lightworks V.I.P application window will appear on the Data Monitor. Wait
until the message “Press any key to begin” is displayed on the V.I.P graphics screen.
Note: The first time the V.I.P application is run up after powering on the system there
may be an extra delay whilst the software loads.
5 To proceed, press any key or click on the graphics screen. The V.I.P Lobby screen
will now be displayed and you can start to use the system.
A2.0 - 60
Lightworks V.I.P 4500 Version 3 - User Guide
Starting the System
A2.2
Lobby Screen
For more information on the Lobby, see ‘Lobby Screen’ on page 82.
Lightworks V.I.P 4500 Version 3 - User Guide A2.0 - 61
A2.3
A2.3
User Interface Basics
User Interface Basics
The Console, Keyboard and Mouse are used to work with objects on the V.I.P graphics screen.
The Lightworks V.I.P graphical user interface is specially designed for the task of editing. This section
describes some general features that are used throughout the system.
A2.3.1
Menu Button
Click on the Menu button
vant to that object.
A2.3.2
of an object to display a Menu containing commands rele-
Open/Close Button
The pink arrow button in the corner of certain objects allows you to open
them.
A2.3.3
or close
Vanish Button
As an alternative to the Shark, some of the V.I.P screen objects have a Vanish button
which can be used to remove them from the screen.
In general, the Vanish button is best for removing individual objects and the Shark is best
if you want to remove several objects.
A2.3.4
Entering Text
Many of the Lightworks screen objects have text entry fields. The procedure for entering
text into these fields is as follows:
1 Click on a field. This selects and highlights the entire field.
2 To replace what was there before, just start typing.
3 To edit what was there before, move the cursor with the Left or Right Arrow keys,
then start typing. Text is always inserted.
Further editing can be achieved using the Backspace, Del, Arrow and Home/End keys.
Fields fit more text than can be shown at one time: the text simply scrolls through.
On objects with more than one field, you can move from field to field by clicking with the
Mouse or by pressing the Tab key.
A2.0 - 62
Lightworks V.I.P 4500 Version 3 - User Guide
User Interface Basics
A2.3.5
A2.3
Removing Objects From the Screen Using the Shark
The Shark is used for removing objects from the screen.
1 Right-click on the Shark and drag it so that its nose overlaps the object to be removed.
2 Keep the right Mouse button held down and click - the object vanishes from the
screen.
3 Release the right Mouse button and the Shark swims back to its home in the bottom
left-hand corner of the screen.
Using the Shark to remove a shot or edit from the screen does not delete it from the system.
Certain objects, for example the Toolbox, cannot be eaten with the Shark as they are permanently needed on screen.
It is possible to redisplay objects that have been eaten by clicking on the Shark. The last
object it ate is ‘vomited’ back onto the screen in its original position. The Shark can repeat
this - redisplaying objects in reverse of the order they were eaten in - provided you have not
left the Room since the Shark was fed.
A2.3.6
Yellow Arrow
The Yellow Arrow
is permanently displayed in the bottom right corner of the left-hand
graphics screen. Click on the Yellow Arrow to pop up any Tools or menus that have become
obscured behind other screen objects.
Lightworks V.I.P 4500 Version 3 - User Guide A2.0 - 63
A2.3
User Interface Basics
A2.3.7
Using Visidirs To Select Folders and Files
Visidirs are ‘visible directories’ that can be used to select folders and files from within the
V.I.P program.
Visidir Name
Current Folder Window
Free Disk Space
Drive Selector Button
Scroll Up Button
Project Folder Name
Folders and Files Window
Scroll Bar
Page Down Button
Text Entry Field
Visidir for Loading Logging Databases
The function of a Visidir is indicated by its name - in the example above the Visidir is for
loading a Logging Database file.
A2.0 - 64
Lightworks V.I.P 4500 Version 3 - User Guide
User Interface Basics
A2.3
Selecting Folders and Files
The Current Folder Window displays the drive and folder that the Visidir is currently
looking at.
The Folders and Files Window displays a list of folders and files available from the
current folder. Select the folder or file required by double-clicking on it (or by highlighting it and then clicking the Change Dir button).
The Previous button moves you back to the previous folder.
In most cases, it will not be possible to use the Visidir to access Projects other than
the current one, in order to protect work in other Projects.
Note: Visidirs display the Windows NT folder name for the Project, not its user name.
The style in which names are displayed in the Folders and Files Window indicates
their status:
Names in bold black letters are files of the correct type for the current operation. For example, in the illustration above the correct type is an .ODB file that
can be loaded by the Logging Database Panel.
Names in bold grey letters are files that are not of the correct type for the current operation.
Names in regular black letters within brackets - for example; [PART 1] - are
folders.
Selecting More Than One File
For some operations, multiple selections of files can be made by holding down the
CTRL or SHIFT key and clicking with the Mouse to highlight the desired files.
Lightworks V.I.P 4500 Version 3 - User Guide A2.0 - 65
A2.3
User Interface Basics
Changing Drives
To change drives, click on the Drive Selector button. A list will display all the available drives appropriate to the operation, categorised under the headings “Removable
Drives”, “Local Drives” and (if connected to a network) “Remote Drives”. Click on
the name of the drive required.
Going Directly To a Drive, Folder or File
The Text Entry field provides a way to go directly to a drive, folder or file, for
example:
To go to a specific drive, type in the letter plus a colon and backslash - D:\.
To go to a specific folder, type in the path - C:\LWPROJ.
To go to a specific file, type in the path - C:\LWPROJ\BASIC.MIX.
If already in the appropriate folder, just type the filename - BASIC.MIX.
To go to the previous folder, type two dots (periods).
Display Of Free Disk Space
By default, Visidirs will display an indication of the free space on the selected drive.
There is a CONFIG.DAT parameter that can be used to disable this feature, to speed
up the use of Visidirs where the V.I.P system is connected to a large network. See
‘disk_menu_space’ on page 591.
A2.0 - 66
Lightworks V.I.P 4500 Version 3 - User Guide
Starting a Project
A2.4
A2.4
Starting a Project
This section provides a summarised step-by-step guide to starting a Project on the V.I.P system. For more
information see ‘Setting Up a Project’ on page 88.
A2.4.1
Starting a Project - Step-by-step
1 In the Lobby, click on the Door Generator
to display a new Door.
2 Go into the new Room by clicking on the new Door. You will see a Projects Visidir
listing any Projects that currently exist on the system.
3 Click on the New button in the Visidir to create a new Project. A Project Card and a
Select Room Style Visidir will be displayed.
4 Click on the OK button to select the default Room Style.
The Project Card is used to enter information about the Project. It will already have
some default details filled in.
Project Name
5 Click on the TV Standard button to set the Project to the standard required.
6 Click on the Audio Parameters button and set the audio sample rate required.
7 Rename the Project by highlighting the default Project name and typing in a new one.
Projects can have names up to 66 characters long.
8 To save the Project details and remove the Project Card from the screen, click on the
Vanish button. The new Project name is now displayed at the top right-hand corner
of the right hand graphics screen.
Lightworks V.I.P 4500 Version 3 - User Guide A2.0 - 67
A2.5
A2.5
The Toolbox
The Toolbox
The Toolbox is permanently displayed in every Room. It contains most of the Tools that are needed to
work on the V.I.P system. To open the Toolbox, click on it.
Timecode
Calculator,
page 220.
Searchcard Tool,
page 223.
Gallery Tool,
page 207.
Playout Tool,
page 437.
Rack Tool,
page 210.
Reels Tool,
page 99.
Door Generator,
page 83.
Import/Export Tool,
page 475.
Viewer Tool,
page 72.
Record Tool,
page 69.
Hand,
page 213
Shark,
page 63.
Effects Tool,
page 391.
Screwdriver,
page 546.
Sync Group
Tool,
page 211.
Edit-to-it
Floppy Disk
Tool,
Tool,
page 269.
page 444.
Disk Manager
Voice Over Tool,
Tool, page 475.
page 368.
Autoconform Tool,
page 169.
Logging Database
Tool, page 147.
The cross-references in the diagram above show where to find further information on each Tool. You can
drag the Tools required out of the Toolbox and position them anywhere on the screen. You don’t need to
put the objects back in the Toolbox - just eat them with the Shark when you have finished.
To close the Toolbox, click on its Close button.
A2.0 - 68
Lightworks V.I.P 4500 Version 3 - User Guide
Making a Recording
A2.6
A2.6
Making a Recording
This section summarises the procedure for making a simple recording on the V.I.P system. For full
details of the procedure, see ‘Recording 3 - Making a Recording’ on page 147.
A2.6.1
Recording - Step-by-step
1 Click on the Record Tool
Device
Selection
Button
Device Status
Display
. A Recording Panel will be displayed.
Timecode
Display
Userbits
Display
Video Output
Button
Transport
Controls
Reel Information
Button
Audio Input
Level Meters
Eject
Button
Picture
Display
Window
Channel
Selector
Buttons
Disk Selection
Button
Reel ID
Display
Picture
Quality
Button
Filecard
Button
Available
Space on Disk
Lightworks V.I.P 4500 Version 3 - User Guide A2.0 - 69
A2.6
Making a Recording
2 Click on the Device Selection button and select the device you want from the list of
Source/Record devices displayed.
3 Check that the correct video, audio, timecode and control inputs have been specified
for the device by clicking on the Recording Panel Menu button and selecting
Change/Inspect Device Definitions.
4 Check that Disk Selection button displays the name of the material disk that you wish
to record to.
5 Set the picture quality for the recording by clicking on the Picture Quality button.
6 Select the channels to record using the Channel Selector buttons.
7 Make sure that the VTR is in remote and that the correct tape is loaded.
8 Click on the Standby button.
9 You will be prompted to enter the reel ID of the source tape. Select the correct reel
ID from the list displayed and click on the OK button.
If the reel ID for the tape is not listed, click on the Create New Reel button and enter
a reel ID in the prompt box displayed, then click on the OK button.
10 To start the tape playing, press the Play button on the Console. See ‘Console
Transport Controls’ on page 525.
11 Click on the Record button, on the Recording Panel, when you want to start the
recording.
12 To end the recording, press the red Stop button on the Console. A Gallery will be
displayed containing a Tile showing the first frame of the shot recorded.
A2.0 - 70
Lightworks V.I.P 4500 Version 3 - User Guide
Displaying and Playing Material
A2.7
A2.7
Displaying and Playing Material
Viewers and Tiles are used to display and play shots, ghosts, edits and reels.
Note: In order to simplify the text in this section, the phrase “shot or edit” refers to “shots, ghosts,
edits or reels”.
A2.7.1
Tiles
Triangle Status
Display
Filecard Button
Viewer Button
Stripview Button
Tile for an Edit
Tiles have the following features:
Name Display
The name of the shot or edit is displayed at the bottom of the Tile.
Triangle and Border Status Displays
See ‘Tile and Viewer Status Displays’ on page 75.
Filecard Button
Click on the Filecard button to display information about the shot or edit. See ‘Logging Shots and Edits’ on page 185.
Viewer Button
Click on the Viewer button to display the shot or edit in a Viewer. Alternatively, drag
the Tile over any Viewer containing a shot, then right+left-click with the Mouse. The
new shot will replace the existing shot in the Viewer.
Stripview Button
Click on the Stripview button to display the Stripview for the shot or edit. See
‘Editing 4 - Trimming With the Stripview’ on page 279.
Lightworks V.I.P 4500 Version 3 - User Guide A2.0 - 71
A2.7
Displaying and Playing Material
A2.7.2
Viewers
To display a shot or edit in a Viewer you first need to display it in a Tile. To turn the Tile
into a Viewer, click on its Viewer button. Alternatively, drag the Tile over any Viewer containing a shot, then right+left-click with the Mouse. The new shot will replace the existing
shot in the Viewer.
Indicator Strip
Pin Button
Video Output Button
Current Frame Marker
Filecard Button
Stripview Button
Tile Button
Copy Button
Undo Button
Redo Button
Pop-Out Original
Tile Button
Channel Selector
Buttons
Label Toggle
Button
Name
Display
Label
Display
Viewer Border
Viewer Labels
Panel Button
Viewer for a Shot
A2.0 - 72
Lightworks V.I.P 4500 Version 3 - User Guide
Displaying and Playing Material
A2.7
You can increase the size of Viewers using the Edit Menu command Viewer Size. Setting
this to BIG enlarges the Viewer to four times its normal size. Alternatively, you can zoomin by positioning the Mouse cursor in the centre of the Viewer and pressing ALT+4 on the
Keyboard. This method enlarges all screen objects (not just the Viewer).
Viewers have the following features:
Indicator Strip
The left of the Indicator Strip represents the beginning of the shot or edit and the right
represents the end. The Indicator Strip shows the position of the current frame (red
marker), any marked frame (blue marker) and any cues (green points).
Video Output Button
Click on this to display the Video Output Routing Panel. See ‘Video Output Routing’
on page 333.
Filecard Button
Click on the Filecard button to display information about the shot or edit.
Stripview Button
Click on the Stripview button to display the Stripview for the shot or edit. See
‘Editing 4 - Trimming With the Stripview’ on page 279.
Tile Button
Returns the shot or edit in the Viewer to a Tile, leaving an empty Viewer.
Copy Button
Use this to copy all or part of the shot or edit in the Viewer. See ‘Breaking Down Shots
Into Ghosts’ on page 190.
Undo Button
For an edit, click on the Undo button to undo your last cut. The number of levels of
Undo is normally set to a default of 5.
Redo Button
For an edit, click on the Redo button to remake any cuts you have undone using the
Undo button. The number of levels of Redo is the same as for Undo.
Lightworks V.I.P 4500 Version 3 - User Guide A2.0 - 73
A2.7
Displaying and Playing Material
Channel Selector Buttons
Click on Channel Selector buttons to control the selection of video and audio channels. If a channel is selected the button is lit (blue). See ‘Selecting Channels To Edit’
on page 238.
Pin Button
The Pin button locks the Viewer in its current position on screen. When the Viewer
is locked the Pin button is highlighted. To unlock a Viewer, click on the Pin button to
turn it grey.
Label Toggle Button
The Label Toggle button toggles the Label and Name Displays. See ‘Displaying
Timecode and Other Labels’ on page 214.
Viewer Labels Panel Button
See ‘Viewer Labels Panel’ on page 217.
Label Display
See ‘Displaying Timecode and Other Labels’ on page 214.
Name Display
The name of the shot or edit in the Viewer is displayed at the bottom. To change it,
click on the existing name and type in the new name, then press the Enter key.
Record Button
Click on the Rec button to turn a Viewer into the record Viewer, ready for editing.
The Rec button is red when a Viewer is the record Viewer.
Pop-Out Original Tile Button
Clicking on this button will find the original source for the current frame in an edit
or ghost (based on the first selected channel). The source shot or ghost is displayed
as a Tile and is parked at the same frame as the current frame of the Viewer.
A2.0 - 74
Lightworks V.I.P 4500 Version 3 - User Guide
Displaying and Playing Material
A2.7.3
A2.7
Tile and Viewer Status Displays
Shot, Ghost, Edit or Reel? - Indicated By the Triangle
The colour of a triangle in the top left corner of a Tile or Viewer shows whether it is
a shot, ghost, edit, or reel:
Triangle Colour
Contents of
Viewer or Tile
Red
Edit
Grey
Ghost
Yellow
Print-Ghost
Blue
Reel
No Triangle
Shot
Source or Record? - Indicated By the Border
The border of the Tile or Viewer indicates the source/record status and whether the
Viewer or Tile is active:
Border Colour
Status of Viewer or Tile
Blue
Selected as source.
Red
Selected as record (Viewers only).
Bright Blue
Selected as source and is active (can be played using the Console).
Bright Red
Selected as a record and is active (Viewers only).
Green
Selected as record with live editing enabled (Viewers only).
Black
Not selected.
Lightworks V.I.P 4500 Version 3 - User Guide A2.0 - 75
A2.7
Displaying and Playing Material
How Many Channels Of Video and Audio? - Indicated By Channel Selectors
On a Viewer for a shot, ghost or edit there are Channel Selector buttons for the first
video channel and up to 2 audio channels. To access Channel Selector buttons for any
further channels, display the Stripview.
On an Edit-to-it Viewer, there are Channel Selector buttons for the video channel and
up to 4 audio channels.
Shots or edits with no video channel (audio only), will display the word “Sound” in
the Viewer or Tile. The video output for these shots will be black.
A2.7.4
Playing Material In a Viewer or Tile
To play the shot or edit in a Viewer or Tile:
1 Click anywhere in the picture area of the Viewer or Tile.
This selects the Viewer or Tile. Its border lights up to show that it is active. The picture displayed in the active Viewer or Tile is sent to the selected video output.
2 Press the Play Forward button on the Console.
3 To stop playing, press the red Stop button on the Console.
You can play any Viewer or Tile anywhere on the screen - simply click and play!
There are two designs of Console that may be connected to the V.I.P system - the Series 1
Console and the Series 2 Console.
For more information, see ‘The Console’ on page 523.
A2.0 - 76
Lightworks V.I.P 4500 Version 3 - User Guide
Displaying and Playing Material
A2.7
Console Cut
Buttons (Live Editing)
Play
Forward
Play
Backward
MARK
UNMARK
Stop
Button
SWAP
CUE
REPLACE
MOVE
INSERT
DELETE
Editing
Buttons
Jump
Buttons
Lever
Series 1 Console
Lightworks V.I.P 4500 Version 3 - User Guide A2.0 - 77
A2.7
Displaying and Playing Material
A2.7.5
Other Methods Of Playing Through Shots and Edits
Using the Console
The Console Play buttons play the shot or edit at normal play speed, forwards or
backwards.
To play shots or edits at any speed between 0% and approximately 1000% of normal
play speed use the Console Lever.
To nudge frame-by-frame through a shot or edit, use the Lever, or hold the Stop
button down and press one of the Play buttons.
To jump a shot or edit from event to event (or cue to cue) use the Console Jump buttons.
To move slowly and accurately through the shot, use the Jog Wheel. To make the Jog
Wheel active, press the Jog On/Off button on the Console so it is lit.
For more information see ‘Console Transport Controls’ on page 525.
Using the Viewer Indicator Strip
The left of the Indicator Strip represents the beginning of the shot or edit and the right
represents the end. The Indicator Strip contains a current frame marker (red diamond) which represents the current frame displayed in the Viewer.
To skip at high-speed through the shot or edit in the Viewer:
1 Point the Mouse cursor at the current frame marker.
2 Hold down the right Mouse button.
3 Drag the current frame marker to a new position on the Indicator Strip, keeping the
right Mouse button held down.
To jump instantly to a new point in the shot or edit:
1 Position the Mouse cursor at the point on the Indicator Strip that represents the part
of the shot or edit you want to jump to.
2 Left+right-click the Mouse.
A2.0 - 78
Lightworks V.I.P 4500 Version 3 - User Guide
Displaying and Playing Material
A2.7
Audio Scrubbing Using the Mouse
When dragging the current frame marker across the Stripview with the Mouse, audio
can be heard.
Right-clicking on the current frame marker will turn it blue. Then by holding the right
Mouse button down and dragging you will hear the audio. The coarseness of the jog
is proportional to how far along the strip the Mouse is moved, and so is determined
by the Stripview zoom. When fully zoomed in, the jog will be most sensitive.
Entering a Timecode To Go To
The Viewer Label Display can be used to jump instantly to a new timecode in the shot
or edit:
1 Click on the Viewer Label Display.
2 Enter the destination timecode.
This can either be typed in from the Keyboard, or pasted in (see ‘SHIFT+INS - Paste
Timecode’ on page 537), or dropped in (see ‘Tear-off Timecodes’ on page 222).
3 Press the Enter key.
The shot or edit will immediately jump to the selected destination frame.
Playing Several Shots Locked Together
It is possible to lock up to four separate sources together, and play them in real time,
cutting between the sources as they are running. See ‘Sync Groups’ on page 252 and
see ‘Live Editing’ on page 260.
Lightworks V.I.P 4500 Version 3 - User Guide A2.0 - 79
A2.8
A2.8
Shutting Down the System
Shutting Down the System
A2.8.1
Shutting Down the System - Step-by-step
1 Go to the Lobby screen.
To do this, click on the Door labelled “Back” in the Room you are working in.
2 In the Lobby, click on the red Exit Door. The system will close down the V.I.P
software.
3 Click on the Start button on the Windows NT taskbar and select Shutdown.
The Shutdown Computer dialogue box will appear with the Shutdown option
selected.
4 Click on OK.
Wait for a message on the Data Monitor saying “It is now safe to turn off your computer”.
5 Switch off the power on all units.
A2.0 - 80
WARNING: NEVER SWITCH OFF THE MAINS POWER UNLESS THE
DATA MONITOR IS DISPLAYING THE MESSAGE “IT IS NOW SAFE TO
TURN OFF YOUR COMPUTER”.
Lightworks V.I.P 4500 Version 3 - User Guide
A3.0 Projects and Rooms
A3.1
An Introduction To Projects and Rooms
A3.1.1
Projects
Projects are used to divide up work on the system.
Each Project is independent from the other Projects on the system. When you are working
in a Project you can access only the shots and edits stored in it.
Projects allow you to keep different items separate. For example, for a six part series you
could use one Project for each part.
A3.1.2
Rooms
You can think of a Room as simply an arrangement of objects on the screen. All the shots
in that Project can be called onto the screen in any Room belonging to the same Project.
Each Room belongs to one Project only. Any work - for example logging, editing - done in
a Room will be stored in that Project.
It is possible to have several Rooms belonging to the same Project.
A3.1.3
Relationship Between Projects and Rooms
Projects are more important than Rooms.
A Project can have several Rooms belonging to it.
A Room belongs to one (and only one) Project.
There are many different ways of using Projects and Rooms to arrange your work. You
should develop a method that suits the material and your style of working.
Lightworks V.I.P 4500 Version 3 - User Guide A3.0 - 81
A3.2
A3.2
Lobby Screen
Lobby Screen
After starting the program you will see the Lobby displayed on the graphics screen.
The Lobby has a Door for each Room that exists on the system. The other objects in the Lobby are:
Door Generator
Click on the Door Generator to generate a new Door.
A3.0 - 82
Lightworks V.I.P 4500 Version 3 - User Guide
Using Rooms
A3.3
Mouse Cursor
Use the Mouse Cursor to control objects on the graphics screen. See ‘The Mouse’ on page 541.
Shark
Use the Shark to delete unwanted Doors from the screen. See ‘Removing Objects From the Screen
Using the Shark’ on page 63.
Machine Room Door
Click on the Machine Room Door to enter the Machine Room. The Machine Room is used for
some system-wide settings.
Exit Door
Click on the Exit Door to shut down the V.I.P program.
Yellow Arrow
Click on the Yellow Arrow to pop up any Tools or Menus obscured behind other screen objects.
To start working you will need to go from the Lobby into a Room.
A3.3
Using Rooms
If you want to work on an existing Project, you can either create a new Room for the Project or use an
existing Room belonging to the Project.
If you want to start a new Project you must create a new Room.
A3.3.1
Creating a New Room For an Existing Project
To create a new Room for an existing Project:
1 In the Lobby, click on the Door Generator. A new Door will appear.
2 Drag the new Door to a convenient position on the screen.
3 Click on the new Door.
This will take you into the new Room. In the centre of the left-hand graphics screen
is the Select Project Panel, listing all the Projects that currently exist on the system.
4 Click on the name of the Project you wish to work on, to highlight it.
Lightworks V.I.P 4500 Version 3 - User Guide A3.0 - 83
A3.3
Using Rooms
5 Click on the OK button.
If the Project has a Project Password, you will be returned to the Lobby screen and
asked to type the Project Password. See ‘Project Passwords’ on page 93.
Otherwise, the Project name (in the top right-hand corner of the right screen) will
change to the name of the specified Project. The Room now ‘belongs’ to that Project.
New Room (Left-Hand Graphics Screen)
A3.0 - 84
Lightworks V.I.P 4500 Version 3 - User Guide
Using Rooms
A3.3
A new Room will have the following objects in it:
General Menu
Use this to activate general commands. See ‘General Menu’ on page 563.
Shark
Use this to remove unwanted objects from the screen. See ‘Removing Objects From
the Screen Using the Shark’ on page 63.
Back Door
Click on the Back Door to return to the Lobby.
Toolbox
The Toolbox is one of the most important screen objects. It contains most of the Tools
needed for a work session. For more information, see ‘The Toolbox’ on page 68.
To start working in the Room, refer to one of the following sections of this user guide:
To Set Up Project Parameters
See ‘Setting Up a Project’ on page 88.
To Record Pictures and Sound Into the Project
See ‘Recording 3 - Making a Recording’ on page 147.
To Search For Shots and Edits Stored In the Project
See ‘Finding Shots and Edits’ on page 223.
To start with you will create new Rooms in the Lobby. However, it is also possible to create
a new Room for an existing Project from within an existing Room. This may be useful if
working on several separate scenes from one Project - each could be in its own Room.
To create a new Room from within an existing Room:
1 Click on the Door Generator (found in the Toolbox). A new Door will appear.
2 Drag the new Door to a convenient position on the screen.
3 Click on the new Door.
This will take you into the new Room, which will automatically belong to the same
Project as its ‘parent’ Room.
Lightworks V.I.P 4500 Version 3 - User Guide A3.0 - 85
A3.3
Using Rooms
A3.3.2
Naming a Room
When a new Door is generated, the system gives a random two-letter name to the new
Room created. This appears in a white box at the top of the Door. The Project name will
appear in the middle of the Door. If the Door has not yet been attached to a Project, then the
words “No Project” will appear.
A Door
To change the Room name:
1 Click on the Room name displayed on the Door. The current name of the Room will
be highlighted.
2 Type in the new name for the Room and then press the Enter key.
A3.3.3
Using an Existing Room
If you wish to work in an existing Room, click anywhere in the green area of the Door to
the Room.
Either the graphics screen will change to display the new Room or a message will be displayed asking you to type the Project Password. You will not be allowed into the Room until
the correct Project Password is typed. See ‘Project Passwords’ on page 93.
When you enter the Room, the graphics screen will display all the screen objects that were
in the Room when it was last used. If there were a lot of objects on the screen it may take a
few seconds for the system to display them all. You cannot start working until all the objects
have been displayed.
A3.0 - 86
Lightworks V.I.P 4500 Version 3 - User Guide
Using Rooms
A3.3
To start working in the Room, refer to one of the following sections of this user guide:
To Set Up Project Parameters
See ‘Setting Up a Project’ on page 88.
To Record Pictures and Sound Into the Project
See ‘Recording 3 - Making a Recording’ on page 147.
To Search For Shots and Edits Stored In the Project
See ‘Finding Shots and Edits’ on page 223.
To Play Shots or Edits Displayed On the Screen
See ‘Playing Material In a Viewer or Tile’ on page 76.
A3.3.4
Creating a New Room and a New Project
You must start in the Lobby.
1 Click on the Door Generator. A new Door will appear.
2 Drag the new Door to a convenient position on the screen.
3 Click on the new Door.
This will take you into the new Room. In the centre of the left-hand graphics screen
is the Select Project Panel, listing all the Projects that currently exist on the system.
4 Click on the New button on the Select Project Panel.
A Project Card will appear. The Project Card is used to enter information about the
Project. See ‘Displaying the Project Card’ on page 89.
A Room Style Panel will also appear. See ‘Saving and Loading Room Styles’ on page
92.
To start working in the new Project, refer to one of the following sections of this user guide:
To Set Up Project Parameters
See ‘Setting Up a Project’ on page 88.
To Record Pictures and Sound Into the Project
See ‘Recording 3 - Making a Recording’ on page 147.
Lightworks V.I.P 4500 Version 3 - User Guide A3.0 - 87
A3.4
A3.4
Setting Up a Project
Setting Up a Project
Please read ‘An Introduction To Projects and Rooms’ on page 81 before proceeding.
A3.4.1
Creating a New Project
To create a new Project:
1 In the Lobby, click on the Door Generator. A new Door will appear.
2 Drag the new Door to a convenient position on the screen.
3 Click on the new Door.
This will take you into the new Room. In the centre of the left-hand graphics screen
is the Select Project Panel, listing all the Projects that currently exist on the system.
4 Click on the New button on the Select Project Panel.
The Project Card and a Room Styles Visidir will be displayed. The Room Styles
Visidir is used to determine the layout of the Room (see ‘Saving and Loading Room
Styles’ on page 92). The Project Card is used to enter information about the Project.
Project Name
Creation Date
Letterbox
Controls
Project Card
A3.0 - 88
Lightworks V.I.P 4500 Version 3 - User Guide
Setting Up a Project
A3.4.2
A3.4
Displaying the Project Card
To display the Project Card:
A3.4.3
When you create a new Project, the Project Card is displayed automatically.
At any other time, click on the General Menu command Current Project
Details.
TV Standard
The TV Standard button on the Project Card sets the TV Standard for the current Project.
This must be set to the correct value before you start work in a Project.
The available TV Standards are:
PAL
Picture will be recorded at 25 fps.
NTSC
Picture will be recorded at 30 fps. Edits will be in non-drop-frame timecode.
NTSC Drop
Picture will be recorded at 30 fps. Edits will be in drop-frame timecode.
A3.4.4
Note: Any change made to the TV Standard will not take effect until the Project Card
is vanished from the screen. Changing the TV Standard will only affect any new
shots and edits created - the TV Standard for existing shots and edits will not be
changed.
Default TV Standard For New Projects
The first time the V.I.P software is run, the system will use the TV Standard defined by a
parameter in the V.I.P user configuration file, CONFIG.DAT. See ‘The CONFIG.DAT File’
on page 585 and see ‘machine_type’ on page 598.
Thereafter, the System Menu command Default Standard for New Projects can be used
to determine the TV Standard for any new Projects created (and the Lobby).
Lightworks V.I.P 4500 Version 3 - User Guide A3.0 - 89
A3.4
Setting Up a Project
A3.4.5
Audio Parameters
Click on the Audio Params button on the Project Card to display the Audio Parameters
Panel. This is used to set the audio rate for the Project and the AES/EBU signal output flag.
When a new Project is started you must ensure that the audio rate is set to the correct value
before you record any audio. Different audio rates cannot be intercut. Once the audio rate
has been set for a Project, it cannot be changed at a later date.
Audio Rate
The audio rate is the sampling rate used to digitise the incoming audio.
To set the audio rate just click on the button displaying the current value. The type of
machines used for input and output of audio will in some cases determine the correct
setting for this parameter. The choices available are 48 KHz, 44.1 KHz, 32 KHz.
When recording digital audio with sample rates that differ from the current Project
rate, sample rate conversion can be used. See ‘AES/EBU (+SRC)’ on page 111.
WARNING: AUDIO INPUT RATE IS SET ONCE ONLY FOR THE WHOLE
PROJECT. YOU CANNOT MIX AUDIO RECORDED AT DIFFERENT
RATES WITHIN ONE PROJECT.
AES/EBU Chan Status
For playout of AES/EBU digital audio, it may be necessary to select the correct
signal standard. On the Audio Parameters Panel, set the AES/EBU Chan Status
button to Cons or Prof (consumer or professional).
Level Control
See ‘Enabling Audio Level Control’ on page 360.
A3.4.6
Note: Audio is recorded and stored uncompressed, whatever the setting for the picture quality of the recording.
Aspect Ratio
A button on the Project Card sets the aspect ratio of Viewers, with a choice of:
4:3
Imges are displayed normally at 4:3 aspect ratio in Viewers, Tiles and on the system
video outputs.
A3.0 - 90
Lightworks V.I.P 4500 Version 3 - User Guide
Setting Up a Project
A3.4
16:9
Images recorded 16:9 that have been ‘squeezed’ horizontally will be aspect ratio corrected to appear with the correct 16:9 aspect ratio in Viewers or Tiles. The video
output will still appear ‘squeezed’ horizontally if 4:3 monitors are used. A 16:9 monitor must be used to see the outputs with the correct aspect ratio.
All real-time effects (mixes, wipes) will be correctly represented in 16:9 format.
A3.4.7
Letterboxing For Viewers and Tiles
It is possible to ‘letterbox’ Viewers and Tiles, using controls on the Project Card.
The top and bottom figures determine the position of the letterbox mask at the top and
bottom of the picture. Whole numbers from 0 to approximately 100 may be used. It may
require a little trial-and-error before you arrive at the settings you want. This reflects the
fact that the position of letterbox masking created during film to tape transfers may vary for
each transfer.
A3.4.8
Naming a Project
The Project is given a default name when it is created. To change the Project name:
1 Display the Project Card.
2 Click on the existing Project name to highlight it.
3 Type in the new name - this will overwrite the existing name.
4 Press the Enter key.
A3.4.9
Note: The new name is not registered until the Project Card is vanished. At this point
the new Project name will appear in the top right-hand corner of the right screen.
Project Creation Date
The date and time when the Project was created are recorded on the Project Card.
A3.4.10
Notes Field
By clicking in this area you can type text into this space on the Project Card.
Lightworks V.I.P 4500 Version 3 - User Guide A3.0 - 91
A3.5
A3.5
Saving and Loading Room Styles
Saving and Loading Room Styles
It is possible to store and recall the layout of a Room. Many different Room styles can saved, to suit the
preferred way of working of different editors.
The Room style stores information about the positions of Tools on the screen. No other information is
saved by this feature.
A3.5.1
Room Styles For New Rooms
When you enter a newly created Room, a Visidir of available Room Styles is displayed. To
select the style of the Room:
1 Highlight the desired Room style by clicking on its name.
2 Click on the OK button or press the Enter key. Any objects on the graphics screen
will be cleared and be replaced with the objects as determined by the newly loaded
Room style.
A3.5.2
Saving Room Styles
1 Click on the Screwdriver Tool over an empty area of the graphics screen. The Preferences Panel is displayed.
2 Click on the Save button. A Visidir of Room styles will be displayed.
3 Type a name for the Room style or highlight the name of a style to be overwritten.
4 Click on the OK button or press the Enter key. The Room Style will be stored.
A3.5.3
Loading a Room Style
1 Click on the Screwdriver Tool over an empty area of the graphics screen. The Preferences Panel is displayed.
2 Click on the Load button. A Visidir of Room styles will be displayed.
3 Highlight the desired Room style by clicking on its name.
4 Click on the OK button or press the Enter key. Any objects on the graphics screen
will be cleared and be replaced with the objects as determined by the newly loaded
Room style.
A3.0 - 92
Lightworks V.I.P 4500 Version 3 - User Guide
Using Passwords
A3.5.4
A3.6
Deleting a Room Style
1 Click on the Screwdriver Tool over an empty area of the graphics screen. The Preferences Panel is displayed.
2 Click on the Delete button. A Visidir of Room styles will be displayed.
3 Highlight the Room style to be deleted by clicking on its name.
4 Click on the OK button. The Room style will be deleted without any further warning.
A3.6
Using Passwords
A3.6.1
Project Passwords
You can set a password to protect the work in your Project. This Project Password prevents
unauthorised entry to Rooms or deletion of Doors.
To create, change or remove a Project Password:
1 Enter a Room belonging to the Project.
2 Click on the Project Password command on the General Menu and follow the
prompts.
Note: When typing in a password the letters do not appear on the screen, just asterisks. It is necessary to press the Enter key to register the password.
It is not possible to change or remove a Project Password without typing in the existing
password first. Once set, the password will have to be typed in each time you enter any of
the Rooms belonging to the Project.
A3.6.2
Skeleton Passwords
The Skeleton Password will override any Project Password that has been set. The Skeleton
Password is initially set up during manufacture and should be kept by the person(s) responsible for housekeeping and support of the system.
To change the Skeleton Password, click on the Skeleton Password option on the General
Menu and follow the prompts. Obviously you need to know the existing Skeleton Password
before you can change it!
In case the Skeleton Password has been mislaid there is a ‘last resort’ Global Password. This
may be requested from your distributor or service provider.
Lightworks V.I.P 4500 Version 3 - User Guide A3.0 - 93
A3.7
A3.7
Transferring Shots, Edits, Ghosts and Reels Between Projects
Transferring Shots, Edits, Ghosts and Reels Between Projects
This is an advanced operation for use on more complex productions. If you are using the system for the
first time we suggest you skip this section for now.
A3.7.1
Moving Shots To Another Project
To move shots from one Project to another:
1 Put the shots into a Gallery or Database.
2 Display the Gallery or Database Menu.
3 Click on the command Move Contents To Another Project. The Move to Project
Visidir appears, listing all other Projects on the system.
4 Click on the destination Project to highlight it.
5 Click on the OK button. A confirmation message will appear, naming the destination
Project.
6 If this is correct, click on Yes.
The Gallery or Database will disappear from the screen - it has been removed from
the current Project and moved to the destination Project.
A3.7.2
Note: If a shot is moved or copied to a different Project, the reel the shot was recorded
from should also be moved or copied.
Moving Reels To Another Project
If shots are moved or copied to a different Project, the reel the shots were recorded from
should also be moved or copied.
If a reel with the same reel ID already exists in the destination Project, it will not be
replaced. The system will assume that any shots copied or moved between Projects come
from the existing reel with the same reel ID in the destination Project.
Take care that the results of such operations make sense! For example, if reel 1 is a DAT in
Project A, moving the shots recorded from reel 1 to Project B where reel 1 is a DVC tape
will mean the system will now assume in Project B that the recordings from the DAT came
from the DVC tape.
A3.0 - 94
Lightworks V.I.P 4500 Version 3 - User Guide
Transferring Shots, Edits, Ghosts and Reels Between Projects
A3.7
To move reels from one Project to another:
1 Put the reels into a Gallery or Database.
2 Display the Gallery or Database Menu.
3 Click on the command Move Contents To Another Project. The Move to Project
Visidir appears, listing all other Projects on the system.
4 Click on the destination Project to highlight it.
5 Click on the OK button. A confirmation message is displayed.
6 Click on Yes to confirm the move.
The Gallery or Database of reels will disappear from the screen - it has been removed
from the current Project and moved to the destination Project.
A3.7.3
Note: Moving or copying reels between Projects will only transfer the reel data - any
shots recorded from the reel are not copied.
Moving an Edit or Ghost To Another Project
If you want to move an edit to another Project you must also move all the shots used in the
edit. If you want to move a ghost to another Project you will need to transfer the original
shots for the ghost as well. If you do not do this you will not be able to play the ghost or edit
in the new Project.
1 Click on the Menu button of the edit to be moved. The Edit Menu will be displayed.
2 Click on the command Gallery of Shots or Database of Shots. This creates a Gallery
or Database containing all the shots used in the edit.
If you choose Gallery of Shots this may produce more than one Gallery. In this case
each Gallery must be moved individually. For this reason it may be best to use a Database when moving long edits.
3 Click on the Vanish button for the Viewer to turn it into a Tile.
4 Add the edit to the Gallery or Database of shots. (For a Database, this is done by
placing the Tile containing the edit over the Database and left-right clicking.)
5 Follow the instructions in ‘Moving Shots To Another Project’ on page 94, to move
the Gallery(s) or Database to another Project.
Lightworks V.I.P 4500 Version 3 - User Guide A3.0 - 95
A3.8
Deleting Rooms and Projects
A3.7.4
Copying Shots and Edits To Another Project
1 Put the items to be copied into a Gallery or Database.
2 Display the Gallery or Database Menu.
3 Click on the command Copy Contents To Another Project. The Copy to Project
Visidir appears, listing all other Projects on the system.
4 Click on the destination Project to highlight it.
5 Click on the OK button. A confirmation message is displayed.
6 Click on Yes to confirm the copy. The Gallery or Database and its contents will be
copied to the destination Project.
A3.8
WARNING: SHOTS COPIED TO ANOTHER PROJECT SHARE THEIR
MATERIAL FILES WITH THE SHOTS IN THE ORIGINAL PROJECT.
Deleting Rooms and Projects
A3.8.1
Deleting a Room - Step-by-step
To delete a Room you must delete the Door to the Room, using the Shark:
1 Right-click on the Shark and drag it into a position where its nose is overlapping the
Door to be deleted.
2 Keep the right button held down and click on the Shark. The Door will disappear.
This means the Room has been deleted.
A3.8.2
Note: By doing this you have not destroyed any shots or edits that were in the deleted
Room. The Room was simply an arrangement of objects on the screen. Your shots
and edits can be found by searching in any other Room belonging to the same Project.
Deleting a Project
To delete an entire Project, use the command Delete Projects on the System Menu. See
‘Deleting a Whole Project - Step-by-step’ on page 503.
A3.0 - 96
Lightworks V.I.P 4500 Version 3 - User Guide
A4.0 Recording 1 - Recording Configurations
A4.1
An Introduction To Recording
The Lightworks V.I.P system can simultaneously record four independent channels of very high quality
video and 16 channels of audio, enabling the following recording features:
Recording ‘Manually’ Using a Recording Panel.
See ‘Basic Recording Using a Recording Panel’ on page 163.
Autoconforming Using One or More Record Channels.
See ‘Autoconforming and Redigitising’ on page 169.
Recording Whilst Editing - ‘Background Recording’.
‘Background recording’ refers to any recording taking place at the same time as a previously
recorded shot or edit (stored on the V.I.P material disks) is being played, edited, or accessed in any
other way.
Edit Directly From Tape or Live Feed To Disk.
See ‘Editing 3 - Editing From Tape To Disk’ on page 269 and see ‘Adding Live Audio To an Edit
Using the Voice Over Feature’ on page 368.
Playing and Recording Within an Edit - ‘Replicating’.
See ‘Replicate - Synchronous Playback and Record’ on page 349.
To record material successfully, it is necessary to ensure that video, audio, timecode and machine control
are correctly connected and configured. This chapter covers configuration once the physical connections
have been made. For details of physical connections see the Lightworks V.I.P 4500 Installation Manual.
A4.2
System Resources
The V.I.P system has four channels of video and 16 channels of audio. Each channel can be used by the
system for either recording or playing back.
The allocation of channels to either record or play back is done automatically by the system, based on
the operation(s) taking place at any time. A number of operations on the V.I.P system use channels for
both recording and playing back at the same time.
Lightworks V.I.P 4500 Version 3 - User Guide A4.0 - 97
A4.2
System Resources
A4.2.1
Resources Available For Recording
Video and Audio Channels
Recording can only take place providing the total number of video and audio channels is not exceeded. Any combination of the available resources can be recorded; for
example, one video channel with up to 16 audio channels plus up to three video only
channels.
Starting a recording will reserve the required number of video and audio channels.
These channels will then not be available for playback until the recording ends
(Recording Panel out of standby), or until the autoconform is complete.
Note: Certain audio-only recordings will require the allocation of a video channel
resource, even if no video is actually recorded. For example, if the timecode source
is VITC, then one picture channel will be used by the timecode reader.
Timecode Readers
There are four LTC timecode inputs; LTC0, LTC1, LTC2, LTC3. This means that
LTC from up to four sources can be read at any one time. The LTC Input button on
the Device Definition Panel will show the location of the LTC input for that device.
Note: Attempting to make simultaneous recordings from two devices that both have
the same LTC input defined as the timecode will result in the second device failing
to make the recording.
Machine Control Resources
The V.I.P system can control up to eight external source/record machines simultaneously via RS-422 control.
A4.2.2
Editing Whilst Recording - ‘Background Recording’
‘Background recording’ refers to any recording taking place at the same time as a previously recorded shot or edit (stored on the V.I.P material disks) is being played, edited, or
accessed in any other way. There is no special mode to do this.
To edit whilst recording, the recording must be set up and started first. The number of channels available for playing the edit will be reduced by the number of channels reserved for
the recording and this will limit the ability of the system to handle a multi-channel edit.
When a recording is under way the shot is not available for inclusion in an edit until the
current recording has been completed and the Tile appears in a Gallery.
A4.0 - 98
Lightworks V.I.P 4500 Version 3 - User Guide
How the V.I.P System Uses Reels
A4.3
A4.3
How the V.I.P System Uses Reels
Source material exists on various types of physical media - for example video tapes, audio tapes, film
camera rolls. When one of these is used as a source for recordings by the V.I.P system, details relating
to the repeatability of the recording become important - for example the type of device that can play the
tape, the channel mapping and how timecode and other labelling information should be read. This data
is saved in the form of a ‘reel’ which is stored on the system as a log file.
Note: The system is only concerned with primary reels - usually video or audio tape. Data for other
reels - for example, original camera rolls - is stored with recorded shots as text and ignored by the
software for recording purposes.
A4.3.1
Reels Panel
The Reels Panel can be displayed by clicking on the Reels Tool
in the Toolbox.
Tag Column
Reel ID
Tape Type Button
Label
Mapping
Button
Gallery
Button
Database
Button
Reels Panel
Lightworks V.I.P 4500 Version 3 - User Guide A4.0 - 99
A4.3
How the V.I.P System Uses Reels
The Reels Panel displays a list of reels present in the Project. Tagged reels can be displayed
in a Gallery or Database, using the appropriate button on the Reels Panel.
The reel data displayed by the Reels Panel is outlined below. It is not compulsory to enter
any of these details apart from the reel ID. (However, when recording from a reel using the
V.I.P autoconform feature, the tape type must be known to the system.)
Reel ID
This is the primary reel ID from which all other data is derived. It must be unique for
each tape in the Project.
Tape Type
This prevents the system assigning a tape to an incompatible device. The tape types
that each device can accept are specified when the device is defined.
Label Mapping
A label mapping set can be specified for each reel. Any recordings made from that
reel will use the specified label mapping set. This helps to manage diverse label
requirements on a tape-by-tape basis.
Reel Available
This tells the system whether the tape is available to record from. Reels marked as
unavailable will not be requested during an autoconform.
Reel User Fields
The User Card on the Reels Panel contains a number of user-definable fields. The
names of the fields are set on a system-wide basis in the Machine Room. The user
fields can store additional information about reels, although the V.I.P system will not
use the data entered.
To define the reel user fields, click on the System Menu command Reel User Field
Names. A panel is displayed that allows you to enter the names of each of the available user fields. Once set, these apply to the whole system.
A4.3.2
Creating Reels
There are several ways of creating a reel:
A4.0 - 100
Lightworks V.I.P 4500 Version 3 - User Guide
How the V.I.P System Uses Reels
A4.3
Manually, Using the Create New Reel Button
Reels can be created using the Create New Reel button. This button appears on the
Reels Panel and on any list of available reels (displayed when preparing to record).
Automatically, When Importing an EDL.
See ‘Reels Created For Imported Data’ on page 102.
Automatically, When Autoconforming a Logging Database.
When a Logging Database is autoconformed, the reel IDs are checked and any reels
not present in the Project are created.
A4.3.3
Tape Types
Each reel must be given a tape type. To do this, click on the Tape Type button on the Reels
Panel. Select one from the displayed list. This tape type information is used by the system
when determining which devices need to be used to record from that reel during autoconform. If no tape type is specified, the reel is said to be unknown.
A4.3.4
Setting a Default Reel Type
The default reel type can be set at both a system-wide level and at a Project level. In situations where any reels used by the system are normally only of one media type, this can save
entering media type for every tape used - only reels not of the default type will need to have
details entered.
There is a system-wide default which is set via a CONFIG.DAT parameter. See
‘default_reel_type’ on page 590.
Any reel created will initially have its reel type set to the default reel type for the Project.
The default reel type for a new Project is set to the current system-wide default reel type. It
can be changed for the current Project using the Set Project Default Reel Type command
on the Reel Menu. Clicking on this command produces a reel type list and the relevant reel
can be selected. The type “Unknown” is included to allow a Project to be returned to
defaulting to unknown.
A4.3.5
Unknown Reels
Reels are said to be ‘unknown’ when the system has no information about their tape type.
Unknown reels are shown in red on the Reels Panel. If a reel is unknown, it cannot be allocated to a device during autoconform.
Lightworks V.I.P 4500 Version 3 - User Guide A4.0 - 101
A4.3
How the V.I.P System Uses Reels
The Reels Panel Menu command Tag Unknown Reels can be used to tag all unknown
reels.
For a known reel you will have:
A4.3.6
Assigned It a Reel ID
Entered the Tape Media Type
Told the System Whether the Reel Is Available
Reels Created For Imported Data
For EDLs and Logging Databases imported into the system, the reels referenced are created
if they do not already exist in the Project. Reels created in this way will not be fully defined,
missing such data as tape type and availability.
The system will assume the events in the EDL or Logging Database with the same reel ID
as a reel already in the Project are from that reel. For example, if “reel 1” is already in the
system defined as a “Digibetacam”, then an EDL imported that has an event referring to a
“reel 1” will be assumed to be from the “Digibetacam” reel already in the system.
It is recommended that you inspect the contents of any Logging Database or EDL before
importing or attempting to record from it, to check that the reel IDs do not conflict with reels
already present in the current Project. If in doubt, import into a new Project to ensure new
unique reels are created, then modify the reel IDs as necessary before moving the new data
into the Project.
A4.3.7
Setting Up Reel ID Prompting
You can make the system prompt you to enter the reel ID for any connected device when it
detects a change to the device or when you enter a Room, by means of a CONFIG.DAT
parameter. See ‘auto_reel_enquiry’ on page 589.
Without this CONFIG.DAT entry present, you will only be prompted to enter a reel ID
when making a recording or putting a Recording Panel into standby.
A4.3.8
Quickly Defining Parameters For New or Imported Reels
The Reels Menu command Set Tagged to Current Reel Settings provides a quick way of
updating all tagged reels on the Reels Panel to match the currently displayed reel details.
A4.0 - 102
Lightworks V.I.P 4500 Version 3 - User Guide
How the V.I.P System Uses Reels
A4.3
To update the parameters:
1 Display the Reels Panel, by clicking on the Reels Tool.
2 Tag any reels you wish to update, or use the Reels Menu command Tag Unknown
Reels to tag all the unknown reels.
3 From the list on the Reels Panel, highlight a reel which has the settings you wish to
apply to the other tagged reels.
4 Modify the parameters for the highlighted reel if you need to - its details will be
shown on the Reels Panel.
5 Click on the Reels Menu command Set Tagged to Current Reel Settings.
The tagged reel details will be updated to be the same as the currently displayed one.
This provides a quick way of making all reels the same tape type.
A4.3.9
Changing the Reel ID
It is not possible to change a reel ID during a recording.
Changing Reel ID for a Shot
You can change any of the reel IDs (video reel, audio reel, compilation reel, camera
reel) for a recorded shot using the Modify button on the Viewer Labels Panel. See
‘Viewer Labels Panel’ on page 217.
Note: If the new reel ID already exists in the Project, the system will not check to see
if the channels on the shot match the tape type (for example, a shot with VA1A2 can
be reassigned to the same reel ID as a DAT tape). Change shot reel IDs with care.
Changing Reel ID for a Reel and All Its Shots
You can change the reel ID for the reel using the Reels Menu command Change Reel
ID. This will change the reel ID for the current reel displayed on the Reels Panel. A
check is made to see if the reel ID exists in the Project already.
This operation will also change the reel ID of any shots already recorded using that
reel.
If the new reel ID does not already exist in the Project, it is created. The new reel will
not be fully defined (it will be missing some information, such as tape type).
Lightworks V.I.P 4500 Version 3 - User Guide A4.0 - 103
A4.4
A4.4
External Devices
External Devices
The V.I.P system can record signals from many different sources simultaneously. The system simplifies
the process of accessing the many permutations of these inputs by bundling groups of signals together
and representing them as separate ‘external devices’.
In the Machine Room, the System Menu has commands that allow devices to be added, modified or
deleted on a system-wide basis.
External devices controlled via GPI or serial control from within an edit (such as DVEs or audio mixers)
are also set up in the Machine Room.
The available physical input connections are as follows:
Video
8 serial digital video inputs.
Analogue Audio
16 analogue audio inputs.
Digital Audio
16 AES/EBU digital audio inputs.
Machine Control
8 RS-422 control ports are available on the RS-422 Connector Box.
Timecode
4 LTC inputs. The machine control cable or VITC on the input video signal can also be used as
timecode sources.
A4.4.1
Definition Of an External Device
An external device is any source or destination for video, audio and RS-422 control that is
physically connected to the V.I.P system.
External devices are defined for the entire V.I.P system - adding devices or changing
existing device set ups will apply across the entire system.
A4.0 - 104
Lightworks V.I.P 4500 Version 3 - User Guide
External Devices
A4.4.2
A4.4
Types Of External Device
Clicking on the Device Selection button (on the Recording Panel, Logging Database Panel,
Playout Viewer, Voice Over Panel and Edit-to-it Viewer) displays a list of devices available.
External devices are colour-coded according to their device type.
There are five device types:
Source/Record Devices
Source/record devices are controllable devices used when recording into or playing
out from the V.I.P system.
When recording into the system, these devices can be any source of video and/or
audio and/or timecode coming into the system (for example, VTR or disk recorder).
A single source/record device must be selected when using a Recording Panel or
Playout Viewer.
There is no limit to the number of source/record devices that can be configured, however the resources of the V.I.P system will limit how many can be used at any one
time. For example, one set of input connections could be connected to an assignment
switcher (router) so the connections to these can be switched externally.
Master Controller Devices
A master controller device (for example an edit controller) controls the V.I.P system,
which slaves to the device. A port is allocated as the control port. Selecting this type
of device on a Playout Viewer or Recording Panel means that, if present, the master
controller device has control of the V.I.P system when the Standby button is pressed.
Note: The dip switches on the RS-422 Connector Box must be correctly set. See the
Lightworks V.I.P 4500 Installation Manual.
Manual Control Devices
Devices that the V.I.P system has no direct control of, for example; live feeds, CD
players.
Audio Mixer Devices
Audio-only devices that are used as sources for replicate. There can only be one audio
mixer device per system. You can also serially control certain types of audio mixer.
See ‘Audio Mixer Automation With Yamaha Audio Consoles’ on page 386.
Lightworks V.I.P 4500 Version 3 - User Guide A4.0 - 105
A4.4
External Devices
External Effects Devices
These are devices used to add video effects to an edit and are controlled via serial
control or GPI trigger.
Certain objects are limited to particular device types - for example the Voice Over Panel
only has manual control type devices, whereas the Recording Panel has all three types.
A4.4.3
Adding New Devices
New devices will be usually added when the V.I.P system is installed or when you want to
use a source not previously defined. Adding a new device (or changing the connections for
an existing device) will make that device available throughout the system.
It is important that you understand how to define a device correctly so that the system can
make appropriate use of it.
For details on configuring external effects devices, see ‘Control Of External Effects
Devices’ on page 343.
To add a new device to record from:
1 Click on the Add New Input Device command on the System Menu in the Machine
Room. The Add New Device Panel will be displayed.
2 Type in a name for the device and press the Enter key.
You may find it best to give the device a name appropriate to the source it represents
- for example “Input 2, caption camera, graphics, tie line 3”.
The name can be up to 64 characters long, but note that the Device Selection button
can only display 14 characters. Longer names will be truncated.
3 Click on the Type button (initially labelled “Unknown”) to display a list of available
Device Type templates. See ‘Device Templates’ on page 107.
A4.0 - 106
Lightworks V.I.P 4500 Version 3 - User Guide
External Devices
A4.4
4 Click on the name of the template you wish to use for the device.
5 Click on the Do It button.
The device is created and the Device Definition Panel will be displayed with some
defaults for the new device, based on the chosen template.
A4.4.4
Renaming Devices
To rename a device:
1 Display the Device Definition Panel for the device you wish to rename.
2 Click on the Menu button to display the Device Menu.
3 Click on the Device Menu command Rename Current Device.
4 Type in a new name for the current device.
5 Click on the OK button. The current device will be renamed.
A4.4.5
Deleting Devices
Click on the Delete Device command on the System Menu. A colour-coded list of the currently defined devices is displayed. Clicking on a device selects it to be deleted. A warning
message appears, asking you to confirm that you wish to delete the selected device.
A4.4.6
Device Templates
New devices can only be created if a device template is chosen. Device templates take much
of the effort out of setting up new devices. The template will allocate some sensible default
values to the settings on the Device Definition Panel. There are templates for most of the
common types of device you are likely to connect to the system. See ‘Device Templates’ on
page 619.
Note that the template chosen for the device may affect whether it is subsequently possible
to modify some of the device settings. For example, a device based on the DAT template
will not allow video inputs and outputs to be set. To reflect this, these settings are greyed
out on the Device Definition Panel.
The Device Definition Panel will initially be set with some defaults for the new device,
based on the chosen device template.
Lightworks V.I.P 4500 Version 3 - User Guide A4.0 - 107
A4.4
External Devices
Custom Devices
If you wish to create a custom device where all options, media types, and channels
are available, choose the Custom device type. Custom devices will not have any
media types selected when they are first created.
To choose the types of media (tapes) acceptable to the device, go to the Media Card
on the Device Definition Panel and use the Add Media Type button. Then select the
tape formats from the list.
Note: If you create a custom device and have all media types listed, any tape type will
be allowed in the device. This may not make operational sense, as during autoconform the system may request tapes to be inserted into incompatible devices.
Live Feed Devices
A live device can be created from a Live Feed template or a custom device whose
acceptable media is set to 'live' by checking the Live Feed box on the Media Card of
the Device Definition Panel.
Live feed devices do not support any type of media - you cannot put a tape in a router!
Live feed devices have no ‘tape’ and, as non-repeatable and non-controllable
sources, they cannot be used for certain types of recording (autoconform, for
example).
A4.4.7
Live Feed Reels
Live feeds have a reel created for them that can be inspected via the Reels Panel. This live
reel can be used as a source for edit-to-it and Recording Panel recordings.
The live device and the live reel are tied together - therefore if a live device is selected on
a Recording Panel the live reel is automatically used. The live reel cannot be selected by
another device. When the live device is selected as a source for an Edit-to-it Viewer, the live
reel is automatically loaded into the Viewer.
The live reel for the device is shown on the Reels Panel and can be modified in the same
way as other reels, except that the device type cannot be changed.
A4.4.8
Using the Device Definition Panel
The Device Definition Panel is used to set the video, audio, timecode, port connections and
media types for a device. It also sets the source record or master controller status of each
device.
A4.0 - 108
Lightworks V.I.P 4500 Version 3 - User Guide
External Devices
A4.4
The Device Definition Panel can be displayed in the following ways:
Click On the Change Device Connections/Inspect Device Definitions Command.
Click On the Device Button On the VTR Monitor Panel.
Click On the Add New Input Device Command On the System Menu.
Device Definition Panel
Depending on the method used to display it, the Device Definition Panel may be displayed
in read-only mode. See ‘Security Of Device Definitions’ on page 113.
Selecting a Device
The Device Definition button displays the name of the device which the Device Definition Panel is currently ‘looking at’. To select a different device, click on this
button. A list of all the devices currently defined, grouped by device type, is displayed. Click on the name of the desired device and the Device Definition Panel will
display the details for that device.
The device type - Source Record, Master Controller and Manual Control is shown on
a button at the bottom of the panel. This can be changed by clicking on the button,
although the choice may be restricted based on the device template chosen at the time
the device was created.
Lightworks V.I.P 4500 Version 3 - User Guide A4.0 - 109
A4.4
External Devices
The Device Definition Panel has four cards, as follows:
Video Card
The Video Card sets input and output connections for video, based on the physical
connections between the device and the V.I.P system. Buttons display the current
connections - click on them to select from the list of available inputs or outputs.
The reason for including both inputs and outputs is that when Source/Record device
types are used for playouts, the video from the edit in the Playout Viewer is routed to
the defined system output. The video output for E to E monitoring can be assigned
using the Video Output buttons. See ‘Video Output Routing’ on page 333.
Audio Card
The Input Type button has three options:
A4.0 - 110
Lightworks V.I.P 4500 Version 3 - User Guide
External Devices
A4.4
Analogue
AES/EBU Digital
AES/EBU (+SRC)
SRC stands for Sample Rate Conversion. This option will convert audio with
digital sample rates between 30kHz - 55kHz to the audio sample rate of the
Project (normally 48kHz) during recording.
The AES/EBU (+SRC) option is best used only in cases where audio needs to
be sample rate converted. Using sample rate conversion when the input audio
is at the same sample rate as the Project will still put the audio through the
sample rate conversion process.
The Input Chans button produces a Device Audio Routing Panel.
This allows channel mapping from the device outputs to the V.I.P system inputs. The
original audio channel from the tape will be stored with any shots recorded from that
device. This allows the V.I.P software to store accurate information regarding original channels during autoconform and when creating EDLs and Logging Databases.
Device channels that are not connected should be set to none and will be displayed
as "X" on the Input Chans button.
The Sync button is used to select the synchronisation source for audio-only recordings. See ‘Audio Synchronisation During Recording’ on page 118.
Lightworks V.I.P 4500 Version 3 - User Guide A4.0 - 111
A4.4
External Devices
Media Card
Live Feed
Checkbox
The Media Card indicates which media (tape types) the device accepts. By defining
this for the device, and defining the tape type for each reel ID on the Reels Panel, the
system can schedule which devices can record the tapes needed for an autoconform.
Some device types will replay multiple tape types - for example if you choose Digital
Betacam/Betacam SP Playback, the software will assume both Digital Betacam tapes
and small or large Betacam SP tapes will be accepted by the device.
The Live Feed checkbox will cause the device to behave as a device that has been set
up with a Live Feed device template. All supported media types will be cleared.
A4.0 - 112
Other Card
Lightworks V.I.P 4500 Version 3 - User Guide
External Devices
A4.4
LTC Input
Determines which of the four LTC input connections to use - 0 -3 or none.
LTC Output
Determines which of the four LTC output connections to use - 0-3 or none.
Control Port Type
Click on the button to list the options COM Port, Omnibus or None. Selecting
None will make the device a manual control type.
Control Port Number
Determines the number of the port to use. Click on the button to display a list
of available ports. It should be noted that multiple devices cannot use the same
port and a check is also made for serial devices on the port.
VTR Setup
See ‘Setup Options For VTRs’ on page 115.
Label Mapping
This button specifies the label mapping to use when recording from the device,
if no label mapping is defined for the reel. Any device can have the default
label mapping changed, regardless of the template used to create it.
A4.4.9
Security Of Device Definitions
It is possible to prevent users from making changes to devices in Rooms other than the
Machine Room, using the Device Menu command Enable Device Configuration In All
Rooms. (This command only appears on the Device Menu in the Machine Room.)
Since the Machine Room is password protected, the system administrator can control the
set up of device definitions and prevent other users from changing them.
Enable Device Configuration In All Rooms - NO
In all Rooms except the Machine Room the relevant controls on the Device Definition Panel are greyed out and cannot be altered.
Enable Device Configuration In All Rooms - YES
The device definitions can be changed in all Rooms.
Lightworks V.I.P 4500 Version 3 - User Guide A4.0 - 113
A4.4
External Devices
Even when it is possible to change device connections in ordinary Rooms, many screen
objects reserve devices for use to prevent connections being changed during an operation.
A4.4.10
Default Label Mapping For Devices
The Label Mapping button on the Other Card specifies the label mapping to use when
recording from that device, if no label mapping is defined for the reel.
All devices, regardless of the template they were created from, can have their default label
mapping changed. This will normally be defined as a sensible default for the type of device.
For example, 9-pin will be defined for VTRs and time-of-day timecode for live devices.
See ‘Allocation Of Label Mapping Sets For Recordings’ on page 126.
A4.4.11
Slave Operations Using Master Control Devices
When a master control device type is selected on the Recording Panel or Playout Viewer,
the Start button on the Playout Viewer or Record button on the Recording Panel is replaced
by the word “Slave” - indicating that the master control device will have control of the
system.
The editor must click on the Standby button to hand control of the Recording Panel or
Playout Viewer to the master control device. Control is regained by clicking on the Standby
button again to go out of standby.
Slave Recordings
Multiple simultaneous slaved recordings are supported, up to the limit of the number
of record channels available to the system at any one time.
Slave Playouts
Multiple simultaneous slaved playouts are not supported.
Recording or Playing Out Under Omnibus Control
The Omnibus automation system can be used in conjunction with Lightworks V.I.P
system and Tektronix Profile disk recorders to create an automated broadcast environment. For more information on using the V.I.P system with Omnibus automation,
see ‘Features For Use With Omnibus Automation Systems’ on page 623.
A4.0 - 114
Lightworks V.I.P 4500 Version 3 - User Guide
Setup Options For VTRs
A4.5
A4.5
Setup Options For VTRs
There are some settings specific to the type of VTR. See ‘Device Templates’ on page 619. These can be
changed from their default values using the VTR Setup Panel.
To display the VTR Setup Panel, select the appropriate VTR device and click on the VTR Setup button
on the Device Definition Panel Other Card. The VTR Setup Panel is displayed, with the following
options:
Auto Edit
Does the VTR support autoedit commands? If not, then record on/off commands are used.
Edit Delay
The number of frames delay between the VTR receiving a record command and entering record.
Note: This value can normally be found on the dial menu on the VTR itself.
Fast Cueing
This option should be set to Yes if, when cueing, a device is capable of fast forwarding or
rewinding until it gets near the timecode in-point and then going into search to locate the exact inpoint. For Profile disk recorders this option should be set to No.
Control Track
If the device supports control track cueing, this option should be set to Yes. This means the system
will cue the device to the in-point, then use control track to preroll the tape (in case there is a break
in the timecode during the preroll time).
Note: Some older VTRs do not support this method of locating an in-point.
When the V.I.P system is being controlled from a master controller device, it does not support control track cueing.
Playout Type D2/D3
Set to Yes if the VTR supports four channels of audio that can be independently edited according
to the Sony D2/D3 edit command protocol. This includes Digital Betacam VTRs.
Note: Certain types of VTR, even if they do have four channels of audio, may not accept these edit
commands.
Lightworks V.I.P 4500 Version 3 - User Guide A4.0 - 115
A4.6
Monitor Panels For VTRs and Other Controllable Devices
A4.5.1
Sony Protocol Adjustment
Certain VTRs do not strictly conform to the timings of Sony 9-pin protocol. The VTR will
fail to cue correctly and may abort recordings. Problems are caused by the V.I.P software
being very stringent when checking the timing of communication between the VTR and
V.I.P system via the 9-pin machine control cable.
The problem can be addressed by adding a parameter to the CONFIG. DAT file. See
‘vtr_timeout’ on page 606.
It has been reported that setting this parameter to a value of 0.03 helped in the case of controlling the Sony DVW522 via the TSIF1 protocol converter box.
A4.6
Monitor Panels For VTRs and Other Controllable Devices
To display a VTR Monitor Panel for any controllable source/record devices configured with the system,
click on the VTR Monitor Panel command on the General Menu.
The VTR Monitor Panel will allow you to monitor audio and video from the device, and to control the
device independently of its use by any of the other Tools on the V.I.P system.
A4.6.1
VTR Monitor Panel Controls and Displays
Device Status Display
Device Button
Video Output
Button
Transport Control
Buttons
Reel Information
Button
Reel ID
Display
Eject
Button
VTR Monitor Panel
A4.0 - 116
Lightworks V.I.P 4500 Version 3 - User Guide
Userbits
Display
Timecode
Display
Monitor Panels For VTRs and Other Controllable Devices
A4.6
The VTR Monitor Panel has the following controls and displays:
Device Status Display
Shows the current status of the connected device.
Device Button
Clicking on the Device button displays the Device Definition Panel for the named
device.
Timecode Display
Displays either LTC or VITC from the machine control cable.
To change the timecode and userbits display between LTC and VITC, right+left-click
in the timecode display. A Timecode to Display Panel will appear. Click on the LTC
or VITC button according to the timecode source you want the VTR Monitor Panel
to display. The display will update when the OK button is clicked.
Note: This does not affect which timecode source is actually recorded.
Userbits Display
Displays either VITC or LTC userbits.
Reel ID Display
If a reel ID has been entered this will be displayed. If not, the reel ID field will show
“???”. Clicking on the display will prompt you to either select a reel from the list of
reels in the Project or create a new reel.
You can configure the system to prompt you to enter a reel ID whenever it detects a
tape change or the VTR comes online or you enter a Room. See ‘Setting Up Reel ID
Prompting’ on page 102. This will happen whether you are actually using the device
or not, so it may be distracting.
Reel Information Button
Displays reel information about the current reel.
Video Output Button
Used to assign E to E output from the VTR.
Lightworks V.I.P 4500 Version 3 - User Guide A4.0 - 117
A4.7
Audio Synchronisation During Recording
Eject Button
Ejects the tape from the VTR (as long as the tape is paused or stopped).
Transport Control Buttons
Click on one of the Transport Control Buttons (rewind, play reverse, stop, play forward, fast forward) to control the device. The active button will be highlighted.
A4.7
Audio Synchronisation During Recording
On the Device Definition Panel Audio Card there is a Sync button. This is used to select the synchronisation source for audio-only recordings. Clicking on the Sync button will toggle between the options.
Video
This is the normal setting for recording sync video and audio (from a VTR, for example).
When recording digital audio, the system will monitor the drift of the video sync source away from
the self-clocking digital audio signal. If the drift becomes too great then recording will be terminated. This feature can be adjusted by a CONFIG.DAT parameter. See ‘audio_drift_tolerance’ on
page 588.
It is possible to make an audio-only recording locked to video without connecting a video input
from the source device. In this case the system genlock video reference is used as the synchronisation source.
LTC
When recording AES/EBU digital audio synced to timecode, the system will monitor the drift of
the LTC sync source away from the self-clocking digital audio signal. If the drift becomes too
great then recording will be terminated. This feature can be adjusted by a CONFIG.DAT parameter. See ‘audio_drift_tolerance’ on page 588.
Free Running
For free running recordings of analogue audio, the long term synchronisation of sound is
dependent on the speed accuracy of the source machine and of the internal clock.
When recording AES/EBU digital audio without accompanying video or timecode, there is no
long-term sync drift as the digital audio signal is self-clocking.
A4.0 - 118
Lightworks V.I.P 4500 Version 3 - User Guide
Adjustment Of Digital Audio Operating Levels
A4.7.1
A4.8
Recording Digital Audio Locked To Audio Inputs
The system will normally record digital audio by assuming it is locked to the reference genlock video input ('house sync'). If the signal is not correctly locked, the recording may fail
or have digital ‘dropouts’.
You can lock the audio system to an AES/EBU digital audio signal that is not itself locked
to the reference genlock signal - (for example, from a free-running digital device such as a
CD player). This is done by means of a CONFIG.DAT parameter. See
‘lock_digital_recordings_to_digital_inputs1&2’ on page 598.
The audio system will be locked to any AES/EBU digital audio signal connected to inputs
one and two. To remind you of this, a message “Audio record sample clock is locked to digital inputs one and two” is displayed whenever a recording is made from a source with digital audio. This message can be removed by means of a CONFIG.DAT parameter. See
‘lock_digital_recordings_advisory_message’ on page 598.
A4.8
Adjustment Of Digital Audio Operating Levels
A CONFIG.DAT entry allows the analogue signal level that relates to 0dB digital to be set (in dBu). See
‘system_0dBFs_level’ on page 603.
For example, to set the V.I.P system so that 0dB digital relates to +18dBu analogue you would need to
set the CONFIG.DAT parameter system_0dBFs_level to a value of 18.
If this CONFIG.DAT entry is used then a comment is written on initialization to the V.I.P application
window and the error.log, to indicate that the system level is not the default +24dBu. In the case of the
above example the comment would be “0dB digital set to 18dBu analogue”.
If the entry is not present in the CONFIG.DAT file, then the hardware will default to being 0dB digital
= +24dBu analogue.
Note: The adjustment is achieved by applying gain/attenuation to all the ADC and DACs in the
audio interface chassis. So when the level is moved away from the default of +24dBu (which
requires no gain adjustments) the amount of gain adjustment it is possible to make to input levels
on the Record Panel reduces accordingly. For example, in the default case the gain controls on the
Record Panel allow gain adjustments in the range +33dB to -40dB; however if the system level
has been reduced to +18dBu these gain controls only allow adjustments in the range +27dB to 40dB. The available range of the system_0dBFs_level is between +24dBu and -9dBu.
Lightworks V.I.P 4500 Version 3 - User Guide A4.0 - 119
A4.8
A4.0 - 120
Adjustment Of Digital Audio Operating Levels
Lightworks V.I.P 4500 Version 3 - User Guide
A5.0 Recording 2 - Recording Timecode and Labels
A5.1
Introduction
Timecode can be used as a means of labelling the frames of material recorded into the Lightworks V.I.P
system, for future identification.
Whenever it makes a recording, the V.I.P system refers to a label mapping set in order to know what to
do with the label information stored in LTC and VITC on the source tapes. The label mapping set used
for the recording is specified on a per reel basis.
A5.1.1
Some Definitions
Labels
A label can be any of the codes used to label the individual frames of source material
(for example; video timecode, audio timecode, film edge numbers).
A label may also be information which does not change during a shot or take, such
as camera ID, date of filming or reel ID. These labels can also be encoded as part of
the LTC or VITC on a video tape.
Label Mapping
Label mapping refers to the way labels are assigned from the LTC or VITC on the
source tape to a destination in the shot log by means of a label mapping set.
Label Mapping Set
A label mapping set determines which labels (up to a maximum of ten) are read,
decoded and saved with a shot when it is recorded into the V.I.P system.
Label Mapping Panel
The Label Mapping Panel is used to define and save label mapping sets.
A5.1.2
Sources Of Labels
The Device Definition Panel for the source device determines the physical source of any
labels required by the label mapping set used for the recording.
Lightworks V.I.P 4500 Version 3 - User Guide A5.0 - 121
A5.2
Primary Timecode
LTC
The system has four LTC readers that can be allocated to particular devices using the
Device Definition Panel. Any source of LTC connected to the appropriate LTC input
on the genlock card will be logged when a recording is made from that device.
Note that timecode reference data can be recorded from the 9-pin machine control
cable.
VITC
Vertical Interval Timecode will be read from the video input selected on the Device
Definition Panel.
9-pin Timecode
The machine control port selected for the device is used as the source for any 9-pin
labels.
A5.2
Note: 9-pin labels can only be used where machine control is available and connected
for the source device.
WARNING: THE ACCURACY OF ANY TIMECODE INFORMATION
DERIVED FROM THE MACHINE CONTROL CABLE RELIES ON THE
DEVICE GENERATING THE SIGNAL. CHECK THAT THE SIGNAL
FROM THE DEVICE IS OF THE REQUIRED TYPE. ALSO NOTE THAT
THIS SIGNAL MAY NOT BE FRAME ACCURATE IN ALL CASES.
Primary Timecode
The primary timecode is the ‘main’ timecode (usually the longitudinal timecode) of the video or audio
tape. The primary timecode recorded for the first frame of the shot is the one that will be displayed on
the Filecard when the recording is completed.
The type of media the recording is made from - either an audio or video tape - is known to the V.I.P
system via the Media selection on the Device Definition Panel.
The primary timecode will usually be the one used in an EDL. Audio events in an edit can be made to
reference the original audio timecode label in an EDL if desired. See ‘Timecode Type’ on page 462.
The Original Audio Timecode label can be used when reference is to be made to another ‘original’ audio
source, and the presence of the label does not specify the tape is an audio tape. When defining an original
audio timecode label, the system will use the knowledge it has about the media, providing the input to
assign the primary timecode and original audio timecode labels as follows:
A5.0 - 122
Lightworks V.I.P 4500 Version 3 - User Guide
Standard Label Mapping Sets
A5.3
Video Tapes
If the system knows that the input medium is video (as defined by the Device Definition Panel for
the device recorded from), then the video timecode (LTC) is assigned as the primary timecode.
If an audio timecode label is also defined, it will be assigned to the original audio timecode label.
Audio Tapes
If the input media is audio tape, the audio timecode (LTC) is assigned as the primary timecode.
If an original audio timecode label is defined in the label mapping set, it is ignored.
The frame rate of the primary timecode must be correctly defined in the label mapping set - so if the primary timecode is defined as a 25 frame timecode, it must be running at 25 frames per second, not 24.
The primary timecode is important for a number of reasons:
At the start of the recording, the V.I.P system will check that the incoming primary timecode matches
the TV Standard of the Project in which the recording takes place. The recording will stop if there is a
discrepancy - for example, if primary timecode is 30 frame NTSC timecode but the Project is set to PAL.
For audio-only recordings, the frame rate (25 or 30 frames), which enables the V.I.P system to synchronise to the incoming LTC, is determined by the type of the primary timecode.
The primary timecode is used to detect the end of a recording which is being controlled by a Logging
Database and so must be the same as the label used for the tape machine cueing commands.
A5.3
Standard Label Mapping Sets
Label mapping sets have the file extension .TCM and are stored in the folder C:\LWPROJ. They can be
accessed using the Label Mapping Visidir. See ‘Using the Label Mapping Visidir’ on page 126. This section describes the standard label mapping sets provided with the V.I.P software.
NORMPAL
This is the default for PAL Projects. A 25 frame video timecode will be read from the LTC input
allocated to the device.
NORMNTSC
This is the default for all NTSC video Projects. A 30 frame video timecode (drop or non-drop)
will be read from the LTC input allocated to the device.
Lightworks V.I.P 4500 Version 3 - User Guide A5.0 - 123
A5.3
Standard Label Mapping Sets
AUDIO25
This is for making audio recordings from an audio tape with 25 frame LTC. A 25 frame audio
timecode will be read from the selected LTC input for the device.
The following label mapping sets are intended to be used to read timecode from the information provided
by the 9-pin machine control cable connected to one of the RS-422 control ports of the V.I.P system. The
Device Definition Panel for the source device for the recording will determine which of the V.I.P system
RS-422 machine control ports the information is read from.
NTS9PIN
For NTSC Projects. A 30 frame primary timecode (drop or non-drop) is read from the 9-pin
machine control cable.
PAL9PIN
For PAL Projects. A 25 frame primary timecode is read from the 9-pin machine control cable.
The following label mapping sets are intended for use with VITC. There are two sets based on reading
VITC information from TV line 16 or line 19. The Device Definition Panel for the source device for the
recording will determine which of the V.I.P system video inputs the VITC is read from.
NTSVIT16
For NTSC Projects. A 30 frame primary timecode (drop or non-drop) is read from line 16 of
VITC.
NTSVIT19
For NTSC Projects. A 30 frame primary timecode (drop or non-drop) is read from line 19 of
VITC.
PALVIT16
For PAL Projects. A 25 frame primary timecode is read from line 16 of VITC.
PALVIT19
For PAL Projects. A 25 frame primary timecode is read from line 19 of VITC.
A5.0 - 124
Lightworks V.I.P 4500 Version 3 - User Guide
Standard Label Mapping Sets
A5.3
PAL3LV16
For PAL Projects. A 3-line VITC signal is read, starting at line 16.
NTS3LV16
For NTSC Projects. A 3-line VITC signal is read, starting at line 16.
In certain installations, where the genlock video signal includes a vertical interval timecode, NTSSYNC
and PALSYNC can be used to read a time-of-day timecode directly from the genlock video input:
NTSSYNC
For NTSC Projects. A 30 frame timecode is read from line 16 of the genlock reference signal.
PALSYNC
For PAL Projects. A 25 frame timecode is read from line 16 of the genlock reference signal.
Using one of the following label mapping sets means that live feed recordings can have a useful timecode
definition in a label mapping set defined as the default for the live feed device. It also avoids the need to
set label break detection on a per-recording basis.
NTSDURTN
For NTSC Projects. A 30 frame duration timecode is given to recordings.
NTSTOFD
For NTSC Projects. A 30 frame time-of-day timecode is added to recordings.
PALDURTN
For PAL Projects. A 25 frame duration timecode is added to recordings.
PALTOFD
For PAL Projects. A 25 frame time-of-day timecode is added to recordings.
OMNISYNC
This label mapping set must be used when making recordings under the control of Omnibus automation systems. It reads time-of-day timecode from the system genlock input. See ‘Features For
Use With Omnibus Automation Systems’ on page 623.
Lightworks V.I.P 4500 Version 3 - User Guide A5.0 - 125
A5.4
A5.4
Allocation Of Label Mapping Sets For Recordings
Allocation Of Label Mapping Sets For Recordings
The label mapping set used for a recording will be the label mapping set of the source reel. If the reel has
no label mapping set defined then the default label mapping set for the device will be used.
The label mapping set for a reel or device is assigned using the Label Mapping Visidir.
A5.4.1
Using the Label Mapping Visidir
To display the Label Mapping Visidir, for a reel, click on the Label Mapping button on the
Reels Panel.
To display the Label Mapping Visidir, for a device, click on the Label Mapping button on
the Device Definition Panel.
Label Mapping Visidir for Device
The Label Mapping Visidir lists all the available label mapping sets and allows you to:
Assign a Label Mapping Set
Clicking on the OK button will assign the currently highlighted label mapping set to
the reel or device. A check is made to ensure that the label mapping set is compatible
with the current device (unless you are defining a reel default).
A5.0 - 126
Lightworks V.I.P 4500 Version 3 - User Guide
Using the Label Mapping Panel
A5.5
Revert To a Default Label Mapping Set
Clicking on the Default button cancels any selected label mapping set and uses the
default label mapping set for the device.
Display the Label Mapping Panel To Inspect or Modify a Label Mapping Set
Clicking on the Inspect/Change button will display the Label Mapping Panel for the
highlighted label mapping set.
Display the Label Mapping Panel To Create a New Label Mapping Set
To create a new label mapping set:
1 Display an existing label mapping set in the Label Mapping Panel, using the Inspect/
Change button on the Label Mapping Visidir.
2 Using the Label Mapping Panel, modify the settings for the existing label mapping
set to those desired for the new label mapping set.
3 Save the modified label mapping set under a new name. See ‘Saving a Label Mapping
Set’ on page 132.
Delete a Label Mapping Set
Clicking on the Delete button deletes the selected label mapping set (unless it is used
as a default for any device or reel, in which case it cannot be deleted).
A5.5
Using the Label Mapping Panel
A5.5.1
Displaying the Label Mapping Panel
1 Display the Label Mapping Visidir. See ‘Using the Label Mapping Visidir’ on page
126.
2 Click on the name of the label mapping set to be inspected/modified.
Lightworks V.I.P 4500 Version 3 - User Guide A5.0 - 127
A5.5
Using the Label Mapping Panel
3 Click on the Inspect/Change button. The Label Mapping Panel is displayed.
Label Name
Buttons
Record Control
Buttons
Source / Type
Buttons
Label Mapping Panel
The Label Mapping Panel lists all the possible items of data that could be read during
recording. The layout of the Label Mapping Panel corresponds to that of the Viewer Labels
Panel, where the labels read during recording can be viewed once the recording of the shot
is complete. See ‘Viewer Labels Panel’ on page 217.
A5.0 - 128
Lightworks V.I.P 4500 Version 3 - User Guide
Using the Label Mapping Panel
A5.5.2
A5.5
Active Labels
Clicking on a Label Name button will highlight it in green to indicate that the label will be
read during recording - the label is said to be ‘active’.
A5.5.3
Optional and Compulsory Labels
The primary timecode for a recording is always compulsory, but label mapping sets can
have other labels defined as optional or compulsory. The optional or compulsory status of
the label determines how the system responds during the recording if the label is missing.
Optional Labels
Optional labels are those that do not have the Stop REC if Missing checkbox
checked.
These will be read and added to the log of the recorded shot if they are found in the
source defined in the label mapping set. If the label is not found, the system will
ignore it. Missing optional labels will not stop the recording.
Compulsory Labels
Each highlighted label has a Stop REC if Missing checkbox next to it. Compulsory
labels are those that have the Stop REC if Missing checkbox checked. When a label
is defined as compulsory then, if the label is missing, the recording will be aborted
after a few seconds.
This behaviour can be overridden, if necessary, by setting Stop Record if Label
Missing to NO on the Recording Panel Menu. In that case, even if a compulsory label
is missing, the recording will continue.
A5.5.4
Record Control Label
Any highlighted label which is a ‘counting’ label (for example, timecode), has a red Record
Control button which can be used to set that label as the record control label. Only one label
can be used to control breaks in recordings - and this label must be ‘active’.
Lightworks V.I.P 4500 Version 3 - User Guide A5.0 - 129
A5.5
Using the Label Mapping Panel
A5.5.5
Displaying Details Of Labels
Each label has a Source/Type button which displays a brief description of the label type and
the source it is to be read from. Clicking this button will display a Source/Type Panel that
has the following features.
Source/Type Label for Primary Timecode
Type Button
Clicking on this button displays a list of available label types appropriate to the label.
Error Correction Button
This numeric entry box allows for correction of static errors - for example introduced
by a telecine reader offset. Enter ‘+’ or ‘-’ to add or subtract from the read data.
Where From Button
This specifies the input route. The choices are normally LTC input, VITC line, 3-line
VITC, 9-pin LTC, 9-pin VITC.
For primary timecode, the following options are also available:
9-pin Control
Control track read from the machine control cable.
Time-of-Day
This uses the system clock to provide the timecode for the recorded shot.
Genlock VITC
This uses timecode read from the genlock (house sync) signal.
A5.0 - 130
Lightworks V.I.P 4500 Version 3 - User Guide
Using the Label Mapping Panel
A5.5
Duration
Timecode counts from zero at the first frame of the recorded material.
A5.5.6
Label Types
The following label types are available:
NTSC 30 Frame Video Timecode
The type of NTSC timecode (drop or non-drop) is automatically detected during
recording - it is not necessary to specify this as a label type.
PAL 25 Frame Video Timecode
25 Frame Camera Timecode
24 Frame Camera Timecode
25 Frame Audio Timecode
Film Inknumber - 16mm, 35mm
Film Keycode - 16mm, 35mm, 35mm 3-perf
Aaton/Evertz 3-line VITC Edgecode
Camera Date - dd:mm:yy or mm:dd:yy
Camera ID
The format of a particular label type may vary significantly depending on how the recording
to the source tape was originally set up. In some cases it will be necessary to use the label
mask feature.
A5.5.7
Label Mask
The label mask feature is used, for certain labels only, to specify exactly where the label
information is located in the 64 usable bits of LTC and VITC.
First, display the Details Panel by clicking on the Details button on the Source/Type Panel.
The Details Panel has a button to choose the label source between two 32-bit fields, called
timecode (T/C) and userbits (U/B).
Lightworks V.I.P 4500 Version 3 - User Guide A5.0 - 131
A5.5
Using the Label Mapping Panel
For certain labels, the Details Panel also has a series of eight green Nibble buttons, each of
which toggles between “Y” and “N”.
Details Panel with Nibble Buttons
For these labels, you can mask off any individual 4-bit group within the selected 32-bit
field, by pressing on any of the 8 Nibble buttons. If a nibble is active the button is labelled
“Y”, and if a nibble is inactive the button is labelled “N”.
For many conventional labels, this mask is not relevant, and all 8 groups are left active. For
some ‘packed’ labelling standards (for example, the Aaton/Evertz 3-line VITC standard),
the mapping is complex and the mask is essential.
In order to use the mask facility with ‘packed’ labels generated during telecine film transfers, it is necessary to know how the telecine equipment is set up to encode label information. It is recommended that you discuss this with your telecine house and perform a
recording test before commencing real work.
A5.5.8
Saving a Label Mapping Set
The Label Mapping Panel Save As button allows any modified label mapping set to be
named and stored. A warning is displayed if the name selected already exists. You cannot
overwrite any label mapping set which is defined as a default for any device or reel.
To save the label mapping set:
1 Click on the Save As button.
A Visidir will be displayed allowing an existing set to be overwritten, or a new name
for the set to be entered. Enter the name for the new label mapping set in the text entry
window of the Visidir.
2 Click on the OK button. The saved label mapping set will be added to the list
displayed in the Label Mapping Visidir next time.
A5.0 - 132
Lightworks V.I.P 4500 Version 3 - User Guide
Using the Label Mapping Panel
A5.5.9
A5.5
Label Mapping Set User Description
On Recording Panels and Edit-to-it Viewers, the filename of the label mapping set is
accompanied by a line of text. This will display the description entered when the label mapping file is created or modified. Type the required text into the User Description field of the
Label Mapping Panel.
If any label in the label mapping set has an error correction defined, the Recording Panel or
Edit-to-it Viewer will display an “Offset in Use” message in red, under the label mapping
set description.
A5.5.10
Reel ID From Labels
It is not possible to read the primary reel ID automatically from the label data stream from
a device.
The Label Mapping Panel includes a Primary Reel button, but this cannot be highlighted.
The reason for the Primary Reel button is to reinforce the idea that there is the same relationship between primary timecode and primary reel ID and original audio timecode and
original audio reel ID and so on.
If the recording is being made from a video tape, then if an original audio reel ID label is
requested, it is read and added to the shot log. However, if the device is an audio device (as
defined on the Device Definition Panel) then a requested original audio reel ID will be
ignored. This is because the primary reel ID will already be known, since it is specified by
the user when making the recording.
A5.5.11
Note: The labels for Compilation Reel and Camera Reel are not tested by the system.
Record Control
If the Stop Record if Label Break command on the Recording Panel Menu is set to YES,
recording can be automatically stopped and restarted according to breaks in the record control label. This facility can be extended so that recording can be controlled by breaks in any
of the active labels. The Label Mapping Panel enables you to assign recording control to
any of the defined labels.
To assign the record control to an active label, click on the red Record Control button next
to the appropriate Label Name button.
Only one active label can be assigned as record control label at any one time. The record
control label should generally be the label that is most likely to contain discontinuities.
Lightworks V.I.P 4500 Version 3 - User Guide A5.0 - 133
A5.6
A5.6
Coping With Missing Labels
Coping With Missing Labels
Missing labels occur if a source tape has discontinuous timecode, gaps in the timecode, or no timecode
at all.
For the primary timecode or any other label specified as a compulsory label (see ‘Optional and Compulsory Labels’ on page 129), recording will normally abort when a missing label is detected.
A5.6.1
Recording From Tapes With Breaks In Timecode
If a source tape has continuous timecode, the V.I.P system can record it to create a single
shot. However, if the system detects breaks in the primary timecode, it will stop the current
recording at the break and start a new recording after the break.
This section describes how the system can be set up to cope with gaps or breaks in the timecode.
Stop Record if Label Missing
The setting of the Stop Record if Label Missing command determines the behaviour
of the system if any of the labels defined as ‘compulsory’ in the label mapping set
being used for the recording is missing. In many cases this command can be used to
allow a recording to be made if the primary timecode is missing.
When Stop Record if Label Missing is set to YES, recording will stop if any of the
active ‘compulsory’ labels are missing.
When Stop Record if Label Missing is set to NO, recordings are possible even if
one or more of the active labels is missing. The Recording Panel will display an
“Ignoring Missing Label” warning.
A5.0 - 134
Lightworks V.I.P 4500 Version 3 - User Guide
Coping With Missing Labels
A5.6
Stop Record if Label Break
The setting of the Recording Panel Menu command Stop Record if Label Break
determines how breaks in the record control label are treated by the system.
When Stop Record if Label Break is set to YES, the system will look for breaks in
the record control label defined in the label mapping set used for the recording.
If a source tape contains several shots, each with its own section of timecode, then
timecode break detection can help break the source tape into separate shots on the
V.I.P system. Simply leave the tape running with the Recording Panel in record and
the material will automatically be broken down.
When a break in the timecode is detected, recording will stop. The VTR will preroll
back from that point and then play forward and attempt to start recording after the
point at which the timecode break was detected. If no timecode is found immediately
after the break, then the recording will abort with a warning message.
Continuation recordings made after a timecode break will have the text “(cont)”
appended to the original shot name. For example, “David(cont)” if the original
recording was named “David”.
Note: It takes one to two seconds to stop one recording and start the next. If the shots
on the tape are very close, and the first few frames are essential, you may need to stop
the tape and manually cue the tape to the start of the next shot before clicking the
Record button.
When Stop Record if Label Break is set to NO, the system will ignore any breaks
in the record control label defined in the label mapping set used for the recording.
You may wish to do this when recording from a source with no timecode or with poor
quality timecode. If the Stop Record if Label Break command is set to NO, then the
Recording Panel will display an “Ignoring Label Break” warning.
WARNING: IT IS NOT POSSIBLE TO GENERATE A VALID EDL FROM
SHOTS WITHOUT A TIMECODE REFERENCE.
If there is some way of referencing timecode after recording you may still be able to
use these shots to generate a valid EDL. See ‘Entering Labels Manually’ on page 137
for a method of entering timecode manually after recording.
Lightworks V.I.P 4500 Version 3 - User Guide A5.0 - 135
A5.6
Coping With Missing Labels
A5.6.2
Recording From Tapes With Gaps In Timecode
When recording from a video tape which consists of a number of shots (video with timecode) interspersed with gaps of blank tape (containing no timecode), it can be useful to
change the behaviour of the system, so that recordings will automatically pass over any
gaps in timecode and recommence when a valid timecode is received.
This is done using parameters in the CONFIG.DAT file. See ‘record_miss_gaps_mode’ on
page 601 and see ‘record_miss_gaps_timeout’ on page 602.
Ensure that the command Stop Record if Label Break is set to YES.
When a break in timecode is detected, the recording of the current shot will end (and the
Tile will be added to the Recordings Gallery, if displayed). The Recording Panel will still
indicate “Record” and the tape in the VTR will play for the selected timeout period. If,
within this time, a valid timecode is received, then recording will recommence.
When a valid timecode is detected again, the VTR is not prerolled, because attempting to
preroll back over a blank tape will generally result in the VTR positioning the tape back to
the previous shot.
If no timecode is detected during the timeout interval the recording will abort.
A5.6.3
Recording From a Source With No Timecode
To record source material without timecode you should use one of the standard label mapping sets provided for this purpose to give recordings a timecode based on the time-of-day
or duration. See ‘Standard Label Mapping Sets’ on page 123.
If you want to temporarily record source material without timecode using a Recording
Panel, use the Recording Panel Menu to make the following settings:
Stop Record if Label Missing - NO
Stop Record if Label Break - NO
With these settings the V.I.P system will record the material from the selected source device
without needing a timecode input.
A5.0 - 136
WARNING: IT IS NOT POSSIBLE TO GENERATE A VALID EDL FROM
SHOTS WITHOUT A TIMECODE REFERENCE.
Lightworks V.I.P 4500 Version 3 - User Guide
Entering Labels Manually
A5.7
A5.7
Entering Labels Manually
A5.7.1
Adding New Labels To a Shot
It is possible to add new labels to a shot, using the Viewer Labels Panel. A reference to the
original label is required - such as a burn-in window in the video.
1 Make the recording as described in the section ‘Recording From a Source With No
Timecode’ on page 136.
2 Display the shot in a Viewer.
3 Click on the Viewer Labels Panel button (yellow triangle) to display the Viewer
Labels Panel.
Label Name
Buttons
Viewer Labels Panel
4 Set the Current Time/Start Time button to display Current Time.
5 Click on the Jump To button. It will turn red and display the word “Modify”.
6 Click on the Label Name button of the label to modify. The button will turn green.
7 Read the label for the current frame from the burn-in window.
Lightworks V.I.P 4500 Version 3 - User Guide A5.0 - 137
A5.7
Entering Labels Manually
8 Type in the new value for the label and press the Enter key. The new label for the shot
is now registered and will be carried into the final EDL.
A5.7.2
Note: It is possible to change the labels for a shot at any time (it does not have to be
done immediately after the recording). Changes will affect all edits that use the shot.
WARNING: IF A MISTAKE IS MADE IT WILL CAUSE ERRORS IN EDLS.
Logging Original Audio Timecode Information
The following section applies to sync picture and sound that are recorded separately (with
separate labels) and then synced-up before being recorded into the system.
For this type of sync material, the audio reel ID and timecode may be different from the primary reel and timecode. In such cases it is necessary to log the original audio reel ID and
timecode separately from primary reel ID and timecode, in order that the final EDL can be
used to conform the master audio as well.
It is possible to log original audio reel ID and timecode information manually. This can be
done from a visual reference on the picture, such as a sound slate that displays audio timecode or a burn-in of the audio reel and timecode.
For each shot recorded:
1 Display the Viewer Labels Panel for the shot.
2 Set the Current Time/Start Time button to display Current Time.
3 Click on the Jump To button. It will turn red and display the word “Modify”.
4 Click on the Orig Audio T/C button so that it is green. A message will be displayed
asking “Make new label for Orig Audio T/C?”
5 Click on Yes. A cursor will appear in the Audio T/C field.
6 Read the audio timecode and reel information for the current frame of the shot, from
the burn-in display.
7 Type in the new value for the audio timecode and press the Enter key.
8 Click in the Audio Reel field (to the right of the Orig Audio T/C field).
9 Type in the new value for the audio reel ID and press the Enter key.
A5.0 - 138
Lightworks V.I.P 4500 Version 3 - User Guide
Labels Required For Syncing Picture and Sound
A5.8
10 Vanish the Viewer Labels Panel.
A5.8
Note: If a separate audio timecode has been logged for audio 1, then EDLs will use
the same timecode and audio reel ID for audio 2 as for audio 1.
Labels Required For Syncing Picture and Sound
The V.I.P system can synchronise separate sound and picture shots using the Synchroniser Tool. See
‘Syncing-up’ on page 193.
If syncing up by timecode, then the correct labels must be present. When recording the material into the
system the definition of label types is crucial.
When the recording is made the label mapping set that is used must have a label for the picture which is
defined as label type “25 frame film timecode” and the audio must have a label for the audio timecode
that is the same timecode standard as the picture.
The camera date label can be taken into account if it is defined for both the audio and picture recordings.
This means that when using the Synchroniser Tool you have the option of ensuring that only picture and
sound recordings made on the same date are synced. This can apply to individual shots, or when syncing
a whole Gallery.
A5.8.1
Camera Date and Camera ID Labels
There are specific label types for camera date and camera ID.
Activating any of these labels in a label mapping set will mean any recordings made using
that set will take the information from that label. At the end of the recording, the label (as
read from VITC or LTC) will replace any information that may have been entered on the
Filecard (either manually during recording or from a Logging Database entry).
The camera date label can read the date of the recording. This information can be taken into
account when syncing separate sound and picture.
A5.9
Recording VITC
The VITC on a source tape can be recorded using an appropriate label mapping set.
A5.9.1
Recording VITC Using a Standard Label Mapping Set
1 Display the reel data on the Reels Panel.
2 Click on the Label Mapping button to display the Label Mapping Visidir.
Lightworks V.I.P 4500 Version 3 - User Guide A5.0 - 139
A5.9
Recording VITC
3 Select one of the VITC label mapping sets appropriate to the TV Standard of the
Project and the line number the VITC is recorded on for that reel.
Options are PALVIT16, PALVIT19, NTSVIT16 and NTSVIT19. These will record
VITC from either line 16 or line 19 of the video signal, as indicated by their names.
It is possible to identify where the VITC is recorded in the video signal and to change
the line read by the V.I.P system. See ‘Selecting the VITC Line Number’ on page 140.
4 Click on the OK button.
This will use the selected label mapping set and record VITC whenever a recording
is made from that reel.
A5.9.2
Selecting the VITC Line Number
When using a label mapping set to record information from VITC, it may be necessary to
change the line number the VITC is recorded from:
1 On the Label Mapping Visidir, highlight the appropriate VITC label mapping set.
2 Click on the Inspect/Change button. The Label Mapping Panel is displayed.
3 Click on the Source/Type button for the primary timecode. The Source/Type Panel
will be displayed for this label.
4 Click on the Details button on the Source/Type Panel to display the Details Panel.
5 Set the VITC Line Number to reflect the line number on which the VITC is recorded
on the source tape. (The available lines are displayed as a list when the button is
pressed.)
If you are unsure of the correct line number, see ‘Identifying VITC Using
NTGRAPHT’ on page 140.
6 Save the modified label mapping set by clicking on the Save As button. A Visidir will
be displayed. Type in a new name or highlight an existing set to be overwritten.
7 Vanish the Label Mapping Panel.
A5.9.3
Identifying VITC Using NTGRAPHT
The NTGRAPHT utility program can be used to identify where the VITC information is
recorded in the video signal. The position of the VITC may vary depending on both the
VTR and the tape.
A5.0 - 140
Lightworks V.I.P 4500 Version 3 - User Guide
Film Labels
A5.10
To identify VITC using the NTGRAPHT utility:
1 Exit the V.I.P program.
2 Using Windows NT Explorer, double click on the C:\LWORKS\NTGRAPHT.EXE
file. The NTGRAPHT program will now run in the Lightworks V.I.P application
window on the Data Monitor.
3 From the opening menu, select the VITC Testing menu by pressing i on the
Keyboard. The Data Monitor will now display the VITC Testing menu with 4
options.
4 Put the tape to be tested into the VTR and ensure that the video output of the VTR is
connected to the appropriate video input of the V.I.P system.
5 Press play on the VTR.
6 In the NTGRAPHT program, select continuous VITC reader test by pressing 3 on the
Keyboard.
The Data Monitor will display the results of the test by showing a list of the lines
between 13 and 22 and any VITC found on those lines.
7 Exit the NTGRAPHT program by pressing the ESC key to return to the previous
menus and then exit to Windows NT.
8 Rerun the V.I.P program.
A5.10
Film Labels
The V.I.P system can read and display a variety of labels associated with source material. In the case of
film labels, the software needs to know the original film format in order to display the label in the appropriate way. This section describes some of the principles of recording film labels.
It is possible to read and display 24 frame labels for film originated material. It is essential that any film
material shot at 24 fps is transferred to video with the correct pulldown before recording into the V.I.P
system. The V.I.P system cannot record 24 frame material.
A5.10.1
3-perf 35mm Film
3-perf 35mm film may be selected as an option for Logging Database defaults and as the
Type of Hand-added Codes option on the Viewer Labels Panel.
Lightworks V.I.P 4500 Version 3 - User Guide A5.0 - 141
A5.10
Film Labels
3-perf codes must include a start-perf, or phase. This is because there are 64 perfs per keycode, and 64 is not divisible by three. The relationship between the keycode and the frameline therefore changes over a cycle of three keycodes (or feet), with different numbers of
frames in each foot:
Foot 1
21 frames
Foot 2
21 frames
Foot 3
22 frames
3-perf codes can be stored with a shot either from a Logging Database (during recording or
later by using the retrofit feature), automatically read from 3-line VITC during recording or
added by hand using the Viewer Labels Panel.
The Lightworks FILMDB Logging Database format (Rev. 9 and above) can have a field for
the start perf. This field is called 'start perf’ and can take the value 1, 2 or 3.
The display of 3-perf keycode on the Viewer Labels Panel and elsewhere looks like this:
FN6543001234+20.2
The .2 means start-perf 2. You can correct any errors in the start perf by editing the last digit
using the Modify button on the Viewer Labels Panel.
A5.10.2
Recording Labels Encoded In 3-line VITC
The 3-line VITC standard encodes film labels in the timecode and userbits fields of three
lines of the VITC.
As the details of the implementation of the standard may vary, the simplest approach is to
modify one of the standard label mapping sets provided, perhaps by changing the Line
Number field to the correct value. Please consult your telecine house and perform appropriate verification recordings before starting real work.
The following section gives a guide to which of the three VITC lines contains what information, and how to set the mask, using the Details Panel, in order to read it.
A5.0 - 142
Lightworks V.I.P 4500 Version 3 - User Guide
Film Labels
A5.10
To display the Details Panel for a label, click on the Details button on the Source/Type
Panel.
Video Timecode
Location: first line, timecode bits.
Mask - all groups active (YYYYYYYY).
3-Perf Keycode
Location: second line, user bits.
Mask - first two groups masked (NNYYYYYY).
Keycode Prefix First Part
Location: second line, timecode bits.
Mask - first group masked (NYYYYYYY).
Keycode Prefix Second Part
Location: second line, user bits.
Mask - first two groups not masked, last 6 masked (YYNNNNNN).
Film Timecode or Audio Timecode
Location: third line, timecode bits.
Mask - all groups active (YYYYYYYY).
Date
Location: third line, user bits.
Mask - last four groups masked (YYYYNNNN).
Lightworks V.I.P 4500 Version 3 - User Guide A5.0 - 143
A5.10
Film Labels
Camera ID
Location: third line, user bits.
Mask - first two groups masked (NNYYYYYY).
A5.10.3
Film Keycodes Not Encoded In 3-line VITC
Labels such as film keycodes may occur in three or more parts when encoded into the VITC
of a video tape. The label is then reassembled at the end of the recording.
The format of a particular label type may vary significantly, based on the telecine equipment
in use. In some cases it will be necessary to use the mask feature.
When reading a keycode that is not encoded in 3-line VITC, the Details button on the
Source/Type Panel allows you to specify three different sources for the sections of the keycode for the software to assemble into a single label at the end of the recording:
The Main Count
Prefix First Part
Prefix Second Part
Each part of the keycode can be read from a different VITC a line number, from the timecode or userbits data. There are separate group mask buttons for each part of the label.
A5.10.4
Setting the Pulldown Sequence When Recording Labels
The pulldown used for a recording is specified in one of two ways:
By the Film Transfer Type Option
This option on the Film -> Video Transfer Panel (accessed from the Recording Panel
Menu) should be set to Film.
On the Logging Database Default Panel
By setting Film to Yes.
A5.0 - 144
Note: These options only specify how the V.I.P software interprets any film labels
read during recording, it does not apply pulldown to the recording or change the
frame rate of the recording itself. This is determined by the Project TV Standard.
Lightworks V.I.P 4500 Version 3 - User Guide
Film Labels
A5.10
Pulldown sequence can be automatically detected by reading film labels from the VITC or
LTC of a video tape. For pulldown sequence detection to be automatic, film labels (keycode, ink (rubber) numbers or 24 frame timecode) must be encoded into VITC or the userbits of LTC when the film is transferred to videotape. Also, the relevant film label must be
one of the active labels defined on the Label Mapping Panel.
On the Film -> Video Transfer Panel, accessed from the Recording Panel Menu, the option
Allow Auto Detect of Sequence for Film Labels can be set to Yes. This means the software
will automatically detect the pulldown sequence, and use this sequence in preference to the
sequence specified on the Recording Parameters Panel.
If the auto-detected sequence is different from the sequence entered in the Logging Database or Film -> Video Transfer Panel, a warning is displayed in the V.I.P application
window, and written to the ERROR.LOG file.
WARNING: IF SHOTS RECORDED ONTO THE SYSTEM USING AUTOMATIC SEQUENCE DETECTION SHOW THE WRONG SEQUENCE OF
FILM FRAMES THEN THE FILM LABELS HAVE BEEN INCORRECTLY
ASSIGNED.
It is recommended that you check that the correct sequence has been achieved for each
recording.
Lightworks V.I.P 4500 Version 3 - User Guide A5.0 - 145
A5.10
A5.0 - 146
Film Labels
Lightworks V.I.P 4500 Version 3 - User Guide
A6.0 Recording 3 - Making a Recording
A6.1
Introduction
Before making a recording it is necessary to ensure that video, audio, timecode and machine control are
correctly connected and configured and that the desired recording options have been set up.
See ‘Recording 1 - Recording Configurations’ on page 97 and see ‘Recording 2 - Recording Timecode
and Labels’ on page 121.
A6.2
Using a Logging Database To Assist Recording
It is possible to record pictures and sound into the V.I.P system by manually controlling the start and end
point for each shot at the time of the recording. This method is fine for recording a small amount of material, especially if it is end-to-end on one reel. For more complex recording sessions it may be faster to
record ‘automatically’ using the autoconform feature. For shots that do not already exist on the system,
the autoconform feature can record from a list of required shots in the form of a Logging Database. See
‘Autoconforming and Redigitising’ on page 169.
Field Header/Sort Buttons
Tag Button
Scroll Bar
Database Name
Logging Database
Lightworks V.I.P 4500 Version 3 - User Guide A6.0 - 147
A6.2
Using a Logging Database To Assist Recording
A Logging Database can be recognised on screen by its blue background. A Logging Database is a list
of start and end timecodes for each section you wish to record, combined with logging information, such
as source tape reel ID, shot name and description. See ‘Lightworks Logging Database Format’ on page
607.
A Logging Database can be created on the V.I.P system by entering timecodes and logging information
directly to a Logging Database template or by generating a Logging Database from existing shots and/
or edits. A Logging Database can be created on another computer by using a database format compatible
with the Lightworks Logging Database format.
For details of general features available on all types of V.I.P database, see ‘Project Management 4 - Databases’ on page 505.
A6.2.1
Creating a Logging Database On the V.I.P System
1 Click on the Logging Database Tool
base Panel is displayed.
from the Toolbox. The Logging Data-
Logging Database Panel
2 Click on the New button on the Logging Database Panel. A new Logging Database
will be created that contains all the possible fields.
(Although only the fields specified by the currently selected view will be displayed
on screen. See ‘Choosing the Fields To Display’ on page 508.)
A6.0 - 148
Lightworks V.I.P 4500 Version 3 - User Guide
Using a Logging Database To Assist Recording
A6.2
3 An entry can be manually added to the Logging Database for each section of source
material to be recorded. See ‘Adding and Modifying Logging Database Entries’ on
page 153.
4 Check the Logging Database for errors. See ‘Checking the Logging Database’ on
page 157.
5 Save the Logging Database by clicking on the Save button.
A6.2.2
WARNING: LOGGING DATABASES ARE NOT AUTOMATICALLY
BACKED UP BY THE V.I.P PROGRAM. REMEMBER TO REGULARLY
SAVE YOUR WORK BY CLICKING THE 'SAVE' BUTTON ON THE LOGGING DATABASE PANEL.
Creating a Logging Database On Another Computer
You can create a Logging Database in other programs and on other computers.
For example, a database of the material shot may be created on location or at the time of a
telecine transfer.
The computer should be a PC or PC compatible, so that the V.I.P system can read the disk
from it.
The database will have to be created in a format that can be converted to the Lightworks
Logging Database format before loading into the system. See ‘Lightworks Logging Database Format’ on page 607.
A6.2.3
Generating a Logging Database From Shots or Edits On the V.I.P System
It is possible to generate a Logging Database from Databases, Galleries, shots or edits
which already exist on the system. There are several methods of doing this:
From an Edit, Using the Database of Shots Command
This method produces a Logging Database with the start and end timecodes of the
whole original shots (not just the sections that appear in the edit).
Clicking on the Edit Menu command Database of Shots produces a Database and
displays it on the screen. This Database is not a Logging Database, but it can be used
to generate a Logging Database by using the Database Menu command Create Logging Database.
Lightworks V.I.P 4500 Version 3 - User Guide A6.0 - 149
A6.2
Using a Logging Database To Assist Recording
From an Edit, Using the Logging Database Tool
To create a Logging Database of an edit, place the Logging Database Tool over the
edit Viewer or Tile and click. The Logging Database Options Panel is displayed,
allowing you to set handle size and enter a name for the Logging Database.
Importing an EDL To Create an Edit
The edit can then be used to produce a Logging Database, as described above.
Autoconforming an Edit
This will create an number of separate Logging Databases that are used to control the
recordings made by each source machine used for the autoconform, and Logging
Databases that detail any failed or skipped recordings. See ‘Autoconforming and
Redigitising’ on page 169.
From a Search
The results of a search can be displayed as a Database. The Database produced by the
search is not a Logging Database - however it is possible to use the Database Menu
to generate a Logging Database.
From a Gallery, Using the Logging Database Tool
To create a Logging Database of a Gallery, place the Logging Database Tool over the
Gallery and click. The Logging Database Options Panel is displayed, allowing you
to set handle size and enter a name for the Logging Database.
From an Existing Gallery
The command Create Logging Database on the Gallery Menu generates a Logging
Database with an entry for each shot or ghost in the Gallery. Edits are ignored.
To create a Logging Database from a Gallery:
1 Display the shots in a Gallery.
2 Click on the Gallery Menu command Create Logging Database.
3 Enter a filename for the Logging Database.
This must be a legal filename. If no new name is entered, the Logging Database will
be given a name based on the Gallery name, truncated to a maximum of eight characters.
A6.0 - 150
Lightworks V.I.P 4500 Version 3 - User Guide
Using a Logging Database To Assist Recording
A6.2
4 Specify where to save the Logging Database. The options are:
LWLISTS
The folder C:\LWLISTS.
Project
The current Project folder on the system (C:) drive.
Floppy
The floppy disk drive (A:).
5 Click on the Do It button to create and save the Logging Database.
The resulting Logging Database uses the start and end timecodes of the whole of each
original shot in the Gallery.
It can be displayed by loading it from the Logging Database Panel in the normal way.
See ‘Loading an Existing Logging Database’ on page 152.
From an Existing Database, Using the Logging Database Tool
To create a Logging Database of the tagged entries in a Database, place the Logging
Database Tool over the Database and click. The Logging Database Options Panel is
displayed, allowing you to enter a name for the Logging Database.
From an Existing Database, Using the Database Menu
The command Create Logging Database on the Database Menu generates a Logging Database with a record for each shot or ghost in the Database. Edits are ignored.
1 Tag the required records in the Database, by clicking in the Tag column.
2 Click on the Database Menu command Create Logging Database.
3 Specify the name and the destination for the Logging Database.
4 Click on the Do It button to create and save the Logging Database.
The resulting Logging Database uses the start and end timecodes of the whole of each
original shot. It can be displayed by loading it from the Logging Database Panel in
the normal way.
See ‘Loading an Existing Logging Database’ on page 152.
Lightworks V.I.P 4500 Version 3 - User Guide A6.0 - 151
A6.2
Using a Logging Database To Assist Recording
A6.2.4
Loading an Existing Logging Database
If you have a Logging Database which is stored in a Project:
1 Click on the Logging Database Tool
base Panel is displayed.
from the Toolbox. The Logging Data-
2 Click on the Load button on the Logging Database Panel.
A Visidir appears, labelled “Load Logging Database”. The Visidir displays a list of
Logging Databases in the current Project.
3 Highlight the Logging Database to be loaded.
4 Click on the OK button on the Visidir (or press the Enter key).
The desired Logging Database will appear on the graphics screen. (This may take a
few seconds if the Logging Database contains many records).
A6.0 - 152
Lightworks V.I.P 4500 Version 3 - User Guide
Using a Logging Database To Assist Recording
A6.2.5
A6.2
Loading a Logging Database From Another Computer
You can use databases compiled in other programs and on other computers. See ‘Creating
a Logging Database On Another Computer’ on page 149.
1 Click on the Logging Database Tool
base Panel is displayed.
from the Toolbox. The Logging Data-
2 Click on the Load button on the Logging Database Panel.
A Visidir appears, labelled “Load Logging Database”. By default, the Visidir displays a list of Logging Databases in the current Project.
3 Use the Visidir to locate the drive and folder containing the Logging Database to be
loaded. See ‘Selecting Folders and Files’ on page 65.
4 Highlight the name of Logging Database to be loaded.
5 Click on the OK button on the Visidir (or press the Enter key).
The desired Logging Database will appear on the screen. (It may take a few seconds
to load from a floppy disk if the Logging Database is a large file).
6 Save the newly loaded Logging Database into your Project. See ‘Saving a Logging
Database’ on page 157.
A6.2.6
Adding and Modifying Logging Database Entries
Creating a New Entry
To create a new entry in a Logging Database, start a new row by pressing the Enter
key or Down Arrow key.
Entering Information To a Field
To enter information, click on any field and start typing. See ‘Entering Text’ on page
62.
In a timecode field, there is no need to type the separators (:) - these will be added
automatically.
Cut and paste operations on the individual Logging Database rows and fields can be
performed. See ‘Cut and Paste Keyboard Commands’ on page 511.
Lightworks V.I.P 4500 Version 3 - User Guide A6.0 - 153
A6.2
Using a Logging Database To Assist Recording
Grabbing Timecodes
To grab timecodes from a connected source device:
1 Select the source device using the Device button on the Logging Database Panel.
2 Click on the Standby button on the Logging Database Panel.
If the source device is set up for machine control you will now be able to use the Console to control it. See ‘Console Transport Controls’ on page 525.
If the reel ID for the tape in the VTR is not known to the system, a panel will be displayed asking you to enter a reel ID.
3 Using the Console, shuttle or play the tape to the start of the first piece of source
material you want to record.
4 Click in the Start Time field for the Logging Database entry to be modified.
5 Press the Mark button on the Console.
The timecode of the frame the device is displaying is grabbed and entered into the
Start Time field of the Logging Database. The reel ID will also be entered into the
reel ID field. The cursor then jumps into the End Time field, ready for the next entry
6 Shuttle or play the tape to the end of the section to be recorded.
7 Press the Mark button. The current timecode is entered into the End Time field. The
recording is now defined in the Logging Database by an in- and an out-timecode.
Saving Modifications
Modifications to a Logging Database must be saved by clicking on the Save button
on the Logging Database Panel. See ‘Saving a Logging Database’ on page 157.
A6.2.7
Deleting Entries From a Logging Database
1 Tag each entry to be deleted by clicking in the Tag column. A check mark will appear
to indicate that the entry is tagged.
2 Click on the Remove Tagged button on the Logging Database. The system asks you
to confirm the deletion.
3 Click on Yes.
4 Save the changes to the Logging Database by clicking on the Save button on the
Logging Database Panel.
A6.0 - 154
Lightworks V.I.P 4500 Version 3 - User Guide
Using a Logging Database To Assist Recording
A6.2.8
A6.2
Logging Database Durations
This field shows the duration of each entry in the Database. In NTSC Projects, duration
fields in Databases will always be drop-frame, even in non-drop-frame Projects.
The duration column allows you to enter an in-point plus a duration and get an out-point (or
any combination of two values to get the third). If the in- and out-points have both been
defined and the duration is changed then the out-point changes (to make the entry longer).
A6.2.9
Setting Default Values For Logging Database Fields
If a large number of shots in the Logging Database are going to have repeated values for
certain fields, you can set up defaults which will be automatically entered during recording.
This saves having to type, for example, “10” into the Picture Quality field for each shot in
the Logging Database.
Defaults Panel
Lightworks V.I.P 4500 Version 3 - User Guide A6.0 - 155
A6.2
Using a Logging Database To Assist Recording
To set default values for fields:
1 Click on the Default button on the Logging Database.
The Defaults Panel is displayed, listing all the fields for which default values can be
entered. The options available will depend on the TV Standard of the Project.
2 Set the required default values, using the buttons and/or fields on the Defaults Panel.
3 When you have finished setting the values, click on the Set button to store the values.
Any default entries entered on the Defaults Panel will be displayed as grey text in the
Logging Database. Default entries can be overwritten by typing into the Logging
Database.
4 If required, use the Set Project Default button to set these defaults as the standard for
any new Logging Databases created in the Project.
Note: Initial values for the label standards for Primary Timecode, Original Audio
Timecode, Film Gauge and Camera TC are taken from the Project TV Standard.
Hierarchy of Default Settings
If the value of a field is not specified in a Logging Database entry then the value in
the Defaults Panel entry will apply.
If the value of a field is not specified in the Defaults Panel then any system defaults
are applied to the recording.
A6.2.10
Logging Databases Containing NTSC Drop and NTSC Non-Drop Timecode
NTSC timecode may be in drop-frame or non-drop-frame format. You can set the format to
use for an entire Logging Database, using the Logging Database Defaults Panel settings. If
the Logging Database contains mixed code, you can toggle an individual timecode field
between drop-frame and non-drop-frame by pressing CTRL+D on the Keyboard.
It is possible to record from a Logging Database containing drop-frame timecodes in a nondrop NTSC Project and vice-versa. If the source tape contains timecodes of a different type
to those in the Logging Database (for example recording a non-drop tape from a drop-frame
Logging Database), then a warning message is displayed after the recording has finished,
regardless of the Project TV Standard.
A6.0 - 156
Note: PAL and NTSC non-drop-frame timecodes use a colon (:) as the separator
between digits. NTSC drop-frame timecodes use a semi-colon (;).
Lightworks V.I.P 4500 Version 3 - User Guide
Using a Logging Database To Assist Recording
A6.2.11
A6.2
Checking the Logging Database
Before any recordings are made from the Logging Database, the system will automatically
check it for errors. You can do this manually, at any time, by clicking on the Check button
on the Logging Database Panel. Only tagged entries are checked.
Any fields containing an error will be highlighted and an error message will be displayed
at the bottom of the Logging Database Panel.
The only compulsory fields are reel, start timecode and end timecode.
Timecode fields are checked for correct formatting and consistency of TV Standard.
The system also checks that the start time is before the end time for each entry. There is an
option which determines whether or not overlapping timecodes between different entries
are treated as errors. To set this option, click on the Menu button on the Logging Database
Panel and click on the command Overlapping Timecode Ignore [Treat As Errors]. The
default setting is to ignore overlapping timecodes.
Any values in the Channels field are checked for valid channel selection. A valid selection
is any combination of V, A1 to A16.
If you have a value in the Picture Quality field it is checked to ensure it is within the allowed
range.
A6.2.12
Saving a Logging Database
Logging Databases are not automatically backed up by the program. To save any work on
a Logging Database you must actively save it by clicking on the Save button on the Logging
Database Panel. If you exit the Room without saving, the Logging Database will not remain
on screen.
WARNING: IF YOU LEAVE THE ROOM WITHOUT SAVING THE LOGGING DATABASE THEN ANY CHANGES MADE TO IT WILL BE LOST.
To save a Logging Database:
1 Click on the Save button on the Logging Database Panel. The Save Logging Database Visidir is displayed.
2 Either type a legal filename into the Visidir Text Entry field or highlight the name of
an existing Logging Database from the list in the Visidir.
Lightworks V.I.P 4500 Version 3 - User Guide A6.0 - 157
A6.2
Using a Logging Database To Assist Recording
3 Click on the OK button or press the Enter key.
If you attempt to overwrite an existing Logging Database, you will be asked to confirm that you really want to before the file is overwritten.
A6.2.13
Note: Legal filenames can contain up to eight letters or numbers but cannot include
characters such as spaces, points, slashes, brackets, asterisks and question marks. If
you are saving a Logging Database for the first time, make sure you choose a unique
name.
Deleting a Logging Database
1 Click on the Delete button on Logging Database Panel. The Delete Logging Databases Visidir is displayed.
2 Highlight the Logging Database(s) to be deleted, from the list displayed.
WARNING: THE VISIDIR ALLOWS MORE YOU TO HIGHLIGHT MORE
THAN ONE LOGGING DATABASE TO DELETE. BE CAREFUL!
3 Click on the OK button or press the Enter key.
A6.2.14
Merging Logging Databases
Several separate Logging Databases can be combined into a single Logging Database. For
example, you may have one Logging Database per videotape and wish to combine them.
The source Logging Databases remain unchanged by the merge operation.
To merge Logging Databases:
1 On the Logging Database Panel, click on the Merge button. A Merge Databases Panel
appears.
2 Click on the Choose button to display a Visidir listing the Logging Databases saved
in the current Project.
3 Select each Logging Database to be merged, by clicking on its name in the list.
4 Click on the OK button on the Visidir.
The highlighted Logging Database(s) will be added to the list on the Merge Databases Panel.
A6.0 - 158
Lightworks V.I.P 4500 Version 3 - User Guide
Using a Logging Database To Assist Recording
A6.2
5 If you change your mind, the Remove button can be used to remove a Logging
Database from the list.
6 Once all the desired Logging Databases are selected, click on the Merge button.
A Visidir will be displayed enabling you to specify a destination and filename for the
merged Logging Database. By default, it will be stored in the current Project.
A6.2.15
Note: The merge operation treats each entry as separate and does not attempt to
remove duplicate entries.
Printing a Logging Database
A Logging Database file (.ODB) can be saved to floppy disk or the LWLISTS folder and
imported by third-party software for printing.
It is not possible to print a Logging Database directly from within the V.I.P program.
See ‘Lightworks Logging Database Format’ on page 607.
A6.2.16
Recording From a Logging Database
To initiate a recording from a Logging Database, click on the Autoconform button on the
Logging Database Panel.
See ‘Autoconforming and Redigitising’ on page 169.
Lightworks V.I.P 4500 Version 3 - User Guide A6.0 - 159
A6.3
A6.3
Recording Options
Recording Options
There are many options available for recording. It is important to ensure that you select the correct
options for the source material and type of production you are working on. If in doubt, you should perform a recording and editing test before starting real work.
Recording options are set by using the Project Card, the Recording Panel and the Device Definition
Panel.
A6.3.1
Recording Options On the Project Card
To display the Project Card, click on the command Current Project Details on the General
Menu.
Project Name
Project Card
TV Standard
The TV Standard button on the Project Card sets the TV Standard for the current
Project.
See ‘TV Standard’ on page 89.
Audio Parameters
See ‘Audio Parameters’ on page 90.
A6.0 - 160
Lightworks V.I.P 4500 Version 3 - User Guide
Recording Options
A6.3.2
A6.3
Recording Options On the Recording Panel
See ‘Displaying a Recording Panel’ on page 163.
Setting Audio Levels For Recording
If a source device with analogue audio is selected, then an Input Gain Control is displayed on the Recording Panel for each channel. This is used to apply a set level of
gain to the analogue signal connected to that audio input. This cannot be adjusted
during the recording.
The Input Gain Controls indicate the gain currently set (in dB). Click on the box and
type in a value. Higher than allowed values will be truncated to the maximum. The
default is zero (no gain applied to input signal).
Choosing the Channels To Record
The Recording Panel can have Channel Selector buttons for one video channel (V)
and up to 16 channels of audio. The definition of the selected source device determines the number of channels that appear. Channels that exist on the device but are
not connected to the V.I.P system are still represented, but their Channel Selector buttons and PPMs are greyed out.
The Channel Selector buttons control which of the defined channels will be recorded.
Selected channels are highlighted in blue. Channels that are not selected are grey. To
toggle a channel between On and Off, just click on its Channel Selector button.
The number of input channels selected affects the amount of storage used by a
recording, so it is best not to record unnecessary channels.
Picture Quality
Picture quality on the V.I.P system is expressed in ‘minutes’. This represents the
number of minutes of picture, with one audio channel, which can be stored per Gbyte.
The available Picture Quality ranges from 3 mins to 20 mins. Pictures recorded at different picture qualities can be freely intercut. When choosing the picture quality, a
decision must be made about the relative importance of quality versus storage.
Higher picture quality means less storage space is available.
Lower picture quality means more storage space is available.
Lightworks
The Picture Quality button on the Recording Panel or Autoconform Options Panel
allows the picture quality to be set for each recording.
Lightworks V.I.P 4500 Version 3 - User Guide A6.0 - 161
A6.3
Recording Options
To set the picture quality for a recording made using a Recording Panel, click on the
Picture Quality button on the Recording Panel until the desired quality is displayed.
To set the picture quality for autoconform recordings, click on the Picture Quality
button on the Options Panel until the desired quality is displayed. See ‘Autoconforming and Redigitising’ on page 169.
Note: There is some loss of accuracy in the indicated storage remaining (‘minutes
left’) and the actual storage available when working at qualities lower than 10 minutes. The actual space remaining can be overstated by approximately 15%.
Choosing Which Disk To Record To
The V.I.P system has an internal array of hard disks on which picture and sound material is stored. This internal array is treated as a single ‘disk’ by the program for the
purpose of recording, and cannot be sub-divided. In addition to this, an external Disk
Expansion Unit can be connected to the system to increase total storage capacity.
The Disk Selection button, on the Recording Panel, displays the disk names as
defined by the Disk Manager Tool. See ‘Disk Manager’ on page 492.
To select the disk to record to, click on the Disk Selection button on the Recording
Panel until the desired disk is displayed.
Calculating the Available Storage Space
An Available Space on Disk display indicates the amount of storage space available
on the selected disk. The display takes the current settings of the following recording
options when calculating the minutes left:
Selected Video and Audio Channels
Picture Quality
Audio Sampling Rate
Selected Disk
In order to get accurate readings, please note that recording options set via the Project
Card do not take effect until the Project Card is vanished from the screen. Also note
that the Available Space on Disk display may not update until the Recording Panel is
updated (when a button on it is clicked).
Another method of checking the available space is using the Disk Manager. See ‘Disk
Manager’ on page 492.
A6.0 - 162
Lightworks V.I.P 4500 Version 3 - User Guide
Basic Recording Using a Recording Panel
A6.4
A6.4
Basic Recording Using a Recording Panel
A6.4.1
Displaying a Recording Panel
To display a Recording Panel, click on the Record Tool
Recording Panel will be displayed.
Device
Selection
Button
Device Status
Display
Timecode
Display
from the Toolbox. A
Userbits
Display
Video Output
Button
Input Gain
Controls
Transport
Controls
Reel Information
Button
Audio Input
Level Meters
Eject
Button
Picture
Display
Window
Channel
Selector
Buttons
Disk Selection
Button
Reel ID
Display
Picture
Quality
Button
Filecard
Button
Available
Space on Disk
Recording Panel
Lightworks V.I.P 4500 Version 3 - User Guide A6.0 - 163
A6.4
Basic Recording Using a Recording Panel
The Recording Panel has the following features:
Channel Selector Buttons
Click on these buttons to select which channels of the source material to record. (When a button
is blue the channel will be recorded).
Device Selection Button
Used to set which of the source/record devices defined for the system will be used as the source
for the recording.
Disk Selection Button
Click on this button to select which of the V.I.P material disks to record to. The button will toggle
through the available disks.
Picture Quality Button
Click on this button to set the picture quality for a recording.
Available Space on Disk
This displays the available space on the selected material disk at the selected picture and sound
quality.
Video Output Button
Click on this to display the Video Output Routing Panel. See ‘Video Output Routing’ on page 333.
Audio Input Level Meters
There is an audio input level meter for each audio channel. The behaviour of the level meters on
the Recording Panel can be customised by using commands on the Level Meters Panel Menu.
Transport Controls
Click on one of the Transport Control Buttons (rewind, play reverse, stop, play forward, fast forward) to control the device. The active button will be highlighted.
Reel ID Display
If a reel ID has been entered this will be displayed. If not, the reel ID field will show “???”.
Clicking on the display will prompt you to either select a reel from the list of reels in the Project
or create a new reel. For more information, see ‘Reel ID Display’ on page 117.
A6.0 - 164
Lightworks V.I.P 4500 Version 3 - User Guide
Basic Recording Using a Recording Panel
A6.4
Standby Button
Click on this button to put the Recording Panel into standby.
Record Button
Click on this button to start a recording.
Picture Display Window
The input video signal will be displayed in the Recording Panel when the Recording Panel is in
standby or record. The Recording Panel picture display is intended for confirmation of the source
only. The image may not always be representative of the quality of the actual recording. See ‘Monitor Video During Record NO [yes]’ on page 571.
Close Button
To save space on screen, it is possible to minimise the Recording Panel by clicking on the Close
button. Some displays and controls, for example the Audio Input Level Meters and the Picture
Display, are not available on the minimised Recording Panel.
Automatic Display of Shots Recorded
When using a Recording Panel, by default each shot recorded is placed in a Gallery which is displayed automatically.
A6.4.2
Basic Recording - Step-by-step
1 Select the source device for the recording, using the Device Selection button.
The source device will determine:
Source of input video and audio signals into the system from the device.
Whether the Recording Panel can machine control the device.
The available audio channels and the mapping of channels on the source
device to channels on the recorded shot.
If a message is displayed informing you that the device is being used by another
object, then check that no other screen objects (for example another Recording Panel
or Playout Viewer) are in standby with have the same device selected.
2 Select the picture quality for the recording.
Lightworks V.I.P 4500 Version 3 - User Guide A6.0 - 165
A6.4
Basic Recording Using a Recording Panel
3 Select the channels (video and audio) to record, by highlighting the appropriate
Channel Selector buttons on the Recording Panel.
4 Click on the Standby button. The system checks that the required resources are
available and the Standby button turns yellow.
5 You will be asked to enter a reel ID for the reel in the device. Select one from the list
displayed or click on the Create New Reel button.
The video input from the source device will be looped through and displayed on the
output selected on the Video Output button on the Recording Panel.
To control a machine controllable device, use the Transport Controls on the
Recording Panel or the Console. See ‘Console Transport Controls’ on page 525.
6 Park the source tape at the desired in-point for the recording.
7 Click on the Record button on the Recording Panel.
If the source device is a VTR, it will preroll and recording will start at the point the
tape was parked when you clicked on the Record button. The Record button turns red
and displays the word End. The V.I.P system is now recording the picture, audio and
timecode signals determined by the source device.
8 To cancel a recording, without recording any material, click on the Cancel button
(which appears on the Recording Panel whilst recording is in progress) or press
ALT+C. No trace of the material will remain in the V.I.P system.
9 To stop the recording, either click on the End button on the Recording Panel or press
the Stop button on the Console.
To return to playing a shot or edit already recorded on the V.I.P system, the Recording
Panel must be taken out of standby, by clicking on the Standby again.
A6.4.3
Logging Basic Details Of a Shot
To display a Filecard when a recording is in progress, click on the Filecard button on the
Recording Panel.
The Filecard displays the reel ID and timecode information logged for each shot. Further
logging information can be entered directly into the Filecard whilst recording or at any time
later (with the exception of the reel ID and timecode, which can only be changed using the
Viewer Labels Panel). See ‘Logging Shots and Edits’ on page 185.
A6.0 - 166
Lightworks V.I.P 4500 Version 3 - User Guide
Recording Panel Timecode Displays
A6.4.4
A6.5
Playing Back the Recording
By default each shot recorded is automatically placed in a Gallery (see ‘Automatic Display
of Shots Recorded’ on page 165).
To play a shot, click anywhere on the Tile containing the shot and press the Play button on
the Console. See ‘Playing Material In a Viewer or Tile’ on page 76.
To display the newly recorded shot in a Viewer, click on the Viewer button on the Filecard
or Tile.
A6.4.5
Default Shot Names For Recordings
The Gallery generated by a Recording Panel is initially given the name of the reel from
which the recording is being made. In turn, shot names are derived from the Gallery name,
with a Project-wide incrementing number appended (the number is in parentheses after the
name).
If the name on the Filecard on the Recording Panel is changed, this becomes the basis for
all following shots and the incrementing number will be for that name only. For example,
if “LARRY” is typed on the Filecard, then the shots are called “LARRY”, “LARRY (1)”,
“LARRY(2)”, “LARRY(3)” and so on.
If the source reel ID is changed, the Recording Panel will create a new Gallery with a name
based on the new reel ID, unless you have already changed the Gallery name. In this case
no new Gallery is created (unless of course you vanished the renamed Gallery).
A6.5
Recording Panel Timecode Displays
Recording Panels have two timecode displays, one for LTC timecode and one for userbits. VTRs read
timecode and userbits from the machine control cable (9-pin). Non-controlled devices will display the
timecode and userbits for the source defined as the primary timecode in the label mapping set used for
the recording.
Note: In NTSC Projects the Recording Panel behaves independently of the Project TV Standard the display of drop-frame or non-drop-frame timecode is deduced from the timecode read from
the tape. For this reason the Recording Panel displays may not show the correct timecode standard
until the tape in a VTR has been played or shuttled.
Lightworks V.I.P 4500 Version 3 - User Guide A6.0 - 167
A6.5
Recording Panel Timecode Displays
A6.5.1
Cueing To a Timecode
When a source machine is being controlled by the V.I.P system, it can be made to cue automatically to any timecode displayed on the graphics screen (in, for example, a Recording
Panel or Viewer).
To do this, click on the target timecode field (so that a cursor appears in it) then press
CTRL+Q on the Keyboard.
Alternatively, you can type a specific target timecode into the Timecode Display on the
Recording Panel, then press CTRL+Q.
A6.0 - 168
Lightworks V.I.P 4500 Version 3 - User Guide
A7.0 Autoconforming and Redigitising
A7.1
An Introduction To Autoconform
The autoconform feature provides the fastest and most efficient means of recording material into the
Lightworks V.I.P system. An autoconform can use a maximum of four of picture record channels, 16
audio record channels and eight serial control channels to control source tape machines or disk recorders
to simultaneously record selected material onto the system. Autoconform has many applications,
including:
Autoconforming an Edit Using an EDL From Another System
To autoconform an EDL in one of the supported EDL formats, it must be imported first. See ‘EDLs
1 - Import’ on page 443.
For an EDL produced on another Lightworks product, see ‘Changing the Material Used In an
Edit’ on page 181.
Autoconforming an Edit Offlined On the V.I.P System
For edits already on the system, the Autoconform Panel can be used to redigitise all material at a
different picture quality, or upgrade the picture quality to a specified level. For example, to finish
an edit done at offline quality by recreating it at the highest picture quality.
Autoconforming a Logging Database
Autoconforming a Logging Database takes a snap shot of the Logging Database when the Autoconform button on the Logging Database Panel is pressed. You can carry on adding to the Logging
Database after this without affecting the autoconform (or having the added entries recorded).
Redigitising or Reloading Material Deleted From the System
The Autoconform Panel can be used to quickly reload material that has been deleted from the
system. For individual edits containing deleted material, simply autoconform the edit with the
Material to Record option set to Missing Material.
To reload several edits, first create a new edit by joining the separate edits together end to end. (It
is not necessary for the material to be present on the system in order to do this.) This compilation
edit can then be autoconformed. For edits that share common material, this technique will minimise tape changes (as all the material for each tape will be recorded at one time), and ensure that
duplicate material is not recorded.
For individual shots, Viewers can provide the source for an autoconform. By creating a Logging
Database, groups of shots from Galleries, Racks or Databases can be autoconformed.
Lightworks V.I.P 4500 Version 3 - User Guide A7.0 - 169
A7.2
A7.2
Allocation and Use Of Resources
Allocation and Use Of Resources
A7.2.1
Allocation Of Record Resources
During an autoconform, the system dynamically allocates tapes to devices (rather than allocating them beforehand). This means an efficient and faster autoconform, as factors such as
devices being taken offline, other objects taking resources and tapes not being inserted are
taken into account.
The Autoconform Panel will analyse the material required by the edit and compare this with
the recording resources available to it. The contents of the edit and the channels that the
available VTRs can supply are therefore crucial to the success of the autoconform.
A7.2.2
Tape Types and Allocation Of Devices
As the V.I.P system will have been told the tape type associated with each reel, it will only
allocate devices for use with the autoconform which support replay of the tape types
required. See ‘Available Devices’ on page 172.
A7.2.3
VTR Type and Reel ID When Autoconforming
The reel database and device definitions are checked to ensure that tape types are only allocated to those devices which can accept them. The system will not ask the impossible - for
example that a Digibeta machine accept a DAT tape.
Any EDL imported into the V.I.P system will only contain reel ID and timecode information
about events in the EDL. There is no information stored about the tape format.
Before recording begins, tape type information will be requested for all reels that are needed
to complete the autoconform and have not yet had their tape type defined.
A7.2.4
Audio Channels Required
The assumptions about audio channel mapping made when an EDL is imported will determine what audio channels are added to any dummy logs created, and hence what audio
channels the Autoconform Panel will look for when autoconforming the edit.
The way the mapping of audio events is interpreted when an EDL is imported can be set by
a CONFIG.DAT file entry. See ‘edl_import_audio_mapping’ on page 592.
The default is to assume no mapping has taken place in the edit - so, for example, events on
EDL audio channel 2 are assumed to come from source audio channel 2.
A7.0 - 170
Lightworks V.I.P 4500 Version 3 - User Guide
Using the Autoconform Panel
A7.2.5
A7.3
Label Hierarchy When Autoconforming From Logging Databases
Label mapping selections will always override any entries in the Logging Database, in the
event of conflicts. For example, a manually entered value for original audio timecode in the
Logging Database will be replaced by any value read from VITC via the label mapping set
used for the recording. Note that there is no warning that this is happening.
A7.3
Using the Autoconform Panel
A7.3.1
Displaying the Autoconform Panel
To display the Autoconform Panel:
For an edit, drag the Autoconform Tool
over the edit Viewer the edit then click.
For a Logging Database, click on the Autoconform button on the Logging Database Panel.
Use Device
Checkbox
Suspend
Buttons
Device Status
Display
Device
Name Button
Skip
Buttons
Video Output
Button
Open
Button
Autoconform Panel
Lightworks V.I.P 4500 Version 3 - User Guide A7.0 - 171
A7.3
Using the Autoconform Panel
A7.3.2
Available Devices
The Autoconform Panel will list all the source VTRs (machine controllable source/record
devices) suitable for an autoconform. To be used in an autoconform, the device must be:
Correctly configured as a machine controllable source/record device.
Of the correct type for the required reels, so all formats can be recorded.
On-line (machine controllable).
For more information, see ‘External Devices’ on page 104.
A7.3.3
Device Monitoring On the Autoconform Panel
For each controllable device, the Autoconform Panel incorporates a VTR Monitor display
which can be expanded to show more details by clicking an Open button .
See ‘Monitor Panels For VTRs and Other Controllable Devices’ on page 116.
Device Status Display
Use Device
Checkbox
Device Name
Button
Close Button
Video Output
Button
Tape Transport
Controls
Timecode
Display
Userbits
Display
Reels Panel Button
Reel ID
Display
Eject
Button
Autoconform Panel with VTR Monitor Display
A7.0 - 172
Lightworks V.I.P 4500 Version 3 - User Guide
Using the Autoconform Panel
A7.3
Next to the name of each device is a Use Device checkbox. This is to confirm that you want
to use the devices the software has determined are suitable for the autoconform. There may
be various operational reasons why only certain devices are appropriate for use, so you must
manually select the devices you want to use.
Click in the checkbox to tag the device to use. Any devices listed that are not tagged will
not be used in the autoconform.
A7.3.4
Label Mapping
The label mapping set to be used when making recordings using autoconform is determined
by the label mapping set defined for the reel or the device default.
A7.3.5
Reels Referenced By Autoconform
The List Reels button displays a list of the reels referenced by autoconform. Reels that have
been set as available on the Reels Panel will be tagged. Tagging or untagging a reel will
change the reel available setting on the Reels Panel. Any undefined reels are shown in red.
You can then manually define the tape type using the Reels Panel. Autoconform will request
tape types for any undefined reels before recording. See ‘Reels Panel’ on page 99.
A7.3.6
Saving, Loading and Deleting Autoconform Sessions
Information about an autoconform session can be saved for future use. The Autoconform
Database, plus information about any material recorded, is saved. This allows the same
autoconform session to be resumed at a later time. When an autoconform session is resumed
and completed, the find and fill operation will choose material recorded from this autoconform session over material that already existed in the project.
Saving an autoconform session saves the Autoconform Database with the current merge
options applied. When the autoconform session is loaded the Autoconform Database cannot
then be unmerged.
To delete an autoconform session, click on the Autoconform Menu command Delete Previously Saved Autoconform(s). Then choose an autoconform session from the Visidir and
click on the OK button.
A7.3.7
Viewing the Progress Of Autoconform Recordings
The View Log button displays a panel that details the progress of each recording and gives
a summary of the success of recordings from each reel.
Lightworks V.I.P 4500 Version 3 - User Guide A7.0 - 173
A7.3
Using the Autoconform Panel
A7.3.8
Inspecting Events To Be Recorded
The Inspect All button lists all the events to be recorded, in the form of a Database. There
is one event in the Database for each source shot, as determined by the source of the autoconform (Logging Database, shot, edit and so on).
The Autoconform Options Panel can be set to determine which of these events are tagged
to be recorded. See ‘Autoconform Options’ on page 175. For example, if you have selected
Quality Upgrade, then only events that exist at a lower quality will be tagged. If you have
selected All for Material to Record, then all events will be tagged.
If you want to make any changes to events to be recorded or add any log information to the
Database, use the Suspend All button then amend the entries in the Database before
resuming the autoconform.
You can untag events you do not want to record.
During autoconform, the events to be recorded will be automatically sorted by reel ID and
timecode. By recording events in ascending timecode order from each reel, tape cueing time
is minimised.
Autoconform Database
A7.0 - 174
Lightworks V.I.P 4500 Version 3 - User Guide
Autoconform Options
A7.4
A7.4
Autoconform Options
To display the Autoconform Options Panel, click on the Options button on the Autoconform Panel.
Max. Video
Align
Fill Gaps Less
Than
Conform Video
Only Checkbox
Autoconform Options Panel for an Edit
The Autoconform Options Panel will be labelled “Autoconform Edit Options” or “Autoconform Logging Database Options”, based on whether the Autoconform Panel is being used on an edit or a Logging
Database.
A7.4.1
Determining the Material To Record
The material already on the system can be checked to see if it corresponds to the events to
be recorded for the autoconform. The options are:
All
All events are recorded.
Lightworks V.I.P 4500 Version 3 - User Guide A7.0 - 175
A7.4
Autoconform Options
Missing
Only those shots for which no suitable material already exists on the system are
recorded.
Quality Upgrade
Only those shots which are at a quality lower than the setting are recorded.
A7.4.2
Setting the Picture Quality
The Picture Quality button selects the picture quality for all recordings made with this Autoconform Panel. When set to a numerical value, this setting overrides the quality field shown
in the Autoconform Database.
When the Picture Quality button is set to No Change, the picture quality is determined by
the Quality field in the Autoconform Database. If there is no entry and the Picture Quality
button is set to No Change, then the default picture quality will be used. The default quality
is displayed in grey lettering on the Autoconform Database and can be set by using the
Defaults Panel. See ‘Setting Default Values For Logging Database Fields’ on page 155.
A7.4.3
Determining the Optimisation To Apply
The shots needed to produce the edit or the events in the Logging Database are examined
by the system. The options allow all the original shot to be recorded, consolidated shots to
be recorded or for the events to be merged.
Note that, when recording from a Logging Database, using the consolidate optimisation
produces the same result as recording all of the original shots, since there is no concept of
which section of the events are used/not used.
Note: The names of the shots may not be the same as the original names if merging
or consolidating has been selected.
The optimisation options are:
None
Edits autoconformed with the optimisation set to None will record the entire length
of each shot that was used by an event in the edit, giving you access to all material
for trimming. Autoconformed shots will have the same name as the original shot or
Logging Database entry.
A7.0 - 176
Lightworks V.I.P 4500 Version 3 - User Guide
Autoconform Options
A7.4
Consolidate
Edits autoconformed with the optimisation set to Consolidate will record only the
portions of the shots needed for the events in the edit, plus a handle determined by
the Handle Size setting. Shots recorded may have the same name as the original shots
in the edit, depending on the handle size.
Merge
Edits autoconformed with the optimisation set to Merge will complete the recording
in the shortest possible time. Because some events may be combined into a single
recording, shots recorded are given names based on the reel ID and order they were
recorded in. For example, the third recording made from reel 121 would be named
Reel 121 (3).
When the optimisation is set to Merge, the effect of handles and other settings may
result in single events in the edit or EDL being split into multiple shots when
recorded. This may affect the ability to directly trim certain cuts - for example, split
edits; where the original edit had a single shot, the autoconformed edit may have split
this into two or more shots.
The following further options are available when optimisation is set to Merge.
Fill Gaps Less Than
If the gap between two required recordings is less than this value, then a single
recording is made. This saves time by avoiding unnecessary prerolling. The
default value is two seconds.
Max Video Align
Sets the amount of extra video material that can be recorded if the audio is
required.
Will help prevent audio split edits being recorded as separate pieces of material if the duration of the split is less than this value. The default is one second.
Note: This parameter reflects the fact that recording extra audio material that is not
actually required in the edit will not use up as much space on the disk as recording
extra picture.
Lightworks V.I.P 4500 Version 3 - User Guide A7.0 - 177
A7.5
Starting the Autoconform
Handle Size
Sets the duration of extra material recorded at the start and end of the shots in seconds. The default is two seconds.
This allows handles to be added, allowing for further trimming of shots once the edit
is on the system.
In the case of Logging Databases, the handle is added to the in-points and out-points
of the Logging Database entries.
A7.4.4
Conform Video Only
When this checkbox is checked, only video events are recorded. Audio events are ignored.
A7.4.5
Options When Autoconforming From a Logging Database or Edit
The Autoconform Options Panel will be labelled “Autoconform Edit Options” or “Autoconform Logging Database Options”, depending on whether the Autoconform Panel was
opened over an edit or a Logging Database.
You can set separate autoconforming options for edits and Logging Databases and save
them as defaults. This avoids having to manually check that the correct options are set up
every time. For instance, when autoconforming a Logging Database you will usually not
want to use the consolidate or merge options.
When the Set Project Defaults button is clicked, the options currently entered in the Autoconform Options Panel are stored as defaults for future autoconforms.
A7.5
Starting the Autoconform
To start the autoconform, click on the Do It button on the Autoconform Panel.
A message “Database is OK” will appear to indicate the edit has been successfully analysed and the
required Logging Databases have been created for each VTR.
The Do It button will turn into a Cancel button.
When starting an autoconform the events to be recorded will be examined and if any are found to be from
a reel that is unknown or not fully defined, you will be prompted to either define them or skip them.
At the start of the autoconform, the system will check the reel ID of the tapes in each VTR. If they are
required by the autoconform, the recording will commence. If the system does not already know the reel
ID of the tape in a device, it will prompt you to enter one. Any tapes not required will be ejected and the
A7.0 - 178
Lightworks V.I.P 4500 Version 3 - User Guide
Starting the Autoconform
A7.5
VTR Monitor Panel will display a “Load Any Tape” message. Once one of the required tapes is loaded,
you can select it from the list displayed. The VTR will then start recording from it. When the system has
finished with the current reel, it will be ejected and the VTR Monitor Panel will prompt for the next reel.
A Rack is created with a name based on the date and time the autoconform was started. A Gallery of
recordings made from each reel will be placed in the Rack during the autoconform.
The VTR Monitor Panel section has a Skip button. Clicking on this will mean no recordings will be made
from that reel. The system will keep a record of any skipped recordings ready for use later. See ‘SKIP
and FAILURE Logging Databases’ on page 180.
The Autoconform Panel has an information display. This will show an elapsed time and a progress bar
for the autoconform. When all the recordings are completed a finished message will be displayed.
The View Log button will display a log of the autoconform, listing in text form what has been recorded
and reporting any problems.
A7.5.1
Monitoring Levels During Autoconform
Audio
It is possible to monitor the audio from individual VTRs during an autoconform. This
is an extension of the principle that the System Sound Monitor Panel monitors the
audio from the currently highlighted object.
Each inset VTR Monitor Panel on the Autoconform Panel has a border. Clicking
within the relevant border will highlight it in red and select that VTR for monitoring.
Clicking on a different VTR will change the monitor focus to that object. The input
audio levels can be monitored using the Level Meters Panel.
Video
If required, video levels must be adjusted before reaching the V.I.P system inputs.
Use the Suspend button to pause the use of individual VTRs in order to set levels,
then resume use of the VTR.
The VTR Monitor Panel section of the Autoconform Panel includes a Video Output
button. Use this to assign the E to E output from the device to a system video output.
If you assign more than one device to the same output (for example the one connected
to your video measurement equipment), then the VTR Monitor Panel clicked on is
the one that appears on the output.
Lightworks V.I.P 4500 Version 3 - User Guide A7.0 - 179
A7.6
A7.6
Stopping an Autoconform
Stopping an Autoconform
Clicking on the Cancel button before the autoconform is complete will stop the autoconform. Any completed recordings will be preserved, but any recordings in progress will be cancelled.
A7.6.1
Suspending Recordings
Suspending Individual VTRs
The use of each VTR can be suspended in order to set video or audio levels. There is
a Suspend button on the Autoconform Panel for each VTR. Clicking on this will
pause the use of that VTR. The Suspend button will then turn into a Resume button.
Maximising the inset VTR Monitor Panel will give access to the VTR Transport buttons. Use these buttons to reposition the tape for making level adjustments.
To continue recording from that VTR, click on the Resume button.
Suspending an Entire Autoconform
The Suspend All button will suspend all recordings. This will turn into a Resume
button which can be used to continue the autoconform.
A7.7
Completing the Autoconform Of an Edit
When an edit is used as a source, once all the recordings are complete, the Autoconform Panel will automatically find material to fill the edit. A new edit Tile will be created that contains the recorded material.
This will be given a name based on the edit name with “(conf)” added to it.
A7.7.1
SKIP and FAILURE Logging Databases
Two Logging Databases are created to store events not recorded during the autoconform.
SKIP.ODB
Contains any events from reels that were skipped.
FAILURE.ODB
Contains any events that failed.
These Logging Databases mean such events can be inspected, corrected, if required, and
recorded later. Each time an autoconform is performed, the contents of the SKIP.ODB and
FAILURE.ODB Logging Databases will be overwritten. Save them under new names if you
want to keep their contents.
A7.0 - 180
Lightworks V.I.P 4500 Version 3 - User Guide
Changing the Material Used In an Edit
A7.8
A7.8
Changing the Material Used In an Edit
The find and fill feature provides the means of automatically replacing all instances of shots in an edit.
The main applications for this are:
Replacing deleted material in an edit.
Replacing specific shots with newer recordings.
For example, where the original shots require colour correction.
To recreate an edit imported from another Lightworks product.
It is suggested that a ‘Redig’ Logging Database of the edit is generated at the same time as the
EDL. This Logging Database can then be imported into the V.I.P system and used to record the
required shots with their original shot names and other Filecard information.
If the EDL is imported after the recordings from the Logging Database have been completed, the
edit created by the import process will be filled with those shots.
To recreate an edit imported from an EDL made on another system.
To replace low quality pictures with high quality pictures (or vice versa).
Projects can be ‘offlined’ at a low picture quality on the V.I.P system. This might be because
storage restrictions make digitising all the material at a high quality impractical. Once the edit is
finalised, just the material used in the edit can be redigitised at the highest picture quality.
To reconstruct ghosts where material has been deleted from the original shots.
A7.8.1
Conditions For Filling an Edit
The following conditions must be met for the fill procedure to work correctly:
The logs for all shots and edits to be filled must be present in the Project.
This includes logs for both the original shots and the shots that will replace them (the
redigitised shots). It is not necessary to delete material from the existing shots first.
Each new shot must have exactly the same reel ID as the shot it is to replace.
Note: The reel ID “05” is not the same as “5”, for these purposes!
Lightworks V.I.P 4500 Version 3 - User Guide A7.0 - 181
A7.8
Changing the Material Used In an Edit
A7.8.2
Recording New Material For an Edit
When filling an edit, you will usually be recording new material to replace the existing (or
deleted) material. The choices you have are:
Autoconform the edit.
By using the options on the Autoconform Panel, it is possible to record just the sections of shots actually used in the edit (plus handles, to allow some further trimming)
or to record the shots used in edit including the unused portions of the shots. The find
and fill operation is automatically performed after the autoconform. See ‘Changing
the Material Used In an Edit’ on page 181.
Redigitise the required material manually.
In this case, the Find Material to Fill Edit command on the Edit Menu must be used
to replace the material in the edit with the new recordings.
Create a Logging Database of shots used in the edit.
Create a Logging Database of shots used in the edit. This can then be used as the
source for an autoconform, recording the entire original shots. The Find Material to
Fill Edit command must be used after recording.
A7.8.3
Filling an Edit (or Ghost)
Provided the conditions specified above have been met, the edit can be filled once the new
material has been recorded. The find and fill operation is based on the reel ID and timecode
information for the logs of both the original and the redigitised shots.
Click on the Edit Menu command Find Material to Fill Edit. The Fill Panel is displayed.
Set the options on the Fill Panel to determine the criteria to use when selecting the material
to for the find and fill operation.
The options are:
Find Picture By
This sets the basis used to identify the material required. This is fixed as primary
timecode and primary reel ID. So any picture material replaced must have the same
timecode and reel ID as the original.
A7.0 - 182
Lightworks V.I.P 4500 Version 3 - User Guide
Changing the Material Used In an Edit
A7.8
Find Sound By
The basis used to identify the audio in the edit. Can be useful when separate audio
may exist for a shot; if separate audio timecode and reel ID labels exist for the shots
used in the edit.
Same as Picture
Same basis as the Find Picture By option. This will use the primary timecode and primary reel ID.
Primary Code and Reel
Using the primary timecode and primary reel ID.
Audio Code and Reel
Will use the audio timecode and audio reel ID when replacing any audio in the edit.
If the edit has separate audio reel ID and audio timecode, then this will be used when
selecting which audio to replace.
Make Copy and Fill That
If set to Yes, then a copy of the edit or ghost will be created when the process is completed and displayed as a Tile. The new edit has exactly the same in- and out-points
as the original edit but will be filled with the material specified. The original edit
remains unchanged by this operation. If set to No, then the original edit or ghost will
be modified.
Replace existing material
If the edit being filled already contains some material, this option specifies whether
this material should be replaced.
When set to Never, no existing material is replaced, even if other criteria can be
matched. Only missing material is filled in.
When set to If Possible, if both the original and new material meet other criteria, the
new material is preferred and replaces the old. This will attempt to replace material
if other options are matched.
When set to Don’t Care, will use any of the other settings as the basis for the decision.
Using this setting means you are not concerned about whether material is replaced.
Lightworks V.I.P 4500 Version 3 - User Guide A7.0 - 183
A7.8
Changing the Material Used In an Edit
Quality Versus Space
When filling an edit with material of a different quality, this option will choose the
quality of material replaced.
When set to Best Quality, will always use the best quality material.
When set to Least Space, will always use the shot that takes the smallest amount of
disk space - in other words the one with the lowest picture quality.
When set to Don’t Care, will use any of the other settings as the basis for the decision.
Using this setting means you are not concerned about the quality or space that material in the edit occupies.
Allow patching of events
Patching of events means allowing an event which originally referred to only one
piece of material to be filled with two or more separate pieces. This is useful when
the new material does not exist as a single piece, which will often happen when the
material for an edit has been recorded in an autoconform.
When set to No, events will only be filled if the shot matches the other requirements
and runs from the source-in timecode or before to the source-out timecode or after.
When set to Yes, means if any part of the shot exists that matches the other criteria
selected then this will be used. Other sections of the event will retain the shot already
there.
After selecting the desired options, click on the Do It button. A message will show the
progress of the find and fill operation.
The system will try to use complete shots in preference to patching events, and will choose
the most recent recording if duplicate matches exist. After completion, use the Inspect Log
button on the Fill Panel to view a text file that shows which events were replaced.
A7.8.4
Filling Ghosts
Individual ghosts can be filled with new material using the Edit Menu command Find
Material to Fill Edit.
For more than one ghost, display them in a Gallery and use the Gallery Menu command
Find Material to Fill Ghosts.
A7.0 - 184
Note: It is not possible to fill a ghost if the logs for the shot it refers to have been
deleted.
Lightworks V.I.P 4500 Version 3 - User Guide
A8.0 Preparing Shots For Editing
A8.1
Introduction
A ‘shot’ is defined as one continuous recording into the V.I.P system. Remember that this may be made
up of several ‘takes’. In some cases the shots recorded may need further preparation before they are used
for editing, for example:
A8.2
Additional information about shots may be logged, manually.
Additional information about shots may be logged, automatically, using a Logging Database.
Long recordings may be broken down into individual takes.
All the shots in a Gallery may be assembled into an edit.
Separately recorded picture and sound may be synced up.
Shots may be joined together in timecode order, to create kemrolls.
Logging Shots and Edits
The way in which shots and edits are logged determines the way they can be found later. The key to logging and finding material is the Filecard. Every shot and edit has a Filecard. You can enter logging information onto the Filecard at the time the shot is recorded, or at any time later.
A8.2.1
Displaying a Filecard For a Shot or Edit
A new Filecard is displayed when you start recording.
To display a Filecard at any other time, click on the Filecard button
Tile containing the shot or edit.
on the Viewer or
Note: Filecards for edits do not contain the same fields as those for shots. The Filecard for an edit contains: the date and time the edit was created, the date and time it
was last modified, fields for name, scene, description and notes.
Lightworks V.I.P 4500 Version 3 - User Guide A8.0 - 185
A8.2
Logging Shots and Edits
Reel ID
Shot Name
Start Timecode
Creation Date
Picture Quality
Cue Button
Disk Material Is
Stored On
Scroll Buttons
Audio Reel
Audio
Timecode
Filecard for a Shot
A8.2.2
Devising a Logging Scheme
The degree of sophistication required when logging will depend on the complexity of the
project and the amount of time you have available.
The minimum information required for each shot is:
Timecode
Reel ID
Shot Name
Timecode will be recorded from the source specified in the label mapping set used for the
recording. A default reel ID and shot name is given to each recording if none is specified.
If your editing session will consists of just a few shots from a small number of source tapes
then you may not need to use any more information than this.
A8.0 - 186
Lightworks V.I.P 4500 Version 3 - User Guide
Logging Shots and Edits
A8.2
For more complex editing sessions it is always best to invest some time in devising a logging scheme.
Since the purpose of logging is to make it easier to find and sort shots later, you should think
about the way in which shots in your Project can be divided up. This may be by scene and
shot numbers or by some descriptive term.
You should invent a consistent scheme. For example, in a documentary you might enter the
word “Fishing” in the Scene field of all the shots that cover fishing.
Since you find shots by using the text on the Filecards, accuracy and consistency are important. For example, suppose you sometimes fill in a close-up shot as CU, and sometimes as
Close. Now, if you search for all the CU shots, the program will not find the ones marked
Close.
A8.2.3
Filling In a Filecard
The empty fields have their names displayed, in pale grey letters. This is simply a guide to
the use of each field; the field names disappear automatically as soon as anything is typed
in. You can type information into the fields using the normal text entry methods. See
‘Entering Text’ on page 62.
A8.2.4
Note: The Filecard reel and timecode fields are read-only. The Viewer Labels Panel
must be used if it is necessary to modify reel or timecode information after completing a recording. See ‘Viewer Labels Panel’ on page 217.
Logging Whilst Recording
Logging information can be entered into the Filecard of shots at the time of recording and
changed at any time later.
Using the Autoconform Panel
If you are using the Autoconform Panel for the recording then some of the fields of
the Filecard will be automatically filled in, using information from the Logging Database.
Lightworks V.I.P 4500 Version 3 - User Guide A8.0 - 187
A8.2
Logging Shots and Edits
Using a Recording Panel
A new Filecard is displayed when you start recording using a Recording Panel. You
can fill in logging information whilst the recording is taking place.
Note: The Filecard in the Recording Panel is slightly different in format from the
Filecard for existing shots.
Viewer
Button
Filecard from Recording Panel
During the recording, text can be typed into whichever field is highlighted (with the
exception of the timecode and reel ID fields, which are read-only). The Viewer
Labels Panel can be used to modify timecode and reel ID for a shot at any time after
the recording. See ‘Viewer Labels Panel’ on page 217.
You can move from field to field in the Filecard by clicking with the Mouse or by
pressing the Tab key.
The V.I.P system fills in a default shot name. See ‘Default Shot Names For Recordings’ on page 167. To change the shot name, simply highlight it and type in a new
name.
If you enter a name or number in the scene field then this will be repeated for each
subsequent recording until you change it (or until you exit the Room or close the
Recording Panel).
A8.0 - 188
Lightworks V.I.P 4500 Version 3 - User Guide
Putting Cues In a Shot
A8.2.5
A8.3
Logging Original Audio Reel IDs and Timecodes
For some sync material, the audio reel ID and timecode may be different from the primary
reel ID and timecode. It is possible to log original audio reel and timecode information manually, after making the recording. See ‘Logging Original Audio Timecode Information’ on
page 138.
A8.2.6
Using the Database Search and Replace Button
The Database search and replace feature can be used to search for and automatically replace
entries on the Filecard for each shot. See ‘Database Searches’ on page 517.
A8.3
Putting Cues In a Shot
Cues can be put in a shot to denote points of interest, for quick reference later.
Pressing the Console Cue button places a cue at the current frame. This can be done ‘on-the-fly’ (when
the shot is playing) or by stopping on the frame first.
The cue appears as a small green triangle on the Viewer Indicator Strip.
Cues also appear on the Filecard for the shot, where you can type a description if you wish. You can only
see three cues at a time on the Filecard, but you can scroll through more by using Scroll buttons.
Any of the following methods can be used to jump to a cue:
Use the Console Jump buttons.
Right+left-click on the cue point on the Viewer Indicator Strip.
Click on the appropriate Cue button on the Filecard.
If you mark a cue in an edit, a cue will appear on the same frame of the original shot. Deleting the cue
shown in the edit will not delete the cue from the original shot.
The Edit Menu command Show Original Cues should be set to YES if you want to use cues to mark
points in an edit.
To delete a cue, go to the cue point and press the Stop+Cue buttons on the Console.
Lightworks V.I.P 4500 Version 3 - User Guide A8.0 - 189
A8.4
A8.4
Breaking Down Shots Into Ghosts
Breaking Down Shots Into Ghosts
You can either record material as a series of separate shots or as a continuous piece which you can break
down afterwards - producing ghosts.
A ghost is a log without a material file. Ghosts do not have their own material files, they refer to the material files of their original shots. See ‘Definitions’ on page 55.
WARNING: IF YOU DESTROY THE ORIGINAL SHOT, YOU WILL LOSE THE PICTURE AND SOUND FOR THE GHOSTS.
Ghosts provide a way of organising material on the system. A number of operations produce ghosts. A
ghost is given the same name as its parent shot or edit, with a suffix that shows how the ghost was made.
After its creation a ghost can be renamed, in the same way as a shot or edit.
Types of Ghost
Ghost Name
Suffix
How Ghost Was Made
Viewer/Tile
Triangle Colour
(part)
Breaking down a shot or edit into parts, using the
Copy button on the Viewer.
Grey
(sync)
Using Make Sync-Ghost on the Edit Menu. See
Grey
‘Syncing-up’ on page 193.
(print)
A8.4.1
Using Make Print-Ghost on the Edit Menu.
Yellow
Edits Containing Ghosts
When used in an edit, ghosts behave like shots for editing purposes, and the Stripview will
be the same colour for all channels of the ghost.
The Pop-out Original Tile button, when applied to an edit made of ghosts, will pop out the
ghost. The Stripview Menu Fix Sync command will treat the ghost as if it was a shot
recorded with sync picture and sound.
In Databases and Logging Databases, ghosts behave like shots and are included in any Logging Database created using the Create Logging Database command.
A8.0 - 190
Lightworks V.I.P 4500 Version 3 - User Guide
Breaking Down Shots Into Ghosts
A8.4.2
A8.4
Breaking Down a Shot
1 Display the shot in a Viewer.
2 Go to the first frame of the section to be broken out.
3 Press the Mark button on the Console.
4 Go to the last frame of the section.
5 Now click on the Copy button, on the side of the Viewer.
The newly created ghost is displayed on the screen in a Tile. A new Filecard is automatically generated and displayed on the screen so that you can rename the ghost
immediately, if required.
6 Repeat steps 2 to 5 for each section of the shot to be broken out.
Using this method you can break down one long shot into several ghosts. The original
shot remains unchanged. The ghosts can be used as sources for editing.
A8.4.3
Ghost Timecode and Reel ID
Ghost Made by Breaking-Down a Shot or Make Sync-Ghost Command
The default timecode and reel ID for each track of the ghost (V, A1 and A2 only) are
as per the original shots. It is possible to change these details for the ghost in the same
way as for a shot - by editing the appropriate fields on the Viewer Labels Panel.
Ghost Made by Make Print-Ghost Command
The default video start timecode is 00:00:00:00 and the default reel ID is PRINT.
These can be changed by editing the appropriate fields on the Viewer Labels Panel.
Timecode and Reel ID in EDLs
Where a ghost has different timecode or reel ID from its original shot(s), it is necessary to determine which timecode and reel ID should appear in EDLs of edits which
use the ghost. This is controlled by the Edit Menu command Use Ghost Codes. This
command must have the correct setting for every ghost used in the edit.
Setting Use Ghost Codes to NO (the default setting) will mean that the timecode and
reel ID for the ghost will be derived from the original shot.
Setting Use Ghost Codes to YES will mean that the timecode and reel ID for the
ghost will be derived from the ghost.
Lightworks V.I.P 4500 Version 3 - User Guide A8.0 - 191
A8.5
Editing Shots Together To Create an Assembly
A8.4.4
EDLs For Edits That Contain Ghosts
When editing with ghosts it is important to be aware of the implications if you want to generate an EDL.
WARNING: IF YOU DELETE THE LOG OF THE ORIGINAL SHOT THEN
EDITS WHICH USE THE GHOST MAY NOT HAVE CORRECT EDLS.
The only situation where the EDL will not need the logs of the original shots is when every
ghost in the edit meets both of the following conditions:
A8.5
The correct reel ID and timecode are entered in the Viewer Labels Panel for the
ghosts.
On the ghosts themselves, the Edit Menu command Use Ghost Codes has been
set to YES.
Editing Shots Together To Create an Assembly
A fast way to create a first assembly of a number of shots is to place them in a Gallery in the order you
want them to appear in an edit. The Make Edit from Gallery command can be used to assemble an edit
containing all the shots in order (from left to right, top to bottom), with straight cuts.
After clicking on the Make Edit from Gallery command, the system will ask you whether to “Use
Marks on Tiles?”. The options are:
Yes
Allows sections of the shots to be defined by marking and parking. See ‘Marking and Parking’ on
page 236. Only selected channels on the Tiles will be edited. Display the Stripview for the Tile to
make the selections.
No
The entire shot will be used in the edit. All channels will be edited.
After the operation, the edit created is displayed next to the Gallery. It is given a name based on the Gallery name.
A8.0 - 192
Lightworks V.I.P 4500 Version 3 - User Guide
Syncing-up
A8.6
A8.6
Syncing-up
The Synchroniser is used for syncing-up separate picture and sound shots. Each syncing-up operation
produces a new ghost or edit. To display the Synchroniser, click on the Make Synchroniser command
on the General Menu.
A8.6.1
Sync-up To Current Frames
1 Find the picture and sound shots that are to by synced-up and display them both in
Viewers.
2 Park on the sync-frame for sound.
If the shots have clapperboards, this will be the first frame in which the clap can be
heard after the slate/take announcement. If there aren’t any boards to sync-up with,
either find another visible sharp noise or, for dialogue, choose a plosive consonant,
for example ‘p’ or ‘b’.
3 Park on the sync-frame for picture.
If the shots have clapperboards, this frame will be the first frame in which the board
is totally closed.
Lightworks V.I.P 4500 Version 3 - User Guide A8.0 - 193
A8.6
Syncing-up
4 Turn one of the Viewers into a record Viewer by clicking on the Rec button. It doesn’t
matter which Viewer, picture or sound, you choose for this.
5 Click on the other Viewer to make it the active source.
6 Click on the Make Synchroniser command on the General Menu. The Synchroniser
will be displayed.
7 Ensure that the Synchroniser is set to synchronise by Current Frames.
8 The Synchroniser can check that the camera date is identical on the picture and sound
shots to be synchronised. The camera date may be read from the VITC or LTC using
an appropriately configured label mapping set or input via a Logging Database.
This is selected using the Ignore Date Mismatch button. If this is set to YES then the
picture and sound will be synced-up even if there is a difference between the picture
camera date and sound camera date.
If set to NO then the picture and sound will not be synced-up if the picture camera
date is different to the sound camera date.
Both picture and sound need to have a camera date label. If only one of the pairs to
be synced up has a camera date then this will be ignored and the syncing up operation
will take place anyway.
If the camera date is missing from either picture or sound then the syncing up operation will take place (the camera date is ignored).
9 Decide which track should take precedence for syncing, from the following options:
Result Starts At - First Picture
Any sound prior to the start of the picture shot will be cut off in the new syncghost or edit. If there is no sound material available at the first frame of picture
then silence will be played until the first frame of available sound.
Result Starts At - Earliest Track
If the earliest track is picture, then the new sync-ghost or edit will contain
silence up to the first frame of available sound material. If the earliest track is
sound, then the new sync-ghost or edit will contain black up to the first frame
of available picture material.
A8.0 - 194
Lightworks V.I.P 4500 Version 3 - User Guide
Syncing-up
A8.6
Result Ends At - Last Picture
Any sound subsequent to the last frame of picture will be cut off in the new
sync-ghost or edit.
Result Ends At - Latest Track
Any picture subsequent to the last frame of audio will be cut off in the new
sync-ghost or edit.
10 Set the Use Only Part Marked on Picture option to Yes if you want to specify the
section to be synced by marking and parking on the picture.
11 Use the Produce Results As button to specify whether the syncing-up operation will
produce a sync-ghost or an edit.
12 Use the Show Result In button to specify whether the new sync-ghost or edit will be
displayed as a Viewer or a Tile.
13 Click on the Do It button.
A8.6.2
Sync-up By Timecode
Under certain conditions, the V.I.P system can automatically sync-up picture and sound
recordings by timecodes. This means it will not be necessary to find sync frames manually.
The conditions are:
Picture shot with time-of-day camera code.
Sound recorded with the same time-of-day code as the picture.
Picture camera code is used as the Film Timecode label.
This must be entered either by using a label mapping set during recording or by manually adding the information later using the Viewer Labels Panel.
If using Label Mapping, Label Type for picture is defined as Film Timecode and
Label Type for sound is defined as Audio Timecode of the same timecode
standard as the picture.
For the date of the recording to be taken into account, both picture and sound need to have
a camera date label. The camera date may be read from the VITC or LTC using label mapping or input via a Logging Database when recorded.
Lightworks V.I.P 4500 Version 3 - User Guide A8.0 - 195
A8.6
Syncing-up
If the camera date is missing from either picture or sound then the syncing up operation will
take place for shots with the relevant matching timecodes whatever the setting of the Ignore
Date Mismatch button (the camera date is ignored).
To sync-up by timecode:
1 Find the picture and sound shots to be synced-up and display them both in Viewers.
2 Turn one of the Viewers into a record Viewer by clicking on the Rec button. It doesn’t
matter which Viewer, picture or sound, you choose for this.
3 Click on the other Viewer to make it the active source.
4 Click on the Make Synchroniser command on the General Menu.
5 Set the Synchroniser to synchronise by Timecodes.
6 Decide on the setting for the option Ignore Date Mismatch - YES/NO.
7 Decide which track should take precedence for syncing, from the following options:
Result Starts At - First Picture
Any sound prior to the start of the picture shot will be cut off in the new syncghost or edit. If there is no sound material available at the first frame of picture
then silence will be played until the first frame of available sound.
Result Starts At - Earliest Track
If the earliest track is picture, then the new sync-ghost or edit will contain
silence up to the first frame of available sound material. If the earliest track is
sound, then the new sync-ghost or edit will contain black up to the first frame
of available picture material.
Result Ends At - Last Picture
Any sound subsequent to the last frame of picture will be cut off in the new
sync-ghost or edit.
Result Ends At - Latest Track
Any picture subsequent to the last frame of audio will be cut off in the new
sync-ghost or edit.
8 Use the Produce Results As button to specify whether the syncing-up operation will
produce a sync-ghost or an edit.
A8.0 - 196
Lightworks V.I.P 4500 Version 3 - User Guide
Kemrolls
A8.7
9 Use the Show Result In button to specify whether the new sync-ghost or edit will be
displayed as a Viewer or a Tile.
10 Click on the Do It button.
A8.6.3
Syncing Multiple Shots By Timecode
It is also possible to sync-up multiple picture and sound shots by timecode using the Auto
Synchronise Gallery command on the Gallery Menu. The conditions are the same as for
syncing-up by timecode with the Synchroniser.
1 Put the picture and sound shots to be synced-up into a single Gallery.
2 Click on the Auto Synchronise Gallery command on the Gallery Menu.
3 Decide on the setting for the option Ignore Date Mismatch - YES/NO.
4 Make selections for the Result Starts At and Result Ends At options.
5 Use the Produce Results As button to specify whether the syncing-up operation will
produce a sync-ghost or an edit.
6 Click on the Do It button. A Gallery is displayed with the new sync-ghosts or edits.
A8.7
Kemrolls
On the V.I.P system, a kemroll is an edit containing many separate shots or ghosts joined into a single
edit with continuous timecode, with black or audio spacing inserted between the shots where necessary.
It is only possible to make a kemroll of original shots, ghosts made from original shots or sync-ghosts.
It is not possible to make a kemroll of edits or print-ghosts.
A8.7.1
Making a Kemroll
1 Display all the shots to be joined together in a single Gallery.
2 Click on the Gallery Menu command Make Kemroll.
3 An edit is created and displayed as a Tile next to the Gallery. It will be given a default
name based on the Gallery name with the suffix “(kemroll)”.
Note: The kemroll is purely based on the start timecode of the shot or ghost; the reel
ID is ignored. Since this means it is possible to mix shots from different cameras on
the same kemroll it is important to ensure that the Gallery contains shots that can be
sensibly joined together before attempting to make the kemroll.
Lightworks V.I.P 4500 Version 3 - User Guide A8.0 - 197
A8.7
Kemrolls
A8.7.2
Multi-Cam Editing Using Kemrolls
The kemroll feature can be useful when editing from multiple sources, where some of the
sources are not continuous recordings.
By turning a number of shots into a single kemroll it becomes possible to use the Sync To:
TIMECODE option on the Sync Group Menu.
A8.7.3
Using Kemrolls When Syncing-up
When syncing-up on the V.I.P system to create sync-ghosts, the Make Kemroll command
can be used to enable the resulting audio to be easily laid back onto the videotape of the
telecine transfer containing the picture rushes or dailies:
1 Record picture and sound separately into the V.I.P system.
2 Use the Synchroniser to create sync-ghosts.
3 Place all the sync-ghosts for a single picture roll into a Gallery.
4 Make a kemroll of the Gallery.
This kemroll will have a timecode which corresponds to the videotape (or picture
roll) from which the picture was recorded.
5 Place the kemroll into a Playout Viewer.
6 Load the tape corresponding to the kemroll into the VTR selected for the playout.
7 Perform a prestriped playout of audio only back onto the videotape.
The audio insert edited onto the videotape will be in sync with the existing picture.
The result is a videotape that contains synced-up rushes - with the original picture
plus the audio played out from the V.I.P system.
A8.0 - 198
WARNING: TAKE CARE WHEN PERFORMING THE PLAYOUT THAT
YOU DO NOT UNINTENTIONALLY RECORD OVER ANY PICTURE OR
AUDIO YOU WANT TO KEEP. PERFORM A TEST RECORDING FIRST
TO ENSURE THE PLAYOUT IS SET UP CORRECTLY.
Lightworks V.I.P 4500 Version 3 - User Guide
Breaking Down Recordings Using Autochop
A8.8
A8.8
Breaking Down Recordings Using Autochop
The autochop feature enables one shot (for example a recording of a whole tape) to be broken down into
a number of ghosts based on a Logging Database. In other words it ‘automatically chops’ the long
recording up into a series of shorter sections. Autochop can create many new ghosts from a single
recording.
The Logging Database does not need to have been generated on the system. This can be useful where
rushes have been logged elsewhere, for example during the telecine transfer of film to videotape or on
another computer.
Autochop works by finding matching reel ID and timecode values for both the shots in the Gallery and
the entries in the Logging Database. If these entries do not correspond then the autochop operation will
not be successful. So make sure that the reel ID is identical for both the recording and Logging Database
entries - for example reel "002" will not be treated as a match for reel "2".
This feature ‘chops’ the source shot into ghosts and applies the name field from the Logging Database
to the corresponding ghosts. Autochop does not add any other information from the Logging Database
fields to the Filecard of the ghost.
A8.8.1
Autochop - Step-by-step
1 Display the Logging Database containing the information to be added to the shots.
2 Tag the entries in the Logging Database you want to use.
3 Place the shot(s) to be autochopped into a single Gallery.
4 Position the bottom left corner of the Logging Database so it overlaps the Gallery.
5 Click on the Logging Database Menu command Autochop.
Autochop will run through all the shots in the gallery, and create ghosts of any parts of the
original shots that correspond to Logging Database entries. These ghosts will be displayed
in a new Gallery with the name “Autochop:” followed by the name of the Logging Database
and the name of the Gallery.
A progress panel is displayed. The Inspect Log button can be used to display a text panel
that contains details of the autochop operation.
The ghosts created can be used as sources for editing. Remember that ghosts do not behave
exactly like shots - take care not to delete the original long shot that the ghosts have been
created from, as this will delete the picture and sound from the ghosts as well. See ‘Definitions’ on page 55.
Lightworks V.I.P 4500 Version 3 - User Guide A8.0 - 199
A8.9
A8.9
Updating Filecards For Shots After Recording Using Retrofit
Updating Filecards For Shots After Recording Using Retrofit
The retrofit feature enables a Logging Database to be used to update information on the Filecards (logs)
for shots after they have been recorded. Retrofit can be set up to modify the Filecards for existing shots
or to create new ghosts.
The retrofit feature uses a Logging Database to enter information into the system after the shots have
been recorded. Retrofit requires specification of the criteria to use when trying to match a shot to a given
Logging Database entry. When a match occurs, the information from the Logging Database entry is
applied to the Filecard for the shot. If a shot is matched by more than one Logging Database entry it is
not modified as retrofit is unable to determine which entry to use.
The Logging Database used does not need to have been generated on the system. This can be useful
where rushes have been logged on another computer (using a separate logging program).
Note: The primary reel ID and primary timecode are the labels on which the matches are based. It
is not possible to modify these using retrofit.
A8.9.1
Retrofit - Step-by-step
1 Generate a Gallery of the shots to be updated.
2 Display the Logging Database containing the information to be added to the
Filecards for the shots.
3 Tag the entries in the Logging Database you want to use.
4 Position the bottom left corner of the Logging Database so it overlaps the Gallery.
5 Click on the Logging Database Menu command Retrofit, to display the Retrofit
Options Panel.
A8.0 - 200
Lightworks V.I.P 4500 Version 3 - User Guide
Updating Filecards For Shots After Recording Using Retrofit
A8.9
6 Decide which of the three match options to use by setting one to Yes and the other
two to No.
Note: Setting more than one match option to Yes is possible, but this may not give
the expected results.
The match options are:
Allow Exact Matches: Yes/No
When set to Yes, any shot whose start and end timecodes are equal to (or within the
specified tolerance range of) the Logging Database entry will be considered to be
matched to that entry.
Shot
Logging Database Entry
Lightworks V.I.P 4500 Version 3 - User Guide A8.0 - 201
A8.9
Updating Filecards For Shots After Recording Using Retrofit
Allow Matches if Shot Contains DB Event: Yes/No
When set to Yes, this option specifies that any shot whose start and end times surround those of the Logging Database entry is considered to match that entry. The tolerance specified (see below) is taken into account.
Shot
Logging Database Entry
Allow Matches if DB Event Contains Shot: Yes/No
When set to Yes, this option specifies that any shot whose start and end times are
completely contained by those of the Logging Database entry is considered to
match that entry. The tolerance specified (see below) is taken into account.
Shot
Logging Database Entry
7 Once the match option has been set, the other options can be set.
Tolerance: Lax, Normal, Strict, Very Strict, Custom
The tolerance setting is used to set how closely the start and end times of a shot and
Logging Database event need to be before being considered a match. This setting is
used in conjunction with the settings Allow Exact Matches, Allow Matches if DB
Event Contains Shot, and Allow Matches if Shot Contains DB Event.
A8.0 - 202
Lightworks V.I.P 4500 Version 3 - User Guide
Updating Filecards For Shots After Recording Using Retrofit
A8.9
Each of the preset tolerance options has a default. These are: Lax = 10 seconds,
Normal = 5 seconds, Strict = 0 seconds, Very Strict = -5 seconds.
A CONFIG.DAT entry can be used to modify the default tolerance values. See
‘ro_normal_tolerance’ on page 711.
Logging Databases have end times one frame later than the last frame on the shot in
order to include the last frame when recording. Using Strict Tolerance may cause retrofit to fail in cases where the Logging Database was created directly from shots on
the system.
When using Lax Tolerance, there is a chance that the handle size will cause the Logging Database entries to overlap, providing two Logging Database entries for one
shot. This will cause retrofit to fail for those shots.
The Custom tolerance uses a value entered into the custom text box. The possible
values are between plus and minus 100 seconds but the extremes of this range should
be used with care. The default value = 0 seconds.
The effect of the tolerance setting depends on the match option selected:
Allow Exact Matches - Yes
The tolerance determines how close the start and end timecodes of a shot need
to be to the Logging Database entry. For example if the tolerance was set to
five seconds then the start and end timecodes for the shot would have to be
within five seconds of that of the database entry for a match to be possible.
Allow Matches if DB Event Contains Shot and Allow Matches if Shot Contains DB Event
The tolerance is used in whichever way would make a match more likely. Negative tolerances are used on the timecodes to make matches less likely.
Lightworks V.I.P 4500 Version 3 - User Guide A8.0 - 203
A8.9
Updating Filecards For Shots After Recording Using Retrofit
Output To: Original Shot/New Ghost
This button is used to specify what form any changes made as a result of the information in the Logging Database are to take.
If this is set to Original Shot, retrofit will place the changes in the Filecard (log) for
the original shot.
If this is set to New Ghost, retrofit will make a ghost based on the original material
and the new information. The original shot will be unchanged.
With so many options to set up it is suggested that the retrofit operation is tested first
with Output To set to New Ghost. This will enable the results of any changes to be
verified manually before the original Filecards are modified.
WARNING: USING RETROFIT WITH THE OUTPUT SET TO ORIGINAL
SHOT WILL MODIFY THE ORIGINAL FILECARD FOR THE SHOT. IT IS
NOT POSSIBLE TO UNDO ANY CHANGES MADE.
Labels Options
These determine how any labels for the shot are to be treated. The labels covered by
this are audio timecode, camera code, ink numbers and keycode.
This allows you to decide how label information in the Logging Database is to be
added to the original shot if it is not already present. Alternatively, you may wish
information to be explicitly overwritten (for example, in the event of inaccurate
information having been recorded with the shot).
Click on the Options button to display a Label Options Panel that lists the labels, with
the currently selected option for each one. The choices are toggled by clicking on the
selection next to each label name. The Set All button can be used to change the selection for all the fields at once.
Add New
Will add new labels if these are present in the Logging Database but not in the
shot.
Overwrite
The retrofit operation will add new labels if none exist, and existing labels will
be overwritten with the new information on the Logging Database, even if the
shot already contains this data.
A8.0 - 204
Lightworks V.I.P 4500 Version 3 - User Guide
Updating Filecards For Shots After Recording Using Retrofit
A8.9
Ignore
No changes will be made to the label.
Text Fields Options
These determine how any text fields on the Filecard for the shot should be treated.
The text fields covered by this are name, notes, shot, description, scene and who.
Click on the Options button to display a Text Options Panel lists the text fields with
the currently selected option for each one. The choices are toggled by clicking on the
selection next to each field name. The Set All button can be used to change the selection for all the fields at once.
Add New
Will add new text.
Add/Overwrite
The retrofit operation will add new text fields if none exist, and existing text
will be overwritten with the information in the Logging Database.
Ignore
No changes will be made to the text.
After selecting the search criteria, click on the Do It button. A new Gallery will be created
that contains any ghosts created or shots with modified Filecards.
Lightworks V.I.P 4500 Version 3 - User Guide A8.0 - 205
A8.9
A8.0 - 206
Updating Filecards For Shots After Recording Using Retrofit
Lightworks V.I.P 4500 Version 3 - User Guide
A9.0 Organising Shots and Edits
A9.1
Galleries, Databases, Racks and Sync Groups
Galleries, Databases, Racks and Sync Groups can all be used to organise shots and edits on the system.
A9.1.1
Galleries
A Gallery is a display of shots and edits as small pictures called Tiles.
Gallery with an Edit and Two Shots
A Tile can be played at any time by clicking on the picture and pressing the Play button on
the Console. You can drag Tiles around inside a Gallery or move them from one Gallery to
another.
One of the main functions of Galleries is to organise and display shots and edits on screen
during editing. You can also perform certain operations on shots or edits in a Gallery, using
the Gallery Menu commands. See ‘Gallery Menu’ on page 559.
Note: It is possible for a shot or edit to be in more than one Gallery at the same time.
You can use this feature to help you organise your material more flexibly. However,
seeing a shot in more than one place on the screen does not mean there is more than
one copy of the shot on the system.
Galleries can be generated by:
Searching, using the Searchcard. See ‘Finding Shots and Edits’ on page 223.
Clicking on the Gallery button on a Recording Panel.
Using the Gallery of Shots command on the Edit Menu.
Lightworks V.I.P 4500 Version 3 - User Guide A9.0 - 207
A9.1
Galleries, Databases, Racks and Sync Groups
Using the Create Gallery button on a Database.
Clicking on the Gallery Tool.
Autoconforming an edit (a Gallery of recordings from each reel is created).
Recording using the edit-to-it or voice over features.
Some general operations apply to Galleries, Racks, Databases and Sync Groups:
See ‘Naming Galleries, Databases, Racks and Sync Groups’ on page 212.
See ‘Gallery, Database, Rack and Sync Group Permanence’ on page 212.
See ‘Arranging Galleries, Databases, Racks and Sync Groups On Screen’ on page 213.
Operations specific to Galleries include:
Tidying the Gallery
Two commands on the Gallery Menu can be used to arrange Tiles within a Gallery:
Tidy Gallery (and Sort) will neatly position the Tiles and sort them by name in
alphanumeric order.
Tidy Gallery (without Sort) will neatly position the Tiles in their existing order.
When a Gallery is first generated from a search, a tidy is performed automatically.
When merging Databases, a CONFIG.DAT parameter determines whether the tidy
operation includes a sort or not. See ‘gallery_sort_tiles’ on page 596.
Default Gallery Name
The Gallery name is displayed on a blue or green bar at the bottom of the Gallery.
The default Gallery name is determined by the way in which the Gallery was generated. For example, if the Gallery was generated by searching for all shots in the scene
“Gerbils” then the Gallery name will be “Scene Gerbils”. You can change the Gallery
name at any time by clicking on the name bar and typing in a new name.
Removing a Gallery from the Screen
To remove a Gallery from the screen, eat it with the Shark. Sharking a Gallery does
not delete shots and edits from the V.I.P hard disks. However, if you want to use the
Gallery again you must make it permanent before you shark it. See ‘Gallery, Database, Rack and Sync Group Permanence’ on page 212.
A9.0 - 208
Lightworks V.I.P 4500 Version 3 - User Guide
Galleries, Databases, Racks and Sync Groups
A9.1.2
A9.1
Databases
A Database is a table of information about shots and edits displayed as text rather than pictures. A Database can be used in the same way as a Gallery to display information or perform an operation. Databases make it easier to handle large numbers of shots and edits.
There are three types of Database on the Lightworks V.I.P system - each type can be recognised by the colour of its background.
Logging Database (Blue Background)
Logging Databases can be used to control recording into the V.I.P system. See ‘Using
a Logging Database To Assist Recording’ on page 147.
Autoconform Database (Grey Background)
An Autoconform Database is used to inspect and modify lists of shots to be recorded
using the Autoconform Panel. See ‘Inspecting Events To Be Recorded’ on page 174.
Database (Orange Background)
Databases are used for displaying information in text form about shots and edits that
exist on the system. See ‘Project Management 4 - Databases’ on page 505.
Tag Button
Scroll Left/Right Bar and
Scroll Left/Right Buttons
Field Header/Sort Buttons
Database Name
Scroll Up/Down Buttons
and Scroll Up/Down Bar
Gallery
Button
Lightworks V.I.P 4500 Version 3 - User Guide A9.0 - 209
A9.1
Galleries, Databases, Racks and Sync Groups
A9.1.3
Racks
When you are not working with it, a Gallery, Database or Sync Group can be closed and
placed in a Rack.
For example, to place a Gallery in a Rack:
1 Click on the Close button to close the Gallery.
2 Generate a Rack, by clicking on the Rack Tool
from the Toolbox.
3 Drag the closed Gallery over the Rack and release the right Mouse button. The Rack
automatically expands to accommodate the Gallery.
Properties of Racks:
A Rack can hold Galleries, Databases, Sync Groups and other Racks.
A Rack can hold up to 20 items.
A Rack can be closed to save space on screen.
Closed Racks can be placed in other Racks.
A Rack can be made permanent and then searched for.
If you right+left-click on the Rack Tool itself, it will generate a Visidir of all permanent
Racks in the current Project. Click on the name(s) of the Rack(s) to be displayed and click
on the OK button. See ‘Rack Menu’ on page 570.
A9.0 - 210
Lightworks V.I.P 4500 Version 3 - User Guide
Galleries, Databases, Racks and Sync Groups
A9.1
Reel Racks
Reel Racks are Racks that automatically create a Gallery for each reel recorded using
the edit-to-it, voice over or autoconform features. Reel Racks are blue. Shots are
placed into the appropriate Gallery within the Reel Rack. Dragging a shot over the
Reel Rack and right+left-clicking will place the shot into the Gallery for that reel.
If configured in the CONFIG.DAT file (see ‘rr_from_db’ on page 602), the Database
Menu will include the command Make Reel Rack. Clicking this command will
create a Reel Rack for the contents of the Database.
A9.1.4
Sync Groups
A Sync Group locks several shots or edits together so that they will play in synchronisation
with each other. See ‘Sync Groups’ on page 252 and see ‘Sync Group Menu’ on page 575.
A new Sync Group is generated by clicking on the Sync Group Tool
Toolbox.
from the
Sync Group
It is possible to search for existing permanent Sync Groups using the Searchcard or by
right+left-clicking on the Sync Group Tool to display a Visidir of all permanent Sync
Groups in the current Project. The desired Sync Group can then be highlighted and the OK
button clicked to display it.
It is not possible to have more than one Sync Group open on screen at any one time.
Lightworks V.I.P 4500 Version 3 - User Guide A9.0 - 211
A9.1
Galleries, Databases, Racks and Sync Groups
A9.1.5
Gallery, Database, Rack and Sync Group Permanence
A Gallery, Database, Rack or Sync Group can be permanent or transient.
Transient
This is the default state for a newly generated Gallery, Database, Rack or Sync
Group. If you Shark one of these objects when transient, you cannot get it back. A
transient Gallery, Database, Rack or Sync Group has a blue label.
Using the Shark to remove a transient Gallery, Database, Rack or Sync Group from
the screen does not delete the shots and edits themselves from the hard disk.
Permanent
If you use the Shark to remove a permanent Gallery, Database, Rack or Sync Group
from the screen, it is possible to redisplay it by searching with the Searchcard.
A permanent Gallery, Database Rack or Sync Group has a green label.
You can change a Gallery, Database or Sync Group to permanent by renaming it or
by clicking on the name label and pressing the Enter key. A Rack automatically
becomes permanent when it first has an item placed in it.
To change a permanent Gallery, Database, Rack, or Sync Group to transient, use the
appropriate command on its Menu.
A right+left-click on the appropriate Tool will generate a Visidir of all the permanent
Galleries, Databases, Racks or Sync Groups in the current Project. Click on the name
of a Gallery, Database, Rack or Sync Group, then click on the OK button, to display
it.
A9.1.6
Naming Galleries, Databases, Racks and Sync Groups
Each Gallery, Database, Rack and Sync Group has a name, which is displayed whether the
object is opened or closed. The name can be used to find the Gallery, Database, Rack or
Sync Group (if permanent), by typing it into the Searchcard.
A newly created Gallery, Database, Rack or Sync Group will be given a default name based
on the method by which it was generated. To change the name:
1 Click on the existing name.
2 Type in the new name and then press the Enter key.
Entering a name will automatically make the Gallery, Database, or Sync Group permanent.
A9.0 - 212
Lightworks V.I.P 4500 Version 3 - User Guide
Galleries, Databases, Racks and Sync Groups
A9.1.7
A9.1
Arranging Galleries, Databases, Racks and Sync Groups On Screen
You can drag a Gallery, Database, Rack or Sync Group to any position on the graphics
screen (or even place it partially off screen).
Resizing
A Gallery, Database or Sync Group can be resized by dragging its border. For
example, to resize a Gallery:
1 Point the Mouse cursor at the border of the Gallery.
2 Hold the right Mouse button down.
3 Drag the Mouse to make the Gallery larger or smaller.
4 Release the right Mouse button.
When you are not working with it, a Gallery, Database or Sync Group can be closed and
placed in a Rack. It is also possible to place a closed Rack in another Rack.
To conserve system resources, it is recommended that you keep the number of on screen
Galleries, Databases, Racks or Sync Groups to a minimum.
Moving Several Objects Using the Hand
The Hand, found in the Toolbox, can be used to pick up several objects at once and
move them elsewhere on the screen. This is particularly useful for transferring several Tiles from one Gallery to another. To use the Hand:
1 Right-click on the Hand (and keep the Mouse button held down).
2 Drag the Hand and position it so that it points at the object to be picked up.
3 Click to pick up the object.
4 Keep the right Mouse button held down, and move on to the next object to pick up.
5 Repeat steps 3 and 4 until you have picked up all the objects required.
6 Keep the right Mouse button held down and drag the Hand (and all the picked up
objects) to their destination.
7 Release the right Mouse button.
Lightworks V.I.P 4500 Version 3 - User Guide A9.0 - 213
A9.2
A9.2
Displaying Timecode and Other Labels
Displaying Timecode and Other Labels
A9.2.1
Label Display On Viewers and Stripviews
The Viewer Label Display can show either one of the labels for the current frame or duration information.
Label Toggle
Button
Name
Display
Label
Display
Viewer Labels
Panel Button
Section of Viewer Showing Label Display
Click on the Label Toggle button to change the type of information displayed.
Label information is shown in black.
Duration information is shown in white.
The duration is between the mark and current frame (or start of the shot and current frame
if no mark exists). Duration will be shown in either timecode or feet and frames format,
depending on the type of label selected.
If the current frame is parked off the start or end of the shot or edit, then the Label Display
will indicate this, as follows:
Off Start = <<:<<:<<:<<
Off End = >>:>>:>>:>>
The label displayed on the Viewer, and any future Viewers for that shot, can be independently specified. This is achieved in conjunction with the Viewer Labels Panel. See ‘Viewer
Labels Panel’ on page 217.
Primary Timecode
The default label displayed for a new Viewer is primary timecode.
A9.0 - 214
Lightworks V.I.P 4500 Version 3 - User Guide
Displaying Timecode and Other Labels
A9.2
Audio Timecode
If the timecode for the audio is different to the timecode for the video then deselecting the video channel on the side of the Viewer or Stripview will display the audio
timecode.
Note: The display of audio timecode is only possible if the Viewer Labels Panel
option Show Video Code Even For Audio Tracks is set to NO. (When set to YES this
will override the Channel Selectors and the video timecode will always be shown.)
Ink Numbers
Select via the Viewer Labels Panel. The duration counter will display durations in
feet and frames.
Film T/C
Also known as camera code. Select via the Viewer Labels Panel. The duration
counter will display durations in feet and frames.
Keycode
Select via the Viewer Labels Panel. The duration counter will display durations in
feet and frames.
Choosing What to Display in Future Viewers
This enables the display for any future Viewers containing that shot (for example
generated by a search) to default to displaying a specific label.
From the Viewer Labels Panel Options, select the desired label using the setting
Choose Code For All Future Viewers.
Locating a Timecode
To ‘go to’ a timecode, enter a new value to the Label Display and press the Enter key.
The Viewer will then display that as the current frame. Timecodes can also be entered
using tear off timecodes or by cutting and pasting. See ‘Tear-off Timecodes’ on page
222.
Lightworks V.I.P 4500 Version 3 - User Guide A9.0 - 215
A9.2
Displaying Timecode and Other Labels
A9.2.2
Label Display For an Edit
The Viewer Label Display is used in conjunction with the Label Toggle button. For an edit,
the Label Toggle button toggles the Label Display as follows:
The source label details will be for the first selected channel in the edit.
Name Display
Label Display
Edit Name
Edit time - current frame (in black).
[Source Shot Name]
Selected source label - current frame (in black).
Edit Name
Duration - mark to park/first frame to park (in white).
Edit Name
Duration - first frame to last frame (in red).
Duration - Mark To Park/First Frame To Park
The Label Display can show the duration between the mark and park frames (or, if
no mark is set, the park frame and the first frame of edit).
Duration - First Frame To Last Frame
The Label Display can show the duration of the entire edit - from first frame to last
frame.
By default, the duration is calculated for the longest channel in the edit. This feature
can be configured to calculate the duration of the first selected channel. See
‘vob_total_duration_by_selection’ on page 605.
Duration in NTSC Projects
In both an NTSC and an NTSC_Drop Project, the duration displayed will be in dropframe timecode (accurate for time).
Choosing the Source Label To Display For an Edit
For an edit it is possible to display the name and source label of the current shot using
the Label Toggle button.
Use the Viewer Labels Panel for the edit to select the desired source label by clicking
on the required button to highlight it. When the Viewer Labels Panel is vanished, this
label will be shown in the Viewer Label Display, with the shot name in brackets.
A9.0 - 216
Lightworks V.I.P 4500 Version 3 - User Guide
Displaying Timecode and Other Labels
A9.2
Lock Current Channel Into Timecode Display
This command on the Edit Menu will cause the label for the currently selected
channel to be the one displayed in the edit Viewer (rather than the label for the first
selected channel). The Viewer Label Display will be yellow in this case.
A9.2.3
Viewer Labels Panel
The Viewer Labels Panel displays all of the labels which are available for a shot or edit. See
‘Recording 2 - Recording Timecode and Labels’ on page 121.
To display the Viewer Labels Panel:
1 Display the shot or edit in a Viewer.
2 Click on the Viewer Labels Panel button (yellow triangle, to the left of the Rec
button).
Viewer Labels Panel
Lightworks V.I.P 4500 Version 3 - User Guide A9.0 - 217
A9.2
Displaying Timecode and Other Labels
Choosing the Label To Display For a Viewer
The default label displayed for a new Viewer is primary timecode. The Viewer
Labels Panel can be used to change the source label displayed by the Viewer. For
example, if a source shot contains keycode and you wish to display this in the
Viewer:
1 Set the Label Toggle button on the Viewer to display source time. See ‘Label Display
On Viewers and Stripviews’ on page 214.
2 Display the Viewer Labels Panel.
3 Click on the Keycode button.
4 Vanish the Viewer Labels Panel.
Current Time/Start Time Button
Determines whether the labels displayed in the Viewer Labels Panel refer to the first
frame of the recording or the current frame displayed in the Viewer.
Jump To/Modify Button
If this button is set to Jump To, then it is possible to jump to a particular frame by
typing in the relevant code then pressing the Enter key.
If this button is set to Modify, then it is possible to alter a label in the Viewer Labels
Panel.
A9.2.4
Viewer Labels Panel Options
Click on the Options button on the Viewer Labels Panel to display the following options:
Choose Code For All Future Viewers
Determines the type of label displayed for any Viewers generated. Options are:
A9.0 - 218
Video Code
Keycode
Camera Code
Lightworks V.I.P 4500 Version 3 - User Guide
Displaying Timecode and Other Labels
A9.2
Show Video Code Even For Audio Tracks
When the video channel is deselected, the Viewer Label Display normally shows the
timecode for the first active audio channel.
To display video code at all times, set this option to YES.
Type of Hand-Added Video Codes
This command determines the timecode standard for hand-added video timecodes.
The default is the same as the TV Standard of the current project. In NTSC it selects
drop-frame or non-drop-frame timecode.
Type of Hand-Added Audio Codes
This command determines the timecode standard for hand-added audio timecodes.
Type of Hand-Added Camera Codes
This command determines the timecode standard for hand-added camera codes.
Type of Hand-Added Keycodes
This command sets the film footage counter for either 35mm or 16mm film.
Destroy Selected Code
This will destroy whichever code is highlighted on the Viewer Labels Panel.
Lightworks V.I.P 4500 Version 3 - User Guide A9.0 - 219
A9.3
A9.3
Timecode Calculations
Timecode Calculations
It is possible to perform calculations on timecodes, film footages or time (hours, minutes, seconds,
frames) using the Calculator.
To display the Calculator, click on the Calculator Tool
in the Toolbox.
All Clear Button
Clear Entry Button
Input/Result
Line
Subtract Button
Add Button
Equals Button
OVR/INS Button
Calculator
At the top of the Calculator are six rows of timecodes. The top five rows show the last five timecodes
entered into the Calculator, with the oldest at the top. The bottom line of the timecode display is the
Input/Result Line. This is where the figures entered will appear, and, when you click on the Equals
button, where the result of the calculation will be displayed.
0 - 9 Buttons
These buttons provide one way of entering timecodes into the Input/Result Line of the Calculator.
00 Button
This button is a quick way to enter a double zero (00) into the Calculator.
A9.0 - 220
Lightworks V.I.P 4500 Version 3 - User Guide
Timecode Calculations
A9.3
AC Button
All Clear - will delete all timecodes currently in the Calculator.
CE Button
Clear Entry - will delete the last number entered to the Calculator.
Timecode Format Button
This will set the timecode format that the Calculator bases its calculations on. The choices are
PAL, PAL 24, NTSC, NTSC DF, 35mm Ft, 16mm Ft and Time. When set to Time, durations
entered can be converted to any of the other formats.
OVR/INS Button
This button toggles between OVR and INS.
When set to OVR, the cursor is yellow. Numbers entered from the Keyboard overwrite the existing
timecode. Only values which are valid for the currently selected timecode format will be accepted.
When set to INS, the cursor is blue. Numbers entered from the Keyboard scroll from right to left.
Any value can be entered.
A9.3.1
Entering Timecodes
There are three methods of entering timecodes into the Calculator:
0-9 and 00 Buttons
Simply click on the numbers required.
From the Keyboard
Numbers can be typed in directly from the Keyboard.
Tear-Off Timecode
See ‘Tear-off Timecodes’ on page 222.
When the OVR/INS button is set to OVR, only values which are valid for the currently
selected timecode format will be accepted.
Lightworks V.I.P 4500 Version 3 - User Guide A9.0 - 221
A9.3
Timecode Calculations
A9.3.2
Tear-off Timecodes
This feature allows ‘cut and paste’ of timecodes between the Calculator, Viewers and
Stripviews:
1 Right+left-click on the timecode you wish to use. The timecode will appear in a strip
of its own.
2 Drag the timecode to the Calculator.
3 Line up the yellow triangle, in the bottom left corner of the strip, over the Input/
Result Line of the Calculator
4 Right+left-click to insert the timecode. A copy of the timecode will appear in the
Calculator.
This process can also work in reverse. A timecode from the Calculator can be picked up
(right+left-click), dragged over and inserted into the Label Display of a Viewer or
Stripview. The shot or edit will jump to the new timecode.
A9.3.3
Timecode Strip
The Timecode Strip contains a copy of a timecode, made by right+left-clicking on any timecode field on the graphics screen.
Yellow Vanish
Button
Yellow Triangle
Timecode
It is possible to change the timecode in the strip, by clicking on the timecode itself to
overtype any part of it.
Yellow Triangle
This is the pointer used to line the strip up with where it is to be inserted. Overlap the
triangle with the Input/Result Line of the Calculator and right+left-click - this will
insert the timecode from the strip into the Calculator.
Yellow Vanish Button
Click on this miniature Vanish button to remove the timecode strip from the screen.
A9.0 - 222
Lightworks V.I.P 4500 Version 3 - User Guide
A10.0 Finding Shots and Edits
A10.1
Introduction
To find shots and edits stored on the V.I.P system you must search for them using the Searchcard. It is
possible to search for any combination of shots, ghosts and edits or any combination of permanent Galleries, Databases, Racks, and Sync Groups.
To display the Searchcard, open the Toolbox and click on the Searchcard Tool
.
With/Without
Button
Searchcard
Lightworks V.I.P 4500 Version 3 - User Guide A10.0 - 223
A10.2
A10.2
Performing a Search
Performing a Search
A10.2.1
Searching For Everything In the Projects
The simplest way to perform a search is:
1 Display the Searchcard by clicking on the Searchcard Tool. By default, the Shots,
Edits and Ghosts checkboxes will be checked.
2 Click on the Search button.
There is no need to type anything. This search will find all shots, ghosts and edits in
the Project and display them on the screen.
A10.2.2
Searching For Specific Shots or Edits
A more sophisticated search procedure makes use of any logging information entered in the
Filecard fields of the shots and edits. The Searchcard includes a blank Filecard to enable
this method of searching.
1 Click on the appropriate Filecard field of the Searchcard. The field will be highlighted.
2 Type the search text into the field.
For example, if you want to find all shots from a scene logged as “balcony”, type
“balcony” into the Scene field.
You can use more than one field. For example, to find all the close-ups from the balcony scene, type “balcony” into the Scene field, and CU in the Shot field. Obviously
the success of this method depends on the logging having been carried out accurately
and consistently.
3 Make sure that the desired combination of the Shots, Edits and Ghosts checkboxes is
selected on the Searchcard. See ‘Search Options 1 - Shots, Ghosts, Edits, Galleries,
Databases or Racks’ on page 226.
4 Select any other search options required (described later in this chapter).
5 Click on the Search button to start the search (or press the Enter key).
The shots or edits you are searching for will be displayed as they are found. If the
system cannot find the shots or edits then a message will be displayed when the
search is complete.
A10.0 - 224
Lightworks V.I.P 4500 Version 3 - User Guide
Performing a Search
A10.2.3
A10.2
Searching For Specific Galleries, Databases, Racks or Sync Groups
Use the Groups Card on the Searchcard to search for permanent Galleries, Databases, Racks
or Sync Groups.
To display the Groups Card, click on the Groups Tab on the Searchcard.
Searchcard Groups Card
The name field on this card is used to enter search text and the appropriate combination of
the Galleries, Databases, Racks and Sync Groups checkboxes must be selected.
A10.2.4
Stopping a Search
If, during a search, you see what you need and want to stop the search before it has finished,
press the ESC key or Spacebar.
Lightworks V.I.P 4500 Version 3 - User Guide A10.0 - 225
A10.3
A10.3
Search Options 1 - Shots, Ghosts, Edits, Galleries, Databases or Racks
Search Options 1 - Shots, Ghosts, Edits, Galleries, Databases or Racks
It is possible to search for any combination of shots, ghosts and edits or any combination of permanent
Galleries, Databases, Racks, and Sync Groups.
This is controlled by checkboxes on the Searchcard:
A10.3.1
Shots Checkbox
When this checkbox is checked, the search will look for shots.
When this checkbox is not checked, the search will ignore shots.
This checkbox can be used in combination with the Edits and Ghosts checkboxes.
When searching for shots it is possible to specify whether the search looks for shots with or
without picture or sound. See ‘Search Options 2 - Searching For Shots With or Without
Material’ on page 228.
A10.3.2
Edits Checkbox
When this checkbox is checked, the search will look for edits.
When this checkbox is not checked, the search will ignore edits.
This checkbox can be used in combination with the Shots and Ghosts checkboxes.
A10.3.3
Ghosts Checkbox
When this checkbox is checked, the search will look for ghosts.
When this checkbox is not checked, the search will ignore ghosts.
This checkbox can be used in combination with the Shots and Edits checkboxes.
A10.3.4
Galleries Checkbox
This is located on the Groups Card.
When this checkbox is checked, the search will look for permanent Galleries.
When this checkbox is not checked, the search will ignore permanent Galleries.
This checkbox can be used in combination with the Databases, Sync Groups and Racks
checkboxes.
A10.0 - 226
Lightworks V.I.P 4500 Version 3 - User Guide
Search Options 1 - Shots, Ghosts, Edits, Galleries, Databases or Racks
A10.3.5
A10.3
Databases Checkbox
This is located on the Groups Card.
When this checkbox is checked, the search will look for permanent Databases.
When this checkbox is not checked, the search will ignore permanent Databases.
This checkbox can be used in combination with the Galleries, Sync Groups and Racks
checkboxes.
A10.3.6
Racks Checkbox
This is located on the Groups Card.
When this checkbox is checked, the search will look for permanent Racks.
When this checkbox is not checked, the search will ignore permanent Racks.
This checkbox can be used in combination with the Galleries, Databases, and Sync Groups
checkboxes.
A10.3.7
Sync Groups Checkbox
This is located on the Groups Card.
When this checkbox is checked, the search will look for permanent Sync Groups.
When this checkbox is not checked, the search will ignore permanent Sync Groups.
This checkbox can be used in combination with the Galleries, Databases and Racks checkboxes.
Lightworks V.I.P 4500 Version 3 - User Guide A10.0 - 227
A10.4
A10.4
Search Options 2 - Searching For Shots With or Without Material
Search Options 2 - Searching For Shots With or Without Material
Clicking on the With/Without button on the Searchcard displays a panel that enables you to make a more
specific search for shots.
The With/Without Picture button options are:
With/Without Picture
Finds shots regardless of whether they have picture or not.
With Picture
Finds only shots with picture.
Without Picture
Finds only shots without picture.
The With/Without Sound button options are:
With/Without Sound
Finds shots regardless of whether they have sound or not.
With Sound
Finds only shots with sound.
Without Sound
Finds only shots without sound.
The buttons may be used in combination, to give precise control of searches. A search done without picture is indicated by appending “(-V)” to the name of the Gallery or Database produced. A search done
without sound is indicated by “(-A)”.
A10.0 - 228
Lightworks V.I.P 4500 Version 3 - User Guide
Search Options 3 - Display Method For Search Results
A10.5
A10.5
Search Options 3 - Display Method For Search Results
It is possible to select how the search results will be displayed on the graphics screen.
For a shots/ghosts/edits search, the options are to display results in a Gallery or a Database.
For a permanent Galleries/Databases/Racks/Sync Groups search, the options are As a List or not.
Whichever display method is in force will be indicated by the text of the Display Results In button. To
change the display method, click on the button.
For Galleries, Databases, Sync Groups or Racks, when the Display Results As a List option is checked,
the results of the search will be displayed in a Visidir. See ‘Using Visidirs To Select Folders and Files’ on
page 64.
To display the actual Gallery, Database, Rack or Sync Group, highlight its name in the Visidir then click
on the OK button (or press the Enter key).
It is possible to use the Searchcard to display the result of a search as a Database and then use the Database Search button to search within that Database. See ‘Databases’ on page 209.
A10.6
Search Options 4 - Whole Words
The Match Whole Words Only option allows you to search only for shots and edits where there is a complete word (or words) that matches the search string.
With the Match Whole Words Only Checkbox Not Checked
A search based on “cat” would find “alleycat”, “cat23”, “catastrophe” and so on, as well as “cat”.
With the Match Whole Words Only Checkbox Checked
Only shots and edits called “cat” will be found.
This feature can be applied to searches for shots/ghosts/edits or searches for permanent Galleries/Databases/Racks/Sync Groups.
A10.7
Searching By Date
It is possible to search by date. The modification date is used (not the creation date).
Note: The Searchcard Year button can display years from 1989 to the current year + 15.
Lightworks V.I.P 4500 Version 3 - User Guide A10.0 - 229
A10.7
Searching By Date
A10.7.1
Searching By Date - Step-by-step
1 Ensure that one or more of the Shots, Edits or Ghosts checkboxes is checked.
2 Click on the word Date in the Filecard section of the Searchcard. Extra buttons will
be displayed in the date field, as shown below:
Searchcard With Search By Date Enabled
3 To set the date, click on the Day, Month or Year buttons to change the values to the
desired date.
Normally, each Mouse click will advance the value by one.
To quickly change or retard values (go backwards) hold the left Mouse button down
and then move the Mouse up or down the screen.
4 Determine whether the search looks for shots and edits on, before or after the given
date. To do this, click on the button before the date, to set it to On, Before or After.
5 Set any other search options required.
6 Click on the Search button to start the search.
7 To disable the search by date feature, click on the Date button again.
A10.0 - 230
Lightworks V.I.P 4500 Version 3 - User Guide
Searching For Material By Disk
A10.8
A10.8
Searching For Material By Disk
When searching for shots it is possible to specify a particular material disk using the All Disks button on
the Searchcard.
The All Disks button toggles through all disks connected to the system, displaying their names. Continue
clicking until the name of the disk you wish to search is displayed
In order to exclude shots without material from the search, use the With/Without Picture and the With/
Without Sound buttons. See ‘Search Options 2 - Searching For Shots With or Without Material’ on page
228.
Lightworks V.I.P 4500 Version 3 - User Guide A10.0 - 231
A10.8
A10.0 - 232
Searching For Material By Disk
Lightworks V.I.P 4500 Version 3 - User Guide
A11.0 Editing 1 - Basic Editing
A11.1
Introduction
This is the first of seven chapters describing the process of editing on the V.I.P system. In this chapter
basic editing operations are covered.
A11.2
Using the Console
All basic editing - assembly, cutaways, inserts and so on, is done using the Console buttons and one or
more Viewers on the graphics screen.
There are four primary editing buttons on the Console: Replace, Move, Insert and Delete. By using these,
you can make any form of edit.
There are two types of Console that may be connected to the V.I.P system - the Series 1 Console and the
Series 2 Console. For more information on using the Console, see ‘The Console’ on page 523.
Console Cut
Buttons (Live Editing)
Play
Forward
Play
Backward
MARK
UNMARK
Stop
Button
SWAP
CUE
REPLACE
MOVE
INSERT
DELETE
Editing
Buttons
Jump
Buttons
Lever
Series 1 Console
Lightworks V.I.P 4500 Version 3 - User Guide A11.0 - 233
A11.3
A11.3
Selecting Record and Source Viewers
Selecting Record and Source Viewers
Before starting to edit, you must select one Viewer as the Record Viewer and one Tile or Viewer as your
source.
You can create as many edits as you like, but only one can be active as the Record Viewer at any time.
For more information on Viewers, see ‘Viewers’ on page 72.
Indicator Strip
Video Output Button
Current Frame
Marker
Pin Button
Filecard Button
Stripview Button
Tile Button
Copy Button
Undo Button
Redo Button
Pop-Out Original
Tile Button
Channel Selector
Buttons
Label Toggle
Button
Name
Display
Label
Display
Viewer Border
Viewer Labels
Panel Button
Empty Viewer for an Edit
A11.0 - 234
Lightworks V.I.P 4500 Version 3 - User Guide
Selecting Record and Source Viewers
A11.3.1
A11.3
Starting a New Edit
Setting the Number Of Channels For a New Edit
1 Position the Screwdriver
over the Viewer Tool.
2 Click the Screwdriver. The Default Channels Panel will be displayed.
3 Use the Default Channels Panel to set the default number of video, audio and external
control channels for all new edits.
Starting a New Edit
1 Generate an empty Viewer by clicking on the Viewer Tool
from the Toolbox.
2 An empty Viewer is created. Position it in a suitable place on the screen.
3 Click on the Rec button to select the empty Viewer as the record Viewer.
The Rec button will turn red when the Viewer is selected as the record Viewer. All
editing commands from the Console will now operate on this Viewer.
Lightworks V.I.P 4500 Version 3 - User Guide A11.0 - 235
A11.4
Selecting Part Of a Shot or Edit
A11.3.2
Selecting an Existing Edit
1 Display the edit in a Viewer.
2 Position the edit Viewer in a suitable place on the screen.
3 Click on the Rec button to select the Viewer as the record Viewer.
The Rec button will turn red when the Viewer is selected as the record Viewer. All
editing commands from the Console will now operate on this Viewer.
A11.3.3
Selecting a Source
Shots, ghosts and edits can all be selected as sources for editing.
1 Display the source(s) you want to use for your editing session as Tiles or Viewers on
the screen.
2 Click on the Tile or Viewer you want to use as the first source.
A blue border lights up to show that it is the active source. This Tile or Viewer will
remain the source until you choose another.
A11.4
Selecting Part Of a Shot or Edit
A11.4.1
Marking and Parking
For many editing operations you need to select a section of the source shot. For example,
to cut out part of a shot you have to select which part of the shot to cut.
The selection of a section of a shot is made using the Mark button on the Console. When
you press the Mark button, the current frame is marked, and becomes one end of your selection. This appears as a blue mark, replacing the normal red diamond, on the Indicator Strip
at the top of the Viewer.
The other end of the selected section is simply wherever the current frame is parked.
When you play forward or backward, the section between the blue mark and the new current
frame is now selected. You can see this on the Indicator Strip, which shows a pink stripe
between the blue mark and the red diamond.
A11.0 - 236
Lightworks V.I.P 4500 Version 3 - User Guide
Selecting Part Of a Shot or Edit
A11.4
The procedure for selecting part of a shot is known as ‘marking and parking’.
Mark
Current Frame
Selected
Section
Selecting Part of a Shot or Edit
It does not matter which end of the selection is marked. You can mark the beginning and
then park at the end, or you can mark the end and then park at the beginning. The system
does not have separate mark in and mark out buttons.
A Viewer can have only one mark point at a time. If you press the Mark button again it
removes the existing mark and marks the current frame instead.
A11.4.2
Using a Series 2 Console To Select an Entire Shot
The Series 2 Console has a Mark All button to speed up the process of accurately selecting
an entire shot.
1 Jump to the beginning of the shot to be selected.
2 Press the Mark All button. The entire shot is selected.
A11.4.3
Swapping Ends Of a Selected Part
To jump to the frame at the other end of the selection, press the Swap button on the Console.
This simply swaps the blue mark and the red current frame.
Since the current frame is used to define one end of the shot, and the blue mark the other,
this button can be used to jump between the selected in-point and out-point of a shot.
A11.4.4
Deselecting Part Of a Shot or Edit
If a selection has been marked on a shot, but is no longer relevant, simply press the Unmark
button on the Console. This removes the mark.
Lightworks V.I.P 4500 Version 3 - User Guide A11.0 - 237
A11.5
Selecting Channels To Edit
A11.4.5
Marking While Playing
The Mark button can also be used to note a likely in- or out-point while playing. For
example, you may feel that you can judge the out-point of a shot better while it is playing.
To do this, just play the shot or edit and press the Mark button at the appropriate point.
You can play backwards and forwards to confirm that it is the right frame - if you change
your mind, just press the Mark button again.
You can note any number of points using the Cue button. Cues are long-term markers - you
have to delete them explicitly later.
A11.4.6
Making a Selection On Both Source and Record
If you attempt an editing operation when both the source and the record have marks, the
system will use the mark on the record (and ignore the mark on the source). The only exception to this is when performing a fit-to-fill edit. See ‘Fit-to-fill’ on page 327.
A11.4.7
Editing From Tiles
When editing from Tiles, there is a quick way of seeing if a shot or edit has been marked if a shot or edit in a Tile has a mark, then the Vanish button for the Tile will be coloured blue
(rather than white).
A11.5
Selecting Channels To Edit
The Channel Selector buttons on the Viewer or Stripview are used to choose which channels are edited.
If the channel is selected the button is lit (blue), if the channel is not selected it is grey. To toggle a
channel between selected and not selected, click on the button for the channel. See ‘Channel Selector
Buttons’ on page 74.
Any edits made using Console buttons will only affect channels that are selected. For Stripview editing
a channel does not have to be selected.
A11.5.1
Channel Assignment During Editing
Usually, channels are edited from source to record, channel for channel. That is, channel 1
goes to channel 1, 2 to 2, and so on. This applies to both audio and video channels.
The Channel Selector buttons on the Viewer or Stripview are used to choose how source
channels are edited across to the channels in the record Viewer.
The general rules are:
A11.0 - 238
Lightworks V.I.P 4500 Version 3 - User Guide
Selecting Channels To Edit
A11.5
Only selected channels on the source are used, and they are only edited into
selected channels on the record.
Source channels will be edited in order, starting with the first selected channel
on the record.
Here are several examples of this:
Editing source channel 1 to record channel 2
Select source channel 1 only. No other source channels are selected (all other
Channel Selector buttons are grey).
Select record channel 2 only. No other record channels are selected (all other Channel
Selector buttons are grey).
Record channel 2 is now the first selected channel, so source channel 1 is edited onto
it. Record channel 1 is not selected, so is ignored.
Editing source channel 2 to record channel 1
Select source channel 2 only. No other channels are selected (all other Channel
Selector buttons are grey).
Select record channel 1 only. No other channels are selected (all other Channel
Selector buttons are grey).
Source channel 2 is now the first selected channel, and channel 1 is ignored. On the
Record Viewer, channel 1 is selected, so channel 2 of the source is edited onto it.
Editing source channels 1 and 2 to record channels 3 and 4
Select channel 1 and 2 on the source Viewer or Stripview.
Select record channels 3 and 4. No other record channels are selected (all other
Channel Selector buttons are grey).
Channel 1 is now the first selected channel on the source. Channel 3 is the first
selected channel on the record, so channel 1 of the source is edited onto it.
The next selected source channel (2) is then edited onto the next selected record
channel (4).
This preservation of the order of channels applies to any number of selected channels.
Lightworks V.I.P 4500 Version 3 - User Guide A11.0 - 239
A11.6
A11.6
Editing Using the Replace Button
Editing Using the Replace Button
A11.6.1
Performing an ‘Open-Ended’ Replace
This operation is similar to a video ‘assemble edit’:
1 Find the in-point on the record Viewer and park there.
There is no need to press the Mark button; the system assumes the current frame is
the in-point.
If you are starting a new edit in an empty Viewer then the in-point will be the first
frame.
2 Find the in-point on the source Viewer or Tile and park there.
Again, there is no need to do anything else.
3 Check that neither of the shots have a mark.
There should be no blue mark in the Indicator Strip at the top of the Viewer. If there
is, click on the Viewer and press the Unmark button.
4 Press the Replace button.
Everything from the in-point of the record onwards, is replaced by everything from
the in-point of the source.
A11.6.2
Note: Even if there are many shots in the edit after the new edit point, they will all be
replaced. If you only want to replace part of the edit, first select that part by marking
and parking.
Replace Edit - Using a Selected Section Of the Source
Replacing with a selected section of the source is useful when you have a specific cutaway,
with known start and end points:
1 Select the cutaway on the source shot by marking and parking.
2 Find the in-point on the record Viewer and park there.
3 Check that there is no mark on the record Viewer. If necessary, click on the Viewer
and press the Unmark button.
A11.0 - 240
Lightworks V.I.P 4500 Version 3 - User Guide
Editing Using the Replace Button
A11.6
The Indicator Strips for source and record should look like this:
Mark
Park
(Current Frame)
Current Frame
Record
Source
4 Press the Replace button. The selected section of the source replaces any shots in the
record Viewer, to the same length.
A11.6.3
Replace - Using a Selected Section Of the Record
This is useful when you want to replace a specific part of the record material with another
shot of the same length:
1 Select a section of the record material to be replaced, by marking and parking.
2 Go to the in-point on the source.
3 Check that there is no mark on the source. If necessary press the Unmark button.
The Indicator Strips for source and record should look like this:
Current Frame at
In-Point
Source
Mark
Park
(Current Frame)
Record
4 Press the Replace button. The selected part of the edit is replaced with the same
amount of the source.
Lightworks V.I.P 4500 Version 3 - User Guide A11.0 - 241
A11.7
Backtiming (Replacing Backwards)
A11.6.4
Replace - Replacing Entire Shots
To replace an entire shot (or shots), use the Jump buttons to make the selection. The Jump
buttons always jump to the first frame after a cut, which is correct for replacing without
leaving a flash frame.
This technique works whether you are selecting a section on the source or the record. In
either case, entire shots are accurately selected.
1 Jump to the beginning of the first shot to be replaced.
2 Press the Mark button.
3 Press the Jump button until you are parked on the first shot not to be replaced.
4 Press the Replace button.
A11.6.5
Replace Edit - Picture Only or Sound Only
The Replace button may be used to make picture or sound only cuts, by selecting only the
required channels of the edit (see ‘Channel Selector Buttons’ on page 74).
For example, to add a picture only cutaway:
1 Mark and park the selection as usual.
2 Select only the video channel on the record Viewer.
3 Press the Replace button.
A11.7
Backtiming (Replacing Backwards)
Normally, you determine the in-point where a cutaway is to start from. Sometimes you know where the
cutaway should end. In a conventional tape edit suite the in-point would be determined by subtracting
the duration of the cutaway from the timecode of the out-point. The V.I.P system does this automatically.
A11.7.1
Backtiming - Selected Section Of the Edit
1 Select a section of the edit as normal, by marking and parking the record Viewer.
2 Go to the out-point on the source. Check that there is no mark.
A11.0 - 242
Lightworks V.I.P 4500 Version 3 - User Guide
Backtiming (Replacing Backwards)
A11.7
The Indicator Strips should look like this:
Current Frame
at Out-Point
Mark
Park
(Current Frame)
Record
Source
3 Hold down the Stop button on the Console and press the Replace button.
The current frame of the source is laid over the last frame of the selected part of the
record, and the source replaced backwards (backtimed) until it reaches the start of the
selection on the record Viewer.
A11.7.2
Backtiming - Selected Section Of the Source
1 Select a section of the source shot as normal, by marking and parking.
2 Go to the point in the record Viewer where you want the new source shot to end.
Check that there is no mark.
The Indicator Strips for source and record should look like this:
Mark
Park
(Current Frame)
Source
Current Frame
at Out-Point
Record
3 Hold down the Stop button on the Console, then press the Replace button.
The last frame of the selected part of the source is laid over the current frame of the
record material, and replaced backwards until it reaches the start of the selection.
Lightworks V.I.P 4500 Version 3 - User Guide A11.0 - 243
A11.8
A11.8
Editing Using the Insert Button
Editing Using the Insert Button
The replace operations described above have the effect of overlaying part of the edit - the overall length
of the edit is not changed. Often, you want to insert into an edit without overlaying anything.
When performing an insert, in effect a cut is made in the record where you are parked, and the selected
part of the source is inserted into it. The duration of the edit is extended by the duration of the new shot.
You can insert all channels together or only some channels. However, if you do not use all channels there
will be implications for sync, because only some of the channels are changing length.
A11.8.1
Inserting Into an Edit
1 Park on the frame of the record that you want to be the first frame after the insert.
2 Select the source to be inserted and park on the first frame to be used. If you want to
insert from that frame to the end of the source, then there is no need to mark.
3 Otherwise, select the section of the source you want to use by marking and parking.
In this case, the Indicator Strips for source and record would look like this:
Mark
Park
(Current Frame)
Source
Current Frame
Record
4 Press the Insert button.
The selected section of the source will be inserted into the recorder and the cursor left
at the first frame of the inserted shot.
Normally, the current frame marker will be parked on the first frame of the inserted
shot after the Insert button is pressed. If you want the current frame marker to be
parked on the first frame of the shot after the inserted shot, then:
A11.0 - 244
Lightworks V.I.P 4500 Version 3 - User Guide
Editing Using the Insert Button
A11.8
On a Series 1 Console
Press Stop+Insert.
On a Series 2 Console
Assign a user key to perform this function. See ‘User Keys (Series 2 Console
Only)’ on page 529.
A11.8.2
Some Special Cases When Inserting
Inserting Audio From Source Channels 1 and 2 to Edit Channels 3 and 4
If you need to do an insert edit that puts audio from source channels 1 and 2 on record
channels 3 and 4 and leave spacing on channels 1 and 2:
Either; insert to channels 1 and 2 (so that spacing is added to 3 and 4) then move the
audio to 3 and 4.
Or, if you need to do this repeatedly, create a four audio channel edit from the source
shot(s) you want to insert into channels 3 and 4, by leaving 1 and 2 blank. This edit
can then be used as the source material, so by leaving all channels selected, insert
edits will insert audio onto channels 3 and 4 and audio spacing on channels 1 and 2.
Clicking with the Screwdriver over the Viewer Tool allows you to specify how many
channels new edits have by default. See ‘Setting the Number Of Channels For a New
Edit’ on page 235.
Record Has More Channels Than Source
If you are building an edit you will often have more than two audio channels, while
the source has only one. In this case, the system inserts black or audio spacing into
all the extra channels of the record, so that sync is not lost.
Some Channels Not Selected on the Record Viewer
In this case, it is assumed that you do not want to change any channels not selected.
Nothing is inserted into them, and the sync will change.
Lightworks V.I.P 4500 Version 3 - User Guide A11.0 - 245
A11.9
Editing Using the Delete Button
Some Channels Not Selected on the Source
This will insert the duration selected at the source in all selected record channels.
Black or audio spacing will be inserted in the edit on any channels that do not have
a selected corresponding source channel.
A11.9
Note: Experience suggests that it is best to leave all the record channels switched on.
Audio spacing is inserted, if required, on record channels - so sync is not lost. Once
the cut has been made it is very easy to make any trims later. See ‘Editing 4 - Trimming With the Stripview’ on page 279.
Editing Using the Delete Button
The delete operation cuts out part of an edit and closes up the gap. This is really the inverse of the insert
operation described in the previous section. Both operations change the overall length of the edit.
A11.9.1
Deleting a Section Of an Edit
1 Use the Channel Selector buttons on the record Viewer or Stripview to select the correct channels.
If you delete with some channels not selected then the sync of the edit will change.
Unless this is your intention, be careful to check that all channels are selected.
2 Mark and park the section to cut.
The Indicator Strip on the record Viewer should look like this:
Mark
Park
(Current Frame)
Selected Part
3 Press the Delete button.
A11.0 - 246
Lightworks V.I.P 4500 Version 3 - User Guide
Editing Using the Move Button
A11.10
A11.10 Editing Using the Move Button
The move operation moves the selected part of the edit to the Clipboard (see ‘Editing By Cutting and
Pasting’ on page 248), leaving the same length of spacing behind it. It is really the opposite of the replace
operation, and has no implications for sync, since the overall length of the edit does not change.
A11.10.1
Moving (Lifting) a Section Of an Edit
1 Mark and park the section to move. If there are channels that you do not want to move
then deselect them using their Channel Selector buttons.
2 Press the Move button.
One application of the move operation is to move a piece of sound from one place to
another, via the Clipboard:
1 Use the Channel Selector buttons to select the channels to be moved. Deselect any
other channels.
2 Select the section of the channel(s) to move by marking and parking.
3 Press the Move button. The selected section is moved to the Clipboard.
4 Play or shuttle to locate the new in-point for the piece of sound.
5 Select the new destination channel, using its Channel Selector button.
6 Click on the Clipboard to make it the source.
7 Press the Replace button.
If you just want to move a selected piece of sound down to another channel, at the same
sync point, there is a shortcut. See ‘Moving Sections Of Audio Within an Edit’ on page 359.
A11.11 Undo and Redo
The Undo
to the edit.
and Redo
buttons, on the Viewer and Stripview, undo and redo the latest change
If you make a mistake, just click on the Undo button. If you undo too many times, click on the Redo
button. The number of times you can undo (or redo) is normally set to a default of 5.
As the undo feature will only allow you to go back a few edits, use the Copy button on the Viewer to
make a copy of the edit, before making any major changes. This will ensure that a version of your edit
is preserved if you decide you don’t like the changes you’ve made.
Lightworks V.I.P 4500 Version 3 - User Guide A11.0 - 247
A11.12
Editing By Cutting and Pasting
A11.12 Editing By Cutting and Pasting
The Clipboard holds the last section of picture and sound overwritten by an editing operation, and can
be used as a source for editing operations.
An important application of the Clipboard is for ‘cutting and pasting’ - that is, moving shots from one
location to another within an edit.
The Replace, Move and Delete buttons all overwrite a section of the edit. The last section overwritten
will be held in the Clipboard, until a further editing operation occurs to change the Clipboard contents.
The Clipboard appears on screen as a Tile (which can be enlarged to a Viewer by clicking on its Viewer
button).
A11.12.1
Using the Clipboard To Cut and Paste
1 Mark and park to select the section of the edit you want to relocate.
2 Press the Delete button or the Move button.
The selected section of the edit will appear in the Clipboard.
3 Park at the desired new in-point in the edit.
4 Press the Replace button or the Insert button.
The contents of the Clipboard will be pasted into the edit.
A11.12.2
Clipboard Undo Button
The Undo button on the side of the Clipboard Viewer can be used to Undo the last change
made to the Clipboard. In effect this recalls the previous contents of the Clipboard, without
changing the edit it came from.
The number of previous versions of the Clipboard that can be recalled depends on the level
of undo set, and this usually defaults to 5.
A11.12.3
Clipboard Redo Button
The Redo button will restore the contents of the Clipboard.
A11.0 - 248
Lightworks V.I.P 4500 Version 3 - User Guide
Making an Empty Cut Within a Shot
A11.13
A11.13 Making an Empty Cut Within a Shot
For certain operations it is useful to make an ‘empty cut’ within a shot. This type of cut is sometimes
referred to as an ‘invisible edit’ or ‘match-frame edit’.
To make an ‘empty cut’, use the Channel Selector buttons to select the channels to be cut and press the
Mark button then, immediately after, press the Delete button.
Because the current frame and the mark are in the same place, the effect is to delete no frames, leaving
an ‘empty cut’ in the shot. If you immediately clicked on the Simplify command on the Stripview Menu,
an empty cut would vanish.
Making an empty cut is often used as one way of replacing a piece of sound with silence, adjusting a bit
of voice over, or putting in an audio fade.
A11.14 Copying and Clipping Up an Edit
It is possible to make a copy of an entire edit (as a safety copy or prior to creating a new version), or to
break an edit down into shorter sections. These operations use the Copy button on the side of the Viewer.
An edit produced using the Copy button behaves in exactly the same way as other edits on the system
and can be used for further editing. The original edit remains unchanged by the procedure.
A11.14.1
Making a Copy Of an Entire Edit
1 Display the edit in a Viewer.
2 Press the Copy button. A message will be displayed asking whether you want to copy
“All” or “Part” of the edit.
3 Click on the All button. A new Tile is displayed, containing a new edit which is an
exact copy of the entire original edit.
A11.14.2
Making a Copy Of Part Of an Edit
1 Display the edit in a Viewer.
2 Mark and park the section to be clipped out.
3 Press the Copy button. A message will be displayed asking whether you want to copy
“All” or “Part” of the edit.
4 Click on the Part button. A new Tile is displayed, containing a new edit based on the
selected section of the original edit.
Lightworks V.I.P 4500 Version 3 - User Guide A11.0 - 249
A11.15
Start Time For an Edit
A11.15 Start Time For an Edit
The start time for an edit defaults to 00:00:00:00.
A11.15.1
Changing the Edit Start Time
1 Display the Viewer Labels Panel.
2 Ensure the Jump to/Modify button is set to Modify.
3 Ensure the Current time/Start time button is set to Start time.
4 Ensure the Primary T/C button is selected (green).
5 Highlight the relevant timecode field.
6 Type the desired start timecode into the field.
7 Press the Enter key.
8 Vanish the Viewer Labels Panel to update the edit start time.
A11.0 - 250
Lightworks V.I.P 4500 Version 3 - User Guide
A12.0 Editing 2 - Editing When Playing Multiple Sources
A12.1
Introduction
The four video channels of the Lightworks V.I.P system make the playing and editing of multiple source
material simple, quick and flexible.
There is no absolute limit to the number of sources that can be locked together, but, depending on the
type of material and method chosen, only four can be updated in real time.
The system offers a choice of methods for playing multiple sources simultaneously:
Play the record Viewer and a single source Viewer together, using ALT+2.
Play four sources together in real time, using a Sync Group.
Play more than four sources, with four in real time, using a Sync Group.
If you wish to use the live editing feature, the sources must be members of a Sync Group.
A12.2
Note: Playing back multiple pictures simultaneously is subject to the availability of resources and
system bandwidth limitations. If these requirements are exceeded it may affect the ability to play
every frame of the shots or edits smoothly.
Playing the Record Viewer and a Single Source Together
This is the simplest case to set up and effectively locks the record Viewer and one source together for
‘twin playing’.
A12.2.1
Using ALT+2 For ‘Twin Playing’
1 Park the record Viewer at the required sync frame.
2 Park the source Viewer at the required sync frame.
3 Press ALT+2 on the Keyboard.
The message “Twin playing enabled” is displayed in the V.I.P application window.
4 Make either of the Viewers active by clicking on it.
5 Press the Play button on the Console.
Both Viewers will play. The audio for the active Viewer will be routed to the audio
monitoring system.
Lightworks V.I.P 4500 Version 3 - User Guide A12.0 - 251
A12.3
Sync Groups
Remember, you may need to assign the two Viewers to different video outputs (output 1 is
the default). If the two Viewers are assigned to the same output, the picture on the video
output will appear to flash. See ‘Video Output Routing’ on page 333.
To stop twin playing:
1 Press the Stop button on the Console.
2 Press ALT+1 on the Keyboard.
The message “Twin Playing disabled” will be displayed in the V.I.P application
window.
A12.3
Sync Groups
The sync group feature allows multiple sources (shots, ghosts or edits) to be locked together so that they
will play in synchronisation with each other.
For example, you can use a Sync Group to set up multi-camera events for live editing. It is not necessary
for all the sources to have the same timecode, as synchronisation can be by timecode or a selected sync
point (or frame).
When a Tile is placed in a Sync Group it immediately becomes synced with all the other Tiles in the Sync
Group. However it is only the individual Tile that is synced - not the original shot or edit.
This can help to organise material very flexibly - the same shot can appear in many different Sync
Groups, represented by separate Tiles that are all synced by different methods and at different points.
Note: The same shot may appear on the screen in more than one place. Remember that there is
only one copy of the material on the V.I.P disks, so deleting the material for a shot that appears in
one Sync Group will delete it everywhere it appears.
A12.3.1
Generating a New Sync Group
A new Sync Group is generated by clicking on the Sync Group Tool
in the Toolbox.
A Sync Group has some properties in common with Galleries, Databases and Racks (see
‘Galleries, Databases, Racks and Sync Groups’ on page 207) and some special properties
which are described in the following sections.
A newly created Sync Group is given a default name of “Sync Group x”. It is a good idea
to rename it and make it permanent so that it can be found using the Searchcard when it is
no longer on screen.
A12.0 - 252
Lightworks V.I.P 4500 Version 3 - User Guide
Sync Groups
A12.3.2
A12.3
Organising Sync Groups On Screen
There are three possible states for a Sync Group on screen:
Open and ‘Normal’
The Sync Group is fully open and any Tiles it contains are visible.
Open and ‘Compact’
The Sync Group is open, but only members of the Sync Group which are displayed
in Viewers will be visible. Text on the ‘compact’ Sync Group shows the number of
members (Tiles) it contains.
This makes the screen tidier and saves system resources when playing back.
Closed
The Sync Group is closed. Any Viewers or Tiles in the group will disappear from the
screen. They will re-appear when the Sync Group is opened in the positions they previously occupied on the screen.
A closed Sync Group can be placed in a Rack.
The Open/Close button toggles the Sync Group between open and closed. Another
button toggles between Compact and Normal.
It is not possible to have more than one Sync Group open on screen at any one time.
A12.3.3
Adding Sources To a Sync Group
Before you add a shot, ghost or edit to a Sync Group, make sure that you have chosen the
desired sync method (Timecode or Lock-Frame). See ‘Choosing the Sync Method’ on page
254.
1 Display the shot, ghost or edit as a Tile.
2 Open the Sync Group.
3 Drag the Tile into the Sync Group.
Alternatively, the Fill from Gallery command on the Sync Group Menu enables several
Tiles to be added at once to an empty Sync Group, directly from a Gallery:
1 Display all the Tiles required, in one Gallery.
Lightworks V.I.P 4500 Version 3 - User Guide A12.0 - 253
A12.3
Sync Groups
2 Open an empty Sync Group.
3 Place the Sync Group so that it overlaps the Gallery.
4 Click on Fill from Gallery in the Sync Group Menu.
This will place all the Tiles from the Gallery in the Sync Group and sync them by the
selected sync method. All Tiles in the Gallery are added to the Sync Group, leaving
the Gallery unchanged. The Sync Group will then be given the same name as the Gallery it was filled from.
The first four Tiles to be added to a Sync Group are assigned to video outputs 1 to 4 in order.
Viewers can be individually assigned to one of the system video outputs. For further information, see ‘Video Output Routing’ on page 333.
The video output also determines which Console Cut button the Viewer is represented by,
for the live editing feature. So the first four Tiles dropped into the Sync Group will automatically be assigned to Console Cut buttons 1 to 4.
A12.3.4
Removing a Source From a Sync Group
To remove a shot, ghost or edit from a Sync Group, click on the Vanish button of the Tile.
Once it has been vanished, the shot is no longer a member of the Sync Group and is no
longer synced. If displayed as a Viewer, this will vanish also.
A12.3.5
Choosing the Sync Method
Placing a Tile into a Sync Group syncs it with all other Tiles in the Group. There are two
methods of syncing available: Timecode or Lock-Frame.
To clearly identify the sync status of a shot or edit, a Lock Indicator (the letter L) appears
on all Tiles which are members of a Sync Group. See ‘Lock Indicator’ on page 256.
The sync method may be selected from the following options, using the Sync Group Menu:
Sync To Timecode
The timecode from the first Tile placed in the Sync Group will be used as the ‘master'
timecode. All subsequent Tiles placed in the Sync Group will jump to a point which
matches the master timecode.
A12.0 - 254
Note: If subsequent Tiles placed in the Sync Group do not contain the timecode of
the ‘master' shot, then they will appear as black Tiles. This is because the master
timecode is either off the start or off the end of the shot.
Lightworks V.I.P 4500 Version 3 - User Guide
Sync Groups
A12.3
When using the Timecode option, you can choose which type of timecode from the master
shot you wish to use. These options are found in the Sync Group Menu under When Timecode, Sync to V [a1] [a2]. Clicking on this command toggles between the options:
V
The timecode is taken from the video channel. (The default option)
A1
The timecode is taken from the first audio channel.
A2
The timecode is taken from the second audio channel.
Sync to Lock-frame
Tiles are synced together by whichever frame each shot is parked on when it is placed
in the Sync Group.
Combining Both Sync Methods
It is possible to mix both Timecode and Lock-Frame methods if, for example, all
shots do not share the same timecode.
For example: You have four shots to place in sync. Shot A and shot B have matching
timecodes, shot C and shot D do not.
1 On the Sync Group Menu, click on the command Sync To: and set the sync method
to TIMECODE.
2 Place shot A in the Sync Group.
The timecode of shot A becomes the master timecode reference point.
3 Place shot B in the Sync Group.
The position of shot B is matched to the timecode reference point of shot A; both
shots are now in sync.
4 On the Sync Group Menu, click on the command Sync To: to change the sync
method to LOCK-FRAME.
For shots A and B, the master timecode reference point is now also the Lock-Frame.
5 Set shots C and D to the frame required (whilst they are still outside the Sync Group).
Lightworks V.I.P 4500 Version 3 - User Guide A12.0 - 255
A12.3
Sync Groups
6 Place shots C and D in the Sync Group.
Shots C and D are now in sync with shots A and B even though a different sync
method was used.
A12.3.6
Lock Indicator
The Lock Indicator will only appear on shots or edits which are currently part of the displayed Sync Group.
For Viewers, the Lock Indicator is in the top right corner of the Viewer. If a shot or edit is
not in the displayed Sync Group then the Lock Indicator on the Viewer will be blank (grey).
For Tiles, the Lock Indicator is in the top right corner of the Tile. If a shot or edit is not in
the displayed Sync Group, then the Lock Indicator on the Tile will not appear at all.
If a shot or edit is in the displayed Sync Group then the Lock Indicator, on both Viewers
and Tiles, will display the letter L.
If the sync method is Sync to LOCK-FRAME then the letter L appears on its own.
If the sync method is Sync to TIMECODE then the letter L is followed by a colon (L:) to
indicate Sync to TIMECODE.
Lock Indicator
Tile Containing a Shot Set To Sync to TIMECODE
If the shot or edit is active (selected) then the letter L will be green. Otherwise it will be grey.
When changing from LOCK-FRAME to TIMECODE (or vice versa), the Lock Indicator
will not update on a Tile in a Gallery unless the Tile is activated.
A12.0 - 256
Lightworks V.I.P 4500 Version 3 - User Guide
Sync Groups
A12.3.7
A12.3
Displaying the Lock-frame
The Lock Indicator can be used to display the Lock-Frame:
1 Click on the letter L and hold down the left Mouse button.
The lock-frame for the shot or edit will be displayed for as long as the left Mouse
button is held down. If the L clicked on is green, then the lock-frame will be displayed on all shots or edits currently in the Sync Group.
2 Release the left Mouse button.
The shot(s) or edit(s) will revert to their current frames.
A12.3.8
Note: If the sync method is Sync to TIMECODE, then clicking on the L has no
effect.
Changing the Lock-frame
The Sync Group Menu command Allow Lock Adjustments [yes] NO enables the lock
frame of any shot to be changed after it has been placed in the Sync Group:
1 Click on the Tile or Viewer to be adjusted, to make it active.
2 Display the Sync Group Menu.
3 Click on the Pin button on the Sync Group Menu, so that it remains on screen after
each command is executed.
4 Click on the command Allow Lock Adjustments [yes] NO to make this YES.
The Lock Indicator will flash in red on the currently active Tile or Viewer.
5 Use the Console to find the new lock-frame.
6 On the Sync Group Menu, click on the command Allow Lock Adjustments YES
[no] to make this NO.
The Lock Indicator will revert to its usual green - the new lock-frame has been set.
Lightworks V.I.P 4500 Version 3 - User Guide A12.0 - 257
A12.3
Sync Groups
A12.3.9
Displaying Synced Tiles As Viewers
Using the Viewer Button
Click on the Viewer button of the Tile to display the shot or edit in a Viewer. Rightclick and drag to place it anywhere on the screen.
Using the Display Viewers Command
Click on the Sync Group Menu command Display Viewers to display all the Tiles in
the Sync Group as Viewers.
On closing a Sync Group, the Viewers will vanish from the screen. When you open
that Sync Group again, any Viewers that were displayed will automatically be displayed again.
A12.3.10
Playing Sync Group Tiles and Viewers
To play all members of the Sync Group, click on one Tile or Viewer then press the Play
button on the Console.
The number of Viewers that will play (and how smoothly) depends on the setting of the
Sync Group Menu command Concurrent Players.
Concurrent Players - YES
Pressing the ALT+3 keys has the same effect as setting Concurrent Players to YES.
The currently active Tile or Viewer will play smoothly. In addition any other players
assigned to video outputs 1 to 4 will play, up to a maximum of four. Any other members of the Sync Group will update slowly and jump to the correct sync frame when
the Stop button is pressed.
Concurrent playing requires a video channel per Tile or Viewer. If background
recording is taking place the number of channels available will be reduced.
Concurrent Players - NO
The Keyboard shortcut ALT+1 has the same effect as setting Concurrent Players to
NO.
Only the currently active Tile or Viewer will play smoothly. All others will update at
less than real time (at a frequency which depends on how many sources there are in
the Sync Group) and will jump to the correct sync frame when the Stop button is
pressed.
A12.0 - 258
Lightworks V.I.P 4500 Version 3 - User Guide
Align Kemrolls
A12.3.11
A12.4
Match-framing For Sync Groups
The match-framing feature can be used to force a Sync Group to display the same frame(s)
as an edit which was generated from that Sync Group, or to force an edit to display the
equivalent frame to that being shown by a Sync Group.
To match-frame an edit:
1 Display the edit.
2 Ensure the Sync Group it was created from is ‘Open’ and ‘Normal’ (see ‘Organising
Sync Groups On Screen’ on page 253), with the Tiles or Viewers visible.
3 Highlight the Viewer or Tile to be matched to. This can be the edit or one of the
members of the Sync Group.
4 Park on the frame to be matched to.
5 Press the Spacebar on the Keyboard (or CTRL+M). All members of the Sync Group,
and the edit, will display the matched frame(s).
Parking any member of the Sync Group on a frame and pressing the Spacebar will jump the
record Viewer to the equivalent frame.
In this case, the source shot that the edit is parked on must be a member of the Sync Group
and currently displayed as a Viewer or Tile (or the Sync Group must be ‘Open’ and
‘Normal’). The feature will not work if the source shot the edit is parked on is not on screen.
The edit itself does not have to be a member of the Sync Group.
A12.4
Align Kemrolls
The kemroll feature produces an edit that has black or audio spacing between shots, so that the edit has
a continuous timecode. See ‘Kemrolls’ on page 197.
For a multi-camera edit, the kemroll feature can be useful if some of the sources are not continuous
recordings. Turning a number of separate shots into a single kemroll makes it possible to use the Sync
To: TIMECODE command on the Sync Group Menu.
When several kemrolls are placed in a Sync Group, it is likely that some of the sections of black will
coincide. To avoid the need to play or search through black sections when editing, the Align Kemrolls
command on the Sync Group Menu will remove any black that is common to all the kemrolls.
Lightworks V.I.P 4500 Version 3 - User Guide A12.0 - 259
A12.5
A12.5
Live Editing
Live Editing
The V.I.P system can play up to four separate sources together in real time. This is known as concurrent
playing.
These sources can be locked together either by primary timecode, original audio timecode, chosen frame
or a combination of these methods. This is achieved by making them members of a Sync Group.
The live editing feature makes it possible to cut between these sources as they are running, to create an
edit 'on-the-fly', in a similar way to live vision mixing.
To make the most of the live editing feature you will need to be familiar with the editing and operational
principles of the V.I.P system.
A12.5.1
Strategies For Live Editing
The live editing feature makes editing from multiple sources quick and simple.
It is worth taking some time to consider how this feature can be best used to produce the
desired end result. This will depend on the nature of the production, how many camera
sources it uses and how it is divided up.
Example 1: A studio drama, shot as a series of scenes each lasting a few minutes.
Use live editing to cut each short scene separately.
Disable live editing and then use the Stripview to trim the edit of each scene.
Join the scene edits together into the final show.
Example 2: A four camera concert consisting of long ISO camera recordings.
Use live editing to create a single edit. You will need to correct mistakes immediately
they are made by running back and changing the edit during live editing.
A12.0 - 260
Note: Picking up after stopping during a live editing session involves some complicated steps and it may be simpler to create a separate new edit to resume live editing.
This can then be added to the end of the original edit later.
Lightworks V.I.P 4500 Version 3 - User Guide
Live Editing
A12.5.2
A12.5
Getting Ready For Live Editing
1 Lock the source shots, edits or ghosts together using a Sync Group.
2 The Sync Group Menu command Concurrent Players must be set to ON
(alternatively, use ALT+3 on the Keyboard); otherwise the members of the Sync
Group will not update smoothly and live editing will not be possible.
With Concurrent Players ON for Sync Groups with more than four members, only
the four Viewers displayed and assigned to video outputs 1 to 4 will run in real time.
The others can still be displayed as Viewers but when live editing is enabled they will
not run in real time and will only update when the Console Stop button is pressed.
When live editing it is not possible to cut to any sources which are not running.
3 Use the Video Output Routing Panel to select which output each source will appear
on. See ‘Video Output Routing’ on page 333. The Video Output Routing Panel
determines which sources will run in real time, which video output each source is
displayed on and also which Console Cut button it is represented by.
A12.5.3
Console Cut Buttons
When live editing, the top four buttons on the Console - Mark, Unmark, Swap and Cue are used as Cut buttons. See ‘The Console’ on page 523.
When live editing is enabled and the Viewers are playing, pressing one of the Console Cut
buttons will cut to the source it represents and add it to the edit at that point, in a similar
way to live vision mixing.
The Cut buttons represent the Viewer assigned to the first four video outputs, as follows:
Console Button
Video Output
Mark
1 (SDI- OutA- J5)
Unmark
2 (SDI- OutA- J15)
Swap
3 (SDI- OutB- J15)
Cue
4 (SDI- OutA- J11)
Lightworks V.I.P 4500 Version 3 - User Guide A12.0 - 261
A12.5
Live Editing
When live editing is enabled, it is not possible to use the top four buttons on the Console
for their normal editing functions, even when the sources are not playing. During live
editing, each cut can be seen on the video output the record Viewer is assigned to. Video
output 5 is a good choice, to avoid conflict with outputs 1 to 4.
A12.5.4
Starting Live Editing
1 Generate an empty record Viewer, by clicking on the Viewer Tool.
2 Press ALT+E on the Keyboard to enable the Console Cut buttons for live editing.
The record Viewer border will turn from red to green and the Lightworks V.I.P application window will display the message “Live Editing Enabled”. The top row of
Console buttons will now operate as Cut buttons when the sources are played.
3 Click on one of the source Viewers.
The audio from the source that is highlighted when you start live editing will be monitored throughout, irrespective of any cuts made. Any audio edits will not be heard
as they are made - they will only be heard once the completed edit is played back.
4 Start playing the sources, using the Console.
5 At the desired source in-point, press the Console Cut button for the first shot.
The edit is only created when the first Console Cut button is pressed. To make the
highlighted shot the first one in an edit it must be actively cut to by pressing its Console Cut button once playing.
Each time a Console Cut button is pressed, a shot is added to the edit as an 'openended' replace. As the sources continue to play, cut to any other source by pressing
the appropriate Console Cut button.
Live editing can take place at normal speed or in slow motion. The Console Lever
can be used to run the four sources in sync in slow motion and still cut between them.
The live edit will only be completed when the Console Stop button is pressed, or the
Console Lever moved to the stop position for more than five seconds.
A12.0 - 262
Note: The record Viewer on the graphics screen will not normally play during live
editing. It will either be empty or display the first frame of the first shot cut to.
Lightworks V.I.P 4500 Version 3 - User Guide
Live Editing
A12.5.5
A12.5
Monitoring Live Edits As They Are Made
Monitors connected to the appropriate video outputs will show the four individual sources
as they play. A monitor connected to the video output the record Viewer is assigned to will
display the last source cut to, so during live editing this output will show each cut at it is
made.
A12.5.6
Stopping Live Editing
When you reach the end of the material that you wish to edit, press the Stop button on the
Console, or leave the Console Lever in the stop position for more than five seconds. This
will stop creating the current edit. The record Viewer will display the first frame of the edit
just created.
The top row of Console buttons will continue operation as Cut buttons if any of the sources
in the Sync Group are played or shuttled. In this case, pressing any of the Console Cut buttons will overwrite the edit just created. The Console Cut buttons will only revert to their
normal functions if live editing is disabled.
To disable live editing, press ALT+E on the Keyboard. The record Viewer border will then
turn from green to red to confirm the Console buttons are no longer assigned as Cut buttons.
A12.5.7
Viewing an Edit Created By Live Editing
1 Stop live editing by pressing the Console Stop button.
2 Click on the record Viewer, to make it active. The record Viewer will display the first
frame of the edit just created.
3
A12.5.8
Press the Console Play button. The edit will play, as normal.
Changing an Edit During Live Editing
To change a cut whilst live editing it is important to correct it immediately, as it is not possible to amend a cut point without overwriting all the following shots. This is because every
cut to another source when live editing is an 'open-ended' replace edit. This means that the
source shot is laid down to its end - overwriting any later events in the edit.
Lightworks V.I.P 4500 Version 3 - User Guide A12.0 - 263
A12.5
Live Editing
To change a cut point during live editing:
1 Use the Console Play Reverse button or the Lever to go back to a point before the cut
was made. Do not press the Stop button.
Note: When live editing with ALT+E enabled, a monitor connected to the switched
output shows the last source cut to. This monitor does not show the contents of the
edit created and will not reflect the true content of the edit when you go back before
the last cut.
2 Use the Play Forward button or the Lever to resume normal playing.
3 Press a Console Cut button to select the new cut point and source.
Note: The edit will not be changed until another Console Cut button is pressed.
4 Continue live editing.
A12.5.9
Note: The edit will be changed as soon as a Console Cut button is pressed. So
pressing the Console Cut button of another source whilst playing backwards will
change the edit so that shot will be cut to at that point, overwriting any later shots.
Resuming Live Editing
Provided these conditions are met, the method described below can be used to resume creating a live edit:
Live editing is still enabled.
The Sync Group containing the sources is open.
Concurrent Players is still set to ON.
1 Park the record Viewer containing the edit at the required pick-up point.
2 Press the Spacebar (or CTRL+M). This will jump all the members of the Sync Group
to match the current frame of the edit. The edit does not need to be a member of the
Sync Group for this to work.
3 Click on one of the sources. The audio will be heard from this source.
4 Press the Console Play button.
A12.0 - 264
Lightworks V.I.P 4500 Version 3 - User Guide
Live Editing
A12.5
5 Press the appropriate Console Cut button at the desired in-point.
Any cuts made will now be added to the edit after the point at which the record
Viewer was parked. This method can only give an approximate pick up because the
new shots are only added to the edit from the selected pick up point when a Console
Cut button is pressed.
Correcting this pick up point is straightforward. At the end of the live editing session, when
the Console Stop button is pressed, the record Viewer will be parked at the first frame after
the point the pick up took place. The pick up point can be corrected straight away by trimming, but remember to disable live editing first by pressing ALT+E. Use the original source
timecode display and the tear-off timecode feature (see ‘Tear-off Timecodes’ on page 222)
to help get the pick up point on the right frame.
A12.5.10
Adding Edits To Sync Groups
Edits can be members of a Sync Group. Note that an edit in a Sync Group cannot be the
current record Viewer - you cannot play it in the Sync Group and add cuts to it at the same
time.
To Sync an Edit By Lock-frame:
This is the most straightforward method and will work with the Sync Group synced
to timecode or lock-frame.
1 Display the edit as a Viewer or Tile.
2 Display the Sync Group the edit was made from.
3 Make sure the Sync Group is ‘Open’ and ‘Normal’ so the Tiles are visible.
4 Set the Sync Group Menu command to Sync to: LOCK-FRAME.
5 Use the match frame feature (press the Spacebar on the Keyboard) to park the edit
and members of the Sync Group on the same frame. See ‘Match-framing For Sync
Groups’ on page 259.
6 Display the edit in a Tile and drop it into the Sync Group. The edit is now locked to
the other members of the Sync Group at that lock-frame.
Lightworks V.I.P 4500 Version 3 - User Guide A12.0 - 265
A12.5
Live Editing
To Sync an Edit By Timecode:
This method involves changing the timecode of the edit to match the sources. It is
only applicable if the Sync Group the edit was created from was synced to timecode.
1 Display the edit as a Viewer.
2 Display the Sync Group the edit was made from.
3 Make sure the Sync Group is ‘Open’.
4 Use the Display Viewers command on the Sync Group Menu, or display one of the
Tiles as a Viewer.
5 Highlight the edit, by clicking on it.
6 Use the match-frame feature (press the Spacebar on the Keyboard) to park the edit
and the Viewers that are members of the Sync Group on the same frame.
7 Display the Viewer Labels Panel for the edit.
8 Click on the Modify button.
9 Tear off the source timecode from one of the source Viewers.
10 Drop the timecode strip into the current timecode field on the Viewer Labels Panel
(or read it from the source Viewer and type it in by hand).
11 Vanish the Viewer Labels Panel. The edit timecode has now been changed to match
the source shots.
12 Display the edit Viewer in a Tile and drop it into the Sync Group. The edit is now
locked by timecode to the other members of the Sync Group.
A12.5.11
Live Editing Picture Only
Before starting live editing, deselect any audio channel(s) on the record Viewer.
A12.0 - 266
Note: The audio for the Viewer highlighted at the start of the live editing session will
be the audio that is monitored.
Lightworks V.I.P 4500 Version 3 - User Guide
Live Editing
A12.5.12
A12.5
Live Editing To an Audio Track
Audio and Three Other Sources
To live edit picture to a soundtrack, first create an audio-only edit of the audio track
then make that edit a member of the Sync Group. See ‘Resuming Live Editing’ on
page 264.
As the edit is a member of the Sync Group, it will be one of the sources that runs.
This means that only three sources will be available to cut to.
Once the edit is a member of the Sync Group:
1 Display the audio-only edit in a Viewer.
2 Click on the Rec button on the Viewer.
3 Deselect the audio channels and select the video channel, using the Channel Selector
buttons.
4 Enable live editing, by pressing ALT+E. The Viewer border will be green to indicate
that any live cuts will be added to this edit.
5 Click on the record Viewer to make it active.
6 Press the Console Play button. The edit in the record Viewer is played (and its audio
is monitored).
7 Press the Console Cut buttons to cut picture only onto the audio track.
Note: Because it is a member of the Sync Group, the record Viewer will attempt to
play and try to show any live edits as they are made. It is likely that there will be some
delay in updating the picture in the record Viewer. Refer to the video output to see
each edit as it is made.
To Run Four Picture Sources With a Separate Audio Track
First edit the audio onto one of the picture sources in the correct sync relationship.
This method has the advantage that four picture sources can then be run together with
the audio.
1 Make the edit containing the picture and audio a member of the Sync Group
2 Make this one of the four source Viewers that are run during live editing.
3 Check that the audio channels for the edit are selected.
Lightworks V.I.P 4500 Version 3 - User Guide A12.0 - 267
A12.5
Live Editing
4 Deselect the audio channels on all the other source Viewers.
5 Ensure the Viewer containing the audio is highlighted when starting to live edit, so
that its audio is monitored.
6 Start live editing. Make sure the Viewer with the audio is the first one that is cut to.
This will lay the audio down to the end of the edit. Any cuts made to the other sources
will not overwrite this if the other source Viewer audio channels are deselected.
A12.5.13
Undo and Redo When Live Editing
An edit created using the live editing feature has not been edited in the same way as other
edits created on the V.I.P system. The Undo and Redo buttons cannot be used to undo and
redo the cuts made when live editing.
However, once an edit created by live editing is modified (using the Console or Stripview,
in the normal way), then Undo and Redo will work for the subsequent edits as usual.
A12.0 - 268
Lightworks V.I.P 4500 Version 3 - User Guide
A13.0 Editing 3 - Editing From Tape To Disk
A13.1
Introduction
This chapter describes how to use the edit-to-it feature to add picture and sound to an edit from a source
that is not already recorded. Using this feature, material can be added to an edit on the V.I.P system
directly from tape and live inputs.
The edit-to-it feature allows the editor to browse a video source from the V.I.P system and to select the
section of the source required for the edit. The video source can be a video tape, material on a Profile
disk recorder channel, or a live feed. Performing any Console editing operation will record the selected
material into the V.I.P system and cut it into the edit.
The edit-to-it feature provides control of VTRs or other devices via the Sony BVW 75 control protocol.
Whenever an Edit-to-it Viewer or Tile is selected it will display video from the source device. Audio
from the source device is routed into the internal mixer for monitoring. This means material can be
viewed and monitored just as if it were already digitised on the system.
Edit-to-it recordings cannot be performed as a background operation.
For information on adding live audio (such as voice over) directly to an edit see ‘Adding Live Audio To
an Edit Using the Voice Over Feature’ on page 368.
A13.2
Displaying Edit-to-it Reels
Edit-to-it recordings can be made from any of the reels within the Project, and any reel can be displayed
as an Edit-to-it Tile or Viewer on the graphics screen. Multiple Edit-to-it Tiles or Viewers can be displayed on screen, but only one can be used as a source for recording at any one time.
Using the Reels Panel to Display a Reel
The Use Reel for Edit-to-it button on the Reels Panel will display an edit-to-it reel for any tagged
reels in the list.
Using the Edit-to-it Tool to Display a Reel
Clicking on the Edit-to-it Tool will display a list of all the reels that currently exist in the Project
plus one reel for each live device. If you wish to see only the reels that are currently loaded into
devices, check the List Loaded Reels Only checkbox. To use one of the reels on the list for editto-it, click on it to highlight it and click on the OK button. The reel will be displayed in an Editto-it Viewer. To create a new reel, use the Create New Reel button.
Lightworks V.I.P 4500 Version 3 - User Guide A13.0 - 269
A13.3
A13.3
Using the Edit-to-it Viewer
Using the Edit-to-it Viewer
An Edit-to-it Viewer has many features in common with an ordinary Viewer, (see ‘Viewers’ on page 72),
plus the following additional features:
.
Video Output
Button
Channel Selector
Buttons
Device
Selection
Button
Available Space
on Disk
Transport Status
Display
Handle Size
Picture Quality
Button
Label Display
Edit-to-it Viewer
A13.0 - 270
Lightworks V.I.P 4500 Version 3 - User Guide
Label Toggle
Button
Using the Edit-to-it Viewer
A13.3
Device Selection Button
Click on this to display a list of available devices. See ‘Assigning a Device To an Edit-to-it Viewer’
on page 272.
Picture Quality Button
Sets the picture quality of edit-to-it recordings made using this Viewer.
Disk Selection Button
Selects the disk to record material onto.
Reel Name Display
Displays the reel ID. This field is read only. See ‘Changing the Reel ID’ on page 103.
Video Output Button
This sets which video output the pictures in the Viewer (or from the source device, if connected)
will appear on.
Channel Selector Buttons
Turning off a Channel Selector button on the Edit-to-it Viewer will mean that it is not added to the
edit and the contents of the channel are not recorded.
Pop-Out Original Tile Button
This will pop out any recorded shot as a Tile if the edit-to-it reel is parked on a previously recorded
section.
Label Toggle Button
Toggles the Label Display.
Label Display
The Label Display toggles between source device timecode, duration and edit-to-it reel time.
Standby Button (Manual Control Devices Only)
Edit-to-it Viewers for manual control devices have a Standby button (located above the Vanish
button). Clicking on the Standby button will display pictures from the video input in the Edit-toit Viewer.
Lightworks V.I.P 4500 Version 3 - User Guide A13.0 - 271
A13.3
Using the Edit-to-it Viewer
New Shot Name
A text entry field shows the name of the recording. Whatever is typed in is used as a root to generate subsequent names, so if the first recording is called “fred”, then subsequent recordings will
be called “fred #1”, “fred #2” and so on. The system will generate a default name based on the reel
ID, such as “Reel #x Shot #y”.
Handle Size
This allows a handle to be entered. The duration entered (in seconds) will be added to the in- and
out- points of any edit-to-it recordings, to allow for subsequent trimming. The handle size can be
adjusted for each editing operation if desired.
Transport Status Display
A status display shows the current tape transport commands in the form of icons.
Available Space On Disk
An indication of space left on the selected disk.
Cue and Record Display
When cueing, a display will indicate the timecode being cued to, in blue. Also indicates prerolling
when the system switches into record.
A13.3.1
Assigning a Device To an Edit-to-it Viewer
The Edit-to-it Viewer represents the reel, not the device (VTR). In the case of a reel that is
already on screen but not connected to a device, you can use the Device Selection button on
the Edit-to-it Viewer to define which device the particular reel is in.
There are two cases to consider:
Tape loaded into VTR but reel ID not yet entered
The VTR Monitor Panel Reel ID field will display “???” when a tape is loaded into
a device but the reel ID has yet to be entered.
A13.0 - 272
Lightworks V.I.P 4500 Version 3 - User Guide
Using the Edit-to-it Viewer
A13.3
Tape loaded into VTR and reel ID already entered
When there is a tape in the device and the VTR Monitor Panel is already displaying
the reel ID, if the reel is the same as the reel ID specified on the VTR Monitor Panel,
the Edit-to-it Viewer will load the reel.
If the edit-to-it reel is different to the reel specified on the VTR Monitor Panel,
changing the device on the Device Selection button will fail.
A13.3.2
Edit-to-it Viewers With VTRs (Source/Record Device Types)
When the Edit-to-it Viewer Menu command Connected to Device is set to YES, the tape
in a machine controllable source device will be controlled by the Console.
When the Edit-to-it Viewer is active and the device is online, the Console can be used to
control the tape transport. The Console Lever and Play buttons work as normal.
The Console Jump buttons will cue the tape to the next cue or digitised section. The Console
Stop+Jump Forward buttons fast-forward the tape and the Stop+Jump Backward buttons
rewind.
When the device is offline, or the tape is not loaded into the device, the Viewer can be used
to view any recorded material on the edit-to-it reel. Any material not already recorded will
be shown as black.
When Connected to Device is set to NO, the Console will not control the device. The Console will control the edit-to-it reel in the Viewer and this will only display digitised material.
A13.3.3
Edit-to-it Viewers For Manual Control Device Types
Edit-to-it Viewers for manual control devices have a Standby button which is used to put
the Edit-to-it Viewer into E to E mode so that the pictures from the manual control device
can be monitored. This button is not needed for controllable devices such as VTRs, as the
Console buttons perform this function.
Recordings made using edit-to-it use timecode to place the recorded material in the edit-toit reel.
When using manual control devices, any recordings will only be added to the reel if an
appropriate source of timecode is connected (or the internally generated time-of-day label
mapping set is used).
Lightworks V.I.P 4500 Version 3 - User Guide A13.0 - 273
A13.3
Using the Edit-to-it Viewer
A13.3.4
Displaying Shots On a Reel Recorded Using Edit-to-it
Use the Edit-to-it Viewer Menu commands Gallery of Shots or Database of Shots to display the shots recorded using the edit-to-it reel (as a Gallery or Database).
A13.3.5
Stripview For Edit-to-it Reels
The Stripview for an edit-to-it reel has some features that distinguish it from the Stripview
for a shot or edit. See ‘Introducing the Stripview’ on page 279.
Device
Button
Tape Transport
Indicators
Stripview for an Edit-to-it Reel
Stripview Colours
The material on the reel that has already been recorded using edit-to-it is represented
by coloured sections. Any sections not yet recorded with edit-to-it will be shown in
grey. Material recorded using Recording Panels or autoconform will not appear in the
Stripview for the reel.
A13.0 - 274
Lightworks V.I.P 4500 Version 3 - User Guide
Using Edit-to-it For Editing Operations
A13.4
Stripview Magnification
The first time the Stripview for a reel is displayed, it will be of the default length
specified by a CONFIG.DAT parameter. See ‘stripv_zoom_mins’ on page 603. It may
be necessary to zoom in to see the desired section.
Shot Names in the Stripview
Each recorded shot in the Stripview for an edit-to-it reel is given a name. The name
is given at the time of recording and can be displayed when Show Shot Names is set
to YES on the Stripview Menu.
Device Button
The Device Button allows the reel to be loaded into a suitable device.
Tape Transport Indicators
The Tape Transport Indicators display the status of a connected device.
A13.4
Using Edit-to-it For Editing Operations
A13.4.1
Using Edit-to-it With a New Reel
1 Click on the Edit-to-it Tool.
2 Click on the Create New Reel button.
3 Enter the reel ID of the reel you intend to use.
4 Click on the OK button. An Edit-to-it Viewer will be displayed for the new reel. The
Device button will display “No Device”.
5 Insert the reel into the device you want to use.
6 Click on the Device button on the Edit-to-it Viewer and select the device containing
the reel. The tape in the device can now be controlled by clicking on the Edit-to-it
Viewer and using the Console.
Note: When recording from an Edit-to-it Viewer with a controllable device, it is
helpful to display the VTR Monitor Panel. This will display the current reel ID for
any controllable devices.
Lightworks V.I.P 4500 Version 3 - User Guide A13.0 - 275
A13.4
Using Edit-to-it For Editing Operations
7 If there is a record Viewer on screen, then pressing the Insert or Replace button on
the Console will record the selected material from the source device and add it to the
edit-to-it reel and the current edit.
Edits can use mark and park positions on the Edit-to-it Viewer or Tile, or the record
Viewer, or be open-ended. Pressing Stop on the Console will stop the recording at
that point. The new material will be edited into the record Viewer, and the recorded
shot placed into a Gallery for the reel inside a Rack.
A13.4.2
Using Edit-to-it With an Existing Reel
1 Click on the Edit-to-it Tool or the Reels Tool to display a list of available reels.
2 Highlight the name of the reel you want to use, by clicking on it.
3 Press the OK button (on the Select Source for Edit-to-it Panel) or the Use Reel for
Edit-to-it button (on the Reels Panel).
The Edit-to-it Viewer for the selected reel will appear on screen. If the reel is already
loaded into a controllable device, the Edit-to-it Viewer will display the name of the
device on its Device button and the device can now be controlled using the Console.
4 If the selected reel is not currently loaded into a controllable device, insert the reel
into the device you want to use.
5 Click on the Device button on the Edit-to-it Viewer and select the device that now
contains the reel. The device can now be controlled by clicking on the Edit-to-it
Viewer and using the Console.
The Edit-to-it Viewer can now be used for editing. See ‘Using Edit-to-it With a New
Reel’ on page 275.
A13.4.3
Available Audio Channels For Edit-to-it Viewers
The channels available on the Edit-to-it Viewer are determined by the device definitions for
the device containing the reel. The number of audio channels displayed on the Edit-to-it
Stripview will be equivalent to the highest number of channels previously displayed for that
reel. However, only the channels which are defined for the device will be active (blue) and
selectable.
This enables a reel previously used in a four audio channel device to be loaded and used in
a two channel device. Material previously recorded on any audio channels which are not
connected in the current device can still be accessed by setting the Edit-to-it Menu command Connected to Device to NO.
A13.0 - 276
Lightworks V.I.P 4500 Version 3 - User Guide
Using Edit-to-it For Editing Operations
A13.4.4
A13.4
Channel Selection and Channel Mapping
Edit-to-it reels act just like ordinary Tiles or Viewers. The first selected channel on the
source is edited to the first selected channel of the edit in the record Viewer.
Deselecting a channel on the Edit-to-it Viewer will mean that the contents of the channel
will not be recorded and not added to the edit.
It is recommended that you only deselect a channel on the Edit-to-it Viewer if you are sure
you will not need the material on the channel later (audio from a vision only cutaway, for
example).
A13.4.5
Monitoring Audio During Edit-to-it Recordings
Audio will be monitored either from the edit-to-it source or record Viewer depending on
which one is currently highlighted (which can be selected by right-clicking on the Viewer
even during recording).
The Level Meters Panel can be used to monitor audio levels. If the focus is an (online) Editto-it Viewer, the Level Meters will switch to be input meters. See ‘Monitoring Audio Levels
With the Level Meters Panel’ on page 384.
A13.4.6
Redigitising Edit-to-it Recordings
If a section of tape has already been recorded from an edit-to-it reel, selecting that section
(or a part of it) for a subsequent edit will redigitise the material. By setting the Edit-to it
Menu command Redigitise Existing Material to NO, the edit will use the existing
recorded shot.
In some cases this will be more efficient, as only the new material needed by the edit is
recorded.
A13.4.7
Seeing Cuts As They Are Made
When the Edit-to-it Menu command Roll Record Viewer is set to YES, the record Viewer
will preroll and show the edit (for example picture cut) in the record Viewer as it is performed.
A13.4.8
Using Edit-to-it For Quick Recording
An Edit-to-it Viewer or Tile can be used to record material without putting it into an edit.
This allows tapes to be viewed, a section to be mark and parked and then immediately
recorded.
Lightworks V.I.P 4500 Version 3 - User Guide A13.0 - 277
A13.4
Using Edit-to-it For Editing Operations
If there is no record Viewer, then pressing either the Insert or the Replace button on the Console will cause the selected material to be digitised (open-ended if not marked).
When the recording ends or the Stop button is pressed on the Console, a Tile will be put into
the Edit-to-it Rack.
A13.4.9
Using Edit-to-it Whilst ‘Background Recording’
Edit-to-it recordings can take place, as long as the number of channels needed by the playback of the edit and the recording(s) does not exceed the system limit.
A13.4.10
Cancelling an Edit-to-it Recording
Whilst recording, the ESC key can be pressed to cancel the recording.
Clicking on another Viewer or Tile or dragging the edit-to-it Viewer during the edit operation will also cancel the edit and the recording. Material recorded up to that point is not
added to the reel.
A13.4.11
Removing Recorded Material From Edit-to-it Reels
To remove digitised material from an edit-to-it reel, press the Undo button on the Edit-to-it
Viewer immediately after the recording.
Shots recorded using edit-to-it can be destroyed or deleted as normal.
A13.4.12
Adding Cues To Edit-to-it Reels
Whilst playing or recording, cues can be entered by pressing the Console Cue button. These
cues are added to the edit-to-it reel itself, not the shot.
A13.0 - 278
Lightworks V.I.P 4500 Version 3 - User Guide
A14.0 Editing 4 - Trimming With the Stripview
A14.1
Introducing the Stripview
The Stripview provides a simple graphical view of a shot or edit. Its most powerful feature is that it
allows you to make changes to an edit. This chapter covers editing operations, especially trimming,
which are controlled by the Stripview.
Other operations controlled via the Stripview are covered in other chapters. See ‘Editing 5 - Real-time
Effects’ on page 303, see ‘Editing 6 - Using Multiple Channels’ on page 329, see ‘Replicate - Synchronous Playback and Record’ on page 349.
To display a Stripview, click on the Stripview button on a Viewer or Tile.
Zoom In Zoom Out
Button
Button
Pin Button
Lightbulb
Button
Indicator Strip
Pop-Out Original
Tile Button
Current Frame
Markers
Stripview
Border
All
Button
Channel Selector
Buttons
Label Toggle
Button
Sync Buttons
Unjoin / Join
Button
Label
Display
Stripview for an Edit
Lightworks V.I.P 4500 Version 3 - User Guide A14.0 - 279
A14.1
Introducing the Stripview
The Stripview contains a strip for each channel of video, audio and external control in the edit. Time runs
from left-to-right: that is, the beginning of the shot or edit is on the left. Each shot is represented by a
strip of a single colour and cuts are represented by vertical lines across the strip.
The current position in the shot or edit is shown by the current frame marker. Each channel has its own
current frame marker.
A14.1.1
Stripview Displays
Name Display
The name of the shot, ghost or edit in the Stripview is displayed at the bottom. For
an edit, it is possible to display the name of the source shot by using the Label Toggle
button. See ‘Label Display For an Edit’ on page 216.
Label Display
The same as the Viewer Label Display. See ‘Label Display On Viewers and
Stripviews’ on page 214.
Stripview Border
The Stripview Border indicates the source/record status of the shot, ghost or edit it
represents:
A14.0 - 280
Border Colour
Status of Shot, Ghost or Edit
Blue
Selected as source.
Red
Selected as record (edits only).
Green
Selected as record with live editing enabled (edits only).
Black
Not selected.
Lightworks V.I.P 4500 Version 3 - User Guide
Introducing the Stripview
A14.1.2
A14.1
Navigating the Stripview
Indicator Strip
The left of the Indicator Strip represents the beginning of the shot or edit and the right
represents the end.
On the Stripview, the white section of the Indicator Strip shows which section of the
edit is displayed by the strips. This will change when the Zoom In or Zoom Out buttons are used.
The Indicator Strip also shows the position of the current frame (red), any marked
frame (blue) and any cues (green).
Any selected frames (those between the current frame and the marked frame) are
highlighted by a pink strip.
Stripview Current Frame Marker
The Stripview current frame marker shows the position of the current frame on each
strip. When playing or shuttling with the Console Lever, the current frame marker
will normally move along the strip until it reaches the end of the section displayed in
the Stripview. The Stripview will then update and the current frame marker will then
jump back to near the start.
The current frame marker in the Stripview can be locked in place by clicking on it the colour will change from red to purple. Now, when the edit is played, the current
frame marker will stay fixed and the strips will scroll past it. To revert to having the
current frame marker move across the strips, click on it again.
Note: When the Stripview is completely zoomed out, or when close to the start or end
of an edit, the current frame marker will behave in the normal way.
Using the Mouse to Move the Current Frame
You can use the Mouse to move the current frame by dragging the current frame
marker.
Also, you can jump to a new position immediately by left+right-clicking anywhere
on the grey area between strips. Take care when clicking between the channel strips
- if you click on the strips themselves, you will unjoin cuts for trimming.
Lightworks V.I.P 4500 Version 3 - User Guide A14.0 - 281
A14.1
Introducing the Stripview
A14.1.3
Customising the Stripview
It is possible to customise the Stripview display:
Stripview Magnification
The Stripview can be set to different magnifications. Initially it shows the entire shot
or edit, no matter how long it is. If there are only a few cuts in an edit, this is fine; but
as soon as there are many you will need to zoom in. Use the Zoom In and Zoom Out
buttons to change the amount of time represented in the Stripview.
A CONFIG.DAT parameter can be used to set the amount of the shot or edit (in minutes) shown in a Stripview when it is first displayed. See ‘stripv_zoom_mins’ on page
603. The default is for the entire duration of the shot or edit to be shown.
Stripview Size
To resize the entire Stripview, right-click and drag anywhere along the bottom edge.
It will turn grey and, in this state, can be enlarged by dragging the Mouse cursor
towards the bottom of the screen.
Resizing Individual Channel Strips
It is possible to adjust the size of each individual channel strip in the Stripview, by
right-clicking and dragging with the Mouse on the top or bottom edge of the strip.
The strip will get narrower or wider, depending on which direction you are dragging
the Mouse.
Shot Names on the Stripview
When the Stripview Menu command Show Shot Names is set to YES, then the
names of all shots, ghosts and external control events will appear in the strips.
A14.0 - 282
Lightworks V.I.P 4500 Version 3 - User Guide
Introducing the Stripview
A14.1
Choosing Which Channels to Display in the Stripview
It is possible to choose which video, audio and external control channels of an edit
should be included in the Stripview display, by using the Stripview Menu command
Show/Hide Strips.
Clicking on this command will display the Select Channels to Display Panel, with a
button for each channel in the shot or edit. The buttons toggle between blue (channel
is displayed) and grey (channel is not displayed).
Select Channels to Display Panel
When the channels to be displayed have been selected, click on the OK button. The
Stripview will update to display only the selected channels. To display no channels,
click on the None button. To display all channels, click on the All button.
Channels that are not displayed are simply not drawn on the Stripview - they remain
in the edit or shot and their selected/deselected status remains unchanged, so the
channel can be edited or deleted as normal.
This feature makes it easier to do detailed Stripview work on a few channels in a
multi-channel edit, where the Stripview would otherwise occupy alot of screen
space.
A14.1.4
Selecting Channels
Each channel displayed has a Channel Selector button on the Stripview. This controls
whether the channel is selected (button is blue) or not (button is grey).
The Stripview All button can be used to select or deselect all channels simultaneously.
For Console Editing
Any edits using Console buttons will only affect selected channels.
Lightworks V.I.P 4500 Version 3 - User Guide A14.0 - 283
A14.1
Introducing the Stripview
For Stripview Editing
A channel does not have to be selected to be edited using the Stripview. However, the
first selected channel determines what point in the edit is monitored during trimming.
The Console Jump button will only recognise cuts on selected channels.
Certain operations, such as fix sync, moving audio channels and displaying source
timecode depend on channels being selected.
Channel Selector buttons also appear on the side of the Viewer, where, for reasons of
space, there are buttons for picture and the first two sound channels only. It is
assumed that for more complex editing, you will be using the Stripview.
A14.1.5
Grouping Channels
Grouping Channels in an Edit
The channels in an edit can be grouped together so that any edits or trims made will
affect all the channels in the group. When working with a group of channels it is not
necessary to unjoin all the channels individually when trimming. This is particularly
useful when editing stereo pairs as it ensures any trims made will always affect both
audio channels equally.
To group a number of channels together:
1 On the Stripview Menu, click on the command Group Channels.
The Select Channels to Group Panel has a button for each of the channels not currently grouped.
Channel Group Panel
2 Click on the buttons representing the channels to be grouped. The buttons for the
selected channels will be highlighted in blue.
A14.0 - 284
Lightworks V.I.P 4500 Version 3 - User Guide
Introducing the Stripview
A14.1
To select all the channels, click on the All button. To deselect all the channels, click
on the None button.
3 When you have selected the channels to group, click on the OK button.
The grouped channels will be displayed as a single strip in the Stripview. The
Channel Selector button shows the names of the grouped channels.
Note: Grouping channels in the Stripview only affects how they are displayed in the
Stripview and edited. They are still treated as separate channels for audio routing or
video output purposes.
Editing Grouped Channels
For Stripview trims, it is not possible to unjoin cuts with the Mouse for grouped channels unless the cut is in the same place on all the channels in the group. Console edits
apply to all grouped channels currently selected.
Ungrouping Channels in an Edit
To ungroup a number of Stripview channel groups:
1 On the Stripview Menu, click on the command Ungroup Channels.
Ungroup Channel Panel
The Select Channels to Ungroup Panel has a button representing each of the currently
grouped channels.
2 Click on the buttons representing the channels to be ungrouped. The buttons for the
selected groups will turn from blue to grey.
To select all the groups, click on the All button. To deselect all the groups, click on
the None button.
3 Once the desired groups have been highlighted in blue, click on the OK button. The
channels will then be ungrouped.
Lightworks V.I.P 4500 Version 3 - User Guide A14.0 - 285
A14.1
Introducing the Stripview
A14.1.6
Other Stripview Controls
Unjoin/Join Button
The Unjoin button reopens the strips at the points where they were last opened for
trimming. When the strips are open the button is labelled as Join and can then be used
to join the strips back together.
Transition Button
See ‘Editing 5 - Real-time Effects’ on page 303.
Stripview Sync Buttons
See ‘Fixing Sync Using the Stripview Sync Buttons’ on page 300.
Pop-Out Original Tile Button
Clicking on this button will find the original source shot for the current frame in an
edit or ghost. The shot is displayed as a Tile and is parked at exactly the same frame
as the current frame.
The Pop-Out Original Tile button acts on the first selected channel in the edit or
ghost.
Pin Button
Clicking on the Pin button locks the Stripview in its current position on the screen.
When the Stripview is locked the Pin button is highlighted. To unlock the Stripview,
click on the Pin button.
Advanced Button
The Advanced button expands the Stripview and adds the following controls:
Video Output Button
The name of the video output each video channel is assigned to is displayed
on a button. Click on this button to display a list of available video outputs.
Varispeed Display
See ‘Varispeed’ on page 325.
Shot Sound Sliders
See ‘Shot-by-shot Audio Level Control’ on page 360.
A14.0 - 286
Lightworks V.I.P 4500 Version 3 - User Guide
Trimming Using the Stripview
A14.2
Current Frame
Markers
Varispeed
Display
Slider
Scissors
Buttons
Stripview with Advanced Controls
A14.2
Trimming Using the Stripview
The Stripview provides the means of adjusting the position (timing) of cuts and real-time effects. You do
this by unjoining the cuts; then, when you play the edit, the position of the cut can move. After making
the trim, the cut is joined back together.
A14.2.1
Unjoining and Joining Cuts
Cuts can be unjoined and joined as follows:
Using the Console Trim Buttons
The Console Trim buttons can be used to unjoin or join a cut for all selected channels,
based on the position of the current frame marker.
Using the Mouse
The Mouse can be used to click on the channel strip itself.
Lightworks V.I.P 4500 Version 3 - User Guide A14.0 - 287
A14.2
Trimming Using the Stripview
There are three places you may unjoin a cut:
On the outgoing side (trim left of the cut)
On the incoming side (trim right of the cut)
In the middle (trim both left and right simultaneously)
How each method - and combinations of them - can be used is described in the following
sections.
A14.2.2
Moving Shots When Cuts Are Unjoined
When a cut is unjoined, there are a number of ways to change the cut point:
Using the Console Controls
Search, jog or play the shot to interactively see and hear where the new cut point will
be. The jump buttons will jump the cut point to the next mark, cue or cut point on the
topmost selected channel.
Using the Mouse
On the unjoined shot, click and drag. Audio will not be heard when using this
method.
Using the Keyboard
See ‘Trimming By Numbers’ on page 291.
A14.0 - 288
Lightworks V.I.P 4500 Version 3 - User Guide
Trimming Using the Stripview
A14.2.3
A14.2
Changing Shot Lengths
Trimming the Outgoing Shot
Click a little way to the left of a cut (but closer to that cut than to the one before), and
the cut is unjoined on the outgoing side. The Stripview shows this with a little curl
just before the cut, signifying that the shot on that side is now on a separate roll and
can be shortened or lengthened.
Now, as soon as you nudge or play forward or backward at any speed, the outgoing
shot is extended or shortened as you play. The rest of the edit is pushed along, or
pulled back, but is otherwise unaffected.
Trimming the Incoming Shot
Clicking a little to the right of the cut, produces the same effect for the incoming shot:
it can change length while everything before it is unaffected. Playing will change the
first frame after the cut.
In both these cases, the edit changes its overall length. If the picture cut only was
unjoined then trimming would change the length of the picture, not the sound, and
everything would slide out of sync. To avoid going out of sync the cuts on every
channel of the edit must be unjoined, so that each channel will be trimmed by the
same amount, keeping everything in sync.
Lightworks V.I.P 4500 Version 3 - User Guide A14.0 - 289
A14.2
Trimming Using the Stripview
A14.2.4
Moving a Cut
Clicking directly on a cut, instead of to one side, will unjoin it in the middle, with both sides
showing a curl. This can be thought of as trimming both left and right simultaneously.
In this case, when the Console Play button is pressed, one side gets longer while the other
side gets shorter; the cut changes but the overall length of the edit does not. There are no
implications for sync; cuts on one channel can be moved without changing the sync of the
edit.
The most common use of this way of unjoining a cut is for making a split or overlapped edit
on a single channel. Simply unjoin the cut and play until the new position is reached. For
example, to overlap a sound cut until the outgoing speaker had finished a sentence, just
unjoin the cut and play until the end of the sentence, then join the cut.
For information about which of the channels is monitored when trimming, see ‘Monitoring
When Trimming’ on page 294.
A14.2.5
Adding Black or Audio Spacing At a Cut
This requires the Stripview Menu command Drag in Black to be set to ENABLED. Then,
by pointing the Mouse cursor directly at a cut and right+left-clicking, the cut will unjoin on
the incoming (right) side.
Then playing or using the Console Lever will add black (or audio spacing) to the start of the
incoming shot. This method can be used to quickly add gaps or space between shots.
A14.0 - 290
Note: Before attempting to make further trims to this type of black or audio spacing,
use the Simplify command on the Stripview Menu.
Lightworks V.I.P 4500 Version 3 - User Guide
Trimming Using the Stripview
A14.2.6
A14.2
Trimming By Numbers
When a cut is unjoined, it is possible to trim it by typing in the number of frames to add or
remove:
1 Unjoin the cut.
2 Type the number of frames that you want to trim. Positive numbers add frames and
negative numbers remove frames.
3 Press the Enter key. The cut will be trimmed by the specified number of frames.
4 Join the cut.
A14.2.7
Note: Ensure that the cursor is not in a timecode field before you type in the trim,
otherwise pressing Enter will jump the edit to the timecode.
Finishing a Trim
When you have finished trimming, you should join the cuts again. You can do this in one
of three ways:
Click on the Strip
Click at the same point on each strip as you did when unjoining.
Click on the Join Button
Click on the Join button on the Stripview. This is quicker as it joins all cuts together.
The Join button allows you to unjoin the same cuts later.
Press the Stop+Unmark Buttons
Hold down the Console Stop button, and press the Unmark button. If further changes
are needed, you can unjoin the same cuts by pressing the Unjoin button, or the
Stop+Unmark buttons again.
It is worth practising unjoining cuts with the Stripview for a few minutes before starting
serious work, so that you have a feel for what happens when you click in the different
places. You will notice that once a shot becomes very short in the Stripview display, there
is not room to choose the side you want to unjoin reliably. This is the time to zoom in by
using the Zoom In button on the Stripview.
Note: The Unjoin button is greyed out when there are no currently selected trims.
Lightworks V.I.P 4500 Version 3 - User Guide A14.0 - 291
A14.3
Trimming - Some Practical Examples
A14.2.8
Previewing Trims
The preview feature enables cuts to be played or shuttled through whilst unjoined. This can
help speed up trimming, as changes to cut points can be quickly 'previewed' and adjusted
further, without first needing to join the trim.
Preview is enabled by pressing CTRL+P on the Keyboard. This will jump the current frame
marker back by the preview preroll time.
From the preroll point, the edit will immediately play forward across the unjoined cut and
carry on playing.
The edit will be seen in the Viewer as normal. If the trimview feature is enabled, the edit is
played in the left-hand side of the Trimview Viewer.
When previewing, using the Console Play buttons and Lever will not change the position
of the cut. They can be used to play or shuttle forwards or backwards over the trim point.
Pressing the Console Stop button disables the preview and returns the current frame marker
to its original position. For an unjoined trim, this will usually be at the first trim point. The
Console can then be used to adjust the trim as normal.
Preview can be used as a means of 'reviewing' any Console edit. Note that, although the edit
will carry on playing past the cut point when the Stop button is pressed, the current frame
marker will jump back to the position it was in when the preview mode was entered.
The preview preroll time is set by a CONFIG.DAT parameter. See ‘preview_preroll_secs’
on page 601. The default is 3 seconds.
A14.3
Trimming - Some Practical Examples
A14.3.1
Adjusting the Outgoing Shot
To adjust the outgoing shot:
1 Using the Stripview, unjoin the appropriate strips on the outgoing (left) side of the
cut.
2 On the Console, use the Play button or Lever to adjust the outgoing shot.
It does not matter where the current frame marker is when you unjoin these cuts. As soon
as you start playing, the current frame marker snaps to the last frame before the cut. If you
are extending the shot, play forward; if you are shortening it, play backward. If you need a
run up in order to determine timing, just play backward then forward. Press the Stop button
at the appropriate moment.
A14.0 - 292
Lightworks V.I.P 4500 Version 3 - User Guide
Trimming - Some Practical Examples
A14.3
You can also move the cut by dragging it with the Mouse. This is very quick, but less precise
than playing it. Also, you cannot hear any sound while doing this.
If you reach the next cut, the edit will stop playing, so you cannot trim more than one shot
out of existence completely in a single trimming operation. Any such ‘empty cuts’ will be
removed when the cut is joined, or the Simplify command is used (on the Stripview Menu).
A14.3.2
Making Split Edits With the Stripview
Any cut on any channel can be moved very simply. When applied to picture or audio cuts
only, this allows split edits or L-cuts to be created. To move a cut:
1 Make the initial cut.
Just decide which channel (picture or sound) is the most important for this particular
cut, and make it there. The cut will be made on all selected channels simultaneously,
producing a straight cut. The overlapping of the sound or picture is very easy and you
can do it at any time later. In this way, you can concentrate on making an assembly
quickly, then improve it later.
2 Unjoin the cuts you want to move.
Click on the middle of the cut that you want to move, on the channel(s) on which you
want it to move.
3 Use the Console to play or shuttle until you can see or hear that the cut is at the point
you want.
4 Click on the Join button to join all the cuts back together.
Here is a specific example; you have cut to picture, halfway through a sentence, and you
want to run the outgoing sound to the end of the sentence underneath the picture:
1 Park the current frame anywhere on the outgoing side, by playing or by dragging the
current frame marker.
2 Unjoin the sound cut in the middle.
3 Play forward until you hear the end of the sentence.
4 Click on the Join button.
Lightworks V.I.P 4500 Version 3 - User Guide A14.0 - 293
A14.4
A14.4
Monitoring When Trimming
Monitoring When Trimming
The position of the current frame marker for the first selected channel determines which point is monitored when trimming. After unjoining a cut, or as soon as the edit is played, the current frame marker
will jump to the first frame after the cut for the first selected channel. If only one side of the cut is
changing, the current frame marker will jump to that side of the cut, irrespective of the side it was originally on.
At any time the side that is monitored can be changed by dragging the current frame marker to the other
side of the cut with the Mouse, or by pointing at the other side of the cut and right-clicking. This does
not trim the cut in any way - the shot must be played or shuttled to change the cut point.
A14.4.1
Monitoring Audio When Trimming
When trimming, the position of the current frame marker will determine which audio is
monitored. For split edits where picture and sound cuts are in different places, the audio that
is monitored will not necessarily be the audio at the audio cut point. The first selected
channel selected determines the position of the current frame marker and hence which audio
is monitored. When the video channel is selected and is being trimmed, the audio that is
monitored will be at the frame that corresponds to the position of the current frame marker
on the video channel.
A14.4.2
Monitoring Video When Trimming
The way that picture trims are displayed on both the graphics screen and the V.I.P system
video outputs is controlled by the trimview feature. With the Edit Menu command Trimview Enabled set to YES, two sides of a picture trim can be seen at the same time, both on
the graphics screen and on two separate video outputs.
With trimview disabled, only one side of the picture trim will be shown. This will be determined by the position of the current frame marker. The record Viewer and the video output
the edit is assigned to will show the side of the trim that the current frame marker is on. The
exception is where only one side of a cut is changing; the side that is changing will be shown
irrespective of the side the current frame marker is on.
A14.4.3
Pictures Displayed With Trimview Enabled
When a cut on the video channel is unjoined, the record Viewer will resize to accommodate
a second picture on the right side. When the trim is completed and any trimmed cuts are
joined, the Viewer returns to its normal size.
The pictures displayed in the record Viewer and on the video outputs will be determined by
the type of trim being performed, as follows:
A14.0 - 294
Lightworks V.I.P 4500 Version 3 - User Guide
Monitoring When Trimming
A14.4
When the cut is being trimmed, the picture in the left-hand side of the Trimview Viewer will
be shown on the video output the edit is assigned to, and the picture in the right-hand side
of the Trimview Viewer will be shown on the next video output. So if the edit is assigned
to output 1, the left side will appear on output 1 and the right side on output 2.
The following diagrams show examples of which picture will be shown in the Trimview
Viewer and the video outputs for the different kinds of trim. The numbers indicate which
pictures appear in the left (1) and right (2) side of the Trimview Viewer. The numbers indicate which video output that picture will appear on for an edit assigned to output 1.
Where more than one cut is being trimmed, the cut point which is nearest to the current
frame marker when trimming begins is the one which is displayed by the trimview feature.
Changing Shot Lengths
Only one side of the cut is changing. The side of the Trimview Viewer that represents
the unchanging shot will show a freeze of the first (or last) frame. The other side will
show the shot that is changing.
Moving a Cut
The left-hand side of the Trimview Viewer shows the outgoing shot, the right-hand
side shows the incoming shot.
Lightworks V.I.P 4500 Version 3 - User Guide A14.0 - 295
A14.5
Changing Sync Using the Stripview
Slipping a Shot
Both the in- and out-points of the shot are changing. The left-hand side of the Trimview Viewer shows the first frame of the shot, the right-hand side shows the last
frame of the shot.
Sliding a Shot
The in- and out- points of the shot being slid are not changing. The left-hand side of
the Trimview Viewer shows the last frame of the shot before the shot being slid, the
right-hand side shows the first frame of the shot after.
A14.4.4
Trimview Default
The trimview feature defaults to enabled for all edits. The default can be changed by adding
an entry to the CONFIG.DAT file. See ‘trimview_default’ on page 605. Trimview can still
be enabled or disabled for specific edits using the Edit Menu.
A14.5
Changing Sync Using the Stripview
Often, you need to change the sync between channels - for example to lay a sound effect in the right
place. You can do this very simply using the Stripview, either by playing the shot while trimming, or by
marking the matching points on the channels and then using the Align Marks command.
In the following section, it is assumed that the channels are already laid up and that just the sync is to be
changed.
A14.0 - 296
Lightworks V.I.P 4500 Version 3 - User Guide
Changing Sync Using the Stripview
A14.5.1
A14.5
Syncing By Playing
1 Find the sync point on one of the channels. It does not matter which order you work
in, but, for example, assume you are laying down a spot effect to a frame on the picture. Here, you would find the picture frame first.
2 Deselect the picture channel and all the audio channels to be synced-up, by clicking
the appropriate Channel Selector buttons on the Stripview. This has the effect of
locking the current frame marker on each of the deselected channels - it becomes
stationary, and the channel can move over it.
Note: If all the channels are deselected then all the current frame markers are locked
down and the system cannot play the edit.
3 On each channel of sound to be synced to the picture, unjoin both the incoming and
outgoing ends of the shot or section (series of shots).
These sections are now free to slip within their own slots: none of the rest of the edit
is affected. In order to sync-up, simply start playing forwards or backwards until the
correct point is reached.
For this example, the audio would be moving and you will hear the audio at the frame
of picture shown in the record Viewer. If this is a spot effect, stop when you hear the
start of the effect.
4 Click on the Join button.
5 Select the channels again, using their Channel Selector buttons.
A14.5.2
Syncing By Marking and Aligning (Action Match)
Suppose that you have a picture channel and a sound channel, and they have been laid
together but are not in sync:
1 Find the sync point on the picture.
2 Press the Mark button on the Console.
3 Deselect the picture channel on the Stripview, using its Channel Selector button.
4 Find the matching sync point on the sound, and press the Mark button. There is now
a separate blue mark for each channel.
5 Select the picture channel again.
Lightworks V.I.P 4500 Version 3 - User Guide A14.0 - 297
A14.6
Fixing Sync Using the Stripview
6 Unjoin a cut on either the picture or sound channel.
The choice of cut is determined by which of the channels (picture or sound) you want
to move in order to achieve sync. Make sure that you leave one of the channel strips
joined.
7 Click on the Align Marks command on the Stripview Menu. The mark on the
channel that was unjoined will be lined up with the mark on the other channel.
8 Click on the Join button. The edit is now in sync.
You can use the same technique within an edit, to get a sound effect in sync with the picture.
Lay down the effect to match the relevant length of picture, but do not bother with sync yet.
Then find the matching sync points as described above. Finally, unjoin the sound both at the
in-point and the out-point. The piece of sound can now be slipped relative to the picture,
without affecting anything else - use the Align Marks command and the chosen frames will
be aligned.
A14.6
Fixing Sync Using the Stripview
When editing picture and sound channels, it is possible for losses of sync to be introduced by making
trims and adjustments.
There are two types of sync loss:
Loss of original sync relationship for a shot.
Picture and sound that were recorded into the system together as sync may be put ‘out-of-sync’
during editing. (This also applies to picture and sound that were synced on the system.
These type of sync losses are identified and dealt with by using the Stripview Menu commands
Show Sync Losses and Fix Sync.
Loss of existing sync relationship between picture and sound channel(s) in an edit.
When a cut or trim is made on one channel and not the others, then the existing sync relationship
between channels may be affected.
This type of ‘sync loss’ is handled by the Stripview Sync buttons.
You may deliberately use both types of sync loss when editing - in which case there is no need to fix
anything! However, should a sync loss be introduced accidentally, the following fixes are available.
A14.0 - 298
Lightworks V.I.P 4500 Version 3 - User Guide
Fixing Sync Using the Stripview
A14.6.1
A14.6
Fixing Sync Using the Stripview Menu Commands
Use this method to fix loss of the original sync relationship for shots or ghosts. This gives
a shot-by-shot indication of sync errors.
1 Use the Stripview Menu command Show Sync Losses to flag (with yellow cues) any
points where the original sync relationship has been lost.
The number of frames out-of-sync is indicated on the strip at the appropriate point.
This can help in making decisions as to how to fix sync errors. For example, if all the
amounts out of sync are the same, then several can be fixed at once by fixing the first
error only.
2 On the Stripview, choose appropriate cut point(s) to be trimmed in order to restore
sync and unjoin them.
3 Ensure that the channels being trimmed are selected and that the current frame
marker is parked somewhere within the sections of picture and sound to be fixed.
4 Click on the Fix Sync command.
Examples:
To pull up the rest of a sound channel that has slipped from a particular cut:
Unjoin the cut on the sound channel, on the incoming side. Then click on the Fix
Sync command.
To correct a shot where the picture is in the wrong place, but sound is correct:
Unjoin the incoming and outgoing cuts on the picture channel. Then click on the Fix
Sync command.
Note: A CONFIG.DAT parameter allows you to tell the system to ignore sync errors
greater than a certain amount (thus stopping errors being flagged where sync has
been deliberately cheated). It can be difficult to decide what value to choose for this
parameter to ensure all cases are correctly flagged. If in doubt, do not alter the default
value! See ‘max_sync_error_seconds’ on page 599.
Lightworks V.I.P 4500 Version 3 - User Guide A14.0 - 299
A14.6
Fixing Sync Using the Stripview
A14.6.2
Fixing Sync Using the Stripview Sync Buttons
Every video channel, audio channel and external control channel in an edit has a Stripview
Sync button. This tracks changes in sync between the first video channel (V) and all other
channels. This makes it easy to monitor and fix sync changes between channels, particularly
when working with multiple video channel edits.
When a cut or trim is made on one channel and not the others, then the existing sync relationship between channels may be affected. This type of ‘sync loss’ between the first video
channel (V) and the audio channels is handled by the Stripview Sync buttons.
A Sync button appears on the Stripview at the end of each audio channel. The Sync button
displays the number of frames that the audio channel is out of sync in relation to the video
channel (V).
Stripview Sync
Button
This is calculated by tracking the difference in overall length between channels. Whenever
any editing or trimming operation changes the length of any audio channel without an equal
change in length of the first video channel (or vice versa) then the difference in frames is
calculated. A ‘+’ value indicates that the channel has increased in length. A ‘-’ value indicates that the channel has been shortened.
The Stripview Sync buttons:
Accumulate sync errors over any number of operations.
Indicate the sync error independently for all audio channels.
Handle sync errors caused by Insert or Delete Console editing operations where
not all channels are selected.
The Stripview Sync buttons can be used to correct the resulting sync errors automatically:
1 Choose the channel to be fixed.
A14.0 - 300
Lightworks V.I.P 4500 Version 3 - User Guide
Undo and Redo
A14.7
2 Unjoin the strip(s) at appropriate place(s).
You can use the Show Sync Losses command on the Stripview Menu in conjunction
with the Sync buttons to help decide where to unjoin the strip(s).
The Strip must be unjoined so that the length of the audio channel can be adjusted
relative to the video channel. It is possible to make adjustments on more than one
channel at once, if the strips are unjoined in an appropriate way.
3 Click on the Sync button for the channel to be fixed.
The chosen channel will be adjusted to bring it back into sync.
4 Join the strips.
If you wish to ignore any deliberate sync errors, you can reset the sync error to zero
by holding down the Shift key while clicking on the Stripview Sync button.
A14.7
Undo and Redo
The Undo
to the edit.
and Redo
buttons, on the Viewer and Stripview, undo and redo the latest change
If you make a mistake, just click on the Undo button. If you undo too many times, click on the Redo
button. The number of times you can undo (or redo) is normally set to a default of 5.
A14.8
Handling the PAL Colour Framing Sequence
The PAL colour framing sequence can be handled on the assumption that there is a rigid relationship
between the colour framing sequence and the timecode. Errors can be adjusted automatically or fixed
manually, using two commands on the Stripview Menu. The commands will only appear if they have
been configured by two CONFIG.DAT parameters. See ‘pal_pairing_amount’ on page 600 and see
‘pal_pairing_flag’ on page 601.
A14.8.1
Show Colour Framing Errors
When set to YES, the Show Colour Framing Errors command causes points where the
colour framing sequence is violated to be displayed as yellow cues. The amount of the violation will be shown in the label of the cue on the Filecard.
For convenience, the cues are added at relative colour framing errors. That is, they are only
added when there is a change in the colour framing sequence.
Lightworks V.I.P 4500 Version 3 - User Guide A14.0 - 301
A14.8
Handling the PAL Colour Framing Sequence
To fix a colour framing error:
1 Unjoin the Stripview to trim the violating shot.
2 Either adjust the cut by the number of frames indicated on the cue label or go to a
frame within the violating shot, then select the Stripview Menu command Fix
Colour Framing. The shot will be trimmed by the appropriate amount to match the
colour framing sequence of edit timecode and original timecode.
A14.0 - 302
Note: The automatic mechanism only fixes the error absolutely. Therefore, if you are
attempting to fix the colour framing sequence across a cut where the previous shot is
already out of sequence, the automatic mechanism will still leave you with a colour
framing sequence error.
Lightworks V.I.P 4500 Version 3 - User Guide
A15.0 Editing 5 - Real-time Effects
A15.1
Introduction
The following effects can be created in real time by the Lightworks V.I.P system:
Dissolves and Wipes
Created using the Transitions Panel, accessed via the Stripview.
Luminance Keys
Created using the Transitions Panel, accessed via the Stripview.
Varispeed
Created on the Stripview.
Using an External Effects Device
Effects can be added in real time to an edit by using an external effects device. See ‘Using the V.I.P
System With External Effects Devices’ on page 342.
In addition, rendered effects and titles can be added. See ‘Rendered Effects 1 - Mirror, Flip, Crop, Resize,
Page Turn’ on page 391 and ‘Rendered Effects 2 - Titles’ on page 403.
This chapter describes how to create dissolves, wipes, luminance keys and varispeeds using the
Stripview.
A15.2
Creating Dissolves and Wipes
Wipes and Wipe Modifiers
The system supports 20 basic wipe patterns, which can be modified to create advanced wipe
effects. Wipe modifiers include progress, position, border width, border colours, edge softness and
modulation.
Keyframeable
Many of the properties, such as border width and edge softness, are keyframeable. This allows
properties of the effect to be varied as the effect progresses. The system will interpolate between
the values defined at the keyframes to give a smooth effect.
Lightworks V.I.P 4500 Version 3 - User Guide A15.0 - 303
A15.2
Creating Dissolves and Wipes
A15.2.1
Using the Transitions Panel
A dissolve or wipe is created by starting with a cut and using the Transitions Panel to transform it in to a dissolve or wipe:
1 Use the Channel Selector buttons on the Stripview to select the video channel you
want the effect to be on.
2 Deselect any other video channels in the edit.
3 Use a Console Jump button to jump to the cut on that channel.
4 Click on the Transition button on the Stripview to display the Transitions Panel.
5 If necessary, click on the Video Tab so that the Video Card is displayed.
Wipe
Patters
Position Button
Transition Inputs Button
Transition Length Field
Transition Length
Button
Transition Length
Format Button
Transitions Panel with Video Card Displayed
6 Choose the type of transition you want by clicking on the appropriate button or wipe
pattern.
A15.0 - 304
Lightworks V.I.P 4500 Version 3 - User Guide
Creating Dissolves and Wipes
A15.2
Linear Dissolve
Produces a standard dissolve effect.
'S' Dissolve
Simulates the type of dissolve used in film.
50% Mix
Gives a constant 50% mix of both images either side of the cut point for the
duration of the effect.
Wipe Patterns
'Wipes' the screen, replacing the original image with whatever is on the other
side of the cut. Wipe direction is specified by the Black-> White button. The
selected wipe pattern is highlighted in green.
7 Choose the positioning of the transition by clicking on the Position button until it
shows the setting required. The choices are:
Centred Here
Positions the transition centred on the cut.
Use Mark
Lets you select the position by marking and parking either side of the cut. You
do not need to park on the cut point first.
From Here
Positions the transition forward from the cut.
To Here
Positions the transition backward from the cut.
8 Set the inputs for the transition, using the Transition Inputs button on the Transitions
Panel Video Card.
All real-time transitions have 2 inputs; the outgoing material and the incoming material. The Transition Inputs button allows you to select the inputs to the transition, as
follows:
Lightworks V.I.P 4500 Version 3 - User Guide A15.0 - 305
A15.2
Creating Dissolves and Wipes
Either Side
Single channel transitions are created, with the inputs taken from shots to the
left and right of the effect.
Specify Tracks
Two edit channel numbers must be specified for use as inputs to the transition.
This allows, for example, wipes to be created where the inputs contain cuts, or
perhaps a smooth fade in and out of one shot over another. The channels to use
as inputs are specified on the Effect Properties Panel. See ‘Effect Inputs’ on
page 307 and see ‘Adjusting Effects Parameters’ on page 309.
Input Tracks buttons will appear on the Effect Properties Panel if the effect has
been created with the Transition Inputs button set to Specify Tracks. These
allow you to choose the two channels to be used as inputs to the wipe or mix,
from a list of the video channels in the edit.
9 If you want to adjust any effects parameters immediately after the effect is created,
check the And Pop-Up Property Sheet checkbox. This means the Effect Properties
Panel will be displayed when the effect is created.
10 Set the length of the transition.
The length can be set by entering the number of frames required for the transition. To
do this either click on the Transition Length button, until it shows the number of
frames required (from a standard set of defaults) or click on the Transition Length
field, and type in the transition time required. Press the Enter key after typing in the
new value.
It is possible to change the format in which the Transition Length is entered by
clicking on the Transition Length Format button. The formats available are:
Seconds and Frames
Frames
Feet and Frames (film)
11 Click on the Do It button.
A15.0 - 306
Lightworks V.I.P 4500 Version 3 - User Guide
Effect Inputs
A15.2.2
A15.3
Representation Of Effects On the Stripview
Luminance keys, wipes (with specified input channels), dissolves and internally rerouted
tracks all appear on the Stripview as a yellow strip, with a faint cross and an FX logo.
The Stripview Menu command Show Shot Names will display any input channel assignments for the effect.
Representation Of a Luma Key On the Stripview
A15.3
Effect Inputs
A15.3.1
Wipe Inputs
Wipes have explicit input channels. This means that the wipe can contain a combination of
pictures from the same channel or any of the other video channels in the edit.
Simple Wipe
Single channel effect, inputs to the transition are from the same channel. For
example, wiping between pictures placed next to each other on the same video
channel.
Multiple Channel Wipe
Wipe takes one input from the video channel, and second from a different channel.
For example, using a circular wipe to create a picture-in-picture effect.
Lightworks V.I.P 4500 Version 3 - User Guide A15.0 - 307
A15.4
Nesting or Combining Effects
A15.3.2
Dissolve Inputs
Dissolves can have explicit input channels.
Simple Dissolve
A transition between outgoing and incoming pictures on the same video channel.
Multiple Channel Dissolve
A dissolve can take its inputs from other video channels in the edit. This could be
used, for example, to create a superimposition with a picture from another channel.
A15.3.3
Adding Effect Inputs
If an effect has been created as a single channel effect, you can change it into a multiple
channel effect. To do this:
1 Park within the effect.
2 Press the Unmark button.
3 Display the Transition Panel.
4 Select Use Marks (even though you have no marks).
5 As inputs, select Specify Tracks.
6 Press the Do It button. You will now be able to specify the inputs for the effect using
the Effect Properties Panel.
A15.4
Nesting or Combining Effects
As you can specify the inputs for both channels of a wipe or dissolve, this provides the means to ‘nest’
or combine two effects. By creating an effect - a key for example - on one channel, this channel can then
be used as one of the inputs to a dissolve effect. The progress control for the dissolve effect can then be
used to either dissolve to the key, or fade it on and off.
Real-time effects are created within the V.I.P main crate. There are two independent channels available,
allowing the system to create a maximum of two simultaneous real-time effects, for example a wipe and
a key, or two wipes.
If you need to combine more than two simultaneous effects, it will be necessary to build the more complex effect by replicating some of its component parts. See ‘Replicate - Synchronous Playback and
Record’ on page 349.
A15.0 - 308
Lightworks V.I.P 4500 Version 3 - User Guide
Adjusting Effects Parameters
A15.4.1
A15.5
Using Internally Rerouted Tracks With Effects
The Transitions Panel Inputs Card lists all the system inputs and also includes the option
“Internally Rerouted Track”.
When created, an internally rerouted track 'effect' allows you to use a section from another
video channel of the edit without having to physically copy that section from one channel
to another.
This is useful if, say, you wanted to apply a key over background video (laid down on a
single channel), without having to copy the background portion to another channel. It also
simplifies trimming of the edit, as the shot only appears once and changes made will automatically be reflected in the internally rerouted section.
A15.5
Adjusting Effects Parameters
A15.5.1
Displaying the Effect Properties Panel
The Effect Properties Panel allows you to adjust various parameters for an effect. To display
the Effect Properties Panel:
At the Time the Effect Is Created
Next to the Do It button on the Transitions Panel is a checkbox labelled And Pop-Up
Property Sheet. When this checkbox is checked, the Effect Properties Panel for the
effect will be displayed, at the time the effect is created.
Lightworks V.I.P 4500 Version 3 - User Guide A15.0 - 309
A15.5
Adjusting Effects Parameters
After an Effect Has Been Created
The Effect Properties Panel can be displayed by parking within a specific effect and
clicking on the FX button on the Advanced section of the Stripview, or by right+leftclicking the Screwdriver Tool over the effect on the Stripview.
Several Effect Properties Panels can be displayed on screen at once, but only one for each
individual effect. Effect Properties Panels will vanish when the edit Viewer they are associated with is sharked or vanished.
Reset
Buttons
Graph Button
Progress Sliders
Effect Properties Panel
A15.0 - 310
Lightworks V.I.P 4500 Version 3 - User Guide
Adjusting Effects Parameters
A15.5
Parameters that can be adjusted (for example, a wipe border width or a key clip value) share
a common layout of the controls for adjusting their value. These consist of a Progress Slider
and a Text Entry Box for directly setting the value, as well as a Reset (0) button for returning
to a default value.
A15.5.2
Using the Effect Properties Panel
To adjust a parameter, simply move the Progress Slider or type a new value into the Text
Entry Box (as a percentage). If the edit is parked within the effect, changes made to these
parameters will be seen immediately.
Some parameters have a KF (keyframe) button which allows them to modified as the effect
progresses. By default the KF button is deselected, so any adjustments to the parameter
apply throughout the effect. For more information, see ‘Working With Keyframes’ on page
312.
A15.5.3
Progress Control
The Progress Slider on the Effect Properties Panel is used to control how far an effect has
progressed. It behaves in a manner similar to the T-bar on a conventional switcher (vision
mixer). Moving the Progress Slider will move the effect.
There is a display of the current position within the effect, with 0% representing the start of
the effect and 100% representing the end.
The Progress Slider control is the only control that is in keyframe mode by default. There
is a keyframe at the start of the effect and one at the end. This gives a smooth transition.
Adding more keyframes and setting the Progress Slider can be used to create various
effects.
For effects that do not completely transition from one image to another, use the Progress
Slider to add a keyframe in the middle so the effect progresses from 0 to 50% then back to
0, for example.
The Progress Slider for luminance key effects can be keyframed to create keys that fade on
and fade off. See ‘Creating a Luminance Key With a Dissolve On and Off’ on page 318.
A15.5.4
Interaction Between Wipe Position and Size
With certain wipes you may notice an interaction between the wipe position and its size.
The wipe size will change if you move it around the screen because the system is ensuring
the effect can end ‘full screen’ at the out-point you have specified, whilst progressing at an
even rate.
Lightworks V.I.P 4500 Version 3 - User Guide A15.0 - 311
A15.6
Working With Keyframes
For example, consider modifying a 30 frame duration circular wipe. Before you modify it,
the wipe is exactly in the centre of the screen at the half way point - you have 15 frames to
go until the end of the wipe. The wipe has to remain large enough to fill the entire screen
by the time it has progressed through the 15 remaining frames. So if you move the position
of the wipe to the corner of the screen, the wipe will have to get larger in order to cover the
entire screen within the remaining 15 frames.
If you want the wipe to remain a certain size at a new position, it may be necessary to
change the duration of the effect.
A15.6
Working With Keyframes
Keyframes allow you to specify different values for an effect parameter at different times within an
effect. The system will automatically smooth the values between these user defined values (or keyframes).
Each parameter with a KF button has the ability to have its own set of keyframes.
A15.6.1
Editing Keyframes
To enter keyframe mode for a parameter, click on its KF button.
When in keyframe mode, there are always at least two keyframes for the parameter - one at
the start of the effect, one at the end. When a parameter is in keyframe mode, the parameter
title will appear as text on a button and that parameter will become active (indicated by a
blue border). This means that certain Console buttons have been reserved by the Effect
Properties Panel for editing keyframes. You can only adjust values at keyframes.
More than one parameter in an effect may have focus at once, resulting in any keyframe
editing operation applying to all the parameters with focus simultaneously. This simplifies
operations such as adding a keyframe at the current time for all parameters in an effect.
Switching off the keyframe button for a parameter will not lose the stored values for the
effect.
A15.6.2
Buttons Used For Keyframe Editing
Four buttons are available for keyframe editing. These appear on the Effect Properties Panel
and, when in keyframe mode, are duplicated by buttons on the Console.
Add (Console Cue Button)
Adds a new keyframe at the current time.
A15.0 - 312
Lightworks V.I.P 4500 Version 3 - User Guide
Working With Keyframes
A15.6
Remove (Console Uncue Button)
Removes the keyframe at the current time (if any).
Previous (Console Jump Back Button)
Sets the time to that of the nearest preceding keyframe. If more than one parameter
is active, the time will be set to that at the nearest preceding keyframe, from all of the
active parameters.
Next (Console Jump Forward Button)
Sets the time to that of the next, nearest keyframe. If more than one parameter is
active, the time will be set to the next, nearest keyframe, from all of the active parameters.
A15.6.3
Keyframeable Effect Parameters For Wipes and Dissolves
Dissolves and wipes have many parameters that can be adjusted using the Effect Properties
Panel. Most of these parameters can be set to a constant value for the duration of the effect,
or keyframed to take different values as the effect progresses.
The parameters are:
Centre X
Used to adjust the horizontal centre position of the wipe.
A value of -50% will position the wipe centre at the left edge of the screen and a value
of +50% will position the wipe centre at the right edge.
This parameter is not available for mix type effects.
Centre Y
Used to adjust the vertical centre position of the wipe.
A value of -50% will position the wipe centre at the bottom edge of the screen and a
value of +50% will position the wipe centre at the top edge.
This parameter is not available for mix type effects.
Lightworks V.I.P 4500 Version 3 - User Guide A15.0 - 313
A15.6
Working With Keyframes
Edge Softness
Used to control the softness of a wipe’s edge. A value of 0% will produce a hard edge
and value of 100% will produce the softest edge available.
This parameter is not available for mix type effects.
Border Width
Used to control the width of the border applied on the inside edge of a wipe.
A value of 0% will produce a wipe with no border and a value of 100% will generate
a wipe with the maximum border width available. The colour of the border can be
adjusted using the border colour controls.
This parameter is not available for mix type effects.
Progress
This is the only parameter that is, by default, in keyframed mode. In fact, by default
the two keyframes at the start and end of the effect are set to 0% and 100% respectively, to provide a smooth transition (T-bar move) through the effect. See ‘Progress
Control’ on page 311.
Edge Modulation Amplitude
Controls the size/height of the edge modulation applied to a wipe. For this parameter
to make a noticeable difference, edge modulation type must be set to a value other
than 'none' (see below).
Values range from -100% to +100%, with 0 giving no edge modulation size.
This parameter is not available for mix type effects or circular/elliptical wipes.
Edge Modulation Phase
Controls the phase of the edge modulation applied to a wipe.
For this parameter to make a noticeable difference, edge modulation type must be set
to value other than 'none' (see below) and edge modulation amplitude must be set to
a value other than 0.
This parameter is not available for mix type effects or circular/elliptical wipes.
A15.0 - 314
Note: When the border colour parameter is in keyframed mode, the crosshairs and
entry boxes used to select a border colour on the Colour Selector Panel will be unavailable when between keyframes.
Lightworks V.I.P 4500 Version 3 - User Guide
Working With Keyframes
A15.6.4
A15.6
Parameters That Are Not Keyframeable
The following mix/wipe parameters are not keyframeable:
Edge Modulation Type
Used to select how a wipe's edge is to be modulated. Available options are None, Sine
Wave, Triangle Wave, Square Wave.
This parameter is not available for mix type effects.
Edge Modulation Frequency
Selects a frequency for the edge modulation. Higher numbers generate more 'repetitions' along a modulated edge.
This parameter is not available for mix type effects.
Horizontal Multiply
This parameter allows a wipe pattern to be repeated across the screen a multiple
number of times.
This parameter is not available for mix type effects, circular/elliptical wipes and vertical wipes.
Vertical Multiply
This parameter allows a wipe pattern to be repeated down the screen a multiple
number of times.
This parameter is not available for mix type effects or circular/elliptical wipes and
horizontal wipes.
Lightworks V.I.P 4500 Version 3 - User Guide A15.0 - 315
A15.6
Working With Keyframes
A15.6.5
Advanced Keyframe Parameters
Clicking on the Graph button
for a keyframed parameter on the Effect Properties Panel
will display a Graph Panel for the effect, showing where the keyframes are. Clicking on the
Advanced button on the Graph Panel will display the Advanced Graph Panel, which
includes controls for adjusting keyframes.
Value of Parameter at
Keyframe
Keyframe
Position
Strip Display
Advanced Graph Panel
To move the effect to a point represented on the graph, right+left-click at the desired point.
A keyframe is selected by right+left-clicking on it in the graph display area. Alternatively,
use the Previous button or the Next button to jump to a keyframe.
The Advanced Graph Panel can be used for the following operations on keyframes:
Adding a New Keyframe
The Add button adds a new keyframe at the current position.
Removing a Keyframe
The remove button removes any existing keyframe at the current position.
A15.0 - 316
Lightworks V.I.P 4500 Version 3 - User Guide
Creating Luminance Keys
A15.7
Adjusting the Value of a Parameter at a Keyframe
When parked on a keyframe, the value of the parameter can be adjusted by dragging
the white cross. The top of the graph represents the maximum value of the parameter.
Trimming Keyframe Positions
The strip display on the Advanced Graph Panel can be used to make timing adjustments to existing keyframes. One or more keyframes may be selected and adjusted,
making it easy to maintain sync between keyframes. To adjust a keyframe, click on
the keyframe in the strip to unjoin it, then play or shuttle. Click on the keyframe
again, to join the strip and complete the trim.
Keyframe Interpolation
Keyframes are used to set the parameters of an effect to take specific values at fixed
points within the effect. If any of the effect parameters change between keyframes,
you can specify the type of interpolation to perform, using the Mode button on the
Advanced Graph Panel. The choices are Smooth and Linear.
A15.7
Creating Luminance Keys
When the Luma Key button is selected, the Do It button will create a new, default luma key effect.
Luma key effects have two variable parameters - clip and gain. These two parameters may be (optionally) keyframed, in the same way as many of the wipe parameters. See ‘Adjusting Effects Parameters’ on
page 309.
The Effect Properties Panel for a luma key effect has the following controls:
Invert Key Checkbox
Switches foreground and background video inputs to the keyer.
Background Input Track
This button pops up a panel for choosing the edit video channel to be used as the background video
for the luma key effect.
Foreground Input Track
This button pops up a panel for choosing the edit video channel to be used as the foreground/fill
video for the luma key effect.
Lightworks V.I.P 4500 Version 3 - User Guide A15.0 - 317
A15.7
Creating Luminance Keys
Key Input Track
This button pops up a panel for choosing the edit video channel to be used as the key/alphachannel video for the luma key effect.
Foreground Type Shaped
This checkbox sets the keyer up to expect ‘preshaped’ video on its foreground video input. This
option should be used if you are keying anti-aliased text which did not have a separate alpha
channel over a background video picture.
To do this, you must feed the same video track (with the text on it) to the foreground and key inputs
using the input track selection buttons (see above).
If this option is not selected, then the edges of the text will appear too dark over the foreground
video. This is because the text being fed to the keyer as foreground video has shaped edges
(because it has been anti-aliased).
Note: Technically, this is known as ‘additive keying’.
Foreground Type Unshaped
This checkbox sets the keyer up to expect 'unshaped' video on its foreground video input. This is
used if separate foreground and key video sources are available (from, for example, a dedicated
caption generator which outputs a separate key signal).
Note: Technically, this is known as ‘multiplicative keying’.
A15.7.1
Creating a Luminance Key With a Dissolve On and Off
This section describes the steps to create a key and have it fade on and off. As there are
many steps needed to do this, it is worth storing the effect so it can be quickly applied to
any other edit. After the effect is stored, the effect and the source material for the effect can
be modified. See ‘Storing and Repeating Effects’ on page 322.
1 Place the background video (the video you want to put the luminance key over) into
the first video channel (V) of the edit.
A total of five video channels will be required in the edit if you are using foreground
video to fill your key. Four video channels will be required if your key does not need
to be filled.
2 If necessary, use the Add Channels command on the Edit Menu to add video
channels to the edit.
A15.0 - 318
Lightworks V.I.P 4500 Version 3 - User Guide
Creating Luminance Keys
A15.7
3 Select the V channel and one of the empty video channels using their Channel
Selector buttons.
4 Mark and park the entire V channel and one of the empty V channels.
5 Use the ALT+M keys to move the video on V to an empty V channel. You will
eventually be viewing this video through an internally rerouted input.
6 Mark and park the section on the V channel again.
7 Click on the Transition button on the Stripview. The Transitions Panel is displayed.
8 Click on the Inputs Tab to display the Inputs Card.
9 Click on the Internally Rerouted Track option.
10 Check the And Pop-up Property Sheet checkbox on the Transitions Panel.
11 Click on the Do It button on the Transitions Panel.
The Effect Properties Panel for the internally rerouted input will be displayed, with
a button used to specify the input channel. You can display the Effect Properties
Panel for the internal input either at the time it is created, or later by parking on the
input and using the FX button on the Advanced section of the Stripview.
12 The Effect Properties Panel lists the other video channels in the edit. Select the
channel that now contains the main picture (the one you moved from V), to use this
as the input for V.
13 Click on the OK button.
When the V channel is selected on the Stripview, you will see the internally rerouted
video in the Viewer. If the Stripview Menu command Show Shot Names is set to
YES then the number of the video channel that is being routed there will appear in
the Stripview.
Lightworks V.I.P 4500 Version 3 - User Guide A15.0 - 319
A15.7
Creating Luminance Keys
14 Mark and park the section of the edit where the key will be.
15 Move this section of your main edit to another empty channel, using the ALT+M
keys. You will now have a black hole in your main edit channel.
16 Mark and park the black hole you have just created.
17 Click on the Transition button on the Stripview. The Transitions Panel is displayed.
18 Click on the Video Tab to display the Video Card.
19 Click on the Luma Key button.
20 Ensure the Transition Inputs button is set to Either Side.
21 Set the Position button to Use Mark.
22 Click on the Do It button. A Luma Key will be added to the Stripview.
23 On the remaining empty video channels add your key material and the foreground
(fill) material, placing them adjacent to the luma key effect.
24 Select channel V, your internally rerouted input track.
25 Display the Effect Properties Panel for the luma key, by parking on it and using the
FX button on the Advanced section of the Stripview.
A15.0 - 320
Lightworks V.I.P 4500 Version 3 - User Guide
Creating Luminance Keys
A15.7
26 On the luma key Effect Properties Panel Input Tracks section, set the channels to be
used for Background, Foreground and Key.
27 Adjust the Clip and Gain by dragging the sliders. See ‘Creating Luminance Keys’ on
page 317.
28 To dissolve the luminance key on and off, mark and park the section of V adjacent to
the luma key effect.
This is done by leaving V2 selected and jumping to the cuts at either end of the luma
key effect.
29 Click on the Transition button on the Stripview. The Transitions Panel is displayed.
30 Click on the Linear Dissolve button.
31 Ensure the Transition Inputs button is set to Specify Tracks.
32 Set the Position button to Use Mark.
33 Click on the And Pop-up Property Sheet checkbox on the Transitions Panel.
34 Click on the Do It button. A dissolve will be added to the Stripview and its Effect
Properties Panel will be displayed.
35 At the bottom of the Effect Properties Panel for the dissolve, set the inputs for the
dissolve.
The foreground input should be set to be the channel which has the luma key effect
on it and the background input should be set to the channel which has the background
video for the effect.
36 Add two keyframes to the dissolve - one where you want the luma key to finish
dissolving on, and one where you want it to start dissolving off.
37 Use the Jump button on the Console to go to the first frame of the dissolve and set
the Progress to 0.0%.
38 Use the Jump button on the Console to go to the first keyframe in the dissolve and
set the Progress to 100.0%.
The luma key will now dissolve on when played.
39 Reverse this sequence to dissolve the key off.
Lightworks V.I.P 4500 Version 3 - User Guide A15.0 - 321
A15.8
A15.8
Storing and Repeating Effects
Storing and Repeating Effects
Setting up the exact effect you want, each time you want it, can be time consuming - so it is possible to
store effects for later use.
All the effect parameters are stored and can be applied to any other edit. This allows you to store specific
effects - a favourite key, for example - and apply it many times within an edit. It also allows you to create
‘templates’ of effects with the basic parameters set up. The template can then be modified once it is
added to an edit.
A15.8.1
To Store an Effect
1 Park within the effect.
2 Click on the Pop-Out Original Tile button.
The effect is popped out as a Tile. This Tile is an edit and is given a default name of
the form "Effect number (edit name)". You can rename it if required.
This edit contains just the video channels used by the effect. It behaves like a normal
edit and you can add it to Galleries or Databases as usual.
A15.8.2
To Add a Stored Effect To an Edit
Stored effects can be used as sources for edits. To add a stored effect to another edit:
1 Park at the point in the edit where you want to add the effect.
2 Ensure the appropriate video channel is selected.
3 Display the effect you wish to add as a Viewer or Tile.
4 Select the desired effect as a source by clicking on it.
5 Press the Console Replace button.
A15.8.3
Copying Effects That Use Specified Channels
Performing an insert or replace with a multiple channel effect as a source will add the effect
and its associated properties to the edit.
If the destination edit does not have enough video channels for the effect plus all the video
channels that are inputs to the effect, the Effect Properties Panel will display “???” instead
of the input channels.
A15.0 - 322
Lightworks V.I.P 4500 Version 3 - User Guide
Trimming Effects
A15.9
This will also happen if the destination edit does not have all the required channels selected
at the time you press the Replace or Insert button. You will need to either manually add
video channels to the edit or assign the desired video channels to the effect.
A15.9
Trimming Effects
You can trim effects just as you would trim a cut, using the Stripview.
A15.9.1
To Change the Length Of an Effect
1 Go to a frame just before (or after) the effect.
2 Unjoin the effect - either click directly on the vertical line representing the start (or
end) or use a Console Trim button.
3 Trim the effect using the Console Lever or Play buttons.
With Trimview Enabled
The Trimview Viewer will show the frames either side of the chosen end of the
effect. This will be the frame after (or before) the effect, and the frame from
the other shot that would adjoin it if the effect was turned into a cut at that
point. The video outputs used by trimview will also show these frames.
With Trimview Disabled
As you trim, the edit Viewer and video output the edit is assigned to will show
the frame just before (or after) the effect. Trim until you see the frame you
want.
4 Click on the Join button when you have finished trimming.
A15.9.2
Note: If you choose a frame inside the effect, you may see only black when trimming.
To Move an Effect
You can move an effect in the same way as a cut, without changing its length.
1 Unjoin both ends of the effect, on the outgoing side and the incoming side. The position of the current frame marker affects what you see as you trim.
With trimview disabled, if the current frame marker is positioned:
Lightworks V.I.P 4500 Version 3 - User Guide A15.0 - 323
A15.9
Trimming Effects
Before
The Viewer shows the frame at the start of the effect.
After
The Viewer shows the frame after the end of the effect.
Inside
The Viewer shows the midpoint of the effect.
With trimview enabled, the Trimview Viewer will show the frames either side of only
one end of the effect. The video outputs used by trimview will also show these
frames.
2 Trim the effect.
3 Click on the Join button when you have finished trimming.
A15.9.3
Turning an Effect Into a Cut
It is possible to turn a real-time effect back into a cut, using the Transitions Panel.
1 Go to any frame within the effect.
2 Click on the Transition button.
3 On the Transitions Panel Video Card, click on the Cut button.
4 Click on the Do It button.
The effect will be changed back to a cut. The new cut point will be the frame before the
current frame marker.
A15.9.4
Trimming a Multiple Channel Effect
When trimming a single channel effect, the effect inputs are trimmed automatically.
When trimming a multiple channel effect (an effect that contains inputs from other video
channels) you will need to trim the input channels too.
Unjoining cuts on the input channels at the same time as unjoining the effect will ensure
that any changes made when trimming the effect are automatically made to the effect inputs.
A15.0 - 324
Lightworks V.I.P 4500 Version 3 - User Guide
Varispeed
A15.10
A15.10 Varispeed
The Lightworks V.I.P system provides real-time varispeed control of picture playback in an edit.
A15.10.1
Varispeed - Step-by-step
To varispeed a shot in an edit:
1 Display the edit in a Viewer
2 The Viewer must be selected as the record Viewer (click on the Rec button if it is not).
3 Display the Stripview for the edit.
4 Click on the Advanced button.
5 Select the video channel containing the shot you want to varispeed.
6 Park the current frame marker between the in-point and out-point of the shot.
7 Click on the Varispeed display and type in the desired varispeed % value.
8 Press the Enter key. The shot will now play at the desired speed.
A15.10.2
Note: The varispeed feature applies to video but not to audio.
Effect Of Varispeed Values
The varispeed % value affects playback speed on a shot-by-shot basis, from in-point to outpoint. Varispeed settings cannot be made for the whole edit in one operation.
The following examples show the effect of various varispeed % values:
100% - Plays at normal speed
50% - Plays at half speed (slomo)
200% - Plays at twice the speed (fastmo)
0% - Produces a freeze frame
-100% - Plays in reverse at normal speed
Literally any value may be entered.
Lightworks V.I.P 4500 Version 3 - User Guide A15.0 - 325
A15.10
Varispeed
The overall running time (duration in the edit) of the shot will not alter when the % value
is changed. Therefore a shot should be cut to the length desired in the edit before the varispeed value is changed.
When the varispeed percentage is changed the current frame is preserved at the current
record time. Therefore parking on the first frame will produce a different result from
parking in the middle of the shot.
Take care to choose the correct frame to park on before typing in the varispeed percentage.
(For example, when reversing a shot, you must park in the middle of the shot if you want
the existing source in- and out-frames to be swapped.)
To create a varispeed change affecting only part of a shot, use the Mark and Delete buttons
to produce an ‘empty cut’ where you want the speed to change.
A15.10.3
Indication Of Varispeed For Shots
The ‘tick’ marks on the Stripview strips will be spaced according to the speed of the shot.
Varispeed
400%
Varispeed
0%
Varispeed
100%
When trimming the out-point of varisped shots, the frame displayed during trimming is the
correct end frame that will appear at that point in the edit when the trim is joined.
A15.0 - 326
Lightworks V.I.P 4500 Version 3 - User Guide
Fit-to-fill
A15.11
A15.10.4
Undoing Varispeed
If you no longer require a varispeed effect, then you have the following options:
Use the Undo button.
This will only work if the varispeed was done less than five edits ago.
Use the Pop-Out Original Tile button and use the Tile to reconstruct the edit.
Remove the varispeed by typing in a varispeed value of 100%.
Note that if the frame you are parked on is different from the one used when the varispeed was created, then the audio sync of the shot will change.
A15.11 Fit-to-fill
The fit-to-fill feature means that a specified duration of picture on a source Viewer can be made to fill a
specified duration on the record Viewer.
A15.11.1
Fit-to-fill - Step-by-step
1 Mark and park to select the section to be used on the source.
2 Mark and park to select the section to be filled on the record.
3 Press ALT+V on the Keyboard.
A replace edit will be performed and the selected section of the record will be filled with
the selected section of the source, with the shot speed set accordingly.
Fit to fill will take account of the order of the mark and park to preserve the relationship
between corresponding marked and parked frames.
If the mark and park selection on the source and record are in the same order (mark followed
by park on both, for example) then fit-to-fill will run the source shot forwards. If they are
not (mark followed by park on one, park followed by mark on the other) then fit-to-fill will
run the source shot backwards.
Lightworks V.I.P 4500 Version 3 - User Guide A15.0 - 327
A15.11
A15.0 - 328
Fit-to-fill
Lightworks V.I.P 4500 Version 3 - User Guide
A16.0 Editing 6 - Using Multiple Channels
A16.1
Introduction
The Lightworks V.I.P system can manipulate, route and combine multiple video signals in real time in a
powerful and flexible way. The effects produced by external devices (DVEs, Character Generators) can
be seamlessly integrated into edits on the V.I.P system.
The system can control the routing of signals between external devices in a dynamic manner from within
the edit itself. This is done by using the Stripview for an edit to ‘tracklay’ multiple video channels and
control the switching and transitions between material on the V.I.P disks and system inputs.
When combined with external effects units this makes it possible to perform multi-layer effects in real
time, with every layer fully trimmable.
A number of external effects units can all be connected to the system simultaneously, with 16 independent channels of GPI control and up to eight serially controlled devices available. In addition, the
V.I.P system can automatically retime non-synchronous sources and compensate for frame delays introduced by external units.
The pictures from the video channels in a shot or edit can be routed to any of the seven available V.I.P
system video outputs. See ‘Video Output Routing’ on page 333.
Note: It is not possible to use all eight physical outputs because the system hardware uses some
of the crosspoints on the internal video router for keying and transitions.
Lightworks V.I.P 4500 Version 3 - User Guide A16.0 - 329
A16.2
A16.2
Adding Channels To an Edit
Adding Channels To an Edit
An edit can contain external control channels. These are represented in the Stripview and can be used to
control external devices via any combination of serial control and GPI events.
It is possible for an edit to have up to 16 audio channels, 8 video channels and 32 external control channels. The number of video and audio channels (and the complexity of the edit) will determine whether
they can all be played back at one time. See ‘Playing Multiple Video Channel Edits’ on page 332.
Channels are represented in the Stripview as separate strips and given names V, V2, A1, A2, and so on.
A16.2.1
Adding a Channel
1 The edit must be selected as a record Viewer. Click on the Rec button if it is not.
2 Click on the Menu button for the Viewer to display the Edit Menu.
3 Click on the command Add Channels to display the Add Channels Panel.
4 Check the Advanced checkbox to display the full Add Channels Panel.
Channel Type
Buttons
A16.0 - 330
Lightworks V.I.P 4500 Version 3 - User Guide
Adding Channels To an Edit
A16.2
5 Click on the appropriate Channel Type button to highlight (in blue) the type of
channel(s) to add - video, audio or external. Only one type of channel can be added
at a time.
6 Enter the number of channels to be added in the Number of Channels field.
7 Determine where the channel(s) should be added, using the Before, Between or After
buttons.
8 Click on the Do It button. The extra channel(s) will be added to the edit. The Add
Channels Panel remains on the screen, allowing further channels to be added.
A16.2.2
Note: If the Stripview is displayed it will not automatically enlarge to cope with the
new channel. It can be resized by dragging the Stripview border.
Deleting a Channel
To delete a channel from an edit:
1 The edit must be selected as a record Viewer. Click on the Rec button if it is not.
2 Click on the Menu button for the Viewer to display the Edit Menu.
3 Click on the command Delete Channels. The Delete Channels Panel will be displayed, with a button for every channel in the edit.
4 Select the channel(s) to be deleted by clicking on the appropriate buttons to highlight
them (in blue). To select all the channels, click on the All button, to deselect all the
channels, click on the None button.
5 Click on the OK button. A warning message will be displayed.
6 If you are sure you want to perform the deletion, click on Yes to confirm this. The
Stripview, if on screen, will update by removing the deleted channel.
Note: Deleting a channel does not delete the shots it contained.
Lightworks V.I.P 4500 Version 3 - User Guide A16.0 - 331
A16.3
A16.3
Assigning and Monitoring Video Channels
Assigning and Monitoring Video Channels
A16.3.1
Monitoring Edits With Multiple Video Channels
For edits with multiple video channels, the first selected video channel is displayed in the
Viewer on the graphics screen.
The Video Output Routing Panel is used to route each of the video channels in the edit to
the V.I.P system video outputs. See ‘Video Output Routing’ on page 333.
A16.3.2
Switching Video Channels To Inputs
Any of the video channels in the Stripview for an edit can be switched to display any of the
V.I.P system inputs. This provides a flexible means of routing and combining the material
in an edit by using external effects devices. See ‘Switching an Edit Video Channel To an
Input’ on page 338.
A16.3.3
Internally Rerouting Video Channels
A video channel (or section of a video channel) can be made to follow the contents of any
other video channel. This is done using the Internally Rerouted Track option on the Inputs
Card of the Transitions Panel. See ‘Internally Rerouting an Edit Video Channel’ on page
337.
A16.3.4
Playing Multiple Video Channel Edits
Each of the video channels in an edit can be routed directly to one of the serial digital video
outputs of the system. The V.I.P system can replay the equivalent of four picture channels
simultaneously. These are referred to as playback channels.
As the edit is played, the four playback channels are allocated dynamically. Providing the
total number of playback channels is not exceeded at any one instant the edit, will play
smoothly, subject to system bandwidth.
The following points should be noted about the way the system allocates the four available
video playback channels:
Each channel of video played from the V.I.P disks uses one playback channel.
This applies even if the video output for that channel is set to None on the Video
Output Routing Panel.
A16.0 - 332
Lightworks V.I.P 4500 Version 3 - User Guide
Assigning and Monitoring Video Channels
A16.3
Playing any section of black does not use a playback channel.
Any inputs to the edit from external devices do not use a playback channel.
See ‘Edit Inputs’ on page 337.
Real-time transitions will use a minimum of two playback channels.
The playback channels are allocated dynamically as the edit is played, so exceeding the
available resources will result in unpredictable results. It is not possible to know in advance
which of the video outputs will be affected.
A16.3.5
Video Output Routing
The Video Output button in the top right corner of each Viewer indicates which of the seven
system video outputs the contents of the Viewer are routed to. Clicking on this button will
display the Video Output Routing Panel for the shot or edit.
Video Output Routing Panel
A button indicates the name of the currently selected video output for each video channel
in the edit.
To change the video output for a video channel, click on the button for that channel. A list
of the system video outputs will be displayed. Click on the name of the desired output. For
quick reference, the Video Output button on the Viewer will show the abbreviated output
number of the output that the first video channel is routed to.
The video output for a channel can be turned off by selecting the No Output option on the
list displayed. An X will then be displayed on the Video Output button to indicate this.
In the case where two objects (for example a Viewer and a Recording Panel) are assigned
to the same output, the active one takes priority.
Lightworks V.I.P 4500 Version 3 - User Guide A16.0 - 333
A16.4
User Names For Video Inputs and Outputs
The names of the available outputs are determined by the setting on the System Configuration Panel Outputs Card in the Machine Room. See ‘User Names For Video Inputs and Outputs’ on page 334.
A16.3.6
Note: The video output assignment is stored as a property of the edit, not the Viewer.
Multiple Video Outputs For Video Channels
The Video Output Routing Panel can only assign a video channel in an edit to one output at
once. To get the same pictures on more than one video output, the contents of the video
channel must be copied onto another video channel (using ALT+K). The contents of this
additional video channel can then be assigned to the desired output.
A16.4
User Names For Video Inputs and Outputs
The user names given to inputs and outputs should take into account the way the V.I.P system is installed
and the external devices it is connected to. It is suggested that the user names given to outputs are based
on their destination and include the number of the output. This has the following advantages:
The name can be related to the number on the Viewer Video Output button.
If an output is advanced then the value of the advance required is likely to be determined by
the destination of the output.
The advance applies every time that output is used, so indicating this in the name will help
avoid confusion when selecting outputs.
For example, “SDI- OutA- J15” could be named “Out 2 adv to DVE”. Inputs should be named according
to the source they are connected to, for example “SDI-InA-J15” could be renamed “Return from DVE”.
A16.0 - 334
Lightworks V.I.P 4500 Version 3 - User Guide
User Names For Video Inputs and Outputs
A16.4.1
A16.4
Setting Video Input and Output Names
Video input and output names are a system-wide setting, made in the Machine Room. Any
changes made to the user names will apply to all Projects and all Rooms on the system.
The Machine Room is accessed through the grey Machine Room Door in the Lobby. The
Skeleton Password for the system is required to enter the Machine Room. Once inside, click
on the System Configuration command, on the System Menu, to display the System Configuration Panel.
Naming Outputs
To display the Outputs Card, click on the Outputs Tab on the System Configuration
Panel. The Outputs Card enables the V.I.P system outputs to be renamed and
advanced by a number of frames.
System Configuration Panel - Outputs Card
The User Name column has a grey box in which a user name can be entered. The user
name is initially set to be the same as the default name.
Lightworks V.I.P 4500 Version 3 - User Guide A16.0 - 335
A16.5
Using Multiple Video Channels In an Edit
Naming Inputs
To display the Inputs Card, click on the Inputs Tab on the System Configuration
Panel. The Inputs Card enables the V.I.P system inputs to be renamed and retimed.
The User Name column has a grey box in which a user name can be entered. The user
name is initially set to the same as the default name.
System Configuration Panel - Inputs Card
A16.5
Using Multiple Video Channels In an Edit
The V.I.P system can control the routing of signals between external devices in a dynamic manner from
within the edit itself. The Stripview is the key to visualising and controlling the timing of switching and
transitions between material on the V.I.P disks and external effects units. The output of external effects
units are represented in the Stripview as video inputs to the system.
By using the Stripview, complex multi-layer effects can be built very simply. Each layer is represented
individually in the Stripview and can trimmed independently.
The V.I.P system can automatically compensate for frame delays introduced by external units and can
retime non-synchronous inputs.
The Stripview combines both editing and routing functions.
A16.0 - 336
Lightworks V.I.P 4500 Version 3 - User Guide
Using Multiple Video Channels In an Edit
A16.5.1
A16.5
Edit Inputs
Any video channel in an edit can include both material played back from the V.I.P hard
disks and video from selected video inputs.
Video signals connected to the V.I.P system video inputs are routed internally and combined
with video from the system’s hard disks, in the Stripview.
Any section of a video channel in an edit can switch to a system input. This means that the
video signal connected to the selected system input will be seen as part of the edit.
The routing of an edit video channel to a system video output will, in fact, route any video
signals in that video channel to the output. If all or part of that video channel is switched to
an input, then the video signal connected to the input will be routed directly to the output.
Internally Rerouting an Edit Video Channel
A section of a video channel (or entire video channel) can be made to follow the contents of any other video channel in an edit. This is called an internally rerouted track
and allows you to use a section from another video channel of the edit without having
to physically copy that shot or section from one channel to another.
It also simplifies trimming of the edit, as the shot only appears once and changes
made will automatically be reflected in the internally rerouted section.
To reroute a section of a video channel:
1 Mark and park the section of the destination video channel.
2 Click on the Transition button on the Stripview. The Transitions Panel is displayed.
3 Click on the Inputs Tab to display the Inputs Card. The Inputs Card lists the eight
system inputs, with their user names (as defined in the Machine Room).
4 Click on the Internally Rerouted Track option.
5 Click on the Do It button. A Properties Panel is displayed with a button used to
specify the input channel.
Lightworks V.I.P 4500 Version 3 - User Guide A16.0 - 337
A16.5
Using Multiple Video Channels In an Edit
6 Click on the Input Tracks Source button. A lists of the other video channels in the
edit is displayed.
7 Select the one containing the video to be rerouted.
8 Click on the OK button.
If the Stripview Menu command Show Shot Names is set to YES then the number
of the channel that is the source for the rerouted section will appear in the Stripview.
A16.5.2
Switching an Edit Video Channel To an Input
1 Determine which video channel is to be used to display the input.
If necessary, use the Add Channels command on the Edit Menu to add a video
channel to the Stripview. It is simplest to make this the first channel (V) as the contents of this channel will be monitored when all channels are selected.
2 Mark and park the section of the video channel to be switched to the input.
3 Click on the Transition button on the Stripview. The Transitions Panel is displayed.
4 Click on the Inputs Tab to display the Inputs Card. The Inputs Card lists the eight
system inputs, with their user names (as defined in the Machine Room).
5 Click on the name of the desired input. The name will be highlighted.
A16.0 - 338
Lightworks V.I.P 4500 Version 3 - User Guide
Adjusting Output and Input Timing
A16.6
6 Click on the Do It button on the Transitions Panel.
The video signal connected to the selected input will appear in the video channel, for
the duration set by the mark and park. When that video channel is the first selected
channel, the video signal connected to the input will be seen in the Viewer on the
graphics screen.
If the Stripview Menu command Show Shot Names is set to YES then the name of
the input will appear in the Stripview.
If you have checked the And Pop-up Property Sheet checkbox on the Transitions
Panel, a Properties Panel for the input will be displayed. This is used to advance the
video feeding that input effect. The default is no inputs (no advance applied).
A16.6
Note: Moving pictures from the input will only be seen in the Viewer on the graphics
screen when the edit is playing or the Jog Wheel is active (Series 2 Consoles only).
When the edit is stopped, a freeze frame from the input is shown.
Adjusting Output and Input Timing
The V.I.P system will normally be set up during installation to output video timed at zero with respect to
the reference signal connected to the genlock input. See the Lightworks V.I.P 4500 Installation Manual.
When working with edits with multiple video channels, video can be routed out of the V.I.P system,
through external devices and then back into the system to be further combined in an edit.
Many external devices have a built in ‘latency’ which causes a delay to any video passing through them.
For DVEs, for example, this delay is typically one or two frames. When routing video between the V.I.P
system and such external devices, the V.I.P system can be set up to automatically compensate for any
delays and timing errors introduced by the external devices.
A16.6.1
Compensating For Delays Introduced By External Devices
When the V.I.P system is used in conjunction with an external effects device, such as a
DVE, the Stripview is used to route video from the edit channels to a video output and hence
to the external device. The video from the edit is then combined in the external device and
the output is fed back into the V.I.P system.
To compensate for the delay introduced by the external device, it is necessary to advance
the video outputs from the edit video channels feeding the effect by a number of frames with
respect to the reference. Then, when the output of the device appears in the Stripview as an
input, everything is correctly timed.
Lightworks V.I.P 4500 Version 3 - User Guide A16.0 - 339
A16.6
Adjusting Output and Input Timing
When the output from the device is routed back into the edit as a Stripview input, you need
to tell the system which video channels in the edit have been used to feed the external
device, and the associated delay. This is done on the Properties Panel for the input.
A16.6.2
Using the Properties Panel For an Input
The advance for each of the outputs that feed an input is set on the Properties Panel for the
input. The advance set on the Properties Panel applies on a ‘per event’ basis, offering great
flexibility. This enables you to apply different advances to video on the same channel at different points in the edit. This is useful where delays are introduced by routing pictures from
the same edit channel to a single output and then through different external paths - for
example through a switcher to add a caption (one frame advance needed) then later through
a DVE (two frame advance needed).
To advance the outputs that feed an input effect:
1 Display the Properties Panel for the input.
2 Type the number of video channels feeding the effect into the Number of Inputs field
and press the Enter key. The panel will expand to include a section for each input.
A16.0 - 340
Lightworks V.I.P 4500 Version 3 - User Guide
Adjusting Output and Input Timing
A16.6
3 Set the channel feeding each input. Click on the None Set button. A panel listing the
channels in the edit is displayed.
4 Select the button corresponding to the video channel feeding the effect.
5 Click on the OK button. The channel number will appear on the Properties Panel.
6 For each channel, type the required advance (in frames) in the Advance box
7 Press the Enter key. This will advance the video from that video channel output by
the entered number of whole frames with respect to the reference genlock input for
the duration of the input. Any of the outputs that feed the input effect can be advanced
by a whole number of frames, up to a maximum of 999.
Note: The advance only affects the video output from the system, not the contents of
the video channel when displayed on the graphics screen.
8 Repeat steps 3 to 7 for each of the effect inputs.
A16.6.3
Non-synchronous Inputs
If an external device is not locked to the same reference as the V.I.P system then any inputs
from that device will have to be synchronised before they can be combined with other video
within an edit.
The V.I.P system has three internal frame synchronisers which can be used to retime nonsynchronous inputs with respect to the reference genlock input.
The Retime box at the right side of the Inputs Card determines whether the signal connected
to that system input will use one of the three available frame store synchronisers.
Lightworks V.I.P 4500 Version 3 - User Guide A16.0 - 341
A16.7
Using the V.I.P System With External Effects Devices
Retiming non-synchronous sources will delay the input by up to one frame. It is recommended that only true non-synchronous sources are retimed.
Only three inputs can be retimed at any one instant. The allocation of the internal frame
store synchronisers is dynamic, so edits can contain more than three non-synchronous
inputs and have them all retimed correctly, providing no more than three non-synchronous
inputs are used simultaneously.
A16.6.4
Display Of Pictures From a VTR In an Edit-to-it Viewer
When using a VTR as a source for edit-to-it, the system input used by the VTR may have
to be retimed to prevent the image in the Viewer appearing to tear. If the input is not retimed,
any recordings will be correct, but the cut (as seen when rolling the record Viewer) may
appear to flash at the in-point.
A16.7
Using the V.I.P System With External Effects Devices
A typical example is where an edit consists of multiple video channels which are routed out of the system
through an external DVE and character generator.
A16.7.1
Summary of Procedure
The steps involved in externally routing video channels for an edit on the V.I.P system can
be summarised as follows:
1 Create the basic edit.
2 Add extra video channels to the edit.
3 ‘Tracklay’ the video channels, so that the pictures required for any effects are on
separate video channels.
4 Using the Video Output Routing Panel for the edit, ensure that the pictures to be
combined in the external device appear at the correct points on separate video outputs
of the V.I.P system.
5 Connect the V.I.P outputs to the external device.
6 Connect the output of the device to one of the inputs of the V.I.P system.
7 Use the Transitions Panel to switch the sections of video channels in the Stripview
where effects are required to display inputs.
8 Add an external control channel to the edit.
A16.0 - 342
Lightworks V.I.P 4500 Version 3 - User Guide
Control Of External Effects Devices
A16.8
9 Add either serial control or GPI triggers to the edit to trigger the external effects
device at the desired point.
10 Decide which of the video channels in the edit should contain the ‘final’ pictures.
Monitor this video channel in the Viewer and route this channel to the video output
for playout.
A16.8
Control Of External Effects Devices
The V.I.P system can control external effects devices, such as character generators or DVEs, by either
one of the following methods:
Serial (RS-422) Control
The V.I.P system provides, smooth, frame-accurate playback of effects, using one of a selection
of control protocols. The system provides access to the following functions via an RS-422 serial
link:
Place an E-MEM register reference in the Stripview and recall at that point the
stored E-MEM from the external device.
Start the recalled effect.
Jog through the recalled effect.
GPI
A GPI (General Purpose Interface) is used to trigger external devices by means of a contact closure. GPI triggers can be added to an edit and provide a simple, accurate means of controlling
external devices.
The V.I.P system has 16 GPI outputs which can be individually configured to match the requirements of a range of external devices.
A16.8.1
Configuring External Control Event Types
New serial control devices and external control event types are installed using the External
Control Configuration Panel, accessed by clicking on the command External Control
Configuration on the System Menu in the Machine Room.
Lightworks V.I.P 4500 Version 3 - User Guide A16.0 - 343
A16.8
Control Of External Effects Devices
Adding a New Event Type
Click on the New button. A new event type is created and given a default name of the
form “New event type #1”. This name appears in the Current Name window and is
added to the list of configured event types at the top of the External Control Configuration Panel.
Current Name Window
External Control Configuration Panel
Checkboxes define a new event type as either GPI or RS-422. When RS-422 is
selected, a button will display the currently selected device type. Click on the button
to display a list of supported devices and select the desired one.
In the Output box, enter the number of the COM port to be used by the device. Note
that multiple devices cannot use the same COM port.
The parameters that apply to the current event type can be entered as follows:
A16.0 - 344
Lightworks V.I.P 4500 Version 3 - User Guide
Control Of External Effects Devices
A16.8
Name
The name can be changed by clicking in the name field and typing a different name.
Press the Enter key to accept the change.
Output
Determines either which of the 16 GPI outputs is used (enter a value from 1 to 16) or
which COM port the serial control device uses (enter a value from 5 to 12).
Length
Sets the time in milliseconds that the GPI relay contact remains closed when triggered.
Latency
The time in milliseconds that the GPI contact will close either before or after the
trigger point in the edit Stripview. Positive values will set an advance (contact closes
before the trigger point).
A16.8.2
Deleting an External Control Event Type
1 Using the External Control Configuration Panel, highlight the event type to be
removed or type the name in the name field.
2 Click on the Delete button.
A16.8.3
Stripview External Control Channels
External control channels provide the means of adding trigger points to an edit. Trigger
points appear as empty cuts in the external control channel strip and can be edited and
trimmed in the same manner as video and audio cuts.
Up to 32 external control channels can be added to an edit. Under normal circumstances
only one external control channel should be required, as multiple event types can be triggered at the same point. More external control channels can be used to allow for flexible
trimming of individual triggers, and to allow groups of triggers to be selectively disabled.
External control channels can be added to an edit using the Edit Menu command Add
Channels.
They appear in the Stripview between the video and audio strips. The Channel Selector buttons for external control channels are given names of the form G1, G2.
Lightworks V.I.P 4500 Version 3 - User Guide A16.0 - 345
A16.8
Control Of External Effects Devices
A16.8.4
Trigger Names
With the Stripview Menu command Show Shot Names set to YES, the name of the event
type, as defined by the External Control Configuration Panel, will be shown in the
Stripview. For multiple triggers at the same point, the names will appear in the strip as a
vertical list, so it may be necessary to resize the strip to see all the names displayed.
The event type and E-MEM number for an RS-422 event will be displayed on the external
control channel strip.
A16.8.5
Adding and Removing Triggers
Any of the configured event types may be added to an edit that has one or more external
control channels. The External Device Control Panel (which is accessed from the Lightbulb
button on the Stripview) is used to add trigger events, which then appear as cuts on the
external control channel.
Adding a Trigger
1 Park the edit at the point where the event is to be triggered.
2 Click on the Lightbulb button at the top of the Stripview. The External Control Panel
appears. This lists any triggers at the current point in the edit.
3 Click on the Add button. A list of Available Devices is displayed.
4 Highlight the desired event type from the list of available event types.
A16.0 - 346
Lightworks V.I.P 4500 Version 3 - User Guide
Control Of External Effects Devices
A16.8
5 Click on the OK button. The trigger is added to the edit. This is indicated on the
Stripview by a light bulb icon in the strip. The External Control Panel also displays
the name of the trigger and the edit time.
The Selected Devices area includes a box allowing the E-MEM number to be entered
for any serial event types.
For GPI event types, the entry field is disabled and the text greyed out. If no E-MEM
number is specified then the effect currently loaded on the external device may be the
one triggered, but this will depend on the external device itself. It is always best to
specify a number and ensure the effect has been stored on the external device. The
set up and storage of effects has to be done on the external device itself.
Removing a Trigger
1 Use the Console Jump buttons to park the edit at the point where the event is triggered.
2 Click on the Lightbulb button at the top of the Stripview. The External Control Panel
appears with all the event types that are being triggered at that point given in the
selected list.
3 Highlight the event type to be removed from the list of selected event types, by
clicking on it.
4 Click on the Remove button. The highlighted trigger is removed from the edit.
5 Vanish the External Control Panel.
A16.8.6
Disabling an External Control Channel
The external control channel must be selected (using its Channel Selector button) in order
for any GPI triggers or serial control events on that channel to be activated. This provides
a means of selectively turning off certain groups of events.
A16.8.7
Serial Control With E-MEM Recall
This powerful feature allows the V.I.P system to control selected external devices (DVEs
and switchers) using serial control. An E-MEM number is included in the serial event on
the Stripview, allowing recall of data stored on the external device.
For information on supported devices, see the release notes for the latest release of V.I.P
software.
Lightworks V.I.P 4500 Version 3 - User Guide A16.0 - 347
A16.8
Control Of External Effects Devices
When playing back a serial control effect with an E-MEM number, the V.I.P software sends
a command to recall the E-MEM and load the effect in advance of it being triggered by the
edit. As the V.I.P software has no way of determining what specific effect is being loaded,
it must always allow the maximum time that may be required for the 'worst case' (slowest)
effect. This operational feature means that the first effect may need to be a few seconds into
your edit to be loaded correctly. This also applies to back-to-back effects - there must be
sufficient time between effects for the E-MEM to be recalled and the effect loaded.
Once the effect has been loaded by playing the edit, stopping in the middle of an effect and
jogging or shuttling through it will correctly display the required frame.
If you find that an effect near the start of an edit is not triggered reliably, add a countdown
clock or some spacing to the start of the edit to allow time for the effect to be loaded.
Note that an amount of run up (approximately 15 frames after start of the edit) may be necessary to ensure smooth playback of the effect.
It is possible to configure the characteristics of how effects are loaded. See ‘Serial Control
Configuration’ on page 348.
A16.8.8
Serial Control Configuration
There are some CONFIG.DAT file parameters that can be adjusted to optimise the performance of the system when serially controlling external devices. See ‘DVExtreme Serial Control Configuration Parameters’ on page 591 and so on.
Load Delay Parameter
When a device recalls an E-MEM it can take place either in play mode or still mode.
In still mode the E-MEM will be recalled as appropriate when the time on the
Stripview is changed by jumping or right+left-clicking. In still mode the system must
wait for an appropriate length of time before updating the Viewer display, otherwise
the device will not have had time to apply the effect and the Viewer display would
not be correct. The length of time the system waits for can be specified for supported
devices in the CONFIG.DAT file by the “Load Delay” parameter.
Play Latency Parameter
In play mode the system must send a play command a certain number of fields before
the transition time for the effect in order for the effect to start exactly on time. This
is the “Play Latency” parameter.
A16.0 - 348
Lightworks V.I.P 4500 Version 3 - User Guide
Replicate - Synchronous Playback and Record
A16.9
Message Latency Parameter
The “Msg Latency” is the basic delay between messages. The fastest messages can
be sent is at a rate of one per field.
Recall Latency Parameter
In play mode the system must recall the effect early enough for the device to be ready
to play it when the transition point is reached. For some devices this time may be as
long as five seconds. The “Recall Latency” parameter partly determines how close
together the effects can be (along with Play Latency and effect length).
Effect Start Parameter
For the Magic DaVE system, the “Effect_Start” parameter sets the in-point for the
effect. By default, sequences start at one minute after the hour (sequence 1 starts at
00:01:00:00, sequence 2 at 01:01:00:00 and so on). This parameter allows this setting
to be modified on the V.I.P system if you don’t want to alter the set up of the Magic
DaVE system.
A16.9
Replicate - Synchronous Playback and Record
The replicate feature allows the synchronous playback and recording of video and audio channels in an
edit. Any of the video and audio content of an edit can be replicated - including Stripview inputs from
external devices, transitions or multiple cut points.
For video, signals from external sources and other video channels in an edit can be combined in an
external device, routed back into the V.I.P system and recorded as a single shot. There is an option to
replace the section of the edit with the replicated shot. The recording process uses one of the available
video channels of the system, so a maximum of three video channels can be combined in this way.
For audio, signals (either from the main mix or from an external audio mixer) can be combined and
recorded as a single shot on the V.I.P system. If you create a sound effect, for example, by laying up multiple pieces of audio across several channels, these can be rendered to create a single shot which can then
be used throughout the Project.
The replicate operation always happens in real time at normal play speed. It cannot be performed as a
background operation.
The replicate operation makes a copy (in the form of a new shot - log plus material) of whatever was in
the video channel of the edit and the output of the audio mixer, for the selected section. It does not alter
or remove the original material in any way.
Lightworks V.I.P 4500 Version 3 - User Guide A16.0 - 349
A16.9
Replicate - Synchronous Playback and Record
Each shot produced by replicate contains information about the edit it came from - in the form of the edit
timecode, default reel ID and name given to it at the time it was created. Information about the source
and routing of the material that made up the replicated material is stored.
Applications of the replicate feature include:
Recording an externally generated effect directly into an edit
Turning multiple cut points into a single piece of material (‘flattening’)
Play speed rendering of dissolves and wipes to allow more playback video channels in an edit
This is useful since real-time transitions require two of the system's internal video channels but
replicate can turn them into a piece of material that requires only one.
Layering
This can be achieved by successively combining video channels in an external device (three at a
time) and replicating them in an edit.
Replicating in Preparation for Export
When exporting edits (for example, via Fibre Channel to a Profile disk recorder), it is likely that
the V.I.P edit will not actually be in a form that the destination device is able to play - it may contain video effects, shot sound level information or require an external audio mixer to add audio
effects and generate the final mix.
In this case the edit must first be converted into its final form by replicating the required audio and
video. This replicated shot is then used for export.
A16.9.1
Performing a Replicate
1 Select the edit as a record Viewer.
2 Display the Replicate Panel, by clicking the Replicate button on the Advanced
section of the Stripview.
3 On the Replicate Panel, select whether the replicate applies to video and/or audio,
using the Video checkbox and Audio checkbox.
A16.0 - 350
Lightworks V.I.P 4500 Version 3 - User Guide
Replicate - Synchronous Playback and Record
A16.9
4 Mark and park the section of the edit to be replicated. If no mark is present, a message
will ask if you want to replicate the entire edit.
If video (or video and audio) is to be replicated:
The section of video is defined by marking and parking on the first selected
video channel.
If only audio is to be replicated:
The section of audio is defined by marking and parking on the first selected
audio channel.
5 Set the desired options. See ‘Replicate Options’ on page 352.
6 Click on the Do It button. The edit will jump to a frame before the selected in-point
and play forward at normal play speed. The system will start recording at the
specified in-point (less the handle), and stop when all the material has been recorded.
During the replicate, clicking on the Cancel button will cancel the operation. No
material will have been recorded. Pressing the Stop button on the Console will stop
the replicate at that point (effectively setting an early out). Any material recorded will
be added to the edit up to that point.
Lightworks V.I.P 4500 Version 3 - User Guide A16.0 - 351
A16.9
Replicate - Synchronous Playback and Record
A16.9.2
Replicate Options
When using replicate, the settings used are saved in the Project and are recalled each time.
Picture Quality Button
Selects the picture quality for the new material. Defaults to three mins.
Destination Disk Button
Selects the disk to record the new material onto. An indication is shown of the
amount of storage available on the currently selected disk.
Handle
Sets the extra amount of material to be recorded in addition to the specified section
(to allow for trimming or transitions). Set in the Handle box. Defaults to five seconds.
The handle recorded on the replicated shot will contain whatever was in the edit
before the specified start point. If you want the handle to contain a specific shot, to
allow you to dissolve into the replicated section, for example, trim the edit before
performing the replicate.
Shot Name
The new shot is given a default name based on the edit name plus the video channel
number and an index number, for example; “Final V2 #1”. A different name for the
shot can be entered into the box if desired.
Reel ID
Sets the reel ID of the recorded material. If none is specified, a default reel ID of the
form “RX” plus the video channel number is used.
Timecode
By default the Use Edit Timecode option is checked. This means material will be
given a timecode that corresponds to the point in the edit it is placed. If this box is
not checked, the new material will have a timecode that starts from zero.
Replace Section With New Shot
The new material will be popped out as a Tile next to the record Viewer when it is
recorded. Defaults to selected. See ‘Replace Section With New Shot’ on page 354.
A16.0 - 352
Lightworks V.I.P 4500 Version 3 - User Guide
Replicate - Synchronous Playback and Record
A16.9.3
A16.9
Replicating Audio
Audio Checkbox
Checking the Audio checkbox on the Replicate Panel enables a toggle button which
allows the user to specify whether the audio to be recorded is from the Main L/R
(Internal Mixer) or from an External Mix. The default setting will be the internal
mixer, unless it has been bypassed. See ‘Bypass Internal Mixer’ on page 378.
Main L/R (Internal Mixer)
This will record the main mix output of the internal mixer. This option is only
valid if the internal mixer is enabled (not bypassed).
Audio PPM’s appear when the record machine has focus and you have
selected audio to be replicated. This allows the audio levels to be checked/set
before the Do It button is clicked. Under each PPM is a Rec button which
allows you to specify whether that channel should be enabled for recording.
External Mix
This will record the audio from an external audio mixer to be recorded. This is
the default case whenever the internal audio mixer has been bypassed. This
option requires an external device, named Audio Mixer, to be defined in the
Machine Room. The Audio Mixer device specifies which system audio inputs
are recorded during the replicate.
When the internal mixer is bypassed and the record source is an external audio
mixer this causes the record signal to be routed to the last 'n' audio outputs of
the V.I.P system, where 'n' is the number of channels being recorded. This is
to allow for monitoring of the record source on the external audio mixer.
Lightworks V.I.P 4500 Version 3 - User Guide A16.0 - 353
A16.9
Replicate - Synchronous Playback and Record
A16.9.4
Replace Section With New Shot
For Video and Audio
Once the replicated shot has been recorded the 'replace section with new shot' operation will be performed, if this checkbox on the Replicate Panel was checked. This
operation performs a replace edit where the source machine is the rendered shot and
the destination is the edit. As with all editing operations the destination video channels are specified by the first video channel.
In the case of a video and audio replicate, the replace edit is automatically preceded
by a remove operation on all the audio tracks which were used to generate the replicated audio. These are assumed to be all the audio channels which were turned on
during the replicate. This ensures that the edit does not contain both the unmixed and
the mixed audio, which could lead to both level and phasing problems.
For Audio Only
If this option is enabled then the shot will be used to perform a replace operation. The
destination channels are defined by the Channel Selector buttons on the Stripview.
When replicating audio only, this will cause a remove operation on the source channels to be carried out before the replace operation. The source channels are all those
which were turned on for playback during the replicate operation. The audio Channel
Status buttons are on the System Sound Monitor Panel. See ‘Tracks Card’ on page
376.
A16.9.5
Monitoring Audio and Video During Replicate
An important aspect of video replicate is that what you record is what you see in the Viewer
when the edit is played, this means that when the Do It button is clicked you can be confident that the recorded material will be correct.
When replicating audio, the PPM meters on the Replicate Panel will display the record
signal. A button under each meter allows individual record channels to be turned off, for
example if you want to only record a mono mix.
When the Replicate Panel is displayed and the audio options are enabled, the PPM meters
display the audio signal for the record Viewer.
When the internal mixer is the source of audio being replicated, the audio monitored is the
signal that will be recorded, the main mix, and this is normally routed to the monitor
speakers.
A16.0 - 354
Lightworks V.I.P 4500 Version 3 - User Guide
Replicate - Synchronous Playback and Record
A16.9
When an external mixer is the record source the record signals will automatically be routed
to the last ‘n’ outputs of the system. You can then connect these to the monitoring facilities
of the external mixer to determine what is monitored. This allows record levels to be set and
verified before the replicate is started.
A16.9.6
Undoing a Replicate
Pressing the Undo button immediately after replicating will revert to the previous version
of the edit but will not delete the new material.
A16.9.7
Replicate History
The system stores the ‘history’ of a replicated shot (information about the sources) as part
of the log for that shot. This can be used to recreate the replicated material.
Pressing the Pop-Out Original Tile button on a replicated shot will display an edit. This edit
is a copy of the section of the edit used to create the shot and includes all source audio and
video channels, and any serial control events.
If the replicated material itself contains replicated shots, their sources can also be popped
out in the form of copy edits.
As these edits are copies (and the replicated shot stores the original data) you can modify
them directly without fear of losing anything.
Lightworks V.I.P 4500 Version 3 - User Guide A16.0 - 355
A16.9
A16.0 - 356
Replicate - Synchronous Playback and Record
Lightworks V.I.P 4500 Version 3 - User Guide
A17.0 Editing 7 - Audio Editing
A17.1
Introduction
Sound is edited on the V.I.P system in the same way as picture - using the Console and Stripview, as
described in the previous chapters. This chapter details additional features available specifically for
audio editing. For information on control of audio levels and routings, see ‘Audio Control’ on page 373.
A17.2
Adding and Removing Audio Channels
A17.2.1
Adding Audio Channels To an Edit
It is possible for an edit to have up to 16 audio channels. These are ‘virtual’ channels - it is
not possible to output them all at once. The V.I.P system has 8 ‘real’ audio output channels.
This means you can output and listen to up to 8 audio channels at once. See ‘Audio Control’
on page 373.
To add audio channels to an edit, see ‘Adding Channels To an Edit’ on page 330.
A17.2.2
Note: It is not possible to add audio channels to a shot.
Removing Audio Channels From an Edit
There are two ways of removing an audio channel from an edit:
Either delete the audio channel from the edit (see ‘Removing Audio Channels From an Edit’
on page 357), or remove any unwanted audio channels by copying the edit into an empty
record Viewer, as follows:
1 Create a new empty Viewer using the Viewer Tool from the Toolbox.
2 Click on the Rec button to turn the empty Viewer into a record Viewer.
3 Go to the first frame of the edit.
4 Use the Stripview Channel Selector buttons to select only those audio channels you
wish to retain.
5 Press the Replace button on the Console.
The record Viewer now contains a new version of your edit with only the selected channels.
Lightworks V.I.P 4500 Version 3 - User Guide A17.0 - 357
A17.3
Replacing Sound With ‘Atmosphere’
A17.2.3
Audio Channel Assignment During Editing
When editing, you can control audio channel assignment by using the Channel Selector buttons on the Stripview. In general, only selected channels are used from the source, and they
are edited only into selected channels on the record. For more information, see ‘Channel
Assignment During Editing’ on page 238.
A17.3
Replacing Sound With ‘Atmosphere’
If you need to remove some sound and replace it with ‘atmosphere’, there are two simple methods: it can
be done by replacing or resyncing.
A17.3.1
Replacing
1 On the record Viewer, deselect any channels that you do not want to change.
2 Mark and park to select the section to be replaced.
3 Find the original shot, so you have a source of atmosphere. The simplest way to do
this is to use the Pop-Out Original Tile button on the record Viewer or Stripview, to
‘match-frame’ to the source shot.
4 Find the beginning of some atmosphere on the source shot and press the Replace
button.
A17.3.2
Finding ‘Atmosphere’ By Resyncing
This method, using the Stripview, can be very quick and elegant if there are sufficiently long
pieces of atmosphere available. It allows you to replace a piece of sound with matching
atmosphere simply by making a cut at either end of the sound, then slipping the section
between the cuts along the original shot, until there is atmosphere. To do this:
1 On the Viewer or Stripview, use the Channel Selector buttons to deselect any channels that are not to be changed.
2 Make empty cuts, by pressing the Mark button then the Delete button, at both ends
of the section of sound to be replaced.
3 Unjoin both the beginning and end of the section, by clicking on the strip to the right
of the cut at the start and the left of the cut at the end.
4 Play through the shot until you find a long enough piece of atmosphere.
5 Click on the Join button.
A17.0 - 358
Lightworks V.I.P 4500 Version 3 - User Guide
Moving Sections Of Audio Within an Edit
A17.4
A17.4
Moving Sections Of Audio Within an Edit
There are several ways of moving audio within an edit.
A17.4.1
Using the Clipboard
1 Use the Channel Selector buttons on the Stripview to ensure that only the required
channels are selected.
2 Mark and park to select the section of audio to be moved.
3 Use the Console Move or Delete buttons to place the audio section in the Clipboard.
4 Use the Channel Selector buttons to deselect the channel(s) the audio came from and
select the destination channel(s).
5 Select the Clipboard as your source by clicking on it and use the Replace or Insert
button to cut the audio section into the edit in the desired position.
A17.4.2
Using ALT+M
This moves a section of audio to the same position on the next free, selected channel.
1 The edit must be selected as a record Viewer.
2 Use the Stripview Channel Selector buttons to ensure that only the source and
destination channels are selected.
3 Mark and park the select the section to be moved.
4 Press ALT+M on the Keyboard. The selected section of audio will move from the
source to the destination channel.
A17.4.3
Note: This will not happen if there is any audio on the destination channel.
Using ALT+S
This swaps a section of audio from the source to the destination channel and vice versa.
Step-by-step instructions are as for ALT+M (above).
A17.4.4
Using ALT+K
This copies a section of audio from the source to the destination channel. Step-by-step
instructions are as for ALT+M (above).
Lightworks V.I.P 4500 Version 3 - User Guide A17.0 - 359
A17.5
A17.5
Shot-by-shot Audio Level Control
Shot-by-shot Audio Level Control
A17.5.1
Enabling Audio Level Control
Audio level control information set using the shot sound and crossfade audio controls may
be set to On or Off using the Project Card. This determines whether the audio for shots and
edits in that Project will be played back with or without any level control instructions.
To access the Level Control button:
1 Click on the Current Project Details command on the General Menu. The Project
Card is displayed.
2 Click on the Audio Params button on the Project Card. The Audio Parameters Panel
is displayed.
3 Toggle the Level Control setting between On and Off, by clicking on the button.
The default is for Level Control to be On. The most common reason for requiring it to be
Off is when playing out audio for external mixing. In this situation it is normally necessary
to play out the audio 'flat'.
Setting Level Control to Off will mean that the system ignores all level control instructions.
The level control instructions remain in the system memory and can be re-enabled by
switching level control back to On.
Level Control may be switched between On and Off at any time - any previously stored
level control information is not lost. The latest setting for Level Control will be remembered
when you return after shutting down the system.
A17.5.2
Making Shot-by-shot Audio Level Adjustments
Shot-by-shot audio level adjustments are made via a set of sliders attached to the Stripview.
There is one slider for each audio channel. Each slider works independently of the others.
To use the sliders:
1 Display the Stripview for the edit.
2 Click on the Advanced button on the Stripview. This will add the shot sound sliders
to the Stripview.
A17.0 - 360
Lightworks V.I.P 4500 Version 3 - User Guide
Shot-by-shot Audio Level Control
A17.5
Current Frame
Markers
Slider
Scissors
Buttons
Stripview with Shot Sound Controls
3 Ensure that the position of the current frame marker is between the in-point and outpoint of the piece of audio to be adjusted.
4 The sound level for each piece of audio (from in-point to out-point) is determined by
the position of the slider. The levels range from 0% (silence) to 150% of the recorded
level.
5 To move a slider, either drag it using the Mouse, or position the Mouse cursor at the
point you want the slider to be and right+left-click.
If an audio channel is not selected, the slider dulls in colour and cannot be moved.
Lightworks V.I.P 4500 Version 3 - User Guide A17.0 - 361
A17.6
Audio Crossfades
A17.5.3
Ramping the Audio
Audio levels at the in-point and out-point of a piece of audio may be adjusted independently, causing the level to ramp up or down between the events.
To do this, click on the Scissors button. The slider will now split into two halves when it is
moved with the Mouse. The two halves may be moved independently of each other. The top
half of the slider sets the in-point level while the bottom half sets the out-point level.
To create an audio ramp within a piece of audio, use the Mark and Delete buttons on the
Console to produce ‘empty cuts’ at the frames where you want the ramp to start and finish.
A17.5.4
Resetting Sliders To Default Value
To reset a shot sound slider to the recorded level (100%), click on the slider.
A17.5.5
Shot Sound Sliders For Grouped Audio Channels
When using shot sound sliders for grouped audio channels, the same audio level changes
are applied to all the individual channels in the group.
A17.6
Audio Crossfades
A17.6.1
Creating a Crossfade
Crossfades are created by using the Audio Card on the Transitions Panel to turn an existing
audio cut into a crossfade. Any audio crossfades will always be centred on the cut point.
1 Display the Stripview for the edit.
2 Use the Jump buttons on the Console to jump to the audio cut which is to be made
into a crossfade. The crossfade will be centred on this cut point.
3 Use the Channel Selector buttons to deselect any channels which do not require
crossfades at this point.
4 Click on the Transition button on the Stripview, to display the Transitions Panel.
A17.0 - 362
Lightworks V.I.P 4500 Version 3 - User Guide
Audio Crossfades
A17.6
5 Display the Audio Card by clicking on the Audio Tab on the Transitions Panel.
Whole Channel
Checkbox
Preserve Crossfades
Checkbox
Transition Length Field
Transition
Length Button
Transition Length
Format Button
6 Click on the Add button, to highlight it in green.
7 Select the duration of the crossfade. This can be done by typing in the desired length
in the Transition Length Field, or by selecting one of the preset durations using the
Transition Length button.
The duration of the crossfade can be defined in frames, seconds + frames or
feet+frames (for film), using the Transition Length Format button.
8 Click on the Do It button.
The audio shots on each side of the crossfade will overlap each other for the full
length of the crossfade. Within this overlap, the sound level of the outgoing shot will
ramp down to zero and the sound level of the incoming shot will ramp up from zero.
The crossfade will be represented as a cross in the Stripview.
Lightworks V.I.P 4500 Version 3 - User Guide A17.0 - 363
A17.6
Audio Crossfades
A17.6.2
Creating Crossfades For an Entire Channel
It is possible to create crossfades at every audio cut point on an audio channel, using one
command on the Transitions Panel.
1 Follow steps 1, 3, 4, 5, 6 and 7 above.
2 Check the Whole Channel checkbox.
3 Click on the Do It button.
Crossfades will be created for every audio cut on all selected audio channels.
A17.6.3
Removing Crossfades
The Remove button on the Audio Transition Card may be used to remove crossfades. To
remove a crossfade:
1 Display the Stripview for the edit.
2 Use the Jump buttons on the Console to jump to the crossfade.
3 Click on the Remove button on the Transitions Panel Audio Card.
4 Click on the Do It button.
If the current frame marker is over a crossfade, the crossfade is removed and the two
shots either side are extended to fill the gap, meeting where the midpoint of the crossfade was. The position of the current frame marker has no influence over the position
of the resulting cut-point; it is always put at the midpoint of the former crossfade.
If the Whole Channel checkbox is checked, all crossfades on the selected audio channels will be turned into cuts. The position of the current frame has no effect.
A17.6.4
Monitoring Crossfades
You can decide whether you want to hear any crossfades on a particular channel when
playing back an edit. Whether crossfades can be heard does not affect any their representation in the Stripview or EDL made from the edit.
To monitor crossfades for a particular channel:
1 Ensure that Level Control is set to On. See ‘Creating a Crossfade’ on page 362.
2 Display the System Sound Monitor Panel by clicking on the General Menu command
System Sound Monitor Panel.
A17.0 - 364
Lightworks V.I.P 4500 Version 3 - User Guide
Audio Crossfades
A17.6
Crossfade Buttons
3 On the Tracks Card, there is a Crossfade button for each channel. This button toggles
between a grey vertical line (for cuts) and a red cross (for crossfades) to determine
whether crossfades in the edit are played as crossfades or as cuts.
Set the Crossfade button for the appropriate channel(s) to display a red cross.
A maximum of eight audio channels can be played at the same time. If one of the
channels that is on has its Crossfade button activated, that channel will actually use
two channels of audio output. Therefore the maximum number of channels that may
be switched on at the same time is reduced by one.
The possible combinations are:
A maximum of 16 audio channels with none playing crossfades.
A maximum of 8 channels all playing crossfades.
Use the Crossfade button to select the desired combination of playback channels and
crossfades for your edit.
Lightworks V.I.P 4500 Version 3 - User Guide A17.0 - 365
A17.7
A17.7
Chequerboarding Audio
Chequerboarding Audio
One of the most time consuming audio tracklaying operations is chequerboarding. This involves going
through each audio channel and splitting adjacent sections of audio onto two or more channels to facilitate audio mixing. The V.I.P system automates the chequerboarding operation.
A17.7.1
Chequerboarding Procedure
To chequerboard an edit:
1 The edit must be selected as a record Viewer.
2 Click on the Transition button on the Stripview, to display the Transitions Panel.
3 Click on the Audio Tab to display the Audio Card.
4 Click on the Chequer button. It will turn green.
A17.0 - 366
Lightworks V.I.P 4500 Version 3 - User Guide
Chequerboarding Audio
A17.7
5 Select the desired overlap.
The duration specified at the bottom of the card will determine the length of the
overlap (or handle) added to the in-point and out-point of each piece of audio in the
edit.
An overlap is automatically created by extending both ends of the audio by the specified number of frames. This is set in frames, seconds + frames or feet+frames (for
film). If the overlap is long, then three channels may be required in order to chequerboard one channel.
6 Decide if you want to any existing crossfades to be retained or replaced by the
chequerboarding operation.
The overlaps (handles) created by chequerboarding will not have any level changes.
If the Preserve Crossfades checkbox is checked, then any existing crossfades will
still exist after the chequerboarding operation.
Otherwise all crossfades on the selected audio channels will effectively be turned
into cuts before the edit is chequerboarded.
7 Click on the Do It button.
All selected audio channels will be chequerboarded. Any extra audio channels
required will be created and added to the edit, but if the number of channels needed
exceeds 16 then the V.I.P program will abort the operation after doing what it can.
Note: The selected overlap will be added to all audio events, irrespective of whether
the result is sensible in editing terms! To avoid chequerboarding certain tracks (dialogue for example), make a copy of the edit first. Then delete the contents of these
tracks from the original edit. Then once the edit has been chequerboarded, the copy
can be used to put the other tracks back in their (unchequerboarded) original state.
Lightworks V.I.P 4500 Version 3 - User Guide A17.0 - 367
A17.8
A17.8
Adding Live Audio To an Edit Using the Voice Over Feature
Adding Live Audio To an Edit Using the Voice Over Feature
The voice over feature allows simultaneous playback and recording of an external audio input into an
edit. Audio can be recorded to disk whilst replaying picture and any other sound channels in an edit. This
allows, for example, a live commentary (voice over) to be recorded from a live source (microphone)
whilst using the edited pictures and sound as a cue.
The recording can be done in as many passes as necessary, with pick ups to the existing voice over, up
to the edit point, being monitored. Sections of an edit can be replaced by marking and parking.
Voice over recordings cannot be performed as a background operation.
For details of how to combine several audio channels into a single channel (without adding a live input)
see ‘Replicate - Synchronous Playback and Record’ on page 349.
A17.8.1
Voice Over Panel
To display the Voice Over Panel, click on the Voice Over Tool
from the Toolbox.
Device Selection
Button
V/O Into Channel
Button
Disk Selection
Button
Voice Over Panel
A17.0 - 368
Lightworks V.I.P 4500 Version 3 - User Guide
Adding Live Audio To an Edit Using the Voice Over Feature
A17.8
The Voice Over Panel includes the following features:
Device Selection Button
This displays the currently selected source device. The audio inputs defined for the
device are the inputs used by the Voice Over Panel.
To select another device, click on the button to display a list of manual devices.
Elapsed Time
This displays the duration of the recording in red timecode numbers.
Audio Input Level Meters
A level meter is displayed for each audio input of the device.
Disk Selection Button
This is used to select the disk to record onto.
Reel ID Box
This is the reel ID given to any voice over audio recordings. This defaults to a reel
ID of the form “v/o <device name>”.
Preroll
This sets the time (in seconds) that the record Viewer will preroll before starting the
recording.
Monitor Button
Clicking on the Monitor button will allow you to monitor audio input from the
selected source device. This can be used to check the signal and adjust levels.
Automatic Rack Generation
When the Put Recordings Into Rack checkbox is checked, each new voice over
recording is placed into a Gallery for that edit and this is placed in a Rack.
A separate Gallery is created for each edit which has a voice over recorded.
Lightworks V.I.P 4500 Version 3 - User Guide A17.0 - 369
A17.8
Adding Live Audio To an Edit Using the Voice Over Feature
A17.8.2
Adding a Device To Use With Voice Over
To add a device suitable for use as a source for voice over recordings, use the Add New
Input Device command on the System Menu to configure a manually controlled device
with the appropriate audio connections. See ‘Adding New Devices’ on page 106.
It is recommended that you choose the device type Live Feed - Audio Only, although any
manual control device type can be used.
A17.8.3
Performing a Voice Over Edit
1 Display the edit in a Viewer.
2 Click on the Rec button on the Viewer.
3 Set the in- and out-points for the voice over recording by marking and parking on the
edit. Alternatively, you can set up an open-ended recording by simply parking at the
in-point.
4 Display the Voice Over Panel.
5 Click on the Device Selection button. A list of manually controlled devices will be
displayed. See ‘Adding a Device To Use With Voice Over’ on page 370.
6 Select the device to record from.
Any manual control source device with one or more audio channels (digital or analogue) can be selected as the audio source for editing. Voice over recordings will have
the same number of audio channels as the input device being used.
7 Click on the Monitor button to enable E to E monitoring of audio from the selected
source device.
8 Use external adjustment to set the input audio level.
9 Use the V/O Into Channel button to select the destination channel for the voice over,
as follows:
Default
The voice over will be recorded to any audio channels in the edit that are
selected, with a one-to-one mapping of source audio inputs to selected channels.
A17.0 - 370
Lightworks V.I.P 4500 Version 3 - User Guide
Adding Live Audio To an Edit Using the Voice Over Feature
A17.8
A2 - A16
The voice over will be recorded to any selected audio channels that are below
the channel number displayed on the button. For example, a setting of A4 will
record the voice over to any selected channels from A4 through to A16.
10 Click on the OK button.
11 Click on the Voice Over Panel to make it the source for editing operations. Its border
will be highlighted in blue.
12 Use the Insert or Replace button on the Console to start the voice over recording.
The record Viewer will preroll by the selected time, and there will be a countdown
(in seconds) on the Elapsed Time display on the Voice Over Panel. This will update
to show elapsed time during the recording.
The input audio from the Voice Over Panel will be mixed with the edit audio, to
sound exactly as it will when the edit is played back.
13 If a selected section of the edit has been marked and parked then the voice over
recording will end at the end of the selected section. Otherwise, the recording will be
open-ended, starting from the park position. To end a recording early, press the
Console Stop button. To cancel a recording, press the ESC key or click on the Cancel
button on the Voice Over Panel.
A17.8.4
Performing a Voice Over Edit Whilst ‘Background Recording’
Voice over recordings can take place, as long as the number of channels needed by the playback of the edit and the recording(s) does not exceed the system limit.
A17.8.5
Names For Voice Over Shots
A new audio-only voice over shot is recorded for each voice over take, and is given a default
name of the form “Edit #xxx V/O #yyy”. A new name can be entered at the bottom of the
Voice Over Panel. Once a name has been entered, subsequent voice over recordings use this
name with a numeric suffix (“#1” and so on).
A17.8.6
Timecode and Reel ID Of Voice Over Recordings
Voice over recordings are given a timecode that matches the edit timecode at the in-point.
The default reel ID is the same as the edit name.
The Filecard Description field gives details of the edit name and timecode of the recording.
Lightworks V.I.P 4500 Version 3 - User Guide A17.0 - 371
A17.8
A17.0 - 372
Adding Live Audio To an Edit Using the Voice Over Feature
Lightworks V.I.P 4500 Version 3 - User Guide
A18.0 Audio Control
A18.1
Introduction
The controls for audio mixing and routing on the V.I.P system effectively provide the capabilities of a
stereo mixer internal to the audio system, with the following features:
Support for up to 16 record and 16 simultaneous playback audio channels.
Stereo capability with all channels in an edit routed to main stereo mix bus.
Level control, pan, mute and solo for each edit channel.
Channels may be routed to any of three stereo sub-mix buses.
Master fader and mute controls on each mix bus.
Multiple outputs of the same channels and mix buses may be routed to any system output.
Multiple channel and mix bus signals may be routed to a single output for unity mixing.
Separate level control for each system output to allow signal to be output at different levels.
Output audio routing settings can be saved and recalled at any time.
Monitor output of main mix with separate independent level control.
PPM level meters for each system input and output.
Serial control of external audio consoles.
Audio layering, using the audio replicate feature.
A18.1.1
Audio Processing Chain
The audio system processes the raw audio information that is read off the hard disks in order
to produce a signal that can be output from the system.
All the audio capabilities are achieved using digital signal processing. However, to understand the way the system works it helps to visualise this process as a series of discrete steps.
Imagine the final output level for each channel is determined by the level of various faders
as the audio passes through them on its way from the edit to the output.
The stages in the signal processing chain are:
Lightworks V.I.P 4500 Version 3 - User Guide A18.0 - 373
A18.1
Introduction
Shot Level
Audio information is read off the hard disk and then passes through the shot sound
slider on the Stripview. This allows the level to be adjusted for that individual shot.
Channel Level
The audio for all the shots in an edit (at the level set by their individual shot sound
sliders) is then combined to make up a channel.
The Tracks Card of the System Sound Monitor Panel determines the overall level of
that channel when it is combined with other channels. At this stage the signal is split
into left and right components depending on the position of the Pan control slider.
Mute Button
Mutes the output of that channel.
Solo Button
Mutes all other channels in the mix for monitoring purposes only.
Mix Level
All channels making up an edit are automatically combined into a main stereo mix.
In addition, each channel can be routed to any of three independent sub-mix buses
post pan. The level of a channel in a sub-mix is the same as the level of the channel
in the main mix.
The overall level of the main mix and sub-mixes can be independently set using the
corresponding level slider on the Mixes Card of the System Sound Monitor Panel.
Any of the mixes can also be muted by using the Mute button on the Mixes Card.
System Output Level
The fader sets the level of the audio output. Outputs can also be muted. This determines the output level from the system. It applies to all shots and edits on the system,
not just the current Project or edit.
Monitor Level
The main mix is routed to the stereo monitor slider on the System Sound Monitor
Panel, and can be routed to a separate audio output. This enables the level that the
main mix is monitored at to be set independently of other outputs of the main mix.
A18.0 - 374
Lightworks V.I.P 4500 Version 3 - User Guide
System Sound Monitor Panel
A18.2
A18.2
System Sound Monitor Panel
The System Sound Monitor Panel contains controls for monitoring the audio for shots and edits. It also
controls audio channel routing and assignments for both individual edits and the entire system. To display it, click on the System Sound Monitor Panel command on the General Menu.
The System Sound Monitor Panel has four cards that are used to set up and display current audio settings.
The sliders on the System Sound Monitor Panel can be moved by dragging them with the Mouse. Alternatively, place the Mouse cursor at the desired point and right+left-click. To reset a slider to its default
value, point at the slider and click.
On the right side of the System Sound Monitor Panel is a monitor slider and a Mute button.
The main mix of the currently highlighted edit is the source for the monitor mix. This feature enables the
main mix output to be monitored at a level that is independent of the actual audio output level if required.
The monitor output L & R appears on the Audio Output Routing Panel (see ‘Using the Audio Output
Routing Panel’ on page 381) and can be routed to specific audio outputs. For example, the V.I.P system
audio output routing could consist of the monitor L & R routed to speakers for monitoring and the main
mix L & R routed to a VTR for playout to tape. This configuration allows the listening level to be
adjusted without altering the level recorded on tape.
Adjust the level of the slider with the Mouse to set the audio level of the monitor output.
A18.2.1
Selecting the Screen Object To Monitor
The System Sound Monitor Panel will act on the currently active shot, edit, Recording
Panel or Autoconform Panel. The name of the active screen object will be displayed at the
top of the System Sound Monitor Panel.
Lightworks V.I.P 4500 Version 3 - User Guide A18.0 - 375
A18.2
System Sound Monitor Panel
A18.2.2
Tracks Card
The Tracks Card is the primary source of information about the audio channels in a shot or
edit.
Tracks Card
The Tracks Card displays the audio information and current settings for all the channels in
the active shot, edit, Recording Panel or Autoconform Panel.
Only four channels can be viewed at any one time. To view any other channels, click on the
Arrow buttons at the top of the Tracks Card. The information shown for each channel is:
A18.0 - 376
Lightworks V.I.P 4500 Version 3 - User Guide
System Sound Monitor Panel
A18.2
Stripview Channel
The channel in the Stripview - A1, A2, and so on.
Mix Destination
All channels are routed to the main mix. The buttons labelled Mix1, Mix2, Mix3
enable the channel to be added to one of the other three sub-mix buses.
Click on the desired button to highlight it and add that channel of the edit to the submix bus. The button will be lit to indicate the channel is also part of the sub-mix.
More than one channel can be added to the same sub-mix, but the level of each individual channel in the sub-mix will be determined by its level in the main mix.
Pan Slider
A horizontal slider that positions the channel in the mix between left and right.
Mute Button
The Mute button (labelled M) mutes the output of that channel.
Solo Button
The Solo button (labelled S) mutes the output of all other channels for monitoring
purposes.
Level Slider
Sets the level for the channel.
Name Field
This defaults to the channel number of the Stripview but can be changed by clicking
on the name with the Mouse and typing in a new name.
Channel Status
Turns the audio output from that channel on or off.
Crossfade Button
Enables crossfades to be monitored for that audio channel. There is a limit of up to
eight channels that can play at any one time with crossfades enabled.
Lightworks V.I.P 4500 Version 3 - User Guide A18.0 - 377
A18.2
System Sound Monitor Panel
A18.2.3
Setup Card
This sets up features which apply to all shots and edits in any Project on the system.
Set Up Card
Audio Soft Cut Rate
This allows short automatic audio crossfades to be performed at every audio edit.
This can be used to smooth out digital ‘clicks’ at edit points. A value of 64 samples
is suggested. A value of 0 means no soft cuts are performed.
Bypass Internal Mixer
The audio system can be configured to route audio directly from an edit to the audio
outputs, bypassing the internal mixer. This can be useful when working with external
audio mixers, as the V.I.P system internal mixer is bypassed pre-fader.
On the Setup Card, check the Bypass Internal Mixer checkbox. The System Sound
Monitor Panel controls will be greyed out and a “Mixer Bypassed” message will be
displayed next to the current source name.
A18.0 - 378
Lightworks V.I.P 4500 Version 3 - User Guide
System Sound Monitor Panel
A18.2
The audio output from any active shot or edit will then be routed prefader direct to
the corresponding audio output socket. This means that audio channel 1 of the edit
will appear on Output 1 and so on. This allows all 16 outputs to be utilised by an
external audio mixer.
This is similar to using the Audio Output Routing Panel to route tracks directly to
output sockets. The main difference is that when you use the internal mixer and route
an edit audio channel directly to an output socket, the signal is taken post-fader from
the internal mixer. When the internal mixer is bypassed, the signals are routed
prefader and all the controls on the internal mixer are disabled. Also, when using the
internal mixer you only have access to the first eight audio outputs of the system.
A18.2.4
Note: Always press the Stop button on the Console when changing the bypass status
of the internal mixer.
Outputs Card
This card sets the level of eight of the physical outputs from the V.I.P audio system. It sets
the output level for the entire system, not just the current shot or edit.
Outputs Card
Lightworks V.I.P 4500 Version 3 - User Guide A18.0 - 379
A18.2
System Sound Monitor Panel
The outputs are labelled OUT 1 up to OUT 8 and these correspond to the first eight audio
output connectors of the system. Each output has an audio fader and a Mute button. The
audio channels or mixes which appear on these outputs is determined by the selection made
on the Audio Output Routing Panel.
To access the other eight audio output sockets (outputs 9 to 16), the internal mixer must be
bypassed. See ‘Bypass Internal Mixer’ on page 378.
A18.2.5
Mixes Card
This card sets the output level of the main mix and three sub-mixes for an edit. The name
of the current edit (the one the card applies to) is shown at the top.
Mixes Card
Every channel in an edit is automatically routed to the main mix. It can also be routed to
three other sub-mix buses by clicking on the appropriate Mix button on the Tracks Card.
The mix buses are called Main, Mix1, Mix2 and Mix3.
A18.0 - 380
Note: The level of an individual channel in every mix it is routed to is set by the fader
position for that channel. It is possible to have the same channel in more than one
mix, but it will have the same level in every one.
Lightworks V.I.P 4500 Version 3 - User Guide
Using the Audio Output Routing Panel
A18.3
Each mix has a fader which represents the overall level of both left and right components
and a Mute button to mute both outputs. Moving the slider with the Mouse will adjust both
left and right components equally.
The audio output which these Mixes appear on (if any) is determined by the selection made
on the Audio Output Routing Panel.
A18.3
Using the Audio Output Routing Panel
The Audio Output Routing Panel controls the assignment of audio channels and mix outputs from an edit
to the physical audio outputs of the system. The Audio Output Routing Panel allows a great deal of flexibility, and settings can be saved and recalled. Edit channels can be assigned to both fader channels and
direct to outputs. The Audio Output Routing Panel is used to assign mix outputs to the monitor output
and/or individual edit audio channels to physical audio outputs.
To display the Audio Output Routing Panel, click on the Routing button on the System Sound Monitor
Panel.
Edit Audio Channels
Buttons
Audio Output Routing Panel
Lightworks V.I.P 4500 Version 3 - User Guide A18.0 - 381
A18.3
Using the Audio Output Routing Panel
On the left-hand side are the Edit Audio Channel buttons. Eight can be displayed at a time - use the More
button to display channels 9 to 16.
On the right-hand side are buttons representing outputs of the monitor, main mix and three sub-mixes.
These are split into left (L) and right (R) components.
Across the bottom are Audio Output buttons representing the first eight audio outputs of the system. It
is necessary to have a monitor or mix output assigned to a physical audio output in order to be able to
hear the audio.
Note: You cannot assign audio from the internal mixer to audio outputs 9 to 16. See ‘Bypass
Internal Mixer’ on page 378.
A18.3.1
Determining Assignments To Audio Outputs
To assign either an edit channel, the main mix or one of the sub-mixes to a physical audio
output: click on the Edit Audio Channel button for the channel and then on the appropriate
Audio Output button.
The routing of the channel or mix to the audio output will be shown by a colour-coded line
(representing an audio patch cord). The line is coloured according to the audio output it represents.
Note: Edit audio channels can be routed directly to outputs as well as being part of
the main mix. This allows for a ‘hard-wired’ output of the channel in addition to it
being part of a mix.
Unity Mixing of Combinations of Sources
It is possible to route combinations of mixes, edit channels and monitor outputs to
the same physical audio output. This gives a unity mix of all the sources at the output
socket. The colour-coded lines connecting the sources and the audio output will be
joined to indicate this.
Removing Assignments
To remove a routing assignment that exists between two points, click on the button
that represents the source then the destination in turn (as if clicking on both ends of
the audio patch cord). The coloured line joining the source and the destination will
be removed.
A18.0 - 382
Lightworks V.I.P 4500 Version 3 - User Guide
Using the Audio Output Routing Panel
A18.3.2
A18.3
Loading and Saving Audio Output Routing Panel Settings
The Audio Output Routing Panel is quite complex, but for many edits the audio routings
will be the same, as they will depend on how the outputs of the system are connected. For
this reason it is possible to save and recall the current settings of the Audio Output Routing
Panel onto either the hard disk or a floppy disk.
There is a standard audio routing which contains the default audio routings and is loaded
whenever the program is run up.
If the settings on the Audio Output Routing Panel are changed, the new settings will be
loaded automatically loaded next time the V.I.P program is run - you don’t need to save
them explicitly.
Note: This routing is saved in the file C:\LWPROJ\STDOUT.MIX.
Loading an Existing Audio Routing
1 Display the Audio Output Routing Panel Menu.
2 Click on the command Load Routing. The Load Routing Visidir will be displayed,
listing the currently saved audio routings.
3 Use the Visidir to select the drive containing the desired audio routing.
4 Press the Enter key or click on the OK button.
The selected audio routing will be loaded.
Saving an Audio Routing
1 Display the Audio Output Routing Panel Menu.
2 Click on the command Save Routing. A Visidir will be displayed, listing the
currently saved audio routings.
3 Use the Visidir to select the location for the audio routing to be saved to.
4 Press the Enter key or click on the OK button.
The audio routing will be saved.
Note: Audio routings are saved in the folder C:\LWPROJ.
Lightworks V.I.P 4500 Version 3 - User Guide A18.0 - 383
A18.4
A18.4
Monitoring Audio Levels With the Level Meters Panel
Monitoring Audio Levels With the Level Meters Panel
The Level Meters Panel can be configured to assist with the monitoring of input audio levels. This is
particularly useful when using the edit-to-it or voice over features.
To display the Level Meters Panel, click on the Level Meters Panel command on the General Menu.
The Level Meters Panel has a Menu which has the following commands:
Inputs Display [user selection] ACTIVE SOURCE ONLY
Select Inputs to Display
These two commands determine which input meters are displayed. When set to USER SELECTION the Level Meters Panel will display whichever input meters the user has requested using
the Select Inputs to Display command.
When set to ACTIVE SOURCE ONLY the Level Meters Panel will automatically display the
input meters for whichever device is currently being monitored by the System Sound Monitor
Panel, for example; when doing an edit-to-it operation it will display the input meters for the editto-it device. In this mode Select Inputs to Display is not applicable.
A18.0 - 384
Lightworks V.I.P 4500 Version 3 - User Guide
Using External Audio Mixers With the V.I.P System
Outputs Display USER SELECTION [none]
Select Outputs to Display
A18.5
These two commands determine which output meters are displayed. When set to USER SELECTION the Level Meters Panel will display whichever output meters the user has requested via the
Select Outputs to Display command.
When NONE is selected, no output meters will be displayed. When set to NONE, the Select Outputs to Display command is not applicable.
A18.4.1
Level Meters Peak Hold Button
The Peak Hold button on the Level Meters Panel turns the peak hold feature on or off. The
duration of the peak hold is set using the Set Peak Hold Time command on the Level
Meters Menu.
A18.5
Using External Audio Mixers With the V.I.P System
The audio capabilities of the V.I.P system can be further enhanced by using external audio devices, as
follows:
As a direct replacement for the internal mixer.
By bypassing the internal software mixer and routing edit audio channels direct to outputs, an
external mixer can be used to perform all audio level and EQ functions manually. The audio output
of an external mixer can be replicated to form a new shot on the system. See ‘Replicating Audio’
on page 353.
For chase sync of edit timecode.
Supported audio mixers serially controlled by the V.I.P system.
Version 3 software supports the Yamaha 02R and 03D audio mixers for storage and recall of multiple mixer status ‘snap shot’ data and complete mix automation data.
A18.5.1
Defining Audio Mixer Device Types
An Audio Mixer device must be created in the Machine Room. The V.I.P system can only
have one such device defined.
External audio mixer device types can also be used as the source for audio when replicating.
The Device Definition Panel for an audio mixer device is used to specify which of the V.I.P
system audio inputs are connected to the audio outputs from the mixer.
Lightworks V.I.P 4500 Version 3 - User Guide A18.0 - 385
A18.5
Using External Audio Mixers With the V.I.P System
When the V.I.P application is run, the audio mixer device information will be retrieved from
the device database and the relevant V.I.P software features enabled. The type of mixer connected will be determined automatically by the V.I.P software.
A18.5.2
Chasing Timecode Output From an Edit
Timecode can be output directly from any edit, to allow external devices (for example audio
mixing desks) to 'chase' edit timecode.
The CONFIG.DAT file must be configured with the number of the LTC output (0, 1, 2 or
3). See ‘timecode_chase_output’ on page 604.
With the CONFIG.DAT file configured, the command Output Chase Timecode [yes] NO
will appear on the Edit Menu. The LTC output will match the edit timecode, as set on the
Viewer Labels Panel for the edit.
At play speed, the generated timecode is frame accurate. When the Viewer is displaying a
still frame, the timecode output is likely to be out by one frame.
The default start timecode for an edit is 00:00:00:00. Rewinding before the start of the edit
will generate a timecode of 23:59:59:00 (for example). This can cause problems for
external devices trying to lock up to the LTC. In such cases it is suggested that the start timecode for the edit is modified using the Viewer Labels Panel to a more appropriate value
(10:00:00:00 for example). See ‘Start Time For an Edit’ on page 250.
A18.5.3
Note: Certain audio mixing desks may require the SMPTE timecode output to be converted to MIDI timecode.
Audio Mixer Automation With Yamaha Audio Consoles
The Yamaha 02R and 03D digital mixing consoles are very popular in the post-production
environment due to their low cost and high functional specification. One of their key features is a comprehensive automation system which has the ability to chase lock to a timecode stream.
The V.I.P system can take advantage of these audio consoles to record audio automation
synchronised to an edit.
A18.0 - 386
Note: The synchronisation relationship between the audio in the edit and the audio
mix data is fixed. If the edit is altered the synchronisation between the edit and the
mix data will be lost from the point where the change took place. In order to remedy
this, you have to manually apply a corresponding edit operation on the mix data using
the edit functions on the Yamaha 02R or 03D interface.
Lightworks V.I.P 4500 Version 3 - User Guide
Using External Audio Mixers With the V.I.P System
A18.5.4
A18.5
Configuring Control Of Yamaha 03D and 02R Audio Consoles
Two physical connections are required for the control of Yamaha 02R or 03D audio consoles; an RS-422 control port and a V.I.P system LTC output.
Installing the Yamaha 02R
1 Connect an XLR - phono cable between the V.I.P system LTC output you wish to use
and the SMPTE port on the back of the Yamaha 02R audio console.
2 Connect the Yamaha 02R control cable to the port you want to use on the V.I.P RS422 Connector Box.
Make sure that the dip switch on the V.I.P RS-422 Connector Box is set to “Device”
not “Controller”. Connect the other end of the control cable to the port labelled “To
Host” on the back of the Yamaha 02R audio console.
3 Add the parameter yamaha_enable 1 to the CONFIG.DAT file on the V.I.P system.
See ‘yamaha_enable’ on page 606.
4 Set up a new audio mixer device on the V.I.P system, to use the LTC and control ports
you have just connected. See ‘Defining Audio Mixer Device Types’ on page 385.
Installing the Yamaha 03D
A timecode - MIDI converter is required. The recommended units are the Phillip
Rees TS1 MIDI Tape Sync Unit or the XRI systems XR300 MTC unit.
1 Connect a cable between one of the V.I.P system LTC outputs and the timecode MIDI converter unit.
2 From the timecode - MIDI converter unit, connect a cable to the MIDI port on the
back of the Yamaha 03D audio console.
3 Connect the Yamaha 03D control cable to the port you want to use on the V.I.P RS422 Connector Box.
Make sure that the dip switch on the V.I.P RS-422 Connector Box is set to “Device”
not “Controller”. Connect the other end of the control cable to the port labelled “To
Host” on the back of the Yamaha 03D audio console.
Lightworks V.I.P 4500 Version 3 - User Guide A18.0 - 387
A18.5
Using External Audio Mixers With the V.I.P System
4 Configure the Yamaha 03D Communications Speed.
This is done from the Yamaha 03D itself from the MIDI/HOST set up page on the
Yamaha 03D utility menu. Ensure the following settings are set:
Menu Item
Setting
HOST INTERFACE
STANDARD I/F
Rx PORT
Host
Tx PORT
Host
MTC Rx
MIDI
REAL TIME MESSAGE
HOST
Tx CLOCK
OFF
BAUD RATE
38.4
5 Add the parameter yamaha_enable 1 to the CONFIG.DAT file on the V.I.P system.
See ‘yamaha_enable’ on page 606.
6 Set up a new audio mixer device on the V.I.P system to use the LTC and control ports
you have just connected. See ‘Defining Audio Mixer Device Types’ on page 385.
Once the configuration has been set up, if there is no communication between the
Yamaha 03D and the V.I.P system, you may need to reset the audio console to its factory defaults.
To Reset the Yamaha 03D Audio Console
1 Turn the power on while pressing 'STORE' on the Yamaha 03D control panel. A
couple of options will appear on the screen. Ignore these.
2 Press 'RECALL'. This will perform a total system reset on the Yamaha 03D system.
A18.5.5
Scene and Automation Data
On the Yamaha 02R and 03D audio consoles there are two types of data that can be stored
and recalled.
A18.0 - 388
Lightworks V.I.P 4500 Version 3 - User Guide
Using External Audio Mixers With the V.I.P System
A18.5
Scene Data
Contains a complete snap shot of all settings at a particular time. Scene data is useful
on its own and allows you to store/recall the configuration of the mixer at the touch
of a button. You may, for example, have a scene which configures the audio console
for digitising and another which configures it for playout.
Automation Data
Contains information on how particular controls change with time. Automation data
is slightly different in that it requires an initial scene in order be useful. This initial
scene defines the positions of all the controls before the dynamic data starts - it is the
state of the mixer when you start playing the automation data from time 00:00:00.00.
This is actually achieved by the mixer automatically placing a recall scene memory
event at the start of the automation data.
A18.5.6
External Mixer Control Panel
The External Mixer Control Panel displays the current status of the external audio mixer
and provides the various controls required. It is accessed via a button on the System Sound
Monitor Panel.
The External Mixer Control Panel has the following sections:
Current State Of Audio Mixer
The current contents of the Yamaha 02R or 03D audio console are displayed at the
top of the panel. This can either be “SCENE <name>” if a scene has been loaded or
“EDIT <Edit name>” if an edit automation file has been loaded.
If the contents of the audio console do not match the currently highlighted edit, this
text will be highlighted in red. Automation playback on the audio console is also
automatically disabled.
Edit Automation
Enable Mixer Automation Play/Record
This allows you to enable or disable the Yamaha 02R or 03D audio console
from chase locking to the active edit. When you make another edit active,
mixer automation is automatically disabled if the automation data currently
loaded on the Yamaha 02R or 03D is not that for the new edit. Changing back
to the edit whose automation is loaded will re-enable the automation.
Lightworks V.I.P 4500 Version 3 - User Guide A18.0 - 389
A18.5
Using External Audio Mixers With the V.I.P System
Automatic Load and Save
When enabled this causes the automation to be saved and loaded automatically
when an edit is made active. Note that, as the file is transferred from the V.I.P
system to the Yamaha 02R or 03D audio console memory, this process can
take a few seconds.
New
This generates a new, blank, automation file for the current edit and overwrites
any existing automation data (there is a warning prompt before this is done).
The current state of the Yamaha 02R or 03D audio console is automatically
stored as the initial scene.
By default, the automation offset is 00:00:00:00. A CONFIG.DAT parameter
can be used to specify the default offset (in seconds) for all new automation
files. See ‘yamaha_automation_offset’ on page 606.
Load
This causes the automation data for the current edit to be downloaded to the
mixer. Once downloaded the mixer will recall the initial scene.
Save Initial Scene
This causes the current state of the mixer to be saved as the initial scene for
automation data to be based on.
Scene Memory
Save
This allows the current state of the mixer to be saved to a given file. These files
are stored in the C:\LWPROJ folder and so are accessible in all Projects on the
V.I.P system.
Load
This allows a previously saved scene to be recalled.
A18.0 - 390
Lightworks V.I.P 4500 Version 3 - User Guide
A19.0 Rendered Effects 1 - Mirror, Flip, Crop, Resize, Page Turn
A19.1
Introduction
It is possible to create the following rendered effects internally on the V.I.P system, using the Effects
Viewer:
Mirror
Flip
Crop
Resize
Page Turn
Black and White
Titling
Rendered effects are not created in real time. The rendering time depends upon how complex the chosen
effect is. Only once the effect has been rendered can it be played in real time. Making a rendered effect
creates an entirely new shot, with its own log and material.
This chapter describes how to use the Effects Viewer to create mirror, flip, crop, resize, page turn and
black and white effects.
For information on creating titles, see ‘Rendered Effects 2 - Titles’ on page 403.
For information on adding effects created on an external device, see ‘Using the V.I.P System With
External Effects Devices’ on page 342.
A19.2
Procedure For Creating Rendered Effects
The following steps are required to create a rendered effect on the V.I.P system.
Display the Effects Viewer
To display the Effects Viewer, click on the Effects Tool
from the Toolbox.
Lightworks V.I.P 4500 Version 3 - User Guide A19.0 - 391
A19.2
Procedure For Creating Rendered Effects
Filecard Button
Layer Button
Picture Quality
Button
Disk Selection
Button
Label Toggle
Button
Effects Viewer
Drop the Shot into the Effects Viewer
Before a shot can be used as a source for a rendered effect, it must be dropped into the Effects
Viewer. To do this, displayed the shot as a Tile then drag the Tile over the centre of the Effects
Viewer and right+left-click. The shot appears in the Effects Viewer.
A19.0 - 392
Lightworks V.I.P 4500 Version 3 - User Guide
Properties Of New Shot Created By Rendering an Effect
A19.3
Select the Picture Quality
The Picture Quality button is used to determine the quality of the rendered effect. Picture quality
values between 3 mins and 10 mins are available. The rendered effect will be of the same TV
Standard as the Project.
Note that the picture quality of the rendered effect shot will degrade a little as the rendering operation will leave out a bit of detail each time an image is processed.
Select the Destination Disk
Click on the Destination Disk button until it shows the name of the disk on which to store the material for the rendered effect.
Mark and Park
It is necessary to mark and park the section of the shot that requires the effect.
In the case of effects with more than one layer it is necessary to mark and park on each layer of
video being used. If a section is not marked when an effect is activated, a dialogue box will appear
asking if the whole shot is to be used - click on Yes or No, as required.
Set Up the Effect
See ‘Setting Up the Effects’ on page 395.
Previewing and Aborting Effects
It is possible to abort the rendering process at any time while the Render Effect button is red and
the “Rendering in progress” message is displayed, by pressing the ESC key or Spacebar.
Aborting the rendering operation will automatically delete the any rendered material that has been
created so far, and so provides, in effect, a method of ‘previewing’ the effect.
A19.3
Properties Of New Shot Created By Rendering an Effect
Rendering an effect creates an entirely new shot. This shot has its own log and material and is independent from the original shot it was created from. The original shot will not be changed by the effect
process.
Shot Name
The name given to a new shot created by rendering an effect will be the name of the source shot
for the effect followed by the type of effect. For example “Scene4-45” would become “Scene445(flip)”, if it has been flipped.
Lightworks V.I.P 4500 Version 3 - User Guide A19.0 - 393
A19.4
Magnifier Tool
Timecode
The timecode for the new shot will be determined by the Effects Menu command Keep Original
Timecodes. When set to YES the new shot will take its timecode from the original shot. When set
to NO the shot created will have a timecode starting from zero.
Note: In the case of effects composed of multiple layers, if Keep Original Timecode is YES then
the timecode from the first layer (V1) is used.
The default for the Keep Original Timecode command is determined by a CONFIG.DAT parameter. See ‘keep_original_timecodes’ on page 597.
Reel ID for Effects Shot
Any shot created by rendering an effect will be given a reel ID of the form fx1428. See ‘Rendered
Effects In EDLs’ on page 402.
A19.4
Magnifier Tool
To display the Magnifier Tool, click on the command Magnifier Tool on the General Menu.
Magnification Level
Buttons
The Magnifier Tool magnifies the area immediately under the Mouse cursor by a selected amount. There
are three buttons which select the magnification level. The settings are times 2, times 4 and times 8.
The Magnifier Tool can be used for selecting small areas of the picture for an effect.
The Magnifier Tool can be enlarged by clicking on the edge of the window and dragging with the Mouse.
As the Magnifier Tool has no Vanish button, the Shark must be used to remove it from the screen.
A19.0 - 394
Lightworks V.I.P 4500 Version 3 - User Guide
Setting Up the Effects
A19.5
A19.5
Setting Up the Effects
A19.5.1
Mirror Effect
The mirror effect will reverse the shot from right to left.
1 Drop the shot to be mirrored into the Effects Viewer.
2 Select the picture quality for the effect.
3 Select the destination disk for the effect.
4 Mark and park the section of the shot to be mirrored.
5 Click on the Mirror button.
6 Click on the Render Effect button. When the render is complete, the new shot will be
displayed in a Tile.
A19.5.2
Flip Effect
The flip effect will turn the picture upside down.
1 Drop the shot to be flipped into the Effects Viewer.
Lightworks V.I.P 4500 Version 3 - User Guide A19.0 - 395
A19.5
Setting Up the Effects
2 Select the picture quality for the effect.
3 Select the destination disk for the effect.
4 Mark and park the section of the shot to be flipped.
5 Click on the Flip button.
6 Click on the Render Effect button. When the render is complete, the new shot will be
displayed in a Tile.
A19.5.3
Crop Effect
The picture can be cropped to any size and placed over a coloured background or over itself.
1 Drop the shot to be cropped into the Effects Viewer.
2 Select the picture quality for the effect.
3 Select the destination disk for the effect.
4 Mark and park the section of the shot to be cropped.
5 Click on the Crop button. A yellow Crop Box will be displayed in the centre of the
shot; this represents the portion of the picture which will be seen after it has been
cropped.
Reposition
Square
Resize
Square
6 Reposition and/or resize the Crop Box by dragging the appropriate squares.
If required, the Effects Menu command Keep Full Video Aspect Ratio can be set to
YES, to ensure that the Crop Box retains the full PAL or NTSC aspect ratio.
7 Display the Effects Menu.
A19.0 - 396
Lightworks V.I.P 4500 Version 3 - User Guide
Setting Up the Effects
A19.5
8 Pin the Effects Menu on screen, by clicking on its Pin button.
9 Use the Effects Menu command Picture in Picture to specify whether the cropped
picture will be placed over itself (Picture in Picture: YES) or over a coloured
background (Picture in Picture: NO).
10 If the cropped picture is to be placed over a background colour, then click on the
command Background Colour.
The Colour Selector Panel will be displayed, with a chart of colours that can be used
as backgrounds to the cropped picture. See ‘Using Colour Selector Panels’ on page
431.
11 Click on the colour required. The colour chosen will appear in a panel just above the
Select button. If a colour is not selected then the background will default to black.
12 To select the luminance of the colour, click on the luminance chart.
Note: If it is necessary to have accurately repeatable colour settings, then it is best to
enter a numerical value. Click on the appropriate field on the Colour Selector Panel
and type in the required number. Values that can be altered are: Hue (measured in
degrees), Saturation (a percentage) and Luminance (percentage).
13 After making adjustments, click on the Select button on the Colour Selector Panel.
14 Click on the Choose Destination command on the Effects Menu. A blue Destination
Box will appear.
15 Reposition the blue Destination Box, by dragging the centre square, to determine
where the finished cropped picture is to appear.
It is not possible to resize the Destination Box; it will always be the same size as the
yellow Crop Box.
16 Click on the Render Effect button. When the render is complete, the new shot will be
displayed in a Tile.
Lightworks V.I.P 4500 Version 3 - User Guide A19.0 - 397
A19.5
Setting Up the Effects
A19.5.4
Resize Effect
Use the resize effect to select an area of the shot and redisplay it at any size up to full frame.
If the picture is not resized to fill the whole screen, then it is possible either to specify a
background colour or to place the resized shot over itself.
1 Drop the shot into the Effects Viewer.
2 Select the picture quality for the effect.
3 Select the destination disk for the effect.
4 Mark and park the section of the shot to be resized.
5 Click on the Resize button. A yellow Resize Box will be displayed.
The Resize Box can be resized and repositioned in the same way as a Crop Box.
6 Position the Resize Box over the part of the shot to be resized.
7 Display the Effects Menu.
8 Pin the Effects Menu on screen, by clicking on its Pin button.
9 Use the Effects Menu command Picture in Picture to specify whether the resized
picture will be placed over itself (Picture in Picture: YES) or over a coloured
background (Picture in Picture: NO).
10 If the resized picture is to be placed over a background colour, then click on the
command Background Colour.
The Colour Selector Panel will be displayed, with a chart of colours that can be used
as backgrounds to the resized picture. See ‘Using Colour Selector Panels’ on page
431.
11 Click on the colour required. The colour chosen will appear in a panel just above the
Select button. If a colour is not selected then the background will default to black.
12 To select the luminance of the colour, click on the luminance chart. This operates in
the same way as for the crop effect.
13 After making adjustments, click on the Select button on the Colour Selector Panel.
A19.0 - 398
Lightworks V.I.P 4500 Version 3 - User Guide
Setting Up the Effects
A19.5
14 Click on the Choose Destination command on the Effects Menu. A blue Destination
Box will appear.
Note: The Destination Box need only be used if you want to place the resize in a specific part of the screen. If you do not choose a destination the resize will default to
fill the whole screen.
15 If required, drag the centre black square of the blue Destination Box determine where
the finished Resized shot is to appear.
It is possible to alter the size of the blue Destination Box in the same way as the original Resize Box.
16 Click on the Render Effect button.
When the render is complete, the new shot will be displayed in a Tile.
A19.5.5
Page Turn Effect
This effect will create the look of a page being turned from bottom right to top left of the
screen.
1 Drop the two shots to be joined by the page turn into the Effects Viewer, one after
another.
It is important to place the shots in the Viewer so that V1 is the outgoing shot and V2
the incoming.
2 Select the picture quality for the effect.
3 Select the destination disk for the effect.
4 Mark and park on both shots.
The mark on V1 will determine the length of the page turn. The mark on V2 will
define the start of the page turn.
5 Click on the Page button.
6 Click on the Render Effect button. When the render is complete, the new shot will be
displayed in a Tile.
Lightworks V.I.P 4500 Version 3 - User Guide A19.0 - 399
A19.6
Using TARGA Files
A19.5.6
Black and White Effect
The black and white effect turns coloured shots into black and white (monochrome).
1 Drop the shot to be monochromed into the Effects Viewer.
2 Select the picture quality for the effect.
3 Select the destination disk for the effect.
4 Mark and park the section of the shot to be monochromed.
5 Click on the B+W button.
6 Click on the Render Effect button. When the render is complete, the new shot will be
displayed in a Tile.
A19.6
Using TARGA Files
TARGA is a widely used file format for graphics files. TARGA files have the file extension .TGA.
TARGA files to be imported can be 24-bit or 32-bit RGB colour, uncompressed. When importing 24-bit
TARGA files, for best results the colour depth should be reduced to 15-bit.
The pixel resolutions for full screen TARGA files are as follows:
PAL 720x576
NTSC 720x480
Note: To import an image that is not ‘aspect ratio corrected’ into an NTSC Project, the TARGA
image should first be created at the PAL pixel resolution and then vertically squeezed to the NTSC
pixel resolution. The image should be created as a 720 x 576 image and then squeezed to a 720 x
480 image. This will ensure that any non aspect-corrected images appear correctly on the NTSC
video output.
A19.6.1
Importing a TARGA Image
To import a TARGA file containing a single frame image:
1 Click on the Import TARGA Image command on the Effects Menu. A Visidir will
be displayed.
2 Use the Visidir to locate the TARGA file to import.
3 Click on the name of the TARGA file to import, to highlight it.
A19.0 - 400
Lightworks V.I.P 4500 Version 3 - User Guide
Using TARGA Files
A19.6
4 Click on the OK button on the Visidir.
A new shot will appear in the Effects Viewer displaying the TARGA image. The shot
will have a duration of five frames (the same frame repeated five times).
5 Click on the Pop button on the Effects Viewer to display the imported TARGA image
in a Tile.
A19.6.2
Importing a TARGA Sequence
A TARGA sequence consists of a series of files. The V.I.P software will describe the
sequence by the filename and the number of frames it contains.
To import a TARGA file containing more than one frame:
1 Click on the Import TARGA Sequence command on the Effects Menu. A Visidir
will be displayed.
2 Use the Visidir to locate the TARGA file to import.
3 Click on the name of the TARGA file to import. A TARGA sequence file will be
displayed as a four-character filename with an indication of the number of frames
contained in the sequence, for example “HAWK [12 frames]”.
4 Click on the OK button on the Visidir.
A new shot containing the TARGA sequence will appear in the Effects Viewer.
5 Click on the Pop button on the Effects Viewer to display the imported TARGA
sequence in a Tile.
A19.6.3
Exporting a TARGA Image
To export all or part of a shot to a TARGA file:
1 Drop the shot to be exported into the Effects Viewer.
2 Mark and park the section of the shot that you want to export to a TARGA file.
3 Left click on the Export TARGA Image command on the Effects Menu. A Visidir
will be displayed.
4 Enter a filename, of up to four characters in length, in the Text Entry Field of the
Visidir.
5 Choose the appropriate drive and folder for the file to be saved to.
Lightworks V.I.P 4500 Version 3 - User Guide A19.0 - 401
A19.7
Rendered Effects In EDLs
6 Click on the OK button on the Visidir.
The image or sequence will be saved to a TARGA file or files. There is an indication
that processing is taking place during TARGA export by the display of a progress
message of the form “Exporting frame 2 of 50”.
Note: If a sequence is being exported, then a separate file will be created for each of
the frames in the sequence. For example, for a five frame sequence:
Hawk0000.TGA
Hawk0001.TGA
Hawk0002.TGA
Hawk0003.TGA
Hawk0004.TGA
However, this group of TARGA files will be represented in the V.I.P system as a
single file, named “HAWK [5 frames]”.
A19.7
Rendered Effects In EDLs
If an edit uses rendered effects, the EDL will, by default, contain descriptions for them. There is an
option on the Comment Options Panel (accessed via the Advanced Options button on the EDL Panel) to
Use Effects Descriptions. Toggling this will allow effects descriptions to be included/excluded.
When an EDL is generated for an edit containing rendered effects, the effects will be represented by text
descriptions only.
If a given rendered effect is made up from a number of other rendered effects, then descriptions will be
given for these as well.
A19.0 - 402
Note: Rendered effects in the EDL cannot be autoconformed. Reels have to be produced containing the effects described.
Lightworks V.I.P 4500 Version 3 - User Guide
A20.0 Rendered Effects 2 - Titles
A20.1
Introduction
The Title Tool enables text and graphic images to be keyed over an original shot, either individually or
when part of an edit.
This provides a high quality titling package for basic captions, captions with straps, layered box outlines,
logos and station idents, roller and crawler generation.
In this chapter, the term ‘title’ is used to refer to any object added to the shot using the Title Tool. This
can include text, symbols, imported bitmaps and objects. When setting attributes such as colours, textures, shadows and fills, the word ‘title’ will apply to both text and objects.
The main features are:
Anti-aliased PostScript fonts with borders, outlines, drop shadows, extruded shadows, textures and adjustable transparency.
High resolution with full alpha channel support.
Four independent layers that can be edited and viewed individually.
Static captions, rolls and crawls.
Tracking, leading and kerning of characters.
Static captions, rolls and crawls.
Import of text files.
Import of TARGA files and bitmaps.
Texture and solid fills.
When a title is added to a shot, new material is rendered that consists of text and graphic images keyed
over the original shot. If a title is added directly to an edit, a new version of the section of the edit will
be created using shots that contain the title images.
Individual shots can have titles added and the titled versions of the shots can then be used as sources for
edits.
Lightworks V.I.P 4500 Version 3 - User Guide A20.0 - 403
A20.1
Introduction
A20.1.1
Title Types
There are three types of title that can be created. The type of title is set for each title layer
using the Title Type button on the Title Tool:
Static
A static caption consists of text and objects that remain in the same place on the
screen.
Static captions can be made up of multiple pages. Each page of a static caption can
be faded in, held for a selected duration and faded out.
Roll
A roll consists of caption text and objects which move from the bottom of the screen
to the top.
The time taken for the entire text to move through the screen from the bottom to the
top can be set as the roll duration.
Crawl
Crawls consists of caption text and objects that move across the screen from the
right-hand side of the screen to the left.
A20.0 - 404
Lightworks V.I.P 4500 Version 3 - User Guide
Procedure For Creating Rendered Titles
A20.2
A20.2
Procedure For Creating Rendered Titles
A20.2.1
Displaying the Title Tool
The Title Tool is displayed by clicking on the Titling button on the Effects Viewer.
Layer
View
Button
Mode
Buttons
Title Window
Layer
Edit
Button
Title
Type
Button
Alignment
Buttons
Cut and
Paste
Buttons
Duration
Display
Defaults Window
Lightworks V.I.P 4500 Version 3 - User Guide A20.0 - 405
A20.2
Procedure For Creating Rendered Titles
A20.2.2
Summary Of Titling Procedure
Each of these steps is covered in detail later in this chapter.
1 Drop the shot or edit into the Effects Viewer.
2 Select the destination for the new shot, using the Destination Disk button.
3 Select the picture quality, using the Picture Quality button on the Effects Viewer.
4 Choose the appropriate setting for the Effects Menu command Keep Original
Timecodes. See ‘Labels for Effects Shots’ on page 366.
5 Display the Title Tool by clicking on the Titling button on the Effects Viewer.
6 Click on the Font button on the Title Tool and select one of the installed fonts. See
‘Selecting Fonts Using the Font Selector Panel’ on page 423. Set this as a default. The
selected font will appear in the default object window, underneath the Title Window,
and will be used for any text typed in or imported.
7 Click on the Effects button and select the desired text attributes (borders, shadows,
colours and texture fills) and set these for the default font style.
8 Set the type of title for the current layer, by using the Title Type button. See ‘Title
Types’ on page 404.
9 Select text entry mode, by clicking on the Tools Text button.
10 Position the Mouse cursor at the point on the Title Window where you want the text
to appear and click. A purple cursor will appear.
11 Type in the text using the Keyboard or import the text using the Titling Menu
command Import Text into Layer.
12 Click on the Pointer button, then click on the text to select it. Align and position the
text, if required by dragging with the Mouse.
13 Set the desired duration of the title, using the timing panel for the layer, accessed via
the Titling Menu command Set Layer Timing.
14 A preview of the image can be seen by pressing the Preview button on the Title Tool.
The Title Window will show the final form of all text and objects, with textures,
shadows, and so on, correctly represented.
15 Click on the Render Effect button on the Effects Viewer. The shot in the Effects
Viewer will have the title added to it. When the rendering is complete a new shot will
be displayed on the graphics screen next to the Effects Viewer.
A20.0 - 406
Lightworks V.I.P 4500 Version 3 - User Guide
Properties Of New Shot Created By Rendering a Title
A20.3
A20.3
Properties Of New Shot Created By Rendering a Title
Rendering a title creates an entirely new shot. This shot has its own log and material and is independent
from the original shot it was created from. The original shot will not be changed by the effect process.
The new shot created will use the name of the original shot followed by “(title)”.
The reel ID and labels for the new shot are determined by the setting of the Effects Menu command Keep
Original Timecode. See ‘Labels for Effects Shots’ on page 366.
Adding Titles To Edits
Adding titles to an edit will create a new shot (with titles added) for each shot included within the
selected section of the edit. These rendered shots will be used to create a new edit that will be displayed on the graphics screen next to the Effects Viewer.
This new edit will match the section of the original but use the new shot(s) and will have “(title)”
added to the original edit name. See ‘Using the Effects Viewer with Edits’ on page 367.
Representation Of Titles In EDLs
Shots with titles added are given effects reel descriptions. The effects reel description can be made
to appear as a comment at the start of any EDL made from an edit containing the shots. This
description simply states that titling was added and includes the original reel ID and timecode. See
‘Effects in the EDL’ on page 385.
A20.4
Title Layers
The Title Tool has four independent layers. Layers can be thought of as separate transparent sheets laid
on top of one another, each with text or images on them. Each layer can be any one of the title types
(static, roll or crawl) and have independent timing and text characteristics.
Simple titles will normally consist of a single layer. Multiple layers can be used to create complex results,
for example a static logo (bitmap) can be combined with rolling text, or text can crawl across a static
strap.
All the elements contained in every layer are combined when the title is rendered.
A20.4.1
Adding and Removing Layers
Layers can be added and deleted. Each layer added is laid on top of the previous layer, so
any object or text on layer 1 will be underneath anything on layer 2. The maximum number
of layers available is four.
Lightworks V.I.P 4500 Version 3 - User Guide A20.0 - 407
A20.4
Title Layers
Each layer can contain only one of the three types of title. The title type for the layer is
selected using the Title Type button. Objects in the layer conform to the current title type.
Changing the layer type will change the behaviour of any objects already in the layer - from
static text to roll for example.
The first time the Title Tool is displayed it has a single layer. Other layers can be added and
removed using the following Titling Menu commands:
Add New Layer
Adds a new layer.
Insert New Layer
Inserts a new layer before the current layer.
Delete Current Layer
Removes the layer which is currently selected for editing. Everything in that layer
will be lost unless the layer has previously been saved.
For example, to roll text over a stationary backdrop: load the bitmap for the backdrop into
layer 1 and make this a Static Layer. Then type the text into layer 2 and set this as a Roll
Layer.
A20.4.2
Editing and Viewing Layers
Any (or all) of the layers can be viewed simultaneously in the Title Window, but only one
layer can be edited at one time.
To select which layer is edited, click on the Edit button for that layer. The Edit button will
then turn blue.
To select which layers are viewed in the Title Window, click on the View button for that
layer. The View button will be green for all layers that are displayed.
A20.0 - 408
Lightworks V.I.P 4500 Version 3 - User Guide
Title Window Scroll Bars
A20.5
A20.5
Title Window Scroll Bars
At the edge of the Title Window is a scroll bar. The complete length of the scroll bar represents the full
duration of the layer. Within the scroll bar is a grey segment which corresponds to the text currently displayed in the Title Window, as follows:
The size of the grey segment:
Represents the proportion of the overall duration that the text in the Title Window represents.
The position of the grey segment:
Represents how far in time from the start of the title the text in the Title Window will appear.
You can drag the grey segment to move the position of the Title Window in time. The Duration Display
will update to show the time that the text currently in the Title Window will appear after the start of the
title.
The scroll bar has Page Up and Page Down buttons. The position of the scroll bar and how to interpret
the information it displays will depend on the layer type:
Static Layers
The scroll bar is displayed vertically on the right-hand side of the Title Window. The top represents the start of the title. For Static Layers consisting of several pages, the grey segment indicates
the proportion of the overall length that the text on the current page will be displayed.
Roll Layers
The scroll bar is displayed vertically on the right-hand side of the Title Window. The length of the
bar is proportional to the duration of the roll, starting at the top. The size of the grey segment indicates the text currently displayed in the Title Window as a proportion of the overall duration. The
vertical position of the grey segment within the scroll bar indicates how far into the roll it will be
before the text is on screen.
Crawl Layers
The scroll bar is displayed horizontally across the bottom of the Title Window. The length of the
bar is proportional to the duration of the crawl, starting at the left-hand side. The grey segment
indicates the text currently displayed in the Title Window as a proportion of the overall crawl duration.
Note: For Roll Layers and Crawl Layers, the duration and position of text are inter-related. This
is because the duration is set by a number of lines per frame, so adding extra lines to a roller caption will increase the duration of the roll.
Lightworks V.I.P 4500 Version 3 - User Guide A20.0 - 409
A20.5
Title Window Scroll Bars
A20.5.1
Duration Display
The information provided by the Duration Display for each type of layer is as follows:
Static Layers
The Duration Display will show the time the page currently displayed in the Title
Window will start. Each page of a Static Layer is treated independently and rendered
as separate titles one after another. The timings for each page set are set on the Static
Layer Timing Panel. Using the Page Up/Page Down keys or buttons on the Title
Window Scroll Bar will move between pages.
Roll Layers
The time after the start of the roll that text currently displayed in the Title Window
will appear on screen is shown, based on the timings set on the Roll Layer Timing
Panel.
Crawl Layers
The time after the start of the crawl that the text currently displayed in the Title
Window will appear on screen is shown, based on the timings set on the Crawl Layer
Timing Panel.
Next to the Duration Display is a button which toggles the display between seconds and
frames, film feet or frames. The figure displayed in the Duration Display is based on the
current durations set in the Timing Panel for the layer. You can type a time into the duration
display and press the Enter key. The contents of the Title Window will be updated to show
the titles that will be visible at that time.
When more than one layer is displayed, the contents of the Title Window takes into account
any delay, fade in/out and hold in/out times for each layer, so the Title Window contents
indicate which text and objects will actually be visible at the time indicated once the title is
rendered.
A20.0 - 410
Lightworks V.I.P 4500 Version 3 - User Guide
Saving and Loading Titles
A20.6
A20.6
Saving and Loading Titles
The system does not automatically back up any text or settings entered into the Title Tool. It is suggested
you use the following methods or combination of methods to make regular safety backups of the current
layer or session you are working on.
A20.6.1
Saving an Individual Layer
The objects in the current layer can be saved to a file, preserving all attributes and positioning information. This layer file information can be saved to the system drive or floppy
disk and recalled later.
To save the layer currently being edited (the layer for which the Edit button is blue):
1 On the Titling Menu, click on the Save Layer command. A Visidir is displayed,
listing the folders on the system drive.
2 Highlight the folder to save the information to.
3 Click on the OK button.
4 Type a filename for the layer into the name field at the top of the Visidir. This must
be a legal filename. Layer files will be given the file extension .LYR.
5 Click on the OK button. The layer will be saved.
A20.6.2
Loading an Individual Layer
This will load a previously saved layer into the current layer, erasing all objects that previously existed in that layer and replacing them with the objects in the saved file.
To load a previously saved layer into the layer currently being edited (the layer for which
the Edit button is blue):
1 On the Titling Menu, click on the Load Layer command. A Visidir is displayed,
listing the folders on the system drive.
2 Highlight the folder the layer is saved in.
3 Click on the OK button.
4 Select the name of the layer from the list shown in the Visidir.
5 Click on the OK button. All objects in the current layer will be erased and replaced
with the objects in the saved file.
Lightworks V.I.P 4500 Version 3 - User Guide A20.0 - 411
A20.6
Saving and Loading Titles
A20.6.3
Saving a Title Session
A session is made up of the combination of text and objects for all the layers currently in
the Title Window. This information can be saved to floppy disk or hard disk and recalled
later.
To save a title session:
1 On the Titling Menu, click on the Save Session command. A Visidir is displayed,
listing the folders on the system drive.
2 Highlight the folder to save the information to.
3 Click on the OK button.
4 Type the name the session should be saved as into the name field at the top of the
Visidir. This must be a legal filename. Session files are given the file extension .SES.
5 Click on the OK button. The session will be saved.
A20.6.4
Loading a Previously Saved Session
These will load a previously saved session into the Title Window, erasing all layers that previously existed.
To load a title session:
1 On the Titling Menu, click on the Load Session command. A Visidir is displayed,
listing the folders on the system drive.
2 Highlight the folder the session information is saved in.
3 Click on the OK button.
4 Select the name of the session to be loaded, by highlighting it or typing its name into
the name field at the top of the Visidir.
5 Click on the OK button. The selected session will be loaded. The current contents of
the Title Tool will be erased and replaced with the selected session.
A20.0 - 412
Lightworks V.I.P 4500 Version 3 - User Guide
Positioning and Aligning Objects
A20.7
A20.7
Positioning and Aligning Objects
The positioning of objects in the Title Window will determine the position of the title when it is rendered
onto the original shot. The Title Window represents the entire picture area. The black background of the
Title Window is marked with two boxes bordered by grey lines. The outer line defines the TV cut off
area (safe action area) and the inner line marks the safe title area.
Title Window rulers and guidelines are used to align objects and determine the position of imported
objects or text.
A20.7.1
Ruler
The ruler is a series of equally spaced gradations across the top or left-hand edges of the
Title Window. The spacing of these gradations is determined by the Titling Menu commands Fine Ruler, Medium Ruler, Coarse Ruler or No Ruler.
Ruler
A20.7.2
Guidelines
Guidelines are vertical or horizontal red lines in the Title Window. The type of caption
determines the orientation of the guideline for the current layer:
Rolls have vertical guidelines.
Crawls have horizontal guidelines.
Static captions have both vertical and horizontal guidelines.
To position a guideline, point the Mouse cursor at the red triangle on the ruler and drag the
guideline into the desired position.
If a ruler is selected then guidelines can only be positioned on ruler gradations. If no ruler
is selected, then guidelines can be positioned anywhere.
To generate a new guideline, point the Mouse cursor at the red triangle symbol on the ruler
and right click. A new guideline can then be dragged into position.
Lightworks V.I.P 4500 Version 3 - User Guide A20.0 - 413
A20.7
Positioning and Aligning Objects
Guidelines
A20.7.3
Aligning Objects
Guidelines are used in conjunction with alignment points to align objects.
To set the alignment point for an object or set of objects, first select the object(s). When an
object is selected, it is surrounded by a dotted yellow selection box. There will be a small
yellow cross on this selection box either in the centre of the object (if it is both horizontally
and vertically centred) or on one edge or corner. This is the alignment point of the object.
The alignment point of currently selected objects can be changed using the Alignment buttons on the Title Tool. Click on the desired Alignment button to change the alignment point.
This will not move the object itself.
To align an object, left+right-click on any selected object to ‘snap’ it to the guideline nearest
to its alignment point in one or both axes (depending on the layer type).
Alignment Point
Selection Box
A20.0 - 414
Lightworks V.I.P 4500 Version 3 - User Guide
Text Entry Mode
A20.8
A20.8
Text Entry Mode
The titling mode determines the type of title creation functions that can be performed. The current mode
is selected by clicking on the appropriate mode button on the Title Tool.
Text Entry mode allows text to be either typed in directly or imported from a ASCII text file. Text can
be entered or edited into one object at a time.
New text objects will use the default font.
When editing an existing text object, new text added will take the font characteristics of the
existing text.
To enter text entry mode, click on the Text button
A20.8.1
.
Entering Text Using the Keyboard
The functions controlled by the Keyboard in text entry mode are:
Alphanumeric text entry
Page Up
Go to previous page.
Page Down
Go to next page.
Insert
Changes between inserting text after current cursor position and over typing text after
current cursor position.
Delete
Deletes any highlighted text or object.
Backspace
Deletes previous character.
Tab
Moves text along horizontally.
Lightworks V.I.P 4500 Version 3 - User Guide A20.0 - 415
A20.8
Text Entry Mode
To enter text using the Keyboard:
1 Click on the Text button
.
2 Click at a point on the Title Window to set the initial cursor position.
3 Type in the text.
Text will be shown as a preview quality version of the current default font (displayed
in the separate defaults window at the bottom of the Title Window). In order to see
the text with all the selected attributes of the font, the Preview button must be used.
A20.8.2
Changing Insertion Point
The text will have a current insertion point, denoted by a purple cursor. The insertion point
can be changed by:
Mouse Cursor
Clicking on a different part of the text (or another text object).
Left Arrow and Right Arrow Keys
Moving the text cursor (hence the insertion point) one character to the left and right
respectively.
Home and End Keys
Moving the cursor to the beginning and end of the text.
A20.8.3
Selecting Multiple Characters
Multiple character selections can be make by pointing the Mouse cursor at one point in the
text and dragging out a selection box to the left or right. If a key is pressed when such a
selection box exists, then the selected text will be replaced by that one character. If the
Delete key is pressed, then all selected text will be deleted.
A20.8.4
Accessing Characters Not On the Keyboard
On the Titling Menu, the Character Selector command will bring up the Character
Selector Panel. This displays all the available characters for the current default font.
A20.0 - 416
Lightworks V.I.P 4500 Version 3 - User Guide
Text Entry Mode
A20.8
This is used to select special symbols and characters not found on the Keyboard, and allows
them to be pasted into text objects, when in text entry mode. Click on the desired characters
and they will appear as a text string in a window at the bottom of the Character Selector
Panel. The contents of this window can be cleared using the Clear button. When the desired
characters have been selected, the Paste button will paste them into the Title Window at the
current text insertion point.
A20.8.5
Title Clipboard Buttons In Text Entry Mode
The Cut, Copy, Paste and Duplicate buttons on the Title Tool work with the Title Clipboard.
Cut Button
This button will cut all the selected text (denoted by a purple rectangle) from the text
object currently being edited and transfer it into the Title Clipboard.
Copy Button
This button will copy all the selected text from the text object currently being edited
and transfer it into the Title Clipboard, leaving the original text on screen (but the
selection box will disappear).
Paste Button
This button will copy the selected text from the Title Clipboard into the text object
being edited at the current cursor position.
Duplicate Button
This button has no effect in text entry mode.
A20.8.6
Importing Text
In text entry mode, text can be imported into the current layer from an ASCII text file with
the file extension .TXT. The text file can contain control codes that can be used to define
the position of text and objects. All objects that were contained in the current layer are
deleted, and the text and control codes contained in the text file are converted into objects,
and displayed in the Title Window. Any imported text will be displayed in the default font.
The Titling Menu command Import Text Into Layer will display a Visidir listing any text
files. Highlight the file to be imported and click on the OK button or press the Enter key.
Lightworks V.I.P 4500 Version 3 - User Guide A20.0 - 417
A20.9
Selection Mode
The text will then be imported and objects will be aligned to guidelines (if any exist), or
ruler divisions if there are no guidelines. Any blank lines in the imported file are translated
as an offset to the horizontal (or “y”) position of the next object.
For details of the control codes see ‘Using Control Codes To Layout Imported Text’ on page
432.
A20.9
Selection Mode
To enter selection mode, click on the Pointer button
.
Selection mode allows text to be positioned using the Mouse, or aligned using the Alignment buttons.
(The Alignment buttons will only operate in selection mode).
A20.9.1
Selecting an Individual Object
To select an object in the Title Window, point at it with the Mouse and click. Any other
objects currently selected will be deselected.
A20.9.2
Selecting Multiple Objects
Normally selecting another object will mean any currently selected objects will be deselected. This behaviour can be modified as follows:
To select multiple objects or sets of objects one at a time
Hold the CTRL key down whilst the selection is made (either by clicking with the
Mouse or dragging to create a selection box). Any other currently selected objects
will remain selected.
To select a number of objects within an area
Point the Mouse cursor at one corner of the area, then hold the left Mouse button
down and drag to the other corner of the area. A selection box will be created. When
the left Mouse button is released, all objects that are contained within the selection
box will be selected. Any currently selected objects outside this area will be deselected.
To select an entire column
Hold down the ALT key before selecting the first corner. This will select all objects
in a column below the Mouse cursor.
A20.0 - 418
Lightworks V.I.P 4500 Version 3 - User Guide
Selection Mode
A20.9
To select an entire row
Hold down the Shift key before selecting the first corner. This will select all objects
in a row to the right of the Mouse cursor.
A20.9.3
Moving Objects
Dragging Selected Objects
Objects can be dragged to the desired location in the Title Window by positioning the
Mouse cursor over a currently selected object and dragging.
Left+right-clicking on an object will align it with the nearest guideline, based on the
alignment point on the object.
If the CTRL key is held down, the object can be dragged along its major axis of
movement by moving the Mouse. These axes are:
Vertical in a Roll Layer.
Horizontal in a Crawl Layer.
Both in a Static Layer.
Nudging Selected Objects with the Arrow Keys
The position of objects can be precisely adjusted by using the four Arrow keys. These
will move the selected object by exact amounts in each of the four directions. Vertical
movements are in multiples of TV lines, horizontal movements are in multiples of
pixels.
Arrow keys move the objects in multiples of the current default font height.
Shift+Arrow key moves the objects in units of 1 pixel (horizontal) or 1 line (vertical).
CTRL+Arrow key moves the objects in units of 10 pixels (horizontal) or 10 lines
(vertical).
Lightworks V.I.P 4500 Version 3 - User Guide A20.0 - 419
A20.9
Selection Mode
A20.9.4
Changing the Order Of Selected Objects
This is controlled by Titling Menu commands, as follows:
Select All
Selects all objects.
Deselect All
Deselects all objects.
Invert Selection
Any selected objects are deselected and any deselected objects are selected.
Send To Back Selected
Makes any currently selected objects appear to be behind all other objects.
Bring To Front Selected
Makes any currently selected objects appear to be in front of all other objects.
A20.9.5
Title Clipboard Buttons In Selection Mode
Cut Button
This button will cut all the selected objects and transfer them into the Title Clipboard.
The Title Clipboard can only store one set of objects at a time, so the previous contents of the Title Clipboard will be lost.
Copy Button
This button will leave the selected objects on screen and copy them into the Title
Clipboard. The selection box will disappear.
Paste Button
This button will copy the selected objects from the Title Clipboard into the same
positions on the screen that they occupied when they were cut or copied. (relative to
the current window). This is useful for duplicating Static titles, where they are copied
from an original page, and then pasted onto subsequent pages - where they occupy
the same positions as the original.
A20.0 - 420
Lightworks V.I.P 4500 Version 3 - User Guide
Image Import Mode
A20.10
Duplicate Button
This button will duplicate all the selected objects and offset the new ones by a small
amount to make them distinguishable. All the original objects will be deselected, and
the new objects will all be selected (to enable them to be positioned immediately).
A20.10 Image Import Mode
Image import mode allows bitmaps to be imported. These are RGB 24 or 32-bit uncompressed TARGA
files.
A20.10.1
Importing a Bitmap
1 Click on the Image Import button
to select image import mode.
2 Click on the Tools Camera icon to display the Load Image File Visidir.
3 Select the desired bitmap from the list by clicking on it or typing into the name field.
4 Click on the OK button. The selected bitmap will appear at the position chosen.
A20.10.2
Setting the Position Of Imported Bitmaps
On entering the image import mode, the current bitmap position will be set as the top lefthand corner of the screen. This is to allow the accurate importing of bitmap backdrops.
Backdrops should be created the same size as the Title Window. The pixel resolutions for
TARGA files are as follows:
PAL 704 x 576
NTSC 704 x 480
Using smaller values means the imported image will not fill the Title Window. You can set
a different bitmap position by clicking the Mouse cursor at the desired position on the Title
Window before clicking on the OK button to import the bitmap.
A20.10.3
Aspect Ratio Correction Of Imported Bitmaps In NTSC Projects
To import a TARGA image that is not ‘aspect ratio corrected’ into an NTSC Project, the
image should first be created at the PAL pixel resolution and then vertically squeezed to the
NTSC pixel resolution.
Lightworks V.I.P 4500 Version 3 - User Guide A20.0 - 421
A20.11
Box Mode
This will ensure that any non aspect-corrected images appear correctly on the NTSC video
output.
A20.10.4
Title Clipboard Buttons In Image Import Mode
None of the Title Clipboard buttons have any effect in image import mode.
A20.11 Box Mode
To enter box mode, click on the Box button
A20.11.1
. Box mode allows rectangular shapes to be created.
Creating a Box
1 Click on the Box button.
2 Position the Mouse cursor where you want one corner of the box to be and hold down
the left Mouse button.
3 Drag the Mouse cursor to where you want the opposite corner of the box to be. A
selection box is displayed.
4 When the selection box is the desired size and position, click on the right Mouse
button without releasing the left button.
Note: If this left+right-click is not performed, then the selection box will disappear
and no box will be created.
The box will use the default object attributes (colour, shadows, textures and so on). However, the box will appear as white in the Title Window. To see the box with its final
attributes, use the Preview button.
A20.11.2
Title Clipboard Buttons In Box Mode
None of the Title Clipboard buttons have any effect in box mode.
A20.0 - 422
Lightworks V.I.P 4500 Version 3 - User Guide
Selecting Fonts Using the Font Selector Panel
A20.12
A20.12 Selecting Fonts Using the Font Selector Panel
The Title Tool includes a number of standard PostScript fonts. The fonts are all scalable, with point sizes
available from 1 to 128. Fonts supplied are:
The Font Selector Panel is used to set the font and size of both selected text objects and the default text
style. More fonts can be added by installing standard PostScript font files into the folder C:\PSFONTS
on the system drive using the Add Font button on the Font Selector Panel.
To display the Font Selector Panel, click on the Font button on the right-hand side of the Title Tool.
If no text objects are currently selected, the Font Selector Panel will be set to the current default style (as
displayed in the panel at the bottom of the Title Window). If any text objects are selected, the Font
Selector Panel will be set to the attributes of the first selected object.
Lightworks V.I.P 4500 Version 3 - User Guide A20.0 - 423
A20.13
Setting Text Attributes Using the Layout Panel
A20.12.1
Resizing Areas Of the Font Selector Panel
The Font Selector Panel can be resized by pointing the Mouse cursor at a corner and dragging. The sample area can be enlarged by dragging its top corners, and the font name style
and size lists can be enlarged by dragging their bottom corners.
A20.12.2
Font Selector Panel Sample Window
The sample window will display any text typed into the sample text field at the bottom of
the Font Selector Panel with the currently selected font attributes when the Preview button
is pressed. This allows you to see what a word will look like in a font without changing anything in the Title Window itself.
A20.12.3
Font Selector Panel Buttons
To be used by the Title Tool, fonts must be installed in the C:\PSFONTS folder on the
system drive.
Add Font Button
This will bring up a Visidir that will allow a font to be selected and installed in the
C:\PSFONTS folder from floppy disk or elsewhere on the system drive.
Preview Button
This will show the preview text, with the current font attributes, in the preview
window.
Apply Button
This will apply the current font to all selected text objects.
Set Default Button
This will set the currently selected font to be the default text style and display this in
the default panel at the bottom of the Title Window.
A20.13 Setting Text Attributes Using the Layout Panel
The Layout Panel allows the leading and tracking of either selected text objects or the default text style
to be changed.
Leading
Extra space is added between lines of text.
A20.0 - 424
Lightworks V.I.P 4500 Version 3 - User Guide
Setting Object Attributes Using the Effects Panel
A20.14
Tracking
Extra space is added between each text character.
Note: Tracking is not the same as kerning, which is handled automatically.
To display the Layout Panel, click on the Layout button on the Title Tool.
If no text objects are currently selected, the Layout Panel will be set to the current default leading and
tracking (as displayed in the preview panel at the bottom of the Title Window). If text objects are
selected, the panel will be set to the leading and tracking of the first selected object.
Layout Panel buttons are then used to change the selected text. The Apply button will apply the currently
selected leading and tracking to all selected text objects. The Set Default button will set the currently
selected leading and tracking to the default text style and display this in the preview panel at the bottom
of the Title Window.
A20.14 Setting Object Attributes Using the Effects Panel
The Effects Panel is used to set the attributes of both selected objects and the default objects. The
attributes selected (colours, fills, textures and so on) can apply to both text and boxes.
To display the Effects Panel, click on the Effects button on the Title Tool.
Lightworks V.I.P 4500 Version 3 - User Guide A20.0 - 425
A20.14
Setting Object Attributes Using the Effects Panel
A20.14.1
Shadow
There are three types of shadow available:
None
No shadow is displayed.
Drop
A shadow of the object is displayed in one offset position. (This gives the effect of a
normal shadow).
Extruded
A shadow of the object is smeared to the offset position (this gives a 3D effect).
A20.14.2
Shadow Drop
This is the shadow offset:
X
Shadow is offset from the original object right 1 pixel.
Y
Vertical down one line.
A20.14.3
Shadow Colour
This is the colour of the shadow. Colour is selected by clicking in the appropriate Colour
Preview box. This will bring up a Colour Selector Panel. The colour is only set if the Select
button is pressed on the Colour Selector Panel.
A20.14.4
Shadow Density
This is the opacity of the shadow. A value of 100% means the shadow is fully opaque, and
a value of 0% means the shadow is effectively invisible.
A20.14.5
Outline
This selects the outline of text:
A20.0 - 426
Lightworks V.I.P 4500 Version 3 - User Guide
Setting Object Attributes Using the Effects Panel
A20.14
None
No outline is displayed.
Outline
A standard outline is displayed.
A20.14.6
Outline Width
This is the width (in pixels) that the outline extends beyond the regular character boundaries.
A20.14.7
Outline Colour
This is the colour of the outline. Colour is selected by clicking in the appropriate Colour
Preview box. This will bring up a Colour Selector Panel. Note that the colour is only set if
the Select button is pressed.
A20.14.8
Outline Density
This is the opacity of the outline. A value of 100% means the shadow is fully opaque, and
a value of 0% means the outline is effectively invisible.
A20.14.9
Fill
There are two fill types available:
Solid
The character is filled with the solid colour shown in the Colour Preview box. This
colour can be changed by clicking in the Colour Preview box to display a Colour
Selector Panel.
Texture
The character is filled with the texture shown in the Texture Preview box. This texture is selected by clicking in the Texture Preview box. This will display a texture file
Visidir. To select a texture, click on the desired texture and click on the OK button on
the Visidir. The selected texture will be displayed in the Texture Preview box.
Any selected texture will not be visible in objects in the Titling window until the Preview
button is pressed.
Lightworks V.I.P 4500 Version 3 - User Guide A20.0 - 427
A20.15
Timing Of Titles
A20.14.10 Opacity
This is the opacity of the character. A value of 100% means the character is fully opaque,
and a value of 0% means the character is effectively invisible.
Apply
This button will apply the currently selected attributes to all selected objects.
Set Default
This button will set all the default objects (displayed in the Defaults box at the bottom
of the Title Window) to have the currently selected attributes.
A20.15 Timing Of Titles
The Titling Menu command Set Layer Timing sets the Fade In/Hold In/Fade Out/Hold Out times for a
Static Layer and the Roll/Crawl speed and the Fade In/First Hold/Second Hold/Fade Out times for rolls
and crawls. Clicking on the Titling Menu command Set Layer Timing will display a Timings Panel
based on the layer type.
A20.15.1
Timing For Static Layers
For static layers, the Static Layer Timings Panel will be displayed.
Each page of a Static Layer will be cycled through the following stages:
Delay
This is the time for which rendering of this layer is delayed. This allows multiple
layers to be offset in time from each other.
Fade In
This is the time over which the static title fades in from transparent to full opacity.
Hold In
This is the time over which the static title is held at full opacity.
Fade Out
This is the time over which the static title fades out from full opacity to transparent.
A20.0 - 428
Lightworks V.I.P 4500 Version 3 - User Guide
Timing Of Titles
A20.15
Hold Out
This is the time over which the static title is held at full transparency.
The total duration of a static layer is the number of pages multiplied by the combined
lengths of these stages.
A20.15.2
Holding Static Layers For the Duration Of a Title
If all the duration fields on the Static Timings Panel are set to zero, then the layer will
assume the length of any other layers when rendered. This means that the image in the Static
Layer will be displayed throughout the entire the length of the title, with this duration
defined by the other layers.
A20.15.3
Timing For Roll and Crawl Layers
Click on the Titling Menu command Set Layer Timing to display the Timing Panel appropriate to the current layer. For Roll and Crawl layers the Roll or Crawl Layer Timings Panel
will be displayed.
This allows the user to change the timing of a Roll Layer or a Crawl Layer. Each roll or
crawl will be cycled through the following stages:
Delay
This is the time for which rendering of this layer is delayed. This allows multiple
layers to be offset in time from each other.
Fade In
This is the time over which the start of the roll/crawl is held static and fades in from
transparent to full opacity.
First Hold
This is the time over which the start of the roll/crawl is held static and is held at full
opacity.
Roll/Crawl Speed
This is the number of lines/pixels that the roll/crawl moves per frame.
Second Hold
This is the time over which the end of the roll/crawl is held static and is held at full
opacity.
Lightworks V.I.P 4500 Version 3 - User Guide A20.0 - 429
A20.15
Timing Of Titles
Fade Out
This is the time over which the end of the roll/crawl is held static and fades in from
full opacity to transparent.
The total duration of a roll or a crawl is the length of the roll/crawl (in lines/pixels) divided
by the roll speed plus the combined length of the Fade In/First Hold/Second Hold/Fade Out
times and the Initial Delay.
A20.15.4
Set FX Viewer Duration
The Titling Menu command Set FX Viewer Duration puts a mark on the shot in the Effects
Viewer at the point at which the title will end, based on the total durations set up on the Timings Panel for all layers.
A20.15.5
Using Invisible Objects For Timings
Invisible objects are used in a Roll or Crawl Layer to define the extent of the roll or crawl.
The length of the roll or crawl is determined as the point where the last object in the Title
Window appears on the screen.
Invisible objects must be used and placed a page further down than the last ‘visible’ object
in order for a roll to end with a clear screen. There is a Titling Menu command Add Invisible Object a Page After Last Object to help do this automatically.
The invisible object can be moved just like any other object, but its movement is constrained to the axis appropriate for the layer type.
The Titling Menu command Add Invisible Object Centred On Screen will add an ‘invisible object’ to the current title layer. This object will be represented in the Title Window by
a square box with a cross hair through it, but will not appear in any rendered titling.
A20.15.6
Setting the End Point Of Titles
The start point for any titles is the current frame of the shot in the Effects Viewer.
The Titling Menu command Set FX Viewer Duration will place a mark at the existing current frame and then park the shot in the Effects Viewer at the point at which the Roll/Crawl/
Static title will end, based on the total of the durations set up on the Timings Panel.
A20.15.7
Using the Duration Display
See ‘Duration Display’ on page 410.
A20.0 - 430
Lightworks V.I.P 4500 Version 3 - User Guide
Other Options
A20.16
A20.16 Other Options
A20.16.1
Using Colour Selector Panels
For options that require a colour to be selected, clicking on the colour block next to that
option will generate the Colour Selector Panel, with a display of the available colours.
To use the Colour Selector Panel:
1 Click on the colour required. The chosen colour will appear in a square just above the
Select button. If no colour is selected, it defaults to black.
2 Select the luminance of the colour required by clicking on the luminance chart
(labelled “Brightness”) at the right of the Colour Selector Panel.
3 Alternatively, the colour information can be entered numerically, by typing in values
for Hue, Saturation, and Luminance in the appropriate fields, then pressing the Enter
key.
4 Confirm the selected settings by pressing the Select button on the Colour Selector
Panel.
Lightworks V.I.P 4500 Version 3 - User Guide A20.0 - 431
A20.16
Other Options
A20.16.2
Gamma Correction
The gamma coefficient of a standard graphics monitor is about 1.8 and the coefficient of a
video monitor is 2.2. This means that the same colours and bitmaps displayed on each type
of monitor may look slightly different unless gamma correction is employed.
The Titling Menu command Gamma Correction [on] OFF determines whether gamma
correction is applied to graphics and colours when rendered for display on the video monitor. The default is set by a CONFIG.DAT parameter. See ‘Titling.Gamma.Correction.Default’ on page 714.
The values for gamma coefficient for each colour used (red, blue and green) on both the
Graphics monitor and the composite monitor are set in the CONFIG.DAT file. See
‘Titling.Workstation.Gamma.Red’ on page 714.
The advantage of using gamma correction is that colours will look the same on both the
graphics monitor and the video monitor. The disadvantages of using gamma correction are
that some colour quantisation may occur and rendering will be slightly slower.
A20.16.3
Importing Bitmaps With Alpha Channels
Bitmaps with prescaled alpha channels are usually bitmaps where all the channels (RGB
and alpha) are anti-aliased, whereas bitmaps without prescaled alpha are only anti-aliased
in the alpha channel. The Titling Menu command Bitmaps Have Prescaled Alpha Channels YES [no] determines how any bitmaps are treated during import into the Title Tool.
Any previously loaded bitmaps will be unaffected by changes in this setting.
A CONFIG.DAT parameter determines the default for this command. See
‘Titling.Bitmap.Prescaled.Alpha’ on page 715.
A20.16.4
Using Control Codes To Layout Imported Text
An imported text file can contain control codes (which must be within square brackets) and
other information that will determine the positioning of text once imported.
[pagebreak]
This moves on to the next page.
[position:x,y]
This locates the next (and only the next) object at the supplied co-ordinates.
A20.0 - 432
Lightworks V.I.P 4500 Version 3 - User Guide
Other Options
A20.16
[picture:file.TGA]
This loads a TARGA bitmap of the supplied name.
[box:xSize,ySize]
This creates a box object at the current position and can be used in conjunction with
[position:x,y].
A20.16.5
Separating Text Objects
Objects are separated on a line by either Tab characters or the ‘|’ character. (This character
is Shift+\ on the Keyboard). This means that a text file containing:
object1
object2
object3
Is the same as:
object1|object2|object3
Roll Layers
For Roll Layers, all text in the file to be imported that is separated by Tab and ‘|’ characters will be treated as objects in a row once imported into the Title Window - the
objects will all have the same vertical start position. A new line in the text file will
be treated as the start of a new column once imported.
Static Layers
For Static Layers, all text in the file to be imported that is separated by Tab and ‘|’
characters will be treated as objects in a row once imported into the Title Window the objects will all have the same vertical position.
Crawl Layers
When importing into a Crawl Layer, all objects on a line in the text file are treated as
objects in a column. When imported they share the same horizontal position, and
each one will be placed under the last. A new line in the text file is used to indicate
the start of a new column once imported.
Lightworks V.I.P 4500 Version 3 - User Guide A20.0 - 433
A20.16
Other Options
For example, a text file containing:
‘object1|object2|object3’
‘object4|object5|object6’
When imported into a Roll Layer, will look like:
object1
object2
object3
object4
object5
object6
Whereas when imported into a Crawl Layer, it will look like:
A20.0 - 434
object1
object4
object2
object5
object3
object6
Lightworks V.I.P 4500 Version 3 - User Guide
A21.0 Playing Out Your Work
A21.1
Introduction
When an edit is completed, it will usually be played back and recorded onto an external record machine.
This process is called playout.
If you want to export your edit to another V.I.P system or audio workstation, for audio finishing, you may
be able to do this as a digital file format exchange. See ‘Project Management 2 - Import and Export Of
Logs and Material’ on page 475.
A requirement for successful playout is that the appropriate connections for video output, audio output,
timecode and machine control are configured correctly. The correct outputs from the system will then
have to be connected to the inputs of the external record machine. See the Lightworks V.I.P 4500 Installation Manual.
The Device Definition Panel determines which video and LTC outputs a particular destination device
should receive. Note that the audio outputs from the V.I.P system will have to be connected to the destination device, as the system does not allocate specific audio outputs for playout.
See ‘Video Output Routing’ on page 333 and ‘Using the Audio Output Routing Panel’ on page 381.
A21.1.1
Playout Options
Any shot, ghost or edit on the V.I.P system can be played back for recording onto an
external record machine (VTR or disk recorder). Edits that are played back using any of
these methods can contain multiple video tracks and routings via external effects units.
There are the following methods of playing out a shot or edit:
Normal Playback
Simply play the shot or edit in a Viewer, as normal, and manually put the VTR in
record. In this case the V.I.P system will not control the destination machine and no
timecode is output.
Playback with Chase Timecode Output
An edit can be played and made to output a ‘chase’ timecode that matches the edit
timecode. Connecting this timecode feed to the VTR will allow the edit and timecode
to be recorded by manually controlling the VTR.
See ‘Chasing Timecode Output From an Edit’ on page 386.
Lightworks V.I.P 4500 Version 3 - User Guide A21.0 - 435
A21.1
Introduction
Controlled Playout
Using the Playout Viewer to allow the V.I.P system to control an external VTR. There
are two options for controlled playout:
Prestriped - An accurate insert edit onto a prestriped tape.
Timecode Generation - An assemble edit with timecode generated by the
V.I.P system to match the timecode of the edit.
Controlled playout can be used to export completed edits to videotape. It can also be
used to produce accurate copies of an edit for reference in an audio recording session.
Slaved Playout
In a slaved playout, the Playout Viewer on the V.I.P system is controlled by an
external master controller device (for example an edit controller or automation
system).
This makes it possible to replay four video channels at once and control them
remotely as a single machine control source.
A21.1.2
Note: The video output of the V.I.P system is always locked to the system genlock
input. The AES/EBU audio output will either be locked to video or to a reference
AES/EBU digital audio input. See ‘Audio Synchronisation During Recording’ on
page 118.
Playing Whilst Recording
It is possible to playback an edit whilst performing other tasks, including recording. Normal
playback should not be relied on as a means of outputting edits to tape or air. Using the
Playout Viewer is the only way in which the integrity of the playout can be guaranteed and
this cannot take place while any recording or editing is taking place.
A21.1.3
Record Destinations
External record machines are used by the V.I.P system when playing out shots or edits. Any
of the configured devices that are defined as source/record machines on the Device Definition Panel can be used as record destinations.
For controlled playout, machine control of the selected record device must be available.
A21.0 - 436
Lightworks V.I.P 4500 Version 3 - User Guide
Controlled Playout
A21.1.4
A21.2
Playout Viewer
The controlled playout operation is performed using the Playout Viewer. The edit to be
played out is placed in the Playout Viewer itself.
To display the Playout Viewer, click on the Playout Tool
Playout Viewer will be displayed.
from the Toolbox. The
Playout Viewer
A21.2
Controlled Playout
You should decide which type of controlled playout is to be used before setting up. The type of controlled
playout can be selected by the Playout Menu command Playout Type: PRESTRIPED [t/c generation].
Prestriped playout is the default type of controlled playout.
Lightworks V.I.P 4500 Version 3 - User Guide A21.0 - 437
A21.2
Controlled Playout
A21.2.1
Prestriped Playout
Prestriped playout performs an insert edit on the recorder, overwriting the channels on the
destination which have been selected using the Channel Selector buttons on the side of the
Playout Viewer. The selected section of the edit will be inserted on the prestriped tape at a
position corresponding to the edit time of that section.
Conditions specific to prestriped playout include:
A21.2.2
The recorder must be capable of executing an auto-edit.
The tape used must be prestriped with timecode of the correct standard.
Timecode Generation Playouts
Timecode generation playout performs an assemble edit (all selected channels plus timecode) on the external record device.
It is possible to perform timecode generation playouts without controlling the destination
record device - the external record device can be manually set to record the playout.
For timecode generation playouts with the video channel selected, the timecode standard
for the playout will automatically match the TV Standard of the current Project, as follows:
PAL
25 frame timecode.
NTSC
30 frame non-drop-frame timecode.
NTSC Drop
30 frame drop-frame timecode.
A21.2.3
Summary Of Procedure
1 Display the edit as a Tile.
2 Display a Playout Viewer, by clicking on the Playout Tool from the Toolbox.
3 Drop the edit into the Playout Viewer, by dragging the Tile over the Playout Viewer
and right+left-clicking.
A21.0 - 438
Lightworks V.I.P 4500 Version 3 - User Guide
Controlled Playout
A21.2
4 Select the destination device using the Device Selection button on the Playout
Viewer. The Playout Viewer can control source/record devices or can be controlled
by master controller devices.
5 Video from the edit will be routed to the video output set on the Device Definition
Panel for the destination device. You can use the Video Output button on the Playout
Viewer to assign a separate monitor for E to E output, if required.
6 Assign the required audio outputs from the system, using the Audio Output Routing
Panel. See ‘Using the Audio Output Routing Panel’ on page 381.
7 Determine the type of controlled playout, using the Playout Menu command Playout
Type: PRESTRIPED [t/c generation].
8 Select the video and audio channels to playout, using the Channel Selector buttons
on the Playout Viewer.
9 Adjust the edit start time if necessary. See ‘Start Time For an Edit’ on page 250.
10 Load a tape into destination VTR or audio recorder. For prestriped playouts, the tape
used must be prestriped with timecode of the correct standard.
11 Define the section of the edit to be played out, by marking and parking on the Playout
Viewer. (Make sure that the Playout Viewer has Standby off.)
If a section is not selected, the playout will default to the whole edit (after prompting
for verification).
12 Click on the Start button on the Playout Viewer.
A21.2.4
Preroll and Postroll Times
For timecode generation playout only, the preroll and postroll of the playout can be adjusted
by a Playout Menu command.
Preroll Time
Default is 10 seconds.
Postroll Time
Default is 0 seconds.
Note: The preroll time must be long enough for the V.I.P system to synchronise to
the destination device, so values of less than 10 seconds are not recommended.
Lightworks V.I.P 4500 Version 3 - User Guide A21.0 - 439
A21.2
Controlled Playout
A21.2.5
Start Timecode For a Playout
The timecode associated with each video frame, either for timecode generation playout or
for prestriped playout, is the same as the edit (record) timecode of that frame.
The edit timecode for the first frame of the edit can be set using the Viewer Labels Panel.
See ‘Start Time For an Edit’ on page 250. The timecode associated with each frame of the
edit will be shifted accordingly.
A21.2.6
Controlling the Record Device
For prestriped playouts, machine control of the record (destination) device is essential. For
timecode generation playouts, machine control may be used but is not necessary.
The Standby button on the Playout Viewer determines whether the Console controls the edit
on the V.I.P system or the destination record device (usually a VTR).
Standby Off
The Console controls the edit in the Playout Viewer.
Standby On
The Console controls the record device if it is set up as a machine controllable device.
A21.2.7
Stopping the Playout
The Console is completely disabled during the playout operation to ensure minimum interference.
The normal method of stopping a playout before completion is to click on the Stop button
on the Playout Viewer. Alternatively, any playout can be stopped immediately (with a much
more sensitive response time) by pressing CTRL+E on the Keyboard.
A21.2.8
VTRs or Audio Recorders With Four Audio Channels
Some VTRs and audio recorders have more than two independently editable audio channels. In order to correctly edit onto tracks 3 and 4 of these recorders during a prestriped
playout, the V.I.P system needs to know if the destination VTR accepts the D2/D3 machine
control protocol. This will ensure the correct selection of channels to edit on the VTR.
See ‘Setup Options For VTRs’ on page 115.
A21.0 - 440
Lightworks V.I.P 4500 Version 3 - User Guide
Slaved Playouts Controlled By Master Controller Devices
A21.3
A21.3
Slaved Playouts Controlled By Master Controller Devices
Any shot or edit placed in a Playout Viewer can be fully controlled by an external control device (for
example an edit controller or automation system).
By selecting a Master Control device type on the Playout Viewer, the Start button on the Playout Viewer
will be replaced by the word 'Slave' - indicating that the Master Control device will have control. When
you click on the Standby button, control of the Playout Viewer is handed over to the Master Control
device. You can regain control by taking the Playout Viewer out of standby by clicking on the Standby
button again.
When controlled by a master controller device type, the system accepts the BVW75 command set:
A21.4
Requests for LTC will return the edit timecode.
Requests for any timecode other than LTC will return 00:00:00:00.
Timecode userbits are preset to 0.
Timecode is not output from the LTC outputs during slaved playout, but is output via the
machine control cable.
Note: The implementation of this feature does not necessarily action all commands.
Audio Level Control During Playout
The V.I.P system shot-by-shot audio level control feature can be used to create audio ramps and changes
in sound level. However, sometimes it is important to playout audio without any shot-by-shot level control. This enables audio to be played out for final mixing elsewhere.
For further information, see ‘Audio Control’ on page 373.
A21.4.1
Switching Off Shot-by-shot Level Control
If shot-by-shot audio level control is not required for a playout:
1 Click on the command Current Project Details on the General Menu. The Project
Card will be displayed.
2 Click on the Audio Params button on the Project Card.
3 Click on the Level Control button to set it to Off.
With Level Control set to Off, all the audio variations created using the shot sound
sliders are ignored. Setting Level Control to On will reintroduce them.
Lightworks V.I.P 4500 Version 3 - User Guide A21.0 - 441
A21.4
A21.0 - 442
Audio Level Control During Playout
Lightworks V.I.P 4500 Version 3 - User Guide
A22.0 EDLs 1 - Import
A22.1
Introduction
You can import EDLs from edits made on other equipment and work with them on the Lightworks V.I.P
system. Typically this will be done prior to recording the material onto the system using the autoconform
feature. See ‘Autoconforming and Redigitising’ on page 169.
A22.2
Requirements For EDL Import
A22.2.1
EDL Conditions
The EDL to be imported must be:
A22.2.2
In an EDL format supported by the V.I.P system
'A' mode sorted and 'clean'
Have no more than four audio channels
In ASCII text file format
Project Conditions
The Project TV Standard must be appropriate to the TV Standard of the EDL.
When importing NTSC EDLs, the TV Standard of the Project must match the TV Standard
of the record timecode events in the EDL. So if the record events are in drop-frame timecode, the Project TV Standard should be set to NTSC Drop at the time the EDL is imported.
Source events in the EDL may contain a mixture of drop-frame and non-drop-frame timecodes, and the import process will preserve these.
The database Label Standard field uses the following codes to describe the timecode
standard of events:
N - 30 frame NTSC non-drop-frame timecode.
ND -29.97 frame NTSC drop-frame timecode.
P - 25 frame PAL timecode.
Lightworks V.I.P 4500 Version 3 - User Guide A22.0 - 443
A22.3
A22.3
Procedure For EDL Import
Procedure For EDL Import
A22.3.1
Displaying the EDL Import Panel
The EDL Import Panel is used to control the EDL import process:
1 Position the Floppy Disk Tool
in an empty (grey) area of the graphics screen.
2 Click on the Floppy Disk Tool to display the EDL Import Panel.
A22.3.2
Inspecting an EDL
The Inspect EDL button can be used to inspect an EDL (or other text file) stored on the V.I.P
system disk or on a floppy disk.
1 Display the EDL Import Panel.
2 Click on the Select EDL to Import button. A Visidir appears.
3 If the EDL to inspect is on floppy disk then insert the disk in the floppy disk drive.
4 Use the Visidir to select the EDL to inspect.
5 Click on the OK button on the Visidir.
6 Click on the Inspect EDL button on the EDL Import Panel.
A22.0 - 444
Lightworks V.I.P 4500 Version 3 - User Guide
Procedure For EDL Import
A22.3.3
A22.3
Reels For Imported Data
For EDLs (and Logging Databases) imported into the system, the reels referenced will be
created if they do not already exist in the Project. Reels created in this way will not be fully
defined, missing such data as tape type and availability.
The system will assume the events in the EDL or Logging Database with the same reel ID
as a reel already in the Project are from that reel. For example, if reel 1 is already in the
system (defined as a “Digibetacam”), then an imported EDL that has an event referring to
a reel 1 will be assumed to be from the “Digibetacam” reel already on the system.
Before importing an EDL, check the reel IDs do not conflict with reels already present in
the current Project. If in doubt, import into a new Project to ensure new unique reels are
created, then modify the reel IDs as necessary before moving the new data into the Project.
A22.3.4
Importing an EDL
1 Display the EDL Import Panel.
2 Click on the Select EDL to Import button. A Visidir appears.
3 If the EDL to import is on floppy disk then insert the disk in the floppy disk drive.
4 Use the Visidir to select the EDL to import.
5 Click on the OK button on the Visidir.
6 Select the format of the EDL by clicking on the EDL Format button on the EDL
Import Panel.
7 Select the desired handle size.
This determines the extra time (in seconds) which will be added to the start and end
of each shot, to allow for future trimming.
8 Click on the Import EDL button.
The EDL is imported and a new edit is created on the V.I.P system. For each event,
the Project is searched to find a shot which contains the correct timecode range and
reel ID. If found, the shot is used for the edit. If not, then a ‘dummy’ shot is created.
The process is repeated for each line of the EDL. When complete, a Tile is displayed
containing the imported edit. This is given a name based on the EDL name, prefixed
with “From EDL”.
Note: Any comments in the EDL will be ignored by the import process.
Lightworks V.I.P 4500 Version 3 - User Guide A22.0 - 445
A22.3
Procedure For EDL Import
‘Dummy’ Shots Created by EDL Import
The dummy shots created by the import process are not ‘real’ shots, and do not
behave in the same way as shots without material. For example, the dummy shots
cannot be found by using the Searchcard.
The dummy shot is given a random name (for example, 'E20Z0B3F dummy') and the
correct timecode and reel ID.
For NTSC Projects, providing the record timecode and Project TV Standard requirements are met, the system will create a dummy shot that matches the source timecode
standard. So, for example, if the source event has drop-frame timecode, then the
dummy shot will have drop-frame timecode.
Mapping of Audio Channels
If the EDL contains audio mapping comments, then these will be read and interpreted
during the import process as audio mapping instructions. For example, if comments
in the EDL state that events on channel 2 came from source channel 1 then the
dummy shots created for those events will have an audio channel 1, not an audio
channel 2.
Because audio channel mapping determines the audio channels that are added to any
dummy shots created, this in turn will affect the audio resources required when
recording material or autoconforming the edit. See ‘Allocation Of Record Resources’
on page 170.
CMX EDL Channel Fields
In the case of CMX EDLs there is some ambiguity as to the positioning of the
channel field. The position of the channel column and the size of the channel field
can be adjusted by modifying entries in the CONFIG.DAT file. See
‘edl_import_channel_length’ on page 592 and see ‘edl_import_channel_start’ on
page 592.
A22.3.5
Changing Handles After EDL Import
The EDL import procedure will only create dummy shots for those events in the EDL for
which there is no existing shot in the Project with the correct timecode range and reel ID.
So if you import an EDL with one second handles and then decide that you actually need to
have three second handles, you must destroy the dummy shot logs created by the first
import procedure before changing the handle size and importing again.
A22.0 - 446
Lightworks V.I.P 4500 Version 3 - User Guide
Recording Missing Shots After Importing an EDL
A22.4
The Gallery of Shots or Database of Shots command must be used on the edit created by
importing the original EDL, in order to display any dummy shots. The Destroy Shots,
Material, Edits and Ghosts command can then be used to destroy them.
If you do not do this, then, when you reimport the EDL no new dummy shots will be created
- as the ones created during the first import already exist in the Project.
A22.4
Recording Missing Shots After Importing an EDL
If the imported edit contains shots which are not already in the Project, then you will need to record the
material required to replace the dummy shots in the edit. There are two ways of doing this:
Autoconform the New Edit
This will automate the recording of the material required and the filling of the edit. See ‘Autoconforming and Redigitising’ on page 169.
Generate a Logging Database from the New Edit
Use this Logging Database as the source for autoconform recording of the required shots and then
use the Find Material to Fill Edit command to replace any dummy shots in the edit with shots
recorded by the autoconform.
A22.5
Some Specific Formats For EDL Import
A22.5.1
Lightworks Generic EDLs
The Lightworks Generic EDL represents a ‘recommended’ way of transferring edits
between Lightworks systems. The Lightworks Generic format contains more information
than other EDL formats available on the system. Lightworks Generic EDLs retain many of
the advantages of a Project Backup and can usually be stored on a floppy disk for ease of
transfer between systems.
The operational procedure for importing a Lightworks Generic EDL is the same as for other
EDLs. See ‘Procedure For EDL Import’ on page 444.
In addition, the system makes the following extra checks, for each event in the EDL:
Is there any material with the same filename as the material used in the EDL? If the
logs for the material referenced by the EDL exist, they will be used in the edit.
Is there a piece of material with reel ID and timecode that matches the one in the
EDL?
Lightworks V.I.P 4500 Version 3 - User Guide A22.0 - 447
A22.5
Some Specific Formats For EDL Import
If, for any event in the EDL, these two checks fail (the required material does not exist in
the Project), then the system will create a new dummy shot.
The dummy shots will have the same Filecard information as the shots used in the original
edit. Once the material is recorded, the shot will match the original shot from the system on
which the Lightworks Generic EDL was generated.
A22.5.2
Importing Edits Created On EditStar Systems
This feature allows edits initially created on an EditStar system to be transferred to the
Lightworks V.I.P system.
The EditStar system creates an EDL in a special format that can be imported into the V.I.P
system in the normal way, usually via a network connection.
An Omnibus automation system is required to provide the means of scheduling and controlling the recording of material required by the EDL onto the V.I.P system. This is done by
having the Omnibus automation system set up as a master controller device type.
See ‘Features For Use With Omnibus Automation Systems’ on page 623.
A22.0 - 448
Lightworks V.I.P 4500 Version 3 - User Guide
A23.0 EDLs 2 - Export
A23.1
Introduction
The Lightworks V.I.P system is an online editing system - however, there are many online post-production applications where an EDL is required in order for further work to be carried out elsewhere.
Edits created on the V.I.P system are stored in its own internal EDL format. When you have finished an
edit, the system can translate the internal EDL to one of several standard formats. This can be exported
(copied) to a floppy disk and used to control online editing.
For information on EDL import, see ‘EDLs 1 - Import’ on page 443.
A23.2
Requirements For EDL Export
When you translate the V.I.P system’s internal EDL to a standard EDL format, the system refers to the
logs of the shots used in the edit to obtain the reel ID and timecode information.
In order to produce a correct EDL the following conditions must be met:
Logs for all shots and ghosts used in the edit must be present in the Project.
Source tape timecode must be correctly logged for every shot used.
Source tape reel ID must be correctly logged for every shot used.
Any special conditions applying to the EDL format used must be adhered to.
For example; characters permitted for reel ID, number of events allowed.
WARNING: SINCE IMPLEMENTATIONS OF EDL FORMATS MAY VARY, A TRIAL
EDL SHOULD BE TESTED IN ADVANCE BEFORE AN ONLINE SESSION.
A23.2.1
EDLs For NTSC Projects
In an NTSC Project, the type of timecode (drop-frame or non-drop-frame) for an edit is
determined by the Project TV Standard at the time the edit is created. It is not determined
by the timecode of the source shots. An edit can intercut both drop-frame and non-dropframe source shots. EDLs generated will contain the same record timecode type as the edit.
Lightworks V.I.P 4500 Version 3 - User Guide A23.0 - 449
A23.3
A23.3
Procedure For EDL Export
Procedure For EDL Export
A23.3.1
Summary Of Procedure
1 Display the EDL Export Panel for edit you are working on.
2 Select the appropriate options for the EDL, as described later in this chapter.
3 Inspect the EDL (this is an optional step).
4 Write the EDL to disk.
A23.3.2
Displaying the EDL Export Panel
1 Position the Floppy Disk Tool
are working on.
so it overlaps the Viewer containing the edit you
2 Click on the Floppy Disk Tool. The EDL Panel is displayed. The name of the edit it
will work on is displayed at the top of the EDL Panel.
EDL Export Panel
A23.0 - 450
Lightworks V.I.P 4500 Version 3 - User Guide
Options On the EDL Export Panel
A23.4
A23.4
Options On the EDL Export Panel
A23.4.1
EDL Format
Click on the EDL Format button, to display the EDL Format Menu, then click on the name
of the EDL format required.
A23.4.2
Channel Mask Button
The Channel Mask button is used to select which channels of the edit to include in the EDL.
The text on the button shows which edit channels are currently selected. Clicking on the
Channel Mask button will display the Channel Mask Panel.
The layout of the Channel Mask Panel will depend on whether Edit->EDL Mapping is
selected.
Channel Mask Panel (Without Edit->EDL Mapping)
Lightworks V.I.P 4500 Version 3 - User Guide A23.0 - 451
A23.4
Options On the EDL Export Panel
The example above shows a straight channel mask (Edit->EDL Mapping not selected), with
the video channel and the first two audio channels selected. There is no mapping between
edit channels and EDL channels.
Channel Mask Panel (With Edit->EDL Mapping)
Edit->EDL Mapping allows each audio channel in the edit to be mapped to any audio
channel in the EDL (up to the number of audio channels supported by the EDL format).
To enable Edit->EDL Mapping, click on the Edit->EDL Mapping button. The Channel
Mask Panel will display two columns of buttons. The Edit Chan column represents edit
audio channels and the EDL Chan column represents EDL audio channels. Selecting a
channel in the Edit Chan column enables or disables the channel within the edit (for EDL
generation purposes only). Clicking a button in the EDL Chan column will cycle through
the available EDL channels.
A23.4.3
Set Output Path Button
Clicking the Set Output Path button displays the following panel:
A23.0 - 452
Lightworks V.I.P 4500 Version 3 - User Guide
Options On the EDL Export Panel
A23.4
Default Path
Clicking on Default Path specifies that EDLs will be written to the location set on
the Default Options Panel. See ‘Default Options’ on page 457.
Current Project
Clicking on Current Project specifies that EDLs will be written to the current
Project folder on the V.I.P system drive.
Select Path Manually
Clicking on Select Path Manually displays a Visidir which allows you to locate a
suitable folder for the EDL to be written to. The text on the Set Output Path button
on the main EDL Export Panel shows the currently selected destination.
A23.4.4
EDL Filename
This determines the filename used for the EDL. Initially, a default filename will be displayed. The default filename is based on the edit name and/or any default filename specified
on the Default Options Panel. See ‘Default Options’ on page 457. To change the EDL
filename, click on the current filename and type in the new one. The new name must be a
legal filename and must conform to any requirements of the online controller to be used.
A23.4.5
Dump Filename
The default filename for the dump reel is based on the name of the edit and/or any default
filename specified on the Dump Reel Options Panel. Initially, the filename DMP*.EDL will
be used, to distinguish the dump reel from the main EDL. For example; if your edit is called
“PROG1” then the filenames will be written as “PROG1.EDL” for the main EDL and
“DMPG1.EDL” for the Dump Reel EDL.
The Dump Filename button allows the user to change the dump reel filename by clicking
on the current filename and typing in the new one. It is also possible to set the default
filename, using a CONFIG.DAT parameter. See ‘edl_dump_reel_filename’ on page 592.
A23.4.6
Inspect EDL
See ‘Inspecting the EDL Before Export’ on page 465.
A23.4.7
Write EDL
See ‘Writing the EDL To Disk’ on page 466.
Lightworks V.I.P 4500 Version 3 - User Guide A23.0 - 453
A23.5
A23.5
Options On the Basic EDL Options Panel
Options On the Basic EDL Options Panel
The Basic EDL Options Panel is intended as a shortcut for commonly used options. When the EDL Panel
is opened, the Basic EDL Options Panel is automatically displayed. At other times, click on the Basic
Options button on the EDL Export Panel to display it.
Basic EDL Options Panel
A23.5.1
Make Dump Reel
If your edit includes dissolves or wipes between two shots from the same source reel then
you may need to make a Dump Reel to use in the online. This is controlled by setting the
Make Dump Reel button to Yes or No.
The default for this option can be set by a CONFIG.DAT parameter. See
‘edl_make_dump_reel’ on page 593.
If you set Make Dump Reel to Yes then the V.I.P system will create a separate EDL for the
Dump Reel. This will appear as reel ID 900 in the main EDL.
See ‘Dump Filename’ on page 453.
A23.5.2
Merge Channels
If some video and audio cuts in an edit are simultaneous (‘straight cut’) then it may be desirable for them to be handled as a single event in the EDL. Set the Merge Channels button to
Yes to enable this option.
A23.0 - 454
Lightworks V.I.P 4500 Version 3 - User Guide
Options On the Basic EDL Options Panel
A23.5
The default for this option can be set by a CONFIG.DAT parameter. See ‘edl_merge_chans’
on page 593.
A23.5.3
Keep Audio Crossfades
Some edit controllers are unable to deal with dissolves on the audio channels. Setting the
Keep Audio Crossfades button to No will prevent any audio dissolves being included in the
EDL.
The default for this option can be set by a CONFIG.DAT parameter. See ‘edl_keep_xfades’
on page 593.
A23.5.4
Sort Mode
The EDL Sort Mode determines the way in which the events in the EDL are sorted. This
can affect the efficiency of the online conform.
The Sort Mode button displays the name of the currently selected EDL Sort Mode. To
change the EDL sort mode click on the button to cycle through the available sort modes.
Definitions of EDL sort modes may vary for different equipment. On the V.I.P system, the
definitions of the available sort modes are:
A Mode
Ascending record in times.
B Mode
Ascending reel number. For each reel, ascending source in times.
C Mode
Ascending reel number. For each reel, ascending record in times.
D Mode
As for B, except dissolves and wipes are at end of list.
E Mode
As for C, except dissolves and wipes are at end of list.
WARNING: ONLY AN ‘A’ MODE EDL CAN BE ALTERED IN THE ONLINE
AS THE OTHER MODES CANNOT BE ‘RIPPLED’ IN THE EDIT CONTROLLER.
Lightworks V.I.P 4500 Version 3 - User Guide A23.0 - 455
A23.5
Options On the Basic EDL Options Panel
A23.5.5
Audio Timecode Type
When logging shots it is possible to use the Viewer Labels Panel to enter a separate original
audio reel ID and original audio start timecode. See ‘Logging Original Audio Timecode
Information’ on page 138.
Original audio timecode and original audio reel ID can also be read from LTC or VITC
using an appropriate label mapping set. See ‘Primary Timecode’ on page 122.
The Audio Timecode Type button determines whether this audio reel and timecode information is used in the EDL.
If you select Primary TC, timecode, then the video reels and timecodes will be used for both
video and audio events.
If you select Orig Audio TC, then the separate original audio reel ID and original audio
timecode will be used for audio events.
The default is set by a CONFIG.DAT parameter. See ‘edl_use_audio’ on page 594.
A23.5.6
Skip Black Events
This button controls whether black in an edit is listed as an event in the EDL. The default
is set by a CONFIG.DAT parameter. See ‘edl_inhibit_black’ on page 593.
A23.5.7
Start Time
The EDL Start Time controls the first record-in timecode in the EDL, by adding an offset
to the start time of the V.I.P edit. The start time for a V.I.P edit is normally 00:00:00:00. (It
is possible to change this. See ‘Start Time For an Edit’ on page 250.)
The default is for the EDL Start Time to be 00:00:00:00, so that the EDL starts at the same
timecode as the V.I.P edit.
To change the EDL Start Time, click on the EDL Start Time field and type in the desired
timecode offset.
A23.5.8
Remove All Comments
See ‘Remove All Comments’ on page 460.
A23.5.9
Force Clean List
See ‘Force Clean List’ on page 464.
A23.0 - 456
Lightworks V.I.P 4500 Version 3 - User Guide
Advanced EDL Options Panel
A23.6
A23.6
Advanced EDL Options Panel
The Advanced EDL Options Panel, which is used to access further options panels, is displayed by
clicking on the Advanced Options button on the EDL Export Panel.
Advanced EDL Options Panel
A23.7
Default Options
The Default Options Panel is displayed by clicking on the Default Options button on the Advanced EDL
Options Panel.
Lightworks V.I.P 4500 Version 3 - User Guide A23.0 - 457
A23.7
Default Options
A23.7.1
Lift CMX3600 Channels
This option changes the way audio channels 3 and 4 are represented for the CMX3600
format. Usually, the text indicating channels 3 and 4 is placed following the event. With this
option selected, audio channels 3 and 4 are represented in the same way as 1 and 2.
A23.7.2
Note: If the EDL also uses channels 1 and 2, this option will not work.
Default Reel ID
If an edit contains a shot which has no log and/or no reel ID, then this option specifies the
reel ID that will be placed in the EDL.
A23.7.3
Pad Reel ID With Zeroes
Some edit controllers will not accept an EDL which contains reel IDs that are not of a specific length. These controllers also tend to be those that will not accept letters in reel IDs.
The Pad Reel ID with Zeroes button causes any short reel IDs to be made up to the full
length with zeroes.
For example, a reel ID of “1” would become “001” if the EDL format chosen specifies three
characters for reel IDs.
A23.7.4
Default Filename
The Default Filename set here specifies the location to which EDLs will be written when
Default is selected as the output path. See ‘Set Output Path Button’ on page 452.
The default filename must be specified as a valid path and must be acceptable to the online
controller that is to be used.
A23.7.5
Start Reel For Alpha->Num
Some edit controllers cannot deal with alphanumeric reel IDs (those containing letters).
If an EDL is being generated for a controller that must have numeric reel IDs, any alphanumeric reel IDs used will be translated to numeric reel IDs. The Start Reel for Alpha->Num
button specifies the number for the numeric reel IDs to start at.
For example, with Start Reel for Alpha->Num set to 200, the following translations would
be made to reels originally named “Graphics” and “Captions”:
“Graphics” would become “200”.
A23.0 - 458
Lightworks V.I.P 4500 Version 3 - User Guide
Dump Reel Options
A23.8
“Captions” would become “201”.
A list of translations made will be included, as a comment, at the start of the EDL.
For varispeed events, the comment in the EDL will refer to the original alphanumeric reel
ID, not the mapped one. So a varispeed of the reel “Graphics” would have a comment of
the form:
COMMENT: <<Speed change>> Reel “Graphics” speed is 012.5 fps (50%)
A23.7.6
Override Alpha->Num Mapping
When set to Yes, this will override any alphanumeric to numeric mapping normally
required by the selected EDL format. The default setting is No.
A23.8
Dump Reel Options
The Dump Reel Options Panel is displayed by clicking on the Dump Reel Options button on the
Advanced EDL Options Panel.
A23.8.1
Make Dump Reel
This specifies whether a dump reel will be created, if needed, for the EDL. It is repeated on
the Basic EDL Options Panel. See ‘Make Dump Reel’ on page 454.
A23.8.2
Dump Reelid
This option specifies the reel ID given to events in the main EDL that reference the dump
reel.
Lightworks V.I.P 4500 Version 3 - User Guide A23.0 - 459
A23.9
Comment Options
A23.8.3
Dump Reel Filename
See ‘Dump Filename’ on page 453.
A23.8.4
Dump Reel Handle
This is the handle for source material listed in the dump reel (in seconds).
A23.9
Comment Options
The Comment Options Panel is displayed by clicking on the Comment Options button on the Advanced
EDL Options Panel.
A23.9.1
Remove All Comments
It is possible to create an EDL without any comment lines in it by setting the Remove All
Comments button to Yes. This overrides all other options that cause comments to be
included in EDLs (for example; varispeed, channel mapping, shot name). This option is
repeated on the Basic EDL Options Panel.
A23.0 - 460
Lightworks V.I.P 4500 Version 3 - User Guide
Comment Options
A23.9.2
A23.9
Use Effects Descriptions
If the Use Effects Descriptions button is set to Yes (the default), then any rendered effects
in the edit will be described by comments at the start of the EDL.
A23.9.3
Use Shot Name List
If the Use Shot Name List button is set to Yes, then each event will be followed by a comment line specifying the name of the current shot.
A23.9.4
List All Reels Used
Generating an EDL with this option selected will put a list of all reels used in the edit at the
top of the EDL.
A23.9.5
Comments For Dissolves
When this option is selected, each dissolve event will be followed by a descriptive comment.
A23.9.6
Comments For Audio Source
Imagine a shot with one vision and two audio channels. Suppose a section of this shot were
inserted into an edit, with audio channel 1 of the shot being put into audio channel 4 of the
edit. This option causes comments describing the audio channel mappings to be inserted
after the relevant events in the EDL.
A23.9.7
Audio Source Comment Text
Specifies the text to be used for the comments for audio source option.
A23.9.8
Comments For Varispeed
If the Comments for Varispeed button is set to Yes, then each varispeed line in the EDL will
have a descriptive comment.
A23.9.9
Text For Varispeed Comment
Specifies the text to be used for the comment for varispeed option.
Lightworks V.I.P 4500 Version 3 - User Guide A23.0 - 461
A23.10
Audio Options
A23.10 Audio Options
The Audio Options Panel is displayed by clicking on the Audio Options button on the Advanced EDL
Options Panel.
A23.10.1
Keep Audio Crossfades
See ‘Keep Audio Crossfades’ on page 455.
A23.10.2
Timecode Type
See ‘Timecode Type’ on page 462.
A23.10.3
Comments For Audio Source
See ‘Comments For Audio Source’ on page 461.
A23.10.4
Audio Source Comment Text
See ‘Audio Source Comment Text’ on page 461.
A23.10.5
Edit To EDL Channel Mapping
This has the same function as the Edit->EDL Mapping button on the Channel Mask Panel.
See ‘Channel Mask Button’ on page 451.
A23.0 - 462
Lightworks V.I.P 4500 Version 3 - User Guide
Optimizations Panel
A23.11
A23.11 Optimizations Panel
The Optimizations Panel is displayed by clicking on the Optimizations button on the Advanced EDL
Options Panel. The Optimizations Panel is used to set up features that make the EDL more efficient.
A23.11.1
Merge Channels
See ‘Merge Channels’ on page 454.
A23.11.2
Use Split Edits
When the Use Split Edits button is set to Yes, split edits will be included in the EDL where
appropriate.
A23.11.3
Combine Dissolves
This is similar to the Merge Channels option, but for dissolves rather than straight cuts. For
example, if a dissolve on a video channel has the same timecodes as an audio dissolve
(crossfade) from the same reel, then the two events will be merged if this option is set to
Yes.
Lightworks V.I.P 4500 Version 3 - User Guide A23.0 - 463
A23.11
Optimizations Panel
A23.11.4
Split Cut/Dissolve Pairs
If the Split Cut/Dissolve Pairs button is set to Yes, comments pertaining to the cut part of
a cut/dissolve pair will be inserted between the cut and dissolve lines.
A23.11.5
Generate Excalibur-Style EDLs
EDLs generated for Excalibur systems are non-standard (they insist on a zero-length cut
before every dissolve). Setting this option to Yes causes Excalibur compatible EDLs to be
generated.
A23.11.6
Skip Black Events
See ‘Skip Black Events’ on page 456.
A23.11.7
Use Preread
Preread allows dissolves and wipes between two sources on the same reel to be performed
without a dump reel. It does this by using the master record reel as one of the sources. Certain VTRs have extra heads to allow (almost) simultaneous reads and writes to a given tape.
Preread can only be performed in a correctly configured digital edit suite.
Note: It is necessary to decide what to call the master record reel. This may be
dependent on the particular online suite to be used - please consult your online editor.
Enabling preread will only allow preread events to be generated in A mode.
Also, the EDL Export Panel can be set up to allow preread events to be merged across channels - set the Combine Dissolves button to Yes.
A23.11.8
Reorder Reel ID
When using Preread, there will be a combination of characters in the reel ID field that will
tell the edit controller/vision mixer that the master record reel is to be used as the source for
an event. There is no way of predicting what this will be for a particular online. This option
defaults to PREREAD.
A23.11.9
Force Clean List
By default, EDLs produced by the V.I.P system will use various ‘shortcuts’ or optimisations
to minimise the time spent autoconforming the edit.
A23.0 - 464
Lightworks V.I.P 4500 Version 3 - User Guide
Wipe Codes Options
A23.12
For example, if you have a 20 second shot with video and audio and replace the middle of
this shot with a 2 second cutaway, then the system will make one event that records the 20
second shot (video and audio) followed by one event that goes back and records the 2
second cutaway over the 20 second shot.
Using optimisation means that it is not possible to reorder the EDL once it has been generated, as if the 2 second shot were recorded before the 20 second shot then the 2 second shot
would be overwritten.
If you wish to reorder the EDL after it has been generated then the Force Clean List button
must be set to Yes. This will produce an EDL without shortcuts.
If the Force Clean List button is set to No then the EDL will include as many shortcuts as
possible. A comment is inserted at the end of the EDL if the list is dirty. This is to enable
an online editor to ascertain whether the list can be manipulated in the online suite.
A23.12 Wipe Codes Options
Wipe patterns are referred to in EDLs by a wipe code number. The wipe code number is dependant on
the combination of edit controller and vision mixer in the online suite. The wipe codes on the V.I.P
system default to CMX.
The Wipe Codes option allows you to specify the wipe codes for your EDL.
Clicking the Wipe Codes button on the Advanced EDL Options Panel displays two Wipe Code Panels.
Each panel has a field for each of the wipe codes that can be generated by the system. One panel contains
forward wipe patterns and the other contains reverse wipe patterns.
The wipe code that appears in the EDL can be changed by modifying the relevant field. Any changes
made will be saved for future use.
A23.13 Inspecting the EDL Before Export
To inspect the EDL before writing it to the disk, click on the Inspect EDL button. The EDL will appear
on screen in an Inspection Window. You can text edit the EDL within the Inspection Window.
Any changes to the EDL made in this way will not affect the edit on the V.I.P system. However, these
changes will be saved in the EDL written to disk, provided the Write button is clicked whilst the Inspection Window is on the screen. You can use this feature to add customised comments to the EDL (but you
must know the correct form for comments in the specified EDL format).
To remove the Inspection Window, click again on the Inspect button.
Any changes made to the EDL by text editing will be lost when the Inspection Window is removed.
Lightworks V.I.P 4500 Version 3 - User Guide A23.0 - 465
A23.14
Writing the EDL To Disk
A23.14 Writing the EDL To Disk
After the EDL options have been selected, click on the Write EDL button to process the EDL and write
it to disk.
Note: If the EDL Inspection Window is on screen when the Write EDL button is clicked, then any
changes made by editing the text in the window will be saved in the EDL.
The program checks the disk to see whether a file of the same name already exists. If it does then the
option is given to either overwrite the existing file or cancel the write operation. If the choice is to overwrite (or if the file doesn’t already exist), then a check is made for the dump reel EDL file.
When the EDL has been written to disk, a message will be displayed confirming this.
If a missing log file is detected, a warning message will be displayed on the screen and written in the
EDL (in the form of a comment). A missing log file may cause serious problems in an online session and
so it is recommended that the problem shot is identified and action taken (for example by finding the log
file or rerecording the shot).
Generation of an EDL will be halted if there are too many events for the chosen EDL format. The events
processed so far will be retained and the EDL can be written to floppy disk. A warning message will
appear on screen and will be written in the last line of the EDL. It will be necessary to break the V.I.P
edit into smaller sections and generate an EDL for each section.
A23.14.1
Checking That the EDL Has Been Written
Use Windows NT Explorer or the command prompt to check that the EDL has been successfully written to disk.
A23.14.2
Using Floppy Disks
Floppy disks can be formatted using the Windows NT Disk Administrator utility. Check the
type of floppy disk required by the destination system.
A23.0 - 466
Lightworks V.I.P 4500 Version 3 - User Guide
A24.0 Project Management 1 - Consolidating
A24.1
Introduction
The consolidate feature creates new shots by copying sections of existing shots on the system. The main
applications of consolidate are:
To free up hard disk space
To copy an edit to a removable disk
To generate a Logging Database
In preparation for exporting an edit
In order to use consolidate effectively, it is important to be aware of how shots and edits are defined on
the system. See ‘Definitions’ on page 55. In addition, the following information is of specific relevance
to consolidate:
An edit needs the shots used (logs plus material)
When you view the edit on the system, it plays pictures and sound from the material files of the
original shots. The edit obtains timecodes and reel IDs from the log files of the original shots.
It is not possible to only delete part of a shot
A single shot on the system may contain several scenes or takes from the original tape which may
be treated as separate shots by the editor. However, as far as the system is concerned the separate
scenes are all part of the one shot. It is not possible to keep only one scene and delete the others if
the scenes are all part of one single shot on the system.
Lightworks V.I.P 4500 Version 3 - User Guide A24.0 - 467
A24.2
A24.2
Using Consolidate
Using Consolidate
A24.2.1
Consolidating an Edit To Free Hard Disk Space
If you use all the available material hard disk storage then you will have to delete some
material before you can record any more.
If there are shots that have not been used at all they can be deleted from the hard disk
without affecting your edit. You do not need to consolidate in order to do this.
If there are shots that have been used in the edit then these shots cannot be deleted without
affecting the edit.
Even if the edit only contains a few frames from a shot, if you delete the original shot then
the edit will not be able to play those frames - it will have a 'black hole' in it.
In this situation, consolidating the edit will allow you to keep a copy of the edit and to freeup hard disk space.
The procedure has two stages.
Consolidate the edit.
The consolidate operation creates:
New shots
By copying sections of existing shots - just the sections used in the edit.
A new edit
Which has exactly the same in- and out-points as the original, but uses the new
shots.
The new edit and new shots are completely self-sufficient - they do not refer to the
original edit or shots at all.
Delete the original shots.
Because the consolidated edit and shots are self-sufficient, the original shots can be
deleted to free up disk space.
A24.0 - 468
Lightworks V.I.P 4500 Version 3 - User Guide
Using Consolidate
A24.2.2
A24.2
Consolidating an Edit - Step-by-step
1 Display the Edit Menu for the edit to be consolidated.
2 Click on the Consolidate command to display the Consolidate Panel.
Disk Selection
Button
3 Select the handle size (in seconds).
The consolidate operation will copy extra material (handles) at the start and end of
each shot. These handles allow you to trim your cuts later.
The default handle size is two seconds, but you can set any value you require, by
typing a number into the Handle Size field.
4 Determine which channels to consolidate - picture and/or sound. See ‘Determining
Which Channels To Consolidate’ on page 473.
5 Decide whether you want unused source shot channels to be consolidated or ignored.
6 Choose where the new material created by the consolidate operation will be stored.
The Disk Selection button lists all the drives accessible via Windows NT (including
network drives). Select one drive using the Visidir.
Lightworks V.I.P 4500 Version 3 - User Guide A24.0 - 469
A24.2
Using Consolidate
Note: Windows NT security privileges and permissions apply when accessing drives
in this way, so the appropriate privileges must be available to your Windows NT log
on name.
7 Click on the Analyze button.
The system calculates how much space is required for the new copies, and how much
will be saved if you subsequently delete the original shots. The results are displayed
on the Consolidate Panel.
8 Check that “MB available” is greater than “MB required”.
If there is not enough room on the chosen drive for the entire edit, break it into two
or more parts. See ‘Copying and Clipping Up an Edit’ on page 249. You can consolidate the parts to different drives, then assemble them together afterwards.
9 Click on the Do It button.
When the consolidate operation is finished, the new edit is displayed as a Tile. It has
the same name as the original edit, with “(cons)” added to it.
The new shots created by the consolidate operation can be displayed using the Database of Shots command on the Edit Menu for the new edit. The original edit and
shots remain unchanged by the consolidate operation.
The time taken by the consolidation process takes will depend on the size of the edit
and the speed of the destination disk.
A24.2.3
Consolidating a Ghost To Free Hard Disk Space
Consolidating a ghost will allow you to free up hard disk space in the same way as consolidating an edit. You can consolidate several ghosts at once by joining them together into an
edit first.
A24.2.4
Using Consolidate To Copy an Edit To Another Drive
Consolidate can be used to save an edit to any of the disk drives connected to the system,
including removable media such as optical disks. The new edit and new shots created by
the consolidate operation will then be stored on the removable disk.
This provides an alternative to using the Import/Export Tool to archive the edit. If you use
archiving you will have to copy the whole length of all the original shots used in the edit. If
you use consolidate you will be copying just the sections of the shots used in the edit.
A24.0 - 470
Lightworks V.I.P 4500 Version 3 - User Guide
Using Consolidate
A24.2.5
A24.2
Using Consolidate To Generate a Logging Database
You can use the consolidate feature to generate a Logging Database from an edit. A Logging
Database generated by the consolidate process will contain just the section of each shot used
in the edit (rather than the whole original shots). If this requires the same shot to be divided
into shorter sections, each Logging Database entry is given the original shot name appended
with a letter such as (A), (B) and so on.
The Logging Database can then be used as the source for an autoconform, to rerecord the
material used in the edit.
There are two ways of generating a Logging Database from an edit, either by using the Logging Database Tool or by using the Consolidate Panel Menu.
To use the Consolidate Panel Menu:
1 Display the Edit Menu for the edit.
2 Click on the Consolidate command to display the Consolidate Panel.
3 Set the desired options on the Consolidate Panel to determine which channels are to
be included in the Logging Database.
Lightworks V.I.P 4500 Version 3 - User Guide A24.0 - 471
A24.2
Using Consolidate
4 Enter the desired handle size (in seconds).
The handles will be used when autoconforming the Logging Database to add extra
material to the start and end of each recording. You can use this feature to re-record
more of each shot than is currently used in the edit, to allow for trimming.
5 Display the Consolidate Panel Menu.
6 Click on the command Create Logging Database.
7 Select where the Logging Database is to be stored by using the Where To Save It?
button to toggle between the current Project, the C:\LWLISTS folder or floppy disk.
8 Enter a name for the new Logging Database.
9 Click on the Do It button.
To use the Logging Database Tool:
1 Place the Logging Database Tool over the edit.
2 Click on the Logging Database Tool. A Consolidate Edit to Logging Database Panel
is displayed.
3 Set the options on the Consolidate Edit to Logging Database Panel to determine
which channels are to be consolidated.
A24.0 - 472
Lightworks V.I.P 4500 Version 3 - User Guide
Consolidate Options
A24.3
4 Select the handle size (in seconds).
5 Select where the Logging Database is to be stored by using the Where To Save It?
button to toggle between the current Project, the C:\LWLISTS folder or floppy disk.
6 Enter a name for the new Logging Database. (This must be a legal filename.)
7 Click on the Do It button.
A24.3
Note: Legal filenames can contain up to eight letters or numbers but cannot include
spaces, points, slashes, brackets, asterisks, question marks and so on. Make sure you
choose a unique name otherwise it will overwrite any existing Logging Database in
the Project with the same name.
Consolidate Options
A24.3.1
Determining Which Channels To Consolidate
The picture and sound checkboxes work in combination with the Ignore Unused Source
Shot Chans/Consider Entire Source button.
Picture and Sound Checkboxes
These checkboxes determine the combination of picture and/or sound to be consolidated. The resulting consolidated edit will not include the video channel(s) from the
original edit if video was not consolidated (and similarly for the audio).
Ignore Unused Source Channels
With the button set to Ignore Unused Source Channels, only channels from source
shots used in the edit will be consolidated.
So, for example, if a shot was VA1A2 and only V and A1 were used in the edit, the
consolidated shot will only contain V and A1 channels.
Consider Entire Source
With the button set to Consider Entire Source, all the channels from the source material are consolidated, even if some of them were not used in the edit.
So, for example, if a shot was VA1A2 and only A1 was used in the edit, the consolidated shot will still contain V A1 and A2 channels.
Lightworks V.I.P 4500 Version 3 - User Guide A24.0 - 473
A24.3
Consolidate Options
A24.3.2
Force/Saving Button
A button on the Consolidate Panel toggles between Force and Saving.
Force
The Force option is used to force the consolidate operation to make a new shot for
every shot used in the edit. This means that the resulting consolidated edit will be
completely self-sufficient - it will not need any of the original shots.
The Force option must be used if:
You wish to delete all the original shots.
You are using consolidate to copy an edit to optical disk.
You are using consolidate to generate a Logging Database.
Saving
The Saving option is used to tell the consolidate operation to make new shots only
for those shots where more than a specified amount (in seconds) is unused in the edit.
You choose the amount; any shots which have less than this amount unused are not
copied.
To choose this mode of consolidating, click on the Force/Saving button to show
Saving.
Type the value you want in to the field that appears. If you set a value of 2, any shots
that have less than 2 seconds unused by the edit will not be copied. The default value
is 1 second; you can set it to any number you like.
A24.0 - 474
WARNING: DO NOT USE THE SAVING OPTION IF YOU NEED TO
CREATE A SELF-SUFFICIENT CONSOLIDATED EDIT. DO NOT USE
THE SAVING OPTION UNLESS YOU ARE SURE YOU KNOW WHAT YOU
ARE DOING.
Lightworks V.I.P 4500 Version 3 - User Guide
A25.0 Project Management 2 - Import and Export Of Logs and Material
A25.1
Introduction
It is possible to transfer data between the V.I.P disk drives and any connected local or network drive. The
main applications of this are:
Making a backup copy of work for safety purposes.
Saving work prior to deleting it from the V.I.P system drive.
Moving work from one V.I.P system to another.
Moving work from a V.I.P system to another disk based post-production tool.
Exporting means copying shots and edits from the V.I.P system to another drive. Importing is the reverse
of exporting. To use the import and export features effectively, it is important to be aware of how shots
and edits are defined on the V.I.P system. See ‘Definitions’ on page 55.
When exporting, the user can choose which shots and edits are going to be exported and whether to
export material or not. Whether material is copied is based on what you are exporting, as follows:
Shots
When you export shots you are copying the logs and material. Reels are automatically added to
archives which contain shots.
Ghosts or Edits
When you export a ghost or edit you are not copying any material. In order to make a useful copy
you must export the ghost or edit with the logs of all the original shots used. If you want to transfer
material files relating to a ghost, you will need to transfer the original shot from which the ghost
was made as well as the ghost itself. To access the original shot for a ghost, use the Pop-Out Original Tile button.
Reels
The reel data is automatically included when importing and exporting. When importing, a check
is made to see if the reel is present to prevent duplicate reels within the same Project. Following
an import, the system will automatically create any reels which are referenced by the shots but not
present in the Project.
Note: If the label mapping file(s) referenced by the imported reels do not exist on the destination
system, you must use the Reels Panel to select an existing label mapping file.
Lightworks V.I.P 4500 Version 3 - User Guide A25.0 - 475
A25.2
Making a Backup Copy Of a Project
When importing or exporting files from the system, the network access privileges of your account may
limit the drives which are available to you. Please consult your system or network administrator if in
doubt and see the Lightworks V.I.P 4500 Installation Manual.
The V.I.P system supports a number of file formats for import and export. See ‘Supported Formats’ on
page 482.
A25.2
Making a Backup Copy Of a Project
It is possible to export log files without copying the material files. On the V.I.P system, editing decisions
are contained in the log files for shots and edits, stored on the system drive.
Provided you have timecode and reel references back to the original sources then it is possible to use the
log files to redigitise material, if necessary.
Exporting log files only serves as a ‘Project backup’ and should be performed regularly, for safety purposes.
Although the V.I.P system continually saves your Project to the system drive, it is recommended that a
Project backup to a removable disk or network drive is performed as often as practical. This gives an
added level of security, as a copy of the Project information is saved separately from the V.I.P system.
A25.2.1
Making a Project Backup - Step-by-step
1 Place the Import/Export Tool
over a blank area of the graphics screen.
2 Click on the Import/Export Tool to display the Import/Export Panel.
3 Make sure the Export Card is displayed (click on the Export Tab if it is not).
4 Select the Lightworks V.I.P format, using the Format button.
A25.0 - 476
Lightworks V.I.P 4500 Version 3 - User Guide
Making a Backup Copy Of a Project
A25.2
5 Click on the Destination button to display a Visidir.
6 Use the Visidir to select the destination drive or folder for the backup.
7 Uncheck the Picture and Sound checkboxes - leave just Logs checked.
8 Click on the Do It button.
Because no material is copied, a Project backup is fairly quick to do and provides a copy of
the editing decisions. It is recommended that a Project backup is performed as often as is
practical.
A25.2.2
Restoring a Project Backup - Step-by-step
The Import/Export Panel can be used to copy a Project backup (the logs for a Project) into
the current Project. This can be used to restore the contents of the Project, or add the logs
and edits from a backed up Project to the current Project.
1 Place the Import/Export Tool
over a blank area of the graphics screen.
2 Click on the Import/Export Tool to display the Import/Export Panel.
Lightworks V.I.P 4500 Version 3 - User Guide A25.0 - 477
A25.2
Making a Backup Copy Of a Project
3 Make sure the Import Card is displayed (click on the Import Tab if it is not).
4 Click on the Choose button.
5 Use the Visidir to select the drive or folder where the Project backup is stored.
The Project backup will be called “Project - [name and date]”.
6 Highlight the name of the Project to restore.
7 Click on the Do It button.
The logs in the Project backup will be copied into the current Project. A Database
called “Imports” will be displayed containing the logs from the restored Project.
A25.0 - 478
Lightworks V.I.P 4500 Version 3 - User Guide
Importing and Exporting
A25.3
A25.3
Importing and Exporting
The procedures for importing and exporting are similar for all file formats.
A25.3.1
Importing - Step-by-step
1 Click the Import/Export Tool
over a blank (grey) area of graphics screen or
click on the Import Tab of the Import/Export Panel. The Import Card is displayed.
Total Size of
Selected Files
2 Click on the Choose button. A Visidir is displayed, from which you can select files
to import. Only files which can be imported are displayed, as follows:
Lightworks V.I.P 4500 Version 3 - User Guide A25.0 - 479
A25.3
Importing and Exporting
Lightworks V.I.P - Files with the extension .ARCHIVE.
OMF1 - Files with the extension .OMF.
OMF2 - Files with the extension .OMF.
WAV - Files with the extension .WAV.
3 Use the Visidir to locate the folder containing the file(s) you wish to import.
If you select a local material drive (normally INT:) using the Drive Selector button
on the Visidir, you will be able to choose certain files and also Profile Movie
Archives. Importing from the internal material drives is normally part of the Fibre
Channel media exchange process. See ‘Fibre Channel Support’ on page 488.
4 Select the file or files by clicking on them.
5 Click on the OK button.
The files chosen to import are listed on the Import/Export Panel. The total size of all
files selected is shown beneath the Details button.
6 You can add more files of different types and from different folders by clicking the
Choose button again.
7 You can use the Remove button to remove any files from the list that you do not want
to import. Highlight the file(s) to be removed in the list then click on the Remove
button.
The Details button displays a database of filename, size and last modification date
for all the files chosen. For .ARCHIVE files, the name of all shots contained in the
archive are shown in the Name column. Individual files listed on the Details Panel
can be untagged to exclude them from the import.
8 Click on the Destination button to choose the drive to which the files will be
imported.
9 Click on the Do It button to start importing the files. A progress bar is displayed.
Once complete, the imported shots and edits will be put into a Gallery called
“Imports”. When importing in Lightworks V.I.P format, the same Galleries that were
exported will be recreated and displayed as part of the import process.
A25.0 - 480
Lightworks V.I.P 4500 Version 3 - User Guide
Importing and Exporting
A25.3.2
A25.3
Exporting - Step-by-step
1 Click the Import/Export Tool
over the object that you wish to export. You can
export a shot, edit, Gallery or Database. If you are going to export the whole Project,
click the Import/Export Tool over any shot, edit, Gallery or Database in the Project.
The Export Card is displayed.
2 Click on the Format button. A list of supported formats is displayed.
3 Click on the format you wish to use for the export.
4 Click on the Destination button. A Visidir is displayed.
5 Select the folder where you want the exported file(s) to be saved. You must have
sufficient Windows NT user access rights to write to the destination chosen.
Note: The format you have selected to export will determine where you can save the
files. Only suitable destinations will be listed.
6 When you have located the destination folder, click on the OK button on the Visidir.
7 Confirm that the Export Items From button shows the name of the object that you
want to export. If desired, you can select other objects (including “Whole Project”),
by using this button.
Lightworks V.I.P 4500 Version 3 - User Guide A25.0 - 481
A25.4
Supported Formats
8 Confirm that the checkboxes labelled Picture, Sound, Logs and Histories (see
‘Replicate History’ on page 355) reflect the correct combination of material and logs
to be exported.
Mandatory options (for the chosen format) will be greyed out with a grey checkmark
which cannot be removed. Unavailable options (for the chosen format) will be
greyed out (with no checkmark).
9 You can check the amount of space required to export the selected items by clicking
on the Import/Export Menu command Calculate Space Required.
10 Click on the Do It button to start exporting the files.
The total size of files to be exported will be calculated and a check made for sufficient
free space on the destination drive. The files will then be exported.
A25.4
Supported Formats
A25.4.1
Lightworks V.I.P Format
Lightworks V.I.P format is not interchangeable with other applications or systems. It provides backup and archiving of Projects for safety or for use on other V.I.P systems.
Lightworks V.I.P Format Export
Files can be exported to any local, removable or network drive recognized by Windows NT.
More than one shot or edit can be exported to the same destination folder. Each
export operation creates a folder based on the name of the object being exported
(such as the Gallery name). This folder contains a summary database (.ODB file) and
a set of the appropriate files.
The set of files created depends upon the Picture and Sound options selected. If the
Picture checkbox is checked, the picture files will be created for each shot exported.
These can be extremely large (several Gbytes). If the Sound checkbox is checked, the
sound files will be created, one per audio channel, for each shot exported. These can
also be large. The Logs option is mandatory. A log file is created for every shot and
edit exported. If an edit is exported, all shots referenced in the edit will also be
exported. Sound and picture files will always contain the whole shot, not just the part
referenced by an edit.
If you only want the archive to contain the sections of shot referenced by an edit, it
is necessary to consolidate an edit, then archive the consolidated version.
A25.0 - 482
Lightworks V.I.P 4500 Version 3 - User Guide
Supported Formats
A25.4
Lightworks V.I.P Format Import
Archives can be imported from any local, removable or network drive recognised by
Windows NT. Archived material can only be imported into Projects of the same TV
Standard.
A25.4.2
OMF1 and OMF2
OMF (Open Media Framework) is a file format that allows picture, sound and edit decision
data to be exchanged between applications and systems. The 1 or 2 suffix denotes the version of the standard, with OMF2 being the more recent revision. Although the V.I.P system
can import and export both OMF1 and OMF2, the level of information imported or
exported is the same.
OMF Export
Files can be exported to any local, removable or network drive recognised by Windows NT.
The V.I.P system supports only the sound and edit decision parts of the OMF
standard, and both of these must be present. As such, the Picture option is disabled
and the Sound and Logs options are mandatory.
All shots and edits in the object selected for export will be written to the same .OMF
file, in Gallery or Database order if applicable. Any shots referenced by an edit will
automatically be included.
OMF Import
Files can be imported from any local, removable or network drive recognised by
Windows NT.
The V.I.P system supports only the sound and edit decision parts of the OMF
standard. Any picture information will be discarded. Files with more than 16 audio
channels cannot be imported.
To successfully import OMF files, the V.I.P system requires the OMF files to conform to the baseline OMF standard.
When importing OMF files into the V.I.P system, the audio sample rate of the file
must match the audio sample rate of the Project.
Lightworks V.I.P 4500 Version 3 - User Guide A25.0 - 483
A25.4
Supported Formats
Notes on OMF Logs
These log files get created when importing material using the Import/Export Tool.
The Destroy Projects command, on the System Menu in the Machine Room, does
not delete any OMF logs, as these are stored in the C:\LWPROJ folder. They should
be deleted manually using Windows NT Explorer.
Composition Information and Media Data
OMF interchange files allow applications to store the media in separate files from the
composition information. When importing an OMF file into the V.I.P system, the
media data must be stored in the same file as the composition information.
OMF Edit Rate
When importing an OMF file into the V.I.P system, the edit rate of the file must
match the edit rate of the Project. For example, if you are working in a PAL Project,
the OMF edit rate must be 25.
Exporting Shots
The V.I.P system can only export edits in OMF format. It is not possible to export
shots. If you wish to export shots, create an edit containing them, then export the edit.
Edit Timecode When Exporting or Importing OMF Files
The V.I.P system does not support the transfer of the edit start timecode in OMF
format. If you have modified the start timecode of an edit using the Viewer Labels
Panel, this timecode is ignored in the conversion to OMF format. All imported or
exported edits will have a start timecode of 00:00:00:00.
A25.0 - 484
Lightworks V.I.P 4500 Version 3 - User Guide
Supported Formats
A25.4
Source Channel Mapping for OMF Imported Material
The V.I.P system will import the source material and assign the first referenced audio
channel to be A1, the second to be A2 and so on. This happens even if the audio channels were A3, A4 on the original source tapes. This does not affect the imported
material as it is used in the imported composition (edit), as this plays correctly.
If you wish to redigitise the audio from the original tapes using the imported information from the OMF composition, you will need to manually confirm the correct
audio channels are being recorded. This can be done by patching the source device
so that audio channels are all recorded as A1, A2.
Note: The extra channel mapping data is contained within the OMF format but this
information is not used by the V.I.P system when creating the audio material.
AIFC Format
OMF files can be exported in AIFC format. See ‘allow_omf_aifc_export’ on page
588.
A25.4.3
WAV
WAV files are part of the Microsoft RIFF (Resource Interchange File Format) family. The
WAV format allows for several audio encoding schemes, the simplest of which (and most
universally used) is PCM. The V.I.P system imports and exports WAV files using only PCM
audio encoding.
WAV Export
Files can be exported to any local, removable or network drive recognized by Windows NT.
The V.I.P system exports only two channel WAV files, as multi-channel WAVs are
not recognized by most applications. Each shot is exported as one or more two
channel WAV files. Edits cannot be directly exported - instead each shot used in the
edit is exported. A .LOG file will be created in the chosen destination folder which
details the shots and channels that make up each exported WAV.
Lightworks V.I.P 4500 Version 3 - User Guide A25.0 - 485
A25.4
Supported Formats
Import
Files can be imported from any local, removable or network drive recognized by
Windows NT.
The V.I.P system can import WAV files of 1 to 16 channels. The sample rate of the
WAV files imported must match the audio sample rate of the Project, or an import
error will occur. Any WAV files conforming to the RIFF standard and using PCM
audio encoding can be imported. This includes uncompressed Broadcast Wave
Format (BWF) files, although the .BWF extension (if present) must be changed to
.WAV. The extra information contained in BWF files is ignored.
When importing WAV files into the V.I.P system, the audio sample rate of the file
must match the audio sample rate of the Project.
A25.4.4
Audio Workstation
The Audio Workstation format is closely related to the native Lightworks V.I.P format. It
provides compatibility with third-party audio workstations that can read Lightworks or
Heavyworks audio files.
Audio Workstation Export
Files can be exported to any local, removable or network drive recognized by Windows NT. However, you cannot select a folder within that drive. A folder called
MATERIAL will automatically be created in the root folder of the drive you choose.
Each shot exported will be saved as one or more .S24 files, one per audio channel.
Edits cannot be directly exported - instead each shot used in the edit will be exported.
Audio Workstation Import
Audio Workstation files cannot be imported.
A25.4.5
Supported Profile Formats
Profile disk recorder terminology is different to the Lightworks terminology applied in this
user guide.
A ‘clip’ is a Profile disk recorder equivalent to a Lightworks ‘shot’; meaning a single piece
of material. A ‘movie’ is a Profile disk recorder equivalent to a Lightworks ‘edit’; meaning
a number of shots that can be played one after the other. In the Profile system, the term
‘complex movie’ is sometimes used as the equivalent of an ‘edit’, being made up of several
clips. As the simplest case of an edit is a single shot, this is sometimes referred to as a
‘simple movie’.
A25.0 - 486
Lightworks V.I.P 4500 Version 3 - User Guide
Supported Formats
A25.4
Profile Movie Format
The Profile Movie format is supported in order to enable the V.I.P system to export
to Profile applications. A Profile Movie can be played on the Profile disk recorder,
EditStar, LVS or similar Profile application. It consists of material with cuts but has
no other edit data.
All the material is in correct order and may not be a single clip (unless made from a
single shot or replicated edit).
Wipes, audio and video effects created by the V.I.P system are not supported and
therefore cannot be replayed on a Profile system. Edits must be replicated before
exporting in Profile Movie format. Profile Movie format edits cannot be imported
into the V.I.P system.
Exporting as a Profile Movie does not use any disk space; it just creates pointers to
the existing material.
Movie Archive
A ‘Movie Archive’ (.MAR) is actually a collection of shots and edits. It does not
make sense to play such a Movie Archive, as it consists of all the shots back-to-back
in a random order. The purpose of a Movie Archive is archiving, shared storage and
exchange of edits between V.I.P systems.
Exporting as a Movie Archive converts shots and edits on the V.I.P into material
which the Media Manager software can see and copy between V.I.P systems.
Importing Movie Archives takes the collection of data and converts it back into shots
and edits that can be played on a V.I.P system.
Movie Archives can only be created on local V.I.P material drives and then moved to
the V.I.P material drives or Profile datasets. Movie Archives are not accessible to
Windows NT Explorer.
Note: You cannot inspect the contents of a Movie Archive and pick out individual
shots to import - you have to take them all.
Number of Channels in Supported Profile Formats
There is no limit to the number of video and audio channels when exporting in Profile
Movie and Movie Archive formats. As Profile Movie format is intended to be played
on a Profile, it must reflect the number of channels available on the destination playback machine. This is likely to be one video and four audio for a play-to-air machine.
Lightworks V.I.P 4500 Version 3 - User Guide A25.0 - 487
A25.5
A25.5
Fibre Channel Support
Fibre Channel Support
Fibre Channel allows a faster than real time file copy of material between V.I.P systems or V.I.P systems
and Profile disk recorders. The Fibre Channel infrastructure and performance for the V.I.P system relies
on a network of Fibre Channel and Ethernet hubs. For information on connecting and configuring V.I.P
systems on a Fibre Channel network see the Lightworks V.I.P 4500 Fibre Channel Upgrade Installation
Manual.
The V.I.P system transfers shots and edits via Fibre Channel in Profile Movie and Movie Archive formats. See ‘Supported Profile Formats’ on page 486.
These are some of the operations that can be performed:
Transfer of shots and edits between V.I.P systems, preserving all edit data.
Transfer of shots and edits to Profile systems for ‘cacheing’ for later import to the same or
another V.I.P system, preserving all edit data.
Import of material recorded on a Profile for subsequent editing on a V.I.P system.
Export of simple completed edits from V.I.P system for replay on a Profile.
Export of complex edits, including all video and audio effects, as replicated shots that can be
represented in Profile Movie format and replayed on a Profile.
In order for edits created on a V.I.P system to be replayed on a Profile, they may need to be ‘flattened’
(using the replicate feature), so that they contain a single video channel and a reduced number of audio
channels and can be replayed by the destination Profile. (The number of channels is likely to be one
video and four audio for a play-to-air machine.)
Fibre Channel transfers are initiated and controlled by the Media Manager software application. This is
a Tektronix Windows NT application that is run on the NT side of the V.I.P system, or on a separate computer connected to the same LAN network as the V.I.P systems and Profiles that contain the media.
Using Fibre Channel to import or export material from the system can take place at the same time as
editing or recording. Fibre Channel transfers are always background operations.
A25.5.1
Media Manager Application
The Media Manager application is the means by which material (media) is transferred
between systems connected to a Fibre Channel network consisting of V.I.P and/or Profile
systems.
The Fibre Channel network can connect any combination of V.I.P and Profile systems, and
these can be made to appear as sources and destinations on the Media Manager interface.
A25.0 - 488
Lightworks V.I.P 4500 Version 3 - User Guide
Fibre Channel Support
A25.5
In common with other file management applications, Media Manager provides a graphical
representation of the network and allows files and folders to be moved between systems by
‘dragging and dropping’.
The use of Media Manager is described in the User Manual Tektronix Profile Family issued
with Profile software and available from the Tektronix VND Website.
A25.5.2
Note: The media files contained in the ‘bins’ visible to Media Manager exist on the
material drives of the Profile and V.I.P systems and are therefore not accessible using
Windows NT Explorer. Media Manager must be used to inspect or move the material.
Exporting Shots and Edits Via Fibre Channel
The export process from a V.I.P system via Fibre Channel is as follows:
1 Use Media Manager to create a bin on one of the local V.I.P material drives.
2 Within the V.I.P program, select the shots and/or edits to be exported.
3 Display them in a Gallery or Database.
4 On the Import/Export Panel, select either Profile Movie or Movie Archive format.
5 Select the desired bin on the local material drive as the destination for the export.
6 Select the required combination of Picture, Sound, Logs and Histories. For more
information on histories, see ‘Replicate History’ on page 355.
7 Click on the Do It button. The exported item is listed in the selected bin with a name
based on the Gallery, Database or edit name.
Note: At this point, a collection of pointers has been created that can be seen by the
Media Manager software. No material has been moved or copied.
8 Using the Media Manager application, select the exported item and drag it to a
destination bin on another system.
This will actually copy the material referenced by the pointers from the source to the
destination drive using the Fibre Channel connection. After the copy is complete, the
pointers on the source machine are deleted. The exported item(s) then need to be
imported on the destination machine.
Lightworks V.I.P 4500 Version 3 - User Guide A25.0 - 489
A25.5
Fibre Channel Support
A25.5.3
Importing Shots and Edits Via Fibre Channel
The import process via Fibre Channel from a V.I.P system is as follows:
1 Within the V.I.P program, use the Import/Export Panel to select the bin (on one of the
local material drives) containing the shots and/or edits to be imported.
2 Click on the Do It button. The imported shots will be displayed on the V.I.P screen
in a Database.
A25.5.4
Deleting Exported Material
Once shots or edits have been exported in Profile Movie or Movie Archive format, they still
reside on the local material drives of the V.I.P system until moved to another system by the
Media Manager software.
This means that after performing an export operation in Profile Movie or Movie Archive
format using the Import/Export Tool, the shots still use space on the V.I.P material drives.
This space will not be freed until the files have been moved from the bin on the local material drive to a bin on another machine. Deleting the source material or destroying the Project
from within the V.I.P application will not destroy any exported material until it has been
moved to its ultimate destination.
This safety feature prevents material required by an export being destroyed ‘in transit’,
before it reaches its destination. Note that this does mean that space on the V.I.P material
drives can therefore be taken up by ‘in transit’ exported material.
A25.5.5
Transfer Speeds and Resources
Media can be moved to and from the V.I.P system via the Fibre Channel network without
impacting the editing performance of the system. This is because the transfer operation is a
background file copy which does not use any playback resources.
The speed of transfer will be affected by many factors - presence of other network traffic,
the picture quality and number of audio channels of the material. Under ideal conditions,
transfers can take place at speeds approaching four times real time.
A25.5.6
Automatic Creation Of Profile Movies
The V.I.P system can be configured to automatically create a Profile Movie for every shot
recorded. See ‘mirror_as_movies’ on page 599.
A25.0 - 490
Lightworks V.I.P 4500 Version 3 - User Guide
Using Optical Disks
A25.6
The bin for the Profile Movies to be stored in can specified for the Project (using the Project
Bin button on the Project Card) or for individual reels (using the Profile Bin button on the
Reels Panel).
A25.6
Using Optical Disks
The V.I.P system ROMU contains a magneto optical disk drive.
Magneto optical disks are removable disks used for storing computer data. An optical disk must be correctly formatted before it is used for the first time, using the Windows NT Disk Administrator utility.
If using optical disks to transfer audio material between systems (including other Lightworks products)
make sure that you use a compatible optical disk (of the appropriate type and size).
It is not possible to directly play shots stored on an optical disk - the material must be imported to the
V.I.P material disks first.
A25.7
Using the PLS20 Tape Archiving System
The export and import of media to the PLS20 single drive Exabyte tape storage system is accomplished
via the Movie Archive format.
First, select the material to be transferred to the tape drive. The export this to a bin on the V.I.P internal
disks in the Movie Archive format or Profile Movie format. The Movie Archive format is recommended
as this will preserve all edit data, and must be used for Project backups.
Use the Tektronix Media Manager application to initiate and control transfers of the media from the bin
to the PLS20 tape drive. This archive process copies the raw data direct to the tape storage system,
avoiding the need to recompress the material by redigitising.
The import process uses Media Manager to transfer the archive from tape into a bin on the V.I.P material
disks. The media can then be imported into a Project from within the V.I.P program.
A25.8
Deleting Archive Files
Use the Import/Export Menu command Delete Lightworks V.I.P Archive. This will display a Visidir
which can be used to browse for .ARCHIVE files. If you select a file then click on the OK button, the
.ARCHIVE file, and all files referenced by it, will be deleted permanently.
Note: You must have sufficient Windows NT user access rights to delete the files.
WARNING: DELETING AN ARCHIVE WILL DESTROY ALL LOGS AND MATERIAL
CONTAINED IN THE ARCHIVE. MAKE SURE YOU REALLY WANT TO DO THIS.
Lightworks V.I.P 4500 Version 3 - User Guide A25.0 - 491
A25.9
A25.9
Disk Manager
Disk Manager
The Disk Manager can be used to perform the following operations on internal and external material
disks local to the V.I.P system:
Local disks can be given names.
Two or more local disks can be grouped under one name.
The amount of free space on each local disk can be displayed.
Material can be moved or copied between local material disks.
WARNING: ANY CHANGES MADE USING THE DISK MANAGER TOOL WILL
AFFECT ALL PROJECTS ON THE V.I.P SYSTEM. TAKE EXTRA CARE WHEN DIFFERENT PROJECTS ARE SHARING MATERIAL DISKS.
To display the Disk Manager, click on the Tower Tool
from the Toolbox.
Amount of
Space Used
Disk Name
Button
Rename
Button
Ungroup
Button
Disk Manager
A25.9.1
Naming Material Disks
Each disk connected to the V.I.P system is given a name. The disk will be referred to by this
name in any Project on the system.
These names are assigned in one of two ways:
A25.0 - 492
Lightworks V.I.P 4500 Version 3 - User Guide
Disk Manager
A25.9
Default Disk Name
Each disk connected to the system will have a default name. This is assigned when
the data set is created during the installation process. For the internal disk, the default
name will usually be “INT”. This name will be used unless another name is entered
using the Disk Manager.
Disk Name Entered Using the Disk Manager
You can rename a disk, using the Disk Manager, at any time. However, as this is a
system-wide setting, in most cases it is recommended that the defaults are used.
To rename a disk using the Disk Manager:
1 Select the disk by clicking on the Disk Name button.
2 Click on the Rename button. A text entry box appears.
3 Type the desired name. Any name up to 20 characters in length is permitted. There
is no restriction on using the same name twice.
4 Click on the OK button. The new name will appear on the disk name button.
A25.9.2
Grouping Disks
It is possible to group two or more disks under one disk name. For example, it is possible
to group the internal disk with those in an external expansion unit.
To group disks:
1 Highlight the disks to be grouped by clicking on their Disk Name buttons.
Disks to be grouped can include already grouped disks. When more than one disk
name is highlighted, the Rename button changes to say Group.
2 Click on the Group button. A text entry box appears.
3 Type the desired disk name for the grouped disk.
4 Click on the Do It button. The Disk Manager shows the grouped disk as one disk with
its disk name.
A25.9.3
Displaying Information About Grouped Disks
To view the default disk name for each grouped disk, click on the Disk Manager Menu command Show Grouped Drive Information. A status panel will be displayed.
Lightworks V.I.P 4500 Version 3 - User Guide A25.0 - 493
A25.9
Disk Manager
A25.9.4
Ungrouping Disks
To ungroup disks:
1 Select the group to ungroup by clicking on its Disk Name button.
2 Click on the Ungroup button. The Disk Manager will show the original disk names
for the ungrouped disks.
A25.9.5
Moving Material Between Disks
The Disk Manager can be used to move material between disks. The move operation copies
material to the destination disk(s) and then deletes it from the source disk(s).
Clicking on the Move Material button will expand the Disk Manager, providing a new set
of buttons.
To cancel the move (without actually moving anything), click on the Move Material button
again.
To move material between disks:
1 To choose the source for the move, position the Disk Manager over a Gallery or Database and click on the Set Source button. The name of the source and the size of its
contents will be displayed.
2 To choose the destination for the move, click on the Set Dest button to cycle through
the names of the available disks until the desired disk is displayed. It is possible to
specify a grouped disk as a destination.
3 Click on the Do It button.
Picture and sound files are moved from their original disk(s) to the destination disk(s).
(After the move operation, the picture and sound files no longer exist on the original disk.)
Moving material between disks may take a long time. A status gauge shows the progress of
the operation.
The move operation may be interrupted at any time by pressing the ESC key. If a move is
interrupted in this way it will stop at the current file.
A25.9.6
Copying Material Between Disks
The Disk Manager can be used to copy material between disks. The copy operation copies
material to the destination disk and leaves it on the source disk.
A25.0 - 494
Lightworks V.I.P 4500 Version 3 - User Guide
Disk Manager
A25.9
After completing copy operations, the source and destination disks involved should not be
left connected to the system at the same time, as having two copies of the same material will
confuse the system.
WARNING: DO NOT USE THE DISK MANAGER TO COPY MATERIAL
UNLESS YOU ARE ABSOLUTELY SURE YOU KNOW WHAT YOU ARE
DOING!
To copy material between disks, follow the steps for the move material operation, but click
on the Copy button before clicking on the Do It button.
The Copy button will turn red to indicate that the Disk Manager is in copy mode.
Lightworks V.I.P 4500 Version 3 - User Guide A25.0 - 495
A25.9
A25.0 - 496
Disk Manager
Lightworks V.I.P 4500 Version 3 - User Guide
A26.0 Project Management 3 - Deleting
A26.1
Introduction
Deleting means removing shots and edits from the V.I.P hard disks.
In order to use the deletion feature safely and effectively, it is important to be aware of how shots and
edits are defined and stored on the V.I.P system. See ‘Definitions’ on page 55.
In general, to delete something you should go through the following steps:
1 Decide which shots, ghosts or edits to delete.
Options include:
An individual shot, ghost or edit
A group of shots, ghosts and/or edits
All the shots used in an edit
All the shots not used in an edit
All the shots recorded from a reel
2 Display the shots, ghosts and/or edits to be deleted in a Gallery or Database.
3 For shots (not ghosts or edits) decide whether to:
Delete picture and sound material only (but keep the logs)
Delete picture only
Delete sound only
Destroy both logs and material
4 Perform a Project backup if necessary.
5 Perform the deletion by displaying the menu for the Gallery or Database and clicking
on the appropriate command.
WARNING: NEVER DELETE ANYTHING UNLESS YOU ARE ABSOLUTELY SURE
YOU KNOW WHAT YOU ARE DOING!
Lightworks V.I.P 4500 Version 3 - User Guide A26.0 - 497
A26.2
Finding the Shots, Ghosts and Edits To Delete
WARNING: IT IS POSSIBLE FOR ONE SHOT (OR EDIT) TO BE ON THE GRAPHICS
SCREEN IN MORE THEN ONE PLACE AT THE SAME TIME. THIS DOES NOT MEAN
THERE IS MORE THAN ONE COPY OF THE SHOT ON THE HARD DISKS. IF YOU
DELETE THE SHOT FROM THE HARD DISK IT WILL BE DELETED FROM ALL
PLACES ON THE SCREEN!
WARNING: IF YOU DELETE THE MATERIAL FOR A SHOT USED IN TWO
PROJECTS IT WILL GO BLACK IN BOTH PROJECTS.
A26.1.1
Deleting Ghosts
If a ghost is deleted, the original shot (log and material) will remain untouched. Deleting a
ghost is like deleting an edit - since a ghost does not actually have material of its own.
A26.1.2
WARNING: IF YOU DELETE THE LOG OF THE ORIGINAL SHOT THEN
EDITS WHICH USE THE GHOST MAY NOT HAVE CORRECT EDLS.
Deleting Reels
A26.2
WARNING: IF YOU DELETE THE MATERIAL FOR THE ORIGINAL
SHOT THEN THE PICTURE AND SOUND FOR THE GHOST WILL BE
LOST.
WARNING: IF A REEL IS DELETED THE SYSTEM WILL ALSO
DESTROY ALL SHOTS RECORDED FROM THIS REEL (THAT IS ALL
SHOTS WITH THE REEL ID OF THE DELETED REEL).
Finding the Shots, Ghosts and Edits To Delete
Shots, ghosts and edits are deleted from the V.I.P system by using the Gallery Menu or the Database
Menu. This means that in order to delete shots or edits you must first display them in a Gallery or Database. The method will depend on what you want to delete.
A26.2.1
An Individual Shot, Ghost or Edit
Use the Searchcard to find the shot, ghost or edit and display it in a Gallery or Database.
A26.0 - 498
Lightworks V.I.P 4500 Version 3 - User Guide
Deciding Whether To Delete Material Only
A26.3
Alternatively, use the command Destroy this Shot/Edit? which appears on the Stripview,
Viewer and Edit-to-it Menus, when configured by a CONFIG.DAT parameter. See
‘viewer_menu_delete’ on page 605. This command can be used to destroy the individual
shot, ghost, reel or edit displayed in the Viewer.
A26.2.2
A Group Of Shots, Ghosts and/or Edits
Use the Searchcard to find the shots, ghosts and/or edits and display them in a Gallery or
Database.
A26.2.3
All the Shots Used In an Edit
1 Display the Edit Menu.
2 Click on Gallery of Shots or Database of Shots.
A26.2.4
All the Shots Not Used In an Edit
It is possible to generate a Database of ‘shots not used’ in an edit. See ‘Database Of Shots
Not Used In an Edit’ on page 506.
A26.2.5
All the Shots Recorded From a Reel
Display the reel in a Viewer and use the Edit Menu commands Gallery of Shots or Database of Shots to display all the shots recorded from that reel.
A26.3
Deciding Whether To Delete Material Only
Whenever you delete a shot, you must decide whether to delete material only or to destroy both log and
material.
A common reason for deleting things is to free storage space in order to record more pictures and sound
into the V.I.P system. In this case you only need to delete the material (not the logs) for the shots.
Deleting the logs for the shots will not free up any space for material, since logs are kept on a separate
system disk in the Main Crate. Deleting edits will not free up any space either, since edits are also kept
on this separate disk. In any case, logs and edits do not occupy a significant amount of storage space,
since they do not contain any pictures and sound.
If you delete the material for a shot but keep the log, then the shot will still exist with Filecard information and timecode, but it will play as black and silence. Any edits in which the shot is used will play black
and silence in place of the deleted material.
Lightworks V.I.P 4500 Version 3 - User Guide A26.0 - 499
A26.4
Deleting Using the Gallery Menu Commands
The Gallery and Database Menu commands offer the following range of options for deletion:
A26.4
Destroy Reels and Their Associated Material
Delete Material (Picture and Sound) from Shots
Delete Only Picture Material from Shots
Delete Only Sound Material from Shots
Destroy Shots, Material, Edits and Ghosts
Deleting Using the Gallery Menu Commands
The options offered by the various deletion commands are described below. The effect of each deletion
command depends on whether it is applied to a shot or an edit. (Ghosts behave in the same way as edits).
A26.4.1
Destroy Reels and Their Associated Material
The shots recorded from any of the reels in the Gallery are destroyed. The reel is also
destroyed.
This frees disk space. Any edits using shots recorded from the reel will have black holes in
them and no longer have valid timecode and reel information.
A26.4.2
Delete Material (Picture and Sound) From Shots
Shots
Deletes all the material (picture and sound) for the shots in the Gallery. This frees
space on the hard disks. The logs for the shots remain untouched.
Edits
Any edits in the Gallery will not be deleted by this command and will still have valid
timecode and reel information. However, if any picture or sound from shots used in
the edit has been deleted, then that part of the edit will play as black or silence.
A26.4.3
Delete Only Picture Material From Shots
Shots
Deletes all pictures for the shots in the Gallery. This frees space on the hard disks.
The sound material and logs for the shots remain untouched.
A26.0 - 500
Lightworks V.I.P 4500 Version 3 - User Guide
Deleting Using the Gallery Menu Commands
A26.4
Edits
Any edits in the Gallery will not be deleted by this command and will still have valid
timecode and reel information. However, if any picture from shots used in the edit
has been deleted, then that part of the edit will play as black.
A26.4.4
Delete Only Sound Material From Shots
Shots
Deletes all sound for the shots in the Gallery. This frees space on the hard disks. The
picture material and logs for the shots remain untouched.
Edits
Any edits in the Gallery will not be deleted by this command and will still have valid
timecode and reel information. However, if any sound from shots used in the edit has
been deleted, then that part of the edit will play as silence.
A26.4.5
Destroy Shots, Material, Edits and Ghosts
WARNING: THIS COMMAND TOTALLY DESTROYS ALL SHOTS,
GHOSTS AND EDITS IN THE GALLERY.
Shots
Deletes the material (picture and sound) and logs for the shots in the Gallery.
This frees space on the hard disks.
Any edits using the deleted shots will have ‘black holes’ in them and will no longer
have valid timecode and reel information.
Edits
Any edits in the Gallery will be deleted. (The shots used in the edit will not be deleted
unless they are also included in the Gallery).
A26.4.6
Deleting an Archive
You can delete any shots or edits contained in an archive (on a removable disk, for example)
created by using the Import/Export Menu command Delete Lightworks V.I.P Archive.
Lightworks V.I.P 4500 Version 3 - User Guide A26.0 - 501
A26.5
Deleting Using the Database Menu Commands
A Visidir of destination drives and the archives they contain is displayed. Select one and
click on the OK button. Any shots and edits in the archive will be deleted from the drive.
A26.5
Deleting Using the Database Menu Commands
The Database Menu deletion commands work in the same way as the equivalent commands on the Gallery Menu, except that the commands only operate on tagged entries in the Database.
A26.6
Performing the Deletion
Before performing the deletion you should have read the earlier sections of this chapter and made careful
choices about what to delete. Deletion is irreversible and therefore it is recommended that a backup of
the Project (see ‘Making a Project Backup - Step-by-step’ on page 476) is made before proceeding.
A26.6.1
Deleting - Step-by-step
1 Display the shots, ghosts and/or edits to be deleted in a Gallery or Database.
2 Display the menu for the Gallery or Database.
3 Select the appropriate command and click on it. See ‘Deleting Using the Gallery
Menu Commands’ on page 500.
4 After clicking on the command, a warning message will appear. To cancel the
deletion at this stage click on No. To proceed with the deletion click on Yes.
In the case of the Destroy Shots, Material, Edits and Ghosts command, if you click
on Yes at this first warning message then any logs, ghosts or edits that are selected
will be deleted immediately.
If there are any shots being deleted the V.I.P system will perform a search to check
whether the material to be deleted is used in other Projects. If it is, then a warning
message is displayed with three option buttons.
Delete
Clicking the Delete button will delete the material from the system.
Cancel
Clicking the Cancel button will not delete the material for that individual shot.
A26.0 - 502
Lightworks V.I.P 4500 Version 3 - User Guide
Deleting a Whole Project
A26.7
All
Clicking on the All button will immediately delete all the remaining material
and no further warning will be given.
A26.7
Deleting a Whole Project
If you have completely finished with a Project, (having backed up if necessary) and want to remove it
completely from the V.I.P system, use the Delete Projects command on the System Menu.
This destroys all the edits, logs and material, Galleries, Databases, Racks and Rooms in the chosen
Project and removes the Project itself from the system.
WARNING: NEVER DELETE ANYTHING UNLESS YOU ARE ABSOLUTELY SURE
YOU KNOW WHAT YOU ARE DOING!
A26.7.1
Deleting a Whole Project - Step-by-step
1 Enter the Machine Room (from the Lobby).
2 Click on the Delete Projects command on the System Menu. The Delete Projects
Panel is displayed.
3 Click on the Choose Project button. A Project Visidir is displayed, headed ‘Select
Project for Destruction’.
4 Select the name of the Project in the Visidir.
5 Decide whether you want the system to check if material belonging to the selected
Project is used in other Projects. If you do, then check the appropriate checkbox on
the Delete Projects Panel.
WARNING: LOGS OF SHOTS COPIED TO ANOTHER PROJECT WILL
SHARE THEIR MATERIAL FILES WITH THE SHOTS IN THE ORIGINAL
PROJECT. IF THESE SHOTS ARE DELETED FROM ONE PROJECT, THE
MATERIAL WILL BE DELETED FOR BOTH PROJECTS!
6 Click on the Do It button. A warning message will appear, asking whether you wish
to continue.
7 To continue, click on Yes, Destroy Project. A confirmation message will appear
when the Project has been destroyed.
Lightworks V.I.P 4500 Version 3 - User Guide A26.0 - 503
A26.8
A26.8
Finding and Deleting Material With No Logs
Finding and Deleting Material With No Logs
Under certain circumstances, it is possible for material to become ‘orphaned’ by losing its log file. If the
log file is lost or deleted without the material being deleted, then the material can no longer be accessed
by the system but still uses up storage space. You may become aware of this when you have deleted all
material from a material disk but the system is not showing the correct amount of space available.
In this situation, the command Find Orphaned Material For Deletion can be used. This operation produces new logs for the orphaned material, so you can access it and delete it.
A26.8.1
Using the Find Orphaned Material For Deletion Command
1 Enter the Machine Room (from the Lobby).
2 Click on the System Menu command Find Orphaned Material For Deletion.
Any orphaned shots found are given a new log (which does not contain any of the
original information about the shot) and displayed in a Gallery with the name
“Orphaned shots for deletion”. Each shot will be identified by its ‘cookie’. See
‘Cookies’ on page 631.
3 The recovered shots can be viewed for identification purposes, but must then be
deleted.
A26.9
WARNING: DO NOT ATTEMPT TO EDIT WITH THE RECOVERED
SHOTS.
Destroying Reels
The command Destroy Reels and Their Associated Material, found on the Gallery, Database and
Reels Panel Menus, can be used to remove a reel and any shots recorded from that reel. This command
will completely destroy the reel and any shots (logs and material) recorded from it.
A26.0 - 504
WARNING: NEVER DELETE ANYTHING UNLESS YOU ARE ABSOLUTELY SURE
YOU KNOW WHAT YOU ARE DOING!
Lightworks V.I.P 4500 Version 3 - User Guide
A27.0 Project Management 4 - Databases
A27.1
Introduction
A Database is a table of shots and edits displayed as text rather than pictures. A Database can be used in
the same way as a Gallery, to display information or perform an operation. Databases allow easier handling of large numbers of shots and edits.
Tag Button
Field Header/Sort Buttons
Scroll Left/Right Bar and
Scroll Left/Right Buttons
Database Name
Scroll Up/Down Buttons
and Scroll Up/Down Bar
Gallery
Button
There are three types of Database on the Lightworks V.I.P system - each type can be recognised by the colour of its background.
Logging Database (Blue Background)
Logging Databases can be used to control recording into the V.I.P system. See ‘Using
a Logging Database To Assist Recording’ on page 147.
Lightworks V.I.P 4500 Version 3 - User Guide A27.0 - 505
A27.2
Creating Databases
Autoconform Database (Grey Background)
An Autoconform Database is used to inspect and modify lists of shots to be recorded
using the Autoconform Panel. See ‘Inspecting Events To Be Recorded’ on page 174.
Database (Orange Background)
Databases are used for displaying information in text form about shots and edits that
exist on the system.
This chapter covers generic features of all three types and describes how Databases can be used to carry
out project management tasks on the V.I.P system.
A27.2
Creating Databases
This section details the ways in which Databases can be created.
A27.2.1
Database Of Shots and Edits Found By a Search
The Searchcard includes a button which toggles between In Gallery and In Database to
determine whether the results of a search are displayed as a Gallery or Database.
The default fields displayed in the Database can be determined by using the checkbox on
the Database Views Panel. See ‘Choosing the Fields To Display’ on page 508.
A27.2.2
Database Of Shots Used In an Edit
For an edit, clicking on the command Database of Shots on the Edit Menu produces a Database of all the shots used in the edit.
A27.2.3
Database Of Shots Not Used In an Edit
It is possible to create a Database of all the shots not used in a particular edit. This feature
can be very useful when archiving and deleting material from the system. There are two
ways of doing this:
Using the Shots Not Used Command
1 Generate a Database containing only the edit in question. To do this, use the Searchcard to search for the edit by name, displaying the results as a Database.
2 Generate a Database of all shots and ghosts in the Project. Use the Searchcard to do
this, by selecting the Finds Shots and Find Ghosts checkboxes.
A27.0 - 506
Lightworks V.I.P 4500 Version 3 - User Guide
Creating Databases
A27.2
3 Position the Database containing the edit so that its bottom left corner overlaps the
top right corner of the Database containing the shots.
4 Click on the Database Menu command Shots Not Used for the Database containing
the edit.
A Tile will be displayed which contains an edit made of all shots not used in the original edit. The new edit is called “Shots Not Used”. You can now either play the
“Shots Not Used” edit, to review the material, or use the Edit Menu command Database of Shots to generate the Database of shots not used.
Using a Database of All Shots in the Project
1 Generate a Database of shots used in the edit, using the Edit Menu command Database of Shots.
2 Generate a Database of all shots (not edits) in the Project, using the Searchcard.
3 Position the Database of all shots in the Project so that it overlaps the top right corner
of the Database of shots used.
4 Click on the Tag Duplicates command for the Database of all shots in the Project.
This tags all shots in the Project Database that appear in the Database of shots used.
5 Click on the Invert Tag button on the Database of all shots in the Project to remove
tags from the tagged shots and place them on the other shots in the Database. These
are all the shots not used in your edit.
6 Use the Show Tagged button on the Database of all shots in the Project to remove all
untagged entries. The Database now contains only the shots not used in the edit.
A27.2.4
Database Of the Shots and Edits In a Gallery
The Database button on a Gallery can be used to display the contents of the Gallery in a
Database.
A27.2.5
Database Of Shots Recorded Using Edit-to-it
The Edit-to-it Menu command Database of Shots will display a Database of any shots
recorded from the loaded reel using edit-to-it.
Note: Shots recorded from the reel by other means (for example, autoconform) are
not included.
Lightworks V.I.P 4500 Version 3 - User Guide A27.0 - 507
A27.3
Choosing the Fields To Display
A27.2.6
Database Of Shot References
For original shots, the Edit Menu command Database of Shot References will display a
Database of all edits in the Project that the shot is used in.
You can pop out the highlighted edit from the Database by left+right-clicking on it.
A27.2.7
Displaying a Gallery Of Shots and Edits In a Database
The Gallery button on a Database will display any tagged items from the Database in a Gallery.
A27.3
Choosing the Fields To Display
The Database ‘view’ is a term used to describe the selection of fields from the Database that are actually
displayed on screen.
A number of Database views can be defined and stored within a Project. The view can contain all or only
some of the fields in the Database. You can use views to help you organise and display Database information.
The Views button on the Database displays a list of stored views. Highlight the view name and click on
the OK button to change view.
Permanent Databases and Logging Databases are always stored with their current view.
Databases produced by searches will use the default view for the Project if one has been set.
If no default view has been set for the Project, Databases and Logging Databases are initially displayed
with the Name Reel, Start Time, End Time, Channels, Quality, Scene, Shot, Who, Description and Notes
fields.
A27.3.1
Changing the Contents Of a View
The fields displayed in the current Database can be changed by using the Change Database
Format command on the Database Menu.
A27.0 - 508
Lightworks V.I.P 4500 Version 3 - User Guide
Choosing the Fields To Display
A27.3
This command will display the Database Views Panel, which lists all the fields available with the ones in the current view tagged.
To Choose Which Fields Are Displayed
Fields currently selected for display are indicated by tags and are in black type. Fields
not selected appear in light grey type. Clicking on the name of the field will toggle it
between these states.
To Change the Order of Fields
1 Hold down the Shift key.
2 Click on the name of the field and hold down the left Mouse button. The name will
be highlighted in green.
3 Use the Mouse to drag the field name up or down the list.
4 When the field name is in the desired place in the list, release the left Mouse button.
Lightworks V.I.P 4500 Version 3 - User Guide A27.0 - 509
A27.4
Moving Around a Database
5 Repeat this for each field until the desired order is achieved.
6 Click on the Use button to change the Database view.
Putting a checkmark in the Set as Default checkbox will store the current selection
of fields, so that the next time a Database is generated it will default to displaying the
selected fields.
A27.3.2
Saving Views
There is a Save button to allow the current selection to be named and saved as a view. Click
on Save and name the view, using the text entry box displayed, then click on the OK button.
The named view will be added to the list of views displayed when the Views button on the
Database is clicked.
A27.4
Moving Around a Database
Use the Keyboard keys to move around a Database.
A27.0 - 510
Key
Function
Left Arrow
Moves left to the next field.
Right Arrow
Moves right to the next field.
Up Arrow
Moves up to next field.
Down Arrow
Moves down to next field.
Enter
Moves left to the next field.
Tab
Moves right to the next field.
Shift+Tab
Moves left to the next field.
PG UP
Moves up.
PG DN
Moves down.
CTRL+PG UP
Goes to the first entry in the Database.
CTRL+PG DN
Goes to the last entry in the Database.
Lightworks V.I.P 4500 Version 3 - User Guide
Operations On Database Fields
A27.5
You can resize a Database by grabbing it near any edge and dragging with the right Mouse button. A
Database can be resized that so not all of the columns or fields are displayed on the screen at once.
In order to view the other entries in the database, use the scroll buttons or scroll bars.
Scroll Up One Row (or Column)
Scroll Up One Page
Scroll Bar
Scroll Bar and Buttons
Use the right Mouse button to drag the yellow scroll bar. When using the scroll bar to move through a
Database, the highlighted entry remains constant until it moves out of the display window. Then the top/
bottom item is highlighted (depending on the direction of travel).
A27.5
Operations On Database Fields
A27.5.1
Database Duration Field
The duration field shows the duration of each shot or edit entry in the database. For NTSC
Projects, duration fields will always be drop-frame, so that they are accurate for time, even
in non-drop-frame Projects.
For Logging Databases, the duration column can be used to calculate in-points, out-points
or durations. For example, to calculate an out-point, enter the in-point and the duration.
A27.5.2
Cut and Paste Keyboard Commands
A series of keystrokes allow you to cut and paste the contents of fields within or between
Databases and Logging Databases. Because some key combinations are not valid for both
kinds of databases (you cannot duplicate rows in a Database for example), the command
Show Keystrokes is available. Clicking on this will produce a list of the valid keystrokes
for the current Database or Logging Database.
Lightworks V.I.P 4500 Version 3 - User Guide A27.0 - 511
A27.5
Operations On Database Fields
The following are available for both Databases and Logging Databases:
Key
Function (Databases and Logging Databases)
ALT+W
Store contents of current field.
ALT+F
Paste stored field (if available) to current
field.
ALT+H
Store current row.
ALT+Y
Paste stored row (if available) to current database before current row.
ALT+T
Delete current row.
ESC
Cancel changes to current field.
The following are available for Logging Databases only:
Key
Function (Logging Databases Only)
ALT+D
Paste copy current row.
ALT+B
Paste blank row before current row.
ALT+I
Paste default row into a Logging Database before
the current row.
ALT+U
Undoes the effect of ALT+I (provided the cursor is
on the same row in the Logging Database).
The stored rows or fields can be pasted to other Databases. A row stored on a Database can
be pasted to a Logging Database. However, this is not true in reverse - records from Logging
Databases do not represent valid Database entries, and so cannot be added to Databases.
A27.0 - 512
Lightworks V.I.P 4500 Version 3 - User Guide
Operations On Database Fields
A27.5.3
A27.5
Cut and Paste Of Text From Windows Clipboard
You can cut and paste text into Databases using the Windows clipboard. This allows you to
cut text from either Windows applications or other text on the screen and paste it into other
text fields.
Standard Windows conventions for cut and paste shortcuts apply:
A27.5.4
CTRL+X - Cut text
CTRL+V - Paste stored text (if available) to current field.
CTRL+C - Copy text
Resizing Database Fields
You can resize the individual Database fields. This is done via the Field Header button at
the top of the column.
1 Right-click on the Field Header button of the field you want to resize.
2 Keep the right Mouse button held down and drag the field to the required size.
3 Release the Mouse button.
A27.5.5
Sorting Database Entries By Field
At the top of each column (field) of the Database is a Field Header button. Clicking on one
of the Field Header buttons will sort the Database by that field.
For example, if you click on the Field Header button for the field labelled “Reel”, the Database entries will be sorted in order of reel number (with the lowest first).
Multi-Level Sorts
To perform a multi-level sort:
1 Click on the Field Header button for the field to perform the primary sort.
2 Hold down the Shift key whilst clicking on another Field Header button to perform
the secondary sort.
3 Subsequent Shift+clicks will add further levels to the sort.
To perform a new primary sort, release the Shift key and click on a Field Header
button.
Lightworks V.I.P 4500 Version 3 - User Guide A27.0 - 513
A27.6
A27.6
Tagging Entries
Tagging Entries
The left-hand column of a Database is used for tagging entries, either by clicking next to individual
entries or by clicking on the Tag button at the top of the column to tag all entries in the Database.
Tagging an entry means it has been selected for an operation - for example, recording or deleting.
Holding the CTRL key down and clicking on the button inverts the tag - all tagged entries become
untagged, and tagged entries become tagged.
A27.6.1
Show Tagged/Show All Button
The Show Tagged button modifies the Database display to show only entries that are
tagged. The button will change to Show All - clicking it again shows all entries.
A27.6.2
Remove Tagged Button
The Remove Tagged button removes any tagged entries from the Database.
The Remove Tagged button does not delete the actual material, logs or edits represented by
those entries.
A27.7
Other Features Of Databases
A27.7.1
Gallery Button
Clicking on the Gallery button, in the bottom right corner of the Database, will create a Gallery containing Tiles for all tagged entries in the Database.
A27.7.2
Note: This button is not found on Logging Databases.
Popping Out Tiles From a Database
It is possible to display a Tile of a shot or edit by clicking on its entry in the Database.
1 Position the Mouse cursor over any field of the entry for the shot or edit to be displayed.
2 Left+right-click with the Mouse.
The shot or edit will be displayed in a Tile.
This feature only applies to Database. It does not work with Logging Databases.
A27.0 - 514
Lightworks V.I.P 4500 Version 3 - User Guide
Other Features Of Databases
A27.7.3
A27.7
Dropping a Tile Into a Database
It is possible to create a new entry in a Database corresponding to a shot or edit, by ‘dropping’ a Tile into the Database.
1 Drag the Tile over the Database.
2 Right+left-click with the Mouse on the Tile.
If the shot or edit is not already present in the Database, then a new entry will be created and the Tile will disappear.
This feature only applies to Databases. It does not work with Logging Databases.
A27.7.4
Database Names
The name of the Database is displayed on a blue or green bar at the bottom of the Database.
You can enter or change the Database name at any time by clicking on the name bar and
typing in a new name. This will also make a transient Database permanent. See ‘Gallery,
Database, Rack and Sync Group Permanence’ on page 212.
A27.7.5
Database Permanence
A Database can be Permanent or Transient.
Transient Databases
This is the normal state of a newly generated Database. If you shark or vanish a Transient Database you can only get it back on the screen by generating it again. A Transient Database has a blue name label.
Permanent Database
If you shark or vanish a Permanent Database it is possible to get it back on the screen
by searching for it using the Searchcard. A Permanent Database has a green name
label.
Databases are automatically made permanent when they are renamed.
You can toggle the status of a Database between permanent and transient by clicking on the
Database Menu command Database Permanence.
A27.7.6
Databases In the Rack
It is possible to store a closed Database in a Rack. See ‘Racks’ on page 210.
Lightworks V.I.P 4500 Version 3 - User Guide A27.0 - 515
A27.7
Other Features Of Databases
A27.7.7
Saving Databases
A Database will remain in the Room when you exit it and will still be on the screen when
you re-enter the same Room. A Logging Database will vanish when you exit the Room and
will not be there when you re-enter. Logging Databases should always be actively saved,
before leaving a Room, using the Logging Database Panel Save button.
A27.7.8
Merging Databases
It is possible to merge two Databases or two Logging Databases, adding any entries in the
source Database to the destination Database (leaving the source unchanged).
Method for Databases
Merging Databases is done by placing one Database over the other and using the
Database Menu command Merge Databases.
1 Position the destination Database so its bottom left corner overlaps the top right
corner of the source Database.
2 In the source Database, tag the records to be added to the destination Database.
3 On the Menu for the destination Database, click on the command Merge Databases.
The tagged records in the source Database will be added to the destination Database.
Method for Logging Databases
1 Click on the Merge button on the Logging Database Panel. The Merge Databases
Panel appears.
2 Click on the Choose button. A Visidir appears.
3 Use the Visidir to locate the Logging Databases to be merged.
4 Highlight the Logging Database(s) to merge.
5 Click on the OK button.
6 The selected Logging Databases appear in the Merge Database Panel.
7 Click on the Merge button.
8 Enter a name for the merged Logging Database in the Visidir, as requested.
9 Click on the OK button. The chosen Logging Databases will be merged and saved.
A27.0 - 516
Lightworks V.I.P 4500 Version 3 - User Guide
Database Searches
A27.8
A27.8
Database Searches
Click on the Searches button to display the Database Search Panel. This lists the fields currently displayed in the Database, with a text entry area to the right of each field name.
Database Search Panel
In order to search for an entry in the Database, highlight the desired text entry field by clicking on it, then
type in the text. You can use the Backspace and Delete keys to edit the text within a single field. To clear
any text entered from all the fields, click on the Clear button. Use the Mouse to move between fields do not press the Enter key as this will start the search operation.
When the search text is entered, click on the Do It button or press the Enter key. The system will tag all
records in the Database that match the text.
A27.8.1
Matching Whole Words
The Match Whole Words Only checkbox on the Database Search Panel can be used to
ensure that only entries that exactly match the search text (with no other characters) will be
found. Otherwise the system will find any entry that includes the sequence of letters in the
search text. For example, with Match Whole Words Only not checked, a search for “side”
will tag entries for shots called “hillside”, “sideview” and “resident”.
Lightworks V.I.P 4500 Version 3 - User Guide A27.0 - 517
A27.8
Database Searches
A27.8.2
Search and Replace
It is possible to search for and automatically replace entries in a Database. For a Database
this will change the Filecard (log) for each shot.
To search for an entry in the Database and replace it:
1 Display the shots to be modified in a Database, using the Searchcard or Show Gallery as Database Gallery Menu command.
2 Click on the Searches button on the bottom of the Database to display the Database
Search Panel.
3 Click on the button labelled Search at the top of the panel to toggle it to Search &
Replace. A Replace With column is added to the Database Search Panel.
In the list of Database fields, any read-only fields will be greyed out.
4 For the desired field, type in the text to be replaced in the left-hand Search For
column.
5 For the desired field, type in the text to replace it with in the right-hand Replace With
column.
If you leave the Search For column blank but enter some text in the Replace With
column then the new text is added to the start of the existing text.
6 When you have finished entering the text, click on the Do It button or press the Enter
key.
The system will search for any text that matches that entered in the Search For
column and replace it with any text for that field in the Replace With column. Any
entries in the Database that have been modified will be tagged.
A27.8.3
WARNING: USING SEARCH AND REPLACE FOR A DATABASE WILL
CHANGE THE FILECARD FOR THE SHOTS. THERE IS NO UNDO.
Search and Replace Timecodes For Logging Databases
For Logging Databases, the timecode replace fields can include the ‘wildcard’ character
“?”.
Whenever the “?” character is present in the replace field, the original text will be left unaltered. It can be used as a way of only updating certain numbers in the timecode.
Simply type a ? for any figure you do not want to replace.
A27.0 - 518
Lightworks V.I.P 4500 Version 3 - User Guide
Database Menu Commands
A27.9
For example:
A27.9
To round down all timecodes to the nearest whole second, type ??:??:??:00 in
the Replace With column for the timecode.
Type 10:??:??:?? in the Replace With column for the timecode to change all the
timecode hours to 10.
Database Menu Commands
See ‘Database Menu’ on page 547.
A27.10 Printing Databases and Logging Databases
It is not possible to print directly from the V.I.P program. To get a printed output it is necessary to use
the Database Menu command Save Database for Export.
A27.10.1
Saving a Database For Export
1 Display the Database Menu and select the command Save Database for Export.
A panel will be displayed with:
Name of Database
A default filename will be given, based on Database name.
Where to Save It
Options are LWLISTS or FLOPPY.
2 Ensure that the Database name is a legal filename. Legal filenames can contain up to
eight letters or numbers but cannot include spaces, points, slashes, brackets,
asterisks, question marks and so on.
3 Click on the Do It button to write the file to disk.
Lightworks V.I.P 4500 Version 3 - User Guide A27.0 - 519
A27.10
A27.0 - 520
Printing Databases and Logging Databases
Lightworks V.I.P 4500 Version 3 - User Guide
Part B: Reference
Lightworks V.I.P 4500 Version 3 - User Guide 521
522 Lightworks V.I.P 4500 Version 3 - User Guide
B1.0 The Console
B1.1
Introduction
The Console is used to control the playing of pictures and sound on the V.I.P system. It also controls
many of the editing functions.
There are two designs of Console that may be connected to the V.I.P system - the Series 1 Console and
the Series 2 Console. The Series 2 Console was introduced as an option in early 1998.
Console Cut
Buttons (Live Editing)
Play
Forward
Play
Backward
MARK
UNMARK
Stop
Button
SWAP
CUE
REPLACE
MOVE
INSERT
DELETE
Editing
Buttons
Jump
Buttons
Lever
Series 1 Console
Lightworks V.I.P 4500 Version 3 - User Guide B1.0 - 523
B1.1
Introduction
Jog On/Off
Button
Trim Buttons
Play Forward
Play Backward
User Keys
Stop Button
Jog Wheel
Levers
Series 2 Console
B1.0 - 524
Lightworks V.I.P 4500 Version 3 - User Guide
Console Transport Controls
B1.2
B1.2
Console Transport Controls
The Console transport controls operate on the ‘active’ Tile or Viewer. To make a Tile or Viewer active,
simply click on it with the Mouse.
The Console transport controls will also operate on a Recording Panel or Edit-to-it Viewer, if the object
is active and connected to a machine controllable device.
B1.2.1
Play/Stop Buttons
The Play buttons are two round grey buttons, for playing forward or backward at normal
play-speed.
The Stop button is a large round red button, used to stop whatever is playing.
You can also use the buttons in combination. If you hold the Stop button down, then press
either of the Play buttons, the shot will be nudged one frame forward or backward. If you
keep holding them down, the shot will continue to nudge along slowly.
B1.2.2
Lever
The Console Lever has the same effect as similar controls on film or video machines: the
shot is played backward or forward at any speed.
Sync of sound and picture is maintained from zero up to 2.5 times play-speed. Above this,
the sound is muted.
There are notches at play-speed forward and backward, but if accurate timing is required
you should play using the buttons, which are locked to play-speed electronically rather than
mechanically.
On the Series 2 Console, dual Levers offer alternative hand positions for ‘left-handed’ and
‘right-handed’ users.
B1.2.3
Jump Buttons
There are two Jump buttons - Jump Forward and Jump Backward.
For a Tile or Viewer, these buttons move the current frame from event to event, forward or
backward. The Jump buttons recognise the following events:
Cut
First or last frame of a dissolve
Lightworks V.I.P 4500 Version 3 - User Guide B1.0 - 525
B1.3
Console Editing Buttons
First or last frame of a wipe
External control event
Cue
Mark
First or last frame of an edit or shot
Most commonly, you jump from cut to cut; the Jump button always parks the current frame
on the first frame after the cut.
The Jump buttons jump to events on all selected channels. If there are split cuts between
picture and sound, they jump to all cuts.
If you want a channel to be ignored by the Jump buttons, deselect the channel using the
Channel Selector buttons on the Viewer or Stripview.
When controlling a machine controllable device, using a Recording Panel or Edit-to-it
Viewer, the Jump Forward button fast forwards the tape and the Jump Backward button
rewinds it.
B1.2.4
Jog Wheel (Series 2 Console Only)
The Series 2 Console has a central Jog Wheel, enabled by Jog On/Off button.
When controlling a machine controllable device, the Console Jog Wheel may not enable the
jog feature on the VTR, depending on the type of VTR.
B1.3
Console Editing Buttons
The Console is used to control some of the main editing functions.
B1.3.1
Mark
Marks the current frame. The marked frame is shown by a blue marker on the Viewer and
Stripview Indicator Strips.
B1.3.2
Unmark
Removes the mark.
B1.0 - 526
Lightworks V.I.P 4500 Version 3 - User Guide
‘Shifted’ Console Button Functions
B1.3.3
B1.4
Swap
Swaps the positions of the current frame and marked frame.
B1.3.4
Cue
Creates a cue point at the current frame. Use the Stop+Cue buttons to delete a cue.
B1.3.5
Replace
Used when editing to control overlay operations and to assemble or replace shots.
B1.3.6
Move (Series 1 Console)/Remove (Series 2 Console)
The reverse of replace; it removes the selected part of the edit, leaving black behind.
B1.3.7
Insert
Inserts all or part of a shot into the edit, without replacing or overwriting.
B1.3.8
Delete
The reverse of insert - the selected part of the edit is cut out and the gap is closed up.
B1.3.9
Trim Buttons (Series 2 Console Only)
Two trim buttons allow cut points to be unjoined and trims performed without using the
Mouse. Multiple cuts can be unjoined at once.
B1.4
‘Shifted’ Console Button Functions
Some Console buttons can be used for additional operations, using the Stop button as a ‘shift’ key.
Hold down the Stop button and then press the other button, as specified below. On the Series 2 Console,
the edges of these buttons are labelled with their ‘shifted’ function.
B1.4.1
Stop+Play Forward
Nudge forward one frame.
B1.4.2
Stop+Play Backward
Nudge backward one frame.
Lightworks V.I.P 4500 Version 3 - User Guide B1.0 - 527
B1.4
‘Shifted’ Console Button Functions
B1.4.3
Stop+Jump Back
Go to start of edit.
B1.4.4
Stop+Jump Forward
Go to end of edit.
B1.4.5
Stop+Replace
Replaces backward. See ‘Backtiming (Replacing Backwards)’ on page 242.
B1.4.6
Stop+Insert
Performs an insert and leaves the current frame marker at the end of the inserted shot.
B1.4.7
Stop+Unmark
Same as the Join/Unjoin button on the Stripview. Unjoins or joins cuts for trimming.
B1.4.8
Stop+Cue
Deletes a cue. Park on the cue point then press the Stop+Cue buttons.
B1.4.9
Stop+Swap
Swaps ‘active’ status between the record Viewer and the current source.
B1.4.10
Stop+Undo and Stop+Redo Buttons (Series 2 Console Only)
To allow editing operations to be undone/redone via the Console instead of the Mouse.
B1.4.11
Stop+Fill Button (Series 2 Console Only)
Allows easy access to the fit-to-fill feature.
B1.4.12
Stop+Mark All (Series 2 Console Only)
This button places a mark at the end of the shot currently parked on.
B1.0 - 528
Lightworks V.I.P 4500 Version 3 - User Guide
Console Cut Buttons
B1.5
B1.5
Console Cut Buttons
When using the ‘live editing’ feature, the Mark, Unmark, Swap and Cue buttons act as cut buttons to
select a source in an edit. See ‘Live Editing’ on page 260.
Mark
Cuts to source 1.
Unmark
Cuts to source 2.
Swap
Cuts to source 3.
Cue
Cuts to source 4.
B1.6
User Keys (Series 2 Console Only)
There are four dedicated user keys that can be programmed to perform a total of eight assignable commands.
B1.6.1
Assigning User Key Functions
User key assignments are made on a system-wide level, from the Machine Room.
1 Enter the Machine Room.
2 Click on the System Menu command System Configuration. The System
Configuration Panel will be displayed.
3 Select the Console Card. For each user key there is a button displaying the command
that is currently assigned to it.
4 To display a list of available commands, click on the button next to the user key that
you wish to assign.
Lightworks V.I.P 4500 Version 3 - User Guide B1.0 - 529
B1.6
User Keys (Series 2 Console Only)
Console Card On the System Configuration Panel
5 Click on the desired command to assign it to that user key.
User key assignments can be saved and loaded using the following buttons on the Console
Card:
Save Button
Saves current user key settings. A Save Console Settings Visidir is displayed.
Load Button
Loads a previously saved user key set. A Load Console Settings Visidir is displayed.
Default Settings
This will reset the user keys to the factory defaults. A warning message will be displayed asking you to confirm this, as the currently loaded user key set will be lost.
B1.0 - 530
Lightworks V.I.P 4500 Version 3 - User Guide
B2.0 The Keyboard
Introduction
The Keyboard is mainly used for typing in text - for instance when logging shots. There are also some
Keyboard shortcuts which are used when editing.
The following Keyboard commands assume you are using the U.S. International 106-key Keyboard supplied with the V.I.P system. However, the key commands should still be valid for most other Keyboard
types.
~
F1
!
1
Tab
Caps
Lock
Shift
Ctrl
F3
F2
@
#
3
2
Q
W
A
$
4
E
S
Z
F4
%
5
R
D
X
F5
T
V
*
8
B
N
Alt
>
.
Backspace
{
[
:
;
Alt
Space Bar
B2.1.1
,
F12
+
=
P
L
<
F11
_
-
O
K
M
F10
)
0
I
J
H
F9
(
9
U
Y
G
F8
F7
&
7
^
6
F
C
F6
\
“
?
/
Print
Scrn
SysRq
Scroll
Lock
Pause
Break
Num
Lock
Insert
Home
Page
Up
Num
Lock
/
*
Delete
End
Page
Down
7
8
9
Enter
Shift
➚
Esc
`
B2.1
Scroll
Lock
PgUp
Home
4
5
6
1
2
3
End
0
Ctrl
Caps
Lock
Ins
-
+
PgDn
.
Enter
Del
Arrow Keys
END - Find Last Field
When working in a Database, the END key jumps the cursor to the last field of the current
record.
Lightworks V.I.P 4500 Version 3 - User Guide B2.0 - 531
B2.1
Introduction
B2.1.2
Enter
The Enter key is labelled with a bent arrow pointing to the left.
Enter
The Enter key tells the system to register a line of text - for example when you have typed
a new name on a Viewer, or filled in a timecode to jump to. On the Searchcard, the Enter
key also starts the search and can be used as an alternative to clicking on the Search button.
B2.1.3
ESC - Stop Current Operation
The ESC key stops the current operation - for example during searches or when archiving.
When working with a Database, the ESC key cancels changes to the current Database field.
B2.1.4
HOME - Find First Field
When working in a Database, the HOME key jumps the cursor to the first field of the current record.
B2.1.5
Spacebar - Stop Search
Hitting the Spacebar during a search will stop the search.
The Spacebar can also be used to match-frame when working with a Sync Group. See
‘CTRL+M - Match-frame Display’ on page 536.
B2.1.6
TAB - Next Field
The TAB key is labelled TAB and/or has two arrows pointing in opposite directions.
The TAB key jumps from field to field on a Filecard or Logging Database.
Tab
B2.0 - 532
Lightworks V.I.P 4500 Version 3 - User Guide
ALT Key Commands
B2.2
B2.2
ALT Key Commands
The ALT Keyboard commands use the ALT key as a ‘shift’ key. For example, ALT+1 means hold down
the ALT key and press the 1 key.
B2.2.1
ALT+1 - Disable Twin Play
ALT+1 disables the twin-playing feature.
B2.2.2
ALT+2 - Enable Twin Play
ALT+2 enables the twin-playing feature.
B2.2.3
ALT+3 - Enable Concurrent Play
ALT+3, when multi-cam playing, enables concurrent playing.
B2.2.4
ALT+4 - Zoom In
ALT+4 zooms in to double the size of the picture on the V.I.P graphics screen, centred on
the Mouse cursor. Press ALT+4 again to return the picture to normal size.
B2.2.5
ALT+B - Paste Blank Row
ALT+B pastes a blank row before the current row in a Database.
B2.2.6
ALT+C - Cancel Recording
ALT+C, when recording, cancels the recording.
B2.2.7
ALT+D - Paste Duplicate Row
ALT+D pastes a duplicate of the current row into Database.
B2.2.8
ALT+E - Enable Live Editing
ALT+E enables or disables live editing.
B2.2.9
ALT+F - Paste Field
ALT+F pastes a stored Database field (if there is one) to the current Database field.
Lightworks V.I.P 4500 Version 3 - User Guide B2.0 - 533
B2.2
ALT Key Commands
B2.2.10
ALT+H - Store Row
ALT+H stores the current Database row.
B2.2.11
ALT+I - Paste Default Row
ALT+I pastes the default row into a Logging Database before the current row.
B2.2.12
ALT+K - Copy From Channel
ALT+K, when used on the Stripview for an edit, copies the selected part of a channel from
the source to the destination channel.
B2.2.13
ALT+M - Move To Channel
ALT+M, when used on the Stripview for an edit, moves the selected part of a channel to the
next active channel.
B2.2.14
ALT+O - Pop-Out Original Tile
ALT+O pops out a Tile displaying the original shot for the current frame in a ghost or edit.
This Keyboard command is an alternative to the Pop-Out Original Tile button on Viewers
and Stripviews.
B2.2.15
ALT+R - Start Recording
ALT+R may be used as an alternative to clicking the Record button on the Recording Panel
to start a recording.
B2.2.16
ALT+S - Swap Channel
ALT+S, when used on the Stripview for an edit, swaps the selected part of a channel
between the source and destination channels.
B2.2.17
ALT+T - Delete Current Row
ALT+T deletes current row from Database.
B2.2.18
ALT+U - Undo Paste Row
ALT+U undoes the effect of the Paste Default Row (ALT+I) command (provided the cursor
is on the same row in the Logging Database).
B2.0 - 534
Lightworks V.I.P 4500 Version 3 - User Guide
Arrow Keys
B2.3
B2.2.19
ALT+V - Fit-to-fill
ALT+V is used to operate the fit-to-fill varispeed feature. A specified section of picture
from the source Viewer is used to fill a specified section on the Record Viewer. See ‘Fit-tofill’ on page 327.
B2.2.20
ALT+W - Store Current Field
ALT+W stores the contents of the current Database field.
B2.2.21
ALT+X - Exit
ALT+X exits from the V.I.P program. (May be used as an alternative to the Exit Door).
B2.2.22
ALT+Y - Paste Stored Row
ALT+Y pastes the stored row (if there is one) to current Database, before current row.
Arrow Keys
There are four Arrow Keys - Left, Right, Up and Down. The Arrow Keys control the position of the keyboard cursor within text and numeric fields on the V.I.P graphics screen. For example, the Arrow Keys
can be used for moving around a Database.
Esc
~
Tab
Caps
Lock
Shift
Ctrl
F1
!
1
F3
F2
@
#
3
2
Q
W
A
$
4
E
S
Z
Alt
F4
%
5
R
D
X
F5
T
Y
G
V
*
8
U
N
F9
I
,
Alt
Backspace
{
[
:
;
>
.
F12
+
=
P
L
<
F11
_
-
O
K
M
F10
)
0
(
9
J
H
B
F8
F7
&
7
^
6
F
C
F6
\
“
`
B2.3
?
/
Enter
Shift
Print
Scrn
SysRq
Scroll
Lock
Pause
Break
Num
Lock
Insert
Home
Page
Up
Num
Lock
/
*
Delete
End
Page
Down
7
8
9
4
5
6
1
2
3
0
Ins
Scroll
Lock
PgUp
Home
End
Ctrl
Caps
Lock
-
+
PgDn
.
Enter
Del
In a numeric field where the cursor takes the form of a white block, the Up Arrow key will increase the
value of that number, the Down Arrow key will decrease it.
Lightworks V.I.P 4500 Version 3 - User Guide B2.0 - 535
B2.4
B2.4
CTRL Key Commands
CTRL Key Commands
The CTRL Keyboard commands use the CTRL key as a ‘shift’ key. For example, CTRL+1 means hold
down the CTRL key and press the 1 key.
~
Tab
Caps
Lock
Shift
Ctrl
B2.4.1
F1
F3
F2
!
1
@
#
3
2
Q
W
A
$
4
E
S
Z
F4
%
5
R
D
X
F5
T
Y
G
V
*
8
Alt
,
Backspace
{
[
:
;
>
.
F12
+
=
P
L
<
F11
_
-
O
K
M
F10
)
0
I
J
N
F9
(
9
U
H
B
F8
F7
&
7
^
6
F
C
F6
\
?
/
Alt
Print
Scrn
SysRq
Scroll
Lock
Pause
Break
Num
Lock
Insert
Home
Page
Up
Num
Lock
/
*
Delete
End
Page
Down
7
8
9
Caps
Lock
Scroll
Lock
PgUp
Home
4
5
6
Shift
1
2
3
0
“
`
Esc
Enter
End
Ctrl
Ins
-
+
PgDn
.
Enter
Del
CTRL+C - Copy Text
CTRL+C, when applied to a text field, copies the highlighted text and leaves the copied text
in the current field.
B2.4.2
CTRL+D - Swap NTSC Timecode
CTRL+D, when applied to an active timecode field, swaps the NTSC timecode between
drop-frame and non-drop-frame (or vice versa).
B2.4.3
CTRL+E - Stop Playout
CTRL+E stops the playout, when using the Playout Viewer.
B2.4.4
CTRL+M - Match-frame Display
CTRL+M - for an edit made from a Sync Group - forces all members of the Sync Group to
display a match-frame corresponding to the frame displayed by the edit.
For a shot in a Sync Group, CTRL+M forces the edit to display the corresponding frame.
Pressing the Spacebar has the same effect.
B2.0 - 536
Lightworks V.I.P 4500 Version 3 - User Guide
SHIFT Key Commands
B2.4.5
B2.5
CTRL+P - Stripview Trimming Preview Feature
The Stripview trimming preview feature enables cuts to be played or shuttled through
whilst unjoined, using the CTRL+P keys. See ‘Previewing Trims’ on page 292.
B2.4.6
CTRL+Q - Cue Device
CTRL+Q is used when a Recording Panel is in Standby mode, controlling a device with
machine control. Click on a timecode field and press CTRL+Q to cue the device to that
timecode.
B2.4.7
CTRL+V - Paste Text
CTRL+V, when applied to a text field, pastes the most recent text that was copied or cut
using CTRL+C or CTRL+X.
B2.4.8
CTRL+X - Cut Text
CTRL+X, when applied to a text field, cuts the highlighted text.
B2.5
SHIFT Key Commands
B2.5.1
SHIFT+DEL - Copy Timecode
When a timecode field is highlighted, SHIFT+DEL copies the timecode to a buffer. This
timecode can then be pasted to another timecode field by SHIFT+INS.
B2.5.2
SHIFT+INS - Paste Timecode
SHIFT+INS pastes a timecode (previously copied with SHIFT+DEL) to another timecode
field.
B2.5.3
SHIFT+Click - Secondary Sort
SHIFT+Click, on the Field Header buttons of a Database will perform a secondary sort,
keeping the original sort intact.
B2.6
Keyboard Reference
The remaining pages of this chapter provide a ‘quick reference’ guide to the keystrokes mentioned
above. This can be printed (if you are using the on-line manual) or the pages detached from the hard copy
version and kept near the system during operation.
Lightworks V.I.P 4500 Version 3 - User Guide B2.0 - 537
B2.6
Keyboard Reference
Lightworks V.I.P 4500 Keyboard Reference
Alt
!
1
- Disable Twin Play
Alt
K
- Copy From Channel
Alt
“
2
- Enable Twin Play
Alt
M
- Move To Channel
Alt
£
3
- Enable Conc Play
Alt
O
- Pop-Out Original Tile
Alt
$
4
- Zoom In
Alt
R
- Start Recording
Alt
B
- Paste Blank Row
Alt
S
- Swap Channel
Alt
C
- Cancel Recording
Alt
T
- Delete Current Row
Alt
D
- Paste Duplicate Row
Alt
U
- Undo Paste Row
Alt
E
- Enable Live Edit
Alt
V
- Fit-to-fill
Alt
F
- Paste Field
Alt
W
- Store Current Field
Alt
H
- Store Row
Alt
X
- Exit
Alt
I
- Paste Default Row
Alt
Y
- Paste Stored Row
Page 1
B2.0 - 538
Lightworks V.I.P 4500 Version 3 - User Guide
Keyboard Reference
B2.6
Lightworks V.I.P 4500 Keyboard Reference
Ctrl
D
- Swap NTSC Timecode
Esc
- Stop Current Operation
Ctrl
E
- Stop Playout
Home
- Find First Field
Ctrl
M
- Match-Frame Display
End
- Find Last Field
Ctrl
Q
- Cue Device
Tab
- Next Field
ñ Shift
Insert
- Paste Timecode
ñ Shift
Delete
- Copy Timecode
Space
- Stop Search / Match-Frame Display
Page 2
Lightworks V.I.P 4500 Version 3 - User Guide B2.0 - 539
B2.6
B2.0 - 540
Keyboard Reference
Lightworks V.I.P 4500 Version 3 - User Guide
B3.0 The Mouse
B3.1
Introduction
The Mouse is used to control objects on the V.I.P graphics screens.
Moving the Mouse changes the position of the Mouse cursor (white arrow) on the screen. The buttons
on the Mouse are used to control the position and behaviour of screen objects and to activate menu commands.
When the V.I.P system is processing, the Mouse cursor turns orange. Whilst the Mouse cursor is orange
it can still be moved but it will not register any clicks made. When the system has finished processing,
the Mouse cursor turns white and you can carry on working.
B3.2
Mouse Clicks In Windows NT
B3.2.1
Single Click (Left Mouse Button)
Single click with the left Mouse button to activate menu commands.
B3.2.2
Double Click (Left Mouse Button)
Double click with the left Mouse button on an icon in order to run up an application.
B3.2.3
Drag
Hold down the left Mouse button and drag, in order to move an object on the Windows NT
screen.
Lightworks V.I.P 4500 Version 3 - User Guide B3.0 - 541
B3.3
B3.3
Mouse Clicks On the V.I.P System
Mouse Clicks On the V.I.P System
B3.3.1
Click (Left Mouse Button)
To Activate Something
Clicking the left Mouse button is used to activate an object, button or command:
1 Place the Mouse cursor over the object, button or command to be activated.
2 Click and release the left Mouse button.
Where the user guide text refers to a “click”, this is shorthand for this “left-click” of
the Mouse.
B3.3.2
Right-Click and Drag
To Move an Object
The right-click and drag is used to move an object:
1 Place the Mouse cursor over the object.
2 Hold down the right Mouse button.
3 Move the Mouse to drag the object into the desired position.
4 Release the right Mouse button.
To Resize Certain Objects
Right-clicking and dragging is also used to change the shape and size of certain
objects. The Door Generator, Magnifier Tool, Visidir, Stripview, Gallery, Sync
Group and Database can all be resized in this way.
1 Position the Mouse cursor on the border of the object.
2 Hold down the right Mouse button.
3 Move the Mouse to resize the object.
4 Release the right Mouse button.
B3.0 - 542
Lightworks V.I.P 4500 Version 3 - User Guide
Mouse Clicks On the V.I.P System
B3.3.3
B3.3
Right+Left-Click
To Bring Objects To Front
The right+left-click can be used to pop Viewers, Stripviews and Galleries to the front
of the screen if they are partially obscured by other objects.
1 Place the Mouse cursor over the Viewer, Stripview or Gallery.
2 Hold down the right Mouse button and click with the left button.
To Jump the Current Frame Marker
In the case of objects which have their own current frame marker (for example, the
Viewer and the Stripview) the right+left-click is also used to jump to a new position.
1 Point the Mouse cursor at the desired new position on the Indicator Strip.
2 Hold down the right Mouse button and click with the left button. The current frame
marker will jump to the new position.
To Make Selections For Certain Tools
When used over certain closed Tools, the right+left-click displays a list of relevant
items for that Tool. For example, applied to a Gallery, Rack or Sync Group Tool, the
right+left-click displays a list of permanent Galleries, Racks or Sync Groups that can
then be opened by highlighting the item and clicking on the OK button. Applied to a
Viewer Tool, the right+left-click displays a panel that can be used to set the number
of channels present when new Viewers are opened.
B3.3.4
Left+Right-Click
To Jump the Current Frame Marker
If you find it more convenient, the left+right-click can also be used to jump the current frame marker on a Viewer or Stripview to a new position.
Lightworks V.I.P 4500 Version 3 - User Guide B3.0 - 543
B3.3
B3.0 - 544
Mouse Clicks On the V.I.P System
Lightworks V.I.P 4500 Version 3 - User Guide
B4.0 Menu Commands
B4.1
Introduction
A menu is a list of commands. Many of the objects on the V.I.P screen have menus associated with them.
A menu can be positioned anywhere on screen but will always act on the object it was called up from.
Pin Button
Name of Object Menu Will
Act On
Type of Menu
Edit Menu
This chapter provides a brief summary of every menu command on the system, with cross references to
the relevant section of this user guide, where appropriate.
Lightworks V.I.P 4500 Version 3 - User Guide B4.0 - 545
B4.1
Introduction
B4.1.1
Displaying the Menu For an Object
Using the Menu Button
Click on the Menu button
of the object. The Menu button is usually located in
the bottom left corner of the object.
Using the Screwdriver
The Screwdriver may be used to call up menus from screen objects - for example
Viewers, Tiles, Stripviews and Galleries. It enables you to do this even if the Menu
button is not visible - for example on a Tile or closed Gallery.
The Screwdriver is found in the Toolbox.
To use the Screwdriver to display a menu:
1 Position it so that it overlaps the target object.
2 Click on the Screwdriver. The menu for the target object will appear.
B4.1.2
Menu Commands
Each line in a menu contains the name or description of a command. The menu command
is, in effect, a button. Click on it to execute the command. The command will be highlighted
in yellow whilst it is being executed.
Some of the menu commands are in the form of toggle switches. For example, Viewer Size
NORMAL [big].
The word in capital letters shows the current status. The word in brackets shows the alternative status. Click on the menu command to change the status.
B4.1.3
Pin Button
Normally the menu will vanish after a command is executed. Click on the Pin button if you
want the menu to remain on screen.
B4.0 - 546
Lightworks V.I.P 4500 Version 3 - User Guide
Database Menu
B4.2
B4.2
Database Menu
B4.2.1
Change Database Format
It is possible to change the fields displayed in the Database, by selecting Change Database
Format on the Database Menu. See ‘Choosing the Fields To Display’ on page 508.
B4.2.2
Tag Duplicates
This works on a source/destination principle, where the Database issuing the command is
always the destination. Position the destination Database so that it overlaps the source Database on screen. All entries in the source Database which have identical entries in the destination Database are tagged (in the destination Database).
B4.2.3
Make Reel Rack
See ‘Reel Racks’ on page 211.
Lightworks V.I.P 4500 Version 3 - User Guide B4.0 - 547
B4.2
Database Menu
B4.2.4
Save Database For Export
Use the command Save Database For Export to produce a file which can be exported via
floppy disk to another computer.
See ‘Printing Databases and Logging Databases’ on page 519.
B4.2.5
Show Keystrokes
Displays a list of Keyboard shortcuts available for that Database. See ‘Cut and Paste Keyboard Commands’ on page 511.
B4.2.6
Database Permanence: TRANSIENT [permanent]
Click on this command to toggle the Database status between transient and permanent. See
‘Gallery, Database, Rack and Sync Group Permanence’ on page 212.
B4.2.7
Move Contents To Another Project
Moves tagged edits, ghosts or shots to another Project.
B4.2.8
Copy Contents To Another Project
Copies tagged edits, ghosts or shots to another Project.
B4.2.9
Merge Databases
Merges the current Database with a Database positioned beneath it. See ‘Merging Databases’ on page 516.
B4.2.10
Shots Not Used
This command can be used to display all the shots not used in a particular edit. See ‘Database Of Shots Not Used In an Edit’ on page 506.
B4.2.11
Create Logging Database
A Logging Database can be used as a source for autoconform recording of material into the
V.I.P system. A Logging Database can be created from a Database displayed as the result
of a search or a Database of shots used in an edit.
B4.0 - 548
Lightworks V.I.P 4500 Version 3 - User Guide
Device Menu
B4.2.12
B4.3
Destroy Reels and Their Associated Material
Shots recorded from any reels in the Database are destroyed. The reel is also destroyed. See
‘Deleting Using the Gallery Menu Commands’ on page 500.
B4.2.13
Delete Material (Picture and Sound) From Shots
This command will operate on any tagged records in the Database, having the same effect
as the equivalent Gallery Menu command. See ‘Deleting Using the Gallery Menu Commands’ on page 500.
B4.2.14
Delete Only Picture Material From Shots
This command will operate on any tagged records in the Database, having the same effect
as the equivalent Gallery Menu command. See ‘Deleting Using the Gallery Menu Commands’ on page 500.
B4.2.15
Delete Only Sound Material From Shots
This command will operate on any tagged records in the Database, having the same effect
as the equivalent Gallery Menu command. See ‘Deleting Using the Gallery Menu Commands’ on page 500.
B4.2.16
Destroy Shots, Material, Edits and Ghosts
This command will operate on any tagged records in the Database, having the same effect
as the equivalent Gallery Menu command. See ‘Deleting Using the Gallery Menu Commands’ on page 500.
B4.3
Device Menu
B4.3.1
Rename Current Device
See ‘Renaming Devices’ on page 107.
Lightworks V.I.P 4500 Version 3 - User Guide B4.0 - 549
B4.4
Disk Manager Menu
B4.3.2
Enable Device Configuration In All Rooms YES [no]
See ‘Security Of Device Definitions’ on page 113.
B4.4
Disk Manager Menu
B4.4.1
Free Space Based On
For each disk displayed on the Disk Manager, the amount of used/free space is shown.
The Disk Manager Menu command Free Space Based On will display a panel that allows
the editor to see the parameters that are used to calculate the “mins free” figure. These
parameters are based on the settings for quality and channels selected the last time a
recording was made or a Recording Panel Standby button pressed.
B4.4.2
Show Grouped Drive Information
See ‘Displaying Information About Grouped Disks’ on page 493.
B4.0 - 550
Lightworks V.I.P 4500 Version 3 - User Guide
Edit Menu
B4.5
B4.5
Edit Menu
The Edit Menu has commands that relate to shots, ghosts, edits and reels in Viewers and Tiles.
To display the Edit Menu:
Click the Screwdriver on the Viewer or Tile, or:
Click on the Menu button for a Viewer, or:
Click on the Menu button for a Stripview.
This produces a version of the Edit Menu with additional Stripview commands. See ‘Stripview
Menu’ on page 573.
Lightworks V.I.P 4500 Version 3 - User Guide B4.0 - 551
B4.5
Edit Menu
B4.5.1
Show Original Material Cues NO [Yes]
Cue points can be marked on shots. The default is for edits not to display any cue points
from the shots used, to prevent the edit becoming cluttered with cues. Setting the Show
Original Material Cues command set to YES causes the cues from original shots to be displayed on an edit.
B4.5.2
Note: When the Cue button (on the Console) is pressed for an edit, the cue is in fact
added to the original shot.
Unlock/Lock Current Channel Into Label Display
When the Label Display and Name Display (on a Viewer or Stripview) are set to show
source name and time, then this command can be used to ensure that the information for the
currently selected video or audio channel is displayed whatever future channel selections
are made.
This can be useful when using the timecode of a particular track as a reference in an edit for example with a music track.
When the Label Display is locked, the numbers are displayed in yellow (rather than black
or white).
To unlock the Label Display, click on the command Unlock Current Channel From Label
Display.
B4.5.3
Add Channels
This command displays the Add Channels Panel, which is used to add new channels (video,
audio or external control) to an edit. See ‘Adding a Channel’ on page 330.
The command has no meaning for original shots.
B4.5.4
Delete Channels
This command displays the Delete Channels Panel, which is used to delete channels from
an edit. See ‘Deleting a Channel’ on page 331.
The command has no meaning for original shots.
B4.5.5
Gallery Of Shots
Applied to an edit, this command creates Galleries containing every source shot used in the
edit. Applied to a shot this command creates a Gallery containing that shot.
B4.0 - 552
Lightworks V.I.P 4500 Version 3 - User Guide
Edit Menu
B4.5.6
B4.5
Database Of Shots
Applied to an edit, this command creates a Database containing every source shot used in
the edit. Applied to a shot, creates a Database with a single entry for that shot.
B4.5.7
Consolidate
See ‘Project Management 1 - Consolidating’ on page 467.
B4.5.8
Find Material To Fill Edit
Used to search for shots that can replace material in an edit. See ‘Changing the Material
Used In an Edit’ on page 181.
B4.5.9
Use Ghost Code NO [yes]
Where a ghost has different timecode or reel ID from its original shot(s), it may be necessary to determine which timecode and reel ID should appear in edits which use the ghost.
This is controlled by the Edit Menu command Use Ghost Code. If valid source timecode
is required in the edit then this command must have the correct setting for every ghost used
in the edit.
Use Ghost Code: NO [yes]
NO is the default setting for this command. Timecode and reel ID for the ghost will
be derived from the original shot.
Use Ghost Code: [no] YES
Timecode and reel ID for the ghost will be derived from the ghost.
B4.5.10
Make Sync-Ghost
This command can be used where syncing-up, or resyncing, of picture and sound is carried
out in the V.I.P system. See ‘Syncing-up’ on page 193.
B4.5.11
Make Print-Ghost
This command is used to produce a ‘print’ from an edit, making the many shots in an edit
behave as a single shot.
Lightworks V.I.P 4500 Version 3 - User Guide B4.0 - 553
B4.5
Edit Menu
B4.5.12
Trace (Ghosts To Shots)
This feature is available in order to trace back from ghosts to their original recorded shots.
B4.5.13
Simplify
Simplifies an edit by removing events of zero length (‘invisible edits’).
B4.5.14
Trimview Enabled [no] YES
When set to YES, the record Viewer will display the in and out frames when trimming a
picture cut.
B4.5.15
Viewer Size NORMAL [big] (High-Res Projects Only)
Clicking on this command toggles the size of the Viewer between ‘normal’ and ‘big’ (‘big’
is four times larger than ‘normal’).
B4.5.16
Destroy This Shot/Edit?
This command will only be present on the Edit Menu if set up by a parameter in the
CONFIG.DAT file. See ‘viewer_menu_delete’ on page 605.
Click on this command to completely destroy the shot, ghost, reel or edit in the Viewer.
Both logs and material will be destroyed.
B4.5.17
WARNING: NEVER DELETE ANYTHING UNLESS YOU ARE ABSOLUTELY SURE YOU KNOW WHAT YOU ARE DOING!
Output Chase Timecode
This command will only be present if set up by a parameter in the CONFIG.DAT file. See
‘timecode_chase_output’ on page 604.
When set to YES, a timecode is output from the defined LTC output whenever the edit
Viewer is active.
B4.5.18
Publish To Omnibus
This command appears on the Edit Menu if the V.I.P system is configured to work with the
Omnibus automation system. See ‘omnibus_dongle’ on page 600 and see ‘Publishing
Edits’ on page 628.
B4.0 - 554
Lightworks V.I.P 4500 Version 3 - User Guide
Edit-to-it Menu
B4.6
B4.6
Edit-to-it Menu
B4.6.1
Gallery Of Shots
Displays a Gallery of shots recorded from that reel using the edit-to-it feature.
B4.6.2
Database Of Shots
Displays a Database of shots recorded from that reel using the edit-to-it feature.
B4.6.3
Roll Record Viewer
Setting this command to YES will cause the edit to roll in sync during the edit-to-it
recording. The record Viewer will show the edit as it takes place.
B4.6.4
Redigitise Existing Material
When set to YES, material will be recorded even if already recorded using that reel.
B4.6.5
Connected To Device
When set to YES, playing or shuttling the reel in the Edit-to-it Viewer will control the
source device.
When set to NO, only material recorded from the reel will be played.
Lightworks V.I.P 4500 Version 3 - User Guide B4.0 - 555
B4.7
EDL Formats Menu
B4.6.6
Change Device Connections/Inspect Device Connections
This command displays the Device Definition Panel. If device configuration is enabled in
all Rooms, the wording of the command will be Change Device Connections and changes
to the device connections and settings can made.
If device configuration is not enabled in all Rooms, the wording of the command will be
Inspect Device Connections and changes can not be made. See ‘Security Of Device Definitions’ on page 113.
B4.7
EDL Formats Menu
See ‘EDLs 2 - Export’ on page 449 and ‘EDLs 1 - Import’ on page 443.
This Menu is displayed by clicking on the EDL Format button on the EDL Export Panel.
Each line is simply the name of an EDL format. To select a format just click on its name.
B4.0 - 556
Lightworks V.I.P 4500 Version 3 - User Guide
Effects Menu
B4.8
B4.8
Effects Menu
To display the Effects Menu, click on the Menu button in the bottom left corner of the Effects Viewer.
Some commands only appear on the Effects Menu when certain effects have been selected on the Effects
Viewer.
B4.8.1
Keep Original Timecodes YES [no]
Determines whether the new shot created by rending an effect will have a timecode based
on the original shot, or a new timecode starting from zero. The default setting for this command is set by a CONFIG.DAT parameter. See ‘keep_original_timecodes’ on page 597.
B4.8.2
Import TARGA Image
Generates a Visidir from which you can select a TARGA image (a single frame) to import.
Lightworks V.I.P 4500 Version 3 - User Guide B4.0 - 557
B4.8
Effects Menu
B4.8.3
Import TARGA Sequence
Generates a Visidir from which you can select a TARGA sequence (more than one frame)
to import.
B4.8.4
Export TARGA Image
Allows you to save part of a shot as a TARGA file (either an image or sequence). Generates
a Visidir in which the TARGA filename can be entered.
B4.8.5
Create Video Black (5 min)
Creates a ghost of 5 minutes duration containing video black and loads it into the Effects
Viewer.
B4.8.6
Create Video Black (10 min)
Creates a ghost of 10 minutes duration containing video black and loads it into the Effects
Viewer.
B4.8.7
Show Layer Commands
A command appears for each layer of video in the Effects Viewer. Clicking on a Show
Layer command has the same effect as clicking on a V button on the Effects Viewer.
For example, clicking on Show Layer 2 causes the second layer of video in the Effects
Viewer to become the active video layer.
B4.8.8
Viewer Size NORMAL [big]
This command can be used to toggle the size of the Effects Viewer between ‘normal’ and
‘big’ (‘big’ is four times ‘normal’ size).
B4.8.9
Choose Destination
This command appears on the Effects Menu when the Crop or Resize effects are selected.
Clicking on Choose Destination generates a blue destination Crop or Resize Box.
B4.8.10
Keep Full Video Aspect Ratio [yes] NO
This command appears on the Effects Menu when the Crop or Resize effects are selected.
If set to YES, this will ensure that the Crop or Resize Box retains the full video (PAL or
NTSC) aspect ratio when its size or position is changed.
B4.0 - 558
Lightworks V.I.P 4500 Version 3 - User Guide
Gallery Menu
B4.8.11
B4.9
Picture In Picture? [yes] NO
This command appears on the Effects Menu when the Crop or Resize effects are selected.
If set to YES, this allows a cropped or resized picture to be placed over itself.
B4.8.12
Background Colour
This command appears on the Effects Menu when the Crop or Resize effects are selected.
Clicking on Background Colour calls up a chart of colours that can be used as backgrounds to the cropped or resized picture.
B4.9
Gallery Menu
The Gallery Menu has commands that relate to a Gallery and the Tiles it contains. To display the Gallery
Menu, click on the Menu button on a Gallery.
Lightworks V.I.P 4500 Version 3 - User Guide B4.0 - 559
B4.9
Gallery Menu
B4.9.1
Tidy Gallery (and Sort)
Tidies the Tiles in the Gallery so that they are neat and occupy the least space. They are also
sorted into alphabetical/numerical name order.
B4.9.2
Tidy Gallery (Without Sort)
Tidies the Tiles in the Gallery so they are neat and occupy the minimum space. Does not
sort Tiles.
B4.9.3
Change Tile Size
Toggles the size of the Tiles; the smaller size allows twice as many shots in the same size
Gallery; they can still be used, played and edited with as normal. An entry in the
CONFIG.DAT file determines whether a sort is performed when Change Tile Size is used.
See ‘gallery_sort_tiles’ on page 596.
B4.9.4
Constant Dimension [Height] WIDTH
Allows you to choose height or width as constant factor in the size of the Gallery when Tidy
Gallery is used. This can be useful to keep a screen arrangement from being upset when the
number of Tiles in the Gallery changes.
B4.9.5
Gallery Permanence TRANSIENT [Permanent]
Click on this command to toggle the Gallery status between Transient and Permanent. See
‘Gallery, Database, Rack and Sync Group Permanence’ on page 212.
B4.9.6
Move Contents To Another Project
Use this command to move shots (logs only), ghosts and edits to another Project. See ‘Transferring Shots, Edits, Ghosts and Reels Between Projects’ on page 94.
B4.9.7
Copy Contents To Another Project
Use this command to copy shots (logs only), ghosts and edits to another Project. See ‘Transferring Shots, Edits, Ghosts and Reels Between Projects’ on page 94.
B4.0 - 560
Lightworks V.I.P 4500 Version 3 - User Guide
Gallery Menu
B4.9.8
B4.9
Find Material To Fill Ghosts
If you are editing from ghosts and you delete the material (picture and sound) only for the
original shots, your ghosts will play black and silence. To restore the material to the ghosts,
redigitise the source shot(s), then use Find Material To Fill Ghosts to reconstitute the
ghosts. See ‘Filling Ghosts’ on page 184.
B4.9.9
Remove Duplicate Shots
The bottom left corner of the master Gallery (the Gallery from which the command is
issued) must be lying over the slave Gallery. All Tiles which are in both the master Gallery
and the slave Gallery are removed from the master. The slave Gallery remains unchanged.
B4.9.10
Merge Gallery
This is the Gallery equivalent of the Merge Database command on the Database Menu.
The bottom left corner of the master Gallery (the Gallery from which the command is
issued) must be lying over the slave Gallery. All Tiles in the slave Gallery are copied into
the master Gallery. The slave Gallery remains unchanged.
B4.9.11
Create Logging Database
A Logging Database can be used to control autoconform recording of material into the V.I.P
system.
Clicking on the Gallery Menu command Create Log Database will generate a Logging
Database of all the shots contained in the Gallery.
B4.9.12
Make Kemroll
The Make Kemroll command joins all the shots or ghosts in the Gallery together into a
single edit with a continuous timecode. This is achieved by inserting black or audio spacing
between the shots to make the timecode continuous.
The kemroll is an edit with a start timecode that matches the start timecode of the earliest
shot in the Gallery.
B4.9.13
Show Gallery As Database
Click on this command to display a Database of the contents of a Gallery. A Database can
also be made by clicking on the Database button in the bottom right corner of the Gallery.
Lightworks V.I.P 4500 Version 3 - User Guide B4.0 - 561
B4.9
Gallery Menu
B4.9.14
Autosynchronise Gallery
Automatically synchronises sound and picture shots in the Gallery, based on timecode and
date of recording if required. A sync-ghost or edit is produced.
B4.9.15
Make Edit From Gallery
This command will assemble an edit using all the shots in the Gallery, in order (from left to
right, top to bottom), with straight cuts.
After clicking on this command, the editor is presented with the option to Use Marks on
Tiles.
B4.9.16
Destroy Reels and Their Associated Material
See ‘Destroy Reels and Their Associated Material’ on page 500.
B4.9.17
Delete Material (Picture and Sound) From Shots
See ‘Delete Material (Picture and Sound) From Shots’ on page 500.
B4.9.18
Delete Only Picture Material From Shots
See ‘Delete Only Picture Material From Shots’ on page 500.
B4.9.19
Delete Only Sound Material From Shots
See ‘Delete Only Sound Material From Shots’ on page 501.
B4.9.20
Destroy Shots, Material, Edits and Ghosts
See ‘Destroy Shots, Material, Edits and Ghosts’ on page 501.
B4.9.21
Publish Contents To Omnibus
This command appears on the Gallery Menu if the V.I.P system is configured to work with
the Omnibus automation system. See ‘omnibus_dongle’ on page 600 and see ‘Publishing
Edits’ on page 628.
B4.0 - 562
Lightworks V.I.P 4500 Version 3 - User Guide
General Menu
B4.10
B4.10
General Menu
The General Menu is permanently displayed in each Room. Many of its commands affect the entire
Project or entire V.I.P system. Unlike the other menus, it is not attached to one specific object.
B4.10.1
System Sound Monitor Panel
This command displays the System Monitor Panel to control the audio for individual shots
or edit and the outputs of the system. See ‘Audio Control’ on page 373.
B4.10.2
VTR Monitor Panel
Click on this command to display VTR Monitor Panels for all currently defined machine
controllable devices. See ‘Monitor Panels For VTRs and Other Controllable Devices’ on
page 116.
B4.10.3
Level Meters Panel
Displays output audio level meters. See ‘Monitoring Audio Levels With the Level Meters
Panel’ on page 384.
Lightworks V.I.P 4500 Version 3 - User Guide B4.0 - 563
B4.10
General Menu
B4.10.4
Current Project Details
Clicking on Current Project Details displays the Project Card. The Project Card is used to
enter information about a Project. See ‘Setting Up a Project’ on page 88.
B4.10.5
Show Cookie
See ‘Cookies’ on page 631.
B4.10.6
Project Password
You can set a password to protect the work in your Project.
See ‘Using Passwords’ on page 93.
B4.10.7
Delete Undo Edits
The Delete Undo Edits command is one of the features available for system housekeeping.
During the course of a long Project the backup edits saved by the undo feature can accumulate and slow down searching. Clicking the Delete Undo Edits command deletes all the
undo edits in the Project. It will not be possible to perform an undo on any edits until further
editing work has taken place, therefore this operation should only be performed at the end
of a work session.
B4.10.8
Make Synchroniser
Generates the Synchroniser, which may be used for syncing-up picture and sound in Lightworks. See ‘Syncing-up’ on page 193.
B4.10.9
Magnifier Tool
The Magnifier Tool enlarges the area around the Mouse cursor.
B4.10.10
Set Default Tool Position
Any on screen arrangement of Tools can be saved by clicking on Set Default Tool Position.
B4.10.11
Tidy Tools
If, at any time, you wish to return the Tools to their saved positions, simply click on Tidy
Tools.
B4.0 - 564
Lightworks V.I.P 4500 Version 3 - User Guide
Import/Export Menu
B4.11
B4.11
Import/Export Menu
B4.11.1
Delete Lightworks V.I.P Archive
See ‘Deleting an Archive’ on page 501.
B4.11.2
Calculate Space Required
Clicking on this command calculates the amount of space required for the items selected to
export.
B4.12
Level Meters Panel Menu
B4.12.1
Inputs Display: [user selection] ACTIVE SOURCE ONLY
See ‘Monitoring Audio Levels With the Level Meters Panel’ on page 384.
Lightworks V.I.P 4500 Version 3 - User Guide B4.0 - 565
B4.12
Level Meters Panel Menu
B4.12.2
Select Inputs To Display
See ‘Monitoring Audio Levels With the Level Meters Panel’ on page 384.
B4.12.3
Outputs Display: USER SELECTION [none]
See ‘Monitoring Audio Levels With the Level Meters Panel’ on page 384.
B4.12.4
Select Outputs To Display
See ‘Monitoring Audio Levels With the Level Meters Panel’ on page 384.
B4.12.5
Set Decay Rate
The level meters have a configurable decay rate. (The decay rate is the rate at which the
level display falls if the signal is suddenly removed). The default value is 60 dB per second.
Clicking on this command brings up an input box prompting the user to enter a new value
in dB per second. Type this in and press the Enter key or click on the OK button.
B4.12.6
Set Red Level
The level at which the display changes from yellow to red. The default value is -6 dB.
Clicking on this brings up an input box prompting the user to enter a new value
B4.12.7
Set Peak Hold Time
The meters have ‘sticky peaks’. The peak hold time specifies the ‘stickiness’ of the meter;
the time for which the peak audio level is retained. The default is 1.5 seconds. Clicking on
this brings up an input box prompting the user to enter a new value.
B4.0 - 566
Lightworks V.I.P 4500 Version 3 - User Guide
Logging Database Menu
B4.13
B4.13
Logging Database Menu
The Logging Database Menu is obtained by clicking on the Menu button in the bottom left corner of the
Logging Database.
B4.13.1
Change Database Format
See ‘Change Database Format’ on page 547.
B4.13.2
Save Database For Export
See ‘Save Database For Export’ on page 548.
B4.13.3
Show Keystrokes
See ‘Show Keystrokes’ on page 548.
B4.13.4
Autochop (TM)
See ‘Breaking Down Recordings Using Autochop’ on page 199.
B4.13.5
Retrofit
See ‘Updating Filecards For Shots After Recording Using Retrofit’ on page 200.
Lightworks V.I.P 4500 Version 3 - User Guide B4.0 - 567
B4.14
B4.14
Logging Database Panel Menu
Logging Database Panel Menu
B4.14.1
Overlapping Timecodes: [flag as errors] IGNORE
See ‘Checking the Logging Database’ on page 157.
B4.15
Audio Output Routing Panel Menu
B4.15.1
Save Routing
See ‘Loading and Saving Audio Output Routing Panel Settings’ on page 383.
B4.15.2
Load Routing
See ‘Loading and Saving Audio Output Routing Panel Settings’ on page 383.
B4.15.3
Delete Routing
See ‘Loading and Saving Audio Output Routing Panel Settings’ on page 383.
B4.0 - 568
Lightworks V.I.P 4500 Version 3 - User Guide
Playout Menu
B4.16
B4.16
Playout Menu
B4.16.1
Playout Type: PRESTRIPED [t/c generation]
See ‘Controlled Playout’ on page 437.
B4.16.2
Change Device Connections/Inspect Device Connections
This command displays the Device Definition Panel.
If device configuration is enabled in all Rooms, the wording of the command will be
Change Device Connections and changes to the device connections and settings can made.
If device configuration is not enabled in all Rooms, the wording of the command will be
Inspect Device Connections and changes can not be made.
See ‘Security Of Device Definitions’ on page 113.
B4.16.3
Sync Prestripe To: [ltc] 9-PIN
This determines the synchronisation source for any prestriped playout as being either the
machine control cable or a return feed of LTC from the destination device.
B4.16.4
Set Preroll Time In Seconds
This command can be used to adjust VTR preroll time, for Timecode Generation playouts
only. The minimum permitted value is 10 seconds.
B4.16.5
Set Postroll Time In Seconds
This command can be used to adjust VTR postroll time, for Timecode Generation playouts
only. The default value is 0 seconds.
Lightworks V.I.P 4500 Version 3 - User Guide B4.0 - 569
B4.17
B4.17
Rack Menu
Rack Menu
B4.17.1
Rack Permanence [transient] PERMANENT
See ‘Gallery, Database, Rack and Sync Group Permanence’ on page 212.
B4.17.2
Make Database Of All
This command will display a Database of every shot and edit in every Gallery and Database
held within the Rack. The Database produced way can be added to the Rack if required.
B4.18
Recording Panel Menu
B4.18.1
Stop Record If Label Break [no] YES
Toggles detection of timecode breaks between YES and NO. If set to YES then, when the
program detects breaks or discontinuites in the primary timecode, it stops the recording at
the break and starts a new recording after the break.
B4.0 - 570
Lightworks V.I.P 4500 Version 3 - User Guide
Reel Menu
B4.18.2
B4.19
Stop Record If Label Missing NO [yes]
When set to NO source material can be recorded with no timecode.
B4.18.3
Monitor Video During Record NO [yes]
When set to NO, the picture in the Recording Panel will not be updated when the Recording
Panel is not selected. When set to YES, the picture in the Recording Panel will be updated
regularly, even when the Recording Panel is not selected.
B4.18.4
Change Device Definitions/Inspect Device Definitions
This command displays the Device Definition Panel.
If device configuration is enabled in all Rooms, the wording of the command will be
Change Device Definitions and changes to the device connections and settings can made.
If device configuration is not enabled in all Rooms, the wording of the command will be
Inspect Device Definitions and changes can not be made.
See ‘Security Of Device Definitions’ on page 113.
B4.18.5
Film -> Video Transfer
See ‘Setting the Pulldown Sequence When Recording Labels’ on page 144.
B4.19
Reel Menu
B4.19.1
Set Tagged To Current Reel Settings
See ‘Quickly Defining Parameters For New or Imported Reels’ on page 102.
Lightworks V.I.P 4500 Version 3 - User Guide B4.0 - 571
B4.20
Searchcard Menu
B4.19.2
Tag Unknown Reels
See ‘Unknown Reels’ on page 101.
B4.19.3
Change Reel ID
See ‘Changing the Reel ID’ on page 103.
B4.19.4
Set Project Default Reel Type
See ‘Setting a Default Reel Type’ on page 101.
B4.19.5
Delete Current Reel and Associated Shots
See ‘Destroy Reels and Their Associated Material’ on page 500.
B4.20
Searchcard Menu
B4.20.1
Delete Undo Edits
See ‘Delete Undo Edits’ on page 564.
B4.0 - 572
Lightworks V.I.P 4500 Version 3 - User Guide
Stripview Menu
B4.21
B4.21
Stripview Menu
The Stripview Menu has commands that relate to edits displayed in Stripviews. It also repeats some of
the Edit Menu commands.
To display the Stripview Menu, click on the Menu button on the Stripview.
B4.21.1
Show/Hide Strips
It is possible to choose which video and audio channels of an edit should be included in the
Stripview display, by using the Stripview Menu command Show/Hide Strips.
Lightworks V.I.P 4500 Version 3 - User Guide B4.0 - 573
B4.21
Stripview Menu
B4.21.2
Group Channels
This allows channels to be combined when displayed in the Stripview. Any Console or
Stripview edits will then apply to all channels in the group.
B4.21.3
Ungroup Channels
Allows any of the currently grouped channels to be selected and to be ungrouped.
B4.21.4
Align Marks
This command can slide channels until their marks are lined up, provided that the strip is
broken in an appropriate place. A typical example is to put picture and sound in sync. See
‘Changing Sync Using the Stripview’ on page 296.
B4.21.5
Show Sync Losses NO [Yes]
When set to Yes, any losses of sync (on shots that were recorded as sync picture and sound)
will be flagged by yellow dots.
B4.21.6
Fix Sync
The Fix Sync command on the Stripview Menu is used to put channels back in sync. It
applies only to channels that were originally recorded together as sync picture and sound:
the system keeps track of the sync relationship. See ‘Fixing Sync Using the Stripview’ on
page 298.
B4.21.7
Show Frame Reuse NO [Yes]
Allows you to determine whether any individual frame occurs more than once in the edit.
See ‘reuse_seconds’ on page 602.
B4.21.8
Drag In Black DISABLED [Enabled]
Allows black or audio spacing to be dragged into an edit using the Mouse. To drag in black,
break a cut by placing the Mouse cursor to the right of the cut, holding down the right
Mouse button and clicking the left Mouse button. It breaks as a straight line, instead of a
curl, and a gap in the edit can then be pulled out. This gap plays as black or silence.
B4.0 - 574
Lightworks V.I.P 4500 Version 3 - User Guide
Sync Group Menu
B4.21.9
B4.22
Show Shot Names NO [yes]
When set to YES, the names of all shots, ghosts and external control event types will be
displayed on the strips of the Stripview.
B4.21.10
Show Colour Framing Errors
See ‘Handling the PAL Colour Framing Sequence’ on page 301.
B4.21.11
Fix Colour Framing
See ‘Handling the PAL Colour Framing Sequence’ on page 301.
B4.22
Sync Group Menu
B4.22.1
Concurrent Players [yes] NO
When set to YES this allows up to four Viewers to play in sync, updating in real time. When
set to NO, more Viewers can be displayed but not all will update in real time.
B4.22.2
Sync To: LOCK-FRAME [timecode]
This command determines how shots are synced together when placed in a Sync Group.
This defaults to the way it was last set up in the current Project. The options are:
Lightworks V.I.P 4500 Version 3 - User Guide B4.0 - 575
B4.22
Sync Group Menu
Lock-frame
Tiles are synced together by whichever frame is displayed when the Tile is placed in
the Sync Group.
Timecode
The timecode from the first Tile placed in the Sync Group will be used as the ‘master’
timecode. All subsequent Tiles placed in the Sync Group will jump to a point which
matches the master timecode.
B4.22.3
When Timecode, Sync To: V [a1] [a2]
Determines which channel’s timecode is used for syncing to timecode.
V
The timecode is taken from the video channel. (The default option)
A1
The timecode is taken from the first audio channel.
A2
The timecode is taken from the second audio channel.
B4.22.4
Allow Lock Adjustments [yes] NO
If this is set to YES it is possible to adjust the lock-frame of the currently highlighted Tile
without affecting other members of the Sync Group.
B4.22.5
Sync Group Permanence TRANSIENT [permanent]
Click on this command to toggle the Sync Group status between Transient and Permanent. The Searchcard Find Sync Groups button can be used to find permanent Sync Groups.
B4.22.6
Display Viewers
Will display Tiles in the Sync Group as Viewers.
B4.22.7
Fill From Gallery
This enables a Sync Group to be filled directly from a Gallery.
B4.0 - 576
Lightworks V.I.P 4500 Version 3 - User Guide
System Menu
B4.22.8
B4.23
Tidy Sync Group
Tidies the Tiles in the Sync Group so they are neat and occupy the least space.
B4.22.9
Align Kemrolls
The Align Kemrolls command removes any common black from kemrolls placed in the
Sync Group. If all the kemrolls in the Sync Group have a section of black at the same point
then this command will remove it.
B4.23
System Menu
The System Menu is permanently displayed in the Machine Room, and contains commands relating to
overall system settings and operations.
B4.23.1
Default Standard For New Projects
See ‘Default TV Standard For New Projects’ on page 89.
B4.23.2
System Configuration
Use this command to display the System Configuration Panel, which is used for configuring
certain system-wide settings.
Lightworks V.I.P 4500 Version 3 - User Guide B4.0 - 577
B4.23
System Menu
B4.23.3
Skeleton Password
The Skeleton Password will override any Project Password that has been set. The Skeleton
Password is initially set during manufacture and should be kept by the person(s) responsible
for housekeeping and support of the system.
To change the Skeleton Password, click on the Skeleton Password command and follow
the prompts. Obviously you need to know the existing Skeleton Password before you can
change it!
B4.23.4
Add New Input Device
See ‘Adding New Devices’ on page 106.
B4.23.5
Delete Device
See ‘Deleting Devices’ on page 107.
B4.23.6
Change Device Connections
See ‘Using the Device Definition Panel’ on page 108.
B4.23.7
External Control Configuration
See ‘Configuring External Control Event Types’ on page 343.
B4.23.8
Delete Projects
See ‘Deleting a Whole Project’ on page 503.
B4.23.9
Find Orphaned Material For Deletion
See ‘Finding and Deleting Material With No Logs’ on page 504.
B4.23.10
Reel User Field Names
See ‘Reel User Fields’ on page 100.
B4.23.11
Use Undo Edits
See ‘Recovering Corrupted Edits’ on page 634.
B4.0 - 578
Lightworks V.I.P 4500 Version 3 - User Guide
Titling Menu
B4.24
B4.24
Titling Menu
B4.24.1
Add New Layer
This will add a new title layer. The maximum number of layers available is four.
Lightworks V.I.P 4500 Version 3 - User Guide B4.0 - 579
B4.24
Titling Menu
B4.24.2
Insert New Layer
This will insert a new title layer before the current layer. The maximum number of layers
available is four.
B4.24.3
Delete Current Layer
This will remove the current title layer. All data in that layer will be lost (unless that layer
has previously been saved using the Save Session command).
B4.24.4
Import Text Into Layer
This allows text from an ASCII.TXT file to be imported into the currently selected layer,
erasing all objects that previously existed in that layer.
B4.24.5
Load Layer
This will load a previously saved layer into the current layer, erasing all objects that previously existed in that layer.
B4.24.6
Save Layer
This will save all the objects in the current layer to a file - all attributes and positioning will
be preserved. All layer files have the suffix .LYR.
B4.24.7
Load Session
These will load a previously saved session into the titling window, erasing all layers that
previously existed in the Title Tool.
B4.24.8
Save Session
This will save all the text and objects in all layers currently in the titling window. All session
files are suffixed.TTL
B4.24.9
No Ruler, Fine Ruler, Medium Ruler and Coarse Ruler
The Ruler commands set the granularity of the rulers in the Titling window. The type of
ruler selected will affect the positioning of guidelines and objects when aligning and
importing.
B4.0 - 580
Lightworks V.I.P 4500 Version 3 - User Guide
Titling Menu
B4.24.10
B4.24
Set FX Viewer Duration
This sets the park position in the Effects Viewer to the point at which the Roll/Crawl/Static
caption will end, based on the durations set up on the timing panel.
B4.24.11
Set Layer Timing
This sets the Fade In/Hold In/Fade Out/Hold Out times for a Static layer and the Roll/Crawl
speed and the Fade In/First Hold/Second Hold/Fade Out times for rolls and crawls. An
appropriate dialogue box will appear depending on the nature of the layer.
B4.24.12
Add ‘Invisible’ Object Centred On Screen
This will add an ‘Invisible Object’ to the current Title Layer. This object will be represented
in the title window by a square box with a cross hair through it, but will not appear in any
rendered titling. The invisible object is used in a roll or crawl layer to define the extent of
the roll or crawl.
B4.24.13
Add ‘Invisible’ Object On Page After Last Object
This will add an ‘Invisible Object’ a page after the last object in the current Title Layer. This
object will be represented in the title window by a square box with a cross hair through it,
but will not appear in any rendered titling. A invisible object on the page after the last object
will ensure a roll ends with a clear screen.
B4.24.14
Gamma Correction [on] OFF
This determines whether gamma correction is applied to graphics and colours when rendered for display on the composite monitor.
B4.24.15
Bitmaps Have Prescaled Alpha Channels YES [no]
This command determines how future imported bitmaps are treated. All previously loaded
bitmaps are unaffected.
B4.24.16
Select All
Selects all objects.
B4.24.17
Deselect All
Deselects all objects.
Lightworks V.I.P 4500 Version 3 - User Guide B4.0 - 581
B4.24
Titling Menu
B4.24.18
Invert Selection
Any selected objects are deselected and any deselected objects are selected.
B4.24.19
Send To Back Selected
Makes any currently selected objects appear to be behind all other objects.
B4.24.20
Bring To Front Selected
Makes any currently selected objects appear to be in front of all other objects.
B4.0 - 582
Lightworks V.I.P 4500 Version 3 - User Guide
Part C: Technical
Lightworks V.I.P 4500 Version 3 - User Guide 583
584 Lightworks V.I.P 4500 Version 3 - User Guide
C1.0 The CONFIG.DAT File
C1.1
Introduction
The CONFIG.DAT file contains system settings that affect some aspects of the way the V.I.P program
works.
The settings can be classified in three groups:
User Options
Settings which affect certain operational parameters. These may be modified or added to by the
user.
Machine Characteristics
Settings which tell the V.I.P program what hardware is installed. They may vary from machine to
machine and should not normally be modified by the user.
Factory Set Parameters
These are settings which fundamentally affect the operation of the V.I.P system. They must not be
modified unless specifically directed by a suitably qualified person.
The person(s) responsible for system maintenance and support may want to change some of the user
options. To do this, it is necessary to edit the CONFIG.DAT file, located in the folder C:\LWORKS.
The CONFIG.DAT file on your machine will not necessarily look exactly like the one listed in this
chapter:
Where a parameter appears in your file, but is not in the list:
The list in this chapter is not fully comprehensive. For example, parameters that affect fundamental system settings and should not be changed are not listed.
Also, there are a number of lines which are no longer used in the current version of software. Such
lines do not always get deleted automatically, they just remain in the file and are ignored by the
program.
Where a parameter appears in this list, but is not in your file:
A number of the parameters listed here are automatically set in the software. Others are duplicated
in the user interface.
You will only need these parameters if you want to change the default settings. If you need to add
the parameter, just type it in to your CONFIG.DAT file with the appropriate value.
Lightworks V.I.P 4500 Version 3 - User Guide C1.0 - 585
C1.1
Introduction
C1.1.1
Format Of Parameters
Each parameter is a single text string (if more than one word is used then they will be joined
by underlines). Each parameter is followed by a space, then the value to which it is set. For
example; auto_simplify 1.
Some parameters are simply switches, where:
1 = ON
0 = OFF
Each parameter occupies one line in the file and must be typed in exactly as shown in the
following list. A parameter can, in theory, appear anywhere in the file between the start of
file marker “{config” and end of file marker “}config”. However, to avoid confusion, user
options should be entered under the appropriate heading.
Be careful to ensure the same parameter does not appear twice in the file, as this could cause
confusion if two different values are set!
Lines starting with a # are comment lines and are ignored by the V.I.P program.
C1.1.2
Modifying CONFIG.DAT Entries
This chapter lists the user adjustable options available in the CONFIG.DAT file.
WARNING: DO NOT ALTER OR ADD ANY ENTRIES OTHER THAN
THOSE LISTED UNLESS SPECIFICALLY INSTRUCTED BY A QUALIFIED PERSON.
When a new release of the V.I.P software is installed on a system, it replaces the existing
CONFIG.DAT with a new version shipped with the software release. The existing
CONFIG.DAT will be saved as CONFIG.OLD. If this contains customised settings they
can be transferred across to the CONFIG.DAT file.
C1.1.3
Editing the CONFIG.DAT File
It is a good idea to save a copy of the CONFIG.DAT file (under a different name) before
you edit it, just in case you make a mistake.
To edit the CONFIG.DAT file:
1 Exit the V.I.P program by clicking on the Exit Door.
C1.0 - 586
Lightworks V.I.P 4500 Version 3 - User Guide
User Adjustable CONFIG.DAT Parameters
C1.2
2 Load the file C:\LWORKS\CONFIG.DAT into a Windows NT text editor.
3 Find the entry to be altered or move to the place you want to add a new parameter if
it is not already in the list.
4 Delete the setting(s) present (if modifying an existing entry) and type the new
setting(s).
5 Save the altered file.
6 Exit the text editor.
C1.2
User Adjustable CONFIG.DAT Parameters
C1.2.1
Alladin Serial Control Configuration Parameters
These are the parameters available to configure serial control of the Alladin system, with
their default values. For more information, see ‘Serial Control Configuration’ on page 348.
C1.2.2
Alladin_PlayLatency_PAL 8
Alladin_PlayLatency_NTSC 9
Alladin_RecallLatency_PAL 250
Alladin_RecallLatency_NTSC 300
Alladin_MsgLatency_PAL 6
Alladin_MsgLatency_NTSC 8
Alladin_loadDelay_PAL 250
Alladin_loadDelay_NTSC 300
Alladin Pro Serial Control Configuration Parameters
These are the parameters available to configure serial control of the Alladin Pro system,
with their default values. For more information, see ‘Serial Control Configuration’ on page
348.
Lightworks V.I.P 4500 Version 3 - User Guide C1.0 - 587
C1.2
User Adjustable CONFIG.DAT Parameters
C1.2.3
AlladinPro_PlayLatency_PAL 24
AlladinPro_PlayLatency_NTSC 24
AlladinPro_RecallLatency_PAL 175
AlladinPro_RecallLatency_NTSC 210
AlladinPro_MsgLatency_PAL 1
AlladinPro_MsgLatency_NTSC 1
allow_MAR
1 = Adds the Profile Movie Archive format to those available on the Import/Export Panel.
C1.2.4
allow_omf_aifc_export
1 = Enables export format options on the Import/Export Panel which allow you to export
OMF audio media in AIFC format instead of WAV.
C1.2.5
allow_system_timing_change
0 = The default system timing of -16 is used and cannot be overridden.
1 = The PDR Configuration Tool can be used to adjust the genlock advance and video
output delay settings.
C1.2.6
audio_drift_tolerance
During recording, this parameter specifies how far (in video frames) a digital audio signal
can drift from the video or LTC synchronisation source before the recording is terminated.
The default is 5 frames.
C1.2.7
audio_xfade_rule
Short crossfades can be automatically performed at audio butt joins, in order to eliminate
digital clicks in the audio. The automatic crossfades are controlled via the System Sound
Monitor Panel.
The parameter audio_xfade_rule determines the profile of the crossfade performed.
0 = Linear.
1 = Cosine (Default).
C1.0 - 588
Lightworks V.I.P 4500 Version 3 - User Guide
User Adjustable CONFIG.DAT Parameters
C1.2.8
C1.2
audio_xfade_samples
Short crossfades can be automatically performed at audio butt joins, in order to eliminate
digital clicks in the audio. The automatic crossfades are controlled via the System Sound
Monitor Panel.
The audio_xfade_samples parameter determines the default length (in samples) of crossfade that appears on the System Sound Monitor Panel.
The value of this parameter must be a positive even number. In general, this parameter
should be left set to its default value of 0 - so that crossfades are only performed if the user
actively sets them up via the System Sound Monitor Panel.
This is because these crossfades use up some of the V.I.P system’s energy during playback
(to the possible detriment of picture playback) and so should only be enabled when playing
out audio channels for use in dubbing.
See ‘audio_xfade_rule’ on page 588.
C1.2.9
autochop_active
0 = Removes the Autochop command from the Logging Database Menu.
C1.2.10
auto_reel_enquiry
1 = Forces the reel ID prompt to be displayed immediately upon entering a Room.
0 = The reel ID prompt is only displayed when a recording is initiated by the user. (Default)
C1.2.11
auto_simplify
0 = Shots trimmed to zero length on the Stripview will remain in the edit (at zero length)
until the Simplify command on the Edit Menu is clicked (Default).
1 = Shots trimmed to zero length on the Stripview will automatically be simplified to
remove them from the edit.
C1.2.12
backup_depth
Sets the number of undo's and redo’s available. Defaults to 5.
Note: There is a potential performance cost to increasing this value.
Lightworks V.I.P 4500 Version 3 - User Guide C1.0 - 589
C1.2
User Adjustable CONFIG.DAT Parameters
C1.2.13
break_on_timecode_break
1 = Sets the default for the Recording Panel Menu command Stop Record if Label Break
to YES. This stops and restarts recording at a timecode break.
C1.2.14
WARNING: CHANGING THIS PARAMETER MAY BE HAZARDOUS!
check_quantise
0 = Suppresses the “Subframe Edit” warning message.
C1.2.15
database_auto_permanence
1 = Databases automatically become permanent when they are renamed. (Default)
0 = Databases can only be made permanent using the Database Menu command.
C1.2.16
default_border_width
Sets the width of the red or blue border for Viewers and Stripviews. Must be an even
number- odd numbers will be rounded up.
C1.2.17
default_gal_shape
Default Gallery shape: 1 = tall and thin, 0 = short and fat.
C1.2.18
default_reel_type
Sets the default reel type for the system. The parameter must be followed by the name of
the desired reel type, entered exactly as it appears on the user interface (with identical
spelling and capitalisation).
C1.2.19
default_stripv_height
Default Stripview height.
C1.2.20
default_stripv_width
Default Stripview width.
C1.0 - 590
Lightworks V.I.P 4500 Version 3 - User Guide
User Adjustable CONFIG.DAT Parameters
C1.2.21
C1.2
disk_menu_space
0 = Disables Free Disk Space display on Visidirs. Setting this parameter to 0 can speed up
the use of Visidirs in cases where the V.I.P system is connected to a large network.
C1.2.22
DVExtreme Serial Control Configuration Parameters
These are the parameters available to configure serial control of the DVExtreme system,
with their default values. For more information, see ‘Serial Control Configuration’ on page
348.
C1.2.23
DVExtreme_PlayLatency_PAL 24
DVExtreme_PlayLatency_NTSC 24
DVExtreme_RecallLatency_PAL 175
DVExtreme_RecallLatency_NTSC 210
DVExtreme_MsgLatency_PAL 1
DVExtreme_MsgLatency_NTSC 1
edl_audio_source
Sets default for an option on the EDL Panel.
1 = Enable audio mapping comments in the EDL.
C1.2.24
edl_audio_mapping_comment
This parameter controls the string prefixed to EDL mapping comments. (Default is ‘COMMENT: AUDIO MAPPING’).
C1.2.25
edl_combine_dissolves
Sets default for the Combine Dissolves button on the EDL Optimisations Panel, which
determines whether dissolves/crossfades on different channels are merged into a single
event line within an EDL.
0 = Do not merge dissolves/crossfades on different channels (Default).
1 = Merge dissolves/crossfades on different channels.
Lightworks V.I.P 4500 Version 3 - User Guide C1.0 - 591
C1.2
User Adjustable CONFIG.DAT Parameters
C1.2.26
edl_default_reelid
Default reel ID (used if no reel ID set by user).
C1.2.27
edl_dissolve_comment
Sets default for an option on the EDL Panel.
1 = Comments are added to the EDL for dissolve events.
C1.2.28
edl_dump_reelid
Sets default for an option on the EDL Panel.
C1.2.29
edl_dump_reel_filename
Sets default for an option on the EDL Panel specifying filename for Dump Reel EDL.
For example, in the case of an edit named ABC123:
*.dmp = Dump Reel Filename will be ABC123.DMP.
dmp*.edl = Dump Reel Filename will be DMP123.EDL (This is default).
C1.2.30
edl_dump_reel_handle
Adds a handle to either end of piece to be dumped (in seconds).
C1.2.31
edl_file_name
Sets default for an option on the EDL Panel specifying the full path name for EDL output.
C1.2.32
edl_import_audio_mapping
1 = Any audio mapping comments in the imported EDL are taken into account when creating dummy logs.
C1.2.33
edl_import_channel_length
Length of EDL channel field. May need adjusting when importing a CMX EDL.
C1.2.34
edl_import_channel_start
Column where channel field starts. May need adjusting when importing a CMX EDL.
C1.0 - 592
Lightworks V.I.P 4500 Version 3 - User Guide
User Adjustable CONFIG.DAT Parameters
C1.2.35
C1.2
edl_inhibit_black
Sets default for option on the EDL Panel that determines whether black in an edit is to be
listed as an event in the EDL.
0 = Do not inhibit black - black is listed as an event in the EDL (Default).
1 = Inhibit black - black is not listed as an event in the EDL.
C1.2.36
edl_keep_xfades
Sets default for option on the EDL Panel that determines whether audio dissolves should be
included in the EDL.
0 = Audio dissolves will be excluded.
1 = Audio dissolves will be included (Default).
C1.2.37
edl_list_reelids
This parameter can be used to include a list of all reel IDs used in the edit, at the top of the
EDL file.
0 = Do not include list of reel IDs (Default).
1 = Include list of reel IDs.
C1.2.38
edl_make_dump_reel
Sets default for option on the EDL Panel that determines whether a dump reel is created, if
needed.
0 = No dump reel will be created.
1 = Dump reel will be created (Default).
C1.2.39
edl_merge_chans
Sets default for option on the EDL Panel that determines whether simultaneous video and
audio cuts in an edit are to be treated as a single event in the EDL.
0 = No channels will be merged.
1 = Channels will be merged where possible (Default).
Lightworks V.I.P 4500 Version 3 - User Guide C1.0 - 593
C1.2
User Adjustable CONFIG.DAT Parameters
C1.2.40
edl_no_comments
Sets default for an option on the EDL Panel that determines whether EDL includes comments or not.
0 = EDL will include comments, as specified by other EDL options (Default).
1 = EDL will not include comments. If this setting is used all other options to include comments will be overridden.
C1.2.41
edl_pad_reelid
Sets default for an option on the EDL Panel.
1 = Automatically pad reel IDs in EDL with leading zeros, to fill field-width.
C1.2.42
edl_use_audio
Sets default for option on the EDL Panel that determines whether any audio reel and timecode information is to be used in the EDL.
0 = Use video reel and timecodes for both video and audio events (Default).
1 = Use video reel and timecodes for video events and audio reel and timecodes for audio
events.
C1.2.43
edl_use_shot_name_list
Sets default for an option on the EDL Panel that determines whether reel ID and shot name
are to be included as comment lines after each event line in the EDL.
0 = Do not include shot names and reel IDs. (Default).
1 = Include shot names and reel IDs.
C1.2.44
edl_use_split_edits
Sets default for an option on the EDL Panel that determines whether an EDL will treat split
edits using sync source material as a single event.
0 = Split edits will not appear as a single event in the EDL. (Default).
1 = Split edits will appear as a single event in the EDL.
C1.0 - 594
Lightworks V.I.P 4500 Version 3 - User Guide
User Adjustable CONFIG.DAT Parameters
C1.2.45
C1.2
edl_varispeed_comment_out
Sets default for an option on the EDL Panel.
1 = varispeed comments not included in EDL.
C1.2.46
edl_varispeed_comment_text
Sets the text for varispeed comments in the EDL.
C1.2.47
EDL Wipe Parameters
The edl_wipe parameters control mapping of wipe codes in EDLs. CMX wipe codes are
used as default.
The settings entered into the Wipe Codes Panel (accessed via the Advanced EDL Options
Panel) are stored as the following parameters:
edl_wipe_1001
Vertical moving bottom to top (default 102).
edl_wipe_2001
Vertical, moving top to bottom (default 2).
edl_wipe_1002
Horizontal, moving left to right (default 1).
edl_wipe_2002
Horizontal, moving right to left (default 101).
edl_wipe_1003
Diagonal, top-right to bottom-left (default 14).
edl_wipe_2003
Diagonal, bottom-left to top-right (default 114).
edl_wipe_1004
Diagonal, bottom-right to top-left (default 113).
Lightworks V.I.P 4500 Version 3 - User Guide C1.0 - 595
C1.2
User Adjustable CONFIG.DAT Parameters
edl_wipe_2004
Diagonal, top-left to bottom-right (default 13).
edl_with_dump_reel
1 = Default setting for Make Dump Reel button on EDL Panel is Yes.
C1.2.48
flag_overlapping_timecodes
1 = Flags overlapping timecodes as errors when check is performed on Logging Database.
Also set in the user interface via Logging Database Panel Menu.
C1.2.49
gallery_auto_permanence
1 = Galleries automatically become permanent when they are renamed. (Default).
0 = Galleries can only be made permanent using the Gallery Menu command.
C1.2.50
gallery_name
Default Gallery name (only applies to Galleries made with the Gallery Tool).
C1.2.51
gallery_sort_tiles
Determines sort behaviour of Galleries generated from merges, or when Tiles are resized,
but not searches.
0 = Alphanumeric sort does not take place.
1 = Alphanumeric sort takes place (Default).
C1.2.52
Grass Valley DPM700 Serial Control Configuration Parameters
These are the parameters available to configure serial control of the DPM700 system, with
their default values. For more information, see ‘Serial Control Configuration’ on page 348.
C1.0 - 596
GVGDPM700_PlayLatency_PAL 5
GVGDPM700_PlayLatency_NTSC 5
GVGDPM700_RecallLatency_PAL 10
GVGDPM700_RecallLatency_NTSC 10
Lightworks V.I.P 4500 Version 3 - User Guide
User Adjustable CONFIG.DAT Parameters
C1.2.53
C1.2
GVGDPM700_MsgLatency_PAL 4
GVGDPM700_MsgLatency_NTSC 4
GVGDPM700_loadDelay_PAL 10
GVGDPM700_loadDelay_PAL 10
Grass Valley 1200 Serial Control Configuration Parameters
These are the parameters available to configure serial control of the Grass Valley 1200
system, with their default values. For more information, see ‘Serial Control Configuration’
on page 348.
C1.2.54
GVG1200_RecallLatency_PAL 6
GVG1200_RecallLatency_NTSC 6
GVG1200_MsgLatency_PAL 1
GVG1200_MsgLatency_PAL 1
Grass Valley 2200 Serial Control Configuration Parameters
These are the parameters available to configure serial control of the Grass Valley 2200
system, with their default values. For more information, see ‘Serial Control Configuration’
on page 348.
C1.2.55
GVG2200_PlayLatency_PAL 15
GVG2200_PlayLatency_PAL 15
GVG2200_MsgLatency_PAL 1
GVG2200_MsgLatency_PAL 1
GVG2200_loadDelay_PAL 15
GVG2200_loadDelay_NTSC 15
keep_original_timecodes
1 = Effects Menu command Keep Original Timecodes defaults to YES.
Lightworks V.I.P 4500 Version 3 - User Guide C1.0 - 597
C1.2
User Adjustable CONFIG.DAT Parameters
C1.2.56
Krystal Serial Control Configuration Parameters
These are the parameters available to configure serial control of the Krystal system, with
their default values. For more information, see ‘Serial Control Configuration’ on page 348.
C1.2.57
Krystal4300_PlayLatency_PAL 11
Krystal4300_PlayLatency_NTSC 11
Krystal4300_MsgLatency_PAL 1
Krystal4300_MsgLatency_NTSC 1
Krystal4300_loadDelay_PAL 16
Krystal4300_loadDelay_PAL 19
lock_digital_recordings_advisory_message
1 = Warning message displayed whenever a recording is made that is locked to AES/EBU
digital audio inputs 1 and 2.
0 = No message is displayed.
C1.2.58
lock_digital_recordings_to_digital_inputs1&2
1 = Locks the audio subsystem to any AES/EBU signal connected to input sockets 1 and 2.
C1.2.59
log_panel_closed_galleries
1 = Recordings made from the Recording Panel will be placed in closed Galleries rather
than open Galleries.
C1.2.60
machine_type
Sets the default TV Standard (PAL or NTSC) if the Default Standard for New Projects
command on the System Menu has not been used to set this.
C1.2.61
Magic DaVE Serial Control Configuration Parameters
These are the parameters available to configure serial control of the Magic DaVE system,
with their default values. For more information, see ‘Serial Control Configuration’ on page
348.
C1.0 - 598
Lightworks V.I.P 4500 Version 3 - User Guide
User Adjustable CONFIG.DAT Parameters
C1.2.62
C1.2
MagicDaVE_PlayLatency_PAL 8
MagicDaVE_PlayLatency_NTSC 8
MagicDaVE_RecallLatency_PAL 15
MagicDaVE_RecallLatency_PAL 15
MagicDaVE_MsgLatency_PAL 1
MagicDaVE_MsgLatency_NTSC 1
MagicDaVE_loadDelay_PAL 8
MagicDaVE_loadDelay_NTSC 8
MagicDaVE_Effect_Start_PAL 1500
MagicDaVE_Effect_Start_NTSC 1800
max_sync_error_seconds
Sets a value (in seconds) above which any sync errors will not be flagged by the Stripview
Menu command Show Sync Losses.
0 = Flag all sync errors.
1 = Only sync errors of one second or less will be flagged.
1,000,000 = Only sync errors of 1,000,000 seconds or less will be flagged. In practice this
means that all sync errors will be flagged (Default).
C1.2.63
menu_font_size
Determines the font size for menu commands. The default size is 12.
C1.2.64
mirror_as_movies
See ‘Automatic Creation Of Profile Movies’ on page 490.
C1.2.65
omnibus_default_dub_destination
Specifies the name of the default dub destination when playing out under control of an
Omnibus automation system.
Lightworks V.I.P 4500 Version 3 - User Guide C1.0 - 599
C1.2
User Adjustable CONFIG.DAT Parameters
C1.2.66
omnibus_dub_service
To allow publishing to occur, the value of this parameter must be the name of the dub
service within the Omnibus Columbus application (found under Configuration - System Cue Name). For example, omnibus_dub_service david.
C1.2.67
omnibus_dongle
Set to 1 to enable features for use with Omnibus automation system. See ‘Features For Use
With Omnibus Automation Systems’ on page 623.
C1.2.68
omnibus_handle
This parameter is to compensate for the extra ‘handle’ inserted in an EDL created by the
EditStar system and imported via Omnibus. Values should be entered in timecode format.
The default value is 00:00:10:00 - that is 10 seconds.
C1.2.69
omnibus_machine_name
This parameter specifies the name that the V.I.P system will have on the Omnibus network.
If no name is specified, the default name LWKSxxx is allocated to the machine, where x is
the machine number of the V.I.P system.
C1.2.70
playout_lock_to_AES
This parameter, when set to 1, will lock the V.I.P system AES/EBU output to an external
AES/EBU reference signal. When a playout is made from the Playout Viewer, the AES/
EBU sample stream will be locked to the external AES/EBU input provided.
The V.I.P system will monitor the drift of the sync source away from the self-clocking digital audio signal. If the drift becomes too great then playout (or recording) will be terminated. (The default tolerance is five video frames. This can be adjusted by a CONFIG.DAT
parameter. See ‘audio_drift_tolerance’ on page 588.)
C1.2.71
pal_pairing_amount
Controls the number of frames in the sequence. All shots digitised are automatically
adjusted so that the first frame is A (0).
0 = No constraint.
2 = Four field sequence.
See ‘Handling the PAL Colour Framing Sequence’ on page 301.
C1.0 - 600
Lightworks V.I.P 4500 Version 3 - User Guide
User Adjustable CONFIG.DAT Parameters
C1.2.72
C1.2
pal_pairing_flag
1 = Cuts will be adjusted automatically to maintain the PAL sequence.
See ‘Handling the PAL Colour Framing Sequence’ on page 301.
C1.2.73
playout_preroll_secs
Sets the default Preroll time when using a Playout Viewer to control an external record
machine. The preroll cannot be set below 10 seconds.
C1.2.74
ppm_decay_rate
See ‘ppm_peak_hold_time’ on page 601.
C1.2.75
ppm_loud_level
Change the level at which the Audio Input Level Meters on a Recording Panel or the Level
Meters Panel change from green to red. Range from -18 (maximum) to 0 (minimum).
For example; ppm_loud_level -18 would cause levels of -18dB and above to display red.
C1.2.76
ppm_peak_hold_time
Sets the default values for the Level Meters Menu commands. These values determine the
behaviour of the audio level meter displays on the Level Meters Panel and Recording Panel.
C1.2.77
preview_preroll_secs
Sets the preroll time when using the preview feature during trimming. See ‘Previewing
Trims’ on page 292. The default is three seconds.
C1.2.78
record_miss_gaps_mode
Determines the behaviour of the Recording Panel after a break in timecode is detected when
Stop Record if Label Break is YES.
0 = Recording will immediately stop.
1 = Recording will pass over any gaps in timecode and recommence when a valid timecode
is received within the timeout period set by the record_miss_gaps_timeout parameter. See
‘record_miss_gaps_timeout’ on page 602.
Lightworks V.I.P 4500 Version 3 - User Guide C1.0 - 601
C1.2
User Adjustable CONFIG.DAT Parameters
C1.2.79
record_miss_gaps_timeout
Sets the period (in seconds) during which the Recording Panel will look for a valid timecode from the tape after a break has been detected. Default = 20.
C1.2.80
report_replace_lost_events
1 = Display warning message if a replace editing operation will overwrite more than a certain number of events.
C1.2.81
retrofit_active
0 = Removes the Retrofit command from the Logging Database Menu.
C1.2.82
reuse_seconds
The Show Frame Reuse command appears on Stripview Menu in order to allow ‘cutting
frames’ to be left between shots for a film neg-cut. The value set for this parameter determines the minimum gap (in seconds) between two uses of the same shot. Gaps smaller than
the minimum will be flagged when the Show Frame Reuse command is clicked. A value
of 0.04 for this parameter would set a minimum gap of one frame.
C1.2.83
rr_from_db
See ‘Reel Racks’ on page 211.
C1.2.84
Sony Generic Serial Control Configuration Parameters
These are the parameters available to configure serial control of a generic Sony-protocol
based system, with their default values. For more information, see ‘Serial Control Configuration’ on page 348.
C1.0 - 602
GenericSony_PlayLatency_PAL 6
GenericSony_PlayLatency_NTSC 6
GenericSony_RecallLatency_PAL 5
GenericSony_RecallLatency_NTSC 5
GenericSony_MsgLatency_PAL 6
GenericSony_MsgLatency_NTSC 6
Lightworks V.I.P 4500 Version 3 - User Guide
User Adjustable CONFIG.DAT Parameters
C1.2.85
C1.2
GenericSony_loadDelay_PAL 5
GenericSony_loadDelay_PAL 5
stop_if_timecode_absent
Sets default for Recording Panel Menu command Stop Record if Label Missing.
1 = Stop recording if no timecode (Default).
C1.2.86
WARNING: CHANGING THIS PARAMETER MAY BE HAZARDOUS!
stripv_celstrip_font_size [number]
This setting determines the size of the font used to display shot names in the Stripview.
The default size is 14.
C1.2.87
stripview_from_tile
Determines whether the Stripview button appears on Tiles. If it doesn’t appear, then more
space is available to see the name of the shot or edit.
0 = Stripview button does not appear on Tiles.
1 = Stripview button appears on Tiles (Default).
C1.2.88
stripv_time_ctr_on
1 = Display Stripview time counter.
C1.2.89
stripv_zoom_mins
This parameter sets the amount of the shot or edit (in minutes) shown in a Stripview when
it is first displayed. Entering a value of 3, for example, will mean that only 3 minutes of the
edit will initially be shown. The default value of 0 means the entire duration of the shot or
edit is shown.
C1.2.90
system_0dBFs_level
Allows the analogue signal level that relates to 0dB digital to be set (in dBu). The available
range of the system_0dBFs_level is between +24dBu and -9dBu. See ‘Adjustment Of Digital Audio Operating Levels’ on page 119.
Lightworks V.I.P 4500 Version 3 - User Guide C1.0 - 603
C1.2
User Adjustable CONFIG.DAT Parameters
C1.2.91
tape_unthread
This and vtr_idle_unthread_time control the behaviour of the automatic VTR tape
unthreading feature:
0 = Automatic unthreading does not take place.
1 = Automatic unthreading takes place (Default).
C1.2.92
timecode_chase_output
Specifies the timecode output used by the current Viewer. Timecode can be output directly
from any edit, to allow external devices (for example audio mixing desks) to 'chase' edit
timecode. See ‘Using External Audio Mixers With the V.I.P System’ on page 385.
The line timecode_chase_output should be followed by the number of the LTC output
(0,1,2 or 3). These numbers correspond to the break out cable from the Genlock Card.
With this line in the CONFIG.DAT file, the command Output Chase Timecode [yes] NO
will appear on the Edit Menu. When the edit is played, and this command is set to YES,
then LTC that matches the edit timecode will be output.
C1.2.93
toolbox_no_copies
Determines whether the Toolbox contains duplicates of Tools already on the screen, when
it opens up.
0 = Toolbox will contain duplicate Tools.
1 = Toolbox will not contain duplicate Tools (Default).
C1.2.94
trash_seeking
Applies only to new Sharks from the Toolbox
0 = The Shark will not swim home.
1 = The Shark will swim home (Default).
C1.2.95
trash_dwell_default
N = Number of ‘ticks’ that a new Shark from the Toolbox will chill out for before starting
to swim home (Default is 10).
C1.0 - 604
Lightworks V.I.P 4500 Version 3 - User Guide
User Adjustable CONFIG.DAT Parameters
C1.2.96
C1.2
trash_speed
N = Speed at which a new Shark from the Toolbox moves (in numbers of ‘pixels per tick’).
(Default is a random number between 0 and 6).
1000 = This will cause the Shark to jump home immediately it is released.
C1.2.97
trimview_enabled
0 = Removes the Trimview Enabled command from the Edit Menu.
C1.2.98
trimview_default
Sets the default setting of the Trimview feature for record Viewers.
0 = Record Viewer defaults to having Trimview disabled.
1 = Record Viewer defaults to having Trimview enabled.
The feature can still be enabled for specific edits by selecting the Edit Menu command
Trimview Enabled.
C1.2.99
use_prefs
0 = Disables the Room styles feature when creating new Rooms.
C1.2.100
viewer_menu_delete
1 = The command Destroy this Shot/Edit? is added to Edit Menu.
C1.2.101
vob_total_duration_by_selection
Determines which channel is used when calculating the total duration of an edit (first frame
to last frame) for the Viewer Label Display.
0 = The duration of the longest channel of the edit is displayed. (Default).
1 = The duration of the first selected channel of the edit is displayed.
C1.2.102
vtr0.no_timer1
See ‘Cueing Problems’ on page 633.
Lightworks V.I.P 4500 Version 3 - User Guide C1.0 - 605
C1.2
User Adjustable CONFIG.DAT Parameters
C1.2.103
vtr_idle_unthread_time
Specifies the time (in seconds) after which the tape will be automatically unthreaded if no
activity has taken place. Default = 20.
C1.2.104
vtr_record_need_servo_lock
Used to prevent recording if tape machine not properly synced.
C1.2.105
vtr_record_preroll
Preroll time used for VTR in seconds.
C1.2.106
vtr_record_start_advance
Allows recording to commence at the correct time if usually late.
C1.2.107
vtrslave_port
Used to enable slaved playout. See ‘Slaved Playouts Controlled By Master Controller
Devices’ on page 441.
C1.2.108
vtr_timeout
This parameter can be used to address problems arising with VTRs which do not strictly
conform to the timings of Sony 9 pin protocol. See ‘Sony Protocol Adjustment’ on page 116.
C1.2.109
vtr_type_no_timer1_mode
Set this parameter to a value of 1 if the tape machine has a problem cueing to ‘control track’
position. See ‘Cueing Problems’ on page 633.
C1.2.110
yamaha_automation_offset
Specifies the offset (in seconds) when Yamaha automation is added to an edit. For example,
yamaha _automation_offset 3600 would create new automation files starting at
01:00:00:00. The offset can be changed afterwards from the user interface. In the case of
the Yamaha 02R this avoids going through midnight (00:00:00:00) when prerolling an edit.
C1.2.111
yamaha_enable
Set this parameter to 1 to enable serial control of certain Yamaha audio consoles. See ‘Configuring Control Of Yamaha 03D and 02R Audio Consoles’ on page 387.
C1.0 - 606
Lightworks V.I.P 4500 Version 3 - User Guide
C2.0 Lightworks Logging Database Format
C2.1
Introduction
Logging information about shots can be imported into the V.I.P program and used to control the
recording process. This appendix describes the standard Lightworks database format, which has been
designed to allow flexible input from a variety of sources.
Please note that this specification may be subject to change at any time.
This chapter will only be intelligible to people with some working knowledge of database files.
The database is in three parts:
Parameters Describing the Recording
Header Describing the Layout of Entries
The Entries
The entire database is in plain ASCII text, one line per parameter, header or entry. All lines and fields
within entries are normally in double-quotes, “thus”.
C2.2
Note: The Lightworks Logging Database is sometimes referred to as an OLEDB or ODB database.
Parameters
The parameters of the recording consist of Project level information such as the video and audio standards. The parameters are optional, but if present, they come first in the database. They consist of a series
of name:value pairs, one per line. For example:
“Frame rate:25”
“sound standard: 48”
The entries may be in any order, and any or all may be omitted. Spaces and case are ignored. For
example,
“FRAME RATE: 25”
is equally acceptable. However, the names that are used must be exactly correct.
“Frame speed:25”
would not work.
Lightworks V.I.P 4500 Version 3 - User Guide C2.0 - 607
C2.3
Format Of the Main Log
If there are any parameters, the first one should be the Lightworks system identifier:
“OLEDB:Rev 1”
If any parameter lines are left out, default assumptions will be made when the database is imported,
according to the configuration of the V.I.P system. There is therefore no absolute need for a parameter
section at all.
C2.3
Format Of the Main Log
The rest of the log is a database in comma-delimited ASCII (CDF) format. All common databases can
export in CDF.
Here is an example of an entry in CDF:
“Lightworks”,”74A Charlotte Street”,”London W1”,””,”636 4000”
Each field should normally be surrounded by quotes, and fields are separated by commas. The record is
terminated with a standard end-of-line (CR/LF).
If the fields are not surrounded by quotes, then embedded commas will cause problems for the entire
record. Embedded quotes would also do this, and must be repeated:
“Quoth the raven, ““Nevermore””. ”
(This will be done automatically by the exporting database - but observe it if massaging by hand).
Note: Some database programs do not put quotes around numbers, when exporting to CDF. The
Lightworks database will accept such unquoted fields.
The CDF format can also be typed in directly on a word processor, but the process is prone to errors.
C2.4
Header For Entries
The header describes the layout of the database. It may take either of two forms, which are described
below. The example layout is just one simple possibility: the OLEDB format allows for many variations.
C2.4.1
Preferred Form
The preferred form consists of four lines, describing this as a standard Lightworks database.
First Line
The first line simply states the type of database:
“OLEDB”
C2.0 - 608
Lightworks V.I.P 4500 Version 3 - User Guide
Header For Entries
C2.4
Second Line
The second line describes the maximum number of characters allowed in each field,
and is a CDF entry:
“20”,”3”,”12”,”12”,”120”
In the case of timecode fields, the number (12) is strictly speaking redundant, since
they are fixed: however, it should still be present.
Third Line
The third line describes the types of the fields. There are only two types: TEXT, and
TIMECODE. The line is a CDF entry:
“TEXT”,”TEXT”,”TIMECODE”,”TIMECODE”,”TEXT”
Fourth Line
The fourth line uses labels to describe the layout of the fields in the entries. It too is
a CDF entry.
“Name”,”Reel”,”Start time”,”End time”,”Description”
The fields to be used may be in any order, and any or all of them may be omitted.
However, the labels must be exactly the same as described below. See ‘Fields
Required’ on page 611. Any fields that do exist, but do not have one of these labels,
are ignored.
C2.4.2
Alternative Form
The alternate form of header is simply the line containing the field labels. The OLEDB
marker, field-type and field-size lines are left out. This format is the one normally produced
by an external database which is exporting to CDF.
In this case, when the database is imported into the V.I.P system, assumptions will be made
about the field types and their maximum sizes:
The field types are derived from the labels: they will all be assumed to be TEXT unless the
label is one of the standard ones defining a time - such as “start time”.
The maximum sizes are defaulted to some internally set values. This will not normally have
any serious effect, unless you are working with very long fields not defined internally.
Lightworks V.I.P 4500 Version 3 - User Guide C2.0 - 609
C2.5
C2.5
Entries
Entries
The individual entries are CDF records, and simply contain the information as described in the headers,
in the same order. For example:
“Stuff”,”B32”,”01:02:13:54”,”01:05:27:03”,”Not very good”
Any or all of the fields may be empty; but in this case the quotes and comma must still appear. If a field
that provides a control is empty (such as channels to record), it will default to the control parameter, or
if there isn’t one, to the defaults within the main system.
Timecode fields are in rigid format. Allowable variations are:
The leading zero on hours may be missing.
In PAL systems, the separator between seconds and frames may be a colon or a full stop. This has
no particular significance.
In NTSC systems, the separator may be a colon, a full-stop, a semicolon or a comma. Semicolon
and comma are used to signify drop-frame.
C2.6
Logging Databases For Import
The system described above allows a database to be imported which was conceived and laid out differently from the Lightworks database format.
Provided the database to import has the required information in it, in any order, addition of the appropriate field labels will allow it to be imported.
The OLEDB header and control parameters can be left out, too, so a straight CDF dump from an external
database program will provide a legitimate Logging Database, provided the field names are correct.
C2.0 - 610
Lightworks V.I.P 4500 Version 3 - User Guide
Sample Parameters
C2.7
C2.7
Sample Parameters
Here is a list of some parameters controlling the logging information. All of these will default if left out,
as follows: If there are controls on the Recording Panel, those values will be used (for example Pic qual).
If not, the values in the CONFIG.DAT file will be used.
C2.8
Chans:
Any combination of V, A1, A2. This controls which channels are
recorded. Examples: V, VA1, A1A2
Pic qual:
50, 40,30,20,10 (as on Recording Panel)
Snd qual:
48 (Sampling rate).
Video rate:
25, 29.97, 30
Frame rate:
25, 29.97, 30
Fields Required
The minimum database requires only the following fields:
Reel
Start Time
End Time
This will allow correct recording of shots. However, no names will be entered into the Filecards for the
shots. Therefore, it is advisable to include a field containing shot names. This field may be labelled either
“Name” or “Slate/take”. Either version will be entered into the Filecard. Some other fields that can be
used:
Any of the Fields on the Filecard
For example; Scene, Who, Shot, Description, Notes.
Channels
Controls which channels to record, for each entry.
Pic Qual
Determines picture quality of recordings.
This list completes the basic database. Additional fields are produced in the Lightworks film databases.
Lightworks V.I.P 4500 Version 3 - User Guide C2.0 - 611
C2.9
C2.9
Simple Example
Simple Example
This is a simple but complete OLEDB:
“OLEDB:Rev1”
“Frame rate:25”
“Chans:VA1”
“OLEDB”
“20”,”3”,”11”,”11”,”120”
“TEXT”,”TEXT”,”TIMECODE”,”TIMECODE”,”TEXT”
“Name”,”Reel”,”Start time”,”End time”,”Description”
“168-4”,”B32”,”01:02:13:54”,”01:05:27:03”,”Not good”
“Stuff”,”B32”,”01:06:14:00”,”01:07:02:02”,””
The alternate form, generated automatically by another database, would be just the final lines:
“Name”,”Reel”,”Start time”,”End time”,”Description”
“168-4”,”B32”,”01:02:13:54”,”01:05:27:03”,”Not good”
“Stuff”,”B32”,”01:06:14:00”,”01:07:02:02”,””
C2.10
More Complex Examples Of the Lightworks Database
Many additional fields can be added to the Lightworks database, for various applications. The FILMDB
(film database) is the most elaborate of the databases used and contains the most variants and parameters.
C2.10.1
Film Database Header
The following describes everything you might put in a film .ODB file. Optional parameters
and fields are in italics: it can be seen that many of the contents are optional.
C2.0 - 612
Lightworks V.I.P 4500 Version 3 - User Guide
More Complex Examples Of the Lightworks Database
C2.10
Parameter Header
"OLEDB:Rev 1"
"FILMDB:Rev 9"
"video label_std:N"
Standard of telecine timecode
"film label_std:F16"
Film gauge
"chans:VA1"
A1-A4)
Which channels to record (any combination of V and
"pic qual:40"
Minutes/Gbyte
"snd label_std:N"
Standard of sound timecode
"cam label_std:P24"
Standard of in-camera timecode
"film rate:24.0"
The speed the film was shot
"pulldown:1"
Whether pulldown was used in transfer (0 or 1 only).
"sequence:0"
If pulldown, standard sequence number
"OLEDB"
Defaulting Rules for Parameters
"video label_std" and "film label_std" must be present.
"snd label_std" defaults to same as video.
"cam label_std" defaults to 25-frame code if video is PAL, 24-frame if NTSC.
"chans"
defaults to what is set on the Lightworks Recording Panel.
"pulldown" defaults to what is set on the Lightworks Recording Panel.
"sequence" defaults to what is set on the Lightworks Recording Panel.
"pic qual"
defaults to what is set on the Lightworks Recording Panel.
Lightworks V.I.P 4500 Version 3 - User Guide C2.0 - 613
C2.10
More Complex Examples Of the Lightworks Database
C2.10.2
Field Headers
Field widths: Maximum number of characters that will be used. In the case of timecode
fields these widths are ignored. For a FILMDB containing all the fields, this would be:
"24","8","12","12","4","9","4","4","8","15","4","4","12","4","12","15","8","12","4","8",
"8", "24","24","24","64","100"
Field types: All are "text" except fields containing timecodes (note that keycodes/ink codes
are "text"):
"text","text","timecode","timecode","text","text","text","text","text","text","text",
"text","timecode","text", "timecode","text","text","timecode","text",”text","text",
"text","text","text","text","text"
C2.10.3
C2.0 - 614
Field Names and Widths
"name" (24)
The shot name
"reel" (8)
The video (telecine) reel ID (alphanumeric)
"start time"
The video in timecode for the shot
"end time"
The video out timecode for the shot
"sequence" (4)
Pulldown sequence (see below)
"chans" (9)
Any combination of V and A1...A4
"pic qual" (4)
Minutes/Gbyte as usual
"label_std" (4)
Video timecode-type (not same name as default)
"cam reel" (8)
Film camera reel
"start keycode" (15)
Prefix,count + offset complete (see below)
"start perf" (4)
below)
(for 3-perf 35mm only: which foot the keycode is in- see
"film label_std" (4)
Film type
"start camcode"
Camera code (Aaton/Arri) if any
"cam label_std" (4)
Camera-code type
"cam date" (12)
Camera date (string)
Lightworks V.I.P 4500 Version 3 - User Guide
More Complex Examples Of the Lightworks Database
C2.10
"start inkcode" (15)
below.
Also known as Acmade-code or rubber-numbers. See
"snd reel" (8)
Sound Reel number, start code and type (if any)
"snd start"
"snd label_std" (4)
"lab reel" (8)
Lab reel-number
"comp reel (8)
Composite reel-number
"scene" (24)
"shot" (24)
"who" (24)
The usual Lightworks stuff: all text strings.
"description" (64)
"notes" (100)
The "label_std" and "film label_std" fields are only used to override the compulsory default
parameters.
In general, for a field that is optional and defines a standard: if it is missing or empty, the
default parameter value will be used.
C2.10.4
Example Of a Record
Here is a completely filled record (within the OLEDB these would all appear on a single
line):
"J-1A","6693A"," 09:00:19;21"," 09:02:56;05","4","VA1A2","40","ND",
"CR3","KJ0943262206+07","1","F16","02:04:17:23","P24","29/04/95","IN00
00001234+02",
"SR4","02:04:17:23","P24",
"LAB 2", "COMP 2",
"bad scene 44","CU","Jim & Chris","single-line description","probably ng"
Lightworks V.I.P 4500 Version 3 - User Guide C2.0 - 615
C2.10
More Complex Examples Of the Lightworks Database
C2.10.5
Audio-Only Entries
If a record in a FILMDB describes an audio-only recording, the audio timecode start and
end should be placed in the "start time" and "end time" fields (and if the code-type is not
the same as "video label_std" in the header, it should be placed in the "label_std" field). This
should be done as well as filling-in the normal "snd start" and "snd label_std" fields.
This is because the Lightworks system uses the basic fields to control its recording times
and expectations about timecode-type.
C2.10.6
Permitted Label Standards
The fields named "xxx label_std" are used to hold a combination of information about
timecode/video/film. Values are:
P
PAL
P24
24-frame timecode
N
NTSC
ND
NTSC drop-frame
F16
16mm film
F35
35mm film
F353
35mm film used at 3 perfs-frame.
The variants N24 and ND24 have appeared in the past; they are allowed but will be treated
as N and ND.
C2.0 - 616
Lightworks V.I.P 4500 Version 3 - User Guide
More Complex Examples Of the Lightworks Database
C2.10.7
C2.10
Label (Code) Formats
In Lightworks terms, all timecodes, keycodes, inkcodes and any other form of identifiers
used on a piece of material are generically known as ‘labels’.
This term has been chosen because it is descriptive and because it does not have any connotations of time. Codes on video or film material usually have nothing to do with time, and
endless confusion has been caused by believing that they do.
Timecodes
All timecodes are in standard format HH:MM:SS:FF.
NTSC drop-frame codes can be entered as HH:MM:SS;FF - this will override any
other default. Allowable variation: HH:MM:SS.FF and HH:MM:SS,FF respectively.
Keycodes and Inkcodes
All keycodes and inkcodes are expected to be a full code with prefix, count and offset
in this format: KJ2905491234+02.
An acceptable substitute when codes are not complete is to pad them with underscores: XX______1234+02; however, the full 15 characters must be present. Note
this difference between key and inkcodes:
16mm keycode
every 20 frames
16mm inkcode
every 40 frames
35mm both
every 16 frames
Note: Lightworks programs that generate FILMDBS guarantee that all codes are produced in these formats, so that programs using them do not have to make complex
attempts to fill in the gaps. Some attempts will be made to do so, but the results
cannot be guaranteed. Therefore, all outside programs should also attempt to get the
codes right.
Lightworks V.I.P 4500 Version 3 - User Guide C2.0 - 617
C2.10
More Complex Examples Of the Lightworks Database
C2.10.8
Pulldown Sequence
The standard for describing pulldown sequence is based on the sequence number at
00:00:00:00. For NTSC 2:3 pulldown transfers, this means:
C2.10.9
0
A1A2-frame at 00:00:00:00
1
B1B2-frame at 00:00:00:00
2
B3C1-frame at 00:00:00:00
3
C2D1-frame at 00:00:00:00
4
D2D3-frame at 00:00:00:00
35mm 3-perf
Since keycodes on 35mm occur every 64 perfs, 3-perf frames only line-up accurately with
the codes at every third one. Effectively, the cycle of frames-per-code runs:
1
21
2
21
3
22
The “start perf” field describes where in the cycle the keycode lies.
C2.0 - 618
Lightworks V.I.P 4500 Version 3 - User Guide
C3.0 Device Templates
C3.1
Introduction
The V.I.P system can record video and audio from many different source devices. See ‘External Devices’
on page 104.
Device templates take much of the effort out of setting up new devices. There are templates for most of
the common types of device you are likely to connect to the system. The template will allocate some sensible default values to the settings on the Device Definition Panel.
Device Templates Supplied With V.I.P Version 3 Software
Device Type
Name
Audio
Video LTC Input
Type
Num
Audio Device
Audio
Sync Type
Chans
Custom
Yes
Yes
AES/EBU
16
Video
Digital Betacam
Yes
Yes
AES/EBU
4
Digital Betacam/Betacam
SP playback
Yes
Yes
AES/EBU
Betacam SP/
standard Beta
playback
Yes
Yes
Betacam SP
Yes
Betacam SP
(small tapes
only)
Yes
Ctrl
Port
Type
Tape Type
D2
Edit
Fast
Delay
Cue
Shift
No
Auto
Edit
No
Timer
1
Source/ Com
Record Port
User Defined
True
2
True False
False
Video
Source/ Com
Record Port
Digital Betacam True
0
True False
False
4
Video
Source/ Com
Record Port
Digital BetaTrue
cam,Betacam SP
- large,Betacam
SP - small
0
True False
False
Analogue
4
Video
Source/ Com
Record Port
Betacam SP large,Betacam
SP small,Standard
Betacam
False 0
True False
False
Yes
Analogue
4
Video
Source/ Com
Record Port
Betacam SP large,Betacam
SP - small
False 0
True False
False
Yes
Analogue
4
Video
Source/ Com
Record Port
Betacam SP small
False 0
True False
False
Lightworks V.I.P 4500 Version 3 - User Guide C3.0 - 619
C3.1
Introduction
Device Type
Name
Audio
Video LTC Input
Type
Num
Audio Device
Audio
Sync Type
Chans
Betacam SX
Yes
Yes
Analogue
4
Video
Standard Beta- Yes
cam (small
tapes only)
Yes
Analogue
2
Standard
Umatic
Yes
Yes
Analogue
Umatic SP
Yes
Yes
Umatic
HiBand SP
Yes
DVC Pro
(small tapes
only)
Tape Type
D2
Edit
Fast
Delay
Cue
Shift
Source/ Com
Record Port
Betacam
SX,Standard
Betacam,Betacam SP large,Betacam
SP - small
True
0
True False
False
Video
Source/ Com
Record Port
Standard Betacam
False 0
True False
False
2
Video
Source/ Com
Record Port
Standard Umatic False 0
True False
False
Analogue
2
Video
Source/ Com
Record Port
Umatic
SP,Standard
Umatic
False 0
True False
False
Yes
Analogue
2
Video
Source/ Com
Record Port
Umatic HiBand
SP,Umatic
HiBand,Umatic
LoBand
False 0
True False
False
Yes
Yes
AES/EBU
2
Video
Source/ Com
Record Port
DVC Pro small,ENG cassette (63 min.
max)
False 0
True False
False
DVC Pro
Yes
Yes
AES/EBU
2
Video
Source/ Com
Record Port
DVC Pro False 0
small,DVC Pro large,DV w/cassette adaptor,ENG
cassette (63 min.
max)
True False
False
DVC Pro 50
Yes
Yes
AES/EBU
4
Video
Source/ Com
Record Port
DVC Pro 50
True
0
True False
False
DV Cam
Yes
Yes
AES/EBU
4
Video
Source/ Com
Record Port
DV Cam,Consumer DV
True
0
True False
False
D1
Yes
Yes
AES/EBU
4
Video
Source/ Com
Record Port
D1
True
0
True False
False
C3.0 - 620
Ctrl
Port
Type
Lightworks V.I.P 4500 Version 3 - User Guide
No
Auto
Edit
No
Timer
1
Introduction
C3.1
Device Type
Name
Audio
Video LTC Input
Type
Num
Audio Device
Audio
Sync Type
Chans
D2
Yes
Yes
AES/EBU
4
Video
D3
Yes
Yes
AES/EBU
4
D5
Yes
Yes
AES/EBU
Digital S
Yes
Yes
SVHS
Yes
M2
Ctrl
Port
Type
Tape Type
D2
Edit
Fast
Delay
Cue
Shift
No
Auto
Edit
No
Timer
1
Source/ Com
Record Port
D2
True
0
True False
False
Video
Source/ Com
Record Port
D3
True
0
True False
False
4
Video
Source/ Com
Record Port
D5
True
0
True False
False
AES/EBU
2
Video
Source/ Com
Record Port
Digital S
False 0
True False
False
Yes
Analogue
4
Video
Source/ Com
Record Port
SVHS
False 0
True False
False
Yes
Yes
Analogue
4
Video
Source/ Com
Record Port
M2
False 2
True True
False
Hi-8
Yes
Yes
Analogue
2
Video
Source/ Com
Record Port
Hi-8
False 0
True False
False
1””
Yes
Yes
Analogue
4
Video
Source/ Com
Record Port
1” reel
True
0
True False
False
DAT
No
Yes
AES/EBU
2
LTC
Source/ Com
Record Port
DAT
False 0
False False
True
ADAT
No
Yes
AES/EBU
8
LTC
Source/ Com
Record Port
ADAT
True
0
False False
True
DA-88
No
Yes
AES/EBU
8
LTC
Source/ Com
Record Port
DA-88
True
0
False False
True
Profile Disk
Recorder
Yes
Yes
AES/EBU
16
Video
Source/ com
Record port
Profile Clip
True
2
False True
True
Disk Recorder Yes
- generic
Yes
AES/EBU
16
Video
Source/ com
Record port
Generic Clip
True
2
False True
True
1/4””” audio
No
Yes
Analogue
2
LTC
Source/ com
Record port
1/4” audio reel
False 2
True True
True
Manual Device Yes
Yes
AES/EBU
4
Video
Manual
False 2
True True
False
Lightworks V.I.P 4500 Version 3 - User Guide C3.0 - 621
C3.1
Introduction
Device Type
Name
Audio
Video LTC Input
Type
Num
Audio Device
Audio
Sync Type
Chans
Live Feed Audio Only
No
No
AES/EBU
4
Freerunning
Live Feed Yes
Video + Audio
No
AES/EBU
4
Audio Mixer
No
No
Analogue
16
Master ConYes
troller - generic
Yes
AES/EBU
4
Master
Controller
Omnibus Mas- Yes
ter Controller
Yes
AES/EBU
4
Master
Controller
C3.0 - 622
Ctrl
Port
Type
Edit
Fast
Delay
Cue
Shift
No
Auto
Edit
No
Timer
1
Tape Type
D2
Live
Feed
Live
False 2
True True
False
Video
Live
Feed
Live
False 2
True True
False
Video
Source/
Record
False 2
True True
False
Com
Port
True
0
True False
False
Omnibus
Port
True
0
True False
False
Note: The following additional settings, not included in the table above, are the same for all
devices in this database:
Command Delay = 0
No Timecode = False
Lightworks V.I.P 4500 Version 3 - User Guide
C4.0 Features For Use With Omnibus Automation Systems
C4.1
Introduction
The Lightworks V.I.P system will interface with Omnibus automation systems, incorporating the
Omnibus Dub Service and/or Columbus. The names of edits created on the Lightworks V.I.P system can
be published to the Omnibus which can then initiate a playout of any edit from the Lightworks system.
The Omnibus system can initiate a recording on the Lightworks V.I.P system from an external source.
C4.1.1
About Omnibus Automation Systems
The Omnibus system comprises of a number of Acorn computers connected via a LAN and
serial control to devices users wish to control. A number of different applications run on
separate computers which are connected to the LAN. These applications are run from
Omnibus terminals which are the graphical interface between the user and the following
different Omnibus applications (known as services).
Columbus Service
This service controls the routing and dubbing of material and edits to and from Lightworks V.I.P systems, disk recorders and VTRs.
Sharers
This service allows a number of users to access the Columbus service.
The sharer is also the clip database for the Omnibus network; so this is where a record
of all known published clips is stored.
Dub Clients
The Dub Clients service uses the Columbus service to take some of the workload off
the main system when multiple users are attempting to dub across the Omnibus network.
C4.2
Configuring the V.I.P System For Use With Omnibus
TCP/IP should be installed and the appropriate address and subnet mask settings entered according to
the particular Omnibus installation. Consult your Omnibus system administrator for the necessary settings.
Lightworks V.I.P 4500 Version 3 - User Guide C4.0 - 623
C4.2
Configuring the V.I.P System For Use With Omnibus
C4.2.1
Enabling Omnibus Features
To enable the Omnibus features, a line must be added to the V.I.P system’s CONFIG.DAT
file. See ‘omnibus_dongle’ on page 600.
The V.I.P system is set up as a Profile disk recorder in most respects, but there are two settings that must be changed in the Columbus software, under ‘Main Menu’ - ‘Configuration’
- ‘Devices’. These settings are different to those for a Profile system:
C4.2.2
Pre-Cue 00:00:15:00
Standby Time 00:00:20:00
Post-roll 00:00:05:00
Note: The longer Standby Time may affect the setting for Dubbing Frequency. Dubbing Frequency is the time delay between Omnibus getting a dub request and the time
the dub is scheduled for. This is set on the Columbus software under ‘Main Menu’ ‘Dubbing’. The Dub Frequency value defaults to “00:00:30:00” but you may want to
reduce this so there is not such a long delay before a dub starts. With Standby Time
set to 20 seconds the Dub Frequency must be 20 seconds or longer.
Enabling the V.I.P System To Initiate Omnibus Dubbing
The dubbing service can always be initiated from the Omnibus system. You can also set up
the system so dubbing can be initiated directly from the V.I.P system. This allows editors
to publish stories as soon as they are ready to air, and removes the need for a dedicated
Omnibus terminal with each V.I.P edit suite.
To allow publishing to occur, a line must be added to the V.I.P CONFIG.DAT file. See
‘omnibus_dub_service’ on page 600.
C4.2.3
Naming the V.I.P System On the Omnibus Network
The V.I.P system can be given a name on the Omnibus network. This is specified by a
CONFIG.DAT line. See ‘omnibus_machine_name’ on page 600.
This will create a machine on the Omnibus network, with the name set by this parameter.
If no name is specified, the default name LWKSxxx is allocated to the machine, where x is
the machine number of the V.I.P system.
C4.0 - 624
Lightworks V.I.P 4500 Version 3 - User Guide
Workflow For EditStar Newsroom Systems
C4.2.4
C4.3
Synchronisation
Since the system is designed to be able to play direct to air, a high degree of accuracy is
required. This is done by passing the time-of-day timecode via VITC lines added to the
'house sync' signal and requiring devices to synchronise to it.
The V.I.P system supports the reading of the time-of-day timecode from the genlock reference signal and defaults to using this as the master time clock for all dubbing and playout
operations.
C4.2.5
EditStar Synchronisation
There is a CONFIG.DAT file parameter to compensate for the extra ‘handle’ inserted in the
EDL by the EditStar software. See ‘omnibus_handle’ on page 600. This defaults to 10 seconds.
The handle added to EditStar EDLs can be changed by the user or the installer of the EditStar system. To check the required value the user must look in the registry on the EditStar
client PC (not the EditStar server Profile).
The value is a string specifying a timecode value and is stored in the registry key:
HKEY_LOCAL_MACHINE \ SOFTWARE \ NewStar \ EditStar \ ExportEDL
OmnibusHandle
“00:00:10.00”
This should be converted into frames and used as the value for the CONFIG.DAT parameter
on the V.I.P system.
C4.3
Workflow For EditStar Newsroom Systems
The EditStar system is a script-based non-linear editing product developed by Tektronix NewStar. It is
possible to transfer a story from an EditStar system to the V.I.P system, via an Omnibus automation
system.
C4.3.1
Transferring an Edit From the EditStar System To the V.I.P System
1 Material is recorded into a Profile disk recorder, or held on tapes.
2 This material is edited on the EditStar machines, which control the Profile systems
in order to perform the editing.
Lightworks V.I.P 4500 Version 3 - User Guide C4.0 - 625
C4.4
Setting Up the Omnibus Master Controller Device
3 The edit is 'published' to the Omnibus system as two related entities known as a ‘Fat
Clip’ and a ‘Sloppy Edit’.
Note that the word 'clip' in this context is an Omnibus term which describes any piece
of material. The Fat Clip consists of all material in the edit, with handles on each
component shot. The Sloppy Edit is an EDL that refers to the Fat Clip in such a way
that it describes how to recreate the edit from the Fat Clip The Omnibus system
makes no distinction between shots and edits - they are all considered clips.
4 The Fat Clip is dubbed, under the control of the Omnibus system, to a V.I.P system.
This means the V.I.P system has all the original shots needed to create the edit. The
Sloppy Edit is copied with the material in the Fat Clip to recreate the edit.
5 The edit can then be refined and amended on the V.I.P system.
6 The edit is either played straight out to air from the V.I.P system or dubbed to a
transmission Profile, under the control of the Omnibus system.
C4.4
Setting Up the Omnibus Master Controller Device
In the Machine Room, an Omnibus Master Controller device should be created. See ‘Adding New
Devices’ on page 106.
The label mapping set OMNISYNC should be configured for whatever physical input the house sync
uses. In general, this is the VITC in the sync reference input and so this is the default, though some installations may use an LTC input.
C4.5
Recording or Playout Under Omnibus Control
C4.5.1
Recording or Playing Out - Step-by-step
1 Display a Recording Panel or Playout Viewer.
2 Use the Device Selection button to choose the Omnibus master controller device. It
should be indicated in red that this device is now a slave device.
3 Click on the Standby button to hand control over to the Omnibus master controller.
The machine is now ready to be slaved to the Omnibus system. Note that another tool
may appear on screen, as both a Recording Panel and Playout Viewer must be present
so that the system can respond to either record or play commands from the Omnibus
network.
C4.0 - 626
Lightworks V.I.P 4500 Version 3 - User Guide
Controlling a V.I.P System From Omnibus
C4.6
During the time that standby is enabled and the V.I.P is slaved to Omnibus, no other editing
operations can be performed.
C4.5.2
Taking Back Local Control From the Omnibus System
Take the currently slaved tool out of standby mode by clicking again on the Standby button.
The Omnibus system is no longer in control of that tool.
C4.6
Controlling a V.I.P System From Omnibus
Dubbing can be performed to and from the V.I.P, and scheduled playouts performed from the V.I.P, as if
it were a Profile disk recorder.
The V.I.P system must be in slave mode, in the same Project that the required clip is in, for the clip to be
seen by the Omnibus system.
The V.I.P can be controlled from either the Omnibus dubbing service or the machine control panel. The
behaviour of a V.I.P system differs from that of a Profile disk recorder in some respects when being controlled via the Omnibus machine control panel: Clips can be loaded and played as for a Profile, except:
Clips cannot be created or recorded over.
In-points/out-points cannot be marked.
Clips dubbed to the V.I.P system via a slave recording will become shots with the same shot name and
reel ID as the clip name, unless the clip is a Fat Clip.
C4.6.1
Playout Viewer Dub Buttons
The Dub Destination and Dub buttons will always appear on the Playout Viewer if the
selected device is an Omnibus device. However, the Dub button will only work if a dubbing
service has been specified in the CONFIG.DAT file. See ‘omnibus_dongle’ on page 600.
Dub Destination Button
This provides a list of dub destinations. To set a particular destination as the default,
use a CONFIG.DAT parameter. See ‘omnibus_default_dub_destination’ on page
599.
Note that there is no way of the V.I.P software telling whether a Profile is an Omnibus
Profile, an EditStar Profile or a V.I.P system, so all of them will appear in the list of
dub destinations.
Lightworks V.I.P 4500 Version 3 - User Guide C4.0 - 627
C4.7
Omnibus and EditStar EDL Interchange
Dub Button
The Dub button will also publish the clip to Omnibus first, if this has not already been
done. This means that for a single shot or edit it is not necessary to do a separate publish before dubbing.
Cancel Last Dub
A feature that allows the user to cancel the last Omnibus dub ordered.
Dub Destination List
A list of allowed target Profile systems can be set in the V.I.P system CONFIG.DAT
file. See ‘omnibus_dub_service’ on page 600. Only the specified Profile systems are
presented when selecting a dub destination from the V.I.P system.
C4.7
Omnibus and EditStar EDL Interchange
When a clip is dubbed (recorded) onto V.I.P system, the V.I.P software will search on the Omnibus network for an EDL associated with the dubbed clip. If one is found, the EDL will be imported.
Fat Clips from the EditStar have names of the following format:
Fat:<reelid>:<clip name>
The edit will be given the name:
EDIT Fat:<reelid>:<clip name>
If no EDL is found, a message stating this will be displayed.
C4.8
Publishing Edits
In order to make the Omnibus system aware of a new edit which can be played out from the V.I.P system,
the edit must be ‘published’ as an Omnibus clip.
C4.8.1
Publishing Individual Edits
On the Edit Menu, click on the Publish to Omnibus command.
C4.8.2
Publishing Entire Galleries
1 Put the edit(s) to be published into a Gallery.
2 Use the Gallery Menu command Publish to Omnibus.
C4.0 - 628
Lightworks V.I.P 4500 Version 3 - User Guide
Publishing Edits
C4.8
A clip will be created on the Omnibus system with the same name as the edit. This clip can
be dubbed or played out from the V.I.P system under the control of the Omnibus system.
This procedure works just as well with shots, and can be used to copy locally recorded
material onto Profiles.
C4.8.3
Renaming Published Edits
If an edit is published to Omnibus and then renamed, the result is undefined if that clip is
subsequently required for playout.
If a clip is published, then modified the result is undefined.
The recommended method of working is to make a copy of the edit and work with the copy,
leaving the original intact. This copy may have the same name as the original edit; if a
playout is initiated from the Omnibus, the original 'published' edit is used.
Note, however, that the results are undefined if two clips of the same name are published
from the same machine.
C4.8.4
Naming Of Edits
Note that it is not a good idea to publish shots or edits with the ‘#’ character in their name.
Omnibus uses the ‘#’ character for numbering clips with the same name, which will conflict
with the ‘#’ character that the V.I.P software uses for numbering consecutive edits.
If a clip is published to Omnibus and a clip with the same name already exists on the
Omnibus file system, then Omnibus appends #1 to the name, then #2, and so on.
Problems may occur if you publish an edit from the V.I.P system that still has the V.I.P software allocated default name, such as “Edit #21” or similar. In this case the Omnibus software sees the ‘#’ character and will save the clip as “Edit”, unless there is an existing clip
called “Edit” - in which case the newly published clip will be called “Edit #1”, not “Edit
#21”. If a clip called “Edit #1” already exists, the newly published clip will be called “Edit
#2” and so on.
This makes it very unlikely that the Omnibus clip name will be the same as the name of the
edit on the V.I.P system.
Lightworks V.I.P 4500 Version 3 - User Guide C4.0 - 629
C4.8
C4.0 - 630
Publishing Edits
Lightworks V.I.P 4500 Version 3 - User Guide
C5.0 Troubleshooting
C5.1
Introduction
This chapter covers some simple troubleshooting procedures that may prove useful if anything unexpected happens when you are working with the V.I.P system.
For more information, see The Lightworks V.I.P 4500 Installation Manual.
C5.2
General Procedure
As a general rule, always try the following steps, as appropriate, before picking up the telephone to contact support:
C5.3
Retry the operation.
Exit the V.I.P program and run it up again. Then retry the operation.
Shutdown and restart Windows NT. Run up the V.I.P software again. Then retry the operation.
If possible, exit the V.I.P program and Windows NT, then power down the Main Crate. Wait
for a minute then run up the system and retry the operation.
Cookies
On Lightworks products, a ‘cookie’ is the unique filename given to a folder or file generated by the
Lightworks program.
Cookies are used for the filenames of the logs for shots, ghosts, edits and reels.
The cookie system for filenames ensures that every shot, ghost, reel and edit created on the system is
unique. This allows the user to rename things at will without any fear of overwriting existing data.
Knowing the cookie for a shot or edit is not necessary for normal editing work - however it can be useful
in some troubleshooting situations, for example if you need to identify the file for a specific edit which
you suspect may be corrupt and causing crashes.
The General Menu command Show Cookie can be used to display the cookie for an item.
Lightworks V.I.P 4500 Version 3 - User Guide C5.0 - 631
C5.4
Bootup Problems
C5.3.1
Displaying the Cookie For a Project Folder
1 Display the Project Card using the General Menu command Current Project
Details.
2 Place the General Menu over the Project Card.
3 Click on the General Menu command Show Cookie.
C5.3.2
Displaying the Cookie For a Shot, Ghost, Edit or Reel
1 Display the shot, ghost, edit or reel as a Viewer.
2 Place the General Menu over the Viewer.
3 Click on the General Menu command Show Cookie.
C5.4
Bootup Problems
This section covers problems that may occur between switching on power to the system and arriving at
the Windows NT desktop.
C5.4.1
Nothing Happens When the System Is Switched On
Check that the system is plugged in to the mains and all power switches are on.
Are the cooling fans running at the rear of the Main Crate? If not then there may be a
problem with the power supply.
Is the Data Monitor connected and switched on? Is the brightness turned up?
C5.4.2
System Hangs With “Non-System Disk or Disk Error” Message
The most common cause of this is that a floppy disk has been left in the drive. Remove the
floppy disk and press any key.
The system should now boot up successfully.
C5.5
Runup Problems
This section covers problems that may occur between double-clicking on the V.I.P program icon to start
the software and arriving at the Lobby screen.
C5.0 - 632
Lightworks V.I.P 4500 Version 3 - User Guide
Recording Problems
C5.5.1
C5.6
Correct Lobby Screen Not Displayed
This may be caused by a damaged Lobby file.
The system may crash immediately after the Lobby has been drawn on the screen, or the
Lobby may not appear at all. You can use the FIXLOBBY utility to fix the problem.
Note: Don't run FIXLOBBY if there is nothing wrong with your Lobby. It will
destroy the current Lobby and build a new one, which may not have all the same
doors. No real damage will be done - all the Projects are still there. But it could be
confusing.
To fix the Lobby:
1 Exit the Lightworks V.I.P program.
2 From Windows NT, select the MS-DOS command prompt.
3 Change directory to C:\LWORKS, by typing CD \LWORKS and then pressing the
Enter key.
4 At the C:\LWORKS> prompt, type ntcardvt
key.
-fixlobby and press the Enter
This will run up the V.I.P program and activate the FIXLOBBY utility at the same
time. The FIXLOBBY utility trawls through all the Projects on the system, and
builds a new Lobby with a Door for each Project.
5 You can now continue working. There is no need to rerun the V.I.P program.
C5.6
Recording Problems
C5.6.1
Cueing Problems
A line can be added to the CONFIG.DAT file if the tape machine has a problem cueing to
'control track' position. See ‘vtr_type_no_timer1_mode’ on page 606.
This is true of the SONY PCM 7030 DAT machine, and also true of the FOSTEX D20B
DAT machine. Without the inclusion of this line, problems could arise during preroll.
Lightworks V.I.P 4500 Version 3 - User Guide C5.0 - 633
C5.7
C5.7
Crashes and Hangs
Crashes and Hangs
A crash is when the system exits the V.I.P program unexpectedly. Crashes are rare and usually completely harmless. The system carries out an orderly shutdown of the V.I.P software. The program can be
run up again as normal - you should find that everything is as you left it.
A hang is when the system enters a state where it will not respond to any further commands. It will be
necessary to switch off the power to the system. Be careful to establish that the system has definitely
hung before powering off, otherwise data may be lost.
If the program repeatedly crashes at the end of the run up procedure, or when the Lobby screen is displayed, this may be the result of a damaged Lobby. See ‘Correct Lobby Screen Not Displayed’ on page
633.
If the program repeatedly crashes on entering a Room, this may be the result of a damaged Room file.
Create a new Room for your Project and continue working in this new Room. Use the Searchcard to find
the shots and edits you were working on in the old Room. You can delete the old Room with the Shark.
If the system repeatedly crashes at the same operation each time, it may be trying to read a corrupt file.
It will be necessary to identify the corrupt file and repair it - this would normally require the assistance
of a suitably qualified person.
WARNING: THE MOST COMMON CAUSE OF FILE CORRUPTION IS REBOOTING
OR SWITCHING OFF THE SYSTEM WHILST THE V.I.P PROGRAM IS RUNNING.
ALWAYS USE THE EXIT DOOR (OR ALT+X).
C5.7.1
Recovering Corrupted Edits
In the unlikely event that an edit is corrupted, the System Menu command Use Undo Edits
can be used to attempt to retrieve the work. This feature searches for the last ‘undo’ version
of the corrupt edit (see ‘Delete Undo Edits’ on page 564). If an ‘undo’ edit is found the
system makes it accessible and deletes the corrupt edit in order to allow further editing.
To attempt to recover a corrupted edit:
1 Exit the Room containing the corrupt edit.
2 Enter the Machine Room.
3 Click on the Use Undo Edits command on the System Menu. This presents a list of
Project names.
4 Select the Project containing the corrupted edit. A list of edit names in that Project is
presented.
C5.0 - 634
Lightworks V.I.P 4500 Version 3 - User Guide
Graphics Monitor Checklist
C5.8
5 Select the name of edit(s) to restore by clicking on their name(s).
6 Click on the OK button. A warning message is displayed.
7 Click on the Yes button to proceed.
If there were any undo versions of the edit, the system will delete the edit itself and
replace it with the most recent undo version. If no undo version is available a message will be displayed.
To resume editing it is recommended that a new Room is created.
8 Exit the Machine Room.
9 Create a new Door in the Lobby.
10 Assign it to the Project.
11 Search for the newly recovered edit, by entering the name of the original edit into the
Searchcard.
C5.8
WARNING: THIS FEATURE PROVIDES A ‘LAST RESORT’ FOR RECOVERING DATA. IT DOES NOT REPLACE THE NEED TO DO REGULAR
SAFETY BACKUPS OF YOUR WORK TO REMOTE OR REMOVABLE
DRIVES.
Graphics Monitor Checklist
C5.8.1
No Power To Monitor
If there is no power to the monitor (the indicator light is not illuminated), check:
1 The monitor is plugged in via the correct mains lead. Check the plug fuse. Turn off,
wait for 60 seconds and turn on again.
2 The monitor is switched on.
Lightworks V.I.P 4500 Version 3 - User Guide C5.0 - 635
C5.8
Graphics Monitor Checklist
C5.8.2
The Power Light Is Illuminated But There Is No Picture
Check:
1 The brightness is turned up.
2 The contrast level is turned up.
3 The monitor is not in standby mode. Some models of graphics monitor will power
down if they do not receive an input signal.
4 If present: The BNC / D-sub switch is set correctly.
5 If present: The D-type connector cable is firmly screwed in and a replacement has
been tried.
C5.8.3
There Is a Picture On the Graphics Monitor, But It Is Not the Correct Picture
Check:
1 A cast of a certain colour over the whole screen, for instance yellow, may be due to
cable problems. Check connections and replace cable.
2 Ghosting - this may be due to cable problems.
3 A colouration of different hues, normally green and purple, appearing at one edge,
usually indicates the monitor has been placed too close to a speaker. Remove the
speaker, degauss. If the problem is severe, it may be necessary to wait several weeks
before all the colouration disappears or a degaussing coil may have to be used to
remove the hues.
4 A flickering monitor or a band of the image that has been offset moving up the screen
can be caused by interference with the signal to the monitor. Disconnect and
reconnect all connections, change the orientation of the graphics lead relative to any
mains leads, try moving the monitor and finally replacing all the leads.
C5.0 - 636
Lightworks V.I.P 4500 Version 3 - User Guide
C6.0 Basic Care and Maintenance
C6.1
Suggestions For Care and Maintenance
Basic care and maintenance of the V.I.P system hardware and software can help prevent problems. The
following suggestions are offered, but are by no means comprehensive. For more information, see the
Lightworks V.I.P 4500 Installation Manual.
DON’T expose the system to extreme temperatures or moisture.
DON’T expose the system to dust or smoke.
Dust and smoke (including cigarette smoke) can damage sensitive equipment.
DON’T subject the system to vibration or shock that might damage the hard disks or other
sensitive components.
DON’T connect or disconnect devices when the system is powered on.
(Devices which are supplied as ‘hot-swappable’ excepted).
DON’T reboot or switch off the mains power until the Data Monitor is displaying the message “It is now safe to turn off your computer”.
DON’T install additional third-party software in such a way as to interfere with the operation of the system.
DON’T leave an optical disk in the MO drive when not in use.
Do not leave an optical disk in the drive when you are not using it - as this leaves the drive and
disk more vulnerable to damage by dust.
DON’T work if the system reports data corruption or other serious problems.
Ensure that the system is checked and, if necessary, repaired by a qualified person before continuing work.
DO transport the system hardware in approved packaging.
DO clean the Main Crate air filter.
See the Lightworks V.I.P 4500 Installation Manual for instructions.
Lightworks V.I.P 4500 Version 3 - User Guide C6.0 - 637
C6.1
Suggestions For Care and Maintenance
DO clean the Graphics Monitor, using the correct method.
See the Lightworks V.I.P 4500 Installation Manual for instructions.
DO virus checks frequently
It is the responsibility of the owner and/or users of any computer system to keep it free from
viruses. This can be achieved by performing regular virus checks, using third-party anti-virus software.
DO make regular Project backups to removable media.
DO use the General Menu command Delete Undo Edits regularly.
DO regular ‘housekeeping’ of Projects to avoid the system drive becoming full of old work.
DO remake the disk drive Data Sets periodically (for example, between projects).
C6.0 - 638
Lightworks V.I.P 4500 Version 3 - User Guide
Glossary
This glossary concentrates on terms that are specific to Lightworks products. Where generic terms from
the television or computer industries have been listed, the explanations given are in the context of their
use in Lightworks products.
AES/EBU
An industry standard digital audio interface, allowing two channels of digital audio
to be sent via a balanced cable.
application window
On Lightworks products running Windows NT, a window, displayed on the Data
Monitor, which is used to provide information about an application.
archive
A copy of shots, ghosts or edits from the system made to a removable storage
medium. An archive can include material. See also ‘export’ on page 641.
autoconform
A feature of the Lightworks V.I.P system that automatically records material
required by an edit (based on an EDL) or specified in Logging Database(s).
BIOS CMOS
The Basic Input Output System (BIOS) is a built-in program the system uses to
access external devices, such as the keyboard, disk drives and the Data Monitor. The
non-volatile CMOS memory stores the set up for the BIOS. It enables the processor
to know what devices are connected to the system.
backup
See ‘Project backup’ on page 645.
BNC connectors
Bayonet fitting coaxial connectors.
boot up
The process of starting a computer by loading the operating system into memory
from disk. The system boot up starts at power-on of the Main Crate. See also ‘run
up’ on page 646.
C: drive
See also ‘system drive’ on page 647.
CD-ROM
Read-only computer data storage medium using compact discs.
command prompt
On Windows NT, a window allowing access to the DOS prompt.
composite video
A single signal containing all the information necessary for the display of a PAL or
NTSC picture.
Lightworks V.I.P 4500 Version 3 - User Guide Glossary - 639
Glossary
CONFIG.DAT
A Lightworks file listing configuration settings for the program.
consolidate
A feature that creates new shots by copying (edited) sections of existing shots that
are on the system. It is often used to reduce the amount of hard disk space occupied
by an edit.
controlled playout
A feature that uses the Playout Viewer to control an external recording device (VTR
or disk recorder). See ‘playout’ on page 644.
Cookie
The unique filename given to a file generated by the Lightworks program.
Cookie Number
The value of the file COOKIE.NUM, which is used to generate a Cookie.
Database
A feature for grouping and displaying shots, ghosts and edits as a table containing
text rather than pictures. See also ‘Logging Database’ on page 643.
Data Monitor
A diagnostic monitor connected to a system and used to display operating system
and application information.
Data Set
See ‘striped drives’ on page 646.
DAT
An industry standard format for Digital Audio Tape.
defragment
The process of relocating data blocks on a disk so that they are contiguous, in order
to speed up access.
delete
1) Remove files from the system and/or material disks.
2) Remove a selected section of an edit and close up the gap, using the Delete button
on the Console.
digitise
Convert analogue picture or sound information into digital data. See also ‘recording’ on page 645.
disk
A general term for computer storage media. In the Lightworks V.I.P system, this
term also refers to a set of striped drives.
disk striping
See ‘striped drives’ on page 646.
Disk Expansion Unit
An external unit which contains additional material disks for use with a Lightworks
V.I.P system.
Glossary - 640
Lightworks V.I.P 4500 Version 3 - User Guide
Glossary
DOS
See ‘MS-DOS’ on page 643.
DOS prompt
Used when in MS-DOS to indicate current directory. MS-DOS commands can be
entered at the MS-DOS prompt.
drive letters
See ‘MS-DOS drive letters’ on page 644.
D-type
A form of multi-way connector where the ends of the shroud slope to produce the
appearance of an elongated ‘D’ (either vertical or horizontal).
dual-field
A term used to describe the two fields that make up one frame of video.
edit
A sequence of one or more cut shots. On the system, an edit consists of a log.
edit-to-it
A feature on some Lightworks products that allows source material to be edited
directly from tape to disk without the need to predigitise.
edit-to-it file
A file created by clicking on the Edit-to-it Tool (found in the Toolbox on some
Lightworks products). An edit-to-it file is used for recording directly from tape to
disk using edit-to-it.
EDL
An Edit Decision List of timecode in- and out-points for each section of picture and/
or sound in an edit. The EDL can be used to autoconform the original tapes.
Effects Viewer
The screen object used to control creation of effects such as flips, zooms, colour
correction, blue screen and other effects.
EISA
Extended ISA. It allows faster 32-bit communication between the processor and
peripherals than 16-bit 8MHz ISA.
EISA CMOS
The CMOS non-volatile memory that stores the set up for the EISA sub-system.
empty cut
An ‘invisible’ or ‘zero-length’ edit, made when editing.
Exabyte
A cassette tape device which can be connected to some Lightworks products for
Project backups and archives.
export
A way of copying shots and edits from the V.I.P system to another connected local or network drive.
Lightworks V.I.P 4500 Version 3 - User Guide Glossary - 641
Glossary
external device
Any source of, or destination for, video, audio and timecode that is connected to a
Lightworks V.I.P system.
film cutting list
A list of film codes for each section of picture in an edit. The film cutting list can be
used to conform print or negative.
free-standing
Describes a piece of equipment that is not rack-mountable. See ‘rack-mount’ on
page 645.
Gallery
A way of grouping and displaying shots, ghosts or edits as Tiles on the graphics
screen.
Gbyte (Gigabyte)
A unit of storage, used to specify disk size.
genlock
A reference video signal used to synchronise video equipment.
ghost
On Lightworks products, a ghost consists of a log that refers to the material of other
shot(s), but does not have its own material.
GO.BAT
A batch file which runs up the Lightworks, Heavyworks or Newsworks programs.
GPI
Abbreviation for General Purpose Interface. A means of triggering external devices
by contact closure.
High-Res
A Heavyworks standard for recorded pictures.
import
The reverse of export. See also ‘export’ on page 641.
ISA
Industry Standard Architecture. This is the specification for a standard PC motherboard.
kemroll
A kemroll is an edit that has black or audio spacer between shots so that the edit has
a continuous timecode.
label
A general term for any of the codes - video timecode, audio timecode - used either
to label individual frames of picture and sound or to label information about takes,
reels and so on.
label mapping
The way in which labels are assigned to a shot from Longitudinal Timecode or Vertical Interval Timecode to a destination within a label mapping set.
Glossary - 642
Lightworks V.I.P 4500 Version 3 - User Guide
Glossary
label mapping set
This determines which labels are saved with a shot when it is recorded into the system.
letterboxing
A feature on some Lightworks products which allows users to alter the aspect-ratio
of Viewers and Tiles.
live editing
A feature on Heavyworks and V.I.P systems which allows up to four sources to be
cut together ‘live’ to create an edit.
Lobby
The screen which contains Doors to the editing Rooms.
lock-frame
With Sync Groups, a lock-frame (as opposed to timecode) may be designated as the
master synchronisation point for shots or edits.
log
A text file containing information for a shot, ghost or edit (for example timecodes,
reel ID, name). Log files have the file extension .ED2.
Logging Database
A type of Database used to control the automatic recording of shots into the system.
Machine Room
A Room on the Lightworks V.I.P system in which various system-wide settings can
be made or altered.
magneto optical (MO) disk
A type of rewriteable optical disk. Uses a different technology to the Phase-Change
optical disk.
Main Crate
The central unit of the system hardware.
mark and park
A method used to select a section of a shot, when editing on the system.
material
Picture and/or sound.
material file
A file (or files) containing digitised picture and/or sound.
material disk
A large capacity hard disk used to store material files.
Mbyte (Megabyte)
A unit of storage, used to specify disk or RAM size.
motherboard
The main printed circuit board in the Main Crate, into which other boards are
plugged.
MS-DOS
A disk-based operating system loaded during bootup.
Lightworks V.I.P 4500 Version 3 - User Guide Glossary - 643
Glossary
MS-DOS drive letters
Letters between A and Z which identify volumes partitioned on a disk. MS-DOS
drive letters are usually followed by a colon, for example C:.
Multi-Cam
A Heavyworks standard for recorded pictures.
NTSC
See ‘TV Standard’ on page 647.
offline editing
Editing with lower quality copies of the pictures and sound, rather than using the
original tape or film.
online editing
The process of editing high quality pictures and sound resulting in the finished
product. The online edit may be based on the autoconform of an offline EDL, with
the addition of high quality effects and titles.
optical disk
A removable data storage device. Can be used for Project backups and archiving.
PAC
Term for the audio chassis that contains the physical XLR connectors that carry the
audio inputs to, and outputs from, the V.I.P system.
PAL
See ‘TV Standard’ on page 647.
partition
A physical section of storage on a hard disk. See also ‘volume’ on page 648.
Phase-Change
optical disk
A type of optical disk. Uses a different technology to the magneto optical disk.
phono connectors
A type of audio connector used on consumer and semi-professional equipment.
playback
The process of playing back picture and/or sound using Viewers or Tiles. Note that
playback is different from playout.
playout
The process of playing out picture and/or sound and/or timecode, using the Playout
Viewer, which controls the destination device and provides complete synchronisation between the system and the external recording device. See also controlled playout.
Playout Viewer
The screen object used to control playout.
plug-in terminator
A SCSI terminator which should be plugged into the connector at the end of an
unterminated SCSI bus.
Glossary - 644
Lightworks V.I.P 4500 Version 3 - User Guide
Glossary
primary timecode
A Lightworks term for the ‘main’ timecode signal (usually the longitudinal timecode) of any video or audio tape. Recordings from tape to disk will normally be set
up to require that the primary timecode is present.
Project
A Lightworks feature used to store all the logs, Databases and Galleries for a specific piece of work. See also ‘Project folder or directory’ on page 645.
Project backup
An export of the contents of a Project folder or directory, made for safety purposes.
A Project backup does not include material. See also ‘archive’ on page 639.
Project folder or directory
A folder or directory containing the data files (for example, log files) for a particular
Project. Does not contain material files.
Project restore
Transfer of a Project backup from a removable storage medium to the system disk.
prompt
See ‘DOS prompt’ on page 641.
Pro quality
An audio standard for Lightworks products using uncompressed audio data.
Pro-Sound
An audio interface unit for the Lightworks, Heavyworks and Newsworks systems,
mounted in a 1U box and providing professional balanced inputs and outputs.
Rack
A screen object used for storing Galleries and Databases.
rack-mount
Describes a piece of equipment with fittings that allow it to be mounted in a 19 inch
rack.
RAM
Random Access Memory
RCA jack
See ‘phono connectors’ on page 644.
recording
On the system, recording refers to the process of digitising picture and/or sound to
hard disk.
redigitising
The process of selectively recording again picture and/or sound material that has
been (or is about to be) deleted from the system.
reel ID
The characters used to identify a reel of video or audio tape both on the system and
in EDL.
restore
See ‘Project restore’ on page 645.
Lightworks V.I.P 4500 Version 3 - User Guide Glossary - 645
Glossary
Room
An editing Room on the Lightworks graphics screen.
Room style
The layout of objects in a Room. The Room style can be stored and recalled for
future use.
RS-232
A serial data link used to communicate with peripheral devices using unbalanced
lines.
RS-422
A serial data link used to communicate with peripheral devices using balanced lines.
RS-422 Connector Box
On V.I.P systems (and some Heavyworks systems), this is a 1U box that converts
RS-422 signals to RS-232 for machine control.
run up
The process of starting the software. Run up is complete when the initial Copyright
information is displayed on the graphics screen.
screen objects
A generic term for items that appear on the graphics screen. For example: Viewer,
Menu, EDL Import Panel.
SCSI
Small Computer Systems Interface. A high-speed parallel data link for communicating with peripheral devices (for example, disks).
shot
A single, continuous recording of picture and/or sound, made on the system. A shot
consists of a log plus material.
SIMM
Single In-line Memory Module. The type of RAM used in the system.
slaved playout
A feature on some Lightworks products that enables a Playout Viewer to be controlled from an external device.
slaved recording
A feature on some Lightworks products that enables a Recording Panel to be controlled from an external device.
SPDIF
An industry standard digital audio interface used on semi-professional equipment,
in which two channels of digital audio are sent via an unbalanced coaxial connector.
striped drives
A group of two or more physical drives used to stripe data across. The process of
spreading material files over striped drives is carried out in order to achieve faster
access times.
strips
The graphical representation of the individual video and audio channels on the
Stripview.
Glossary - 646
Lightworks V.I.P 4500 Version 3 - User Guide
Glossary
Stripview
A screen object which gives a graphical view of an edit and allows the user to make
changes.
S-VHS (YC)
Super VHS or separate chrominance and luminance. An alternative analogue output
from a VTR.
sync
Abbreviation of synchronise/synchronisation.
Sync Group
Means of locking a number of shots/edits together on some Lightworks products.
synchronised playout
For Lightworks and Heavyworks systems, the process of playing out picture and/or
sound and/or timecode, using the Playout Viewer, that provides complete synchronisation between the system and the external recording device.
system drive
The hard disk which contains the system software, programs, and Project folders or
directories.
Tile
A screen object which can be used to view and play shots, ghosts and edits. A Tile is
smaller than a Viewer.
Tools
A generic term for screen objects that appear in the Toolbox.
Tower
A 4U Box which contains additional material drives for use with Lightworks, Heavyworks and Newsworks systems.
track
A name given to the audio channels in an edit.
trimview
A feature that allows both sides of a cut to be seen on the graphics screen and video
outputs during trimming.
TV Standard
The Lightworks Project standard, based on the type of material recorded - for example PAL, NTSC.
U
A standard unit of height for rack-mounting equipment. 1U = 4.5cm.
VGA
Video Graphics Adapter. An adapter used to drive the Data Monitor.
Viewer
A screen object which can be used to view and play shots, ghosts and edits.
Visidir
A screen object used to locate and select folders and files.
Lightworks V.I.P 4500 Version 3 - User Guide Glossary - 647
Glossary
Voice Over
A feature on some Lightworks products that allows audio to be recorded directly
into an edit whilst simultaneously replaying picture and other audio tracks.
volume
A single continuous unit of storage space on a hard disk. It can be part or all of a single disk drive (see partition), or composed of a group of drives (see disk).
VTR
Video Tape Recorder
Windows NT
32-bit operating system used by the Lightworks V.I.P system.
XLR connectors
Professional audio connectors used for both analogue and AES/EBU digital audio.
Glossary - 648
Lightworks V.I.P 4500 Version 3 - User Guide
Index
Numerics
16mm, see film
16x9 90
35mm, see film
3-line, see VITC
3-perf, see film
-AACE25 EDL format 451
alpha channel
in imported graphics 432
ALT key 533
archiving, see export
Arrow keys 535
aspect ratio 90
also see letterboxing
audio
adding channels 330
adjustment of digital audio levels 119
deleting channels 331
import and export of files 482
monitoring input levels 384
synchronisation during recording 118
audio editing 357
adding and removing channels 357
adding live audio 368
audio channel assignment 358
chequerboarding 366
crossfades 362
level control 360
Lightworks V.I.P 4500 Version 3 - User Guide Index - 649
Index
mixing and routing 373
moving sections of audio within an edit 359
using external mixers 385
voice over feature 368
Audio Output Routing Panel 381
Audio Output Routing Panel Menu 568
audio parameters 90
autochop 199
autoconform 169
allocation of resources 170
options 175
Autoconform Panel 171
-Bbackground recording 98
backtiming 242
backup of a Project 476
bitmaps, importing 432
black and white effect 400
black, creating 558
bootup problems 632
-CCalculator 220
care and maintenance 637
Carriage Return, see Enter key
Channel Selector buttons 74
channels
adding and removing audio 357
adding to an edit 330
choosing the channels to record 161
deleting from an edit 331
displaying 283
Index - 650
Lightworks V.I.P 4500 Version 3 - User Guide
Index
external control 345
grouping 284
in an EDL 451
rerouting 337
selecting 283
using multiple 329
chequerboarding 366
Clipboard
cut and paste editing 248
using to move audio 359
Close button 62
CMX
EDL format 458
CMX EDL format 451
Colombus, see Omnibus
colour framing 301
Colour Selector Panel 431
comments in EDL 460
compression, see picture quality
CONFIG.DAT file 585
Console 523, 525
button combinations 527
Cut buttons when live editing 261
editing buttons 526
editing with 233
Jog Wheel 526
Jump buttons 525
Lever 525
Play buttons 525
Stop button 525
transport controls 525
user keys 529
consolidating 467
cookie 631
Lightworks V.I.P 4500 Version 3 - User Guide Index - 651
Index
Copy button 73
copying
an edit 249
material between disks 494
shots and edits to another Project 96
crashes, troubleshooting 634
crop effect 396
crossfades 362
automatic soft cuts 378
CTRL key 536
Cue button 527
cueing
Console Cue button 527
marking points in material 189
to a timecode 168
current frame marker 281
cut and paste
editing by 248
for Database fields 511
of timecode 222
Cut buttons, when live editing 261
cutting, see editing
-DDatabase 209, 505
also see Logging Database
choosing the fields to display 508
creating 506
dropping Tiles into 515
in the Rack 515
moving around a Database 510
names 515
permanent and transient states 212
printing 519
Index - 652
Lightworks V.I.P 4500 Version 3 - User Guide
Index
resizing 213
resizing fields 513
search and replace 518
searches 517
searching for 225
sorting entries 513
tagging entries 514
views 508
Database Menu 547
Delete button, editing with 246
deleting 497
a section of an edit 246
archive files 491
channel from an edit 331
finding a shot or edit to delete 498
finding material to delete 498
Logging Database 158
material only 499
menu commands for 500
Project 96, 503
reels 504
Room 96
Device Definition Panel 108
Device Menu 549
devices 104
adding 106
master control 114
renaming 107
templates 107, 619
digitising, see recording
disk
available storage space 162
choosing which to record to 162
Disk Manager 492
Lightworks V.I.P 4500 Version 3 - User Guide Index - 653
Index
Disk Manager Menu 550
dissolves 303
Door Generator 82
drive, see disk
drop-frame, see TV Standard
dump reel for EDL 454, 459
DVE, using the system with 342
-EEdit Menu 551
edit, definition of 55
editing
adding and removing audio channels 357
adding channels 330
audio channel assignment 358
audio editing 357
automatically creating an assembly 192
backtiming 242
basic, using Console 233
by cutting and pasting 248
changing shot lengths 289
Console editing buttons 526
copying an edit 249
deleting a section of the edit 246
deleting channels 331
from tape to disk 269
from Tiles 238
live editing 260
making an empty cut within a shot 249
marking ‘on-the-fly’ 238
marking and parking 236
moving a cut 290
moving material out of an edit 247
overlapping edits 293
Index - 654
Lightworks V.I.P 4500 Version 3 - User Guide
Index
replacing backwards 242
selecting channels to edit 238
selecting source and record 234
split edits 293
undo and redo 247
using multiple channels 329
using the edit-to-it feature 269
using the Insert button 244
using the Replace button 240
using the Stripview 279
whilst recording 98
EditStar
EDL interchange with 628
importing edits created on 448
synchronisation 625
workflow with 625
edit-to-it 269
Edit-to-it Menu 555
Edit-to-it Viewer 270
EDL
comments 460
dump reel 454
export 449
exporting to floppy disk 466
format 451
import 443
inspecting the EDL for export 465
interchange with EditStar 628
Lightworks Generic format 447
omptimisation 463
preread 464
rendered effects in 402
sort mode 455
wipe codes 465
Lightworks V.I.P 4500 Version 3 - User Guide Index - 655
Index
writing to disk 466
EDL Export Panel 450
EDL Formats Menu 556
EDL Import Panel 444
Effect Properties Panel 309
effects 391
black and white 400
crop 396
external effects devices 342
flip 395
keyframes 312
luminance keys 317
mirror 395
page turn 399
real-time 303
resize 398
timecode for 394
titling 403
trimming 323
effects inputs 307
Effects Menu 557
Effects Viewer 391
E-MEM 347
empty cut 249
Enter key 532
ESC key 532
Excalibur
EDL format 464
Exit Door 83
export
Databases and Logging Databases 519
EDL 449
logs and material 475
OMF files 483
Index - 656
Lightworks V.I.P 4500 Version 3 - User Guide
Index
Profile files 486
Project backup 476
TARGA files 401
using Fibre Channel 488
using PLS20 491
WAV files 485
external audio mixers 385
external devices 104
external effects devices 342
-Ffast motion, see varispeed
fault finding, see troubleshooting
Fibre Channel 488
Filecard
displaying 185
filling in 187
Filecard button 71, 73
files, finding and selecting 64
film
3-perf 141
labels 141
find material to fill edit 181
finding, see searching
fit-to-fill 327
flip effect 395
floppy disk 466
folders, finding and selecting 64
fonts, for titles 423
freeze frame, see varispeed
-GGallery 207
Lightworks V.I.P 4500 Version 3 - User Guide Index - 657
Index
permanent and transient states 212
resizing 213
searching for 225
Gallery Menu 559
General Menu 563
ghost, definition of 56
ghosts
breaking down shots into 190
edits containing 190
EDLs 192
timecode and reel ID 191
GPI 343
graphics monitor, troubleshooting 635
graphics, see TARGA files
Grass Valley EDL format 451
-HHand 213
handles
for autoconform 178
for consolidate 469
with EditStar EDL 625
hangs, troubleshooting 634
hard disk, see disk
hybrid editing, see edit-to-it
-Iimport
bitmaps 432
edits created on EditStar 448
EDL 443
logs and material 475
OMF files 483
Index - 658
Lightworks V.I.P 4500 Version 3 - User Guide
Index
Profile files 486
Project restore 477
TARGA files 400
using Fibre Channel 488
using PLS20 491
WAV files 485
Import/Export Menu 565
Indicator Strip 73, 281
in-point, see marking and parking
inputs
for effects 307
routing inputs to an edit
timing adjustment 339
Insert button, editing with 244
invisible edit 249
-JJog Wheel on Console 526
Join button 286, 287
-Kkemroll 197
align kemroll feature 259
keyboard 531
keycodes, see film labels
keyframes 312
-Llabel mapping 121
Label Mapping Panel 127
label mapping set 121
standard files supplied 123
Label Mapping Visidir 126
Lightworks V.I.P 4500 Version 3 - User Guide Index - 659
Index
labels
displaying 214
entering manually 137
film 141
recording 121
Letterboxing 91
Level Meters Panel 384
Level Meters Panel Menu 565
Lightworks Generic EDL 447, 451
live editing 260
Lobby 82
Lock button 74
Lock Indicator 256
lock-frame
sync to when playing multiple sources 255
Logging Database
adding and modifying entries 153
creating 148
default entries 155
deleting 158
deleting entries 154
format specification 607
loading 152
merging 158
printing 159
using for recording 147
Logging Database Menu 567
Logging Database Panel Menu 568
logging off 80
logging on 59
logging, shots and edits 185
LTC, see labels
luminance keys 317
Index - 660
Lightworks V.I.P 4500 Version 3 - User Guide
Index
-Mmachine control, see devices
Machine Room 83
Magnifier Tool 394
maintenance 637
marking and aligning 297
marking and parking 236
master control devices 114
match-frame 249
for Sync Group 259
material disk, see disk
Media Manager application 488
Menu button 546
menus 545
Audio Output Routing Panel Menu 568
Database Menu 547
Device Menu 549
Disk Manager Menu 550
Edit Menu 551
Edit-to-it Menu 555
EDL Formats Menu 556
Effects Menu 557
Gallery Menu 559
General Menu 563
Import/Export Menu 565
Level Meters Panel Menu 565
Logging Database Menu 567
Logging Database Panel Menu 568
Pin button 546
Playout Menu 569
Rack Menu 570
Recording Panel Menu 570
Reel Menu 571
Lightworks V.I.P 4500 Version 3 - User Guide Index - 661
Index
Searchcard Menu 572
Stripview Menu 573
Sync Group Menu 575
System Menu 577
Titling Menu 579
mirror effect 395
mix, see audio editing
mix, see crossfades
mix, see dissolves
monitoring
audio routing and levels 375
input audio levels 384
video and audio during replicate 354
video and audio when trimming 294
video output 333
motion control, see varispeed
Mouse 541
Move button, editing with 247
Movie Archive, Profile format 487
Movie, Profile format 487
moving
edit to another Project 95
material between disks 494
multi-camera editing 260
-NNTSC, see TV Standard
-OOMF 483
Omnibus
features for use with 623
slave operations using 114
Index - 662
Lightworks V.I.P 4500 Version 3 - User Guide
Index
Open button 62
optical disk 491
out-point, see marking and parking
output
timing adjustment 339
video routing 333
-Ppage turn effect 399
PAL
also see TV Standard
colour framing 301
Passwords
Project passwords 93
skeleton password 93
permanence of Galleries, Databases, Racks, Sync Groups 212
picture quality 161
Pin button 546
playing, shots and edits 71
playout
Omnibus controlled 626
prestriped 438
slaved 441
synchronised 435
system resources 97
timecode generation 438
Playout Menu 569
Playout Viewer 437
PLS20 491
Pop-Out Original Tile button 286
PPMs, see Level Meters Panel
preread 464
preview
of trim 292
Lightworks V.I.P 4500 Version 3 - User Guide Index - 663
Index
printing
Databases and Logging Databases 519
Logging Database 159
problems, see troubleshooting
Profile, file formats 486
Project 81
backing up 476
creating a new Project 87, 88
naming a Project 91
restoring a backup 477
setting audio parameters 90
setting TV Standard 89
setting up 88
Project Card 89
changing letterboxing of Viewers and Tiles 91
displaying the Project Card 89
setting audio parameters 90
Projects
deleting a whole Project 96
passwords 93
skeleton password 93
pulldown 144
-Qquality, see picture quality
-RRack 210
permanent and transient states 212
resizing 213
searching for 225
Rack Menu 570
ramping, see audio level control
Index - 664
Lightworks V.I.P 4500 Version 3 - User Guide
Index
real-time effects 303
recording
automatic cueing to a timecode 168
channel selection 161
logging basic details of a shot 166
making a recording 147
Omnibus controlled 626
recording configurations 97
recording options 160
recording timecode and labels 121
setting TV Standard 89
system resources 97
whilst editing 98
Recording Panel 163
Channel Selector buttons 161
Recording Panel Menu 570
redigitising
and changing the material in an edit 181
redo 247, 301
Reel Menu 571
reel, definition of 56
reels
changing reel ID 103
creating 100
edit-to-it reels 269
for imported data 102
tape types 101
unknown 101
Reels Panel 99
rendered effects 391
titling 403
Replace button, editing with 240
replicate feature 349
resize effect 398
Lightworks V.I.P 4500 Version 3 - User Guide Index - 665
Index
resizing
Database fields 513
Galleries, Databases, Racks and Sync Groups 213
Stripview 282
restoring a Project backup 477
retrofit 200
Return key, see Enter key
Room 81
creating a new Room and a new Project 87
creating a new Room for an existing Project 83
deleting a Room 96
naming a Room 86
saving and loading a Room style 92
working in 86
routing
audio channels 381
internally rerouting a channel 337
video output 333
RS-422 control of effects devices 343
RS-422, also see devices
running up the system 59
runup problems 632
-Ssampling rate 90
saving a Logging Database 157
saving, see export
Screwdriver 546
search and replace
in a Database 518
Searchcard
displaying 223
Searchcard Menu 572
searching
Index - 666
Lightworks V.I.P 4500 Version 3 - User Guide
Index
by date 229
by disk 231
for everything in a Project 224
for Galleries, Databases, Racks, Sync Groups 225
for shots and edits 224
in a Database 517
serial control 343
with E-MEM recall 347
service vii
Shark 63
shot sound 360
shot, definition of 55
shutting down 80
shuttle control 525
slave operations 114
slaved playout 441
slow motion, see varispeed
SMPTE EDL format 451
soft cuts 378
Sony EDL format 451
sorting
Database entries 513
EDL sort mode 455
sound, see audio
Spacebar 532
special effects, see effects
split edit 293
in EDL 463
starting the system 59
Stripview
changing shot lengths 289
changing sync using 296
current frame marker 281
displaying shot names on 282
Lightworks V.I.P 4500 Version 3 - User Guide Index - 667
Index
editing with 279
effects on the 307
external control channels 345
Indicator Strip 281
moving a cut 290
name display 280
resizing 282
trimming cuts 287
Undo and Redo buttons 301
Unjoin/Join button 286
Stripview button 71, 73
Stripview Menu 573
support vii
switching off the system 80
switching on 59
switching, see routing
sync
changing using the Stripview 296
marking and aligning 297
Sync Group 211
match-frame for 259
permanent and transient states 212
resizing 213
searching for 225
using to play multiple sources 252
Sync Group Menu 575
synchronisation of audio recording 118
syncing-up 193
System Configuration Panel
assigning Console user keys 529
System Menu 577
System Sound Monitor Panel 375
Index - 668
Lightworks V.I.P 4500 Version 3 - User Guide
Index
-TTab key 532
tape control, see devices
tape type 101
TARGA files 400
telephone support vii
Tile 71
border 75
Filecard button 71
playing material in 76
Stripview button 71
triangle status display 75
Viewer button 71
timecode
calculations 220
chasing output from an edit 386
cut and paste of 222
displaying 214
for rendered effects 394
sync to when playing multiple sources 254
timecode, also see labels
timing
adjustment for inputs and outputs 339
of titles 428
Title Tool 405
titling 403
Titling Menu 579
Toolbox 68
transience of Galleries, Databases, Racks, Sync Groups 212
Transitions Panel 304
transport controls on Console 525
trimming
by entering a number of frames 291
Lightworks V.I.P 4500 Version 3 - User Guide Index - 669
Index
dissolves and wipes 323
monitoring video and audio 294
preview of trim 292
using the Stripview 287
trimview 294
troubleshooting 631
TV Standard 89
-Uundo 247, 301
Unjoin/Join button 286, 287
user configuration file, see CONFIG.DAT
-VVanish button 62
varispeed 325
fit-to-fill 327
Viewer 72
border 75
Channel Selector buttons 74
Copy button 73
Filecard button 73
Indicator Strip 73
Label display 74
Label Toggle button 74
Lock button 74
Name display 74
playing material in 76
Pop-Out Original Tile Button 74
Record button 74
Redo button 73
selecting a record Viewer 234
Stripview button 73
Index - 670
Lightworks V.I.P 4500 Version 3 - User Guide
Index
Tile button 73
triangle status display 75
Undo and Redo buttons 247
Undo button 73
Viewer Labels Panel 217
virus 638
Visidir 64
VITC 139
3-line 142
VITC, also see labels
voice over feature 368
VTR
device templates 619
monitoring 116
setup options 115
VTR control, see devices
VTR Monitor Panel 116
-WWAV 485
Windows NT
accounts 59
log on 60
mouse clicks in 541
wipes 303
in EDL 465
-YYamaha audio consoles 386
Yellow Arrow 63
-Zzoom effect, see resize effect
Lightworks V.I.P 4500 Version 3 - User Guide Index - 671
Index
Index - 672
Lightworks V.I.P 4500 Version 3 - User Guide