1
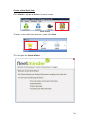
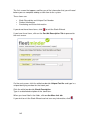
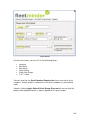
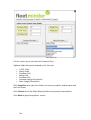
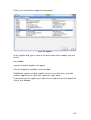
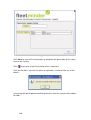
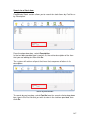
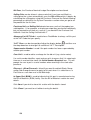
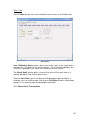
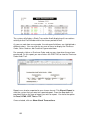
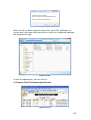
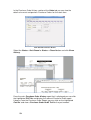
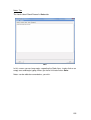
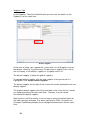
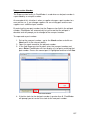
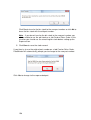
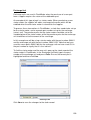
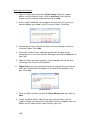
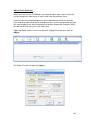
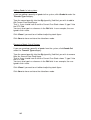
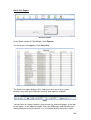
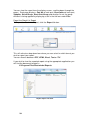
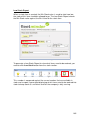
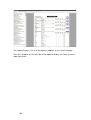
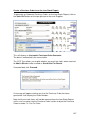
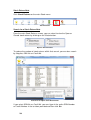
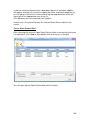
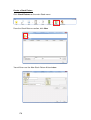
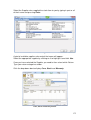
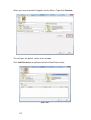
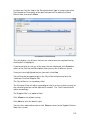
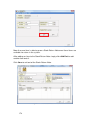
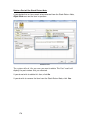
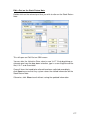
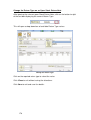
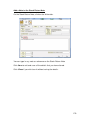
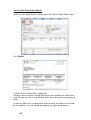
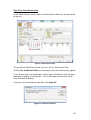
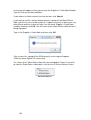
Chapter 6
Stock
139
140
Create a New Stock Item
Click Stock on top bar of buttons on main screen.
Stock Section
To enter a new stock item onto the system click New.
New Stock Item
This will open the Stock Wizard.
Stock Wizard
141
The first screen that appears notifies you of the information that you will need
before you can complete adding a stock item to the system.
These items are:
•
•
•
Stock Description and Unique Part Number
Product Information
Purchasing and Sales Information
If you do not have these items, click
to exit the Stock Wizard.
If you have these items, click on the Part No/Description Tab to proceed to
the next screen.
Part Number and Description
On the next screen, click the white box beside Unique Part No. and type in a
unique identifying number for that stock part.
Click the white box beside Stock Description.
Type in a detailed description of the stock item .
When you have filled in the fields, click on the More Info tab.
If you wish to exit the Stock Wizard and not save any information, click
142
.
Stock Details
On the next screen, you must fill in the following fields:
•
•
•
•
•
•
Location
Min Stock
Max Stock
Stock Group
Stock Sub Group
V.A.T. Code
You can also tick the Serial Number Required box to ensure that a serial
number is always written in whenever a unit of this product is received into
stock.
Likewise, ticking Apply Default Stock Group Discount will ensure that the
default stock group discount is always applied to this part number.
143
Purchase/Sales Details
On this screen you must enter the Purchase Price.
Optional fields that can be entered at this time are:
•
•
•
•
•
•
•
V.O.R. Price
Selling Price
Purchase Unit
Selling Unit
Purchase Unit
Purchase Ledger Description
Sales Ledger Description
Click Suppliers once you have filled in all necessary details and to move onto
the final screen
Click Cancel to exit the Stock Wizard without saving any of these details.
Click Back to go to the previous screen.
144
Finally, you must pick the Supplier of the product.
Select the Supplier
In the Supplier field, type in some or the entire name of the supplier you wish
to find.
Press Enter.
A grid of available Suppliers will appear.
Click the Supplier to highlight it and click Use.
FleetMinder supports multiple suppliers for the same stock item, so to add
another supplier for this stock item, repeat the steps above.
If you do not see the supplier you need in the list and wish to exit to repeat the
search, click Cancel.
145
Supplier Added
Click Save to save all the information to complete the generation of this stock
item on the system.
Click
if you wish to exit the creation of this stock item.
Click on the tabs if you wish to return to a previous screen to alter any of the
details.
Part Added Successfully
A message will be displayed confirming that this item was successfully added
to stock.
146
Search for a Stock Item
FleetMinder Stock section allows you to search for stock items by Part No. or
by Description.
Search by Description
From the drop down box, select Description.
In the text box provided type in part of, or, the entire description of the item
that you are looking for then click Go.
The system will retrieve all parts that have that sequence of letters in its
description.
Search by Part Number
To search by part number, select Part No from the search criteria drop down
box, type in the Part No that you wish to view in the text box provided, then
click Go.
147
Edit Details of a Part/Stock Item
After the necessary details are setup in the Stock Wizard for a part, there are
other items that can be added in and information that can be retrieved
regarding that part number from within the Stock section.
Open Stock Record
Double click the part you wish to view or click on the part to highlight it and
click Record.
Stock Record
148
Details Tab
A Stock Record is displayed, defaulting to the Details tab.
On this screen you will view the Part No. This item cannot be edited.
Description of the Part and Location of part in stock stores – both can be
edited.
Accumulate Running Quantity will establish whether or not you want to
store how many items are coming in and going out of stock. You may not
wish to accumulate a running quantity of items such as stationery.
However, if you have accumulated a running quantity it is important that you
input a Min Stock and Max Stock figure. This will allow you to manage the
quantity of your stock more efficiently.
Bin Stock indicates the amount of stock that is on the premises and On
Order indicates the amount of stock on order.
Warranty Period will denote the standard warranty period of the product in
months. This can be 0.
Creation Date is the date that this stock item was added to the system; this
cannot be edited.
Stock Group can be altered by clicking the display button ( ) and then
selecting the appropriate Stock Group from the available Stock Groups in the
drop down list.
Sub Group is altered in the same way by clicking the display button and
selecting appropriate Sub Group from available Sub Groups in the drop down
list.
Stock Groups and Sub Groups are created from the System Menu, sub-menu
Stock Groups.
V.O.R. Price is the Vehicle Off-Road price.
Discount Matrix is the code used to point to the Supplier Discount Matrix.
Purchase Price cannot be edited – this is derived from the price that the
system last purchased in goods from the supplier at from a Purchase Order
into Stock. As you can have more than one supplier, who can all sell the
product to you at different prices; this field will always vary and is a guide.
Valuation Price is a derived price for evaluating stock. It can be edited but
first you must click the display button ( ). This will confirm your level of
permission on the system to alter the details and once confirmed you can alter
the value.
149
NL Desc., the Purchase Nominal Ledger Description can be altered.
Selling Price can be altered – please note that if you have not filled in a
selling price the system automatically uses the Recc Price which it obtains by
calculating the selling price using the Purchase Price and the Default Markup
percentage as defined in the System Parameters section when you go to sell
the product for the first time.
Purchase Unit and Selling Unit denote how many units of the product are
sold together. If, for example, a windscreen wiper was purchased individually
but you wanted to sell them as a unit of 2, you would fill the Purchase Unit
field with 1 but the Selling Unit field with 2.
Always sell at VAT Code is used to force FleetMinder to always sell this part
at the VAT Code that you specify.
V.A.T. Desc. can be changed by clicking the display button ( ) and then use
the drop down box to change it to a different V.A.T. Description.
Supersession Number is used if the part number has been superseded by
another part number.
Core Unit is used to add a surcharge for the old unit (e.g. starter motor).
If a serial number identifies a part and you wish to ensure that it is noted each
time one is received into stock, tick Serial Number Required box. This will
prompt the user to put in a serial number when receiving in the stock after
purchase.
Discount – Allow Discount is ticked if you want the default Stock Group
and/or Sub Group discounts to apply to this part when it is sold either as a
Part Sale or a sale from use in the Workshop.
Is Super Part (BOM) is used to indicate that this part is manufactured using
the Bill of Materials (BOM) facility. See the Bill of Materials section for more
details.
Click Save if you wish to close this section with the details stored.
Click Close if you want to exit without saving the details.
150
Sales Tab
On the Sales tab you can view a detailed sales history on the Stock Item.
Stock Sales
Last 12 Monthly Sales shows a basic view of the sales of the stock item in
the previous 12 months to the current month. This cannot be edited by the
user but is updated as the sales are carried out on the system.
The Stock Audit section gives a view of the sales of the stock item in a
specific period of time chosen by the user.
Select a Start Date (type in full date or click drop down box to display a
calendar so as to select a date) and also an End Date (likewise selected by
typing it in or selecting from the drop down calendar).
Click Show Stock Transactions.
151
Stock Transaction Audit Report
The system will display a Stock Transaction Audit displaying all transactions
relating to that Part Number within the chosen period of time.
As you can note from our example, the reference field items are highlighted a
different colour. You can click on any one of these to display the Purchase
Order, Sales Order or Job Card that it generated from.
For example, click on a Purchase Order and you can view when the part was
purchased. On this report you can click on the PART NO to view the Purchase
Order Audit Trail.
Purchase Order Audit Trail
Reports can also be exported to your chosen format. Tick Export Report to
alert the system that you want an exported report. From the drop down list
provided, click on the type of report you wish to export. You have the option
of Excel, HTML, PDF, Text or Tiff.
Once selected, click on Show Stock Transactions.
152
Report Export
When the file has been exported successfully, you will be notified by the
system with a message telling you that the system has completed exporting
the requested file type.
Exports Folder
As with all exported files, you can find it in:
C:\Program Files\Fleetminder\Apps\Exports
Report in Excel
153
In the Purchase Order History section of the Sales tab you can view the
details of current and previous Purchase Orders for the stock item.
View Closed Purchase Orders
Select the Status – Not Closed or Status – Closed button and click Show
History.
Audit Trail
From the main Purchase Order History report that is displayed you can click
the highlighted POP No. and display the relevant Purchase Order report.
Likewise, from the Purchase Order Report you can click on the highlighted
Part No. and view a Purchase Order Audit Trail for the part number.
154
Notes Tab
The fourth tab of Stock Record is Notes tab.
Note
In this screen you can keep notes regarding the Stock Item, simply click on an
empty area and begin typing. When you have finished click on Save.
Notes can be edited or amended as you wish.
155
Suppliers Tab
In the Suppliers Tab of the Stock Record you can view the details on the
Supplier(s) of the stock item.
Default Supplier
At the time of setup, you supplied the system with a list of Suppliers and set
the default. Likewise, if you purchase this part from a supplier that is not on
the list already, it will add this supplier as a supplier to this list.
The default supplier is below the grid of suppliers.
To change default supplier, click the new supplier in the grid so that it is
highlighted. Click Set as Default Supplier.
The default supplier on the right of the screen will now be replaced to the new
default supplier.
The original default supplier will still be available in the list on the left, should
you need to purchase this part from them. However, they will not be
considered the default supplier.
Note that the Last Date column is the last day on which the default price for
the stock item was changed. E.g. when signing off a GRN, if the price has
changed, FleetMinder prompts you to change the default price for the stock
item.
156
Supersession Number
The Supersession facility in FleetMinder is used when an old part number is
superseded by a new part number.
An example of this situation is when a supplier changes a part number to a
new revision, or, if you change suppliers for an existing part and the new
supplier uses a different part number.
By entering the new part number into the Supersession field in the old part
number, FleetMinder will automatically let you know that the old part is
obsolete and will prompt you to change to the new part number.
To supersede a part number:
1. Set up the new part number – go to the Stock section and click on
New and fill in the relevant details.
2. Open the stock record for the old part number.
3. In the field Supersession Number, enter the new part number and
press Enter. FleetMinder will then display a list of parts matching that
part number. Ensure the correct part is highlighted and then click Use.
New Part Number
4. If the bin stock for the old part number is greater than 0, FleetMinder
will prompt you to transfer the stock to the new part number.
157
Transfer Stock
Click Yes to transfer the bin stock to the new part number or click No to
leave the bin stock with the old part number.
Note – if you do not transfer the bin stock to the new part number you
will be unable to use the old stock on a Job Card or Sales Order. In this
situation you should use the remaining bin stock before setting up the
Supersession.
5. Click Save to save the stock record.
If you then try to use the original part number on a Job Card or Sales Order,
FleetMinder will automatically prompt you to change to the new part number.
Superseded Part
Click Yes to change to the superseded part.
158
Exchange Unit
Exchange units are used in FleetMinder when the purchase of a new part
from a supplier requires the return of the old/broken part.
An example of this type of part is a starter motor. When purchasing a new
starter motor, the supplier will add a surcharge to the price which will be
credited when the old starter motor is returned to the supplier.
To process these transactions in FleetMinder, a stock item needs to be set up
for the starter motor, and a separate part number set up for the exchange
(return) unit. The purchase price for the starter motor should be set to the
standard price of the starter motor, while the purchase price for the exchange
unit should be set to the amount of the surcharge.
In this example we will be using a starter motor with the part number SM001
and the exchange unit with the part number SM001/OU. Note that we have
used the same prefix SM001 but for the exchange unit we have used /OU in
the part number to signify that it is the “old unit”.
To link the starter motor and the core unit, open up the stock record of the
starter motor in FleetMinder. In the Exchange Unit field, type in the part
number of the exchange unit and press Enter. Ensure the correct part is
highlighted and then click Use.
Exchange Unit
Click Save to save the changes to the stock record.
159
Exchange Unit Process
1. Open the Job Card and click on Create Order. Enter the supplier
details on the Purchase Order. Click on Add Part. Enter the part
number and the quantity required and click on Add.
2. At this stage FleetMinder will recognise that this part has a core unit
and will prompt you to add it to the Purchase Order. Click Yes.
Add Exchange Unit
3. FleetMinder will then auto-fill the details of the exchange unit on the
Purchase Order. Click Add.
4. Save the Purchase Order and then receive both the part and its
exchange unit in the usual manner. Both parts will then be added to the
Job Card.
5. Open the Job Card and in the parts section double-click on the core
unit to open the Job Parts Edit window.
6. Right-click on the line containing the part to remove the part from the
Job Card. FleetMinder will prompt you to confirm the deletion of the
part. Click Yes.
Confirm Delete
7. Go to the Stock section and click on Stock Returns and then click on
New.
8. Create the Stock Return Note for the core unit and return it to the
supplier. When you receive the Credit Note from the supplier, enter the
details into the Stock Return Note and then sign it off.
160
Adjust Stock Quantity
When you start to use FleetMinder you need to adjust your stock so that the
system recognises how many of each stock item you actually have.
Likewise, you may find discrepancies occurring between what you actually
have and what you should have according to the system and occasionally you
will need to adjust the stock to display the correct amount on situations when
you do not wish to carry out a full stock take.
Open the Stock section, search for the part, highlight the line then click on
Adjust.
Stock Adjust
The Stock Transfer window will appear:
Stock Transfer
161
Adding Goods In into system:
If you are adding a quantity of goods to the system, click Goods In under the
Transfer Type category.
Type the correct quantity into the Qty (quantity) field that you wish to add to
the Current Free Stock figure.
That is, if you should have 5 and the Current Free Stock shows 3, type 2 into
the QTY field.
You must also type in a reference in the Ref field. In our example, the user
typed in their name.
Click Close if you want to exit without adjusting stock figure.
Click Save to close and store the alterations made.
Removing Goods Out of System:
If you are removing a quantity of goods from the system, click Goods Out
under the Transfer Type category.
Type the correct quantity into the Qty (quantity) field that you wish to remove
from the Current Free Stock figure.
That is, if you should have 5 and the Current Free Stock shows 7, type 2 into
the QTY field.
You must also type in a reference in the Ref field. In our example, the user
typed in their name.
Click Close if you want to exit without adjusting stock figure.
Click Save to close and store the alterations made.
162
Stock List Report
Stock List Report
In the Stock section of FleetMinder, click Reports.
On the screen that appears, click Stock List.
Stock List
The Stock List report displays ALL stock items that are on the system,
whether they were only ordered in once or one regularly ordered.
Pages
You can print all sheets however, please note the amount of pages at the top
of the report. In our above example, there are 550 pages and therefore you
would need to ensure your printer is in a situation to print that many sheets.
163
You can view the report from the display screen, scrolling down through the
pages. Each page displays: Part No of each part, Description of each part,
Supplier, Stock Group, Stock Sub Group and whether or not the group
discount is being applied by displaying a tick in the tick box under Disc.
Export the Stock List Report
To Export the Stock List Report, click the Export tick box.
Export Stock List Report
This will activate a drop down box where you can select in which format you
wish to export your report.
You can choose between PDF, HTML, Excel, Text or Tiff.
If you wish to view the exported report using the appropriate application you
will find the document located in:
C:\Program Files\Fleetminder\Exports
Report Export Location
164
Low Stock Report
When a stock item is created, the Min Stock value is used to state how low
the stock of this item should be allowed to go. The Low Stock Report checks
the Min Stock value against the Bin Value for the stock item.
Min Stock on the Stock setup Wizard
To generate a Low Stock Report to view what items need to be ordered, you
need to click Low Stock button from the stock section.
Low Stock Report
This number is compared against the current number that are available in
stock and a report is generated displaying which items need to be ordered into
stock to keep stock at a sufficient level for the company’s daily running.
165
Low Stock Report
The report displays a list of all the default suppliers on the left of the page.
Click on a Supplier on the left side of the report to display the stock you must
order from them.
166
Create a Purchase Order from the Low Stock Report
To generate an Automatic Purchase Order, on the Low Stock Report, click on
the Auto PoP button on the top right corner for each Supplier.
Automatic Purchase Order Generator
This will display an Automatic Purchase Order Generator.
The date is automatically the current date.
The POP Type allows you to pick whether you want the stock, when received
to Add to Stock or to be marked as Goods Not For Resale.
Once decided, click Proceed.
Automatic Purchase Order
A message will appear alerting you that the Purchase Order has been
generated. It will display the Order Number.
Note that these stock items will not be removed from the Low Stock Report
until a user has gone into the Purchase Order section and put the Purchase
Order on order, i.e. Put On Order.
167
Stock Return Note
Click Stock Returns on the main Stock menu.
Stock Returns
Search for a Stock Return Note
From the main Stock Returns screen, you can select to view the Open or
Closed stock returns by clicking on the Status button.
Open & Closed Status
To reduce the number of stock returns within that search, you can do a search
by Supplier, SRN No. or Credit No.
Search for an Open Stock Return Note
If you select SRN No. or Credit No. you must type in the entire SRN Number
or Credit Number in the text box provided and then click Go.
168
If you are selecting Supplier then a drop down box of all available suppliers
will appear and you can select the supplier by either scrolling through the list,
or else typing in part of the name and clicking the drop down box which will
move you to the appropriate area of the list.
Click Go once you have selected your Supplier.
In both cases, the grid will display the relevant Stock Return Note for the
search.
View a Stock Return Note
After selecting the relevant Open Stock Returns Note in the grid by clicking on
it to highlight it, click View or else double click on the entry in the grid.
View Stock Return Note
This will open up the Stock Return Note with full details.
169
Create a Stock Return
Click Stock Returns on the main Stock menu.
Stock Returns
From the Stock Returns section, click New
New Stock Return
You will then see the New Stock Return Note window.
New Stock Return Note
170
Select the Supplier who supplied the stock item to you by typing in part or all
of their name and pressing Enter.
Select Supplier Name
A grid of available suppliers who match that name will appear.
Select the appropriate supplier by clicking on it to highlight it and click Use.
Once you have selected the Supplier you need to then select which Return
Type your return categorizes under.
Click the drop down box to display Core, Stock and Warranty.
Core, Stock or Warranty Return
171
When you have entered the Supplier and the Return Type click Continue.
Continue with the Stock Return
This will open the details section of the window.
Click Add Part button to add a part onto the Stock Return Note.
Add a Part
172
In either the Part No. field or the Description field, type in some or the entire
Part Number or Description of the part that you wish to add to the Stock
Return Note, then press Enter.
Part Number to be Returned
This will display a list of items that you can chose from the required item by
clicking on it to highlight it.
If you do not wish to use any of the ones that are displayed, click Cancel to
return to the Part No and Description fields to carry out a different search.
Once you have highlighted the one you want, click Use.
You will then be prompted to put in the Qty to Return figure and also the
Valuation Price and Supplier Ref.
The Qty to Return is a mandatory field.
The Valuation Price will adjust according to what is on the system currently as
the valuation price but can be adjusted if needed. The Total Value field will
adjust accordingly.
The Supplier Ref is an optional field.
Click Close to exit without saving.
Click Save to save the details input.
You can then add another part or click Close to return to the Supplier Returns
Note main screen.
173
Part Details
More than one item is able to go on a Stock Return Note once these items are
available for return in the system.
After adding an item to the Stock Return Note simply click Add Part to add
another item onto it.
Click Save to exit out of the Stock Return Note.
Multiple Parts on the Stock Return Note
174
Adding a stock item that is no longer in stock
If a Part has no free items in stock (i.e. the Free field displays 0) then the
system will not allow you to use this part in the Stock Return Note.
No Bin Stock to Return
After you click Use, the system will display the message:
“There is NO STOCK showing for this Item. The Item has NOT been added to
the SRN.”
175
Delete a Part off the Stock Return Note
If you decide that an item needs to be removed from the Stock Return Note,
Right-Click once on the item in question.
Delete a Part
The system will ask “Are you sure you want to delete This Part:” and it will
display the part number that you selected.
If you do not wish to delete this item, click No.
If you do wish to remove the item from the Stock Return Note, click Yes.
176
Edit a Part on the Stock Return Note
Double-click on the relevant part that you wish to alter on the Stock Return
Note.
Change the VAT Code
This will open an Edit Part on SRN screen.
You can alter the Valuation Price; select a new V.A.T. Code by picking an
alternate one from the drop down selection, type in a new Supplier and the
Net, V.A.T. and Grand total.
Once all items that need to be altered have been adjusted accordingly,
click Save to ensure that they system stores the altered information on the
Stock Return Note.
Otherwise, click Close to exit without saving the updated information.
177
Change the Return Type on an Open Stock Return Note
After opening the relevant open Stock Return Note, click on the button to right
of the text box displaying the current Return Type.
This will open a drop down box of available Return Type values.
Change the Return Type
Click on the required return type to select the value.
Click Close to exit without saving the alterations.
Click Save to exit and save the details.
178
Add a Note to the Stock Return Note
On the Stock Return Note, click on the Notes tab.
Add a Note
You can type in any note as reference on the Stock Return Note
Click Save to exit and save all the details that you have altered.
Click Close if you wish to exit without saving the details.
179
View a Stock Return Note Report
From the main Stock Returns section, open the relevant Stock Return Note.
View SRN Report
Click Report.
Stock Return Advice Note
A Stock Return Advice Note is displayed.
It displays who the stock is being returned to, who reviewed the stock return,
what the type of return is, the date, the items that are being returned and any
notes.
As with all reports this can be printed and then once the goods are received
by the supplier, it can be signed to complete this stage of the process.
180
Sign Off a Stock Return Note
In the Stock Returns section, open the Stock Return Note that you would like
to sign off.
Sign off a Stock Return Note
To sign off the Stock Return Note you must set the Credit Note Date.
Tick the Set Credit Note Date box and today’s date will automatically appear.
If you need to alter it to another date, either type in the date or click the drop
down box to display a full calendar. Click on the date you wish the Credit
Note Date field to display.
Once you have selected the right date, click Sign Off.
Supplier’s Credit Note Number
181
A message will appear asking you to enter the Supplier’s Credit Note Number.
Type this into the text box provided.
If you make a mistake and wish to clear the box, click Cancel.
If you want to exit this section without actually signing off the Stock Return
Note, type Exit (it can also be written all in upper case or all in lower case; any
other format and the system will take it as the actual Supplier’s Credit Note
number) and then click OK. You will return to the Stock Return Note without it
being signed off.
Type in the Supplier’s Credit Note and then click OK.
SRN Successfully Signed Off
If the system has signed off the SRN correctly a message will appear:
“SRN has been Signed Off successfully.”
The status of this Stock Return Note will now changed to Closed. If you wish
to view this Stock Return Note again, click on the All Closed Returns status.
All Closed Returns
182
Stock Return Note without a Credit Note date
If you click Sign Off without having set a Credit Note Date, the system will
generate an error message saying “Please supply a Credit Note Date”.
Credit Note Date
If this message appears, click OK and then click Set Credit Note Date tick
box to access the calendar facility to set a date.
You will then be able to sign off the Stock Return Note as normal.
Can a Stock Return Note be signed off more than once?
Can I sign off a Closed Stock Return Note?
If you try to sign off a Stock Return Note that has already been signed off, that
is; one with Return Closed status, then the system will display the message:
“This SRN has already been signed off” as you cannot sign a Stock Return
note off more than once.
SRN Already Signed Off
183
184